

Page 1
AR-P17
SHARR
SHARP CORPORATION
Printed on 100% post-consumer recycled paper
PRINTED IN CHINA
2004M
KS1
-TINSElOnQS~l--
SHARR
PRINTER EXPANSION KIT
SOFTWARE SETUP GUIDE
(for network printer)
Page
• INTRODUCTION···· Back cover
• SETUP IN A WINDOWS
ENViRONMENT ..·....
·..··
..·....··......· ... 2
• SETUP IN A MACINTOSH
ENViRONMENT · 29
• SAFETY STANDARDS 38
Page 2
INTRODUCTION
This
manual explains
how
to install and configure the software that is required
for
the printer function
of the
SHARP
digital multifunctional system
AR-M230/M270
series.
The
procedure
for
viewing the
online manual is alsoexplained.
• The explanationsof screens and procedures in this manualare primarilyfor Wlndows®XP in
Windows®environments, and Mac OS X
v1
0.2 In Macintoshenvironments. The screensmay
vary in other versions ofthe operating systems.
• The explanationsinthis manuai are based onthe NorthAmericanversion of the software.
Versionsfor othercountries and regions mayvary slightlyfrom the North American version.
• Where "AR-XXXX" appearsinthis manual,pleasesubstitutethe nameof yourmodelfor "XXXX".
Forthe nameof yourmodel,see "PART NAMESAND FUNCTIONS" in the operationmanual for
copier.
• This manual refers
to the "SHARPDigital Multlfunctlonal SystemAR-M230/M270Series
Software CD-ROM" that accompaniedthe printer expansion kit AR-P17simply as "CD-ROM".
• The PS3 expansion kit (AR-PK1) and
print server card(AR-NC5J)mentioned in this manualare
options.
Trademark acknowledgments
• Microsoft®Windows® operating
system
is a trademark or copyright of Microsoft Corporation in the
U.SA
and
other
countries.
• Windows® 95, Windows® 98, Windows® Me,
Windows
NT® 4.0, Windows® 2000, and Windows®
XP are trademarks or copyrights of MicrosoftCorporation in the
U.SA
and
other
countries.
• Acrobat®
Reader
CopyrighJ© 1987-
2002
Adobe
Systems Incorporated. All rights reserved. Adobe,
the
Adobe
logo, Acrobat, and the
Acrobat
logo
are
trademarks of
Adobe
Systems
Incorporated.
• IBM
and
PC/AT
are
trademarks
o/International
Business Machines Corporation.
• Macintosh,
Power
Macintosh,
Mac
OS, LaserWriter, and AppleTalkare trademarks of Apple
Computer, Inc.
• PostScript®is a registered
trademarkofAdobe
Systems Incorporated.
•
PCL
is a
trademark
of the Hewiett-Packard Company.
• All
other
trademarks and copyrights are the
property
of their respective owners.
SOFTWARE LICENSE
The
SOFTWARE
LICENSE
will
appear
when
you install the software from the
CD-ROM.
By using all
or
any
portion of the softwareon the
CD-ROMorin the machine, you are agreeing to be bound by the
termsofthe
SOFTWARE
LICENSE.
The dispiayscreens, messages,and key names shown in the manualmay differfrom those on the actual
machine due to product improvementsand modifications.
.
.
Page 3
CONTENTS
SETUP IN A WINDOWS ENVIRONMENT
ABOUT THE SOFTWARE CD-ROM 2
BEFORE INSTALLATION 3
• HARDWARE AND SOFTWARE REQUIREMENTS 3
• INSTALLATION ENVIRONMENT AND INSTALLATION PROCEDURE
3
USING THE MACHINE AS A NETWORK PRINTER 4
• CONNECTING TO A NETWORK 4
•
SETIING
THE IPADDRESS OF THE MACHINE 5
• INSTALLING THE PRINTER DRIVER (Standard installation) 8
• CUSTOM INSTALLATION 10
• INSTALLING THE PRINTER STATUS MONITOR 12
• INSTALLING THE PRINTER ADMINISTRATION UTILITY 13
USING THE MACHINE WITH A
PARALLEL
OR USB CONNECTION 14
• INSTALLING THE PRINTER DRIVER 14
• CONNECTING TO A COMPUTER 20
SHARING THE PRINTER USING WINDOWS NETWORKING 21
INSTALLING THE PS DISPLAY FONTS 23
USING THE PPD FILE 24
•
Installing
the
resident
font
information
for
PPD
(only
when
the
PPD
fileis
installedinWindows
95/9S/Me)
24
CONFIGURING THE PRINTER DRIVER 25
HOW TO USE THE ONLlNE
MANUAL.
26
TROUBLESHOOTING 27
SETUP IN A MACINTOSH ENVIRONMENT
USING THE PRINTER IN A MACINTOSH ENVIRONMENT 29
ABOUT THE SOFTWARE CD-ROM 29
BEFORE INSTALLATION 30
• HARDWARE AND SOFTWARE REQUIREMENTS 30
• CONNECTING TO A NETWORK 30
• APPLETALK
SETIINGS
30
INSTALLING THE PPD FILE 31
• INSTALLATION IN MAC OS X 31
• INSTALLATioNTN
MAC
os
8.6 ' 9.x
32'
• INSTALLING THE SCREEN FONTS (Mac OS 8.6 - 9.x) 32
CONFIGURING THE PRINTER DRIVER 33
• MAC OS X v10.2.x 33
• MAC OS X v10.1.5 35
• MAC OS 8.6 - 9.x 36
HOW TO USE THE ONLlNE
MANUAL
37
SAFETY STANDARDS 38
- -- - --- - -- ----_.._------_..
_-_
...-
1
Page 4
ABOUT THE SOFTWARE CD-ROM
The
CD-ROM
that
accompanies
the
printer
expansion
kit
contains
the
following
software:
• Printer driver
The
printer
driver
enables
youtouse
the
printer
functionofthe
machine.
The
CD-ROM
contains
the
PCL6
and
PCL5
printer
drivers*1
and
thePSprinter
driver*2.
• Printer Status Monitor*3
This
allows
youtocheck
the
statusofthe
network
printeronyour
computer
screen.
• Printer Administration Utility*3, 4
This
is a
utility
that
allows
administratorstocheck
the
statusofthe
printer
and
change
settings.
• Discover and Link Tool
Thisisusedtoconfigure
and
check
theIPaddressofthe
machine,
whichisused
when
the
machineisconnected
to a
network.
*1 It is recommended
that
you use the PCL6 printer driver. Ifyou have a problem printing from oldersoftware
using the PCL6 printer driver, use the PCL5e printer driver.
*2 To use the PS printer driver, the PS3 expansion kit must be installed.
*3 To use the PrinterStatus Monitor and the Printer Administration Utility, the printermust be connected to a
network running TCP/IP protocol. .
*4 If you are installingthe Printer Administration Utility in Windows 95, a system file must be updated before
the utility can be installed. Formore information, click the "Display Readme" button in the Software
Selection window of the installer. (p.13)
2
SAFETY STANDARDS
WARNING:
FCC Regulations state that any unauthorized changes or modifications to this equipmentnot
expressly approved by the manufacturercould void the user is authority to operate this equipment.
Note:
This equipment has been tested and found to comply with the limits for a Class A digital device,
pursuant to part 15 of the FCC Rules. These limits are designed to provide reasonable protection
against harmful interference when the equipment is operated in a commercial environment. This
equipment generates, uses, and can radiate radio frequency energy and, if not installedand used
in
accordance
with
thejnstructlon
manual,
may
cause
harmful
interferencetoradio
communications.
Operation of this equipment in a residential area is likely to cause harmfulinterference in which
case the
userwill
be required to correctthe interferenceat his own expense.
.....
../
Notice
for Usersin
Canada
This
Class A digital apparatus complies
with
Canadian ICES-003.
Cet appareii numeriquede la c1asseA est conforme
it la norme NMB-003 du Canada.
39
Page 5
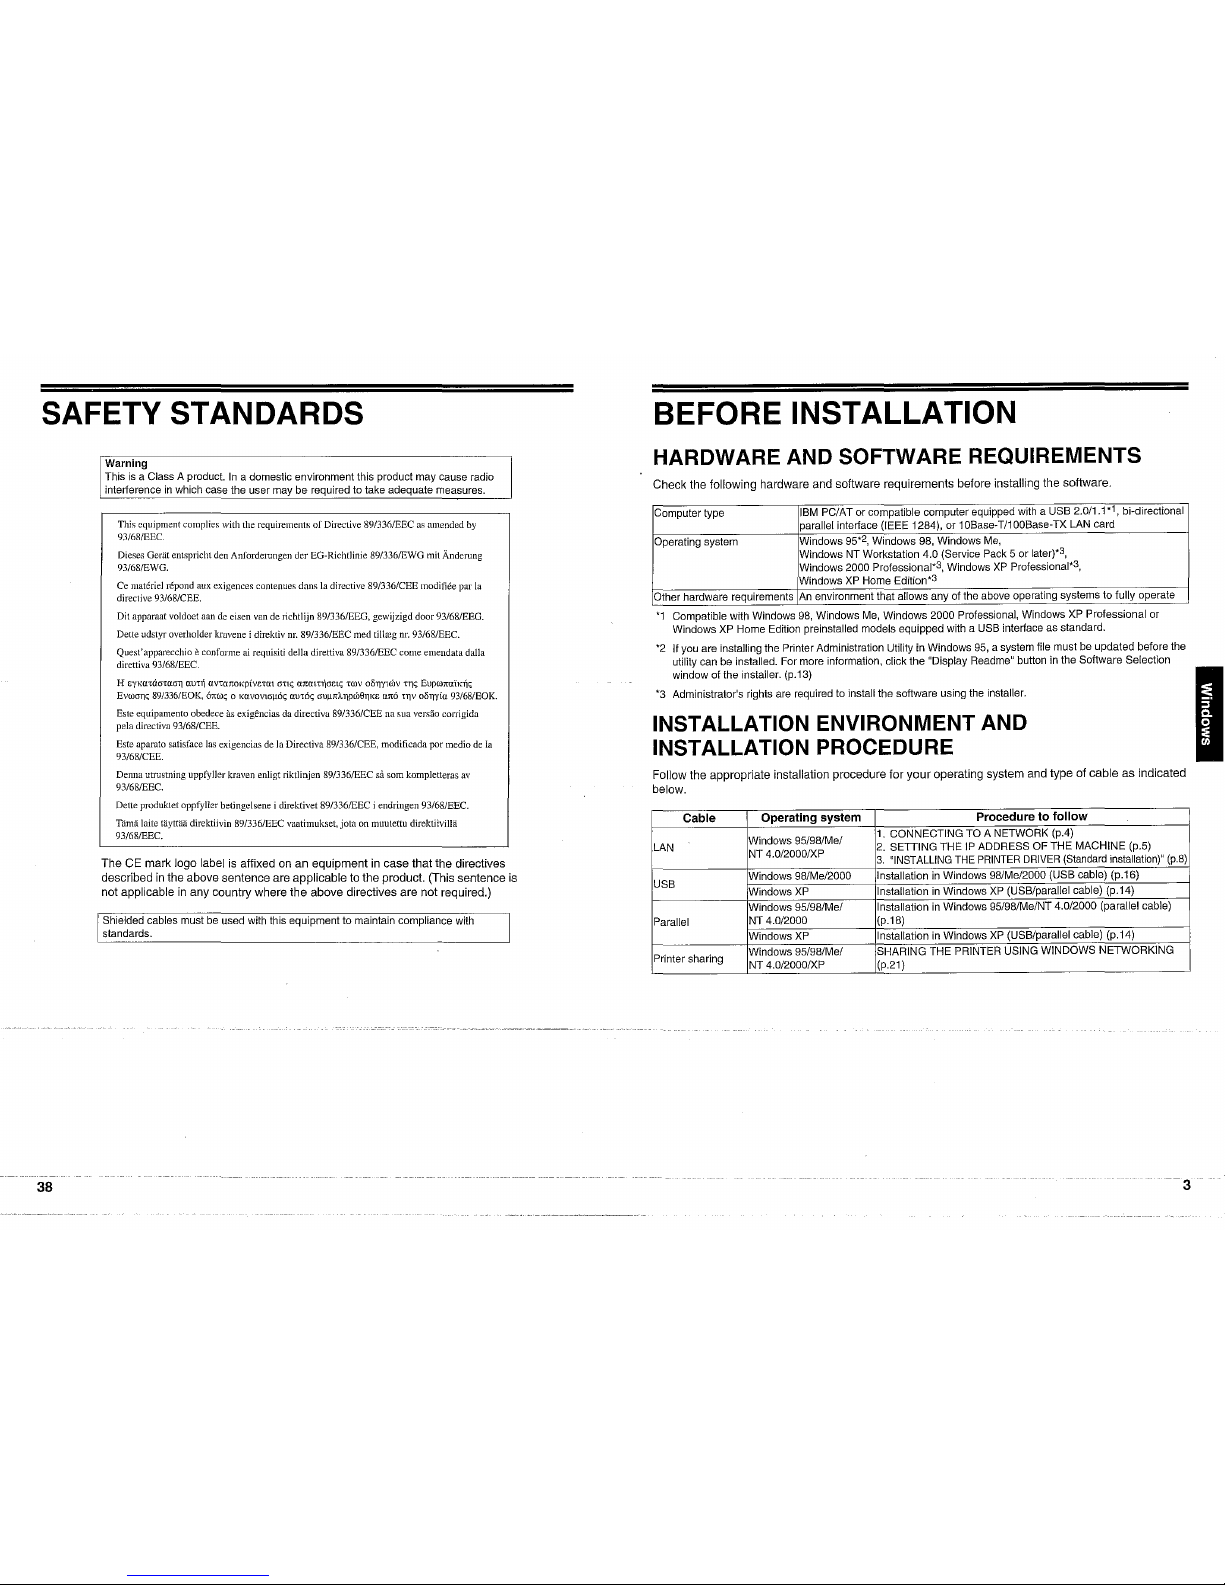
SAFETY STANDARDS
Warning
This is a Class A product. In a domestic environment this product may cause radio
interference in which case the user may be required to take adequate measures.
This equipmentcomplies with the requirementsofDirective
89/336/EECasamended
by
93/6B/EEC
Dieses Gertit entspricht den Anforderungen del"EG-RichtJinie 891336/EWG mit
Anderung
93/68/EWG.
Cc materiel repond aux exigences contenues
dans
la directive
89/336/CEE
modifiee par la
directive
93IG8/CEE.
Dit
apparaar
voldoet aan de eisen van de richtlijn
89/336/EEG,
gewijzigd
door
93/68/EEG.
Dette udstyr overholder kruvene
i direktiv nr.
89/336/EEC
med
tillteg or.
93/68/EEC.
Quest'apparecchioeconforme
ai requisiti
della
direttiva 891336/EEC
come
emendata
dalla
direttiva 93/68/EEC.
I-I EyKU1llcnacHl nurnnvrcncicpivarnt
rmc
rounrroe«;
rmv
OOllYWJV
.11<;
EupwnulK"t;;
Evcioru; 89/336/EOK,
(mOOt;;
0 xcvovicuoc
aU16<;
aUrLnA,llPcbSllKE
ano
111V
oOllyiu 93/68/EOK.
Este equipamento
obedece
as exigencies da directive
89/336/CEE
na sua versac corrigida
pela directiva 93/68/CEE.
Este aparuto satisface las exigencias de la Directive
89/336/CEE,
modificada
par
media
de la
93/68/CEE.
Denna
utrustning uppfyller kraven enligt riktlinjen 891336/EEC sa
som
kompletteras
av
93/68/EEC
Dette produktet oppfyller betingelsene i direktivet
89/336/EECiendringen
93/68/EEC.
Tbma laite tayttaa direktiivin 89/3361EEC vaatimukset,
jota
on muutettu direktiivilla
93/68/EEC
TheCEmark
logo
label is
affixedonan
equipmentincase
that
the
directives
describedinthe
above
sentence
are
applicabletothe
product.
(This
sentence
is
not
applicableinany
country
where
the
above
directives
are
not
required.)
Shielded cables must be used with this equipment to maintain compliance with
standards.
38
BEFORE INSTALLATION
HARDWARE AND SOFTWARE REQUIREMENTS
Check
the
following
hardware
and
software
requirements
before
installing
the
software.
Computer type
IBM PC/AT or compatible computer equipped with a USB 2.0/1.1'1, bi-directional
parallei interface (IEEE 1284), or 1OBase-T/1OOBase-TX LAN card
Operating system
Windows 95'2, Windows 98, Windows Me,
Windows NTWorkstation 4.0 (Service Pack 5 or
laterr
3,
Windows 2000 Professional'S, Windows XP Protessional'v,
Windows XPHome
Edition'
3
Other hardware requirements
An environment that allows any of the above operating systems to fully operate
'1 Compatible with Windows 98,Windows Me, Windows 2000 Professional, Windows XP Professional or
Windows XP Home Edition preinstalled models equipped with a USB interface as standard.
'2
If you are installing the Printer Administration Utility in Windows 95, a system file must be updated before the
utility can be installed. For more information, click the "Display Readme" button in the Software Selection
window of the installer. (p.13)
'3
Administrator's rights are required to install the software using the installer.
INSTALLATION ENVIRONMENT AND
INSTALLATION PROCEDURE
Follow
the
appropriate
installation
procedure
for
your
operating
system
and
typeofcableasindicated
below.
Cable
Operating
system
Proceduretofollow
Windows 95/98/Me/
1. CONNECTING TO A NETWORK (p.a)
LAN
NT 4.0/2000/XP
2. SETTING THE IP ADDRESS OF THE MACHINE (p.5)
3. "INSTALLING THE
PRINTER
DRIVER
(Standardinstallation)" (p.8)
USB
Windows 98/Me/2000
Installation in Windows 98/Me/2000 (USB cable) (p.16)
Windows XP
Installation in Windows XP (USB/parallel cable) (p.14)
Windows
95/98/Mel
Installation in Windows 95/98/Me/NT 4.0/2000 (parallel cable)
Parallel
NT 4.0/2000
(p.18)
WindowsXP
Installation in Windows XP(USB/parallel cable) (p.14)
Printer sharing
Windows
95/98/Me/
SHARING THE PRINTER USING WINDOWS NETWORKING
NT 4.0/2000/XP
(p.21)
3
Page 6
USING THE MACHINE AS A
NETWORK.PRINTER
HOW TO USE THE ONLINE MANUAL
Followthe steps below to view the online manual. This manualcontains informationneeded for using
the machine as a printer.
(/PM
t
~
To access the online manual, your computer must have Acrobat Reader 4.0 or a laterversion. II
o e you do not have Acrobat Reader,lollow the instructions in "InstallingAcrobat Reader"to install it.
This section explains how to configure the machine settings and install the software that enabies the
machine to be used as a networkprinter.
ICDc
. I .The following explanationsare
toraWindows
environment on aTCP/IP network.
•
.autlon
•. To use the machine in other environments, the print server card is requlred.Beethe "Print
Server Card User's M,mual" on the CD-ROM thataccompanied the
print
server card.
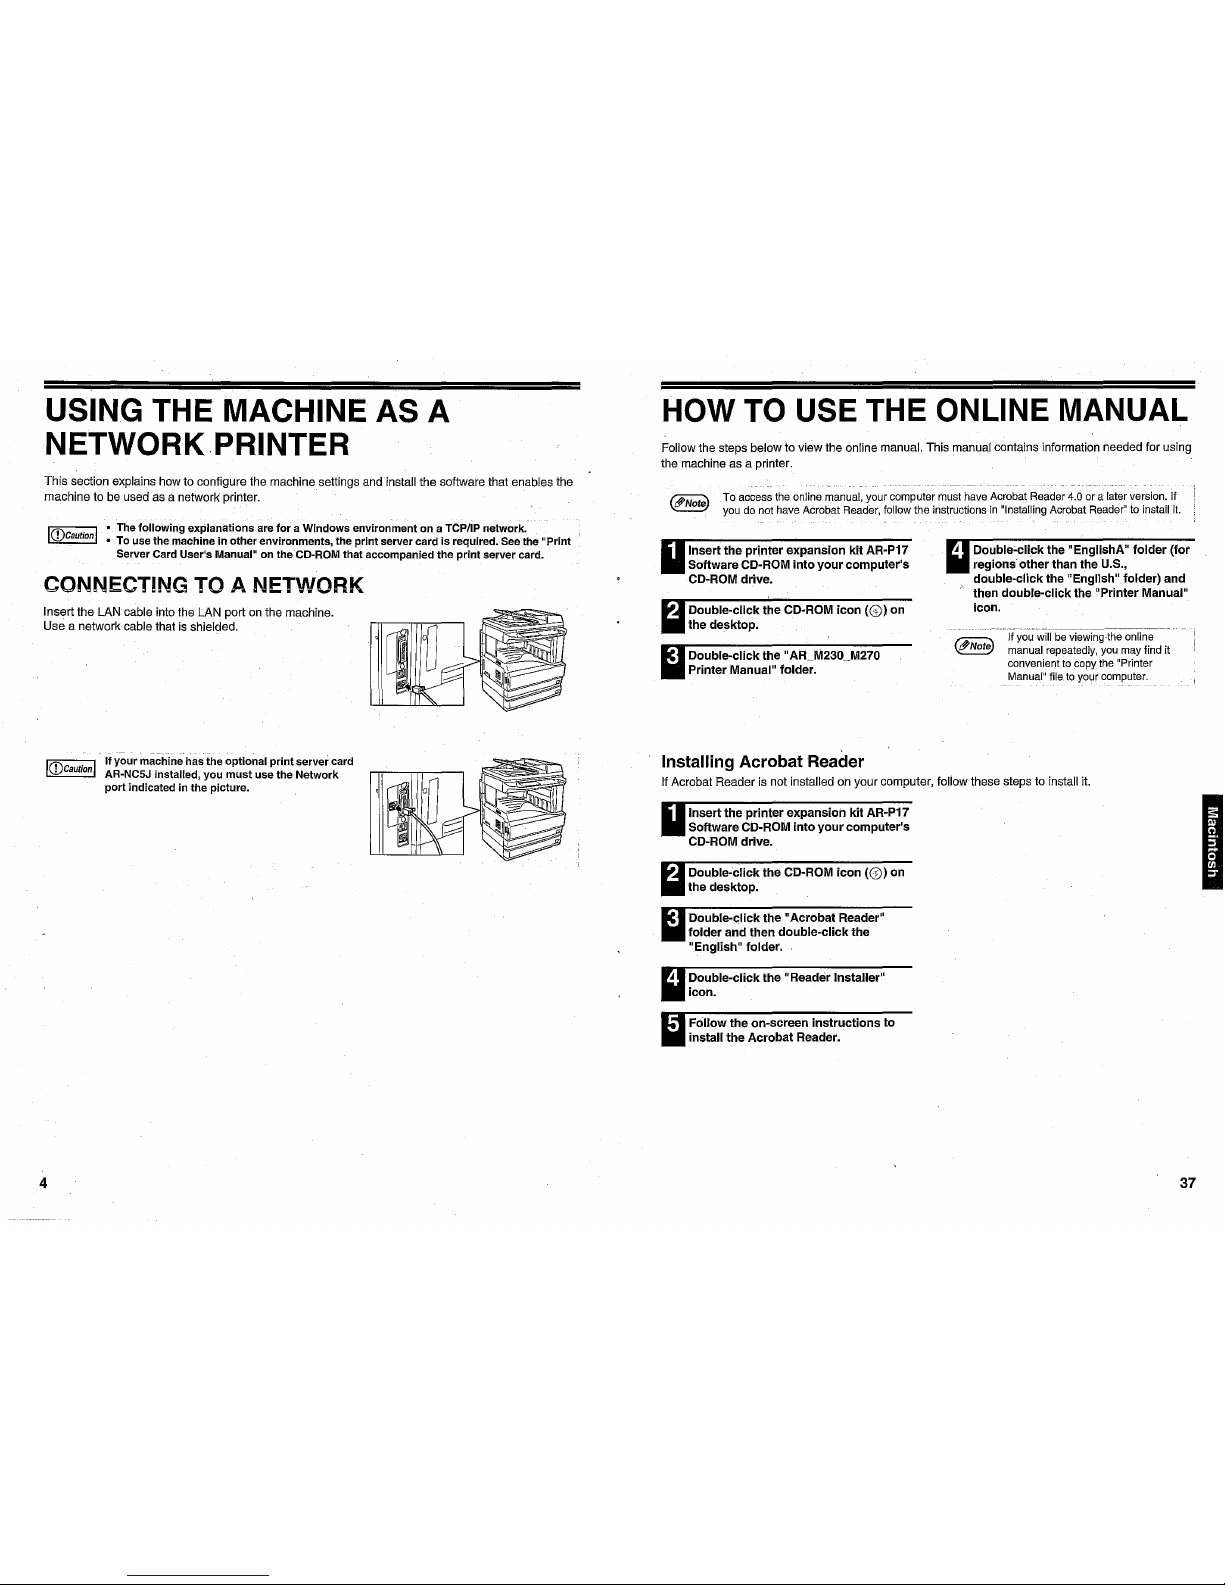
CONNECTING TO A NETWORK
Insert the LAN cable into the LAN port onthe machine.
Use a networkcable that is shielded.
Insert
the printer expansion
kit
AR-P17
SoftwareCD-ROM
into
your
computer's
CD-ROM drive.
Double-click the CD-ROM
icon
(0l
on
the desktop.
Double-click
the"
AR M230_M270
Printer Manual" folder.
~
Double-click
the"
EnglishA"
folder
(for
regions other than the U.S.,
double-click the "English" folder) and
then double-clickthe "Printer Manual"
icon.
II you will be viewinqthe onllne
manual repeatedly, you maylind it
convenientto copy the "Printer
Manual"lile.to your computer.
Installing Acrobat Reader
If Acrobat Reader is not installed on your computer, follow these stepsto install it.
ICD
I
·If
your
machinehas
the
optional
print
servercard
!
Caution
. . AR-NC5J installed,
you
must
use the
Network
port
indicated in the picture.
4
Insert
the
printer
expansion
kit
AR-P17
Software CO-ROM
into
your
computer's
CD-ROM drive.
Double-clickthe CD-ROM
icon
(0)
on
the desktop.
Double-c:lick
the"
Acrobat Reader"
folder
and then
double-click
the
"English"
folder.
Double-click
the"
Reader Installer"
icon.
Follow the on-screen
instructions
to
install the Acrobat Reader.
37
Page 7
CONFIGURING THE PRINTERDRIVER
USING THE MACHINE AS A NETWORK PRINTER
MAC OS 8.6 - 9.x
SETTING THE IP ADDRESS OF THE MACHINE
P';nt", D'iver
~:~I~I.t
d"·..ren.ble, yooloo,olho p"nlerlumilonollhe _j
P,int",
Slalul
Manila'
~:~
~~~~'ol~,o,b~;~Ck
Ih~
,I~l"'
01Ihonel"",,1;pr",lerDn
..:.J
Ifyou
wish
toviewthe
Discover
and
LinkTool
manual
(for
network
administrators),
see
"Viewing
the
Discover
andLink
Tool
manual"
(p.?).
P,int", Adtninid'ftlion Utilily
~,~'pl,:n~e~I~'~~!~~~~~~"',~~~~~ni'ltOIO"
lochool; Ihe,Iolu, 01
_j;
DilCove, and Link Tool
...;.
TI"
" u,ed IDconligur.andcI",cI; 11",IP
odd'e"
ollhe
"
hi
~:I:~~·
which" o,ed when
11",
mool",,,,, oo"""cled,o0
[D"pla~R"admel
~
l.::]J
Selecta software10beinstalled
Select asoftware to be Installed
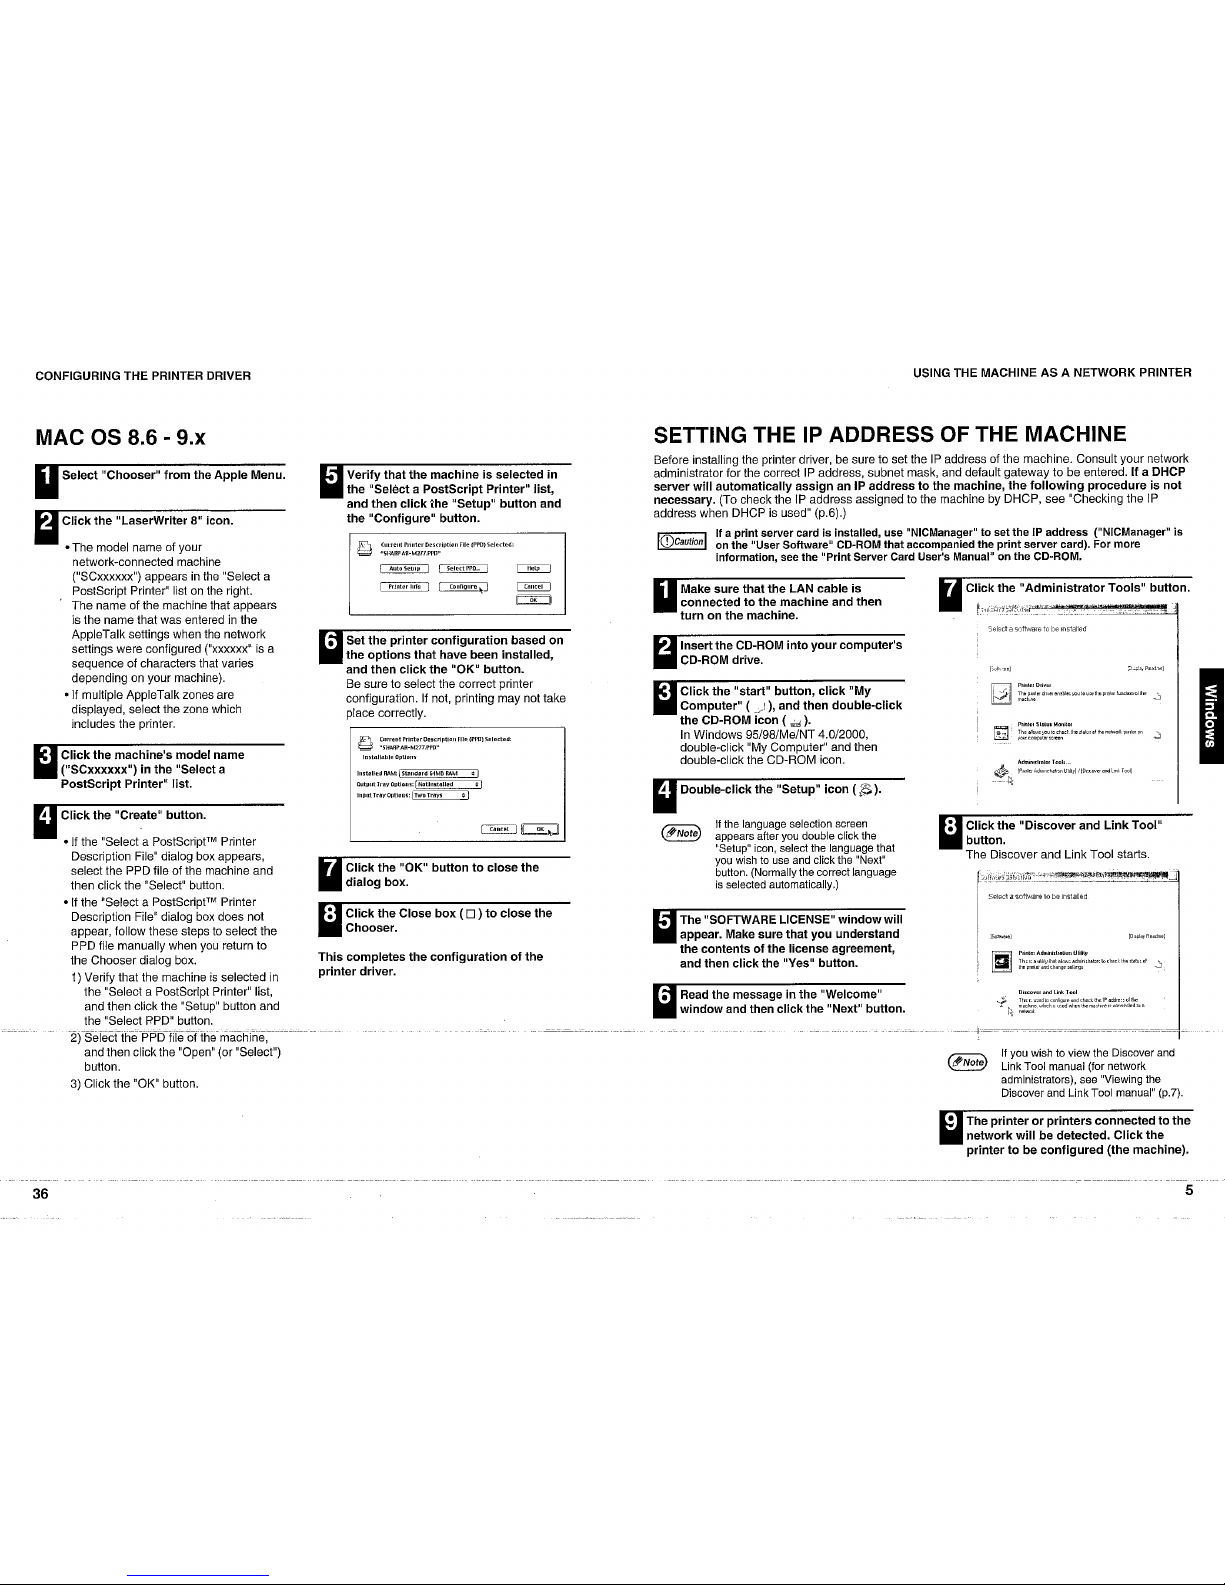
Click
the
"Administrator
Tools"
button.
:
Click
the
"Discover
and
Link
Tool"
button.
The Discover and Link Tool starts.
If a print server card is installed,use
"NICManager"
to set theJPaddress
("NJCManager"
is
on the "User Software"
CD-ROM
that accompanied the print server card). For more
information, seethe "PrintServer Card User's Manualuon the
CD~ROM.
If the
language
selection
screen
appears
after
you
double
clickthe
"Setup"
icon,
select
the
language
that
you
wishtouse
and
clickthe
"Next"
button.
(Normally
the
correct
language
is
selected
automatically.)
Click
the
"start"
button,
click
"My
Computer"
(
~.I),
and
then
double-click
the
CD-ROM
icon
( ,;,d
).
In Windows 95/98/Me/NT 4.0/2000,
double-click "My Computer" andthen
double-click the CD-ROM icon.
Insertthe CD-ROM
into
your
computer's
CD-ROM drive.
Make
sure
that
the
LAN cableis
connected to the
machine
and
then
turn
on the machine.
The "SOFTWARE LICENSE"
window
will
appear. Make sure thatyou understand
the contents of the license agreement,
and then
click
the "Yes" button.
• Read the message in the "Welcome"
window
and then
click
the "Next" button.
~
Double-click the
"Setup"
icon
(;SS).
ICDcautionl
Before installing the printer driver, be sure to set the IP address of the machine. Consult your network
administrator for the correct IPaddress, subnet mask,and default gateway to be entered. If a DHCP
server
will
automatically
assign
an IP
address
to the machine,
the
following
procedureisnot
necessary. (To check the IP address assigned to the machineby DHCP, see "Checking the
JP
address when DHCP is used" (p.6).)
J&l.
unrent
Printer
oescnpuon
HII' (PPD15elected:
~
"5HARPAR-M277.PPD"
Installable
Options
Click
the
"OK"
buttontoclose
the
dialog
box.
Installed
RAM:I
Standard
&-1M1l
RAM ;; I
Output Tray Options: INotlnstalJed
~
I
Input
TrayOlltlollS: ITwo Trays ; I
Verify that
the
machine is selected in
the "Select a PostScript Printer" list,
and
then
click
the
"Setup"
button
and
the
"Configure"
button.
I Auto 5etllll I I serect
ron.
I
I
PrInter lufo I I
renncnre
h;J
current
Printer
[)e~criptilln
File (PPDl5elected:
"5HARP
AIl-M217.PPO"
Click
the
Close
box
(0
)
to
close
the
Chooser.
• Set
the
printer
configuration
based on
the
options
that
have been installed,
and then
click
the
"OK"
button.
Be sure to select the correct printer
configuration. Ifnot, printing may not take
place correctly.
This
completes
the
configurationofthe
printer
driver.
Select "Chooser"
from
the Apple Menu.
IiI
Click
the
"LaserWriter 8" icon.
oThe model name of your
network-connected machine
("SCxxxxxx") appears in the "Select a
PostScript Printer" list on the right.
The name of the machine that appears
is the name that was entered in the
AppleTalk settings when the network
settings were configured ("xxxxxx" is a
sequence of characters that varies
depending on your machine).
olf multiple AppleTalkzones are
displayed, select the zone which
includes the printer.
Click
the machine'smodel name
("SCxxxxxx")
in the "Select a
PostScript
Printer" list.
11
Click
the "Create" button.
oIf the "Select a
Posttscript"? Printer
Description File" dialog box appears,
select the PPD file of the machine and
then click the "Select" button.
oIf the "Select a PostScript'MPrinter
Description File" dialog box does not
appear, follow these steps to select the
PPD file manually when you return to
the Chooser dialog box.
1)Verify that the machine is selected in
the "Select a PostScript Printer" list,
and then click the "Setup" button and
the "Select RPD" button.
2)t>efecfthEtf'Pi:HiTeofthe
machine~-
andthen click the "Open"(or "Select")
button.
3) Click the "OK" button.
• The
printerorprinters
connectedtothe
network
will
be detected.
Click
the
printer
to be
configured
(the machine).
36
5
Page 8

USING
THE
MACHINE
AS A
NETWORK
PRINTER
CONFIGURING
THE
PRINTER DRIVER
•
Click
the
machine's
model
nameinthe
list.
The name of the machinethat appears is
the name that was entered in the
AppleTalk settings when the network
settings were configured ("xxxxxx" is a
sequence of characters that varies
depending on your machine).
Printer Model: Auto Sele<:t...
n]
I
Cancel'
~
~'''M·."_~.''--''*
•
Click
the
startup
disk
name,
"Library",
"Printers", llpPDs
lI
,
"centents'',
"Resources",
"en.lproj",
and
select
the
PPD
file
with
your
model
name.
:
Click
the
"Printer
Model"
menu
and
select
"Other"inthe
listofPPO files.
The PPD file selection window will appear.
I
Click
the
"Choose"
button.
III
Click
the
"Add"
button.
Help
~
Computer
HOME':
lD!sk
- Favcrites
II':f!I
Window
Ifthis isthefirsttime youare installing
a printerdriver onyour
computer,
a
confirmation
message
will
appear.
Clickthe "Add"
button.
Connect to Server... XK
Goto Folder... X;."
Double-click
the"
Utilities"
folder.
Double-click
the
"Print
Center"
icon
("" ).
The "PrinterList" windowappears.
Select
"Applications"
from
the
"Go"
menu.
Make
sure
that
the
machineispowered
on,
MAC OS X v10.1.5
IiI
Click
the
"Add
Printer"
button.
600
P/lnferUst
If
you
wishtochange
the
name
ofthe
machine,
double
click
the
displayed
name.
The
Web
page
inthe
machine
will
appear.
III
Click
the
"OK"
button.
The Web page in the machine opens in
your Web browser to let you conflgure the
machine name and othersettings.
For detailed explanations of the
procedures for configuring settings, click
"Help" inthe menu frame.
When
you
have completed the settings,
quit your Web browser.
III
Restart
the
machine.
Power off the machine and then power it
back on.
This
completes
theIPaddress
settings.
III
Click
the
"Refresh"
button.
The IP address that you entered will
appear. Make sure that it is correct.
1255,255.255,U
PSZ1611.0,1
IPAdd,_
MAC
Addr..,
,.
OeldGalOWdj'
11ame
'J'
IPA<kk=
j"''''"''W-.,ffi,"--
IPConngUlalionlo,ihep,ir,ler
Ilyourprirller"nollisle<!.verilyyou:rn.t"",kconnecli,... and
...
k".urol!lop,;n\oIj,,"rnodon
CITck
onA.rre.hlobegin
anolM.r
,••
roh.
, .
Enter
theIPaddress,
subnet
mask,
and
default
gateway.
The settings inthe abovewindoware
examples. Be sure to askyour network
administratorfor thecorrectIP
address,
subnet
mask,and defaultgatewayto be
entered.
Checking
theJPaddress when DHCP is used
If DHCP is being used, write down the IP address that appears in the window of siep 9 on page 5, as you
will need to enter and/or checkthe IP address at several points in the procedures on the following pages.
I
Click
the
"Configure"
button.
'mM
Sti
"iEl!i&
AA-»::«
192.16ll.1.1O
oaOOMbl:9abD
This
completes
the
configurationofthe
pri
nter
driver.
"
II
~O"'
p,inl.,i>""III:I'd
\,€,~y
)'Our
nol"o'k
""MOCHcn.
ord
"'al<ft
,urnIhepl;ol""t"""d on
CickonRor,..nlob!llinOl1oll>e,.".,ch.
•
Select"
AppleTalk"inthe
menuatthe
topofthe
window.
A list of printers connected to the network
will appear.
If multiple AppleTaikzonesare
displayed, select the zone
which'
includes theprinter.
Ifthe machineis usedin a DHCPenvironment, the machine's IP addressmay change
automatically. If this
happens,
printingwill noiongerbe possibie. In this event,use aWiNS server
or donot usethe
machine
ina DHCPenvironment.
6
35
Page 9

CONFIGURING THE PRINTER DRIVER
USING THE MACHINE AS A NETWORK PRINTER
)",["11
Di,cover
ond
Linl,
Tool
Click
the
"start"
button,
click
"My
Computer" ( ,',I),and then double-click
the CD-ROM icon (
.;,;).
In Windows 95/98/Me/NT 4.0/2000,
double-click "My Computer" and then
double-click the CD-ROM Icon.
Double-click the "Tool" folder.
Insertthe CD-ROMinto yourcomputer's
CD-ROMdrive.
Double-click
the
"Setup"
icon(
g'!).
Click
the "ViewAdmin Guide" button.
Viewing the Discover and Link Tool manual
imt,:;lled K!\M
~landard
b4M~
RAM Tt
------
Set
the
printer
configuration based on
the
options
that
have been installed,
and then
click
the
"Apply
Changes"
button.
Set the printer configuration properly. If
not, printing may not be executed
properly.
"",',
This completes
the
configurationofthe
printer driver.
III
Close the
window.
o
.'
Cancel
rAdd~
It
"""
Mod.,
~.mo
<;li~R"~"
t/.' cO !'I'D
,IIMP/,I(
M~;;
ero
'1,,\~,'A'l
I.'n"
rvo
S1'I\~P"'R-Mll7rrD
Il;
Nom,
~r"l\U
LU
Prmte, Mod.'t
Sil.rp
rg:tt-.:mt
Jobs wmdcw
Select the PPDfile of
the
machine.
Click the name of
the
machine in
the
"Printer
List"
window, and select
"Show Info" from
the
"Printers" menu.
The "Printer info"window will appear.
•
I Clickthe
"Add"
button.
The machine is added to the list of
printers.
Make Defaun
:lI:D
Add Prmtcr
Delete Printer
Cop~"ghlleJ
2003
SHARP
CDRPOAA1ION,AII
,~hl'
"".'ved
Show
jobs
Stop
jobs
"0
To
install
the
"Discover
andLink
Tool",
clickthe
"Install
Discover
and
Link
Tool"
button.
Select "Installable Options" in
the
menu.
St'"~X"X
o!""·~:6n~_~.l-O,
..
lhon ..- . .,
I,~~~
,""
p;.!!Lf:Tl1"~~~,.,,',
..
@,,:£!a
c.
SCxxxx"
Loc,,1
Zon~
34
7
Page 10

USING THE MACHINEAS A NETWORK PRINTER
INSTALLING
THE
PRINTER
DRIVER
(Standard installation)
CONFIGURING
THE
PRINTER
DRIVER
Follow the steps belowto configure the machine's printerdriver.
Ifyou
wishtoinstall
the
display
fontor
specify
the
machine'sIPaddress
when
installing
the
printer
driver,
select
"Custom
installation"
(p.10)
MAC OS X v10.2.x
D
If
multiple
AppleTalk
zones
are
displayed,
select
the
zone
which
includes
the
printer.
Appl,r,1k
._-3]
~I,me
~a(al
APPleTalk"Zane."
...i
T:
-I
1
SCxuxxx
~
PonScrlpt
prinw
~;:
'.
:1
1
Ch""""
S,tW."orn
~L_,
__
._._.
__
~._.._.~.~,.I
PrinterModel:
'"AUtDSerea
--'--==-=n
~~
Prlnter use
1
<1
Auto Select
Generic
! Other ...
_~~"""'I
Apple
ESP
He
i.
texmark
2i@¥lij€$¥Q.@g
"
r
The name of the machine that appears is
the name that was entered inthe
AppleTalk settings when the network
settings were configured ("xxxxxx" is a
sequence of characters thatvaries
depending on your machine).
Click
the machine'smodel
nameinthe
list.
: Select
"Sharp"
in the
"Printer
Model"
menu.
The PPD file selection window appears.
l PrinterModel: r
•
Select"
AppleTalk" in the
menuatthe
topofthe
window.
A list ofprinters connected to the network
will appear.
Cl
Printer List
i'l.me "'151.tu.
Ifthisisthe first time you are
installing
a printer driver on your computer, a
confirmation
message
will
appear.
Clickthe
"Add"
button.
€lComputer
.oac
!
11 Home OWH :
Q iDlsk .0381 ,
~t@('t~
....,
revcrues
OWF
;
• Window Help ""'"
nccn
.
:-;:t
I
Fu;\',j-id
~~l
Goto Folder.. , O:l!:G I
Conned
to Server...
WK
savcrnes
~
Recent Folders
~
Double-click
the
"Utilities"
folder.
Select
"Applications"
from
the
"Go"
menu.
Make
sure
that
the
machine
is powered
on.
~
Double-click
the"
Print
Center"
icon
(,..,).
The "Printer List" windoWappears.
',,:,
DeL.,,.,
IiI
Click"
Add".
000
,
[Di:ployA••drnej·
Cu,lomi",la!IaIi""
J
ElIeCUl.
lh.
in'lallalion
bjo
sel.iO-lg
"MFP
with
TCPIIP
nelw<Jrk
oonn"d;oo.
""IW<llk
,h.re,
USB
conn.clim, or
paralolCUlfleclioo
I .
Standord
installalion
l:;J
~
Print..Slat",
Mo.;tQ'
~
Thi>","",w,youloohe,1<
111.
"o"",oflhen,lw"kprint';'on
r"~
I
~
l"u,,,,,mP\JI,,,,,.""
~
,
.•.
""-,~
LI
Adm;ni.i,aln, To.I ••..
~
[PtinlerAd~i'1Ja"'"Ut!lyl/[D~'O'I".ndLink
ToolI
[SoIIW
...
j
Selecta scnvere to be
installed
•
Click
the
"Printer
Driver"
button.
To view information on the software, click
the "Display Readme" button.
:
Click
the
"Standard
installation"
button.
I
Click
the
"Next"
button.
Click
the
"start"
button,
click
"My
Computer"
( "Jj ), and
then
double-click
the
CD-ROM
icon
(
\id
).
In Windows 95/98/Me/NT 4.0/2000,
double-click "My Computer" and then
double-click the CD-ROM icon.
Double-click
the
i'Setup"
icon
(
~).
Insert
the CD-ROM
into
your
computer's
CD-ROM drive.
Ifthe
language
selection
screen
appears
after
you
doubleclickthe
"Setup"
icon,
select
the
language
that
you
wish
to useandclickthe
"Next"
button.
(Normally
the
correct
language
is
selected
automatically.)
Read
the
messageinthe
"Welcome"
window
and
then
click
the
"Next"
button.
~
The "SOFTWARE LICENSE"
window
will
appear. Make
sure
that
you
understand
the
contentsofthe
license
agreement,
and then
click
the
"Yes"
button,
8
33
Page 11

INSTALLING THE PPD FILE
USING THE MACHINE AS A NETWORK PRINTER
•
•
Ifyou arerunning Windows
2000IXP
anda warning messageappears
regarding theWindows logo test or
digital signature, be sureto click
"Continue Anyway" or "Yes".
!CDcautionl
Click
the
"Next"
button.
Begin installation ofthe printer driver.
If
you
installed
the PS
printer
driver,
thePSdisplayfontcanbe
installed
from
the
"PRINTER
UTILITIES"
CD-ROM
that
accompanied
the
PS3
expansion
kit.
(p.23)
This
completes
the
installationofthe
software.
• After installation, see "CONFIGURING THE
PRINTER DRIVER" (p.25) to check the
printer driver settings.
• To install the Printer Status Monitor or Printer
Administration Utility, see the following
pages:
8rintercStatus.Monitor:.p.t2
•••.
Printer Administration Utility: p.13
Select
whetherornot
you
wish
the
printer
to be
your
default
printer
and
click
the
"Next"
button.
Ifyou are installing multiple printer drivers,
select the printer that you wish to use as
your defauit printer.
if you do not wish to set either printer
driver as the default printer, select "No".
After the installation, a message
prompting
youto
restart
your
computer
may
appear.
Inthis
case,
clickthe
"Yes"
buttontorestart
your
computer.
J When "The
installationofthe
SHARP
softwareiscomplete"
appears,
click
the
"OK"
button.
III
Click the
"Close"
button.
IP
,,~j,,'
].I4C oddte,
"J:':oU11"
DJ(j(jIFB.''JAV
Tousethe PS
printer
driver,
thePS3
expansion kit must be installed.
A
confirmation
window
appears.
Check
the
contents
and then
click
the
"Next"
button.
Ifthe
machine
isnot
found,
makesure
thatthe
machineispowered
onand
connected
toyour
computer
andthen
search
again.
Ifthe
machine
isstillnot
found,
usethe
custom
installation
procedure
todirectly
specify
the IP
address
(p.10).
(B"c1~
Conool
When
the
printer
driver
selection
window
appears,
select
the
printer
driver
to be
installed
and
click
the
"Next" button.
Select the checkboxes of the printer
drivers to be installed.
• Printers
connected
to the
network
are
detected. Select the
machine
and
click
the"
Next" button.
Read the message in
the
window
that
appears and
click
the
"Continue"
button.
Begin installation of the PPD file.
After the installation, a message
prompting you to restart your computer
will appear. Click the "OK" button and
restart your computer.
•
The
License Agreement
window
will
appear. Make
sure
that
you
understand
the
contentsofthe
license
agreement,
and then
click
the "Yes"
button.
This
completes
the
installationofthe
PPD
file.
SHARP
[oncel
jus
EogllSll : I
Iln'loll
; I
Insert
the
printer
expansion
kit
AR-P17
Software CD-ROM
into
your
computer's
CD-ROM
drive.
Double-click
the
"MacOS" folder.
Double-click
the CD-ROM
icon
«.»
on
the
desktop.
Double-click
the
"Installer"
icon(~).
The installer window will appear.
. ..
Copy,,~lrt
lel
:'[I{l~
SHARP CORPORAJlON All
nghl,
"''''''d
C?r,!.o!~
if a
malfunction
occurs
dueto the
installationofscreen
fonts,
deletethe
fonts
from
the
system.
INSTALLATION IN MAC OS 8.6 - 9.x
INSTALLING THE SCREEN FONTS (Mac OS 8.6 - 9.x)
The screen fonts for Macintosh are contained in the "Font" folder ofthe PS3 expansion kit AR-PK1
PRINTER UTILITIES CD-ROM. install the screen fonts as needed. The screen fonts are instalied by
copying the required screen font suitcase folders to your Macintosh.
Copy the screen fonts to the following foider:
• Mac OS
8.6 to g.x: "Fonts" folder in the "System Folder"
IiI
Click
the
"Install"
button.
I,,,
Driver
,~w""
32
9
Page 12

USING THE MACHINEAS A NETWORK PRINTER
CUSTOM INSTALLATION
If you wish to install the displayfont or specify the machine's IP address when installing the printer
driver, select "Custom installation".
INSTALLING THE PPD FILE
In order to print from a Macintosh, the PPD file must be installed. To install the PPD file to your
Macintosh computer, follow the procedure below.
ClI<kIn,,,,1I'"porlo,,"~ba,lcl"",llatlo"
ofthl.
,oftw".
pack"g•.
OSoJ«IOWlnotlo..
..,In'lalta"o"Tvpo
""11",,,
'.1
""",.-n,-,
Olnlrodu'tIO"
When
the
message _
"The
software was
successfully
installed" appears in
the
installation
wtndow,
click
the "Close"
button.
casy
Install
Insr.IIAR-PI1
-_._----
- ----- -------------._---
The LicenseAgreement
window
will
appear. Make
sure
that
you
understand
the
contentsofthe licenseagreement,
and
then
click
the "Continue" button.
A message will appearasking you if you
-aqreeto the terms of the license. Click the
"Agree" button.
: Select
the
hard
diskinwhich
you
wish
to
install
the
PPD file, and
click
the
"Continue"
button.
Be sure to select the hard disk in which
your operating system is installed.
This
completes
the
installationofthe
PPD
file.
IiI
Click
the
"Install"
button.
-
Begin installation ofthe PPD file.
W.lcom.
to tlto AR-P17 Installor
r------·-------..---------------------
.
I
This Mac OS X installer will install the printer :
driver. ;
I ·
.1
.~
,~
~
OI"'m~u"lo"
'"mll:"'"I'T'II"
:r,m.lil,,,)
• If
you
are
using
MacOS Xv10.2.x,
the
"Authenticate"
window
will
appear.
Enter
the
password
and
clickthe
"OK"
button.
• [f youare
using
MacOS Xv10.1.5,
clickthe lock
icon
(~'),
enterthe
password,
andclickthe
"OK"
button.
Insert
the
printer
expansion
kit
AR-P17
SoftwareCD-ROM
into
your
computer's
CD-ROM drive.
Double-click
the
CD-ROM
icon
(El)
on
the
desktop.
Double-click
the
"MacOSX" folder.
Double-click
the
"AR-P17"
icon(......
).
The installer window will appear.
~
Double-click
the
folderofthe
operating
system
version
you
are using.
• In Mac OS X v10.1.5, double-click the
"Version 1
a.
1" folder.
• In Mac OS X v10.2.x, double-click the
"Version 10.2" folder.
INSTALLATION IN MAC OS X
IiI
Click
the
"Continue"
button.
9
-.--
-, I,,"'IJAR_PH
I
IPaddr...
MAC.ddre:l.
192.1b1i1.l0
IJIHlJ:1F:92:9A:A5
Choo
..
an
insl.II.~'n
method
E'e<uoth.
in,l.lollon
b)',••
,chin~
a
MFf'
cQnneOled
10
the
TCP~P
nelw,"k
,ulornalio.II~,
lNet_k
porii.
C<e.!led
""ill
LPA
aulomalically.j
C~k>nmo.laliJn
~
E",o"I.I~.,n,t"'llon
bl'
,et!i1gaMFP
"ithTePII?
",twork
connection.
network
,hale.usa
conneel;.,n.
or
P'""U.lconnei:lian
ProdLII:tnam.
tlam.
S"'cl.MFPloin,I.IIJ",rnlh.r~t
Printers connected to
the
network
are
detected. Select
the
machine
and
click
the
"Next"
button.
If you wish to specify theJPaddress, click
the "Specify address" button, enter the IP
address, and click the "Search" button.
A
confirmation
window
appears.
Check
the
contents
and
then
click
the
"Next"
button.
:
Click
the
"Custom
installation"
button.
•
Select"
LPR Direct
Print"
and
click
the
"Next"
button.
11
Click
the
"Next"
button.
IOI,plOl'Aeadmej
I~
<Back I
[SoIl"'""'l
Select8
sotbNare
tobe
installed
Click
the
"start"
button,
click
"My
Computer"
( .;J), and then
double-click
the
CD-ROM
icon
(~).
In Windows 95/98/Me/NT 4.0/2000,
double-click "My Computer" and then
double-click the CD-ROM icon.
~
I
Admin;.!,aln,
Tool•...
~
IPrir'.rAdm"i'lrolionUllil~J/IDi,oO'/
..
ondLinl<
ToolI
Insert
the
CD·ROM into
your
computer's
CD-ROM drive.
[f the
language
selection
screen
appears
after
you
double
clickthe
"Setup"
icon,
select
the
language
that
you
wishto use
and
clickthe
"Next"
button.
(Normaliythe
correct
language
is
selected
autornatically.)
Double-click
the
"Setup"
icon
(~).
Read the message in the "Welcome"
window
and then
click
the "Next" button.
~
The "SOFTWARE LICENSE"
window
will
appear. Make sure that you understand
the
contentsofthe
license agreement,
and
then
click
the
"Yes" button.
•
Click
the
"Printer
Driver" button.
To view information on the software, click
the "Display Readme"button:
.~
'I
~
10
31
Page 13

USING THE MACHINEASA
NETWORK
PRINTER
BEFORE INSTALLATION
If you are runningWindows
2000IXP
and a warning message appears
regarding the Windows logo test or
digital signature, be sure to click
"Continue Anyway" or "Yes".
ImCautlon I
This
completes
the
installationofthe
software.
• After installation, see "CONFIGURING THE
PRINTER DRIVER" (p.25) to check the
printer driver settings.
• To install the PrinterStatus Monitoror Printer
Administration Utility, see the following
pages:
Printer Status Monitor: p.12
Printer Administration Utility: p.13
I
Click
the
"Next"
button.
Begin installation of the printer driver.
Afterthe installation, a
message
prompting
youto restartyour
computer may
appear.
Inthis
case,
clickthe "Yes"buttonto restartyour
computer.
III
Click
the
"Close"
button.
When
"The
installationofthe
SHARP
softwareiscomplete"
appears,
click
the
"OK"
button.
PCL5,
flole'I1
)'OU
won:10p,,",d.lo ",'h PS,YO"ne,d tb" O,"IIM,I
"P,
",p"""onl,It"
Th, PPDdrIve,,,m"
.,;lbl~d
I,,," See
lh, :elupg'Jldelo,,,,lolPPD
To usethe PSprinter
driver,
the
PS3
expansion
kit must be
installed.
When
the
window
for
enteringaprinter
name
appears,
click
the
"Next"
button.
If you wish to change the printer name,
enter the desired name.
When the
printer
driver
selection
window
appears, select the
printer
driver
to be
installed and
click
the "Next" button.
Select the checkboxes of the printer
drivers to be installed.
Select
whetherornot
you
wish
the
printertobe
your
default
printer
and
click
the"
Next"
button.
If you are installing multiple printerdrivers,
select the printer that you wish to use as
your default printer.
If you do not wish to set either printer
driver as the default printer, select "No".
MacOS8.6to s.x,
10.1.5,
and10.2to
10.2,8
(except
10.2.2)
Requirements
ofthe
operating
system
mustbe
satisfied.
Ifyouare
using
MacOS 8.6 to9.x, make sure that
LaserWriter8
has
been
installed
andthatthe
"LaserWriter8"
checkboxisselected
(
!El
)in
"Extensions
Manager"in"Control
Panels".
Ifnot,
installitfrom
the
system
CD-ROM
supplied
withyour
Macintosh
computer.
Operating
system
CPUand
RAM
You will need the following hardware and software in order to install the PPD file for Macintosh.
ImCaution I Whenthe print server card is installed, the LANport on the printer expansion kit cannot be
used. Be sure to connect the cable to the Network port indicated in the picture.
HARDWARE ANDSOFTWARE REQUIREMENTS
CONNECTING TO A
NETWORK
Install the print server card (AR-NC5J) in the machine and connect the machine to the network.
The cable and adapter that are used vary depending on the network. Be sure to use equipment that
meets the specifications of the network. Connect the LAN cable to the LAN port on the print server
card in the machine.
APPLETALK
SETTINGS
After connecting the machine to the network, configure AppleTalk settings as required for your
networi<environmenl. To configure the settings, see the online manual on the "User Software"
--Cn:RDM:-----
- -- -- - -
-----
- -------.----------
- -
----------
-- -
--------------------
------------
Select
whetherornot
you
wish
to
install
the
display
font
and
click
the
"Next" button.
-'\'00
11"'.ln;'.ll1,.Pld"pl,ylrnlb,",,,,gtl,eop'lOo,I"PS
.""''',oohL''
Ifyou installed the PSprinter
driver,
the PSdisplay font canbe installed
fromthe
"PRINTER
UTILITIES"
CD-ROM
that
accompanied
the PS3
expansion
kit.
(p.23)
'D.'k~
C.ncel
30
11
Page 14

USINGTHE MACHINEAS A NETWORK PRINTER
INSTALLING THE PRINTER STATUS MONITOR
IfAS]
Pr'nter Driver
:~i
The
~inter
d'ive'enable.youroU,e
tHo
pt;nt.,
lunclicn
oJlhe
[CJ
I
L-----l
mad,..,..
~
• Click
the"
Printer Status Monitor" button.
To view information on the software, click
the "Display Readme" button.
Insertthe
CD-ROM
into your computer's
CD-ROMdrive.
Click
the
"start" button, click "My
Computer"
(';19
), and then double-click
the CD-ROMicon (
Q ).
In Windows 95/98/Me/NT 4,0/2000,
double-click "My
Computer" and then
double-click the CD-ROM icon,
Double-click the "Setup" icon (g;:.).
Selecta softwareto be
instaJled
ISollw<lIe!
{D~pl.~Re~mel
"
USING THE PRINTER
INA
MACINTOSH ENVIRONMENT
To use the machine as a printer for the Macintosh, the PS3 expansion kit AR-PK1 and print server
card AR-NC5J must be installed,
Install the PPD file needed to use
the
machine as a printer from the Software CD-ROM that
accompanied the printerexpansion kit (AR-P17).
Ifthe languageselection
screen
appearsafter youdouble click the
"Setup"
icon,selectthe language that
you wish to useandclick the
"Next"
button.(Normally the correctlanguage
isselected autornatlcally.)
~
The "SOFTWARELICENSE"windowwill
appear. Make sure that you understand
the contents of the licenseagreement,
and then clickthe "Yes" button.
Read the messagein
the
"Welcome"
window
and then
click
the
"Next"
button.
12
.-L
I Admini.tlatc, Tool",
__
~
[Prinl.,A'*nini'l!aticn
Utility)l
[Disco'leland
Link
Tool]
Follow the on-screen instructions.
ABOUT THE SOFTWARE CD-ROM
The CD-ROM that accompanies the printer expansion kit contains the following software:
• PPD
file
A Macintosh computer refers to the PPD flie when using a printer driverfor printing,
• .Acrobat Reader 4.05
Software that allows you to viewthe online printer manual on your computer.
29
Page 15

TROUBLESHOOTING
USING THE MACHINE AS A
NETWORK
PRINTER
IDicploJ'Roodme]
Di,cove,
and Link Tool
y
~~'~I~~n~'~h:~I~~~i~~~o",~ne~
~~~o~~~l~'~
~d~~~::.~:~~;~
•
n.'worl
Ifyouare installing the Printer
Administration
Utilityin
Windows
95,a
system
filemust be
updated
before
theutilitycanbe Installed. Formore
Information,
clickthe "Display
README"
button.
..,
g
.
.I P,inle, Adrnini.lJalion Ulilily
:.:Thi,,,.
Ulilit~
Ihatallow' "dmlni'I'otorolochock 11..,
~alu,
01 '.
!
'lh.p"nl.,.ndchange'~lIlng,.
_...J
-s
[Soil""'"]
Select a sonware to bemstejed
Click
the
"Printer
Administration
Utility"
button.
To view Information on the software, click
the "Display Readme" button.
:
Follow
the
on-screen
instructions.
-
-------------------~----
\Dj:ploJ,Aeodmel
!5DIl",a'e]
I
I Select a
software
to be
Installed
Insert
the
CD-ROM
into
your
computer's
CD-ROM drive.
Click
the
"start"
button,
click
"My
Computer"(.:),
and
then
double-click
the
CD-ROM
icon
( .id ).
In Windows 95/98/Me/NT 4.0/2000,
double-click "My Computer" and then
double-click the CD-ROM icon.
If the
language
selection
screen
appears
afteryou
double
clickthe
"Setup"
icon,
select
the
language
that
you
wish
to useand clickthe
"Next"
button.
(Normally
the
correct
language
is
selected
automatically.)
Adrn;ni,l,alo, Tool•...
~
IPJJol«Admini,l,ollon
Ulllit~]1
[D"CD"",""d llnf; Tool]
I"
Read
the
message in the "Welcome"
window
and
then
click
the "Next"
button.
The "SOFTWARE LICENSE"
window
will
appear. Make
sure
that
you
understand
the
contentsofthe
license agreement,
and
then
click
the
"Yes"
button.
Double-click
the
"Setup"
icon
(p).
•
Click
the
"Administrator
Tools"
button.
INSTALLING THE PRINTER ADMINISTRATION UTILITY
Click "System",
click
the "Hardware" tab,
and
click
the "Device Manager" button.
"Universal Serial Bus controllers" will
appear in the list of devices.
~
• In
Windows
98/Me,
double-click the
tffNote
"System" icon and click the "Device
Manager"
tab.
In
Windows
2000,double-click the
"System" icon, click the "Hardware"
tab,andclickthe
"Device
Manager"
button.
• Ifthe
"System"
icon
does
notappear
in Windows Me, click "view all
Control
Panel
options".
-
~
QI.G::.::.:.!Ea'E~Tg;:.EiEZ:I!~';~;2.;:~r~r~.T.\;r:T~
"1;ci'
Standard
OpenHCD
USB
HostCcrcroller
c.fy
LlSB
RootHub
Two items should appear: your controiler
chipset type and Root Hub. If these items
appear, you can use the USB port. If the
"Universal Serial Bus controllers" shows a
"-"yer(owexclamation'=poTnror~'does-
-not
--------------
appear, you must check your computer
manual for USB troubleshooting or contact
your computer manufacturer.
Click
the
"start"
button,
click
"Control
Panel",
and
then
click
"Performance
and
Maintenance".
In Windows 98/Me/2000, click the "Start"
button, select "Settings", and then click
"Control Panel".
Click
the
( ±)
icon
beside
"Universal
Serial
Bus
controllers".
Plug and play screen does
not
appear (when
using
a USB
cable)
If the Plug and Play screen does not appear
after you connectthe machine to your computer
with a USB cable and turn on the machine,
follow the steps below to verify that the USB
port is available.
If
"Other
devices" doesnot
appear,
close the "Device Manager" window.
Click
the
"start"
button,
click
"Control
Panel", and
then
click
"Performance
and
Maintenance".
in Windows 2000, click the "Start" button,
select "Settings", and then click "Control
Panel".
Click
"System",
click
the
"Hardware"
tab, and
click
the
"Device
Manager"
button.
Click
the
(Of )
icon
beside
"Other
devices".
-
'if-
Other
devices
'1f
5HARPAR-XXX~(
If "SHARP AR-XXXX" appears, select and
delete it.
Illcstallthec~s()ftll\laroe_ll!l_explaillllt:lj!L
_
"INSTALLING
THE
SOFTWARE".
In
Windows
2000,
double-click
the
"System" icon, click the 'Hardware"
tab,andclickthe "Device
Manager"
button.
The printer
driver
cannot be
correctly installed by Plug and
Play (Windows 2000/XP)
InWindows 2000/XP, ifthe printer driver cannot
be correctly Installed by Plug and Play (for
example, Plugand Play takes place without
copying the required files for the printer driver
installation), follow these steps to remove
unneeded devices and then install the printer
driver as explained in "INSTALLING THE
SOFTWARE".
:I
Once
you
have
verified
that
the
USB
port
is enabled,
install
the
software
as
explained
in "INSTALLINGTHE
SOFTWARE".
<Bocl
Clo,"
28
13
Page 16

USING THE MACHINE WITH A
PARALLEL OR USB CONNECTION
INSTALLING THE PRINTER DRIVER
TROUBLESHOOTING
If the software does not install correctly, check the following items on your computer.
To remove the software, see "Removing the software" in the online manual.
Troubleshooting information can also be found inthe READMEfiles for each of the software programs.
To view a README file, click the "Display Readme" button in the "Software Selection" screen.
Click the icon ofthe printer driverfor which
you wish to change the port setting, and
select "Properties" from the "File" menu.
Click the "start" button, click "Control
Panel",click "Printers and OtherHardware",
andthen click "Printers andFaxes",
In Windows
95/98/Me/NT4.0/2000, click
the "Start" button, select "Settings", and
then click "Printers".
~
Select
"FILE:"inthe
"Printtothe
following
port"
list
box,
arid
click
the
"OK"
button.
11
Click
the
"Ports"
tab.
In Windows
95/9B/Me,
click the "Details" tab.
Another printeris usingthe
parallel
port
(when
usingaparallel
cable)
If anotherprinter is using the parallel port and
printing is not possible using the machine,
follow the steps below to change the port
,setting ofthe other printer driver, and make
sure that the port of the printerdriver for the
machine isset to LPT1
'.
What ecuon do you 'fJant
Windo'''I~
to take?
oignore-
Install
the softwareanywayand don'task
For
hW
approval
o
Warn-Prompt
meeach timetochoose an ecuon
Click
the
"Hardware"
tab
and
then
click
the
"Driver
Signing"
button.
Click
"Performance
and
Maintenance",
and
then
click
"System".
In Windows 2000, double-clickthe
"System" icon.
Check
"What
actiondoyou
want
Windowstotake?"
("File
signature
verification"inWindows
2000).
Click
the
"start"
button
and
then
click
"Control
Panel".
In Windciws 2000, clickthe "Start" button,
select "Settings", and then click "Control
Panel".
Printer
driver
cannot be
installed (Windows
20001XP)
If the printer driver cannot be installed in
Windows 2000/XP. follow these steps to check
your computer's settings,
, Admin;'l'olo'Tool •..•
~
·tPlinl.rAdmi"'I,o'ianUtOl,II[D~,o""rondli1k
Tool!
~
<8""kl",'I~
I Prlnte'
Slolu.
Mon;IOI
~
I of»
.u"""~au
la
""ook
il10
'Iolu'
oiIr..
",iwo'k
pr"'.,on :... 1
g
~ClJrcompul."cr
..
n.
~
[SaR"
...
]
Selecta
software
to be
installed.
Click
the
"Printer
Driver"
button.
To view information on the software, click
the "DisplayReadme" button.
IiI
Click
the
"Next"
button.
Insert
the
CD·ROM
into
your
computer's
CD-ROM
drive.
Click
the
"start"
button,
click
"My
Computer"
(
.';J
),
and
then
double-click
the
CD-ROM
icon
(
\.id
).
The
USBorparallel
cable
must
not
be
connectedtothe
machine.
Make
sure
that
the
cableisnot
connected
before
proceeding.
If the cable is connected, a Plug and Play
window will appear.
If this happens, click
the "Cancel" button to close the window
and disconnect the cable.
if anerror
message
appears,
followthe
on-screen
instructions to solvethe
problem.
Afterthe
problemissolved,
theinstallation
procedure
will
continue.
Depending
onthe
problem,
youmay
have to clickthe
"Cancel"
buttonto exit the installer. Inthis case,
reinstall
the software from the
beginning
after
solving
the
problem.
~Note)
The
cable
will be
connected
instep 14.
~
Double-click
the
"Setup"
icon
(
~).
Installation in Windows XP (USS/parallel cable)
Ifthe
language
selection
screen
appears
afteryoudoubleclickthe
"Setup"
icon,selectthe
language
that
you wish to'use and click the "Next"
button.
(Normallythecorrect
language
isselected automatically.)
The
"SOFTWARE LICENSE"
window
will
appear. Make
sure
that
you
understand
the
contentsofthe
license
agreement,
and
then
click
the
"Yes"
button.
•
Click
the
"Custom
installation"
button.
" J - I
Choo
•• on
in,lolI.lion
method
Stondarclinslalal;on
E,eotte
th<>
insloDolion
b)o
'oaIchingaMFP
conoei:led
10
Ihe
TCPIIP
nel"'tMk
"utornatioall~,
~leIW",k
porti,cr••led
wi1hLFil,ulomal"ol~,J
Cuslorninslalalion
~
E>=ul~
Ih.
in,loJollon
b)o
,elllng•
MFP
volh
TCPJlP
netwo'k
ooonoclian.
""twork
'hare,
USB
connoclion,
or
lIMallelconoeClian
o
Block
- never
Install
unsigned
driversoftware
Admi"istrator option
~
Nakethisactionthe systemdefault
If the option "Block" has been selected, it
will not be possible to install the printer
driver. Select the option "Warn" and then
install the printer driver as explained in
"INSTALLING THE SOFTWARE".
Click
the
"SHARP
AR-XXXX"
printer
driver
icon
and
select
"Properties"
from
the
"File"
menu.
IiI
Click
the
"Ports"
tab.
In Windows
95/9B/Me,
click the "Details"tab.
Select
"LPT1"inthe
"Printtothe
following
port"
list
box,
and
click
the
"0K" button.
• Read
the
message
in the
"Welcome"
window
and
then
click
the
"Next"
button.
Inthe event that you
need
to usethe
other
printer,
repeat
theabove steps
to setthe pertof the
machine
to
"FILE", and
change
theport
setting
of
the other printerbackto
"LPT1
".
14
27
Page 17

USING THE MACHINE WITH A
PARALLEL
OR USB CONNECTION
HOW TO USE THE ONLINE MANUAL
PC",
PC,S
.i PS
1;S
S.I.ollh.d"votlo.,,'all
1·~.lo11~""
wonllo prlnl
d.l.
IV.lh
ps.
~,,"
""od Ih.
opl'Dl\,1
"PS.>p"""",, I·.,'"
lh.
PPD
d'"''''
nol
,doll.dh".
5"
11>0
,.Iur,guldo'0
,,-,,1011
PPD
I
Connect
the
interface
cabletothe
machine
and
your
computer
(p.20).
• If
you
are
using
a USB cable, make
sure the machine's power is turned on
and then connect the cable.
• If youare using a parallel cable,turnoffthe
power
ofthe machineand your
computer,
connect
thecable, turn onthe powerof the
machine,
andthenturn onyour
computer.
Windows wili detect the machine and the
Plug and Play screen will appear.
Begin
installationofthe
PCL6
printer
driver.
"SHARP AR-XXXX" will appear in the
"Found New Hardware Wizard" dialog box.
Select "Instali the software automaticaliy
(Recommended)" and click the "Next"
button. Follow the on-screen instructions.
I
' .IIf a warningwindow
appears
regarding
(DCautlon
the
nWindows
logo
test",
besureto
click the "Continue
Anyway"
button.
This completes the installation of the software.
• Ifyou
installed
the
printer
driver,
configure
the
printer
driver
settings
asexplained in
"CON
FIGURiNG
THE
PRINTER
DRIVER"
(p.25).
• If you instalied the PS printer driver, the PS
display font can be instalied from the
"PRINTER
UTiliTIES"
CD-ROM that
accompanied the PS3 expansion kit. (p.23)
After
completing
the
above
steps,
repeat
the
installation
procedure
from
step1if
you
are
installing
the
PCL5eorPS
printer
driver.
1. Repeat the installation procedurefrom step 1.
2. When the select printerdriver to instali screen
appears, remove the checkmark from "PCL6"
and select the checkboxof the printer driver
that you wish to instali ("PCL5e" or "PS").
I.PR
""""1',,,,1
• [,,,,,",,,,'d'olh.'. ,,,,,;-.,,,,,,
Cgminuin~.v"ur
in,tall.lion
01thi••"nwale
mOJimpair
or
dodab,Jize
the COli"cl
"per.tlon
cf
YO~I
sy.lem
cilho' im",.di.tely n, in the future. Mic,o.ell
.1,on~[~
lee.mmend.
lnal you
,lop
llli.
in.lotl.lIoo
oow aod
coolacll'"
,.llw""
vend.!
10<
<ollwa'c
lhal
h,,,
pa
..
.,d
Window.
logo
le.hog
Th'
,cllw"e
)'00are
.,,'':''n~
I,.,
""I
p",,.d
lifO'ldow;
LOIlll
IO"l'lglove;II),j;oOJ'!i'OIJUII,lj'"ilhW,ndo""XP
lIr~
""" ,. ,,,,".'
"O!,,,tal~
I
n
!
••••.0.,--,
Aftertheinstallation, a
message
prompting
youto
restart
your
computer
may
appear.
Inthis
case,
clickthe
liVes" button to restart your computer.
Ifthe following
screen
appears
while
thefiles arebeing
copied
(the
message
may
appear
morethan
once),
click the "Continue
Anyway"
button.
When
you
are
asked
how
the
printer
is
connected,
select
"Connectedtothis
computer"
and
click
the
"Next"
button,
Select
whetherornot
you
wish
to
install
the
display
font
and
click
the
"Next" button.
When
"Theinstallation of the
SHARP
software
is
complete"
appears,
clickthe
"OK"
button.
Follow
the
on-screen
instructions.
l(DcaUtionl
When
the
"Finish"
screen
appears,
click
the
"Close"
bullon.
_____
~,~,~
_
....
~.~~~~,~.,~,.,.
-~=_A
message.will
appearinstructing_yo,uJo_,~,~
.__ _
======='-----'===~~-=1.~,--
connect the machine to your computer.
Click the "OK" button.
Double-click
the
"Manual"
folder,
double-click
the"
EnglishA"
folder
(for
regions
other
than
the
U.S.,
double-click
the
"English"
folder),
and
then
double-click
the
"AR_M230_M270.pdf"
icon.
The onlina manual will appear.
Double-click
the
"Acrobat"
folder,
and
then
double-click
the
"ar500enu.exe"
icon.
Follow the on-screen instructionsto install
Acrobat Reader.
Click
the
"start"
button,
click
"My
Computer"
( .;,J), and
then
double-click
the
CD-ROM
icon
( ,;,d
).
In Windows 95/98/Me/NT4.0/2000,
double-ciick "My Computer" and then
double-ciick the CD-ROM icon.
Insert the CD-ROM into
your
computer's
CD-ROM drive.
• Ifyou will be
viewing
the
onllne
manual
repeatedly,
youmayfindit convenient to copythis
online
manual
fileto your
computer.
• The
onHne
manual
canbe
printed
outusing
Acrobat
Reader.
SHARP
recommends
printing out
the
sections
which
youreferto
regularly.
• Referto
"Help"atAcrobat
Reader
for more detailson how to use
Acrobat
Reader.
Insert
the CD-ROM
that
accompanied
the
machine
into
your
computer's
CD-ROM
drive.
Click
the
"start"
button,
click
"My
Computer"
( .:,J ), and
then
double-click
the
CD-ROM
icon
( ,;,d ).
In Windows 95/98/Me/NT4.0/2000,
double-click "My Computer" and then
double-click the CD-ROM icon.
~
Toviewtheonline
manuai,
yourcomputer musthave
Acrobat
Reader
5.0or later.If you do not
~
have
Acrobat
Reader,
tallowthe instructions in
"lnstalHng
Acrobat
Reader"
to installit.
The online manual provides detailed instructions for operating the machine as a printer. View the
onllne manual to use the printer function after the initial setup is completed.
Installing Acrobat Reader
26
15
Page 18

USING THE MACHINE WITH A PARALLEL OR USB CONNECTION
Click
the
"OK"
buttoninthe
printer
properties
window.
Click
the
"Set Tray
Status"
button
and
set the size and
typeofpaper
loaded
in
each tray.
Select a tray from the "Paper source"
menu, set the size of paper loaded in the
tray from the "Set Paper Size" menu, and
select the type of paper from
the"
Set
PaperType" menu.
Repeat for each ot the
trays.
Tra~Slalu"
Paper
Source:
I
Tfa>'1
[Let.lej".__
v'
Set
Pap~r
Si<:.:
11@!me
~i
Set
Paper
!l'pe
-t::k
I-NoIS;;;I--""-
v,
•
Click
the
"OK"
buttoninthe
"Set
Tray
Status"
window.
'n,'oIIOdFIAM
[G4~a-iiMt·
.-
if the
machineisused
asa
network
printer,
youcanclickthe"Auto
Configuration"
buttontoautomatically
configure
the
settings
based
onthe
detected
machine
status.
Clickthe "start" button,click "Control
Panel",click "Printers andOther Hardware",
andthen click "Printers andFaxes".
In operating systems other than Windows
XP, click
the"
Start" button, select
"Settings", and then click "Printers".
Click
the
"SHARP AR·XXXX"
printer
driver
icon
and
select
"Properties"
from
the"
File" menu.
Ifyou are using Windows NT 4.0/2000IXP,
go to step 4.
--~_..~--~._~.~_..~~'~
~~~
~..~-~-
o.o~
~
Click
the
"Configuration"
tab
and
set
the
printer
configuration
basedonthe
options
that
have
been installed.
Set the printer configuration properly.
Otherwise, printing may not take place
correctly.
Create Shortcut
Delete
Aaa
Printer
Server Properties
Set
UpFaxing
In
Windows
95/98/Me,
click
the
"Setup"
tab.
After installing theprinter driver, you must configure the printerdriver settings appropriatelyfor the
number of paper trays on the machine and the size of paper loaded in each tray.
CONFIGURING
THE
PRINTER
DRI.VER
o
[Ditpl"l'
RMdm.1
Soledhow
~O"'
pl;"I.,
~
beconnecled
('
LPA
Di,ecl
P<i"1
r Sha"df'rir1le'
r-
Ca"".cl~dlolhi,compule,
E,eoul.the
in,tallation
by,"..
c~ing
a
MFP
conneoled
to
the
TCPIIP
network
.ulo",,';001[1.
(lIelwo,k
po,'i' "'Mled
~.;u,
LPR
aUlom.tioolly.)
Cu,tom;o~.II"lion
I~
E,"ct.llelhe
.,"
....1....bjo
"",.,g
"
MFP.
withTCPIIP
nelwo'~
conned",n,n'lWO!k,h".,
usa
connecllon.
or
p.,.lIeloorll'l<!ction.
[Soll"""e[
~
~'~
I
"".,",,,,,",
",I"~
Ire"inlerdd'",erlObl.e"otJlo"""I~.o"'I"I"""tl,oof'h.·,,,,,,
I
L~i
mac,,,""
.
.,'3
~
Plinl.'
5talu.
Monitor
~
T~i,.n'"'J'O"'o<'''''l<lh.''Ol",''U.,nelw[)ll'pl'''''''''
""I
I::1liJ
1"L>"e""'ptJl.r,c
...
~
.~
Selecta sortesrs to be hstelled
§'!hh(iM'§I·
hl6hi\l.j,ij'Fij,rl'fh'ffllMit@ffl.
;;
Click
the
"Printer
Driver"
button.
To view information on the software, click
the "Display Readme" button.
When
you
are
asked
how
the
printer
is
connected,
select
"Connectedtothis
computer"
and
click
the
"Next"
button.
•
Click
the
"Custom
installation"
button.
IiI
Click
the
"Next"
button.
The
USB
cable
must
notbeconnected
to
the
machine.
Make
sure
that
the
cableisnot
connected
before
proceeding.
If the cable is connected, a Plug and Play
window will appear. If this happens, click
the "Cancel" button to close the window
and disconnect the cable.
Ifthe
language
selection
screen
appears
afteryou
double
clickthe
"Setup"
icon,
select
the
ianguage
that
you wish to use and click the "Next"
button.
(Normally
the
correct
language
Is
selected
automatically.)
Insert
the
CD-ROM
into
your
computer's
CD-ROM
drive.
Double-click
"My
Computer"
(!;rl), and
then
double-click
the
CD-ROM icon(I1j)).
The
"SOFTWARE LICENSE"
window
will
appear.
Make
sure
that
you
understand
the
contentsofthe
license
agreement,
and
then
click
the
"Yes"
button.
(&Note)
Thecable
Willbeconnectedinstep
15.
~
Double-click
the
"Setup"
icon
(
J:?).
• Read
the
message in the "Welcome"
window
and
then
click
the "Next" button.
Installation in Windows 98/Me/2000 (USB cable)
16
25
Page 19

USING THE MACHINEWITH A
PARALLEL
OR USB CONNECTION
USING THE PPD FILE
<;.l",llhodriver!<>;",t.1I
r.' PS
[<
NOI.,
11
~O"
.,,,,,110prinl
d"e"'l1
P5.l'OO
need theoplion!i "
"PSo,p.o::>on
1;,1",
Th.PPD
d''''.r"
nOlill,lollodho,e,See I
!he.olupgr><lelo;",t.IIPPO
r-
PCL6
This completes the installation of the software.
• Ifyou installed the printer driver, configure the
printer driver settings as explained in
"CONFIGURING THE PRINTER DRIVER"
(p.25).
011
youinstalledth_e_!,§-,)~nje-'.drivEJr,the
PS
display font callbeillsfalledfroin
the
--"PRINTER UTILITIES" CD-ROM that
accompanied the PS3 expansion kit (p.23).
Make sure
that
the
powerofthe
machineisturned
on,
and
then
connect
the
USB cable. (p.20)
Windows will detect the machine and the
Plug and Play screen will appear.
I
Follow
the
instructionsinthe
Plug
and
Play screen
that
appearsinyour
versionofWindowstobegin
the
installation.
After
completing
the
above
steps,
repeat
the
installation
procedure
from
step
1 if
you
are
installing
the
PCL5eorPS
printer
driver.
1. Repeat the installation procedure from step 1.
2. When the select printer driver to install
screen appears,
remove the checkmark from
"PCL6" and select the checkbox of the
printer driver that you wish to install
("PCL5e" or "PS").
~"kno"""ol'".repocl;og,
Th.
M,OtOloll
69it.'
"!l'\1lluro
ollllm,that,oil
...
,. h
..
~e""
le,led
w~il\if.,d""".r>d
Ih., Ih. '011""'0 11" nD!
b.er..II
...
d,,,,,,.,'WO,lo,l,d
II~ou.,anllo"';ohlotM",ro:oftdogil.lly"gn,,"
'01'''",0
1'l"llh,WIt>do"'~i>d'I.W.b,'
• .,
Wpll",ndDw,opd",miC1O<oliooml o ,,,,, ilo,,,, i,
"".,Ioblo
Th.,oll''''.I'O'J.,
••
"""II"''''ldildo,,nolcon'~".
l.I,o,oooll<igllol,ign,iul.Therelole,lb"oi,,,,,
guaranleell1al'h"",rr""oWDIk,oorreclly,,"h
W"'OO",,
..
US8
~eIoclon",I"rloc"lobeco"rN'.d
In
Windows
2000, if thefollowing
screen
appears
while
thefiles
are
being
copied
(the
message
may
appear
more
than
once),
clickthe
"Yes"
button.
Afterthe
installation,amessage
prompting
youtorestart
your
computer
may
appear.
Inthis
case,
clickthe
"Yes"
buttontorestart
your
computer.
When
the
interface
selection
screen
appears,
select
"USB"
and
click
the
11Next" button.
fjl/.\;ijl.ji@
fUG
w¥Ht1rffM'ZT
Select
whetherornot
you
wish
to
install
the
display
font
and
click
the
11
Nextllbutton.
When "The installation of the SHARP
software is complete" appears, click the
"OK" button.
Follow
the
on-screen
instructions.
'V\lhen
the
"Finish~..,creenalJpears,
click
the'IIClose
ll
-
button.
-----------------
A message will appear instructing you to
connect the machine to your computer.
Click the "OK" button.
l(Dcautio"
I
If printerresident fonts
cannot
be
specified
fromthe
application
software,
the
resident
font
information
hasnotbeen
installed
orthe
information is not correct. In this case,
reinstall
the
resident
font
information.
Follow
the
on-screen
instructions.
After
the
resident
font
information
has
·beenoinstalled,.restarLyour.•computer..
•.
~~~.~..~~
.•.c.
~
Follow
the
on-screen
instructions.
When you are asked to specify the path of
the PPD file, enter the path as follows.
(Substitute the letter of your CD-ROM
drive for "R" inthe following paths.)
* In regions otherthan the U.S., enter "English"
instead of "EnglishA".
Operating
system
PPD
file
path
Windows
95/9B/Me R:\Drivers\Printer
\EnglishA\PPD\9XME
Windows
NT4.0 R:\Drivers\Printer
\EnglishA\PPD\NT
40
Windows
2000/XP
R:\Drivers\Printer
\EnglishA\PPD\2KXP
• Ifyou are
using
Windows
2000or
Windows
XP,the
resident
font
information
isautomatically
installed
when
the
PPD
fileis
installed
.
•
Before
installing the
resident
font
information,
besureto
install
the
PPD
file.
Click
the
"start"
button,
click
"Control
Panel",
click
"Printers
and
Other
Hardware",
and
then
click
"Printers
and
Faxes
ll
•
in operating systems other than Windows
XP, click the "Start" button, select
"Settings", and then click "Printers".
Click
"Addaprinter"in"Printer
Tasks".
In Windows 95/9B/Me/NT 4.0/2000,
double-click the "Add Printer" icon.
The "Add Printer Wizard" will appear.
Insert the CD-ROM
into
your
computer's
CD-ROMdrive.
Insert the CD-ROM
into
your
computer's
CD-ROM drive.
Double-click
the
"Drivers"
folder,
the
"Printer"
folder,
the
"EnglishA"
folder
(for
regions
other
than
the
U.S.,
double-click
the
"English"
folder),
the
"PPD" folder,
the
"9XME" folder,
and
"PFMSetup.exe".
Double-click"MyComputer"
(~),
and
then-double-click-the..CD-ROMjconc
..~••c
(~).
The PPD file enables the machine to print using the standard PS driverof the operating system, and
can be used when the optional PS3 expansion kit AR-PK1 isinstalled. Install the PPD file as needed.
Use the Add Printer Wizard in Windows to install the PPD file.
Be sure to read the Readme file before installing the PPD file. The Readme file is in the "EnglishA" or
"English" folder. Forthe location of the folder, see step 4.
If you
have installed the PPD file in Windows 95/9B/Me and will use the resident font, you must install
resident font information for PPD. Followthe procedure below to install the resident fonts information.
Installing the resident
font
information
for
PPD(only
when the PPD file is installed in Windows 95/9B/Me)
24
17
Page 20

USING THE MACHINE WITH A
PARALLEL
OR USB CONNECTION
Do
not
select
liPS PrinterDriver".
The PS printer driver for the
machine should only beinstalled
Iromthe
CD-ROM
thataccompanies
the
AR-PH
printer expansion kit.
DI~iJajlBEADME
I
._
.t'!.ame
'- __ '_
o
()'~S
Printer
D,iv~
i'2l
~
PS
Display
Font
Packoge
SelectClpackage
tobe
installed.
Follow
the
on-screen
instructions.
~
Select
the
"PS
Display
Font"
checkbox
.
and
click
the
"Next"
button.
l(DcautiO"
I
IIthe
lanquaqe
selection
screen
appears
afteryou
double
clickthe
"Setup"
icon,
select
the
language
that
you
wish
to use andclickthe
"Next"
button.
(Normallythe
correct
language
is
selected
automatically.)
Click
the
"start"
button,
click
"My
Computer"
(~),
and then
double-click
tile
CD-ROM
icon
(
\id
).
In Windows 95/98/Me/NT 4.0/2000,
double-click "My Computer", and then
double-click the CD-ROM
icon.
Double-click
the
"Setup"
lcon
(~).
Insert
the
PS3
expansion
kit
AR-PK1
PRINTER UTILITIES CD-ROM
into
your
computer's
CD-ROM
drive.
If your computer is configured for auto
start on the CD-ROM, proceed to step 4.
The fonts used by the PS printer driver are contained inthe "PRINTER UTILITIES" CD-ROM that
accompanied the PS3 expansion kit (AR-PK1). Installthese fonts as needed for the PSprinter driver.
INSTALLING THE PS DISPLAY
FONTS
,.
r USB
r SI",,";?,;"'"'
r.
Porollel
r.
Connected
10In..
oampuler
Selectan inl",
acelobe
coon.doli
5.1.01
how
~~'"
1"",10'
will
b. oomee'.d
Cnoa
••an
in,i.II.Uon
illothod
E'O<:\JIe!he
in".II.lIo~
by,
...
ohing
.'MfP'oonnoolod
la
,haTCP/lP
nelwOJk
oulo""l'lo.llY.
1~1.I"ork·~brl
i.
oloolod
",lhLPFI_lio.I!Y,J
C"~'Cmin"'II'lIon~
E,.oule
ths,,,,talalio<'l
by'olllng. MFP
with
Tep/IP
network
conneol"",
n~otk
,h.to. U58 """".cl;on. 0'
poi.llejconneotiorL
fiW;IlH:mO@'ffllMil!ffiOH
I.
When
you
are
asked
how
the
printer
is
connected,
select
"Connectedtothis
computer"
and
click
the
"Next"
button.
If you are using Windows 95/NT 4.0, go to
step 12.
When
the
interface
selection
screen
appears,
select
"Parallel"
and
click
the
IINext" button.
•
Click
the
"Custom
installation"
button.
IiI
Click
the"
Next"
button.
Double-click
"My
Computer"
(~),
and
then
double-click
the
CD-ROM
icon
(~).
Selecta
sortware
to be
installed.
I
IS'~
...,,1
Insert
the CD-ROM
into
your
computer's
CD-ROM drive.
The "SOFTWARE LICENSE"
window
will
appear. Make
sure
that
you understand
the
contentsofthe
license agreement,
and
then
click
the
"Yes" button.
Ifthe
language
selection
screen
appears
afteryou
double
clickthe
"Setup"
icon,
select
the
language
that
you wish to use and click the "Next"
button.
(Normally
the
correct
language
is
selected
automatically.)
The parallel cable must not beconnected
to the machine. Make sure that the cable
is
not
connected before proceeding.
If the cable isconnected, a Plug and Play
window will appear. If this happens, click
the "Cancel" button to close the window
and disconnect the cable.
Click
the
"Printer
Driver"
button.
To view information on thesoftware, click
the "Display Readme" button.
(cPNote)
The
cable
willbe
connected
instep21.
~
Double-click
the
"Setup"
icon
(~).
• Read the message in the "Welcome"
window
and
then
click
the "Next" button.
Installation in Windows 95/98/Me/NT 4.0/2000 (parallel cable)
18
23
Page 21

SHARING THE PRINTER USING WINDOWS NETWORKING
USING THE MACHINE WITH A
PARALLEL
OR USB CONNECTION
Select
whetherornot
you
wish
the
printertobe
your
default
printer
and
click
the"
Next"
button.
If you are installing multiple printer drivers,
select the printer that you wish to use as
your default printer.
If you do not wish to set either printer
driver as the defaultprinter, select "No".
Turn off the power of the machine andyour
computer, andconnect the machine to your
computer with the parallel cable.(p.20)
After connecting the machineto your
computer, turn on the power of the
machine and then start up your computer.
Selectwhether or not you wish to install the
display font and click the "Next" button.
Atterthe installation, a
message
prompting
youto
restart
your
computer
may
appear.
Inthis
case,
clickthe
"Yes"
buttontorestart
your
computer.
Follow
the
on-screen
instructions.
When
the"
Finish"
screen
appears,
click
the
"Close"
button.
A message will appear instructing you to
connect the machineto your computer.
Click the "OK" button.
I When
the
window
for
enteringaprinter
name appears,
click
the
"Next"
button
.
If you wish to change the printer name,
enter the desired name.
I When
"The
installationofthe
SHARP
softwareiscomplete"
appears,
click
the
"OK"
button.
...Tl1is
c
corrjplelesttlEfii{stalliitioric6fttleocc-c
software
.
• Ifyou installed theprinter driver,conflgurethe
printerdriver settings as explainedin
"CON
FIGURING
THE PRINTER
DRIVER"
(p.25).
• If you installed the PS printer driver, the PS
display font can be installed from the
"PRINTER UTiLITIES" CD-ROM that
accompanied the PS3 expansion kit. (p.23)
1,101)
:.:J
AddNotworkPoll
I
Solodlh"d''''o,
10",,1011
Nolo
11
'/Ou
",.nllo
roinld.I.
"'h
PS,rou"".d Iho
oplionol
"PS•.".,,,,ion
101"
Ih. PPD'""'0' i, nol
,n,ld.d
ho'oS""
Ih.,et"!'gcridolon,loDPPD
~
eu.s
r- PCl50
If
"LPT1"
doesnot
appear,
another
printeror
peripheral
deviceIsusing
LPT1.
Inthiscase
continue
the
installation, andatterthe installation is
finished,
change
theport
setting
so
thatthe
machine
canuse
LPT1.
This
procedureisexplainedin"Another
printeris
using
the
parallel
port
(when
usingaparallel
cable)"
onpage27.
To usethe PSprinter
driver,
thePS3
expansion
kitmustbe installed.
fi"'dil·';§
W&fPofttfiMHi,ijjj
W!.1;'il'Jij
f-MilfJiofiW·'iIffl\rn,1!
j..
Select
the
printer
port
and
click
the
"Next"
button.
Select "LPT1" for the printer port.
When
the
model
selection
window
appears,
select
model
nameofyour
machine
and
click
the
"Next"
button.
Forthe modeiname ofyour machine, see
"PARTNAMESAND
FUNCTIONS"
in the
operationmanualfor
copier.
When
the
printer
driver
selection
window
appears,
select
the printer
drivertobe
installed and
click
the "Next" button.
Seiect the checkboxes of the printer
drivers to be installed.
PCL5,
.. PCL6
S.loCllhod'I'arlo",,'ol
NolOIlj'Ou"onl'oI'fJn'delo","hPS')'O"""edlhoopl,onol
"PSo,pantlooN!" ThePPDdl,veri,
""',"'t.lled"",.
S""
Ih.:eI"~Quid.'oln"olPPD
Afterthe
installation,amessage
prompting
youto
restart
your
computer
may
appear.
Inthis
case,
click the "Yes" button to restart your
computer.
When
the
printer
driver
selection
window
appears,
select
the
printer
drivertobe
installed
and
click
the
"Next"
button.
Be sure to select the same printer driver
as the printer driver used in the print
server (the machine).
l When
the
"Finish"
screen
appears,
click
the
"Close"
button.
This
completes
the
installationofthe
software.
• If you installed the printer driver, configurethe
printer driver settings as explained in
"CONFIGURING THE PRINTER DRIVER"
(p.25).
• If you installed the PS printer driver, the PS
display font can be installed from the
"PRINTER UTILITIES" CD-ROM that
..•
~Ec;9f1lP<lniedtbElt'_SileJ<JJ.flmi9.n~iL{[(33)
.~__
~_~
_~~_
_ _
III
Follow
the
on-screen
instructions.
AddNetworJ;Porl
Coo""cl,dlolh"oo'nputor
• Sh"e<JPJ"t.r
S.I.clhoWI"'''P'''''·,w,lIpe"","'''ed
.1'
, I ,
If
the
shared
printer
does
not
appearinthe
list,
check
the
settingsinthe
printer
server.
For
the
porttobe used,select
the
machine
set
as a
shared
printer, and
click
the
"Next"
button.
You can also click the "Add Network Port"
button and select the printer to be shared
(the machine) by browsing the network in
the window that appears.
•
Select
"Shared
Printer"
and
click
the
11Next" button.
When
the
model
selection
window
appears,
select
model
nameofyour
machine
and
click
the
"Next"
button.
Forthe modelname ofyour
machine,
see
···~~-~~~-·-"PART·NAMES-AND-FONCTIONS"
irrtl1e~~~~··
operation manual for
copier.
22
-
19
Page 22

USING THE MACHINE WITH A
PARALLEL
OR useCONNECTION
Cu,'cm
mlallotion
!1d
E""oul.the
i1o~""ion
b~
••
Uing
Io!FP
wih
TCl'IIP
nol"o,kC<Jn'leo50n,notwo,k,h.ro,LlSBcQnnectioo.o,
p",.lleloill'lneClion
Choo
....an
In>t.oll.lian
molhod
E~ecu!e
the
ir>sl!llollon
bjo
,....,~Inli
a
MF?
ooooecled
'"
IheTCP/IP""lwr>k
,,"Iomoli~.
(tletWOlk
poriI.
orl!<llod
will1LPA
,ulomalioill~l
jjnj
Printer Stalus lotonilar
~
Tt» oIIc...
~D"Ino~
•.'k
11>0
,100u,
Orlha
n.lwork
p!i11.,
on
fj'~
I
I:.:uJ
yoor'ompul.r,,,,,••"
~
[SoUw".1
Selecta
softWare
to be
installed.
•
Click
the"
Printer
Driver"
button.
To view information on the software, click
the "Display Readme" button.
:
Click
the
"Custom
installation"
button.
11
Click
the
"Next"
button.
The
"SOFTWARE LICENSE"
window
will
appear. Make
sure
that
you
understand
the
contentsofthe
license
agreement,
and
then
click
the
"Yes"
button.
Click
the
"start"
button,
click
"My
Computer"
('0),
and
then
double-click
the
CD-ROM
icon
(
\.id
).
In Windows 9S/98/Me/NT 4.0/2000,
double-click "My Computer", and then
double-click the CD-ROM icon.
Insert
the
CD-ROM
into
your
computer's
CD-ROM
drive.
Double-click
the
"Setup"
icon
(~).
Ifthe
language
selection
screen
appears
afteryou
double
clickthe
"Setup" icon, select the language that
you wish to use and click the "Next"
button.
(Normally
the
correct
language
is
selected
automatically.)
Read the message in the. "Welcome"
window
and
then
click
the "Next" button.
SHARING THE PRINTER USING
WINDOWS NETWORKING
If the machine will be used as a shared printer on a network, follow these steps to install the printer
driver inthe clieht computer.
~
To
configure
the
appropriate
settings
intheprint
server,
seethe
operation
manualorhelp
file
Of
~
your
operating
system.
"Print
server"asexplained
here Isa
computer
thatis
directly
connected
tothe
machine,
anda
"Client"
is anyother
computer
thatis
connected
tothe
same
network.
o
,
,
Ensure
that
your
computer
and
the
machine
are
turned
off.
Insert
the
cable
into
the
parallel
connectoronthe
machine
and fasten
with
the
clasps.
Insert
the
other
endofthe
cable
into
your
computer's
parallel
connector.
CONNECTING A PARALLEL
CABLE
•
use
is available ona PC/ATcompatible computer that was originally equippedwith
use
and had Windows 98,Windows Me,Windows 2000 Professional, Windows XP
Professional or Windows XP HomeEdition preinstalled.
• Do not connect the interface cable before installing the printer driver. Theinterface cable
must be connectedduring installation of the printer driver.
The
cable
can
alsobeinserted
intoa
USB
1.1
connector.
Insert
the
cable
into
the
use
connector
on
the
machine.
Insert
the
other
endofthe
cable
into
your
computer's
use
connector.
l(Deaulion
I
CONNECTING TO A COMPUTER
Follow the procedure below to connect the machine to your cornputer.
Interface cables for connecting the machine to your computer are not included with the machine.
Please purchase the appropriate cable for your computer.
Interface cable
USB
cable
Shielded twisted pair cable, high-speed transmission equivalent (9feet (3 m) max.)
If the machine will beconnected using a USB 2.0 interface, please purchase a USBcable that
supports USB 2.0.
Parallel
cable
IEEE 1284-Shlelded type bi-directional parallel Interface cable (9 feet (3 m) max.)
CONNECTING A USB CABLE
20
21
 Loading...