

Seville Classics 10187 User Manual
Instruction Manual for
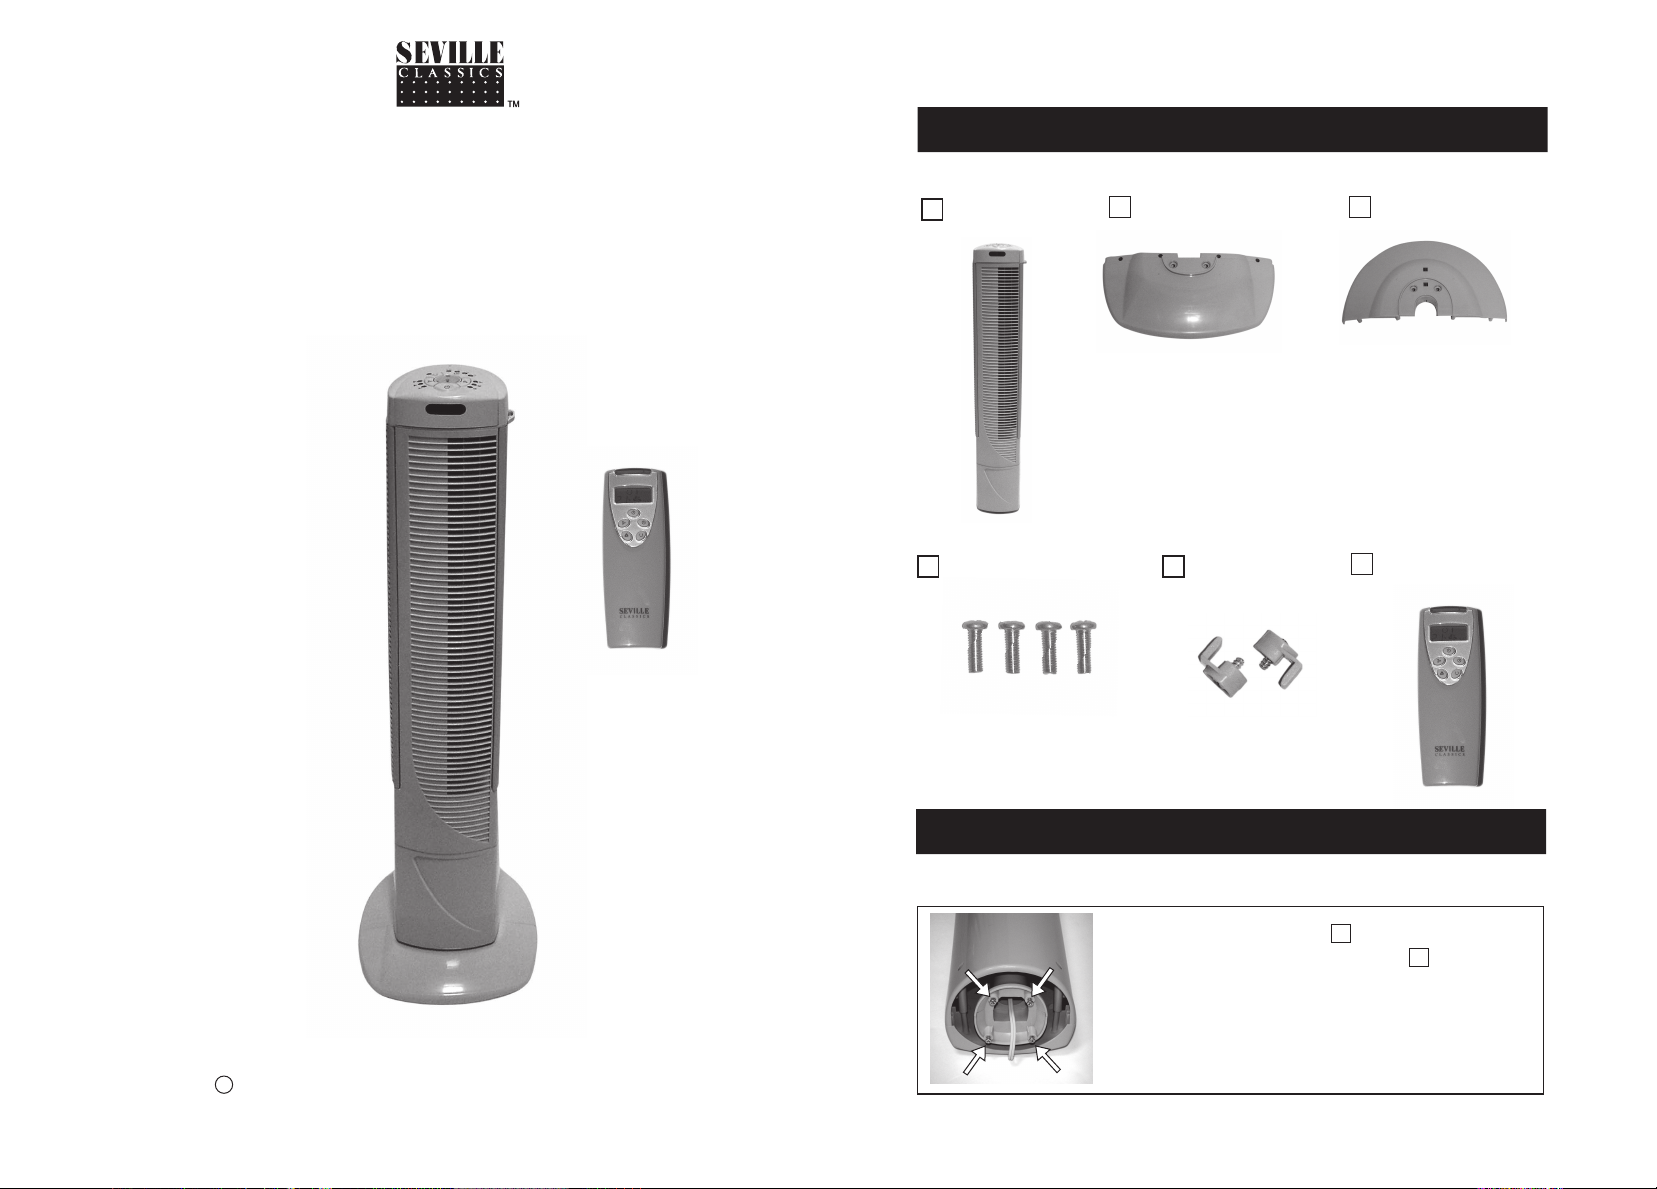
Parts List
UltraSlimline Floor Fan
Model: 10187 (with remote-control)
Voltage: 120V AC Frequency: 60 HZ Current: 0.6 A
A
FAN-Body
D
Fan-Body SCREWS
B
BASE-Front
E
Base SCREWS
and CLIPS
C
BASE-Back
F
Remote Control
Fan Assembly
STEP 1
Remove the 4 SCREWS D from the center post
on the bottom of the FAN - body A .
PLEASE READ AND SAVE THESE INSTRUCTIONS
c 2006 Seville Classics Inc. (800)-323-5565 or (310)-533-3800
www.sevilleclassics.com
1
2
Fan Assembly
STEP 2
STEP 3
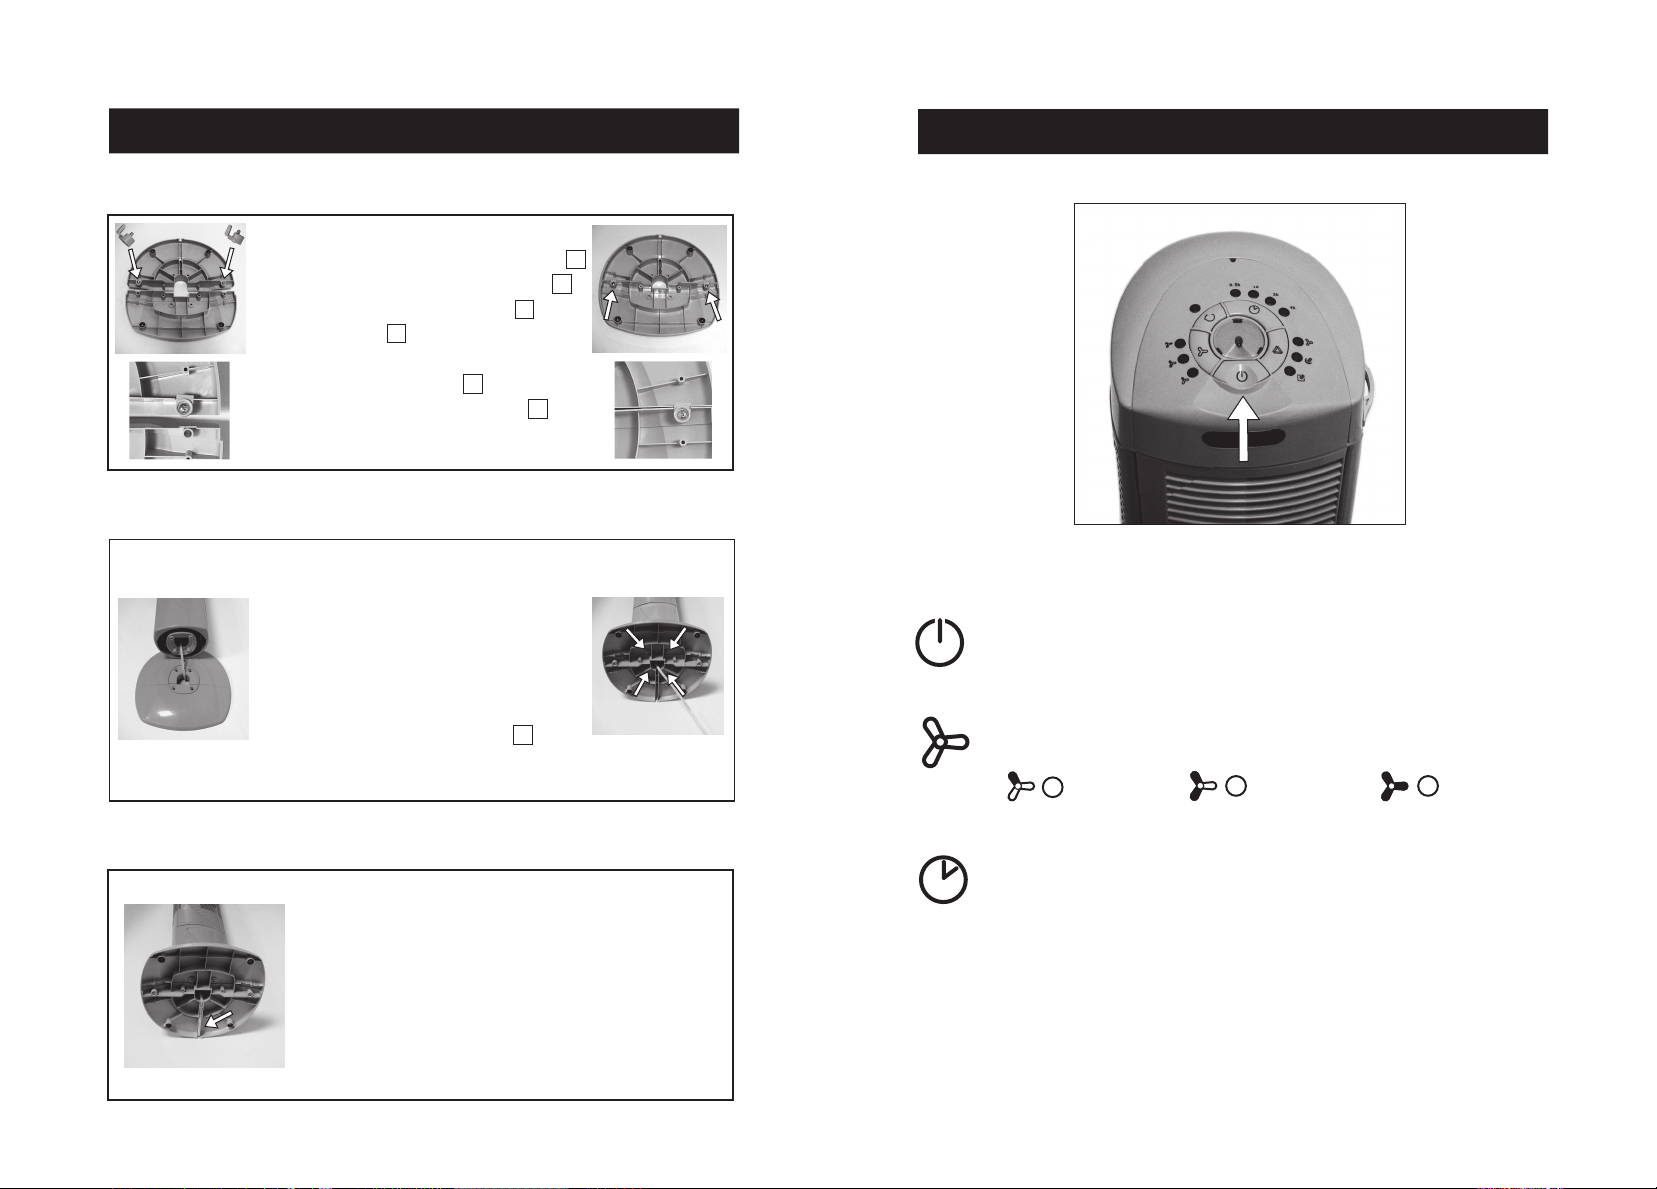
Control Panel
Turn the base upside down. Unscrew
the 2 base SCREWS and base CLIPS E
from posts on the BASE -back C .
Firmly snap the BASE-front B onto
the BASE-back C by aligning the four
holes onto the four posts. Replace
the SCREWS and CLIPS E so that the
clips wraps over the BASE-back C and
tighten.
Pass the Power Cord through the
center hole now in the center of the
BASE.
Align the BASE front with the FAN
front and insert the four posts on
the FAN body into the four holes on
the top of the BASE, it will only go
one way. Place the 4 SCREWS D into
the holes through the bottom of
the base and tighten securely.
ON/OFF: Turns fan ON & OFF
Speed Selection: Allows three different speed settings
Push buttons to activate features
Low Medium
High
STEP 4
Timing Selection: There are 15 settings, in 1/2 hour
Run the power cord through the guide on
the bottom of the BASE-back by tucking the
cord under the tabs. Set fan upright
on the base and it is ready for use.
increments. Time increases with each push of the
button. 1/2 hour, 1 hour, 1-1/2, 2 hours etc. to a
maximum time setting of 7- 1/2 hours.
The LED Indicators on the control panel are marked
See further instructions on use, care and
safety.
3
0.5h, 1h, 2h, 4h. (h for Hour) The sum of the lit LED’s is
the total time period.
4
 Loading...