

Seville classics 05813 User Manual
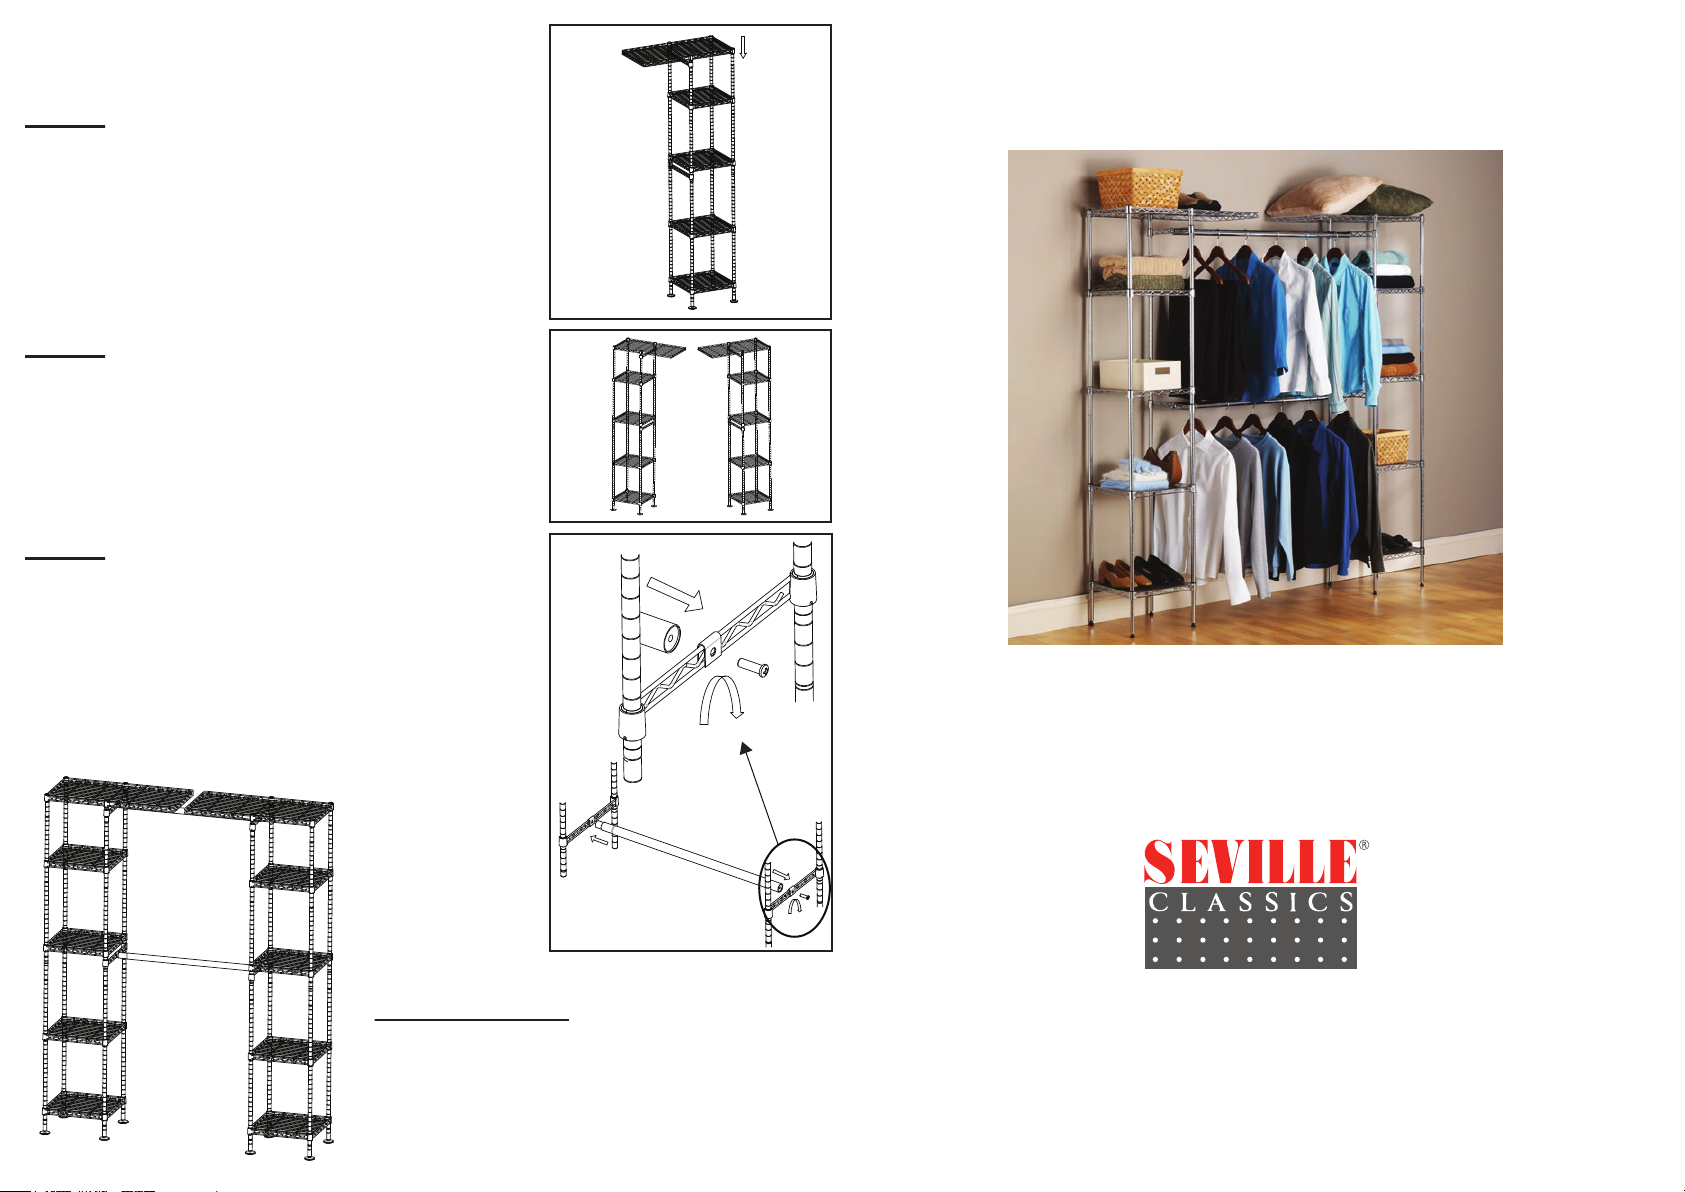
Step 7:
Fasten a pair of slip sleeves at the top of each
pole and slide the Top Shelf (I) over the poles
until secure.
Step 8:
Repeat steps 1-7 to assemble the second
tower.
Note: Make sure both sets of rod brackets are
installed at the same height on both towers.
Step 9:
Place the U-Sleeves (H) in the center of each
rod bracket. Install the Expandable Rod (J) by
inserting the Screws (for rod) (G) through the
u-sleeves on both ends of each rod. Tighten the
screws on both ends of each expandable rod
with a Phillips screwdriver. Place Shelf Liners
(K) on the small shelves.
Expandable Closet Organizer
Model No. 05813
Assembly Instructions
Customer Service
Tel (310) 533-3800
Tel (800) 323-5565
Fax (310) 533-3899
Monday - Friday 8:30am to 4:30pm PST
Weight Capacity:
100 lbs per shelf
125 lbs on expandable rod (not extended)
50 lbs on expandable rod (extended)
TF120919
Seville Classics, Inc.
Torrance, CA 90501 USA
www.sevilleclassics.com
Please read and save these instructions
© 2012 Seville Classics, Inc.
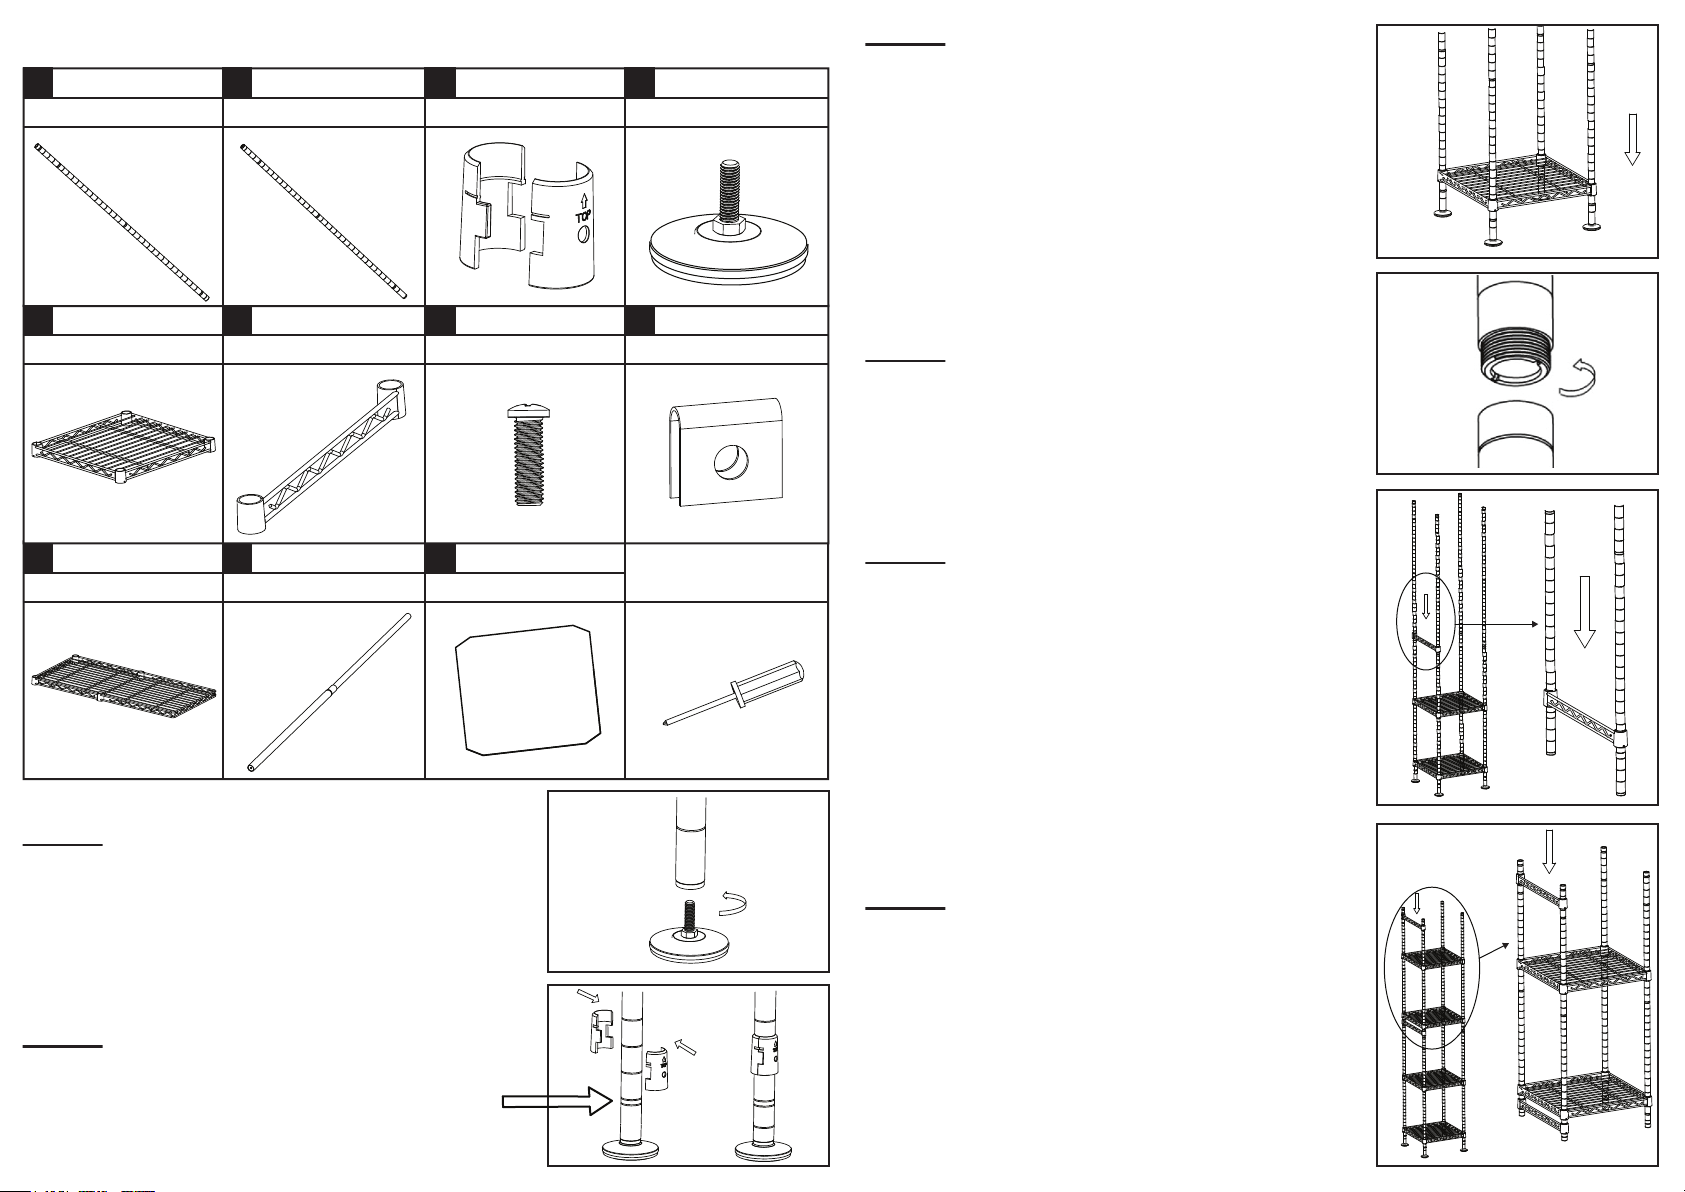
Please make sure you have all the parts before starting assembly.
A
E
8 pcs
Top Poles
Plastic cap (top)
8 pcs
Small Shelves
B
F
8 pcs
Bottom Poles
Threaded (bottom)
4 pcs
Rod Bracket
C D
G H
48 pairs
Slip Sleeves
4 pcs
Screws (for rod)
Leveling Feet
8 pcs
4 pcs
U-Sleeve
Step 3:
Slide a Small Shelf (E) over the top of 4
bottom poles until it rests snugly over the slip
sleeves. Repeat steps 2 and 3 by attaching
slip sleeves and another small shelf at the
desired height.
Tip: It is easier to do this step with the unit on
its side. If necessary, use a rubber mallet to
further secure the shelf.
Step 4:
Once the unit is stable and upright, screw 4
Top Poles (A) into the bottom poles.
I
2 pcs
Top Shelves
J
Expandable Rod
2 pcs
K Assembly Tools
Shelf Liners
Step 1:
Screw the Leveling Feet (D) into 4 Bottom
Poles (B).
Step 2:
On the bottom of each pole, fasten a pair of
Slip Sleeves (C) around the grooves at the
desired shelf height.
8 pcs
Required
Phillips Screwdriver
Step 5:
Determine the desired height to install the Rod
Bracket (F). Fasten a pair of slip sleeves
around the grooves on two poles and slide the
rod bracket over the two poles.
Step 6:
Install the 3rd and 4th small shelf at the
desired height. Repeat step 5 to add another
rod bracket.
Note: Leave enough room above the rod
bracket to install the Top Shelf (I).
 Loading...