

Page 1

Cal. 4S12
INSTRUCTIONS (P. 3)
BEDIENUNGSANLEITUNG (S. 12)
INSTRUCTIONS (P. 21)
ISTRUZIONI (P. 30)
INSTRUCCIONES (P. 39)
INSTRUÇÕES (P. 48)
用法説明 (57 頁)
Page 2

You are now the proud owner of a SEIKO Automatic Mechanical Watch Cal. 4S12. For best results,
please read the instructions in this booklet carefully before using your SEIKO Automatic Mechanical
Watch. Please keep this manual handy for ready reference.
Sie sind jetzt stolzer Besitzer einer mechanischen Automatikuhr SEIKO Kal. 4S12. Lesen Sie zur
English
Erzielung optimaler Ergebnisse diese Bedienungsanleitung sorgfältig durch, bevor Sie diese
mechanische Automatikuhr verwenden. Bewahren Sie diese Bedienungsanleitung zum späteren
Nachschlagen gut auf.
Vous voilà l’heureux propriétaire d’une Montre Mécanique Automatique SEIKO Cal. 4S12. Pour en
obtenir d’excellents résultats, veuillez lire attentivement les explications de ce manuel avant d’utiliser
cette montre SEIKO. Conservez cette brochure à portée de la main pour vous y référer en cas de
besoin.
Grazie per aver acquistato questo orologio Meccanico Automatico SEIKO Cal. 4S12. Per ottenere i
migliori risultati dall’uso di questo orologio, leggere attentamente le istruzioni contenute in questo
libretto prima di passare all’uso di questo orologio meccanico automatico SEIKO. Tenere poi il
manuale a portata di mano per eventuali future consultazioni.
Usted es ahora un orgulloso propietario de un Reloj Mecánico Automático SEIKO Cal. 4S12. Para
los mejores resultados, por favor lea las instruciones de este librito cuidadosamente antes de
utilizar su Reloj Mecánico Automático SEIKO. Le rogamos que guarde este conveniente manual
para pronta referencia.
Você agora pode sentir-se orgulhoso de ter adquirido o Relógio Mecânico Automático SEIKO Cal.
4S12. Para obter os resultados máximos, solicitamos-lhe que, antes de usar o seu Relógio Mecânico
Automático SEIKO, leia cuidadosamente as instruções contidas neste opúsculo. E guarde este
manual para futuras referências.
2
Page 3

CONTENTS
Page
HOW TO START THE WATCH ................................................................................ 5
TIME/DATE SETTING............................................................................................... 6
DUAL TIME .............................................................................................................. 7
TIME DIFFERENCES................................................................................................ 9
NOTES ON USING THE WATCH ............................................................................. 10
SPECIFICATIONS..................................................................................................... 11
✩
For the care of your watch, see “TO PRESERVE THE QUALITY OF YOUR
WATCH” in the attached Worldwide Guarantee and Instruction Booklet.
ENGLISH
English
3
Page 4
English
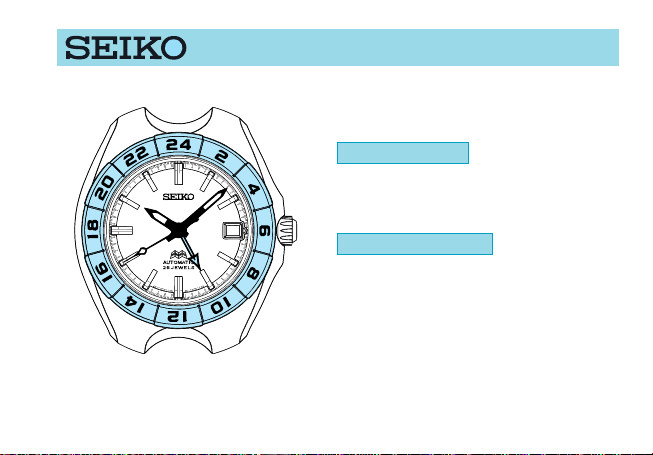
CAL. 4S12
TIME/CALENDAR
● Hour, minute, second and 24-hour hands
● Date is displayed in numerals.
5
4
DUAL TIME DISPLAY
● Time in a different time zone can be
displayed by the 24-hour hand and
rotating bezel.
Page 5

HOW TO START THE WATCH
This is an automatic mechanical watch. To initially start the watch, wind it either by
turning the crown or swinging it from side to side.
● To initially start the watch:
Swing it from side to side until the second hand
starts moving.
▼
Set the time and date, and put on the watch.
* If the watch is worn on the wrist, the mainspring will be
wound automatically through normal wrist movement.
● To wind the watch manually:
CROWN
Slowly turn clockwise.
5
▼
About 35 turns winds the watch fully.
English
5
Page 6

TIME/DATE SETTING
English
Hour hand Minute hand
6
Second hand
5
24-hour hand
Date
➠
➠
➠
CROWN
Pull out to first click.
▼
Turn clockwise until the date for the
previous day appears.
▼
Pull out to second click when the second hand is at the 12 o’clock position.
▼
Turn to set the desired date and time.
▼
Push back in to normal position in accordance with a time signal.
Page 7

DUAL TIME
The time of an area in a different time zone can be displayed by the 24-hour hand and
rotating bezel.
Check that “24” on the rotating bezel is
at the 12 o’clock position.
Rotating bezel
5
24-hour hand
▼
Turn the rotating bezel clockwise or
counterclockwise the number of hours
corresponding to the time difference
between your area and the area whose
time you wish to know. (Refer to “Example of dual time indication” on the
next page.)
* If the time in the other area is “ahead ” of
local time, turn the rotating bezel counterclockwise. If it is “behind” local time, turn
the bezel clockwise.
▼
The number on the rotating bezel that
the 24-hour hand points to indicates
the time of the target area in 24-hour
indication.
English
7
Page 8

● Example of dual time indication
If you are in London (10:00 a.m.) and wish to know the time of Los Angeles:
English
8
[A] London time : 0 (GMT)
[B] Los Angeles time : -8 hours from GMT
So the time difference between London and Los Angeles is:
[B] - [A] = (-8) - (±0) = -8 (hours)
You should turn the rotating bezel clockwise by 8 hours. The 24-hour hand
points to “2” on the rotating bezel,
indicating that the time of Los Angeles
is “2:00 a.m.”.
Los Angeles time: 2:00 a.m.
Page 9

TIME DIFFERENCES
GMT = Greenwich Mean Time
GMT
± (hours)
0
London*, Casablanca, Dakar
Paris*, Rome*, Amsterdam*, Frankfurt*, Berlin*,
+ 1
Tripoli*
+ 2
Cairo*, Athens*, Istanbul*, Kiev*, Cape Town
Moscow*, Mecca, Nairobi
+ 3
Dubai
+ 4
Karachi, Tashkent
+ 5
Dacca
+ 6
Bangkok, Phnom Penh, Jakarta
+ 7
Hong Kong, Manila, Beijing, Singapore
+ 8
Tokyo, Seoul, Pyongyang
+ 9
Sydney*, Guam, Khabarovsk*
+10
Nouméa (New Caledonia), Solomon Islands
+11
★
The cities marked with “*” (asterisk) use daylight saving time (summer time).
Major cities
in respective time zones
GMT
± (hours)
+12
-11
–10
– 9
– 8
– 7
– 6
– 5
– 4
– 3
– 2
– 1
in respective time zones
Wellington*, Fiji Islands
Midway Islands
Honolulu
Anchorage*
Los Angeles*, San Francisco*, Vancouver*, Dawson
(Canada)*
Denver*, Edmonton (Canada)*
Chicago*, Mexico City*
New York*, Washington, D.C.*, Montreal*
Caracas, Santiago (Chile)*
Rio de Janeiro*, Buenos Aires
Azores*, Cape Verde Islands
(As of July, 1998)
Major cities
English
9
Page 10

NOTES ON USING THE WATCH
HOW TO START THE WATCH
● The watch can be wound manually when the crown is at the normal position or first click.
English
● The watch cannot be wound by turning the crown counterclockwise.
● When the watch is wound manually, please note that the crown can be turned even after the watch
is wound fully. While turning the crown, therefore, count the number of turns given to the crown.
● Once the watch is wound fully, it operates for about 40 hours.
● Wear the watch daily for at least 8 hours.
● If the watch is used without wearing on the wrist, be sure to wind it fully every day at a fixed time.
TIME/DATE SETTING
● When setting the hour hand, check that AM/PM is correctly set. The watch is so designed that the
date changes once in 24 hours.
* The 24-hour hand moves correspondingly with the hour hand.
● Do not set the date between 9:00 p.m. and 1:00 a.m. Otherwise, it may not change properly.
If it is necessary to set the date during that time period, first change the time to any time outside it,
set the date and then reset the correct time.
● When setting the time, first set the hands to the time a few minutes behind the correct time and then
advance the hands to the exact time.
● It is necessary to adjust the date at the end of February and 30-day months.
In this case pull out the crown to the first click and turn it to set the date to “1”. Then, push the crown
back in to the normal position.
10
Page 11

SPECIFICATIONS
1 Vibrations per hour ............................................ 28,800
2 Loss/gain (daily rate) ......................................... Within +25 and -15 seconds at normal temperature
3 Operational temperature range ......................... –10° C ~ +60° C (14° F ~ 140° F)
4 Driving system .................................................. Self-winding type with manual winding mechanism
5 Display system
Time ............................................................. Hour, minute, second and 24-hour hands
Date ............................................................. Displayed in numerals.
Dual time...................................................... 24-hour hand and rotating bezel
6 Jewels ............................................................... 25 jewels
* Due to the mechanism of mechanical watches, actual loss/gain may not fall within the time accuracy
specified above, depending on the conditions of use, such as the length of time during which the watch
is worn on the wrist, life style (whether much arm movement is involved or not), whether the watch is
wound fully or not, etc.
* The specifications are subject to change without prior notice for product improvement.
range (5° C ~ 35° C) (41° F ~ 95° F)
English
11
 Loading...