

Seiko 4F series, 8F series Battery Replacement Manual
C
R
1
6
1
2
1
6
1
2
C
R
1
6
1
2
BATTERY REPLACEMENT MANUAL
FOR CAL. 4F (LADIES’) / 8F (GENT’S) SERIES WATCHES
● NOTE: When replacing the battery for Cal. 4F and Cal. 8F Series watches, please be sure to use
CR1612 and CR2412 batteries having a seal-type insulator attached to them, respectively.
● BATTERY REPLACEMENT WORK FLOW
▼
▼
▼
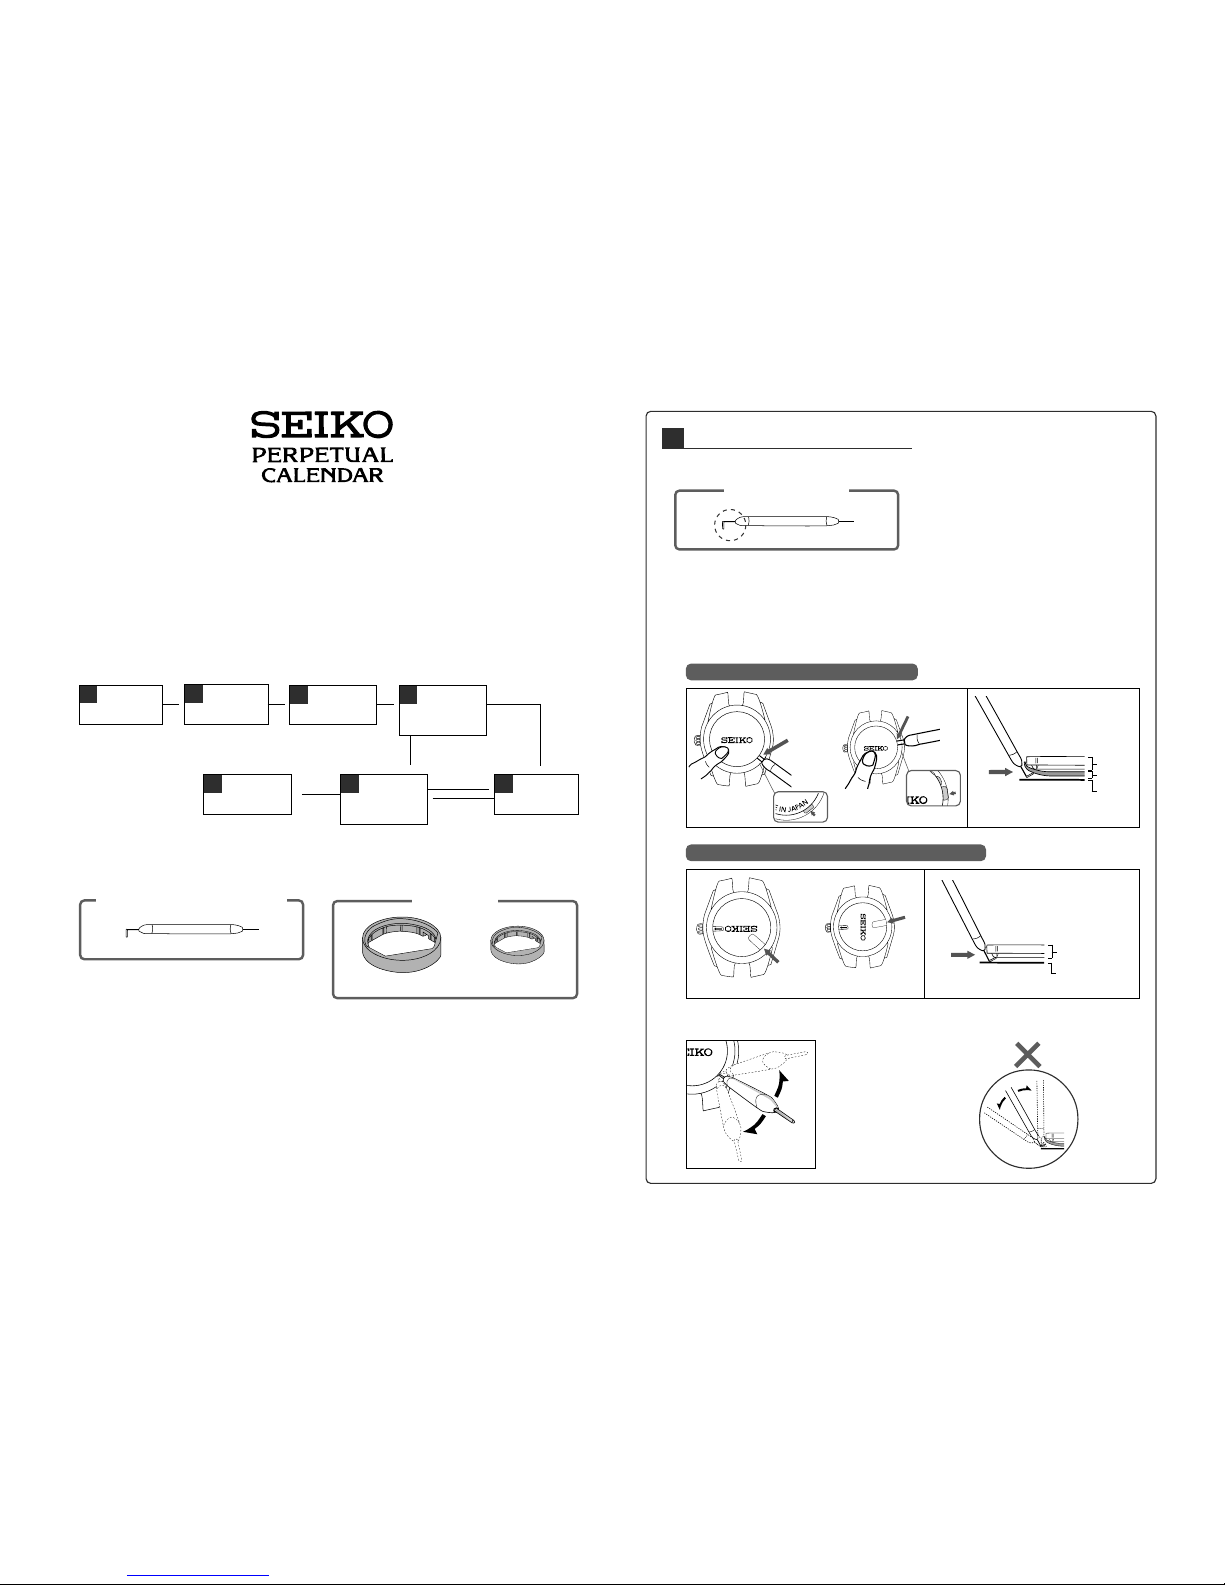
1 REMOVE THE OLD BATTERY.
● Tools to use:
Tool for removing battery
1. Open the case back and remove the casing ring.
C
R
2
4
1
2
[ Cal. 8F Series ]
[ Cal. 4F Series ]
* Some models of Cal. 4F Series watches have an antimagnetic ring. Remove it first. Then follow
the steps below.
2. Insert the tip of the tool between the insulator and the movement.
* Be sure to insert from the specified position.
Battery
Insulator
Movement
1
REMOVE
THE OLD
BATTERY
2
INSTALL
A NEW
BATTERY
3
REACTIVATE
THE BUILTIN IC
5
INPUT
DATA
▼
▼
● Tools to use in the replacement work
Tool for removing battery/inputting data
Battery installer
[ For Cal. 4F Series ]
[ For Cal. 8F Series ]
▼
6
CHECK
CALENDAR
DATA –
CORRECT?
7
END OF
REPLACEMENT WORK
4
CHECK
CALENDAR
DATA –
RETAINED?
▼
NO (Erased)
▼
NO
(Incorrect)
YES
(Correct)
YES
(Retained)
For the watch with a battery with a seal-type insulator:
[ Cal. 8F Series ]
[ Cal. 4F Series ]
C
R
2
4
1
2
Insert
here.
Movement
Battery with
insulator
2
3. Move the tool from side to side.
* Do not pry the
battery up. This
will damage the
movement.
▼
For the watch with a red plastic insulator:
Insert under
the insulator
here.
▼
Insert under the
insulator here.
Insert
here.
C
R
1
6
1
2
2 INSTALL A NEW BATTERY.
● Tool to use:
1. Remove the casing ring and red insulator (if the watch has one).
* Be sure to use a battery with a seal-type
insulator attached to it.
▼
3. Put the edge of the battery under the installer.
C
R
2
4
1
2
デ
ン
チ
ハ
ズ
シ
Crown
Arrow mark
4. Press down the battery
until it clicks fixed.
C
R
2
4
1
2
デ
ン
チ
ハ
ズ
シ
5.
Remove the installer, and set the casing ring.
* Set the notched portion to the crown side.
[ Cal. 8F Series ]
[ Cal. 4F Series ]
Crown
side
12 o’clock
side
Crown
side
12 o’clock
side
Notched
portion
Notched
portion
2. Set the battery installer into the case
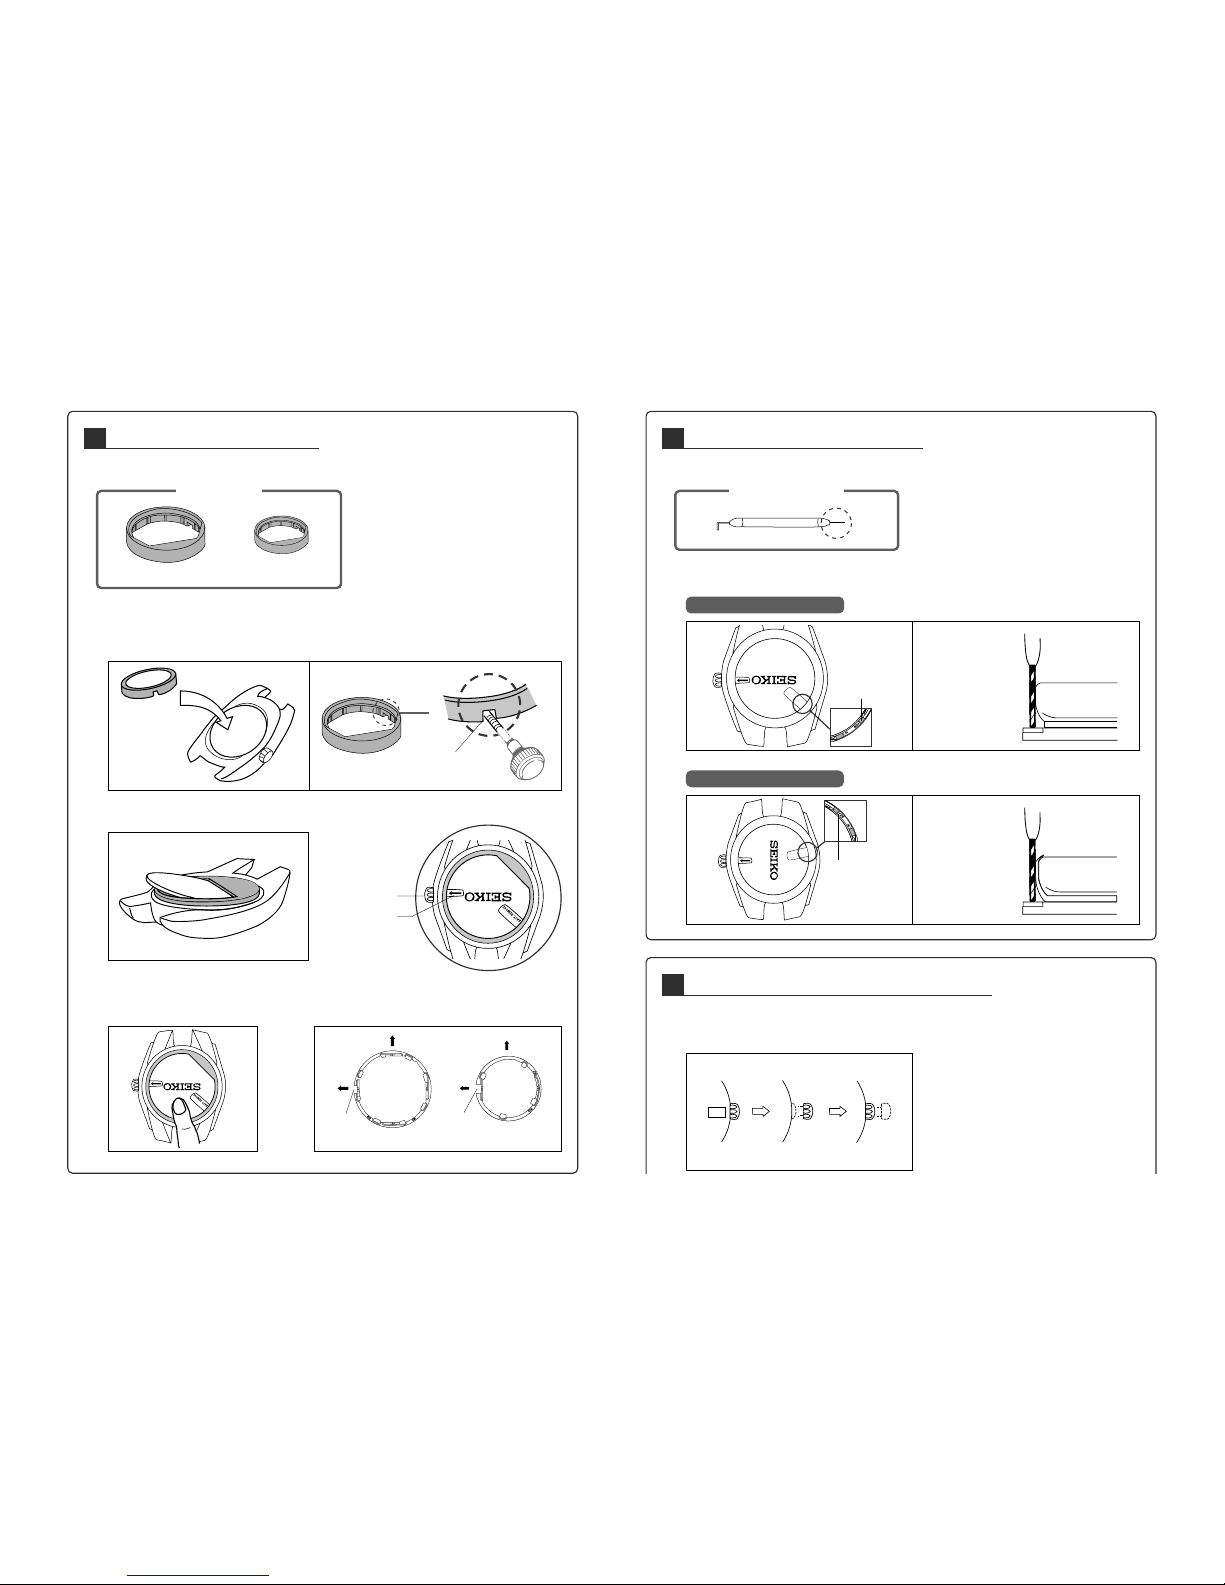
3 REACTIVATE THE BUILT-IN IC.
● Tool to use:
Tool for resetting the IC
● Short-circuit the AC terminal and the battery using the tool.
For Cal. 8F Series watches:
C
R
2
4
1
2
AC terminal
Contact the AC
terminal and the
side face of the
battery securely.
For Cal. 4F Series watches:
Contact the AC
terminal and the
hooking portion of
the battery clamp
securely.
AC terminal
4 CHECK CALENDAR DATA – RETAINED?
1. Pull out the crown to the first click, and push it back immediately.
* Lightly press down the movement with a finger to hold it in position.
2
➟
➟
[ CASING RING ]
* Line up the arrow
mark precisely with
the crown.
Battery installer
[ For Cal. 4F Series ]
[ For Cal. 8F Series ]
Notched
portion
 Loading...