

Page 1

SE421TT
Page 2

Page 3

TABLE OF CONTENTS
1
2
IMPORTANT
INFORMATION
PREFACE
2
4
English
3
4
5
6
SAFETY
PRECAUTIONS
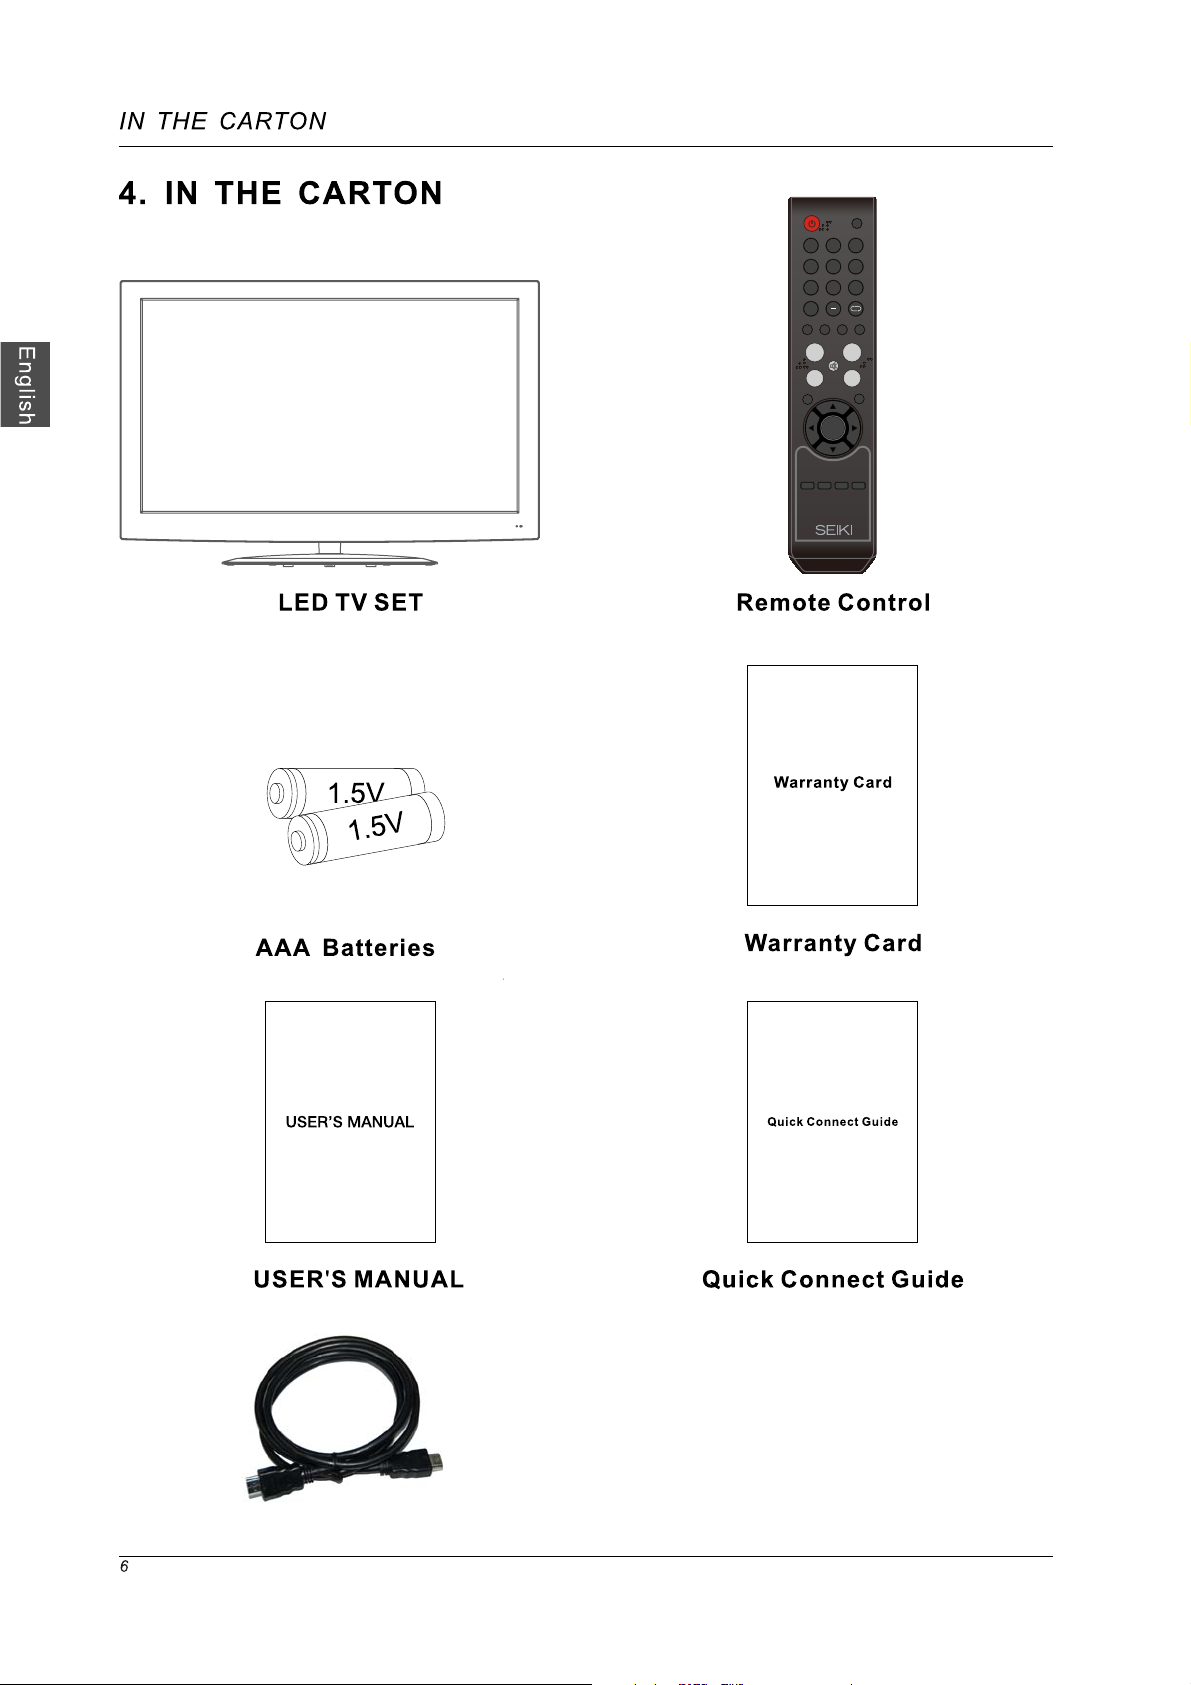
IN THE CARTON
FRONT/BACK
CONNECTIONS
OF LCD TV
TV INSTALLATION
DRAWINGS
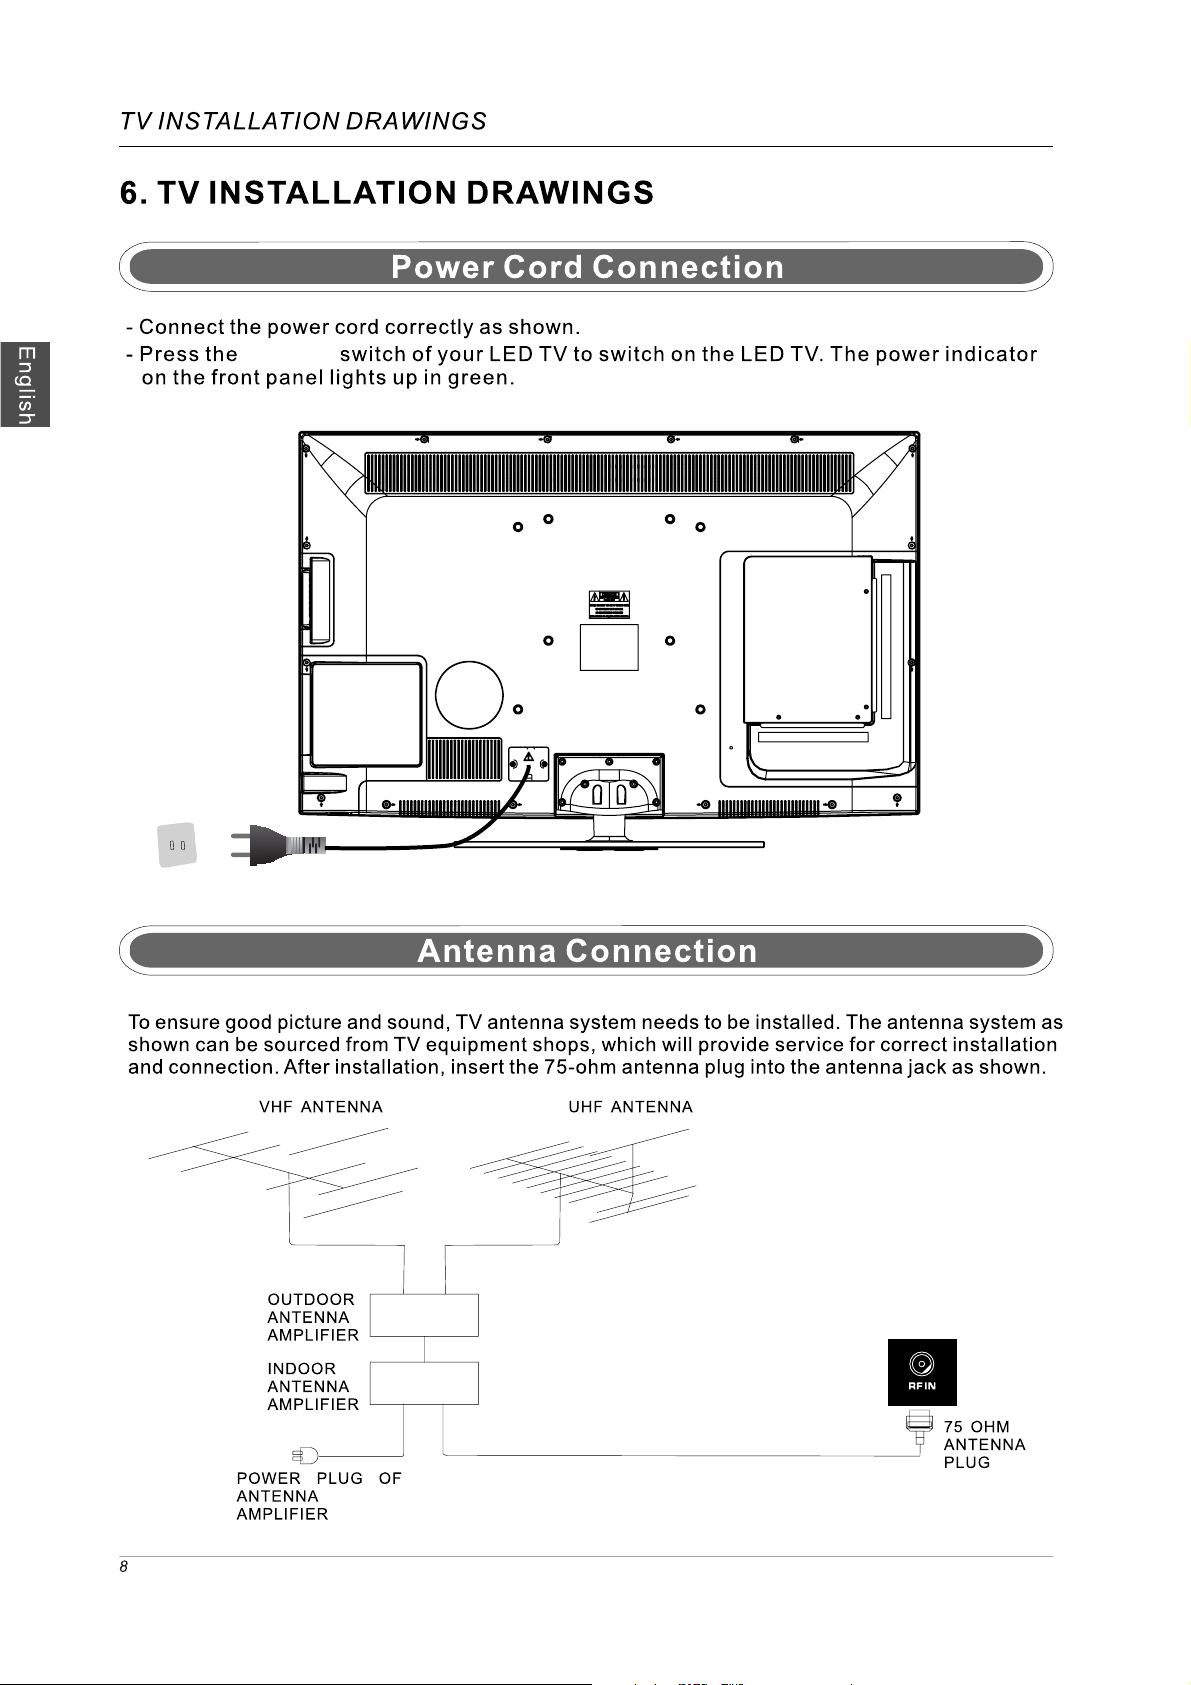
Power Cord Connection
Antenna Connection
AV Connection
YPbPr
VGA
COAX Connection
HDMI Connection
Service Port Function
(component) Connection
(PC) Connection
4
6
7
8
8
9
9
10
10
11
11
7
8
9
10
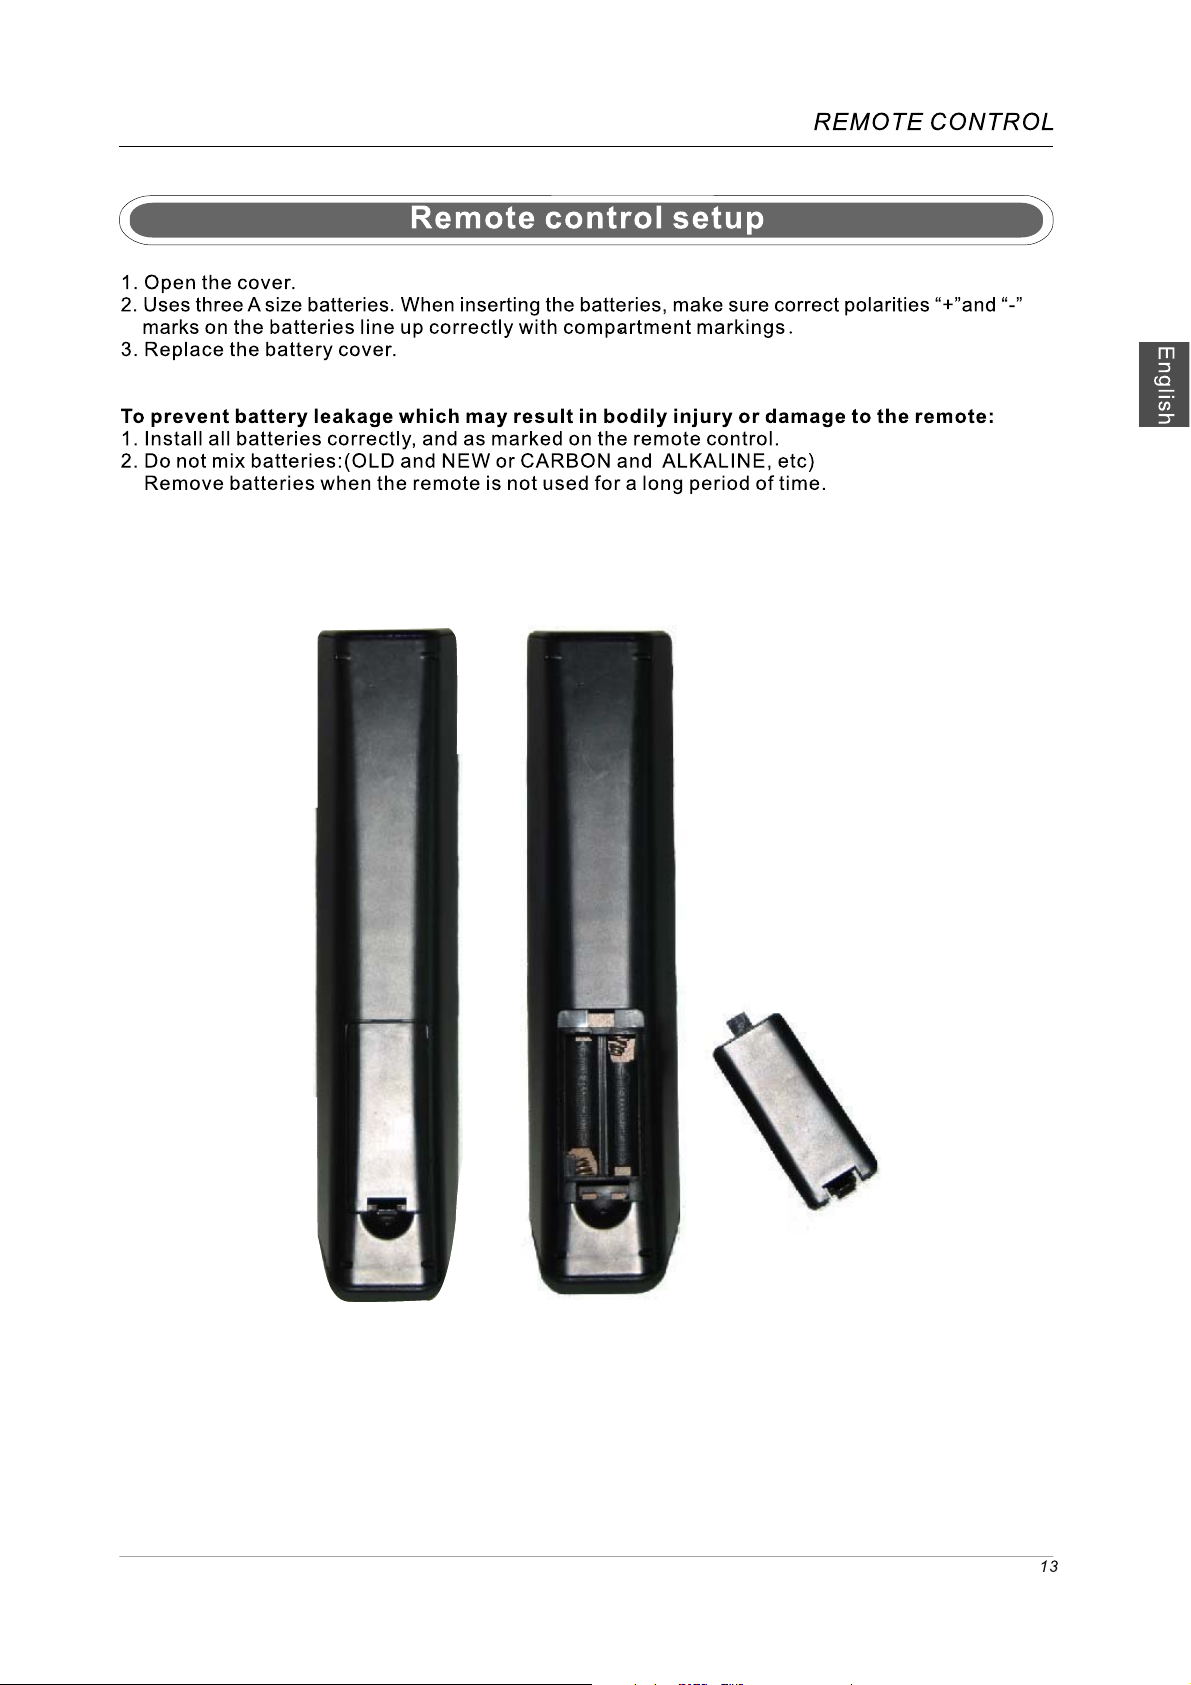
REMOTE CONTROL
MENU OPERATION
TROUBLESHOOTING
SPECIFICATIONS
Remote control instructions in TV mode
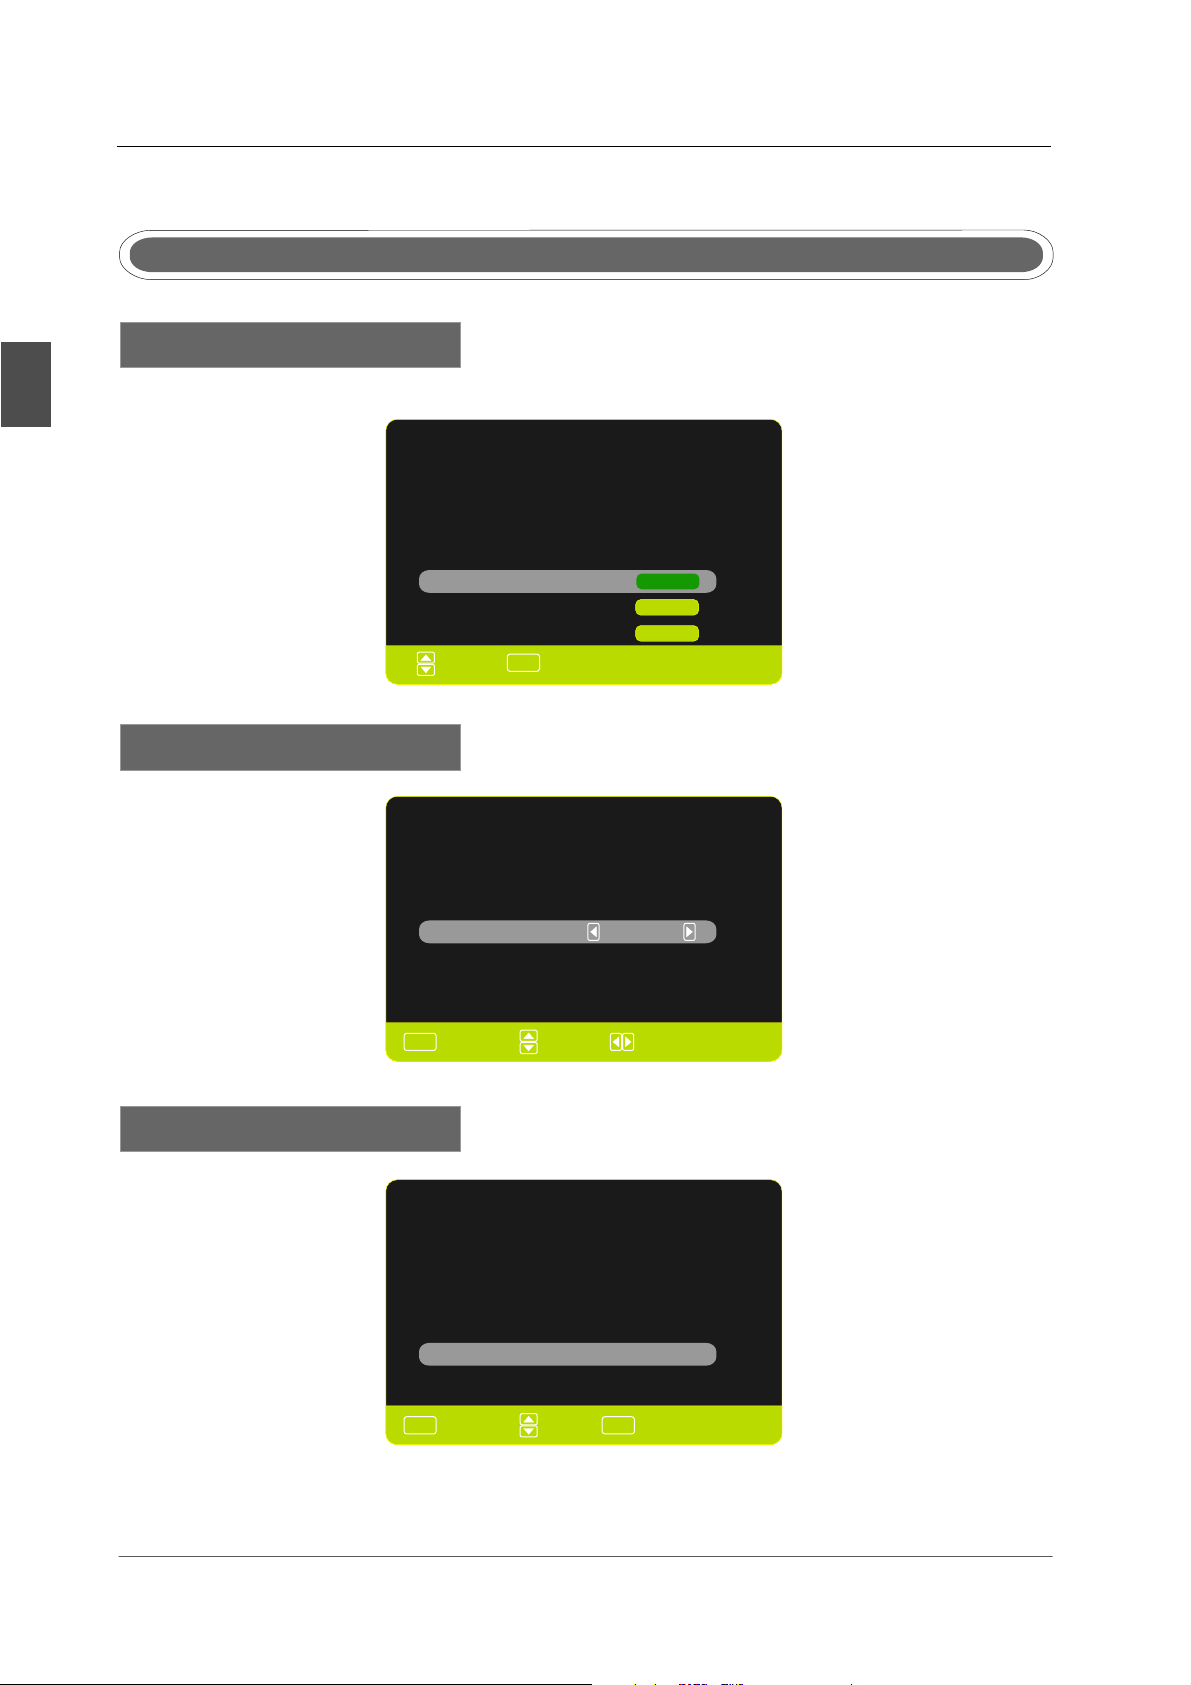
Remote control setup
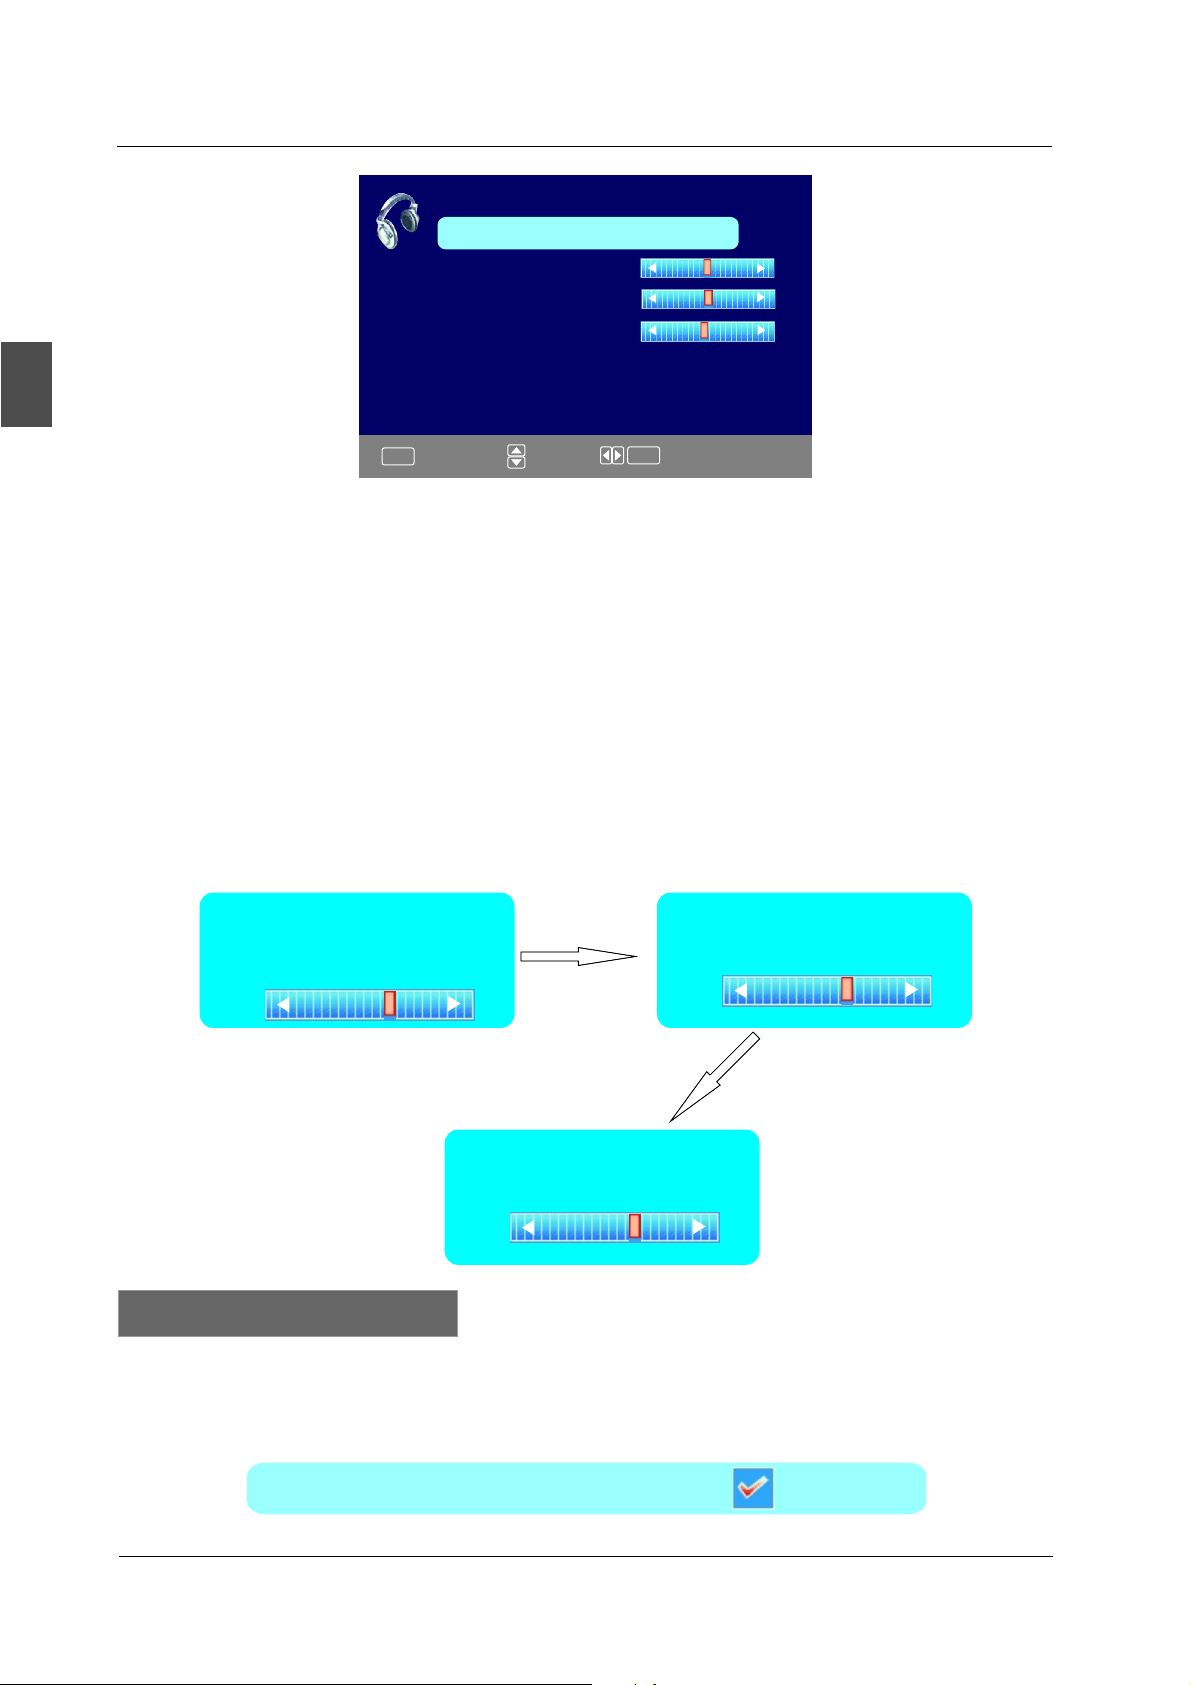
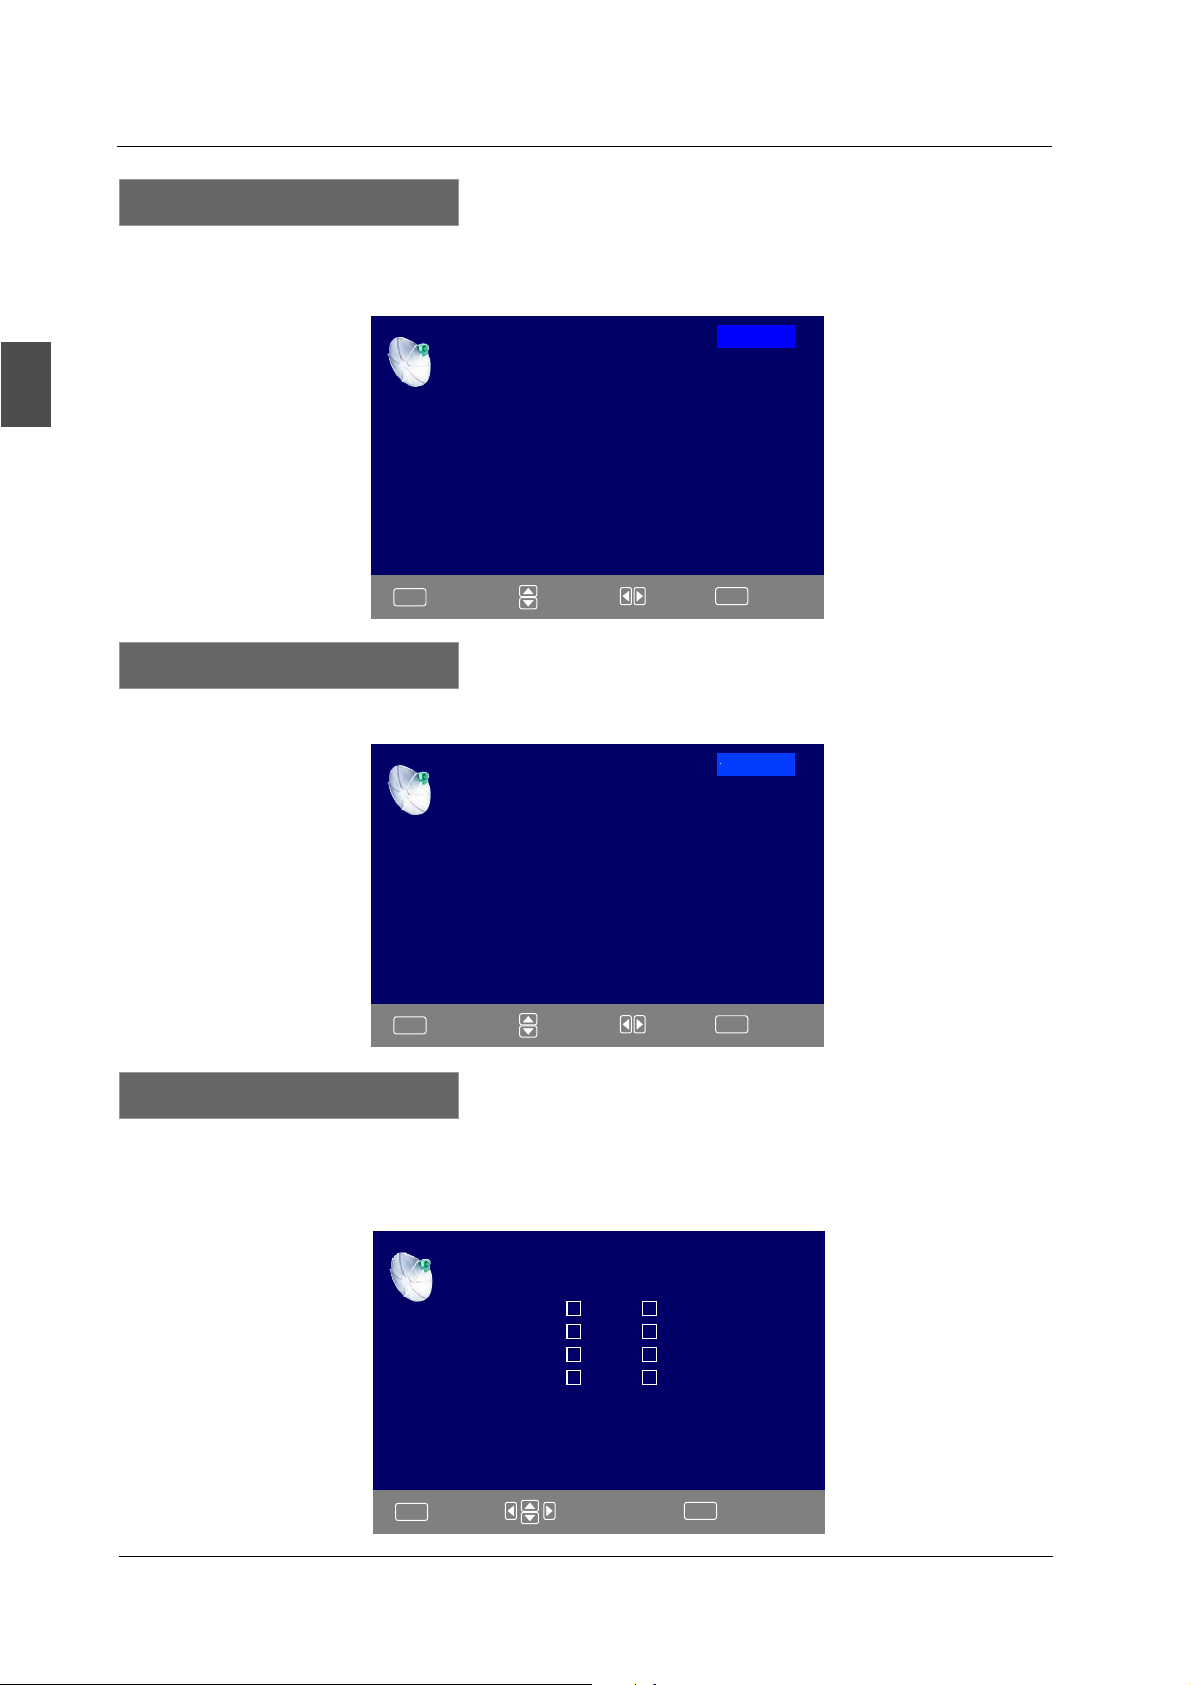
Setup Wizard
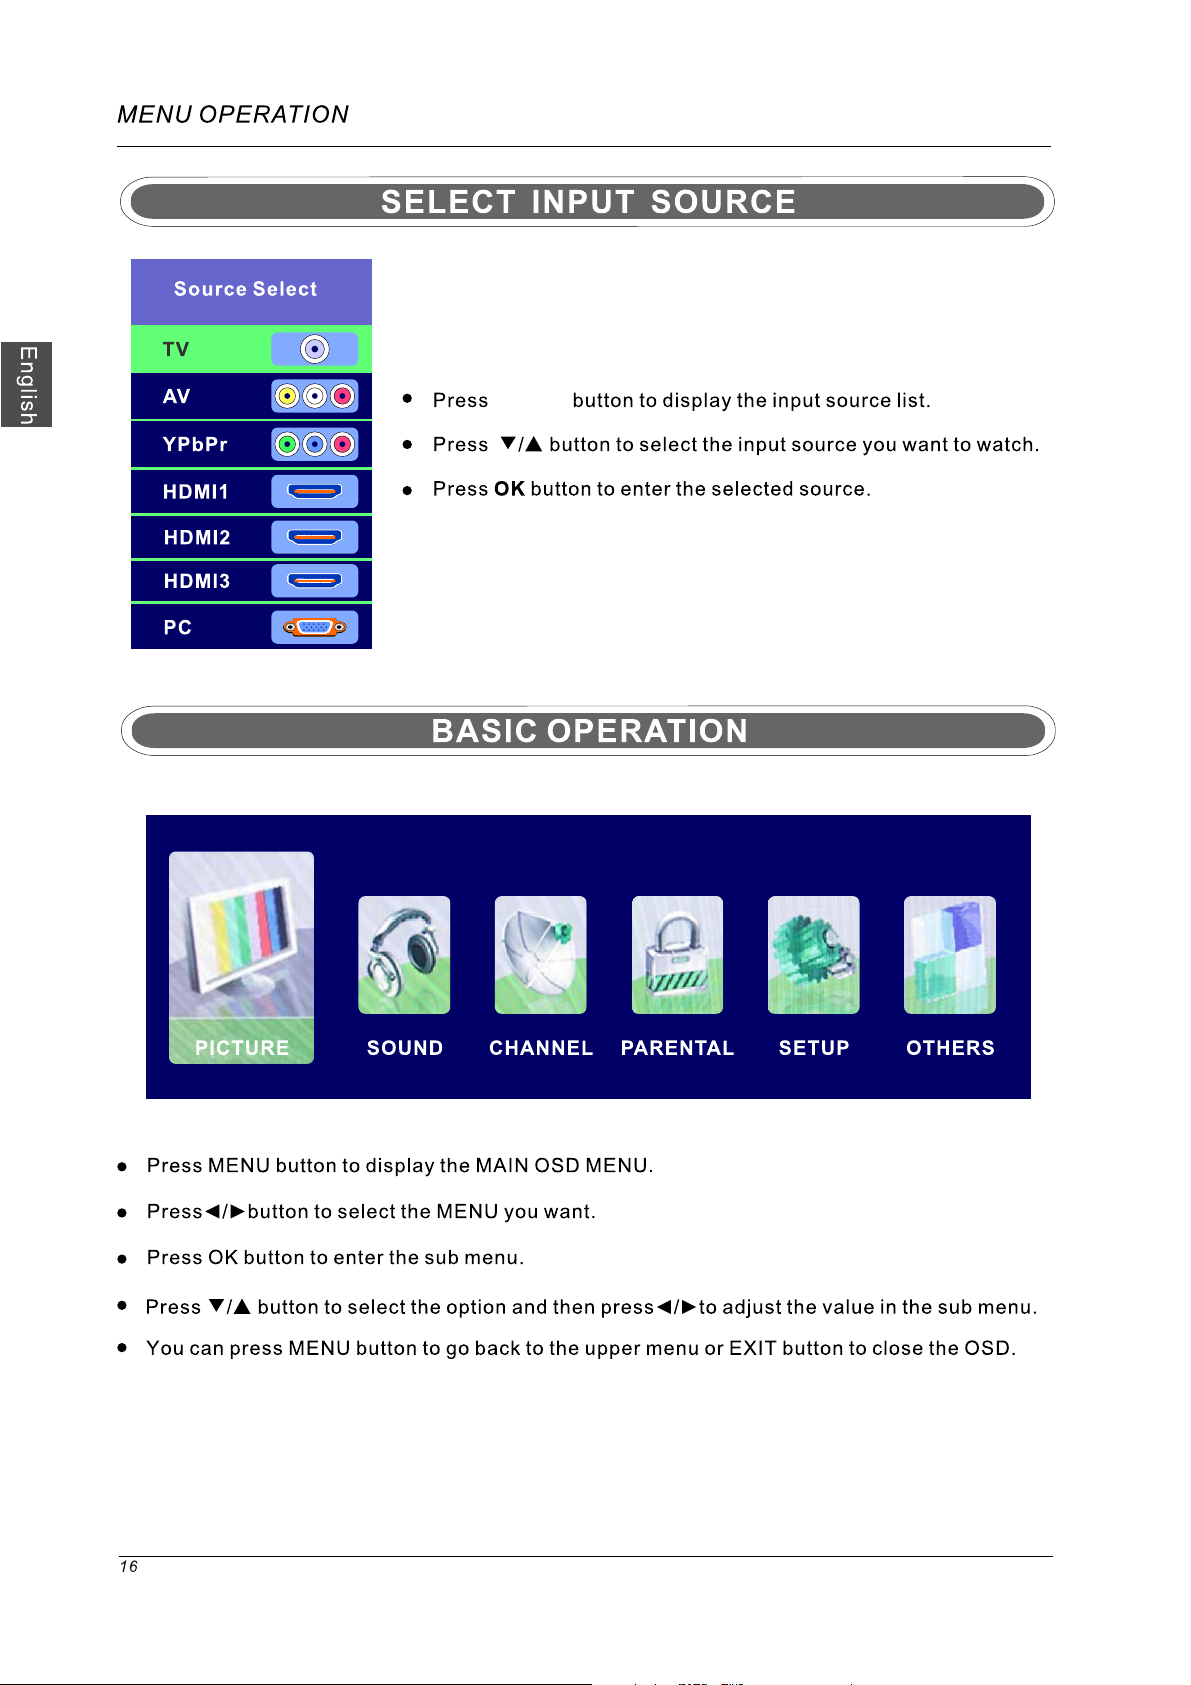
Select Input Source
Basic Operation
Picture Menu
Sound Menu
Channel Menu
Parental Control
Setup Menu
Other Menu
Picture Menu
12
13
14
16
16
17
19
21
23
27
29
30
34
35
1
Page 4
English
IMPORTANT INFORMATION
The lightning flash with arrowhead symbol, within an equilateral triangle, is intended to
alert the user to the presence of un-insulated dangerous voltage within the products
enclosure that may be of sufficient magnitude to constitute a risk of electric to persons.
The exclamation point within an equilateral triangle is interded to
presence of important operating and maintenance (servicing) instruction the literature
accompanying the appliance.
aler the user to the
CAUTION: USE OF ANY CONTROLS, ADJUSTMENTS, OR PROCEDURES OTHER THAN
THOSE SPECIFIED HEREIN MAY RESULT IN HAZARDOUS RADIATION EXPOSURE.
CAUTION: These servicing instructions are for use by qualified service personnel only. To reduce
the risk of electric shock, do not perform any servicing other than that contained in the operating
instructions unless you are qualified to do so.
Refer to service manual for servicing instructions.
Important Safety Instructions
Note:
1.Read these instructions.
2.Keep these instructions.
3.Heed all warnings.
4.Follow all instructions.
5.Do not use near water.
6.Clean only with dry cloth.
7.Do not block any ventilation openings. Install in accordance with the manufacturer's instructions.
8.Do not install near any heat sources such as radiators, heat registers, stoves, or other apparatus
(including
9.Do not defeat the safety purpose of the polarized or grounding-type plug. A polarized plug has
two blades with one wider than the other. A grounding type plug has two blades and a third
grounding prong. The wide blade or the third prong are
plug does not fit into your outlet, consult an electrician for replacement of the obsolete outlet.
amplifiers) that produce heat.
provided for your safety. If the provided
2
Page 5
IMPORTANT INFORMATION
10.Protect the power cord from being walked on or pinched particularly at plugs, convenience receptacles, and the point
where they exit from the apparatus.
11.Only use attachments / accessories specified by the manufacturer.
12.Use only with the cart, stand, tripod, bracket, or table specified by the manufacturer, or sold
When a cart is used, use caution when moving the cart / apparatus combination to avoid injury from tip-over.
13.Unplug this apparatus during lightning storms or when unused for long periods of time.
14.Refer all servicing to qualified service personnel. Servicing is required when the apparatus has been damaged in any
way, such as power-supply cord or plug is damaged, liquid has been spilled or objects have fallen into the apparatus,
the apparatus has been exposed to rain
.Apparatus shall not be exposed to dripping or splashing and that no objects filled with liquids, suchas vases, shall be
15
placed on the apparatus.
16.WARNING:To reduce the risk of fire or electric shock, do not expose this apparatus to rain or moisture.
17.Mains plug or appliance coupler is used
18.The apparatus shall be connected to a MAINS socket outlet with a protective earthing connection.
or moisture, does not operate normally, or has been dropped.
as the disconnect device, shall be readily operable.
with the apparatus.
English
3
Page 6
PREFACE
2. PREFACE
English
Thank you for buying this Please read this manual thoroughly before operating the TV.
TV!
Make sure the TV was not damaged in transit. Should the TV be damaged, do not install it and
contact your dealer. Check that you have all the accessories according to the model.
3. SAFETY PRECAUTIONS
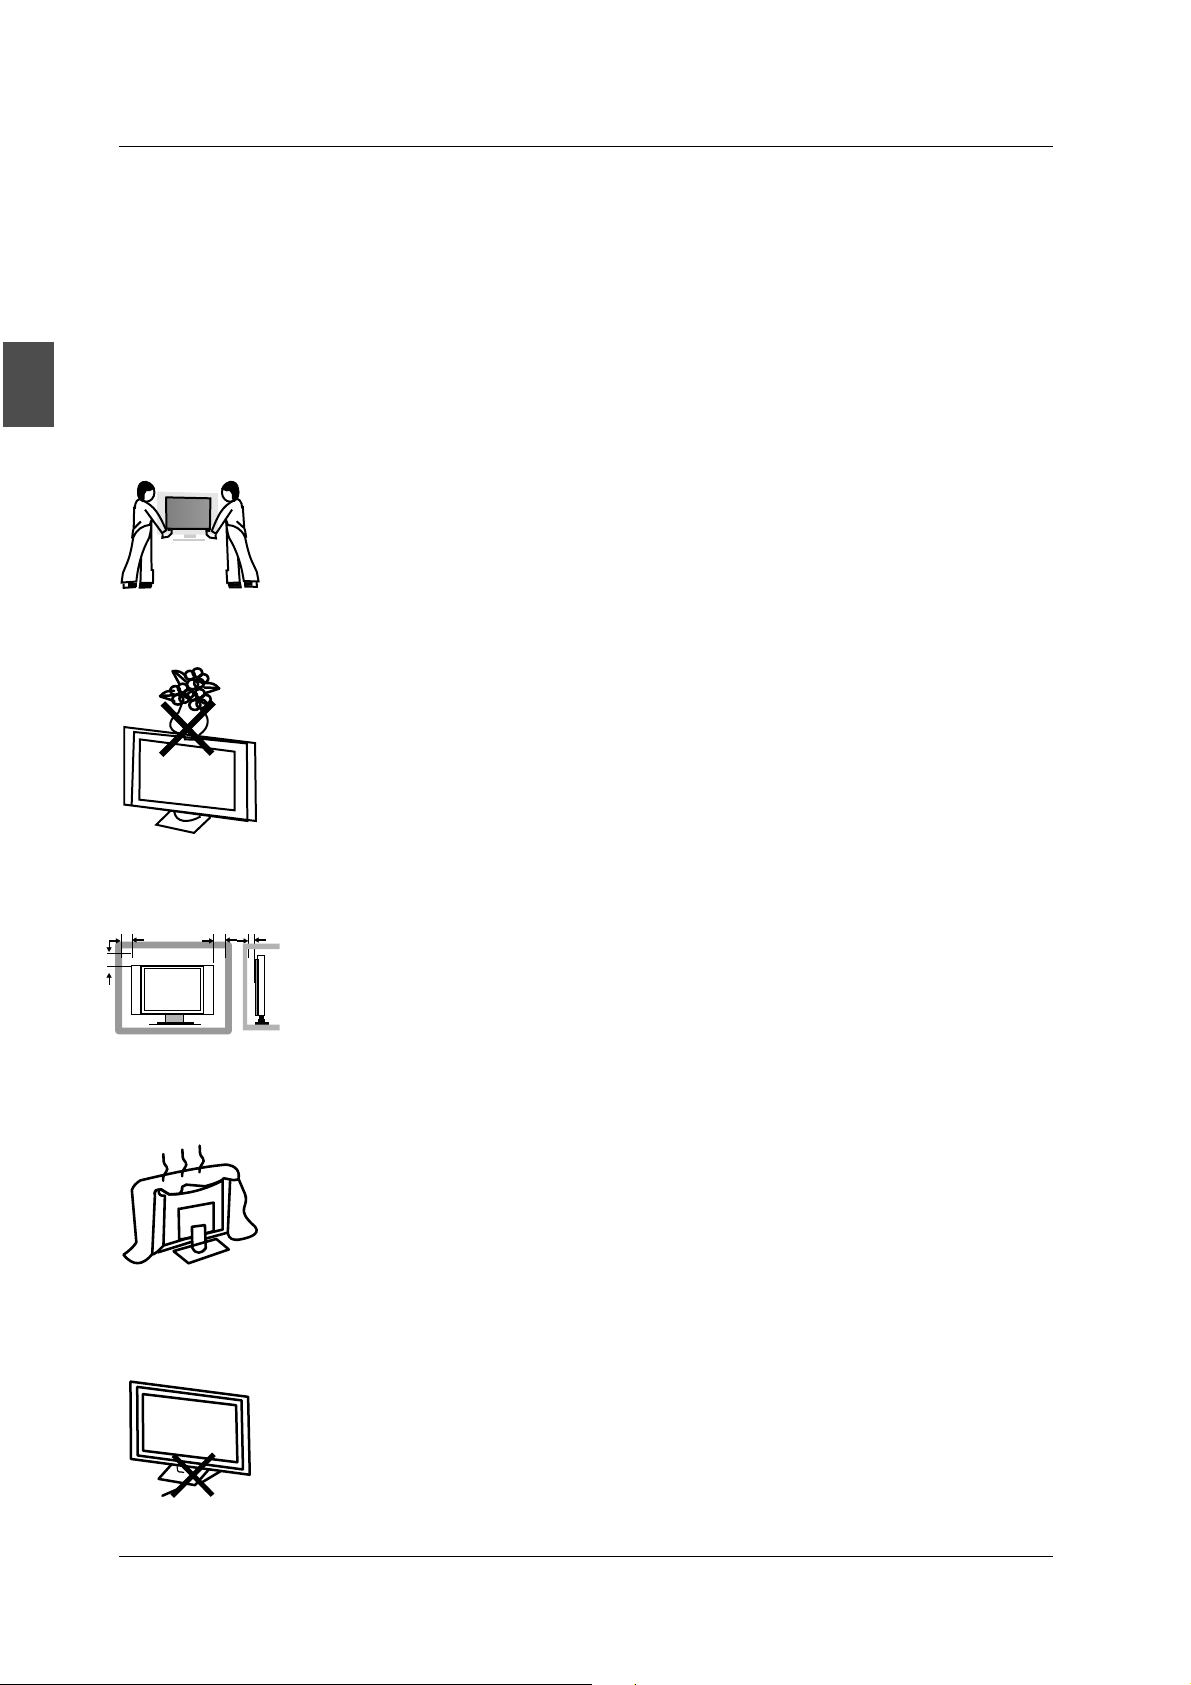
Put the TV on a stable surface.
Do not place any material on the TV.
Minimum distances
10cm
20cm
10cm 5cm
Do not use the TV with fixtures other than those provided or
suggested by the
manufacturer.
Do not block or cover the ventilation openings on the TV.
If you have a wall mount, check that it is steady.
Power cord and cables must be properly routed and protected to prevent
people from stepping on them and causing the TV to fall.
4
Page 7
SAFETY PRECAUTIONS
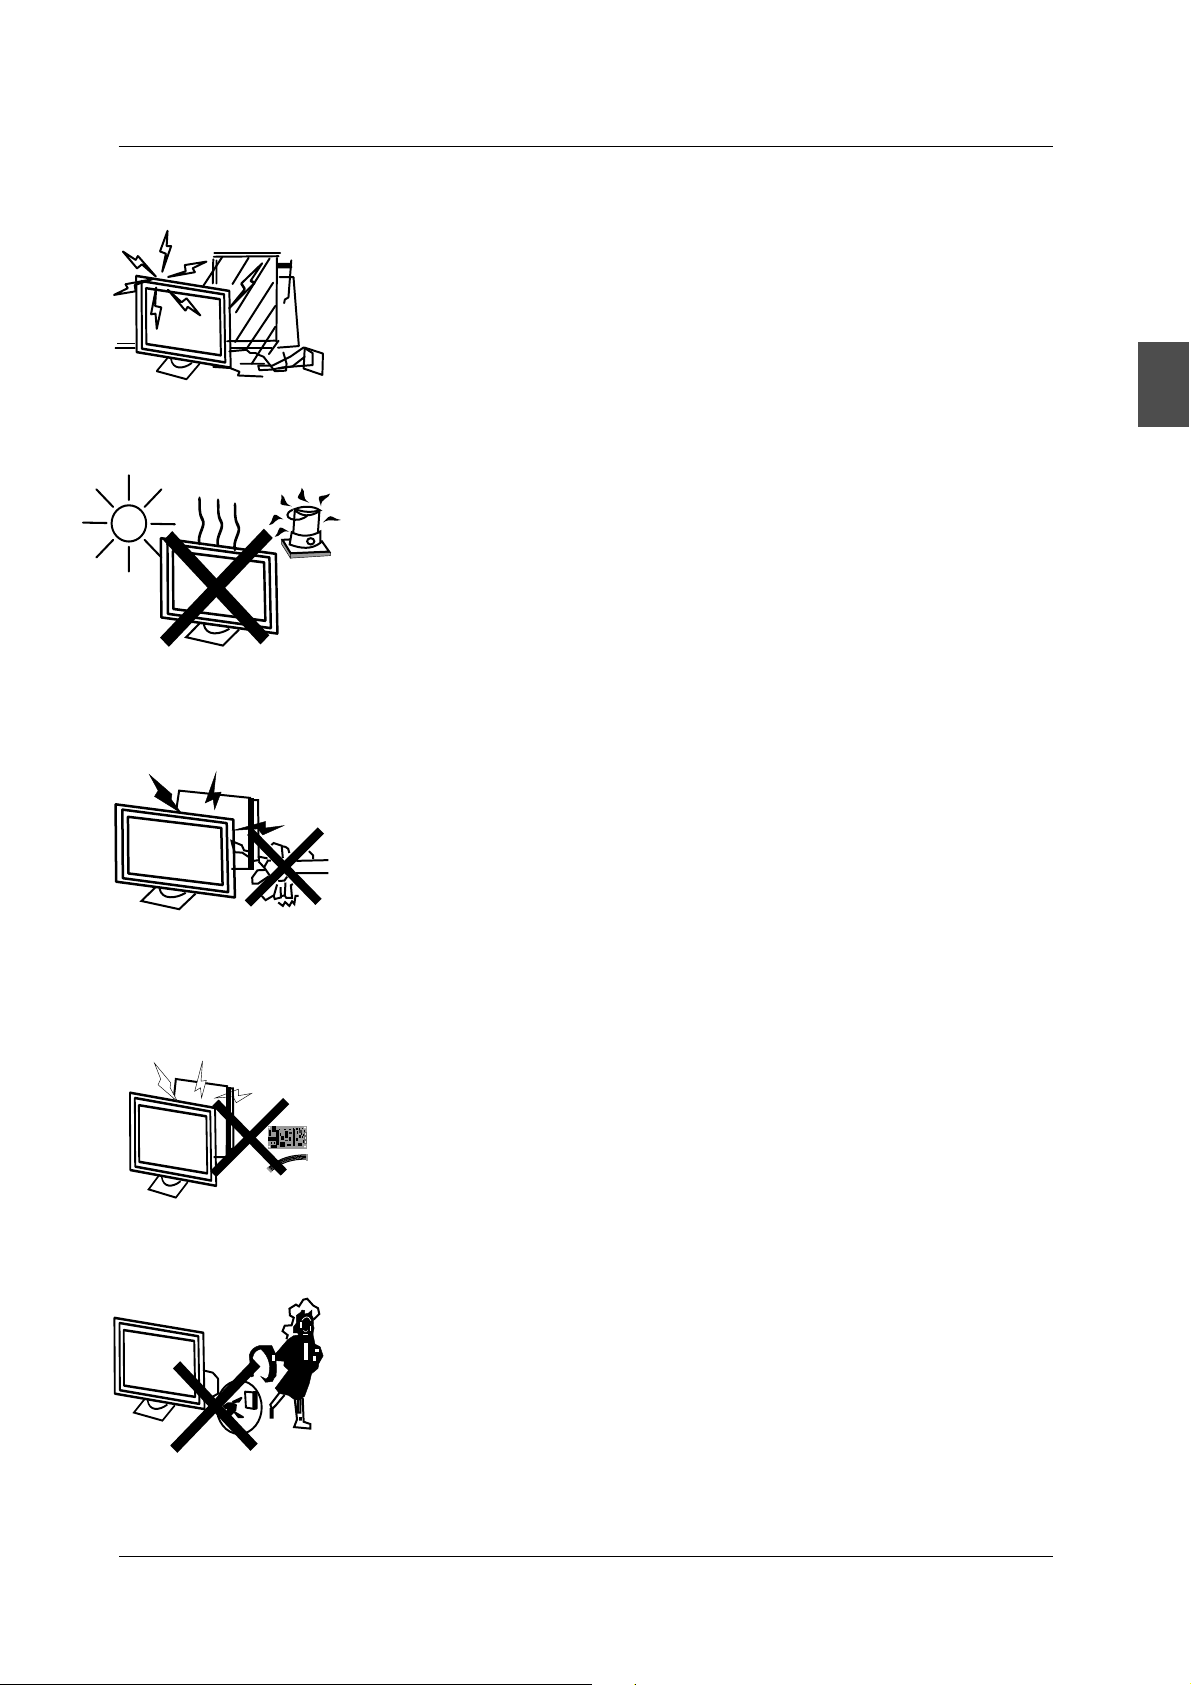
Keep the TV dry and away from humidity.
Keep the TV away from heat sources
Unplug the TV before cleaning it. Do not use solvent or liquid to clean
the TV.
Only clean the TV with a soft and dry cloth.
.
English
In case of troubleshooting, do not use spare parts other than those
suggested by
lead to electric shocks, short-circuits, fire or other incidents.
Unplug the TV during lightning storms or when unused for long periods
of time.
the manufacturer. Using inadequate spare parts can
5
Page 8
123
456
789
0
PICTURE SOUND SLEEP DISPLAY
VOL+
MUTE
VOL-
EXIT
OK
ENTER
CC
MTS
ASPECT
INPUT
CH+
CH-
MENU
FAV
HDMI cable
Page 9
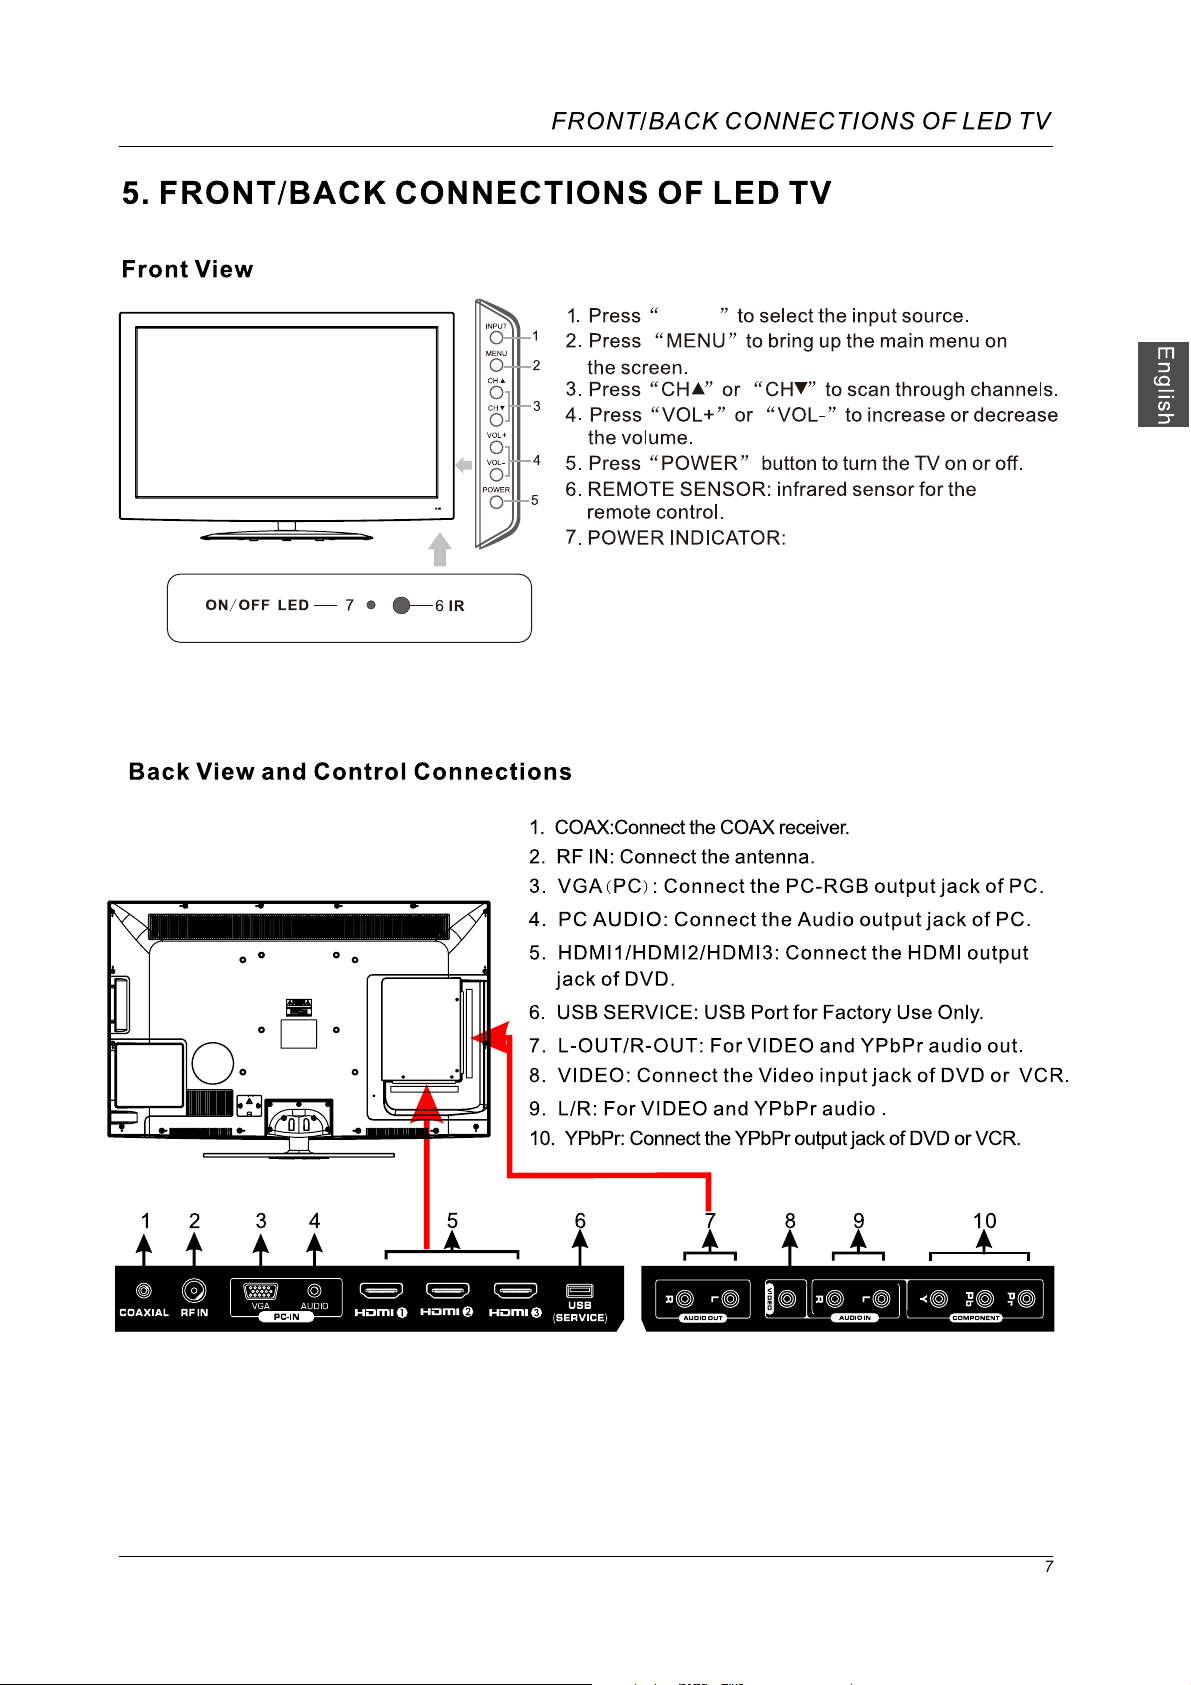
INPUT
Blue when TV is powered on.
Red when TV is powered off. No color when power switch
is turned off.
Page 10
POWER
Page 11

(Component)
TV INSTALL TION DRAWINGSA
VIDEO R L
AV Connection
Connect the VIDEO and AUDIO output jack of the DVD or VCR to the VIDEO jacks on the set using
the RCA cable. Match the jack colors: Video is yellow, Audio left is white, and Audio right is red.
Select the AV input source using the SOURCE button on the remote control.
Video Cable
AUDIO cable
VIDEO R L
DVD or VCR Back
TV Back
English
DVD or VCR
YPbPr Connection(Component)
Connect the YPbPr output of the DVD or VCR to the YPbPr input on the set. The picture quality is
improved; compared to connecting a regular VCR to the video input. Connect the Audio output of
the DVD or VCR to the Audio input jacks on the set using the RCA
cable.
Match the jacks colors :Y is green,Pb is blue,Pr is red,Audio left is white and Audio right in red.
Select component input source using the SOURCE button on the remote control.
TV Back
YPbPr cable
AUDIO cable
Pb
Y
DVD or VCR
Pr
DVD or VCR Back
LR
9
Page 12
English
COAX
TV INSTALL TION DRAWINGSA
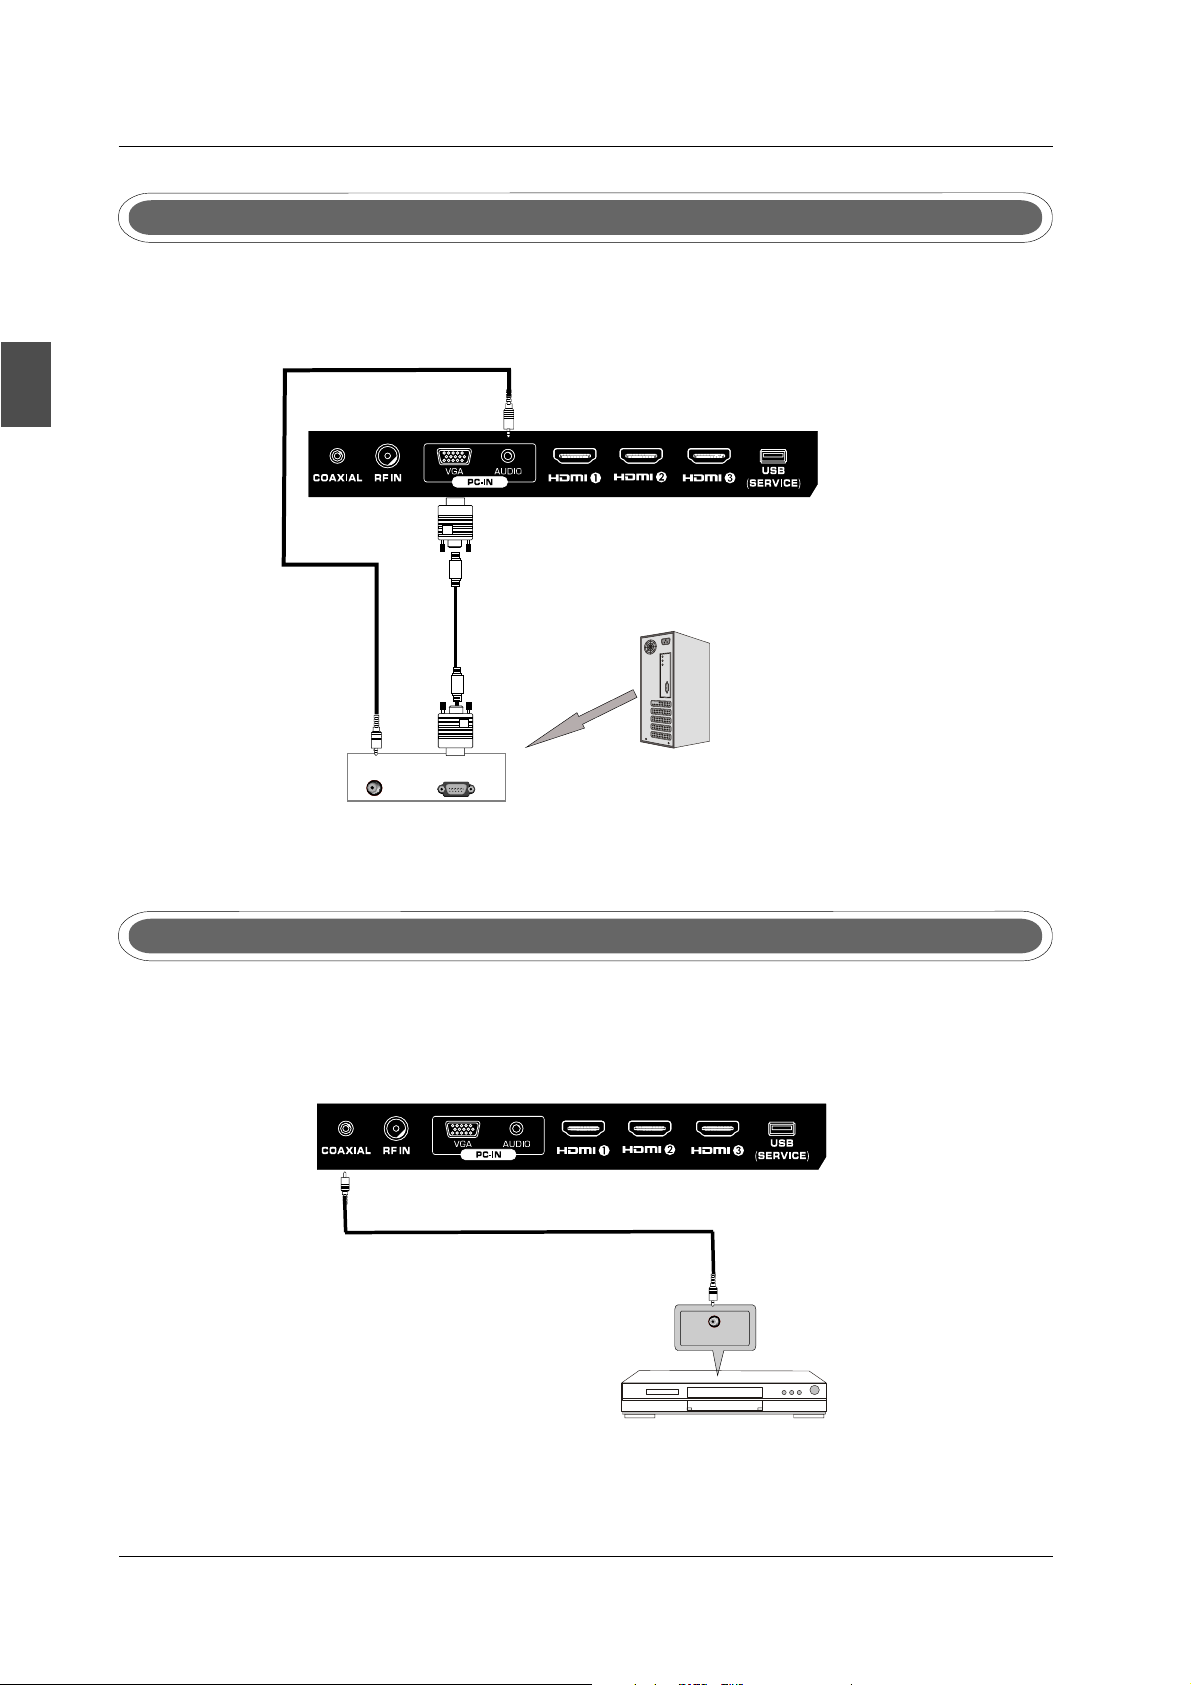
VGA(PC) Connection
Connect the RGB output of the PC to the jack on the set. Connect the AUDIO output ofVGA(PC)
The PC to the PC AUDIO jack on the set. Select the RGB input source with using SOURCE button
on the remote control.
TV Back
Audio Cable
VGA Cable
AUDIO RGB-PC OUTPUT
COAX Connection
Connect to Audio Amplifier device to the COAX output jack on the TV.
COAX Cable
TV Back
the audio amplifier back
10
Audio amplifier
Page 13
TV INSTALL TION DRAWINGSA
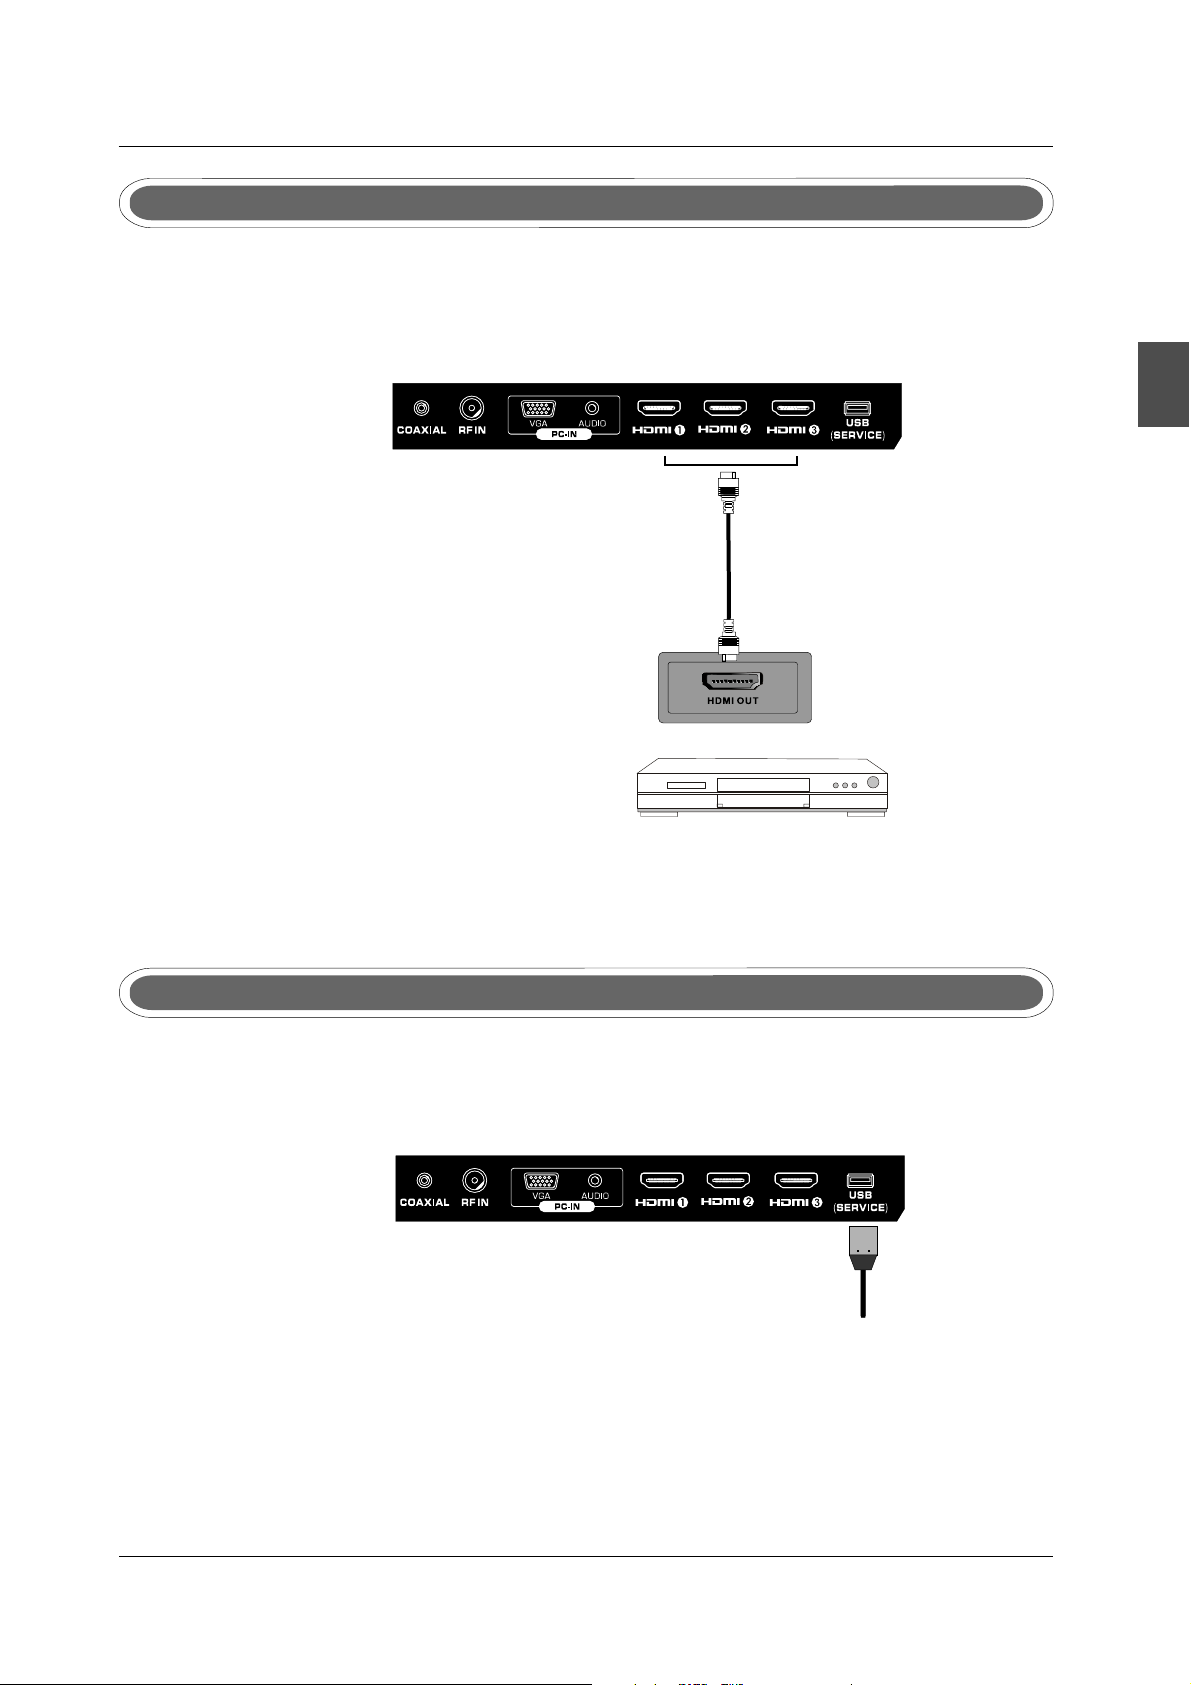
HDMI Connection
HDMI plug which replaces the HDMI connection allows transfer of all audio/video/control
signals through one cable only. These signals are transferred in digital.
TV Back
HDMI Cable
English
Service Port Function
Service port: (For factory uses only.)
DVD Back
TV Back
USB Cable
11
Page 14
INPUT
123
456
789
0
PICTURE SOUND SLEEP DISPLAY
VOL+
VOL-
EXIT
MUTE
MENU
CH+
CH-
INPUT
INPUT
PICTURE
Select the picture mode
SOUND
Select the sound mode
SLEEP
Set the Sleep Timer.
Displays
CC
OK
ENTER
MTS
ASPECT
Displays
FAV
set
Page 15
Page 16
MENU OPERATION
8.Menu Operation
SETUP WIZARD
English
Select Language
Select the language you want.
Welcome to the SEIKI HDTV Setup Wizard.Follow this guide to
help setup your HDTV for scanning channels or accessing your
external devices for Antenna,Set- top Box, Blu-ray, DVD, Games
and other player.
Use the up and down arrows on your remote control TV keypad
to select the
Select Ti me Zone
Use the left and right arrows on your remote control to select
your local time zone .
Select Language
language of screen menu and message
English
French
Spanish
:Move :Press to Enter
ENTER
Time zone
Enter
Enter
Enter
Power On Mode
Time zone
Eastern
Next
MENU
:Return
:Move :Change Setting
Power On Mode
Home optimizes the standard video setting for ENERGY
STAR@ qualification.
Retail Mode optimizes the video setting for use on a retail
showroom floor or demo environment.
Use the up/down key arrows on you remote control or TV
keypad to select power on mode.
Home Mode(Energy Saving)
Retail Mode
MENU
:Return
:Move
ENTER
:Press to Enter
14
Page 17
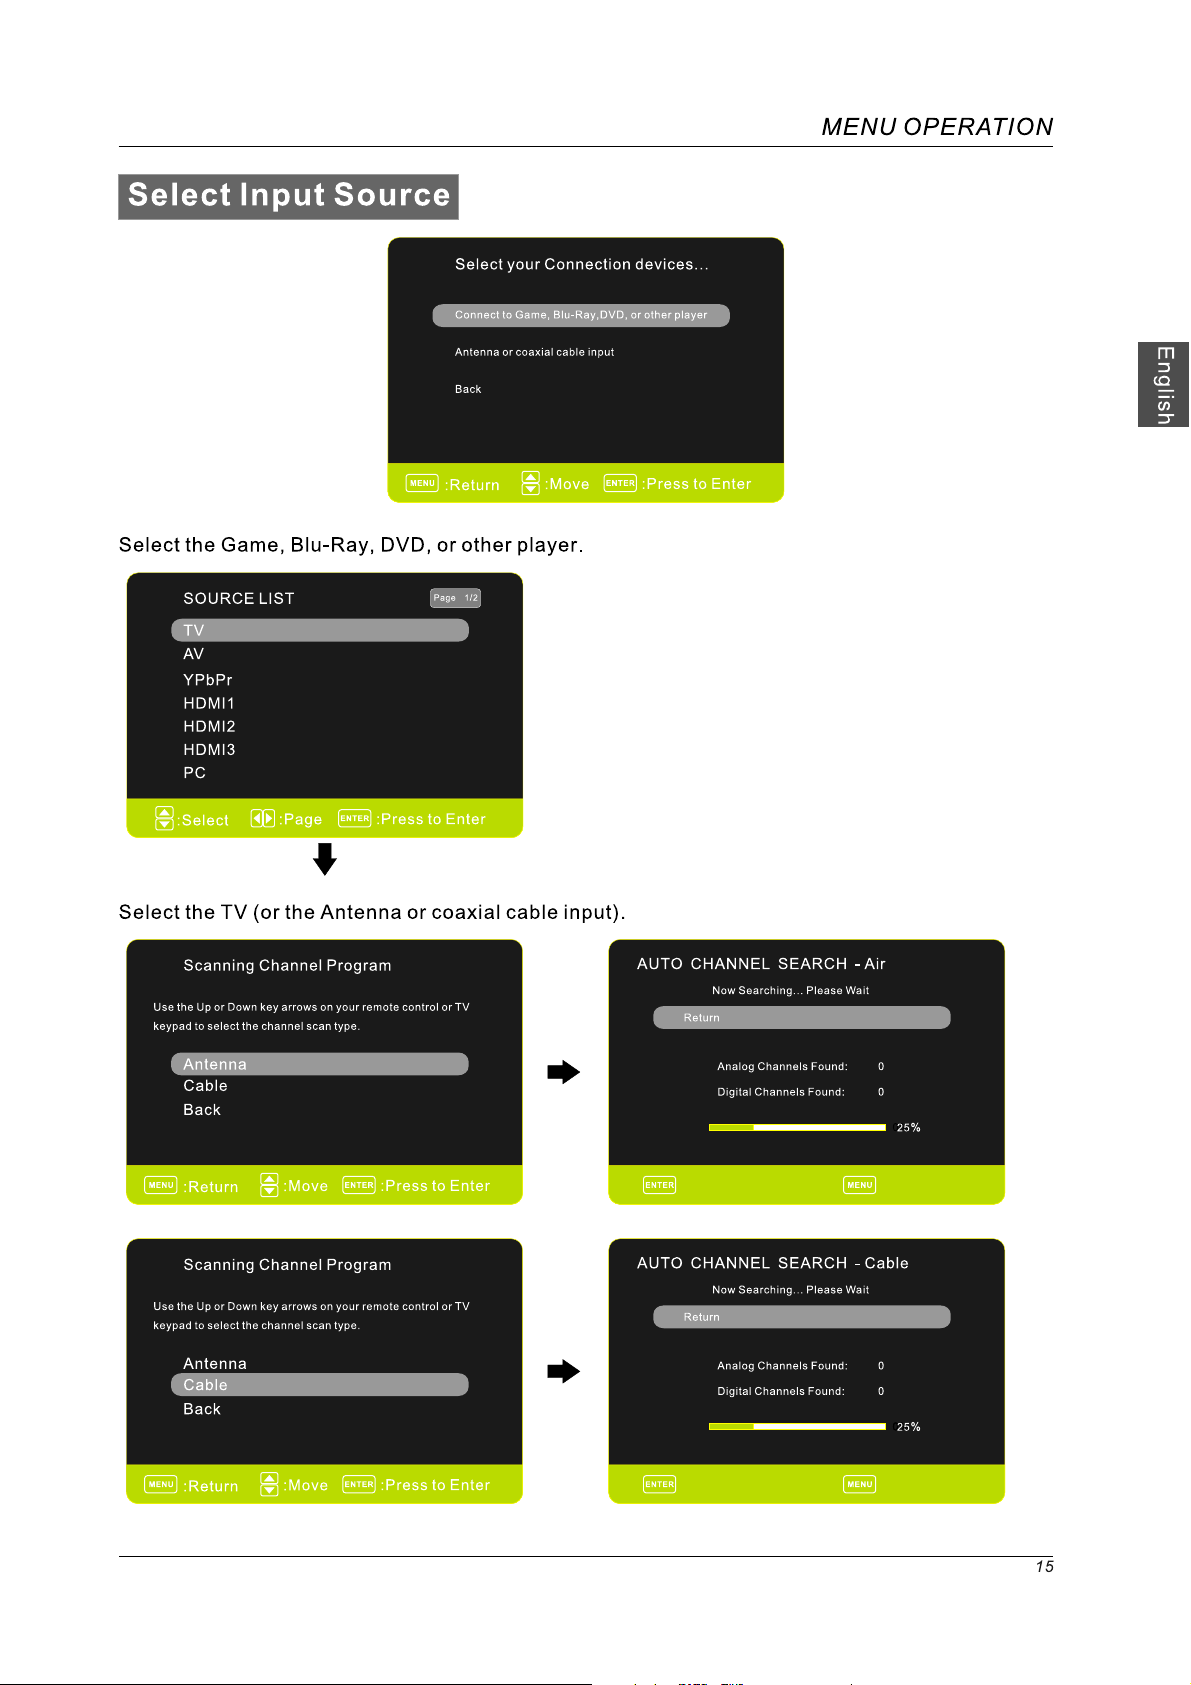
Stop Auto Channel Search Skip
Stop Auto Channel Search Skip
Page 18
INPUT
Page 19
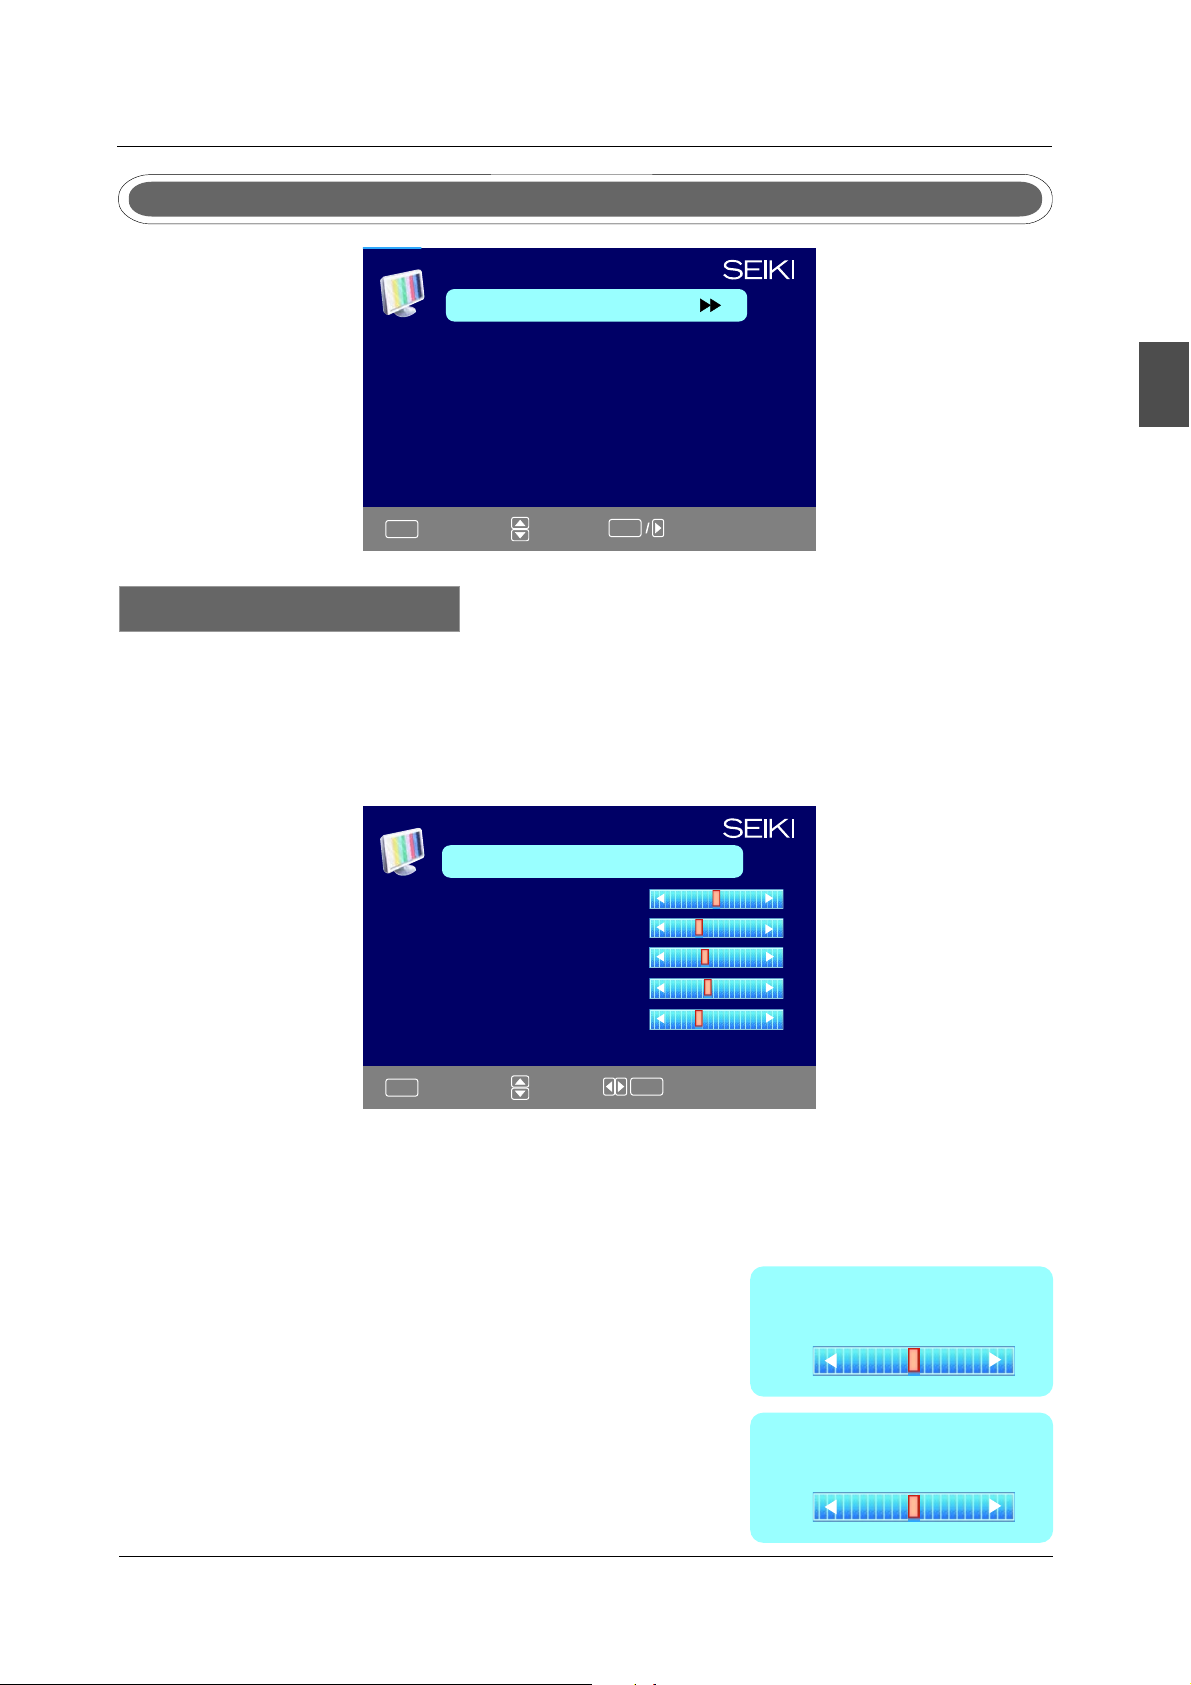
PICTURE MENU
PICTURE
Picture Settings
Screen Size
PC Settings
Color Temperature Normal
Advanced Picture Settings
Wide
MENU OPERATION
English
MENU
:Return
:Move :Go to Next Menu
ENTER
Picture Settings
1.Press ENTER when the Picture Settings item is highlighted. Then you will go to the sub-menu
as following.
2.Press ▼/▲ to select the desired menu item. Press ENTER to proceed if necessary.
3.Press ◄/► to the desired level.
4.When you have changed the settings, you can exit from the
PICTURE SETTINGS
Picture Mode User
Brightness
Contrast
Color
Tint
Sharpness
MENU
:Return
:Move :Go to Next Menu
ENTER
menu by pressing MENU.
Picture Mode
Press ▼/▲ button to select Picture Mode, then press ◄/► button to adjust. Only in the User mode,
the detail options as following can be adjusted. Available picture mode: Dynamic, Standard,Movie
User.
Brightness
Press ▼/▲ button to select Brightness,
Brightness
25
then press ◄/► button to adjust.
Contrast
Press ▼/▲ button to select Contrast,
Contrast
25
then press ◄/► button to adjust.
17
Page 20
MENU OPERATION
English
Color
Press ▼/▲ button to select Color,
then press ◄/► button to adjust.
Sharpness
Press ▼/▲ button to select Sharpness,
then press ◄/► button to adjust.
Tint
Press ▼/▲ button to select Tint,
then press ◄/► button to adjust.
Color
27
Sharpness
27
Tint
27
Screen Settings
Screen Size
Press ▼/▲ button to select Screen Size, then press ◄/► button to adjust. Available Screen Size:
Standard, Wide, Wide Zoom, Zoom.
Color Temperature
Press ENTER when the Color Temperature item is highlighted. Then press ◄/► button to adjust.
Available color temperature: Normal, Warm, Cool.
Color Temperature
Warm
Advanced Picture Settings
ADVANCED PICTURE SETTINGS
Dynamic Contrast
Film Mode
Noise Reduction
MPEG Noise Reduction
Off
Off
Off
Off
18
MENU
:Return
:Move :Change Setting
Page 21
Dynamic Contrast
Press button to select the ▼/▲ ◄/► button to adjust.
It can adjust the contrast corresponding to the input
signal in order to improve the picture quality displayed.
Available Mode: On/Off.
Film Mode
Press ▼/▲ button to select the item Film Mode, then
press ◄/► button to adjust. It handles 3:2 pull down
and 2:2 pull down. Available Film Mode: On/Off.
MENU OPERATION
Dynamic Contrast
Off
English
Film Mode
Off
Noise Reduction
Press ▼/▲ button to select the item Noise Reduction,
then press ◄/► button to adjust. Available Noise
Reduction: Off, Low, Medium,
High.
MPEG Noise Reduction
Press ▼/▲ button to select the item MPEG Noise Reduction,
then press ◄/► button to adjust. It can improve the quality
of the pictures by reducing the block noise. Available MPEG
Noise Reduction: Off, Low, Medium, High.
SOUND MENU
SOUND
Sound Settings
Surround Mode
AVL
Analog Sound Stereo
Digital Sound English
Audio Output PCM
Digital
Equalizer Settings
Noise Reduction
Off
MPEG Noise Reduction
Off
MENU
:Return
:Move :Go to Next Menu
ENTER
Sound Settings
1.Press ENTER when the Sound Settings item is high lighted. Then you will go
following.
2.Press ▼/▲ to select the desired menu item. Press ENTER to proceed if necessary.
3.Press ◄/► to the desired level.
4.When you have changed the settings, you can exit from the menu by pressing MENU.
to the sub-menu as
19
Page 22
English
MENU OPERATION
SOUND SETTING
Sound Mode User
Bass
Treble
Balance
MENU
:Return
:Move :Change Setting
ENTER
Sound Mode
Press ▼/▲button to select the item Sound Mode, then press ◄/► button to adjust. Only in the
User mode, the detail optionsas following can be adjusted. Available Sound Mode: User, Dynamic,
Standard, Soft.
Bass
Press ▼/▲ button to select the item Bass, then press ◄/► button to adjust.
Treble
Press ▼/▲ button to select the item Treble, then press ◄/► button to adjust.
Balance
Press ▼/▲ button to select the item Balance, then press ◄/► button to adjust.
Bass
7
Treble
7
Balance
7
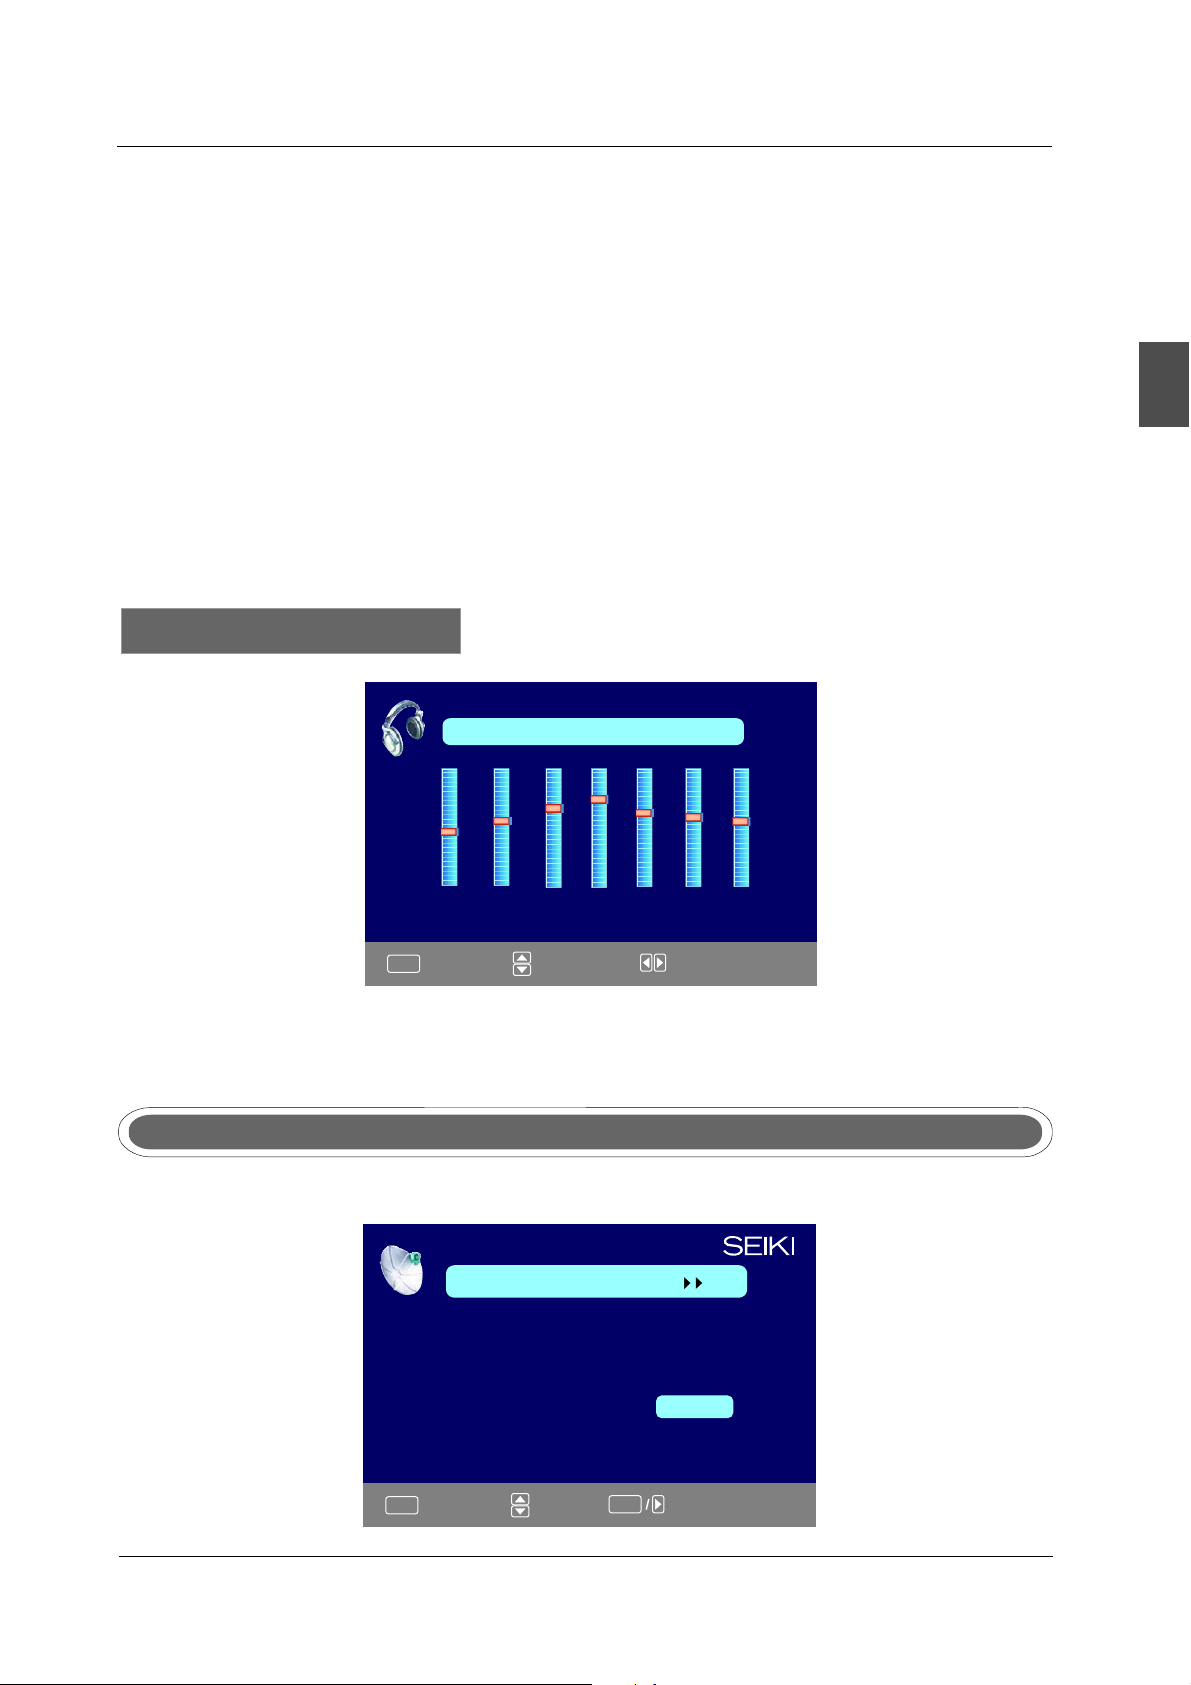
Surround Mode
Press ▼/▲ button to select the item Surround Mode, then press OK button to adjust. It can set
the picture to fit the screen automatically. When the Auto Wide is selected, the symbol will show as
following:
Surround Mode
20
Page 23
MENU OPERATION
AVL
Press ▼/▲ button to select the item AVL, then press ◄/► button to select ON or OFF. Auto
Volume Level can set the volume automatically adjust corresponding to the input audio.
Analog Sound
Press ▼/▲ button to select the item Preferred Analog Sound, then press ◄/► button to select
the prefer audio when switching to an analog channel. Available Analog Sound: Stereo, Mono,SAP.
Digital Sound
Press ▼/▲ button to select the item Preferred Digital Sound , then press ◄/► button to
select
the prefer audio when switching to a digital channel. Available Digital Sound: English, French,
Spanish.
Digital Audio Output
Press
▼/▲ button to select the item Digital Audio Output, then press ◄/► button to select the
desired digital audio output. Available digital audio output: PCM,Raw, Off .
Equalizer Settings
EQUALIZER SETTINGS
Mode Off
-1 2 3 1 0 -1
English
100-2250 500 1K 2K
MENU
:Return
:Move :Change Setting
4K
10K
Equalizer Mode
Press ▼/▲ button to select the item Equalizer Mode, then press ◄/► button to select the desired
mode. Available Equalizer Mode: Off , Rock, Pop, Jazz, User.
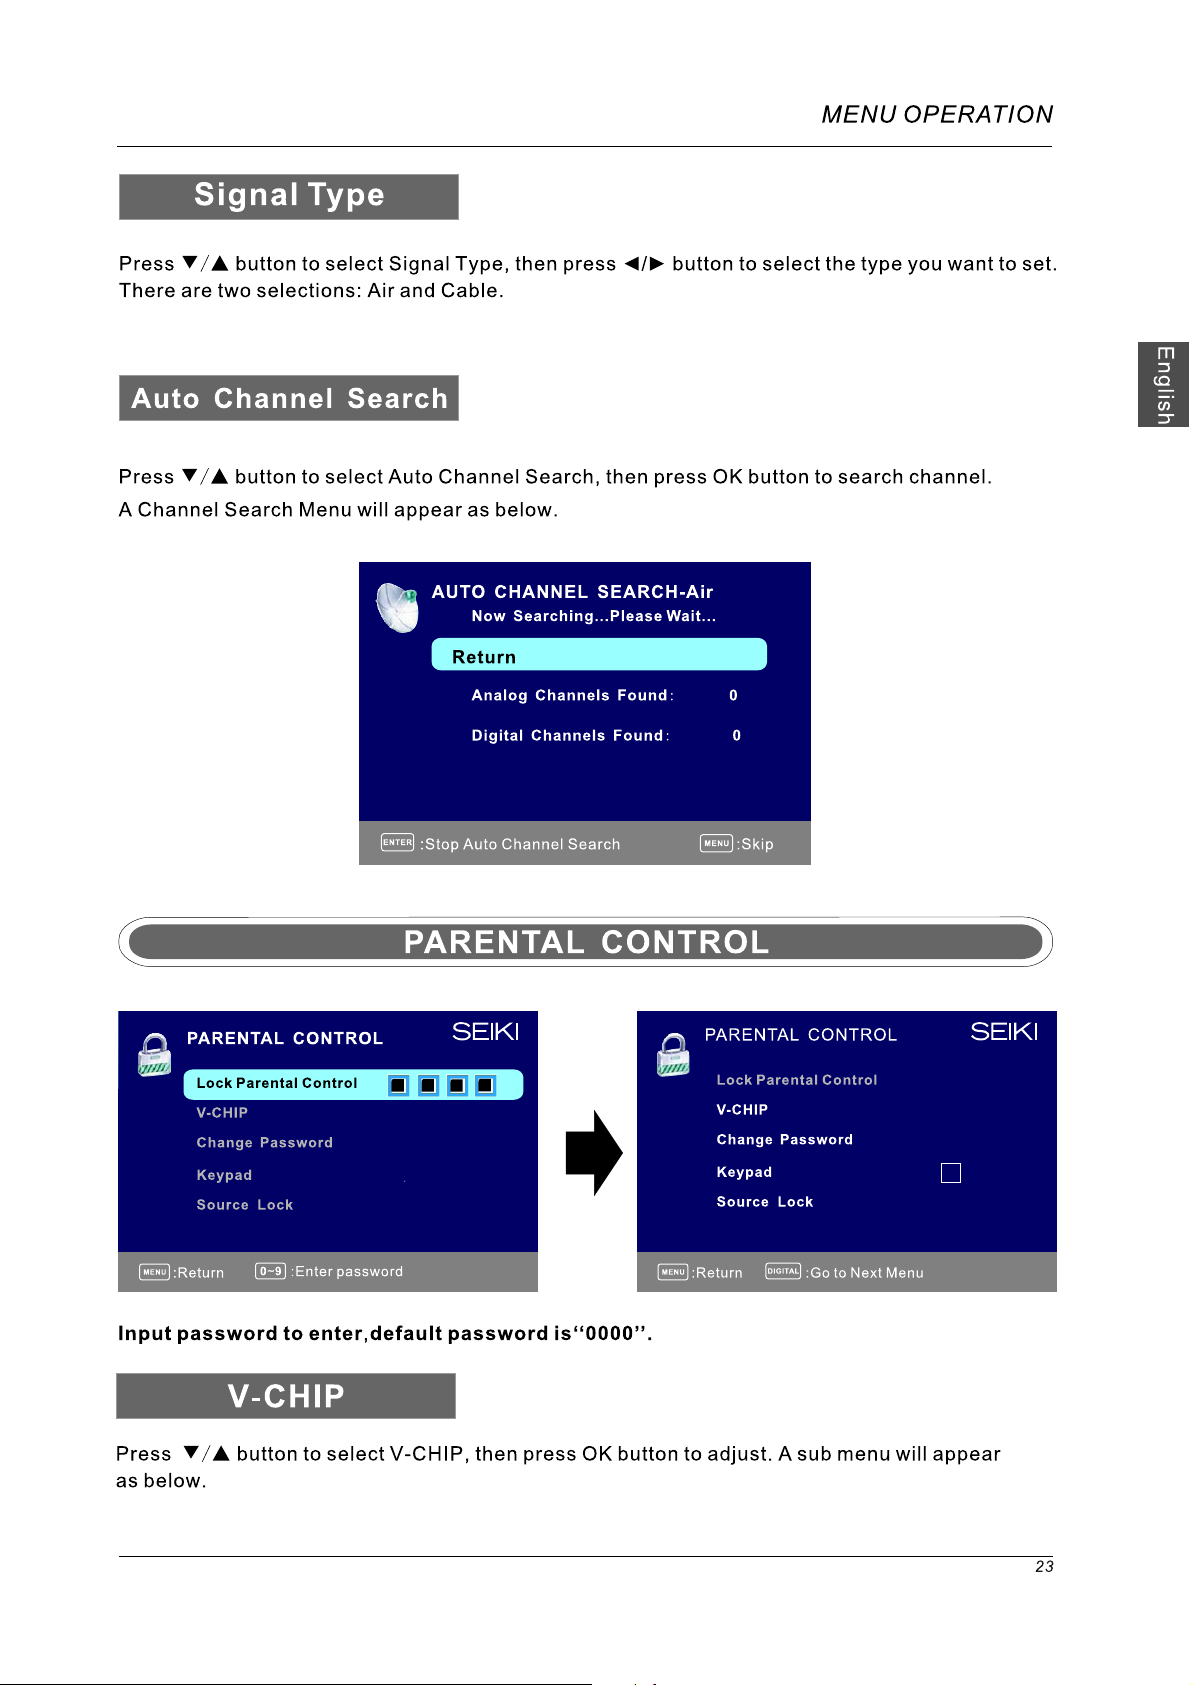
CHANNEL MENU
Note:This menu is only shown when the input source is TV.
CHANNEL
Channel List
Favorite List
Channel Setting
Signal Typ e Air
Auto Channel Search Enter
MENU
:Return
:Move :Go to Next Menu
ENTER
21
Page 24
MENU OPERATION
Channel List
Press ▼/▲ button to select Channel List, then press OK button to scan the Channel List. If you
select the option “In Channel List” On, the channel label will display in the list.
English
Page 1/ 1
ENTER
MENU
Channel List
A4
A11
A14
A63
:Return
:Move :Select
:Page
Favorite List
Press ▼/▲ button to select Favorite List, then press OK button to scan the Favorite Channel List.
FAVORITE LIST
No Favorite Channels Present
Please Perform Favorite Channel Add First
Page 1/ 1
MENU
:Return
:Move :Select
:Page
ENTER
Channel Setting
Press ▼/▲ button to select Manual Channel Setting, then press OK button to set the value in the
sub menu.
CHANNEL SETTING
Channel Skip Favorice Label
A4
A11
A14
A63
ENTER
22
MENU
:Return
:Cursor/Page :Select
Page 25
Page 26
English
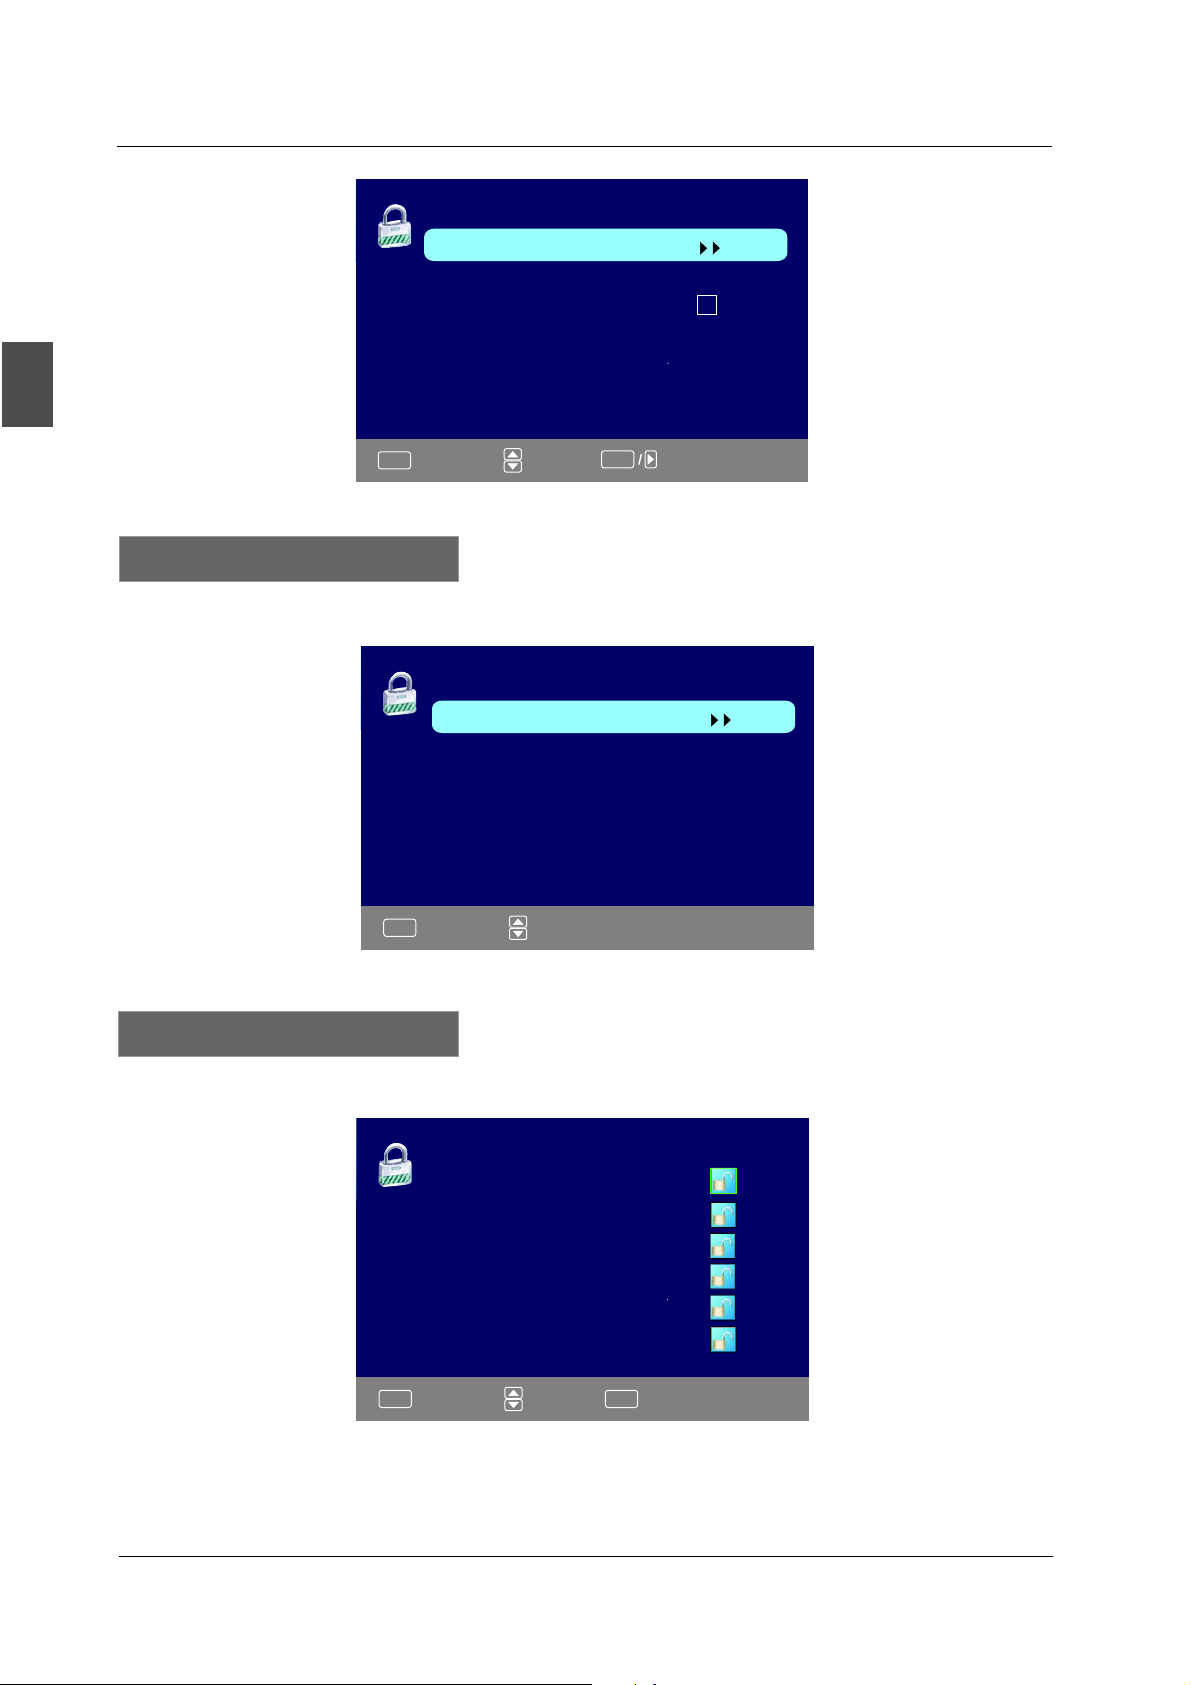
MENU OPERATION
V-CHIP
US V-Chip
Canada V-Chip
Block UnRated Show
Downloadable Rating
Clear Downloadable Date
MENU
:Return
:Move :Go to Next Menu
ENTER
US V-CHIP
Press ▼/▲ button to select US V-CHIP, then press OK button to adjust. A sub menu will appear
as below.
USA
Movie Rating
TV Rating
MENU
:Return
:Move
Movie Rating
Press ▼/▲ button to select Movie Rating, then press OK button to adjust. A sub menu will appear
as below.
Movie Rating
G
PG
PG-13
R
NC-17
X
MENU
:Return
:Move
ENTER
:Lock/Unlock
Press ▼/▲ button to select Rating, then press OK button to lock.
24
Page 27
MENU OPERATION
TV Rating
Press ▼/▲ button to select TV Rating, then press OK button to adjust. A sub menu will appear
as below.
TV Rating
TV-Y
TV-Y7
TV-G
TV-PG
TV-14
TV-MA
D L S V FV
English
MENU
:Return
:Select
ENTER
:Lock/Unlock
Press ▼/▲/◄/►button to select Rating, then press OK button to lock.
CANADA V-CHIP
Press ▼/▲ button to select US V-CHIP, then press OK button to adjust. A sub menu will appear
as below.
English Rating
C
C8
G
PG
14
18+
MENU
:Return
+
+
ENTER
:Move
:Lock/Unlock
MENU
CANADA
English Rating
French Rating
:Return
:Move
French Rating
G
+
8ans
13ans+
16ans+
18ans+
MENU
:Return
:Move
ENTER
:Lock/Unlock
The operation of CANADA V-CHIP is the same as the operation of US V-CHIP.
25
Page 28
English
MENU OPERATION
Block UnRated Show
Press ◄/► button to select Block UnRated Show, then press OK button to set the rating locked.
Downloadable Rating
Press ▼ / ▲ button to select Downloadable Rating, then press OK button to set the rating.
If the DTV program doesn’t have this rating information, this
option will be in gray.
Clear Downloadable Date
Press ▼ / ▲ button to select Clear Downloadable Data, then press OK button to set the rating.
Note: The above two operation only valid when playing the downloadable data stream.
The operations are the same as US V-CHIP.
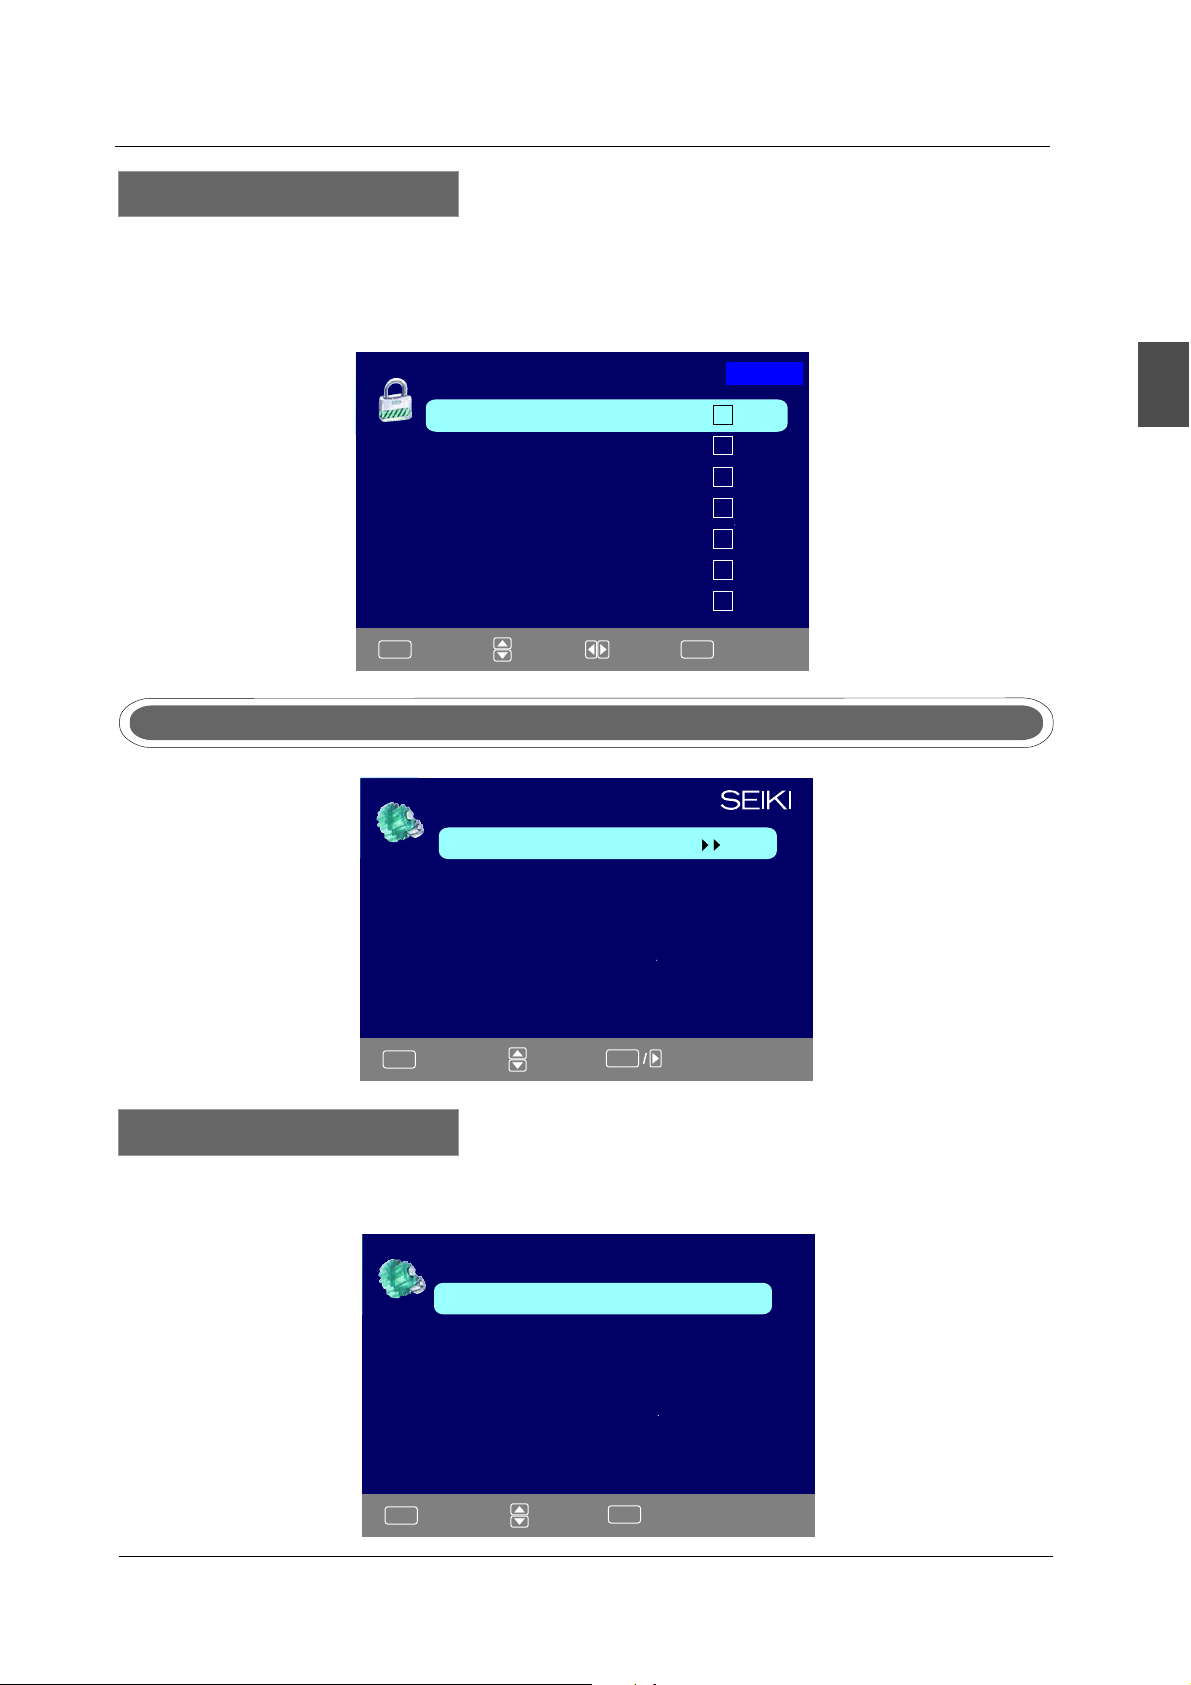
CHANGE PASSWORD
Press ▼ / ▲ button to select Change Password, then press OK button to adjust the value.
A Sub Menu Will appear as below. If the password is changed, all of the passwords in the menu will
be changed at the same time.
Change Password
Old PIN
New PIN
Confirm
26
MENU
:Return
DIGITAL
:Password
Page 29
MENU OPERATION
Source Lock
Press ▼/▲ button to select Source Lock, then press OK button to enter the sub menu.
Press ▼/▲ button to select Source, then press OK button to set the Source Lock .
You can’t enter the locked source if you set the Source lock.
Source Lock
TV
AV
YPbPr
HDMI1
HDMI2
HDMI3
PC
Page1/2
English
MENU
:Return
:Move
:Page
ENTER
:On/Off
Setup Menu
SETUP
Closed Caption
Menu Language English
CLOCK
OSD Timer 5s
MENU
:Return
:Move :Go to Next Menu
ENTER
Closed Caption
Press ▼/▲ button to select the item Closed Caption, then press ◄/► button to adjust.
CLOSED CAPTION
Caption Display
Analog Caption Type
Digital Caption Type
Digital CC Preset
Digital CC Style
MENU
:Return
:Move
ENTER
Off
CC1
Service1
Custom
:On/Off
27
Page 30
English
MENU OPERATION
Caption Display
Press ▼/▲ button to select Caption Display, then press ◄/► button to select ON or OFF.
Analog Caption Type
Press ▼/▲ button to select Analog Caption Type, then press ◄/► button to select the type.
Available type: CC1, CC2, CC
Digital Caption Type
Press ▼/▲ button to select Digital Caption Type, then press ◄/► button to select the type.
Available type: Service1~6.
Digital CC Preset
Press ▼/▲ button to select Digital CC Preset, then press ◄/► button to select Default or Custom.
Digital CC Style
This menu is only shown when the Digital CC
3, CC4, TEXT1, TEXT2, TEXT3, TEXT4.
Preset is selected Custom.
DIGITAL CC STYLE
CC Size Default
CC Font
CC Opacity
Text Color
CC Background Opacity
CC Background Color
CLOSE CAPTION
Default
Default
Default
Default
Default
MENU
:Return
:Move :Change Setting
CC Size
Press ▼/▲ but ton to select CC Si ze, then press ◄/► but ton to set . Avai l abl e Size: Defaul t, Sm al l,
Standar d, Lar ge.
CC Font
Press ▼/▲ but ton to sel ect , then press ◄/► but ton to sel ect the Font. Avai labl e type: Defaul t, Styl e0~7 .
CC Opacity
Press ▼/▲ button to select CC Opacity, then press ◄/► button to select the Opacity.
Available Opacity: Default, Solid, Flashing, Translucent, Transparent.
Text Color
Press ▼/▲ button to select Text Color, then press ◄/► button to select the color.
Available Color: Default, Black, White,
Red, Green, Blue, Yellow, Magenta, Cyan.
CC Background Opacity
Press ▼/▲ button to select CC Background Opacity, then press ◄/► button to select the Opacity.
Available Opacity: Default, Solid, Flashing, Translucent, Transparent.
CC Background Color
Press ▼/▲ button to select CC Background Color, then press ◄/► button to select the Color.
Available Color: Default, Black, White, Red,
Green, Blue, Yellow, Magenta, Cyan.
Menu Language
Press ▼/▲ button to select the item Menu Language, then press ◄/► button to adjust.
Available Language: English, French, Spanish.
28
Page 31

Clock
Press ▼/▲ button to select the Clock, then press OK to edit.
CLOCK
MENU OPERATION
Time Zone Alaska
Auto Clock
Setup Time 2009-10-21 20:00:00
Day Of Week Wed
Daylight Saving Time
MENU
:Return
:Move : Change Setting
Time Zone
Press ▼/▲ button to select Timer Zone, then press ◄/► button to set. Available Size: Central,
Mountain, Pacific, Alaska, Hawaii, Samoa, Newfoundland, Atlantic, Eastern.
Auto Clock
Press ▼/▲ button to select Auto Clock, then press ENTER button to set it Enable/Disable. If you
it Enable, it will adjust the time corresponding the DTV time automatically.
set
Setup Time
Press ▼/▲ button to select Setup Time, then press ◄/► button to adjust the time and use the
ENTER button to go to the next option.
Day Of Week
This option displays the Day Of Week corresponding to the setup time.
English
Daylight Saving Ti me
Press ▼/▲ button to select , then press ◄/► button to set. Size: ,
10s 20s 30s 40s 50s 60s
, , , , , .
Daylight
Saving Time Time 5s
OTHERS MENU
OTHERS
Blue Back
No Signal Power Off
No Operation Power Off
All Reset
MENU
:Return
:Move :On/Off
ENTER
Blue Back
Press ▼/▲ button to select Blue Background, then press OK button to select when there is
no signal, whether set the background in blue or not.
Enter
29
Page 32

English
MENU OPERATION
No Signal Power Off
Press▼/▲ button to select No Signal Power Off, then press OK button to select it On or Off.
When set it On and there is no signal input by 10 minutes, it will turns off the panel and the LED light
turns amber.
No Operation Power Off
Press ▼/▲ button to select No Operation Power Off, then press OK button to select it On or Off.
When set it On and there is no operation input by
light turns red.
All Reset
Press ▼/▲ button to select All Reset, then press OK button to execute reset. When you select
All Reset item, a dialogue box will appear as following:
If [ All Reset ] was executed
TV system is reset.
3 hours, it will turns off the panel and the LED
Attention!
AV/YPbPr/HDMI1/HDMI2/HDMI3/PC
1.PICTURE menu and description are the same as that for TV source.
2.SOUND menu and description are the same as that for TV.
But the settings for Analog Sound and Digital Sound are invalid
in these sources.
3.PARENTAL menu and description are the same as that for TV V source.
4.SETUP menu and description are the same as that for TV source.
But the setting for Closed Caption is invalid in source HDMI.
5.OTHER menu and description are the same as that for TV source.
6.CHANNEL menu and description are invalid in these sources .
PICTURE MENU
PICTURE
Picture Settings
Screen Size
PC Settings
Color Temperature Normal
Advanced Picture Settings
Wide
30
MENU
:Return
:Move :Go to Next Menu
ENTER
Page 33

MENU OPERATION
Picture Settings
1.Press ENTER when the Picture Settings item is highlighted. Then you will go to the sub-menu as
following.
2.Press ▼/▲ to select the desired menu item. Press ENTER to proceed if necessary.
3.Press ◄/► to adjust the item to the desired level.
4.When you have changed the settings, you
PICTURE SETTINGS
Picture Mode User
Brightness
Contrast
Color
Tint
Sharpness
can exit from the menu by pressing MENU.
English
MENU
:Return
:Move :Go to Next Menu
ENTER
Picture Mode
Press ▼/▲ button to select Picture Mode, then press◄/►button to adjust.
Available picture mode: Dynamic, Standard, Movie, User.
Brightness
Press ▼/▲ button to select Brightness,
then press ◄/► button to adjust.
Contrast
Press ▼/▲ button to select Contrast,
then press ◄/► button to adjust.
Color
Press ▼/▲ button to select Color,
then press ◄/► button to adjust.
Brightness
25
Contrast
25
Color
27
Sharpness
Press ▼/▲ button to select Sharpness,
then press ◄/► button to adjust.
Sharpness
27
31
Page 34

English
MENU OPERATION
Screen Size
1.Press ENTER when the Screen Size item is highlighted. Then you will go to the sub-menu as
following.
2.Press▼/▲ to select the desired menu item. Press ENTER to proceed if necessary.
3.Press ◄/► to adjust the item to the desired level.
4.When you have changed the size
, you can exit from the menu by pressing MENU.
PICTURE
Picture Settings
Screen Size
PC Settings
Color Temperature Normal
Advanced Picture Settings
Wide
MENU
:Return
:Move :Go to Next Menu
ENTER
Screen Size
Press ▼/▲ button to select Screen Size, then press ◄/► button to adjust. Available Screen Size:
Standard, Dot By Dot, Wide.
PC Setting
1.Press ENTER when the PC Settings item is highlighted. Then you will go the sub-menu as following.
2.Press ▼/▲to
3.Press ◄/► to adjust the item to the desired level.
4.When you have changed the settings, you can exit from the menu by pressing MENU.
select the desired menu item. Press ENTER to proceed if necessary .
PC SETTINGS
Auto Adjust Enter
Horizontal Position
Vertical Position
Clock
Phase
Reset Enter
32
MENU
:Return
:Move
ENTER
:Press To Enter
Page 35

MENU OPERATION
Auto Adjust
Press ▼/▲ button to select Auto Adjust, then press OK button to start auto adjusting.
Horizontal Position
Press ▼/▲ button to select Horizontal Position,
then press ◄/► button to adjust.
Vertical Position
Press ▼/▲ button to select Vertical Position,
then press ◄/► button toadjust.
Clock
Press ▼/▲ button to select Clock, then press
◄/► button
Phase
Press ▼/▲ button to select Phase, then press
◄/► button to adjust.
Reset
Press ▼/▲ button to select Reset, then press
OK button to reset the options above.
to adjust.
Horizontal Position
0
Vertical Position
0
Clock
0
Phase
32
English
1.SOUND menu and description are the same as that for TV.
but the settings for Analog Sound and Digital Sound are invalid in PC source.
2.PARENTAL menu and descriptions are the same as that for TV source.
3.SETUP menu and description are the same as that for TV source.
But the setting for Closed Caption is invalid in PC source.
4.OTHER menu and description are the same as that for TV source.
5.CHANNEL menu and description are invalid in PC source.
Note: The operation and description of the hot key is programmable on your
remote control.
33
Page 36

English
TROUBLESHOOTING
9. Troubleshooting
Please check if you can solve problems by troubleshooting yourself.
Troubleshooting
No signal
No color shades
Stain on the
screen
Double or multiple
display image
Snow on the screen
The remote control
does not work
"Zip" made noise on
TV cover
Control
Please check that all cables are correctly plugged in.
Adjust the contrast, the color and the brightness.
May be the result from a lighting
and other electrical devices or appliances.
May be the result of an electrical wave disturb from other TV,
Computer and Game machine or Radio.
The cables of the antenna are not correctly plugged in.
Please check the batteries order and alignment. Check that the IR
of
the remote control is not hidden by something.
Even if the display image is correct, the noise may come from an
unsteady fixation of the panel.
signal from car, motor, neon light
34
No sound
Make sure that you have not press the MUTE button of the panel
or of the remote control.
Page 37

42
120
1022*56*631 mm
1302*325*855 mm
M6*15
15.5
17.8
Page 38

Page 39

SE421TT
Page 40

Page 41

TABLE DES MATIÈRES
1
2
3
4
INFORMATIONS
IMPORTANTES
PREFACE
PRECAUTIONS
DE SECURITE
DANS LA CAISSE
CONNEXIONS
5
FRONT/ARRIERE
DU TELEVISEUR LED
DESSINS A
6
L'INSTALLA TI ON
DE TV
Français
Connexion du cordon d'alimentation
Connexion de l'antenne
Connexion AV
Connexion YPbPr(composante)
Connexion VGA(PC)
Connexion COAX
Connexion HDMI
Fonction Port Service
7
8
9
10
TELECOMMANDE
MENU D'OPÉRATION
DEPANNAGE
SPECIFICATIONS
Instructions de la télécommande dans la mode TV
Configuration de la télécommande
Configuration Wizard
Source d'entrée à sélection
Opération de base
Menu Image
Menu Son
Menu Chaîne
Contrôl Parental
Menu de configuration
Autre Menu
Menu Image
16
16
17
21
23
1
Page 42

INFORMATIONS IMPORTANTES
Avertissement
Risque de choc électrique
Ne pas ouvrir !
Français
ATTENTION:L'UTILISATION DE TOUT CONTROLE,DE REGLAGES OU PROCEDURES AUTRES
QUE CELLES SPECIFIEES DANS CE DOCUMENT PEUVENT ENTRAINER UNE EXPOSITION
A DES RADIATIONS DANGEREUSES.
ATTENTION: Ces instructions de service ne sont destinées qu'à l'usage par le personnel
qualifié.
autres que celles décrites dans les instructions de fonctionnement, sauf si vous êtes
qualifié pour le faire.
Consultez le manuel d'entretien pour les instructions d'entretien.
Le symbole de l'éclair fléché dans un triangle équilatéral, est destiné à alerter l'utilisateur
de la présence de « tension» dangereuse non-isolée dans le boîtier du produit qui
peut être d'une ampleur suffisante pour constituer un risque d'électrocution.
Le point d'exclamation dans un triangle équilatéral est destiné à alerter l'utilisateur
de
la présence d'exploitation importante et d'instructions de maintenance (entretien)
dans la documentation jointe à l'appareil.
Pour réduire le risque de choc électrique, ne jamais effectuer des réparations
Consignes de sécurité importantes
Note:
1.Lisez ces instructions.
2.Conservez ces instructions.
3.Respectez tous les avertissements.
4.Suivez toutes les instructions.
5.Ne l'utilisez pas près de l'eau.
6.Nettoyez avec un chiffon sec.
7.Ne bloquez pas les ouvertures de ventilation. Installation conformément aux instructions du fabricant.
8.Ne l'installez pas près de sources de chaleur telles que radiateurs, registres de chaleur, poêles
ou autres appareils (y compris les amplificateurs) produisant de la chaleur.
9.N'éliminez pas l'intention de sécurité de la fiche polarisée ou à la terre. Une prise polarisée possède
deux lames dont une est plus large que l'autre. Une prise à la terre possède deux lames et une
broche
fournie ne rentre pas dans votre fiche, consultez un électricien pour faire remplacer la fiche obsolète.
2
de terre. La lame large ou la troisième broche est prévue pour votre sécurité. Si la prise
Page 43

INFORMATIONS IMPORTANTES
10.Assurez vous que le cordon d'alimentation ne soit pas écrasé ou pincé, particulièrement au niveau des prises de
commodité, et le point où ils sortent de l'appareil.
11.Utilisez uniquement les fixations / accessoires spécifiés par le fabricant.
12.Utilisez uniquement le chariot, trépied, console ou table spécifiée par le fabricant
chariot est utilisé, soyez prudent lorsque vous déplacez l'ensemble chariot / appareil pour éviter des blessures en cas
de renversement.
13.Débranchez cet appareil pendant les orages ou lorsqu'il n'est pas utilisé pendant de longues périodes de temps.
14.Confiez toute réparation à un personnel qualifié. Un entretien est requis lorsque l'appareil a été endommagé, comme le
cordon d'alimentation ou la prise est endommagée, le liquide a été renversé ou des objets sont tombés dans l'appareil,
l'appareil exposé à la pluie ou à l'humidité ne
.L'appareil ne doit pas être exposé à des gouttes ou des éclaboussures et aucun objet rempli de liquide, tels que vases,
15
peut être placé sur l'appareil.
16.AVERTISSEMENT: Pour réduire des risques d'incendie ou le choc électrique, n'exposez pas cet appareil à la pluie ou à
l'humidité.
17.La prise électrique ou le coupleur de l'appareil utilisé comme dispositif de débranchement, doit être facilement accessible.
18.L'appareil doit être raccordé à une prise secteur avec connexion à la terre.
fonctionne pas normalement, ou il est tombé.
ou vendu avec l'appareil. Quand un
Français
3
Page 44

PREFACE
2. PREFACE
Merci d'avoir acheté ce téléviseur! S'il vous plaît lisez attentivement ce manuel avant de faire
fonctionner le téléviseur. Assurez-vous que la télévision n'a pas été endommagée pendant le
transport. Si le téléviseur est endommagé, ne l'installez pas, et contactez votre revendeur.
Vérifiez que vous avez tous les accessoires selon le modèle.
Français
3. PRECAUTIONS DE SECURITE
Placer le téléviseur sur une surface stable.
Ne pas placer de matériels sur le téléviseur.
Minimum distances
10cm
20cm
10cm 5cm
Ne pas utiliser le téléviseur avec des accessoires autres que
ceux fournis ou suggérés par
le fabricant.
Ne pas bloquer ou couvrir les ouvertures de ventilation sur le téléviseur.
Si vous avez un support mural, vérifiez qu'il est stable.
Le cordon d'alimentation et les câbles doivent être correctement
acheminés et protégées pour empêcher les hommes de marcher
sur eux et de faitre tomber la téléviseur.
4
Page 45

PRECAUTIONS DE SECURITE
Garder le téléviseur dans une condition sèche
et éloignée de l'humidité.
Français
Garder le téléviseur loin de toute source de chaleur
.
Débrancher le téléviseur avant de le nettoyer. Ne pas utiliser de
solvants ou de liquides pour nettoyer le téléviseur. Il faut nettoyer
le téléviseur avec un chiffon doux et sec.
En cas de dépannage, ne pas utiliser les pièces de rechange autre
que celles suggérées par le fabricant. L'utilisation inadéquate des
pièces de rechange peut conduire à des chocs électriques, des
courts-circuits, d'incendies, et d'autres incidents.
Débrancher le téléviseur pendant les orages ou lorsqu'il n'est pas
utilisé pendant de longues périodes de temps.
5
Page 46

123
456
789
0
PICTURE SOUND SLEEP DISPLAY
VOL+
MUTE
VOL-
EXIT
OK
ENTER
CC
MTS
ASPECT
INPUT
CH+
CH-
MENU
FAV
HDMI CÂBLE
Page 47

1.Appuyer sur "ENTRÉE" pour sélectionner la source
d'entrée.
2.Appuyer sur "MENU" pour afficher le menu principal
sur l'écran.
3.Appuyer sur "CH " ou "CH " pour parcourir les chaînes.
4.Appuyer sur "VOL+" ou "VOL-" pour augmenter ou
diminuer le volume.
5.Appuyer sur le bouton "puissance " pour ouvrir ou éteinder
le téléviseur.
6.Capteur à distance: capteur infrarouge pour la
télécommande.
7.Indicateur de puissance:Blue lorsque le téléviseur est
allumé. Rouge lorsque le téléviseur est éteint. Pas de
couleur lorsque l'interrupteur est éteint.
Page 48

Page 49

DESSINS A L'INSTALLATION DE TV
VIDEO R L
Connexion AV
Connecter la prise de sortie VIDEO et AUDIO du DVD ou du VCR aux prises VIDEO du téléviseur
en utilisant le câble RCA. Faites correspondre les couleurs de prise: La vidéo est jaune, l'audio
gauche est blanc, et l'audio est bien rouge. Sélectionnez la source d'entrée AV en utilisant la
touche SOURCE sur la télécommande.
Arrière de TV
Câble Vidéo
VIDEO R L
DVD ou VCR
Câble AUDIO
Arriere de DVD ou VCR
Connexion YPbPr(Composant)
Connecter la sortie YPbPr du DVD ou du VCR à l'entrée YPbPr du téléviseur. La qualité d'image
est améliorée par rapport à la connexion d'un VCR ordinaire à l'entrée vidéo. Reliez la sortie audio
du DVD ou du VCR aux prises d'entrée audio du téléviseur en utilisant le câble RCA.
Faire
correspondre les couleurs de prises: Y est vert, Pb est bleu, Pr est rouge, l'audio gauche
est blanc et l'audio droite est rouge. Sélectionner la source d'entrée de composant en utilisant la
touche SOURCE de la télécommande.
Français
Câble YPbPr
Pb
Y
DVD ouVCR
Arrière de TV
TV Back
Câble AUDIO
Pr LR
Arriere de DVD ou VCR
9
Page 50

Français
COAX
DESSINS A L'INSTALLATION DE TV
Connexion VGA(PC)
Connectez la sortie RGB du PC à la prise VGA (PC) sur le téléviseur. Reliez la sortie audio de
PC à la prise AUDIO PC sur le téléviseur. Sélectionnez la source d'entrée RGB avec l'aide du
bouton SOURCE sur la télécommande.
Arrière de TV
Câble Audio
Câble VGA
AUDIO RGB-PC OUTPUT
Connexion COAX
Connecter l'amplificateur audio à la prise de sortie COAX sur le téléviseur.
Arrière de TV
Câble coaxial
Arriere de l'amplificateur audio
10
Amplificateur audio
Page 51

DESSINS A L'INSTALLATION DE TV
Connexion HDMI
La prise HDMI qui remplace la connexion HDMI permet de transférer tous les signaux
audio / vidéo / commande via un seul câble. Ces signaux sont transmis en numérique.
Câble HDMI
Arrière de DVD
Fonction de Port Service
Arrière de TV
Français
Port service: (Pour l'utilisation exclusive en usine.)
Arrière de TV
Câble USB
11
Page 52

INPUT
PUISSANCE
Mettre le TV LCD marche/arrêt.
ENTRÉE
Appuyer sur ENTRÉE pour l'affichage de source OSD.
123
456
789
0
PICTURE SOUND SLEEP DISPLAY
VOL+
VOL-
EXIT
CC
MUTE
OK
ENTER
MTS
MENU
ASPECT
FAV
CH+
CH-
Appuyer
pour sélectionner la source d'ENTRÉE,
et après appuyer sur le bouton OK pour confirmer.
Bouton de nombres
Appuyer sur les boutons 0-9 pour changer directement la
chaîne du téléviseur.
Appuyer sur ce bouton à entrer le numéro de programme
pour le canal de programme multiple tels que 2-1, etc.
Retour à la chaîne précédente consultée.
IMAGE
Sélectionner le mode de l'image.
SON
Sélectionner le mode du son
SOMMEIL
Sélectionner le temps du sommeil
DISPLAY
Afficher les information sur la source et le canal.
MENU
Afficher le menu principal de TV
SORTIE
Quitter le menu principal de TV
MUTE
Appuyer sur le bouton pour couper le son. Appuyer sur le
bouton de nouveau ou VOL+ pour enlever le son du
téléviseur.
VOL+/VOLAppuyer à augmenter/diminuer le niveau sonore.
CH+/CHAppuyer à parcourir les canals
Permet de naviguer dans les menus sur l'écran et d'ajuster
le réglage du système selon vos préférences.
CC
Appuyer à afficher le sous-titrage
MTS
Appuyer à ajuster parmi les canals disponibles d'audio
ASPECT
Appuyer à sélectionner le ratio d'aspect.
FAV
Appuyer à afficher la liste des programmes préférés de TV
Page 53

Page 54

Français
MENU D'OPÉRATION
8.Menu d'Opération
CONFIGURATION WIZARD
Sélectionner laLangue
Sélectionnez la langue que vous voulez.
Welcome to the SEIKI HDTV Setup Wizard.Follow this guide to
help setup your HDTV for scanning channels or accessing your
external devices for Antenna,Set- top Box, Blu-ray, DVD, Games
and other player.
Use the up and down arrows on your remote control TV keypad
to select the
Select Language
language of screen menu and message
English
French
Spanish
:Move :Press to Enter
ENTER
Enter
Enter
Enter
Fuseau horaire
TENSION
Time zone
Use the left and right arrows on your remote control to select
your local time zone .
Time zone
Eastern
Next
MENU
:Return
:Move :Change Setting
Power On Mode
Home optimizes the standard video setting for ENERGY
STAR@ qualification.
Retail Mode optimizes the video setting for use on a retail
showroom floor or demo environment.
Use the up/down key arrows on you remote control or TV
keypad to select power on mode.
Home Mode(Energy Saving)
Retail Mode
14
MENU
:Return
:Move
ENTER
:Press to Enter
Page 55

Stop Auto Channel Search Skip
Stop Auto Channel Search Skip
Page 56

INPUT
Page 57

MENU D'IMAGE
PICTURE
Picture Settings
Screen Size
PC Settings
Color Temperature Normal
Advanced Picture Settings
Wide
MENU D'OPÉRATION
Français
MENU
:Return
:Move :Go to Next Menu
ENTER
Réglage d'image
1. Appuyez sur ENTRER lorsque l'élément de Réglage d'Image est mis en surbrillance. Puis vous
irez à la sous-menu comme suit.
2. Appuyez ▼ / ▲ pour sélectionner la rubrique souhaitée. Appuyez sur ENTRER pour procéder si
nécessaire.
3. Appuyez ◄ / ► pour le niveau souhaité.
4. Lorsque vous avez modifié le réglage, vous pouvez quitter le menu en appuyant sur MENU.
PICTURE SETTINGS
Picture Mode User
Brightness
Contrast
Color
Tint
Sharpness
MENU
:Return
:Move :Go to Next Menu
ENTER
Mode Image
Appuyez sur ▼ / ▲ pour sélectionner le Mode Image, puis appuyez sur ◄ / ► pour ajuster.
Ce n'est que dans le mode utilisateur les options de détail suivantes peuvent être ajustées.
Mode Image
disponible: Utilisateur, Dynamique, Standard, Film.
Luminosité
Appuyez sur la touche ▼ / ▲ pour
sélectionner la Luminosité, puis appuyez
Brightness
25
sur la touche◄ / ► pour ajuster.
Contraste
Appuyez sur la touche ▼ / ▲ pour
sélectionner le Contraste, puis appuyez
Contrast
25
sur la touche◄ / ► pour ajuster.
17
Page 58

MENU D'OPÉRATION
Français
Couleur
Appuyez sur la touche ▼ / ▲ pour
Color
27
sélectionner la couleur, puis appuyez
sur la touche◄ / ► pour ajuster.
Netteté
Sharpness
Appuyez sur ▼ / ▲ pour sélectionner la netteté,
puis appuyez sur la touche◄ / ► pour ajuster.
Teinte
Appuyez sur ▼ / ▲ pour sélectionner la Teinte,
puis appuyez sur la touche◄ / ► pour ajuster.
27
Tint
27
Réglage d'écran
Taille d'Ecran
Appuyez sur la touche ▼/▲ pour sélectionner la Taille d'Ecran, puis appuyez sur la touche ◄ / ►
pour ajuster. Taille d'Ecran disponible: Standard, Wide, Wide Zoom, Zoom.
Température de Couleur
Appuyez sur la touche ENTRER lorsque l'élément de température de couleur met en surbrillance.
Ensuite, appuyez sur la touche ◄ / ► pour ajuster. Température de couleur disponible: Normal,
Warm,Cool.
Color Temperature
Warm
Réglage d'Image avancé
ADVANCED PICTURE SETTINGS
Dynamic Contrast
Film Mode
Noise Reduction
MPEG Noise Reduction
Off
Off
Off
Off
18
MENU
:Return
:Move :Change Setting
Page 59

Contraste Dynamique
MENU D'OPÉRATION
Appuyez sur la touche ▼ / ▲ pour sélectionner la
touche ◄ / ► pour ajuster. Il est possible de régler le
contraste correspondant au signal d'entrée afin d'améliorer
la qualité de l'image affichée. Mode Libre: Marche / Arrêt.
Film Mode
Appuyez sur la touche ▼ / ▲
pour sélectionner
l'élément de Mode Film, puis appuyez sur la
touche ◄ / ► pour ajuster. Il traite de mouvement
3:2 et 2:2. Mode Film disponible: Marche / Arrêt.
Réduction de bruit
Appuyez sur la touche ▼ / ▲ pour sélectionner
l'élément de Réduction de Bruit, puis appuyez sur la
touche ◄ / ►
pour ajuster. Réduction de bruit disponible:
Désactivé, Faible, Moyen, Haut.
Réduction de Bruit MPEG
Appuyez sur la touche ▼ / ▲ pour sélectionner l'élément de
Réduction de Bruit MPEG, puis appuyez sur la touche ◄ / ►
pour ajuster. Elle peut améliorer la qualité d'image en
réduisant le bloc de bruit. Disponible de réduction de bruit
MPEG: Arrêt, Faible, Moyen, Haut.
Dynamic Contrast
Off
Film Mode
Off
Noise Reduction
Off
MPEG Noise Reduction
Off
Français
MENU SON
SOUND
Sound Settings
Surround Mode
AVL
Analog Sound Stereo
Digital Sound English
Digital
Audio Output PCM
Equalizer Settings
MENU
:Return
:Move :Go to Next Menu
Réglage de Son
1.Appuyez ENTRER lorsque l'élément de Réglage de Son est mis en surbrillance, Puis vous irez
à la sous-menu ci-après.
2.Appuyez ▼ / ▲ pour sélectionner la rubrique souhaitée. Appuyez sur ENTRER pour procéder
si nécessaire.
3.Appuyez ◄ / ► pour le niveau souhaité.
4.Lorsque vous avez modifié le
réglage, vous pouvez quitter le menu en appuyant sur MENU.
ENTER
19
Page 60

Français
MENU D'OPÉRATION
SOUND SETTING
Sound Mode User
Bass
Treble
Balance
MENU
:Return
:Move :Change Setting
Mode Son
Appuyez sur la touche ▼ / ▲ pour sélectionner l'élément de Mode Son, puis appuyez sur la
touche ◄ / ► pour ajuster. Ce n'est que dans le mode utilisateur, les options de détail suivantes
peuvent être ajustées. Mode Son disponible: Utilisateur, Dynamique, Standard, Doux.
Basse
Appuyez sur la touche ▼ / ▲ pour sélectionner l'élément Bass, puis appuyez sur la touche ◄ / ►
pour ajuster.
ENTER
Aigus
Appuyez sur la touche ▼ / ▲ pour sélectionner l'élément aigus, puis appuyez sur la touche ◄ / ►
pour ajuster.
Balance
Appuyez sur la touche ▼ /
▲ pour sélectionner l'élément de balance, puis appuyez sur la touche
◄ / ► pour ajuster.
Bass
7
Treble
7
Balance
7
Mode Surround
Appuyez sur la touche ▼ / ▲ pour sélectionner l'élément de Mode Surround, puis appuyez sur la
touche OK pour régler. Il peut placer l'image pour ajuster à l'écran automatiquement. Lorsque la
largeur Auto. est sélectionnée, le symbole s'affichera comme suit:
Surround Mode
20
Page 61

MENU D'OPÉRATION
AVL
Appuyez sur la touche ▼ / ▲ pour sélectionner l'élément AVL, puis appuyez sur ◄ / ► pour
sélectionnerMarche ou ARRET. Le Niveau de Volume Auto. Peut régler le volume automatiquement
en correspondant à l'audio d'entrée.
Son Analogique
Appuyez sur la touche ▼ / ▲ pour sélectionner l'élément de Son analogique préféré, puis appuyez
sur la touche ◄ / ► pour sélectionner l'audio préféré lors du passage à une chaîne analogique.
Son Analogique Disponible: SAP, Stéréo, Mono.
Son Numérique
Appuyez sur la touche ▼ / ▲ pour
sélectionner l'élément de Son Numérique préféré, puis appuyez
sur la touche ◄ / ► pour sélectionner l'audio préféré lors du passage à une chaîne analogique.
Son Numérique Disponible: anglais, français, espagnol.
Sortie Audio Numérique
Appuyez sur la touche ▼ / ▲ pour sélectionner l'élément de Sortie
Audio Numérique, puis appuyez
sur la touche ◄ / ► pour sélectionner la sortie audio numérique. Sortie Audio Numérique Disponible:
PCM,Raw,Off .
Réglage d'Egaliseur
EQUALIZER SETTINGS
Mode Off
-1 2 3 1 0 -1
100-2250 500 1K 2K
MENU
:Return
:Move :Change Setting
4K
10K
Français
Mode d'Egaliseur
Appuyez sur la touche ▼ / ▲ pour sélectionner l'élément de Mode d'Egalisateur, puis appuyez sur
la touche ◄ / ► pour sélectionner le mode souhaitée. Mode d'Egaliseur Disponibles: Arret, Rock,
Pop, Jazz, Utilisateur.
MENU CHAINE
Note: Ce menu ne s'affiche que lorsque la source de sortie est TV.
CHANNEL
Channel List
Favorite List
Channel Setting
Signal Typ e Air
Auto Channel Search Enter
MENU
:Return
:Move :Go to Next Menu
ENTER
21
Page 62

MENU D'OPÉRATION
Liste des Chaînes
Appuyez sur la touche ▼ / ▲ pour sélectionner la liste de chaîne, puis appuyez sur la touche OK
pour numériser la liste de chaînes. Si vous sélectionnez l'élément “Dans la liste de chaînes”
MARCHE, l'étiquette de chaîne sera affichée dans la liste.
Français
Page 1/ 1
ENTER
MENU
Channel List
A4
A11
A14
A63
:Return
:Move :Select
:Page
Liste des Favoris
Appuyez sur la touche ▼ / ▲ pour sélectionner l'élement de Liste des Favoris, puis appuyez sur la
touche OK pour numériser la liste des Favoris.
FAVORITE LIST
No Favorite Channels Present
Please Perform Favorite Channel Add First
Page 1/ 1
MENU
:Return
:Move :Select
:Page
ENTER
Réglage de Chaînes
Appuyez sur la touche ▼ / ▲ pour sélectionner le Réglage de Chaînes Manuel, puis appuyez sur
la touche OK pour définir la valeur dans le sous-menu.
CHANNEL SETTING
Channel Skip Favorice Label
A4
A11
A14
A63
ENTER
22
MENU
:Return
:Cursor/Page :Select
Page 63

Page 64

Français
MENU D'OPÉRATION
V-CHIP
US V-Chip
Canada V-Chip
Block UnRated Show
Downloadable Rating
Clear Downloadable Date
MENU
:Return
:Move :Go to Next Menu
ENTER
V-CHIP US
Appuyez sur la touche ▼ / ▲ pour sélectionner V-Chip US, puis appuyez sur la touche OK pour régler.
Un sous-menu apparaîtra comme suit.
USA
Movie Rating
TV Rating
MENU
:Return
:Move
Rating Film
Appuyez sur la touche ▼ / ▲ pour sélectionner le Rating Film, puis appuyez sur la touche OK pour
régler. Un sous-menu apparaîtra comme suit.
Movie Rating
G
PG
PG-13
R
NC-17
X
MENU
:Return
:Move
ENTER
:Lock/Unlock
Appuyez sur la touche ▼/▲ pour sélectionner le Rating, puis appuyez sur la touche OK pour verrouiller.
24
Page 65

MENU D'OPÉRATION
Rating TV
Appuyez sur la touche ▼ / ▲ pour sélectionner le Rating TV, puis appuyez sur la touche OK pour
régler. Un sous-menu apparaîtra comme suit.
MENU
TV Rating
TV-Y
TV-Y7
TV-G
TV-PG
TV-14
TV-MA
:Return
D L S V FV
:Select
ENTER
:Lock/Unlock
Appuyez sur les touches▼/▲/◄/► pour sélectionner le Rating,puis appuyez sur la touche OK
pour verrouiller.
V-CHIP CANADIEN
Appuyez sur la touche ▼ / ▲ pour sélectionner US V-CHIP, puis appuyez sur la touche OK pour régler.
Un sous-menu apparaîtra comme suit.
CANADA
English Rating
French Rating
English Rating
C
+
C8
G
PG
+
14
18+
Français
MENU
:Return
:Move
MENU
:Return
:Move
ENTER
:Lock/Unlock
French Rating
G
+
8ans
13ans+
16ans+
18ans+
MENU
:Return
:Move
ENTER
:Lock/Unlock
Le fonctionnement du V-CHIP CANADIEN est le même que le fonctionnement du V-CHIP US.
25
Page 66

Français
MENU D'OPÉRATION
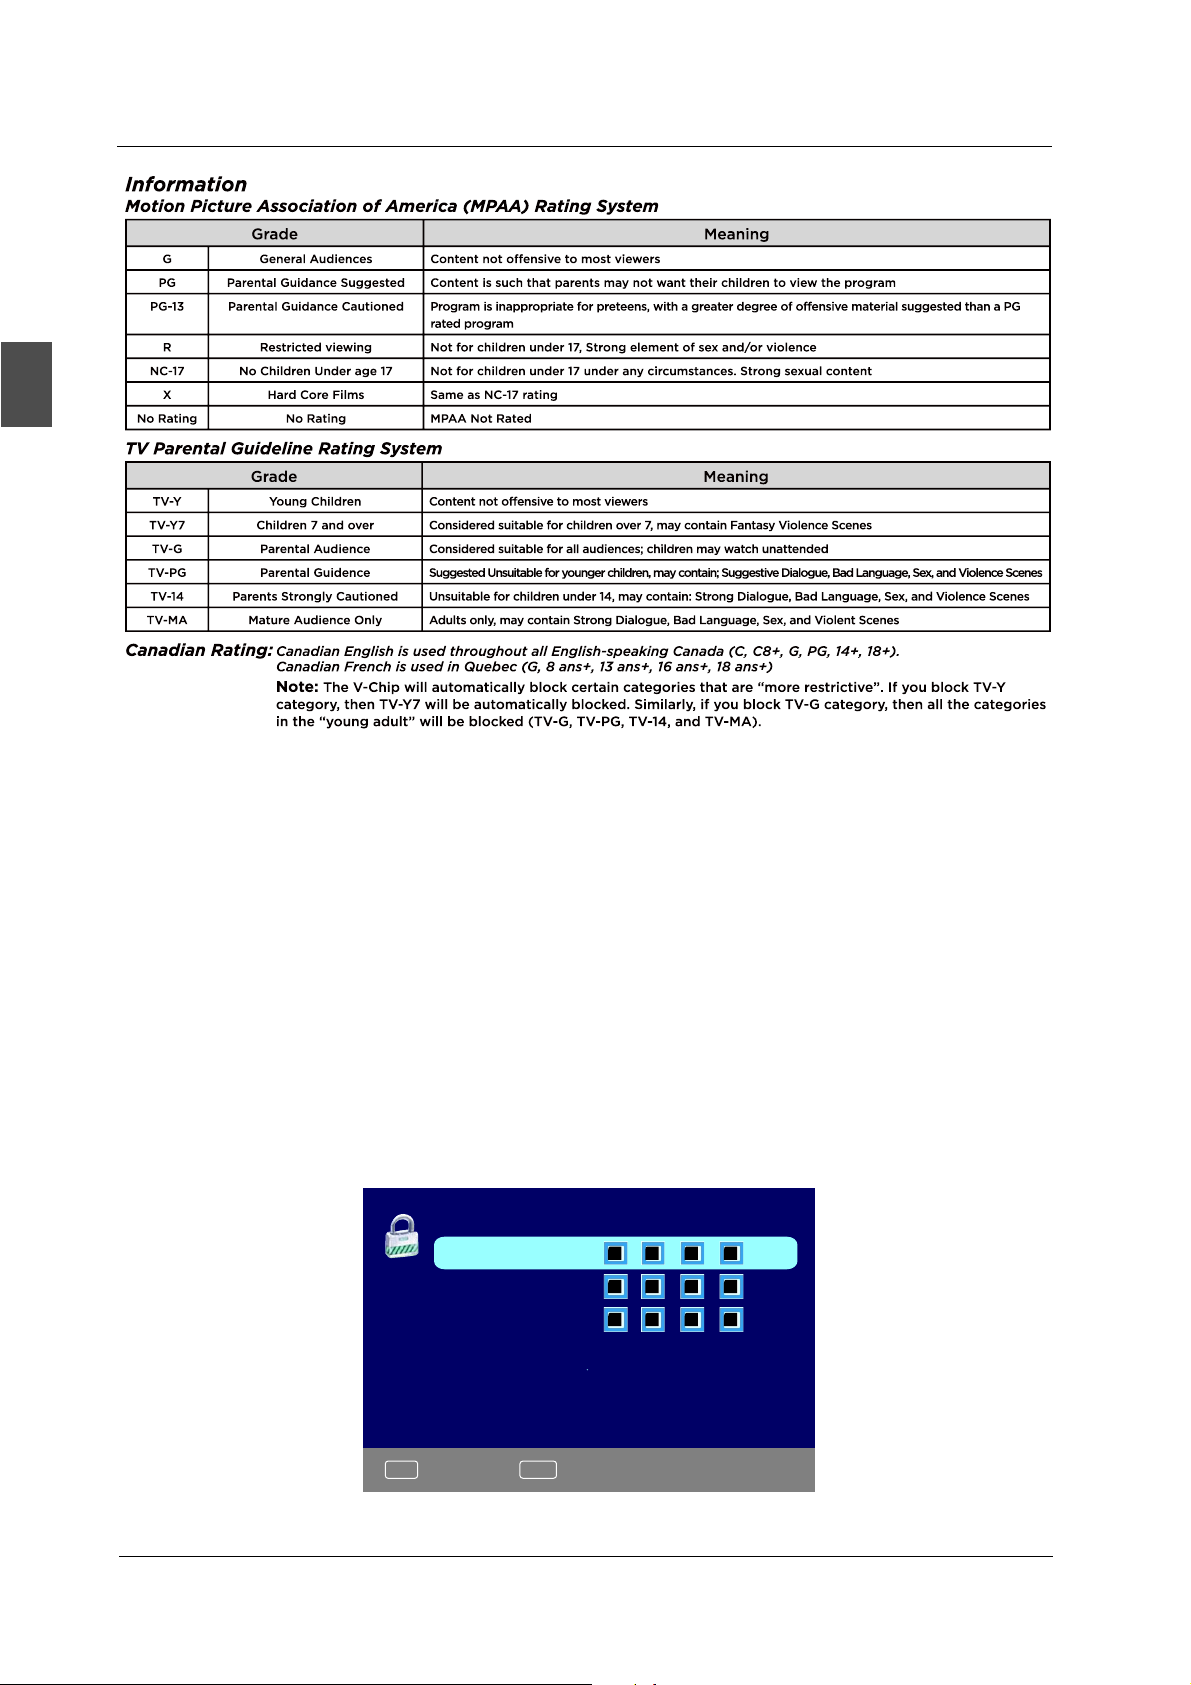
Information
Système de rating de Motion Picture Association of America (MPAA)
Grade
G
PG
PG-13
R
NC-17
X
NONE
Audiences
Surveillance Parentale Recommandée
Fortement Prévenu Par Parents
Restreinte
Nul enfant de 17 ans Nul enfant de
Film dur
Aucun
Convenant à tous les âges.
Certains documents peuvent être inappropriés pour les enfants.
Certains documents seraient inappropriés pour les enfants de moins de 13 ans.
Les enfants moins de 17 ans nécessitant l'accompagnement d'un parent ou d'un tuteur adulte pour
l'affichage dans les cinémas.
17 ans ou moins admis en salle de cinéma.
Même que NC-17
MPAA non évalué
Système de Rating de Surveillance Parentale TV
Grade
TV-Y
TV-Y7
TV-G
TV-PG
Jeune enfants
Enfant plus de 7 ans Convenant aux enfants plus de 17 ans, il peut contenir des scènes violentes fantastiques
Audience parentale
Guide parentale
Contenu qui n'est pas offensif pour la plupart de spectateurs
Convenant à tous les audiences, les enfants peuvent regarder sans surveillance
Pas convenant aux jeunes enfants, il peut contenir Dialogue
Scènes Violentes
Définition
Définition
suggestive, Mouvais Langage, Sexe, et
TV-14
TV-MA
Fortement Prévenu Par Parents
Seule audience mûre
Pas convenant aux enfants moines de 14 ans, il peut contenir Dialogue forte, Mouvais Langage, Sexe, et
Scènes Violentes
Seule pour adultes, il peut contenir Dialogue forte, Mouvais Langage, Sexe, et Scènes Violentes
Rating Canadien: L'anglais canadien est utilisé à tout Canada anglophone, (C, C8+, G, PG, 14+, 18+).
Le français canadien est utilisé à Québec, (G, 8ans+,13ans+,16ans+,18ans+)
bloquez la catégorie TV-Y, et TV-Y7 sera bloqué automatiquement. De la même manière,
Note: V-Chip bloquera automatiquement certaines catégories qui sont « plus restrictives ». Si vous
si vous
bloquez la catégorie TV-G, et toutes les catégories en « jeunes adultes » seront bloquées
automatiquement
(TV-G, TV-PG, TV-14, et TV-MA).
Affichage Sans Block
Appuyer sur la touche ◄ / ► pour sélectionner l'Affichage Sans Block, puis appuyez sur la touche
OK pour définir le rating verrouillé.
Rating téléchargeable
Appuyez sur la touche ▼ / ▲ pour sélectionner le Rating téléchargeable, puis appuyez sur la
touche OK pour régler le
rating. Si le programme DTV ne dispose pas de cette information de
notation, cette option sera en gris.
Effacer Données téléchargeables
Appuyez sur la touche ▼ / ▲ pour sélectionner l'élement d'Effacer Données téléchargeables, puis
appuyez sur la touche OK pour régler le rating. Note: Les deux opérations ci-dessus uniquement
sont valables lors
de la lecture du flux de données téléchargeables. Les opérations sont les mêmes
que US V-CHIP.
CHANGER LE MOT DE PASSE
Appuyez sur la touche ▼ / ▲ pour sélectionner l' élement de Changer le Mot de Passe, puis appuyez
sur la touche OK pour ajuster la valeur. Un sous-menu apparaîtra comme suit. Si le mot de passe est
modifié, tous les mots de passe dans le menu sont changés en même
temps.
26
MENU
Change Password
Old PIN
New PIN
Confirm
:Return
DIGITAL
:Password
Page 67

MENU D'OPÉRATION
Verrouillage de Source
Appuyer sur la touche ▼/▲ pour sélectionner le Verrouillage de Source, puis appuyez sur la touche
OK pour entrer dans le sous-menu. Appuyer sur la touche ▼/▲ pour sélectionner la Source, ensuite
appuyez sur la touche OK pour définir le Verrouillage de Source, vous ne pouvez pas entrer la source
verrouillée si vous avez défini le Verrouillage de Source.
Source Lock
TV
AV
YPbPr
HDMI1
HDMI2
HDMI3
PC
MENU
:Return
:Move
:Page
ENTER
:On/Off
Configuration de Menu
SETUP
Closed Caption
Menu Language English
CLOCK
OSD Timer 5s
Page1/2
Français
MENU
:Return
:Move :Go to Next Menu
ENTER
Sous-titrage Fermé
Appuyez sur la touche▼ / ▲ pour sélectionner l'élément de Sous-titrage fermé, puis appuyez sur
la touche ◄ / ► pour ajuster.
CLOSED CAPTION
MENU
Caption Display
Analog Caption Type
Digital Caption Type
Digital CC Preset
Digital CC Style
:Return
:Move
ENTER
Off
CC1
Service1
Custom
:On/Off
27
Page 68

Français
MENU D'OPÉRATION
Affichage de Sous-titrage
PAppuyez sur la touche ▼ / ▲ pour sélectionner l'Affichage de Sous-titrage, puis appuyez sur la
touche ◄ / ► pour sélectionner MARCHE ou ARRET.
Type de Sous-titrage Analogique
Appuyez sur la touche ▼ / ▲ pour sélectionner
sur la touche ◄ / ► pour sélectionner le type. Type Disponible: CC1, CC2, CC3, CC4, texte1, texte2,
Text3, TEXT4.
Type de Sous-titrage Numérique
Appuyez sur la touche ▼ / ▲ pour sélectionner Type de Sous-titrage Numérique, puis appuyez sur
la touche ◄ / ► pour sélectionner le
type. Type Disponible: Service1 ~ 6.
Préréglage Numérique CC
Appuyez sur la touche ▼ / ▲ pour sélectionner Préréglage Numérique CC, puis appuyez sur la
touche ◄ / ► pour sélectionner Par défaut ou Autodéfinition.
Style Numérique CC
Ce menu est affiché uniquement lorsque le système de Préréglage Numérique CC test l'autoféfinition
sélectionnée.
DIGITAL CC STYLE
CC Size Default
CC Font
CC Opacity
Text Color
CC Background Opacity
CC Background Color
CLOSE CAPTION
le Type de Sous-titrage Analogique, puis appuyez
Default
Default
Default
Default
Default
MENU
:Return
:Move :Change Setting
Taille CC
Appuyez sur la touc he ▼/ ▲ pour sél ect ionner la Taille CC, pui s appuy ez sur la touc he ◄ / ► à déf ini r. Taille
Dispo ni bl e: Pet ite, Standar d, Grande, Par Défaut .
Police de Caractère CC
Appuyez sur la touche ▼ /▲ pour sél ect ionner , puis appuyez sur la touche ◄ / ► pour sél ect ionner la Police
de Car act ère CC. Taille Disponi bl e: Styl e 0 ~ 7. Par Déf aut .
Opacité CC
Appuyez sur la touche ▼ / ▲ pour sélectionner l'Opacité CC, puis appuyez sur la touche ◄ / ► pour
sélectionner l'opacité. Opacité Disponible: Par défaut, Solides, Clignotant, Translucide, Transparent.
Couleur de texte
Appuyez sur la touche ▼ / ▲ pour sélectionner la Couleur de Texte, puis appuyez sur la
touche ◄ / ►
pour sélectionner la couleur. Couleurs disponibles: Par défaut, Noir, Blanc, Rouge,
Vert, Bleu, Jaune, Magenta, Cyan.
Opacité de Fond CC
Appuyez sur la touche ▼ / ▲ pour sélectionner l'Opacité de Fond CC, puis appuyez sur la
touche ◄ / ► pour sélectionner l'opacité. Opacité disponible: Par défaut, Solides, Clignotant,
Translucide, Transparent.
Couleur de Fond CC
Appuyez sur
la touche ▼ / ▲ pour sélectionner la Couleur de Fond CC, puis appuyez sur la
touche ◄ / ► pour sélectionner la couleur. Couleurs disponibles: Par défaut, Noir, Blanc, Rouge,
Vert, Bleu, Jaune, Magenta, Cyan.
28
Page 69

MENU D'OPÉRATION
Menu Langue
Appuyez sur la touche ▼ / ▲ pour sélectionner l'élément de Menu Langue, puis appuyez sur la
touche ◄ / ► pour
ajuster. Disponible Langue: Anglais, français, espagnol.
Horloge
Appuyez sur la touche ▼ / ▲ pour sélectionner l'horloge, puis appuyez sur OK pour modifier.
CLOCK
Time Zone Alaska
Auto Clock
Setup Time 2009-10-21 20:00:00
Day Of Week Wed
Daylight Saving Time
MENU
:Return
:Move : Change Setting
Fuseau Horaire
Appuyez sur la touche ▼ / ▲ pour sélectionner le Fuseau Horaire, puis appuyez sur la
touche ◄ / ► pour régler. Taille disponible: Central, Montagne, Pacifique, Alaska, Hawaii, Samoa,
Terre-Neuve, Atlantique, Orient.
Horloge Auto.
Appuyez sur la touche ▼ / ▲ pour sélectionner
l'Horloge Auto., puis appuyez sur la
touche ENTRER pour MARCHE ou ARRET. Si vous placez-le sur MARCHE, il ajuste le temps
correspondant au temps DTV automatiquement.
Configuration de Temps
Appuyez sur la touche ▼ / ▲ pour sélectionner la Configuration de Temps, et appuyez sur la
touche ◄ / ► pour ajuster le
temps et l'utilisation de la touche ENTRER pour passer à l'élément
suivante.
Jour de Semaine
Cette option affiche le jour de semaine correspondant au temps de configuration.
Heure d'été
Appuyez sur le bouton ▼ / ▲ pour sélectionner l'heure d'été, puis appuyez sur ◄ / ► pour
régler. Format d'Heure: 5s, 10s, 20s, 30s, 40s, 50s, 60s.
Français
MENU
AUTRE MENU
OTHERS
Blue Back
No Signal Power Off
No Operation Power Off
All Reset
:Return
:Move :On/Off
Enter
ENTER
29
Page 70

MENU D'OPÉRATION
Fond Bleu
Appuyez sur la touche ▼ / ▲ pour sélectionner le Fond bleu, puis appuyez sur la touche OK pour
sélectionner, lorsqu'il n'y a pas de signal, que ce soit le réglage le fond en bleu ou non.
Pas de Signal Arrêt
Appuyez sur la touche ▼ / ▲ pour sélectionner l'élement de Pas de Signal Arrêt, puis appuyez sur
la touche OK pour sélectionner Marche ou Arrêt. Lorsque placez-le sur Marche, et il n'y a aucune
entrée de signal dans 10 minutes, il s'éteint le panneau et le voyant LED devient ambre.
Français
Pas d'Opération
Arrêt
Appuyez sur la touche ▼ / ▲ pour sélectionner l'élement de Pas d'Opération Arrêt, puis appuyez
sur la touche OK pour sélectionner Marche ou Arrêt. Lorsque placez-le sur Marche, et il n'y a pas
d'entrée opération dans 3 heures, il s'éteint le panneau et le voyant DEL devient ambre.
Toutes Réinitialisations
Appuyez sur la touche ▼ / ▲ pour sélectionner l'élement de toutes Réinitialisations, puis appuyez
sur la touche OK pour exécuter la réinitialisation. Lorsque vous sélectionnez l'élément de Toutes
Réinitialisations, une boîte de dialogue apparaîtra comme suit:
Attention!
If[All Reset]was executed
TV system is reset.
AV/YPbPr/HDMI1/HDMI2/HDMI3/PC
1. Le Menu IMAGE et la description sont les mêmes que pour la source TV.
2. Le Menu SON et la description sont les mêmes que pour TV.
Mais le Son Analogique et le Son Numérique ne sont pas valides dans ces sources.
3. Le Menu PARENTAL et la
4. Le Menu CONFIGURATION et la description sont les mêmes que pour la source TV.
Mais la création de sous-titrage fermé n'est pas valide dans la source HDMI.
5. AUTRE Menu et la description sont les mêmes que pour
6. Le Menu CHAINE et la description ne sont pas valides dans ces sources.
description sont les mêmes que pour la Source TV V.
la source TV.
30
MENU
MENU D'IMAGE
PICTURE
Picture Settings
Screen Size
PC Settings
Color Temperature Normal
Advanced Picture Settings
:Return
:Move :Go to Next Menu
ENTER
Wide
Page 71

MENU D'OPÉRATION
Régalge d'Image
1. Appuyez ENTRER lorsque l'élément de Réglage d'image est mis en surbrillance. Puis vous irez
à la sous-menu suivant.
2. Appuyez ▼ / ▲ pour sélectionner la rubrique souhaitée. Appuyez sur la touche ENTRER pour
procéder si nécessaire.
3. Appuyez ◄ / ► pour régler l'élément au
4. Lorsque vous avez modifié le réglage, vous pouvez quitter le menu en appuyant sur MENU.
PICTURE SETTINGS
Picture Mode User
Brightness
Contrast
Color
Tint
Sharpness
niveau désiré.
Français
MENU
:Return
:Move :Go to Next Menu
ENTER
Mode Image
Appuyez sur la touche ▼ / ▲ pour sélectionner le Mode Image,
puis appuyez sur la touche ◄ / ► pour ajuster. Mode Image disponibles:
Film, Utilisateur, Dynamique, Standard.
Luminosité
Appuyez sur la touche
▼ / ▲ pour sélectionner la luminosité,
puis appuyez sur la touche ◄ / ► pour ajuster.
Contraste
Appuyez sur la touche ▼ / ▲ pour sélectionner
le Contraste, puis appuyez sur la touche ◄ / ► pour ajuster.
Couleur
Appuyez sur la touche ▼ / ▲ pour sélectionner la Couleur,
puis appuyez sur la touche ◄ / ► pour ajuster.
Brightness
25
Contrast
25
Color
27
Netteté
Appuyez sur la touche ▼ / ▲ pour sélectionner la Netteté,
puis appuyez sur la touche ◄ / ► pour ajuster.
Sharpness
27
31
Page 72

MENU D'OPÉRATION
Réglage d'Ecran
1. Appuyez ENTRER lorsque l'élément de Réglage d'Ecran est mis en surbrillance. Puis vous irez
à la sous-menu suivant.
2. Appuyez ▼ / ▲ pour sélectionner la rubrique souhaitée. Appuyez sur la touche ENTRER pour
procéder si nécessaire.
3. Appuyez ◄ / ►
4. Lorsque vous avez modifié le réglage, vous pouvez quitter le menu en appuyant sur MENU.
pour régler l'élément au niveau désiré.
Français
PICTURE
Picture Settings
MENU
Screen Size
PC Settings
Color Temperature Normal
Advanced Picture Settings
:Return
:Move :Go to Next Menu
ENTER
Wide
Taille d'Ecran
Appuyez sur la touche ▼ / ▲ pour sélectionner la Taille d'écran, puis appuyez sur la touche ◄ / ►
pour ajuster. Taille d'écran disponible: Full,Dot By Dot.
Largeur Auto.
Largeur
Auto. est invalide dans la source PC.
Réglage PC
1. Appuyez ENTRER lorsque l'élément de Réglage PC est mis en surbrillance. Et vous irez le
sous-menu de la manière suivante.
2. Appuyez ▼ / ▲ pour sélectionner la rubrique souhaitée. Appuyez sur la touche ENTRER pour
procéder si nécessaire.
3. Appuyez ◄ / ► pour régler l'élément au niveau désiré.
4. Lorsque vous avez modifié le réglage, vous pouvez quitter le menu en appuyant sur MENU.
PC SETTINGS
Auto Adjust Enter
Horizontal Position
Vertical Position
Clock
Phase
Reset Enter
ENTER
:Press To Enter
32
MENU
:Return
:Move
Page 73

MENU D'OPÉRATION
Réglage Auto.
Appuyez sur la touche ▼ / ▲ pour sélectionner le Réglage Auto., puis appuyez sur la touche OK
pour commencer le réglage auto.
Position Horizontale
Appuyez sur la touche ▼ / ▲ pour sélectionner la Position
Horizontale, puis appuyez sur la touche ◄ / ► pour ajuster.
Position Verticale
Appuyez sur la touche ▼ /
Verticale, puis appuyez sur la touche ◄ / ► pour ajuster.
Horloge
Appuyez sur la touche ▼ / ▲ pour sélectionner l'Horloge,
puis appuyez sur la touche ◄ / ► pour ajuster.
Phase
Appuyez sur la touche ▼ / ▲ pour sélectionner la Phase,
puis appuyez sur la
Réinitialisation
Appuyez sur la touche ▼ / ▲ pour sélectionner la
Réinitialisation, puis appuyez sur la touche OK pour
réinitialiser les options ci-dessus.
▲ pour sélectionner la Position
touche ◄ / ► pour ajuster.
Horizontal Position
25
Vertical Position
25
Clock
25
Phase
25
Français
1. Le Menu Son et la description sont les mêmes que pour TV, mais le
Son Analogique et le Son Numérique ne sont pas valides dans ces sources PC.
2. Le Menu PARENTAL et les descriptions sont les mêmes que pour la source TV.
3. Le Menu CONFIGURATION et la
Mais la création de sous-titrage fermé n'est pas valide dans la source PC.
4. Autre Menu et la description sont les mêmes que pour la source TV.
5. Le Menu CHAINE et la description ne sont pas valides dans
description sont les mêmes que pour la source TV.
la source PC.
Note: L'opération et la description de la touche personnalisée sont
programmables sur votre télécommande.
33
Page 74

DÉPANNAGE
9. Dépannage
Vérifiez si vous pouvez résoudre les problèmes à travers le dépannage par vous-même.
Français
Dépannage
Aucun signal
Aucun nuances
de couleurs
Teinté à l'écran
Image d'affichage
double ou multiple
Neige sur l'écran
La télécommande ne
fonctionne pas
Le fait du
“Zip"
bruit sur le
Contrôle
Vérifiez que tous les câbles sont correctement branchés.
Réglez le contraste, la couleur et la luminosité.
Il peut être le résultat d'un éclairage de la signalisation de la voiture,
moteur, lampe au néon et d'autres dispositifs ou appareils électriques.
Il peut être le résultat d'une onde électrique perturbée
d'ordinateurs et de machines de jeux ou de la radio.
Les câbles de l'antenne ne sont pas correctement branchés.
Vérifiez l'ordre et l'alignement des piles. Vérifiez que IR de la
télécommande n'est pas enfoui par quelque chose.
Même si l'image affichée est correcte, le bruit peut provenir d'une
fixation instable
du panneau.
d'autres TV,
34
Pas de son
Assurez-vous que vous n'avez pas appuyé sur la touche MUET du
panneau ou de la télécommande.
Page 75

42
1920x1080
120W
1022*56*631 mm
1302*325*855 mm
M6*15
15.5
17.8
Page 76

Imprimé en Chine
Page 77

SE421TT
Page 78

Page 79

TABLA DE CONTENIDO
1
2
3
4
INFORMACIÓN
IMPORTANTE
PROLÓGO
PRECAUCIONES Y
SEGURIDAD
EN EL CARTON
Español
5
CONEXIÓN FRONTAL/
TRASERA DE LCD TV
Conexión del cable de alimentación
Conexión de antena
Conexión de AV
6
INSTALACIÓN
DE TV
DIBUJO DE
Conexión Ypbpr( componente)
Conexión VGA (PC)
Conexión COAX
Conexión HDMI
Servicio de función de puerto
7
MANDO A DISTANCIA
Instrucciones del mando a distancia distancia
en
TV modo
Configuración de mando
Asistente de configuración
Seleccione la fuente de entrada
Operación básica
Menú de imagen
8
MENÚ DE
FUNCIONAMIENTO
Menú de sonido
Menú de canal
Control parental
16
16
17
21
23
Menú de configuración
Otro menú
Menú de imagen
9
RESOLUCIÓN DE
PROBLEMAS
10
ESPECIFICACIONES
1
Page 80

Español
INFORMACIÓN IMPORTANTE
El símbolo del rayo con punta de flecha dentro de un triángulo equilátero alerta al usuario
de la presencia de un-"voltaje peligroso" dentro del gabinete del producto, que puede
tener la magnitud suficiente para constituir un peligro de descarga eléctrica.
El símbolo de admiración dentro de un triángulo equilátero alerta al
presencia de importantes instrucciones de mantenimiento (servicio) en la literatura
que acompaña al aparato.
RIESGO DE DESCARGA ELÉCTRICA
NO ABRIR
PRECAUCIÓN
usuario de la
PRECAUCIÓN: El uso de controles, ajustes o el llevar acabo procedimientos distintos a los
especificados aquí puede causar niveles de radiación peligrosos.
PRECAUCIÓN: Estas instrucciones de servicio son para ser usados solamente por personal
cualificado.Para
de las contenidas en el manual de instrucciones a menos que esté calificado para hacerlo.
Consulte el manual de servicio para instrucciones de mantenimiento.
Importantes instrucciones de seguridad
Nota:.
1.Lea las instrucciones.
2.conserve las instrucciones.
3.preste atención a todas las advertencias.
4.obedezca todas las instrucciones.
5.no utilícelo cerca del agua.
6.límpielo sólo con paño seco.
7.no bloquee las aberturas de ventilación. Instálelo de acuerdo con las instrucciones del fabricante.
8.No instale cerca de fuentes de calor tales como radiadores, calefactores, estufas u otros
aparatos (incluyendo amplificadores) que produzcan calor.
9.No anule el propósito de seguridad del enchufe polarizado o de tipo de conexción a tierra. Un
enchufe polarizado tiene dos clavijas, una más ancha que la otra. Un enchufe con puesta a tierra
tiene dos clavijas y una tercera
ancha o la tercera clavija.Si el enchufe suministrado no encaja en su toma de corriente, consulte
con un electricista para que sustituya la toma de corriente obsoleta.
reducir el riesgo de descarga eléctrica, no realice servicios al aparato además
de puesta a tierra. Por seguridad, se proporciona la hoja de contacto
2
Page 81

INFORMACIÓN IMPORTANTE
10.Proteja el cable de alimentación de ser pisado o pinchado, especialmente los enchufes, tomas de corriente y el punto
en donde salen del aparato.
11.Utilice sólo los accesorios especificados por el fabricante.
12.Utilice únicamente la carretilla, plataforma, trípode, soporte o mesa especificados por el fabricante, o suministrados
juntos con el aparato. Cuando utilice un carro, tenga cuidado al mover la combinación carro / aparato para evitar lesiones
por vuelco.
13.Desenchufe este aparato durante tormentas eléctricas o cuando no vaya a utilizar por largos períodos de tiempo.
14.refiera todo servicio a personal cualificado solamente. Se requiere servicio cuando el aparato haya sido dañado de
alguna manera, si el cable de alimentación o el enchufe están dañados, se ha derramado líquido o han caído objetos
dentro del aparato, el aparato ha sido expuesto a
.No se debe exponer el aparato a goteos o salpicaduras, y no se deben poner objetos llenos de líquidos, tales como
15
floreros, sobre el aparato.
16.ADVERTENCIA: Para reducir el riesgo de incendio o una descarga eléctrica, no exponga este aparato a la lluvia o la
humedad.
17.el
enchufe de toma de corriente o un acoplador se utiliza como dispositivo de desconexión, deberá estar operativo.
18.El aparato estará conectado a una fuente de corriente eléctricaq con una conexión a tierra.
lluvia o humedad, no funciona normalmente , o se ha caído.
Español
3
Page 82

PRÓLOGO
2. PRÓLOGO
Gracias por comprar este TV. Por favor, lea este manual atentamente antes de hacer las
operaciones. Asegúrese de que este TV no ha recibido ningún daño en el transporte. Si este TV
ha sido dañado, deje de instalarlo y consulte a su comerciante. Compruebe que tiene todos los
accesorios de acuerdo
con el modelo.
3. PRECAUCIONES Y SEGURIDAD
Español
Minimum distances
10cm
20cm
Ponga el TV en una superficie estable.
No ponga ningún material arriba del TV.
10cm 5cm
No utilice el televisor con los accesorios distintos de los suministrados o
sugeridos por el fabricante.
No cubren los orificios de ventilación del televisor. Si tiene un soporte de
anclaje a la pared, compruebe que es estable.
Cable de alimentación y cable de conexción deben ser correctamente
colocados y protegidos para evitar que las personas tropezen con ellos y se
produzca el vuelco del TV.
4
Page 83

PRECAUCIONES Y SEGURIDAD
Mantega el TV seco y lejos de la humedad.
Mantenga el TV lejos de un calentador
.
Español
Desenchufe el TV antes de limpiarlo. No utilice el solvente O líquido
para limpiarlo.
Sólo limpie el TV con un paño seco y limpio.
En caso de solución de problemas, no utilice las piezas de respuestos
que no sean sugeridas por el fabricante. Utilizando las piezas de
respuestos no adecuadas pueden
dar lugar a descargas eléctricas,
cortos circuitos, incendio u otros accidentes.
Desenchufe el TV durante las tormentas eléctricas o cuando no lo
utiliza durante largos períodos de tiempo.
5
Page 84

123
456
789
0
PICTURE SOUND SLEEP DISPLAY
VOL+
MUTE
VOL-
EXIT
OK
ENTER
CC
MTS
ASPECT
INPUT
CH+
CH-
MENU
FAV
HDMI CABLE
Page 85

Encendido/
apagado LED
1. Pulse INPUT para seleccionar la fuente de entrada.
2. Pulse el "menú" para que aparezca el menú principal
en la pantalla.
3. Pulse"CH "o"CH "para seleccionar los canales.
4. Pulse "VOL+ "o "VOL-" para aumentar o bajar el volumen.
5. Pulse el botón "POWER para encender o apagar el TV.
6. Remote sensor:Cuando TV se conecta con la alimentación
de energía, la luz azul se enciende. Cuando TV se
desconecta con la alimentación de energía, la luz roja se
enciende. Cuando se apaga el interruptor de potencia,
no luz se enciende.
7."Power indicator" muestra de color rojo en el modo de
espera. Cuando el TV está encendido, muestra de color
rojo o verde.
Page 86

Page 87

DIBUJOS DE INSTALACIÓN DE TV
VIDEO R L
CONEXIÓN DE AV
Conecta la toma de salida de VIDEO y AUDIO de DVD o VCR con la toma de VIDEO en el set
utilizando el cable RCA. Coincide color con la toma: Video es amarillo, audio izquierdo es blanco
y audio derecho es rojo. Selecciona la fuente de entrada de AV utilizando el
en el mando a distancia.
botón de SOURCE
Parte atras de TV
Cable de video
VIDEO R L
AUDIO cable
Parte atras DVD o VCR
DVD o VCR
CONEXIÓN DE COMPOTENTE(Ypbpr)
Conecta la salida Ypbpr de DVD o VCR con la entrada Ypbpr en el set. La calidad de imagen es
mejor en comparación con la conexión de un VCR regular con la entrada de vídeo. Conecta la
salida de audio de DVD o VCR con la toma de entrada de audio
Coincide color con la toma: Y es verde, pb es azul, pr es rojo, audio izquierda es blanco y audio
derecha es rojo. Selecciona la fuente de entrada de componente utilizando el botón SOURCE en
el mando a distancia.
en el set utilizando el cable RCA.
Español
YPbPr cable
Pb
Y
DVD o VCR
parte atras de TV
AUDIO cable
Pr LR
Parte atras DVD o VCR
9
Page 88

DIBUJOS DE INSTALACIÓN DE TV
COAX
CONEXIÓN VGA(PC)
Conecta la salida de RGB de PC con la toma VGA(PC) en el set. Conecta la salida de audio de
PC con la toma AUDIO PC en el set. Seleccione la fuente de entrada RGB utilizando el botón
SOURCE en el mando a distancia.
Español
Parte atras de TV
Audio Cable
VGA Cable
AUDIO RGB-PC OUTPUT
CONEXIÓN COAX
Conecta el dispositivo amplificador de audio con la toma de salida COAX en el TV.
10
Parte atras de TV
COAX Cable
the audio amplifier back
Amplificador de audio
Page 89

DIBUJOS DE INSTALACIÓN DE TV
CONECIÓN HDMI
Conector HDMI, que sustituye la conexión HDMI permite la transferencia de audio / vídeo
/ señales de control a través de cable. estas señales se transmiten en formato digital.
Parte atras de TV
HDMI Cable
Español
Servicio de la función de puerto
Servicio de puerto( para el uso en fábrica sólo)
parte atras de DVD
Parte atras de TV
USB Cable
11
Page 90

INPUT
123
456
789
0
PICTURE SOUND SLEEP DISPLAY
VOL+
VOL-
EXIT
CC
MUTE
OK
ENTER
MTS
MENU
ASPECT
FAV
CH+
CH-
POTENCIA
Encender o apagar el LCD TV.
ENTRADA
Pulse INPUT para demostrar el fuente de entrada de OSD.
Pulse para seleccionar un fuente de entrada y luego
pulse OK para confirmar..
TECLADO ALFANUMÉRICO
Pulse directamente 0-9 para cambiar los canales.
Presione este boton para entrar en un programa de
canal con un número múltiple, tales como 2-1, etc.
Volver al canal visto anteriormente.
IMAGEN
Seleccionar el modo de imagen.
SONIDO
Seleccionar el modo de sonido.
SUEÑO
Definir el temporizador de sueño.
DISPLAY
Pulse para mostrar la fuente y la información de los
canales.
MENU
Aparecen el menú principal de TV en la pantalla.
EXIT
Salir del menú principal de TV en la pantalla.
MUTE
Pulse para apagar el sonido. Pulse otra vez o pulse
VOL+ para encender el sonido de TV.
VOL+/VOLPulse para aumentar o bajar el nivel de volumen.
7+80%67,&.ŸźŻŹ2.
Te permite navegar por los menús en pantalla y ajustar el
sistema según tu preferencia.
CC
Pulse para visualizar los subtítulos.
MTS
Pulse para ajustar entre los canales de audio disponibles.
ASPECT
Pulse para seleccionar el ratio de aspecto.
FAV
Pulse para visualizar el favorito de televisión en lista de
programas.
Page 91

Page 92

Español
OPERACIÓN MENÚ
8.Operación Menú
Asistente de configuración
Seleccione el idioma
Selecciona el idioma que quieres.
Select Language
Welcome to the SEIKI HDTV Setup Wizard.Follow this guide to
help setup your HDTV for scanning channels or accessing your
external devices for Antenna,Set- top Box, Blu-ray, DVD, Games
and other player.
Use the up and down arrows on your remote control TV keypad
to select the
language of screen menu and message
English
French
Spanish
:Move :Press to Enter
ENTER
Enter
Enter
Enter
Huso horario
Modo de encendido
Time zone
Use the left and right arrows on your remote control to select
your local time zone .
Time zone
Eastern
Next
MENU
:Return
:Move :Change Setting
Power On Mode
Home optimizes the standard video setting for ENERGY
STAR@ qualification.
Retail Mode optimizes the video setting for use on a retail
showroom floor or demo environment.
Use the up/down key arrows on you remote control or TV
keypad to select power on mode.
Home Mode(Energy Saving)
Retail Mode
14
MENU
:Return
:Move
ENTER
:Press to Enter
Page 93

Stop Auto Channel Search Skip
Stop Auto Channel Search Skip
Page 94

INPUT
Page 95

OPERACIÓN MENÚ
Menú de imagen
PICTURE
Picture Settings
Screen Size
PC Settings
Color Temperature Normal
Advanced Picture Settings
MENU
:Return
:Move :Go to Next Menu
ENTER
Configuración de imagen
1.Pulse ENTER cuando la configuración de imagen está marcada. Despúes puedes ir al
submenú como lo siguiente.
2.Pulse el botón ▼/▲ para seleccionar el menú deseado. Pulse ENTER para proceder si es necesario.
3.Pulse el botón ◄/► para seleccionar el nivel deseado.
4.Cuando se haya cambiado
la configuración, puede salir del menú pulsando MENÚ.
Wide
Español
PICTURE SETTINGS
Picture Mode User
Brightness
Contrast
Color
Tint
Sharpness
MENU
:Return
:Move :Go to Next Menu
ENTER
Modo imagen
Pulse el botón ▼/▲ para seleccionar el modo imagen, despúes pulse el botón ◄/► para ajustarlo.
Sólo en el modo de usuario, la opción de detalles como la siguiente puede ser ajustada.Modo de
imagen disponible: usuario, dinámico, estándar, película.
Brillo
Pulse el botón ▼/▲ para seleccionar el brillo,
despúes pulse el botón ◄/► para ajustarlo.
Brightness
25
Contraste
Pulse el botón ▼/▲ para seleccionar el contraste,
despúes pulse el botón ◄/► para ajustarlo.
Contrast
25
17
Page 96

OPERACIÓN MENÚ
Español
Color
Pulse el botón ▼/▲ para seleccionar el color,
Color
27
despúes pulse el botón, ◄/► para ajustarlo.
Nitidez
Pulse el botón ▼/▲ para seleccionar el nitidez,
despúes pulse el botón ◄/► para ajustarlo.
Sharpness
27
Tinte
Pulse el botón ▼/▲ para seleccionar el tinte,
despúes pulse el botón ◄/► para
ajustarlo.
Tint
27
Configuración de pantalla
Tamaño de pantalla
Pulse el botón ▼/▲ para seleccionar el tamaño de pantalla, despúes pulse el botón ◄/► para
ajustarlo.Tamaño de pantalla disponible: Normal, WaterGlass, Cinema, Full.
Temperatura de color
Pulse ENTER cuando la temperatura de color está marcada. Despúes pulse el botón ◄/►
para ajustarlo.
Temperatura de color disponible: fresco, normal, cálido.
Color Temperature
Warm
Configuración avanzada de imagen
ADVANCED PICTURE SETTINGS
Dynamic Contrast
Film Mode
Noise Reduction
MPEG Noise Reduction
Off
Off
Off
Off
18
MENU
:Return
:Move :Change Setting
Page 97

Contraste dinámico
OPERACIÓN MENÚ
Pulse el botón para seleccionar el botón ▼/▲ ◄/►para ajustarlo.
puede ajustar el contraste correspondiente a la señal de entrada
con el fin de mejorar la calidad de imagen mostrada.
Modo disponible: encendido/ apagado.
Modo película
Pulse el botón ▼/▲ para seleccionar el modo Película. despúes
pulse el botón◄/► para ajustarlo. manejan la tracción 3:2 y 2:2.
Modo película disponible: encendido/ apagado.
Reducción de ruido
Pulse el botón ▼/▲ De ruido,
para seleccionar la
reducción
despúes pulse el botón ◄/► para ajustarlo. reducción de ruido
disponible: apagado, bajo, medio, alto.
Reducción de ruido MPEG
Pulse el botón ▼/▲ para seleccionar la reducción
De ruido MPEG, despúes pulse el botón ◄/► para
ajustarlo.pueden mejorar la calidad de imágenes mediante
la reducción del ruido de bloque.reducción de ruido MPEG
disponible: apagado, bajo, medio, alto.
Dynamic Contrast
Off
Film Mode
Off
Español
Noise Reduction
Off
MPEG Noise Reduction
Off
Menú de sonido
SOUND
Sound Settings
Surround Mode
AVL
Analog Sound Stereo
Digital Sound English
Digital
Audio Output PCM
Equalizer Settings
MENU
:Return
:Move :Go to Next Menu
Configuración de sonido
1.Pulse ENTER cuando la configuración del sonido está marcada. Entonces, usted va al
como lo siguiente.
2.Pulse el botón ▼/▲ para seleccionar el menú deseado. pulse ENTER para proceder si es necesario.
3.Pulse ◄/► al nivel deseado.
4.Cuando se haya cambiado la configuración, puede salir del menú pulsando MENÚ.
ENTER
submenú
19
Page 98

OPERACIÓN MENÚ
SOUND SETTING
Sound Mode User
Bass
Treble
Balance
Español
MENU
:Return
:Move :Change Setting
ENTER
Modo de sonido
Pulse el botón ▼/▲para seleccionar el modo de sonido. despúes pulse el botón ◄/► para
ajustarlo.sólo en el modo de usuario, la operación de detalles como lo siguiente puede ser
ajustada.modo de sonido disponible: usuario, dinámico, estándar, suave.
BASS
Pulse el botón ▼/▲ para seleccionar BASS, despúes pulse el botón ◄/► para ajustarlo.
Triple
Pulse el botón ▼/▲ para seleccionar triple, despúes pulse el botón ◄/► para ajustarlo.
Balance
Pulse el botón ▼/▲ para seleccionar Balance, despúes pulse el botón ◄/► para ajustarlo.
Bass
7
Treble
7
Balance
7
Modo de sonido envolvente
Pulse el botón ▼/▲ para seleccionar el modo de sonido envolvente, despúes pulse el botón OK
para ajustarlo.
Se puede configurar que la imagen se adapte a la pantalla automáticamente.
Cuando el ancho automático está seleccionado, el símbolo se verá como lo siguiente.
Modo envolvente
20
Page 99

OPERACIÓN MENÚ
AVL
Pulse el botón ▼/▲ para seleccionar AVL, despúes pulse el botón ◄/► para seleccionar
encendido o apagado. nivel de auto volumen puede ajustar el volumen automáticamente
correspondiente a la entrada
de audio.
Sonido analógico
Pulse el botón ▼/▲ para seleccionar el sonido analógico preferido. Despúes pulse el botón ◄/►
para seleccionar el audio preferido al cambiar a un canal analógico Sonido analógico disponible:
SAP, Estéreo, Mono.
Sonido digital
Pulse el botón ▼/▲ para seleccionar el sonido digital preferido. Despúes pulse el botón ◄/►
seleccionar el audio preferudo al cambiar a un canal digital Sonido digital disponible: inglés,
para
francés, español.
Salida de audio digital
Pulse el botón ▼/▲ para seleccionar la salida de audio digital, despúes pulse el botón ◄/► para
seleccionar la salida de audio digital deseada. Salida de audio digital disponible: Dolby Digital,
apagado, PCM.
Configuración de ecualizador
Español
EQUALIZER SETTINGS
Mode Off
-1 2 3 1 0 -1
100-2250 500 1K 2K
MENU
:Return
:Move :Change Setting
4K
10K
Modo ecualizador
Pulse el botón ▼/▲ para seleccionar el modo ecualizador, despúes pulse el botón ◄/► para
seleccionar el modo deseado.Modo ecualizador disponible: apagado, el rock, el pop, el jazz, el usuario.
Menú de canal
Menú de canal este menú aparece cuando la fuente de entrada es TV.
CHANNEL
Channel List
Favorite List
Channel Setting
Signal Typ e Air
Auto Channel Search Enter
MENU
:Return
:Move :Go to Next Menu
ENTER
21
Page 100

OPERACIÓN MENÚ
Lista de canal
Pulse el botón▼/▲ para seleccionar la lista de canal, y pulse OK para explorar la lista de canales.
si seleccione la opción ¨in channel list¨, la etiqueta de canal aparecerá en la lista.
Español
Page 1/ 1
ENTER
MENU
Channel List
A4
A11
A14
A63
:Return
:Move :Select
:Page
Lista favorita
Pulse el botón ▼/▲ para seleccionar la lista favorita, y pulse el botón OK para explorar la lista
favorita de canales.
FAVORITE LIST
No Favorite Channels Present
Please Perform Favorite Channel Add First
Page 1/ 1
MENU
:Return
:Move :Select
:Page
ENTER
Configuración de canales
Pulse el botón ▼/▲ para seleccionar configuración manual de canales, y pulse el botón OK para
establecer el valor en el submenú.
22
CHANNEL SETTING
Channel Skip Favorice Label
A4
A11
A14
A63
MENU
:Return
:Cursor/Page :Select
ENTER
 Loading...