

Page 1

LCD Television
SC322TI
Page 2

Page 3

TABLE OF CONTENTS
1
2
I M P O R TA N T
INFORMATION
PREFACE
2
4
English
3
4
5
6
SAFETY
PRECAUTIONS
IN THE CARTON
FRONT/BACK
CONNECTIONS
OF LCD TV
TV INSTALLATION
DRAWINGS
Power Cord Connection
Antenna Connection
AV Connection
YPbPr(component) Connection
VGA(PC) Connection
COAX Connection
HDMI Connection
Service Port Function
4
6
7
8
8
9
9
10
10
11
11
7
8
9
10
REMOTE CONTROL
MENU OPERATION
TROUBLESHOOTING
SPECIFICATIONS
Remote control instructions in TV mode
Remote control setup
Setup Wizard
Select Input Source
Basic Operation
Picture Menu
Sound Menu
Channel Menu
Parental Control
Setup Menu
Other Menu
Picture Menu
12
13
14
16
16
17
19
21
23
27
29
30
34
35
1
Page 4
IMPORTANT INFORMATION
English
The lightning flash with arrowhead symbol, within an equilateral triangle, is intended to
alert the user to the presence of un-insulated dangerous voltage within the products
enclosure that may be of sufficient magnitude to constitute a risk of electric to persons.
The exclamation point within an equilateral triangle is interded to aler the user to the
presence of important operating and maintenance (servicing) instruction the literature
accompanying the appliance.
CAUTION: USE OF ANY CONTROLS, ADJUSTMENTS, OR PROCEDURES OTHER THAN
THOSE SPECIFIED HEREIN MAY RESULT IN HAZARDOUS RADIATION EXPOSURE.
CAUTION: These servicing instructions are for use by qualified service personnel only. To reduce
the risk of electric shock, do not perform any servicing other than that contained in the operating
instructions unless you are qualified to do so.
Refer to service manual for servicing instructions.
ENERGY STAR Qualification.
This SEIKI product has earned the ENERGY STAR for meeting U.S. Federal energy efficiency guidelines as set
by the Department of Energy and Environmental protection agency.
The ENERGY STAR program exists to provide energy saving guidelines and help promote energy efficient products
and practices. Changes to certain features, settings and functions of this TV can change and/or increase its power
consumption.
Home Mode is the mode in which the product qualifies for ENERGY STAR .
Retail Model optimizes the video effects when use at a retail showroom or demo environment. This mode the video
setting may increase energy consumption beyond the limits required for ENERGY STAR qualification.
Important Safety Instructions
Note:
1.Read these instructions.
2.Keep these instructions.
3.Heed all warnings.
4.Follow all instructions.
2
Page 5
IMPORTANT INFORMATION
5.Do not use near water.
6.Clean only with dry cloth.
7.Do not block any ventilation openings. Install in accordance with the manufacturer's instructions.
8.Do not install near any heat sources such as radiators, heat registers, stoves, or other apparatus
(including amplifiers) that produce heat.
9.Do not defeat the safety purpose of the polarized or grounding-type plug. A polarized plug has
two blades with one wider than the other. A grounding type plug has two blades and a third
grounding prong. The wide blade or the third prong are provided for your safety. If the provided
plug does not fit into your outlet, consult an electrician for replacement of the obsolete outlet.
10.Protect the power cord from being walked on or pinched particularly at plugs, convenience
receptacles, and the point where they exit from the apparatus.
11.Only use attachments / accessories specified by the manufacturer.
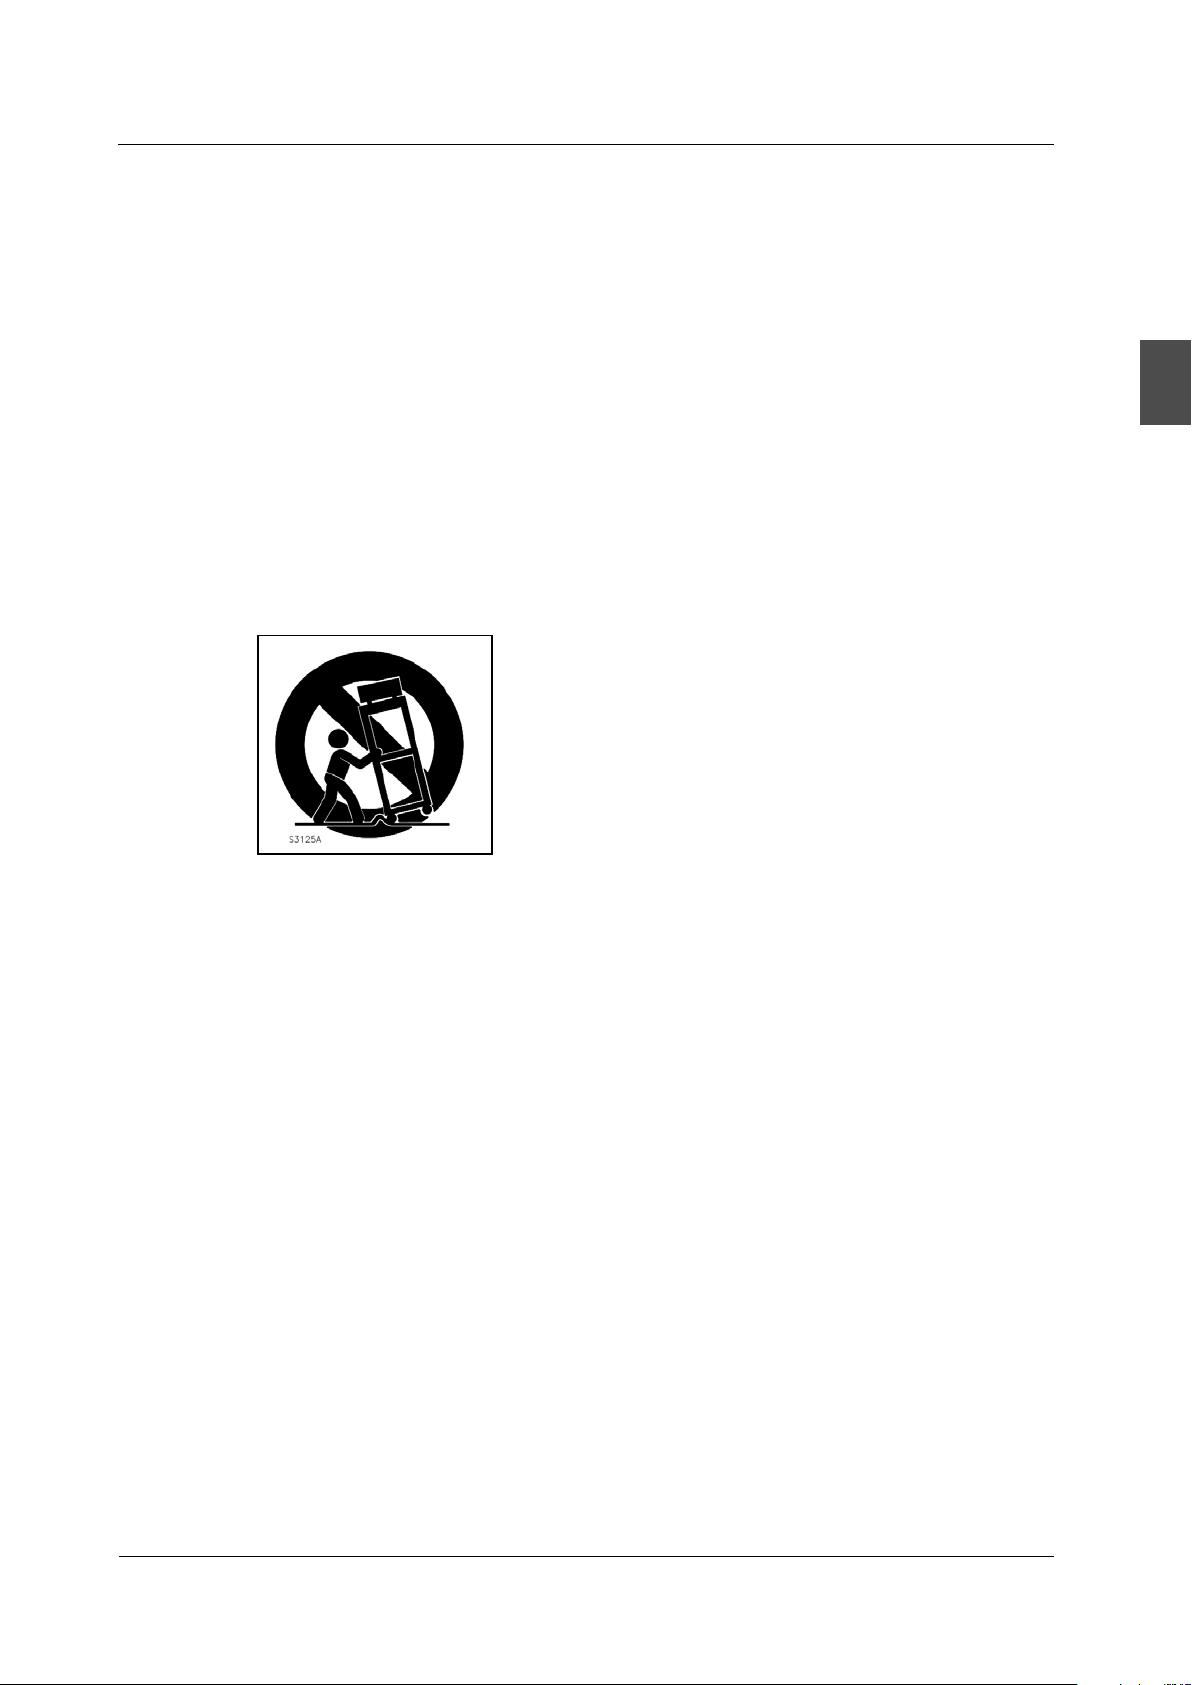
12.Use only with the cart, stand, tripod, bracket, or table specified by the manufacturer, or sold with
the apparatus. When a cart is used, use caution when moving the cart / apparatus combination
to avoid injury from tip-over.
English
13.Unplug this apparatus during lightning storms or when unused for long periods of time.
14.Refer all servicing to qualified service personnel. Servicing is required when the apparatus has
been damaged in any way, such as power-supply cord or plug is damaged, liquid has been spilled
or objects have fallen into the apparatus, the apparatus has been exposed to rain or moisture,
does not operate normally, or has been dropped.
15.Apparatus shall not be exposed to dripping or splashing and that no objects filled with liquids,
suchas vases, shall be placed on the apparatus.
16.WARNING:To reduce the risk of fire or electric shock, do not expose this apparatus to rain or moisture.
17.Mains plug or appliance coupler is used as the disconnect device, shall be readily operable.
18.The apparatus shall be connected to a MAINS socket outlet with a protective earthing connection.
3
Page 6
PREFACE
2. PREFACE
Thank you for buying this Please read this manual thoroughly before operating the TV.
TV!
Make sure the TV was not damaged in transit. Should the TV be damaged, do not install it and
contact your dealer. Check that you have all the accessories according to the model.
English
3. SAFETY PRECAUTIONS
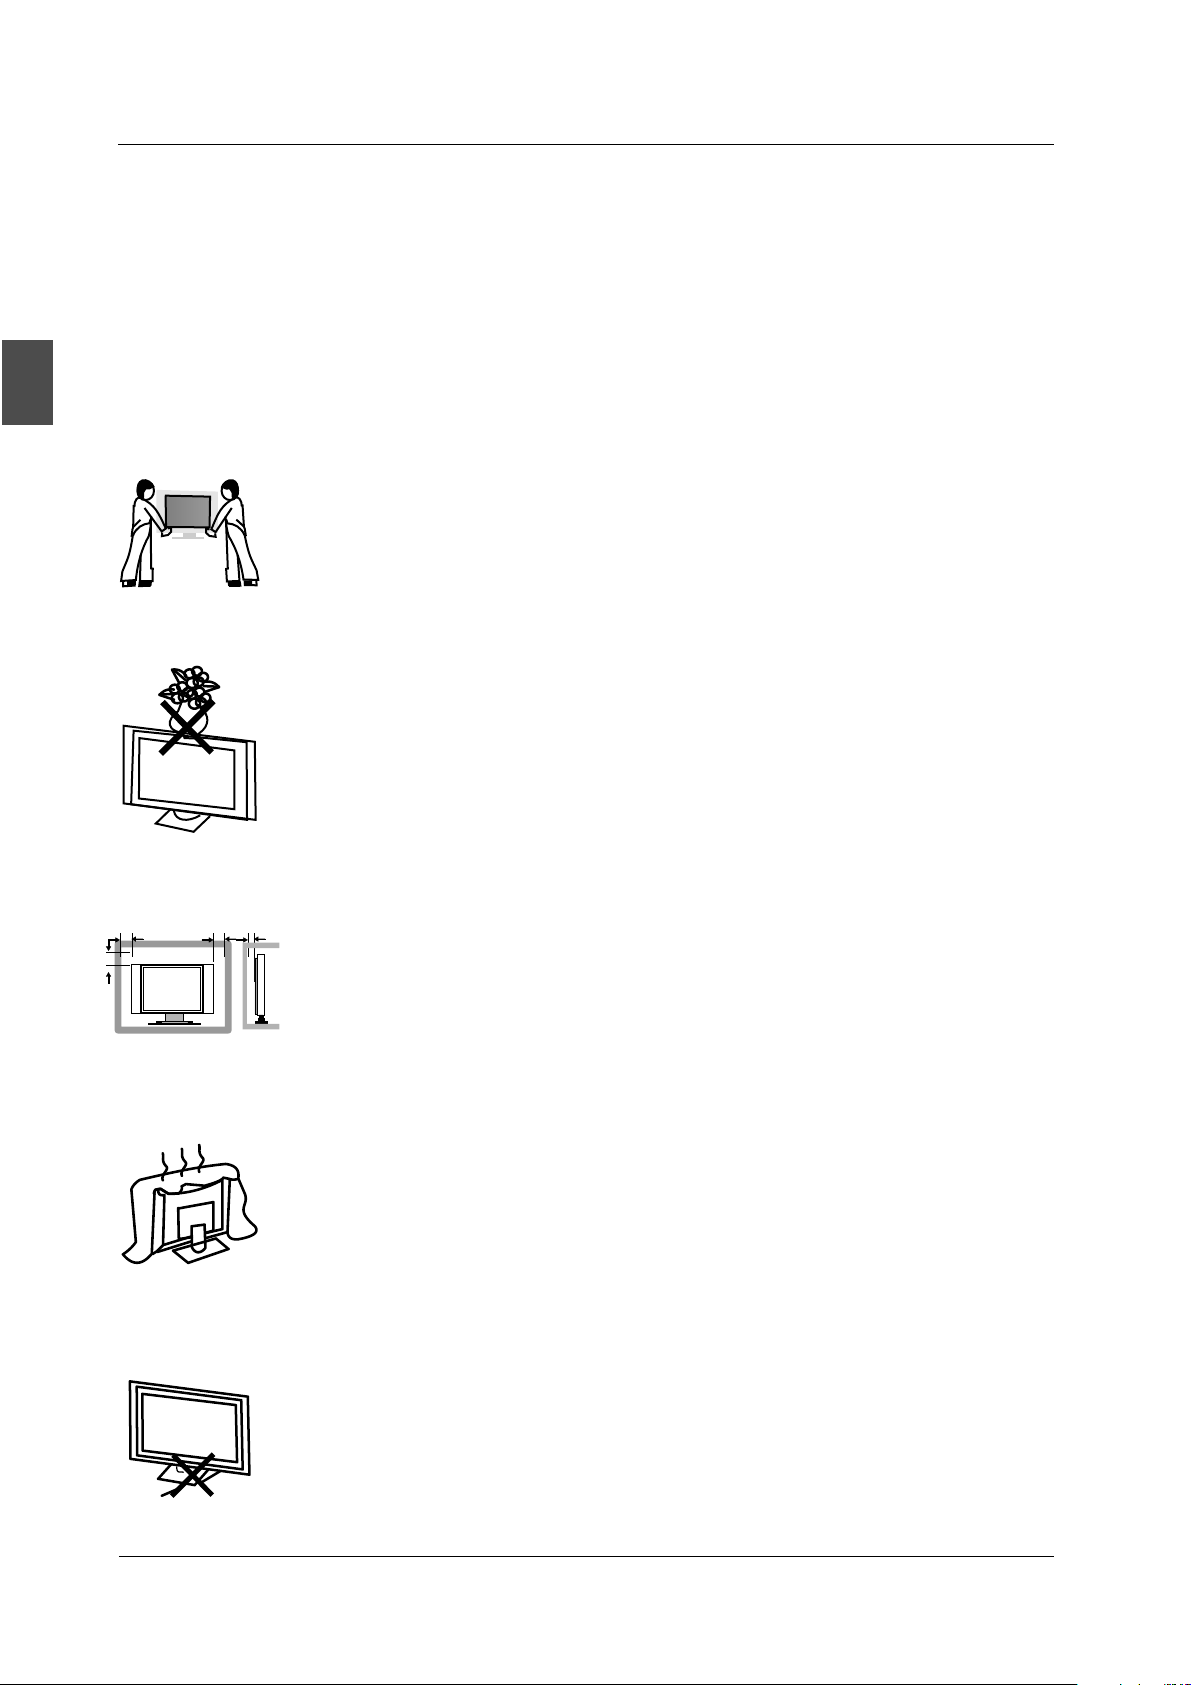
Put the TV on a stable surface.
Do not place any material on the TV.
Min imum dis tance s
10c m
20c m
10c m 5cm
Do not use the TV with fixtures other than those provided or
suggested by the manufacturer.
Do not block or cover the ventilation openings on the TV.
If you have a wall mount, check that it is steady.
Power cord and cables must be properly routed and protected to prevent
people from stepping on them and causing the TV to fall.
4
Page 7
SAFETY PRECAUTIONS
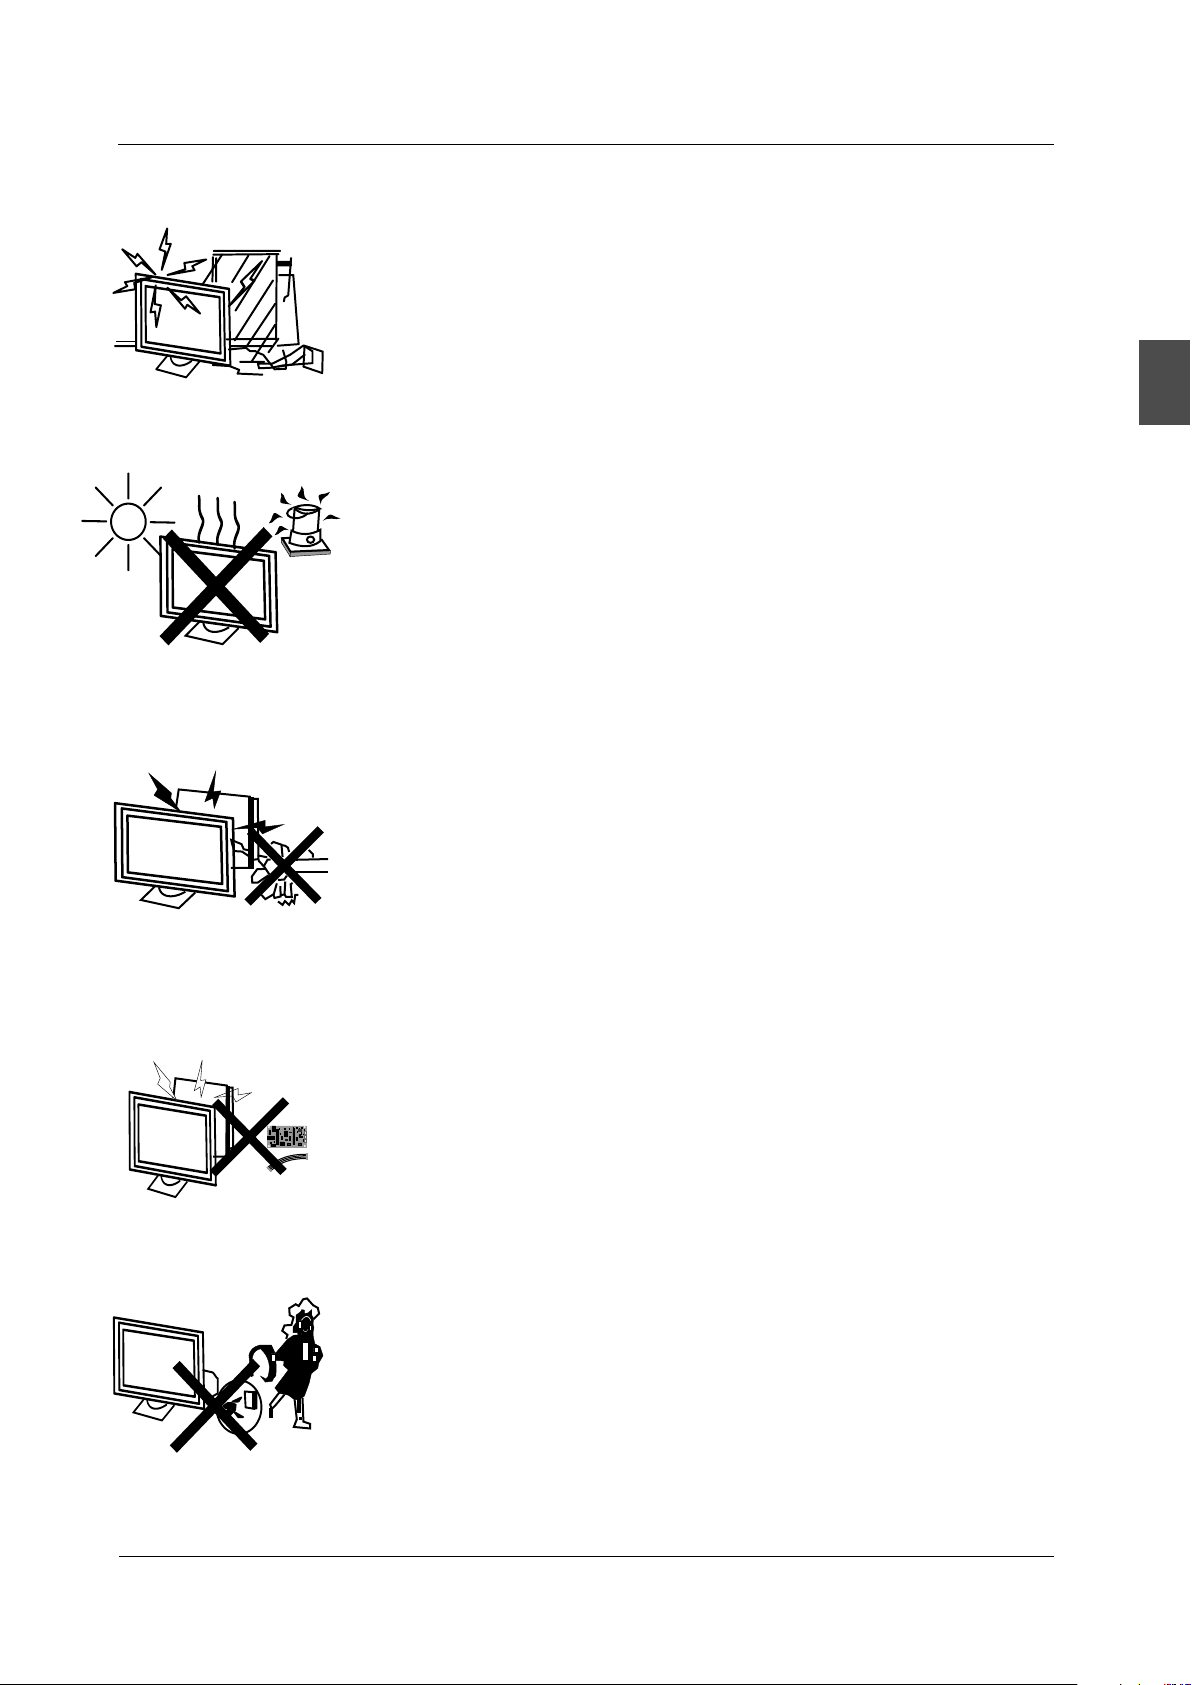
Keep the TV dry and away from humidity.
Keep the TV away from heat sources.
Unplug the TV before cleaning it. Do not use solvent or liquid to clean
the TV.
Only clean the TV with a soft and dry cloth.
English
In case of troubleshooting, do not use spare parts other than those
suggested by the manufacturer. Using inadequate spare parts can
lead to electric shocks, short-circuits, fire or other incidents.
Unplug the TV during lightning storms or when unused for long periods
of time.
5
Page 8
IN THE CARTON
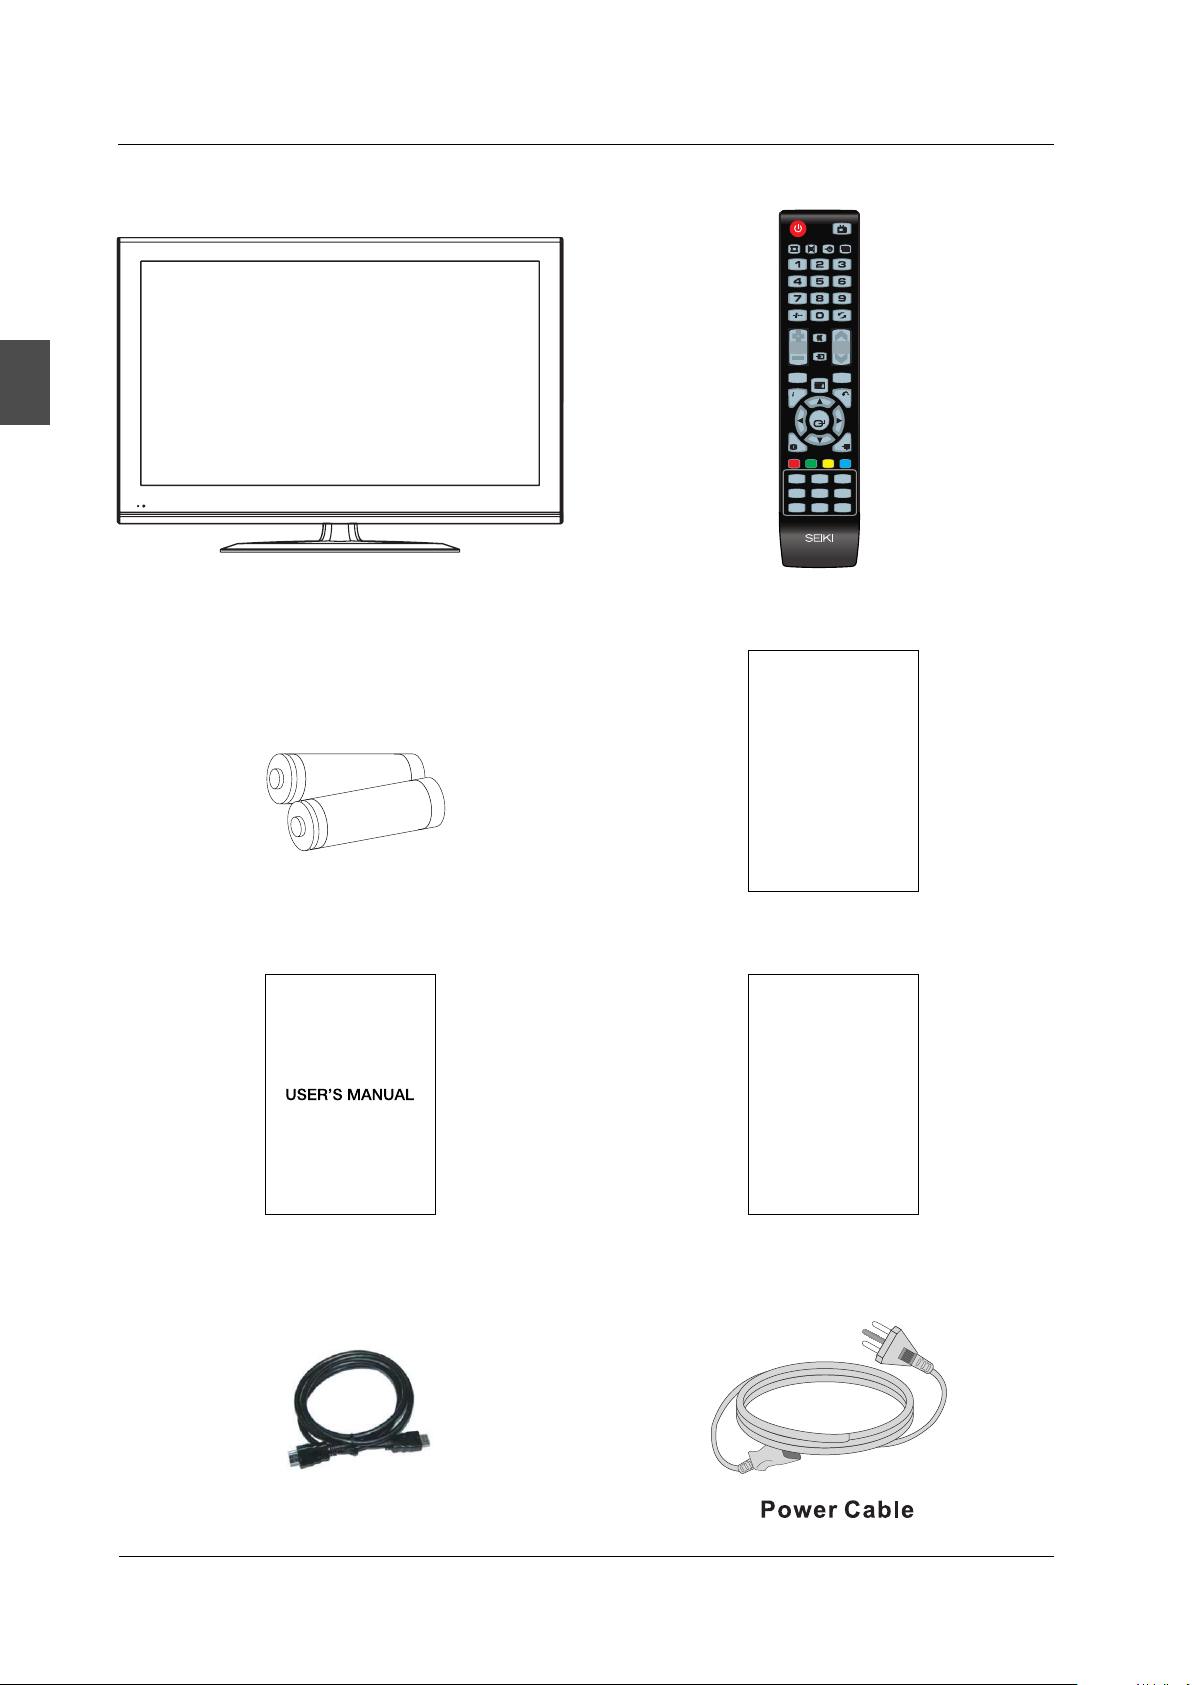
4. IN THE CARTON
POWER
TV
P.MODE S.MODE SLE EP ASPECT
English
TV SET
HD
Remote Control
1.5V
V
.5
1
MUTE
VOL CH
SOURCE
MENU
MTS C.C
R
Y
E
A
T
L
UR
P
S
N
DI
ENTER
C
H
T
.
I
LI
X
S
E
T
D
ABC
FAV.+
V-CHIP
FAV.CH
ADD/ERASE
FAV.-
AUTO
COMP
VGA
HDMI
SRC11-49 A
Warranty Card
AAA Batteries
USER'S MANUAL
Warranty Card
Qui ck Co nnect Gui de
Quick Connect Guide
HDMI Cable
6
Page 9
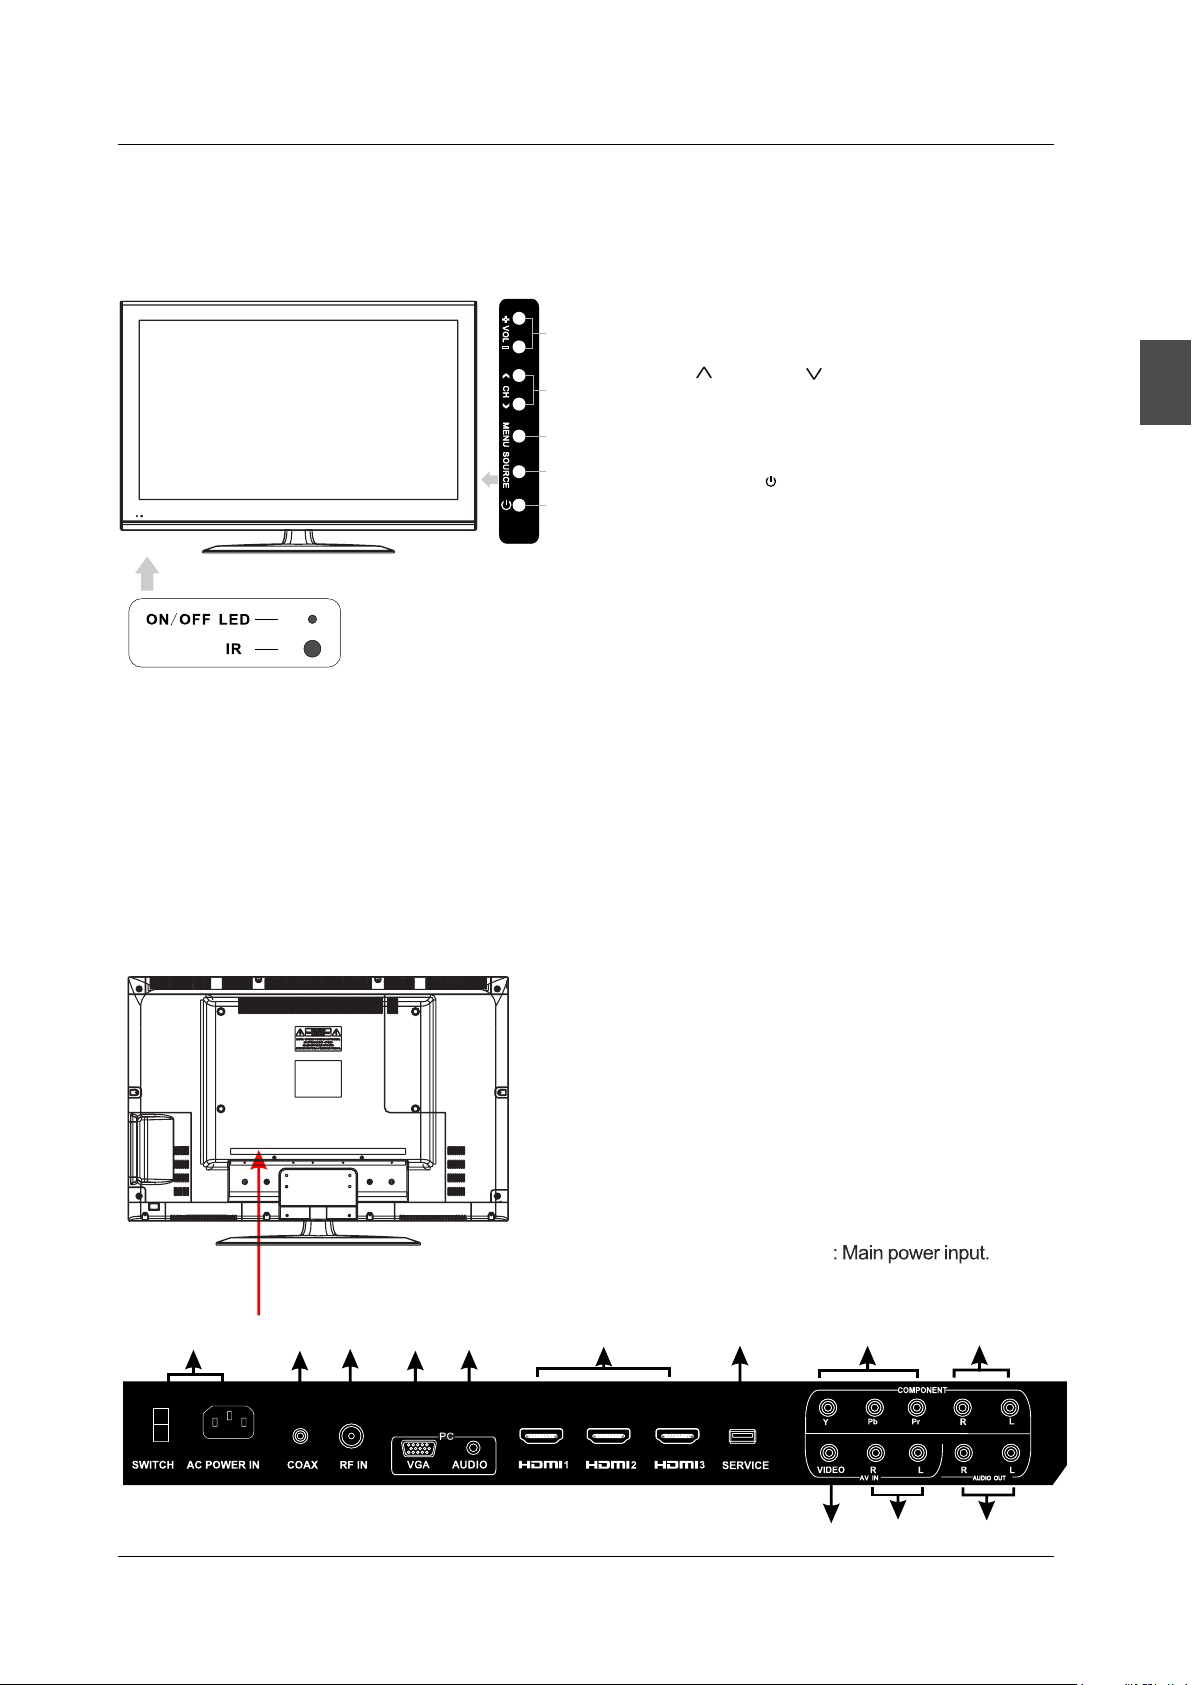
FRONT/BACK CONNECTIONS OF L D TV
C
5. FRONT/BACK CONNECTIONS OF L D TV
C
Front View
1.
Press“VOL+”or “VOL-”to increase or decrease
1
the volume.
2.
Press“CH ”or “CH ”to scan through channels.
2
3.
Press “MENU”to bring up the main menu on
the screen.
3
4.
Press“SOURCE”to select the input source.
4
5. Press“STANDBY ” button to turn the TV on or off.
5
6. POWER INDICATOR: red in standby mode.
blue or green when your TV is switched on.
Shows
7. REMOTE SENSOR: infrared sensor for the
remote control.
7
6
Shows
English
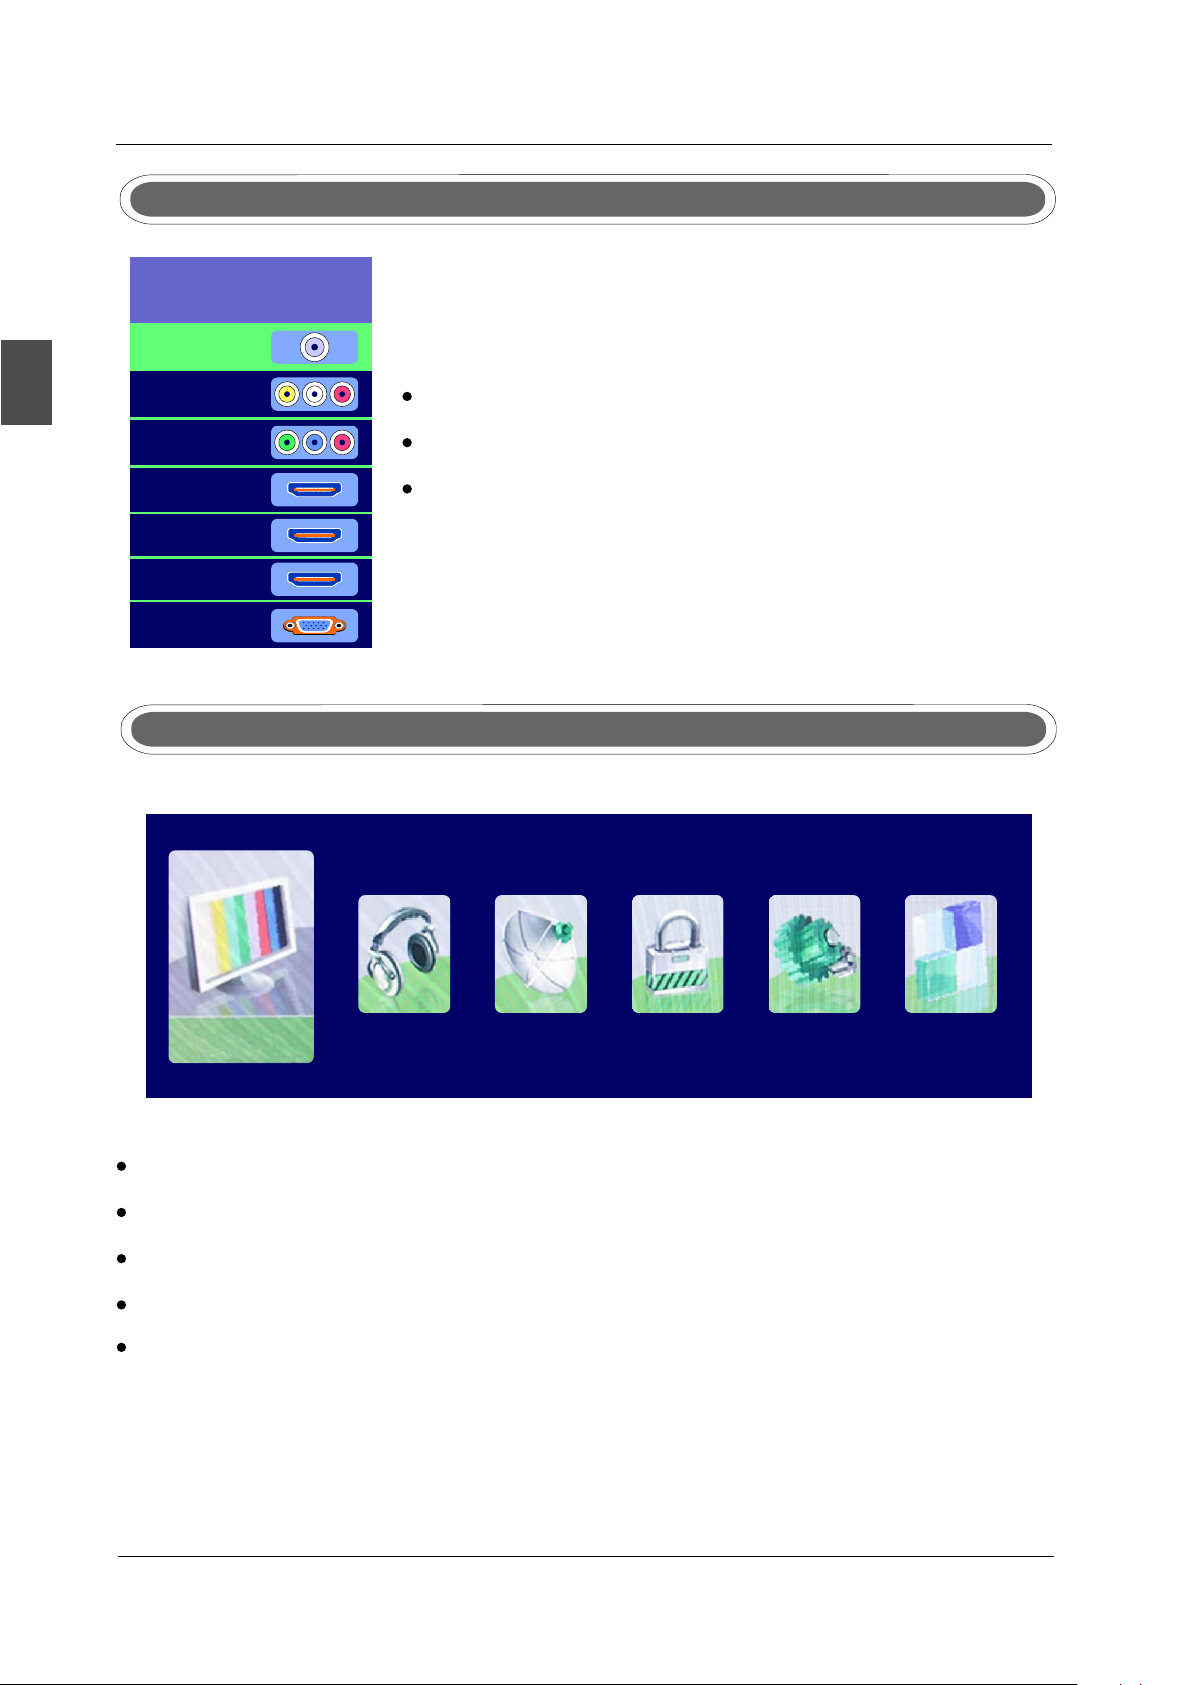
Back View and Control Connections
1. COAX:Connect the COAX receiver.
2. RF IN: Connect the antenna.
3. VGA(PC): Connect the PC-RGB output jack of PC.
4. PC AUDIO: Connect the Audio output jack of PC.
5. HDMI1/HDMI2/HDMI3: Connect the HDMI output
jack of DVD.
6. USB SERVICE: USB Port for Factory Use Only.
7. L-OUT/R-OUT: Connect to Audio Amplifier device.
8. VIDEO: Connect the Video input jack of DVD or VCR.
9. L/R: For VIDEO audio .
10. YPbPr: Connect the YPbPr output jack of DVD or VCR.
1
1
3
1
1
2
2
4
.
L/R: For YPbPr audio .
1
.
AC IN and POWER SWITCH
2
5
1
106
1
8
9
7
7
Page 10
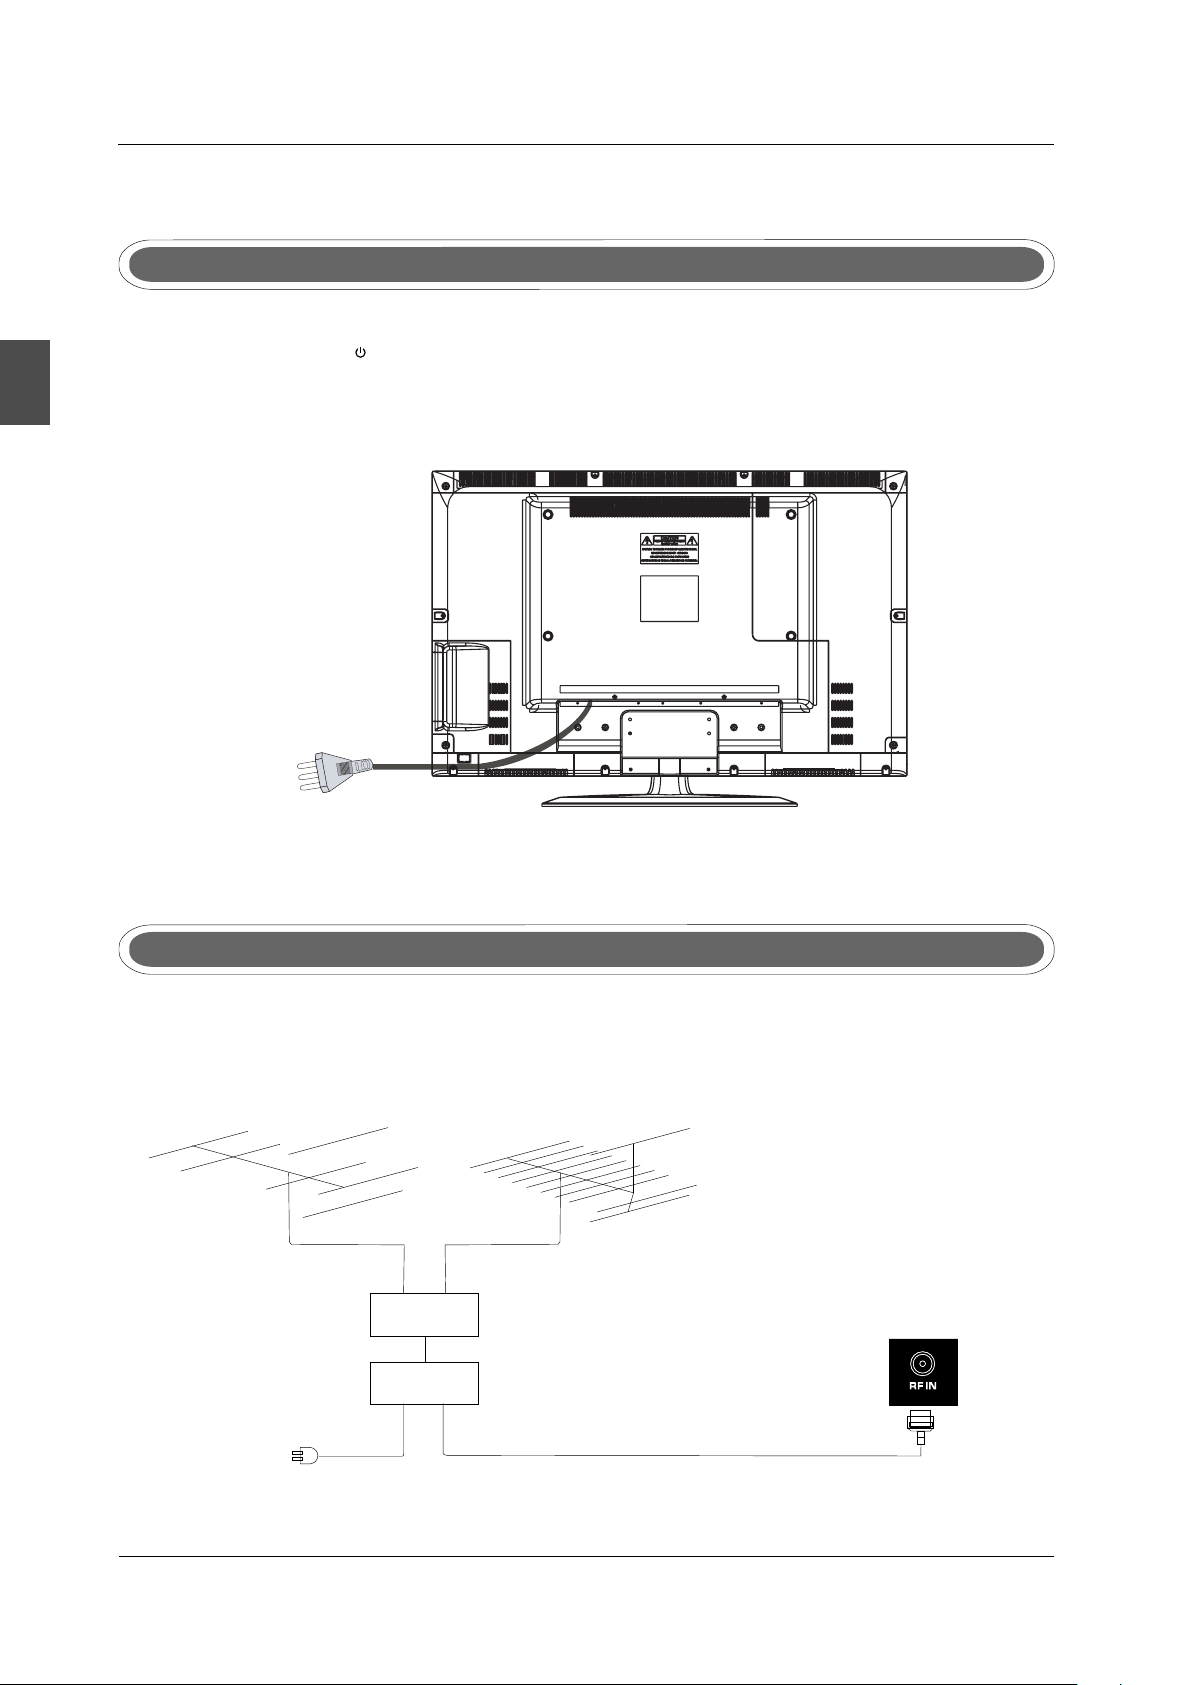
TV INSTALL TION DRAWINGSA
6. ATV INSTALL TION DRAWINGS
Power Cord Connection
English
- Connect the power cord correctly as shown.
- Press the STANDBY switch of your D TV to switch on . The power indicator
on the front panel lights up in .
blue
H
Antenna Connection
To ensure good picture and sound, TV antenna system needs to be installed. The antenna system as
shown can be sourced from TV equipment shops, which will provide service for correct installation
and connection. After installation, insert the 75-ohm antenna plug into the antenna jack as shown.
VHF ANT ENNA UHF ANTENNA
OUTDOOR
ANTEN NA
AMPLI FIER
INDOO R
ANTEN NA
AMPLI FIER
75 OHM
ANTEN NA
POWER PLUG OF
ANTEN NA
AMPLI FIER
PLUG
8
Page 11

TV INSTALL TION DRAWINGSA
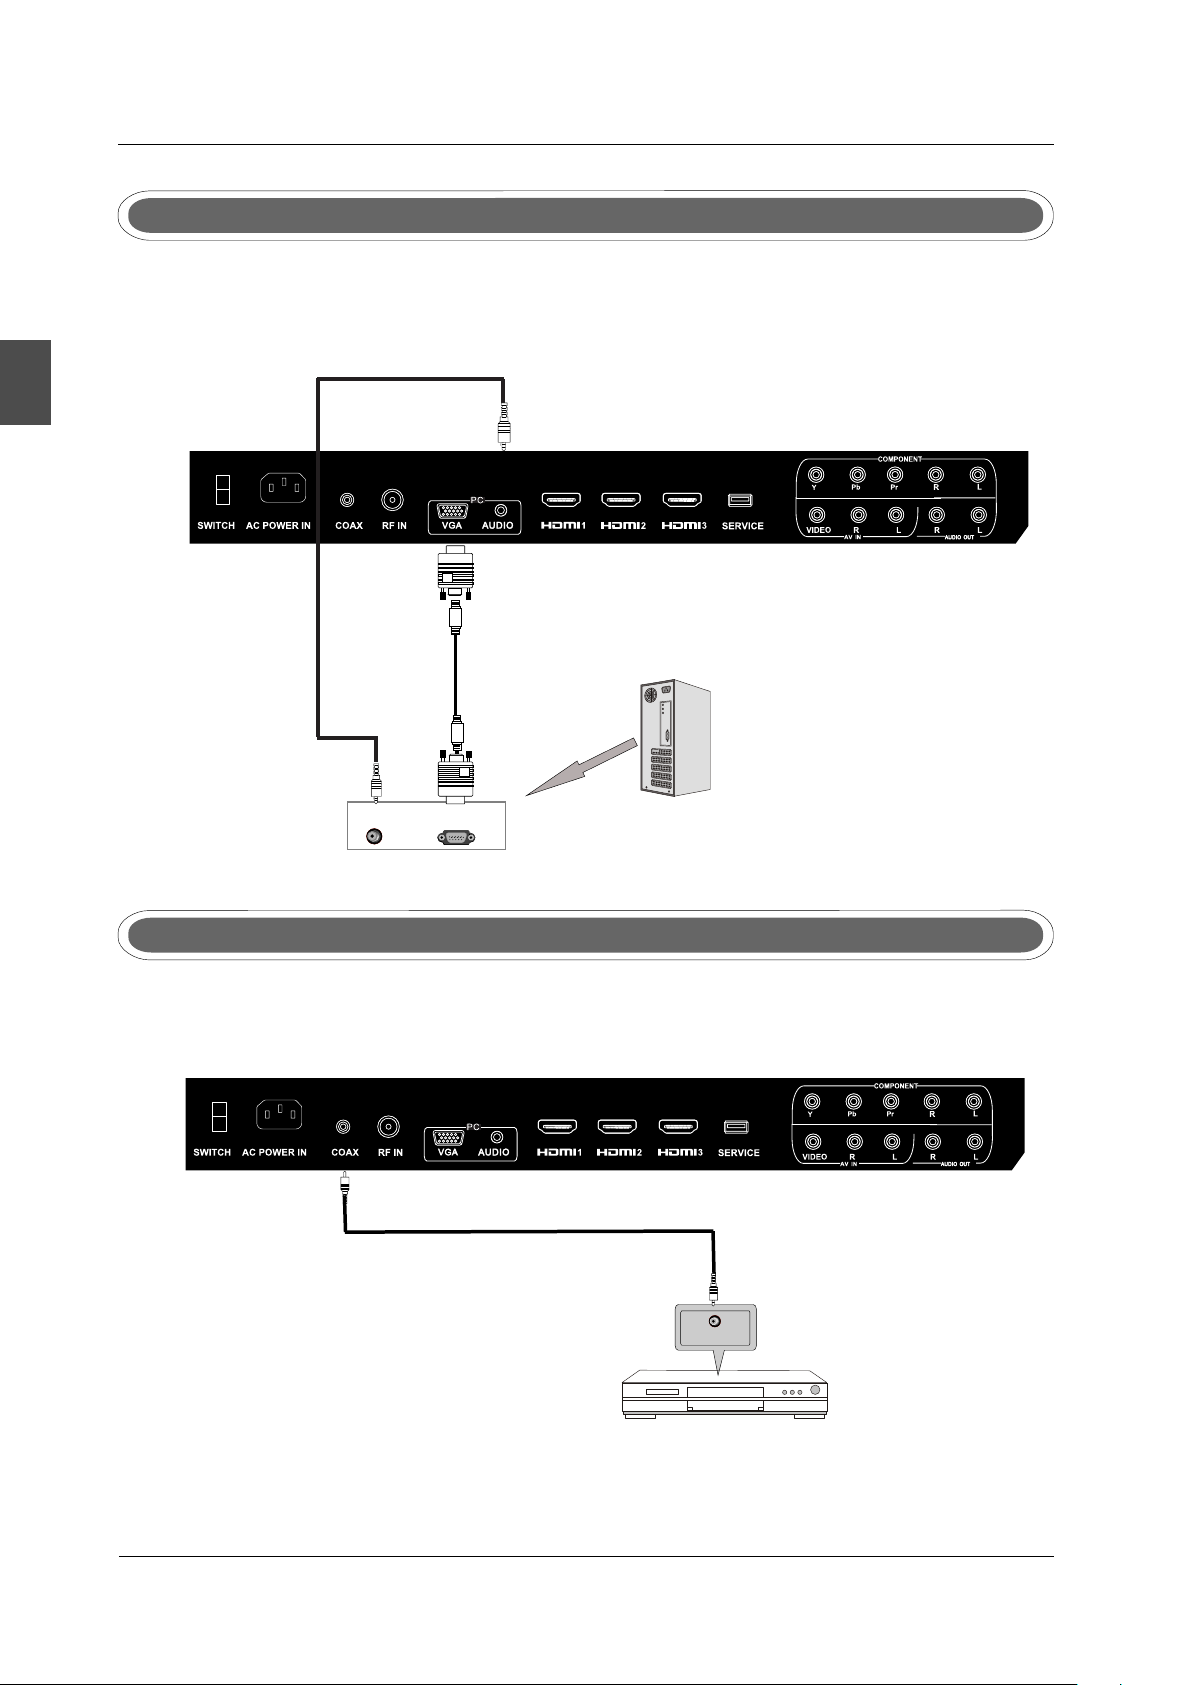
AV Connection
Connect the VIDEO and AUDIO output jack of the DVD or VCR to the VIDEO jacks on the set using
the RCA cable. Match the jack colors: Video is yellow, Audio left is white, and Audio right is red.
Select the AV input source using the SOURCE button on the remote control.
TV Back
Video Cable
AUDIO cable
VIDEO R L VIDEO R L
DVD or VC R Back
English
DVD or VC R
YPbPr Connection(Component)(Component)
Connect the YPbPr output of the DVD or VCR to the YPbPr input on the set. The picture quality is
improved; compared to connecting a regular VCR to the video input. Connect the Audio output of
the DVD or VCR to the Audio input jacks on the set using the RCA cable.
Match the jacks colors :Y is green,Pb is blue,Pr is red,Audio left is white and Audio right in red.
Select component input source using the SOURCE button on the remote control.
TV Back
YPbPr c able
AUDIO cable
Pb
Y
DVD or VC R
Pr
DVD or VC R Back
LR
9
Page 12
TV INSTALL TION DRAWINGSA
VGA(PC) Connection
Connect the RGB output of the PC to the jack on the set. Connect the AUDIO output ofVGA(PC)
The PC to the PC AUDIO jack on the set. Select the RGB input source with using SOURCE button
English
on the remote control.
TV Back
VGA Cable
Audio Cable
AUD IO R GB-PC O UTPUT
COAX Connection
Connect to Audio Amplifier device to the COAX output jack on the TV.
COAX Ca ble
TV Back
10
COAXCOAX
Audio amplifier
the aud io amplifier back
Page 13
TV INSTALL TION DRAWINGSA
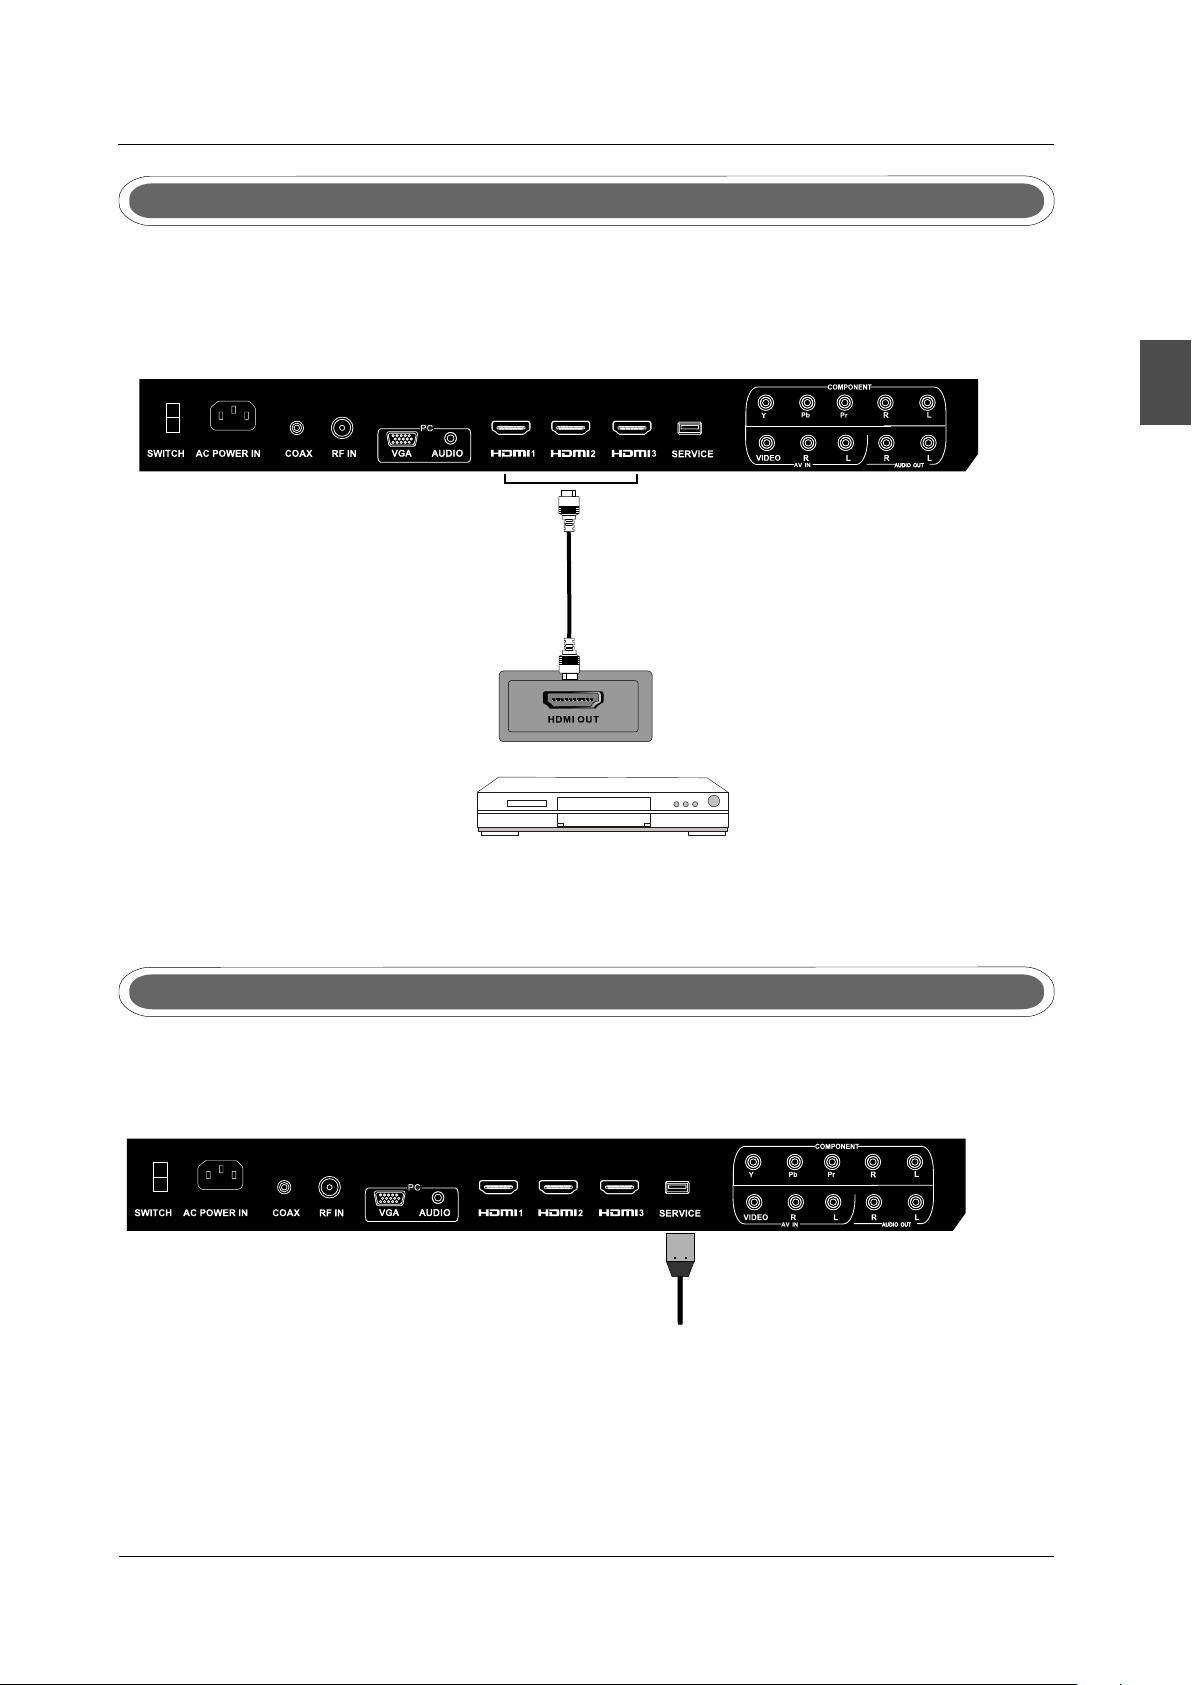
HDMI Connection
HDMI plug which replaces the HDMI connection allows transfer of all audio/video/control
signals through one cable only. These signals are transferred in digital.
TV Back
HDMI Ca ble
English
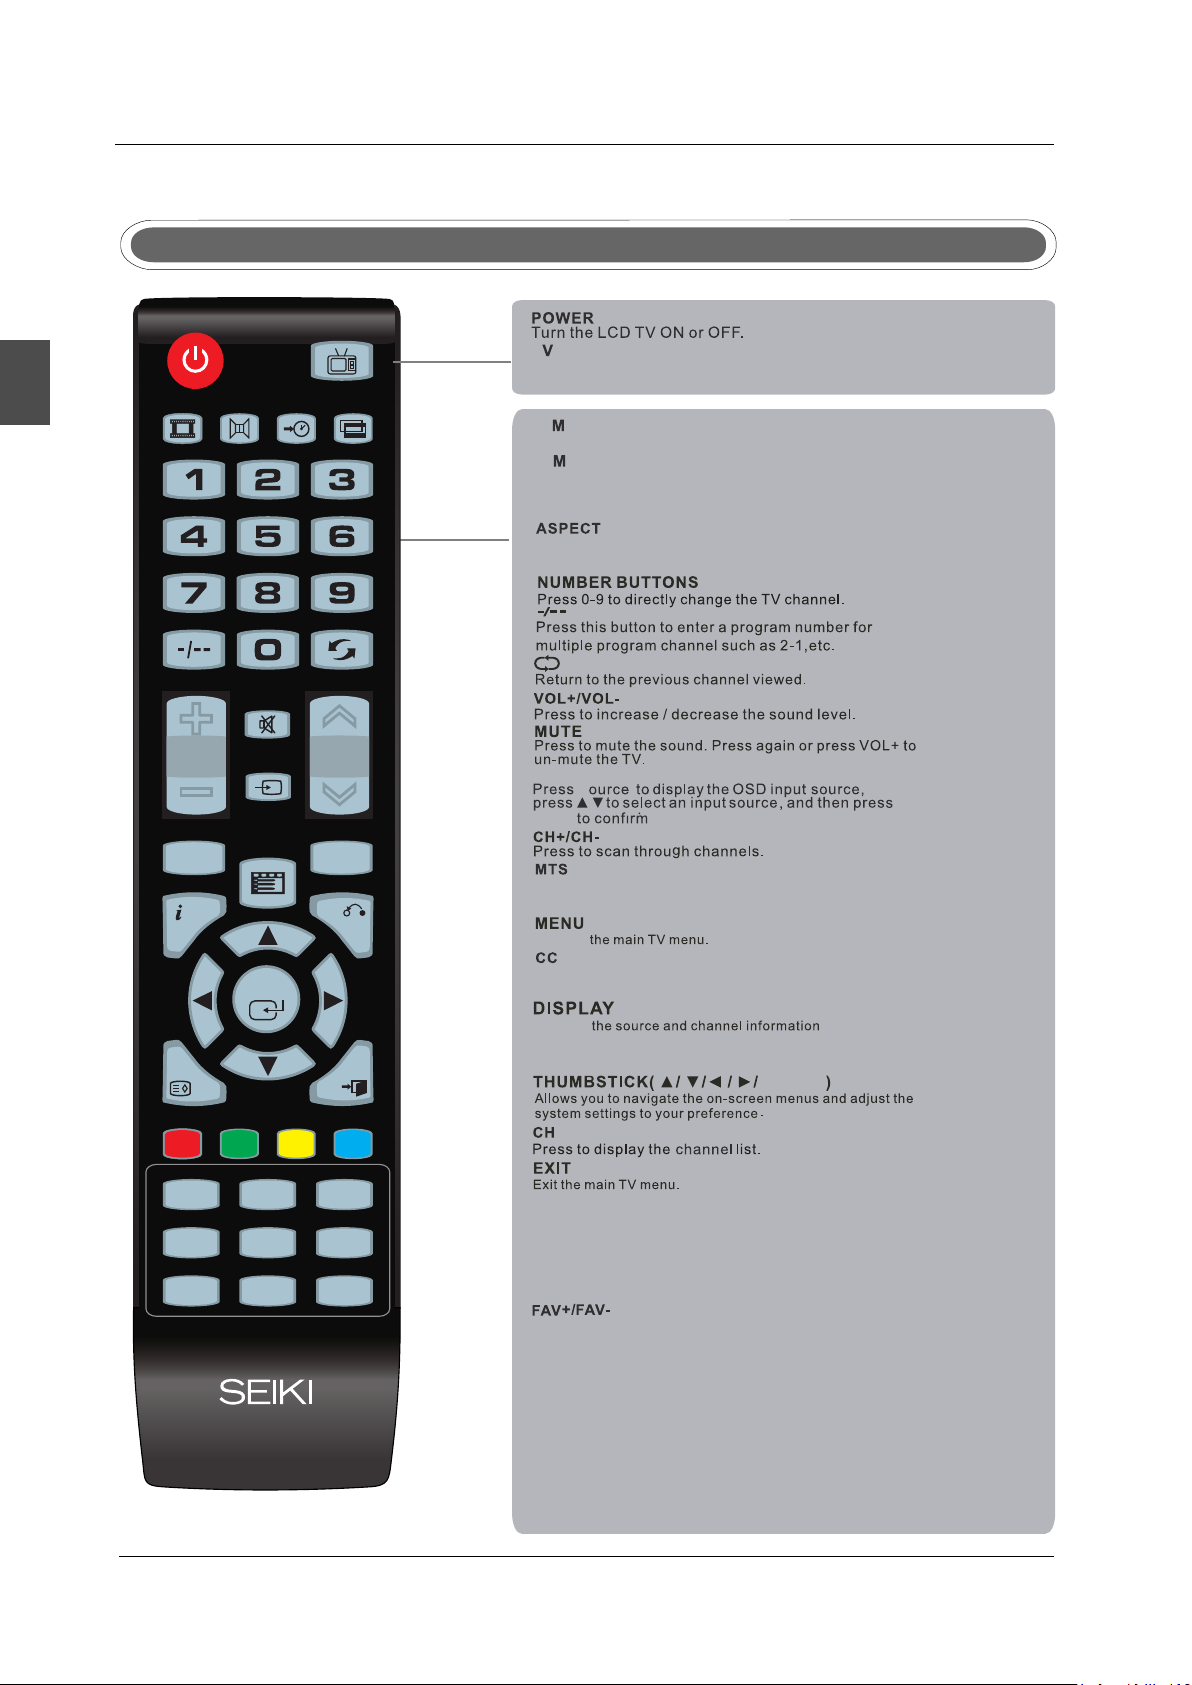
Service Port Function
Service port: (For factory uses only.)
DVD Back
TV Back
USB Cable
11
Page 14
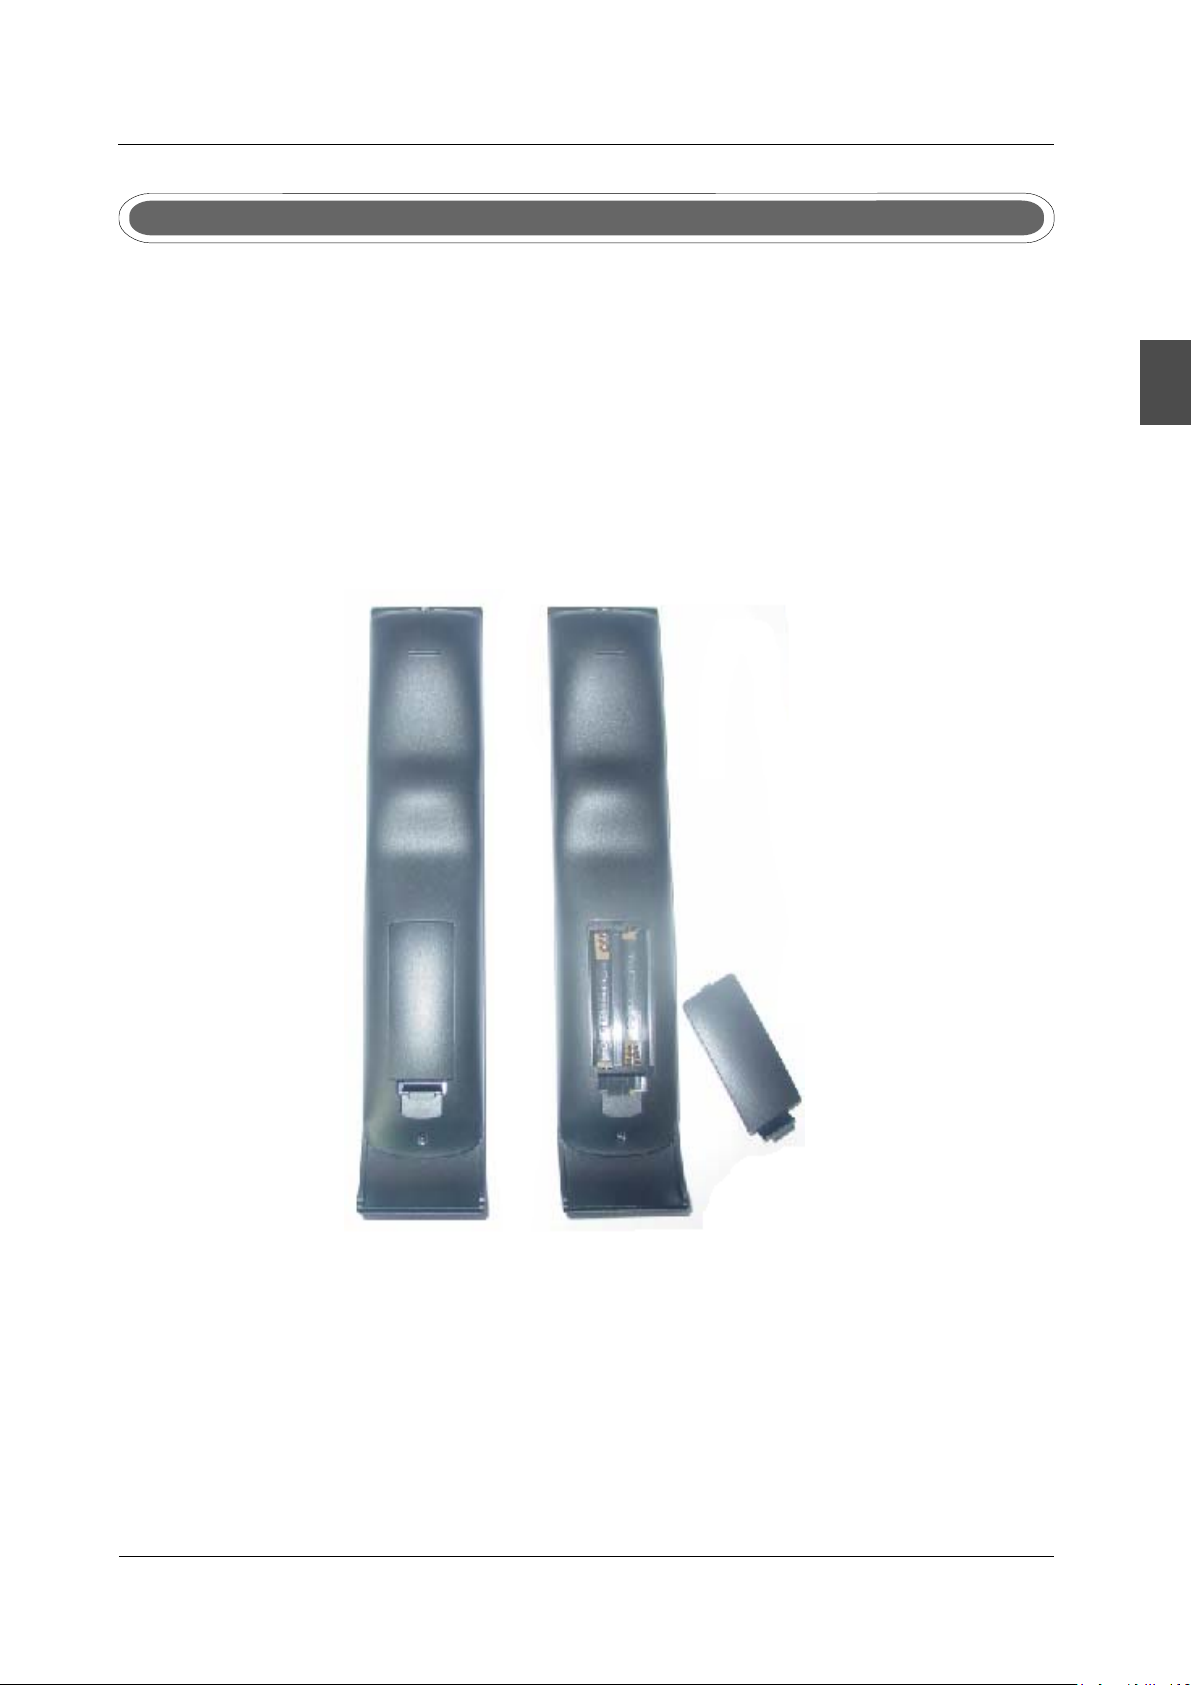
REMOTE CONTROL
7 REMOTE CONTROL.
Remote control instructions in TV mode
English
POW ER
P.MOD E S.M ODE SLEEP ASP ECT
TV
T
Press this button,turn to TV source.
P
.
ODE
Select the picture mode.
S
.
ODE
Select the sound mode.
SLEEP
Set the Sleep Timer.
Press to select Aspect ratio
( As follow Standard,Wide,Wide Zoom,Zoom,etc.)
MUT E
VO L CH
MTS C.C
D
SOU RCE
MEN U
R
AY
L
ISP
E
TU
RN
ENTER
SOURCE
S
ENTER
Choose Mono,stereo or sap for analog TV input.
Choose English,French or Spanish
Displays
Press to set the closed caption
as follow cc mode on,cc mode off,cc mode on mute
DTV input.
for
CH. LI
S
T
A B C D
V-C HIP
AUTO
HDM I
12
FAV.CH
ADD/ ERASE
VGA COM P
FAV.+
FAV.-
SRC 11- 49A
Displays
RETURN
IT
EX
Return to previus chanel.
ENTER
LIST
.
A ,B,C,D
Push and hold 3 second then store current channel in A ,B,C,D.
V-CHIP
Switch to V-CHIP input.
FAV.CH
Press to diaplay the favourite program list.
Press these two keys to switch to your favourite programs.
AUTO
Automatically adjust Horizontal / Vertial position( in PC Mode)
ADD/ERASE
Add/Erase channel to favourite program list.
HDMI
Switch to HDMI input.
VGA
Switch to VGA input.
COMP
Switch to COMP input.
Page 15
REMOTE CONTROL
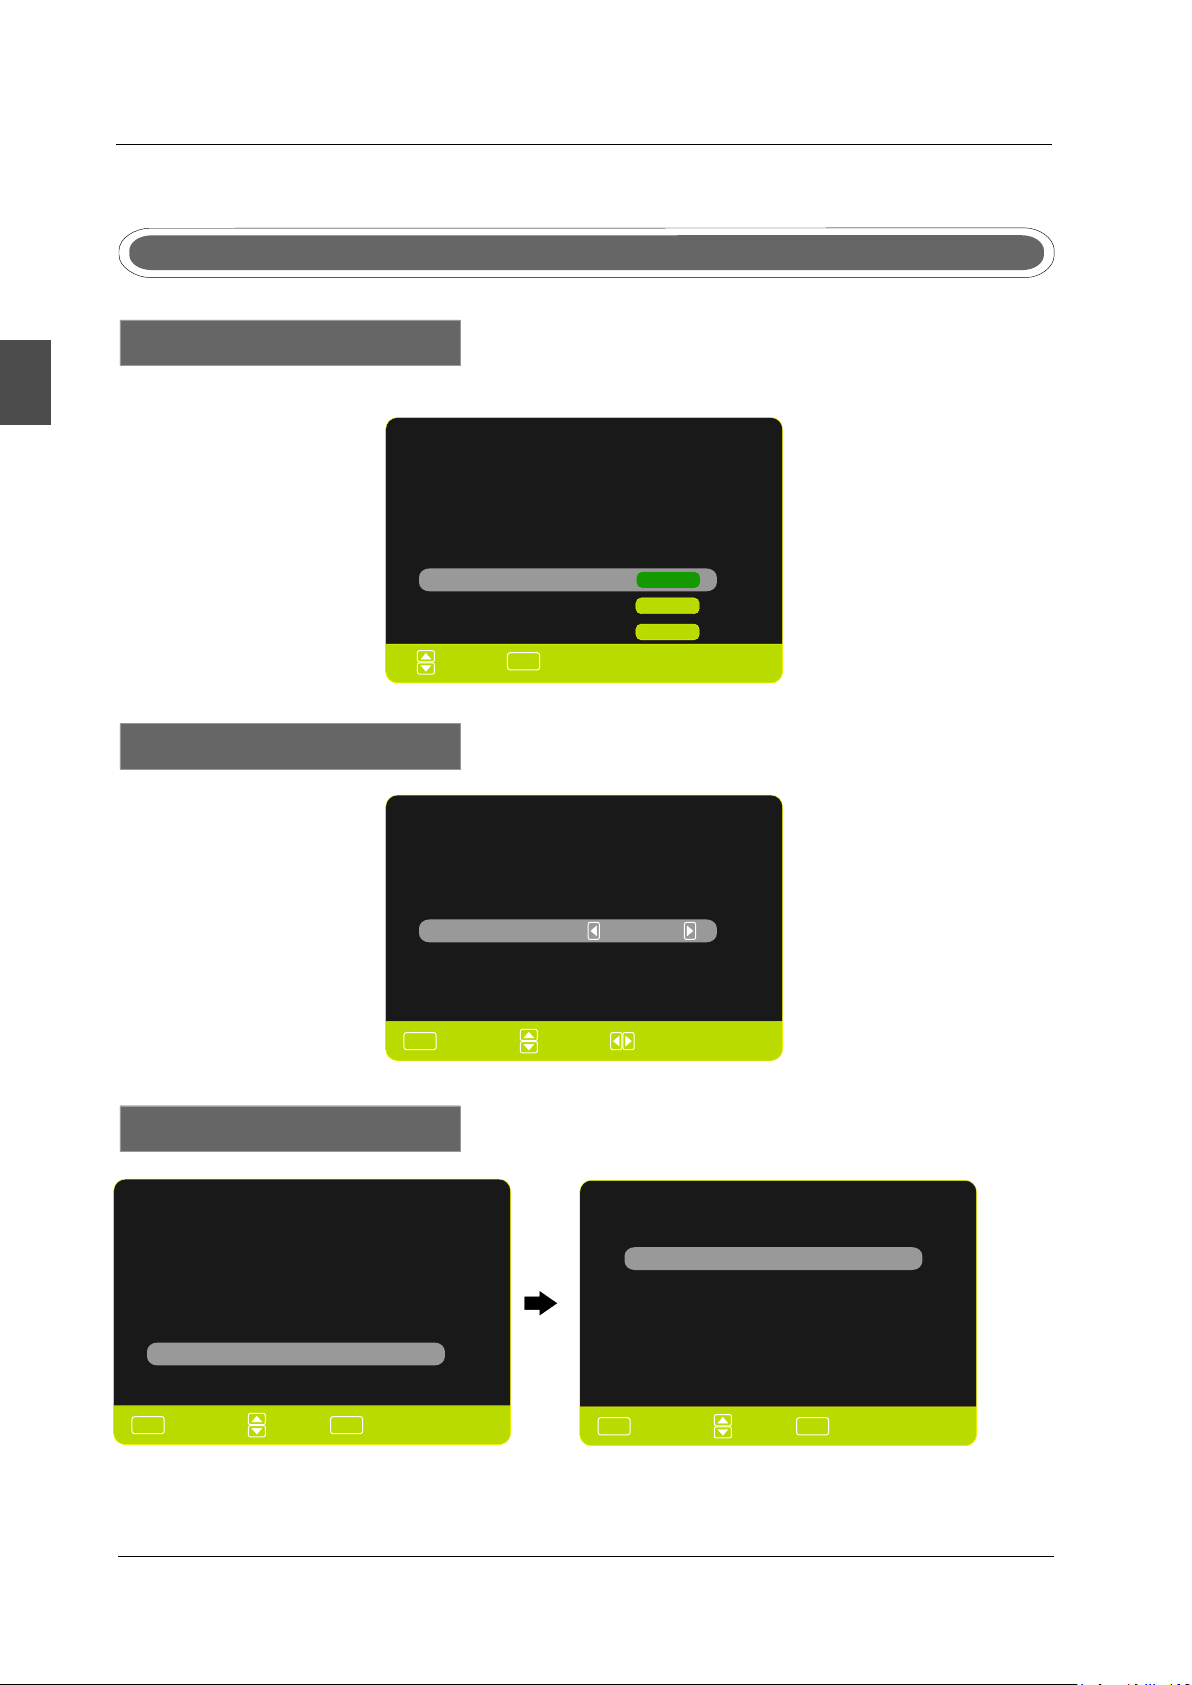
Remote control setup
1. Open the cover.
2. Uses three A size batteries.When inserting the batteries, make sure correct polarities “+”and “-”
marks
3. Replace the battery cover.
To prevent battery leakage which may result in bodily injury or damage to the remote:
1. Install all batteries correctly, and as marked on the remote control.
2. Do not mix batteries:(OLD and NEW or CARBON and ALKALINE, etc)
on the batteries line up correctly with compartment markings.
Remove batteries when the remote is not used for a long period of time.
.
English
13
Page 16
MENU OPERATION
8.Menu Operation
SETUP WIZARD
English
Select Language
Select the language you want.
Select Language
Wel come to t he SEIK I HDTV Se tup Wiz ard.F ollow t his gui de
t o
hel p setup y our HDT V for sca nning c hanne ls or acc essin g
you r
ext ernal d evice s for Ant enna, Set-t op Box, B lu-ra y, DVD,
and o ther pl ayer.
Gam es
Use t he up and d own arr ows on yo ur remo te cont rol TV
key pad
to se lect th e langu age of sc reen me nu and me ssage
Eng lish
Fre nch
Spa nish
:Move :Press to Ente r
ENTE R
ro
Ent er
Ent er
Ent er
Select Time Zone
Time zone
Use t he left a nd righ t arr ows on y our re mote co ntrol
key pad
to sel ect
you r local t ime zon e .
TV
ro
MENU
Power On Mode
Power O n Mode
Mod e
Hom e optimi zes the s tanda rd vide o setti ng fo r
ENE RGY
STA R@ qual ifica tion.
Ret ail Mod e optim izes th e video s ettin g for use o n a retai l
sho wroom f loor or d emo env ironm ent.
Use t he up/d own key a rrows o n you rem ote con trol or T V
key pad to se lect po wer on mo de.
Home Mod e(Energy Sav ing)
Retail M ode
MENU
:Return
:Move
ENTE R
s
:Pres s to Ente r
Time zone
Next
:Return
Eastern
:Move :Change Setting
Select your Connection devices...
Con nect to G ame, Bl u-Ray ,DVD, o r other p layer
Ant enna or c oaxia l cable i nput
Bac k
MEN U
:Return
:Move
ENTE R
:Pres s to Ente r
14
Page 17

Select Input Source
MENU OPERATION
Select your Connection devices...
Con nect to G ame, Bl u-Ray ,DVD, o r other p layer
Ant enna or c oaxia l cable i nput
Bac k
MEN U
:Return
:Move
ENTE R
:Pres s to Ente r
SOURCE LIST
Pag e 1/2
TV
AV
YPbPr
HDMI1
HDMI2
HDMI3
PC
ENTE R
:Select
:Page
:Pres s to Ente r
Scanning Cha nnel Program
Use t he Up or Do wn key ar rows on y ou rem ote co ntro l or TV
key pad to se lect th e chann el scan t ype.
Antenna
Cable
Back
MEN U
:Return
:Move
ENTE R
:Pres s to Ente r
English
Select the TV (or the Antenna or coaxial cable input) .
Scanning Cha nnel Program
Use t he Up or Do wn key ar rows on y ou rem ote co ntro l or TV
key pad to se lect th e chann el scan t ype.
Antenna
Cable
Back
MEN U
:Return
:Move
ENTE R
:Pres s to Ente r
Under “Setup Wizard”, the buttons’ function:
“Menu”-----Enter
“CH / ”-----Up/Down
>
<
“Vol+/-”-----Left/Right
15
Page 18
MENU OPERATION
Source Select
SELECT INPUT SOURCE
English
TV
AV
YPbPr
HDMI1
HDMI2
HDMI3
PC
Press SOURCE button to display the input source list.
Press button to select the input source you want to watch.▼/▲
Press OK button to enter the selected source.
BASIC OPERATION
PICTURE
Press MENU button to display the MAIN OSD MENU.
Press◄/►button to select the MENU you want.
Press OK button to enter the sub menu.
Press ▼/▲ button to select the option and then press◄/►to adjust the value in the sub menu.
You can press MENU button to go back to the upper menu or EXIT button to close the OSD.
16
SOUND
CHANNEL PARENTAL
SETUP OTHERS
Page 19
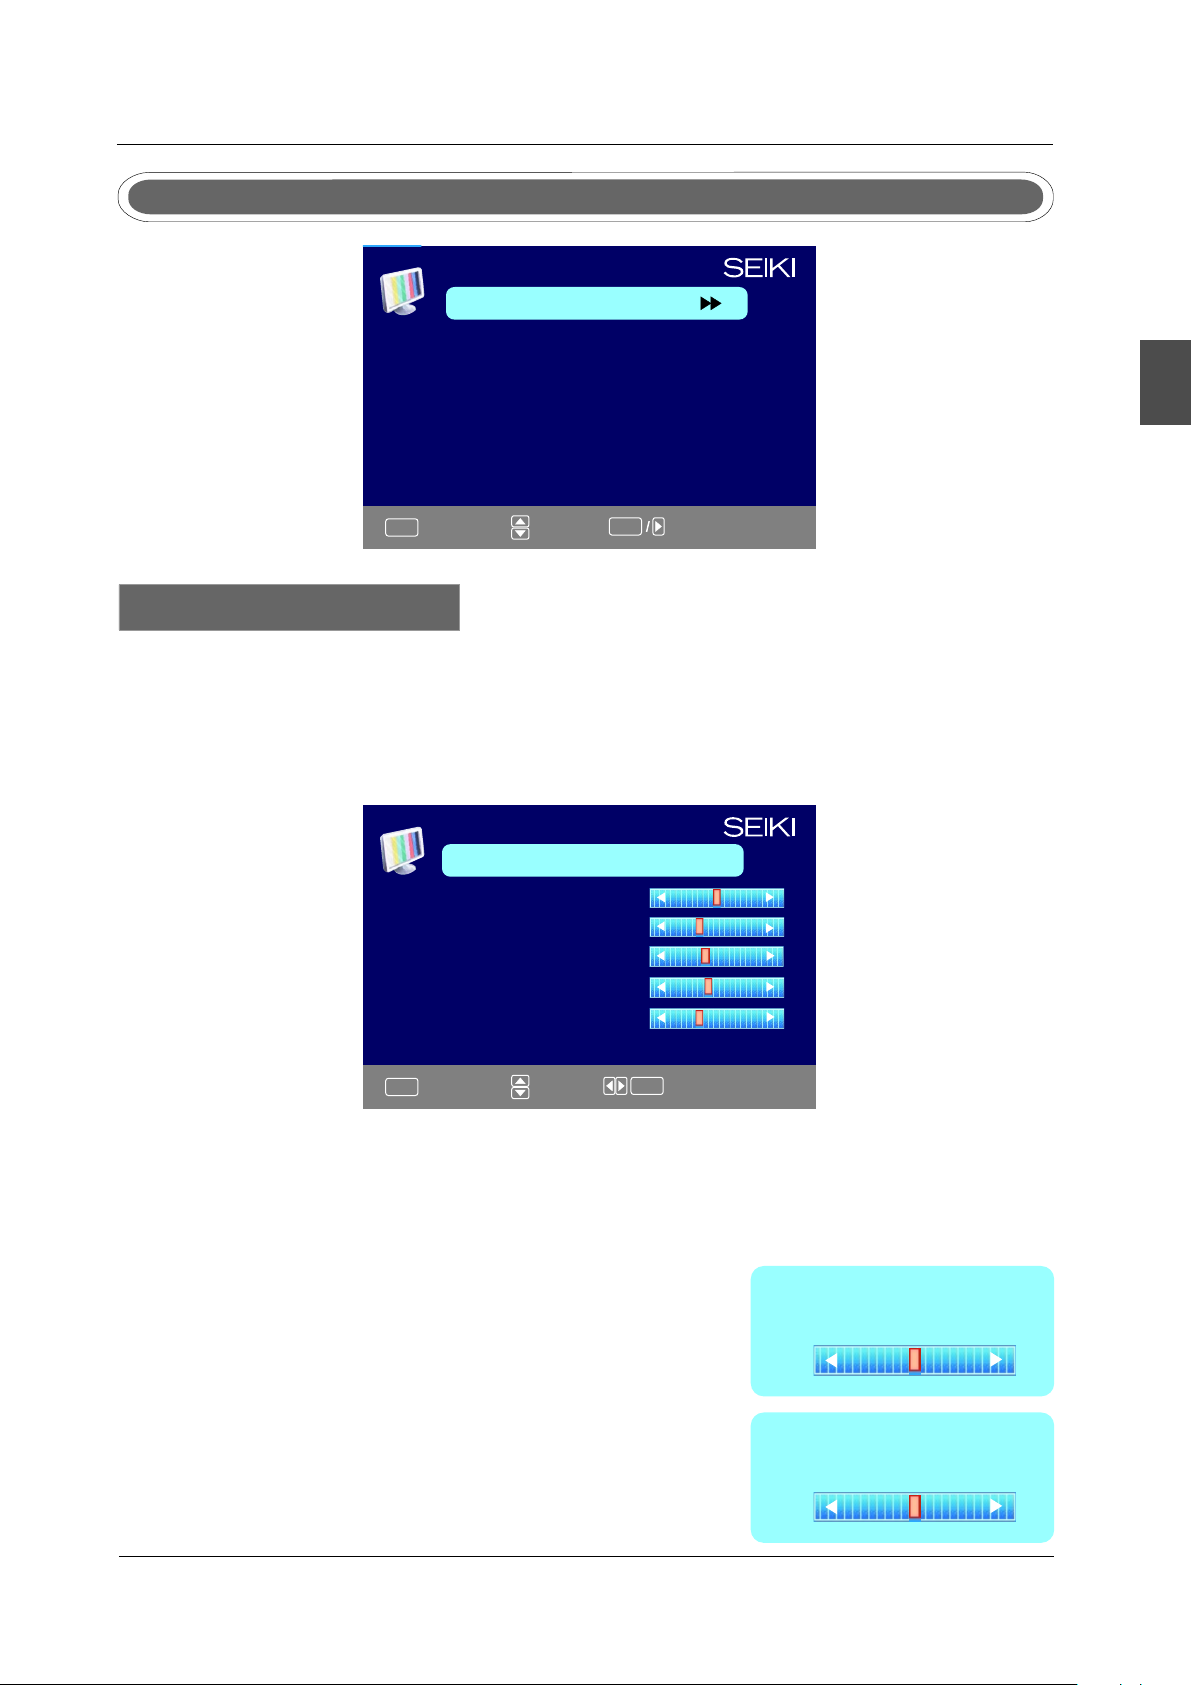
PICTURE MENU
PICTURE
Picture Setting s
Screen Size
PC Settings
Color Temperature Normal
Advanced Pictur e Settings
Wide
MENU OPERATION
English
MENU
:Return
:Move :Go to Next Menu
ENTE R
Picture Settings
1.Press ENTER when the Picture Settings item is highlighted. Then you will go to the sub-menu
as following.
2.Press ▼/▲ to select the desired menu item. Press ENTER to proceed if necessary.
3.Press ◄/► to the desired level.
4.When you have changed the settings, you can exit from the menu by pressing MENU.
PICTURE SETTINGS
Picture Mode User
Brightness
Contrast
Color
Tint
Sharpness
MENU
:Return
:Move :Go to Next Menu
ENTE R
Picture Mode
Press ▼/▲ button to select Picture Mode, then press ◄/► button to adjust. Only in the User mode,
the detail options as following can be adjusted. Available picture mode: Energy Saving,Dynamic,
Standard,Movie ,User.
Brightness
Press ▼/▲ button to select Brightness,
Brightness
25
then press ◄/► button to adjust.
Contrast
Press ▼/▲ button to select Contrast,
Contrast
25
then press ◄/► button to adjust.
17
Page 20
MENU OPERATION
Color
Press ▼/▲ button to select Color,
then press ◄/► button to adjust.
Color
27
English
Sharpness
Press ▼/▲ button to select Sharpness,
then press ◄/► button to adjust.
Tint
Press ▼/▲ button to select Tint,
then press ◄/► button to adjust.
Sharpness
27
Tint
27
Screen Settings
Screen Size
Press ▼/▲ button to select Screen Size, then press ◄/► button to adjust. Available Screen Size:
Standard, Wide, Wide Zoom, Zoom.
Color Temperature
Press ENTER when the Color Temperature item is highlighted. Then press ◄/► button to adjust.
Available color temperature: Normal, Warm, Cool.
Color Temperature
Warm
Advanced Picture Settings
ADVANCED PICTURE SETTINGS
Dynamic Contras t
Film Mode
Noise Reduction
MPEG Noise Reduct ion
Off
Off
Off
Off
18
MEN U
:Return
:Move :Change Setting
Page 21
Dynamic Contrast
Press button to select the ▼/▲ ◄/► button to adjust.
It can adjust the contrast corresponding to the input
signal in order to improve the picture quality displayed.
Available Mode: On/Off.
Film Mode
Press ▼/▲ button to select the item Film Mode, then
press ◄/► button to adjust. It handles 3:2 pull down
and 2:2 pull down. Available Film Mode: On/Off.
MENU OPERATION
Dynamic Contrast
Off
English
Film Mode
Off
Noise Reduction
Press ▼/▲ button to select the item Noise Reduction,
then press ◄/► button to adjust. Available Noise
Reduction: Off, Low, Medium, High.
MPEG Noise Reduction
Press ▼/▲ button to select the item MPEG Noise Reduction,
then press ◄/► button to adjust. It can improve the quality
of the pictures by reducing the block noise. Available MPEG
Noise Reduction: Off, Low, Medium, High.
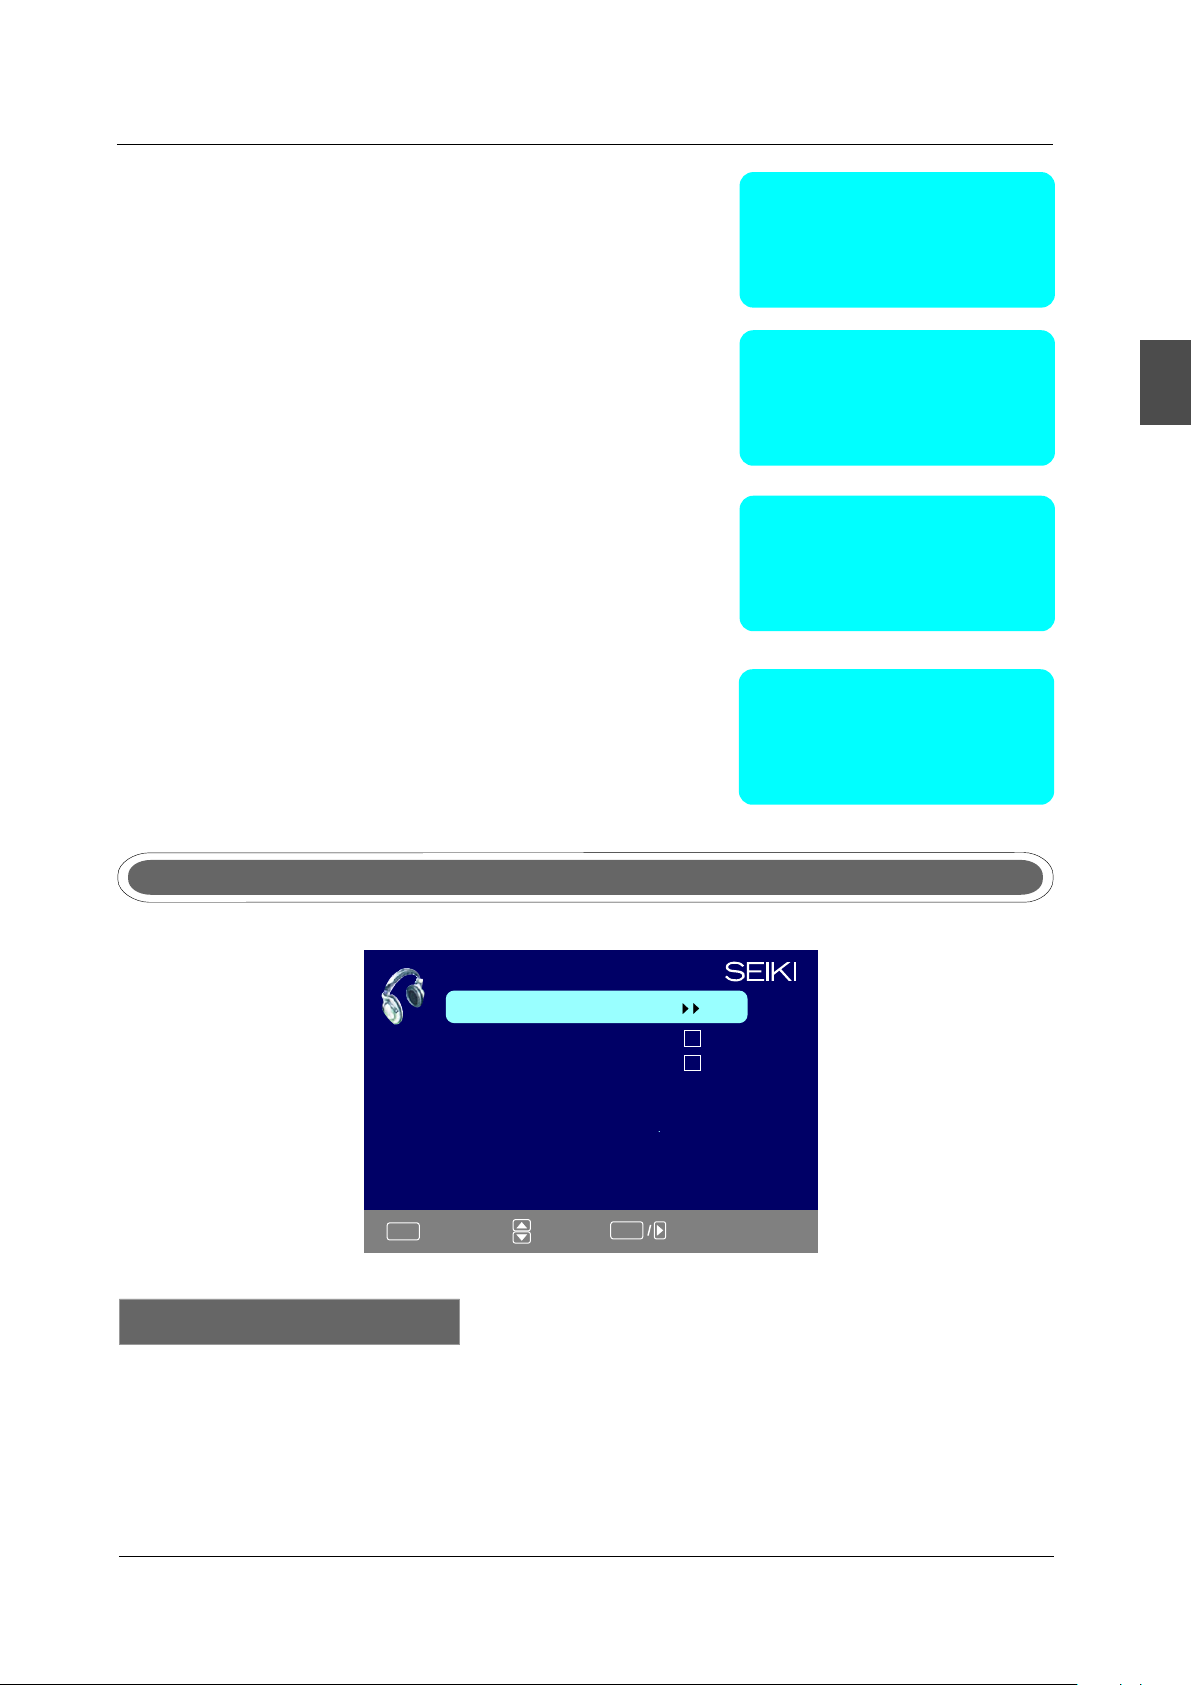
SOUND MENU
SOUND
Sound Settings
Surround Mode
AVL
Analog Sound Ster eo
Digital Sound English
Digital Audio Out put PCM
Equalizer Setti ngs
Noise Reduction
Off
MPEG Noise Reduction
Off
MEN U
:Return
:Move :Go to Next Menu
ENTE R
Sound Settings
1.Press ENTER when the Sound Settings item is high lighted. Then you will go to the sub-menu as
following.
2.Press ▼/▲ to select the desired menu item. Press ENTER to proceed if necessary.
3.Press ◄/► to the desired level.
4.When you have changed the settings, you can exit from the menu by pressing MENU.
19
Page 22
MENU OPERATION
SOUND SETTING
Sound Mode User
Bass
Treble
English
Balance
MENU
:Return
:Move :Change Setting
ENTE R
Sound Mode
Press ▼/▲button to select the item Sound Mode, then press ◄/► button to adjust. Only in the
User mode, the detail optionsas following can be adjusted. Available Sound Mode: User, Dynamic,
Standard, Soft.
Bass
Press ▼/▲ button to select the item Bass, then press ◄/► button to adjust.
Treble
Press ▼/▲ button to select the item Treble, then press ◄/► button to adjust.
Balance
Press ▼/▲ button to select the item Balance, then press ◄/► button to adjust.
Bass
7
Treble
7
Balance
7
Surround Mode
Press ▼/▲ button to select the item Surround Mode, then press OK button to adjust. It can set
the picture to fit the screen automatically. When the Auto Wide is selected, the symbol will show as
following:
Surround Mode
20
Page 23
MENU OPERATION
AVL
Press ▼/▲ button to select the item AVL, then press ◄/► button to select ON or OFF. Auto
Volume Level can set the volume automatically adjust corresponding to the input audio.
Analog Sound
Press ▼/▲ button to select the item Preferred Analog Sound, then press ◄/► button to select
the prefer audio when switching to an analog channel. Available Analog Sound: Stereo, Mono,SAP.
Digital Sound
Press ▼/▲ button to select the item Preferred Digital Sound , then press ◄/► button to select
the prefer audio when switching to a digital channel. Available Digital Sound: English, French,
Spanish.
Digital Audio Output
Press ▼/▲ button to select the item Digital Audio Output, then press ◄/► button to select the
desired digital audio output. Available digital audio output: PCM,Raw, Off .
Equalizer Settings
EQUALIZER SETTINGS
Mode Off
-1 2 3 1 0 -1
English
100-2250 500 1K 2K
MENU
:Return
:Move :Change Setting
4K
10K
Equalizer Mode
Press ▼/▲ button to select the item Equalizer Mode, then press ◄/► button to select the desired
mode. Available Equalizer Mode: Off, Rock, Pop, Jazz, User.
CHANNEL MENU
Note:This menu is only shown when the input source is TV.
CHANNEL
Channel List
Favorite List
Channel Setting
Signal Type Air
Auto Channel Sear ch Enter
MENU
:Return
:Move :Go to Next Menu
ENTE R
21
Page 24
MENU OPERATION
Channel List
Press ▼/▲ button to select Channel List, then press OK button to scan the Channel List. If you
select the option “In Channel List” On, the channel label will display in the list.
English
MENU
Channel List
A4
A11
A14
A63
:Return
:Move :Select
:Page
Page 1/ 1
ENTE R
Favorite List
Press ▼/▲ button to select Favorite List, then press OK button to scan the Favorite Channel List.
FAVORITE LIST
No Favorite Chann els Present
Please Perform Fa vorite Channel Add First
Page 1/ 1
MEN U
:Return
:Move :Select
:Page
ENTE R
Channel Setting
Press ▼/▲ button to select Manual Channel Setting, then press OK button to set the value in the
sub menu.
CHANNEL SETTING
Channel Skip Favorice Label
A4
A11
A14
A63
ENTE R
22
MEN U
:Return
:Cursor/Page :Select
Page 25

MENU OPERATION
Signal Type
Press ▼/▲ button to select Signal Type, then press ◄/► button to select the type you want to set.
There are two selections: Air and Cable.
Auto Channel Search
Press ▼/▲ button to select Auto Channel Search, then press OK button to search channel.
A Channel Search Menu will appear as below.
AUTO CHANNEL SEARCH-Air
Now Searching.. .Please Wait...
Return
Analog Channels F ound: 0
English
PARENTAL CONTROL
Lock Parental C ontrol
V-CHIP
Change Passwo rd
Keypad
Source Lock
MENU
:Return
0~9
ENTE R
:Enter passwo rd
Digital Channel s Found: 0
92%
MENU
:Stop Auto Channe l Search
:Skip
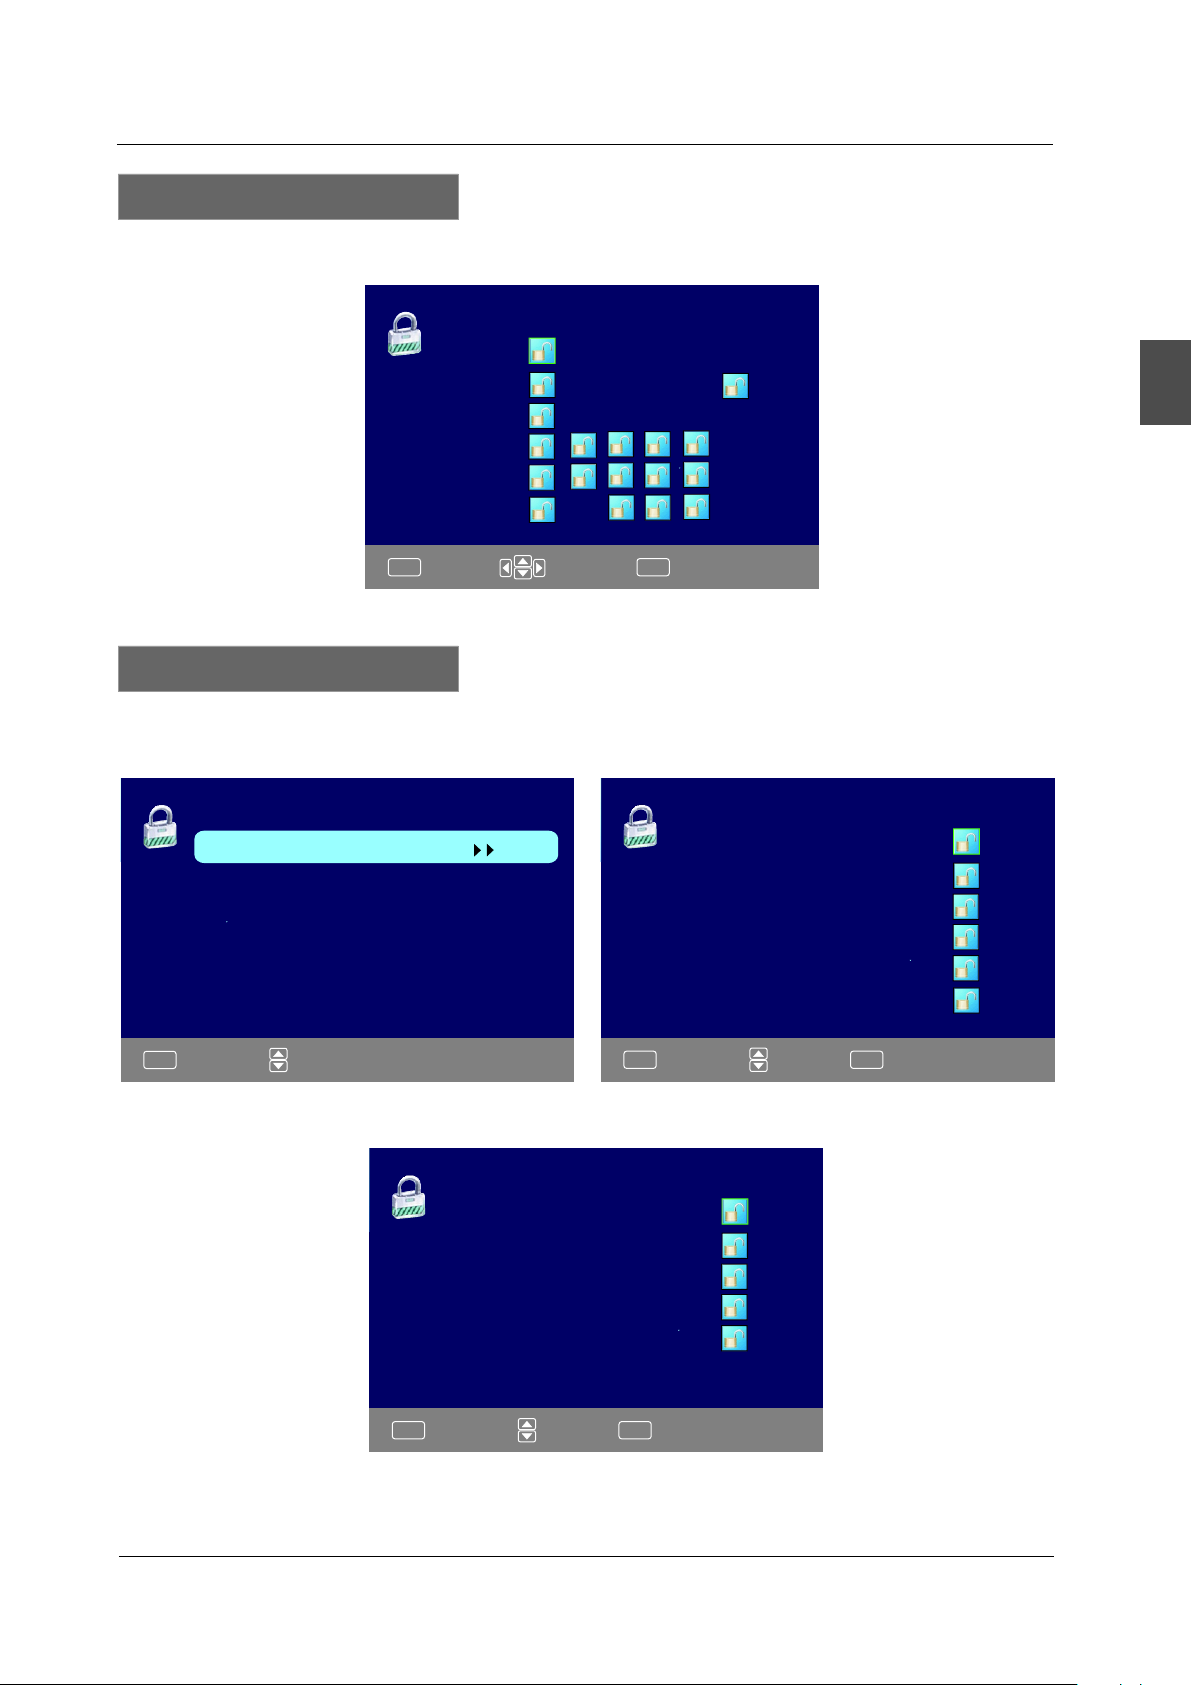
PARENTAL CONTROL
PARENTAL CONTROL
Lock Parental C ontrol
V-CHIP
Change Passwo rd
Keypad
Source Lock
MENU
:Return
DIGI TAL
:Go to Next Menu
Input password to enter,default password is‘‘0000’’.
V-CHIP
Press ▼/▲ button to select V-CHIP, then press OK button to adjust. A sub menu will appear
as below.
23
Page 26
MENU OPERATION
V-CHIP
US V-Chip
Canada V-Chip
Block UnRated Sho w
English
Downloadable Ra ting
Clear Downloada ble Date
MEN U
:Return
:Move :Go to Next Menu
ENTE R
US V-CHIP
Press ▼/▲ button to select US V-CHIP, then press OK button to adjust. A sub menu will appear
as below.
USA
Movie Rating
TV Rating
MENU
:Return
:Move
Movie Rating
Press ▼/▲ button to select Movie Rating, then press OK button to adjust. A sub menu will appear
as below.
Movie Rating
G
PG
PG-13
R
NC-17
X
MENU
:Return
:Move
Press ▼/▲ button to select Rating, then press OK button to lock.
24
ENTE R
:Lock /Unlo ck
Page 27
MENU OPERATION
TV Rating
Press ▼/▲ button to select TV Rating, then press OK button to adjust. A sub menu will appear
as below.
TV Rating
TV-Y
TV-Y7
TV-G
TV-PG
TV-14
TV-MA
D L S V FV
English
MEN U
:Return
:Select
ENTE R
:Lock /Unlo ck
Press ▼/▲/◄/►button to select Rating, then press OK button to lock.
CANADA V-CHIP
Press ▼/▲ button to select US V-CHIP, then press OK button to adjust. A sub menu will appear
as below.
English Rating
C
C8+
G
PG
14+
18+
MENU
:Return
:Move
ENTE R
:Lock /Unlo ck
MENU
CANADA
English Rating
French Rating
:Return
:Move
French Rating
G
8ans+
13ans+
16ans+
18ans+
MENU
:Return
:Move
ENTE R
:Lock /Unlo ck
The operation of CANADA V-CHIP is the same as the operation of US V-CHIP.
25
Page 28
MENU OPERATION
English
Block UnRated Show
Press ◄/► button to select Block UnRated Show, then press OK button to set the rating locked.
Downloadable Rating
Press ▼ / ▲ button to select Downloadable Rating, then press OK button to set the rating.
If the DTV program doesn’t have this rating information, this option will be in gray.
Clear Downloadable Date
Press ▼ / ▲ button to select Clear Downloadable Data, then press OK button to set the rating.
Note: The above two operation only valid when playing the downloadable data stream.
The operations are the same as US V-CHIP.
CHANGE PASSWORD
Press ▼ / ▲ button to select Change Password, then press OK button to adjust the value.
A Sub Menu Will appear as below. If the password is changed, all of the passwords in the menu will
be changed at the same time.
Change Password
Old PIN
New PIN
Confirm
26
MEN U
:Return
DIGI TAL
:Password
Page 29
MENU OPERATION
Source Lock
Press ▼/▲ button to select Source Lock, then press OK button to enter the sub menu.
Press ▼/▲ button to select Source, then press OK button to set the Source Lock .
You can’t enter the locked source if you set the Source lock.
Source Lock
TV
AV
YPbPr
HDMI1
HDMI2
HDMI3
PC
Page1/2
English
MENU
:Return
:Move
:Page
ENTE R
:On/O ff
Setup Menu
SETUP
Closed Caption
Menu Language English
CLOCK
OSD Timer 5s
MEN U
:Return
:Move :Go to Next Menu
ENTE R
Closed Caption
Press ▼/▲ button to select the item Closed Caption, then press ◄/► button to adjust.
CLOSED CAPTION
Caption Display
Analog Caption Type
Digital Caption Type
Digital CC Preset
Digital CC Style
MENU
:Return
:Move
ENTE R
Off
CC1
Service1
Custom
:On/O ff
27
Page 30
MENU OPERATION
Caption Display
Press ▼/▲ button to select Caption Display, then press ◄/► button to select ON or OFF.
Analog Caption Type
Press ▼/▲ button to select Analog Caption Type, then press ◄/► button to select the type.
Available type: CC1, CC2, CC3, CC4, TEXT1, TEXT2, TEXT3, TEXT4.
English
Digital Caption Type
Press ▼/▲ button to select Digital Caption Type, then press ◄/► button to select the type.
Available type: Service1~6.
Digital CC Preset
Press ▼/▲ button to select Digital CC Preset, then press ◄/► button to select Default or Custom.
Digital CC Style
This menu is only shown when the Digital CC Preset is selected Custom.
DIGITAL CC STYLE
CC Size Default
CC Font
CC Opacity
Text Color
CC Background Opa city
CC Background Col or
CLOSE CAPTION
Default
Default
Default
Default
Default
MEN U
:Return
:Move :Change Setting
CC Size
Press ▼/▲ but ton to select CC Size, then pr ess ◄/► but ton to set . Avai labl e Size: Defaul t, Small,
Standar d, Lar ge.
CC Font
Press ▼/▲ but ton to sel ect , then press ◄/► but ton to sel ect the Fo nt . Avai labl e type: Defaul t, Style0~7 .
CC Opacity
Press ▼/▲ button to select CC Opacity, then press ◄/► button to select the Opacity.
Available Opacity: Default, Solid, Flashing, Translucent, Transparent.
Text Color
Press ▼/▲ button to select Text Color, then press ◄/► button to select the color.
Available Color: Default, Black, White, Red, Green, Blue, Yellow, Magenta, Cyan.
CC Background Opacity
Press ▼/▲ button to select CC Background Opacity, then press ◄/► button to select the Opacity.
Available Opacity: Default, Solid, Flashing, Translucent, Transparent.
CC Background Color
Press ▼/▲ button to select CC Background Color, then press ◄/► button to select the Color.
Available Color: Default, Black, White, Red, Green, Blue, Yellow, Magenta, Cyan.
Menu Language
Press ▼/▲ button to select the item Menu Language, then press ◄/► button to adjust.
Available Language: English, French, Spanish.
28
Page 31

Clock
Press ▼/▲ button to select the Clock, then press OK to edit.
MENU OPERATION
CLOCK
Time Zone Alaska
Auto Clock
Setup Time 2009-10-21 20:00:00
Day Of Week Wed
Daylight Saving Time
MENU
:Return
:Move : Change Setting
Time Zone
Press ▼/▲ button to select Timer Zone, then press ◄/► button to set. Available Size: Central,
Mountain, Pacific, Alaska, Hawaii, Samoa, Newfoundland, Atlantic, Eastern.
Auto Clock
Press ▼/▲ button to select Auto Clock, then press ENTER button to set it Enable/Disable. If you
set it Enable, it will adjust the time corresponding the DTV time automatically.
Setup Time
Press ▼/▲ button to select Setup Time, then press ◄/► button to adjust the time and use the
ENTER button to go to the next option.
Day Of Week
This option displays the Day Of Week corresponding to the setup time.
English
Daylight Saving Time
Press ▼/▲ button to select , then press ◄/► button to set. Size: ,
, , , , , .
10s 20s 30s 40s 50s 60s
Daylight Saving Time Time 5s
OTHERS MENU
OTHERS
Blue Back
No Signal Power Off
No Operation Powe r Off
All Reset
MENU
:Return
:Move :On/Off
ENTE R
Blue Back
Press ▼/▲ button to select Blue Background, then press OK button to select when there is
no signal, whether set the background in blue or not.
Ent er
29
Page 32

MENU OPERATION
No Signal Power Off
Press▼/▲ button to select No Signal Power Off, then press OK button to select it On or Off.
When set it On and there is no signal input by 10 minutes, it will turns off the panel and the LED light
turns amber.
No Operation Power Off
English
Press ▼/▲ button to select No Operation Power Off, then press OK button to select it On or Off.
When set it On and there is no operation input by 3 hours, it will turns off the panel and the LED
light turns red.
All Reset
Press ▼/▲ button to select All Reset, then press OK button to execute reset. When you select
All Reset item, a dialogue box will appear as following:
Attention!
If [ All Reset ] was executed
TV system is reset.
AV/YPbPr/HDMI1/HDMI2/HDMI3
1.PICTURE menu and description are the same as that for TV source.
2.SOUND menu and description are the same as that for TV.
But the settings for Analog Sound and Digital Sound are invalid
in these sources.
3.PARENTAL menu and description are the same as that for TV V source.
4.SETUP menu and description are the same as that for TV source.
But the setting for Closed Caption is invalid in source HDMI.
5.OTHER menu and description are the same as that for TV source.
6.CHANNEL menu and description are invalid in these sources .
PICTURE MENU
PICTURE
Picture Setting s
Screen Size
PC Settings
Color Temperature Normal
Advanced Pictur e Settings
Wide
30
MEN U
:Return
:Move :Go to Next Menu
ENTE R
Page 33

MENU OPERATION
Picture Settings
1.Press ENTER when the Picture Settings item is highlighted. Then you will go to the sub-menu as
following.
2.Press ▼/▲ to select the desired menu item. Press ENTER to proceed if necessary.
3.Press ◄/► to adjust the item to the desired level.
4.When you have changed the settings, you can exit from the menu by pressing MENU.
PICTURE SETTINGS
Picture Mode User
Brightness
Contrast
Color
Tint
Sharpness
English
MENU
:Return
:Move :Go to Next Menu
ENTE R
Picture Mode
Press ▼/▲ button to select Picture Mode, then press◄/►button to adjust.
Available picture mode: Dynamic, Standard, Movie, User.
Brightness
Press ▼/▲ button to select Brightness,
then press ◄/► button to adjust.
Contrast
Press ▼/▲ button to select Contrast,
then press ◄/► button to adjust.
Color
Press ▼/▲ button to select Color,
then press ◄/► button to adjust.
Brightness
25
Contrast
25
Color
27
Sharpness
Press ▼/▲ button to select Sharpness,
then press ◄/► button to adjust.
Sharpness
27
31
Page 34

MENU OPERATION
Screen Size
1.Press ENTER when the Screen Size item is highlighted. Then you will go to the sub-menu as
following.
2.Press▼/▲ to select the desired menu item. Press ENTER to proceed if necessary.
English
3.Press ◄/► to adjust the item to the desired level.
4.When you have changed the size, you can exit from the menu by pressing MENU.
PICTURE
Picture Setting s
Screen Size
PC Settings
Color Temperature Normal
Advanced Pictur e Settings
Wide
MEN U
:Return
:Move :Go to Next Menu
ENTE R
Screen Size
Press ▼/▲ button to select Screen Size, then press ◄/► button to adjust. Available Screen Size:
Standard, Dot By Dot, Wide.
PC Setting
1.Press ENTER when the PC Settings item is highlighted. Then you will go the sub-menu as following.
2.Press ▼/▲to select the desired menu item. Press ENTER to proceed if necessary .
3.Press ◄/► to adjust the item to the desired level.
4.When you have changed the settings, you can exit from the menu by pressing MENU.
PC SETTINGS
Auto Adjust Enter
Horizontal Posi tion
Vertical Position
Clock
Phase
Reset Enter
32
MENU
:Return
:Move
ENTE R
:Press To Enter
Page 35

MENU OPERATION
Auto Adjust
Press ▼/▲ button to select Auto Adjust, then press OK button to start auto adjusting.
Horizontal Position
Press ▼/▲ button to select Horizontal Position,
then press ◄/► button to adjust.
Vertical Position
Press ▼/▲ button to select Vertical Position,
then press ◄/► button toadjust.
Clock
Press ▼/▲ button to select Clock, then press
◄/► button to adjust.
Phase
Press ▼/▲ button to select Phase, then press
◄/► button to adjust.
Reset
Press ▼/▲ button to select Reset, then press
OK button to reset the options above.
Horizontal Position
0
Vertical Position
0
Clock
0
Phase
32
English
1.SOUND menu an d description a re the same as that f or TV.
but the setting s for Analog Soun d and Digital Sou nd are invalid in P C source.
2.PARENTAL me nu and descript ions are the same a s that for TV sourc e.
3.SETUP menu an d description a re the same as that f or TV source.
But the setting f or Closed Capti on is invalid in PC s ource.
4.OTHER menu an d description a re the same as that f or TV source.
5.CHANNEL men u and descripti on are invalid in P C source.
Note: The operation and description of the hot key is programmable on your
remote control.
33
Page 36

TROUBLESHOOTING
9. Troubleshooting
Please check if you can solve problems by troubleshooting yourself .
English
Troubleshooting
No signal
No color shades
Stain on the
screen
Double or multiple
display image
Snow on the screen
The remote control
does not work
"Zip" made noise on
TV cover
Control
Please check that all cables are correctly plugged in.
Adjust the contrast, the color and the brightness.
May be the result from a lighting signal from car, motor, neon light
and other electrical devices or appliances.
May be the result of an electrical wave disturb from other TV,
Computer and Game machine or Radio.
The cables of the antenna are not correctly plugged in.
Please check the batteries order and alignment. Check that the IR
of the remote control is not hidden by something.
Even if the display image is correct, the noise may come from an
unsteady fixation of the panel.
34
No sound
Make sure that you have not press the MUTE button of the panel
or of the remote control.
Page 37

SPECIFICATIONS
10. SPECIFICATIONS
This manual is only for your reference, any change to the design and specification will not be
advised.
3 Inch
Screen Size
Display Type
Resolution(Pixel)
Aspect Ratio
Power Supply
Power Consumption
TV System
Video Input Format
Audio Output Power
AC100-240V,50/60Hz
2
TFT L D
C
9
1 8
1
ATSC/NTSC
PAL/NTSC
L / R 2X8W
0
2
16:9
1
0
X
1
W
0
0
English
SUPPORT
DVD
Dimensions
ANTENNA
AV-IN
YPbPr - IN
HDMI - IN
VGA(PC) - IN
VGA(PC) AUDIO - IN
SCART - IN
SCART - OUT
AUDIO - OUT
S-VIDEO - IN
COAXIAL - OUT
COMMON INTERFACE
USB
IPOD
Disc Physical Format
DVD Video Output Format
W/Stand(LxWxH-mm)
W/O Stand(LxWxH-mm)
Wall-mount
YES
YES
YES
YES
YES
YES
--
--
YES
--
YES
--
Service Port Only
--
--
--
7
8
2
* *5 mm
78* * mm
2
4
00* 00 VESA(mm)
2
5
2
8
8
3
8
5
5
3
0
Weight
Wall-mount Screw size
Net (Kgs)
Gross (Kgs)
5
M *1
.
9
12.65
2
4
8
35
Page 38

Page 39

À écran plat
Téléviseur LCD
SC322TI
Manuel d’Instruction
Fr
Lisez toutes les instructions attentivement avant l’utilisation de cette télévision.
Conservez ces instructions dans une place en sécuritépour la référence future.
Page 40

Page 41

TABLE DES MATIÈRES
1
2
3
4
INFORMATIONS
IMPORTANTES
PREFACE
PRECAUTIONS
DE SECURITE
DANS LA CAISSE
CONNEXIONS
5
FRONT/ARRIERE
DU TELEVISEUR LED
DES SI NS A
6
L'INSTALLA TI ON
DE TV
Français
Connexion du cordon d'alimentation
Connexion de l'antenne
Connexion AV
Connexion YPbPr(composante)
Connexion VGA(PC)
Connexion COAX
Connexion HDMI
Fonction Port Service
7
8
9
10
TELECOMMANDE
MENU D'OPÉRATION
DEPANNAGE
SPECIFICATIONS
Instructions de la télécommande dans la mode TV
Configuration de la télécommande
Configuration Wizard
Source d'entrée à sélection
Opération de base
Menu Image
Menu Son
Menu Chaîne
Contrôl Parental
Menu de configuration
Autre Menu
Menu Image
16
16
17
21
23
1
Page 42

INFORMATIONS IMPORTANTES
Avertissement
Risque de choc électrique
Ne pas ouvrir !
Français
Le symbole de l'éclair fléché dans un triangle équilatéral, est destiné à alerter l'utilisateur
de la présence de « tension» dangereuse non-isolée dans le boîtier du produit qui
peut être d'une ampleur suffisante pour constituer un risque d'électrocution.
Le point d'exclamation dans un triangle équilatéral est destiné à alerter l'utilisateur
de la présence d'exploitation importante et d'instructions de maintenance (entretien)
dans la documentation jointe à l'appareil.
ATTENTION:L'UTILISATION DE TOUT CONTROLE,DE REGLAGES OU PROCEDURES AUTRES
QUE CELLES SPECIFIEES DANS CE DOCUMENT PEUVENT ENTRAINER UNE EXPOSITION
A DES RADIATIONS DANGEREUSES.
ATTENTION: Ces instructions de service ne sont destinées qu'à l'usage par le personnel
qualifié. Pour réduire le risque de choc électrique, ne jamais effectuer des réparations
autres que celles décrites dans les instructions de fonctionnement, sauf si vous êtes
qualifié pour le faire.
Consultez le manuel d'entretien pour les instructions d'entretien.
Qualification ENERGY STAR
Ce produit SEIKI a gagné l'ENERGY STAR dans la réunion.Les directives fédérales d'efficacité
énergétique sont définies par le Ministère de l'Énergie et de l'Environmental Protection Agency.
Le programme ENERGY STAR est pour but de fournir les directives d'économie d'énergie et
d'aider à promouvoir les produits économes en énergie et les pratiques, les changements à
certaines fonctions, les réglages et fonctions de ce TV peuvent modifier et / ou augmenter sa
consommation d'énergie.
Le M od e d'accueil est le mode dans lequel le produit se qualifie pour ENERGY STAR .
Le M od èl e de détail optimise les effets vidéo lorsque l'utilisation au showroom de détail ou de
l'environnement de démonstration.Ce mode de la configuration vidéo peut augmenter la
consommation d'énergie au-delà des limites requises dans la qualification ENERGY STAR .
2
Page 43

INFORMATIONS IMPORTANTES
Consignes de sécurité importantes
Note:
1.Lisez ces instructions.
2.Conservez ces instructions.
3.Respectez tous les avertissements.
4.Suivez toutes les instructions.
5.Ne l'utilisez pas près de l'eau.
6.Nettoyez avec un chiffon sec.
7.Ne bloquez pas les ouvertures de ventilation. Installation conformément aux instructions du fabricant.
8.Ne l'installez pas près de sources de chaleur telles que radiateurs, registres de chaleur, poêles
ou autres appareils (y compris les amplificateurs) produisant de la chaleur.
9.N'éliminez pas l'intention de sécurité de la fiche polarisée ou à la terre. Une prise polarisée possède
deux lames dont une est plus large que l'autre. Une prise à la terre possède deux lames et une
broche de terre. La lame large ou la troisième broche est prévue pour votre sécurité. Si la prise
fournie ne rentre pas dans votre fiche, consultez un électricien pour faire remplacer la fiche obsolète.
10.Assurez vous que le cordon d'alimentation ne soit pas écrasé ou pincé, particulièrement au niveau
des prises de commodité, et le point où ils sortent de l'appareil.
11.Utilisez uniquement les fixations / accessoires spécifiés par le fabricant.
12.Utilisez uniquement le chariot, trépied, console ou table spécifiée par le fabricant ou vendu avec
l'appareil. Quand un chariot est utilisé, soyez prudent lorsque vous déplacez l'ensemble chariot /
appareil pour éviter des blessures en cas de renversement.
Français
13.Débranchez cet appareil pendant les orages ou lorsqu'il n'est pas utilisé pendant de longues
périodes de temps.
14.Confiez toute réparation à un personnel qualifié. Un entretien est requis lorsque l'appareil a été
endommagé, comme le cordon d'alimentation ou la prise est endommagée, le liquide a été
renversé ou des objets sont tombés dans l'appareil, l'appareil exposé à la pluie ou à l'humidité ne
fonctionne pas normalement, ou il est tombé.
15.L'appareil ne doit pas être exposé à des gouttes ou des éclaboussures et aucun objet rempli de
liquide, tels que vases, peut être placé sur l'appareil.
16.AVERTISSEMENT: Pour réduire des risques d'incendie ou le choc électrique, n'exposez pas cet
appareil à la pluie ou à l'humidité.
17.La prise électrique ou le coupleur de l'appareil utilisé comme dispositif de débranchement, doit
être facilement accessible.
18.L'appareil doit être raccordé à une prise secteur avec connexion à la terre.
3
Page 44

PREFACE
2. PREFACE
Merci d'avoir acheté ce téléviseur! S'il vous plaît lisez attentivement ce manuel avant de faire
fonctionner le téléviseur. Assurez-vous que la télévision n'a pas été endommagée pendant le
transport. Si le téléviseur est endommagé, ne l'installez pas, et contactez votre revendeur.
Vérifiez que vous avez tous les accessoires selon le modèle.
Français
3. PRECAUTIONS DE SECURITE
Placer le téléviseur sur une surface stable.
Ne pas placer de matériels sur le téléviseur.
Min imum dis tance s
10c m
20c m
10c m 5cm
Ne pas utiliser le téléviseur avec des accessoires autres que
ceux fournis ou suggérés par le fabricant.
Ne pas bloquer ou couvrir les ouvertures de ventilation sur le téléviseur.
Si vous avez un support mural, vérifiez qu'il est stable.
Le cordon d'alimentation et les câbles doivent être correctement
acheminés et protégées pour empêcher les hommes de marcher
sur eux et de faitre tomber la téléviseur.
4
Page 45

PRECAUTIONS DE SECURITE
Garder le téléviseur dans une condition sèche
et éloignée de l'humidité.
Garder le téléviseur loin de toute source de chaleur.
Français
Débrancher le téléviseur avant de le nettoyer. Ne pas utiliser de
solvants ou de liquides pour nettoyer le téléviseur. Il faut nettoyer
le téléviseur avec un chiffon doux et sec.
En cas de dépannage, ne pas utiliser les pièces de rechange autre
que celles suggérées par le fabricant. L'utilisation inadéquate des
pièces de rechange peut conduire à des chocs électriques, des
courts-circuits, d'incendies, et d'autres incidents.
Débrancher le téléviseur pendant les orages ou lorsqu'il n'est pas
utilisé pendant de longues périodes de temps.
5
Page 46

DANS LA CAISSE
4. DANS LA CAISSE
POWER
TV
P.MODE S.MODE SLE EP ASPECT
MUTE
VOL CH
SOURCE
MENU
MTS C.C
RE
T
U
PLAY
RN
S
DI
Français
Télevision à écran
HD
Télécommande
ENTER
CH.
LI
S
T
A B C D
V-CHIP
FAV.CH
ADD/ERASE
AUTO
VGA
HDMI
COMP
SRC11-49 A
T
I
X
E
FAV.+
FAV.-
1.5V
1.5V
Piles AAA
MANUEL D'UTILISATION
Warranty Card
Carte de garantie
Qui ck Co nnect Gui de
Guide de connexion rapide
HDMI C bleà
Câble d'alimentation
6
Page 47

CONNEXIONS FRONT / ARRIERE DU TELEVISEUR L D
C
5.CONNEXIONS FRONT / ARRIERE DU TELEVISEUR L D
C
Vue Frontale
Appuyez sur “VOL ”+ ou “VOL- ”pour augmenter ou
1.
1
diminuer le volume.
Appuyez sur “CH ” ou “CH ”pour parcourir les chaînes.
2.
2
Appuyez sur “MENU” pour afficher le menu principal
3.
sur l'écran.
3
4.
Appuyez sur “SOURCE” pour sélectionner la source
4
d'entrée.
5. Appuyez sur la touche “ALIMENTATION ” pour mettre
5
le téléviseur sous ou hors tension.
6. INDICATEUR D'ALIMENTATION :Affichage rouge
en mode veille. Affichage bleue ou vert lorsque votr e
MARCHE/ ARR ET LED
7
6
téléviseur est allumé.
7. CAPTEUR A DISTANCE: capteur infrarouge pour la
télécommande.
Français
Vue Arrière et Connexions de Contrôle
3
1
1
2
2
4
1. Sortie DE CABLE COAXIAL: Connecter le récepteur de COAX.
2. RF IN: Connecter l'antenne.
3. VGA( PC) : Relier la prise de sortie PC-RGB du PC.
4. PC AUDIO: Connecter la prise de sortie audio du PC.
5. HDMI1/HDMI2/HDMI3: Connecter la prise de sortie HDMI
du DVD.
6.SERVICE USB: Port USB pour l'utilisation exclusive en usine.
7. L-OUT,R-OUT: .
8. VIDEO: Connecter la prise d'entrée video de DVD or VCR.
9.L/R: pour l'audio VIDEO.
10. YPbPr1/YPbPr2: Connecter la prise de sortie YPbPr de DVD
ou VCR.
1 .
1
L/R: pour l'audio YPbPr.
AC IN et interrupteur d'alimentation: Entrée principal
1 .
2
d’alimentation.
5
Connecter l'amplificateur audio à la prise
1
106
1
8
9
7
7
Page 48

DESSINS A L'INSTALLATION DE TV
6. DESSINS A L'INSTALLATION DE TV
Connexion du cordon d'alimentation
- Raccorder le cordon d'alimentation correctement comme indiqué .
- Appuyer sur la prise d'ALIMENTATION de votre D TV pour brancher le .
L'indicateur d'alimentation sur le panneau frontal s'affiche en couleur .
H
bleue
Français
Connecxion de l'Antenne
Pour assurer la bonne image et le son, le système d'antenne TV doit être installé. Le système
d'antenne comme indiqué peut provenir de magasins d'équipement TV, qui fournira des services
pour une installation et une connexion correcte. Après l'installation, insérez la fiche d'antenne
75-ohm dans la prise d'antenne, comme indiqué.
Amplificateur d'a ntenn e
extér ieur
Amplificateur d'a ntenn e
intérieur
Fiche d 'Alimentation
de l'Amplificateur d'antenne
8
ANTEN NE VHF ANTEN NE UHF
Fiche
d'antenne
75-ohm
Page 49

DESSINS A L'INSTALLATION DE TV
Connexion AV
Connecter la prise de sortie VIDEO et AUDIO du DVD ou du VCR aux prises VIDEO du téléviseur
en utilisant le câble RCA. Faites correspondre les couleurs de prise: La vidéo est jaune, l'audio
gauche est blanc, et l'audio est bien rouge. Sélectionnez la source d'entrée AV en utilisant la
touche SOURCE sur la télécommande.
Arriè re de TV
Français
Câble Vidéo
VIDEO R L VIDEO R L
DVD ou VCR
Câble AUDIO
Arrie re de DVD ou VCR
Connexion YPbPr(Composant)
Connecter la sortie YPbPr du DVD ou du VCR à l'entrée YPbPr du téléviseur. La qualité d'image
est améliorée par rapport à la connexion d'un VCR ordinaire à l'entrée vidéo. Reliez la sortie audio
du DVD ou du VCR aux prises d'entrée audio du téléviseur en utilisant le câble RCA.
Faire correspondre les couleurs de prises: Y est vert, Pb est bleu, Pr est rouge, l'audio gauche
est blanc et l'audio droite est rouge. Sélectionner la source d'entrée de composant en utilisant la
touche SOURCE de la télécommande.
Arriè re de TV
Câble YPbPr
Pb
Y
DVD ouVCR
Câble AUDIO
Pr
Arrie re de DVD ou VCR
LR
9
Page 50

DESSINS A L'INSTALLATION DE TV
Connexion VGA(PC)
Connectez la sortie RGB du PC à la prise VGA (PC) sur le téléviseur. Reliez la sortie audio de
PC à la prise AUDIO PC sur le téléviseur. Sélectionnez la source d'entrée RGB avec l'aide du
bouton SOURCE sur la télécommande.
Français
Câble VGA
Arriè re de TV
Câble Audio
AUD IO R GB-PC O UTPUT
Connexion COAX
Connecter l'amplificateur audio à la prise de sortie COAX sur le téléviseur.
Câble coaxial
Arriè re de TV
10
COAXCOAX
Arrie re de l'a mplificate ur audio
Ampli ficat eur aud io
Page 51

DESSINS A L'INSTALLATION DE TV
Connexion HDMI
La prise HDMI qui remplace la connexion HDMI permet de transférer tous les signaux
audio / vidéo / commande via un seul câble. Ces signaux sont transmis en numérique.
Arriè re de TV
Câble HDMI
Français
Fonction de Port Service
Port service: (Pour l'utilisation exclusive en usine.)
Arriè re de DVD
Arrière de TV
Câble USB
11
Page 52

TELECOMMANDE
7. TELECOMMANDE
Instructions de la télécommande en mode TV
POW ER
TV
POWER
Allumer ou éteindre la TV LCD.
TV
Appuyer sur ce bouton pour tourner à la source de TV.
Français
P.MOD E S.M ODE SLEEP ASP ECT
MUT E
VO L CH
MTS C.C
DIS
C
H
A B C D
V-C HIP
AUTO
HDM I
SOU RCE
MEN U
Y
LA
P
RET U
RN
ENTER
.
L
IS
T
FAV.CH
ADD/ ERASE
VGA COM P
EXI T
FAV.+
FAV.-
SRC 11- 49A
P.MODE
Sélectionner la mode d’image.
S.MODE
Sélectionner la mode d’image.
SLEEP
Fixer le compteur de sommeil.
ASPECT
Appuyer sur ce bouton pour sélectionner la radio Aspect (comme suit : Standard,
Wide, Wide Zoom, Zoom, etc.)
BOUTONS NUMÉRIQUES
Appuyer sur les boutons 0-9 pour changer directement la chaîne de TV.
-/--
Appuyer sur ce bouton pour entrer un numéro de programme pour une
chaîne multiple comme 2-1, etc.
Retourner au menu précédemment affiché.
VOL+/VOL-
Appuyer sur ce bouton pour augmenter ou diminuer le volume de son.
MUTE
Appuyer sur ce bouton pour fermer le son. Appuyer sur ce bouton une
autre fois ou appuyer sur le bouton VOL+ pour reprendre le son de la TV.
SOURCE
Appuyer sur le bouton Source pour afficher la source d’entrée d’OSD,
appuyer sur le bouton▲ /▼ pour sélectionner une source d’entrée, et
puis appuyer sur ENTER pour la confirmer.
CH+/CH-
Appuyer sur ce bouton pour augmenter ou diminuer le numéro de chaîne.
MTS
Choisir Mono, stereo ou sap pour l’entrée analogique de TV. Choisir
l’anglais, le français ou l’espagnole pour l’entrée DTV.
MENU
Afficher le menu principal de TV.
CC
Appuyer sur ce bouton pour configurer le sous-titre comme suit: cc mode
ouvert, cc mode fermé, cc mode en muet.
DISPLAY
Afficher les informations de source et de chaîne
RETURN
Retourner à la chaîne précédente.
THUMBSTICK (▲ /▼ /◄ / ► / ENTER)
Naviguer dans les menus sur l’écran et ajuster les configurations du
système à ce que vous préférez.
CH.LIST
Appuyer sur ce bouton pour afficher la liste de chaîne.
EXIT
Sortir du menu de TV.
A, B, C, D
Appuyer sur un des ces 4 boutons pendant 3 seconds et puis enregistrer
la chaîne courante en A, B, C, D.
V-CHIP
Opter l’entrée V-CHIP
FAV.CH
Appuyer sur ce bouton pour afficher la liste des programmes favoris.
FAV+/FAV-
Appuyer sur ces 2 touches pour opter vos programmes favoris.
AUTO
Ajuster automatiquement la position Horizontale / Verticale (en mode de PC)
ADD/ERASE
Ajouter/supprimer les chaînes dans la liste des programmes favoris.
HDMI
Opter l’entrée HDMI.
VGA
Opter l’entrée VGA.
COMP
Opter l’entrée COMP.
12
Page 53

TELECOMMANDE
Configuration de la télécommande
1. Enlevez le couvercle.
2. Placez trois piles A. Lors de l'insertion des piles, assurez-vous de faire correspondre les
extrémités + et - sur les piles, mettez en rang correctement avec la section de marques.
“ ” “ ”
3. Remettez le couvercle de la pile.
Eviter une fuite des piles, cela pourrait entraîner des blessures corporelles ou dommages
à la télécommande:
1. Installez toutes les piles correctement, comme indiqué sur la télécommande.
2. Ne mélangez pas de piles: (ANCIENS et NOUVEAUX au carbone et alcalines, etc.) Enlevez les
piles lorsque la télécommande n'est pas utilisée pendant une longue période de temps.
Français
13
Page 54

MENU D'OPÉRATION
8.Menu d'Opération
CONFIGURATION WIZARD
Sélectionner laLangue
Sélectionnez la langue que vous voulez.
Français
Select Language
Wel come to t he SEIK I HDTV Se tup Wiz ard.F ollow t his gui de
t o
hel p setup y our HDT V for sca nning c hanne ls or acc essin g
you r
ext ernal d evice s for Ant enna, Set-t op Box, B lu-ra y, DVD,
and o ther pl ayer.
Gam es
Use t he up and d own arr ows on yo ur remo te cont rol TV
key pad
to se lect th e langu age of sc reen me nu and me ssage
Eng lish
Fre nch
Spa nish
:Move :Press to Ente r
ENTE R
ro
Ent er
Ent er
Ent er
Fuseau horaire
Use t he left a nd righ t arr ows on y our re mote co ntrol
key pad
Time zone
Next
MENU
TENSION
Power O n Mode
Mod e
Hom e optimi zes the s tanda rd vide o setti ng for
ENE RGY
STA R@ qual ifica tion.
Ret ail Mod e optim izes th e video s ettin g for use o n a retai l
sho wroom f loor or d emo env ironm ent.
Use t he up/d own key a rrows o n you rem ote con trol or T V
key pad to se lect po wer on mo de.
Home Mod e(Energy Sav ing)
Retail M ode
s
Time zone
to sel ect
:Return
you r local t ime zon e .
Eastern
:Move :Change Setting
Select your Connection devices...
Con nect to G ame, Bl u-Ray ,DVD, o r other p layer
Ant enna or c oaxia l cable i nput
Bac k
TV
ro
14
MENU
:Return
:Move
ENTE R
:Pres s to Ente r
MEN U
:Return
:Move
ENTE R
:Pres s to Ente r
Page 55

Sélectionnez la source d'entrée
MENU D'OPÉRATION
Select your Connection devices...
SOURCE LIST
TV
Con nect to G ame, Bl u-Ray ,DVD, o r other p layer
Ant enna or c oaxia l cable i nput
AV
YPbPr
HDMI1
Bac k
HDMI2
HDMI3
PC
MEN U
:Return
:Move
ENTE R
:Pres s to Ente r
:Select
Scanning Cha nnel Program
Use t he Up or Do wn key ar rows on y ou rem ote co ntro l or TV
key pad to se lect th e chann el scan t ype.
Antenna
Cable
Back
MEN U
:Return
Sélectionnez le téléviseur (ou l'Antenne l'entrée du câble coaxial).
:Page
:Move
ENTE R
:Pres s to Ente r
ENTE R
:Pres s to Ente r
Pag e 1/2
Français
Scanning Cha nnel Program
Use t he Up or Do wn key ar rows on y ou rem ote co ntro l or TV
key pad to se lect th e chann el scan t ype.
Antenna
Cable
Back
MEN U
:Return
:Move
ENTE R
:Pres s to Ente r
En vertu“Configuration Wizard”, l' fonction du bouton :
“Menu”-----Entrez
“CH / ”-----Up/Down
>
<
“Vol+/-”-----Gauche / Droite
15
Page 56

MENU D'OPÉRATION
SELECTIONNER LA SOURCE D'ENTREE
Source Select
TV
AV
Français
YPbPr
Appuyez sur la touche SOURCE pour afficher la liste de source d'entrée.
HDMI1
HDMI2
HDMI3
PC
PICTURE
Appuyez sur ▼ / ▲ pour sélectionner la source que vous voulez regarder.
Appuyez sur la touche OK pour entrer dans la source sélectionnée.
OPERATION DE BASE
SOUND
CHANNEL PARENTAL
SETUP OTHERS
Appuyez sur la touche MENU pour afficher le menu principal OSD.
Appuyer sur la touche ◄ / ► pour sélectionner le menu que vous voulez.
Appuyez sur la touche OK pour entrer dans le sous-menu.
Appuyez sur la touche ▼/▲ pour sélectionner l'élément et appuyez sur ◄ / ► pour régler la
valeur dans le sous-menu.
Vous pouvez appuyer sur la touche MENU pour revenir au menu précédent ou SORTIR pour
fermer le menu OSD.
16
Page 57

MENU D'IMAGE
PICTURE
Picture Setting s
Screen Size
PC Settings
Color Temperature Normal
Advanced Pictur e Settings
Wide
MENU D'OPÉRATION
Français
MENU
:Return
:Move :Go to Next Menu
ENTE R
Réglage d'image
1. Appuyez sur ENTRER lorsque l'élément de Réglage d'Image est mis en surbrillance. Puis vous
irez à la sous-menu comme suit.
2. Appuyez ▼ / ▲ pour sélectionner la rubrique souhaitée. Appuyez sur ENTRER pour procéder si
nécessaire.
3. Appuyez ◄ / ► pour le niveau souhaité.
4. Lorsque vous avez modifié le réglage, vous pouvez quitter le menu en appuyant sur MENU.
PICTURE SETTINGS
Picture Mode User
Brightness
Contrast
Color
Tint
Sharpness
MENU
:Return
:Move :Go to Next Menu
ENTE R
Mode Image
Appuyez sur ▼ / ▲ pour sélectionner le Mode Image, puis appuyez sur ◄ / ► pour ajuster.
Ce n'est que dans le mode utilisateur les options de détail suivantes peuvent être ajustées.
Mode Image disponible:Energy Saving , Dynamique, Standard, Film,Utilisateur.
Luminosité
Appuyez sur la touche ▼ / ▲ pour
sélectionner la Luminosité, puis appuyez
Brightness
25
sur la touche◄ / ► pour ajuster.
Contraste
Appuyez sur la touche ▼ / ▲ pour
sélectionner le Contraste, puis appuyez
Contrast
25
sur la touche◄ / ► pour ajuster.
17
Page 58

MENU D'OPÉRATION
Couleur
Appuyez sur la touche ▼ / ▲ pour
Color
27
sélectionner la couleur, puis appuyez
sur la touche◄ / ► pour ajuster.
Netteté
Sharpness
Appuyez sur ▼ / ▲ pour sélectionner la netteté,
Français
puis appuyez sur la touche◄ / ► pour ajuster.
Teinte
Appuyez sur ▼ / ▲ pour sélectionner la Teinte,
puis appuyez sur la touche◄ / ► pour ajuster.
27
Tint
27
Réglage d'écran
Taille d'Ecran
Appuyez sur la touche ▼/▲ pour sélectionner la Taille d'Ecran, puis appuyez sur la touche ◄ / ►
pour ajuster. Taille d'Ecran disponible: Standard, Wide, Wide Zoom, Zoom.
Température de Couleur
Appuyez sur la touche ENTRER lorsque l'élément de température de couleur met en surbrillance.
Ensuite, appuyez sur la touche ◄ / ► pour ajuster. Température de couleur disponible: Normal,
Warm,Cool.
Color Temperature
Warm
Réglage d'Image avancé
ADVANCED PICTURE SETTINGS
Dynamic Contras t
Film Mode
Noise Reduction
MPEG Noise Reduct ion
Off
Off
Off
Off
18
MENU
:Return
:Move :Change Setting
Page 59

Contraste Dynamique
MENU D'OPÉRATION
Appuyez sur la touche ▼ / ▲ pour sélectionner la
touche ◄ / ► pour ajuster. Il est possible de régler le
contraste correspondant au signal d'entrée afin d'améliorer
la qualité de l'image affichée. Mode Libre: Marche / Arrêt.
Film Mode
Appuyez sur la touche ▼ / ▲ pour sélectionner
l'élément de Mode Film, puis appuyez sur la
touche ◄ / ► pour ajuster. Il traite de mouvement
3:2 et 2:2. Mode Film disponible: Marche / Arrêt.
Réduction de bruit
Appuyez sur la touche ▼ / ▲ pour sélectionner
l'élément de Réduction de Bruit, puis appuyez sur la
touche ◄ / ► pour ajuster. Réduction de bruit disponible:
Désactivé, Faible, Moyen, Haut.
Réduction de Bruit MPEG
Appuyez sur la touche ▼ / ▲ pour sélectionner l'élément de
Réduction de Bruit MPEG, puis appuyez sur la touche ◄ / ►
pour ajuster. Elle peut améliorer la qualité d'image en
réduisant le bloc de bruit. Disponible de réduction de bruit
MPEG: Arrêt, Faible, Moyen, Haut.
Dynamic Contrast
Off
Film Mode
Off
Noise Reduction
Off
MPEG Noise Reduction
Off
Français
MENU SON
SOUND
Sound Settings
Surround Mode
AVL
Analog Sound Ster eo
Digital Sound English
Digital Audio Out put PCM
Equalizer Setti ngs
MEN U
:Return
:Move :Go to Next Menu
Réglage de Son
1.Appuyez ENTRER lorsque l'élément de Réglage de Son est mis en surbrillance, Puis vous irez
à la sous-menu ci-après.
2.Appuyez ▼ / ▲ pour sélectionner la rubrique souhaitée. Appuyez sur ENTRER pour procéder
si nécessaire.
3.Appuyez ◄ / ► pour le niveau souhaité.
4.Lorsque vous avez modifié le réglage, vous pouvez quitter le menu en appuyant sur MENU.
ENTE R
19
Page 60

MENU D'OPÉRATION
SOUND SETTING
Sound Mode User
Bass
Treble
Balance
Français
MENU
:Return
:Move :Change Setting
Mode Son
Appuyez sur la touche ▼ / ▲ pour sélectionner l'élément de Mode Son, puis appuyez sur la
touche ◄ / ► pour ajuster. Ce n'est que dans le mode utilisateur, les options de détail suivantes
peuvent être ajustées. Mode Son disponible: Utilisateur, Dynamique, Standard, Doux.
Basse
Appuyez sur la touche ▼ / ▲ pour sélectionner l'élément Bass, puis appuyez sur la touche ◄ / ►
pour ajuster.
ENTE R
Aigus
Appuyez sur la touche ▼ / ▲ pour sélectionner l'élément aigus, puis appuyez sur la touche ◄ / ►
pour ajuster.
Balance
Appuyez sur la touche ▼ / ▲ pour sélectionner l'élément de balance, puis appuyez sur la touche
◄ / ► pour ajuster.
Bass
7
Treble
7
Balance
7
Mode Surround
Appuyez sur la touche ▼ / ▲ pour sélectionner l'élément de Mode Surround, puis appuyez sur la
touche OK pour régler. Il peut placer l'image pour ajuster à l'écran automatiquement. Lorsque la
largeur Auto. est sélectionnée, le symbole s'affichera comme suit:
Surround Mode
20
Page 61

MENU D'OPÉRATION
AVL
Appuyez sur la touche ▼ / ▲ pour sélectionner l'élément AVL, puis appuyez sur ◄ / ► pour
sélectionnerMarche ou ARRET. Le Niveau de Volume Auto. Peut régler le volume automatiquement
en correspondant à l'audio d'entrée.
Son Analogique
Appuyez sur la touche ▼ / ▲ pour sélectionner l'élément de Son analogique préféré, puis appuyez
sur la touche ◄ / ► pour sélectionner l'audio préféré lors du passage à une chaîne analogique.
Son Analogique Disponible: SAP, Stéréo, Mono.
Son Numérique
Appuyez sur la touche ▼ / ▲ pour sélectionner l'élément de Son Numérique préféré, puis appuyez
sur la touche ◄ / ► pour sélectionner l'audio préféré lors du passage à une chaîne analogique.
Son Numérique Disponible: anglais, français, espagnol.
Sortie Audio Numérique
Appuyez sur la touche ▼ / ▲ pour sélectionner l'élément de Sortie Audio Numérique, puis appuyez
sur la touche ◄ / ► pour sélectionner la sortie audio numérique. Sortie Audio Numérique Disponible:
PCM,Raw,Off .
Réglage d'Egaliseur
EQUALIZER SETTINGS
Mode Off
-1 2 3 1 0 -1
100-2250 500 1K 2K
MENU
:Return
:Move :Change Setting
4K
10K
Français
Mode d'Egaliseur
Appuyez sur la touche ▼ / ▲ pour sélectionner l'élément de Mode d'Egalisateur, puis appuyez sur
la touche ◄ / ► pour sélectionner le mode souhaitée. Mode d'Egaliseur Disponibles: Arret, Rock,
Pop, Jazz, Utilisateur.
MENU CHAINE
Note: Ce menu ne s'affiche que lorsque la source de sortie est TV.
CHANNEL
Channel List
Favorite List
Channel Setting
Signal Type Air
Auto Channel Sear ch Enter
MENU
:Return
:Move :Go to Next Menu
ENTE R
21
Page 62

MENU D'OPÉRATION
Liste des Chaînes
Appuyez sur la touche ▼ / ▲ pour sélectionner la liste de chaîne, puis appuyez sur la touche OK
pour numériser la liste de chaînes. Si vous sélectionnez l'élément “Dans la liste de chaînes”
MARCHE, l'étiquette de chaîne sera affichée dans la liste.
Channel List
A4
Français
MEN U
A11
A14
A63
:Return
:Move :Select
:Page
Page 1/ 1
ENTE R
Liste des Favoris
Appuyez sur la touche ▼ / ▲ pour sélectionner l'élement de Liste des Favoris, puis appuyez sur la
touche OK pour numériser la liste des Favoris.
FAVORITE LIST
No Favorite Chann els Present
Please Perform Fa vorite Channel Add First
Page 1/ 1
MENU
:Return
:Move :Select
:Page
ENTE R
Réglage de Chaînes
Appuyez sur la touche ▼ / ▲ pour sélectionner le Réglage de Chaînes Manuel, puis appuyez sur
la touche OK pour définir la valeur dans le sous-menu.
CHANNEL SETTING
Channel Skip Favorice Label
A4
A11
A14
A63
ENTE R
22
MENU
:Return
:Cursor/Page :Select
Page 63

MENU D'OPÉRATION
Type de Signal
Appuyez sur la touche ▼ / ▲ pour sélectionner le Type de Signal, puis appuyez sur la
touche ◄ / ► pour sélectionner le type que vous souhaitez définir. Il y a deux options: Air et câbles.
Recherche de Chaînes Auto.
Appuyez sur ▼ / ▲ pour sélectionner recherche de chaîne Auto., ensuite appuyez sur la touche
OK pour la recherceh de chaîne, un Menu à la Recherche de Chaîne s'affiche comme suit.
AUTO CHANNEL SEARCH-Air
Now Searching.. .Please Wait...
Return
Analog Channels F ound: 0
Digital Channel s Found: 0
92%
ENTE R
:Stop Auto Channe l Search
MENU
:Skip
CONTROLE PARENTAL
PARENTAL CONTROL
PARENTAL CONTROL
Français
Lock Parental C ontrol
V-CHIP
Change Passwo rd
Keypad
Source Lock
MENU
:Return
0~9
:Enter passwo rd
Lock Parental C ontrol
V-CHIP
Change Passwo rd
Keypad
Source Lock
MENU
:Return
DIGI TAL
:Go to Next Menu
Entrer le mot de passe pour entrer, le mot de passe par défaut est ‘‘0000’’.
V-CHIP
Appuyez sur la touche ▼ / ▲ pour sélectionner V-Chip, puis appuyez sur la touche OK pour régler.
Un sous-menu apparaîtra comme suit.
23
Page 64

MENU D'OPÉRATION
V-CHIP
US V-Chip
Canada V-Chip
Block UnRated Sho w
Downloadable Ra ting
Clear Downloada ble Date
Français
MEN U
:Return
:Move :Go to Next Menu
ENTE R
V-CHIP US
Appuyez sur la touche ▼ / ▲ pour sélectionner V-Chip US, puis appuyez sur la touche OK pour régler.
Un sous-menu apparaîtra comme suit.
USA
Movie Rating
TV Rating
MENU
:Return
:Move
Rating Film
Appuyez sur la touche ▼ / ▲ pour sélectionner le Rating Film, puis appuyez sur la touche OK pour
régler. Un sous-menu apparaîtra comme suit.
Movie Rating
G
PG
PG-13
R
NC-17
X
MENU
:Return
:Move
ENTE R
:Lock /Unlo ck
Appuyez sur la touche ▼/▲ pour sélectionner le Rating, puis appuyez sur la touche OK pour verrouiller.
24
Page 65

MENU D'OPÉRATION
Rating TV
Appuyez sur la touche ▼ / ▲ pour sélectionner le Rating TV, puis appuyez sur la touche OK pour
régler. Un sous-menu apparaîtra comme suit.
MEN U
TV Rating
TV-Y
TV-Y7
TV-G
TV-PG
TV-14
TV-MA
:Return
D L S V FV
:Select
ENTE R
:Lock /Unlo ck
Appuyez sur les touches▼/▲/◄/► pour sélectionner le Rating,puis appuyez sur la touche OK
pour verrouiller.
V-CHIP CANADIEN
Appuyez sur la touche ▼ / ▲ pour sélectionner US V-CHIP, puis appuyez sur la touche OK pour régler.
Un sous-menu apparaîtra comme suit.
CANADA
English Rating
French Rating
English Rating
C
C8+
G
PG
14+
18+
Français
MENU
:Return
:Move
MENU
:Return
:Move
ENTE R
:Lock /Unlo ck
French Rating
G
8ans+
13ans+
16ans+
18ans+
MENU
:Return
:Move
ENTE R
:Lock /Unlo ck
Le fonctionnement du V-CHIP CANADIEN est le même que le fonctionnement du V-CHIP US.
25
Page 66

MENU D'OPÉRATION
Information
Système de rating de Motion Picture Association of America (MPAA)
Grade
G
Sur veill ance Pa renta le Reco mmand ée
PG
PG- 13
R
NC-17
X
Français
NONE
For tem ent Préve nu Pa r Parents
Audien ces
Restre inte
Nul enfa nt de 17 ans Nu l enfant de 1 7 ans o u moins adm is en s alle de cin éma .
Film dur
Aucun
Conven ant à tous les âge s.
Certai ns documents p euvent êt re in appropriés p our les enfant s.
Certai ns documents s eraient inap propriés pou r les enfants de m oins de 13 ans.
Les enfa nts moins de 17 an s nécessitan t l'accom pag nement d'un pa rent ou d'un tut eur adulte pou r
l'affichage dan s les cinémas.
Même que N C-17
MPAA no n évalué
Système de Rating de Surveillance Parentale TV
Grade
TV-Y
TV-Y7
TV-G
TV-PG
Jeune en fants
Enfant p lus de 7 ans Convenant a ux enfants plu s de 17 ans, il peut c ontenir des sc ènes violent es fantastiq ues
Audien ce parentale
Gui de pa rentale
Conten u qui n'est pas offensif po ur la plupart de s pectateurs
Conven ant à tous les aud iences, les en fants peuven t regarder san s surveillan ce
Pas conv enant aux j eun es enfants, il p eut conte nir D ialogue sugg estive, Mouv ais Langage, S exe, et
Scè nes Violente s
Définition
Définition
TV-14
TV-MA
For tem ent Préve nu Pa r Parents
Seule au dience mûre
Pas conv enant aux e nfa nts moine s de 14 a ns, il peut cont enir Dial ogu e forte, Mo uva is Langage, Se xe, et
Scè nes Violente s
Seule po ur adultes, il p eut conte nir D ialogue fort e, Mouvais Lan gage, Sexe, et S cènes Vio lentes
Rating Canadien: L'anglais canadien es t utilisé à tout Canada anglop hone, (C, C8+, G, PG, 14+, 18+).
Le français canadien est utilisé à Québec, (G, 8ans+,13ans+,16ans+,18ans+)
Note: V-Chip bloquera automatiquement certaines catégories qui sont « plus restrictives ». Si vous
bloquez la catégorie TV-Y, et TV-Y7 sera bloqué automatiquement. De la même manière, si vous
bloquez la catégorie TV-G, et toutes les catégories en « jeunes adultes » seront bloquées
automatiquement (TV-G, TV-PG, TV-14, et TV-MA).
Affichage Sans Block
Appuyer sur la touche ◄ / ► pour sélectionner l'Affichage Sans Block, puis appuyez sur la touche
OK pour définir le rating verrouillé.
Rating téléchargeable
Appuyez sur la touche ▼ / ▲ pour sélectionner le Rating téléchargeable, puis appuyez sur la
touche OK pour régler le rating. Si le programme DTV ne dispose pas de cette information de
notation, cette option sera en gris.
Effacer Données téléchargeables
Appuyez sur la touche ▼ / ▲ pour sélectionner l'élement d'Effacer Données téléchargeables, puis
appuyez sur la touche OK pour régler le rating. Note: Les deux opérations ci-dessus uniquement
sont valables lors de la lecture du flux de données téléchargeables. Les opérations sont les mêmes
que US V-CHIP.
CHANGER LE MOT DE PASSE
Appuyez sur la touche ▼ / ▲ pour sélectionner l' élement de Changer le Mot de Passe, puis appuyez
sur la touche OK pour ajuster la valeur. Un sous-menu apparaîtra comme suit. Si le mot de passe est
modifié, tous les mots de passe dans le menu sont changés en même temps.
26
MEN U
Change Password
Old PIN
New PIN
Confirm
:Return
DIGI TAL
:Password
Page 67

MENU D'OPÉRATION
Verrouillage de Source
Appuyer sur la touche ▼/▲ pour sélectionner le Verrouillage de Source, puis appuyez sur la touche
OK pour entrer dans le sous-menu. Appuyer sur la touche ▼/▲ pour sélectionner la Source, ensuite
appuyez sur la touche OK pour définir le Verrouillage de Source, vous ne pouvez pas entrer la source
verrouillée si vous avez défini le Verrouillage de Source.
Source Lock
TV
AV
YPbPr
HDMI1
HDMI2
HDMI3
PC
MENU
:Return
:Move
:Page
ENTE R
:On/O ff
Configuration de Menu
SETUP
Closed Caption
Menu Language English
CLOCK
OSD Timer 5s
Page1/2
Français
MEN U
:Return
:Move :Go to Next Menu
ENTE R
Sous-titrage Fermé
Appuyez sur la touche▼ / ▲ pour sélectionner l'élément de Sous-titrage fermé, puis appuyez sur
la touche ◄ / ► pour ajuster.
CLOSED CAPTION
MENU
Caption Display
Analog Caption Type
Digital Caption Type
Digital CC Preset
Digital CC Style
:Return
:Move
ENTE R
Off
CC1
Service1
Custom
:On/O ff
27
Page 68

MENU D'OPÉRATION
Affichage de Sous-titrage
PAppuyez sur la touche ▼ / ▲ pour sélectionner l'Affichage de Sous-titrage, puis appuyez sur la
touche ◄ / ► pour sélectionner MARCHE ou ARRET.
Type de Sous-titrage Analogique
Appuyez sur la touche ▼ / ▲ pour sélectionner le Type de Sous-titrage Analogique, puis appuyez
sur la touche ◄ / ► pour sélectionner le type. Type Disponible: CC1, CC2, CC3, CC4, texte1, texte2,
Text3, TEXT4.
Type de Sous-titrage Numérique
Français
Appuyez sur la touche ▼ / ▲ pour sélectionner Type de Sous-titrage Numérique, puis appuyez sur
la touche ◄ / ► pour sélectionner le type. Type Disponible: Service1 ~ 6.
Préréglage Numérique CC
Appuyez sur la touche ▼ / ▲ pour sélectionner Préréglage Numérique CC, puis appuyez sur la
touche ◄ / ► pour sélectionner Par défaut ou Autodéfinition.
Style Numérique CC
Ce menu est affiché uniquement lorsque le système de Préréglage Numérique CC test l'autoféfinition
sélectionnée.
DIGITAL CC STYLE
CC Size Default
CC Font
CC Opacity
Text Color
CC Background Opa city
CC Background Col or
CLOSE CAPTION
Default
Default
Default
Default
Default
MENU
:Return
:Move :Change Setting
Taille CC
Appuyez sur la touc he ▼/ ▲ pour sélect ionner la Tai lle CC, pui s appuy ez sur la touc he ◄ / ► à déf inir. Tai lle
Dispo ni bl e: Pet ite, Standar d, Grande, Par Déf aut .
Police de Caractère CC
Appuyez sur la touche ▼ /▲ pour sélect ionner , puis appuyez sur la touche ◄ / ► pour sél ectionner la Police
de Caract èr e CC. Taille Disponi ble: Styl e 0 ~ 7. Par Déf aut .
Opacité CC
Appuyez sur la touche ▼ / ▲ pour sélectionner l'Opacité CC, puis appuyez sur la touche ◄ / ► pour
sélectionner l'opacité. Opacité Disponible: Par défaut, Solides, Clignotant, Translucide, Transparent.
Couleur de texte
Appuyez sur la touche ▼ / ▲ pour sélectionner la Couleur de Texte, puis appuyez sur la
touche ◄ / ► pour sélectionner la couleur. Couleurs disponibles: Par défaut, Noir, Blanc, Rouge,
Vert, Bleu, Jaune, Magenta, Cyan.
Opacité de Fond CC
Appuyez sur la touche ▼ / ▲ pour sélectionner l'Opacité de Fond CC, puis appuyez sur la
touche ◄ / ► pour sélectionner l'opacité. Opacité disponible: Par défaut, Solides, Clignotant,
Translucide, Transparent.
Couleur de Fond CC
Appuyez sur la touche ▼ / ▲ pour sélectionner la Couleur de Fond CC, puis appuyez sur la
touche ◄ / ► pour sélectionner la couleur. Couleurs disponibles: Par défaut, Noir, Blanc, Rouge,
Vert, Bleu, Jaune, Magenta, Cyan.
28
Page 69

MENU D'OPÉRATION
Menu Langue
Appuyez sur la touche ▼ / ▲ pour sélectionner l'élément de Menu Langue, puis appuyez sur la
touche ◄ / ► pour ajuster. Disponible Langue: Anglais, français, espagnol.
Horloge
Appuyez sur la touche ▼ / ▲ pour sélectionner l'horloge, puis appuyez sur OK pour modifier.
CLOCK
Time Zone Alaska
Auto Clock
Setup Time 2009-10-21 20:00:00
Day Of Week Wed
Daylight Saving Time
MEN U
:Return
:Move : Change Setting
Fuseau Horaire
Appuyez sur la touche ▼ / ▲ pour sélectionner le Fuseau Horaire, puis appuyez sur la
touche ◄ / ► pour régler. Taille disponible: Central, Montagne, Pacifique, Alaska, Hawaii, Samoa,
Terre-Neuve, Atlantique, Orient.
Horloge Auto.
Appuyez sur la touche ▼ / ▲ pour sélectionner l'Horloge Auto., puis appuyez sur la
touche ENTRER pour MARCHE ou ARRET. Si vous placez-le sur MARCHE, il ajuste le temps
correspondant au temps DTV automatiquement.
Configuration de Temps
Appuyez sur la touche ▼ / ▲ pour sélectionner la Configuration de Temps, et appuyez sur la
touche ◄ / ► pour ajuster le temps et l'utilisation de la touche ENTRER pour passer à l'élément
suivante.
Jour de Semaine
Cette option affiche le jour de semaine correspondant au temps de configuration.
Heure d'été
Appuyez sur le bouton ▼ / ▲ pour sélectionner l'heure d'été, puis appuyez sur ◄ / ► pour
régler. Format d'Heure: 5s, 10s, 20s, 30s, 40s, 50s, 60s.
Français
MEN U
AUTRE MENU
OTHERS
Blue Back
No Signal Power Off
No Operation Powe r Off
All Reset
:Return
:Move :On/Off
Ent er
ENTE R
29
Page 70

MENU D'OPÉRATION
Fond Bleu
Appuyez sur la touche ▼ / ▲ pour sélectionner le Fond bleu, puis appuyez sur la touche OK pour
sélectionner, lorsqu'il n'y a pas de signal, que ce soit le réglage le fond en bleu ou non.
Pas de Signal Arrêt
Appuyez sur la touche ▼ / ▲ pour sélectionner l'élement de Pas de Signal Arrêt, puis appuyez sur
la touche OK pour sélectionner Marche ou Arrêt. Lorsque placez-le sur Marche, et il n'y a aucune
entrée de signal dans 10 minutes, il s'éteint le panneau et le voyant LED devient ambre.
Pas d'Opération Arrêt
Français
Appuyez sur la touche ▼ / ▲ pour sélectionner l'élement de Pas d'Opération Arrêt, puis appuyez
sur la touche OK pour sélectionner Marche ou Arrêt. Lorsque placez-le sur Marche, et il n'y a pas
d'entrée opération dans 3 heures, il s'éteint le panneau et le voyant DEL devient ambre.
Toutes Réinitialisations
Appuyez sur la touche ▼ / ▲ pour sélectionner l'élement de toutes Réinitialisations, puis appuyez
sur la touche OK pour exécuter la réinitialisation. Lorsque vous sélectionnez l'élément de Toutes
Réinitialisations, une boîte de dialogue apparaîtra comme suit:
Attention!
If[All Reset]was executed
TV system is reset.
AV/YPbPr/HDMI1/HDMI2/HDMI3
1. Le Menu IMAGE et la description sont les mêmes que pour la source TV.
2. Le Menu SON et la description sont les mêmes que pour TV.
Mais le Son Analogique et le Son Numérique ne sont pas valides dans ces sources.
3. Le Menu PARENTAL et la description sont les mêmes que pour la Source TV V.
4. Le Menu CONFIGURATION et la description sont les mêmes que pour la source TV.
Mais la création de sous-titrage fermé n'est pas valide dans la source HDMI.
5. AUTRE Menu et la description sont les mêmes que pour la source TV.
6. Le Menu CHAINE et la description ne sont pas valides dans ces sources.
MENU D'IMAGE
PICTURE
Picture Setting s
Screen Size
PC Settings
Color Temperature Normal
Advanced Pictur e Settings
Wide
30
MEN U
:Return
:Move :Go to Next Menu
ENTE R
Page 71

MENU D'OPÉRATION
Régalge d'Image
1. Appuyez ENTRER lorsque l'élément de Réglage d'image est mis en surbrillance. Puis vous irez
à la sous-menu suivant.
2. Appuyez ▼ / ▲ pour sélectionner la rubrique souhaitée. Appuyez sur la touche ENTRER pour
procéder si nécessaire.
3. Appuyez ◄ / ► pour régler l'élément au niveau désiré.
4. Lorsque vous avez modifié le réglage, vous pouvez quitter le menu en appuyant sur MENU.
PICTURE SETTINGS
Picture Mode User
Brightness
Contrast
Color
Tint
Sharpness
Français
MENU
:Return
:Move :Go to Next Menu
ENTE R
Mode Image
Appuyez sur la touche ▼ / ▲ pour sélectionner le Mode Image,
puis appuyez sur la touche ◄ / ► pour ajuster. Mode Image disponibles:
Film, Utilisateur, Dynamique, Standard.
Luminosité
Appuyez sur la touche ▼ / ▲ pour sélectionner la luminosité,
puis appuyez sur la touche ◄ / ► pour ajuster.
Contraste
Appuyez sur la touche ▼ / ▲ pour sélectionner
le Contraste, puis appuyez sur la touche ◄ / ► pour ajuster.
Couleur
Appuyez sur la touche ▼ / ▲ pour sélectionner la Couleur,
puis appuyez sur la touche ◄ / ► pour ajuster.
Brightness
25
Contrast
25
Color
27
Netteté
Appuyez sur la touche ▼ / ▲ pour sélectionner la Netteté,
puis appuyez sur la touche ◄ / ► pour ajuster.
Sharpness
27
31
Page 72

MENU D'OPÉRATION
Réglage d'Ecran
1. Appuyez ENTRER lorsque l'élément de Réglage d'Ecran est mis en surbrillance. Puis vous irez
à la sous-menu suivant.
2. Appuyez ▼ / ▲ pour sélectionner la rubrique souhaitée. Appuyez sur la touche ENTRER pour
procéder si nécessaire.
3. Appuyez ◄ / ► pour régler l'élément au niveau désiré.
4. Lorsque vous avez modifié le réglage, vous pouvez quitter le menu en appuyant sur MENU.
Français
PICTURE
Picture Setting s
Wide
MEN U
Screen Size
PC Settings
Color Temperature Normal
Advanced Pictur e Settings
:Return
:Move :Go to Next Menu
ENTE R
Taille d'Ecran
Appuyez sur la touche ▼ / ▲ pour sélectionner la Taille d'écran, puis appuyez sur la touche ◄ / ►
pour ajuster. Taille d'écran disponible: Full,Dot By Dot.
Largeur Auto.
Largeur Auto. est invalide dans la source PC.
Réglage PC
1. Appuyez ENTRER lorsque l'élément de Réglage PC est mis en surbrillance. Et vous irez le
sous-menu de la manière suivante.
2. Appuyez ▼ / ▲ pour sélectionner la rubrique souhaitée. Appuyez sur la touche ENTRER pour
procéder si nécessaire.
3. Appuyez ◄ / ► pour régler l'élément au niveau désiré.
4. Lorsque vous avez modifié le réglage, vous pouvez quitter le menu en appuyant sur MENU.
PC SETTINGS
Auto Adjust Enter
Horizontal Posi tion
Vertical Position
Clock
Phase
Reset Enter
ENTE R
:Press To Enter
32
MENU
:Return
:Move
Page 73

MENU D'OPÉRATION
Réglage Auto.
Appuyez sur la touche ▼ / ▲ pour sélectionner le Réglage Auto., puis appuyez sur la touche OK
pour commencer le réglage auto.
Position Horizontale
Appuyez sur la touche ▼ / ▲ pour sélectionner la Position
Horizontale, puis appuyez sur la touche ◄ / ► pour ajuster.
Position Verticale
Appuyez sur la touche ▼ / ▲ pour sélectionner la Position
Verticale, puis appuyez sur la touche ◄ / ► pour ajuster.
Horloge
Appuyez sur la touche ▼ / ▲ pour sélectionner l'Horloge,
puis appuyez sur la touche ◄ / ► pour ajuster.
Phase
Appuyez sur la touche ▼ / ▲ pour sélectionner la Phase,
puis appuyez sur la touche ◄ / ► pour ajuster.
Réinitialisation
Appuyez sur la touche ▼ / ▲ pour sélectionner la
Réinitialisation, puis appuyez sur la touche OK pour
réinitialiser les options ci-dessus.
Horizontal Position
25
Vertical Position
25
Clock
25
Phase
25
Français
1. Le Menu Son et la description sont les mêmes que pour TV, mais le
Son Analogique et le Son Numérique ne sont pas valides dans ces sources PC.
2. Le Menu PARENTAL et les descriptions sont les mêmes que pour la source TV.
3. Le Menu CONFIGURATION et la description sont les mêmes que pour la source TV.
Mais la création de sous-titrage fermé n'est pas valide dans la source PC.
4. Autre Menu et la description sont les mêmes que pour la source TV.
5. Le Menu CHAINE et la description ne sont pas valides dans la source PC.
Note: L'opération et la description de la touche personnalisée sont
programmables sur votre télécommande.
33
Page 74

DÉPANNAGE
9. Dépannage
Vérifiez si vous pouvez résoudre les problèmes à travers le dépannage par vous-même.
Dépannage
Français
Aucun signal
Aucun nuances
de couleurs
Teinté à l'écran
Image d'affichage
double ou multiple
Neige sur l'écran
La télécommande ne
fonctionne pas
Le fait du
“Zip"
bruit sur le
Vérifiez que tous les câbles sont correctement branchés.
Réglez le contraste, la couleur et la luminosité.
Il peut être le résultat d'un éclairage de la signalisation de la voiture,
moteur, lampe au néon et d'autres dispositifs ou appareils électriques.
Il peut être le résultat d'une onde électrique perturbée d'autres TV,
d'ordinateurs et de machines de jeux ou de la radio.
Les câbles de l'antenne ne sont pas correctement branchés.
Vérifiez l'ordre et l'alignement des piles. Vérifiez que IR de la
télécommande n'est pas enfoui par quelque chose.
Même si l'image affichée est correcte, le bruit peut provenir d'une
fixation instable du panneau.
Contrôle
34
Pas de son
Assurez-vous que vous n'avez pas appuyé sur la touche MUET du
panneau ou de la télécommande.
Page 75

SPECIFICATIONS
10. SPECIFICATIONS
Ce manuel ne sert de référence, tout changement sur le design et les spécifications ne sera
pas informé.
Taille d'Ecran
Type d'Ecran
Résolution(Pixel)
Format
Alimentation de puissance
Consommation de puissance
Système TV
Format d'Entrée Vidéo
Puissance de Sortie Audio
ANTENNE
AV-IN
YPbPr - IN
HDMI - IN
VGA(PC) - IN
SUPPORT
DVD
Dimensions
Poids
VGA(PC) AUDIO - IN
SCART - IN
SCART - OUT
AUDIO - OUT
S-VIDEO - IN
COAXIAL - OUT
INTERFACE COMMUNE
USB Port Service seulement
IPOD
Format de Disque Physique
Format de Sortie Vidéo DVD
W/Stand(LxWxH-mm)
W/O Stand(LxWxH-mm)
Fixation murale
Taille de Vis à Fixation murale
Net (Kgs)
Brut(Kgs)
3 Inch
2
TFT L D
C
9
1 8
AC100-240V 50/60Hz
1
ATSC/NTSC
PAL/NTSC
L / R 2X8W
7
8
2
* *5 mm
78* * mm
2
4
00* 00 VESA(mm)
2
0
X
2
16:9
0W
1
YES
YES
YES
YES
YES
YES
--
--
YES
--
YES
--
--
--
--
2
3
8
5
8
5
M *1
9
12.65
0
0
1
5
8
5
3
0
2
.
4
.
8
Français
35
Page 76

Imprimé en Chine
Page 77

Pantalla plana
Televisión LCD
SC322TI
Manual de instrucciones
Es
Lea todas estas instrucciones antes de usar la televisión.
Guarde estas instrucciones en un lugar seguro para referencia futura.
Page 78

Page 79

TABLA DE CONTENIDO
1
2
3
4
INFORMACIÓN
IMPORTANTE
PROLÓGO
PRECAUCIONES Y
SEGURIDAD
EN EL CARTON
Español
5
CONEXIÓN FRONTAL/
TRASERA DE LCD TV
Conexión del cable de alimentación
Conexión de antena
Conexión de AV
6
INSTALACIÓN DE TV
DIBUJO DE
Conexión Ypbpr( componente)
Conexión VGA (PC)
Conexión COAX
Conexión HDMI
Servicio de función de puerto
7
MANDO A DISTANCIA
Instrucciones del mando a distancia distancia
en TV modo
Configuración de mando
Asistente de configuración
Seleccione la fuente de entrada
Operación básica
Menú de imagen
8
MENÚ DE
FUNCIONAMIENTO
Menú de sonido
Menú de canal
Control parental
16
16
17
21
23
Menú de configuración
Otro menú
Menú de imagen
9
RESOLUCIÓN DE
PROBLEMAS
10
ESPECIFICACIONES
1
Page 80

INFORMACIÓN IMPORTANTE
Español
El símbolo del rayo con punta de flecha dentro de un triángulo equilátero alerta al usuario
de la presencia de un-"voltaje peligroso" dentro del gabinete del producto, que puede
tener la magnitud suficiente para constituir un peligro de descarga eléctrica.
El símbolo de admiración dentro de un triángulo equilátero alerta al usuario de la
presencia de importantes instrucciones de mantenimiento (servicio) en la literatura
que acompaña al aparato.
RIESGO DE DESCARGA ELÉCTRICA
NO ABRIR
PRECAUCIÓN
PRECAUCIÓN: El uso de controles, ajustes o el llevar acabo procedimientos distintos a los
especificados aquí puede causar niveles de radiación peligrosos.
PRECAUCIÓN: Estas instrucciones de servicio son para ser usados solamente por personal
cualificado.Para reducir el riesgo de descarga eléctrica, no realice servicios al aparato además
de las contenidas en el manual de instrucciones a menos que esté calificado para hacerlo.
Consulte el manual de servicio para instrucciones de mantenimiento.
Calificación de Estrella de Energía
Este producto SEIKI se ha ganado Estrella de Energía en cuanto al cumplimiento de normas de
ahorro de energía de EE.UU. establecidas por el Departamento de Energía y Agencia de Protección
del Medio Ambiente.
El programa Estrella de Energía existe para proporcionar normas de ahorro de energía y ayudar
a promover productos y prácticas energéticas eficientes. Los cambios en ciertas características,
parámetros y funciones de este televisor se puede cambiar y / o aumentar su consumo de energía.
Mo do d e Ca sa es el modo en el que el producto cumple los requisitos de Estrella de Energía .
Mo de lo d e Di st ri bu ci ón optimiza los efectos de vídeo cuando se utiliza en una sala de exhibición o
en el medio ambiente de demostración. Este modo de la configuración de vídeo puede aumentar
el consumo de energía más allá de los límites requeridos para la certificación de Estrella de
Energía .
2
Page 81

INFORMACIÓN IMPORTANTE
Importantes instrucciones de seguridad
Nota:.
1.Lea las instrucciones.
2.conserve las instrucciones.
3.preste atención a todas las advertencias.
4.obedezca todas las instrucciones.
5.no utilícelo cerca del agua.
6.límpielo sólo con paño seco.
7.no bloquee las aberturas de ventilación. Instálelo de acuerdo con las instrucciones del fabricante.
8.No instale cerca de fuentes de calor tales como radiadores, calefactores, estufas u otros
aparatos (incluyendo amplificadores) que produzcan calor.
9.No anule el propósito de seguridad del enchufe polarizado o de tipo de conexción a tierra. Un
enchufe polarizado tiene dos clavijas, una más ancha que la otra. Un enchufe con puesta a tierra
tiene dos clavijas y una tercera de puesta a tierra. Por seguridad, se proporciona la hoja de contacto
ancha o la tercera clavija.Si el enchufe suministrado no encaja en su toma de corriente, consulte
con un electricista para que sustituya la toma de corriente obsoleta.
10.Proteja el cable de alimentación de ser pisado o pinchado, especialmente los enchufes, tomas de
corriente y el punto en donde salen del aparato.
11.Utilice sólo los accesorios especificados por el fabricante.
12.Utilice únicamente la carretilla, plataforma, trípode, soporte o mesa especificados por el fabricante,
o suministrados juntos con el aparato. Cuando utilice un carro, tenga cuidado al mover la
combinación carro / aparato para evitar lesiones por vuelco.
Español
13.Desenchufe este aparato durante tormentas eléctricas o cuando no vaya a utilizar por largos
períodos de tiempo.
14.refiera todo servicio a personal cualificado solamente. Se requiere servicio cuando el aparato
haya sido dañado de alguna manera, si el cable de alimentación o el enchufe están dañados,
se ha derramado líquido o han caído objetos dentro del aparato, el aparato ha sido expuesto
a lluvia o humedad, no funciona normalmente , o se ha caído.
15.No se debe exponer el aparato a goteos o salpicaduras, y no se deben poner objetos llenos de
líquidos, tales como floreros, sobre el aparato.
16.ADVERTENCIA: Para reducir el riesgo de incendio o una descarga eléctrica, no exponga este
aparato a la lluvia o la humedad.
17.El enchufe de toma de corriente o un acoplador se utiliza como dispositivo de desconexión,
deberá estar operativo.
18.El aparato estará conectado a una fuente de corriente eléctricaq con una conexión a tierra.
3
Page 82

PRÓLOGO
2. PRÓLOGO
Gracias por comprar este TV. Por favor, lea este manual atentamente antes de hacer las
operaciones. Asegúrese de que este TV no ha recibido ningún daño en el transporte. Si este TV
ha sido dañado, deje de instalarlo y consulte a su comerciante. Compruebe que tiene todos los
accesorios de acuerdo con el modelo.
3. PRECAUCIONES Y SEGURIDAD
Español
Ponga el TV en una superficie estable.
No ponga ningún material arriba del TV.
Min imum dis tance s
10c m
20c m
10c m 5cm
No utilice el televisor con los accesorios distintos de los suministrados o
sugeridos por el fabricante.
No cubren los orificios de ventilación del televisor. Si tiene un soporte de
anclaje a la pared, compruebe que es estable.
Cable de alimentación y cable de conexción deben ser correctamente
colocados y protegidos para evitar que las personas tropezen con ellos y se
produzca el vuelco del TV.
4
Page 83

PRECAUCIONES Y SEGURIDAD
Mantega el TV seco y lejos de la humedad.
Mantenga el TV lejos de un calentador.
Español
Desenchufe el TV antes de limpiarlo. No utilice el solvente O líquido
para limpiarlo.
Sólo limpie el TV con un paño seco y limpio.
En caso de solución de problemas, no utilice las piezas de respuestos
que no sean sugeridas por el fabricante. Utilizando las piezas de
respuestos no adecuadas pueden dar lugar a descargas eléctricas,
cortos circuitos, incendio u otros accidentes.
Desenchufe el TV durante las tormentas eléctricas o cuando no lo
utiliza durante largos períodos de tiempo.
5
Page 84

EN EL CARTON
4. En el carton
POWER
TV
P.MODE S.MODE SLE EP ASPECT
MUTE
VOL CH
SOURCE
MENU
MTS C.C
RE
Y
A
T
L
URN
SP
I
D
ENTER
CH.
T
I
LIST
X
E
A B C D
FAV.+
V-CHIP
FAV.CH
ADD/ERASE
FAV.-
Español
AUTO
COMP
VGA
HDMI
SRC11-49 A
HD
TV SET
1.5V
1.5V
Pila AAA
Mando a distancia
Warranty Card
Tarjeta de garantía
Qui ck Co nnect Gui de
Manual de usuario
HDMI Cable
Guía de conexión rápida
Cable de alimentación
6
Page 85

CONEXIONES FRONTALES / TRASERAS DE LCD TV
5. Conexiones frontales / traseras de L D TV
C
Vista delantera
1.
Pulse "VOL+ "o "VOL-" para aumentar o bajar
1
el volumen.
2.
Pulse"CH "o"CH- "para seleccionar los canales.
3.
2
Pulse el "MENÚ" para que aparezca el menú
principal en la pantalla.
3
4.
Pulse "SOURCE" para seleccionar la fuente
de entrada.
4
5. Pulse el botón "STANDBY ” para encender o
5
apagar el TV.
6."Power indicator" muestra de color rojo en el
modo de espera. Cuando el TV está encendido,
Encendido/apagadoLED
7
6
muestra de color azul o verde.
7. Remote sensor: sensor infrarrojo del mando
a distancia.
Back View and Control Connections
Español
1. COAX out: Conecta el receptor de coaxial.
2. RF IN: Conecta la antena.
3. VGA(PC): Conecta la toma de salida de PC-RGB de PC.
4. PC AUDIO: Conecta toma de salida de Audio de PC.
5. HDMI1/HDMI2/HDMI3: Conecta la toma de salida de
HDMI del DVD.
. USB SERVICE: Puerto USB para uso en fábrica sólo.
6
7. L-OUT/R-OUT:
con la toma
.
8. VIDEO: Conecta la salida de video de DVD o VCR.
9. L/R: Para audio de video .
10. YPbPr: Conecta la toma de salida de Ypbpr de DVD o VCR.
. L/R: Para audio de Ypbpr.
1
1
3
1
1
2
2
4
5
Conecta el dispositivo amplificador de audio
1
106
1
8
9
7
7
Page 86

DIBUJOS DE INSTALACIÓN DE TV
6. Dibujos de instalación de TV
Conexión del cable de alimentación
- conecte el cable de alimentación correctamente como se muestra.
- presione el botón STANDBY de su D TV para encender el TV. el indicador de encendido
del panel frontal se ilumina en .
azul
Español
H
Conexión de Antena
para garantizar la buena imagen y sonido, el sistema de antena de TV debe ser instalada. el sistema
de antena como se muestra puede obtenerse de las tiendas de equipo de TV, que ofrecerá un servicio
para una correcta instalación y conexión. después de la instalación, inserte el 75-ohm enchufe de
antena a la toma de antena como se muestra.
VHF ANTE NA UHF ANTENA
AMPLI FICADOR
DE ANTENA
EXTER IOR
AMPLI FICADOR
DE ANTENA
INTER IOR
75 OHM
ENCHUFE
DE ANTENA
ENCHUFE DE ENE RGÍA DE
AMPLI FICADOR DE ANTENA
8
Page 87

DIBUJOS DE INSTALACIÓN DE TV
CONEXIÓN DE AV
Conecta la toma de salida de VIDEO y AUDIO de DVD o VCR con la toma de VIDEO en el set
utilizando el cable RCA. Coincide color con la toma: Video es amarillo, audio izquierdo es blanco
y audio derecho es rojo. Selecciona la fuente de entrada de AV utilizando el botón de SOURCE
en el mando a distancia.
Parte a tras de TV
Cable de video
VIDEO R L VIDEO R L
AUDIO cable
Parte a tras DVD o VCR
DVD o VCR
CONEXIÓN DE COMPOTENTE(Ypbpr)
Conecta la salida Ypbpr de DVD o VCR con la entrada Ypbpr en el set. La calidad de imagen es
mejor en comparación con la conexión de un VCR regular con la entrada de vídeo. Conecta la
salida de audio de DVD o VCR con la toma de entrada de audio en el set utilizando el cable RCA.
Coincide color con la toma: Y es verde, pb es azul, pr es rojo, audio izquierda es blanco y audio
derecha es rojo. Selecciona la fuente de entrada de componente utilizando el botón SOURCE en
el mando a distancia.
parte a tras de TV
Español
YPbPr c able
Y
DVD o VCR
Pb
Pr LR
Parte a tras DV D o VCR
AUDIO c able
9
Page 88

DIBUJOS DE INSTALACIÓN DE TV
CONEXIÓN VGA(PC)
Conecta la salida de RGB de PC con la toma VGA(PC) en el set. Conecta la salida de audio de
PC con la toma AUDIO PC en el set. Seleccione la fuente de entrada RGB utilizando el botón
SOURCE en el mando a distancia.
Parte a tras de TV
Español
VGA Cable
Audio Cable
AUD IO R GB-PC O UTPUT
CONEXIÓN COAX
Conecta el dispositivo amplificador de audio con la toma de salida COAX en el TV.
COAX Ca ble
Parte a tras de TV
10
COAXCOAX
the aud io amplifier back
Ampli ficad or de audio
Page 89

DIBUJOS DE INSTALACIÓN DE TV
CONECIÓN HDMI
Conector HDMI, que sustituye la conexión HDMI permite la transferencia de audio / vídeo
/ señales de control a través de cable. estas señales se transmiten en formato digital.
Parte a tras de TV
HDMI Ca ble
Español
Servicio de la función de puerto
Servicio de puerto( para el uso en fábrica sólo)
parte a tras de D VD
Parte a tras de TV
USB Cable
11
Page 90

MANDO A DISTANCIA
7. Mando a distancia
Instrucciones de mando a distancia en modo TV
POW ER
TV
Energìa
Para ENCENDER o APAGAR la pantalla.
TV
Aprieta este botón para la televisión.
P.MOD E S.M ODE SLEEP ASP ECT
Español
MUT E
VO L CH
MTS C.C
D
CH.
A B C D
V-C HIP
AUTO
HDM I
SOU RCE
MEN U
R
E
LAY
P
IS
TU
R
N
ENTER
L
IST
FAV.CH
ADD/ ERASE
VGA COM P
IT
EX
FAV.+
FAV.-
SRC 11- 49A
Modo P
Selecciona el modo de la imagen.
Modo S
Selecciona el modo de la voz.
SLEEP
Para ajustar el tiempo de durmiento.
ASPECT
Aprieta para seleccionar la proporción del exposición (como el estandar, ancho,
enfoca ancho, enfoca,etc.)
Los botones de nùmeros
Aprieta 0 -9 para cambiar el canal directamente.
-/--
Aprieta este botón para entrar el número para el programa .Multipla los canales de
programa como 2-1,etc
Vuelve a canal que visto anteriormente.
VOL+/VOL-
Aprieta para aumentar/diminuir la volumen de la voz.
MUTE
Aprieta para apagar la voz, aprieta por la otra vez o aprieta VOL+ para recuperar
la voz.
SOURCE
Aprieta SOURCE para mostrar el fuente deentrada de OSD. Apreita ▼ ▲ para
seleccionar una entrada de fuente ,y aprieta ENTER para reconfirmar.
CH+ /CH-
El bóton para seleccionar el canal completamente.
MTS
Escoge Mono,Estereo o sap para entrada de TV analogica.Escoge Inglés , Frances
o español para entrada de DTV.
MENU
Muestra el menu de televisión
CC
Aprieta para ajustar tìtulo Como cc modo enciendido ,modo apagado y modo mudo.
DISPLAY
Muestra el fuente y informacion de canal.
RETURN
Vuelve a canal anterior.
THUMBSTICK (▼ ▲ ◄ ► ENTER)
Permite a usted a navegar por el menu de pantalla y ajusta las configuración del
sistema.
CH LIST
Aprieta para mostra la lista de canales.
EXIT
Salir del menu principal de TV.
A,B,C,D
Presiona y aguarda por 3 segundos para archivar el canal presente en A,B,C,D.
V CHIP
Cambia la entrada de VCHIP.
FAVCH
Aprieta para mostrar la lista de programa favorito.
FAV+/FAV-
Apreita los 2 botones para cambiar su programa favorito
AUTO
Ajusta posición horizontal o vertical automaticamente (modo pc).
ADD /ERASE
Añadir/borra el canal favorito en su lista de favorito.
HDMI
Cambia a entrada de HDMI.
VGA
Cambia a entrada de VGA.
COMP
Cambia a entrada de COMP.
12
Page 91

MANDO A DISTANCIA
Configuración de mando a distancia
1. Abra la cubierta.
2. Utilice tres pilas con tamaño A. Al insertar las pilas, asegúrese que la polaridad con
marcas + y - en la línea de pilas de forma correcta con las marcas del compartimiento.
3. Vuelva a colocar la cubierta.
Para evitar fugas de las pilas que puede resultar en lesiones corporales o daños en el
mando a distancia:
1. .Instale todas las pilas correctamente según lo que indican en el mando a distancia
2. No mezcle las pilas.( viejo y nuevo o carbono y alcalino,ect) retire las pilas del mando a
distancia cuando no se utiliza durante mucho tiempo.
.
Español
13
Page 92

OPERACIÓN MENÚ
8.Operación Menú
Asistente de configuración
Seleccione el idioma
Selecciona el idioma que quieres.
Select Language
Wel come to t he SEIK I HDTV Se tup Wiz ard.F ollow t his gui de to
hel p setup y our HDT V for sca nning c hanne ls or acc essin g your
Español
ext ernal d evice s for Ant enna, Set-t op Box, B lu-ra y, DVD, G ames
and o ther pl ayer.
Use t he up and d own arr ows on yo ur remo te cont rol TV ke ypad
to se lect th e langu age of sc reen me nu and me ssage
Eng lish
Fre nch
Spa nish
:Move :Press to Ente r
ENTE R
Ent er
Ent er
Ent er
Huso horario
Modo de encendido
Time zone
Use t he left a nd righ t arrow s on your r emote c ontro l to sele ct
you r local t ime zon e .
Time zone
Eastern
Next
MEN U
:Return
:Move :Change Setting
Power O n Mode
Hom e optim izes th e stand ard vid eo sett ing for E NERGY
STA R@ qual ifica tion.
Ret ail Mod e optim izes th e video s ettin g for use o n a retai l
sho wroom f loor or d emo env ironm ent.
Use t he up/d own key a rrows o n you rem ote con trol or T V
key pad to se lect po wer on mo de.
Home Mod e(Energy Sav ing)
Retail M ode
14
MEN U
:Return
:Move
ENTE R
:Pres s to Ente r
Page 93

Seleccione la fuente de entrada
OPERACIÓN MENÚ
Select your Connection devices...
Con nect to G ame, Bl u-Ray ,DVD, o r other p layer
Ant enna or c oaxia l cable i nput
Bac k
MEN U
:Return
:Move
ENTE R
:Pres s to Ente r
Use t he Up or Do wn key ar rows on y ou rem ote co ntro l or TV
key pad to se lect th e chann el scan t ype.
MEN U
Seleccione la TV (o el cable de entrada de antena o coaxial).
SOURCE LIST
TV
AV
YPbPr
HDMI1
HDMI2
HDMI3
PC
:Select
:Page
ENTE R
Scanning Cha nnel Program
Antenna
Cable
Back
:Return
:Move
ENTE R
Pag e 1/2
:Pres s to Ente r
Español
:Pres s to Ente r
Scanning Cha nnel Program
Use t he Up or Do wn key ar rows on y ou rem ote co ntro l or TV
key pad to se lect th e chann el scan t ype.
Antenna
Cable
Back
MEN U
:Return
:Move
ENTE R
:Pres s to Ente r
En virtud“Asistencia de Configuración”,la fonction de la botón:
“Menu”-----Entrar
“CH / ”----- Arriba / Abajo
>
<
“Vol+/-”-----Lzquierda / Derecha
15
Page 94

OPERACIÓN MENÚ
Seleccione la fuente de entrada
Source Select
TV
AV
YPbPr
Español
HDMI1
HDMI2
HDMI3
PC
Pulse el botón Source para mostrar la lista de fuente de entrada.
Pulse el botón para seleccionar la fuente de entrada que quieres ver.▼/▲
Pulse el botón OK para entrar en la fuente seleccionada.
Operación básica
PICTURE
Pulse el botón menu para mostrar el principal OSD menú.
Pulse el botón ◄/► para seleccionar el menú que quiere ver.
Pulse el botón OK para entrar el submenú.
Pulse el botón▼/▲ para seleccionar la opción y despúes pulse ◄/►para ajustar el valor
en el submenú.
Puede pulsar el botón de MENU para volver al menú anterior o pulsar el botón EXIT para cerrar OSD.
16
SOUND
CHANNEL PARENTAL
SETUP OTHERS
Page 95

OPERACIÓN MENÚ
Menú de imagen
PICTURE
Picture Setting s
Screen Size
PC Settings
Color Temperature Normal
Advanced Pictur e Settings
MENU
:Return
:Move :Go to Next Menu
ENTE R
Configuración de imagen
1.Pulse ENTER cuando la configuración de imagen está marcada. Despúes puedes ir al
submenú como lo siguiente.
2.Pulse el botón ▼/▲ para seleccionar el menú deseado. Pulse ENTER para proceder si es necesario.
3.Pulse el botón ◄/► para seleccionar el nivel deseado.
4.Cuando se haya cambiado la configuración, puede salir del menú pulsando MENÚ.
Wide
Español
PICTURE SETTINGS
Picture Mode User
Brightness
Contrast
Color
Tint
Sharpness
MENU
:Return
:Move :Go to Next Menu
ENTE R
Modo imagen
Pulse el botón ▼/▲ para seleccionar el modo imagen, despúes pulse el botón ◄/► para ajustarlo.
Sólo en el modo de usuario, la opción de detalles como la siguiente puede ser ajustada.Modo de
imagen disponible: Energy Saving, Dinámico, Estándar, Película,Usuario.
Brillo
Pulse el botón ▼/▲ para seleccionar el brillo,
despúes pulse el botón ◄/► para ajustarlo.
Brightness
25
Contraste
Pulse el botón ▼/▲ para seleccionar el contraste,
despúes pulse el botón ◄/► para ajustarlo.
Contrast
25
17
Page 96

OPERACIÓN MENÚ
Color
Pulse el botón ▼/▲ para seleccionar el color,
Color
27
despúes pulse el botón, ◄/► para ajustarlo.
Nitidez
Pulse el botón ▼/▲ para seleccionar el nitidez,
despúes pulse el botón ◄/► para ajustarlo.
Sharpness
27
Tinte
Español
Pulse el botón ▼/▲ para seleccionar el tinte,
despúes pulse el botón ◄/► para ajustarlo.
Tint
27
Configuración de pantalla
Tamaño de pantalla
Pulse el botón ▼/▲ para seleccionar el tamaño de pantalla, despúes pulse el botón ◄/► para
ajustarlo.Tamaño de pantalla disponible: Normal, WaterGlass, Cinema, Full.
Temperatura de color
Pulse ENTER cuando la temperatura de color está marcada. Despúes pulse el botón ◄/►
para ajustarlo.
Temperatura de color disponible: fresco, normal, cálido.
Color Temperature
Warm
Configuración avanzada de imagen
ADVANCED PICTURE SETTINGS
Dynamic Contras t
Film Mode
Noise Reduction
MPEG Noise Reduct ion
Off
Off
Off
Off
18
MENU
:Return
:Move :Change Setting
Page 97

Contraste dinámico
OPERACIÓN MENÚ
Pulse el botón para seleccionar el botón ▼/▲ ◄/►para ajustarlo.
puede ajustar el contraste correspondiente a la señal de entrada
con el fin de mejorar la calidad de imagen mostrada.
Modo disponible: encendido/ apagado.
Modo película
Pulse el botón ▼/▲ para seleccionar el modo Película. despúes
pulse el botón◄/► para ajustarlo. manejan la tracción 3:2 y 2:2.
Modo película disponible: encendido/ apagado.
Reducción de ruido
Pulse el botón ▼/▲ De ruido,
para seleccionar la reducción
despúes pulse el botón ◄/► para ajustarlo. reducción de ruido
disponible: apagado, bajo, medio, alto.
Reducción de ruido MPEG
Pulse el botón ▼/▲ para seleccionar la reducción
De ruido MPEG, despúes pulse el botón ◄/► para
ajustarlo.pueden mejorar la calidad de imágenes mediante
la reducción del ruido de bloque.reducción de ruido MPEG
disponible: apagado, bajo, medio, alto.
Dynamic Contrast
Off
Film Mode
Off
Español
Noise Reduction
Off
MPEG Noise Reduction
Off
Menú de sonido
SOUND
Sound Settings
Surround Mode
AVL
Analog Sound Ster eo
Digital Sound English
Digital Audio Out put PCM
Equalizer Setti ngs
MEN U
:Return
:Move :Go to Next Menu
Configuración de sonido
1.Pulse ENTER cuando la configuración del sonido está marcada. Entonces, usted va al submenú
como lo siguiente.
2.Pulse el botón ▼/▲ para seleccionar el menú deseado. pulse ENTER para proceder si es necesario.
3.Pulse ◄/► al nivel deseado.
4.Cuando se haya cambiado la configuración, puede salir del menú pulsando MENÚ.
ENTE R
19
Page 98

OPERACIÓN MENÚ
SOUND SETTING
Sound Mode User
Bass
Treble
Balance
MENU
:Return
:Move :Change Setting
ENTE R
Español
Modo de sonido
Pulse el botón ▼/▲para seleccionar el modo de sonido. despúes pulse el botón ◄/► para
ajustarlo.sólo en el modo de usuario, la operación de detalles como lo siguiente puede ser
ajustada.modo de sonido disponible: usuario, dinámico, estándar, suave.
BASS
Pulse el botón ▼/▲ para seleccionar BASS, despúes pulse el botón ◄/► para ajustarlo.
Triple
Pulse el botón ▼/▲ para seleccionar triple, despúes pulse el botón ◄/► para ajustarlo.
Balance
Pulse el botón ▼/▲ para seleccionar Balance, despúes pulse el botón ◄/► para ajustarlo.
Bass
7
Treble
7
Balance
7
Modo de sonido envolvente
Pulse el botón ▼/▲ para seleccionar el modo de sonido envolvente, despúes pulse el botón OK
para ajustarlo.
Se puede configurar que la imagen se adapte a la pantalla automáticamente.
Cuando el ancho automático está seleccionado, el símbolo se verá como lo siguiente.
Modo envolvente
20
Page 99

OPERACIÓN MENÚ
AVL
Pulse el botón ▼/▲ para seleccionar AVL, despúes pulse el botón ◄/► para seleccionar
encendido o apagado. nivel de auto volumen puede ajustar el volumen automáticamente
correspondiente a la entrada de audio.
Sonido analógico
Pulse el botón ▼/▲ para seleccionar el sonido analógico preferido. Despúes pulse el botón ◄/►
para seleccionar el audio preferido al cambiar a un canal analógico Sonido analógico disponible:
SAP, Estéreo, Mono.
Sonido digital
Pulse el botón ▼/▲ para seleccionar el sonido digital preferido. Despúes pulse el botón ◄/►
para seleccionar el audio preferudo al cambiar a un canal digital Sonido digital disponible: inglés,
francés, español.
Salida de audio digital
Pulse el botón ▼/▲ para seleccionar la salida de audio digital, despúes pulse el botón ◄/► para
seleccionar la salida de audio digital deseada. Salida de audio digital disponible: Dolby Digital,
apagado, PCM.
Configuración de ecualizador
Español
EQUALIZER SETTINGS
Mode Off
-1 2 3 1 0 -1
100-2250 500 1K 2K
MENU
:Return
:Move :Change Setting
4K
10K
Modo ecualizador
Pulse el botón ▼/▲ para seleccionar el modo ecualizador, despúes pulse el botón ◄/► para
seleccionar el modo deseado.Modo ecualizador disponible: apagado, el rock, el pop, el jazz, el usuario.
Menú de canal
Menú de canal este menú aparece cuando la fuente de entrada es TV.
CHANNEL
Channel List
Favorite List
Channel Setting
Signal Type Air
Auto Channel Sear ch Enter
MENU
:Return
:Move :Go to Next Menu
ENTE R
21
Page 100

OPERACIÓN MENÚ
Lista de canal
Pulse el botón▼/▲ para seleccionar la lista de canal, y pulse OK para explorar la lista de canales.
si seleccione la opción ¨in channel list¨, la etiqueta de canal aparecerá en la lista.
Channel List
A4
A11
A14
A63
Page 1/ 1
Español
MEN U
:Return
:Move :Select
:Page
ENTE R
Lista favorita
Pulse el botón ▼/▲ para seleccionar la lista favorita, y pulse el botón OK para explorar la lista
favorita de canales.
FAVORITE LIST
No Favorite Chann els Present
Please Perform Fa vorite Channel Add First
Page 1/ 1
MENU
:Return
:Move :Select
:Page
ENTE R
Configuración de canales
Pulse el botón ▼/▲ para seleccionar configuración manual de canales, y pulse el botón OK para
establecer el valor en el submenú.
MENU
22
CHANNEL SETTING
Channel Skip Favorice Label
A4
A11
A14
A63
:Return
:Cursor/Page :Select
ENTE R
 Loading...