

Sega PLAYSTATION 2 GAMES NBA 2K2 User Manual

WARNING: READ BEFORE USING YOUR PLAYSTATION®2
COMPUTER ENTERTAINMENT SYSTEM.
A very small percentage of individuals may experience epileptic seizures
when exposed to certain light patterns or flashing lights. Exposure to certain
patterns or backgrounds on a television screen or while playing video
games, including games played on the PlayStation 2 console, may induce
an epileptic seizure in these individuals. Certain conditions may induce
previously undetected epileptic symptoms even in persons who have no
history of prior seizures or epilepsy. If you, or anyone in your family, has an
epileptic condition, consult your physician prior to playing. If you experience
any of the following symptoms while playing a video game – dizziness,
altered vision, eye or muscle twitches, loss of awareness, disorientation,
any involuntary movement, or convulsions – IMMEDIATELY discontinue use
and consult your physician before resuming play.
WARNING TO OWNERS OF PROJECTION TELEVISIONS:
Do not connect your PlayStation 2 console to a projection TV without first
consulting the user manual for your projection TV, unless it is of the LCD
type. Otherwise, it may permanently damage your TV screen.
USE OF UNAUTHORIZED PRODUCT:
The use of software or peripherials not authorized by Sony Computer
Entertainment America may damage your console and/or invalidate your
warranty. Only official or licensed peripherals should be used in the
controller ports or memory card slots.
HANDLING YOUR PLAYSTATION 2 FORMAT DISC:
• This disc is intended for use only with PlayStation 2 consoles
with the NTSC U/C designation.
• Do not bend it, crush it or submerge it in liquids.
• Do not leave it in direct sunlight or near a radiator or other source of heat.
• Be sure to take an occasional rest break during extended play.
• Keep this compact disc clean. Always hold the disc by the edges and
keep it in its protective case when not in use. Clean the disc with a lint free, soft, dry cloth, wiping in straight lines from center to outer edge.
Never use solvents or abrasive cleaners.
Getting Started . . . . . . . . . . . . . . . 2
Starting Up . . . . . . . . . . . . . . . . . . 3
Powering Up The System . . . . . 3
Control Summary . . . . . . . . . . . . . 4
Menu Controls . . . . . . . . . . . . . 4
Team Selection . . . . . . . . . . . . . . . 5
Options Menu. . . . . . . . . . . . . . 5
Offensive Controls. . . . . . . . . . . . . 6
Free Throw Shooting. . . . . . . . 13
Basic Defense . . . . . . . . . . . . . . . 14
Defensive Sets . . . . . . . . . . . . . . 16
Pause Menu . . . . . . . . . . . . . . . . 17
In-Game Coaching Moves . . . . 17
Timeouts . . . . . . . . . . . . . . . . 17
Substitutions . . . . . . . . . . . . . 17
Stats. . . . . . . . . . . . . . . . . . . . 18
Cameras . . . . . . . . . . . . . . . . . 18
Replay Controls . . . . . . . . . . . 18
Game Modes. . . . . . . . . . . . . . . . 19
Exhibition . . . . . . . . . . . . . . . . 19
Season . . . . . . . . . . . . . . . . . . 19
Practice . . . . . . . . . . . . . . . . . 19
Street Courts. . . . . . . . . . . . . . . . 21
Allen Iverson Bio. . . . . . . . . . . . . 22
Quick Reference . . . . . . . . . . . . . 24
Offensive Controls . . . . . . . . . 24
Defensive Controls . . . . . . . . . 24
Franchise . . . . . . . . . . . . . . . . . . 25
Customize. . . . . . . . . . . . . . . . . . 27
Player Create . . . . . . . . . . . . . 27
Pre-set Players . . . . . . . . . . . . 27
Team Create . . . . . . . . . . . . . . 28
Legends Teams. . . . . . . . . . . . 28
Team Capsules . . . . . . . . . . . . . . 29
Credits . . . . . . . . . . . . . . . . . . . . 39
Notes . . . . . . . . . . . . . . . . . . . . . 42
TABLE OF CONTENTS
TABLE OF CONTENTS
1
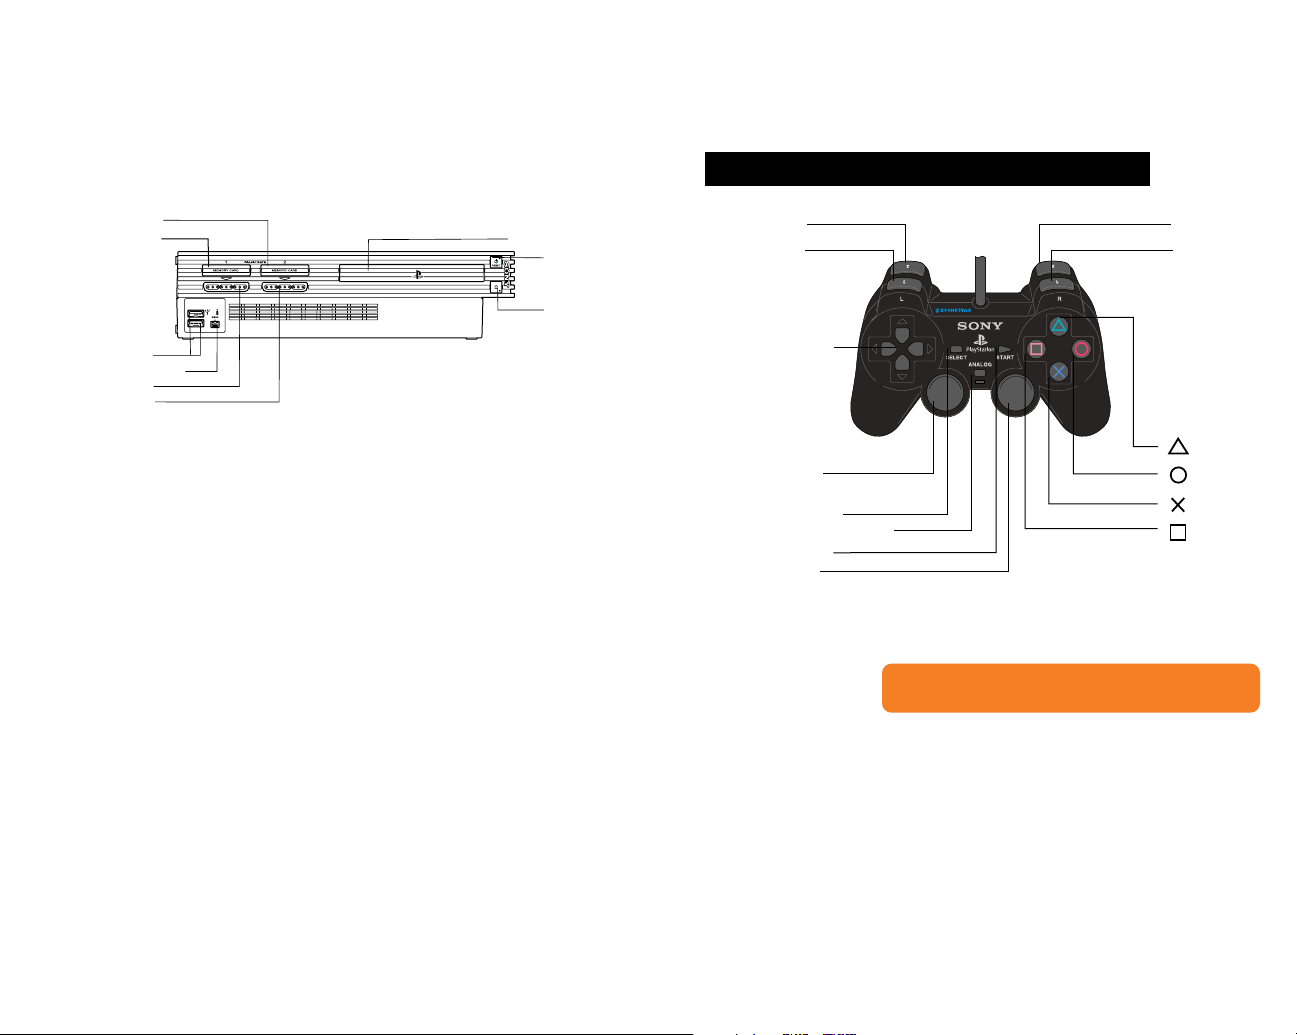
button
button
button
button
directional
buttons
left analog stick
(L3 button
when pushed down)
SELECT button
ANALOG mode switch
START button
right analog stick
(R3 button
when pushed down)
L2 button
L1 button
R2 button
R1 button
DUALSHOCK®2 ANALOG CONTROLLER CONFIGURATIONS
Set up your PlayStation®2 computer entertainment system
according to the instructions in its Instruction Manual. Make
sure the MAIN POWER switch (located on the back of the
console) is turned on. Press the RESET button. When the power
indicator lights up, press the open button and the disc tray will
open. Place the Sega Sports NBA 2K2 disc on the disc tray with
the label side facing up. Press the open button again and the
disc tray will close. Attach game controllers and other
peripherals, as appropriate. Follow on-screen instructions and
refer to this manual for information on using the software.
GETTING STARTED STARTING UP
MEMORY CARD slot 1
MEMORY CARD slot 2
USB connector
S400 i.LINK connector
controller port 1
controller port 2
disc tray
RESET button
(OPEN) button
Powering Up The System
NOTE: Sega Sports™ NBA 2K2 is a one to eight-player game. Before turning the
PlayStation 2 Power ON, connect the controller(s) or other peripheral equipment into the
control ports of the PlayStation® 2.
Sega Sports NBA 2K2 is designed with analog functionality in mind. The DUALSHOCK®2 analog controller provides a full range of motion and adds to the
overall depth and pinpoint control of the game. However, we understand that “old
habits die hard,” so if you’re partial to using the directional buttons as your primary source of control, you can modify the controller settings to do just that.
From the Main Menu, select Options, then select Controller, and use the R1/L1
buttons to scroll through the available combinations to find one that’s right for
you.
Button Action
left analog stick Highlight menu options
✖ Select/Scroll forward through highlighted sections
● Scroll backward through highlighted sections
■ Access a Help Screen
▲ Cancel/Return to previous screen
CONTROL SUMMARY
CONTROL SUMMARY
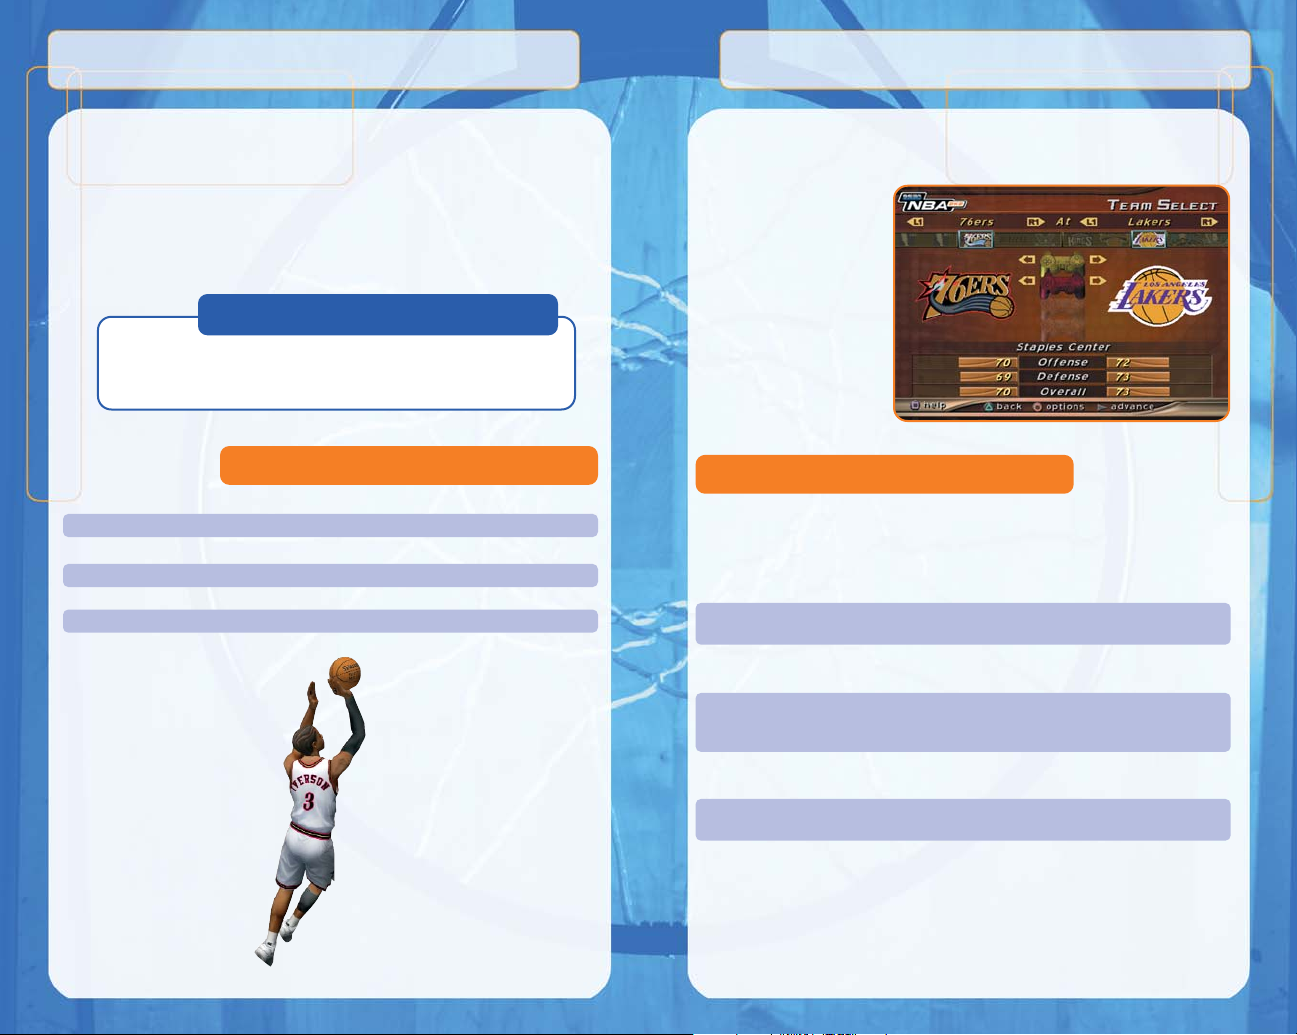
TEAM SELECTION
TEAM SELECTION
4
5
Menu Controls
Coach’s Corner: Feel The Power
To get the most from your DUALSHOCK®2 analog controller, you’ll
need to turn the Vibration setting to ON. To do so from the Main Menu,
select Options, then select Presentation and change Vibration to ON.
Once you're ready to start a game in any mode, you'll be guided to this menu.
Press the left analog stick to the left or right to select whether you'd like to
control the visiting team
(left) or the home team
(right). After you've moved
the controller icon to the
left or right, press the L1
or R1 buttons to cycle
through the list of available
teams. Once you've set the
match-up you desire,
press the START button to
get things underway.
Customize the way you play NBA 2K2 prior to the opening tip with this menu.
Press the ✖ button to cycle forward through an option; press the ■ button to
cycle backward.
NBA Rules Every rule in the game is adjustable or can
be turned on and off.
Game Play Adjust such parameters as game speed,
quarter length, and difficulty.
Controller Browse through different controller configu-
rations, including those utilizing the directional buttons.
Presentation Adjust sound effects, commentary, music,
overlays and more.
Player Information Access information about your favorite
NBA players.
Users/High Scores Input your name and allow the game to track
your win-loss record and statistics.
Options Menu
ICON PASSING: ▲ button
Use icon passing to guarantee that your pass goes to the right teammate.
While controlling the ball, press the ▲ button to call up button icons over
the heads of your teammates. Then, simply
press the corresponding
button to immediately
send the pass to the
teammate you choose.
OFFENSIVE CONTROLS
OFFENSIVE CONTROLS
6
7
Coach’s Corner: Icon Passing
Want to get the ball into the hands of your point guard to run a play? Need
to get it down to your power forward to exploit a mismatch? The following
buttons correspond to the following positions:
✖ Point Guard
● Shooting Guard
■ Small Forward
▲ Power Forward
R1 Center
Here’s a look at the basic offensive controls you’ll use during gameplay (we’ll
discuss them in detail in the pages to come) …
Button Action
left analog stick Control Player
✖ button Pass
■ button Shoot/Jump For Rebound
● button Crossover Dribble/Spin Move
▲ button Call Up Pass Icons
L1 Back Down Defender
L2 Call For Pick
R1 Turbo/Speed Burst
R2 Pass To Player Closest To Basket
right analog stick Bring Up Playcall Menu
right analog stick + ✖,●,■,▲ Call Play
START button Pause Game
DIRECTIONAL PASSING: ✖ button
Good ball movement is important in setting up open looks at the basket.
While controlling the ball, press the left analog stick in the direction of the
player you wish to pass to, then press the ✖ button to deliver the pass. Make
sure you have an open lane to the recipient, though. Throwing into a crowd,
trying to thread the needle a bit too closely, or heaving crosscourt passes will
often lead to turnovers.
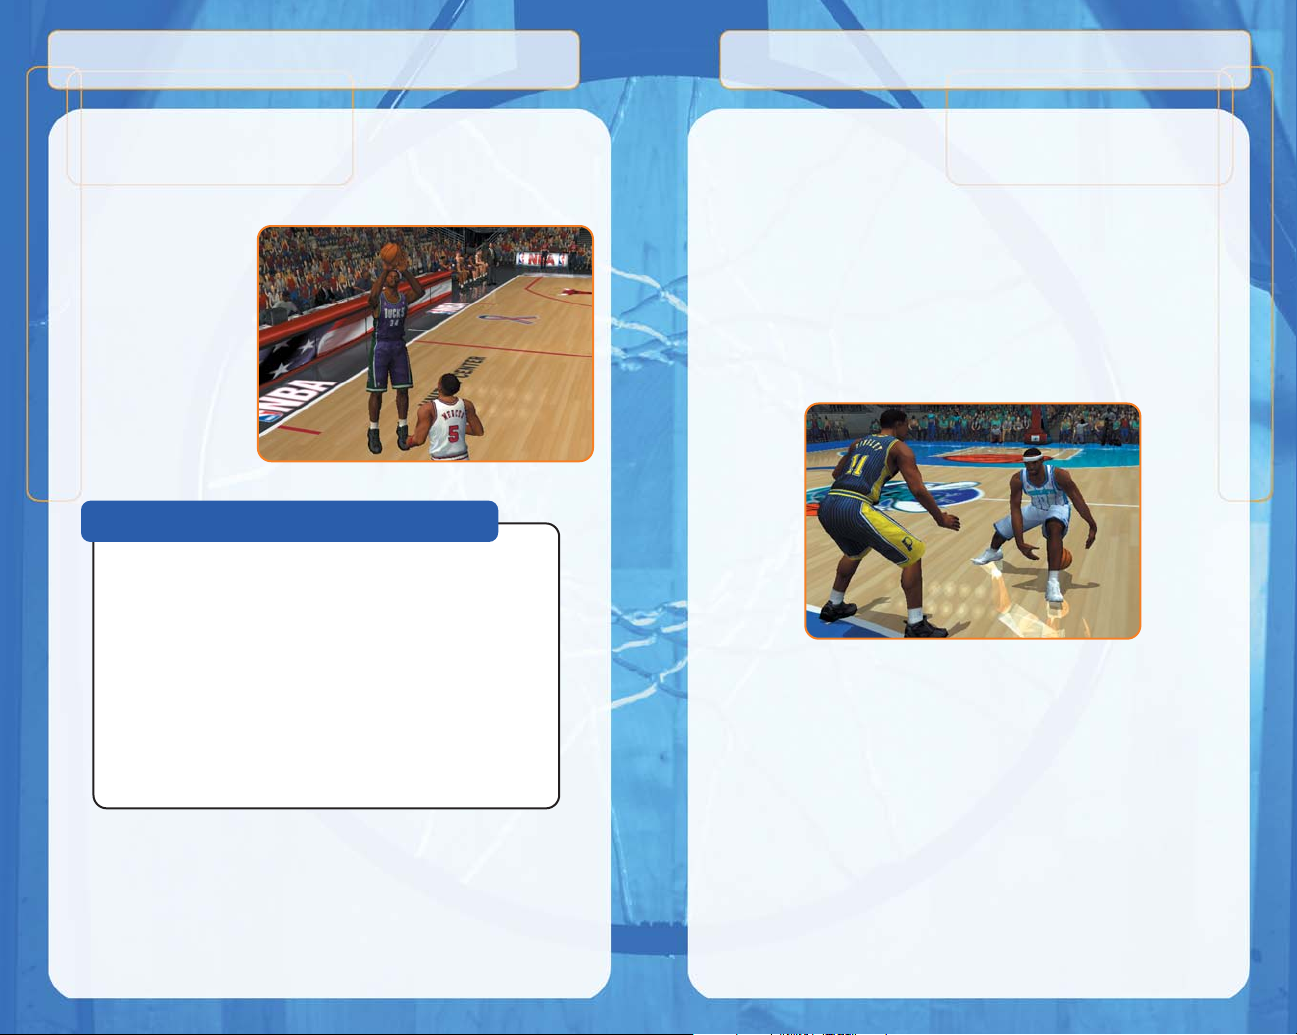
SHOOTING: ■ button
To shoot the ball, press and hold the ■ button. When your player reaches the
top of his jump, release the ■ button to release the shot. As in the real NBA,
timing is crucial. If you let
go of the button before
the player reaches his
peak, he’ll likely short-arm
the shot. Similarly, if you
release the shot while the
player’s on his way down,
he’ll be more likely to
have the shot drift on him
or have it blocked.
Releasing the shot at the
top of the player’s jump
gives you the greatest
likelihood of draining it.
PUMP FAKES: tap ■ button
To perform a pump fake, tap and release the ■ button in an attempt to get the
defender to jump into the air. If he bites, you’ll have a good chance to drive
around him into the lane. At the very least, you may be able to freeze the defender
and create a little space, enabling you to get a cleaner look at the basket.
CROSSOVER DRIBBLES: ● button
Players like Tim Hardaway and Stephon Marbury have made a career out of
faking one way with the dribble then breaking their defender’s back by crossing
over in the other direction. If you catch a defender flat-footed as you dribble
toward him, press the ● button to cross over and zip past him.
New this year is a special crossover move. If you press the ● button while
your player is dribbling in place, he will swing his arms in a wide crossover
motion. Then, press the left analog stick in any direction to have the player fake
his crossover and blow past his man.
TURBO/SPEED BURST: R1 button
By pressing the R1 button, you’ll kick your player into overdrive so that his
speed and energy pick up a notch. Use turbo to get that extra step past the
defender or to gain a bit of extra oomph when you’re backing down a defender
down low. Be careful not to overuse this however, as your player will tire too
quickly if he’s continually sprinting up and down the court. If you see him languishing with his head down, it’s probably time to get him out of there.
8
9
Coach’s Corner: Know Your Players
Getting the hang of when to release the ■ button is just the first
step to becoming a good shooter (and scorer). Perhaps the next
most important aspect to shooting is to learn your players’ shooting
tendencies. If you’ve got Shaq firing from behind the three-point line
all afternoon, it won’t matter how perfectly you release the shoot
button – he’s not gonna be hitting anything. Similarly, even if your
5'10" point guard's releasing shots in the paint at the peak of his
jump, his shots will likely be, uh, “returned” (leaving “SPALDING”
imprinted backward on his forehead). Good jump shooters like
Reggie Miller or Ray Allen will have a little more leeway with regard
to releasing the ball at the exact pinnacle of their jump, just as the
big guys like Tim Duncan will generally have a bit more room for
error down low.
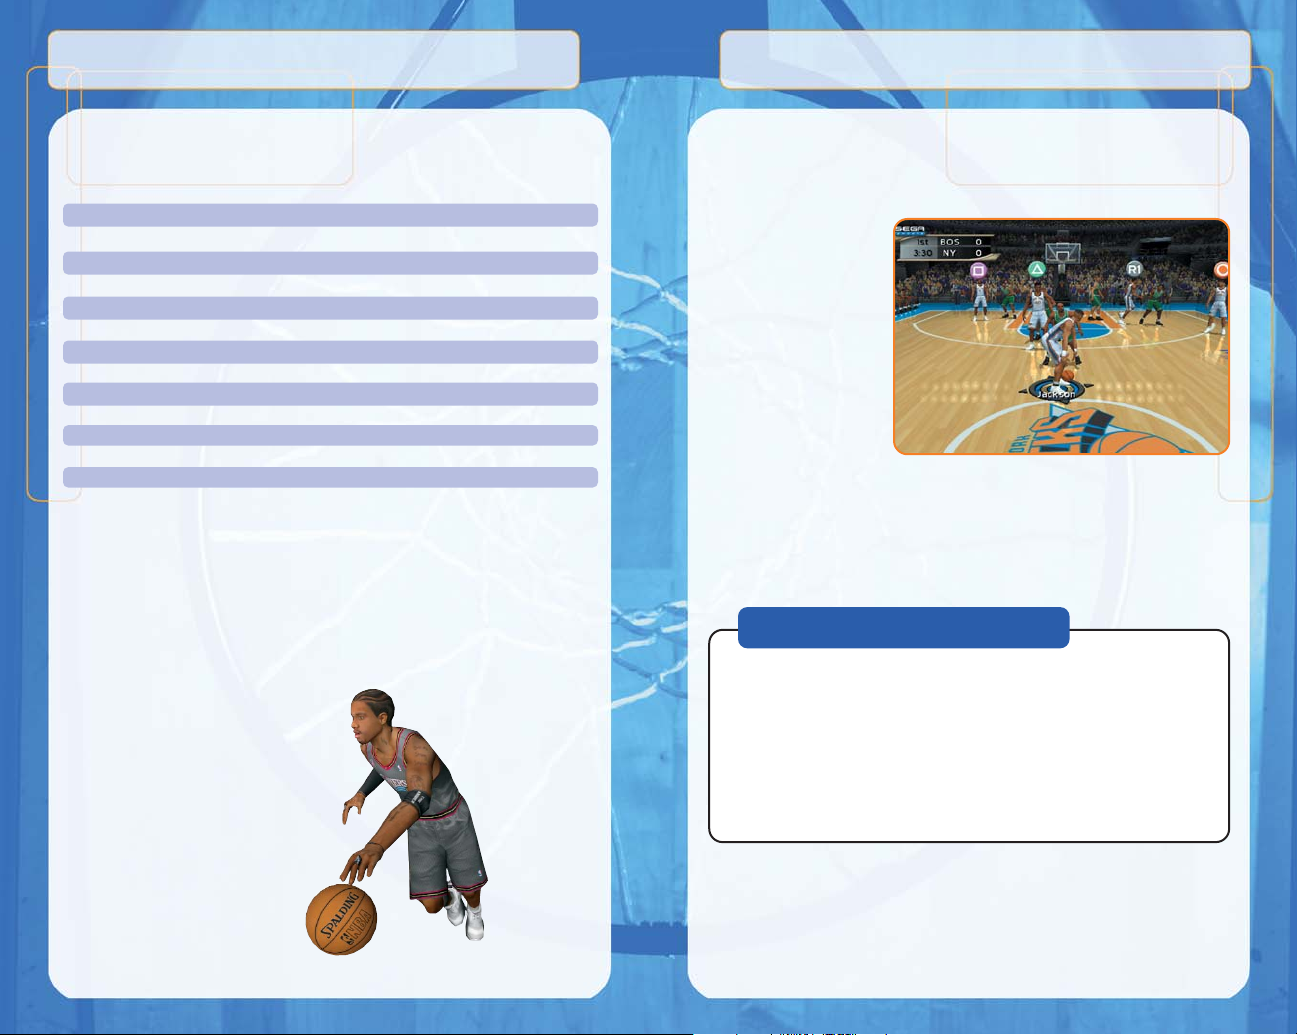
PASSING TO THE PLAYER CLOSEST TO THE BASKET: R2 button
New to this year’s version of the game is the option for one-button passing to get
the ball to the open man nearest the basket. If you see a player break free down
low, simply press the R2 button and your player will whip a pass to the man
closest to the hoop. You’ll still be able to pass to that player using the traditional
directional passing or icon passing options, but this button can serve to give you
those Larry Bird-esque
“eyes in the back of your
head.” If you see a double- or triple-team occurring at the half-court line,
someone has to be open.
Of course, as with all
other passes, if the player
is closely guarded when
you make the pass,
there’s a good likelihood
that the pass will be
knocked away or stolen.
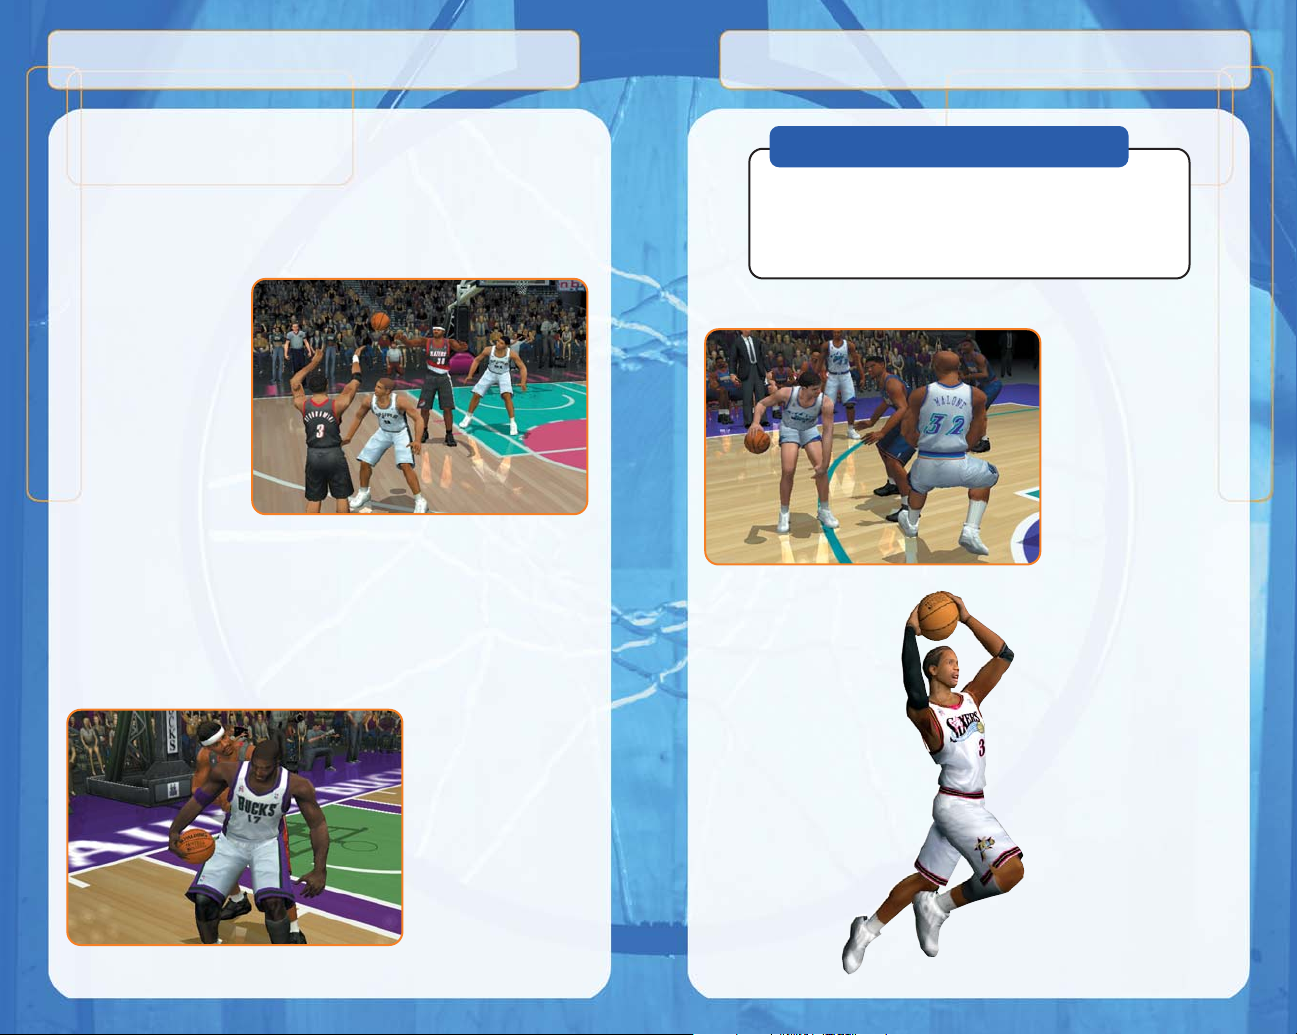
BACKING DOWN THE DEFENDER: L1 button
Do you have a size advantage over your defender? If so, press the L1 button to
drive him back into the paint, then release the button and press the left analog
stick in any direction to create space for the shot. If you press left or right, your
player will attempt to spin around the defender and get to the hole, or he will
perform a drop step. If you pull back, he’ll attempt a classic fadeaway a la
Hakeem Olajuwon or Juwan Howard. If he’s underneath the basket, simply
press forward and press
the ■ button to slam it on
your defender’s melon.
Don’t forget about the
three-second violation or
the newer five-second
“back-to-the-basket” rule.
10
CALLING FOR A
PICK: L2 button
To have a teammate set
a pick for you in an
effort to lose that pesky
defender, press the L2
button. Doing so will
cause the teammate
nearest you to create a
wall for you to step
around and (hopefully)
get you an open look at
the basket.
11
Coach’s Corner: Posting Up
When in a post-up battle, both players’ physical size, strength
and post-up skill will determine whether you back your man
down or bang against a brick wall. If you find yourself squaring
off against an equal opponent, try pumping the R1 button to
give yourself a little extra power.
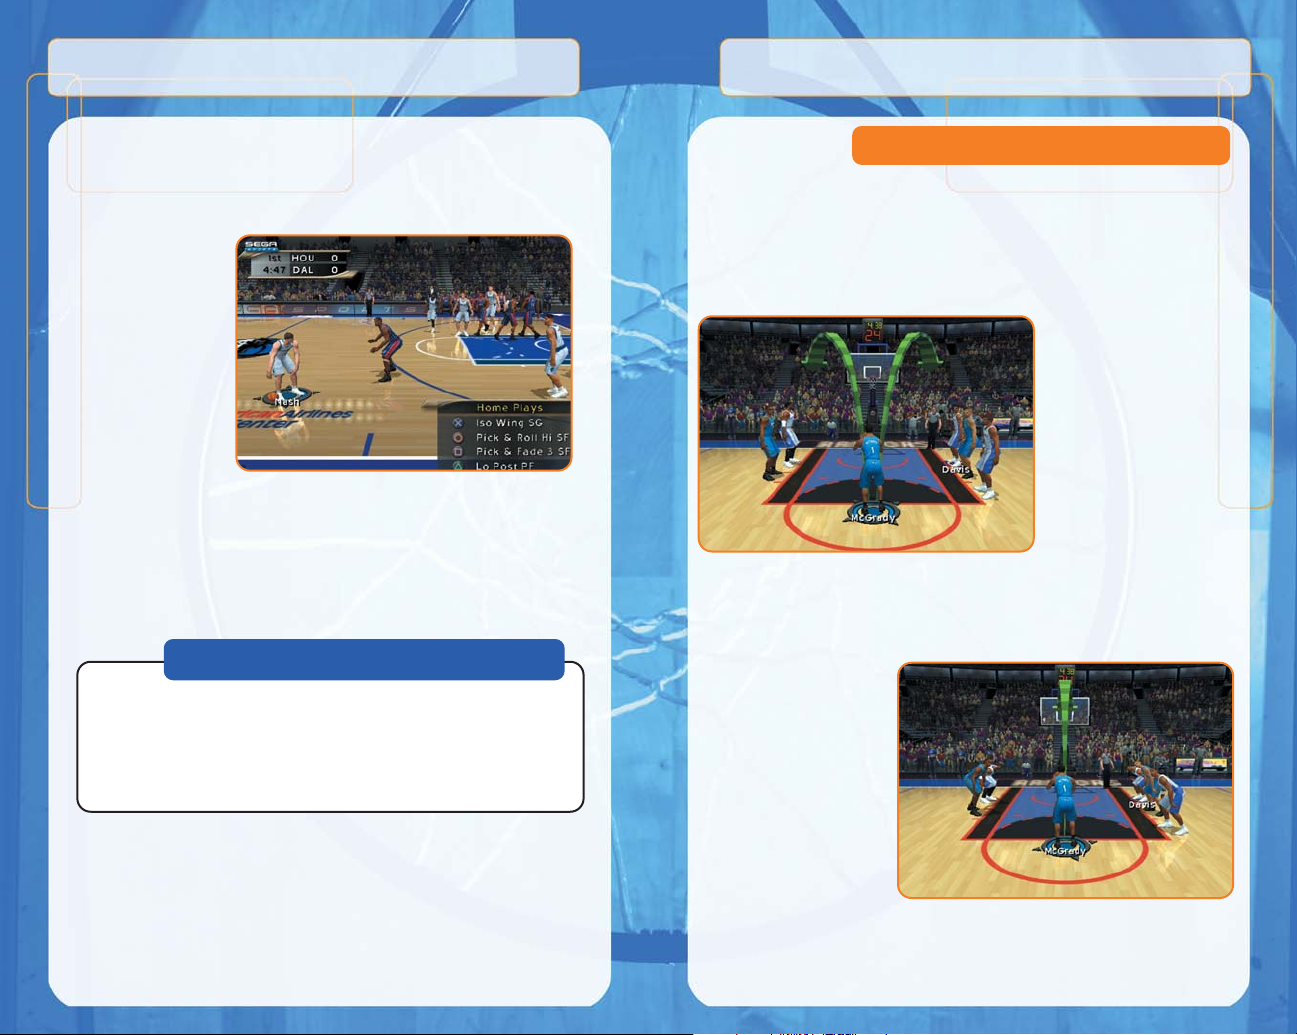
PLAYCALLING: right analog stick + ✖, ■,●,▲
Each team has sixteen plays in its offensive playbook, of which four plays can be
used during a game via the in-game playcall menu. If you’d like to customize the
four plays currently in use, select Coach from the Pause Menu, and select
Offensive Plays (you
can also set your offensive plays in Customize
Mode). To access the
playcall menu during
gameplay, press the
right analog stick to
call up the Plays
Overlay, then press the
corresponding button
to run a specific play.
12
Many people can simply pick up a controller and get a good feel for normal
gameplay, but free throw shooting can be a bit trickier. If you want to progress
from a Chris Dudley to a Reggie Miller at the free-throw line, it’s gonna take a
little bit of time and patience.
To shoot a successful free throw, you’ll need to line up both green arrows
directly over the basket. To do so, press both the left analog stick and the right
analog stick at exactly the
same pressure to line up
the arrows, then press any
of the four trigger buttons
(L1, L2, R1, R2) to release
the shot. If you don’t
press both analog sticks
at the same time, your
shot will be off (so, you
can’t line up one arrow
then get to work on the
second arrow).
Remember that you don’t have all day to line up your arrows until they’re just
right. If you’re taking too long, a clock will appear in the upper right corner of
the screen to tell you how many seconds you have remaining.
If it’s taking a while for you
to get the hang of it, a stop
off at the Practice Mode
gymnasium may be just the
tonic for your shooting ills,
and can be invaluable in
learning the fundamentals of
good free throw shooting.
13
Free Throw Shooting
Coach’s Corner: Passing Out Of A Shot
Try passing out of your shot by pressing the ■ button to leap into the air,
then pressing the ✖ button to pass before you release the shot. It’s a great
way to get the ball to an open man if the defense collapses on you. To execute this move, you’ll need to roll your finger from the shoot button to the
pass button. If you let go of the shoot button, your player will release the
shot, so you’ll need to keep it held down.
 Loading...