

Page 1
Instruction Manual
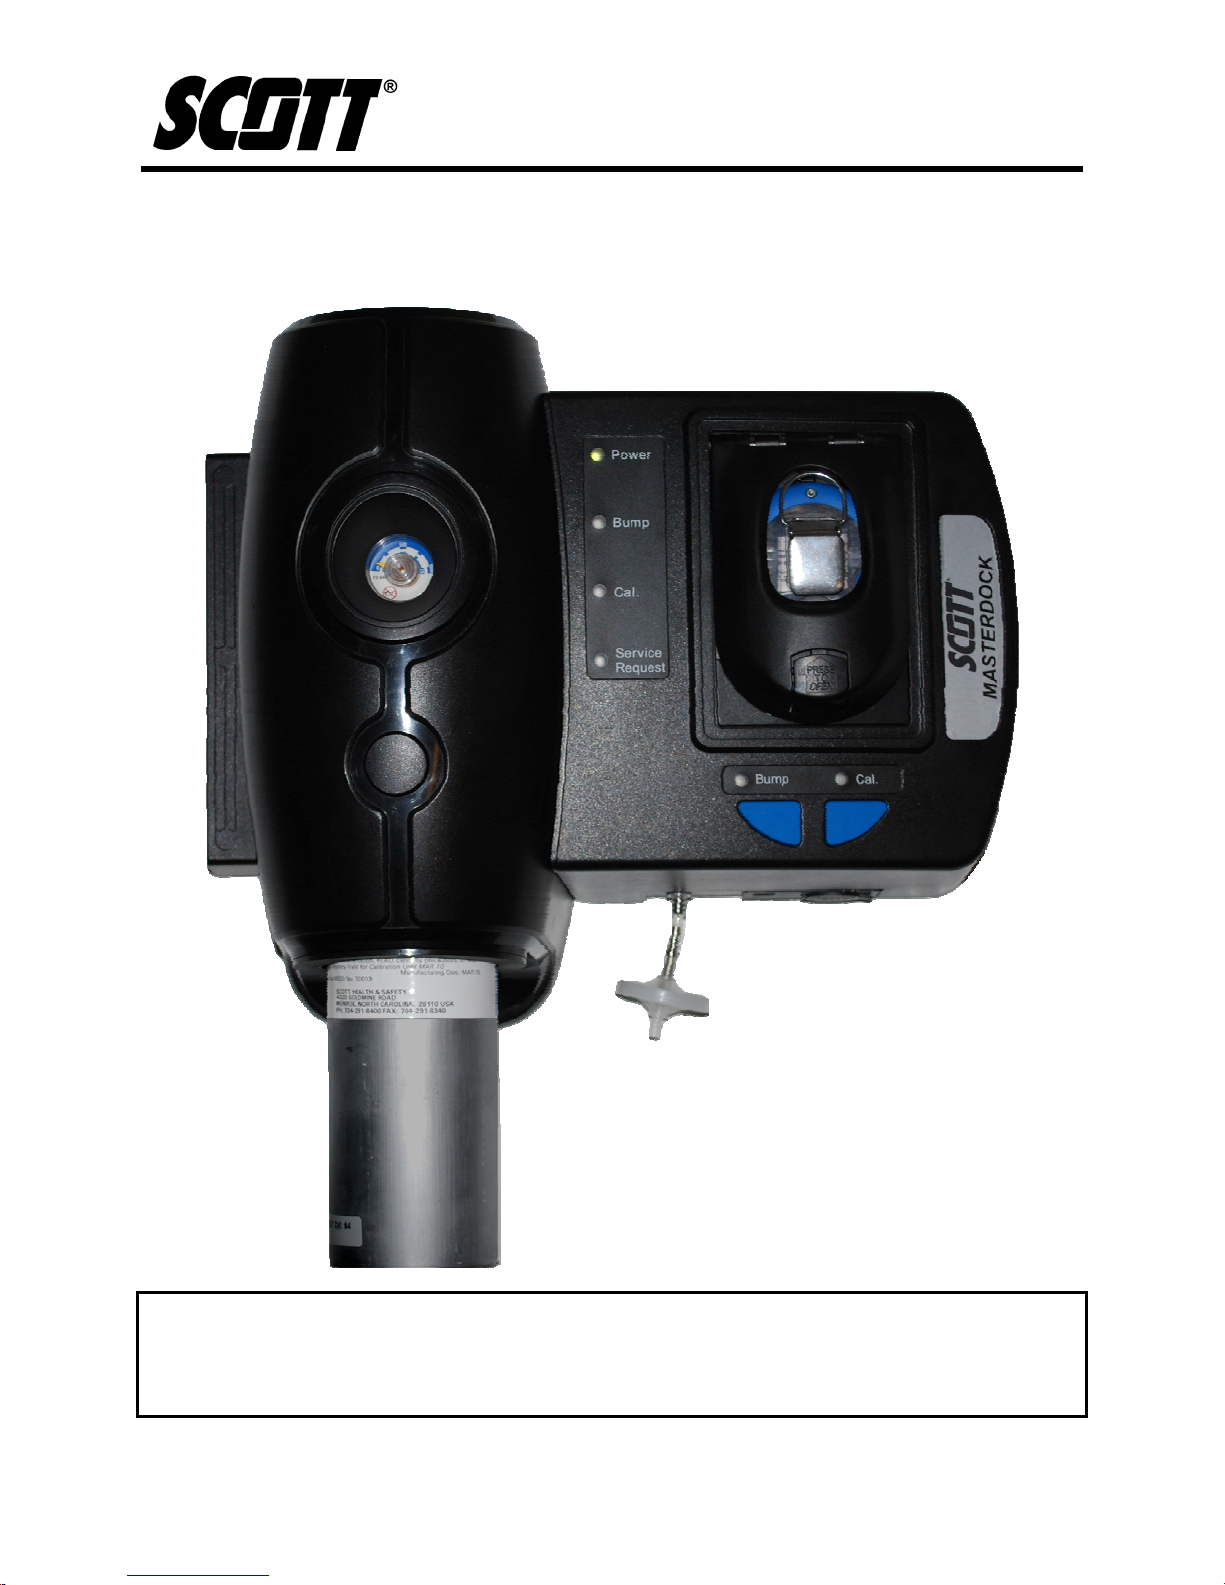
Masterdock™
Docking Station
READ AND FOLLOW THE ENTIRE CONTENT OF THIS MANUAL PRIOR TO
USE. FAILURE TO DO SO MAY RESULT IN SERIOUS INJURY OR DEATH.
COPYRIGHT © 2009, SCOTT, ALL RIGHTS RESERVED
WARNING
P/N 087-0045 Rev. E 01/10
Page 2

Masterdock Docking Station
Instruction Manual
This Page Left Intentionally Blank
P/N 087-0045 Rev. E 01/10
ii
Page 3

Masterdock Docking Station
Instruction Manual
Table of Contents
1. Safety and General Information .................................................................... 1
1.1. Important Notices ................................................................................. 1
1.2. Warnings, Cautions, and Notes ............................................................ 2
1.2.1. General Warnings and Cautions .......................................................... 3
1.2.2. General Rules for Use of the Masterdock ............................................ 3
1.3. Warranty Statement ............................................................................. 4
1.3.1. Contacting Scott Health & Safety ......................................................... 4
1.4. Acronyms Quick Reference .................................................................. 5
2. Introduction ................................................................................................... 7
3. Setup and Mounting ...................................................................................... 9
3.1. Mounting the Masterdock ..................................................................... 9
3.2. Powering the Masterdock ................................................................... 10
3.3. Connecting Calibration Gas ............................................................... 10
3.4. Secure Digital Memory Card .............................................................. 11
3.4.1. Formatting an SD Card ...................................................................... 12
3.5. Air Filter .............................................................................................. 12
3.6. Installing Software .............................................................................. 12
4. Operation .................................................................................................... 13
4.1. Bump Testing and Calibration ............................................................ 13
4.2. LED Alerts and Displays..................................................................... 13
4.3. Masterdock Utility ............................................................................... 14
4.3.1. Connecting Masterdock to a PC ......................................................... 14
4.3.2. Masterdock Utility Modes ................................................................... 14
4.3.3. Masterdock Utility Main Display ......................................................... 15
4.3.4. Masterdock Utility Menus ................................................................... 15
4.3.4.1. Operation Menu ................................................................................. 16
4.3.4.2. Option Menu ....................................................................................... 17
4.3.4.3. View Menu ......................................................................................... 17
4.3.4.4. Help Menu .......................................................................................... 18
5. Parts List and Maintenance ......................................................................... 19
5.1. Cleaning and Routine Maintenance ................................................... 19
5.2. Troubleshooting ................................................................................. 20
5.3. Scott Repairs ...................................................................................... 21
P/N 087-0045 Rev. E 01/10
iii
Page 4

Masterdock Docking Station
Instruction Manual
This Page Left Intentionally Blank
P/N 087-0045 Rev. E 01/10
iv
Page 5

Masterdock Docking Station
Instruction Manual
List of Figures
Figure 2-1. Masterdock Components ........................................................................... 8
Figure 3-1. Masterdock Wall Mounting Dimensions ..................................................... 9
Figure 3-2. Installing Calibration Gas ......................................................................... 10
Figure 3-3. Installing SD Memory Card ...................................................................... 11
Figure 4-1. Masterdock Utility Main Display ............................................................... 15
Figure 4-2. Masterdock Utility Operation Menu .......................................................... 16
Figure 4-3. Masterdock Utility Option Menu ............................................................... 17
Figure 4-4. Masterdock Utility View Menu .................................................................. 17
Figure 4-5. Masterdock Utility Help menu .................................................................. 18
P/N 087-0045 Rev. E 01/10
v
Page 6

Masterdock Docking Station
Instruction Manual
This Page Left Intentionally Blank
P/N 087-0045 Rev. E 01/10
vi
Page 7

Masterdock Docking Station
Instruction Manual
List of Tables
Table 1-1. Acronym Quick Reference List .................................................................. 5
Table 2-1. Masterdock Components ........................................................................... 8
Table 4-1. Status LED Indications............................................................................. 13
Table 5-1. Parts List .................................................................................................. 19
Table 5-2. Troubleshooting Chart ............................................................................. 20
P/N 087-0045 Rev. E 01/10
vii
Page 8
Masterdock Docking Station
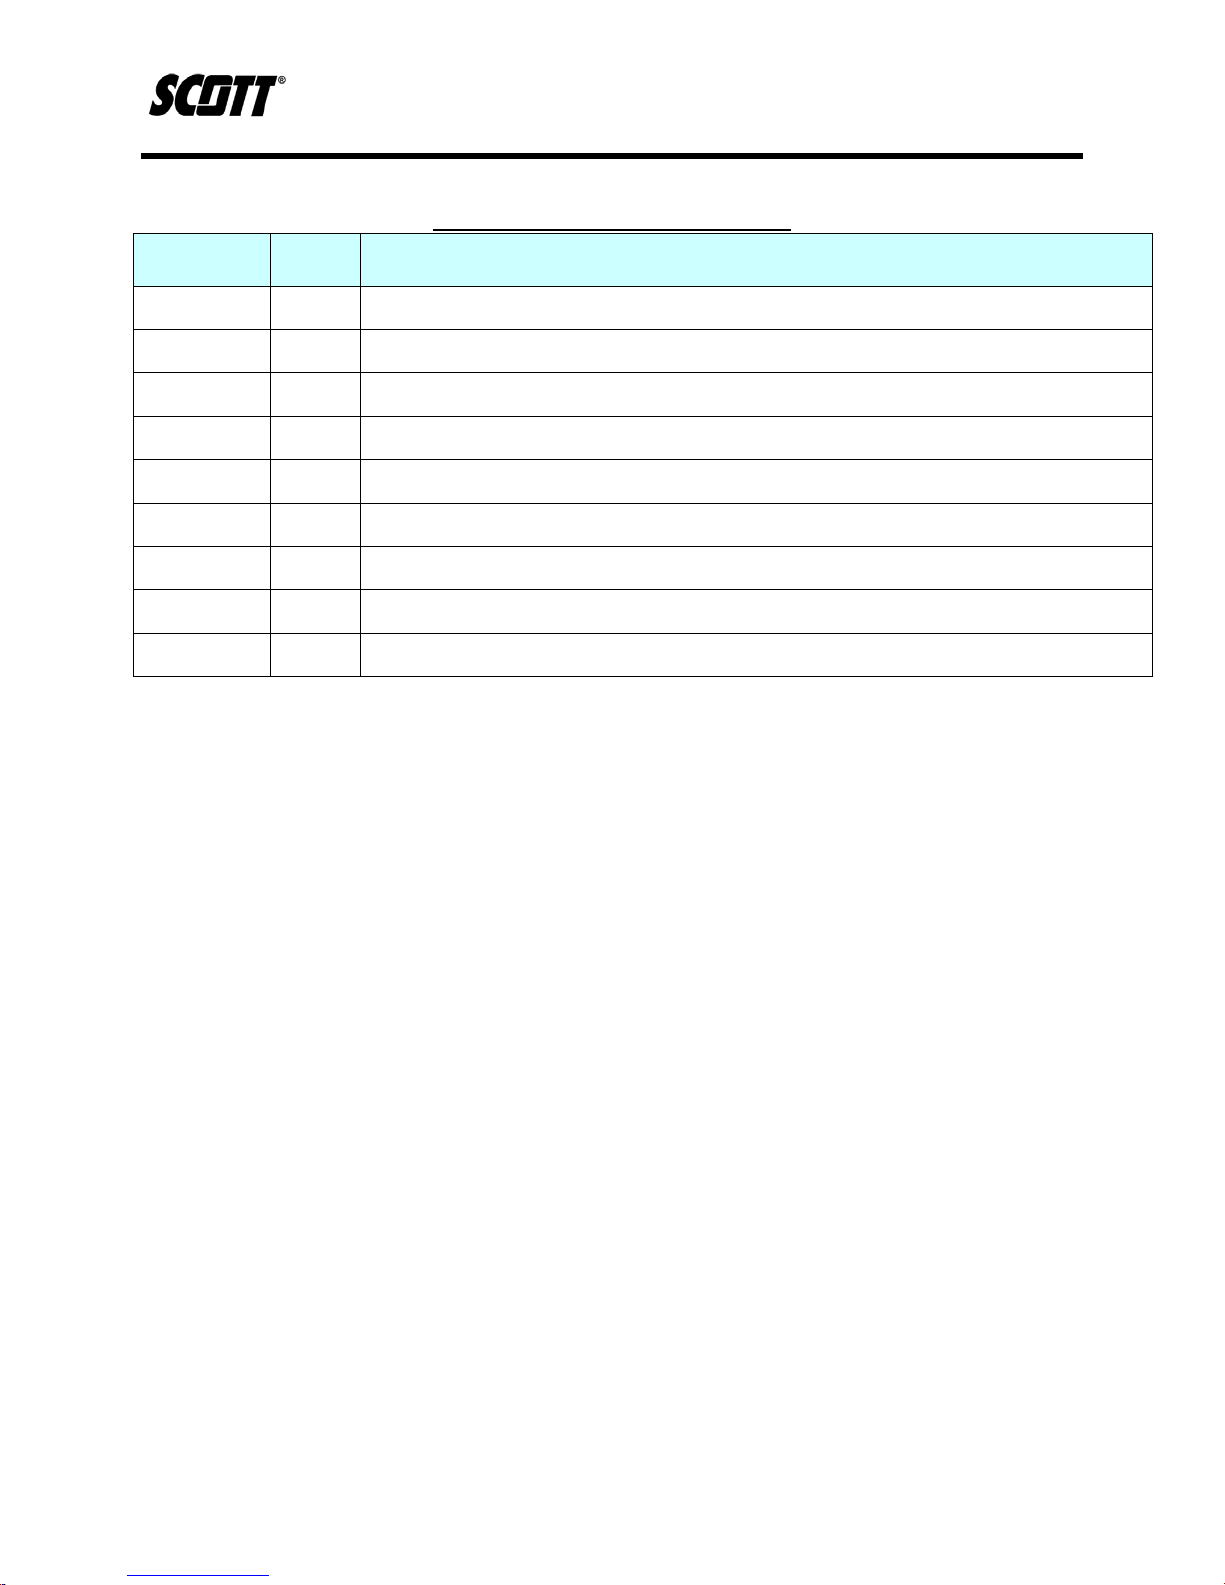
Record of Revisions
Revision Date Description
A 04/09 Initial release
B 08/09 Updated LED indications and troubleshooting table
C 09/09 Updated P/N's
D 10/09 Updated P/N's
E 01/10 Updated Table 4-1 and 5-2.
Instruction Manual
P/N 087-0045 Rev. E 01/10
viii
Page 9
Masterdock Docking Station
Instruction Manual
1. Safety and General Information
WARNING
ALL INDIVIDUALS WHO HAVE OR WILL HAVE RESPONSIBILITY FOR USING OR TESTING THIS PRODUCT MUST READ
AND UNDERSTAND THE CONTENTS OF TH IS MANUAL. THE PRODUCT WILL PERFORM AS DESIGNED ONLY IF USED
AND TESTED IN ACCORDANCE WITH THE MANUFACTURER’S INSTRUCTIONS. FAILURE TO FOLLOW
MANUFACTURER’S INSTRUCTIONS WILL RENDER THE WARRANTY AND APPROVALS NULL AND VOID . FAILURE TO
FOLLOW THESE INSTRUCTIONS MAY ALSO RESULT IN SERIOUS INJURY OR DEATH.
1.1. Important Notices
Scott Health and Safety can take no responsibility for use of its equipment if it is not used in
accordance with the instructions. If further operational or maintenance details are required but not
provided in this manual, contact Scott Health and Safety or their agent. Scott Health and Safety
shall not be liable for any incidental or consequential damages in connection with any modifications,
errors or omissions in this manual. While every effort has been made to ensure accuracy in this
owner’s manual, no responsibility can be accepted for errors or omissions. This publication is not
intended to form the basis of a contract, and the company reserves the right to amend the design,
content, and specifications of the detector without notice. Additionally, industry standards, codes,
and legislation are subject to change. Updated copies should be obtained by users to ensure the
most recently issued regulations, standards and guidelines are available.
P/N 087-0045 Rev. E 01/10
1 of 20
Page 10

Masterdock Docking Station
Instruction Manual
1.2. Warnings, Cautions, and Notes
Throughout this document, warnings, cautions, and notes have been interspersed to draw attention
to potentially unsafe, hazardous, or unique situations that require user attention. Each warning,
caution, or note is labeled and quickly identified using an icon.
WARNING - INDICATES A POTENTIALLY HAZARDOUS SITUATION, WHICH, IF NOT AVOIDED, COULD RESULT
IN DEATH OR SERIOUS INJURY
.
CAUTION
- INDICATES A POTENTIALLY HAZARDOUS SITUATION THAT, IF NOT AVOIDED, MAY
RESULT IN MINOR OR MODERATE INJURY. IT MAY AL SO BE USED TO ALERT AGAINST UNSAFE PRACTI CES.
NOTE - HIGHLIGHTS VARIOUS INSTANCES WHERE AN ATTENTION TO DETAIL IS CRITICAL TO PRODUCT
PERFORMANCE
.
P/N 087-0045 Rev. E 01/10
2 of 20
Page 11

Masterdock Docking Station
Instruction Manual
1.2.1. General Warnings and Cautions
The following list of warnings and cautions pertain to the general use and care of the Masterdock.
Failure to follow these warnings and cautions may result in death, injury, or poor equipment
performance.
WARNINGS
USE THE MASTERDOCK ONLY IN AN ATMOSPHERE THAT HAS BEEN VERIFIED TO BE FREE OF TOXIC OR
COMBUSTIBLE GASES OR VAPORS.
THE MASTERDOCK IS NOT FOR USE WITH ANY OTHER PRODUCT THAN THE PROTÉGÉ PORTABLE G AS MOINITOR.
CAUTIONS
VERIFY THE GAS INLET PORT HAS A CLEAN FILTER ATTCHED AND AN UNOBSTRUCTED FLOW PATH PRIOR TO USE.
DO NOT USE A MAGNET NEAR THE SD MEMORY CARD TO PREVENT LOSING OR CORRUPTING DATA.
DO NOT USE ANY SOLVENTS, CHEMICALS, OR POLISHES CONTAINING SILICON COMPOUNDS TO CLEAN THE
MASTERDOCK AS THESE CAN CAUSE DAMAGE TO T H E SENSORS OF THE PROTÉGÉ.
1.2.2. General Rules for Use of the Masterdock
It is critical that this docking station be used and maintained properly. Failure to do so could
jeopardize the people whose lives depend on its operation and cause injury or death.
• USE THE DOCKING STATION CORRECTLY. Only use the Masterdock to bump test and
calibrate Scott’s Protégé portable gas monitor.
• POWER MUST BE ON TO WORK. The Masterdock will only function while powered on.
• VERIFY CALIBRATION CYLINDERS ARE SUFFICIENTLY CHARGED. Calibration
cylinders must have at least 50 psi of pressure to accurately calibrate or bump test Protégé
units.
• DO NOT USE CALIBRATION GAS BEYOND THE EXPIRATION DATE. Verify Calibration
gas has not exceeded its expiration date prior to use.
• DO NOT USE IN UNKNOWN OR POTENTIALLY HAZARDOUS ATMOSPHERES. Always
verify an atmosphere is free of toxic or combustible gases prior to powering up the
Masterdock. Keep the air filter clean to prevent contaminants from entering the units air
system.
P/N 087-0045 Rev. E 01/10
3 of 20
Page 12

Masterdock Docking Station
Instruction Manual
1.3. Warranty Statement
SCOTT HEALTH & SAFETY
TM
LIMITED WARRANTY ON Masterdock
Scott Health & Safety (SCOTT), a division of Scott Technologies Inc. warrants it's MASTERDOCK
DOCKING STATION (THE PRODUCTS) to be free from defects in workmanship and materials for a
period of one (1) year from the date of original manufacture by SCOTT. This warranty applies to all
components of THE PRODUCTS supplied at the time of original sale of THE PRODUCTS. SCOTT’s
obligation under this warranty is limited to replacing or repairing (at SCOTT’s option) THE
PRODUCTS or components shown to be defective in either workmanship or materials.
Only personnel of SCOTT or, when directed by SCOTT, authorized SCOTT agents are permitted to
perform warranty obligations. This warranty does not apply to defects or damage caused by any
repairs of or alterations to THE PRODUCTS made by owner or any third party unless expressly
permitted by SCOTT product manuals or by written authorization from SCOTT. To obtain
performance under this warranty, and as a condition precedent to any duty of SCOTT, the
purchaser must return such products to SCOTT, a SCOTT authorized distributor or a SCOTT
authorized service center. Any product returned to SCOTT shall be sent to “SCOTT HEALTH &
SAFETY” (Attn: Warranty Claim Dept.), P.O. Box 569, Monroe, NC 28111.
Docking Station
This warranty does not apply to any malfunction of or damage to THE PRODUCTS resulting from
accident, alteration, misuse, or abuse.
THIS WARRANTY IS MADE IN LIEU OF ALL OTHER WARRANTIES, EXPRESSED OR
IMPLIEDINCLUDING, BUT NOT LIMITED TO, ANY IMPLIED WARRANTY OF
MERCHANTABILITY OR FITNESS FOR A PARTICULAR PURPOSE. IN ADDITION, SCOTT
EXPRESSLY DISCLAIMS ANY LIABILITY FOR SPECIAL, INCIDENTAL OR CONSEQUENTIAL
DAMAGES IN ANY WAY CONNECTED WITH THE SALE OR USE OF SCOTT PRODUCTS, AND
NO OTHER FIRM OR PERSON IS AUTHORIZED TO ASSUME ANY SUCH LIABILITY.
1.3.1. Contacting Scott Health & Safety
To contact Scott Health & Safety, call, fax, email or write to:
Website: www.scotthealthsafety.com
Phone: 800.247.7257 FAX 704.291.8330
Scott Health & Safety
4320 Goldmine Road
Monroe, NC 28110
P/N 087-0045 Rev. E 01/10
4 of 20
Page 13

Masterdock Docking Station
Instruction Manual
1.4. Acronyms Quick Reference
Throughout the duration of this manual, several acronyms are used. Provided in Table 1-1 is a quick
reference chart to quickly identify any acronym that may be unfamiliar to users.
Table 1-1. Acronym Quick Reference List
Acronym Definition
AC Alternating Current
DC Direct Current
FAT File Allocation Table
lb Pounds
LCD Liquid Crystal Display
LED Light Emitting Diode
mm Millimeter
PC Personal Computer
psi Pounds per Square inch
SD Secure Digital
USB Universal Serial Bus
P/N 087-0045 Rev. E 01/10
5 of 20
Page 14

Masterdock Docking Station
Instruction Manual
This Page Left Intentionally Blank
P/N 087-0045 Rev. E 01/10
6 of 20
Page 15

Masterdock Docking Station
Instruction Manual
2. Introduction
The Masterdock is an automated bump testing and calibration station designed exclusively for
performing bump tests and calibration of Scott’s Protégé portable gas monitors. The Masterdock
allows users to quickly and effectively verify the proper operation of the Protégé with the touch of a
button. Removable memory in the Masterdock logs all calibrations and testing for accurate record
keeping. The Masterdock can be powered using the included AC adapter or by installing four
alkaline C-cell batteries.
The Masterdock eliminates the need to connect a calibration adapter and a remote calibration
cylinder to the Protégé. A calibration cylinder is installed into the docking station allowing for multiple
bump tests and calibrations of Protégé units simply by docking a Protégé into the Masterdock and
pressing a button.
The Masterdock can be used on any flat surface such as a desk top, or can be mounted on a wall.
Wall-mounting instructions are included in this guide.
Refer to Figure 2-1.
P/N 087-0045 Rev. E 01/10
7 of 20
Page 16

Masterdock Docking Station
Instruction Manual
Figure 2-1. Masterdock Components
Table 2-1. Masterdock Components
Number Component Number Component
1 Air Outlet 7 Bump and Calibration Activation Buttons
2 Calibration Gas Gauge 8 Calibration Gas Dock
3 Status LEDs 9 Air Inlet
4 Protégé Dock 10 Air Filter
5 Battery Cover (On Side of Unit) 11 USB Port
6 Activation LEDs 12 SD Card Slot
P/N 087-0045 Rev. E 01/10
8 of 20
Page 17

Masterdock Docking Station
Instruction Manual
3. Setup and Mounting
3.1. Mounting the Masterdock
The Masterdock does not need to be mounted on a wall to operate. It may be placed on any desk
top, table top, or other horizontal surface and will operate. However, users may choose a more
permanent location, such as mounted on a wall.
To mount the Masterdock on the wall, drill four holes per the dimensions shown in Figure 3-1.
Mounting hardware must not exceed 14.5 mm in diameter and be capable of supporting the weight
of the Masterdock.
NOTE
T
HE MASTERDOCK WEIGHS APPROXIMATELY 8.5 LBS WITHOUT A CYLINDER OR PROTÉGÉ DOCKED.
Allow for sufficient spacing around the Masterdock to utilize all the features such as installing
calibration cylinders and accessing the battery compartment.
Figure 3-1. Masterdock Wall Mounting Dimensions
P/N 087-0045 Rev. E 01/10
9 of 20
Page 18

Masterdock Docking Station
Instruction Manual
3.2. Powering the Masterdock
The master dock must be powered from an external power supply plugged into the rear side
receptacle or with 4 C-cell batteries. External power supplies may be plugged into the wall or to a
12V cigarette lighter socket.
Refer to Figure 3-1 for the location of the AC power connection.
The battery compartment is located on the side of the Masterdock. Push up on the tab and then pull
up on the door to remove the cover. Rechargeable batteries may be used; however, the Masterdock
will not recharge those batteries when connected to an external source. Rechargeable batteries
must be removed and charged in an external charger.
3.3. Connecting Calibration Gas
Insert either 58L or 34L cylinder of calibration gas into the Calibration Gas Dock and thread into
place.
NOTE
IF USING THE 58L CYLINDER, THE RUBBER SLEEVE MUST BE REMOVED FROM THE CALIBRATION GAS DOCK.
The Gas Gauge will indicate cylinder pressure. Cylinder pressure must be above 50 PSI to perform
a calibration or bump test. There is no isolation valve. The Masterdock controls flow automatically
through a solenoid valve.
The cylinder does not need to be removed between bump tests or calibrations. When cylinder
contents fall below 50 psi, remove from dock simply by unthreading the cylinder.
Figure 3-2. Installing Calibration Gas
P/N 087-0045 Rev. E 01/10
10 of 20
Page 19

Masterdock Docking Station
Instruction Manual
3.4. Secure Digital Memory Card
The Masterdock docking station comes with an SD memory card for electronic storage of all bump
tests and calibrations for transferring of data to a PC. The Masterdock will not perform a bump test
or calibration with out the SD card installed and sufficient memory available. Do not use the SD card
for saving any other file types or data.
To install the SD card, open the cover found on the bottom of the Masterdock next to the USB
connection. Verify the SD card is unlocked prior to installation. Slide the SD card into the slot fully
until it clicks and close the cover.
To remove the SD card, push the card in and allow it to release, then pull the card out.
Keep the SD port cover closed at all times when not removing or installing an SD card. This will
prevent dust and contaminants out of the data drive.
Figure 3-3. Installing SD Memory Card
The SD memory card that comes with the Masterdock has been formatted for use. New SD cards
will need to be formatted prior to use with the Masterdock. Replacement SD cards must not exceed
2GB.
C
USTOMERS MUST SUPPLY AN EXTERNAL SD MEDIA CARD READER TO ACCESS THE DATA ON THE CARD. SCOTT
HEALTH & SAFETY DOES NOT SUPPLY A READER.
Each record contains roughly 200 bytes of data allowing a 2GB memory card to hold thousands of
records.
P/N 087-0045 Rev. E 01/10
NOTE
11 of 20
Page 20

Masterdock Docking Station
Instruction Manual
3.4.1. Formatting an SD Card
If the Service Requested LED blinks orange on the Masterdock or if you are using a new SD card
for the first time, the SD card may need to be formatted. The Masterdock does not automatically
format a card, it must be formatted using a PC.
SD cards typically come formatted by the manufacturer, but for an SD card to operate properly in
the Masterdock, it must be formatted for FAT32, a 32-bit file allocation system. If the card is
formatted for FAT or FAT16 or unformatted, it must be formatted for FAT32.
Before using an SD card or checking whether it needs formatting, verify the sliding locking tab is in
the unlocked position as shown in Figure 3-3.
NOTE
FORMATTING AN SD MEMORY CARD WILL ERASE ALL DATA ON THE CARD. BACKUP ANY DATA PRIOR TO
FORMATTING
Verify the lock tab on the memory card is unlocked and connect the SD memory card to a PC. Open
the My Computer icon on the desk top. Locate the SD card, it is typically identified as Removable
Disk. Right click and select Format. When the Format Disk window appears, set or verify the File
System is set to FAT32 and select Start. The PC will notify when the format is complete.
.
3.5. Air Filter
Verify the Air Inlet port on the bottom of the Masterdock is not operated without the filter in place.
The filter prevents dust and other contaminants from entering the Masterdock unit.
CAUTION
OPERATING THE MASTERDOCK WITHOUT THE AIR FILTER IN PL ACE MAY CAUSE CALIBRAT IONS OR BUMP TEST S
TO FAIL
Periodically inspect and replace the air filter as necessary.
The Masterdock Utility software comes on the CD packaged with the docking station. The utility is
used to upgrade firmware, set the date and time and to input calibration gas lot numbers for data
recording.
Installation of the software onto a PC occurs in two stages. First a driver must be loaded for the
USB, then the utility program is installed.
Insert the CD into a PC. Once the start-up screen appears click on the appropriate buttons and
follow the on-screen prompts.
.
3.6. Installing Software
P/N 087-0045 Rev. E 01/10
12 of 20
Page 21

Masterdock Docking Station
Instruction Manual
4. Operation
4.1. Bump Testing and Calibration
Prior to performing any bump test or calibration, the Protégé unit and the Masterdock must be
powered on. Verify the Battery LED is green on the Masterdock and the pressure gauge indicates
greater than 50 psi. Ensure the air inlet is not obstructed and the filter is clean.
1) Open the door to the docking station and insert the powered on Protégé unit face down so
that that charging contacts of the Protégé align with contacts in the docking station door.
2) Close the door to the docking station.
3) Verify the Bump and Cal. LEDs are lit green. If not, open door and verify the Protégé is firmly
seated in docking station.
4) Push Bump to perform a bump test or Cal. to perform a calibration. The LED above the
selected button will turn off and the status LED will begin blinking orange.
5) When the status LED lights green, the Protégé unit has completed testing. If the LED lights
red instead of green, the test has failed.
4.2. LED Alerts and Displays
Refer to Table 4-1 for Status LED indications and their meanings.
Table 4-1. Status LED Indications
Status LED Red Green Orange (Blinking)
Battery power or
external power is
sufficient
Power
Bump
Cal.
Low Battery, external power not
supplied
Test Failed Test Passed Test in Progress
Test Failed Test Passed Test in Progress
SD card is not installed
OR SD card memory is full
Service
Request
OR a communication failure has
occurred
OR The date/time needs
N/A
synchronization with the
Masterdock Utility
N/A
SD card is locked
OR SD cards needs
formatting
OR SD memory is
low
OR synchronize the
date/time using the
Masterdock Utility
P/N 087-0045 Rev. E 01/10
13 of 20
Page 22

4.3. Masterdock Utility
Masterdock Docking Station
Instruction Manual
4.3.1. Connecting Masterdock to a PC
1) Use the supplied USB cable to connect the Masterdock to a PC.
2) Right click on the My Computer icon found on the desktop and select properties.
3) Select the Hardware Tab.
4) Select Device Manager.
5) Click on the + icon to the left of Ports. Identify the COM number associated CP210x to UART
Bridge Controller. This COM port number is necessary for configuring the Masterdock Utility.
6) Open the Masterdock Utility software.
7) Select Operation -> Setup Port. Select the COM number previously identified.
4.3.2. Masterdock Utility Modes
The Masterdock utility can be used in User Mode or Administrator Mode. All options available in
User Mode are available in Administrator Mode. However, Administrator Mode also allows users to
set the Gas Lot Number, set the Location, synchronize the Masterdock to the time on the PC, and
configure the Masterdock to perform a calibration in the event of a bump test failure.
The Administrator mode is password protected. To select Administrator Mode, Select Operation ->
Operation Mode -> Administrator Mode. At the password prompt screen, a Change Password option
is available.
NOTE
THE DEFAULT PASSWORD FOR THE ADMINISTRATOR MODE IS SCOTT (ALL CAPITAL LETTERS).
P/N 087-0045 Rev. E 01/10
14 of 20
Page 23

Masterdock Docking Station
Instruction Manual
4.3.3. Masterdock Utility Main Display
The Masterdock Utility Main Display shows Firmware Revision, the date and time, Gas Lot Number,
Serial Number, and Location of the Masterdock. When in Administrator Mode, the options to sync
time with the PC clock and Calibrate if a Bump test fails become available.
A toolbar located at the top of the display has three quick use buttons; Get Configurations, Upgrade
Firmware, and Help.
Figure 4-1. Masterdock Utility Main Display
4.3.4. Masterdock Utility Menus
Four Menus are available for use in the Masterdock, Operation, Option, View, and Help. Not all
selections will be available depending on which mode is selected.
P/N 087-0045 Rev. E 01/10
15 of 20
Page 24

Masterdock Docking Station
Instruction Manual
4.3.4.1. Operation Menu
Setup Port - Used to change the COM port. Refer to Paragraph 4.3.1 for more information.
Get Configurations - Used to poll the Masterdock about current information for display including
the Firmware Revision, Gas Lot Number, Serial Number, and Location of the Masterdock.
Operation Mode - Used to select either user mode or Administrator Mode. Refer to Paragraph
4.3.2. for more information.
Upgrade Firmware - Used to Upgrade the Firmware installed in the Masterdock.
Figure 4-2. Masterdock Utility Operation Menu
P/N 087-0045 Rev. E 01/10
16 of 20
Page 25

Masterdock Docking Station
4.3.4.2. Option Menu
Language - Used to Select which language for the Masterdock utility to display.
Instruction Manual
Figure 4-3. Masterdock Utility Option Menu
4.3.4.3. View Menu
Toolbar - Used to display or hide the Toolbar.
Status Bar - Used to display or hide the Status Bar.
Figure 4-4. Masterdock Utility View Menu
P/N 087-0045 Rev. E 01/10
17 of 20
Page 26

Masterdock Docking Station
Instruction Manual
4.3.4.4. Help Menu
About Masterdock Utility - Used to display the current software revision level of the Masterdock
Utility.
Figure 4-5. Masterdock Utility Help menu
P/N 087-0045 Rev. E 01/10
18 of 20
Page 27

5. Parts List and Maintenance
Part Description Scott P/N
Masterdock 093-0526
Instruction Manual 087-0045
Scott Portable gas Detection CD (Masterdock
Software and Instruction Manual Included)
Quick Start Guide 062-0031
USB Cable 093-0527
12V Power Supply 028-0053
SD Memory Card 093-0532
Air Filter (5 pack) 093-0534
Cigarette Cable Supply 028-0054
Calibration Gas 34L 077-0351
Calibration Gas 58L 077-0352
Masterdock Docking Station
Instruction Manual
Table 5-1. Parts List
096-3366
5.1. Cleaning and Routine Maintenance
The Masterdock is designed to be free of routine maintenance unless operated with batteries. As
needed, replace batteries with C-Cell batteries. Rechargeable batteries may be used in the
Masterdock, however batteries will not recharge when installed in the Masterdock. Batteries must be
charged with an external charger.
CAUTION
NEVER LEAVE DEAD BATTERI ES INSTALLED IN THE MASTER DOCK AS THEY MAY LEAK OR CO RRODE AND CAUSE
DAMAGE TO COMPONENTS
Clean the Masterdock as needed using only compressed air or a clean dry cloth. If needed, a
dampened cloth may be used for external cleaning, however do not use any cleaners or solvents.
.
P/N 087-0045 Rev. E 01/10
19 of 20
Page 28

5.2. Troubleshooting
Indication Reason Recommended Action(s)
All LEDs extinguished
Service Request LED is red,
unable to perform a Bump Test
or Calibration
LEDs indicate normal
operation (Green) however
unable to perform a Bump Test
or Calibration
Pump does not operate
Masterdock Utility fails to open
COM port
Bump and Cal. LED flash red
Table 5-2. Troubleshooting Chart
Verify power source. If battery operated,
verify batteries have sufficient charge. If
Masterdock is not
powered externally, verify power source is
receiving power
Verify AC adapter is not damaged. Check
for loose or broken wires.
Verify SD card is installed.
SD Card problem
OR
Date/Time
Connect SD card to PC and remove data
to clear memory on card.
Replace SD memory card.
Synchronization is
required
Synchronize the Masterdock date/time
using the Masterdock Utility.
Empty calibration
cylinder
OR
Verify gauge indicates properly with a full
Defective gauge
OR
Verify inlet line and air filter are clear of
Obstruction in inlet
line
Faulty pump
OR
Obstructed line
Check pump wiring, clear obstructions
from air inlet, air outlet and port inside
docking station door to Protégé, or replace
Port has not been
setup
OR
Refer to Paragraph 3.6 and Paragraph
USB driver has not
been installed
correctly
Pump is stalled, Cal
Replace Calibration Gas bottle. Refer to
Gas bottle is empty
Masterdock Docking Station
Instruction Manual
connected.
OR
Replace cylinder.
tank.
obstructions.
pump.
4.3.
Paragraph 3.3
.
P/N 087-0045 Rev. E 01/10
20 of 20
Page 29

Masterdock Docking Station
Instruction Manual
5.3. Scott Repairs
For quick and effective service of your instrumentation, and to reduce time spent on repairs, the
SCOTT Instruments Service Department requires a Return Maintenance Authorization number be
issued prior to any product being shipped for service repairs.
Contact the Service Department at:
Phone: 1- 800-247-7257 • Fax: 1-704-291-8330
Monday - Friday
8.30 AM to 5.00 PM EST.
e-mail: techsupport.scotths.us@tycoint.com
www.scotthealthsafety.com
P/N 087-0045 Rev. E 01/10
21 of 20
Page 30

Printed in the USA
Health & Safety
Monroe Corporate Center
PO Box 569
Monroe, NC 28111
Telephone 1-800-247-7257
FAX (704) 291-8330
www.scotthealthsafety.com
Copyright © 2010, SCOTT, All Rights Reserved
 Loading...