

Page 1
SALUS
®
- Hygiene Instrument
Reprocessing Container
Operator’s Manual
95-114168 US EN R2 SALUS-10-AM
SALUS is a registered trademark and Your Infection Control Specialist is a trademark of SciCan Ltd. All other trademarks referred to in this manual are the property
of their respective owners. © 2017 SciCan Ltd. All rights reserved.
Page 2

1. INDICATIONS FOR USE 3
2. DISCLAIMERS 3
3. SAFE HANDLING 3
4. OVERVIEW 4
4.1 Checking the package contents 4
4.2 Acces sori es 4
4.3 Spare parts 4
4.4 Specifications 5
5. PREPARING THE CONTAINER FOR SERVICE 5
6. HOW TO CALCULATE THE END OF LIFE EXPIRY DATE 5
7. USING THE CONTAINER 6
7.1 Opening the contai ner: 6
7.2 Preparing and loading instruments 6
7.3 Load instruments 6
8. REPROCESSING SALUS – HYGIENE SLEEVE AND RACK WITH INSTRUMENTS 6
8.1 After u se - used instr uments 6
8.2 Cleaning the Rack wi th Instruments 7
8.2.1 In a medic al wash er or the rmal di sinfec tor 7
8.2.2 In an ultr asonic c lean er 7
8.3 Cleaning the Sleeve 7
8.3.1 In a medic al wash er or the rmal di sinfec tor 7
8.3.2 In an ultr asonic c lean er 7
8.3.3 Manua l clean ing 7
8.4 Preparing for sterilization 8
8.5 Closing the container 8
8.6 Sterilizing instruments in the co ntainer 8
9. TRANSPORTING AND STORING THE CONTAINER 9
9.1 Transpor ting 9
9.2 Storing 10
10. REMOVING INSTRUMENTS FROM THE CONTAINER 10
11. MAINTENANCE AND INSPECTION 10
11.1 Reusable filter in spec tion and care 11
11.2 Seal inspection and care 11
11.3 Cont aine r sleeve and rack insp ection 11
11.4 Rack ha ndle inspection and care 11
12. MANUFACTURER’S INFORMATION AND CUSTOMER SERVICE INFORMATION 12
13. WARR A NTY 13
14. SALUS - HYGIENE PL ACEMENT IN RACKS 14
Page 3
3
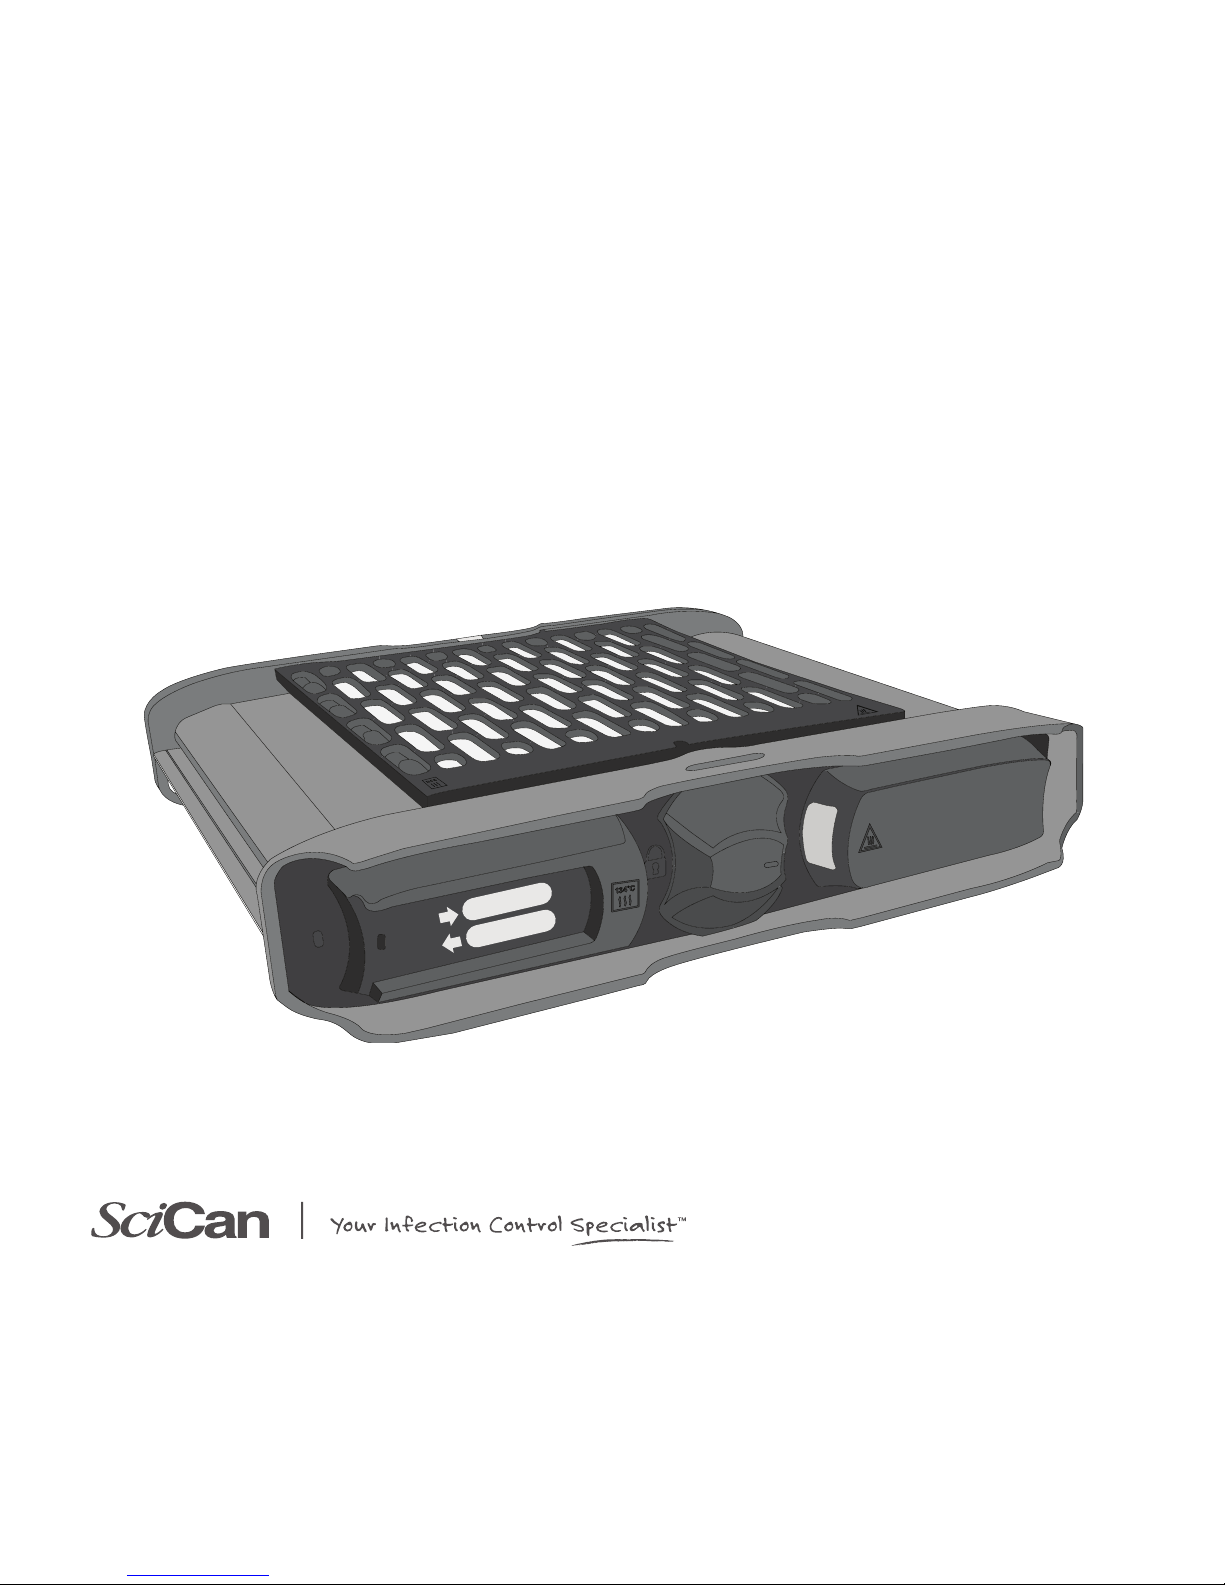
INSTRUCTIONS FOR USE
1. INDICATIONS FOR USE
The SALUS® - Hygiene is a device intended to be used to enclose another medical device that is to be sterilized by a health care provider. It is intended
to allow sterilization of the enclosed medical device and also to maintain sterility of the enclosed device until used. The SALUS® - Hygiene is a reusable
instrument reprocessing container intended to enclose and organize instruments that are designed to withstand steam sterilization and to maintain
sterility of the reusable instruments during storage. The SALUS - Hygiene is suitable for use in dynamic air removal steam sterilizers. Please refer to the
chart below for validated sterilization cycles.
2. DISCLAIMERS
Do not permit any person other than certified personnel to supply parts for, service or maintain your SALUS - Hygiene. SciCan will not be liable for
incidental, special or consequential damages caused by any maintenance by a third party including lost profits, any commercial loss, economic loss, or
loss arising from personal injury.
It is important to follow local guidelines governing verification of any sterilization process used to sterilize instruments when using the SALUS - Hygiene.
3. SAFE HANDLING
Symbols on the container indicate the following:
Steam Sterilizer Type Cycle
Sterilization
Temperature
-0/+6°F (-0 /+3°C)
Exposure
Time
Recommended
Drying Time
Load
Typ e
Maximum
Instrument
Load Per Container
Dynamic-air-removal
(pre-vacuum)
Wrapped 27 0° F (132°C) 4 minute s 16 mi nutes
Solid Hygiene
Instruments &
Lumen Hygiene
Instruments
(Ø .028” [0.7mm] x L
3.35” [85 mm], Qty. 1)
0.487lb (221g)
Dynamic-air-removal
(steam-flush, pressure-pulse, SFPP)
Wrapped 27 0° F (132°C) 4 minute s 30 minutes 0.478lb (217g)
Dynamic-air-removal
(pre-vacuum)
Wrapped 273°F (134°C) 4 minute s 30 minutes 0.473lb (215g)
Sterilizable up to the sterilization
temperature specified.
Caution: Hot surface. Container is locked.
Page 4
4
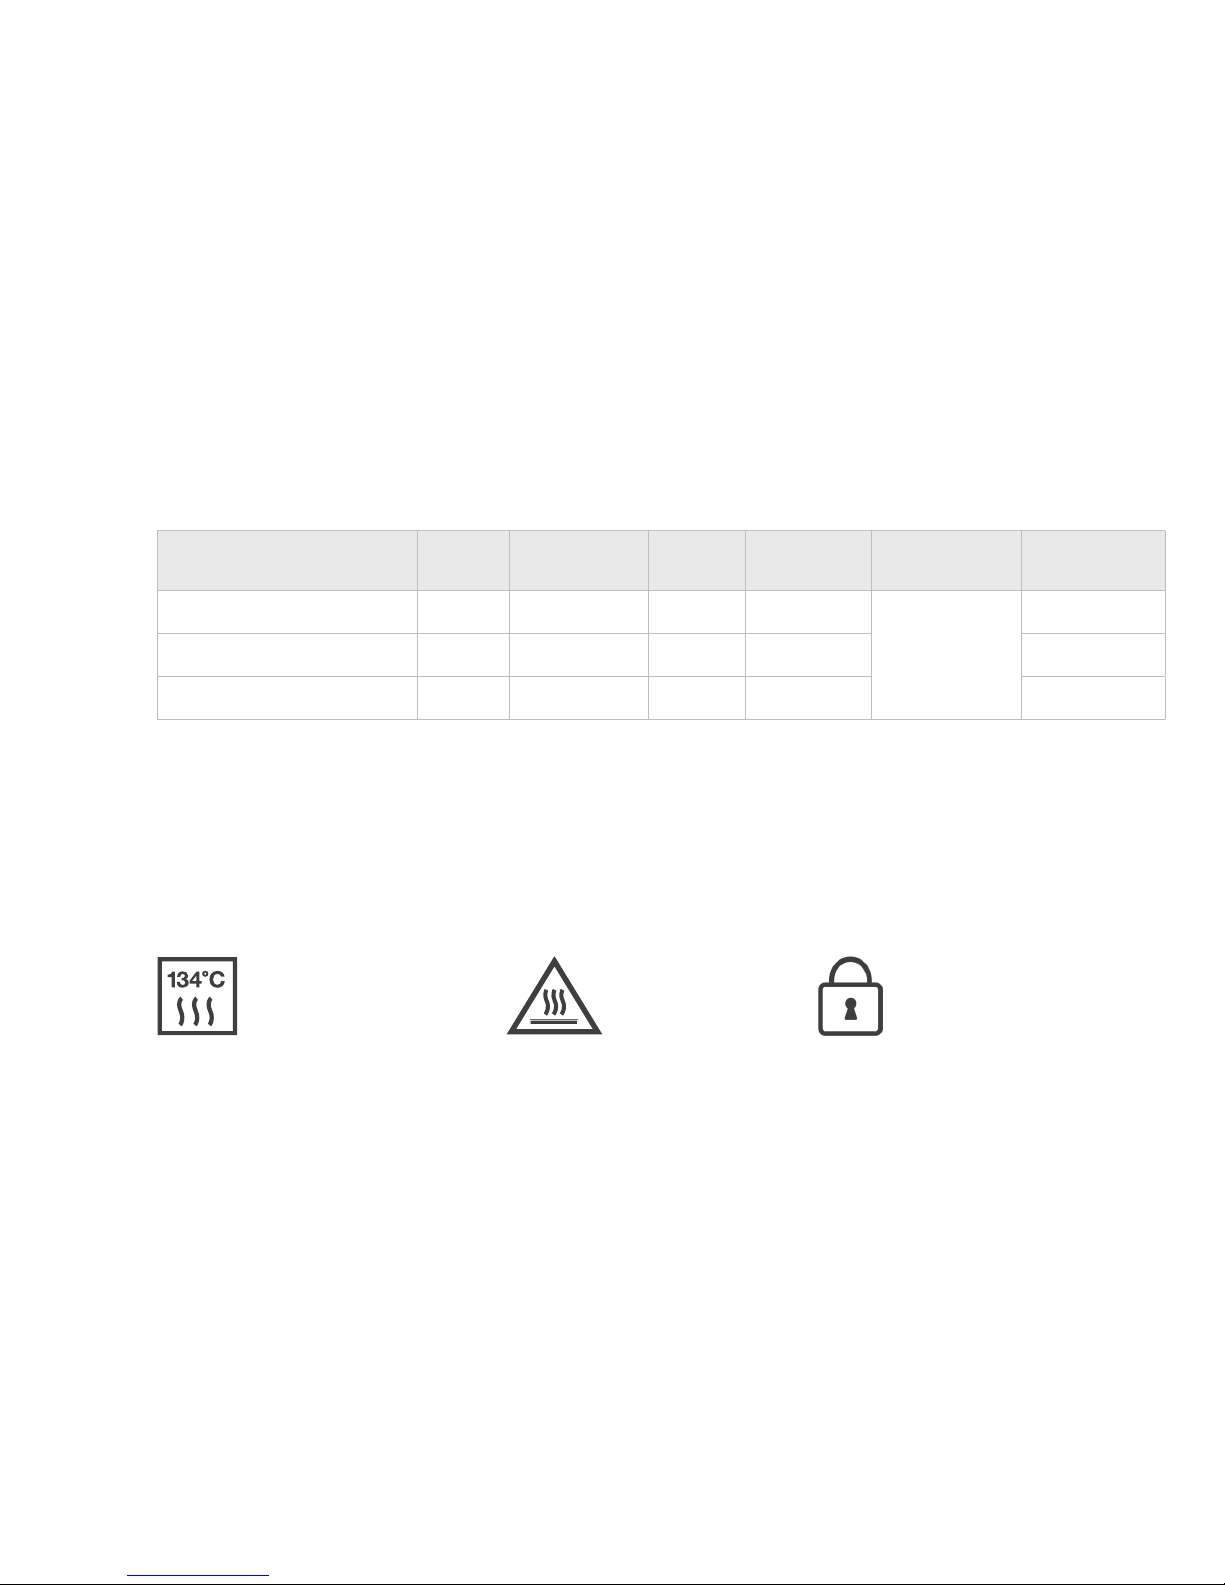
1. Sleeve
2. Filter cover
3. Reusable filter
4. Rack
5. Instrument cradle
6. Instrument cradle
handles
7. Color-coded pins
(optional accessory)
4.3 Spare parts
Gasket seal, front 01-114777S
Gasket seal, back 01-1147 7 8 S
Reusable filter 01-114196S
Rack handles (2/
pack)
01-114365S
4.2 Accessories
Air/water syringe tip clip CASSETTE-CLIP
Labels (English/Spanish, 100/pack) 01-114360
Autoclavable markers (3/pack) 01-11420 4
HYDRIM L110/M2 10 sleeve rack 01-11420 6
Medium rack assembly 01-114430
Medium sleeve assembly 01-11420 8
Color-coded pins (Blue, 20/pack) 01-114211
Color-coded pins (Yellow, 20/pack) 01-11421 0
Color-coded pins (Red, 20/pack) 01-1142 0 9
Color-coded pins (Assorted, 18/pack) 01-114 2 17
4. OVERVIEW
1
2
11
3 4
109
BACK
of Rack
5
12
7
8
13
6
4.1 Checking the package
contents
When you receive your SALUS Hygiene packing carton, the items
listed below will be included. If any of
the items are missing, contact your
dealer immediately so that situation can
be corrected.
SALUS - Hyg iene S terility
Instrument Reprocessing
Container
(1 Sleeve + 1 Rack)
Qt y. 1
Instructions for Use (IFU) Qty. 1
Single-use labels Qt y. 10 0
Autoclavable marker pen Qty. 1
8. Slot for label
9. Knob
10. Tamper-evident latch
11. Rack seal (back)
12. Suggested locations for
fastening chemical indicator
13. Rack seal (front)
Page 5
5
4.4 Specifications
Dimension (width x depth x height): 7.7” x 6.5” x 1.6” (195mm x 165mm x 41mm)
Recommended maximum container weight with load: 23 oz (652 g)
Weight: 15 oz (425 g) (container only)
Maximum steam sterilization temperature: 273 ºF -0/+6°F (134°C -0/+3°C)
Load type: 10 Hygiene instruments
Life span: 2,500 cycles
Sterility Maintenance: up to 30 days
Fits most standard commonly used hygiene instruments (instruments up to 6.9” (175 mm) in length)
SALUS - Hygiene is designed to be compliant with ANSI/AAMI ST77: 2013
5. PREPARING THE CONTAINER FOR SERVICE
1. Inspect the SALUS - Hygiene for shipping damage.
2. Write the date of service in the box, as shown, and the estimated “end of life” expiry date
in the box, as shown, on the filter cover using a non-toxic, autoclavable marker (included).
[See Fig. 1a]. Do not write on the reusable filters.
3. Write the date of service as shown, and the estimated “end of life” expiry date in the box,
as shown, on the slot for label in the rack using a non-toxic autoclavable marker.
[See Fig. 1b].
4. Optional: If you are using the color-coded pin system (available as an accessory) to identify
instrument sets or users, determine your code and insert the pins accordingly.
6. HOW TO CALCULATE THE END OF LIFE EXPIRY DATE
Using Table 1 below, find the number of sterilization cycles per day your office performs on one container
and the number of workdays per year your office is open. The result is an estimate of the year
recommended to retire your SALUS - Hygiene.
Example: A dental office runs 4 sterilization cycles a day and is open 150 days of the year, in 4 years
SALUS - Hygiene will need to be retired. Upon the filter label and the rack label, you would write today’s
date in the date of service box, add four years and write that date in the “end of life” expiry date box.
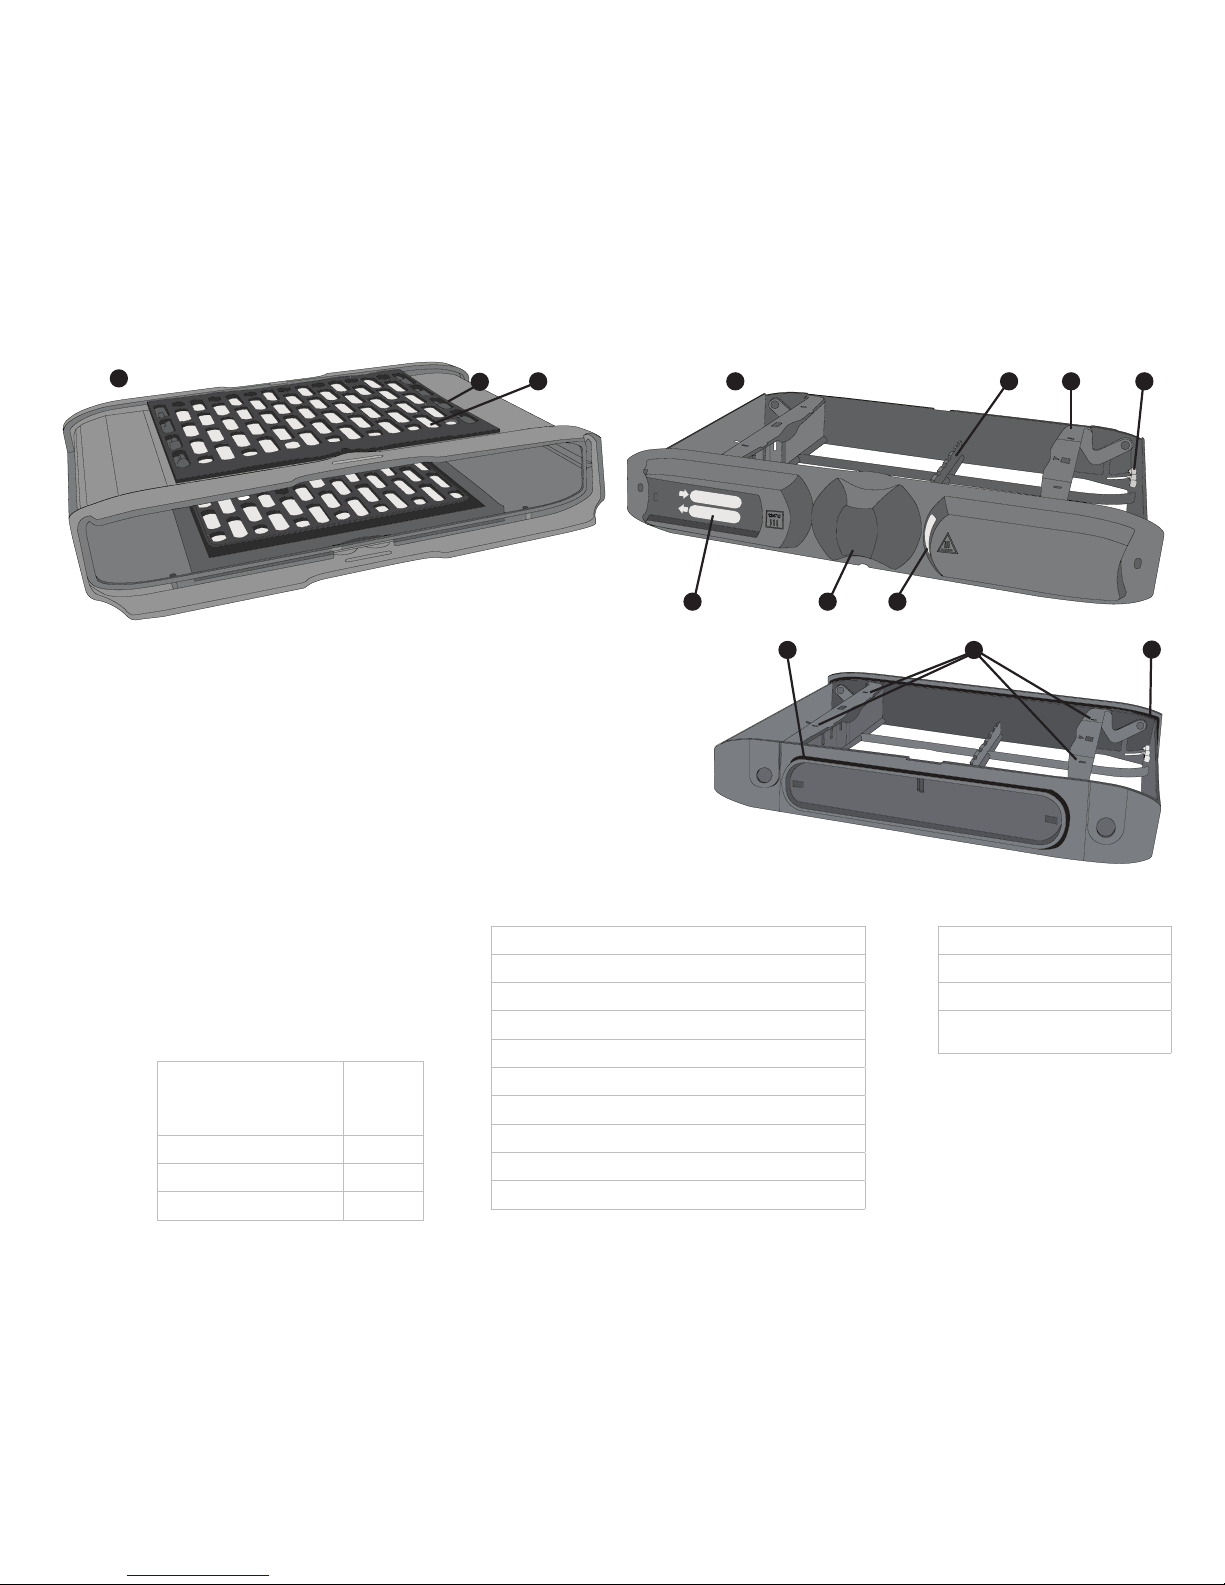
Table 1: Tool for estim ating how long it w ill take your practice to re ach 2,500 c ycles.
WORK DAYS/YEAR
Cycles/Day 100 150 200 250 300
2 13 8 6 5 4
3 8 6 4 3 3
4 6 4 3 2 2
5 5 3 2 2 1
6 4 3 2 1 1
Fi g. 1a
Fi g. 1b
Page 6

6
7. USING THE CONTAINER
7.1 Opening the container:
1. Turn the latch counterclockwise to unlock the rack [See Fig. 2].
2. Pull the rack out from the sleeve.
7.2 Preparing and loading instruments
Before loading any instruments into the SALUS - Hygiene, consult the instrument manufacturer’s
reprocessing instructions.
7.3 Load instruments
1. Open the container and place the rack on a level surface.
2. Rest your thumbs against the handles on either side of the instrument cradle, gently push outwards
to unlatch and swing them open to release [See Fig. 3].
3. If loading the instruments for cleaning, arrange solid unwrapped instruments in the cradles of the
instrument rack. If loading the instrument for sterilization, properly cleaned/disinfected hygiene
lumened instruments, such as an air/water syringe tip can be included in the cradles of the
instrument rack.
4. Push down on the instrument cradle handles to lock them into position [See Fig. 5].
8. REPROCESSING SALUS – HYGIENE SLEEVE AND RACK
WITH INSTRUMENTS
8.1 After use - used instruments
After a procedure, instruments should be replaced in the rack and the container should be closed for safe
handling. See Section 8.5 – “Closing the container”.
IMPORTANT: The SA LUS - Hygi ene is not designed to a llow cl eani ng of instruments with lume ns or channels.
IMPORTANT: The SA LUS - Hygi ene ha s not been validated to proces s implantab le med ical d evices.
IMPORTANT: Only instruments that ca n withs tand steam sterilization can be re processed in the
SALUS – Hyg iene.
The cra dles a re set de eper on one si de than the othe r. This is to allow easy removal of the instrument. Ens ure instruments are oriented with handles sitting in the deeper c radles. Place mirrors and pliers in the outermost cradles
that are d esigned for these instru ments [See Fig. 4].
NOTE
IMPORTANT: The SA LUS - Hygi ene is not designed to a llow cl eani ng of instruments with lume ns or channels.
IMPORTANT: The SA LUS - Hygi ene ha s not been validated to proces s implantab le med ical d evices.
IMPORTANT: Only instruments that ca n withs tand steam sterilization can be re processed in the
SALUS – Hyg iene.
Fig. 2
Fig. 5
Fig. 3
Fig. 4
S
A HIGHER STANDARD
STERILIZATION MONITOR - STEAM CLASS 4
INDICATEUR / INDICADOR
S
A HIGHER STANDARD
STERILIZATION MONITOR - STEAM CLASS 4
INDICATEUR / INDICADOR
S
A HIGHER STANDARD
STERILIZATION MONITOR - STEAM CLASS 4
INDICATEUR / INDICADOR
S
A HIGHER STANDARD
STERILIZATION MONITOR - STEAM CLASS 4
INDICATEUR / INDICADOR
Page 7

7
8.2 Cleaning the Rack with Instruments
1. Unlock the container latch and separate the rack from the sleeve.
2. Remove any large debris from the rack.
8.2.1 In a medical washer or thermal disinfector
Place the rack with instruments in an automated washer or thermal disinfector and reprocess
according to the medical washer or thermal disinfector manufacturer’s instructions.
8.2.2 In an ultrasonic cleaner
Place the rack with instruments in an ultrasonic cleaner and reprocess according to the ultrasonic
cleaner and/or cleaning solution manufacturer’s instructions.
8.3 Cleaning the Sleeve
1. Unlock the container latch and separate the sleeve from the rack.
2. Remove any large debris from the sleeve.
8.3.1 In a medical washer or thermal disinfector
Place the sleeve in an automated washer or thermal disinfector and reprocess according to the
medical washer or thermal disinfector manufacturer’s instructions.
8.3.2 In an ultrasonic cleaner
Place the sleeve in an ultrasonic cleaner and reprocess according to the ultrasonic cleaner and/or
cleaning solution manufacturer’s instructions.
8.3.3 Manual cleaning
Rinse the sleeve with cold tap water while using a soft-bristle cleaning brush until no visible soil is
observed.
CAUTION: Rack with instruments subjected to thermal disinfection only shall not be stored without further
steam ste rilization according to Sectio n 8.4 “Ster ilizing instruments in th e container”.
Condu ct cle aning tests to verify expos ure times to ensure that cleaning ef ficacy has be en ach ieved
NO
TE
Condu ct cle aning tests to verify expos ure times to ensure that cleaning ef ficacy has be en ach ieved
NOTE
Page 8

8
8.4 Preparing for sterilization
1. Chemical indicators and/or biological indicator strips suitable for steam sterilization cycles listed in Table
2 are to be included in each load being sterilized. There are four potential locations (marked on the
cradle handles) designed to allow the cradle handles to clamp down and secure the chemical indicator.
Placing the indicator in one of these locations will allow its result to be easily viewed through the
transparent container sleeve upon completion of sterilization cycle without compromising sterility of the
contents [See Fig. 4]. Self-contained biological indicators (SCBI), if used, can be placed in one of the
four corner instrument slots.
2. Rest your thumbs against the handles on either side of the instrument cradle, gently push outwards to
unlatch and swing them open to release [See Fig. 3].
3. With the chemical and/or biological indicators in one or more of these positions, push down on the
instrument cradle handles to lock them into position [See Fig. 5].
4. When attaching an air/water syringe tip, a cassette clip must be attached perpendicular to instruments
to one of the four areas shown in Fig.4.
5. Using a non-toxic, autoclavable marker (included), write the dates and insert the label into the holder.
The external label is used to record when the load was processed and when the load sterility expires.
8.5 Closing the container
1. Insert the rack fully into the sleeve [See Fig. 6].
2. Turn the latch clockwise to lock [See Fig. 7].
8.6 Sterilizing instruments in the container
1. The SALUS - Hygiene has been designed for moist heat sterilization using saturated steam in a steam
sterilizer for wrapped loads, eliminating the need for wrapping instruments. It should be processed in
a steam sterilizer. Since sterilizers vary in design and performance characteristics, users are strongly
recommended to verify the cycle parameters for the specific sterilizer they are using. SALUS - Hygiene
has been validated in steam sterilizer cycles shown in Table 2:
CAUTION: Not all chemical indicators are compatible with the SALUS – Hygiene due to their shapes, sizes and
pass/fail indication. Make sure the section of the chemical indicator allows for clear and unambiguous
interpretation of its result through the transparent container sleeve.
CAUTION: Biological indicators, if used, need to be retrieved for incubation post sterilization. This requires opening
the container which will compromise the sterility of the contents. Therefore, biological indicators should
only be placed in the SALUS – Hygiene container for process/sterilization verification activities as per
local guidelines.
CAUTION: Inspection procedures should be carried out by trained personnel only.
IMPORTANT: Only instruments that can withstand steam sterilization can be reprocessed in the SALUS Hygiene.
Fig. 7
Fig. 6
Page 9

9
Table 2: Steam ste rilization c ycles validated with SA LUS - Hygi ene.
* No visible condensation or pooling on the external surface of the container and the contents are free of visible condensation
[ANSI/A AMI ST77:2013 Se ction s 4.4.2 & 5.7]
Users may also conduct sterilizer testing to:
• verify successful sterilization has been achieved using biological and chemical indicators
• determine drying times necessary to achieve dryness of particular load
2. Do not stack the SALUS - Hygiene containers for sterilization. Whenever possible, position the SALUS -
Hygiene vertically with the label facing forward to facilitate load drying.
3. Inspect SALUS – Hygiene container according to Section 11 – “Maintenance and Inspection”.
4. When sterilization is complete and successful, remove the SALUS - Hygiene from the sterilizer.
5. Check the tamper-evident latch to ensure it is extended to indicate the SALUS - Hygiene has been
processed [See Fig. 8].
6. Check the chemical indicator to ensure it has reached recommended sterilization conditions.
7. If using the instruments immediately, transport the container to chairside for immediate use.
8. If the container is to be stored, inspect the container and its contents for dryness. If moisture is present,
reprocess and re-sterilize the load with a longer drying time. Before storing the container, write the expiry
date (30 days from the date it is processed) on the external label.
9. TRANSPORTING AND STORING THE CONTAINER
9.1 Transporting
Steam Sterilizer Type C ycle
Sterilization
Temperature
-0/+6°F
(-0/+3 °C )
Exposure
Time
Recommended
Drying Time
Load Type
Maximum
Instrument
Load Per
Container
Dynamic-air-removal
(pre-vacuum)
Wrapped 270 °F (132°C) 4 minutes 16 m in utes
Solid Hygiene
Instruments &
Lumen Hygiene
Instruments
(Ø .028”
[0.7mm] x L
3.35” [85 mm],
Qt y. 1)
0.487lb (221g)
Dynamic-air-removal
(steam-flush, pressure-pulse, SFPP)
Wrapped 270 °F (132°C) 4 minutes 30 minutes 0.478lb (217g)
Dynamic-air-removal
(pre-vacuum)
Wrapped 273°F (134°C) 4 minutes 30 m inute s 0.473lb (215g)
CAUTION: Burns from hot surfaces. When removing the SALUS - Hygiene after a sterilization cycle, exercise
caution to avoid skin burns as the container surfaces may still be hot. Allow SALUS - Hygiene to cool
sufficiently before handling or wear heat-resistant gloves.
CAUTION: Not all chemical indicators are compatible with SALUS – Hygiene due to their shapes, sizes and pass/
fail indication. Make sure the section of the chemical indicator allows for clear and unambiguous
interpretation of its result through the transparent container sleeve.
IMPORTANT: The SALUS - Hygiene is not designed to be stacked when transporting.
Fig. 8
Page 10

10
9.2 Storing
SALUS - Hygienes containers can be stacked in storage and the sterility of the container contents is
ensured for 30 days.
SALUS - Hygiene containers should be stored in a manner that reduces the potential for contamination.
Recommended storage conditions for SALUS- Hygiene are between 64 and 75 ºF (18 and 24 ºC) with
relative humidity between 30 to 70%. Closed or covered cabinets are recommended for the storage of
SALUS- Hygiene.
When removing from storage, it is important to check the SALUS - Hygiene’s integrity before bringing
stored instruments into service. Ensure the tamper-evident latch is activated and that the expiry date on the
external label has not been exceeded.
10. REMOVING INSTRUMENTS FROM THE CONTAINER
1. Place the container on a level surface.
2. Ensure that the tamper-evident latch is activated and that the chemical indicator indicates sterilization
conditions have been reached.
3. Unlock the container by manually pushing the tamper-evident lock all the way back until a click is
heard.
4. Turn the latch counterclockwise and pull the rack out from the sleeve. Ensure sterilized contents do
not come in contact with the outside of the container and the inner surfaces of the sleeve opening to
allow aseptic presentation of contents at the point of use.
5. Place the rack on top of the sleeve.
6. Rest your thumbs against the handles on either side of the instrument cradle, gently push outwards
to unlatch and swing them open to release.
7. To remove a selected instrument, press down on its handle to tip it up so that the instrument can be
grasped with your thumb and forefinger [See Fig. 9].
11. MAINTENANCE AND INSPECTION
• Inspect rack seals to ensure they are free of cracks, tears and that they are properly seated in their
retaining grooves. Note the date of service of rack. If the end of life expiry date has been reached,
discard the rack.
• Inspect both the sleeve and rack for cracks.
• The Sleeve may exhibit some loss of transparency over time. If the loss of transparency of the sleeve
prevents accurate reading of the internal chemical indicator, discard the sleeve.
• Inspect reusable filters for punctures, discoloration, note date of service. If the “end of life” expiry date
has been reached, discard the entire sleeve including the reusable filters and filter covers.
• Inspect the tamper-evident latch before and after a sterilization cycle. if the tamper-evident latch
cannot be reset before a cycle or does not fully extend after a cycle, do not use the container.
CAUTION: Maintenance and inspection procedures should be carried out by trained personnel only.
Since s leeve s and racks are interch ange able, w hen the sleeve expires, it does not ne cessarily mean the rack
is also expired.
NOTE
Fig. 9
Page 11

11
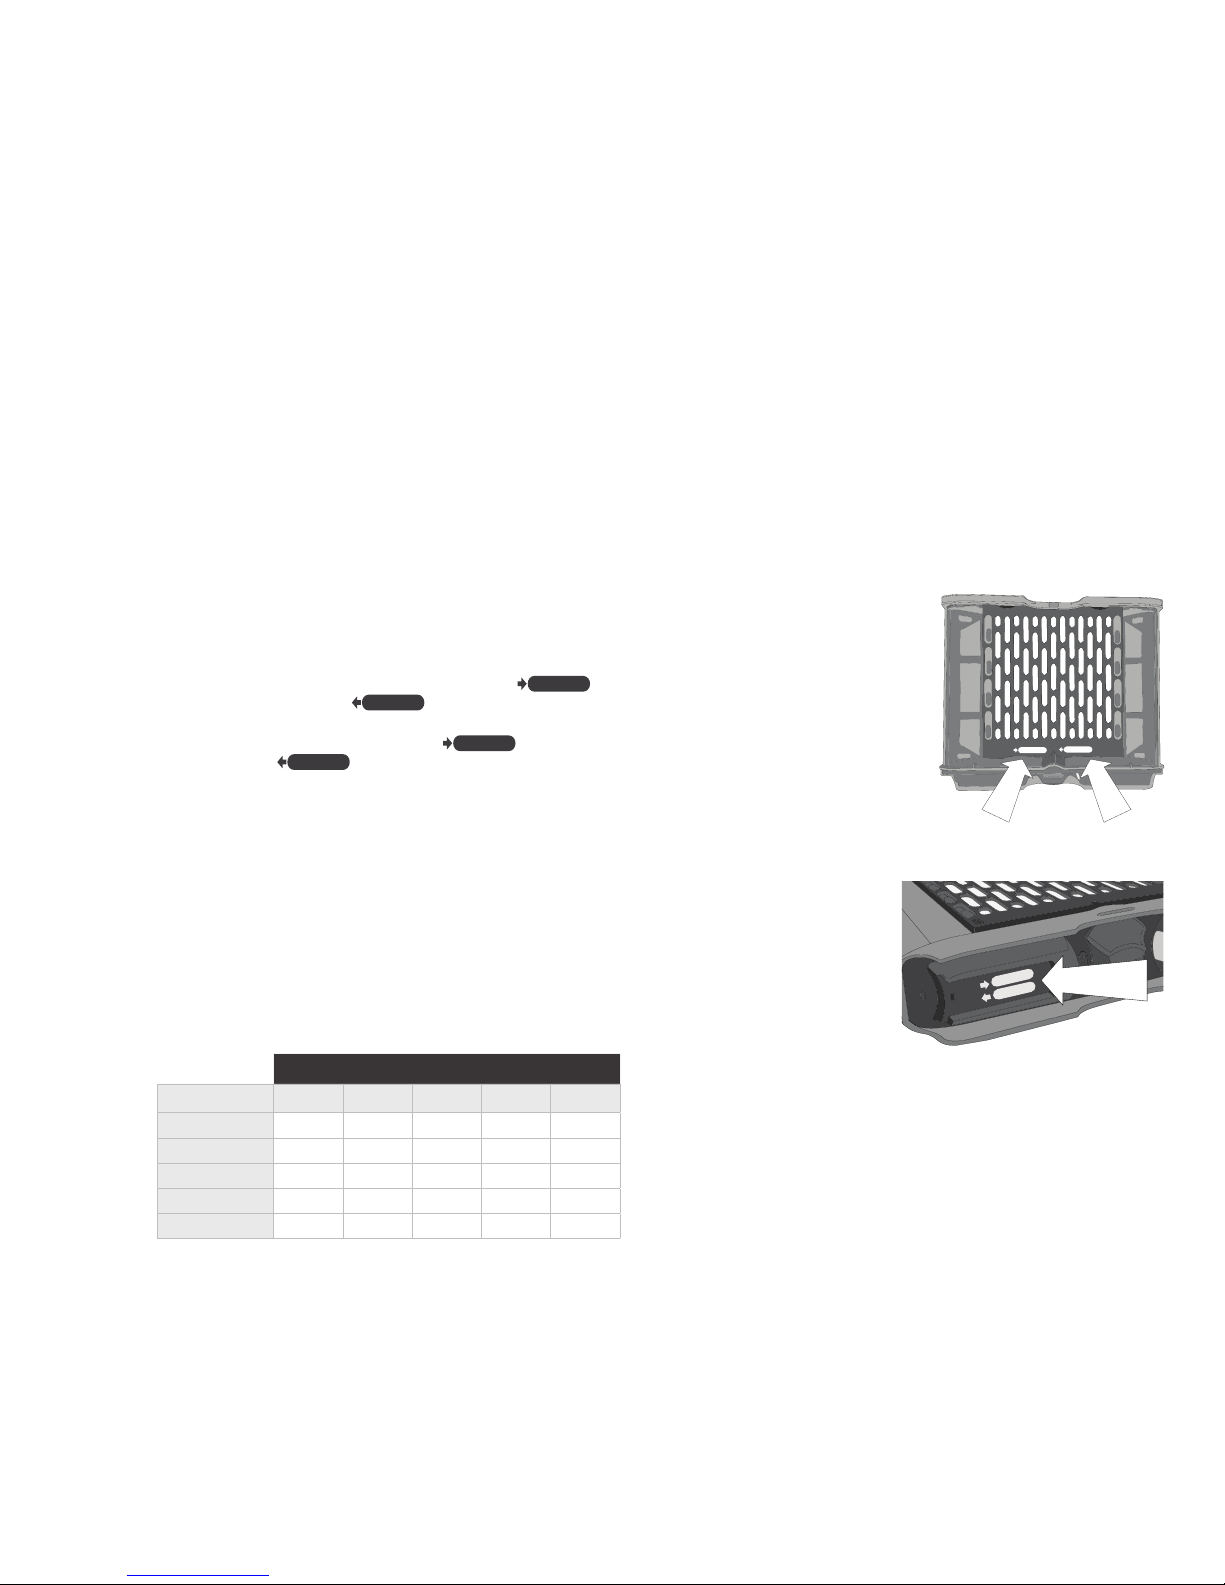
11.1 Reusable filter inspection and care
The SALUS - Hygiene filter is designed for a service life of 2,500 cycles. If the filter is damaged, punctured
or visibly stained, it must be replaced. Replacement of the filter DOES NOT prolong the service life of the
SALUS - Hygiene.
To replace the filter:
1. Unlock the SALUS - Hygiene and remove the rack from the container sleeve.
2. Slide the filter cover towards the container sleeve opening to remove [See Fig. 10].
3. Place the new filter into position.
4. Re-install the filter cover.
5. Run a test cycle with a chemical indicator to ensure proper steam penetration is achieved.
11.2 Seal inspection and care
The SALUS - Hygiene has a gasket seal on both sides (front and rear) of the rack. Inspect the gasket seals
to ensure they are free of tears, deterioration, debris and indentation. A damaged seal must be replaced.
Replacement of the gasket seals DOES NOT prolong the service life of the SALUS - Hygiene.
To replace the front or rear gasket seal:
1. Unlock the SALUS - Hygiene and remove the rack from the container sleeve.
2. Remove the seal and replace with a new seal.
3. Ensure it is properly seated in the retaining groove [See Fig. 11].
4. Run a test cycle with a chemical indicator to ensure proper steam penetration is achieved.
11.3 Container sleeve and rack inspection
The SALUS - Hygiene is designed for a service life of 2,500 cycles. Inspect the sleeve and rack for cracks
before every use. Do not use the container if cracks are found.
11.4 Rack handle inspection and care
The SALUS - Hygiene has two rack handles designed to hold the instruments in place. Inspect the handles
are working properly. A damaged handle must be replaced.
To replace a rack handle:
1. Open the handle and squeeze the ends of the handle to loosen them from the snap-on notches on
the inside of the rack.
2. In the open position, place the new handle in the notches on each side to snap into place.
3. Ensure they are securely fastened on both sides and close handles.
Fi g. 11
Fig . 10
Page 12

12
12. MANUFACTURER’S INFORMATION AND
CUSTOMER SERVICE INFORMATION
For all service and repair inquiries:
In Canada: 1-800-870-7777
United States: 1-800-572-1211
Germany: +49 (0) 7561-983-620
International: (416) 446-4500
techservice.ca@scican.com
Manufactured by:
SciCan Ltd.
1440 Don Mills Road,
Toronto, ON M3B 3P9
Canada
Telephone: (416) 445-1600
Fax: (416) 445-2727
Toll free: 1-800-667-7733
SciCan Inc.
701 Technology Drive
Canonsburg, PA 15317
USA
Telephone: +1 724-820-1600
Fax: +1 724-820-1479
Toll free: 1-800-572-1211
EU Representative:
SciCan GmbH
Wangener Straße 78
88299 Leutkirch
Germany
Telephone: +49 (0)7561 98343-0
Fax: +49 (0)7561 98343-699
SciCan Medtech
Alpenstrasse 16
6300 Zug Switzerland
Telephone: +41 (0) 41 727 7027
Fax: +41 (0) 41 727 7029
Page 13

13
13. WARRANTY
Limited Warranty
When manufactured by SciCan in new and unused condition. SciCan guarantees the SALUS - Hygiene
will not fail during normal service due to defects in material and workmanship that are not due to apparent
abuse, misuse or accident for a period of one year.
The one year warranty from date of purchase will cover the performance of all components provided that the
product is being used and maintained according to the description in the instructions for use. In the event of
failure due to such defects during this period of time, the exclusive remedies shall be repaired or replaced, at
SciCan’s option and without charge of any defected part(s), provided SciCan is notified in writing within thirty
(30) days of the date of such a failure and further provided that the defective part(s) are returned to SciCan
prepaid.
This warranty shall be considered to be validated, if the product is accompanied by the original purchase
invoice from the authorized SciCan dealer, and such invoice identifies the item by lot number and clearly
states the date of purchase. No other validation is acceptable. After one year, all SciCan’s warranties and
other duties with respect to the quality of the product shall be conclusively presumed to have been satisfied,
all liability therefore shall terminate, and no action or breach of any such warranty or duty may thereafter be
commenced against SciCan.
Any express warranty not provided hereon and any implied warranty or representation as to performance,
and any remedy for breach of contract which, but for this provision, might arise by implication, operation of
law, custom of trade or course of dealing, including any implied warranty of merchantability or of fitness for
particular purpose with respect to all and any products manufactured by SciCan is excluded and disclaimed
by SciCan.
If you would like to learn more about SciCan products and features, visit our website at www.scican.com.
Page 14

14
HYDRIM C61 W/WD Ra ck - Fits 3 SALUS
01-113 253
HYDRIM C61W/WD Rack - Fits 6 SALUS
01-113 251
HYDRIM L110W/WD/M2 Rack -
Fits 10 SALUS racks or 5 SALUS sle eves
01-1099 63 S
HYDRIM L110W/WD/M2 Rack -
Fits 10 SALUS sleeve s
01-11420 6
HYDRIM L110W/WD/M2 Rack -
Fits 5 SALUS racks
01-1099 64 S
BR AVO 17V Rack - Fits 3 SALUS
C1BP583000Y
BR AVO 21V Rack - Fits 6 SALUS
99950917
BRAVO Accessories
14. SALUS - HYGIENE PLACEMENT IN RACKS
HYDRIM G4 Accessories
 Loading...