

Schlage Touch FE695 Lever Installation Instructions Manual
*P516-866*
P516-866
Model FE695, Lever Installation Instructions
Default Codes
Códigos de predeterminado
Codes du défaut
Place Label Here
Poner la etiqueta aquí
Placer l’autocollant ici
Scan for programming
information, help,
warranty, and more.
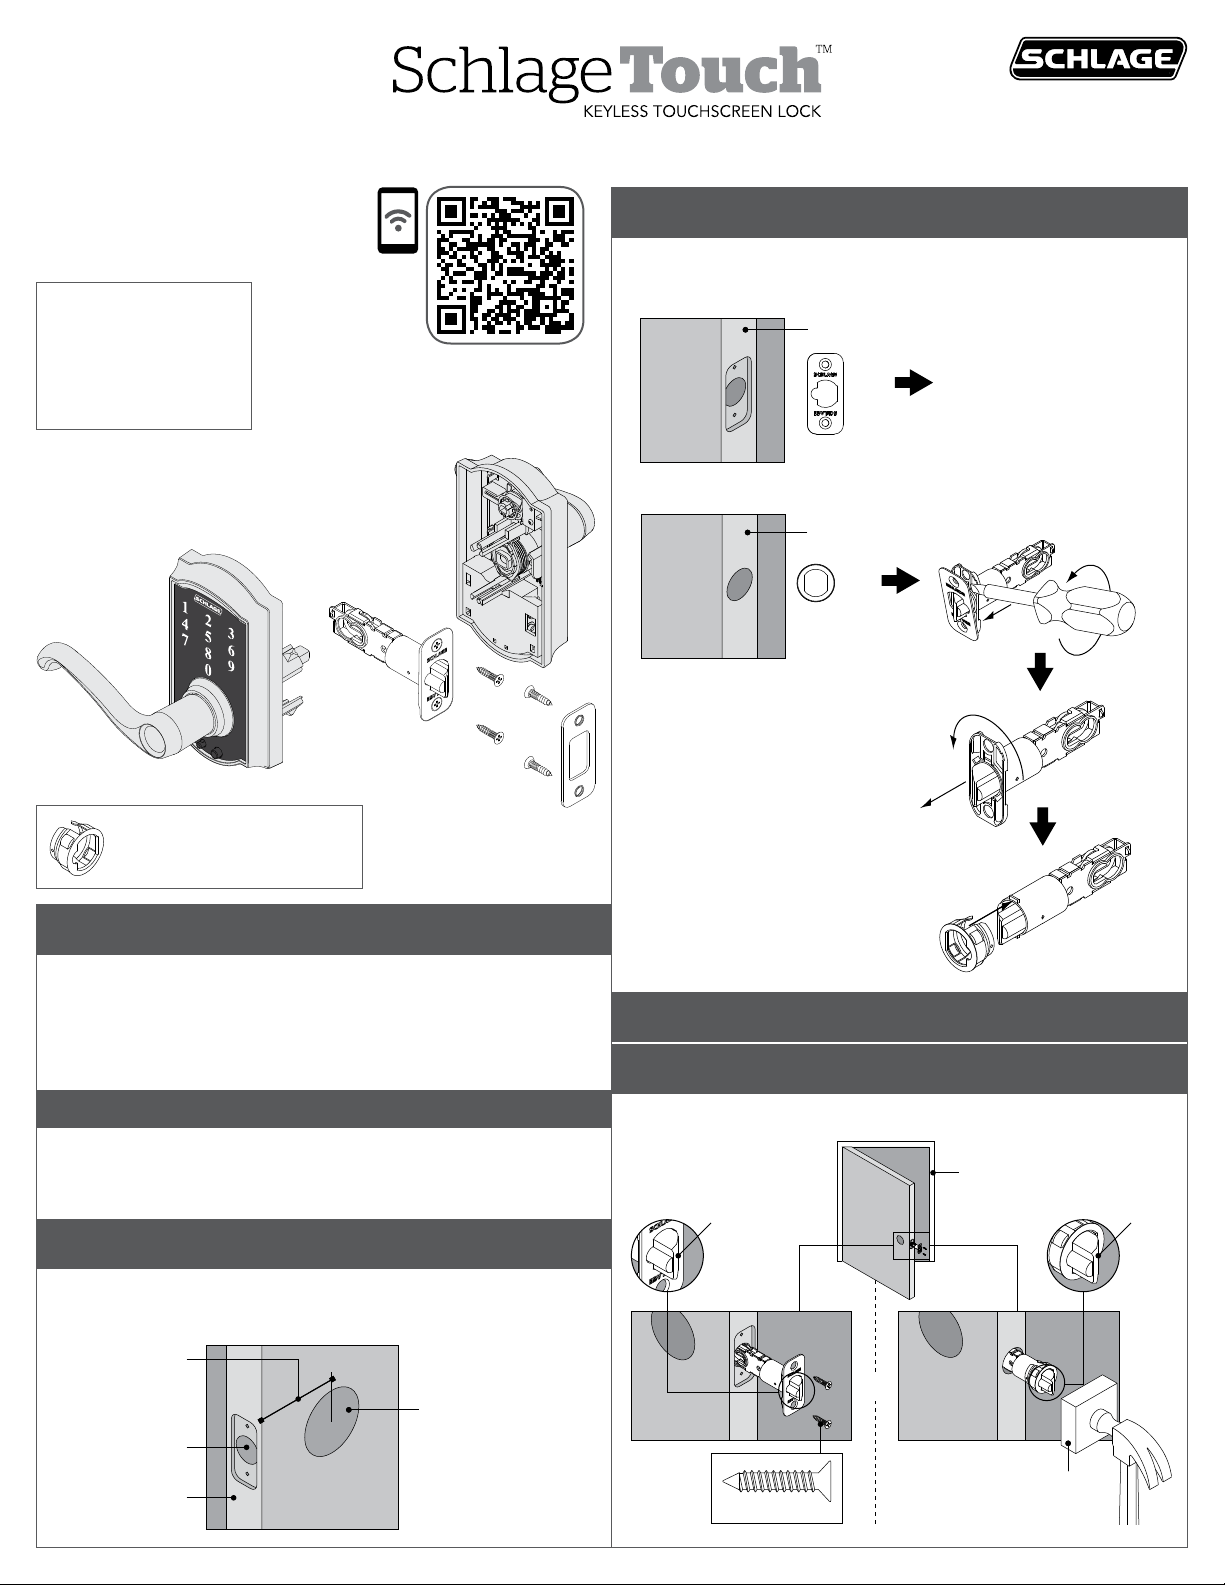
B Change faceplate, if necessary.
Choose the drawing that matches your door edge. If the hole
has no mortise, change to the circular faceplate.
Door Edge
No change necessary.
OR
Door Edge
Alternate Faceplate
Placa frontal alternativa
Plaque frontale alternative
Prepare for Installation
Tools Needed
• Phillips screwdriver, #1
and #2 bits
• Tape Measure
• Pencil
Optional
• Flathead Screwdriver
• Wood Block
• Hammer
IMPORTANT NOTES
DO NOT use a power drill for installation!
• Install and test lock with door open to avoid being locked
out.
A Check door dimensions.
See consumer.schlage.com/Service-Support for door
preparation instructions if dimensions are different.
2³⁄₄” (70 mm)
OR
2³⁄₈” (60 mm)
1” (25 mm)
2¹⁄₈” (53 mm)
Hole
Install Lock
1 Install latch.
Make sure latch angle faces door jamb.
Jamb
Angle
OR
Angle
Door Edge
Actual Size
Wood Block
(Not Included)
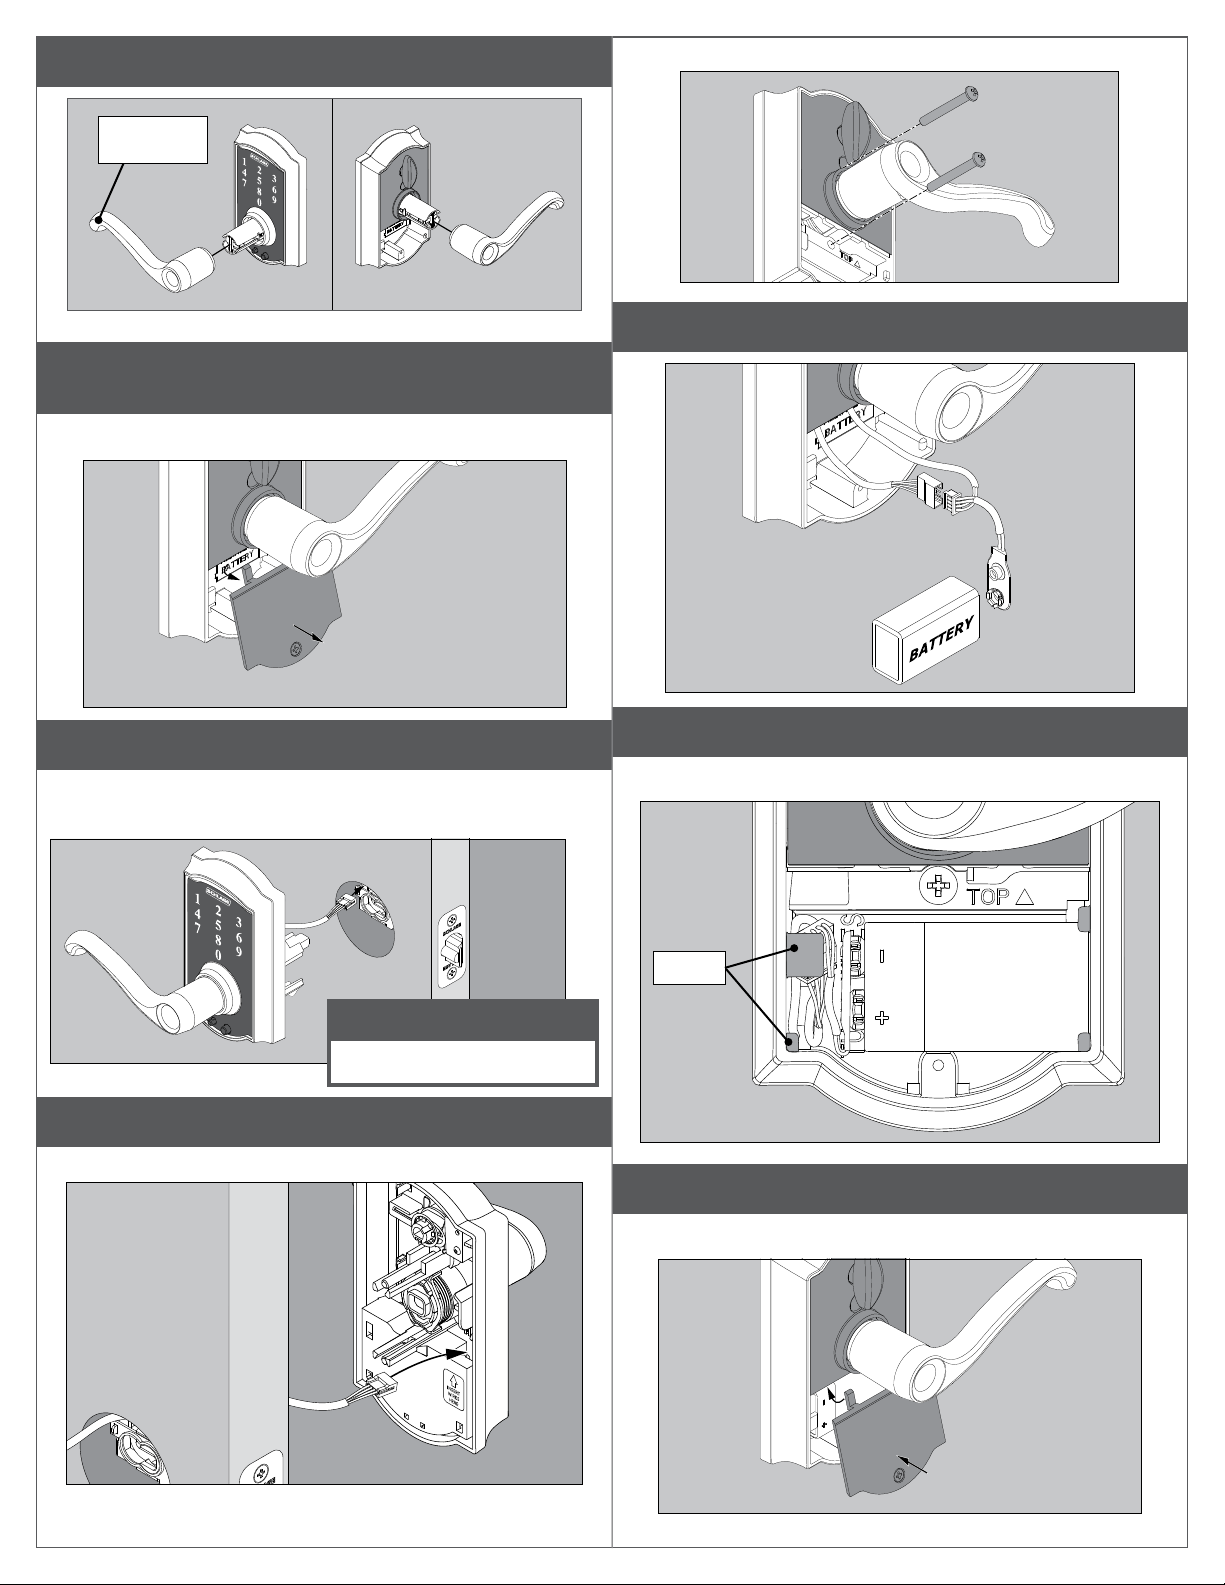
2 Press levers onto lever posts.
Tip points
down
3 Remove battery cover from the interior thumbturn
assembly.
Unscrew the cover and lift down and out to remove.
5b Secure interior assembly with screws.
6 Connect wire and battery.
4 Install the touchscreen on the outside of door.
Bar should slide smoothly through hole in latch. If not, check
door dimensions.
IMPORTANT!
Route wire over the latch.
5 Install the interior lever assembly.
5a Route wire through indicated hole below.
7 Place battery in holder and tuck wires.
Tuck battery and wires behind the tabs.
Tabs
8 Install battery cover.
Angle the cover up to install, then screw the cover in.

9 Install strike onto door jamb.
10 If needed, switch levers.
Test Lock
a Unlock.
1. Find User Code A on label
on front of this document.
2. Enter User Code A (four
digits) into the keypad.
Actual Size
3. Rotate and then
release lever.
Correct
Incorrect
b
If your lever looks like this, then
no change is necessary.
If your lever does not look like
this, switch the levers by
following the steps below.
OR
a
Insert the pin wrench
into the hole in the
lever. Push in and hold.
c
Did latch retract and then extend?
Did latch retract and then extend?
Yes. Lock is installed correctly.
No. Latch retracted but did not extend (latch bound).
Uninstall the lock, check step 1, and make sure the latch is
facing the right direction.
No. Nothing happened. Make sure the cable is connected in
step 6, then try again.
Pull the lever off. Repeat steps a and b to remove the
lever from the other side of the door.
Switch the levers.
d
Push each lever back into place.
Basic Programming Functions
Go to schlage.com/faqs-touch for videos, more advanced programming instructions, and more. Register your product at
RegisterMySchlage.com.
ADD OR REMOVE USER CODE
1 4
Enter 6 digit
Programming
Code
Wait for 3
orange lights
and 3 beeps
2
Press
Choose and
press:
add
1
or
delete
2
Enter
user code to
add or delete
Wait for 3
orange lights
and 3 beeps
53
Re-enter
user code to
conrm
6
Success!
1 green light
and 1 long
beep
CHANGE THE PROGRAMMING CODE
1 4
Enter 6 digit
Programming
Code
Wait for 3
orange lights
and 3 beeps
Battery Jump
The emergency battery jump start can be used if your battery is dead to unlock your door. Do not remove the battery until you
have opened your door.
WARNING: The lock will remain unlocked until you change the battery or manually relock the door from the inside!
2 3
Press Press
3
Enter new
Programming
Code
Wait for 3
orange lights
and 3 beeps
5
Re-enter
new
Programming
Code to
conrm
6
Success!
1 green light
and 1 long
beep
1. Connect a new high-quality alkaline 9
volt battery to the contacts below the
touchscreen keypad.
Keep the battery connected to the jump
»
start contacts as you unlock your door.
4. Replace the dead battery with the new 9 volt battery.
2. Enter a User Code into the
keypad.
Questions about your new
Keyless Touchscreen Lock?
Please don’t return it to the store!
Let us help you rst!
3. Rotate the lever to open the
door.
Scan for
programming
information, help,
warranty, and more.
 Loading...