

Schlage FE599 Installation Instructions Manual
FE599 Lever Lock
1
Installation Instructions
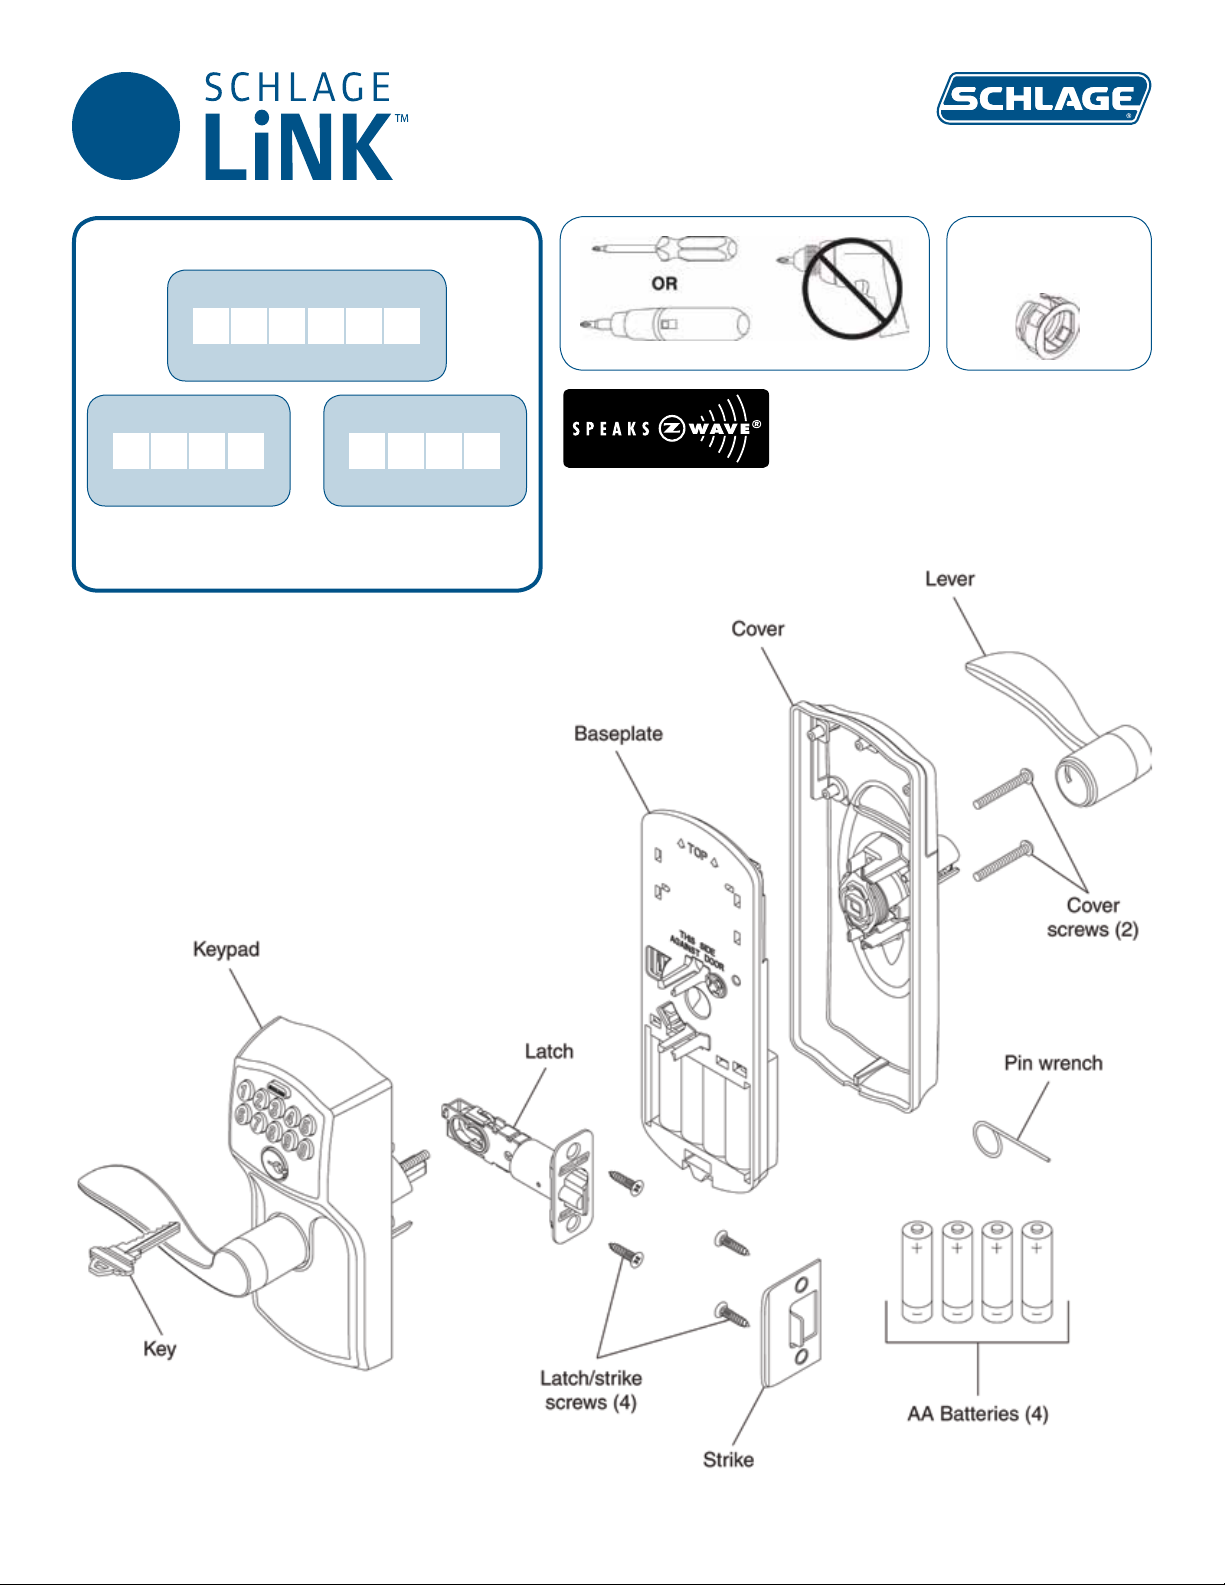
Important Information
Lock Programming Code
six (6) digits
User Code A
four (4) digits
Web Support: part2.schlage.com
Customer Service: (877) 288-7707
User Code B
four (4) digits
Alternate
Faceplate
1
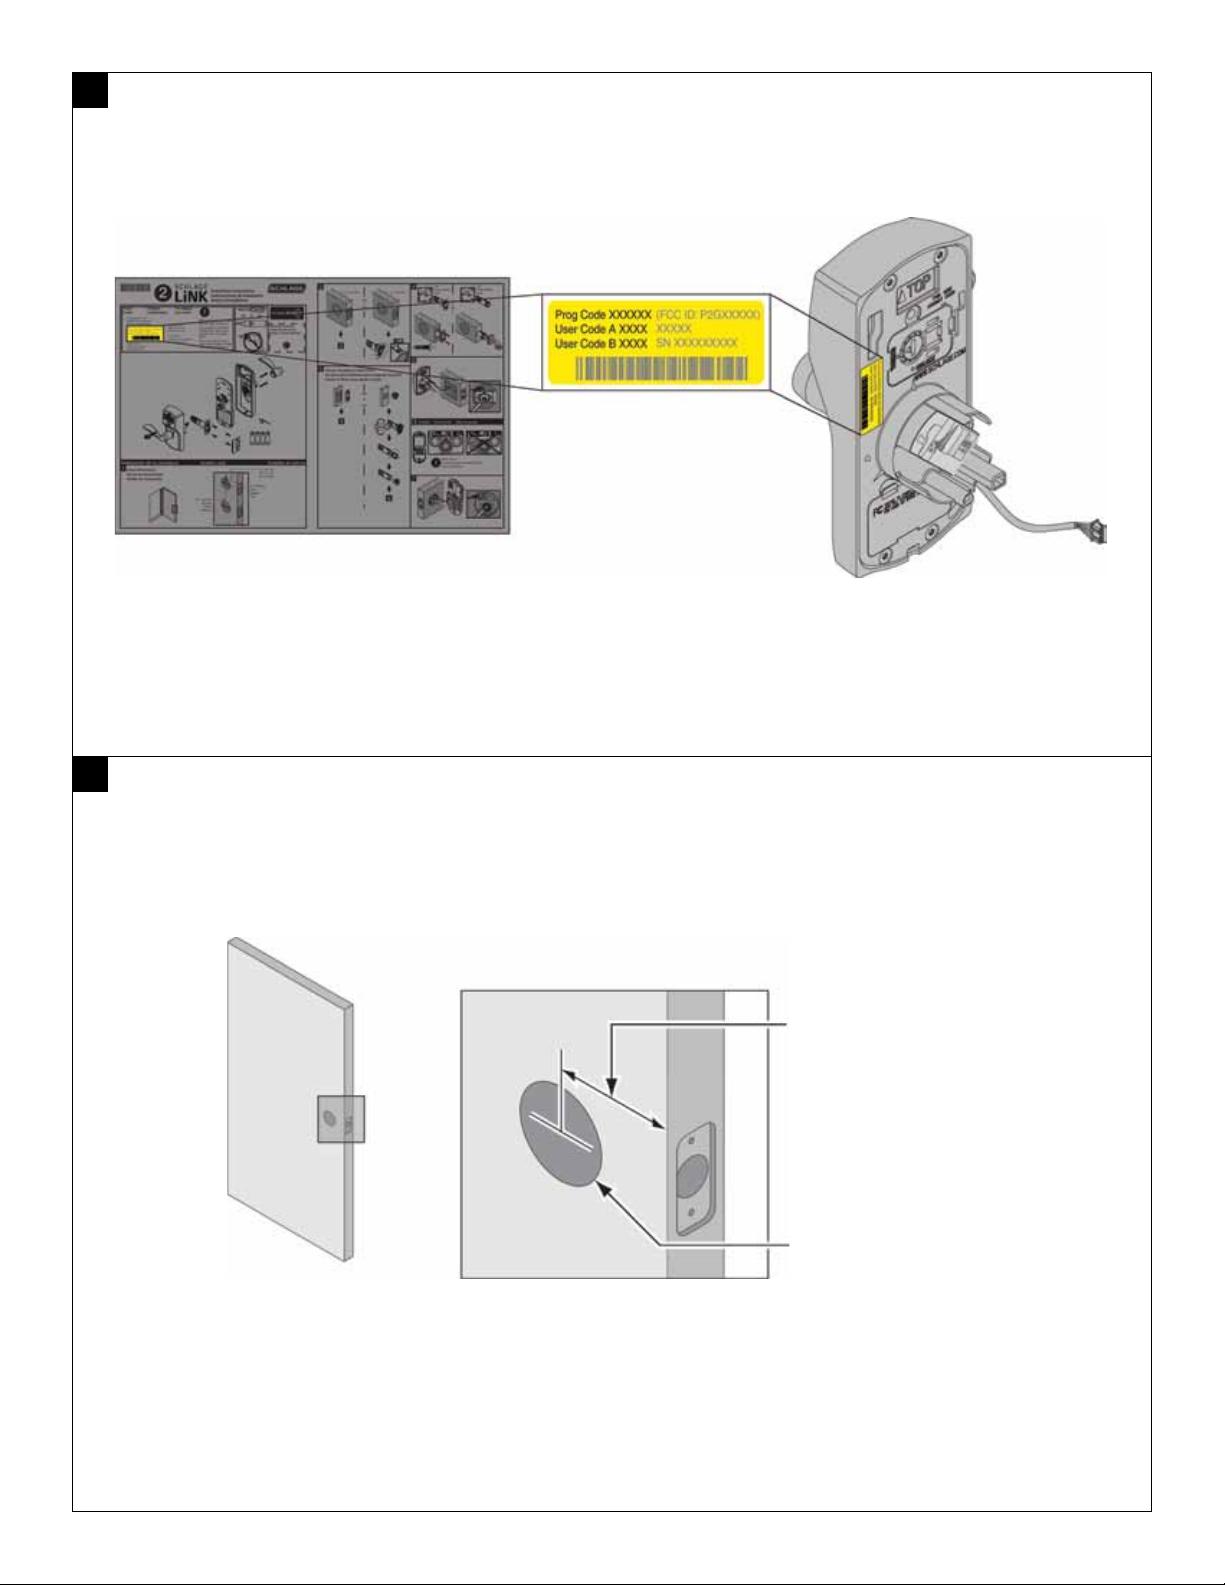
Locate Programming Code and Preset User Codes
The programming code and the preset user codes are printed on the yellow stickers located on the back of the
keypad and on the installation sheet that came in the box. Write these codes in the space provided on the first page.
2
Check Door Dimensions
If your door does not match the dimensions shown, go to www.part2.schlage.com for instructions on how to prepare
your door.
2C\,” (60 mm)
OR
2C\v” (60 mm)
2Z\,” (53 mm)
Hole
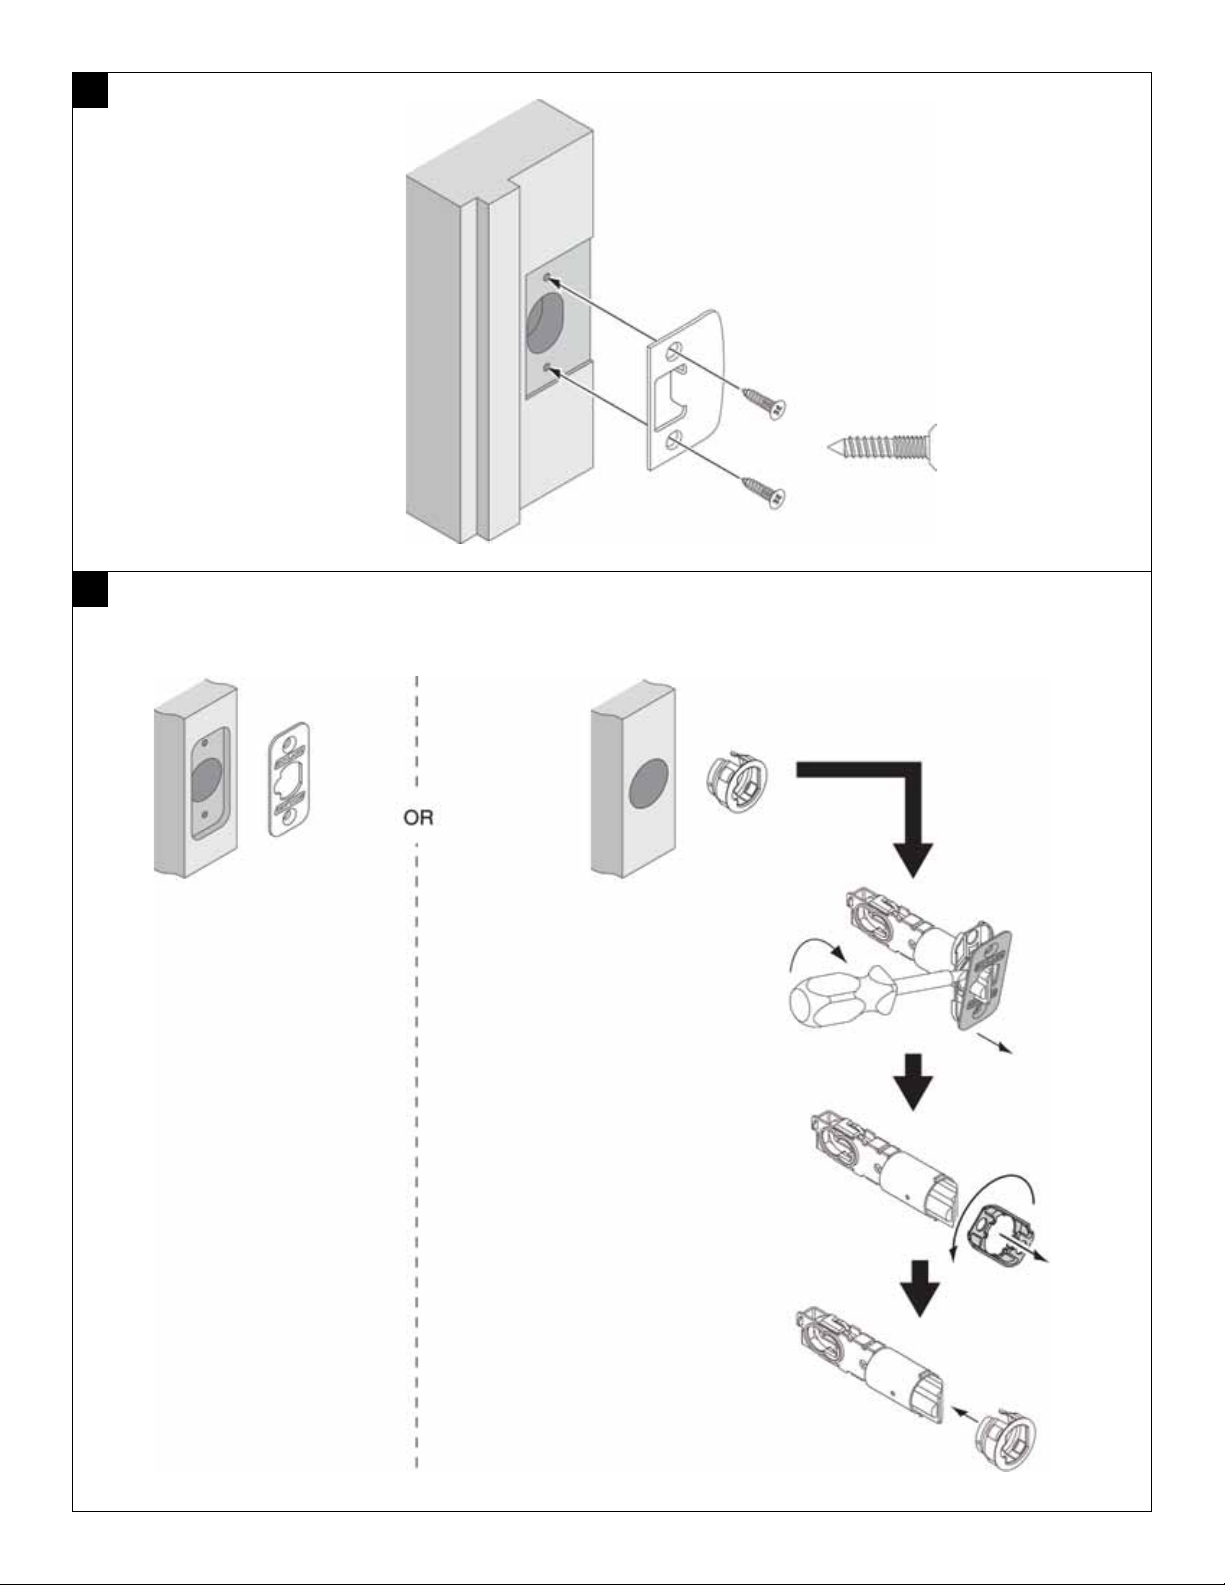
3
Install Strike Into Frame
4
If Necessary, Change Latch Faceplate
Check edge of door to determine the type of faceplate required.
5
5
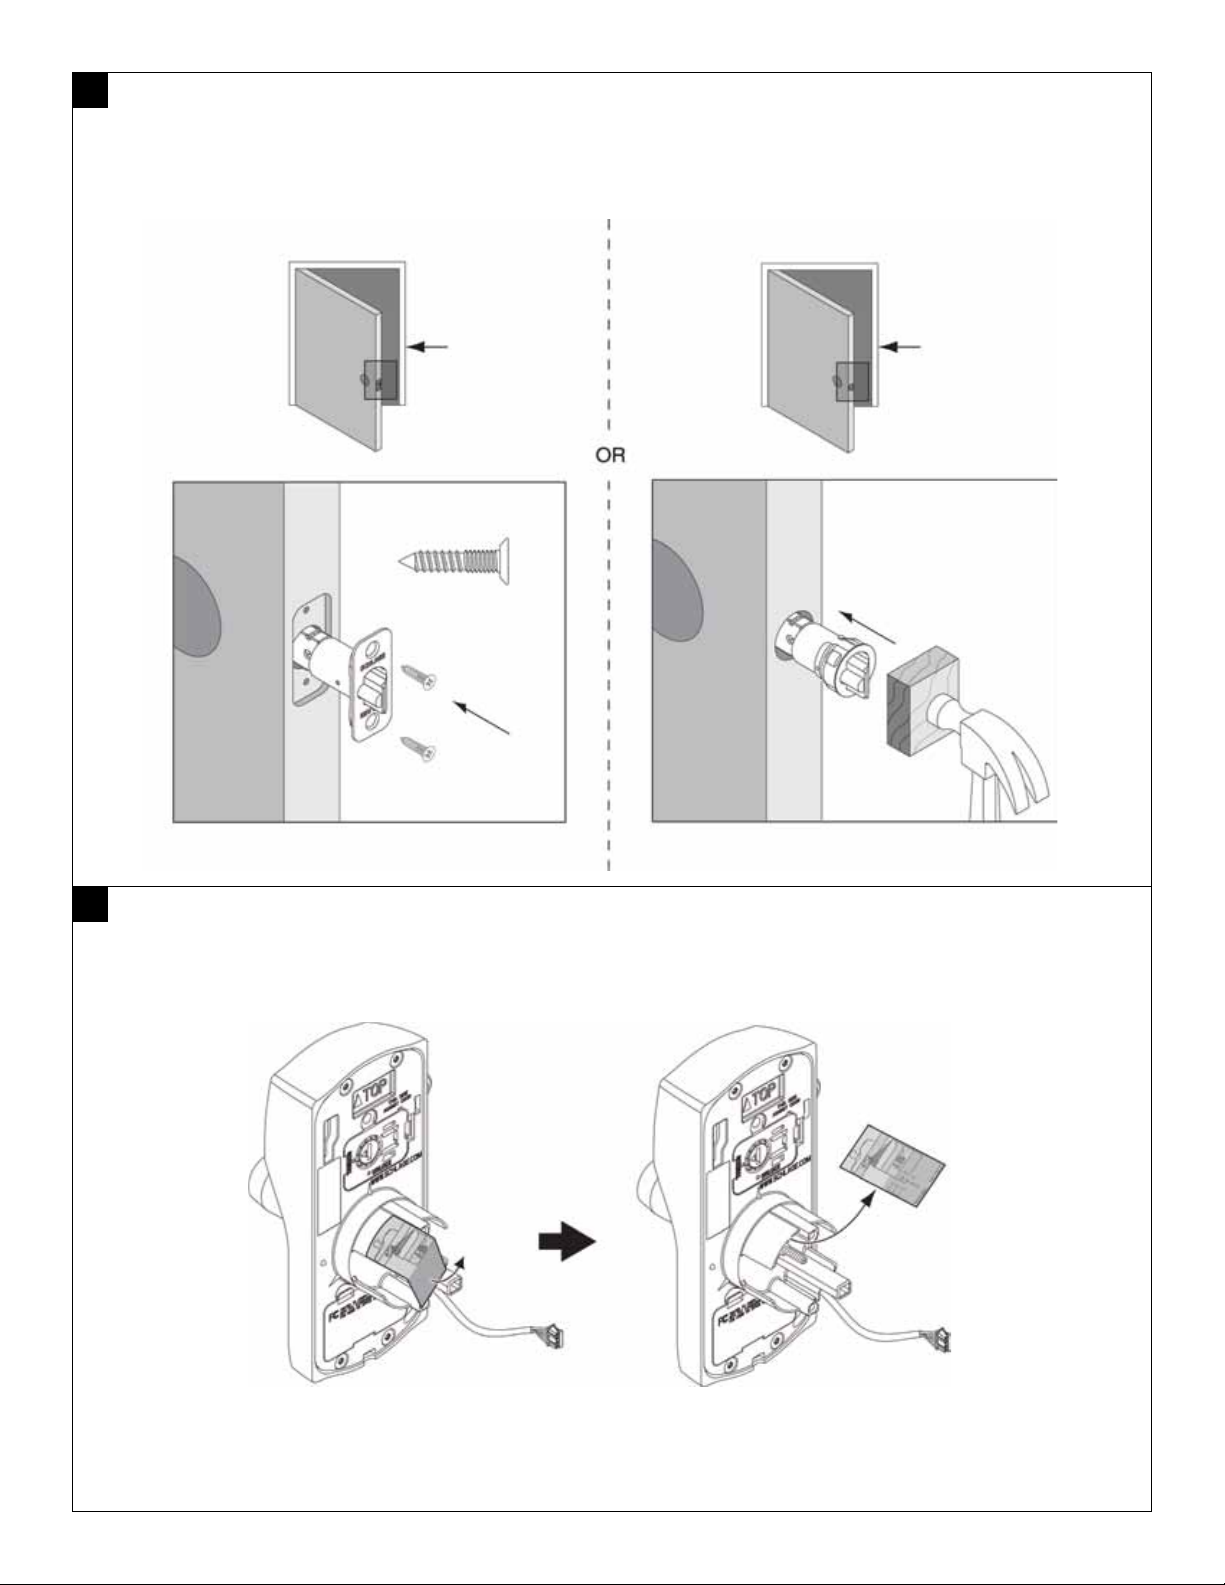
Install Latch
Latch must be flipped so that bevel faces toward door jamb.
Door Jamb Door Jamb
6
6
Remove Sticker from back of Lock
 Loading...