

CAUTION – INVISIBLE LASER RADIATION WHEN OPEN AND
VORSICHT – UNSICHTBARE LASERSTRAHLUNG TRITT AUS,
VARNING – OSYNLIG LASER STRÅLNING NÄR DENNA DEL
ADVARSEL – USYNLIG LASER STRÅLING VED ÅBNING, NÅR
VARO – AVATTAESSA JA SUOJALUKITUS OHITETTAESSA
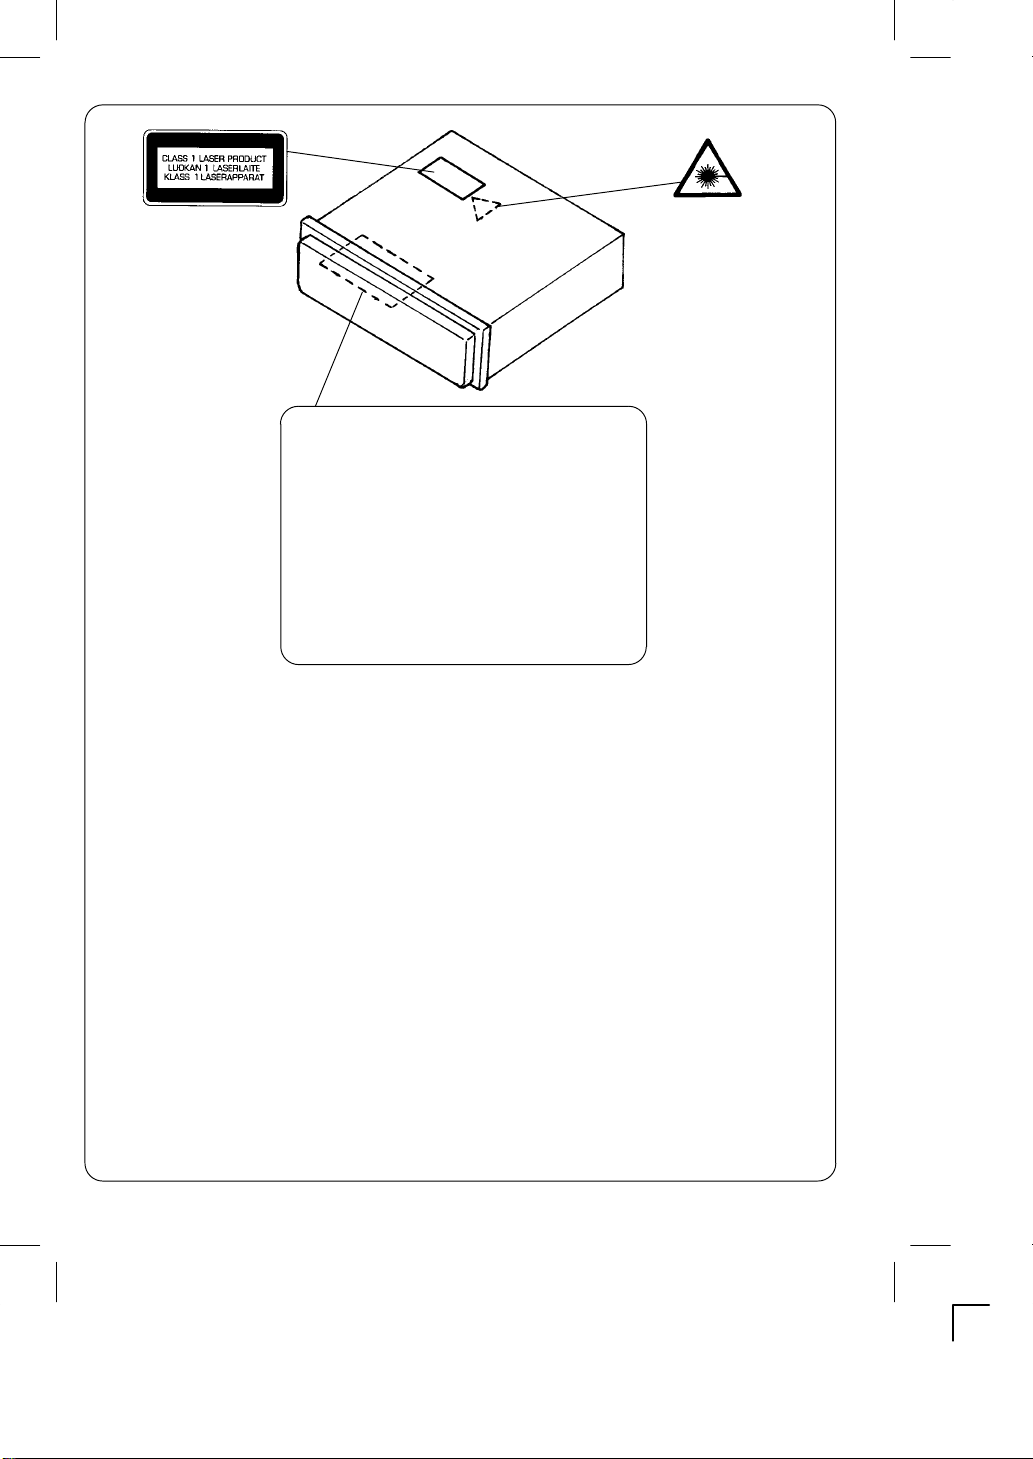
CAUTION - USE OF CONTROLS OR ADJUSTMENTS OR PERFORMANCE OF PROCEDURES OTHER THAN
THOSE SPECIFIED HEREIN MAYRESULT IN HAZARDOUS RADIATIIONEXPOSURE.
ACHTUNG - WENN ANDERE ALS DIE HIER SPEZIFIZIERTEN BEDIENUNGSĆ ODER JUSTIEREINRICHTUNGEN
BENÜTZT ODER ANDERE VERFAHRENSĆWEISEN AUSGEFÜHRT WERDEN, KANN DIES ZU GEFÄHRLICHER
STRAHLUNGSEXPOSITION FÜHREN.
ATTENTION - L'EMPLOID'ORGANES DE COMMANDE OU DE RÉGLAGE, OU L'EXÉCUTIONDEPROCÉDURES,
AUTRES QUE CEUX SPÉCIFIÉS DANS LE MODE D'EMPLOI, PEUT PROVOQUER UNE EXPOSITION DANGERĆ
EUSE AU RAYONNEMENT.
INTERLOCKS DEFEATED. AVOID EXPOSURE TO BEAM.
WENN DECKEL GEÖFFNET UND WENN
SICHERHEITSVERRIEGELUNG ÜBERBÜCKT IST.
NICHT, DEM STRAHL AUSSETZEN.
ÄR ÖPPNAD OCH SPÄRR ÄR URKOPPLAD.
STRÅLEN ÄR FARLIG.
SIKKERHEDSABRYDERE ER UDE AF FUNKTION,
UNDGÅ UDS ÆTTELSE FOR STRÅLING.
OLET ALTTINA NÄKYMÄTTÖMÄLLE LASERSÄTEILYLLE.
ÄLÄ KATSO SÄTEESEEN.
OPGELET - HET GEBRUIK VAN REGELAARS OF HET MAKEN VAN AFSTELLINGEN E.D. DIE NIET IN DEZE GEĆ
BRUIKSAANWIJZING ZIJN BESCHREVEN KAN LEIDEN TOT SCHADELIJKE STRALINGEN.
VARNING!OMAPPARATENANVÄNDSPÅ ANNAT SÄTT ÄN VADSOMBESKEIVIDENNA BRUKSANVISNING, KAN
ANVÄNDAREN UTSÄTTAS FÖR OSYNLIG LASERSTRÅLNING, SOM ÖVERSKRIDER GRÄNSEN FÖR LASERKĆ
LASS 1.
VAROITUS! LAITTEEN KÄYTTÄMINEN MUULLA KUIN TÄSSÄ KÄYTTÖOHJEESSA MAINITULLA TAVALLASAATĆ
TAA ALTISTAA KÄYTTÄJÄN TURVALLISUUSLUOKAN1 YLITTÄVÄLLENÄKYMÄTTÖMÄLLE LASERSÄTEILYLLE.
CAUTELA - L'USO DI COMANDI, AGGIUSTAMENTIO PROCEDIMENTI DIVERSO DA QUELLO QUI SPECIFICATO
PUÒ DAR LUOGO AD ESPOSIZIONE A RADIAZIONI PERICOLOSE.
PRECAUCION - EL USO DE CONTROLES O AJUSTES, O PROCEDIMIENTOS DE OPERACION DIFERENTES DE
LOS ESPECIFICADOS EN ESTE DOCUMENTO RESULTARANEN EXPOSICION PELIGROSA A LA RADIACION.
CUIDADO - O USO DOS CONTROLOS OU AJUSTES OU DESEMPENHOS DE PROCEDIMENTOS OUTROS QUE
NÃO OS ESPECIFICADOS NAS INSTRUÇÕES DE OPERAÇÃO PODEM RESULTAR EM PERIGOSAS EXPOĆ
SIÇÕES À RADIAÇÃO.
-ā1ā-
English
CONTENTS
COMPACT DISC CARE ă2....................................................................
DIGITAL DISPLAY ă4.........................................................................
DETACHABLE FRONT PANEL ă5..............................................................
GENERAL OPERATION ă6....................................................................
RADIO OPERATION 8........................................................................
RDS FUNCTION OUTLINE 10.................................................................
HOW TO USE THE RDS FUNCTION 11.........................................................
TAPE OPERATION 14........................................................................
CD OPERATION 17..........................................................................
CD CHANGER OPERATION 19................................................................
ERROR SIGNS 21...........................................................................
CLOCK 22..................................................................................
HINTS FOR PROPER AND SAFE OPERATION 23................................................
TROUBLESHOOTING 24.....................................................................
ACCESSORIES AND HARDWARE 25...........................................................
INSTALLATION 25............................................................................
UNIT REMOVAL 27...........................................................................
ELECTRICAL CONNECTIONS 28..............................................................
LINE OUT/CD CHANGER CONNECTIONS 30....................................................
CAUTION
S This unit is designed to operate on 12 volts DC, NEGATIVEground electrical systems only.
S When fuse replacement is necessary, use only a 15 amp fuse. Do not replace with a higher rated fuse. If the
fuse blows often, carefully check all electrical connections for any short circuits and have your car's voltage
regulator checked also.
S Do not install the unit where it will be exposed to direct sunlight or hot air discharged from the car heater.
S Do not expose the unit to water or moisture.
S To avoid damaging the unit, never insert anything other than a compact disc into the disc slot.
S This unit should not be adjusted or repaired by anyone except qualified service personnel.
If servicing is required, return the unit to an authorized SANYO mobile audio dealer.
S Use of Controls or adjustments or performance of procedures other than those specified herein may result in
hazardousradiationexposure.
S Changesormodificationsnotexpressly approved by Sanyo may void the user's authoritytooperatethis equipĆ
ment.
COMPACT DISC CARE
Dirt, dust, scratches and warpage can cause a deterioration in the sound or intermittent skipping some tracks
during play.
S This unithasbeendesignedto play compact
discs bearing the identification logo shown
on the left. No other discs can be played.
-ā2ā-
LabelSide
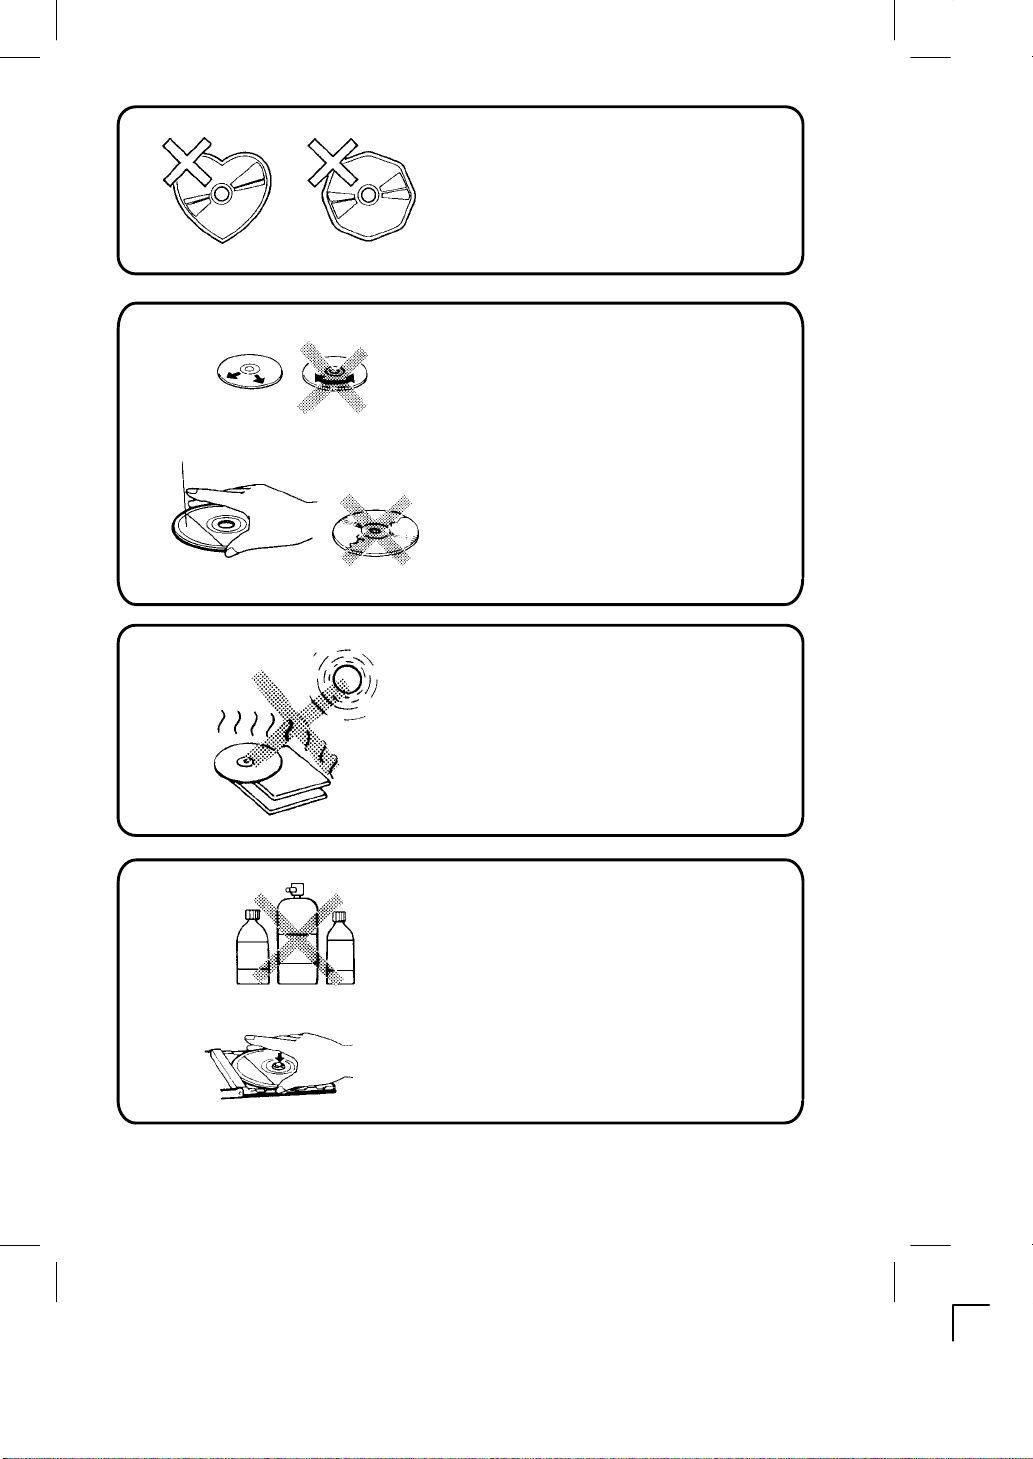
S Do not use nonĆconventional discs such as
heartĆshaped, octagonal discs, etc.
The player could be damaged.
S Fingerprints and dust should be carefully
wiped off the signal surface of the disc
(glossy side) with a soft cloth.
Wipe in a straight motion from the inside to
the outside of the disc. Unlike conventional
records,thecompactdischasnogroovesto
collectdust and debris. Small dust particles
will have no effect on reproduction quality.
S Do not insert a disc which is cracked into the
unit.
S Do not apply paper or write anything on the
surface of the disc.
S To prevent warping the disc, do not expose
it to direct sunlight, high humidity or high
temperaturesfor extended periods of time.
Benzene Thinner Cleaning spray
S Never use chemicals such as record cleanĆ
ing sprays, antistatic sprays or fluids, benĆ
zene or thinner to clean compact discs.
These chemicals will permanently damage
the plastic surface of the disc.
S When not using the discplayerforextended
periods of time, remove the compact disc
andreturnittothe plastic storage case. This
will protect the disc from dust andexposure
to the sun.
-ā3ā-
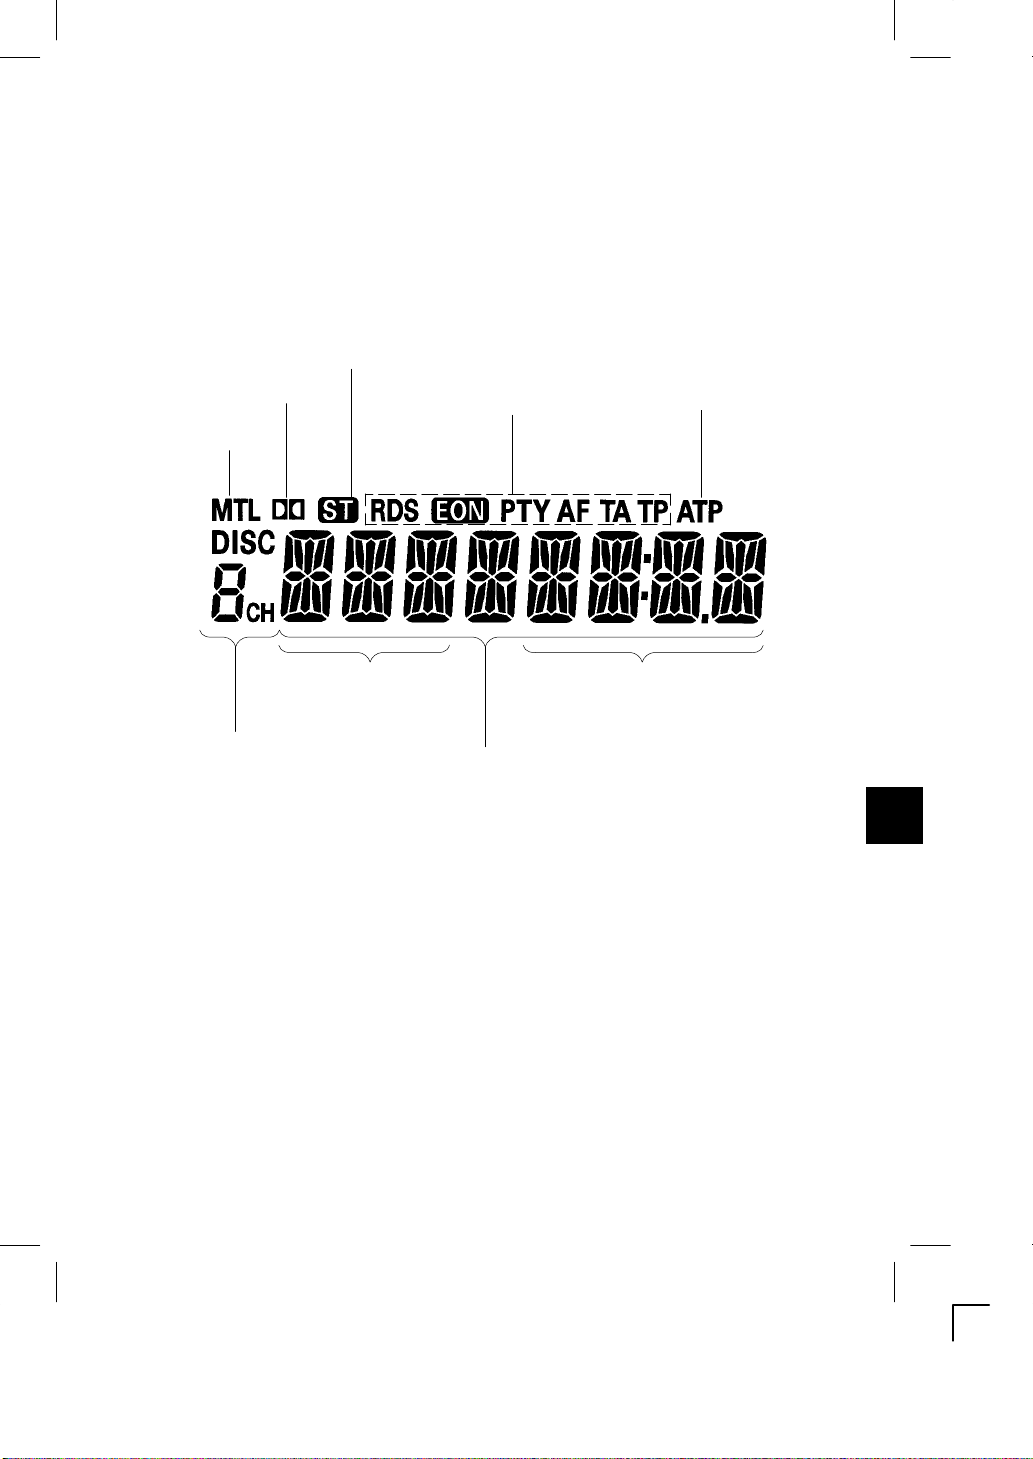
DIGITAL DISPLAY
StereoIndicator
Dolby Noise Reduction*
MetalIndicator
RDS Indicator
ATPIndicator
Radio Band Display
CD Play Mode Display
Disc Number Display
Radio Preset Channel
Number Display
*Dolby noise reduction manufactured under license from Dolby Laboratories Licensing Corporation.
Dolby" and the double-D symbol are trademarks of Dolby Laboratories Licensing Corporation.
RDS Program Type Display
CD Changer Error Sign Display
-ā4ā-
Radio Freguency Display
CD Track Number Display
TimeDisplay
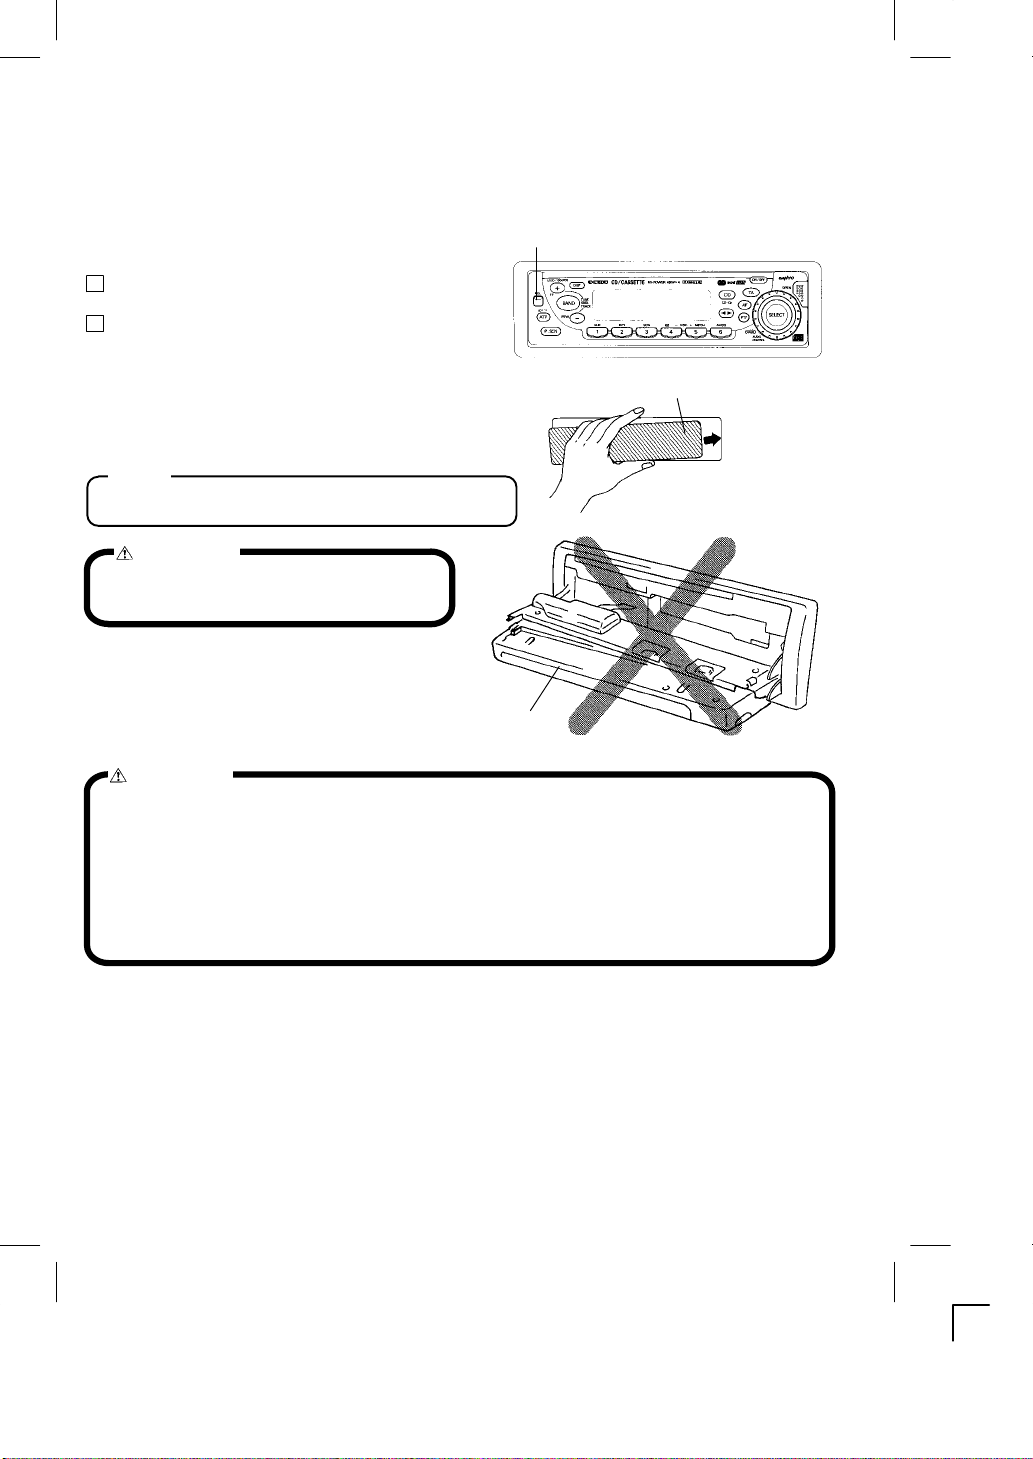
DETACHABLE FRONT PANEL
The front panel is designed to be removable for antitheft purposes.
It is recommended that you remove and carry the front panel with you when you leave your car.
A carrying case is provided with the unit for this purpose.
HOW TO DETACH THE FRONT PANEL
1 Press down the release knob (REL) to release the front
panel.
2 Pull the entire panel to remove it from the unit.
RELEASE KNOB
HOW TO REPLACE THE FRONT PANEL
Align the right side of the panel with the stopper,
and then push the left side of the panel into the
unit until it clicks.
Note
The unit will not operate if it is installed incorrectly.
FRONT PANEL
CAUTION
With the door opened, do not attempt
to remove or replace the front panel.
FRONT PANEL
CAUTION
S Do not attempt to remove the panel in a manner other than that described above.
S When installing the panel, do not force it into the unit.
S Do not touch the connection terminals of the panel or the unit. It may causepoor contact.
S Use a clean, dry cloth when cleaning the terminals.
S Keep the panel out of direct sunlight and high temperatures.
S Prevent the panel from coming into contact with benzene, thinner, or insecticides.
S Do not drop the panel.
-ā5ā-
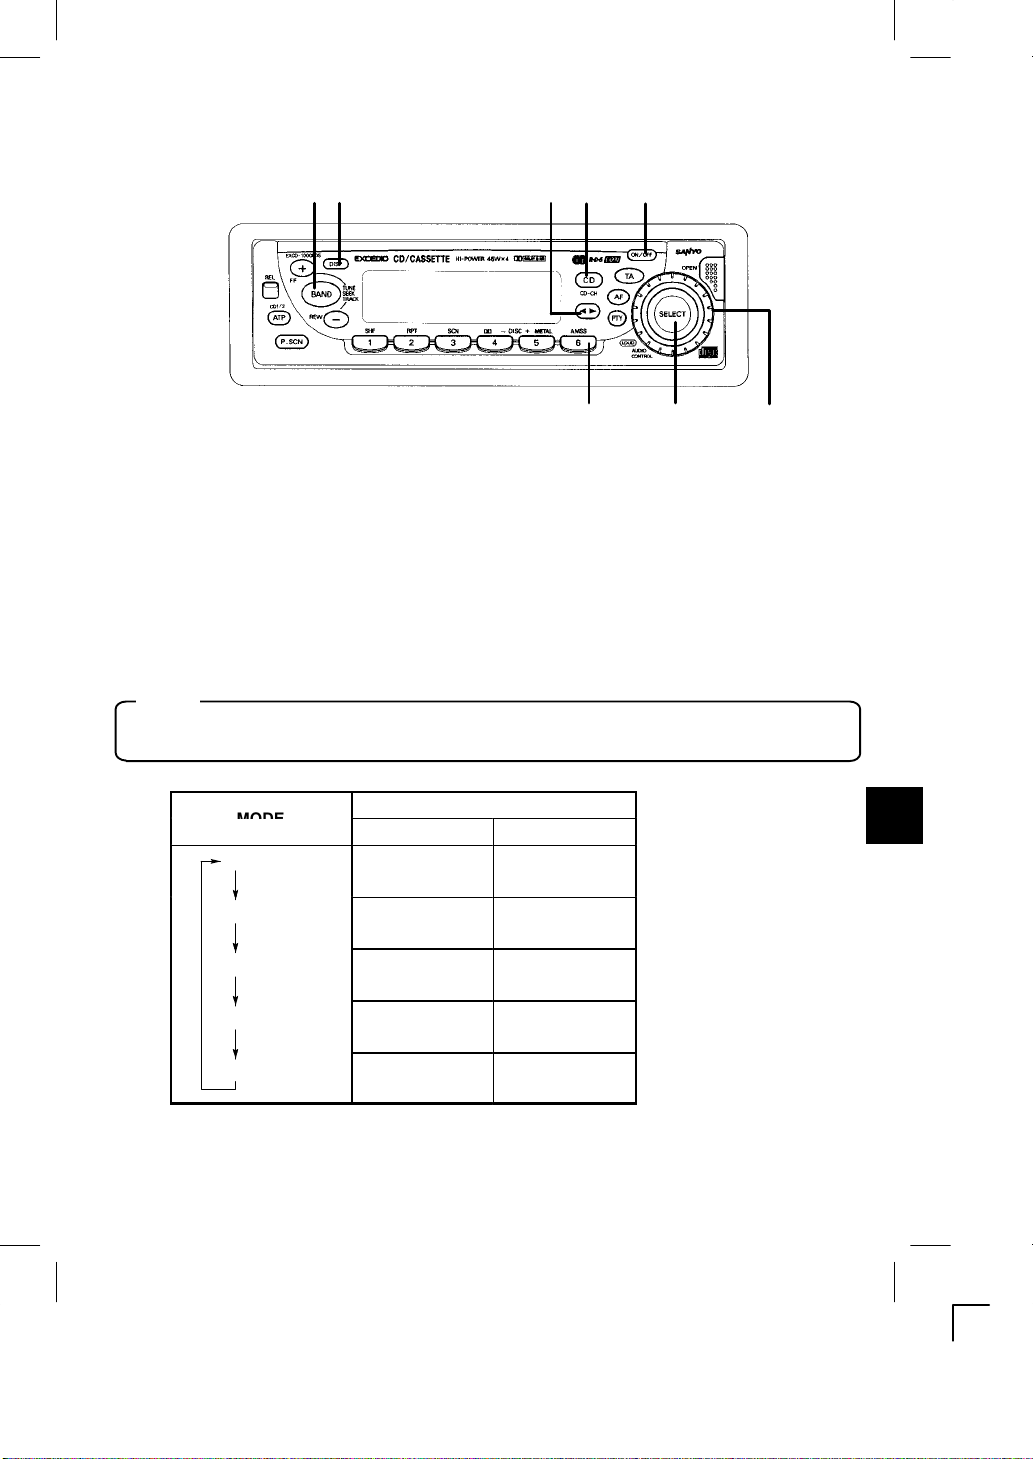
GENERAL OPERATION
45
8
167
2 3
TURNING THE POWER ON
Install the front panel and press the ON/OFF button ➀ when ACC is on.
TURNING THE POWER OFF 1.............................
Press the ON/OFF button ➀to stop the current operation.
The button dims when the power is off (ACC on).
ELECTRONIC CONTROLS 2, 3..............................
Press the SELECT button ➁to select the audio functions as shown in the table below.
Turn the jog dial ➂ to adjust the selected function ; bass, treble, balance, fade, or volume.
Note
While no other mode is displayed, the jog dial adjusts the volume.
MODE
BAS (bass)
TRE (treble)
BAL (balance)
FAD(fader)
VOL (volume)
Jog Dial Operation
Turned left Turnedright
Decreased Increased
Decreased Increased
Shifted to left Shifted to right
Shifted to front Shifted to rear
Decreased Increased
-ā6ā-
LOUDNESS OFF 2.......................................
The lowĆfrequency sound is enhanced at all volume levels.
To cancel the effect, press and hold the SELECT button ➁ and LOUD OFF is displayed.
Press and hold the button again to restore loudness function and LOUD ON is displayed.
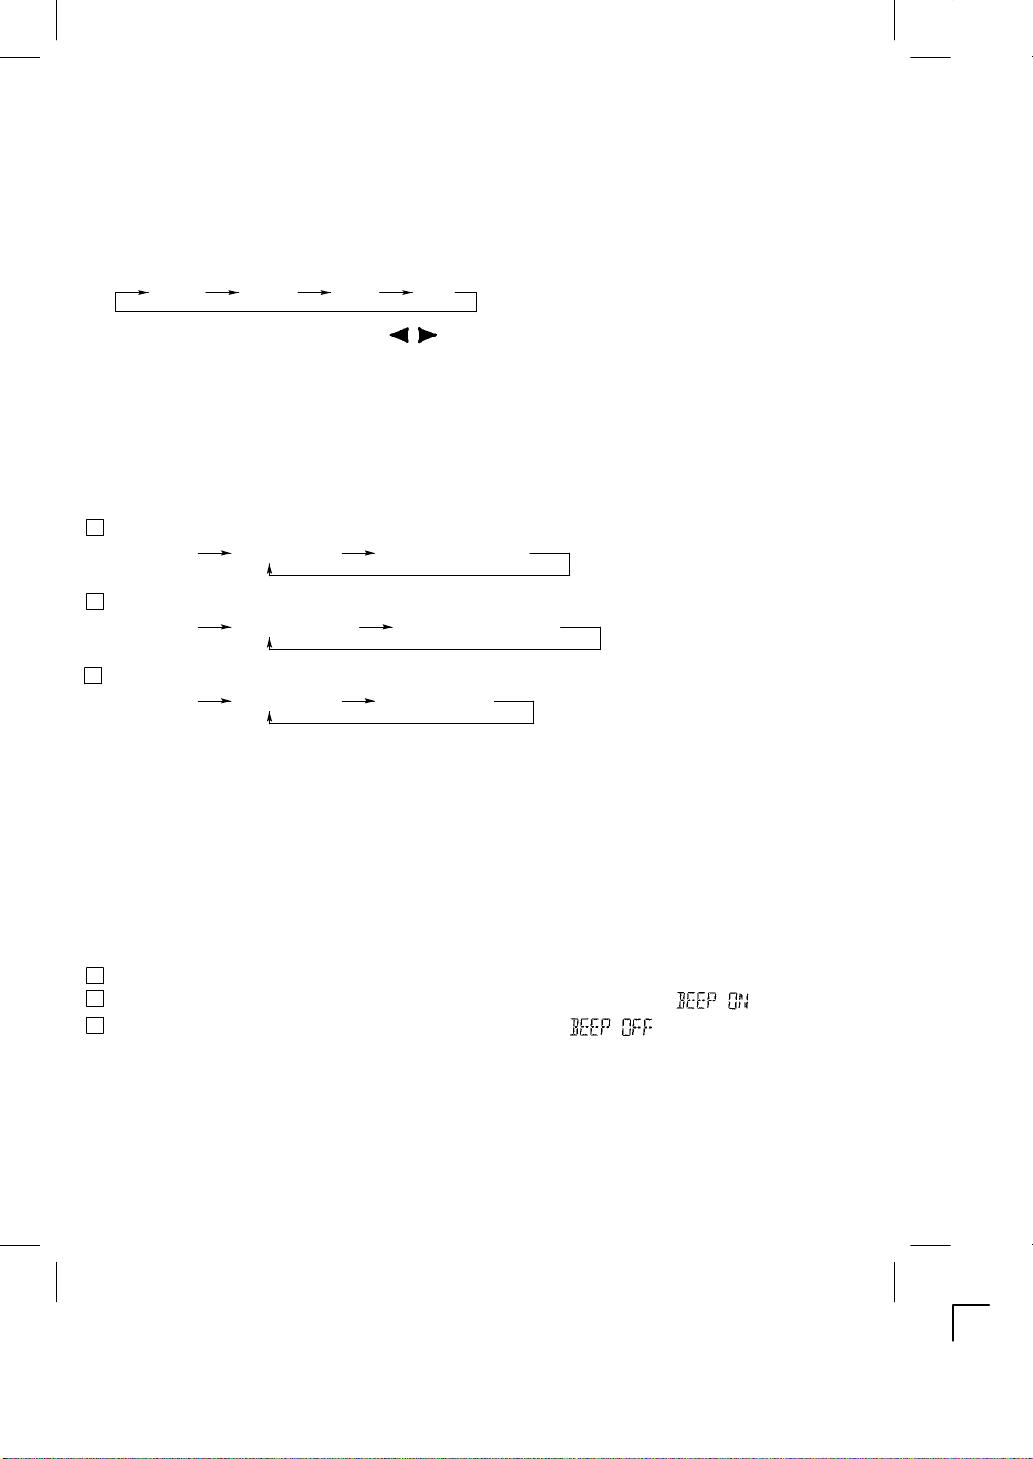
RADIO SELECTION BUTTON (BAND) 4....................
Press the BAND button ➃ to switch from tape, CD player or CD changer mode to radio.
Each time the button is pressed, the function changes as shown below.
FM1 FM2 MW LW
TAPE SELECTION BUTTON ( ) 5......................
Press button ➄ to switch from radio, CD player or CD changer mode to tape mode.
CD PLAYER OR CD CHANGER* SELECTION BUTTON
(CD/CD-CH)
Press the CD/CD-CH button ➅ to switch from radio or tape mode to CD player or CD changer* mode.
* If a CD changer is connected.
Pressing the button will change the mode as follows:
1 When a CD is loaded in the CD player and a CD changer is not connected;
Radio/Tape CD player CD player pause
2 When a CD is not loaded in the CD player and a CD changer is connected;
Radio/Tape CD changer CD changer pause
3 When a CD is loaded in the CD player and a CD changer is connected;
Radio/Tape CD player CD changer
6...........................................
CLOCK BUTTON (DISP) 7.................................
Press the DISP button ➆ to switch between the clock and audio display. When an audio function is performed
while the time display is selected, the audio display will appear for 5 seconds, then the display will return to the
timemode.
BEEP TONES 1, 8..........................................
You can set the radio with beep tones which will sound when a button is pressed. To set the function, follow the
proceduresbelow.
1 Turn off the power by depressing the ON/OFF button ➀.
2 WithACCon,pressthe ON/OFF button ➀ andpresetbutton6➇simultaneouslyuntil is displayed.
3 Tocancel the beep tones on again, repeat steps 1 and 2, and then is displayed.
TELEPHONE MUTE
The radio is muted while you receive or give a phone call using the car phone.
While a CD, CD changer or TAPE is being played, they will be put in PAUSE, and PAU CD or PAU TAPE will
appear in the display.
When a RADIO broadcast is being received, the display remains unchanged and the broadcast will be put in
MUTE.
-ā7ā-
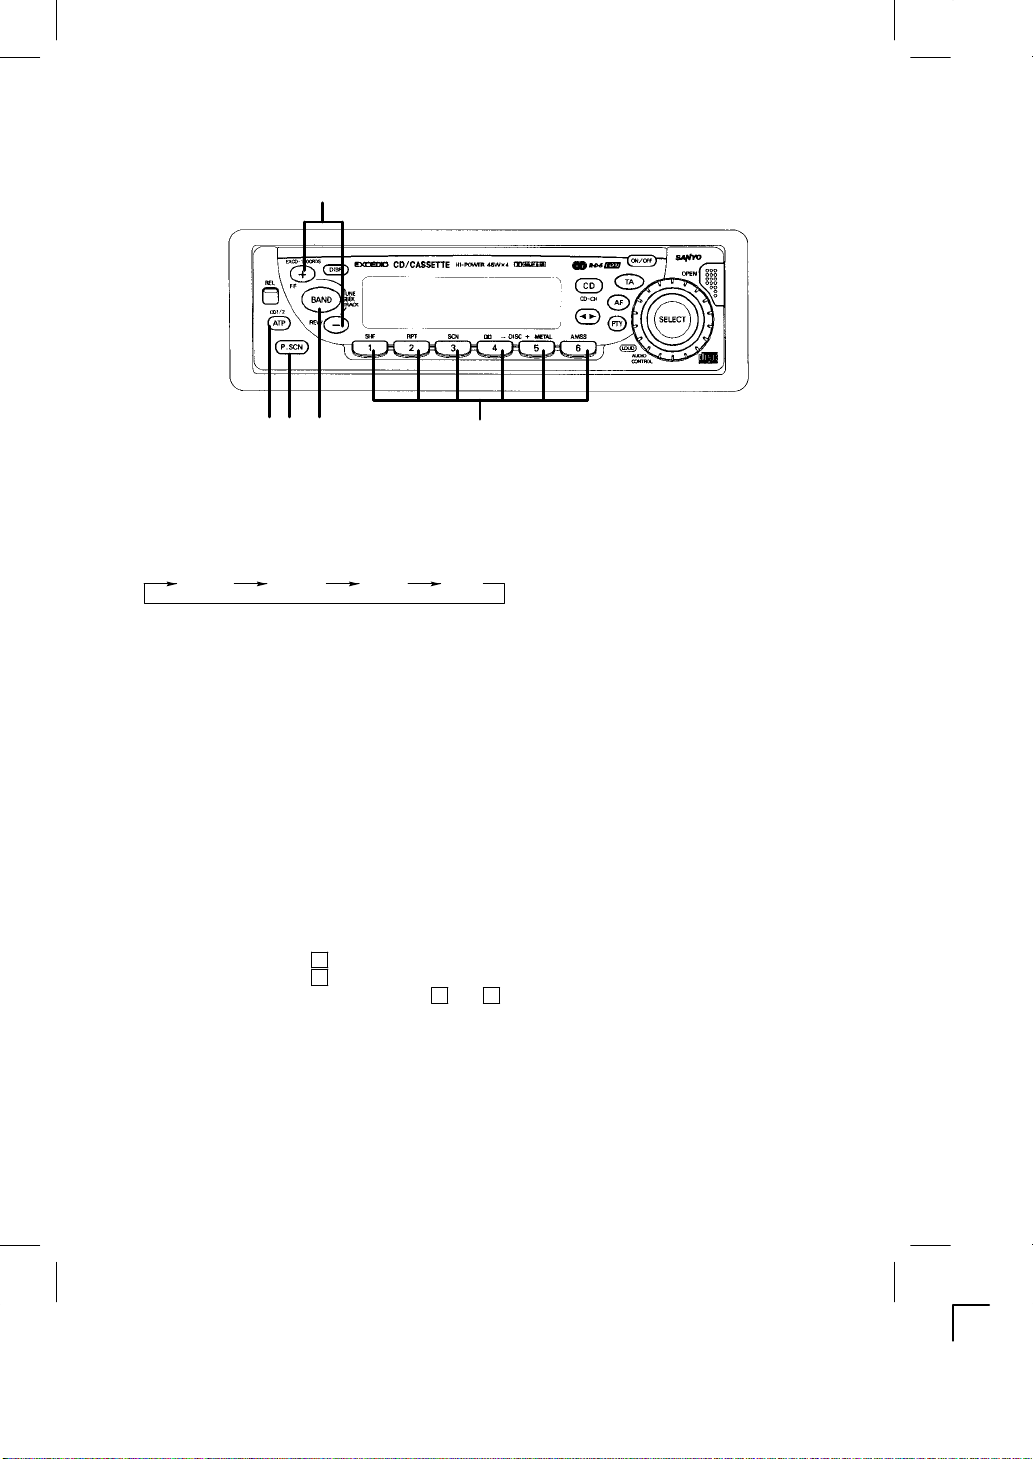
RADIO OPERATION
2
5 14
3
SELECTING RADIO MODE 1.......................
Press the BAND button ➀ to switch from tape, CD player or CD changer* mode to the radio.
Each time the BAND button is pressed, the selected band changes as
shown below.
FM1 FM2 MW
LW
RADIO TUNING 2........................................
S Automatic tuning Press the TUNE/SEEK/TRACK or button ➁ for more than 0.5 second until it...
S Manual tuning To select higher frequency stations, press the button for less than 0.5 seconds.......
beeps twice if the beep tones are on.
When the button is released, the system will start automatic tuning and stop at the
next receivable station.
To select lower frequency stations, press the button for less than 0.5 seconds.
To quickly scan up or down in frequency, press and hold the or button. Release
thebuttonwhenthedisplayapproachesthe desired frequency, then press and release
the button repeatedly until the desired frequency is displayed.
InFM mode a flashing decimal point in the frequency display indicates that the system
is receiving a station 50 kHz higher than the displayed frequency.
STORING PRESET STATIONS 3...........................
Thepreset buttons ➂ can be used to store 6 stations in each band (FM1, FM2, MW and LW)for convenient acĆ
cess to your favorite stations.
S Programmingstations 1 Select the desired band, then tune in the station you want to store in memory....
S Quick tuning Select the desired band, then press one of the six preset buttons............
2 Press and hold one of the preset buttons for more than 1.5 seconds.
Repeat steps 1 and 2 to program additional stations.
* If a CD changer is connected.
-ā8ā-

ATP (AUTO TRAVEL PRESET) OPERATION 4..............
The Auto Travel Preset function searches for and memorizes the 6 strongest stations in one of the two bands
(FM, MW) in order of signal strength.
Thisfeature is useful when you are driving in an unfamiliar location and want to memorize local stations without
changingthe standard preset stations.
A total of 12 stations (6 FM and 6 MW) can be programmed.
S To set the stations 1 Select the desired band..............
2 Pressandholdthe ATPbutton➃formore than 1.5 seconds. ATP"apĆ
pears in the display.
When the stations have been memorized, scanning stops and the
strongest station is selected.
S Quick Tuning of ATP Stations 1 Select the desired band.....
S Toscan programmed stations See PRESETĆSCANĆBUTTON OPERATION"....
Notes
S If no station can be received, - - -" appears in the display.
S If fewer than 6 stations can be received, the system will memorize as many stations
as possible, then select the strongest one.
S When LW is being received, the ATP function cannot be used.
S When setting ATP at an RDS station with identical PI, only the strongest station will
be set.
To cancel the ATP, press the ATP button again. When ATP is canceled, the ATPindicator disappears and ATP
mode is canceled.
2 Press the ATP button if the ATP" indicator does not appear in the disĆ
play.
3 WhileATPis illuminated, press a preset button 1-6 and the unit seeks
ATP1-6. If there is no preset ATP,---appears in the display.
PRESETĆSCANĆBUTTON OPERATION 1, 4, 5....................
This function scans each of the preset stations stored in the selected band (both manual preset and auto travel
presets).
1 Select the desired band or ATPmode.
Press the BAND button ➀ for FM1, FM2, MW, or LW. Press the ATP button ➃ for less than 1.5 seconds to
select the ATPmode.
2 Press the P.SCN button ➄. The system will select and receive each preset station for 5 seconds.
3 Tostop scanningandretainthestationcurrentlyselected,presstheP.SCNbutton➄again duringthisfiveĆseĆ
condperiod.
-ā9ā-
 Loading...