

Page 1
STEP ONE
INSTALLING MUSIC MATCH SOFTWARE
1- Insert the SanDisk Digital Audio Player (DAP) installation CD version 1.0 in
your CD-Rom Drive. The CD should automatically run, and take you through an
Intro.
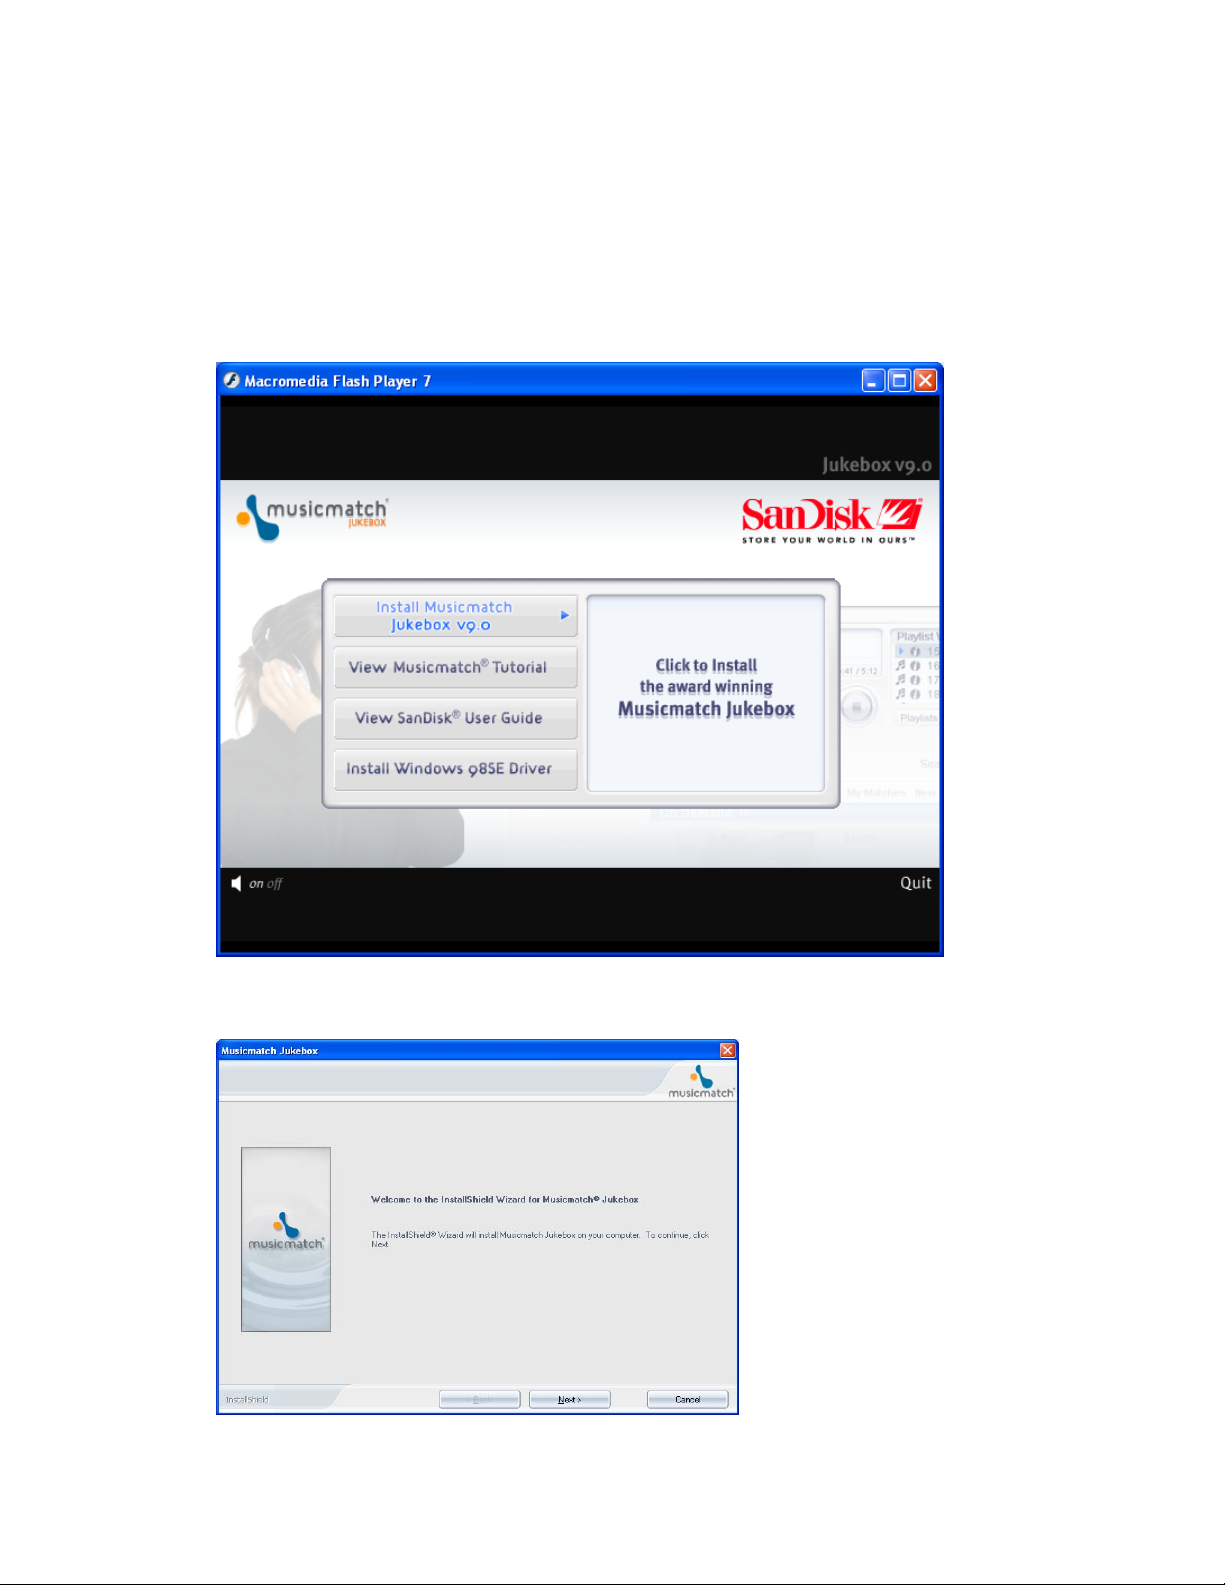
2- Click on Install Music Match Jukebox v9.0 to begin installation of the music
match software.
3- The installation will begin and now you can click Next
4- Click YES to accept agreement
Page 2
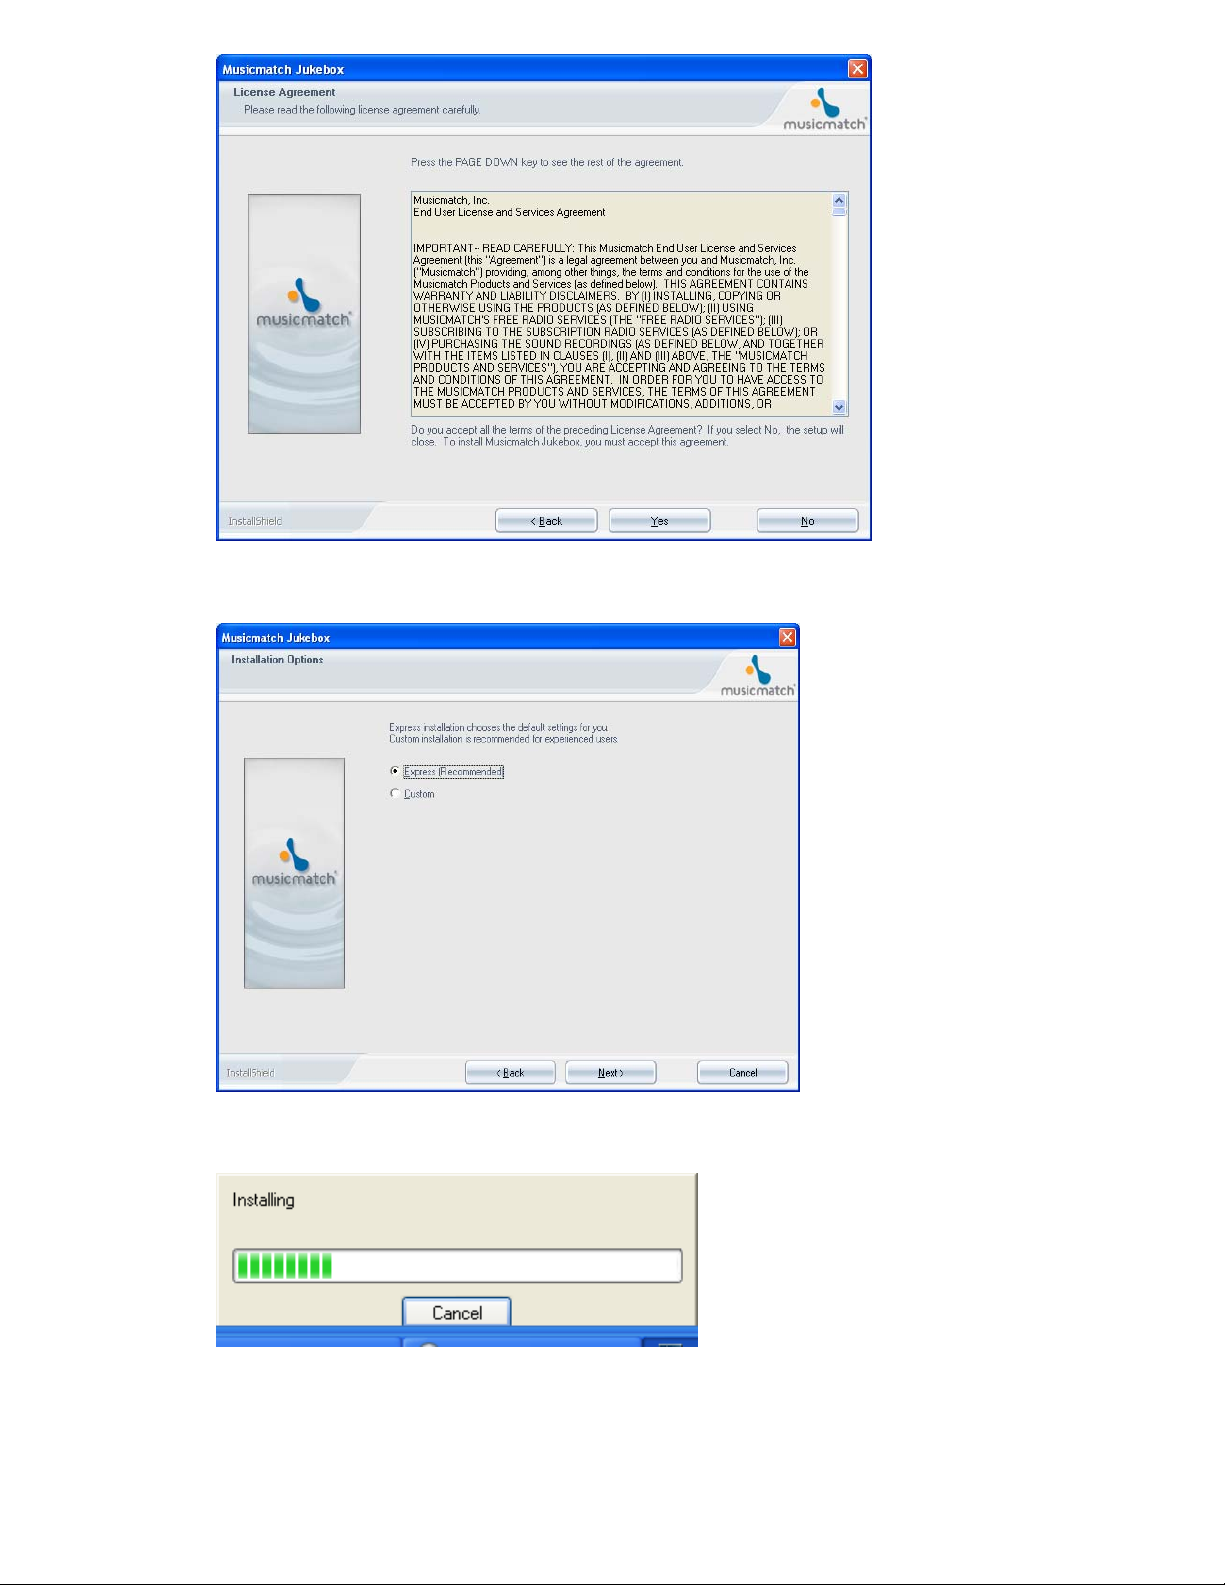
5- Select EXPRESS RECOMMENDED and click NEXT
6- Music match will now install
7- Select YES to restart your computer and click FINISH, Now take the installation
cd out.
Page 3

8- NOTE: IF YOU HAVE WINDOWS 98SE, DO NOT RESTART YET GO
BACK TO THE INTRO AND CLICK ON INSTALL WINDOWS 98SE
DRIVER AND THEN RESTART YOUR COMPUTER AND REMOVE
THE INSTALLATION CD.
STEP TWO
USING MUSIC MATCH JUKEBOX 9.0 TO COPY MUSIC FILES TO THE DAP
1- After your computer is restarted, click on the Music Match icon from your
desktop and you will be prompted to register your product. Fill the required
information and click NEXT
2- You will now see the following screen select either option and click NEXT
Page 4
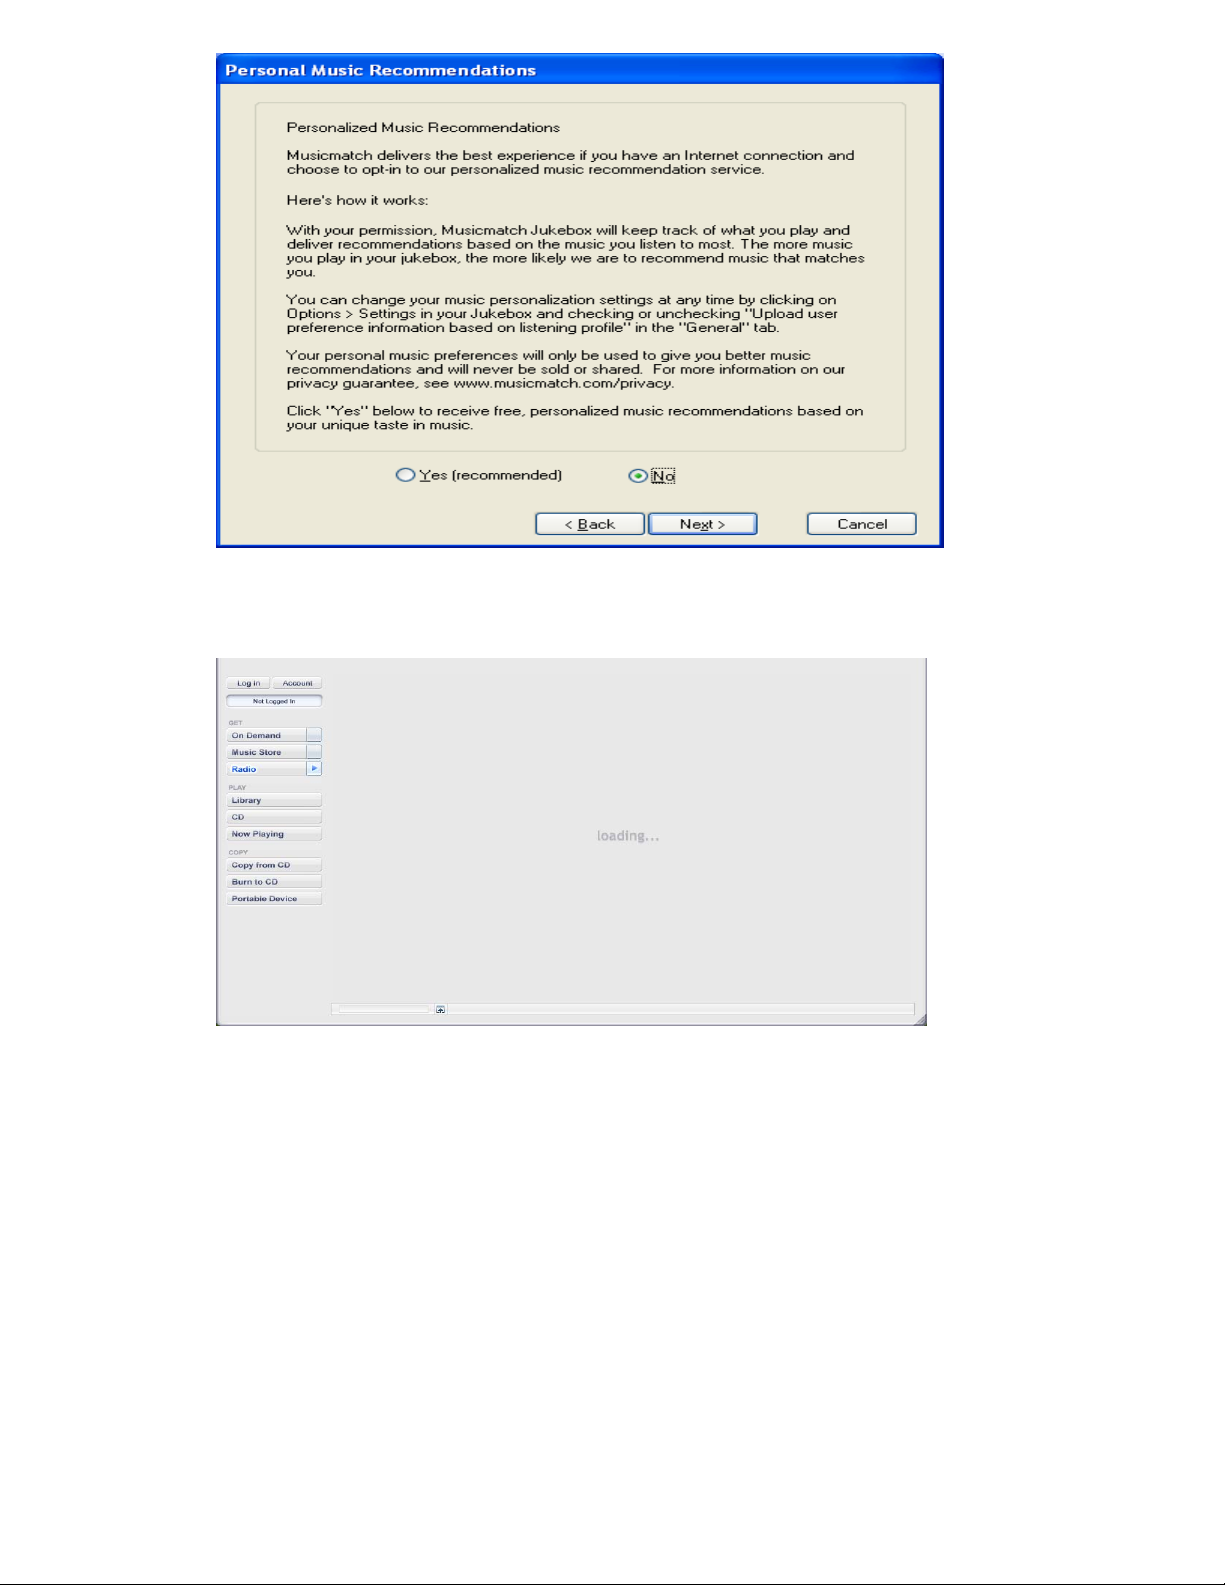
3- Music Match will now launch for the first time. You will be prompted with
several ADDS and Upgrade options. Cancel out of all those prompts
4- The software is now completely loaded and will look as follows. Pay a closer look
at the left side of the screen
Page 5

5-Click on PORTABLE DEVICE and you will be prompted for the first time to
synchronize your device (REMENBER THIS IS NOT NECESSARY AND YOU
CAN CHOOSE NO and CLICK DONE)
5- Your screen will now look as follows ( MY PLAYER ALREADY HAS MUSIC
FOLDERS CREATED ON IT AS SHOWN IN THE LEFT PANE)
Page 6

6- Clicking on one of the folders will show you its content on the right Windows as
follows:
7- Click on ADD (to allow you add a song to your player) USE THIS WINDOW TO
BROWSE TO THE FOLDER WHERE YOUR SONGS ARE. REMENBER:
USING THE COPY FROM CD FEATURE AUTOMATICALLY COPIES THE
SONG IN THE “My Music” FOLDER.
Page 7

8-LOCATE MY MUSIC FOLDER
8- My Music folder will likely be in My documents folder
Page 8

9- Now click on My Music Folder and select the respective folder containing you
songs
10- You can now select the songs you want to add and click ADD
Page 9

STEP THREE
USING MUSIC MATCH TO COPY SONGS FROM CD (Note this function will
not automatically copy the songs to the player) it is important that you use Music
match to copy songs from CD to allow the software convert the files from CDA to
MP3. USING THE COPY FROM CD FEATURE WILL AUTOMATICALLY
SAVE THE SONGS IN “My Music” FOLDER AS MP3.
1- Inset a MUSIC CD of your choice in the CD-ROM
2- Music match will launch automatically and if not click on the music match icon
from your desktop to launch the application
3- Now click on COPY FROM CD BUTTON and the following RECORDER
SCREEN WILL APPEAR. You may uncheck the unwanted songs and click
START COPY
Page 10

4- The RECORDER screen will look as follows showing you the copying progress
NOTICE ABOVE THAT THE SONG IS BEING RECORDED AT 96Kbps
(THIS FILE SHOULD PLAY IN THE PLAYER. The default Music match bit
rate is 128Kbps and the files are MP3 therefore should play in the player.
IN THE EVENT THAT THE FILES WERE COPIED AT MORE THAN
128kbps; YOU CAN CHANGE THIS SETTINGS BY CLICK ON
TOOLS/SETTINS on the RECORDER window
Page 11

As you can see the settings here was changed to “near cd quality (96kbps). The
default is “CD quality (128kbps) “and the recording format is MP3.
Other recording formats available are MP3pro, Windows Media Audio and WAV.
We advise that you stick with MP3.
 Loading...