


YP-Z5QB/XAA
Samsung YP-Z5QB/XAA, YP-Z5AB/XAA, YP-Z5QP/XAA, YP-Z5ZB/XAA, YP-Z5QS/XAA User Manual
...
For Your Safety
Read this manual carefully to ensure proper use of the product and
to avoid any danger or physical damage.
2
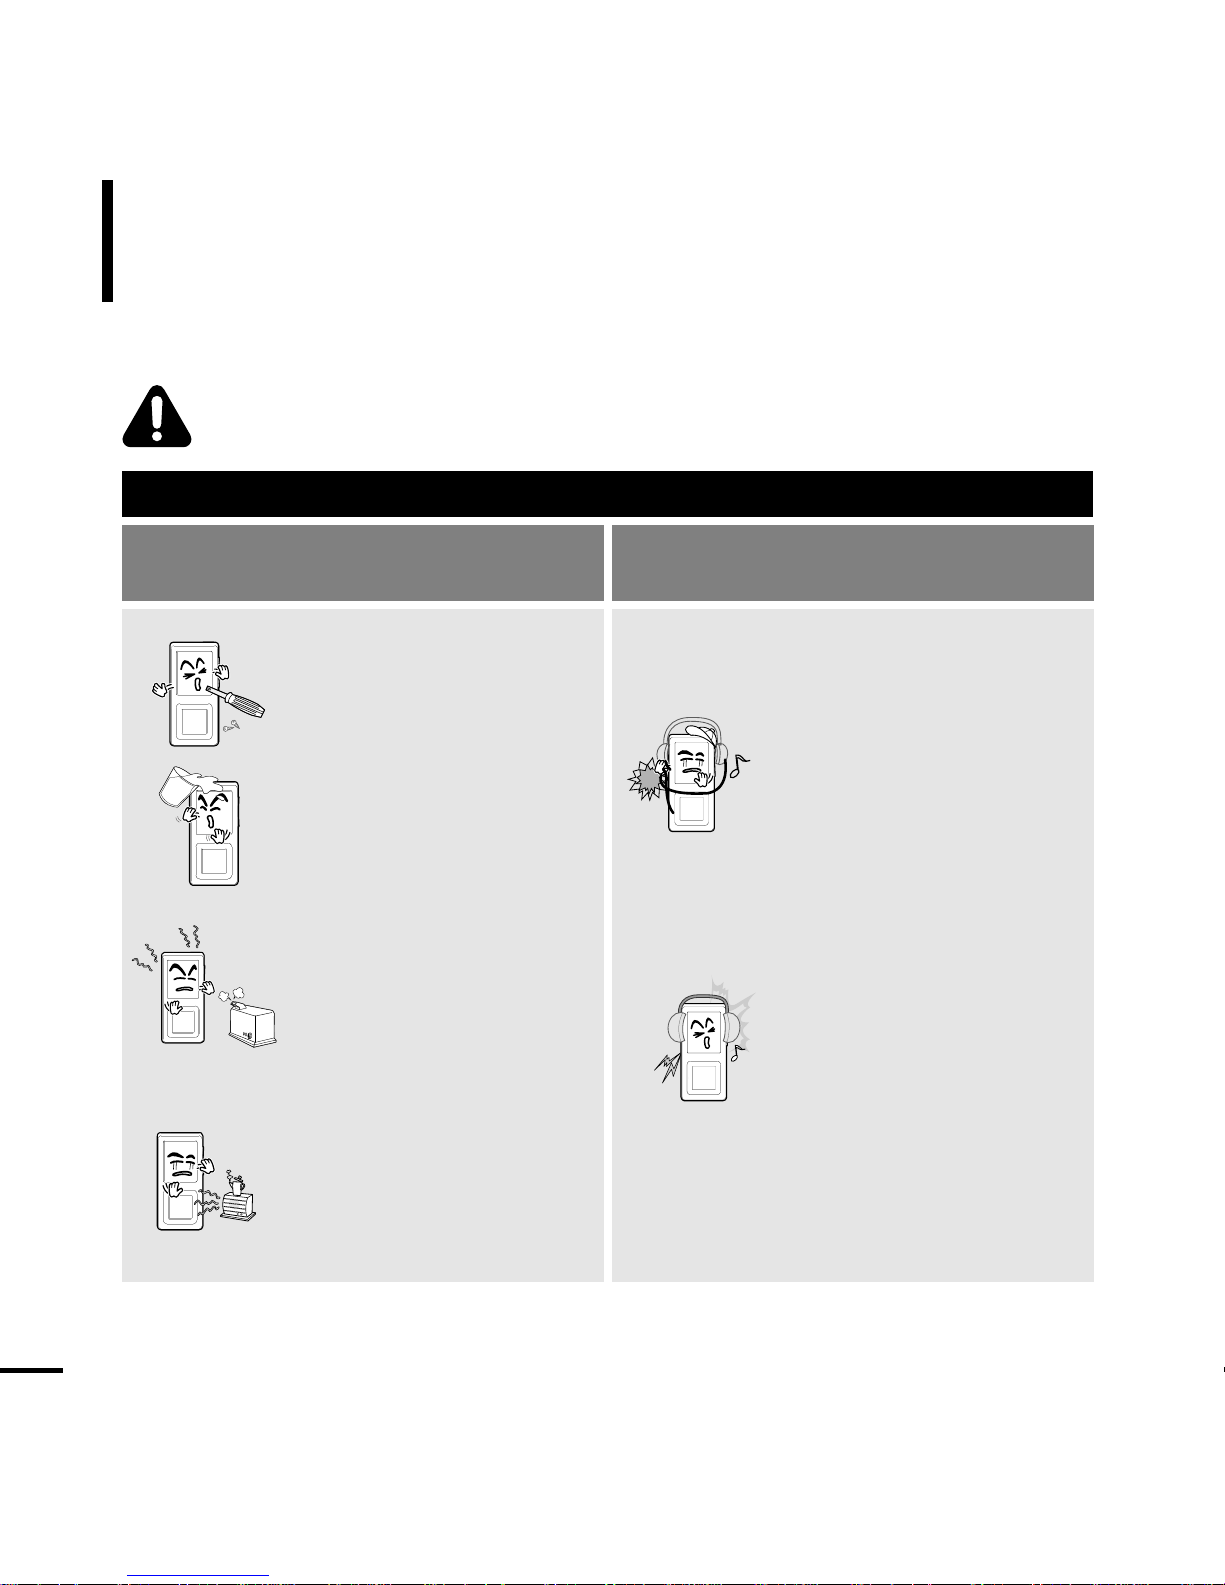
WARNING
Product Use
Improper use can result in explosion,
fire or electric shock.
Take care to avoid physical damage.
Do not disassemble, repair
or modify this product on
your own.
Do not get the product wet
or drop it in water.
If the product gets wet,
do not switch it on.
Contact a Service Center.
Do not place the product in
damp, dusty or sooty areas,
as it could result in fire or
electric shock.
Av oid using your product at
high volume levels, as it may
result in permanent hearing
damage. If you experience
ringing in your ears while
using the earphone, remove
the earphone immediately
and lower the volume.
Do not leave the product in
areas above 35°C(95°F)
(such as a sauna or inside
a parked car).
During the summer the
temperature inside a car may
rise up to 80°C(176°F).
Take care not to tangle the
earphone cable around your
arms or neighboring objects
while driving, working out or
walking, as it could result in
a car accident or other
injuries.
Failing to heed the product instructions may cause serious injury.
Chapter 1. Preparation
3
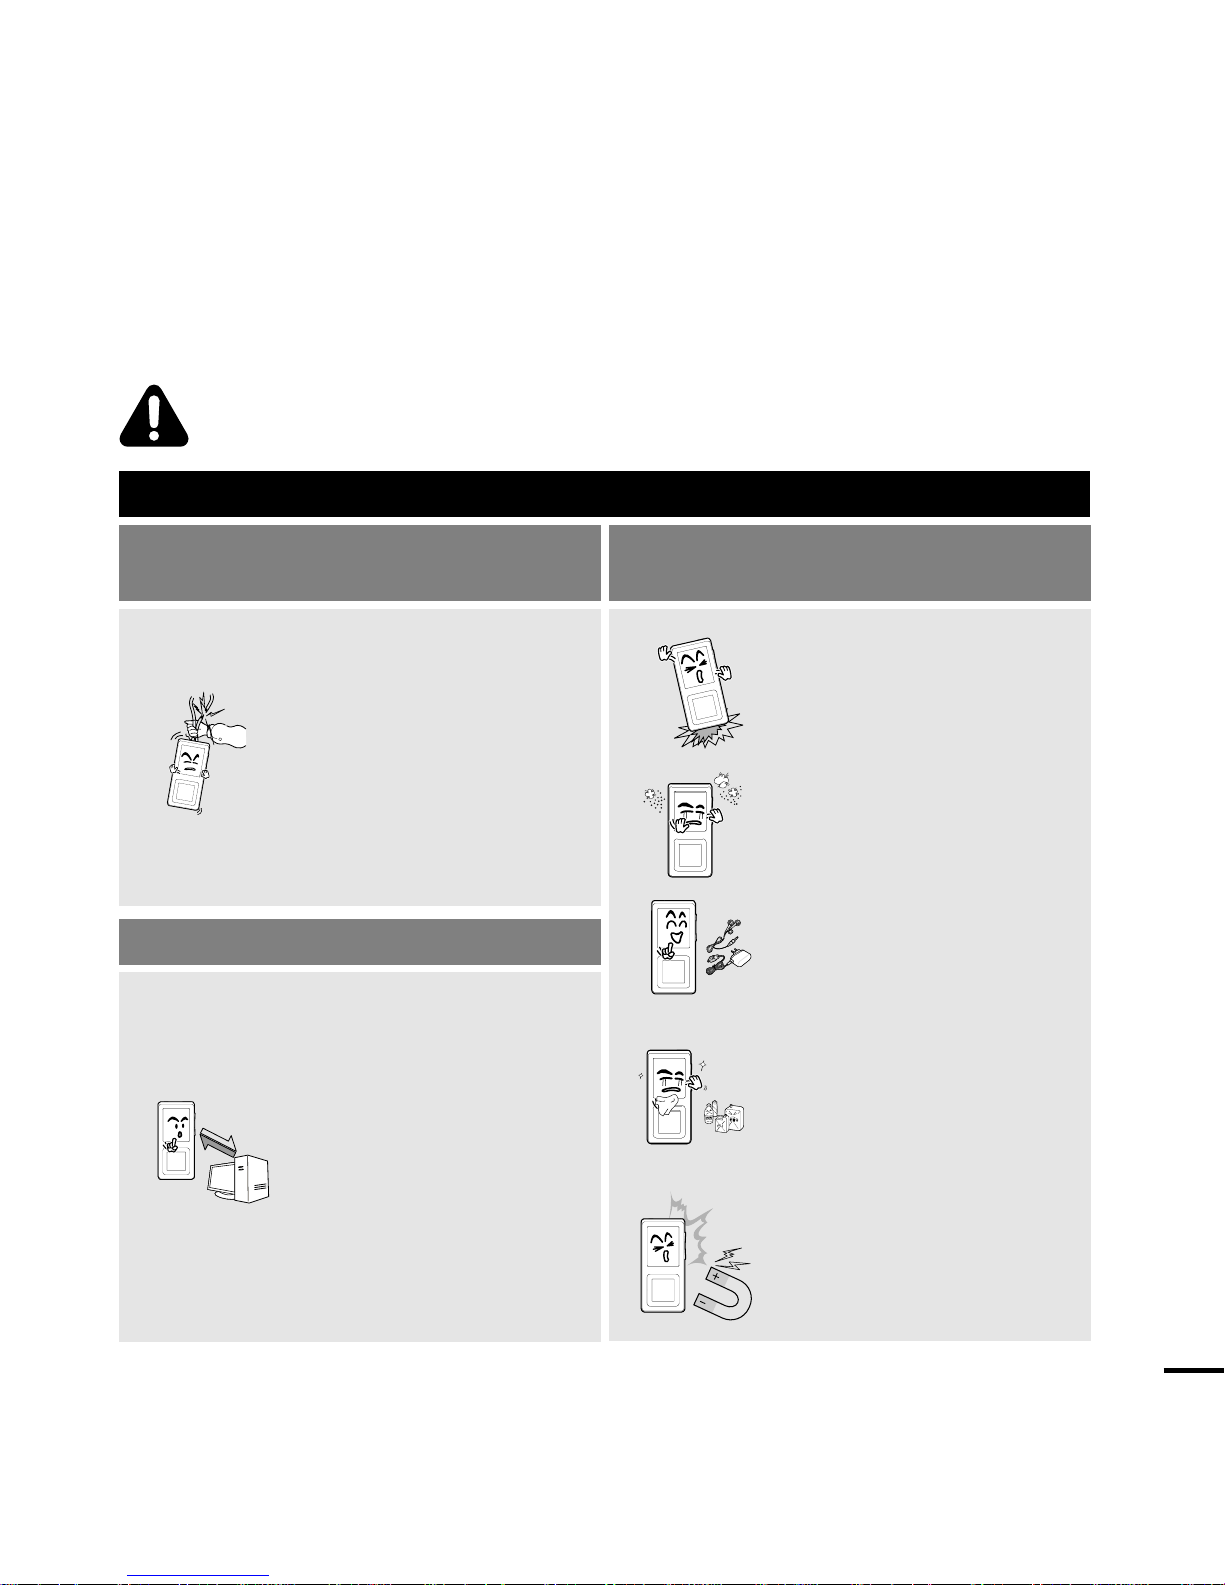
CAUTION
Product Use
Take care to avoid product malfunction
and physical damage.
Management of Important Data
Avoid malfunction
When wearing the product
around your neck, take
care not to exert excessive
force on the neck string.
Be sure to backup
important data.
Please be aware that we claim no
responsibility for damage from data
loss due to breakdown, repair or
other causes.
Failure to follow all instructions lead to physical injuries or damage to the product.
Do not cause excessive
impact on the product by
dropping it. Do not place
heavy objects on top of the
product.
Prevent any foreign
particles or dust from
entering into the product.
Always use the accessories
provided by or approved by
Samsung.
Do not spray water on the
product. Never clean the
product with chemical
substances such as
benzene or thinner, as it may
cause fire, electric shock or
deteriorate the surface.
Do not place the product
near magnetic objects, as it
may cause a malfunction.

Contents
4
Chapter 1. Preparation
Checking the Product and
Accessories
.................................................7
Checking the Accessories ...........................7
Components ................................................8
Screen Display Information .......................10
Button Functions .......................................11
Charging the battery ...............................13
Basic Use ...................................................14
Chapter 2. Connecting to a PC
Connecting to a PC..................................18
Transferring Music to your Player.........19
Chapter 3. Listening to Music
Listening to Music....................................22
Transferring Playlists from WMP10.......25
To Play a Playlist.......................................27
Shuffle Play (Random Repeat)...............28
Checking the Music Information ...........30
Chapter 4. Picture Viewing
Picture Viewing..........................................32
Picture Enlarging/Slideshow Viewing...33
Safety Precautions ....................................2
Contents ......................................................4

5
Chapter 5. Setup
Setup ...........................................................35
Audio Setup ..............................................35
Display Setup.............................................36
Slideshow Setup .......................................37
Repeat Setup.............................................38
Timer Setup...............................................39
Language Setup ........................................40
Reset .........................................................41
Checking the System Infomation...............42
Chapter 6.
Troubleshooting & Appendix
System Reset.............................................44
To Upgrade Firmware ..............................45
Troubleshooting........................................47
Menu Tree ..................................................50
Product Specifications............................51
License........................................................52
Safety Information....................................54
Warranty .....................................................56

Chapter 1. Preparation
Checking the Product and
Accessories .................................................7
Charging the battery ...............................13
Basic Use ...................................................14
Chapter 1. Preparation
Checking the Product and Accessories
7
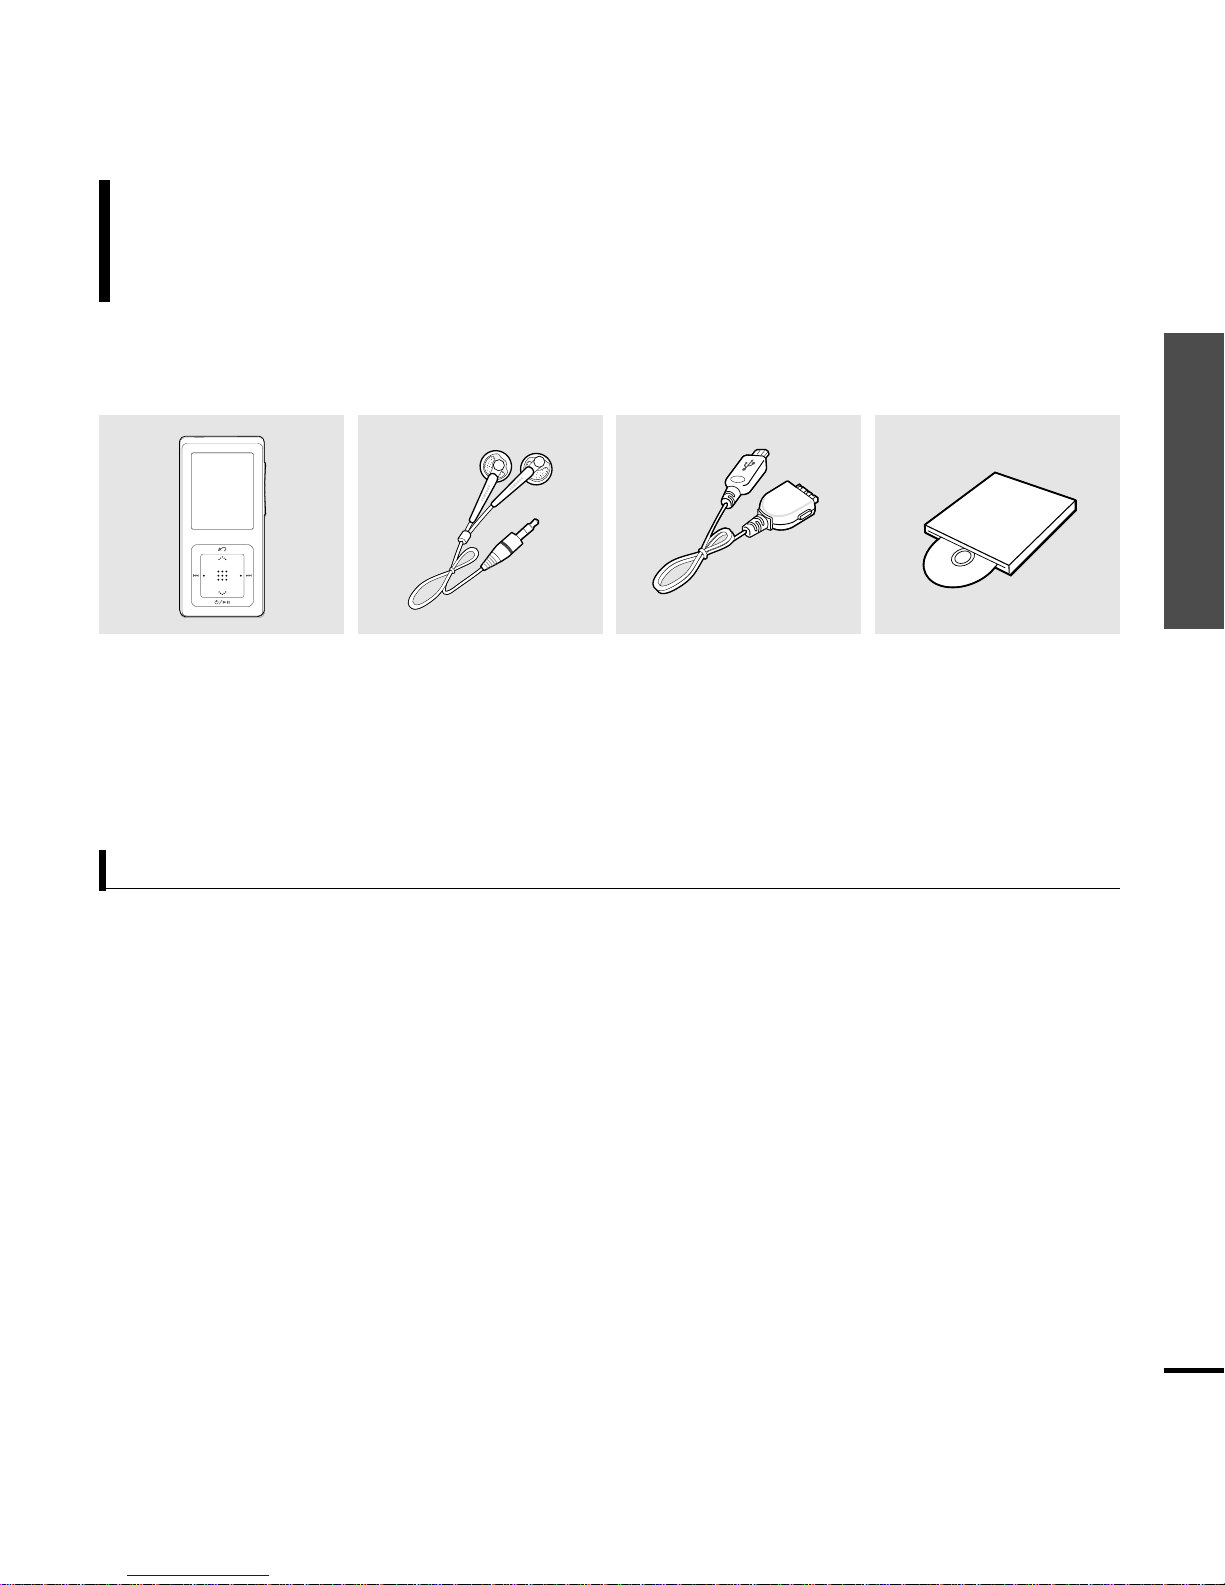
Checking the Accessories
The following diagrams are a guide and
may differ slightly from the actual product
appearance.
Checking the Product and Accessories
Player Earphones USB Cable
Easy Start CD
AH30-00086D(White) AH39-00783B AH80-00131A
AH30-00087D(Black)
Easy Start CD Overview
What is Easy Start CD?
■
The Easy Start CD provides a simple way for you to get started using a PlaysF orSureTM‚ portable music device
by quickly and easily installing any necessary software needed including Windows Media Player 10 and support
for online music stores.This CD will also show you how to rip CDs, download new music from an online store,
manage your music with Windows Media Player 10 and take it with you on your new portable music device.
What is PlaysForSure?
■ PlaysForSure is a logo and testing program that ensures content compatibility of online music stores and
portable music devices.When you see the PlaysF orSure logo on the product box of a music device, you
know it will work with content from the widest range of online stores and services that also carry this
logo.
■
Design of accessories is subject to change for the purpose of improvement, without notice.
8
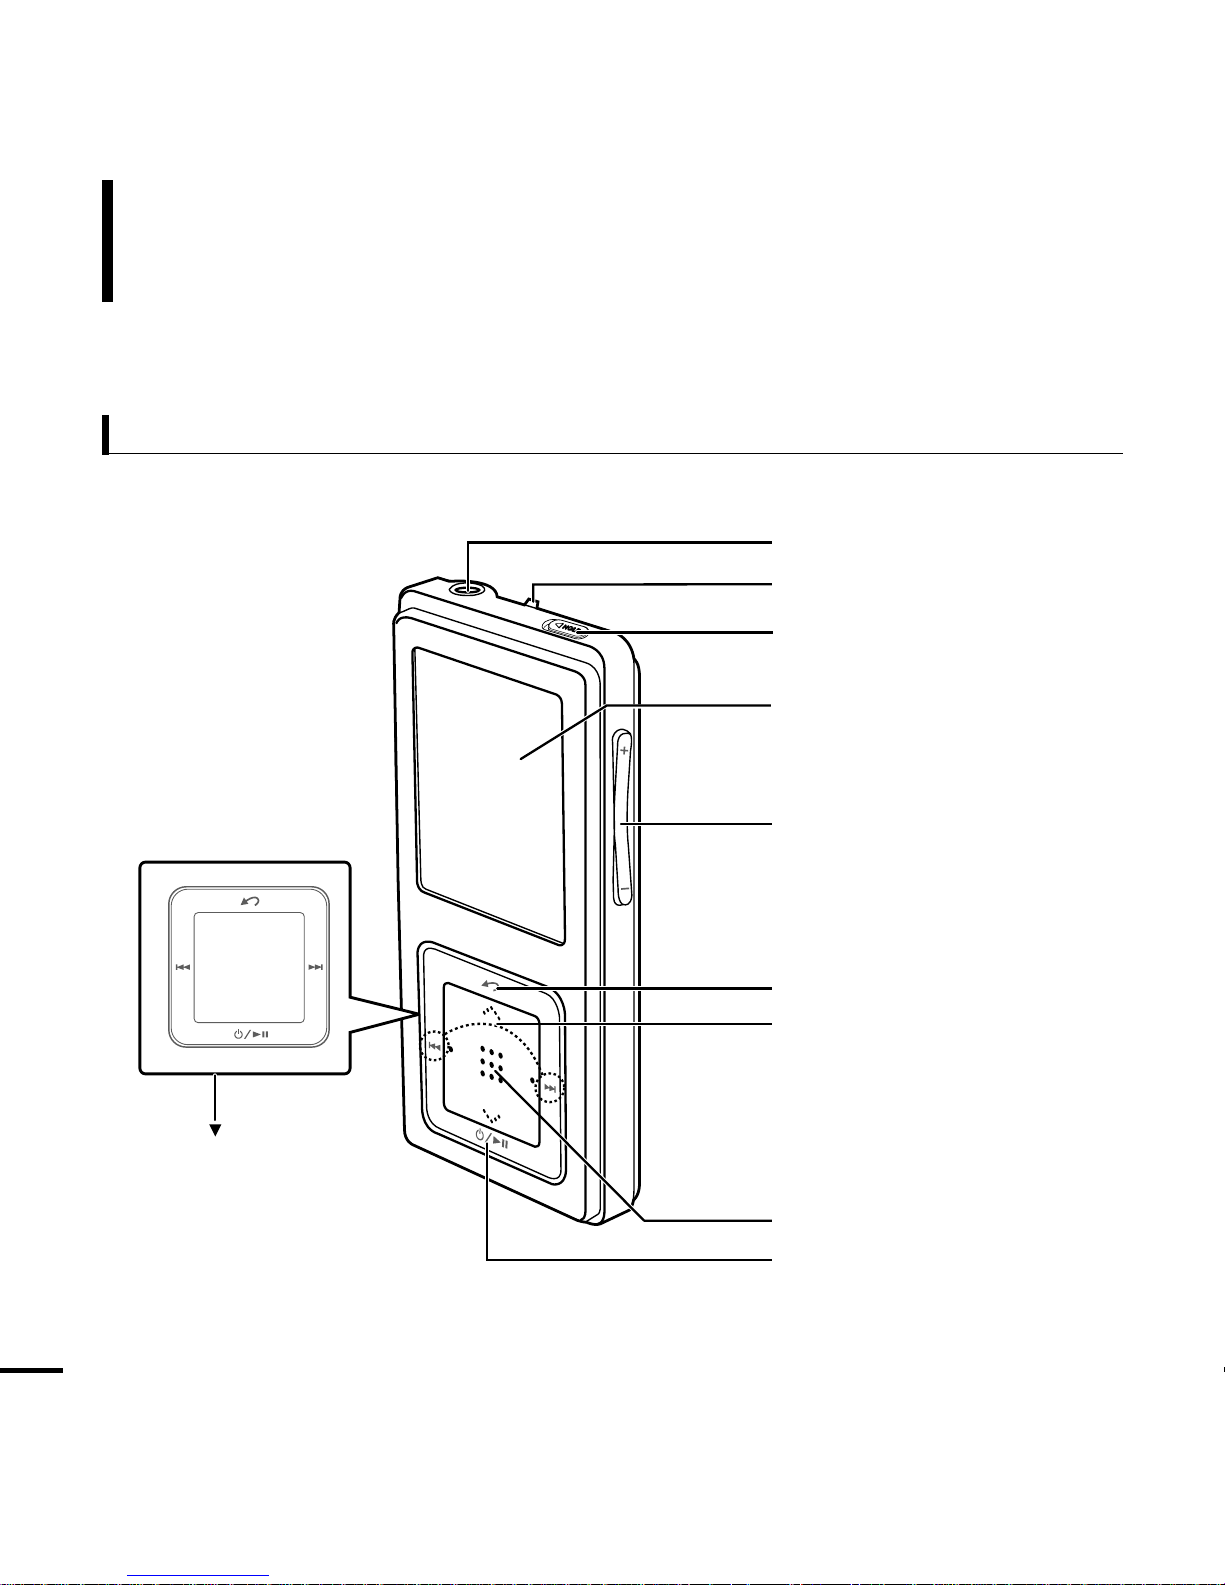
Components
Checking the Product and Accessories
Front, Right Side and Top
Earphone Connection Port
Neck String Hole
Lock Switch
Screen Display
Volume Control Button
Back Button
Move Track/Quick Search Button
Outer Ring
Touch Pad/Select Button
Power & Play/Pause Button
Chapter 1. Preparation
Checking the Product and Accessories
9
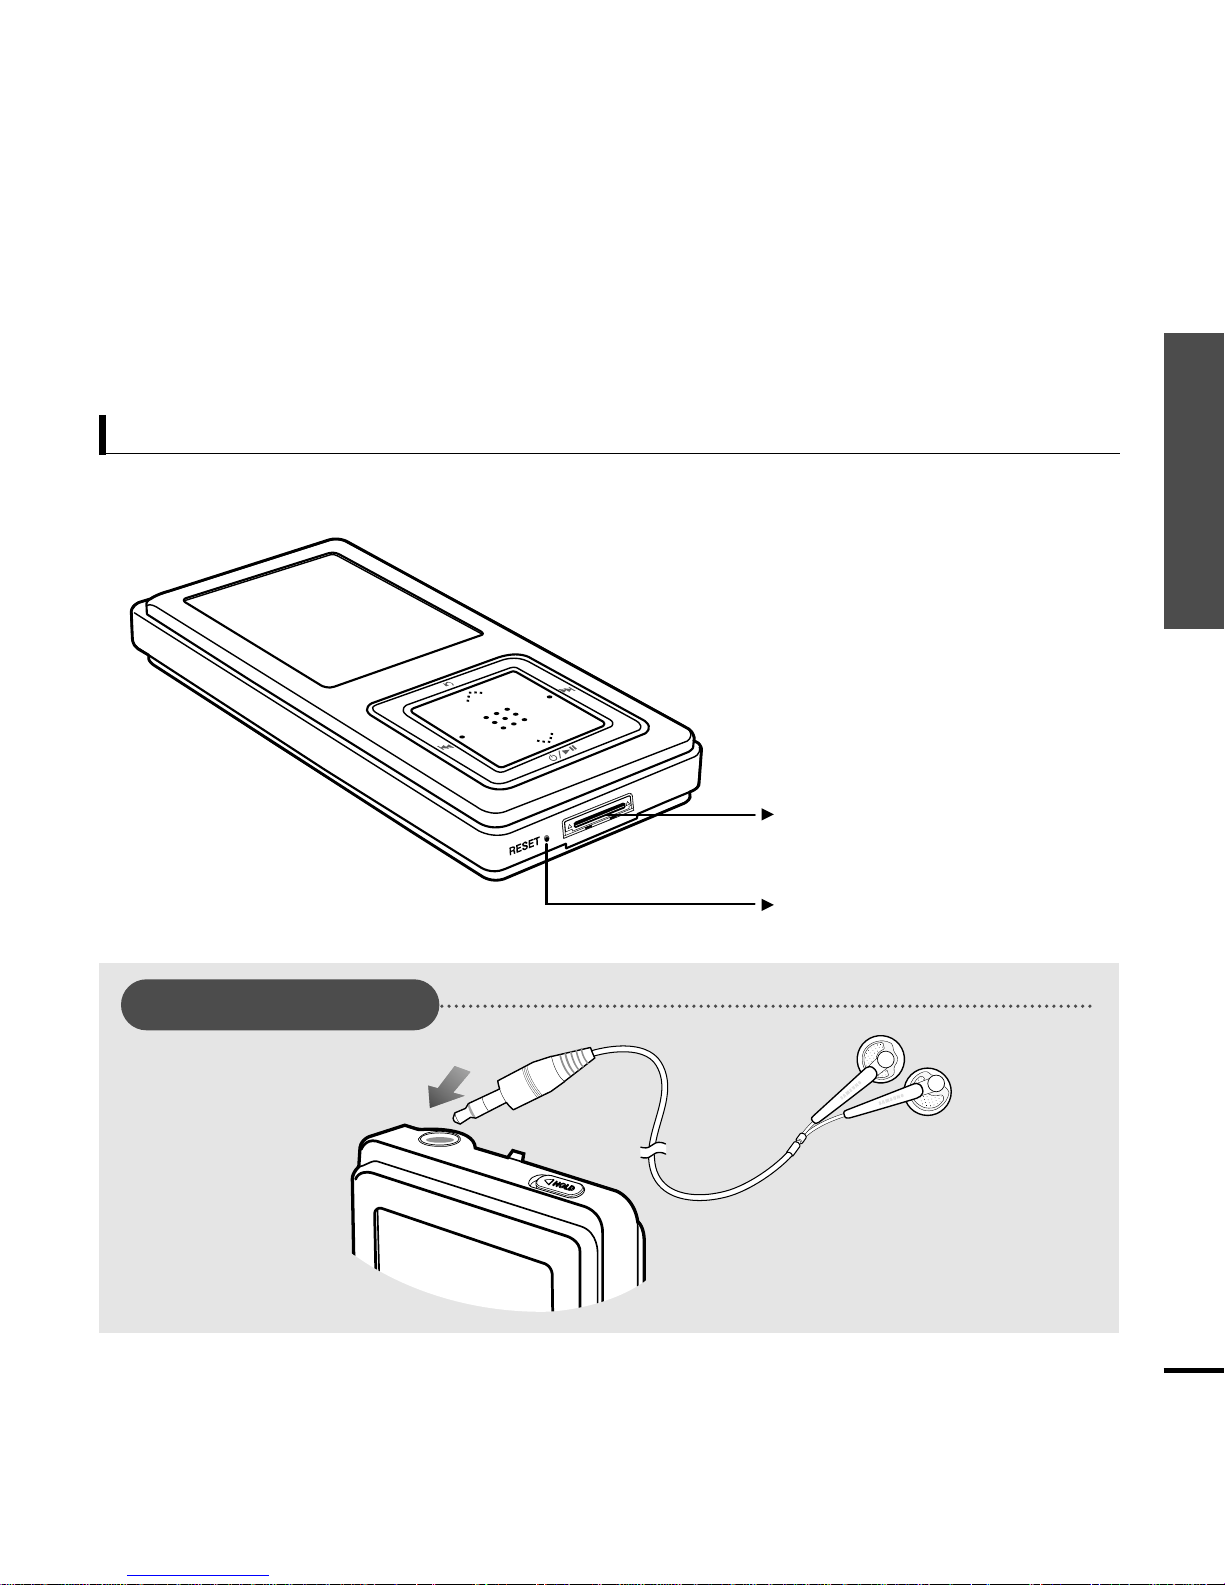
Bottom
Power/USB Connection Port
Reset Button
Earphone Connection
√ Top
Earphones

0:49 2/2 1:36
MP3 DNSe STR REP
Rising Sun
Samsung MP3
Samsung
2:10 AM
Screen Display Information
Checking the Product and Accessories
10
1
Current Time Display
3
Album Display
2
Album Title Display
4
3D Sound Displays
5
File Type Display
(MP3, WMA etc)
6
Play Status Bar
7
Play Time Display
8
Play/Pause Display
10
Street Mode Display
9
Music Title Display
11
Repeat Play Display
12
Total Play Time Display
13
Current Music Number/
Total Number Display
NOTE
■ The screen pictures are for illustration purposes only.The actual screen may differ.
1
2
3
4
5
6
7
8
10
11
12
13
9
Chapter 1. Preparation
Checking the Product and Accessories
11
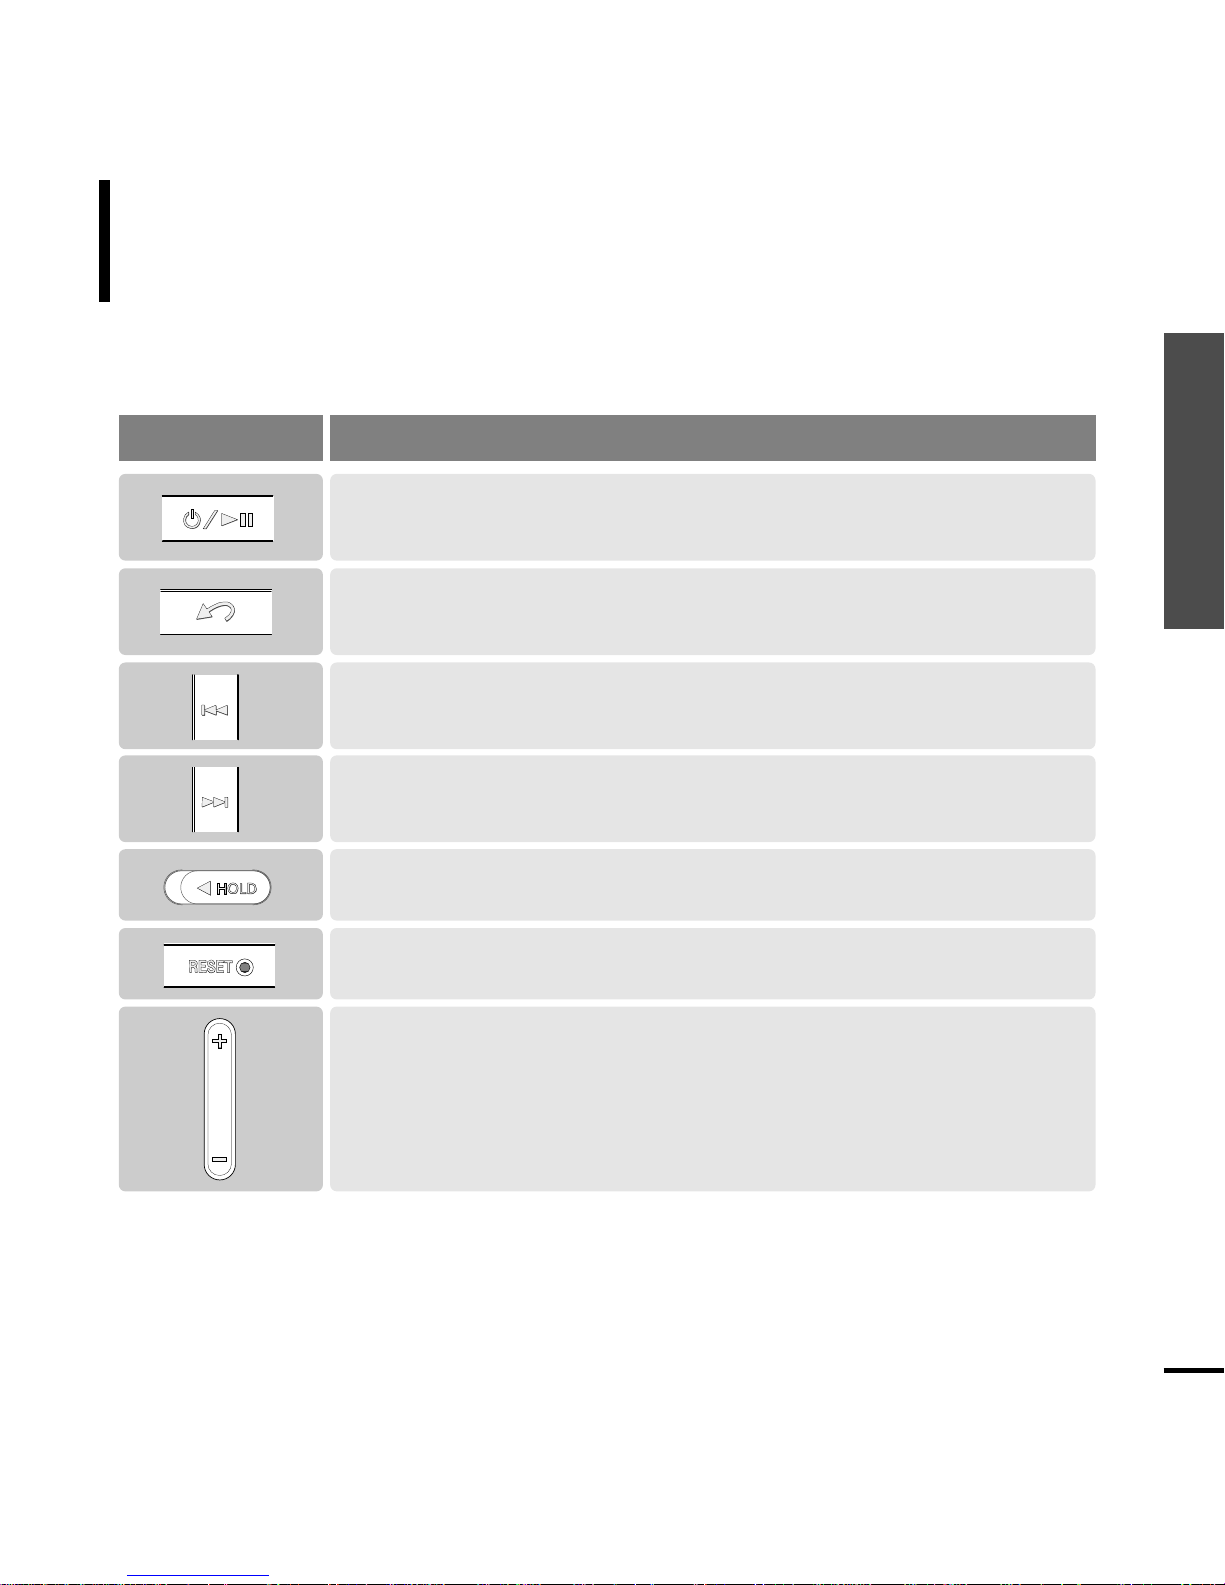
Button Functions
Checking the Product and Accessories
■ Long press for power on/off.
■ Short press for play/pause.
■
Long press to scan to a point on the current track.
■
Short press to move to the previous track or to play the current track from the start.
■
Long press to scan to a point on the current track.
■
Short press to move to the next track.
■
Push in the direction of the arrow to lock the button functions.
■
Press with a pointed object to reset.
■
Long press to move to the Menu screen.
■
Short press to move to the previous screen.
Buttons Functions and Use
■ Press to reduce/increase the volume.
12
Button Functions (Continued)
Checking the Product and Accessories
■
Moving up, down, left and right and Function Selection
Tap on the top or bottom side to move up or down by one selection.
Tap on
the left or right side to move left or right by one selection
(Picture mode).
Tap and hold on top or bottom side to move up or down
continuously.
Press the center of the Touchpad to select the function and move to
the next screen.
Buttons Functions and Use
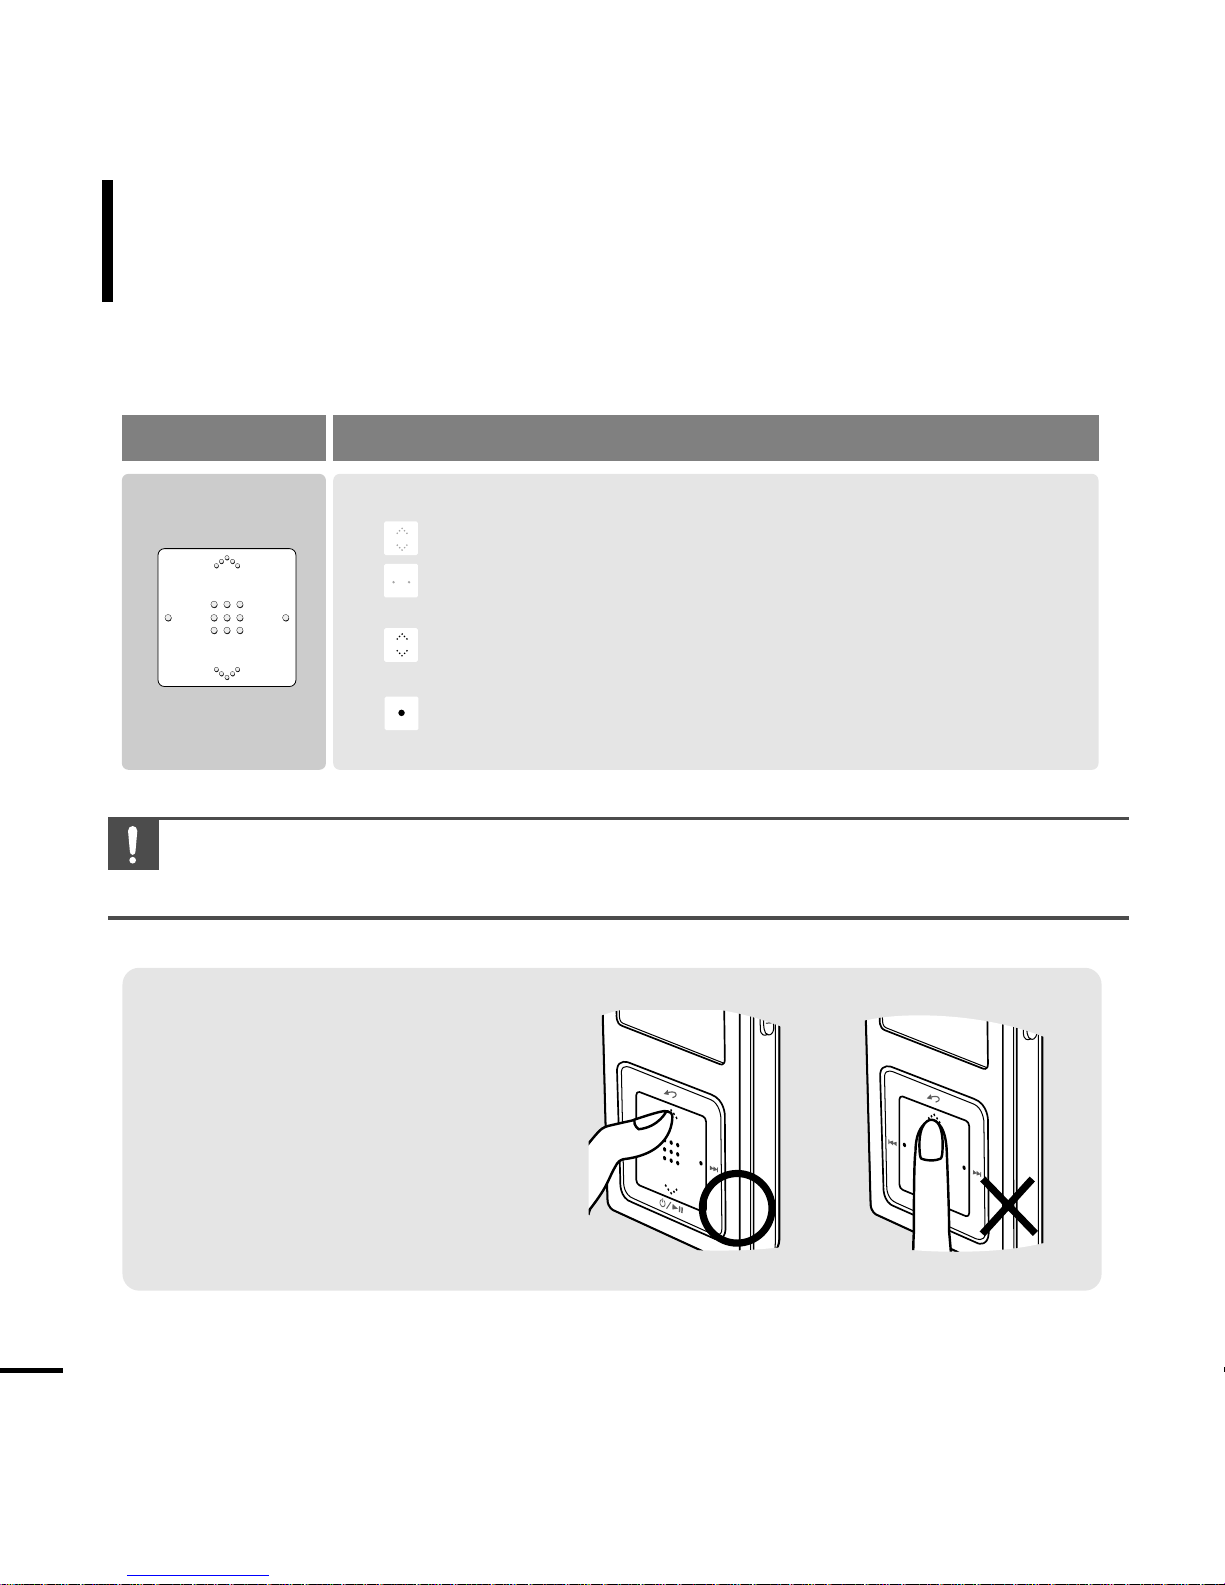
CAUTION
■ Do not use any sharp object other than your fingers to operate the touchpad. Otherwise, touchpad
may be damaged.
✽
The touchpad works better when
pressed lightly with a fingertip.
Chapter 1. Preparation
Checking the Product and Accessories/Charging the battery
13
Charging the battery
Fully charge the battery before using the player for the first
time or when the it has not been used for a while.
1
Connect the USB cable to the USB port
( ) on your PC.
Screen Display
■
Recharging
■
(Green) Recharge
Complete
2
Connect the other end of the USB
cable to the
Power/USB Connection
Port
on bottom of the player.
■
<Connected> appears on the screen display of the player.
■
When connected with the USB cable, it takes
about 4 hours for a full charge although this
may vary depending on the PC environment.
Battery Use
■
Recharge and store within the temperature range
of 5
°C
~35
°C(40°F
~95°F).
■
Do not overcharge (longer than 12 hours).
Excessive charging or discharging may shorten
the battery’ s life.
■
Battery life naturally shortens slowly over time as
it is a consumable item.
■ Press the [ ] button to move to the previous screen.
■ Press and hold the [ ] button to move to the Menu screen.
Basic Use
14
Turning the Power On & Off
Playing Music
Turning the Power On
Press and hold the [ ] button
■ Po w er is turned on.
Turning the Power Off
Press and hold the [ ] button
■ Po w er is turned off.
■ Po w er is automatically turned off when none of the buttons have been
pressed for a preset period of time (Default: 1 minute) in the pause mode.
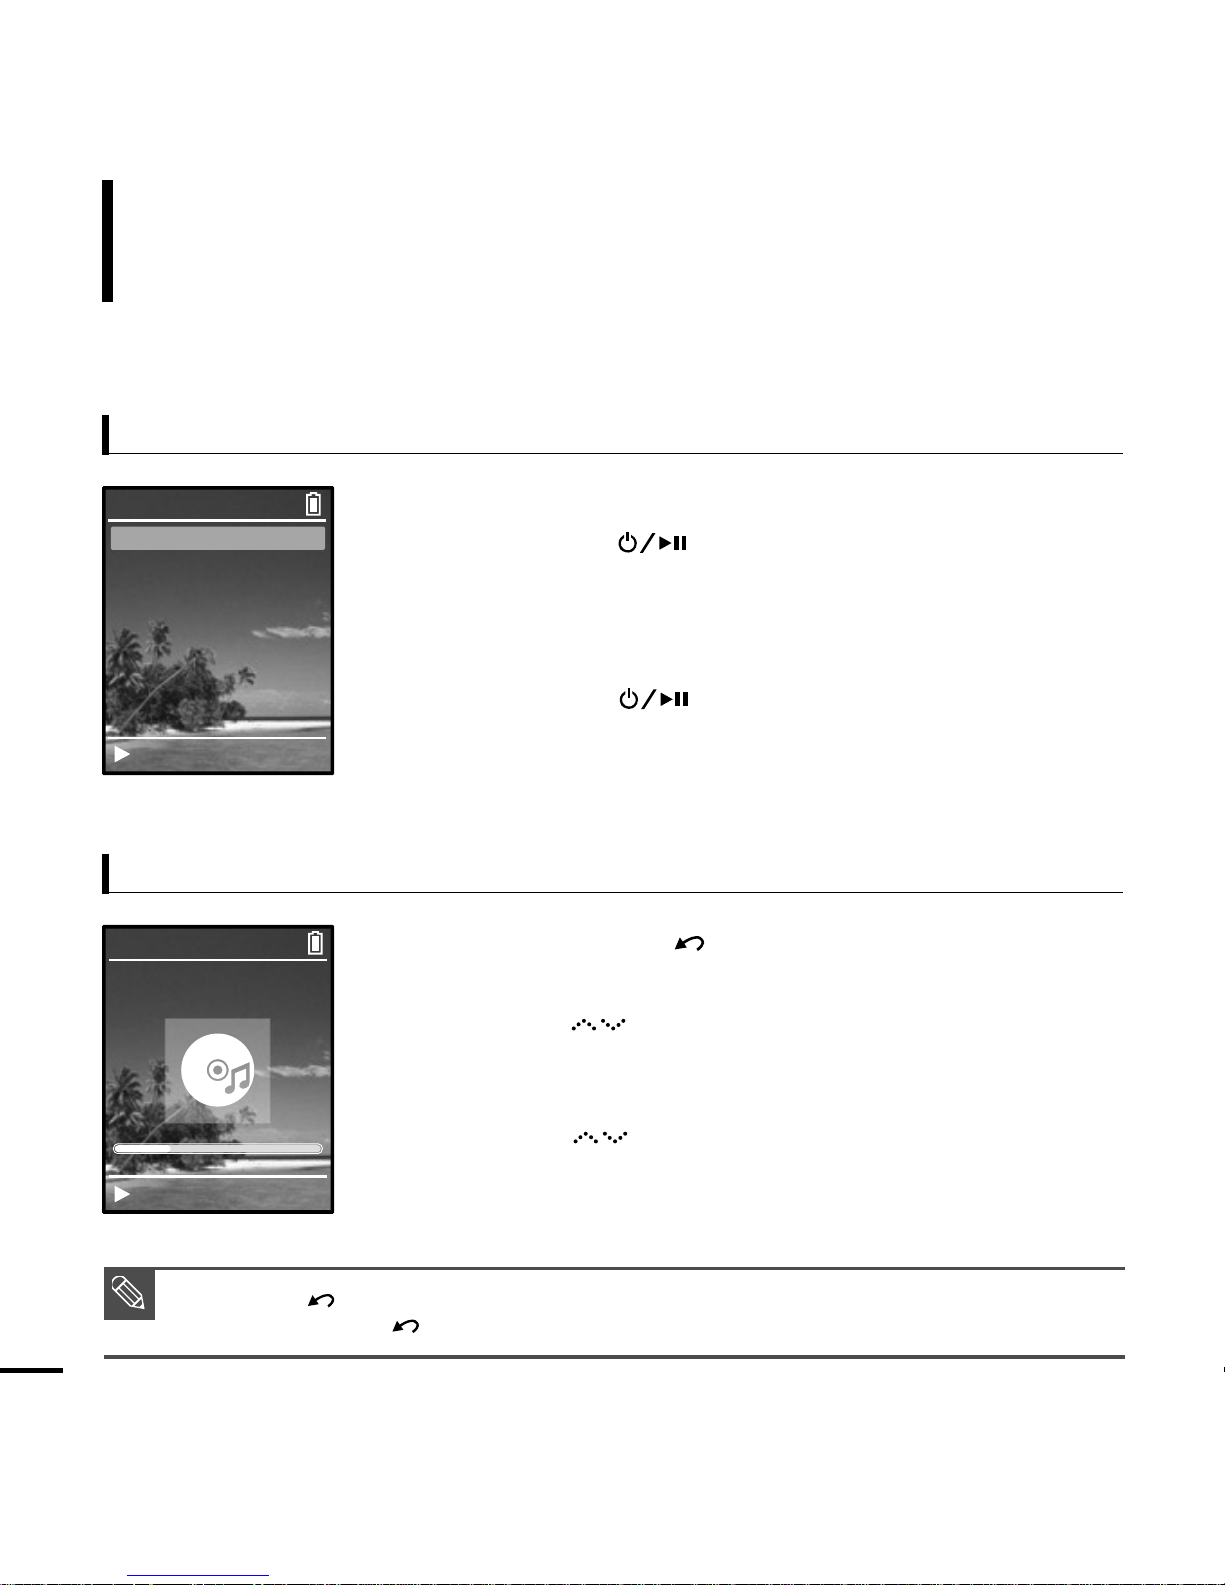
1
Press and hold the [ ] button to move to the Menu
screen.
2
Ta b on th e [ ] to select <Music>, then press the
[Touch Pad].
■
The Music Menu will appear.
3
Ta b on th e [ ] to select a music file of your choice.
4
Press the [Touch Pad].
■ The music file will begin playing.
NOTE
Music
Pictures
Playlists
Shuffle All
Settings
Now Playing
Samsung MP3
Samsung
MP3 DNSe STR REP
0:49 2/2 1:36
2:10 AM
2:10 AM
Rising Sun
Rising Sun

Chapter 1. Preparation
Basic Use
15
Volume Control
Lock Function
Press the [ + , - ] button on the side of the unit.
■ The Volume Status Bar will appear.
■ Press the + button to increase the volume or the – button to decrease it.
In Hold mode, all buttons are disabled.This function is useful
when you are walking or jogging.
1
Push the [HOLD] button on the top of the unit in the
direction of the arrow.
2
Push the [HOLD] button in the opposite direction of the
arrow to release the Lock function.
Samsung MP3
Samsung
MP3 DNSe STR REP
0:49 2/2 1:36
2:10 AM
Samsung MP3
Samsung
MP3 DNSe STR REP
0:49 2/2 1:36
2:10 AM
Rising Sun

Basic Use (Continued)
16
If a product malfunction occurs, you can
re-initialize the system by pressing the Reset
button.
√
P44
Reset Function
Reset Button

Chapter 2. Connecting to a PC
Connecting to a PC..................................18
Transferring Music to your Player.........19

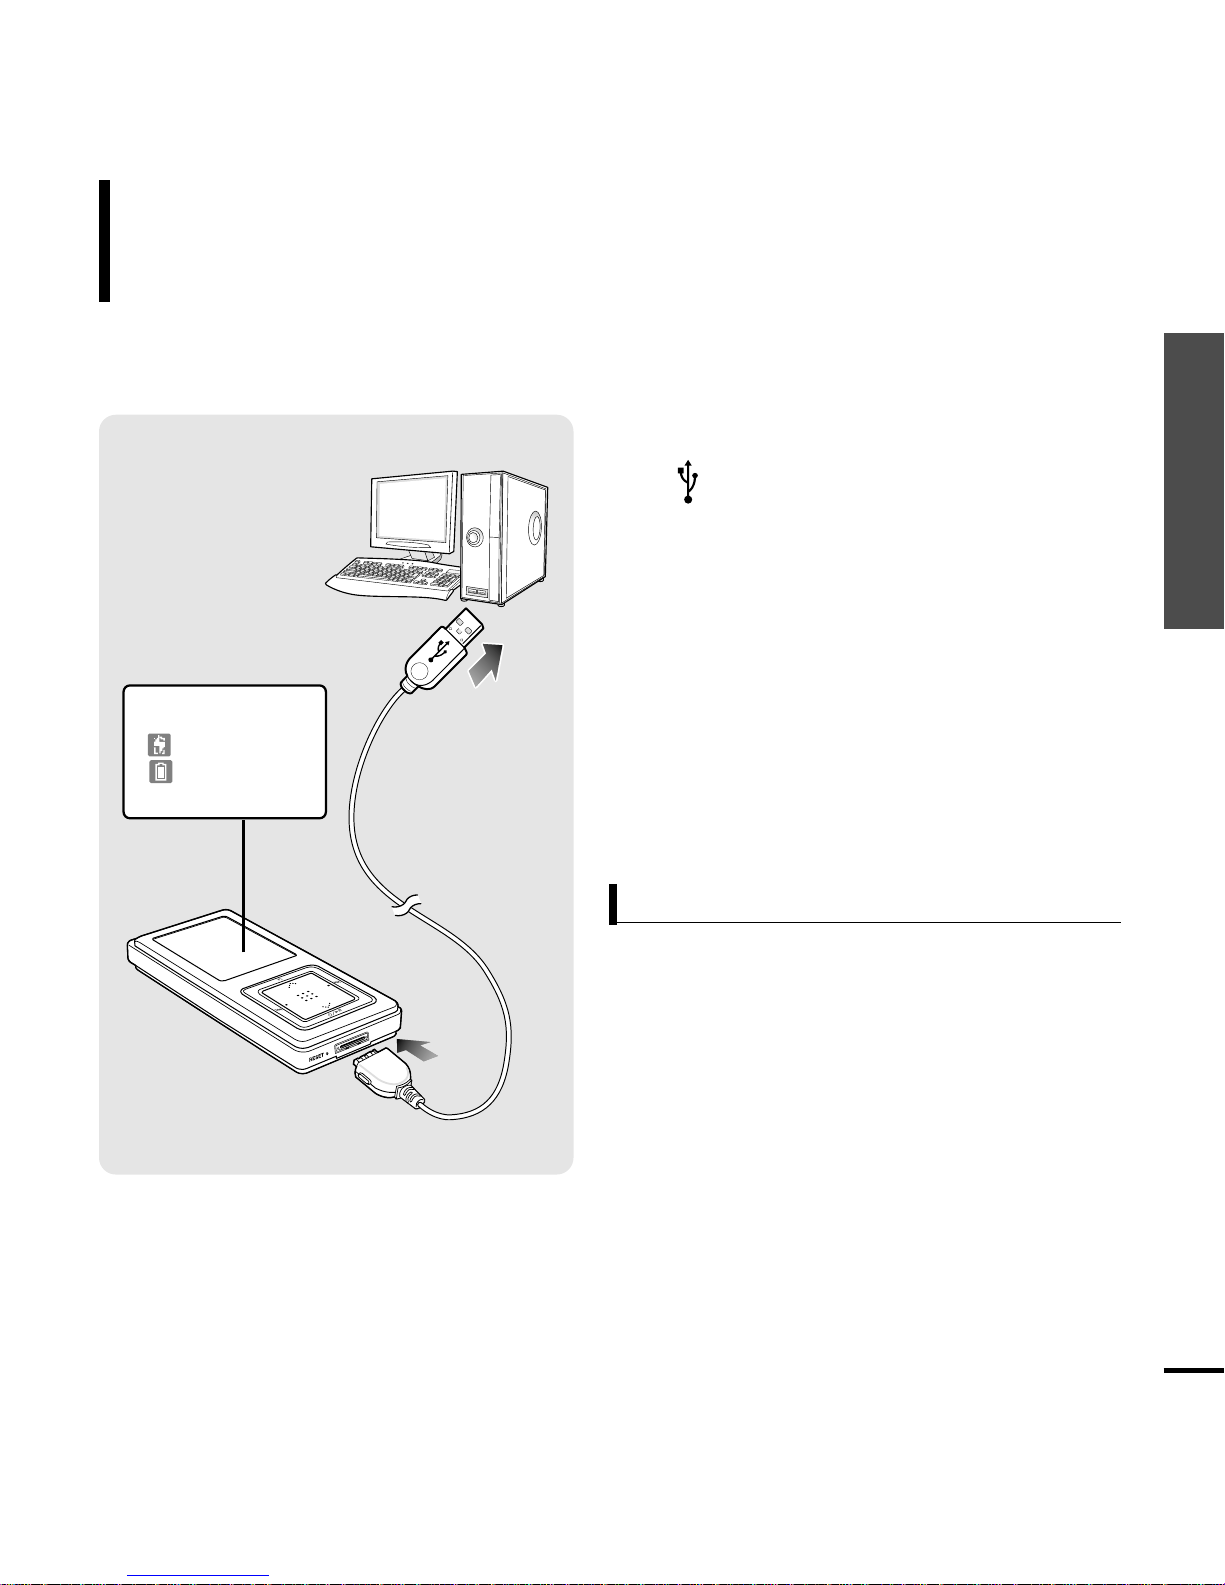
Connecting to a PC
18
Before you start!
Use the USB Cable provided when connecting the product to a PC.
1
Connect the USB cable to the USB port ( ) on your PC.
2
Connect the other end of the USB cable to the
Power/USB Connection Port
on
bottom of the player .
■
<Connected> appears on the screen display of the player.
For use in conjunction with a PC, the following is required:
■ Pentium 300MHz or higher ■ USB Port 2.0 only
■ Windows XP Service Pack 1 or higher ■ DirectX 9.0 or higher
■ 100MB of free hard disc space ■ Windows Media Player 10.0 or higher
■ CD Rom Drive (2X or higher)
PC Requirements
CAUTION
■
If you connect the player through a USB hub, the connection may be unstable. Please connect the
player to the computer directly.
 Loading...