

Page 1

Contents
Channel Setting
●Using the INFO button (Now & Next guide) 1
●Memorizing channels 2
●Using the Channel menu 7
●Locking Programme 21
●Other Features 23
Basic Features
●Changing the Preset Picture Mode 36
●Adjusting Picture Settings 37
●Changing the Picture Options 44
● Using the Sound Support Functions 51
●Changing the Preset Sound Mode 52
●Adjusting Sound Settings 53
●Selecting the Sound Mode 58
●Connecting to the Network 59
Advanced Features
●Using the Source List 79
●Connecting a USB Device 80
●Using the Media Contents 86
●Playing the Photos / Videos / Music 88
Other Features
●Viewing the e-Manual 98
●Using the Self Diagnosis 99
●Updating the Software 101
●Changing the Use Mode 104
●Viewing the Contact Samsung 105
●Using the Sports Mode (Depending on the country and model) 106
●Using the Wireless Network 108
●All care protection 109
Preference Features
●Executing initial setup 60
●Setting the Time 61
●Using the Sleep Timer 65
●Setting the On / Off Timer 66
●Economical Solutions 71
●Other Features 73
Page 2

❑Using the INFO button (Now & Next guide)
The display identifies the current channel and the status of certain audio-video
settings.
The Now & Next guide shows daily TV programme information for each channel
according to the broadcasting time.
When you press the INFO button, a channel information banner will appear
N
on the top of the screen. And then press the ENTER
the details of the programme.
●
Scroll ◄, ► to view information for a desired programme while watching
the current channel.
●
Scroll ▲, ▼ to view information for other channels.
button, you can see
E
▶
English
Page 3

❑Memorizing channels
■Aerial
(Depending on the country and model)
MENU
O
Before your television can begin memorising the available channels, you must
specify the type of signal source that is connected to the TV.
m
Broadcasting
→
Aerial
→
ENTER
→
E
◀ ▶
English
Page 4

■Auto Tuning
(Depending on the country and model)
O
N
●
MENU
Automatically allocated programme numbers may not correspond to actual
or desired programme numbers. If a channel is locked, the PIN input window
appears.
Auto Tuning
Aerial (Terrestrial / Cable / Satellite) (Depending on the country and model):
Select the aerial source to memorise.
m
Broadcasting
→
Auto Tuning
→
ENTER
→
E
◀ ▶
When selecting Terrestrial, scans for a channel automatically and stores
N
in the TV.
Channel Type (Digital & Analogue / Digital / Analogue): Select the channel
source to memorise.
Channel Ordering (Depending on the country and model): Select the channel
order type.
English
Page 5

When selecting Cable
–
Operator Selection (Depending on the country and model): Selects a
provider of cable services.
–
Search Mode: Scans for all channels with active broadcast stations and
stores them in the TV.
If you select Quick, you can set up the Network, Network ID,
N
Frequency, Modulation and Symbol Rate manually by pressing the
button on the remote control.
–
Network: Selects the Network ID setting mode among Auto or Manual.
Digital & Analogue, Digital or Analogue
→
◀ ▶
●
Network ID: When Network is Manual, you can set up Network ID
using the numeric buttons.
English
Page 6

●
Frequency: Displays the frequency for the channel (differs in each
country).
●
Modulation: Displays available modulation values.
●
Symbol Rate: Displays available symbol rates.
●
Cable Search Option
(Depending on the country and model & cable channels only)
Sets additional search options such as the frequency and symbol rate for a
cable network search.
Start Frequency / Stop Frequency: Set the start or stop frequency (differs in
◀ ▶
each country).
Symbol Rate: Displays available symbol rates.
Modulation: Displays available modulation values.
English
Page 7

●
Satellite
(Depending on the country and model & satellite only)
When selecting Satellite, scans for a channel automatically and stores in the
T V.
Channel Type (All / TV / Radio): Select the channel type to memorise.
Satellite: Select the satellite to scan.
Scan Mode (All Channels / Free Channels Only): Select a scan mode for
the selected satellite.
Search Mode: Sets Search Mode using ▲ / ▼ buttons.
◀ ▶
●
Standby Auto Tuning (Depending on the country and model): Auto-tune
channels while your TV is in standby mode.
●
Wake-up Timer (Depending on the country and model): Schedule timer to
turn the TV on and scan channels automatically.
English
Page 8

❑Using the Channel menu
■Channel List
MENU
O
The Channel List contains the channels your TV displays when you press the
channel button. You can view channel information, All, TV, Radio, Data/Other,
Analogue or Favourites 1-5.
Press ► (Mode) button to change the channel mode, or press ◄ (Sorting)
button to change the channel order according to channel number or name on the
m
Broadcasting
→
Channel List
→
ENTER
→
E
◀ ▶
list.
When you press the CH LIST button on the remote control, Channel List
N
screen will be displayed at once.
English
Page 9

Channel Sorting
●
Number / Name: Arranges the channel order according to channel number or
name on the list.
Channel Mode
●
Aerial: Switches to Terrestrial, Cable or Satellite. (Depending on the country
and model)
●
Edit Favourites: Set channels you watch frequently as favourites.
For detailed information about using Edit Favourites, refer to “Edit
N
Favourites”.
◀ ▶
●
Favourites 1-5: Shows all favourite channels, arranged in up to five groups.
Each group has a separate screen.
The TV displays Favourites 1-5 only if you have added favourites using
N
Edit Favourites.
English
Page 10

●
All: Shows all currently available channels.
●
TV: Shows all currently available TV channels.
●
Radio: Shows all currently radio channels.
●
Data/Other: Shows all currently available MHP(Multimedia Home Platform) or
other channels.
●
Analogue: Shows all currently available analogue channels.
◀ ▶
English
Page 11

■Guide
MENU
O
The EPG (Electronic Programme Guide) information is provided by broadcasters.
Using programme schedules provided by broadcasters, you can specify
programmes you want to watch in advance so that the channel automatically
changes to the selected programme channel at the specified time. Programme
entries may appear blank or out of date depending on a channel status.
●
Red (Quick Nav): Viewing the TV programmes on the list quickly using
a
▲/▼/◄/►
m
Broadcasting
→
buttons.
Guide
→
ENTER
→
E
◀ ▶
●
●
Green (Channel Category): Select the type of channels you want to
b
display.
Yellow (Schedule Manager): Moves to the reserved programmes in
{
Schedule Manager.
English
Page 12

■Schedule Manager
MENU
O
You can set a desired channel to be displayed automatically at the intended time.
In addition, you can view, modify or delete a channel you have reserved to watch.
You must set the current time first using the Time
N
System menu to use this function.
1. Press the Schedule on the Schedule Manager screen. The Schedule
Viewing menu appears.
◀ ▶
2. Press the
●
Aerial: Selects the desired broadcasting signal.
●
Channel: Select the desired channel.
Broadcasting
m
→
▲/▼/◄/►
Schedule Manager
→
buttons to set each option menu.
→
Clock function in the
→
ENTER
E
English
Page 13

●
Repeat: Select Once, Manual, Sat~Sun, Mon~Fri or Everyday to set at
your convenience. If you select Manual, you can set the day you want.
N
The (
N
●
Date: You can set the desired date.
It is available when you select Once in Repeat.
N
●
Start Time: You can set the start time you want.
If you want to edit or cancel a reserved schedule, select the reserved
schedule on Schedule Manager. Then press the ENTER
select the Edit or Delete.
) mark indicates the day you’ve selected.
c
button and
E
◀ ▶
English
Page 14

■Edit Channel
MENU
O
You can edit or delete channels.
1. Go to Edit Channel screen.
2. Press the
ENTER
You can select more than one channel.
N
Press the ENTER
N
m
E
Broadcasting
→
▲/▼
button. The (
buttons to select the desired channel, then press the
Edit Channel
→
) mark indicates the channel you’ve selected.
c
again to deselect the channel.
E
ENTER
→
E
◀ ▶
English
Page 15

Using the coloured and function buttons with the Edit Channel.
N
●
●
●
Red (Change Number): Changes channel order on the channel list.
a
–
N
Green (Delete): Deletes a channel from the channel list.
b
Yellow (Lock / Unlock): Lock a channel so that the channel cannot be
{
selected and viewed. / Unlock the channel that you locked.
N
(Done): Completes changing the channel order.
E
Digital channel does not support this function when the Edit Channel
Number is set to Disable. (Depending on the country and model)
This function is available only when the Channel Lock is set to On.
◀ ▶
The PIN input screen appears. Enter your 4-digit PIN. Change the
N
PIN using the Change PIN option.
English
Page 16

●
●
●
●
Blue (Select All / Deselect All): Selects or deselects all channels at
}
once.
Ÿ
k
T
may differ depending on the channel status and type.
–
–
(Go To): Goes to channel directly by pressing numbers (0~9).
(Page): Moves to previous or next page.
(Tools): Displays the option menu. The option menu items that appear
Sorting (digital channels only): Changes the list ordered by channel
number or channel name.
Aerial: Selects the desired broadcasting signal. (Depending on the
◀ ▶
country and model)
English
Page 17

–
Category: Change the channel mode to All, TV, Radio, Data/Other,
Analogue, Recently Viewed, Most Viewed. The selected channel
mode is displayed.
–
Edit Favourites: Go to Edit Favourites screen directly.
–
Rename channel (analogue channels only): Assign a name of up to
five characters to a channel. For example, Food, Golf, etc. This makes
it easier to find and select the channel.
–
Channel Info: Display details of the selected channel.
–
Information: Display details of the selected programme.
◀ ▶
English
Page 18

■Edit Favourites
t
MENU
O
You can add, edit or delete favourite channels.
1. Go to Edit Favourites screen.
2. Press the
ENTER
3. Choose a specific favourite list among Favourites 1-5 using b (Change Fav.)
button, and then press the } (Add) button. The selected channel has been
◀ ▶
added in Favourites 1-5.
One favourite channel can be added in several of favourites among
N
Favourites 1-5.
m
E
Broadcasting
→
▲/▼
button.
buttons to select the desired channel, and then press
Edit Favourites
→
ENTER
→
E
English
Page 19

Using the coloured and function buttons with the Edit Favourites.
N
●
Red (Category / Change order)
a
–
Category: Changes the channel mode to All, TV, Radio, Analogue,
Data/Other, Recently Viewed, Most Viewed. The selected channel
mode is displayed.
–
Change order: Changes the favourite channel order.
–
(Done): Completes changing the channel order.
E
◀ ▶
English
Page 20

●
●
●
Green (Change Fav.): Changes favourite list among Favourites 1-5.
b
Yellow (Select All / Deselect All): Selects or deselects all channels at
{
once.
Blue (Add / Delete)
}
–
Add: Adds selected channels to Favourites 1-5.
–
Delete: Deletes the favourite channel from Favourites 1-5.
◀ ▶
English
Page 21

●
Ÿ
●
k
●
T
may differ depending on the channel status and type.
–
–
–
(Go To): Goes to channel directly by pressing numbers (0~9).
(Page): Moves to previous or next page.
(Tools): Displays the option menu. The option menu items that appear
Copy to Favourites: Edit the selected favourite channel in Favourites
1-5.
Rename Favourites: Assign your own favourite channel name.
Sorting (digital channels only): Changes the list ordered by number or
name.
◀ ▶
–
Aerial: Selects the desired broadcasting signal. (Depending on the
country and model)
–
Edit Channel: Go to Edit Channel screen directly.
–
Information: Display details of the selected programme.
English
Page 22

❑Locking Programme
■Programme Rating Lock
(Depending on the country)
MENU
O
Prevent unauthorised users, such as children, from watching unsuitable
programme with a user-defined 4-digit PIN code. If the selected channel is
locked, the “\” symbol will be displayed.
The items of Programme Rating Lock differs depending on the country and
◀ ▶
N
model.
m
Broadcasting
→
Programme Rating Lock
→
ENTER
→
E
English
Page 23

■Channel Lock
MENU
O
Lock channels in Channel menu to prevent unauthorised users, such as children,
from watching unsuitable programme.
Available only when the Source is set to TV.
N
m
Broadcasting
→
Channel Lock
→
ENTER
→
E
◀ ▶
English
Page 24

❑Other Features
■Channel Settings
O
●
MENU
Country (Area)
(Depending on the country and model)
Selects your country (or area) so that the TV can correctly auto-tune the
broadcasting channels.
m
Broadcasting
→
Channel Settings
→
ENTER
→
E
◀ ▶
English
Page 25

●
Manual Tuning
Scans for a channel manually and stores in the TV.
If a channel is locked, the PIN input window appears.
N
According to the channel source, Manual Tuning may be supported.
N
●
Digital Channel Tuning: Scans for a digital channel manually and stores
in the TV. Press the New button to search the digital channels. When
scanning has finished, a channel is updated in the channel list.
–
When selecting Aerial
Bandwidth
Terrestrial: Channel, Frequency,
→
◀ ▶
–
When selecting Aerial
Rate
Cable: Frequency, Modulation, Symbol
→
English
Page 26

●
Analogue Channel Tuning: Scans for an analogue channel. Press the
New button to search the channels by adjusting the Programme, Colour
System, Sound System, Channel, Search.
Channel mode
N
–
P (programme mode): When tuning is complete, the broadcasting
stations in your area have been assigned to the position numbers
from P0 to P99. You can select a channel by entering the position
number in this mode.
–
C (aerial channel mode) / S (cable channel mode): These two
◀ ▶
●
Satellite (Depending on the country and model): Scans for a satellite
channel. Press the Scan button to search the channels by adjusting the
Transponder, Scan Mode, Network Search.
modes allow you to select a channel by entering the assigned
number for each aerial broadcasting station or cable channel.
English
Page 27

●
Fine Tune
(Analogue channels only)
If the signal is weak or distorted, fine tune the channel manually.
Fine tuned channels are marked with an asterisk “*”.
N
To reset the fine-tuning, select Reset.
N
●
Transfer Channel List
(Depending on the country and model)
Imports or exports the channel map. You should connect a USB storage to
◀ ▶
use this function.
The PIN number input screen appears. Enter your 4 digit PIN number.
N
Supported file systems are FAT and exFAT.
N
●
Delete CAM Operator Profile: Selects the CAM operator to delete.
(Depending on the country and model)
English
Page 28

●
Satellite System (Depending on the country and model)
Configure settings for your satellite equipment
The PIN number input screen appears. Enter your 4 digit PIN number.
N
To reset the Satellite System, select Reset all settings.
N
◀ ▶
English
Page 29

■Subtitle
t
MENU
O
Use this menu to set the Subtitle mode.
●
Subtitle: Switches subtitles on or off.
●
Subtitle Mode: Sets the subtitle mode.
N
●
◀ ▶
Subtitle Language: Select the subtitle language.
N
N
Broadcasting
m
→
If the programme you are watching does not support the Hearing
Impaired function, Normal automatically activates even if the
Hearing Impaired mode is selected.
The available language may differ depending on the broadcast.
English is the default in cases where the selected language is
Subtitle
→
ENTER
→
E
unavailable in the broadcast.
English
Page 30

●
Primary Subtitle: Sets the primary subtitle.
●
Secondary Subtitle: Sets the secondary subtitle.
■Edit Channel Number (Depending on the country and model)
MENU
O
Use this change channel number. When channel number is changed, channel
information is not updated automatically.
m
Broadcasting
→
Edit Channel Number
→
ENTER
→
E
◀ ▶
English
Page 31

■Audio Options
(Depending on the country and model)
O
●
MENU
Audio Language
Change the default value for audio languages.
Audio Language / Primary Audio / Secondary Audio: You can set the
primary or secondary audio.
The available language may differ depending on the broadcast.
N
m
Broadcasting
→
t
Audio Options
→
ENTER
→
E
◀ ▶
English
Page 32

●
Audio Format
(Depending on the country and model)
When sound is emitted from both the main speaker and the audio receiver,
a sound echo may occur due to the decoding speed difference between
the main speaker and the audio receiver. In this case, use the TV Speaker
function.
Audio Format option may differ depending on the broadcast. 5.1ch
N
Dolby digital sound is only available when connecting an external speaker
through an optical cable.
◀ ▶
●
Audio Description (Depending on the country and model)
This function handles the Audio Stream for the AD (Audio Description) which
is sent along with the Main audio from the broadcaster.
Audio Description: Turn the audio description function on or off.
Volume: Adjust the audio description volume.
English
Page 33

■Teletext Language
(Depending on the country and model)
MENU
O
●
Teletext Language
English is the default in cases where the selected language is unavailable
N
in the broadcast.
●
Primary Teletext / Secondary Teletext
Primary Teletext and Secondary Teletext may not be supported in
N
◀ ▶
some locations.
m
Broadcasting
→
Teletext Language
→
ENTER
→
E
English
Page 34

■Digital Text
(UK only)
O
N
MENU
If the programme broadcasts with digital text, this feature is enabled.
N
MHEG (Multimedia and Hypermedia Information Coding Experts Group)
An International standard for data encoding systems used in multimedia and
hypermedia. This is at a higher level than the MPEG system which includes
data-linking hypermedia such as still images, character service, animation,
graphic and video files as well as multimedia data. MHEG is user runtime
m
Broadcasting
→
Digital Text
→
ENTER
→
E
◀ ▶
interaction technology and is being applied to various fields including VOD
(Video-On-Demand), ITV (Interactive TV), EC (Electronic Commerce), tele
education, teleconferencing, digital libraries and network games.
English
Page 35

■Common Interface
MENU
O
(Depending on the country and model)
●
CI Menu: This enables the user to select from the CAM-provided menu.
Select the CI Menu based on the menu CI CARD.
●
CAM video transcoding: You can configure the setting to transcode the
video codec from the CAM automatically. Turn it Off if you do not want to use
it.
You must use a CAM that supports transcoding the video codec.
N
m
Broadcasting
→
Common Interface
→
ENTER
→
E
◀ ▶
English
Page 36

●
Application Info: View information on the CAM inserted into the CI slot and
on the “CI or CI+ CARD” which is inserted into the CAM. You can install the
CAM anytime whether the TV is on or off.
1. Purchase a CI CAM module at your nearest dealer or by phone.
2. Firmly insert the “CI or CI+ CARD” into the CAM in the direction of the
arrow.
3. Insert the CAM with the “CI or CI+ CARD” into the common interface slot,
in the direction of the arrow so that it aligns parallel with the slot.
4. Check if you can see a picture on a scrambled signal channel.
◀ ▶
English
Page 37

❑Changing the Preset Picture Mode
■Picture Mode
MENU
O
Select your preferred picture type.
When connecting a PC, you can only make changes to the Entertain and
N
Standard.
●
Dynamic: Suitable for a bright room.
◀ ▶
●
Standard: Suitable for a normal environment.
●
Natural (depending on the model): Suitable for reducing eye strain.
●
Movie: Suitable for watching movies in a dark room.
●
Entertain: Suitable for watching movies and games.
m
→
t
Picture
Picture Mode
→
ENTER
→
E
N
It is only available when connecting a PC.
English
Page 38

❑Adjusting Picture Settings
■Backlight / Contrast / Brightness / Sharpness / Colour / Tint (G/
R)
Your television has several setting options for picture quality control.
NOTE
N
●
In analogue TV, AV modes of the PAL system, the Tint (G/R) function is
not available. (Depending on the country and model)
●
When connecting a PC, you can only make changes to Backlight,
◀ ▶
Contrast, Brightness and Sharpness.
●
Settings can be adjusted and stored for each external device connected
to the TV.
●
Lowering picture brightness reduces power consumption.
English
Page 39

■Picture Size
MENU
O
Set the various picture options such as picture size and aspect ratio.
The available items may differ depending on the selected mode.
N
Depending on the input source, the picture size options may vary.
N
●
Picture Size
of screen sizes as well. However, we highly recommend you use 16:9 mode
most of the time.
◀ ▶
Auto Wide: Automatically adjusts the picture size to the 16:9 aspect ratio.
16:9: Sets the picture to 16:9 wide mode.
m
Picture
→
t
Picture Size
→
: Your cable box/satellite receiver may have its own set
ENTER
→
E
English
Page 40

Wide Zoom: Magnifies the picture size more than 4:3.
Adjusts the Position by using ▲, ▼ buttons.
N
Zoom: Magnifies the 16:9 wide pictures vertically to fit the screen size.
Adjusts the Zoom or Position by using ▲, ▼ button.
N
4:3: Sets the picture to basic (4:3) mode.
Do not watch in 4:3 format for a long time. Traces of borders displayed
N
on the left, right and centre of the screen may cause image retention
(screen burn) which are not covered by the warranty.
◀ ▶
Screen Fit: Displays the full image without any cut-off when HDMI (720p /
1080i / 1080p) or Component (1080i / 1080p) signals are inputted (Depending
on the country and model).
Custom: Magnifies or shrinks 16:9 pictures vertically and/or horizontally. A
magnified or shrunk picture can be moved left, right, up, and down.
English
Page 41

●
Zoom/Position: Adjust the picture size and position. It is only available in
Zoom and Custom.
●
Position: Adjust the picture position. It is only available in Screen Fit or Wide
Zoom.
◀ ▶
English
Page 42

N
NOTE
●
After selecting Screen Fit in HDMI (1080i / 1080p) or Component (1080i
/ 1080p) mode, you may need to centre the picture (Depending on the
country and model):
1. Select the Position. Press the ENTER
2. Press the ▲, ▼, ◄ or ► button to move the picture.
●
If you want to reset the position you adjusted, select Reset in the
Position screen. The picture will be set to its default position.
●
If you use the Screen Fit function with HDMI 720p input, 1 line will be cut
◀ ▶
●
4:3 Screen Size: Available only when picture size is set to Auto Wide. You
can determine the desired picture size at the 4:3 WSS (Wide Screen Service)
size or the original size. Each European country requires different picture size.
at the top, bottom, left and right as in the overscan function.
button.
E
English
Page 43

■PIP
t
MENU
O
You can watch the TV tuner and one external video source simultaneously. For
example, if you have a cable box connected to the Cable In jack, you can use
PIP to watch programmes from the cable box and watch a movie from a Blu-ray
player attached to the HDMI In jack. PIP does not function in the same mode.
NOTE
N
●
If you turn the TV off while watching in PIP mode, the PIP window will
◀ ▶
disappear.
●
You may notice that the picture in the PIP window becomes slightly
unnatural when you use the main screen to view a game or karaoke.
m
Picture
→
→
PIP
ENTER
→
E
English
Page 44
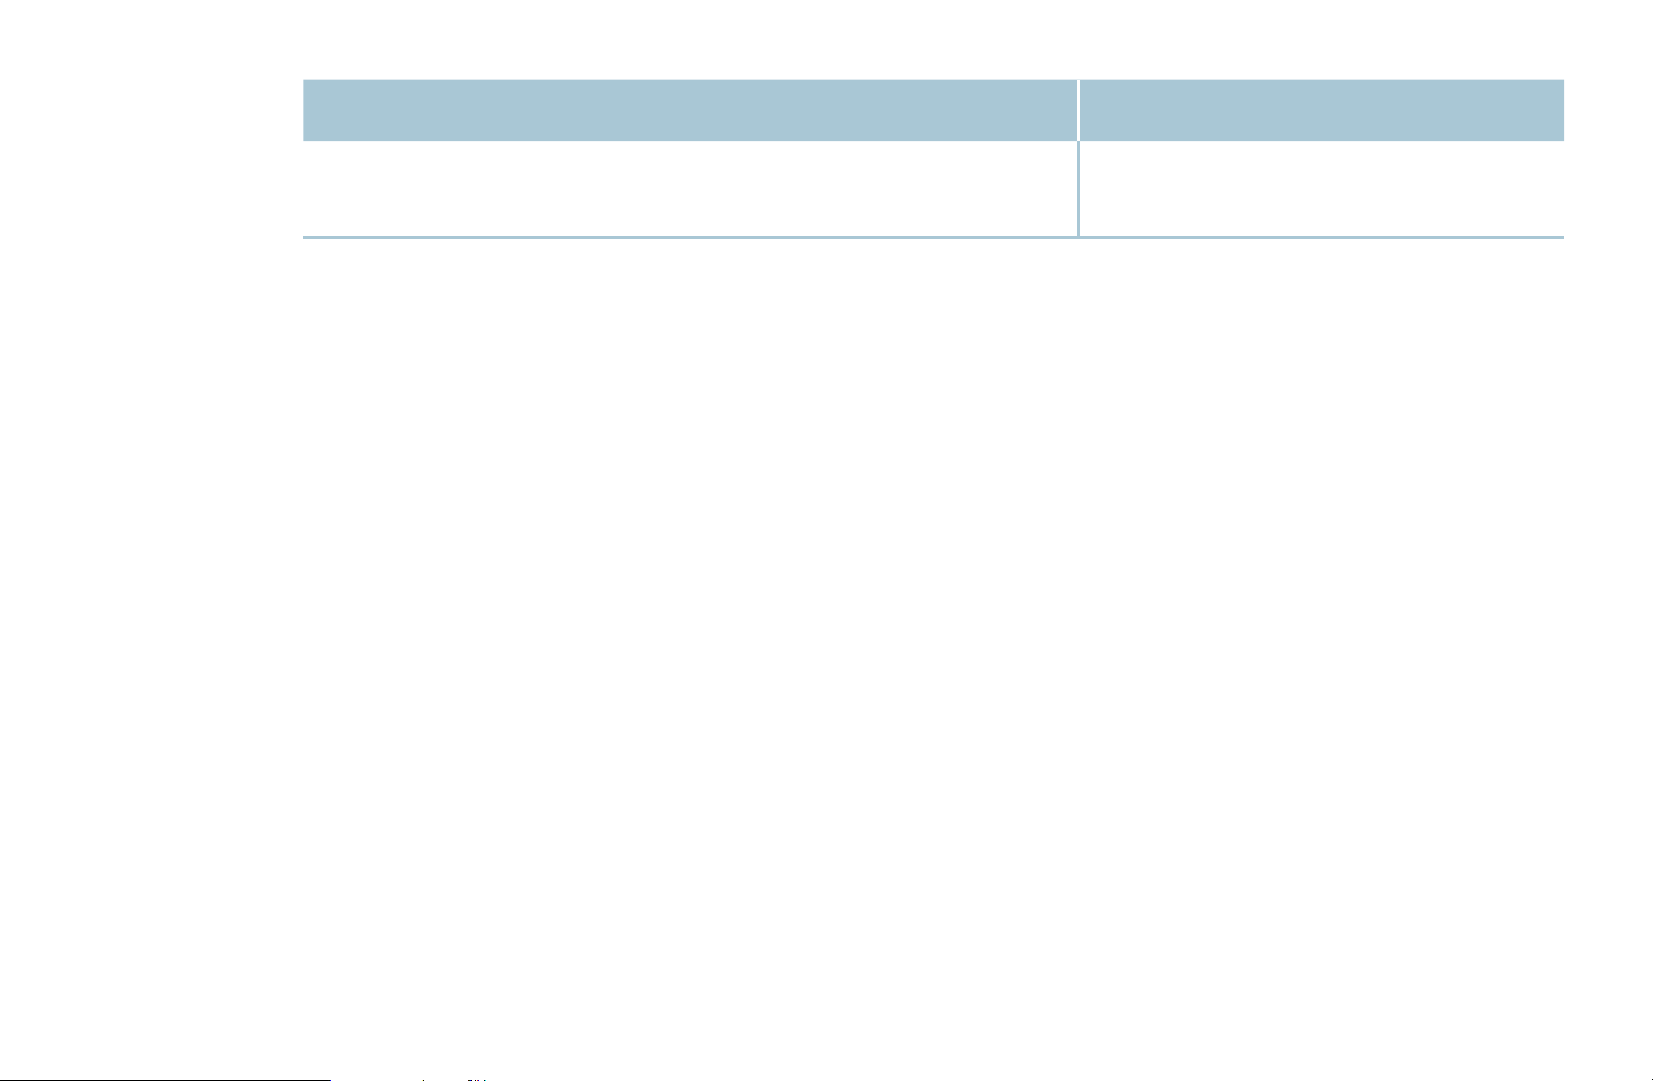
●
PIP settings
Main picture Sub picture
Component, HDMI1, HDMI2/DVI
TV
(Depending on the country and model)
●
PIP: Activate or deactivate the PIP function.
●
Aerial (Depending on the country and model): Select aerial for the sub-
screen.
●
Channel: Select the channel for the sub-screen.
●
Size (
õ
/
ã
): Select a size for the sub-picture.
◀ ▶
●
Position (
ã
/
–
/
—
/
œ
): Select a position for the sub-picture.
●
Sound Select: You can choose the desired sound in PIP mode.
English
Page 45

❑Changing the Picture Options
■Advanced Settings
MENU
O
(Available in Standard / Movie mode)
You can adjust the detailed setting for the screen including colour and contrast.
When connecting a PC, you can only make changes to the White Balance
N
and Gamma.
●
◀ ▶
Dynamic Contrast: Adjust the screen contrast.
●
Black Tone: Select the black level to adjust the screen depth.
●
Flesh Tone: Adjust the flesh tone colour.
m
Picture
→
Advanced Settings
→
ENTER
→
E
English
Page 46

●
RGB Only Mode: Displays the Red, Green and Blue colour for making fine
adjustments to the hue and saturation.
●
Colour Space: Adjust the range of colours available to create the image.
●
White Balance: You can adjust the colour temperature of the picture to make
white objects look white, and the overall picture appear natural.
R-Offset / G-Offset / B-Offset: Adjusts each colour’s (red, green, blue)
darkness.
R-Gain / G-Gain / B-Gain: Adjusts each colour’s (red, green, blue)
brightness.
◀ ▶
Reset: Resets the White Balance to its default settings.
●
Gamma: Adjust the primary colour intensity.
●
Motion Lighting: Reduce power consumption by brightness control adapted
motion.
English
Page 47

■Picture Options
O
N
●
MENU
When connecting a PC, you can only make changes to the Colour Tone.
Colour Tone
Warm1 or Warm2 will be deactivated when the picture mode is
N
Dynamic.
Settings can be adjusted and stored for each external device connected
N
to an input on the TV.
m
Picture
→
Picture Options
→
ENTER
→
E
◀ ▶
●
Digital Clean View: If the broadcast signal received by your TV is weak, you
can activate the Digital Clean View feature to reduce any static and ghosting
that may appear on the screen.
N
When the signal is weak, try other options until the best picture is
displayed.
English
Page 48

Auto Visualisation: When changing analogue channels, displays signal
strength.
Only available for analogue channels.
N
When the INFO button is pressed, the signal strength bar is displayed.
N
When bar is green, you are receiving the best possible signal.
N
●
MPEG Noise Filter: Reduces MPEG noise to provide improved picture
quality.
●
HDMI Black Level: Selects the black level on the screen to adjust the screen
depth.
◀ ▶
Available only in HDMI mode (RGB signals).
N
English
Page 49

●
Film Mode: Sets the TV to automatically sense and process film signals from
all sources and adjust the picture for optimum quality.
Available in TV mode and external input mode which supports SD (480i /
N
576i) and HD (1080i) except in PC mode.
If the screen does not seem natural, change its option to Off / Auto1 /
N
Auto2 in Film Mode.
●
Analogue Clean View (Depending on the country and model): Reduces noise
in the form of a diagonal line that occurs due to interferences between signals.
This function is only supported for analogue broadcasts.
N
◀ ▶
●
LED Clear Motion (Depending on the model): Removes drag from fast
scenes with a lot of movement to provide a clear picture.
It will be deactivated when the Picture Mode is set to Natural.
N
The screen may become slightly darker when you play LED Clear
N
Motion.
English
Page 50

■Picture Off
t
MENU
O
The screen is turned off but the sound remains on. Press any button except
volume button and power button to turn on the screen.
m
Picture
→
Picture Off
→
ENTER
→
E
◀ ▶
English
Page 51

■Reset Picture
MENU
O
Resets your current picture mode to its default settings.
m
Picture
→
Reset Picture
→
ENTER
→
E
◀ ▶
English
Page 52

❑ Using the Sound Support Functions
■ Sound Output
MENU
O
You can select which speakers the TV uses for audio output. (TV Speaker /
Audio Out/Optical)
m
Sound
→
Sound Output
→
ENTER
→
E
◀ ▶
English
Page 53

❑Changing the Preset Sound Mode
■Sound Mode
MENU
O
●
Standard: Selects the normal sound mode.
●
Music: Emphasises music over voices.
●
Movie: Provides the best sound for movies.
●
Clear Voice: Emphasises voices over other sounds.
●
◀ ▶
N
Amplify: Increase the intensity of high-frequency sound to allow a better
listening experience for the hearing impaired.
If Sound Output is set to Audio Out/Optical, Sound Mode is disabled.
m
Sound
→
Sound Mode
→
ENTER
→
E
English
Page 54

❑Adjusting Sound Settings
■Sound Effect
(Standard sound mode only)
MENU
O
●
Equaliser
Use Equaliser to customize sound setting for each speaker.
Balance: Adjusts the balance between the right and left speaker.
◀ ▶
100Hz / 300Hz / 1kHz / 3kHz / 10kHz (Bandwidth Adjustment): Adjusts the
level of specific bandwidth frequencies.
Reset: Resets the equaliser to its default settings.
If Sound Output is set to Audio Out/Optical, Sound Effect is disabled.
N
m
Sound
→
Sound Effect
→
ENTER
→
E
English
Page 55

■Speaker Settings
MENU
O
●
Auto Volume
To equalize the volume level on each channel, set to Normal.
Night: This mode provides an improved sound experience compared to
Normal mode, making almost no noise. It is useful at night.
To use the volume control on the source device connected to the TV,
N
set Auto Volume to Off on the TV. Otherwise, a change to the volume
◀ ▶
●
TV Installation Type
Specify the TV's installation type. Choose between Wall Mount and Stand to
control of the source device may not be applied.
m
Sound
→
Speaker Settings
→
ENTER
→
E
optimise the TV's sound automatically.
If Sound Output is set to Audio Out/Optical, Speaker Settings is
N
disabled.
English
Page 56

■Additional Settings
O
●
MENU
DTV Audio Level (digital channels only): This function allows you to reduce
the disparity of a voice signal (which is one of the signals received during a
digital TV broadcast) to a desired level.
According to the type of broadcast signal, MPEG / HE-AAC can be
N
adjusted between -10dB and 0dB.
To increase or decrease the volume, adjust between the range 0 and -10
N
respectively.
m
Sound
→
Additional Settings
→
ENTER
→
E
◀ ▶
●
HDMI Audio Format: Sets the audio input signal format suitable for the
external device connected to the TV's HDMI port.
English
Page 57

●
Digital Audio Out: Digital Audio out is used to provide digital sound, reducing
interference going to speakers and various digital devices such as a DVD
player.
Audio Format: You can select the Digital Audio output format. The available
Digital Audio output format may differ depending on the input source.
By connecting to 5.1ch speakers in a Dolby Digital setup, maximize your
N
interactive 3D sound experience.
Audio Delay: Correct audio-video sync problems, when watching TV or
video, and when listening to digital audio output using an external device such
◀ ▶
as an AV receiver (0ms ~ 250ms).
English
Page 58

●
Dolby Digital Comp: This function minimizes signal disparity between a dolby
digital signal and a voice signal (i.e. MPEG Audio, HE-AAC, ATV Sound).
Select Line to obtain dynamic sound, and RF to reduce the difference
N
between loud and soft sounds at night time.
Line: Set the output level for signals greater or less than -31dB (reference) to
either -20dB or -31dB.
RF: Set the output level for signals greater or less than -20dB (reference) to
either -10dB or -20dB.
■Reset Sound
◀ ▶
MENU
O
Reset all sound settings to the factory defaults.
m
Sound
→
Reset Sound
→
English
ENTER
→
E
Page 59
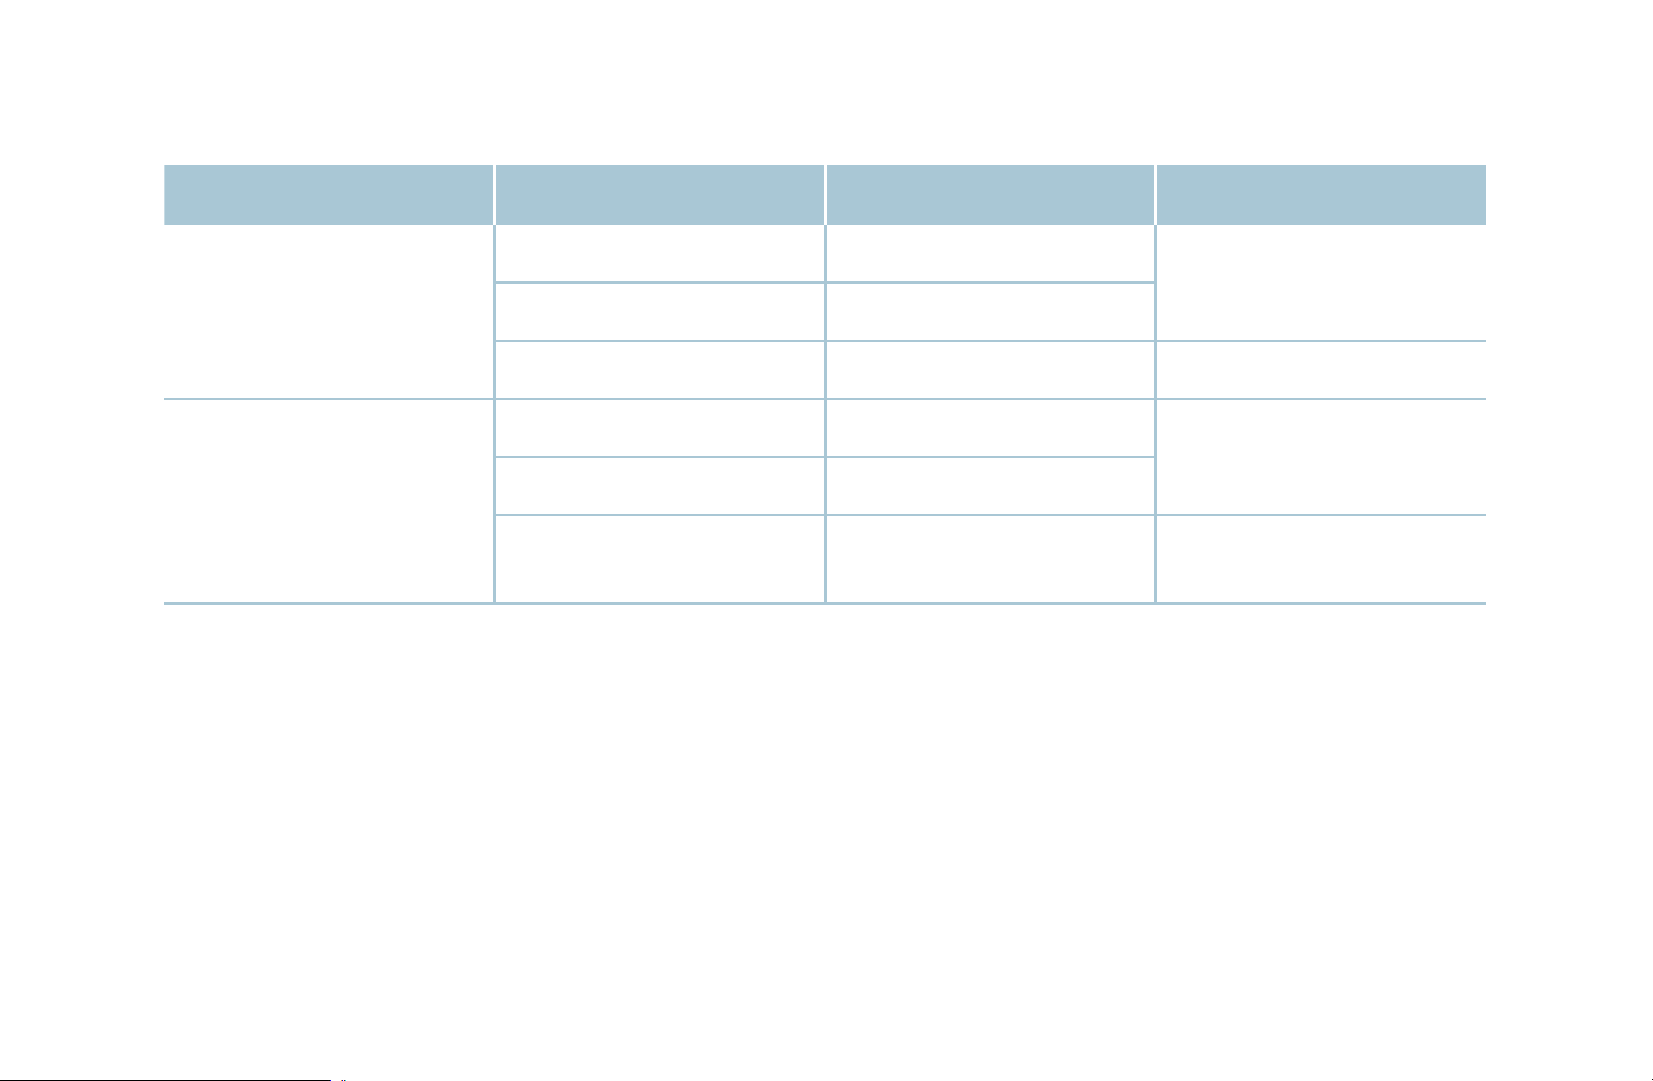
❑Selecting the Sound Mode
t
When you set to Dual I II, the current sound mode is displayed on the screen.
Audio Type Dual I II Default
Mono Mono
Automatic change
A2 Stereo
Stereo
Stereo
Mono
↔
Dual
Mono Mono
NICAM Stereo
◀ ▶
If the stereo signal is weak and an automatic switching, occurs, then switch
N
Stereo
Dual
Dual I ↔ Dual II
Mono ↔ Stereo
Mono → Dual I
Dual II
Automatic change
Dual I
Dual I
to the mono.
Only activated in stereo sound signal.
N
Only available when the Source is set to TV.
N
English
Page 60

❑Connecting to the Network
(Depending on the country and model)
■Checking the Network connection status
MENU
O
View the current network status.
m
Network
→
Network Status
→
ENTER
→
E
■Establishing a wireless Network connection
O
MENU
m
Network
→
Network Settings
→
ENTER
→
E
◀ ▶
Make sure that you have the wireless router's SSID (name) and password settings
before attempting to connect.
If the network you want doesn't appear in the list, select Add Network, and then
enter the network's SSID (name) manually.
If your network is security enabled, enter the password. If your network is not
security-enabled, the TV will bypass the on-screen keyboard and attempt to
connect right away.
English
Page 61

❑Executing initial setup
■Setup
MENU
O
Configure the channels and the time when setting up the TV for the first time or
when resetting the unit.
Execute the initial setup following instructions that the TV guides.
N
m
System
→
Setup
→
ENTER
→
E
◀ ▶
English
Page 62

❑Setting the Time
■Time
MENU
O
The current time will appear every time you press the INFO button.
●
Clock: Setting the clock is for using various timer features of the TV.
If you disconnect the power cord, you have to set the clock again.
N
Clock Mode: Set up the current time manually or automatically.
◀ ▶
–
Auto: Set the current time automatically using the time from a digital
channel.
m
System
→
Time
→
ENTER
→
E
English
Page 63

The aerial must be connected in order to set the time automatically.
N
–
Manual: Set the current time manually.
Depending on the broadcast station and signal, the auto time set up may
N
not be correct. In this case, set the time manually.
◀ ▶
English
Page 64

Clock Set: Set the Date and Time.
Available only when Clock Mode is set to Manual.
N
You can set the Date and Time directly by pressing the number buttons
N
on the remote control.
Time Zone (Depending on the country and model): Select your time zone.
This function is only available when the Clock Mode is set to Auto.
N
When selecting Manual in Time Zone, GMT and DST will be activated.
N
◀ ▶
English
Page 65

Time Offset (Depending on the country and model): Adjusts the time when
your TV receives the time information via Internet. Set the right time by
selecting an offset.
The current time will be set through a network, if the TV fails to receive
N
the time information including the broadcast signal from TV stations. (ex:
Watching TV via set-top box, Satellite receiver, or etc)
◀ ▶
English
Page 66

❑Using the Sleep Timer
O
●
MENU
Sleep Timer
time. (30, 60, 90, 120, 150 and 180 minutes)
Use the ▲/▼ buttons to select a period of time, and then press
N
ENTER
m
System
→
t
. To cancel the Sleep Timer, select Off.
E
Time
→
: Automatically shuts off the TV after a preset period of
Sleep Timer
→
ENTER
→
E
◀ ▶
English
Page 67

❑Setting the On / Off Timer
MENU
O
●
On Timer: You can set up three separate On Timer configurations. (On Timer
1, On Timer 2, On Timer 3)
Setup: Select Off, Once, Everyday, Mon~Fri, Mon~Sat, Sat~Sun or
Manual to set at your convenience. If you select Manual, you can set up the
day you want to activate the timer.
The
N
◀ ▶
Time: Set the hour and minute.
Volume: Set the desired volume level.
m
c
System
→
mark indicates the day you’ve selected.
Time
→
On Timer <or> Off Timer
→
ENTER
→
E
English
Page 68

Source: To select the source of the content that will play when the TV turns
on. You can:
–
Select TV and have the TV display a specific aerial or cable channel.
–
Select USB and have the TV play back photo or audio files from a USB
device.
–
Select a source on your TV that you have connected a set-top box to, and
have the TV display a channel from the set-top box.
The USB device must be connected to your TV before you can select
N
USB.
◀ ▶
English
Page 69

If you select a source other than TV or USB, you must:
N
●
Have a cable or satellite set-top box attached to that source
●
Set the set-top box to the channel you want to watch when the TV
goes on
●
Leave the set-top box turned on.
When you select a source other than TV, the Aerial and Channel options
N
will disappear.
Aerial (when the Source is set to TV): Select ATV or DTV.
Channel (when the Source is set to TV): Select the desired channel.
◀ ▶
English
Page 70

Music / Photo (when the Source is set to USB): Select a folder in the USB
device containing music or photo files to be played when the TV is turned on
automatically.
–
If there is no music file on the USB device or the folder containing a music
file is not selected, the timer function does not operate correctly.
–
When there is only one photo file in the USB device, the slide show will not
play.
–
If a folder name is too long, the folder cannot be selected.
–
Each USB you use is assigned its own folder. When using more than one
◀ ▶
of the same type of USB, make sure the folders assigned to each USB
have different names.
English
Page 71

–
It is recommended that you use a USB memory stick and a multi card
reader when using On Timer.
–
The On Timer function may not work with USB devices with a built-in
battery, MP3 players, or PMPs made by some manufacturers because
these devices take a long time to be recognised.
●
Off Timer: You can set up three separate Off Timer configurations. (Off Timer
1, Off Timer 2, Off Timer 3)
Setup: Select Off, Once, Everyday, Mon~Fri, Mon~Sat, Sat~Sun or
Manual to set at your convenience. If you select Manual, you can set up the
◀ ▶
day you want to activate the timer.
The
N
Time: Set the hour and minute.
mark indicates the day you’ve selected.
c
English
Page 72

❑Economical Solutions
■Eco Solution
O
●
●
MENU
Energy Saving: This adjusts the brightness of the TV in order to reduce
power consumption.
Eco Sensor (depending on the model): To enhance your power savings; the
picture settings will automatically adapt to the light in the room.
If you adjust the Backlight, the Eco Sensor will be set to Off.
N
m
System
→
Eco Solution
→
ENTER
→
E
◀ ▶
English
Page 73

Min. Backlight: When Eco Sensor is On, the minimum screen brightness
can be adjusted manually.
If Eco Sensor is On, the display brightness may change (become slightly
N
darker or brighter) depending on the surrounding light intensity.
●
No Signal Power Off: To avoid unnecessary energy consumption, set how
long you want the TV to remain on if it’s not receiving a signal.
Disabled when the PC is in power saving mode.
N
●
Auto Power Off: If the TV remains turned on for four hours without any user
input, the TV will automatically turn off to prevent overheating.
◀ ▶
English
Page 74

❑Other Features
■Menu Language
MENU
O
Set the menu language.
m
System
→
Menu Language
→
ENTER
→
E
◀ ▶
English
Page 75

■Auto Protection Time
O
●
MENU
Auto Protection Time (Off / 2 hours / 4 hours / 8 hours / 10 hours):
If the screen remains idle with a still image for a certain period of time defined
by the user, the screen saver is activated to prevent the formation of ghost
images on the screen.
m
System
→
Auto Protection Time
→
ENTER
→
E
◀ ▶
English
Page 76

■General
MENU
O
●
Game Mode: When connecting to a game console such as PlayStation™ or
Xbox™, you can enjoy a more realistic gaming experience by selecting game
mode.
NOTE
N
●
◀ ▶
System
m
→
Precautions and limitations for game mode
–
To disconnect the game console and connect another external
device, set Game Mode to Off in the setup menu.
–
If you display the TV menu in Game Mode, the screen shakes
slightly.
General
→
ENTER
→
E
English
Page 77

●
Game Mode is not available in TV mode.
●
After connecting the game console, set Game Mode to On.
Unfortunately, you may notice reduced picture quality.
●
If Game Mode is On:
–
Picture Mode is set to Game and Sound Mode is set to Game.
●
Panel Lock: Lock or unlock all the keys on the panel at once. When Panel
Lock is on, none of the keys on the panel will work.
●
Boot Logo: Display Samsung logo when the TV is turned on.
◀ ▶
English
Page 78

■Change PIN
MENU
O
Change your password required to set up the TV.
The PIN input screen appears before the setup screen.
N
Enter your 4-digit PIN. Change the PIN using the Change PIN option.
N
m
System
→
Change PIN
→
ENTER
→
E
◀ ▶
English
Page 79

■DivX® Video On Demand
MENU
O
Shows the registration code authorised for the TV. If you connect to the DivX
web site and register with 10-digit registration code, you can download the VOD
activation file.
Once you play it using Videos, the registration is completed.
For more information on DivX® VOD, visit http://vod.divx.com.
N
m
System
→
DivX® Video On Demand
→
ENTER
→
E
◀ ▶
English
Page 80

❑Using the Source List
■Source List
MENU
O
When you press the SOURCE button, Source screen will be displayed at
N
once.
You can only choose external devices that are connected to the TV. In
N
Source, connected inputs are highlighted.
◀ ▶
N
For the detailed information, refer to “Changing the Input Source” in User
Manual.
m
Applications
→
Source List
→
ENTER
→
E
English
Page 81

❑Connecting a USB Device
1. Turn on your TV.
2. Connect a USB device containing photo, music and movie files to the USB
port on the side of the TV.
3. When USB is connected to the TV, popup window appears. You can select
the Photos, Videos or Music directly.
◀ ▶
English
Page 82

It might not work properly with unlicenced multimedia files.
N
Need-to-Know List before using Media Contents
N
●
MTP (Media Transfer Protocol) is not supported.
●
Supported file systems are FAT and exFAT.
●
Certain types of USB Digital camera and audio devices may not be
compatible with this TV.
●
Media Play only supports sequential jpeg format.
●
Media Play only supports USB Mass Storage Class (MSC) devices. MSC
is a Mass Storage Class Bulk-Only Transport device. Examples of MSC
◀ ▶
are Thumb drives, Flash Card Readers (USB HUB are not supported).
Devices should be connected directly to the TV’s USB port.
English
Page 83

●
Before connecting your device to the TV, please back up your files to
prevent them from damage or loss of data. SAMSUNG is not responsible
for any data file damage or data loss.
●
Do not disconnect the USB device while it is loading.
●
The higher the resolution of the image, the longer it takes to display on
the screen.
●
The maximum supported JPEG resolution is 15360 x 8640 pixels.
●
For unsupported or corrupted files, the “Not Supported File Format”
message is displayed.
●
◀ ▶
The scene search and thumbnail functions are not supported in the
Videos.
English
Page 84

●
MP3 files with DRM that have been downloaded from a non-free site
cannot be played. Digital Rights Management (DRM) is a technology that
supports the creation, distribution and management of the content in an
integrated and comprehensive way, including the protection of the rights
and interests of the content providers, the prevention of the illegal copying
of contents, as well as managing billings and settlements.
●
A USB device that requires high power (more than 500mA or 5V) may
not be supported. The HDD (Hard Disk Drive) connected to USB is not
supported.
●
If the TV has been no input during time set in Auto Protection Time, the
◀ ▶
screen saver will run.
●
The power-saving mode of some external hard disk drives may be
released automatically when connected to the TV.
English
Page 85

●
If a USB extension cable is used, the USB device may not be recognised
or the files on the device may not be read.
●
If a USB device connected to the TV is not recognised, the list of files on
the device is corrupted or a file in the list is not played, connect the USB
device to the PC, format the device and check the connection.
●
If a file deleted from the PC is still found when Media Contents is run, use
the “Empty the Recycle Bin” function on the PC to permanently delete the
file.
●
If the number of files and folders saved on a USB storage device is
approximately over 4000, the files and folders may not appear and some
◀ ▶
folders may not be opened.
English
Page 86

Disconnecting a USB Device
1. Press the SOURCE button.
2. Select a desired USB device, and then press the TOOLS button. The Tools
menu appears.
3. Select Disconnect USB Device, and then wait until the selected USB device
is disconnected. You can remove a USB device from the TV.
To remove a USB device from the TV, we recommend use Disconnect USB
N
Device function.
◀ ▶
English
Page 87

❑Using the Media Contents
MENU
O
Enjoy photos, music and movie files saved on a USB Mass Storage Class (MSC)
device.
1. Press the MEDIA.P button.
2. Press
press the ENTER
3. Press
◄/►
◄/►
m
Applications
→
button to select desired menu (Photos, Videos, Music), then
button.
E
button to select desired device, then press the ENTER
Media Play
→
ENTER
→
E
E
button
◀ ▶
again.
4. Press the
ENTER
E
▲/▼/◄/►
button or ∂ (Play) button.
button to select the desired file in the list, then press the
English
Page 88

Playing the selected files
1. Press the ▲ button to select Options at the top of each main screen and
select Play Selected.
2. Select the desired files.
The check box appears to the left of the selected files.
N
Press ENTER
N
3. Press the ▲ button to select Play.
You can select or deselect all files pressing the Select All / Deselect All.
N
button again to deselect the file.
E
◀ ▶
English
Page 89

❑Playing the Photos / Videos / Music
During playing a file, press the
When the option menu is not displayed, press the TOOLS button or
N
N
N
ENTER
You can also use ∂/∑/∫/
playback.
If you press the INFO button during playback, you can view the playback
information.
button.
E
π/µ
▲/▼/◄/►
buttons on the remote control during
button to select the desired menu.
◀ ▶
English
Page 90
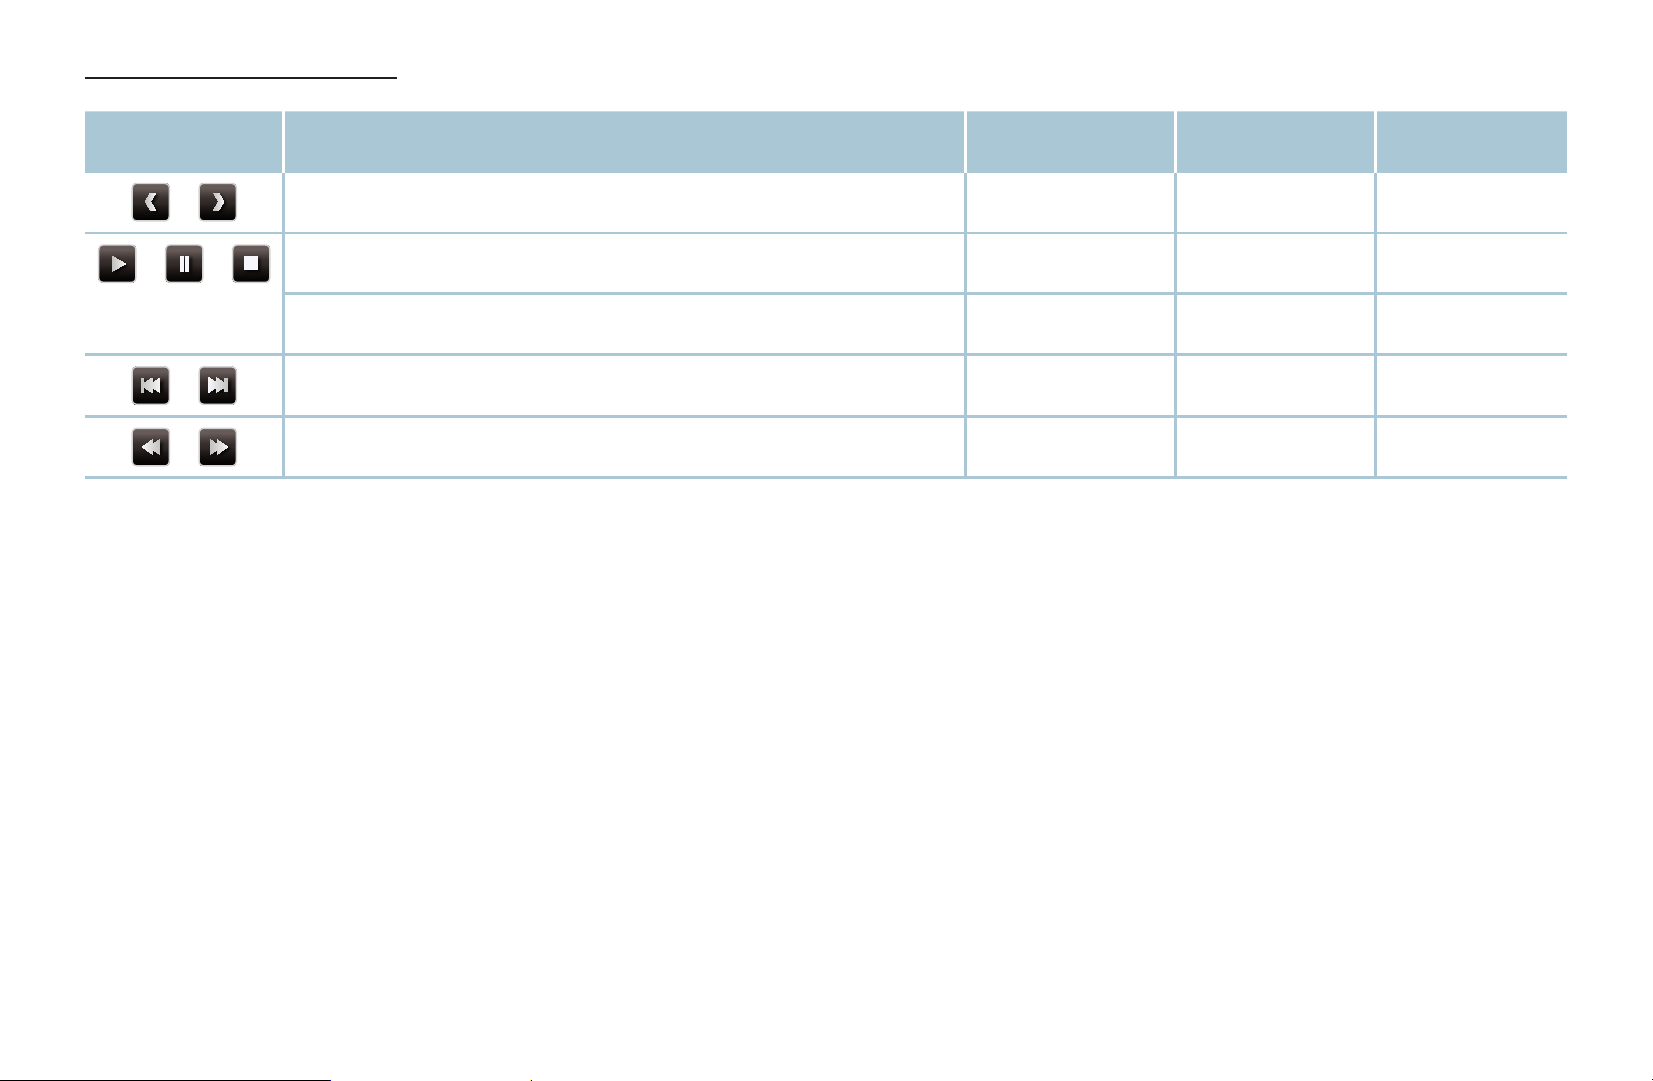
Playback menu
Button Operation Photos Videos Music
/
/ /
/
/
◀ ▶
* When setting the Background Music to Mini Player in Photos, these buttons previous appear.
Start Slide Show / Stop Slide Show
Previous / Next
Play / Pause
Previous / Next
Rewind / Fast Forward
Mini Player*
Mini Player*
●
●
● ●
● ●
● ● ●
English
Page 91
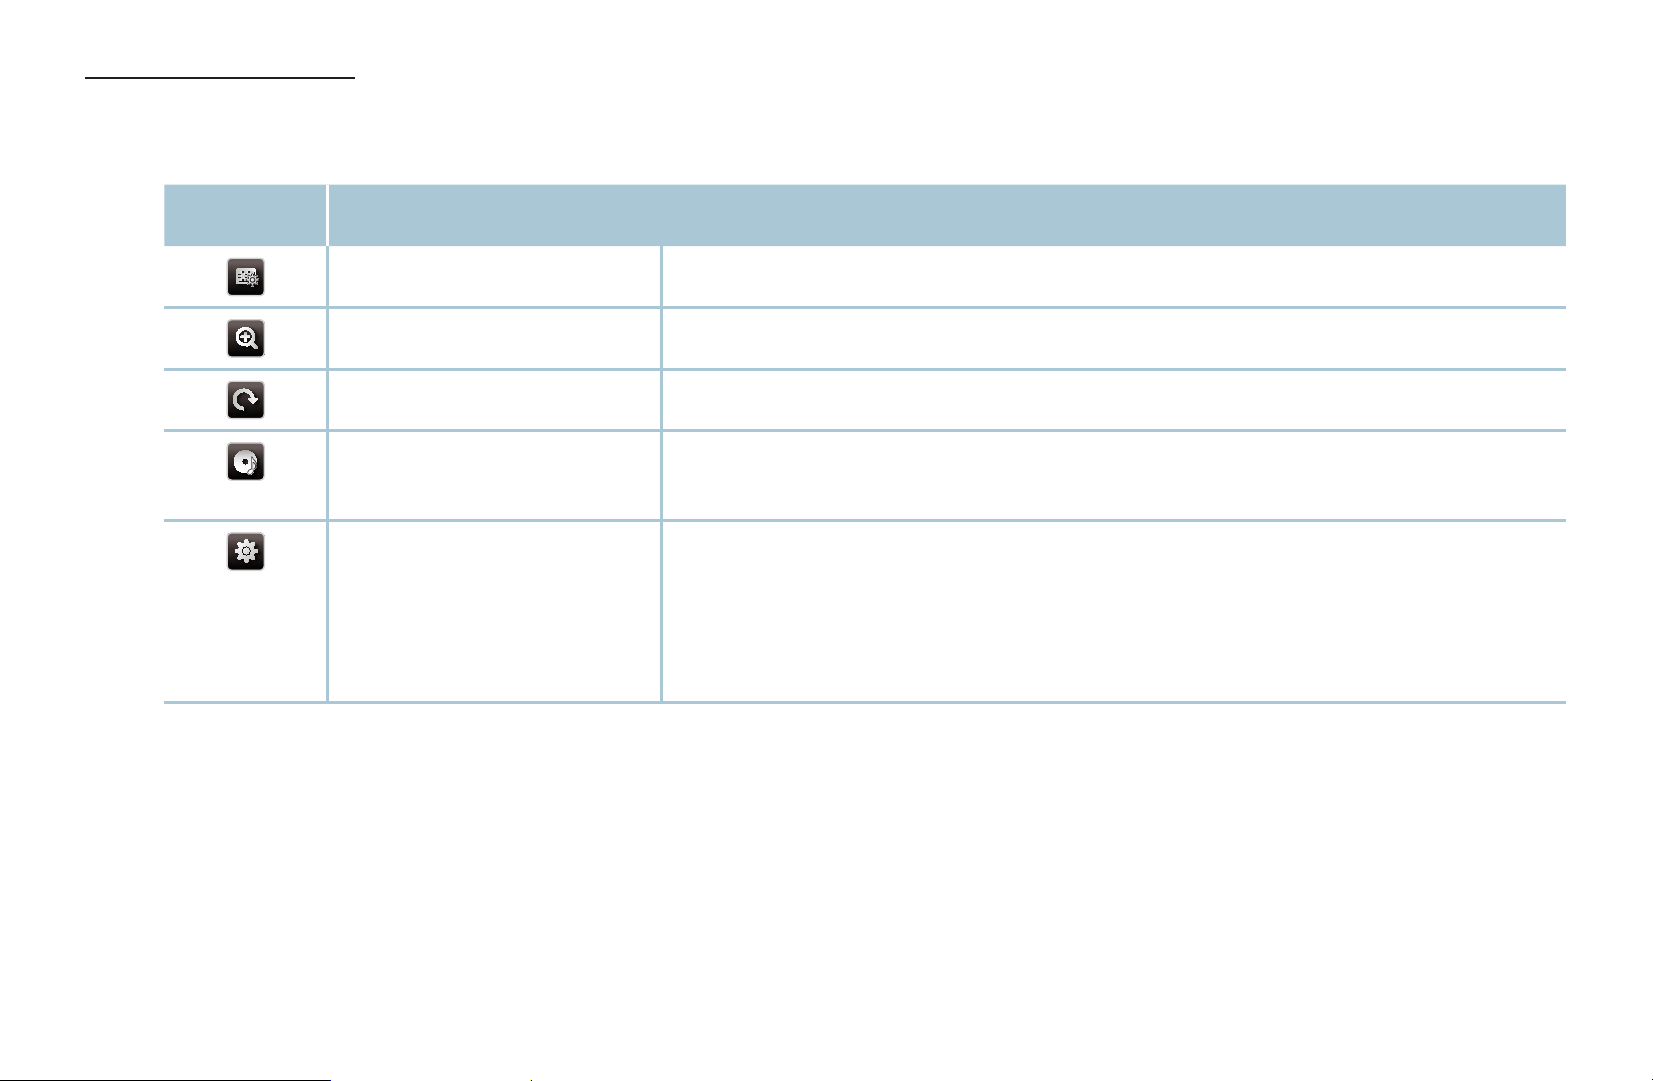
Setting menu
Photos
●
Button Operation
Slideshow Settings You can set the Speed and Effects during the slide show.
Zoom You can zoom the image.
Rotate You can rotate images in full screen mode.
Background Music /
Mini Player
◀ ▶
Settings Picture Mode / Sound Mode: You can adjust the picture or
You can set background music when watching a slide show. /
You can control simple playback menus.
sound setting.
Information: You can see detailed information about the played
file.
English
Page 92

N
During the slide show, all files in the file list will be displayed in order.
N
N
●
When you press the ∂ (Play) button (or
in the file list, slide show will be started immediately.
During the slide show, you can adjust the slide show speed using
or μ (FF) button.
Supported Photo Formats
For the details, refer to “Specifications” in User Manual.
N
button
▲
Options
→
Slide Show)
→
π
(REW)
◀ ▶
English
Page 93
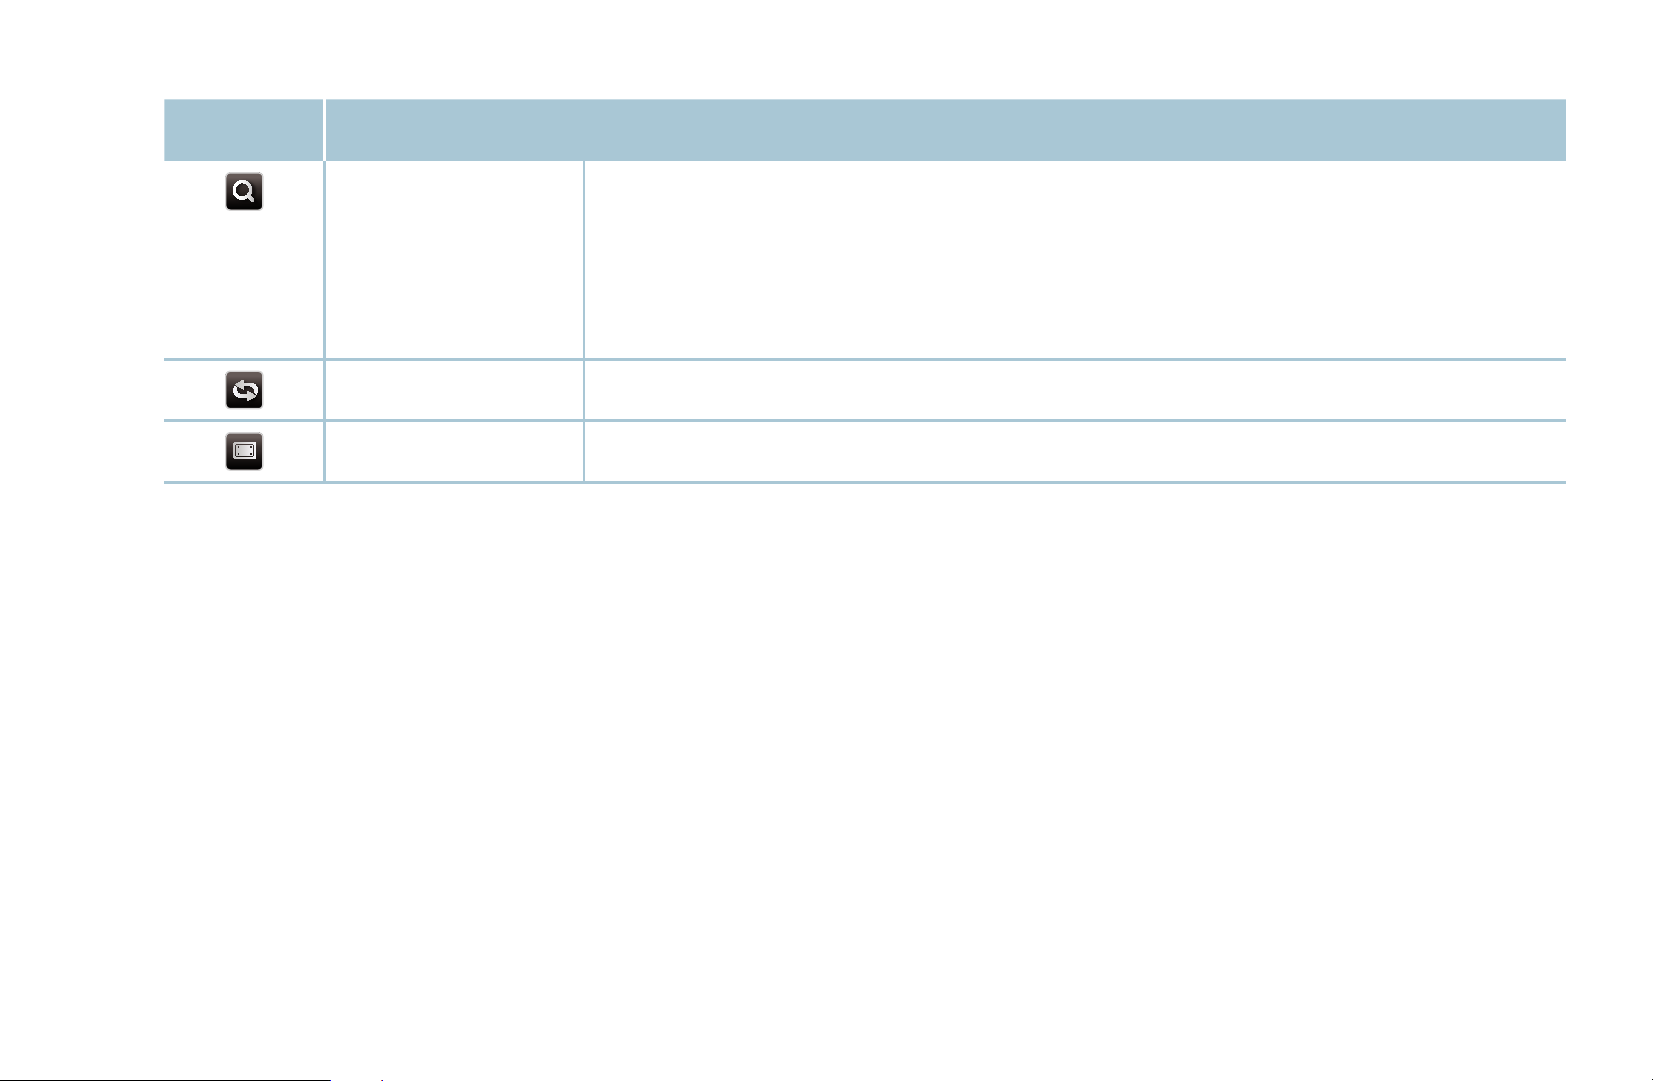
Videos
●
Button Operation
Search Search Titles: You can move the other file directly.
Search Time Bar: You can search the video using ◄ and ► button
at one minute interval or entering the number directly.
NIt may not be supported depending on the input source.
Repeat Mode You can play movie files repeatedly.
Picture Size You can adjust the picture size to your preference.
◀ ▶
English
Page 94
Button Operation
Settings Subtitle Settings: You can play the video with subtitles. This function
only works if the subtitles are the same file name as the video.
Picture Mode / Sound Mode: You can adjust the picture or sound
setting.
Audio Language: You can change the audio language if the video
has more than one language.
Information: You can see detailed information about the played file.
◀ ▶
English
Page 95

If video time information is unknown, play time and progress bar are not
N
displayed.
In this mode, you can enjoy movie clips contained on a Game, but you
N
cannot play the Game itself.
●
Supported Subtitle / Video Formats
For the details, refer to “Specifications” in User Manual.
N
◀ ▶
English
Page 96
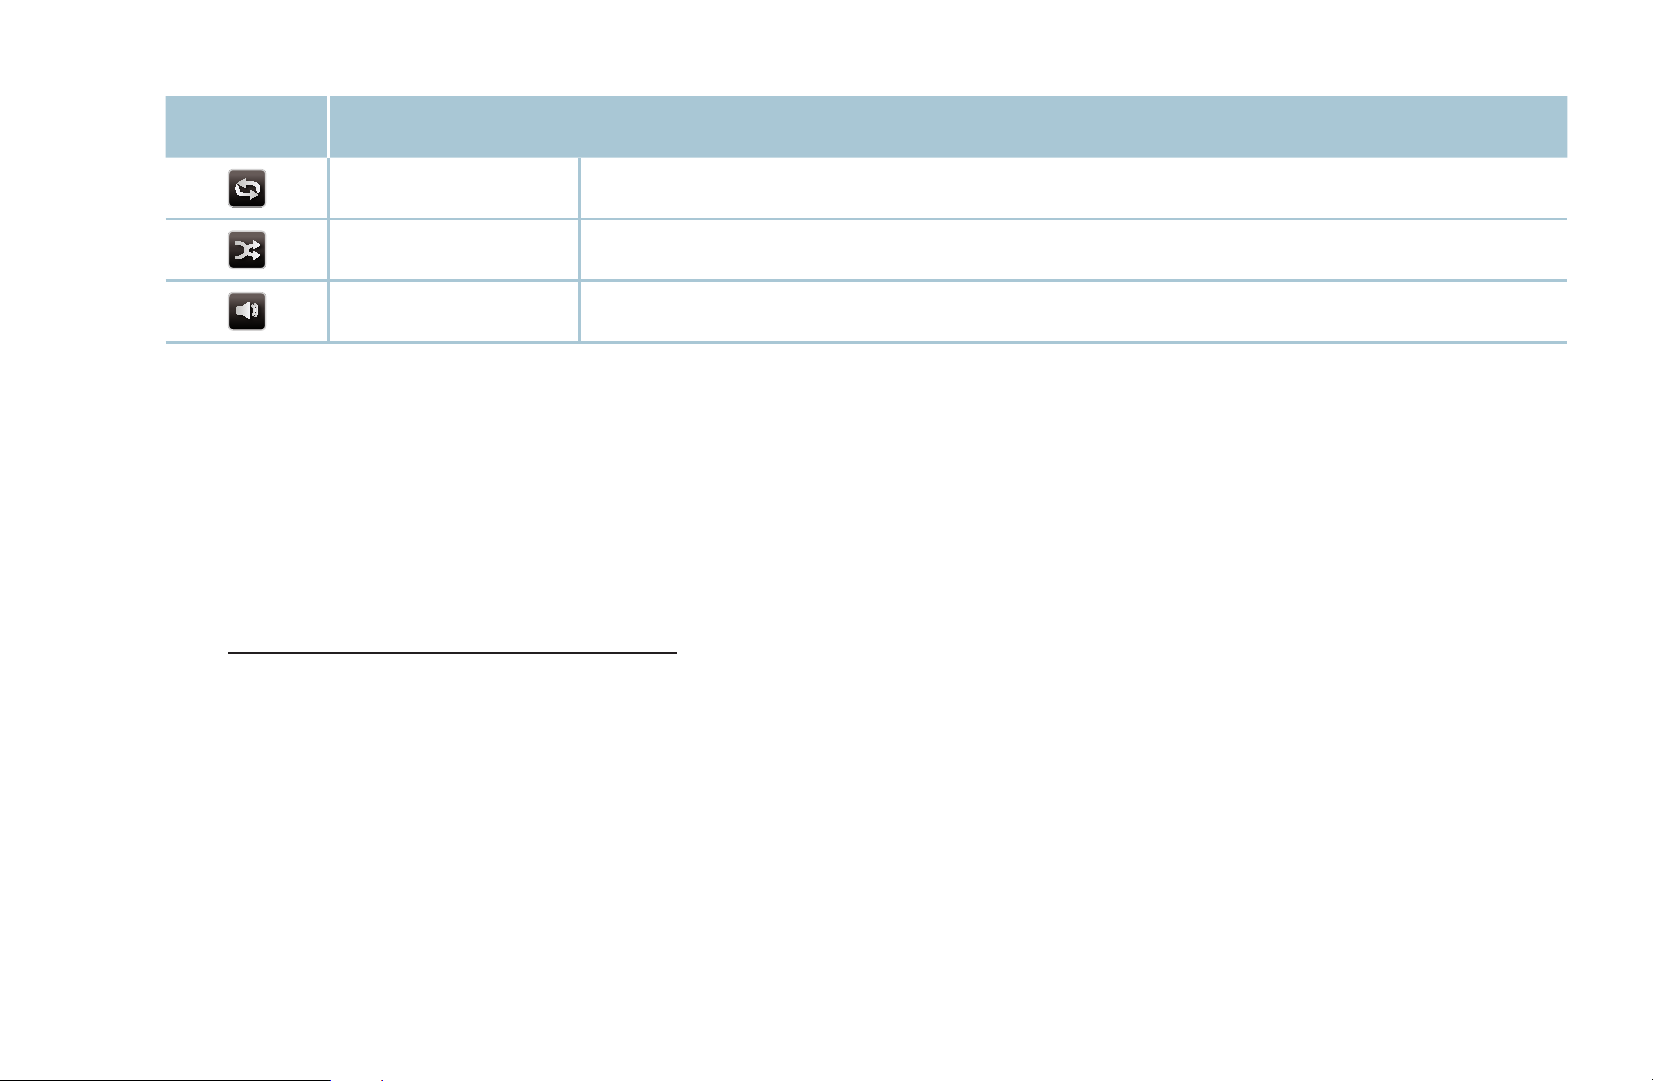
Music
●
Button Operation
Repeat You can play music files repeatedly.
Shuffle You can play the music randomly.
Sound Mode You can adjust the sound setting.
Only displays the files with supported music file extension. Other file
N
extensions are not displayed, even if they are saved on the same USB device.
If the sound is abnormal when playing music files, adjust the Equaliser in the
N
◀ ▶
Sound menu. (An over-modulated music file may cause a sound problem.)
●
Supported Music Formats
For the details, refer to “Specifications” in User Manual.
N
English
Page 97

Setting the Encoding language
Set the encoding language if the text is not supported.
1. Press the ▲ button to select Options at the top of music main screen and
select Encoding.
2. Select the desired encoding language.
◀ ▶
English
Page 98
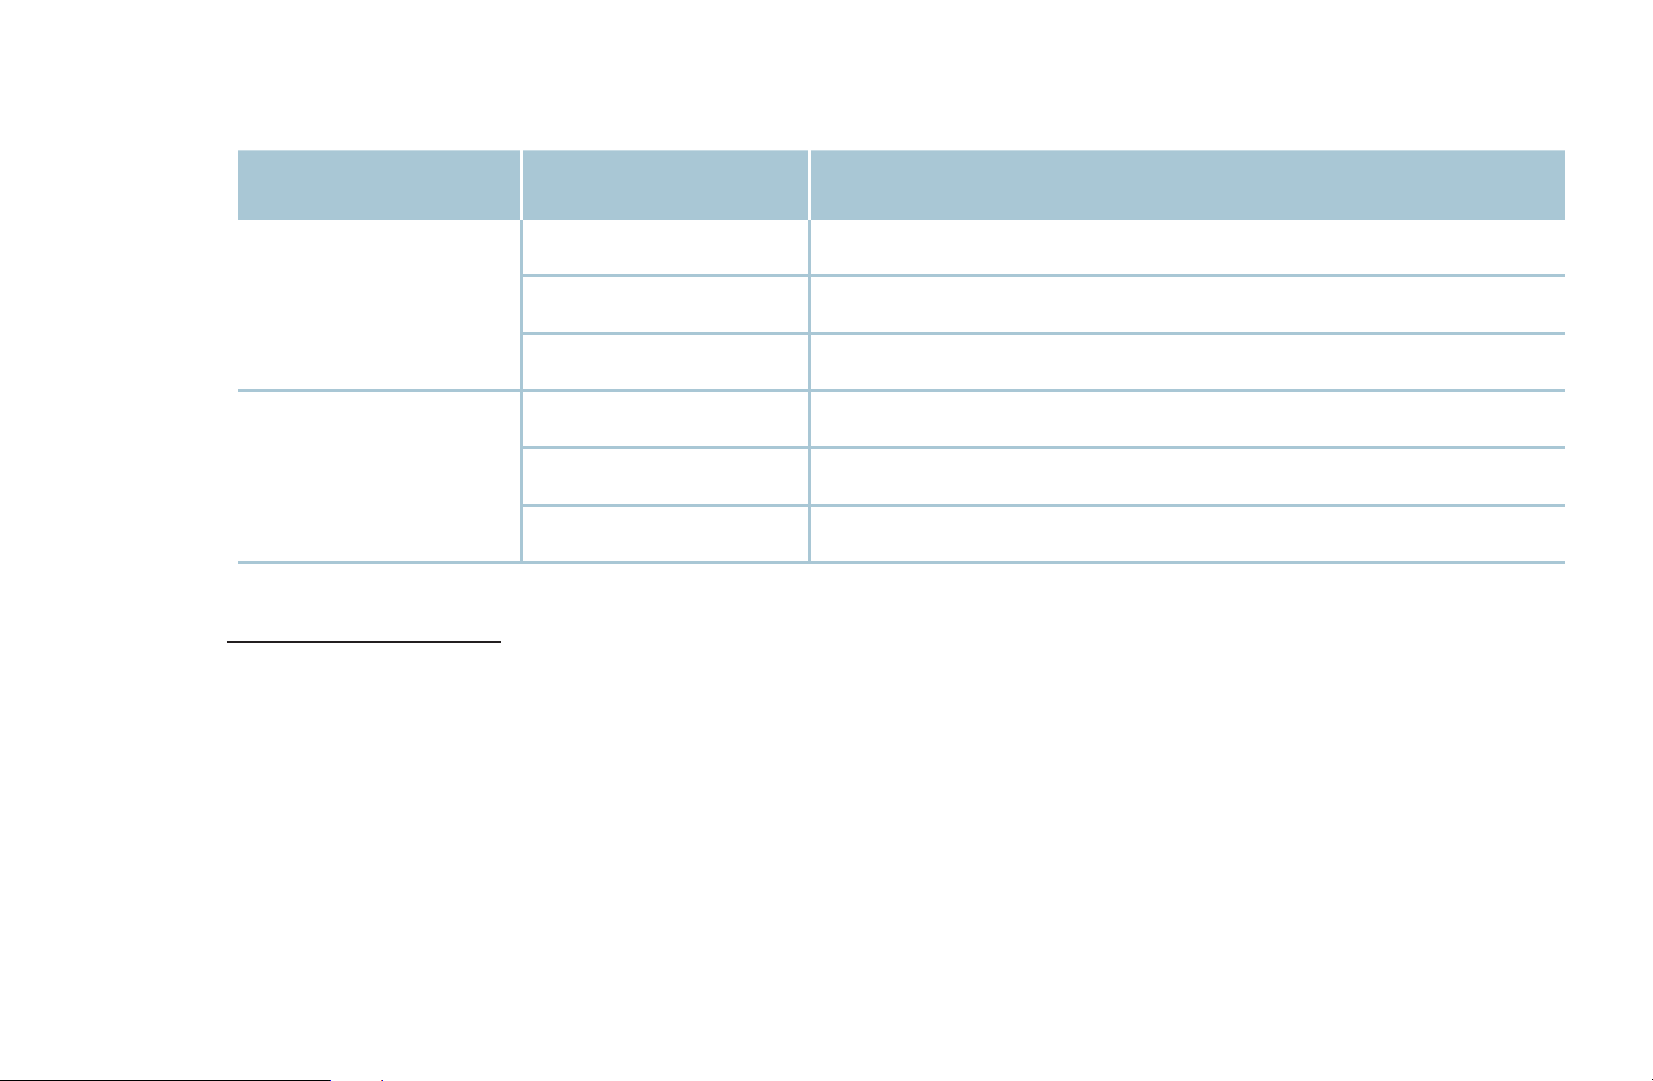
●
Components & DTV
(Depending on the country and model)
Source Resolution Frequency (Hz)
Components 1280 x 720p 50 / 59.94 / 60 Hz
1920 x 1080i 50 / 59.94 / 60 Hz
1920 x 1080p 23.98 / 24 / 25 / 29.97 / 30 / 50 / 59.94 / 60 Hz
DTV 1280 x 720p 50 / 59.94 / 60 Hz
1920 x 1080i 50 / 59.94 / 60 Hz
◀ ▶
1920 x 1080p 25 Hz
●
Videos / Photos (In
Media Play
For the details, refer to “Specifications” in user manual.
)
English
Page 99

❑Viewing the e-Manual
■e-Manual
MENU
O
You can read the introduction and instructions about the TV features stored in
your TV.
For the detailed information about e-Manual Screen, refer to “How to use the
N
e-Manual” in User Manual.
m
Support
→
e-Manual
→
ENTER
→
E
◀ ▶
English
Page 100

❑Using the Self Diagnosis
■Self Diagnosis
MENU
O
Self Diagnosis might take few seconds, this is part of the normal operation
N
of the TV.
●
Picture Test: Use to check for picture problems.
●
Sound Test: Use the built-in melody sound to check for sound problems.
◀ ▶
N
If you hear no sound from the TV’s speakers, before performing the
sound test, make sure Sound Output is set to TV Speaker in the Sound
menu.
m
Support
→
Self Diagnosis
→
ENTER
→
E
English
 Loading...