


MOBILE PHONE
SPH-L500
This document is watermarked because certain important information in the
document has not yet been verified.This document has been sent to you as
a draft and for informational purposes only.The document should only be
used for internal purposes and may not be distributed outside of Samsung,
except to Samsung's carrier customer for testing purposes. Distributing
the document outside of Samsung, except to Samsung's carrier customer for
testing purposes could result in legal exposure to the company if the
preliminary, unverified information in the draft turns out to be inaccurate.
DRAFT - Internal Use Only
Basics Guide
Please read this manual before operating your
phone and keep it for future reference.
GH68XXXXXX Printed in Korea

Intellectual Property
DRAFT - Internal Use Only
All Intellectual Property, as defined below, owned by or which is otherwise the property of Samsung or its
respective suppliers relating to the SAMSUNG Phone, including but not limited to, accessories, parts, or
software relating there to (the “Phone System”), is proprietary to Samsung and protected under federal
laws, state laws, and international treaty provisions. Intellectual Property includes, but is not limited to,
inventions (patentable or unpatentable), patents, trade secrets, copyrights, software, computer programs,
and related documentation and other works of authorship. You may not infringe or otherwise violate the
rights secured by the Intellectual Property. Moreover, you agree that you will not (and will not attempt to)
modify, prepare derivative works of, reverse engineer, decompile, disassemble, or otherwise attempt to
create source code from the software. No title to or ownership in the Intellectual Property is transferred to
you. All applicable rights of the Intellectual Property shall remain with SAMSUNG and its suppliers.
Open Source Software
Some software components of this product incorporate source code covered under GNU General Public
License (GPL), GNU Lesser General Public License (LGPL), OpenSSL License, BSD License and other open
source licenses. To obtain the source code covered under the open source licenses, please visit:
http://opensource.samsung.com
.
Disclaimer of Warranties; Exclusion of Liability
EXCEPT AS SET FORTH IN THE EXPRESS WARRANTY CONTAINED ON THE WARRANTY PAGE ENCLOSED
WITH THE PRODUCT, THE PURCHASER TAKES THE PRODUCT "AS IS", AND SAMSUNG MAKES NO
EXPRESS OR IMPLIED WARRANTY OF ANY KIND WHATSOEVER WITH RESPECT TO THE PRODUCT,
INCLUDING BUT NOT LIMITED TO THE MERCHANTABILITY OF THE PRODUCT OR ITS FITNESS FOR ANY
PARTICULAR PURPOSE OR USE; THE DESIGN, CONDITION OR QUALITY OF THE PRODUCT; THE
PERFORMANCE OF THE PRODUCT; THE WORKMANSHIP OF THE PRODUCT OR THE COMPONENTS
CONTAINED THEREIN; OR COMPLIANCE OF THE PRODUCT WITH THE REQUIREMENTS OF ANY LAW, RULE,
SPECIFICATION OR CONTRACT PERTAINING THERETO. NOTHING CONTAINED IN THE INSTRUCTION
MANUAL SHALL BE CONSTRUED TO CREATE AN EXPRESS OR IMPLIED WARRANTY OF ANY KIND
WHATSOEVER WITH RESPECT TO THE PRODUCT. IN ADDITION, SAMSUNG SHALL NOT BE LIABLE FOR ANY
DAMAGES OF ANY KIND RESULTING FROM THE PURCHASE OR USE OF THE PRODUCT OR ARISING FROM
VMU_SPH-L500_BG_Eng_MA2_CH_010213_D1
THE BREACH OF THE EXPRESS WARRANTY, INCLUDING INCIDENTAL, SPECIAL OR CONSEQUENTIAL
DRAFT - Internal Use Only
DAMAGES, OR LOSS OF ANTICIPATED PROFITS OR BENEFITS.
SAMSUNG IS NOT LIABLE FOR PERFORMANCE ISSUES OR INCOMPATIBILITIES CAUSED BY YOUR EDITING
OF REGISTRY SETTINGS, OR YOUR MODIFICATION OF OPERATING SYSTEM SOFTWARE.
USING CUSTOM OPERATING SYSTEM SOFTWARE MAY CAUSE YOUR DEVICE AND APPLICATIONS TO WORK
IMPROPERLY.
Samsung Telecommunications America (STA), LLC
Headquarters:
1301 E. Lookout Drive
Richardson, TX 75082
Customer Care Center:
1000 Klein Rd.
Plano, TX 75074
Toll Free Tel: 1.888.987.HELP (4357)
Internet Address:
http://www.samsung.com
©
2013 Samsung Telecommunications America, LLC. Samsung is a registered trademark of Samsung
Electronics Co., Ltd.
Do you have questions about your Samsung Mobile Phone?
For 24 hour information and assistance, we offer a new FAQ/ARS System (Automated Response System)
www.samsung.com/us/support
at:

The Bluetooth® word mark, figure mark (stylized “B Design”), and combination mark (Bluetooth word
DRAFT - Internal Use Only
mark and “B Design”) are registered trademarks and are wholly owned by the Bluetooth SIG.
Nuance®, VSuite
Nuance Communications, Inc., or its affiliates in the United States and/or other countries.
microSD™, microSDHC™ and the microSD logo are Trademarks of the SD Card Association.
Wi-Fi® , the Wi-Fi CERTIFIED logo, and the Wi-Fi logo are registered trademarks of the Wi-Fi Alliance.
DivX®, DivX Certified® and associated logos are trademarks of Rovi Corporation or its subsidiaries and
are used under license.
DivX Certified® to play DivX® video up to HD 720p, including premium content.
ABOUT DIVX VIDEO: DivX® is a digital video format created by DivX, LLC, a subsidiary of Rovi Corporation.
This is an official DivX Certified® device that plays DivX video. Visit divx.com for more information and
software tools to convert your files into DivX videos.
ABOUT DIVX VIDEO-ON-DEMAND: This DivX Certified® device must be registered in order to play
purchased DivX Video-on-Demand (VOD) movies. To obtain your registration code, locate the DivX VOD
section in your device setup menu (From the Home screen, touch Applications > Settings > About phone
> Legal information > License settings > DivX® VOD > Register). Go to
on how to complete your registration.
Google, Google Play and other marks are trademarks of Google, Inc.
©2013 Samsung Telecommunications America, LLC. Samsung is a registered trademark of Samsung
Electronics Co., Ltd. All product and brand names are trademarks or registered trademarks of their
respective companies. Screen images simulated. Appearance of the device may vary.
®
VIRGIN
used under license.
™, XT9® Text Input, and the Nuance logo are trademarks or registered trademarks of
vod.divx.com
and the Virgin signature logo are registered trademarks of Virgin Enterprises Limited and are
for more information

Table of Contents
DRAFT - Internal Use Only
Section 1: Getting Started ................3
Installing the Battery . . . . . . . . . . . . . . .3
Removing the Battery . . . . . . . . . . . . . . .3
Charging the Battery . . . . . . . . . . . . . . .3
Turning the Phone On or Off . . . . . . . . . .4
Securing your Phone . . . . . . . . . . . . . . .4
Section 2: My Account ......................5
Create your Account and Pick Your Plan .5
Activating Your Device . . . . . . . . . . . . . .5
Managing Your Account . . . . . . . . . . . . .6
Section 3: Understanding Your Phone 7
Front View . . . . . . . . . . . . . . . . . . . . . . .7
Back View . . . . . . . . . . . . . . . . . . . . . . .7
Side Views . . . . . . . . . . . . . . . . . . . . . . .8
Navigation . . . . . . . . . . . . . . . . . . . . . . .8
Home Screen . . . . . . . . . . . . . . . . . . . . .9
Notifications . . . . . . . . . . . . . . . . . . . . .10
Entering Text . . . . . . . . . . . . . . . . . . . .10
Memory Card . . . . . . . . . . . . . . . . . . . .11
Section 4: Calling ............................13
Making a Call . . . . . . . . . . . . . . . . . . . .13
Ending a Call . . . . . . . . . . . . . . . . . . . .13
Answering Calls . . . . . . . . . . . . . . . . . .13
Options During a Call . . . . . . . . . . . . . .13
Options After a Call Ends . . . . . . . . . . .14
Sending Calls to Voicemail . . . . . . . . . .14
Using Speakerphone . . . . . . . . . . . . . .14
Section 5: Contacts and Accounts . 15
Adding a New Contact . . . . . . . . . . . . . 15
Saving a Phone Number . . . . . . . . . . . 15
Setting up Accounts . . . . . . . . . . . . . . . 15
Section 6: Messaging .....................17
Text and Multimedia Messages . . . . . . 17
Voicemail . . . . . . . . . . . . . . . . . . . . . . . 18
Email . . . . . . . . . . . . . . . . . . . . . . . . . . 19
Gmail . . . . . . . . . . . . . . . . . . . . . . . . . . 19
Section 7: Apps ...............................20
Camera . . . . . . . . . . . . . . . . . . . . . . . . 22
Internet . . . . . . . . . . . . . . . . . . . . . . . . 23
Section 8: Connections ..................25
Wi-Fi . . . . . . . . . . . . . . . . . . . . . . . . . . 25
Bluetooth . . . . . . . . . . . . . . . . . . . . . . . 26
Section 9: Settings .........................27
Display . . . . . . . . . . . . . . . . . . . . . . . . 27
Sound . . . . . . . . . . . . . . . . . . . . . . . . . 28
Security . . . . . . . . . . . . . . . . . . . . . . . . 28
Section 10: Health and Safety
Information ......................................30
Exposure to Radio Frequency
(RF) Signals . . . . . . . . . . . . . . . . . . . 30
Specific Absorption Rate (SAR)
Certification Information . . . . . . . . . . 34
FCC Part 15 Information to User . . . . . . 36
Commercial Mobile Alerting
System (CMAS) . . . . . . . . . . . . . . . . 36
1

Smart Practices While Driving . . . . . . . 36
DRAFT - Internal Use Only
Battery Use and Safety . . . . . . . . . . . . 38
Samsung Mobile Products
and Recycling . . . . . . . . . . . . . . . . . 39
UL Certified Travel Charger . . . . . . . . . 40
Display / Touch-Screen . . . . . . . . . . . . 41
GPS & AGPS . . . . . . . . . . . . . . . . . . . . 41
Emergency Calls . . . . . . . . . . . . . . . . . 42
Care and Maintenance . . . . . . . . . . . . 43
Responsible Listening . . . . . . . . . . . . . 43
Operating Environment . . . . . . . . . . . . 45
FCC Hearing Aid Compatibility (HAC)
Regulations for Wireless Devices . . . 47
Restricting Children's Access to
Your Mobile Device . . . . . . . . . . . . . 48
FCC Notice and Cautions . . . . . . . . . . . 49
Other Important Safety Information . . . 49
Section 11: Warranty Information ..51
Standard Limited Warranty . . . . . . . . . 51
End User License Agreement
for Software . . . . . . . . . . . . . . . . . . 55
Index ...................................................1
2
Section 1: Getting Started
DRAFT - Internal Use Only
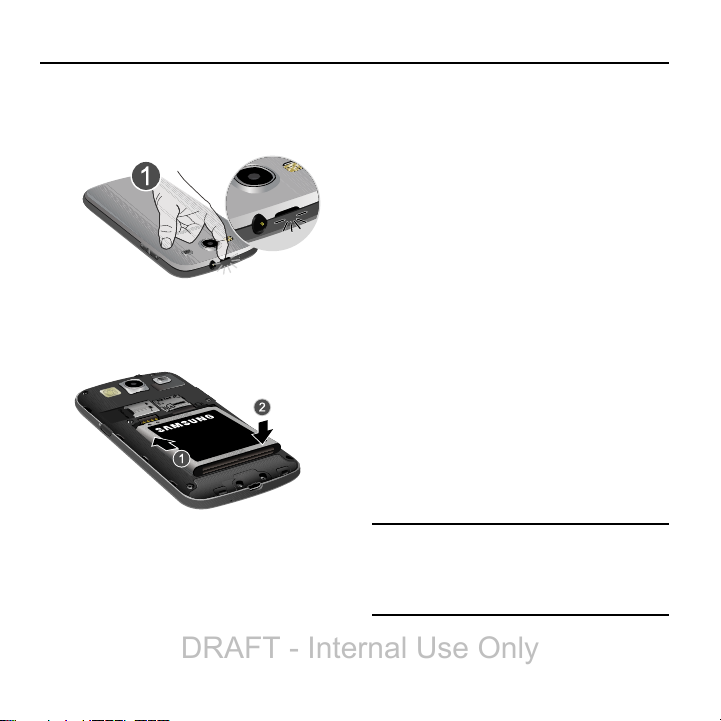
Installing the Battery
1. Remove the battery cover by pulling up on
the slot provided.
2. Insert the battery into the back of the
phone, making sure to align the gold
contacts.
3. Replace the battery cover by aligning the
cover and pressing it gently into place.
Removing the Battery
1. Turn the phone off. Removing the battery
when the device is on may cause loss of
stored numbers or messages.
2. Remove the battery cover by pulling up on
the slot provided.
3. Lift the battery out of the device using the
slot provided.
4. Replace the battery cover by aligning the
cover and pressing gently until it clicks into
place.
Charging the Battery
Keeping track of your battery’s power level is
important. If the power level becomes too low,
the phone turns off automatically, and you can
lose any unsaved information.
With the Virgin Mobile-approved Li-Ion battery,
you can recharge the battery before it completely
runs down.
Note:
The battery comes partially charged, but
you should fully charge the battery before
using your phone. After the first charge, you
can use the phone while charging.
Getting Started 3
DRAFT - Internal Use Only
Connect the charger to the USB/Accessory
port, then plug the Charger into an
electrical outlet.
Turning the Phone On or Off
Turning the Phone On
Press and hold the
the phone starts up.
Turning the phone Off
1. Press and hold the Power/Lock Key until
the Device Options menu displays.
2. On the Device Options menu, touch
Power off
.
Lock/Power Key
until
Securing your Phone
Use your phone’s screen lock features to secure
your phone.
To set a personal screen lock, and for other
settings related to securing your phone, refer to
Settings
➔
Security
Locking the phone
By default, the phone locks automatically
when the screen times out.
– or –
Press the
Tip:
When the phone is locked, the Emergency call
feature is available on the lock screen, to
allow you to make emergency calls even
while the phone is locked.
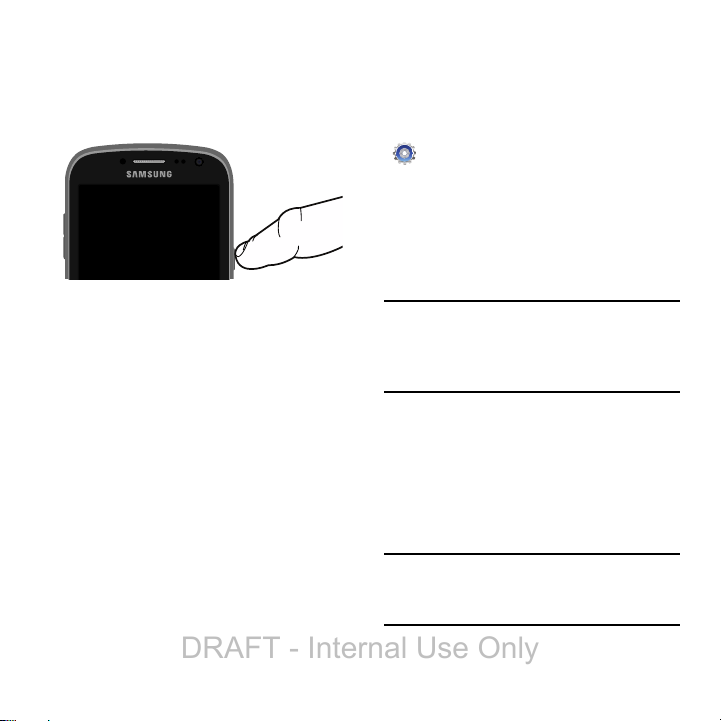
Unlocking the phone
Unlock the phone using one of the default unlock
screens, or use Screen lock options for
increased security.
Press the
drag your finger across the screen.
Tip:
Special notification icons display for missed
calls or new messages. Drag a missed call or
message icon to view the message or call log.
.
Power/Lock Key
Power/Lock Key
.
, then touch and
4

Section 2: My Account
DRAFT - Internal Use Only
Before using your device, you must activate your
service with Virgin Mobile. You will need your
phone’s serial number, printed on a sticker inside
the battery compartment.
Create your Account and Pick
Your Plan
1. From your computer, visit
virginmobileusa.com
2. Choose an activation option and click
then enter your ZIP code and click
3. When prompted, enter the
printed on a sticker inside the
(MEID)
battery compartment.
4. Follow the instructions to choose your plan
and select a payment method.
5. Follow the
instructions after creating your account in
order to start using your phone.
and click
Activating Your Device
Activate
serial number
.
Next
Next
.
Activating Your Device
After setting up your account on
virginmobileusa.com, simply turn your device on.
Your device is designed to activate automatically.
If you are swapping from another Virgin Mobile
device to a new one, be sure to turn off the old
device before swapping the serial number
(MEID). Once the MEID swap is complete, turn on
the new device and the programming
,
information will be pushed to your device
automatically.
You can also start the activation process
manually.
From the Home screen, touch
Settings ➔ System Update ➔Update
.
Profile
Note:
Do not press the
activation. Pressing the
cancels the activation process.
6.
Power/Lock Key
Power/Lock Key
during
My Account 5
Managing Your Account
DRAFT - Internal Use Only
Access your account, where you can:
•
Check your minutes
•
Add money (Top-Up)
•
Change plans, and a lot more...
From your Phone
Dial *86.
From Your Computer
Log in with your phone number and Account PIN
virginmobileusa.com
at
everything above, and a lot more.
Auto Payment
Registering a credit or debit card is the easiest
way to keep your service working. Set it up to
pay your monthly service fee automatically so
you can keep emailing, IMing, surfing, and
talking. No interruptions, no sweat.
Advance Payment
If you want to pay for next month so you don't
have to worry, use our Advance Payment option.
Activate Auto Payment by adjusting your
payment settings or use Advance Pay anytime by
logging in at virginmobileusa.com. Follow the
prompts to enter payment information and
complete the process.
, where you can do
Manual Top-Ups
From Your Computer
If you don’t want to register a credit or debit
card, you can still log in at
whenever you need a quick Top-Up.
From Your Phone
Dial *729.
virginmobileusa.com
Additional Informaiton
For more information about your Virgin Mobile
account, as well as other Virgin Mobile services,
visit us at:
Or, call Virgin Mobile At Your Service:
1-800-322-1122.
virginmobileusa.com
.
6
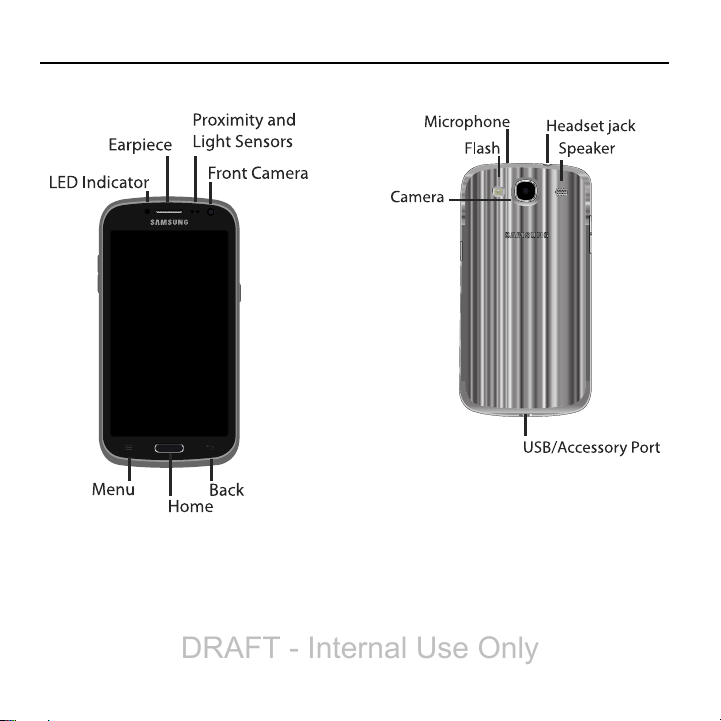
Section 3: Understanding Your Phone
DRAFT - Internal Use Only
Front View Back View
Understanding Your Phone 7

Side Views Navigation
DRAFT - Internal Use Only
Navigate your phone’s features using the
command keys and the touch screen.
Warning!
Warning! Please note that a touch
screen responds best to a light touch
from the pad of your finger or a
nonmetallic stylus. Using excessive
force or a metallic object when pressing
on the touch screen may damage the
tempered glass surface and void the
warranty.
Command Keys
Menu
Tou ch
menu for the current app or feature.
Home
Tou ch
Back
Tou ch
or step.
Menu
Home
Back
to display a context-sensitive
to display the Home screen.
to return to the previous screen
8
Finger Gestures
DRAFT - Internal Use Only
Tou c h
Touch items to select or launch them. For
example:3
•
Touch the onscreen keyboard to enter characters or
text.
•
Touch an item to select it.
•
Touch an app’s icon to launch the application.
Touch and Hold
Activate items by a touch and hold gesture. For
example:
•
Touch and hold a widget on the Home screen to
move it.
•
Touch and hold on a field to display a pop-up menu
of options.
Swipe
Swipe your finger across the screen. For
example:
•
Unlocking the screen
•
Scrolling the Home screen or a menu
•
Combine touch and hold with swipe to drag an item.
Pinch
Using two fingers, make a pinch motion on the
screen. For example:
•
Pinch in to zoom in on pictures or screens.
•
Pinch out to zoom out on pictures or screens.
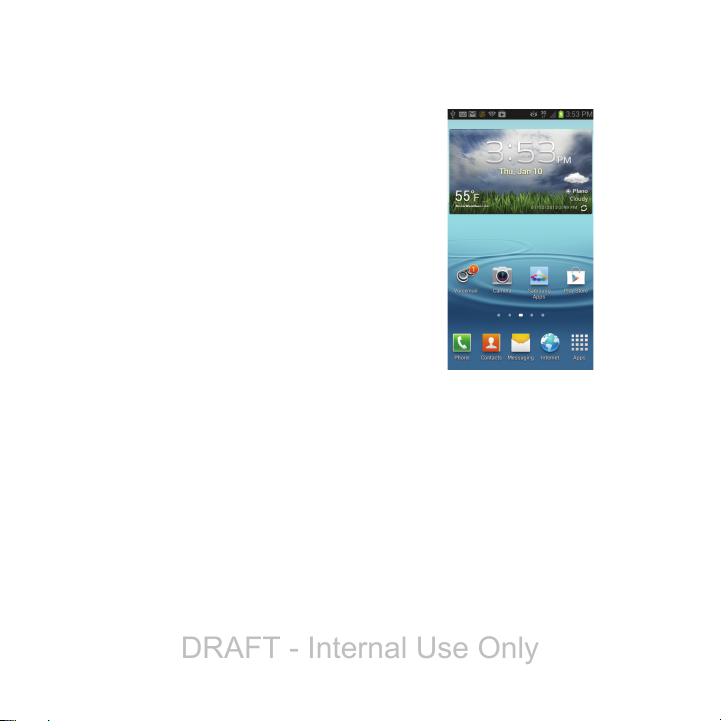
Home Screen
The Home screen is the starting point for using
your phone.
•
Status Bar
battery power, and connection details.
•
Primary Shortcuts
phone’s common apps.
•
Shortcuts
shortcuts are on the Home screen by default, plus
you can add your own by touching and holding on
the screen for options.
•
Widgets
widgets are on the Home screen by default, plus you
can add your own by touching and holding on the
screen for options.
: Presents icons to show network status,
: Provides access to your
: Shortcuts to favorite apps. These
: Apps that run on the Home screen. These
Understanding Your Phone 9
Customizing the Home Screen
DRAFT - Internal Use Only
Customize the Home screen to your preferences:
•
Edit a Home page
panels. Touch
•
Display Settings: Refer to
Settings
•
Wallpaper
options for setting wallpaper for the Home and Lock
screens.
: Add and remove Home screen
Menu ➔
Edit page
.
Apps
➔
➔
Display
.
: Touch and hold on the Home screen for
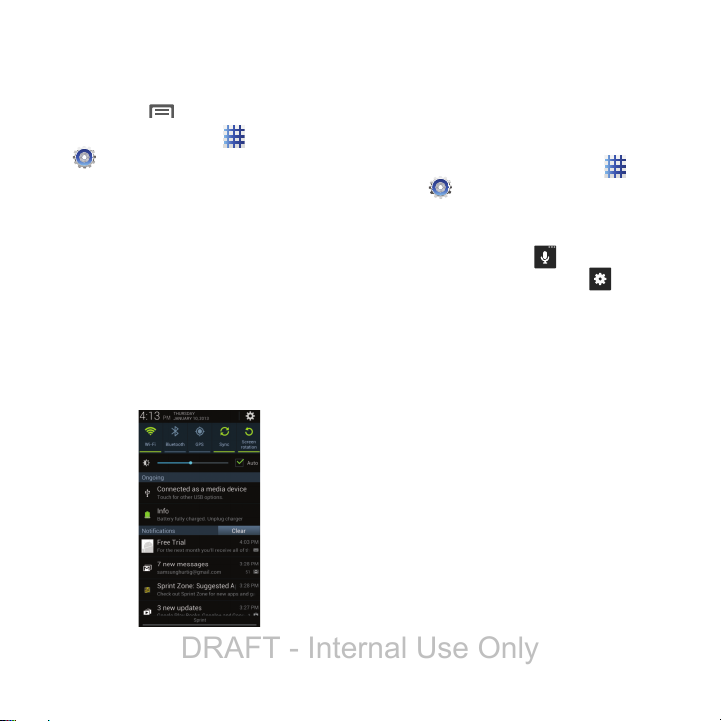
Notifications
Notifications shows details about connections,
alerts and other items.
1. Touch and drag downward from the top of
the screen to display notifications.
2. Touch an item to open it, or to launch the
related app or feature.
Entering Text
Enter text using your phone’s virtual QWERTY
keyboard, or speak your entries.
Configuring Text Entry
Configure text entry options to your preferences.
From the Home screen, touch
Settings
➔
Language and input
– or –
While entering text, touch and hold on the
multi-feature key until the options
menu pops-up, then touch .
Using Samsung Keyboard
Samsung keyboard is a custom virtual QWERTY
keyboard, featuring optional predictive text. Input
characters by tapping the on-screen keys with
your finger, or use speech recognition.
Enable predictive text, to have the Samsung
keyboard match your key touches to common
words and display them. Select a word from the
display to insert it into your text.
Apps
.
➔
10

Using Google Voice Typing
DRAFT - Internal Use Only
Use your voice to enter text using the Google
Voice typing feature.
1. While entering text, touch and drag
downward from the top of the screen to
display Notifications, then touch
➔
input method
2. At the
As you speak, the text displays in the text
field.
Google voice typing
Listening
prompt, speak your text.
Choose
Memory Card
Your phone supports optional microSD™ or
microSDHC™ memory cards (not included), for
storage of music, pictures, and other files.
Installing a Memory Card
.
1. Turn the phone off.
2. Remove the battery cover by pulling up on
the slot provided.
3. Lift the battery out of the device using the
slot provided.
4. Using your thumbnail, slide the memory
card into the slot, gold contacts face down
until the card clicks securly.
5. Insert the battery into the back of the
phone, making sure to align the gold
contacts.
6. Replace the battery cover by aligning the
cover and pressing gently until it clicks into
place.
Understanding Your Phone 11
Removing a Memory Card
DRAFT - Internal Use Only
Important!
To prevent damage to data stored on
the memory card, unmount the card
before removing it from the phone.
1. From the Home screen, touch
Settings
➔
Storage
➔
Unmount SD
card
.
2. At the prompt, read the warning and select
OK
to continue. Wait for
to display in the Status bar and
remove
Notifications before removing the card.
3. Open the memory card cover, turning the
cover to the side to expose the card slot.
4. Gently press the memory card to release
the lock, then carefully pull the card out.
5. Close the memory card cover.
SD card safe to
12
Section 4: Calling
DRAFT - Internal Use Only
Making a Call
1. From the Home screen, touch
2. Touch the digits of the telephone number
on the Keypad, then touch .
Phone
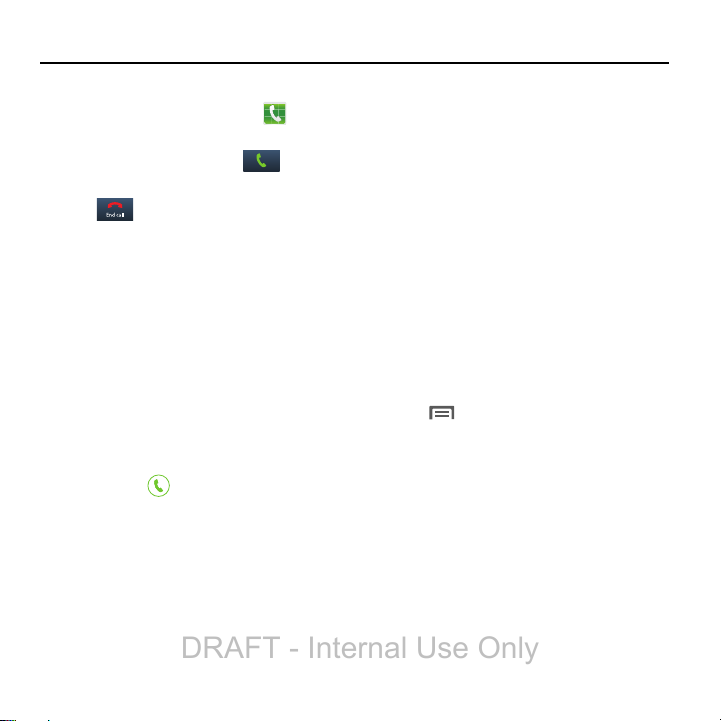
Ending a Call
•
Tou c h .
Answering Calls
The phone alerts you to incoming calls.
Depending on the phone’s status and the type of
call, you may see a combination of:
•
Playing the ringer and/or vibrating.
•
Illuminating the backlight.
•
Displaying an incoming call message. If the call is
from a number stored in Contacts, the name
displays. You may also see the caller’s phone
number, if available based on their preferences.
To answer a call:
•
Touch and drag toward the middle of the
screen.
Muting an Incoming Call Ringer
.
When an incoming call’s ringer plays, you can
quickly mute the ringer by pressing the
Key
.
Options During a Call
During a call, press an option key options:
•
Add call
:
•
Keypad
: Display a keypad to enter numbers.
•
End call
: End the phone call.
•
Speaker
: Enable or disable Speakerphone.
•
Mute
: Control whether your side of the call is heard.
•
Headset
: Switch the call’s audio to an optional
Bluetooth headset (not included). The phone and
headset must already be paired.
•
To uch
–
–
–
–
–
Menu
Contacts
: Launch Contacts.
Message
: Launch Messaging.
Memo
: Launch Memo.
Noise reduction off
My call sound
: Adjusts sound quality for this call.
for:
: Adjusts sound quality.
Volume
Calling 13
Options After a Call Ends
DRAFT - Internal Use Only
After a call, you can use these options:
•
Create Contact
contact record.
•
Update existing
a contact.
•
Call
: Redial the call.
•
Message
phone number.
: Save the phone number as a new
: Save the phone number to update
: Create a new message, addressed to the
Sending Calls to Voicemail
Rejecting a call sends the caller directly to
voicemail, and stops the incoming call ringer.
You can also choose to reject the call and send a
text message to the caller.
•
Touch and drag toward the middle of the
screen.
•
Touch and drag
the middle of the screen, then select an existing
message, or
Reject call with message
Create new message
toward
.
Using Speakerphone
To use your phone hands-free, or to share a call
Speaker
with others, touch
On or Off.
Caution!
Due to increased volume, do not place
the phone near your ear when
Speakerphone is On.
to turn Speakerphone
14

Section 5: Contacts and Accounts
DRAFT - Internal Use Only
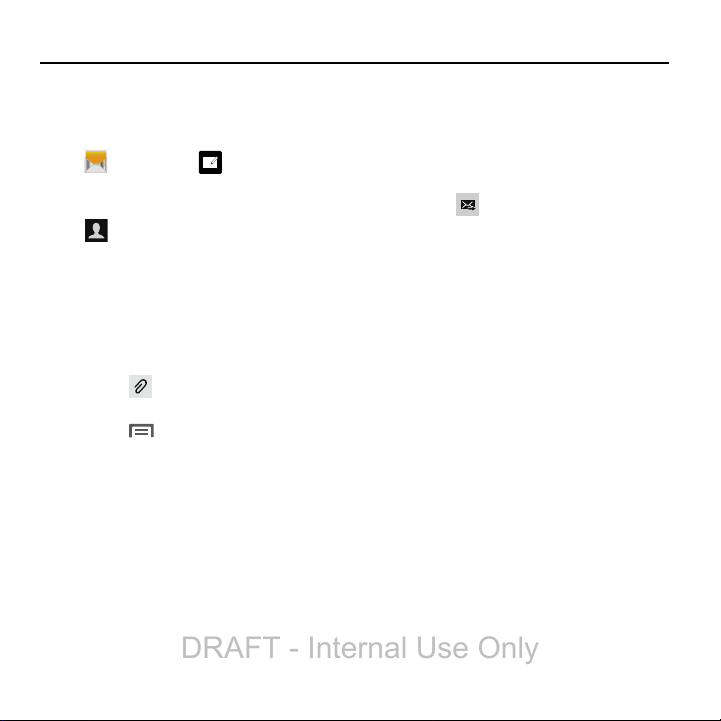
Adding a New Contact
1. From the Home screen, touch
Contacts
➔
2. At the prompt, select a save option for the
contact (options depend on accounts set
up).
3. Touch contact fields to enter information.
Touch to choose a label, and touch
to add new field:
• Contact photo
•Phone
: Enter a phone number.
•Name
: Enter a name for the contact.
•Groups
: Assign the contact to a group.
• Ringtone
: Choose a ringtone for the contact.
• Message alert
• Vibration pattern
play along with the ringtone when this contact
calls or sends a message.
•Add another field
Phonetic Name, Organization, IM, Notes,
Nickname, Website, Internet call, or Relationship.
4. When you finish entering information,
touch
Save
.
Create contact
: Touch to select a picture.
: Choose a vibration pattern to
: Add more fields, including
Saving a Phone Number
1. From the Home screen, touch
.
2. Touch the digits of the telephone number
on the Keypad.
3. Touch
Create contact or Update existing.
4. Continue entering contact information.
Add to contacts
Phone
, then select
.
Setting up Accounts
Your phone provides the ability to synchronize
information, from a variety of accounts, including
Email, Google, and Microsoft Exchange.
Depending on the account, you can choose to
synchronize your calendar, contacts, and other
types of content.
Contacts from your accounts appear in your
phone’s Contacts, and you can save new
contacts to an account.
With synchronization, you can ensure that
information on your phone is updated with any
information that changes in your accounts.
Contacts and Accounts 15
Adding accounts
DRAFT - Internal Use Only
1. From the Home screen, touch
Settings
➔
2. Select an account provider, then follow the
prompts to enter your credentials and sign
in. The phone communicates with the
provider’s server to set up your account on
the phone.
Add account
.
Apps
Synchronization
➔
You can choose to have your phone
automatically sync with your accounts, or
manually synchronize each account when you
want to check messages.
You may also choose to limit automatic or
background synchronization to extend battery
life, or to control when your phone uses data
services.
1. From the Home screen, touch
2. Tou ch Menu
3. Touch Auto synch app data and touch OK
to synchronize all accounts.
and touch
??Contacts
Accounts
.
16
Section 6: Messaging
DRAFT - Internal Use Only
Text and Multimedia Messages
Sending Messages
1. From the Home screen, touch
Messaging
2. Tou ch
phone number or email address, or touch
to add recipients from Contacts. As
you enter text, matching contacts appear.
Touch a contact to add it to the list.
3. Tou ch
message. While entering the message, use
these options (available options depend on
attachment):
•
Touch Attach
the message (converts the message to MMS).
•
Touch
–
Insert smiley
message.
–
Add text
Location, Contacts or Text templates to add to
the message.
–
Add slide/Remove slide
slide. Slides hold pictures or other media, and
adding a slide converts the message to MMS.
➔
New message
Enter recipient
Enter message
and enter a name,
, then enter the
to add media or content to
Menu
for options:
: Add an emoticon to the
: Select text from Memo, S Planner,
: Add or remove a
.
–
Add subject
message to MMS.)
–
Scheduled message
this message to send.
–
Discard
4. Touch to send the message.
: Add a subject field (converts the
: Set the time and date for
: Discards the message draft.
Messaging 17
 Loading...