

ANDROID TABLET
DRAFT For Internal Use Only
**This device is capable of operating in 802.11a/n mode. For 802.11a/n devices operating in the frequency range of 5.15 - 5.25 GHz, they
are restricted for indoor operations to reduce any potential harmful interference for Mobile Satellite Services (MSS) in the US. WIFI
Access Points that are capable of allowing your device to operate in 802.11a/n/ac mode (5.15 - 5.25 GHz band) are optimized for indoor
use only. If your WIFI network is capable of operating in this mode, please restrict your WIFI use indoors to not violate federal regulations
to protect Mobile Satellite Services.**
User Manual
Please read this manual before operating your
device and keep it for future reference.
Warning!
DRAFT For Internal Use Only
This product contains chemicals known to the State of California to cause cancer and reproductive toxicity.
Intellectual Property
All Intellectual Property, as defined below, owned by or which is otherwise the property of Samsung or its respective suppliers
relating to the SAMSUNG Galaxy Tab, including but not limited to, accessories, parts, or software relating there to (the “Galaxy Tab
System”), is proprietary to Samsung and protected under federal laws, state laws, and international treaty provisions. Intellectual
Property includes, but is not limited to, inventions (patentable or unpatentable), patents, trade secrets, copyrights, software,
computer programs, and related documentation and other works of authorship. You may not infringe or otherwise violate the
rights secured by the Intellectual Property. Moreover, you agree that you will not (and will not attempt to) modify, prepare
derivative works of, reverse engineer, decompile, disassemble, or otherwise attempt to create source code from the software. No
title to or ownership in the Intellectual Property is transferred to you. All applicable rights of the Intellectual Property shall remain
with SAMSUNG and its suppliers.
Open Source Software
Some software components of this product, including but not limited to 'PowerTOP' and 'e2fsprogs', incorporate source code
covered under GNU General Public License (GPL), GNU Lesser General Public License (LGPL), OpenSSL License, BSD License and
other open source licenses. To obtain the source code covered under the open source licenses, please visit:
http://opensource.samsung.com
VZW_SM-T337V_UM_Eng_xxx_TE_030714_D1
.

Disclaimer of Warranties; Exclusion of Liability
DRAFT For Internal Use Only
EXCEPT AS SET FORTH IN THE EXPRESS WARRANTY CONTAINED ON THE WARRANTY PAGE ENCLOSED WITH THE PRODUCT, THE
PURCHASER TAKES THE PRODUCT "AS IS", AND SAMSUNG MAKES NO EXPRESS OR IMPLIED WARRANTY OF ANY KIND
WHATSOEVER WITH RESPECT TO THE PRODUCT, INCLUDING BUT NOT LIMITED TO THE MERCHANTABILITY OF THE PRODUCT OR
ITS FITNESS FOR ANY PARTICULAR PURPOSE OR USE; THE DESIGN, CONDITION OR QUALITY OF THE PRODUCT; THE
PERFORMANCE OF THE PRODUCT; THE WORKMANSHIP OF THE PRODUCT OR THE COMPONENTS CONTAINED THEREIN; OR
COMPLIANCE OF THE PRODUCT WITH THE REQUIREMENTS OF ANY LAW, RULE, SPECIFICATION OR CONTRACT PERTAINING
THERETO. NOTHING CONTAINED IN THE INSTRUCTION MANUAL SHALL BE CONSTRUED TO CREATE AN EXPRESS OR IMPLIED
WARRANTY OF ANY KIND WHATSOEVER WITH RESPECT TO THE PRODUCT. IN ADDITION, SAMSUNG SHALL NOT BE LIABLE FOR
ANY DAMAGES OF ANY KIND RESULTING FROM THE PURCHASE OR USE OF THE PRODUCT OR ARISING FROM THE BREACH OF
THE EXPRESS WARRANTY, INCLUDING INCIDENTAL, SPECIAL OR CONSEQUENTIAL DAMAGES, OR LOSS OF ANTICIPATED PROFITS
OR BENEFITS.
Modification of Software
SAMSUNG IS NOT LIABLE FOR PERFORMANCE ISSUES OR INCOMPATIBILITIES CAUSED BY YOUR EDITING OF REGISTRY SETTINGS,
OR YOUR MODIFICATION OF OPERATING SYSTEM SOFTWARE.
USING CUSTOM OPERATING SYSTEM SOFTWARE MAY CAUSE YOUR DEVICE AND APPLICATIONS TO WORK IMPROPERLY. YOUR
CARRIER MAY NOT PERMIT USERS TO DOWNLOAD CERTAIN SOFTWARE, SUCH AS CUSTOM OS.
IF YOUR CARRIER PROHIBITS THIS, IF YOU ATTEMPT TO DOWNLOAD SOFTWARE ONTO THE DEVICE WITHOUT AUTHORIZATION,
YOU WILL BE NOTIFIED ON THE SCREEN THAT THE PHONE WILL NO LONGER OPERATE AND BE INSTRUCTED TO POWER DOWN
THE DEVICE. YOU MUST THEN CONTACT YOUR CARRIER TO RESTORE THE DEVICE TO THE CARRIER AUTHORIZED SETTINGS.
Samsung Telecommunications America (STA), LLC
DRAFT For Internal Use Only
Headquarters:
1301 E. Lookout Drive
Richardson, TX 75082
Customer Care Center:
1000 Klein Rd.
Plano, TX 75074
Toll Free Tel: 1.888.987.HELP (4357)
Internet Address:
http://www.samsung.com
©
2014 Samsung Telecommunications America, LLC. Samsung is a trademark of Samsung Electronics Co., Ltd.
Do you have questions about your Samsung Mobile Device?
For 24 hour information and assistance, we offer a new FAQ/ARS System (Automated Response System) at:
www.samsung.com/us/support
© Verizon Wireless Verizon Wireless and the Verizon Wireless logos are trademarks of Verizon Trademark Services LLC. All
company names, trademarks, logos and copyrights not property of Verizon Wireless are the property of their respective owners.

©2014 Google Inc. All rights reserved. Google, the Google logo, Android, Chrome, Gmail, Google+, Google Books, Google Maps,
DRAFT For Internal Use Only
Google Mobile Services, Google Play, Google Voice, Google Voice Search, Google Wallet, Hangouts, YouTube, and Picasa are
trademarks of Google, Inc.
Other marks are property of their respective owners.
Screen images simulated. Appearance of device may vary.
The actual available capacity of the internal memory is less than the specified capacity because the operating system and default
applications occupy part of the memory. The available capacity may change when you upgrade the device.
Table of Contents
DRAFT For Internal Use Only
Section 1: Getting Started ...........................4
Understanding This User Manual . . . . . . . . . . . .4
SIM Card . . . . . . . . . . . . . . . . . . . . . . . . . . . . . . 5
Battery . . . . . . . . . . . . . . . . . . . . . . . . . . . . . . . 6
Turning Your Device On and Off . . . . . . . . . . . . . 8
Setup Wizard . . . . . . . . . . . . . . . . . . . . . . . . . . . 9
Memory Card . . . . . . . . . . . . . . . . . . . . . . . . . .9
Securing Your Device . . . . . . . . . . . . . . . . . . .10
Section 2: Understanding Your Device .....11
Features . . . . . . . . . . . . . . . . . . . . . . . . . . . . . 11
Front and Sides . . . . . . . . . . . . . . . . . . . . . . . . 12
Back and Top . . . . . . . . . . . . . . . . . . . . . . . . . 12
Navigating Your Device . . . . . . . . . . . . . . . . . .13
Using the Touch Screen . . . . . . . . . . . . . . . . . .14
Multi Window . . . . . . . . . . . . . . . . . . . . . . . . .18
Home Screen . . . . . . . . . . . . . . . . . . . . . . . . .21
Screen Capture . . . . . . . . . . . . . . . . . . . . . . . .30
Entering Text . . . . . . . . . . . . . . . . . . . . . . . . . . 30
Section 3: Accounts and Contacts ...........33
Accounts . . . . . . . . . . . . . . . . . . . . . . . . . . . . . 33
Your Google Account . . . . . . . . . . . . . . . . . . . . 34
1
Your Samsung Account . . . . . . . . . . . . . . . . . .34
Contacts . . . . . . . . . . . . . . . . . . . . . . . . . . . . .34
Groups . . . . . . . . . . . . . . . . . . . . . . . . . . . . . . .37
Favorites . . . . . . . . . . . . . . . . . . . . . . . . . . . . .39
Section 4: Connections .............................40
Wi-Fi . . . . . . . . . . . . . . . . . . . . . . . . . . . . . . . .40
Wi-Fi Direct . . . . . . . . . . . . . . . . . . . . . . . . . . .42
Bluetooth . . . . . . . . . . . . . . . . . . . . . . . . . . . . .43
Mobile Hotspot . . . . . . . . . . . . . . . . . . . . . . . .48
Tethering . . . . . . . . . . . . . . . . . . . . . . . . . . . . .50
Synchronizing with Windows Media Player . . .51
Connecting as a Mass Storage Device . . . . . . .51
Section 5: Applications ............................. 52
Apps Screen . . . . . . . . . . . . . . . . . . . . . . . . . .52
Action Memo . . . . . . . . . . . . . . . . . . . . . . . . . .54
Alarm . . . . . . . . . . . . . . . . . . . . . . . . . . . . . . .54
Amazon . . . . . . . . . . . . . . . . . . . . . . . . . . . . . .55
Amazon Kindle . . . . . . . . . . . . . . . . . . . . . . . . .55
Amazon MP3 . . . . . . . . . . . . . . . . . . . . . . . . . .55
Appstore (Amazon) . . . . . . . . . . . . . . . . . . . . .55
Audible . . . . . . . . . . . . . . . . . . . . . . . . . . . . . .55

Businessweek+ . . . . . . . . . . . . . . . . . . . . . . . 55
DRAFT For Internal Use Only
Calculator . . . . . . . . . . . . . . . . . . . . . . . . . . . 56
Calendar . . . . . . . . . . . . . . . . . . . . . . . . . . . . 56
Camera . . . . . . . . . . . . . . . . . . . . . . . . . . . . . 57
Chrome . . . . . . . . . . . . . . . . . . . . . . . . . . . . . 65
Cloud . . . . . . . . . . . . . . . . . . . . . . . . . . . . . . . 65
Contacts . . . . . . . . . . . . . . . . . . . . . . . . . . . . 65
Downloads . . . . . . . . . . . . . . . . . . . . . . . . . . . 65
Drive . . . . . . . . . . . . . . . . . . . . . . . . . . . . . . . 66
e-Meeting . . . . . . . . . . . . . . . . . . . . . . . . . . . 66
Email . . . . . . . . . . . . . . . . . . . . . . . . . . . . . . . 66
Flipboard . . . . . . . . . . . . . . . . . . . . . . . . . . . . 70
Gallery . . . . . . . . . . . . . . . . . . . . . . . . . . . . . . 71
Gmail . . . . . . . . . . . . . . . . . . . . . . . . . . . . . . . 75
Google . . . . . . . . . . . . . . . . . . . . . . . . . . . . . . 76
Google Now . . . . . . . . . . . . . . . . . . . . . . . . . . 76
Google Settings . . . . . . . . . . . . . . . . . . . . . . . 77
Google+ . . . . . . . . . . . . . . . . . . . . . . . . . . . . . 77
Hancom Viewer . . . . . . . . . . . . . . . . . . . . . . . 77
Hangouts . . . . . . . . . . . . . . . . . . . . . . . . . . . . 77
Help . . . . . . . . . . . . . . . . . . . . . . . . . . . . . . . . 78
IMDb . . . . . . . . . . . . . . . . . . . . . . . . . . . . . . . 78
Internet . . . . . . . . . . . . . . . . . . . . . . . . . . . . . 78
KNOX . . . . . . . . . . . . . . . . . . . . . . . . . . . . . . . 80
Maps . . . . . . . . . . . . . . . . . . . . . . . . . . . . . . . 81
Mobile Hotspot . . . . . . . . . . . . . . . . . . . . . . . . 81
Music . . . . . . . . . . . . . . . . . . . . . . . . . . . . . . . 81
My Files . . . . . . . . . . . . . . . . . . . . . . . . . . . . . 84
My Verizon Mobile . . . . . . . . . . . . . . . . . . . . . 86
NYTimes . . . . . . . . . . . . . . . . . . . . . . . . . . . . 86
Photos . . . . . . . . . . . . . . . . . . . . . . . . . . . . . . 86
Play Books . . . . . . . . . . . . . . . . . . . . . . . . . . . 87
Play Games . . . . . . . . . . . . . . . . . . . . . . . . . . 87
Play Movies & TV . . . . . . . . . . . . . . . . . . . . . . 87
Play Music . . . . . . . . . . . . . . . . . . . . . . . . . . . 87
Play Newsstand . . . . . . . . . . . . . . . . . . . . . . . 88
Play Store . . . . . . . . . . . . . . . . . . . . . . . . . . . . 88
S Note . . . . . . . . . . . . . . . . . . . . . . . . . . . . . . 90
S Voice . . . . . . . . . . . . . . . . . . . . . . . . . . . . . . 90
Scrapbook . . . . . . . . . . . . . . . . . . . . . . . . . . . 92
Settings . . . . . . . . . . . . . . . . . . . . . . . . . . . . . 92
Setup Wizard . . . . . . . . . . . . . . . . . . . . . . . . . 92
SideSync 3.0 . . . . . . . . . . . . . . . . . . . . . . . . . 92
SketchBook for Galaxy . . . . . . . . . . . . . . . . . . 93
Task Manager . . . . . . . . . . . . . . . . . . . . . . . . 93
Verizon Messages . . . . . . . . . . . . . . . . . . . . . 94
Video . . . . . . . . . . . . . . . . . . . . . . . . . . . . . . . 94
Voice Search . . . . . . . . . . . . . . . . . . . . . . . . . 95
2

VZ Navigator . . . . . . . . . . . . . . . . . . . . . . . . . .96
DRAFT For Internal Use Only
WatchON . . . . . . . . . . . . . . . . . . . . . . . . . . . . . 96
WebEx . . . . . . . . . . . . . . . . . . . . . . . . . . . . . . . 96
World Clock . . . . . . . . . . . . . . . . . . . . . . . . . . . 97
YouTube . . . . . . . . . . . . . . . . . . . . . . . . . . . . . 98
Section 6: Settings ....................................99
About Settings . . . . . . . . . . . . . . . . . . . . . . . . . 99
Wireless and Networks . . . . . . . . . . . . . . . . . 100
Device . . . . . . . . . . . . . . . . . . . . . . . . . . . . . . 109
Personal . . . . . . . . . . . . . . . . . . . . . . . . . . . . 119
Accounts . . . . . . . . . . . . . . . . . . . . . . . . . . . . 133
System . . . . . . . . . . . . . . . . . . . . . . . . . . . . . 134
Index .........................................................142
3
Section 1: Getting Started
DRAFT For Internal Use Only
This section helps you to quickly start using your device.
Understanding This User Manual
The instructions in this manual are based on default settings,
and may vary from your device depending on the software
version on your device and any changes to the device’s
settings.
Unless otherwise specified, all instructions in this manual
assume that you are starting from a Home screen. To get to a
Home screen, you may need to unlock the device. For more
information, refer to “Securing Your Device” on page 10.
Note:
Unless stated otherwise, instructions in this user manual
start with the device unlocked, at the Home screen.
All screen images in this manual are simulated. Actual
displays may vary depending on the software version of
your device and any changes to the device’s settings.
Special Text
In this manual, some text is set apart from the rest. This
special text is intended to point out important information,
share quick methods for activating features, define terms,
and more. The definitions for these methods are as follows:
•
Notes
: Presents alternative options for the current feature, menu,
or sub-menu.
•
Tips
: Provides quick or innovative methods or useful shortcuts.
•
Important!
feature that could affect performance.
•
Warning!
can help to prevent loss of data or functionality or damage to
your device.
Important!
: Points out important information about the current
: Brings important information to your attention that
Getting Started 4
Text Conventions
DRAFT For Internal Use Only
This manual provides condensed information about how to
use your device. To make this possible, the following text
conventions are used to represent often-used steps:
➔
Arrows are used to represent the sequence of
selecting successive options in longer, or
repetitive, procedures.
For example:
Apps
➔
OFF
ON
.
.
OFF / ON
From a Home screen, touch
Settings
➔
Wi-Fi
.
This button disables or enables a feature, or turns
a setting off or on.
• indicates that the feature is
• indicates that the feature is
For example:
OFF / ON
Touch the
ON or OFF .
button to turn Bluetooth
SIM Card
Your device uses a 4G LTE SIM (Subscriber Identity Module).
The 4G LTE SIM is a small, rectangular plastic card that
stores your device number, information about your wireless
service, and may contain other information such as
messages and contacts.
The SIM card is installed in a slot on the top of your device.
If you purchased your device at a Verizon Wireless store, the
SIM card is activated and ready to use. If you ordered a new
device, the card may need to be activated before you can use
it. For more information about activating the SIM card, visit:
verizonwireless.com/4GSIM
Caution!
Do not bend or scratch the SIM card. Take care when
handling, installing, or removing the SIM card, and
avoid exposing the SIM card to static electricity,
water, or dirt. Keep the SIM card out of reach of small
children.
.
5
Important!
Turn the device off before installing or removing
the SIM card. To turn the device off, press and hold
the
Power/Lock Key
.
Installing the 4G LTE SIM Card
DRAFT For Internal Use Only
1. Locate the SIM card slot on the bottom right side of the
tablet.
2. Make sure the gold contacts of the SIM card face
downward and that the notched corner of the card
faces inward toward the left (as shown).
3. Carefully slide the SIM card into the SIM card socket
(as shown) until the card locks into place.
Battery
Your device is powered by a rechargeable, standard Li-Ion
battery. A Wall/USB Charger (Charging Head and USB cable)
are included with the device for charging the battery.
Warning!
Use only approved charging devices. Approved
accessories are designed to maximize battery life.
Using other accessories may invalidate your
warranty and may cause damage.
Battery Indicator
The Battery icon in the Status Bar shows the battery
power level. When battery power is low, your device prompts
you to charge the battery. If you continue to operate the
device without charging, the device powers off. For battery
use information, see “Battery” on page 115.
Getting Started 6
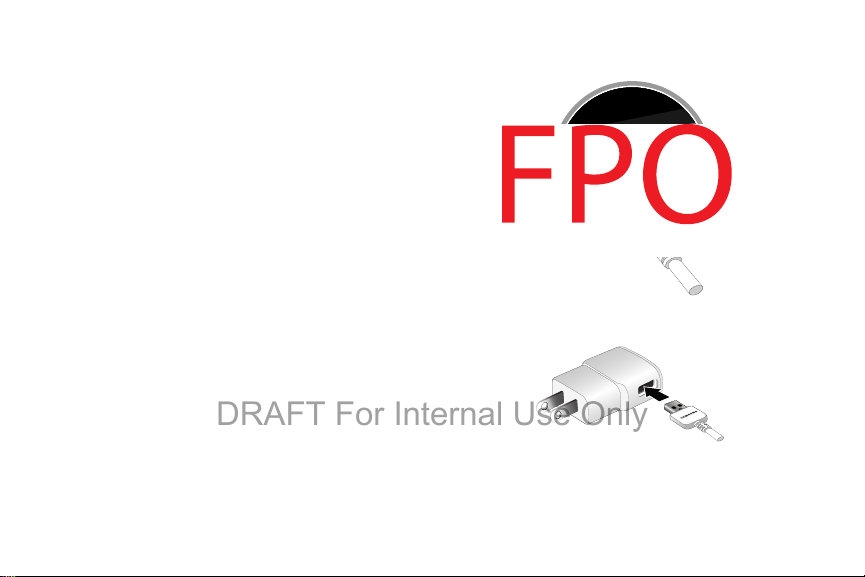
Charging the Battery
DRAFT For Internal Use Only
Your device comes with a Charging Head and USB cable to
charge your device from any standard power outlet.
Please note that:
•
The battery comes partially charged. You must fully charge the
battery before using your device for the first time. After the first
charge, you can use the device while charging.
•
You cannot charge the battery using the USB cable and your PC.
•
If the battery is completely discharged, you cannot turn on the
device, even with the USB power adapter connected. Allow a
depleted battery to charge for a few minutes before you try to turn
on the device.
7
1. Insert the USB 3.0 cable into the Charger/Accessory
Port.
2. Insert the USB 3.0 cable into the Charging Head.
3. Plug the Charging Head into a standard AC power
outlet.
4. When charging is complete, unplug the Charging Head
DRAFT For Internal Use Only
from the power outlet and remove the USB cable from
the device.
Note:
If you are using a USB 2.0 Travel Charger to charge your
battery, plug the flat end of the Travel Charger into the
port on the
right side
of the Charger/Accessory Port.
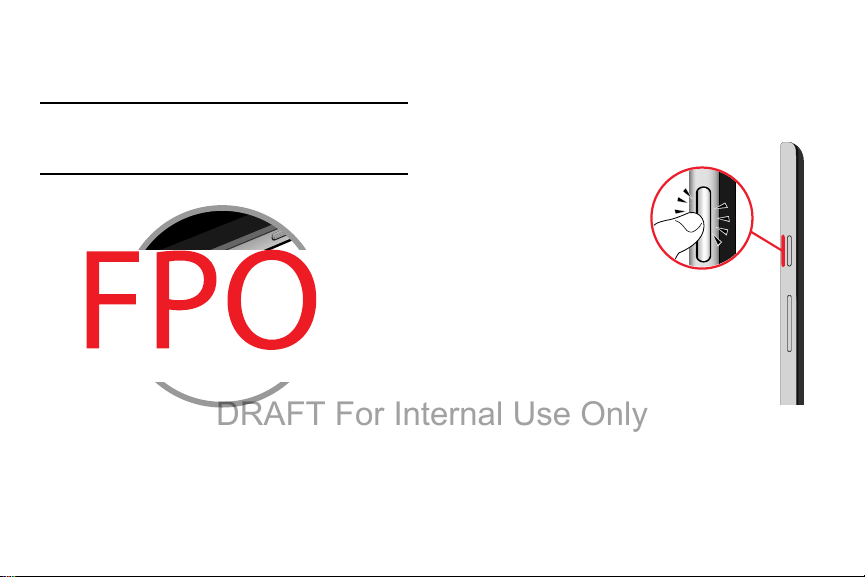
Turning Your Device On and Off
The Power/Lock Key is located on the top left side of the
tablet. For more information, refer to “Back and Top” on
page 12.
Turning Your Device On
Press and hold the
Power/Lock Key
Turning Your Device Off
1. Press and hold the
Power/Lock Key
2. On the Tablet options
menu, touch
➔ OK.
.
.
Power off
Getting Started 8
Setup Wizard
DRAFT For Internal Use Only
The first time you turn your tablet on, Setup Wizard will guide
you through the basics of setting up your tablet.
Follow the prompts to choose a default language, set up
accounts, choose location services, and learn more about
your tablet.
You can also use the Setup Wizard to quickly configure your
tablet at any time.
From a Home screen, touch
Setup Wizard
.
Apps
➔
Memory Card
Your device supports removable microSD or microSDHC
memory cards (not included) with maximum capacities of 64
GB (depending on the memory card manufacturer and type).
Memory cards are used to store music, photos, videos, and
other files.
9
Installing a Memory Card
1. Open the memory card slot cover on the bottom right
side of the tablet and turn to expose the slot.
2. With the gold contacts facing down, carefully slide the
memory card into the slot, pushing gently until it clicks
into place.
3. Close the Memory Card Slot cover.
Securing Your Device
DRAFT For Internal Use Only
By default, the device locks automatically when the screen
times out or you can lock it manually.
Unlock the tablet by swiping your finger across the screen.
This is the default Screen lock (Swipe), and offers no
security.
Prevent others from using or accessing personal data
and information stored in the device by using a secure
Screen Lock.
For more information about creating and enabling a secure
Screen Lock, see “Lock Screen” on page 121.
For other settings related to securing your device, see
“Security” on page 125.
Note:
Unless stated otherwise, instructions in this User Manual
start with the device unlocked, at the Home screen.
Locking the Device Manually
Press the
Power/Lock Key
.
Unlocking the Device
1. Press the
2. Swipe across the screen as shown. This is the default
Power/Lock Key
Swipe screen lock and offers no security.
. The Lock screen displays.
Getting Started 10

Section 2: Understanding Your Device
DRAFT For Internal Use Only
4
This section outlines key features of your device and
describes the screen and the icons that appear when the
device is in use. It also shows how to navigate through
the device.
Features
•
12.2-inch WQXGA (2560 X 1600) TFT touch screen
•
Android Version: Kit Kat 4.4
•
Wi-Fi 802.11 a/b/g/n/ac (2.3 GHz/5 GHz)
•
Bluetooth 4.0 LE
•
Memory:
–
Internal: 32MB (The actual available capacity of the internal
memory is less than the specified capacity because the
operating system and efault applications occupy part of the
memory. The available capacity may change when you upgrade
the device.)
–
Memory card: Up to 64GB
11
•
Camera:
–
Main (rear): 8MP AF with flash
–
Front: 2 MP
•
Connectivity:
–
Wi-Fi Direct
–
Mobile Hotspot
–
DLNA
–
USB 3.0
–
3.5mm Headset Port
•
Audio: Support for MP3, AAC, WMA, FLAC, OGG, AMR,
3GA/M4A, QCP
•
Video: Support for AVI, WMV/ASF, FLV, MKV, MP4/3GP, WEBM
•
Photos: Support for GIF, JPEG, PNG, BMP
•
Stereo speaker
•
Video player
•
Music player
•
Preloaded applications for productivity, entertainment,
communicating, and creating content
Front and Sides
Light
Sensor
Front-fa cing
Camera
Lens
3.5 mm
Headset
Jack
Display
Screen
External
Speaker
External
Speaker
Memory
Card Slot
Recent
Apps
BackHome
SIM
Card
Slot
Charger/
Accessor y
Port
Flash
Camera
Lens
Infrared
Blaster
Power/
Lock Key
Volu me
Key
S Pen
Microphone
DRAFT For Internal Use Only
The following items can be found on the front and sides of
your device.
Back and Top
The following items can be found on the back and top of
your device.
Understanding Your Device 12
Navigating Your Device
DRAFT For Internal Use Only
Use command keys and the touch screen to navigate.
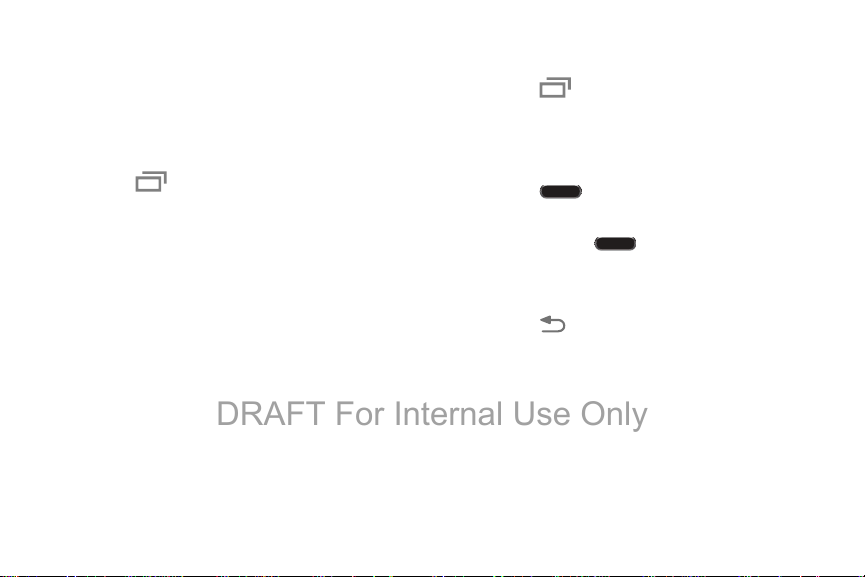
Command Keys
Recent Apps
To display a list of recently used apps:
To uch
To close an app:
Drag the app preview up or down.
To end all running apps:
To uch
13
Close all
Recent apps
.
. Touch an app to open it.
To manage running apps, downloads, device memory, and
storage:
Tou ch
For more information, refer to “Task Manager” on page 93.
Home
To display the main Home screen:
Touch Home.
To launch Google Now:
Touch and hold
Back
To return to the previous screen, option, or step:
Tou ch Back
Recent apps
.
➔
Task Manager
Home.
.
Using the Touch Screen
DRAFT For Internal Use Only
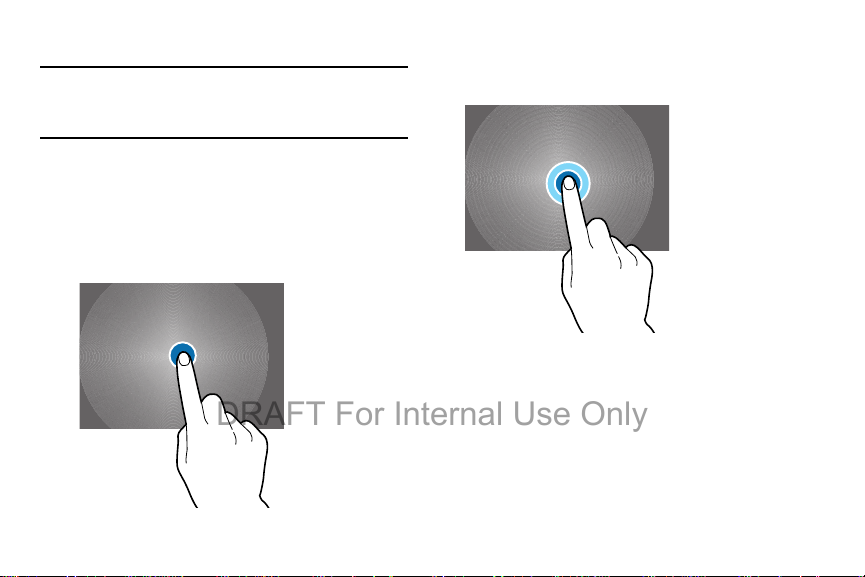
Important!
Finger Gestures
Touching
To avoid damaging the touch screen, do not touch
it with anything sharp or apply excessive pressure
to it with your fingertips.
To open an application, to select a menu item, to press an
onscreen button, or to enter a character using the onscreen
keyboard, touch it with a finger.
Touching and Holding
Touch and hold an item for more than 2 seconds to access
available options.
Understanding Your Device 14
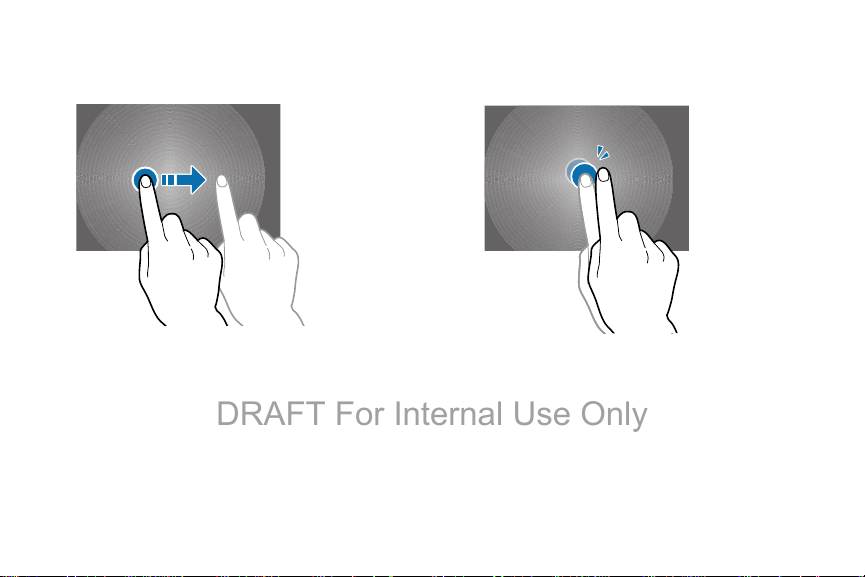
Dragging
DRAFT For Internal Use Only
To move an icon, thumbnail, or preview to a new location,
touch and hold it and drag it to the target position.
15
Double-Tapping
Double-tap on a web page, map, or image to zoom in a part.
Double-tap again to zoom out again.
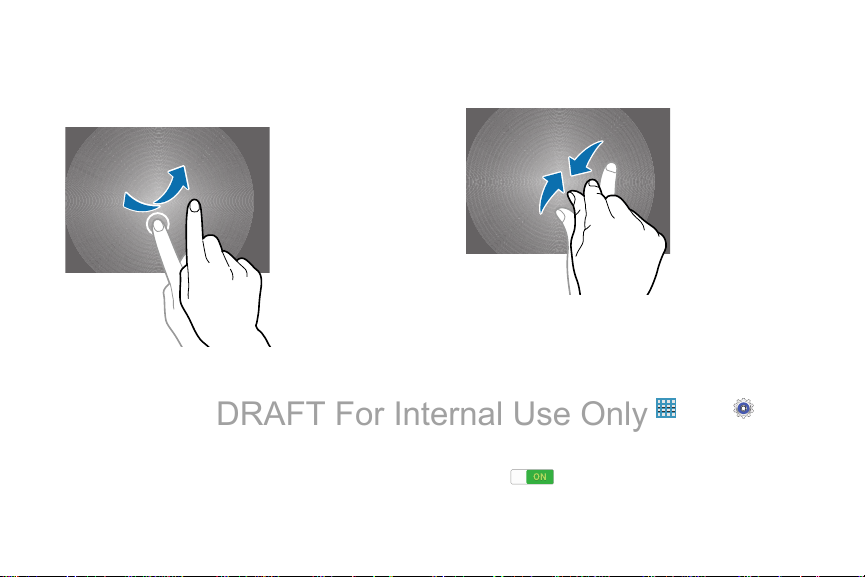
Swipe
DRAFT For Internal Use Only
Swipe left or right on the Home screen or the Applications
screen to see another panel. Swipe up or down to scroll
through a web page or a list, such as contacts.
Pinching and Spreading
Spread two fingers apart on a web page, map, or image to
zoom in. Pinch to zoom out.
Control Motions
Simple motions allow easy control of the device.
Before using motions, make sure the motion feature is
activated.
Apps
1. From a Home screen, touch
Motions and gestures
➔
2. Touc h the
ON .
OFF / ON
➔
Motions
button to turn the feature
Understanding Your Device 16
➔ Settings
.
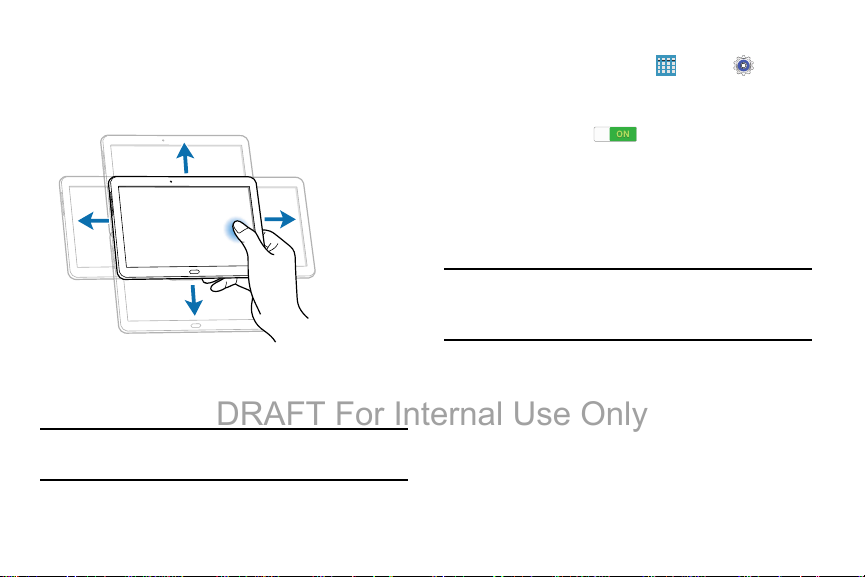
Rotating the Screen
DRAFT For Internal Use Only
Many applications allow display in either portrait or
landscape orientation. Rotating the device causes the display
to automatically adjust to fit the new screen orientation.
Tilting
Touch and hold two points on the screen, and then tilt the
device back and forth to zoom in or out.
To prevent the display from rotating automatically, open the
Notification Panel and deselect
Note:
Some applications do not allow screen rotation, or
display a different screen depending on the orientation.
For example, the calculator turns into a scientific
calculator when rotated to landscape.
17
Screen rotation
.
Panning to Browse
DRAFT For Internal Use Only
When an image is zoomed in, touch and hold a point on the
screen, and then move the device in any direction to browse
the image.
Multi Window
Multi task by using up to four applications at the same time.
Note:
Only applications displayed on the Multi window panel
can be used with the Multi window feature.
Activate Multi Window
1. From a Home screen, touch
➔
Display
.
OFF / ON
2. Touc h the
Multi window ON .
3. If desired, touch
multi window view
Multi window when you open files from My Files or
Video player, or attachments from email and
messages.
Note:
You can also activate Multi window from the Notification
Panel. For more information, refer to “Notification Panel”
on page 25.
button next to
Multi window
to automatically view content in
Understanding Your Device 18
Apps
➔ Settings
Multi window
and then touch
to turn
Open in
Multi Window
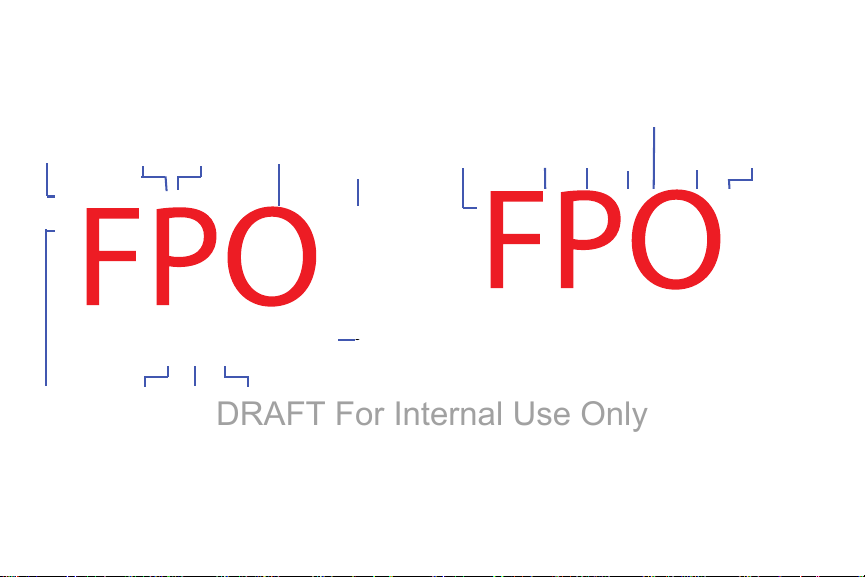
Controls
Panel
Controls
Multi Window
Pane l
App 1
App 2
DRAFT For Internal Use Only
Multi Window Panel
Multi window apps are displayed on the Multi window panel.
Display the Multi window panel:
1. Activate Multi window (see “Activate Multi Window” on
page 18).
19
2. Swipe the right edge of the screen toward the center to
display the Multi window panel. After a few seconds,
the panel will be hidden again.
Using Multi Window Applications
You can use Multi window to run up to four applications at
the same time.
1. With Multi window activated, swipe the right edge of
the screen toward the center to display the Multi
window panel.
2. Drag an app off the panel and release. Drag up to three
more apps off of the panel and release them into one of
the highlighted windows.
Window Controls
Select an application window and touch in the middle of
the windows. Window controls appear:
Switch app to compact screen.
Switch locations between Multi Window
applications.
Share items between the application windows. Drag
DRAFT For Internal Use Only
an item to share from one window to another. Some
applications may not support this feature.
Maximize the application.
Close the application.
Creating a Paired Window
Use this feature to save the combination of current running
Multi window applications.
On the Multi window panel:
1. Touch to access the panel controls.
Create
2. Touc h
3. Enter a title and then touch
Panel Configuration
You can rearrange the apps on the Multi window panel, add
new apps, or remove apps.
On the Multi window panel:
1. Touch to access the panel controls.
2. Touc h
.
OK
.
Edit
.
Understanding Your Device 20
Configuring Apps
DRAFT For Internal Use Only
To remove an app from the panel:
Touch and drag it off of the panel and place it in the
storage area.
To add an app to the panel:
Touch and drag it from the storage area to the panel.
To relocate an app:
Touch and drag it to a new location.
To save your changes:
Touc h
21
Done
.
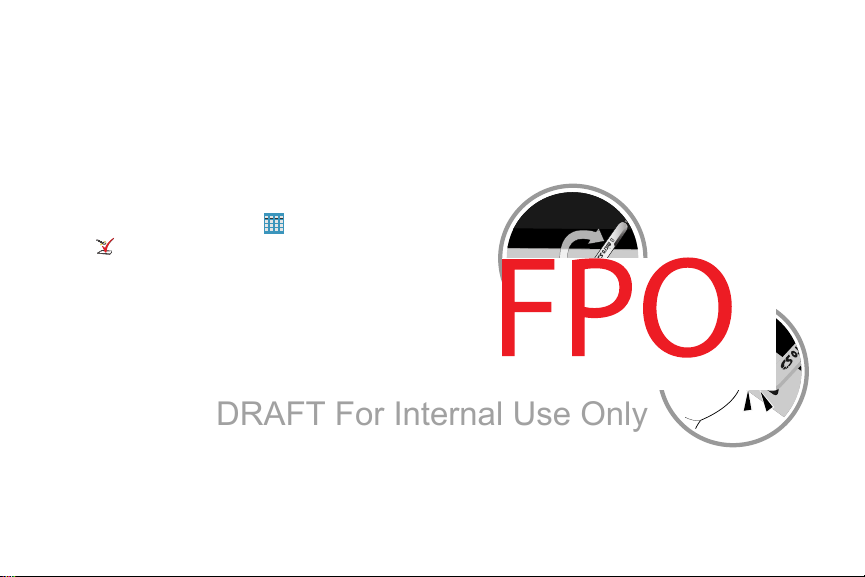
Home Screen
The Home screen is the starting point for using your device. It
consists of:
•
Status Bar
and status indicators on the right side.
•
Notifications
top of the screen to report new messages, calendar events,
device status, and more. Drag down from the Status Bar to open
the Notification Panel.
•
Widgets
widgets are found on the Home screen by default.
•
Refresh Content
•
Status Indicators
strength, battery charge, and time.
•
Google Search
information, refer to “Google” on page 76.
•
Current Screen
displayed.
•
App Shortcuts
•
App Screen
: The Status Bar displays notifications on the left side
: Notification icons appear on the Status Bar at the
: Applications that run on the Home screen. Some
: Touch to refresh the content of the Widget.
: Display your current network status, signal
: Search the web by typing or speaking. For more
: Shows which Home screen is presently
: Touch to launch your favorite apps.
: Access to all your apps and widgets.
Notifications
Status
Bar
Widgets
Refresh
Content
Status
Indicators
Apps
Screen
App
Shortcuts
Current
Screen
Google
Search
DRAFT For Internal Use Only
Additional Home Screens
There are two types of Home screen. The Standard panels
display shortcuts to applications and widgets and the
Magazine panels can host News, Social, and Application
widgets.
The Home screen can have multiple panels. One Home
screen is designated as the main Home screen, and it
displays whenever you press the Home key.
To scroll through the Home screens:
Slide your finger horizontally across the screen.
The first three Pages to the left can host News, Social, and
Application widgets, which are built-in apps that run on the
Home screen.
The rest of the pages are for app shortcuts and widgets.
Customize Home Screen Widgets
You can modify the layout of each Home screen by adding or
removing Widgets and resizing them.
Understanding Your Device 22
To modify a Home screen:
DRAFT For Internal Use Only
1. From a Home screen, touch and hold on a Widget until
the Edit page displays.
2. Touch
23
Widgets.
Change layout
to randomly rearrange the
To resize a Home Screen Widget:
1. Touch and hold a Widget until a gold box appears
around it.
2. Drag a side of the box to resize it. The other Widgets
automatically adjust to accommodate the resized
window.
Note:
Not all Widgets can be resized.
To relocate a Widget:
1. Touch and hold a Widget until it “releases” from the
page.
2. Drag the Widget to a new location and release. The
other Widgets automatically adjust to accommodate it.
Customizing Home Screens
Your device comes with two default magazine style Home
screens, which contain Widgets. You can add two additional
pages of Widgets and up to three additional pages to hold
apps and widgets.
To customize the Home screens:
Active Page
Main Home
Screen
Widgets
Add Page
DRAFT For Internal Use Only
1. From a Home screen, pinch the screen to display the
editing screen.
2. Touch a Home screen to activate it.
Add or remove Widgets:
Widgets currently in use on the active page display a
check mark.
Touch a Widget to add it to the active page.
Tou ch
to remove the Widget from the active page.
Change the layout of Widgets:
Tou ch
Change layout
Widgets on the active page.
To rearrange the order of pages:
Touch and hold, and then drag a page to a new
location.
To set a new main Home screen:
Tou ch
main Home screen ( )
to randomly rearrange the
on a Home screen to set it as the new
.
Understanding Your Device 24
Add or remove Home screens:
DRAFT For Internal Use Only
To add a new Home screen:
Touc h .
To remove an existing Home screen:
Touch and hold, and then drag a page to Remove
.
Notifications
Notification icons appear on the Status Bar at the top of the
screen to report new messages, calendar events, device
status, and more. For details about these notifications, open
the Notification Panel.
Notification Panel
To view the Notification Panel:
1. Swipe downward from the top of the screen to display
the Status Bar.
2. Swipe downward again on the Status Bar to display the
Notification Panel.
3. Scroll down the list to see additional notification
details.
4. Touch an item to open it.
25
5. To clear a single notification, drag the notification left
or right. Touch to clear all notifications.
6. To close the Notification Panel, swipe upward from the
Back
bottom of the screen or touch
Accessing Additional Panel Functions
In addition to notifications, the Notification Panel also
provides quick and ready access to separate device
functions. These can be quickly activated or deactivated by
toggling them on or off. You can choose the functions that
display.
From the Notification Panel:
1. To go to Settings, touch
information, refer to “Settings” on page 99.
2. Touch to display additional options.
The following functions can either be activated (green)
or deactivated (gray): Wi-Fi, GPS, Sound/Vibrate/Mute,
Screen rotation, Bluetooth, Reading mode, Smart stay,
Airplane mode, Power saving, Screen Mirroring,
Multi window, Mobile data, Air view, Sync,
Smart pause, and Blocking mode.
Settings
.
. For more
 Loading...