

Samsung SHS-2320 User Manual

1
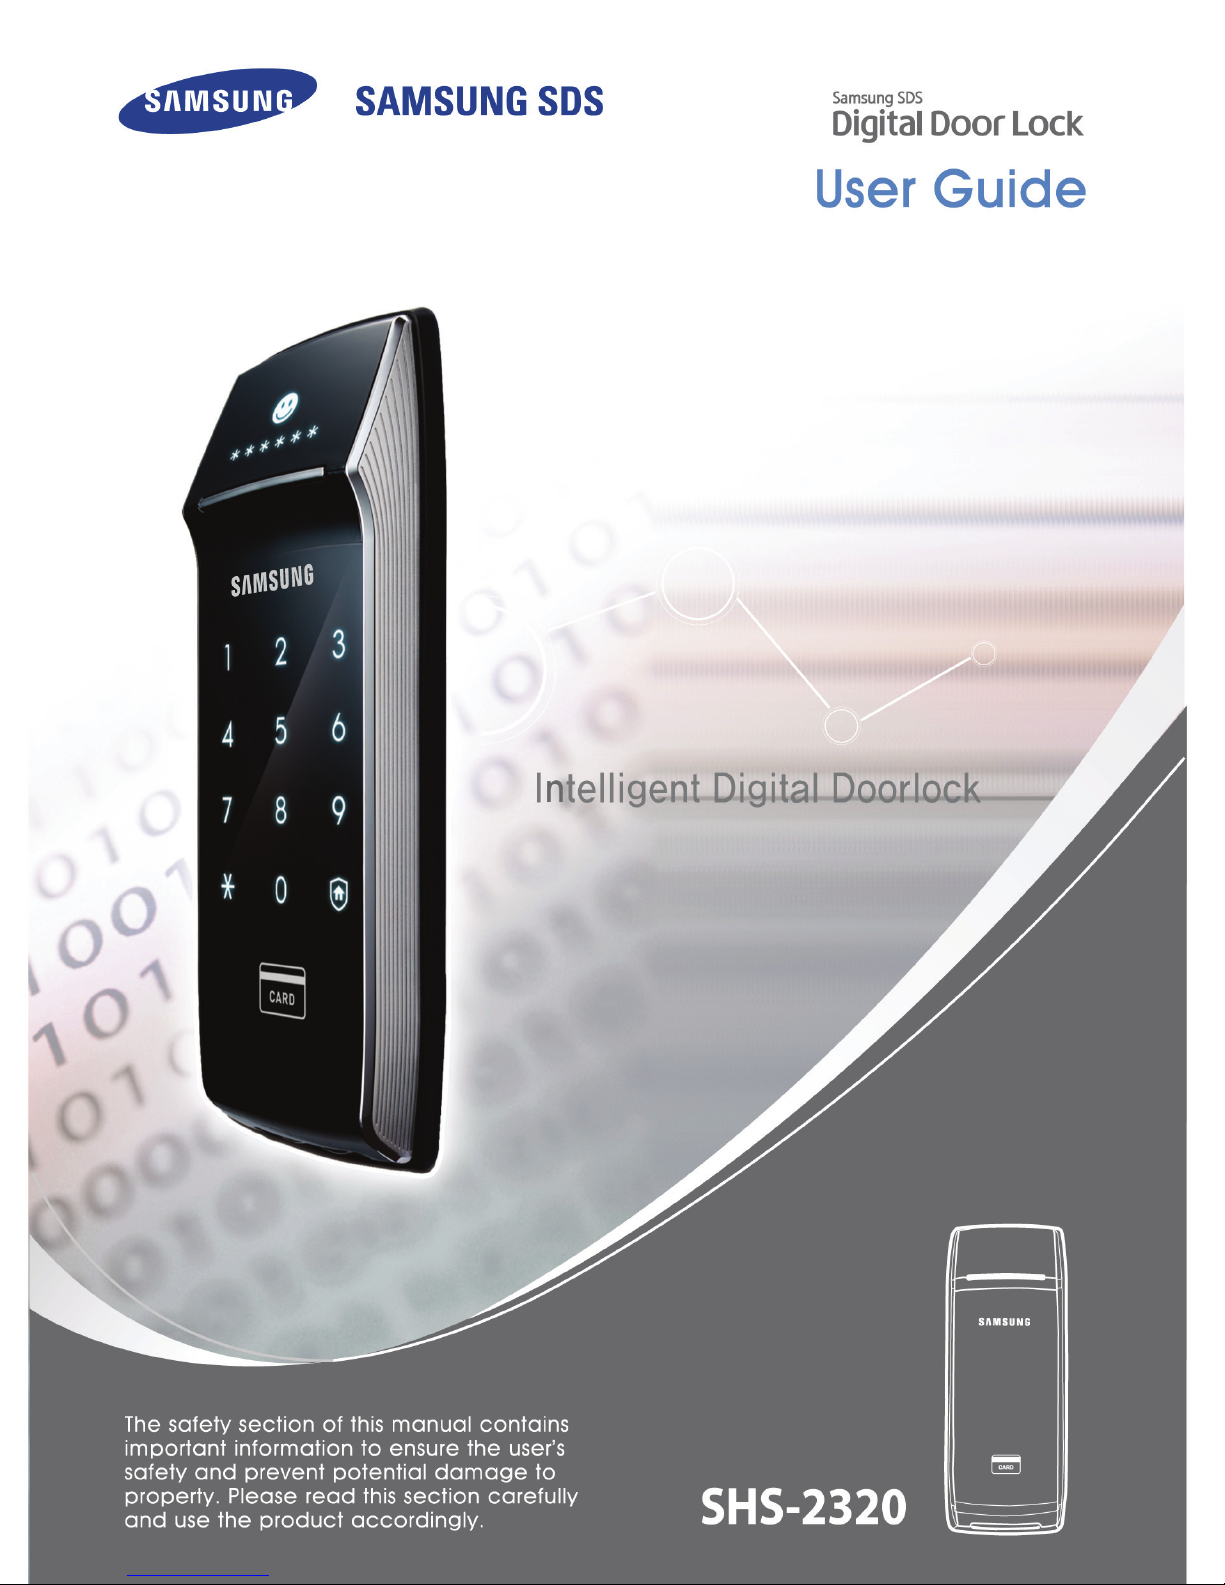
Product Features
Double Claw Bolt Ensures Robust and Safe Lock
With double claw bolt, it prevents forced intrusion, ensuring your safety.
User-friendly Graphic Interface Allows You to
Check the Status of the Doorlock
When the user opens the door or sets up the modes, user-friendly
graphic interface icons appear showing the user the status of the
doorlock, making it convenient.
With Infrared Ray Sensor, Security Is Stronger
When the door is unlocked from the inside without sensing any
movement inside, the door won’t open, strengthening the security
against intrusion.
Anti-theft Function Ensures Worry Free Trip
When going out, the user can set up the anti-theft function, which
creates a warning sound when the doorlock operates, preventing any
tempering.
Multi-leveled Security Code Entry Mode Is More
Secure
Passwords will be pressed after press two random numbers,
preventing intruders from checking the fingerprint marks left on the pad
and break in.
Double Authentication Function Is More Secure
With double authentication mode set up, both password and card must
be authenticated to open the door, strengthening security.
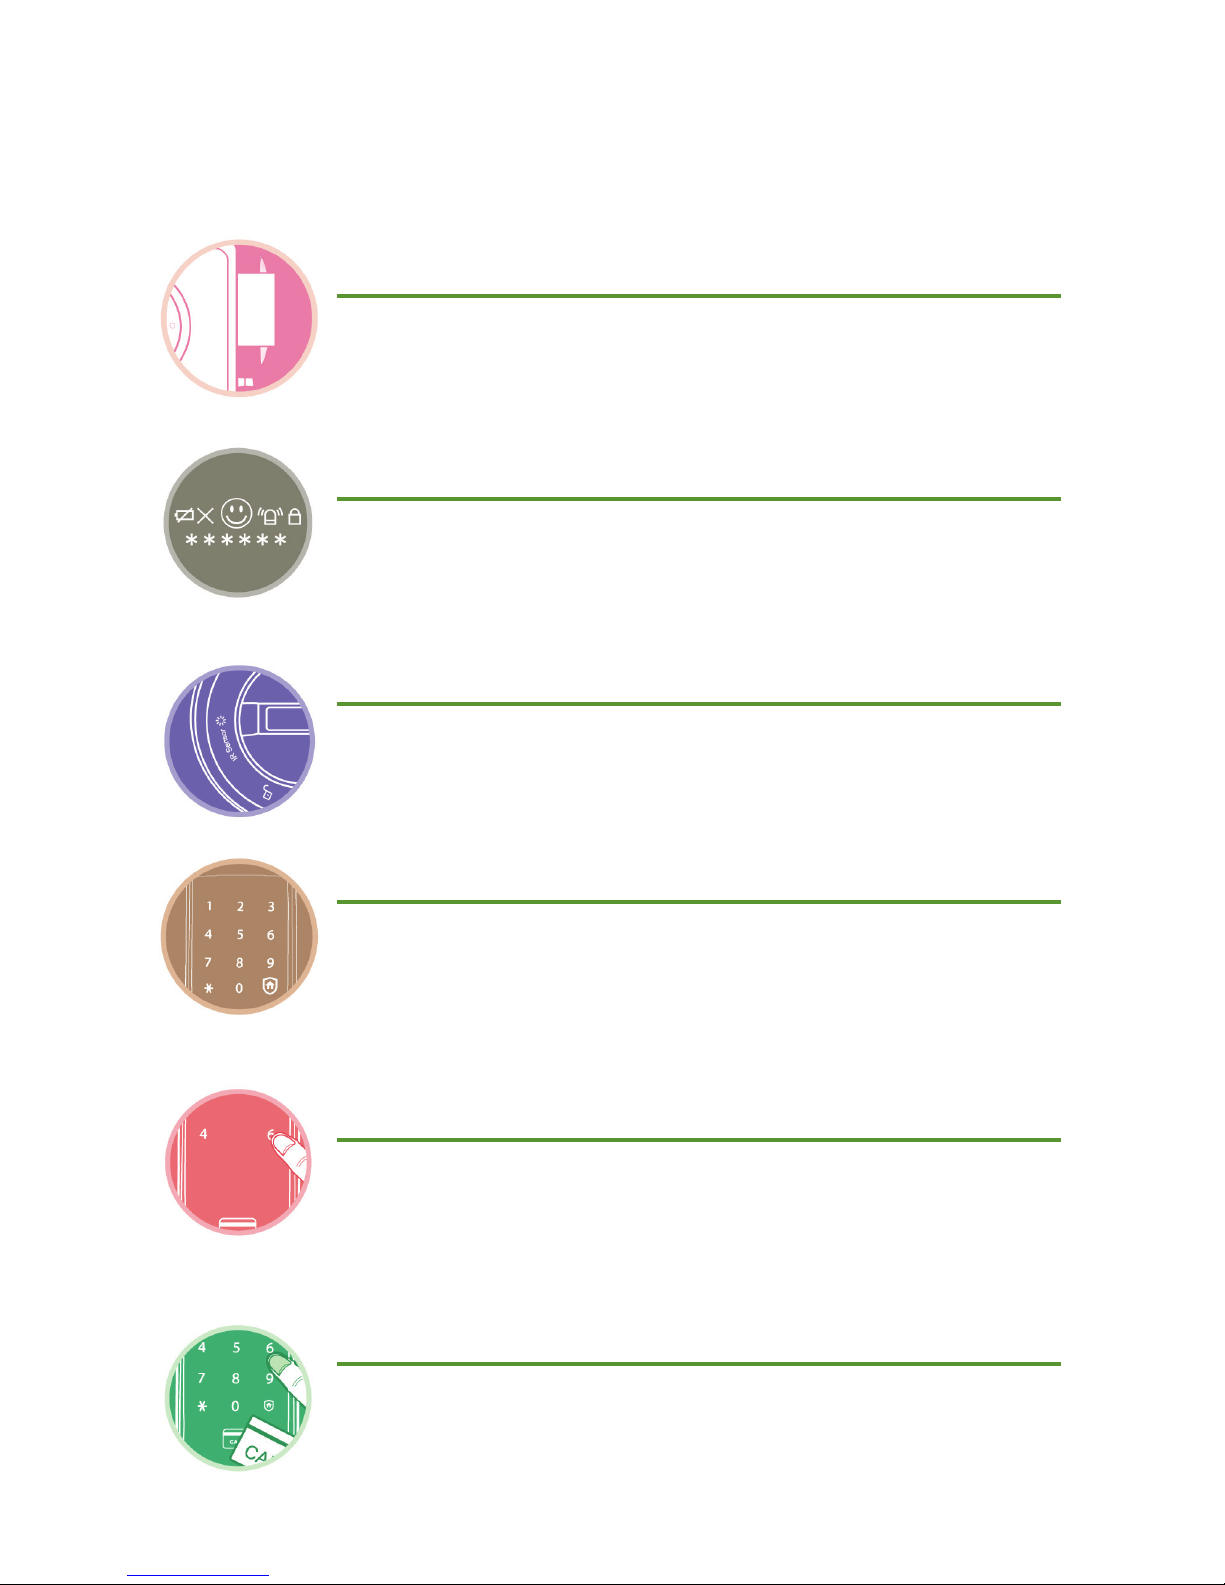
2
Other RF-enabled Cards as well as the Key
Tag Provided Can Be Used to Open the Door
Not only the key tag provided but also other cards with a radio
frequency function can be registered and used to open the door. (Up
to 20 cards can be registered.)
Passwords Can Open the Door
Register desired password, and use it to open the door without any
keys.
With the Built-in Fire Detection Feature, It Is
Possible to Exit Promptly and Safely in Case of a
Fire
When a fire breaks out from the inside and temperature exceeds the
normal level, a warning alarm will sound and the door will automatically
open.
Door has Auto-lock Function
Auto-lock allows the door to be locked automatically.
Double Lock System Is More Secure
At night, it is best to use double lock function to lock the door.
Protects from Outside Tampering
When trying to open the door with an unregistered card, key tag or
password 5 times, the alarm will sound and the power will shut down
for 3 minutes automatically.

3
Table of Contents
Product Features 1
Precautions 4
Read before Use 7
Product Components .................................................................. 7
Outer Body Part Names ............................................................... 8
Inner Body Part Names ............................................................... 9
How to Replace Batteries ........................................................... 10
How to Use Emergency Battery ................................................... 11
Basic Functions 12
How to Reset (Password, Card, Key Tag) ...................................... 12
How to Register and Change Password......................................... 13
How to Register Card and Key Tag ............................................... 15
How to Delete Card or Key Tag ................................................... 17
How to Open Door from the Outside (Password) ............................. 18
How to Open Door from the Outside (Card, Key Tag) ............................ 19
How to Open and Close the Door from Inside ............................... 20
Additional Functions 21
How to Set up Multi-leveled Security Code Entry Mode .................. 21
How to Set up Infrared Ray Sensor .............................................. 22
How to Set up Double Authentication Mode ............................... 23
How to Set up Auto/Manual Lock ................................................. 24
How to Set up and Turn off Sound ................................................ 25
Warning Alarm / Emergency Alarm .............................................. 26
Troubleshooting 30
Summary of Usage 32
Product Specifications 34
Product Warranty 35
4
Precautions
The following contents are designed to protect user safety and prevent loss and
damage of their property. Please read this prior to use to ensure the product properly
used.
Meaning of Warning, Caution, and Reference
Warning text
Provides user information to prevent physical damage.
Things to Be Cautious of
Provides user information to prevent system error or system damage.
Things to refer to
Provides additional information regarding each topic.
Meaning of Each Symbol
Indicates warnings or cautions.
Indicates banning miss-use of the product.
Indicates special instructions for the user.
5
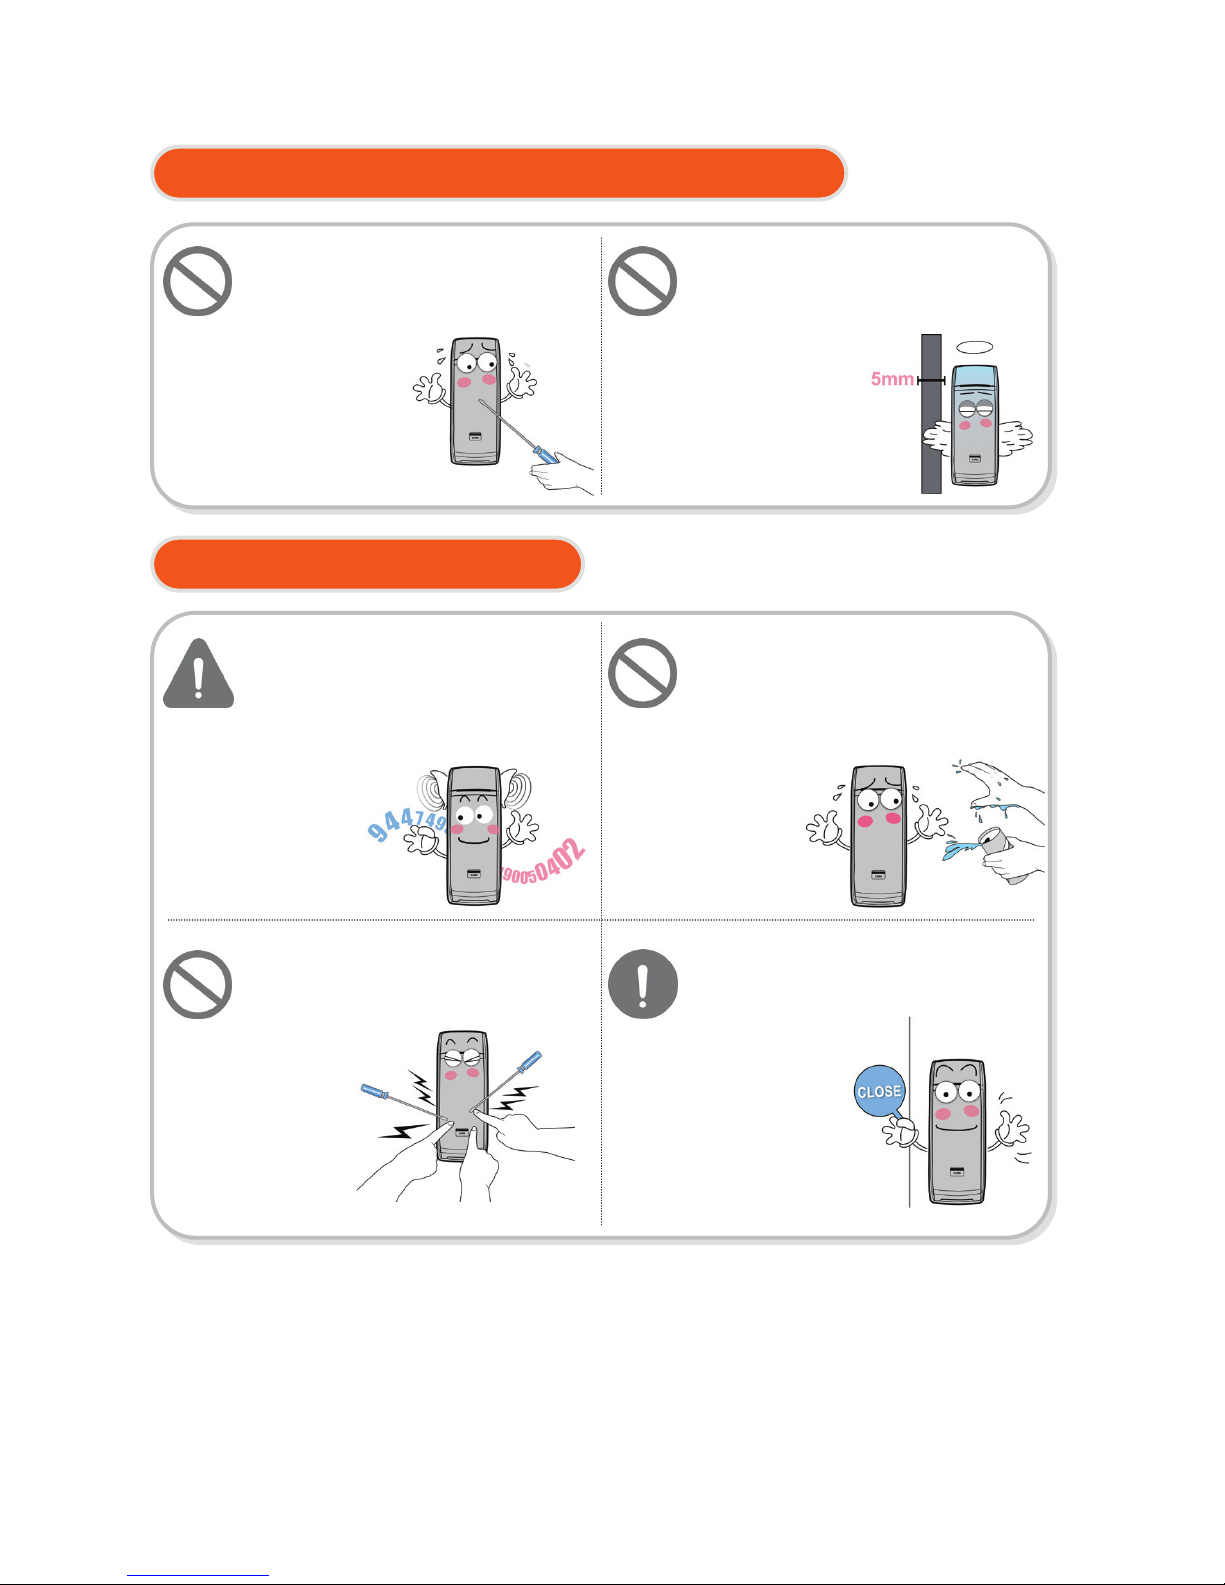
Cautions Regarding the Installation
Caution While in Use
Do not install or disassemble on
your own.
If users install or repair on their own,
the company
will not be
responsible for
any damage.
Do not install where the gap
between door and door frame is
bigger than 5mm.
May not work well
if large gap exists.
Do not let others know the
password. Change it periodically.
This is done to prevent
a potential break-in.
Do not push the buttons
excessively hard or with a sharp
object.
This may
result in a
malfunction.
Please check if the door is locked
before you leave.
The company will not be
responsible for
accidents resulting
from an unlocked
door.
Please do not use the product
with wet hands, and make sure
that liquids such as water or a
beverage do not get inside the
product.
This may
result in a
malfunction
or damage
to the produc
t
.

6
Cautions Regarding Repair and Maintenance
When replacing the batteries,
please replace all the batteries at
the same time, and do not mix
new batteries with used ones.
Product can be
damaged or
its lifespan can
be reduced.
When the product sounds to
indicate the need for a battery
change for the first time, please
make sure to do so within one
week.
If the batteries
are not
replaced on
time, it may
only be
opened with
the emergency
ke
y
.
When cleaning the product, please
do not use water, benzene, or
alcohol; instead, please use a soft,
dry cloth.
There is a
risk of
damaging
the product.
Insert batteries with correct
(+/-) directions.
If the battery is not properly inserted,
it might lead to
a leakage or
explosion.
7
Inner body
holding panel
Inner bod
y
Screws to ensure fixture between the
panel and the outer body
Read before Use
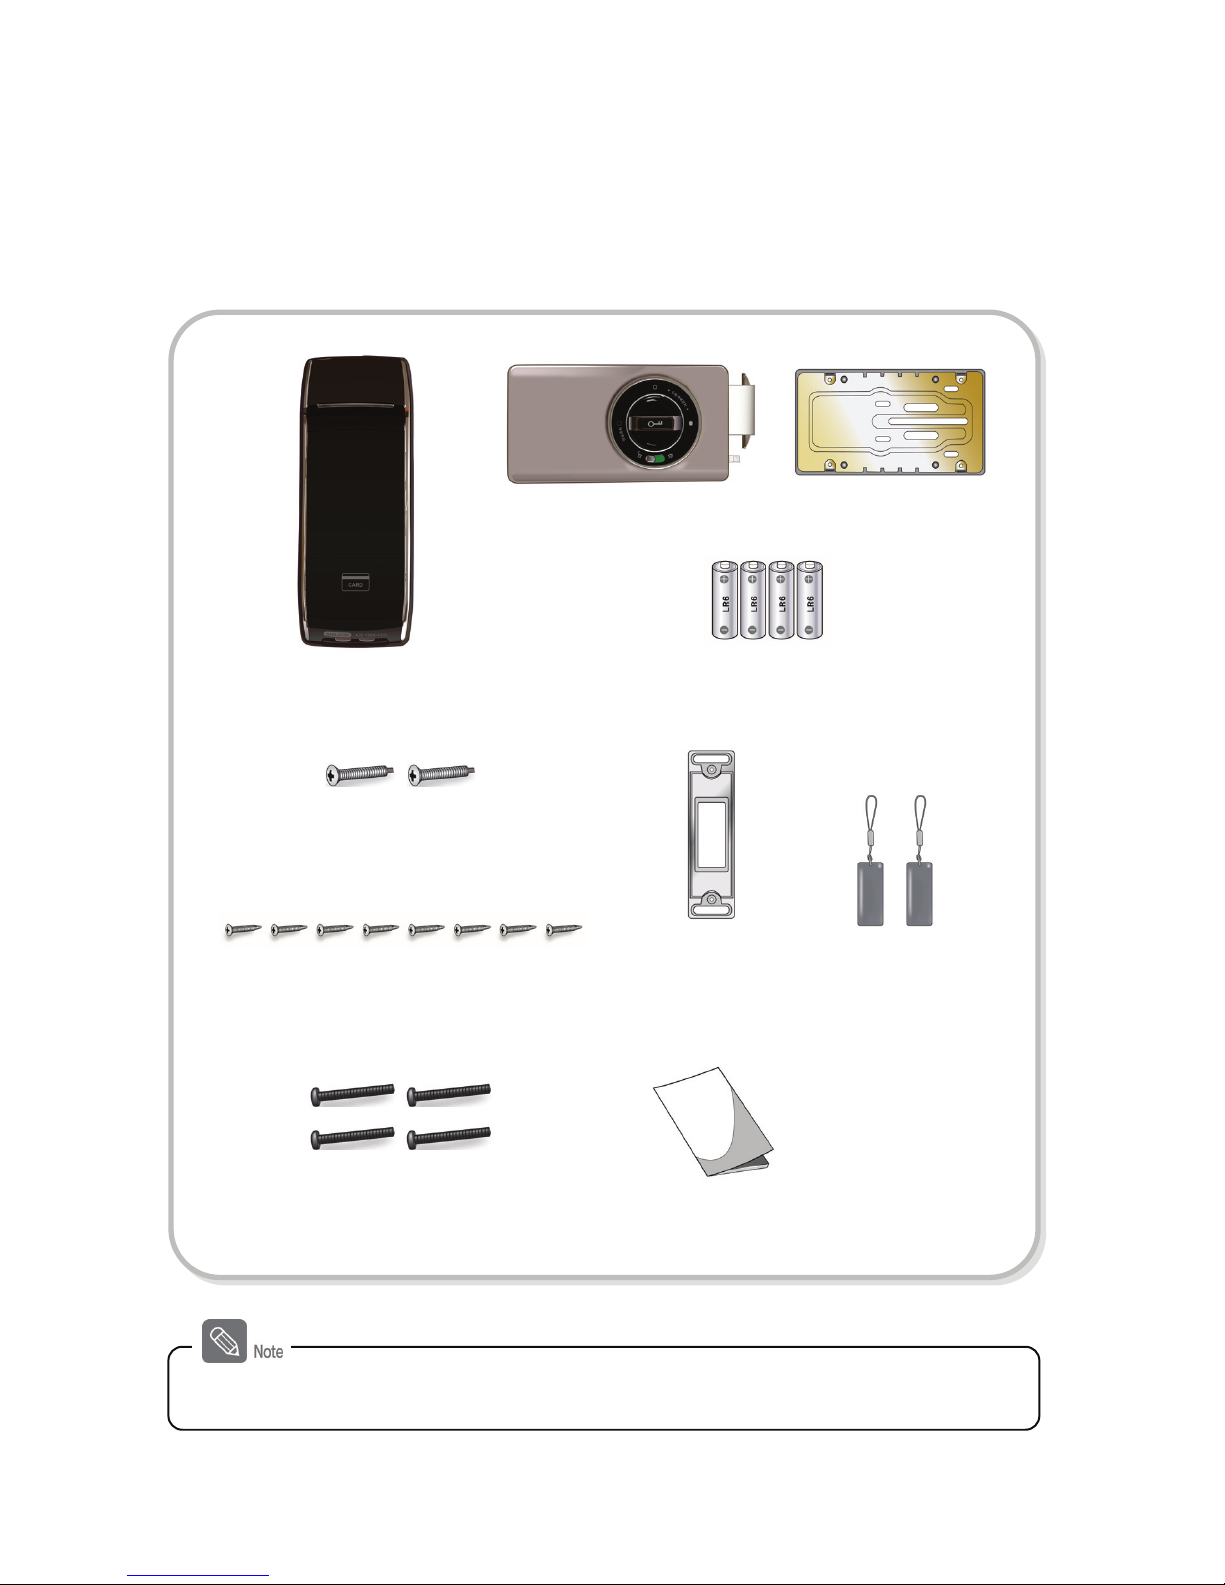
Product Components
User Guide
'AA' batteries (LR6)
Screws to hold the fixtures from
the inside
- Product composition can be different and subject to change without notification.
Outer body
Self-drilling screws to hold panel
Strike
Key tags
ㅔ
8
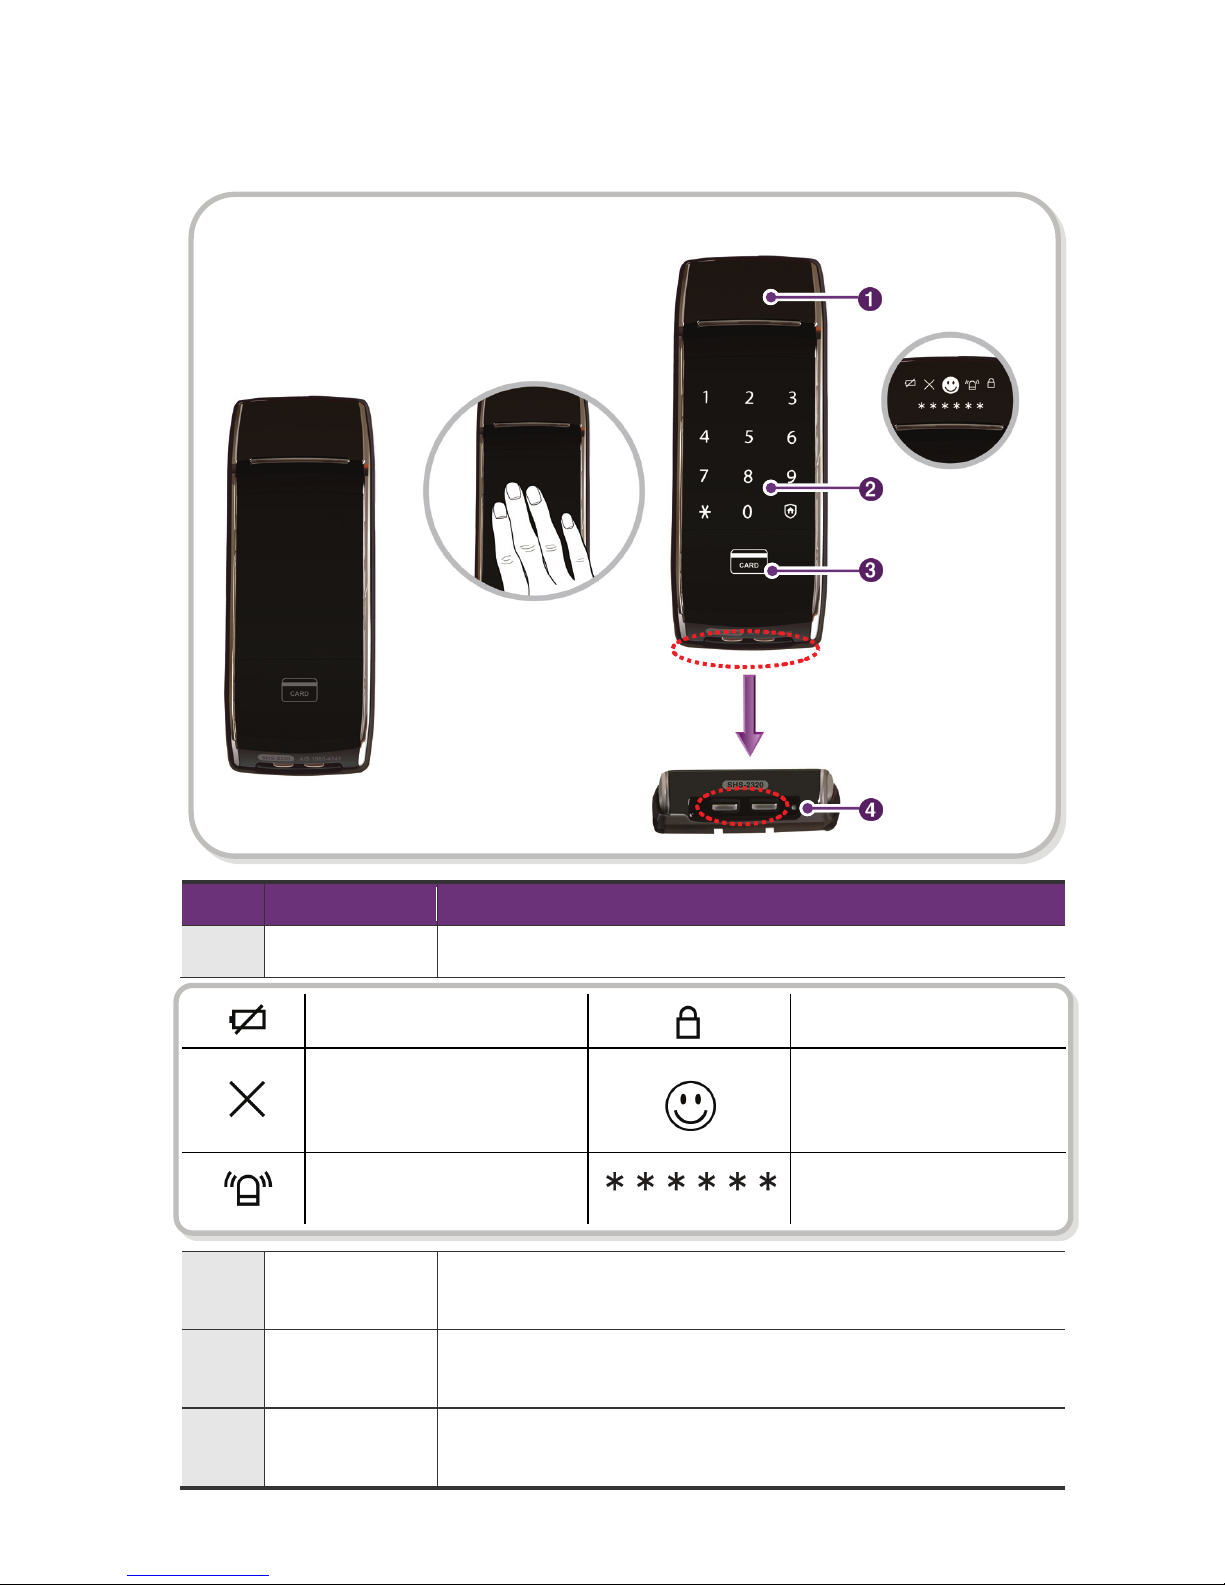
Outer Body Part Names
No. Part Function
1
User-friendly
Graphic Interface
Shows the status of the doorlock function.
Battery Change Time
Notification
Double Lock Mode Being
Setu
p
Password or Card
Authentication Failure/
Registration or Setup Failure
Password or Card
Authentication Success/
Registration or Setup
Succes
s
Intrusion/Fire/Security
Breach Inciden
t
Word Count of Password
Entered
2 Number Pad
Press to change password or to select or delete it.
Use number pad to enter the password and open the door.
3 Card Reader
The place to read cards or key tags to unlock the door
Touch the number pad to activate the Card reader.
4
Emergency
Power Supply
Gives power in case of complete discharge of batteries with the
connection of an emergency battery. (Use 9-volt battery.)
Number Pad (off)
Number Pad (on)
User-friendly
Graphic Interface
Emergency Power
Supply
Card Reader
Number Pad
9
Inner Body Part Names
No. Part Function
1
Battery Cover Open
Button
Button used to open the battery cover.
2 Registration Button Button used to register/change password, card, key tag.
3
Manual Open/Close
Lever
Lever used to lock or unlock the door manually in case of any
electrical failure.
4 Open/Close Button Button used to open and close the door.
5
Deadbolt
(With Double Claw Bolt)
Device that locks the door at the door frame with double claw
shaped bolts.
6
Infrared Ray Sensor
When pressing Open/Close button, the red light will appear if the
sensor detects normal environment. (If infrared ray sensor is not
activated, the light will not appear)
7 Open-door Sensor
Sensor that detects open/close status after auto-lock mode is
being set up.
8 Double Lock Lever
Lever that prevents any opening from the outside with password,
card or key tag.
9 Sound Volume Switch Switch that adjust the volume of sound.
10
Auto/Manual
Locking Switch
Switch that converts from Auto-lock to Manual-lock or vice
versa. If it is at auto-lock position, the door locks automatically.
If it is at manual-lock position, closing the door does not
automatically lock the door.
11
Battery Cover
Cover that protects batteries and registration button.
10
Battery Cover
Open Button
Registration Button
Manual Open/Close
Lever
Open/Close Button
Deadbolt (With
Double Claw Bolt)
Open-door Sensor
Double Lock Lever
Sound Volume Switch
Auto/Manual
Locking Switch
Batter
y
Cover
9
11
Infrared Ray Sensor
ㅔ
10
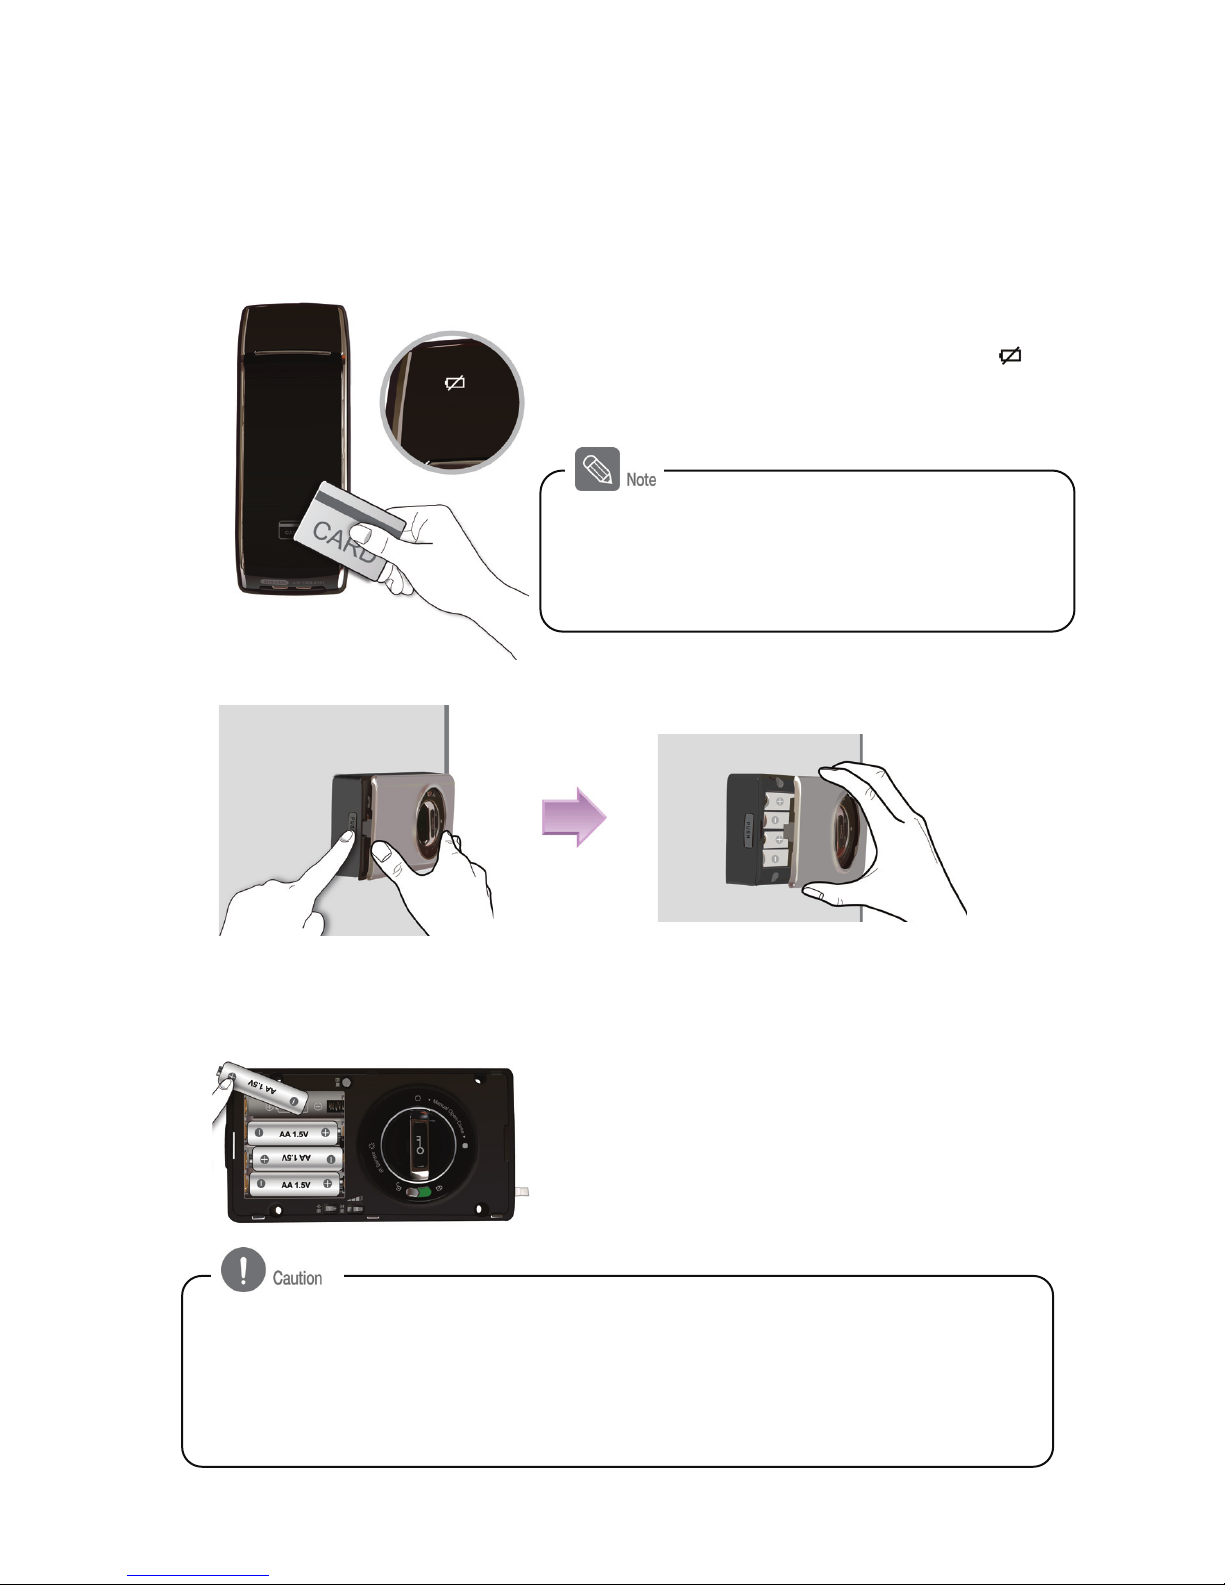
How to Replace Batteries
1. When the Low Battery Ring Tone Sounds
If the melody "Fur Elise" rings before the door
opens with password or key tag, it is time to
replace batteries (The replace battery icon
at the user-friendly graphic interface will light
up after the low battery ring tone sounds)
2. Opening Inner Body Cover
Press the battery cover button lightly and pull the cover to open.
3. Replacing Batteries
Please replace all 4 batteries with new ones
within a week.
- The product may shut down without warning if
the battery is not replaced promptly after the
replace battery sound.
- If the battery is not inserted correctly, the door lock will not work.
- Leakage from the battery may harm the product, so please check the battery regularly
(about once every six months).
- Until the battery is replaced after the replace battery warning sound, functions like register,
change, or setup of password/card cannot be used.
AA형 건전지×4개
Battery lifespan is different depending on its manufacturer,
manufacturing date, and use environment. Use 4 1.5volt
AA Alkaline batteries and batteries last 10 months with an
average of 10 uses a day.
Battery Lifespan
 Loading...