

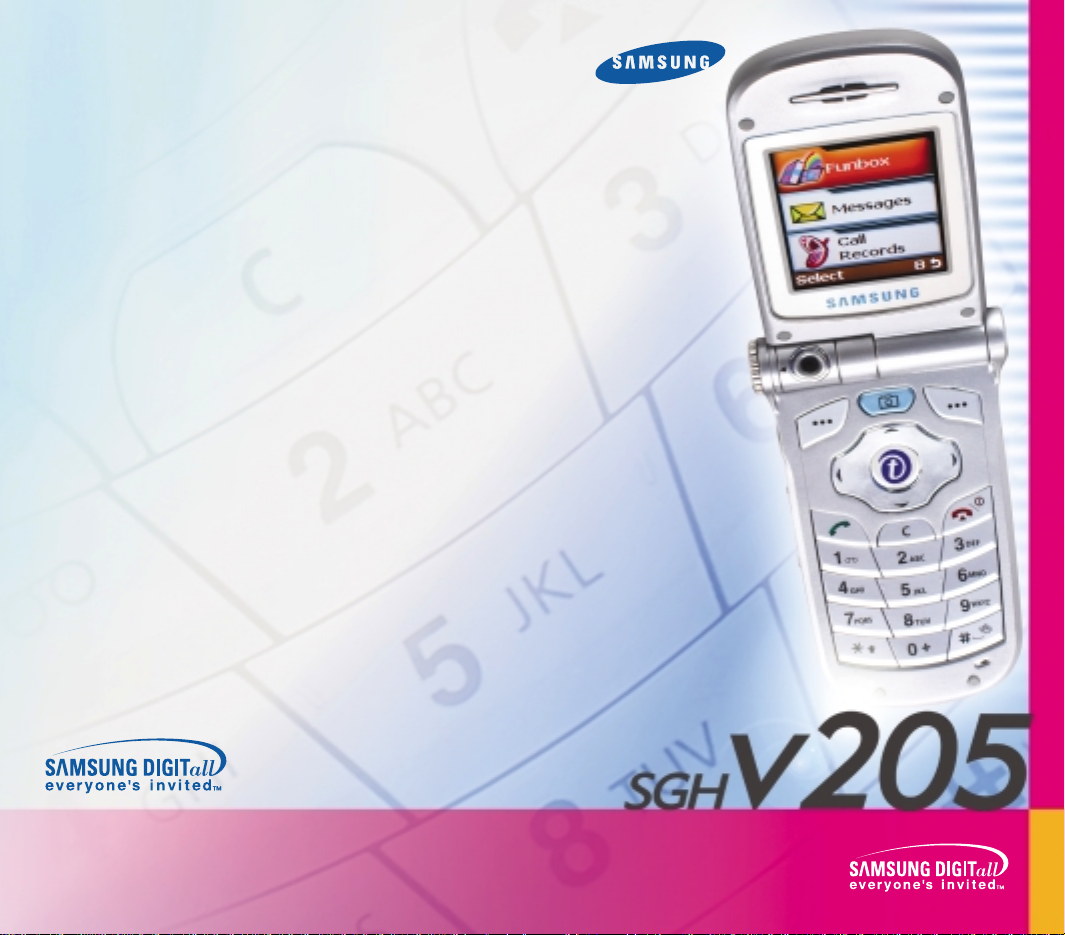
Samsung SGH-V205MSATMB User Manual
Samsung Telecommunications America
1130 East Arapaho Road
Richardson, TX 75081
Telephone: 1-800-SAMSUNG
Tech Support: 1-888-987-HELP (4357)
www.samsungusa.com/wireless
User Guide
GH68-03235A Rev.1.0

Contents
Important Safety Precautions ...................... 7
Unpacking.................................................... 9
Your Phone ................................................ 10
Phone Layout.................................................... 10
Display............................................................. 13
Service Light..................................................... 16
Getting Started .......................................... 17
Installing the SIM Card....................................... 17
Charging a Battery ............................................ 19
Switching the Phone On/Off ................................ 21
Using the Holster............................................... 22
Call Functions ............................................ 23
Making a Call .................................................... 23
Adjusting the Volume......................................... 25
Answering a Call................................................ 26
Viewing Missed Calls .......................................... 27
Quickly Switching to Silent mode......................... 29
Selecting Functions and Options ................ 30
Example: Setting the Display Language................ 32
Phonebook................................................. 34
Storing a Number with a Name............................ 34
Using Phonebook Entry Options........................... 36
Searching for a Number in the Phonebook............. 38
Editing a Caller Group ........................................ 40
Speed-Dialing ................................................... 41
Checking the Memory Status............................... 42
* Some of the contents in this manual may differ from your
phone, depending on the software installed or your
service provider.
* Licensed under U.S patent no.4,558,302 and foreign
counterparts.
2
Entering Text ............................................. 43
Changing the Text Input Mode ............................ 44
Using the T9 Mode............................................. 45
Using the Upper/Lower-Case Character Mode ........ 46
Using the Symbol Mode...................................... 48
Using the Number Mode ..................................... 48
3

Contents
Contents
Options During a Call ................................. 49
Putting a Call on Hold......................................... 49
Switching the Microphone Off (Mute).................... 50
Muting/Sending Key Tones.................................. 51
Searching for a Number in the Phonebook............. 51
Using the SMS Service ....................................... 52
Answering a Second Call..................................... 52
Making a Multiparty Call ..................................... 53
Using the Menus......................................... 55
Accessing Menu Functions by Scrolling ................. 55
Accessing Menu Functions by Using Shortcuts ....... 56
List of Menu Functions........................................ 56
Text Messages ........................................... 61
Inbox
(Menu 1.1)
Outbox
Write New
Templates
Settings
My Objects
Memory Status
Voice Mail
Broadcast
(Menu 1.2)
.............................................. 61
............................................ 62
(Menu 1.3)
(Menu 1.4)
(Menu 1.5)
(Menu 1.6)
(Menu 1.8)
(Menu 1.9)
........................................ 64
........................................ 66
........................................... 67
....................................... 68
(Menu 1.7)
................................. 69
........................................ 69
........................................ 70
Picture Messages ....................................... 72
Inbox
(Menu 2.1)
Outbox
Write New
Delete All
Setup
(Menu 2.2)
(Menu 2.5).................................................
.............................................. 72
............................................ 74
(Menu 2.3)
(Menu 2.4)............................................
........................................ 75
77
77
Call Records ............................................... 78
Missed Calls
Incoming Calls
Outgoing Calls
Delete All
Call Time
(Menu 3.1)
(Menu 3.3) ....................................
(Menu 3.4)
(Menu 3.5)
..................................... 78
(Menu 3.2)
.................................. 78
......................................... 79
......................................... 79
79
Camera ...................................................... 81
Take and Send
New Photo
My Photos
(Menu 4.1)
(Menu 4.2)
(Menu 4.3)
................................. 81
....................................... 82
........................................ 82
Sound Settings........................................... 84
Ring Tone
Ring Volume
Alert Type
Keypad Tone
Message Tone
Extra Tones
(Menu 5.1)...........................................
(Menu 5.2) .......................................
(Menu 5.3)
(Menu 5.6)
........................................ 85
(Menu 5.4)
(Menu 5.5)
.................................... 85
................................... 86
...................................... 87
84
84
Phone Settings........................................... 88
Infrared Activate
My Settings
Greeting Message
Own Number
Language
Security
Display Settings
Extra Settings
Short Cut
Reset Settings
(Menu 6.6)
(Menu 6.1)
(Menu 6.2)
(Menu 6.3)
(Menu 6.4)
(Menu 6.5)
........................................... 91
(Menu 6.7)
(Menu 6.8)
(Menu 6.9)............................................
(Menu 6.10)
............................... 88
...................................... 89
............................. 90
.................................... 90
......................................... 91
............................... 94
................................... 96
................................ 97
97
Organizer................................................... 98
Calendar
To Do List
Time & Date
Alarm
Calculator
Currency Exchange
(Menu 7.1)
(Menu 7.2)
(Menu 7.4)
(Menu 7.5)
.......................................... 98
....................................... 100
(Menu 7.3) .....................................
............................................. 104
....................................... 105
(Menu 7.6)
.......................... 106
103
Network Services..................................... 107
Call Forwarding
Call Waiting
Network Selection
Caller ID
Band Selection
(Menu 8.1)
(Menu 8.2)
(Menu 8.4)...........................................
(Menu 8.5)..................................
................................ 107
..................................... 109
(Menu 8.3)
............................ 110
111
112
4
5

Contents
Funbox..................................................... 113
Games
(Menu 9.1)
T-Zones
Downloads
(Menu 9.2)
............................................ 113
.......................................... 113
(Menu 9.3)
...................................... 113
Solving Problems ..................................... 115
Access Codes ........................................... 118
Phone Password ............................................... 118
PIN................................................................. 119
PUK................................................................ 119
PIN2............................................................... 120
PUK2 .............................................................. 120
Health and Safety Information................. 121
Exposure to Radio Frequency (RF) Signals ........... 121
Precautions When Using Batteries....................... 124
Road Safety..................................................... 126
Operating Environment ..................................... 128
Potentially Explosive Atmospheres ...................... 130
Emergency Calls............................................... 131
Other Important Safety Information.................... 132
Care and Maintenance....................................... 133
Acknowledging Special Precautions and
the FCC and Industry Canada Notice ................... 135
Glossary................................................... 140
Index ....................................................... 144
6

Important Safety
Precautions
Read these guidelines before using your wireless
phone. Failure to comply with them may be
dangerous or illegal. For more detailed safety
information, see “Health and Safety Information”
on page 121.
Road Safety at All Times
Do not use a hand-held phone while driving; park
the vehicle first.
Switching Off When Refueling
Do not use the phone at a refueling point (service
station) or near fuels or chemicals.
Switching Off in Aircraft
Wireless phones can cause interference. Using them
in aircraft is both illegal and dangerous.
Switching Off in Hospitals
Switch off your phone near medical equipment.
Follow any regulations or rules in force.
Interference
All wireless phones may be subject to interference,
which could affect their performance.
Special Regulations
Meet any special regulations in force in any area
and always switch off your phone whenever it is
forbidden to use it, or when it may cause
interference or danger (in a hospital for example).
7
Important Safety Precautions
Radio Frequency Exposure
The design of this phone complies with FCC (of the
U.S. Government) requirements relating to radio
frequency (RF) exposure. To maintain compliance
with these requirements, use only Samsungsupplied or approved accessories. Use of nonapproved accessories may violate the
requirements.
Sensible Use
Use only in the normal position (held to the ear).
Avoid unnecessary contact with the antenna when
the phone is switched on.
Accessories and Batteries
Use only Samsung-approved accessories and
batteries.
Qualified Service
Only qualified service personnel may install or
repair your phone.
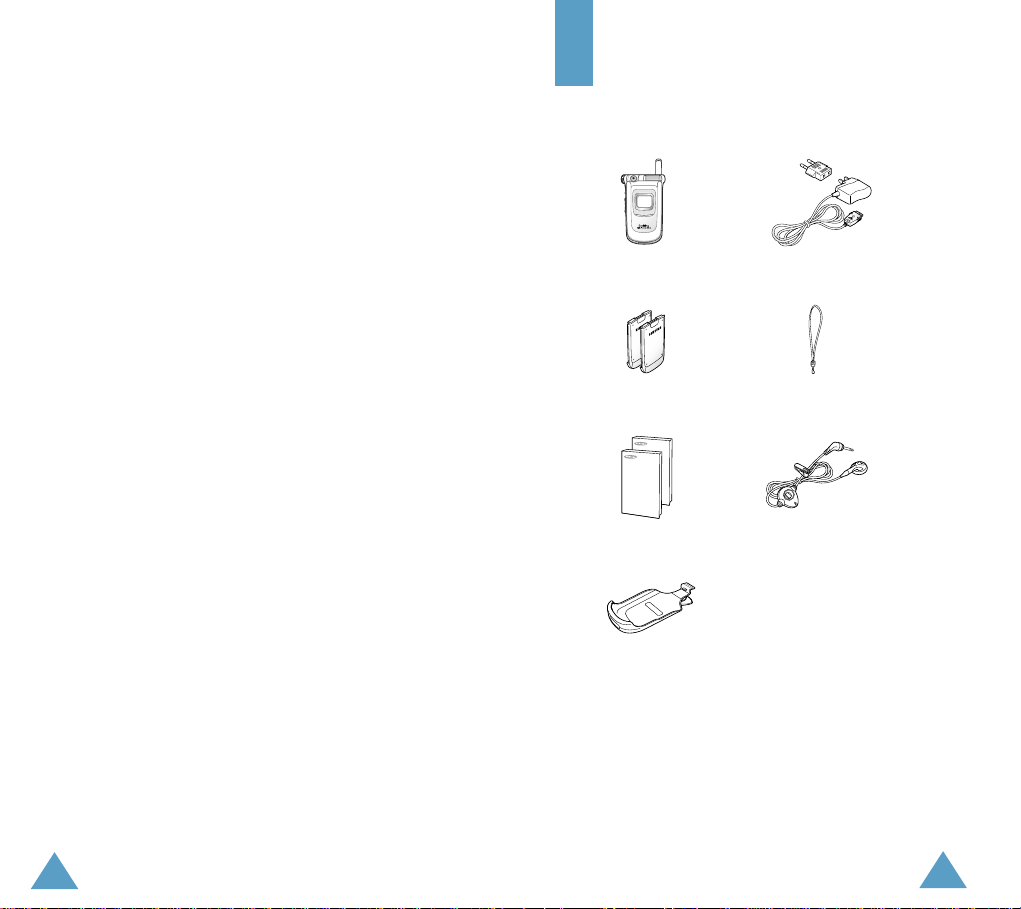
Unpacking
Your package contains the following items.
Handset
Batteries
User’s Manuals
Holster
Travel Adapter
Hand Strap
Ear-microphone
In addition, you can obtain the following
accessories for your phone from your local
Samsung dealer:
• Ear-microphone
• Simple hands-free kit
• Standard/slim batteries
• Cigarette lighter adapter
• Data link cable
8
9
Your Phone
Your Phone
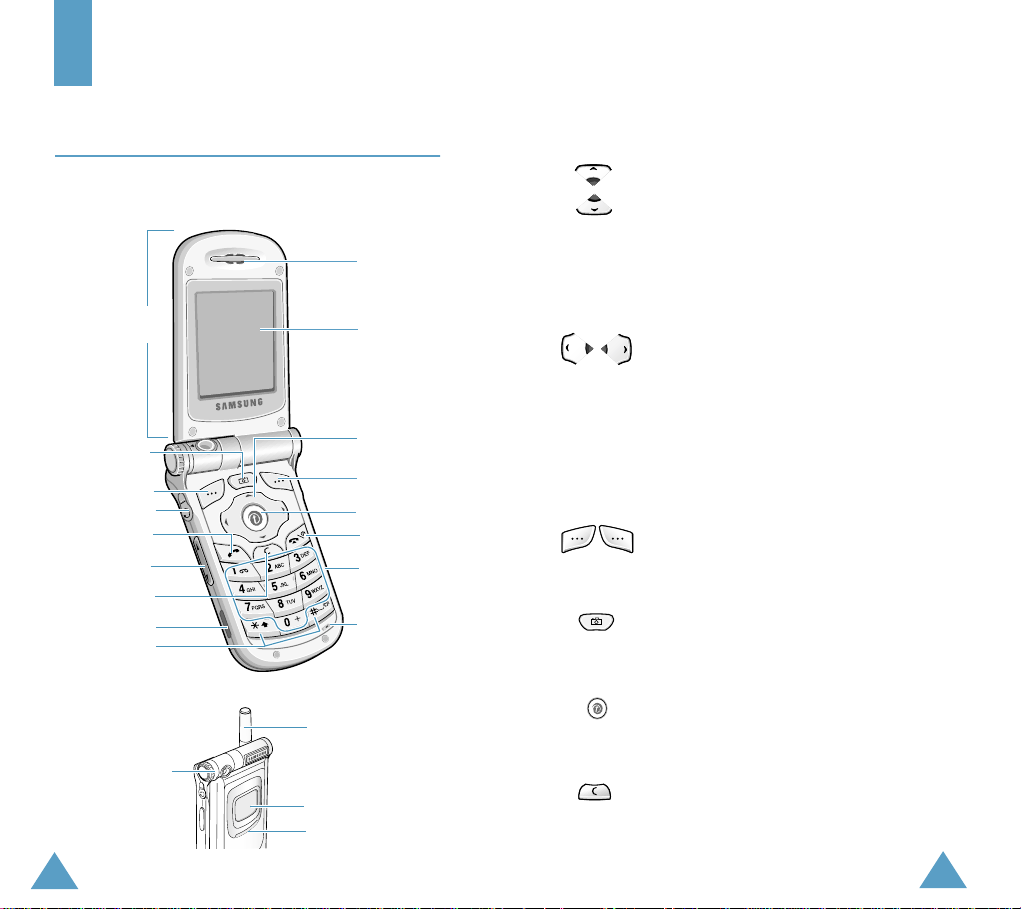
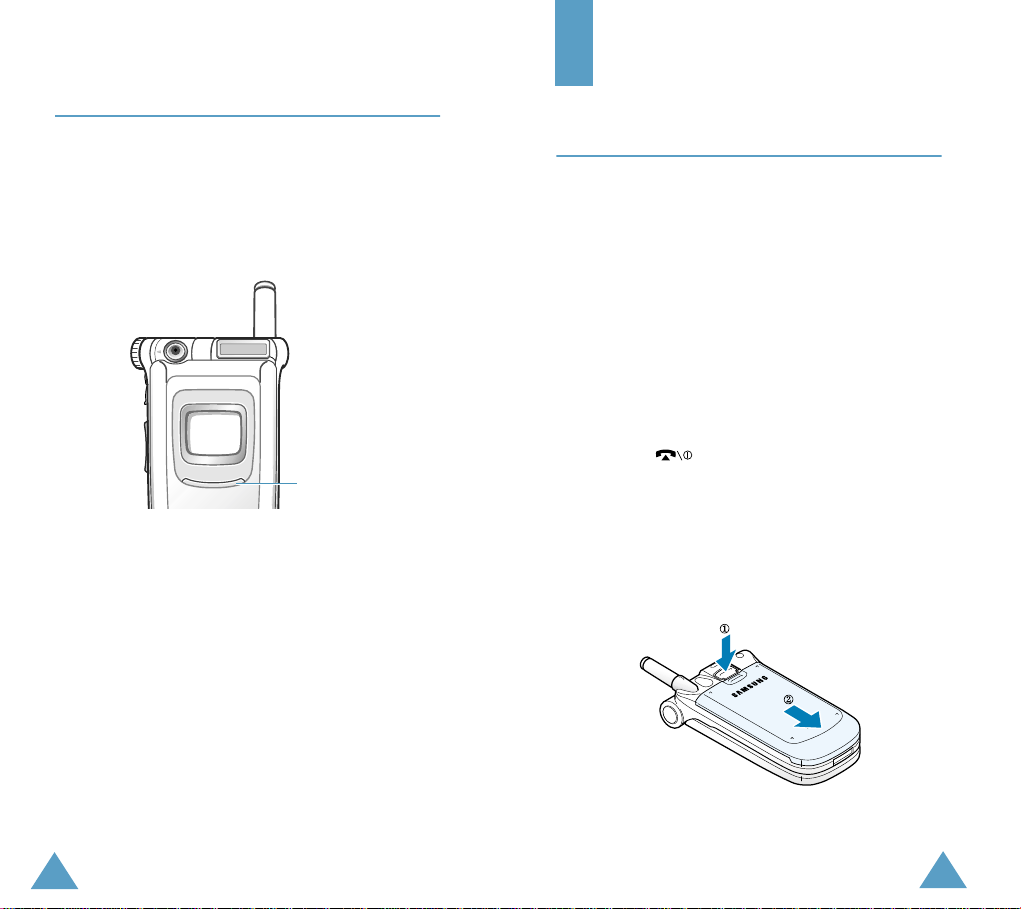
Phone Layout
The following illustrations show the main elements
of your phone.
Earpiece
Folder
Camera key
Soft key (left)
Ear-microphone
confirmation key
jack
Dial/menu
Volume/menu
browse keys
Cancel/
correction key
IrDA port
Special
function keys
Camera module
Display
Navigation
keys
Soft key (right)
WAP Browser
key
Power on/off /
menu exit key
Alphanumeric
keys
Microphone
Antenna
External display
Service light
Key Description
In menu mode, scroll through the
menu options and Phonebook memory.
In idle mode, allow you to access your
favourite menu options directly; for
more information on shortcuts, see
page 97.
In menu mode, return to the previous
menu level and select the current
menu respectively.
When entering text, move the cursor
left and right respectively.
In idle mode, allow you to access your
favourite menu options directly; for
more information on shortcuts, see
page 97.
Perform the functions indicated by the
text above them (on the bottom line of
(soft keys)
the display).
In idle mode, quickly accesses the
Camera
camera on your phone.
In idle mode, quickly launches the W AP
(Wireless Application Protocol)
browser.
Deletes characters from the display.
In menu mode, returns to the previous
menu level.
menu to allow you to use the
10
11
Your Phone
M
Ph.Book
Your Phone
Key Description (continued)
Makes or answers a call.
When held down in idle mode, recalls
the last number dialed or received.
In menu mode, selects a menu
function or stores information that you
have entered (such as a name) in the
phone or SIM memory.
Ends a call. Also switches the phone on
and off when held down.
In menu mode, cancels your input and
returns to idle mode.
When held down in idle mode, quickly
accesses your voice mail.
Enter numbers, letters and some
special characters.
Enter special characters.
Perform various functions.
(on the side of the phone)
During a call, adjust the earpiece
volume.
In idle mode, adjust the key volume.
In menu mode, scroll through the
menu options and Phonebook memory.
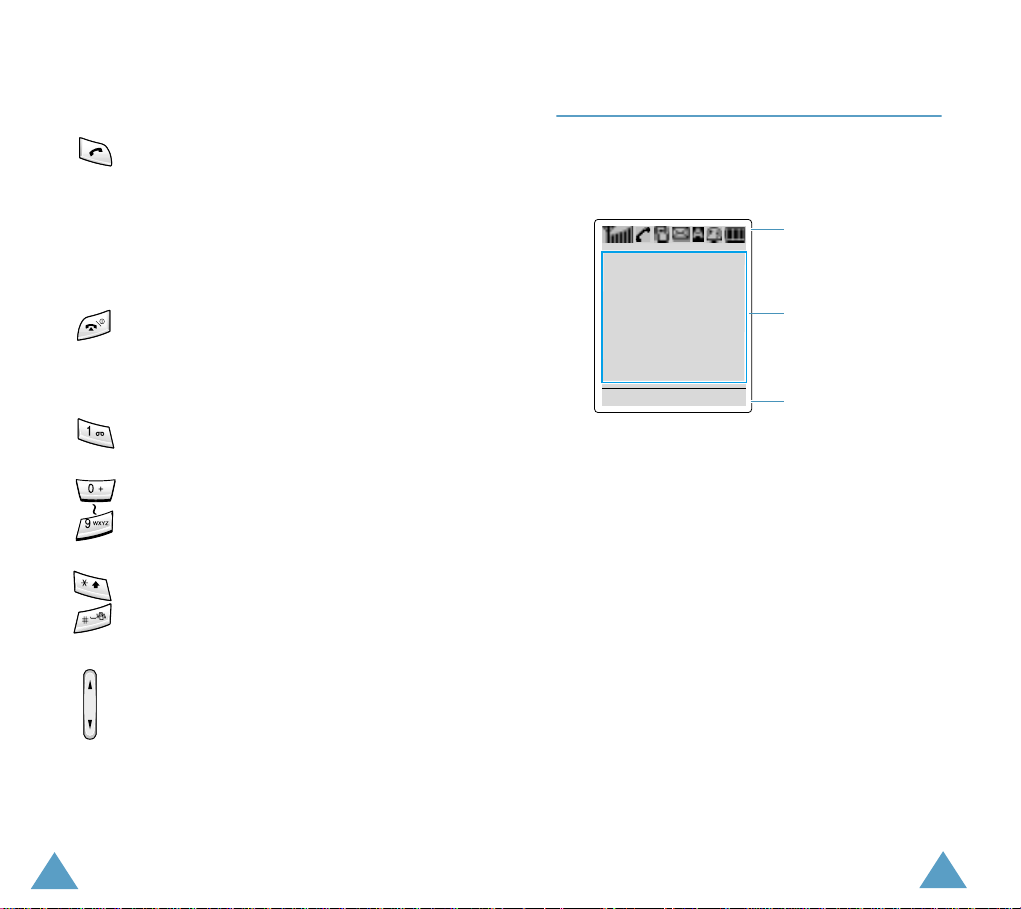
Display
Display Layout
The display has three areas.
Icons area
Text and
graphic area
enu
Area Description
First line Displays various icons (see
page 14).
Middle lines Display messages, instructions
and any information that you
enter (number to be dialed, for
example).
Last line Shows the functions currently
assigned to the two soft keys.
Soft keys
indication area
12
13

Your Phone
Your Phone
Icons
Icon Description
Shows the received signal strength. The
greater the number of bars, the better the
signal.
Appears when a call is in progress.
Appears when the silent mode is active or
you set the
Menu 5.3
(
when you receive a call; for further
details, see page 85.
Appears when a new text message is
received.
Appears when a new voice mail message
is received.
Appears to indicate the current text input
mode when you are entering text.
Appears when you set an alarm.
Shows the level of your battery . The more
bars you see, the more power you have
left.
Alert Type
menu option
), so that the phone vibrates
Backlight
The display is illuminated by a backlight. When you
press any key or open the folder, the backlight
illuminates. It turns off if no key is pressed within a
given period of time, depending on the
menu option (
Menu 6.7.2
).
Back Light
T o specify the length of time for which the backlight
is active, set the
6.7.2
); see page 94 for further details.
Back Light
menu option (
Menu
You can also set the phone to use the backlight only
during a specified period of time, via the
Light
menu option (
Menu 6.7.3
Auto
); see page 95 for
further details.
External Display
Your phone has an external display on the cover. It
indicates that you have an incoming call or a
message, and notifies you when you set an alarm at
the specified time.
14
Appears when the IrDA port is active. For
details, see page 88.
Appears when the mute mode is active.
15
Your Phone
Service Light
Getting Started
The service light is below the external display on
the folder cover. It flashes when services are
available on the phone.
To activate or deactivate use of the service light,
set the
Service Light
6.7.4
); see page 95 for further details.
menu option (
Service light
Menu
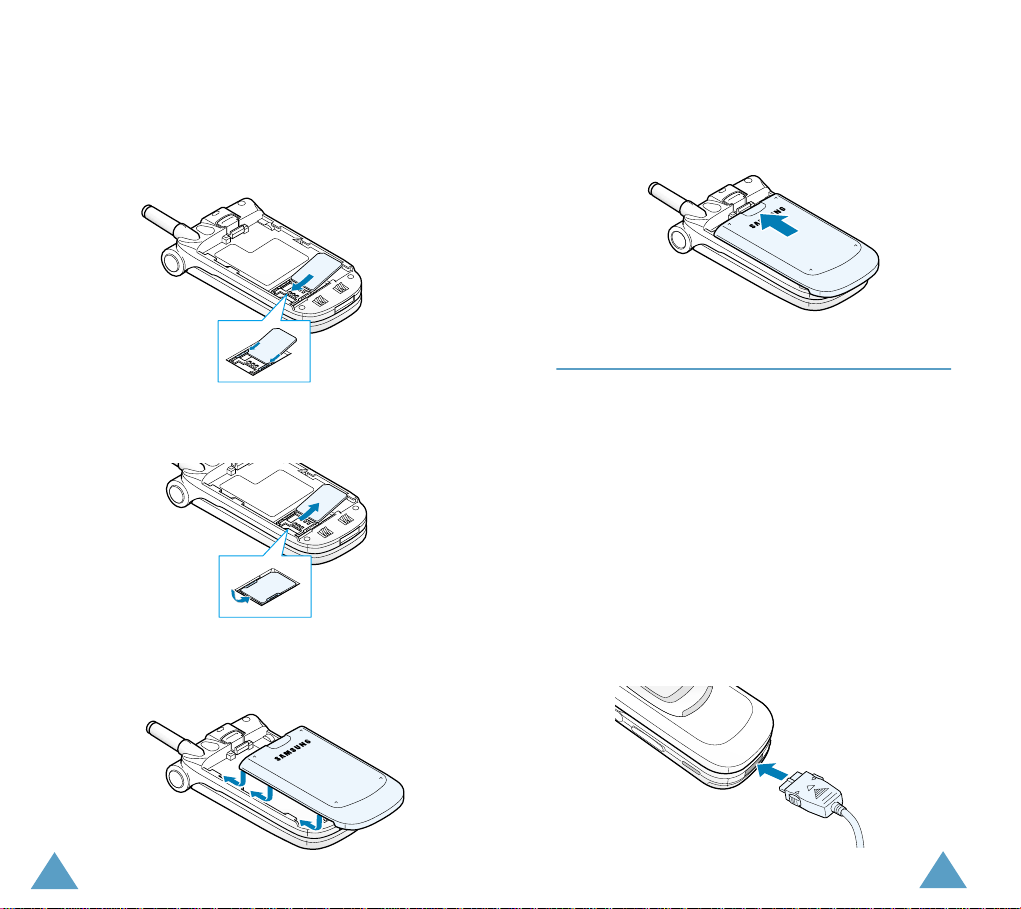
Installing the SIM Card
When you subscribe to a cellular network, you are
provided with a plug-in SIM card loaded with your
subscription details, such as your PIN, any optional
services available and many others.
Important!
1. If necessary, switch off the phone by holding
down the key until the power-off image is
displayed.
2. Remove the battery. To do so:
➀ Press down the catch above the battery and
➁ Slide the battery and lift it away, as shown.
The plug-in SIM card and its contacts
can be easily damaged by scratches
or bending, so be careful when
handling, inserting or removing the
card.
Keep all SIM cards out of the reach of
small children.
hold it in this position.
16
17
Getting Started
Getting Started
3. Slide the SIM card into the SIM card holder so
that the holder locks the card in position.
Make sure that the notched corner is top left and
the gold contacts of the card face into the
phone.
Note
: When you need to remove the SIM card, slide
it, as shown, and take it out of the holder.
4. Place the battery back, taking care to match the
tabs on the battery with the grooves on the
phone.
5. Slide the battery towards the top of the phone
until it clicks into place. Make sure that the
battery is properly installed before switching on
the power.
Charging a Battery
Your phone is powered by a rechargeable Li-ion
battery. A travel adapter is provided with your
phone. Use only approved batteries and chargers.
Ask your local Samsung dealer for further details.
The phone can be used while the battery is charging,
but this will cause the phone to charge more slowly.
Note
: You must fully charge the battery before using
your phone for the first time. A discharged
battery is fully recharged in approximately
200 minutes.
1. With the battery in position on the phone, plug
the connector of the travel adapter into the
bottom of the phone.
18
19
Getting Started
Getting Started
2. Plug the adapter into a standard AC wall outlet.
3. When charging is finished, unplug the adapter
from the power outlet and from the phone by
pressing the gray tabs on both sides of the
connector and pulling the connector out.
Low Battery Indicator
When the battery is weak and only a few minutes of
talk time remain, you will hear a warning tone and a
message will be repeated at regular intervals on the
display:
**Warning**
Low Battery
Switching the Phone On/Off
1. Open the folder.
2. Hold down the key until the phone
switches on.
3. If the phone asks for a password, enter the
password and press the
password is factory set to “00000000.” For
further details, see page 118.
4. If the phone asks for a PIN, enter the PIN and
press the
OK
soft key. For further details, see
page 119.
The phone searches for your network and when
it finds the network, the idle screen, illustrated
below, appears on each display. Now, you can
make or receive a call.
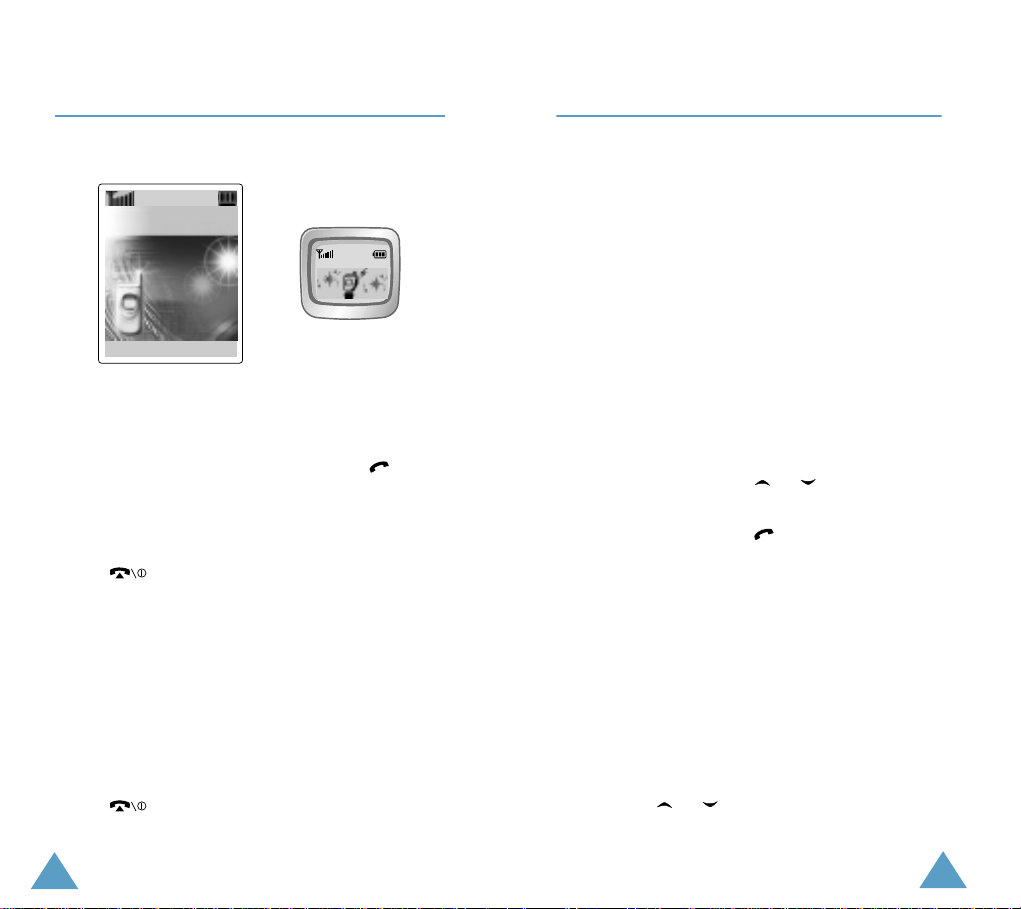
Service Provider
07:30 AM
Wed Jul 31
Menu Ph.Book
OK
soft key. The phone
07:30
Wed/31 AM
Menu Ph.Book
When the battery becomes too weak for the phone
to operate, it switches off automatically.
20
Note
: The display language is factory set to English.
To change the language, use the
menu option (
Menu 6.5
Language
); for further details,
refer to page 91.
5. When you wish to switch the phone off, hold
down the key until the power-off image is
displayed.
21
Getting Started
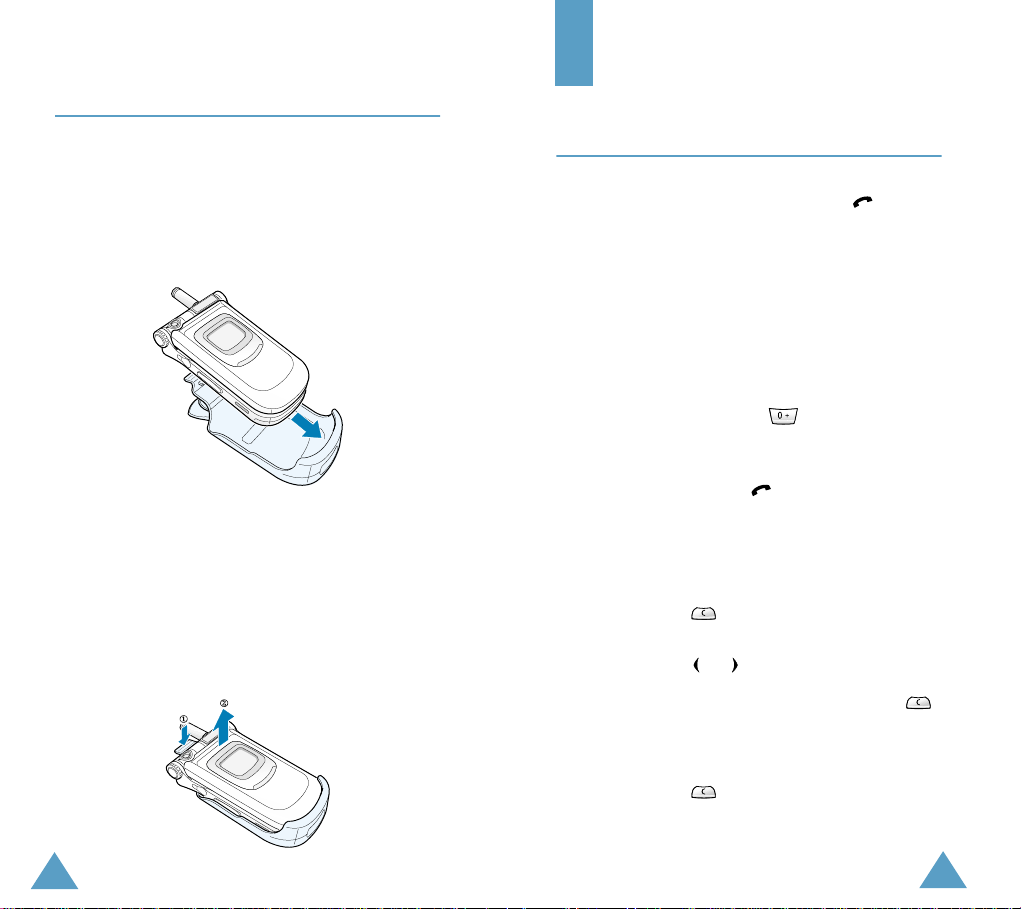
Using the Holster
Call Functions
The supplied holster allows you to conveniently
carry your phone with you.
To attach the phone to the holster:
1. Insert the phone into the slot of the holster and
press the top of the phone down until it locks
into place.
2. Attach the holster to your belt or clothing where
it will convenient to reach and use.
Note:
If a hand strap is attached to the phone or
there is any obstacle in the hand strap hole,
the phone may not be firmly inserted.
To remove the phone from the holster, first press
the catch of the holster down to unlock the phone,
and then take the phone out of the slot.
Making a Call
When the idle screen is displayed, enter the area
code and phone number, and press the key.
Note:
If you have checked the
in the
Extra Settings
the number is redialed automatically up to ten
times when the person does not answer the
call or is already on the phone; see page 96 for
further details.
Making an International Call
1. Press and hold down the key.
+
character appears.
The
2. Enter the country code, area code and phone
number and press the key.
Correcting the Number
To clear... Press the...
the last digit
displayed
any other digit
in the number
the whole
display
key.
or key until the cursor is
immediately to the right of the
digit to be cleared. Press the
key. You can also insert a
missing digit simply by pressing
the appropriate key.
key for more than one
second.
Auto Redial
menu (
Menu 6.8
option
),
22
23
Call Functions
Call Functions
Ending a Call
When you want to finish your call, briefly press the
key.
Redialing the Last Number
The phone stores the numbers you dialed, received
or missed if the callers are identified; see “Call
Records” on page 78 for further details.
To recall any of these numbers:
1. If you have typed any characters on the displa y,
clear the display by holding down the key
for more than one second.
2. Press the key to display a list of the last
numbers in the order in which the calls were
made.
3. Use the and keys to scroll through the
numbers until the required number highlights.
4. T
o... Press the...
dial the number
highlighted
edit the number
highlighted
key.
Edit
soft key and change
the number as required,
referring to “Correcting
the Number” on page 23
for further details.
Making a Call from the Phonebook
You can store frequently dialed phone numbers with
a name in the SIM card or the phone memory, using
the Phonebook. You then simply select the required
name to recall the associated number. For further
details on the Phonebook features, refer to page 34.
Adjusting the Volume
During a call, if you want to adjust the earpiece
volume, use the volume keys on the left side of the
phone.
Press the key to increase and the key to
decrease the volume.
In idle mode with the folder open, you can adjust the
key volume using these keys.
24
25
Call Functions
Call Functions
Answering a Call
When somebody calls you, the phone rings and the
following screen appears on each display.
nnnnnn
Accept Reject
If the caller can be identified, the caller’s phone
number or name, if stored in your Phonebook,
displays.
1. If necessary , open the folder. Press the key or
the
Accept
soft key to answer the incoming call.
Anykey Answer
If the
Settings
menu (
press any key to answer a call except for
the key and the
page 96).
If the
Active Folder
Settings
menu (
answer the call simply by opening the folder (see
page 96).
Note
: To reject an incoming call, press and hold
the volume keys on the left side of the
phone before opening the folder.
2. End the call by closing the folder or pressing
the key.
Note
: You can answer a call while using the
26
Phonebook or menu features.
option in the
Menu 6.8
Reject
option in the
Menu 6.8
) is checked, you can
Extra
soft key (see
Extra
) is checked, you can
Viewing Missed Calls
If you are unable to answer a call for any reason,
you can find out who called you, provided that this
service is available, so that you can call the person
back, if necessary.
The number of missed calls is displayed on the idle
screen immediately after a call was missed.
To view the missed call immediately:
1. If the phone is closed, open the folder.
2. Press the
The number corresponding to the most recent
missed call displays, if available.
3. To.... Press the...
scroll through the
missed calls
call the number
displayed
edit or delete a
missed call number
Editing a Missed Call Number
Note
1. Press the
2. Press the or key to highlight the
Number
View
soft key.
or key.
key.
Select
soft key (see
below).
: If the number corresponding to the missed call
is not available, the
Edit Number
option is
not displayed.
Options
soft key.
Edit
option.
27
Call Functions
Call Functions
3. Press the
Select
soft key.
4. Change the number as required.
5. To... Press the...
call the number key.
store the number
Save
soft key and enter
the name and location
required (for further details,
refer to page 34).
Deleting a Missed Call
1. Press the
2. If necessary , press the or key to highlight
the
3. Press the
You can press the key at any time to exit the
Missed Call feature.
Note
Options
Delete
Select
soft key.
option.
soft key.
: You can access the Missed Call feature at any
time by selecting the
Menu 3.1
option (
Missed Calls
menu
); for further details, see
page 78.
Quickly Switching to Silent mode
The silent mode is convenient when discretion is
required and you wish to stop the phone from
making any noise, in a theatre for example.
In idle mode, to switch your phone quickly to silent
mode, simply press and hold down the key until
the “Silent Mode” message and vibration icon ( )
are displayed.
In silent mode, your phone changes the sound
settings as follows.
Option New Setting
Alert Type (Menu 5.3) Vibration
Keypad Tone (Menu 5.4) OFF
SMS Tone (Menu 5.5.1) Light Only
To exit the silent mode and reactivate the previous
sound settings, press and hold the key again
until “Exit Silent Mode” appears. The vibration icon
( ) is no longer displayed.
28
29
Selecting Functions and Options
Selecting Functions
and Options
Your phone offers a set of functions that allow you
to customize your phone. These functions are
arranged in menus and sub-menus, accessed via
the two soft keys marked and . Each menu
and sub-menu allows you to view and alter the
settings of a particular function.
The roles of the soft keys vary according to the
current context; the label on the bottom line of the
display just above each key indicates its current
role.
Example
:
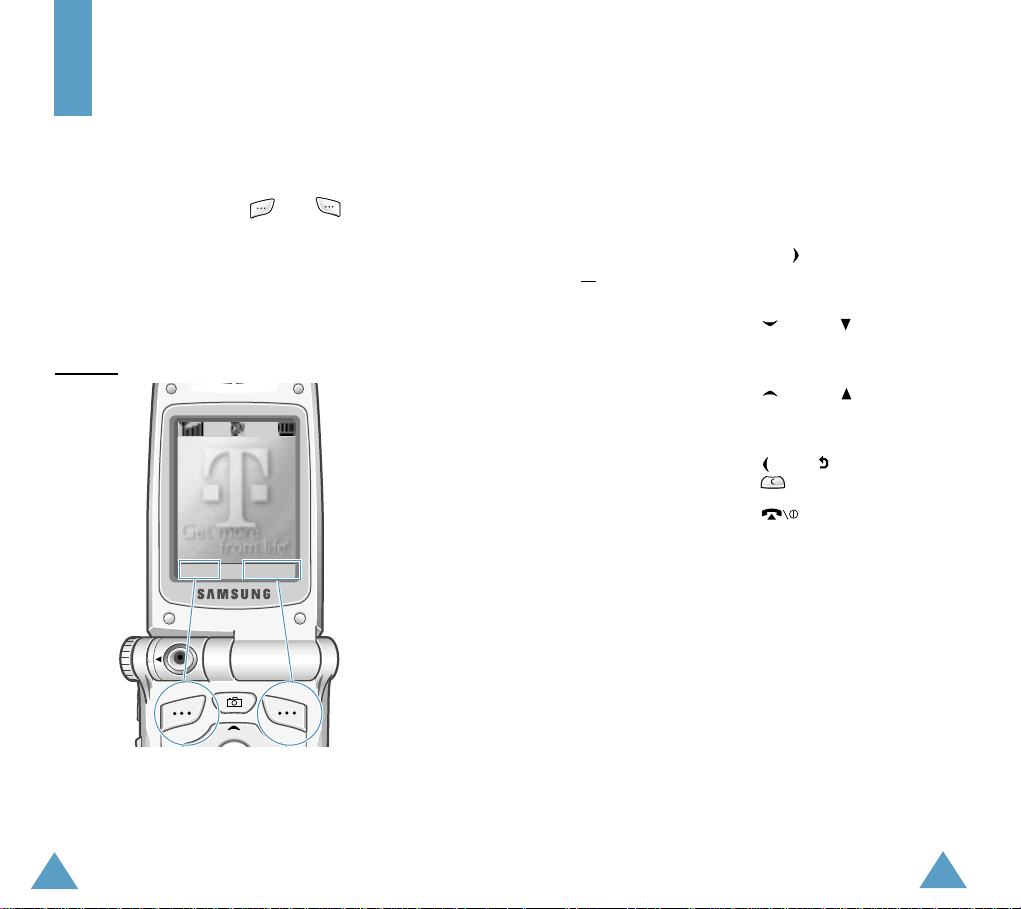
Service Provider
07:30 AM
Wed Jul 31
Menu Ph.Book
To view the various functions/options available and
select the one required:
1. Press the appropriate soft key.
2. To... Press the...
select the:
• function displayed
or
• option highlighted
view the next function
or highlight the next
option in a list
move back to the
previous function or
option in a list
move back up one
level in the structure
exit the structure
without changing the
settings
In some functions, you may be asked for a
password or PIN. Enter the required code and press
OK
soft key.
the
Select
soft key or
the key.
key or key on
the left side of the
phone.
key or key on
the left side of the
phone.
key, soft key or
key.
key.
Press the left soft
key to access the
main menu mode.
30
Press the right soft
key to access the
Phonebook feature.
31
Selecting Functions and Options
Selecting Functions and Options
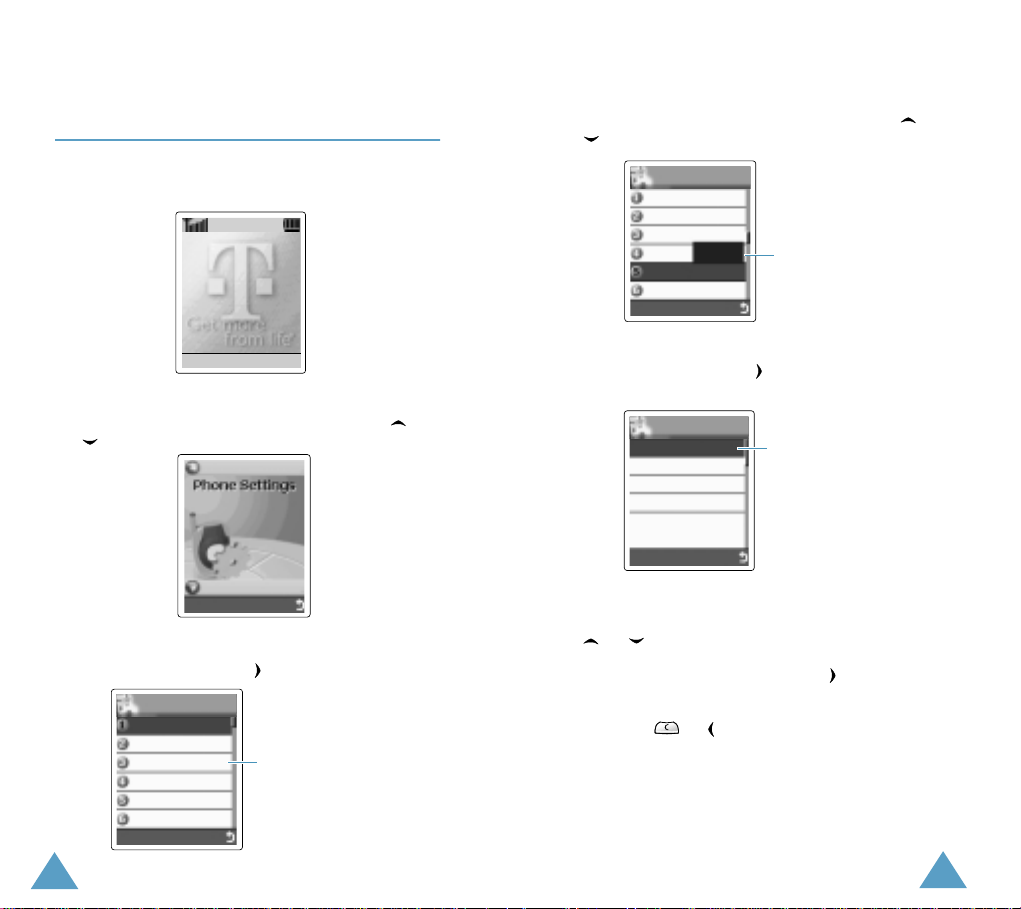
Example: Setting the Display
Language
1. When the idle screen is displayed, press the
Menu
soft key to access the menus.
Service Provider
07:30 AM
Wed Jul 31
Menu Ph.Book
2. Scroll through the menus until you reach the
Phone Settings
key.
3. To select the
Select
soft key or the key.
Phone Settings
Infrared Activ...
My Settings
Greeting Me...
Own Number
Language
Security
Select
menu, by pressing the or
Sound Settings
Organizer
Select
Phone Settings
6.1
6
menu, press the
If the menu name is too long
for the display, it is scrolled
when highlighted.
4. Scroll through the sub-menus until you reach
Language
the
sub-menu, by pressing the or
key.
Phone Settings
Infrared Activ...
My Settings
Greeting Me...
Own N
Language
Security
Select
English
6.5
Shows the current
setting
5. To view the languages available, press the
Select
soft key or the key.
The current setting is highlighted.
Language
English
Español
Français
Automatic
Select
6.5.1
Current language
6. Scroll through the list of languages until the
appropriate one is highlighted, by pressing the
or key.
Select
7. Press the
soft key or the key to
confirm your selection.
8. Press the or key twice to exit the menu
structure.
32
33

Phonebook
Phonebook
You can store phone numbers and their
corresponding names in the memory of your SIM
card. In addition, you can store up to 500 numbers
in the phone memory. The SIM card and phone
memories, although physically separate, are used
as if they were a single entity, which is called the
Phonebook.
Storing a Number with a Name
There are two ways to store a number:
Save
• Using the
• Using the
menu
Storing a Number in Idle mode
As soon as you start to enter a number,
appears above the left soft key to allow you to store
the number in the Phonebook.
1. Key in the number to be stored.
Note
: If you make a mistake while entering a
2. When you are sure that it is correct, press the
Save
soft key.
3. Select an icon to identify the category of number
to be stored. Three categories are available;
(mobile phone number), (office number)
and (home number). To select the category,
press the or key, followed by the Select soft
key.
soft key in idle mode
New Entry
number, correct it using the key. For
further details, refer to page 23.
option in the Phonebook
Save
4. Enter a name and press the OK soft key.
The maximum length of a name depends on
your SIM card. For information on how to enter
characters, see page 43.
5. Press the right soft key, labeled
Phone
to switch between the phone and card
memories.
Note
: If you change phones, any numbers stored
in your SIM card memory will automatically
be available with the new phone, whereas
any numbers stored in the phone memory
must be restored.
6. Press the OK soft key to store the name and
number.
After storing, the phone displays the Phonebook
entry or name just created.
7. To... Press the...
use the entry options
return to the idle
screen
To Card
Options
key.
soft key.
or
To
Storing a Number Using the Phonebook
Menu
1. When the idle screen is displayed, press the
Ph.Book
2. Scroll to
key and press the
soft key.
New Entry
Select
by pressing the or
soft key.
34
35

Phonebook
Phonebook
3. Select an icon to identify the category of the
number to be stored.
Note
: The E-mail icon ( ) is available in this
step. It allows you to save an E-mail
address instead of a phone number.
4. Continue the procedure from Step 4 on page 35
to store the number.
Using Phonebook Entry Options
While accessing any Phonebook entry, press the
Options
To... Press the...
select the
highlighted option
highlight a different
option
The following options are available:
Paste
into normal dialing mode.
Use this option to dial a number similar to one in
the Phonebook, a different extension in the same
office, for example.
Use the key to change the number as required;
refer to page 23 for further details. When you are
ready to dial, press the key.
soft key to use the options for the entry.
Select
soft key or the
key.
or key until the
required option highlights.
: allows you to paste the selected number
Edit
: allows you to edit the Phonebook entry.
Select
One Entry
to change one number in the
selected name. If you change the name, the
number is saved separately. Select
All Entry
to
change the name of the entry.
Erase
: allows you to erase the selected name and
number from the Phonebook. You are asked to
confirm that you wish to erase the name and
number by pressing the
Copy
: allows you to copy the selected number to
Yes
soft key.
another location. Use this option to store a number
similar to one already in the memory; once copied,
edit the number and store it in the Phonebook.
Caller Group
: allows you to assign the entry to a
caller group so that the phone alerts you in a
particular way when the corresponding person calls
you. Select one of the ten groups available.
To remove an entry from a group, select the
option.
Group
No
For more information on how to change caller group
properties, see page 40.
Add Entry
: allows you to add a new number in
a different category (mobile, office, home or
E-mail) to the currently selected name. A
Phonebook entry or name can contain up to four
numbers, one in each category.
36
37

Phonebook
Phonebook
Searching for a Number in the
Phonebook
After storing numbers in the Phonebook, you can
search for them in two ways; by name and by caller
group.
Searching for a Number by Name
1. When the idle screen is displayed, press the
Ph.Book
2. Press the
highlights. You are asked to enter a name.
3. Enter the first few letters of the name that you
wish to find.
The Phonebook entries are listed, starting with
the first entry matching your input. This entry is
also highlighted.
4. To... Press the...
view the highlighted
entry
select a different
entry
look for a name
starting with a
different letter
soft key.
Select
soft key when
View
soft key.
or key until the
required entry
highlights.
key labeled with the
required letter.
Search
Searching for a Number by Caller Group
1. When the idle screen is displayed, press the
Ph.Book
2. Scroll to
asked to enter a group name.
3. Enter the first few letters of the group name that
you wish to find.
The caller groups are listed, starting with the
first group matching your input. The group is
also highlighted.
4. Scroll to the required group by pressing the
or key and press the
The Phonebook entries in the selected caller
group are listed.
5. To... Press the...
view the
highlighted entry
select a different
entry
6. Once you have found the required entry, press
the key to dial the number, or press the
Options
entry options; for further details, see page 36.
soft key.
Group Search
key and press the
soft key to access the Phonebook
by pressing the or
Select
soft key. You are
View
soft key.
View
soft key.
or key until the
required entry highlights.
5. Once you have found the required entry, press
the key to dial the number, or press the
Options
entry options; for further details, see page 36.
38
soft key to access the Phonebook
39

Phonebook
Phonebook
Editing a Caller Group
1. When the idle screen is displayed, press the
Ph.Book
2. Scroll to
key and press the
3. Enter the first few letters of the required group
name or scroll through the group list by pressing
the or key.
4. When the group you want to edit highlights,
press the
5. Select each option and change the settings, as
required. The following options are available:
•
•
•
•
6. When you have finished, press the or
soft key.
Group Edit
Options
Call ring tone
tone to be used when you receive a voice call
from a person in the group.
SMS tone
to be used when you receive a text message
from a person in the group.
Graphic
to be displayed when you receive a voice call
from a person in the group.
Group Name
the group; for further details on how to enter
characters, see page 43.
: allows you to select the ring tone
: allows you to select the graphic icon
key.
by pressing the or
Select
soft key.
soft key.
: allows you to select the ring
: allows you to assign a name to
Speed-Dialing
Once you have stored phone numbers in the SIM
card, you can set up to eight speed-dial entries and
then dial them easily whenever you want, simply by
pressing the associated number key.
Setting Up Speed-Dial Entries
1. When the idle screen is displayed, press the
Ph.Book
2. Scroll to
key and press the
3. Select the key, to , to which you wish to
assign the speed-dialing feature, and press the
OK
Note
4. Select the required Phonebook entry from the
list and press the
5. Select the required number if the entry has
more than one number, by pressing the or
6. Once you have assigned a number to the
selected key, The following options are
available:
•
•
soft key.
Speed Dial
soft key.
: If you have already assigned a number to
the key , the
OK
soft key. Go to Step 6.
key and press the
Change
number to the key.
Erase
no number is assigned to the key.
: allows you to assign a different
: allows you to clear the setting so that
by pressing the or
Select
soft key.
Options
View
soft key replaces the
soft key.
Select
soft key.
40
41

Phonebook
•
Erase All
all keys so that no numbers are assigned to
any of the keys.
Number
•
assigned to the key.
7. When you have finished, press the or
key.
: allows you to clear the settings for
: allows you to view the number
Speed-Dialing from the Phonebook
To speed-dial the numbers assigned to keys to
, press and hold down the appropriate key.
Note
: Memory location 1 is reserved for your Voice
Mail server number.
Checking the Memory Status
You can check how many names and numbers are
stored in the Phonebook (card and phone
memories) or how many free locations remain.
1. When the idle screen is displayed, press the
Ph.Book
2. Select the
3. Press the or key to view the number of
existing and remaining entries in the card and
phone memories.
soft key.
Memory Status
option.
Entering Text
When using your phone, you will often need to
enter text. For example, when storing a name in the
Phonebook, creating your personal greeting or
scheduling events in your calendar. You can enter
alphanumeric characters by using your phone’s
keypad.
Your phone has the following text input modes:
• T9 mode
This mode allows you to enter words with only
one keystroke per letter. Each key on the keypad
has more than one letter – when you press the
key once, J, K or L may be displayed. The T9
mode automatically compares your keystrokes
with an internal linguistic dictionary to determine
the correct word, thus requiring far fewer
keystrokes than the traditional upper/lower-case
character modes.
• Upper/lower-case character modes
These modes allow you to enter letters by
pressing the key labeled with the required letter
once, twice, three or four times until the letter
displays.
• Symbol mode
This mode allows you to enter symbols, such as
punctuation marks.
• Number mode
This mode allows you to enter numbers.
42
43
Entering Text
Entering Text
Changing the Text Input Mode
When you are in a field that allows characters to be
entered, you will notice the text input mode
indicator on the display.
Example
To select the...
T9 mode displays.
Upper-case character
mode
Lower-case character
mode
Number mode
Symbol mode displays.
: When you create a text message
Text input mode
indicator
Options
918
Press the soft key
until...
See page 45.
A
displays.
See page 46.
a
displays.
See page 46.
1
displays.
See page 48.
See page 48.
Using the T9 Mode
The T9 predictive text input mode allows you to key
in any character using single keystrokes. This text
input mode is based on a built-in dictionary.
1. When you are in T9 predictive text input mode,
start entering a word by pressing keys to
. Press each key only once for one letter.
Example
The word that you are typing appears on the
display. It may change with each key that you
press.
2. Enter the whole word before editing or deleting
the keystrokes.
3. If the word is correct, start entering the next
word.
Otherwise, press the , or key to
display alternative word choices for the keys
that you have pressed.
Example
4. Put a space between each word by pressing the
• To type words not found in the T9 mode, change
the text input mode to the upper/lower-case
character input mode.
: to enter Hello in T9 mode,
press , , , and .
: both Of and Me have the sequence
, . The phone displays the most
commonly used choice first.
key.
44
45
 Loading...