

Samsung SGHE820N Users Manual
* Some of the contents in this manual may differ from your
phone, depending on the software installed or your
service provider.
ELECTRONICS
GPRS TELEPHONE
SGH-E820P
World Wide Web
http://www.samsungmobile.com
Printed in Korea
Code No.: GH68-05273A
English. 11/2004. Rev. 1.0

Contents
Important safety precautions ...................... 7
Special features ........................................... 9
Unpacking .................................................. 13
Your phone ................................................ 14
Phone layout...................................................... 14
Display.............................................................. 17
Backlight ........................................................... 20
Service display................................................... 20
Camera............................................................. 20
Built-in antenna ................................................. 21
Getting started........................................... 22
Inserting/Removing the SIM card ......................... 22
Installing/Removing/Charging the battery.............. 23
Switching the phone on or off............................... 27
Selecting functions and options ............................ 28
Locking or unlocking the keypad........................... 30
Call functions ............................................. 31
Making a call...................................................... 31
Ending a call ...................................................... 34
Answering a call ................................................. 35
Rejecting a call................................................... 35
Adjusting the volume .......................................... 35
Accessing options during a call ............................. 36
Using the ear-microphone.................................... 45
Using the Push to talk service .............................. 46
Entering text .............................................. 48
Changing the text input mode .............................. 49
Using the T9 mode ............................................. 50
Using the ABC mode ........................................... 52
Using the symbolic mode..................................... 55
Using the number mode ...................................... 55
Using the menus ........................................ 56
Accessing a menu function................................... 56
2
3

Contents
Contents
List of menu functions ......................................... 57
Phonebook menu ....................................... 63
Find name ......................................................... 63
Add entry .......................................................... 66
Speed list ......................................................... 67
Copy all to phone ............................................... 69
Send all via infrared............................................ 70
Delete all........................................................... 72
Own number...................................................... 73
Group setting..................................................... 74
Memory status ................................................... 75
Service directory ................................................ 75
Push To Talk(PTT) ................................... 76
Login to service / Logout from PTT........................ 78
Callback inbox.................................................... 78
Contact list ........................................................ 79
Group list .......................................................... 80
Add group ......................................................... 81
Settings ............................................................ 84
PTT call records ................................................ 86
Call records ................................................ 90
Missed calls ....................................................... 90
Received calls .................................................... 90
Dialled calls ...................................................... 91
Delete all........................................................... 91
Call time ........................................................... 92
Call costs .......................................................... 92
Network services ....................................... 94
Call diverting ..................................................... 94
Call barring........................................................ 96
Call waiting........................................................ 99
Network selection ............................................. 100
Caller ID ......................................................... 101
Active line ....................................................... 101
Sound settings ......................................... 102
Incoming calls.................................................. 102
Messages ........................................................ 103
4
Push to talk .................................................... 104
Power on/off .................................................... 105
Connection tone ............................................... 105
Key tone ......................................................... 106
Minute minder.................................................. 106
Quiet mode...................................................... 106
Slider tone....................................................... 107
Alerts on call.................................................... 107
Messages ................................................. 108
Short messages ............................................... 108
Multimedia messages ........................................ 114
Push messages ................................................ 126
Preset messages .............................................. 127
Voice mail ....................................................... 127
Broadcast ........................................................ 128
Settings .......................................................... 130
Memory status ................................................ 133
Fun box .................................................... 134
WWW services ................................................. 134
Media box........................................................ 140
JAVA world ...................................................... 144
SIM-AT MENU (SIM Application Toolkit) ............... 148
Organiser ................................................. 149
New memo ...................................................... 149
Calendar ......................................................... 151
To do list......................................................... 154
Clock .............................................................. 155
Alarm ............................................................. 157
Calculator........................................................ 159
Conversion ...................................................... 160
Timer.............................................................. 161
Stopwatch ....................................................... 162
Camera .................................................... 163
Take photos..................................................... 163
My photos ....................................................... 169
My albums....................................................... 169
Delete all......................................................... 170
Settings ......................................................... 170
Memory status ................................................. 171
5

Contents
Phone settings ......................................... 172
Display............................................................ 172
Greeting message............................................. 174
Security .......................................................... 175
Auto redial....................................................... 178
Voiceclarity ..................................................... 178
Slide down operation ....................................... 179
Active slide ...................................................... 179
Anykey answer................................................. 179
Fax mode ........................................................ 180
Infrared activation ............................................ 180
Reset settings .................................................. 181
Using ALS (Alternate Line Service) .......... 182
Solving problems ..................................... 184
Access codes ............................................ 187
Phone password ............................................... 187
PIN................................................................. 187
PIN2 ............................................................... 188
PUK ................................................................ 188
PUK2 .............................................................. 188
Call barring password........................................ 189
Health and safety information.................. 190
SAR certification information .............................. 190
Precautions when using batteries........................ 194
Road safety ..................................................... 195
Operating environment ..................................... 198
Electronic devices............................................. 198
Potentially explosive atmospheres....................... 200
Emergency calls ............................................... 201
Other important safety information..................... 202
Care and maintenance ...................................... 203
Glossary................................................... 224
Index....................................................... 228
Quick reference card................................ 237
6

Important safety
precautions
Read these guidelines before using your wireless
phone. Failure to comply with them may be
dangerous or illegal.
Road safety at all times
Do not use a hand-held phone while driving; park
the vehicle first.
Switching off when refuelling
Do not use the phone at a refuelling point (service
station) or near fuels or chemicals.
Switching off in aircraft
Wireless phones can cause interference. Using them
in aircraft is both illegal and dangerous.
Switching off near all medical equipment
Switch off your phone near the medical equipment.
Hospitals or health care facilities may be using
equipment that could be sensitive to external RF
energy. Follow any regulations or rules in force.
Interference
All wireless phones may be subject to interference,
which could affect their performance.
Special regulations
Meet any special regulations in force in any area and
always switch off your phone whenever it is
forbidden to use it, or when it may cause
interference or danger (in a hospital for example).
Water resistance
Your phone is not water-resistant. Keep it dry.
7

Important safety precautions
Sensible use
Use only in the normal position (held to the ear).
Avoid unnecessary contact with the antenna when
the phone is switched on, especially the phone is in
service.
Emergency call
Key in the emergency number for your present
location, then press the key. Give all the
necessary information as accurately as possible. Do
not cut off the call until given permission to do so.
Keeping small children away from your phone
Keep the phone and all its parts including
accessories out of the reach of small children.
Accessories and batteries
Use only Samsung-approved accessories and
batteries.
Special features
Compact & Stylish slide-up design
Samsung E820 is an
amazing phone with a
refined slide design, which
fits comfortably in your
hand. The semi-automatic
slide allows you to open the
phone quietly, smoothly and
with very little effort.
VGA camera with flash (see page 163)
With the built-in VGA
Camera, the Samsung E820
allows you to shoot the
clearest of images, anytime,
anywhere. Take a close look
at another advanced
technology masterpiece
created by Samsung.
Qualified service
Only qualified service personnel may install or
repair your phone.
For more detailed safety information, see “Health
and safety information” on page 190.
CAUTION
RISK OF EXPLOSION IF BATTERY IS REPLACED BY
AN INCORRECT TYPE
DISPOSE USED BATTERIES ACCORDING TO THE
INSTRUCTIONS
8
Speaker phone (see page 36)
The integrated speakerphone
incorporates a state-of-the-art
echo cancellation technology
and incorporates both noise
cancellation and voice clarity
functions to let you speak
more freely in the car. They'll
always be able to hear you
loud and clear.
9
Special features
Special features
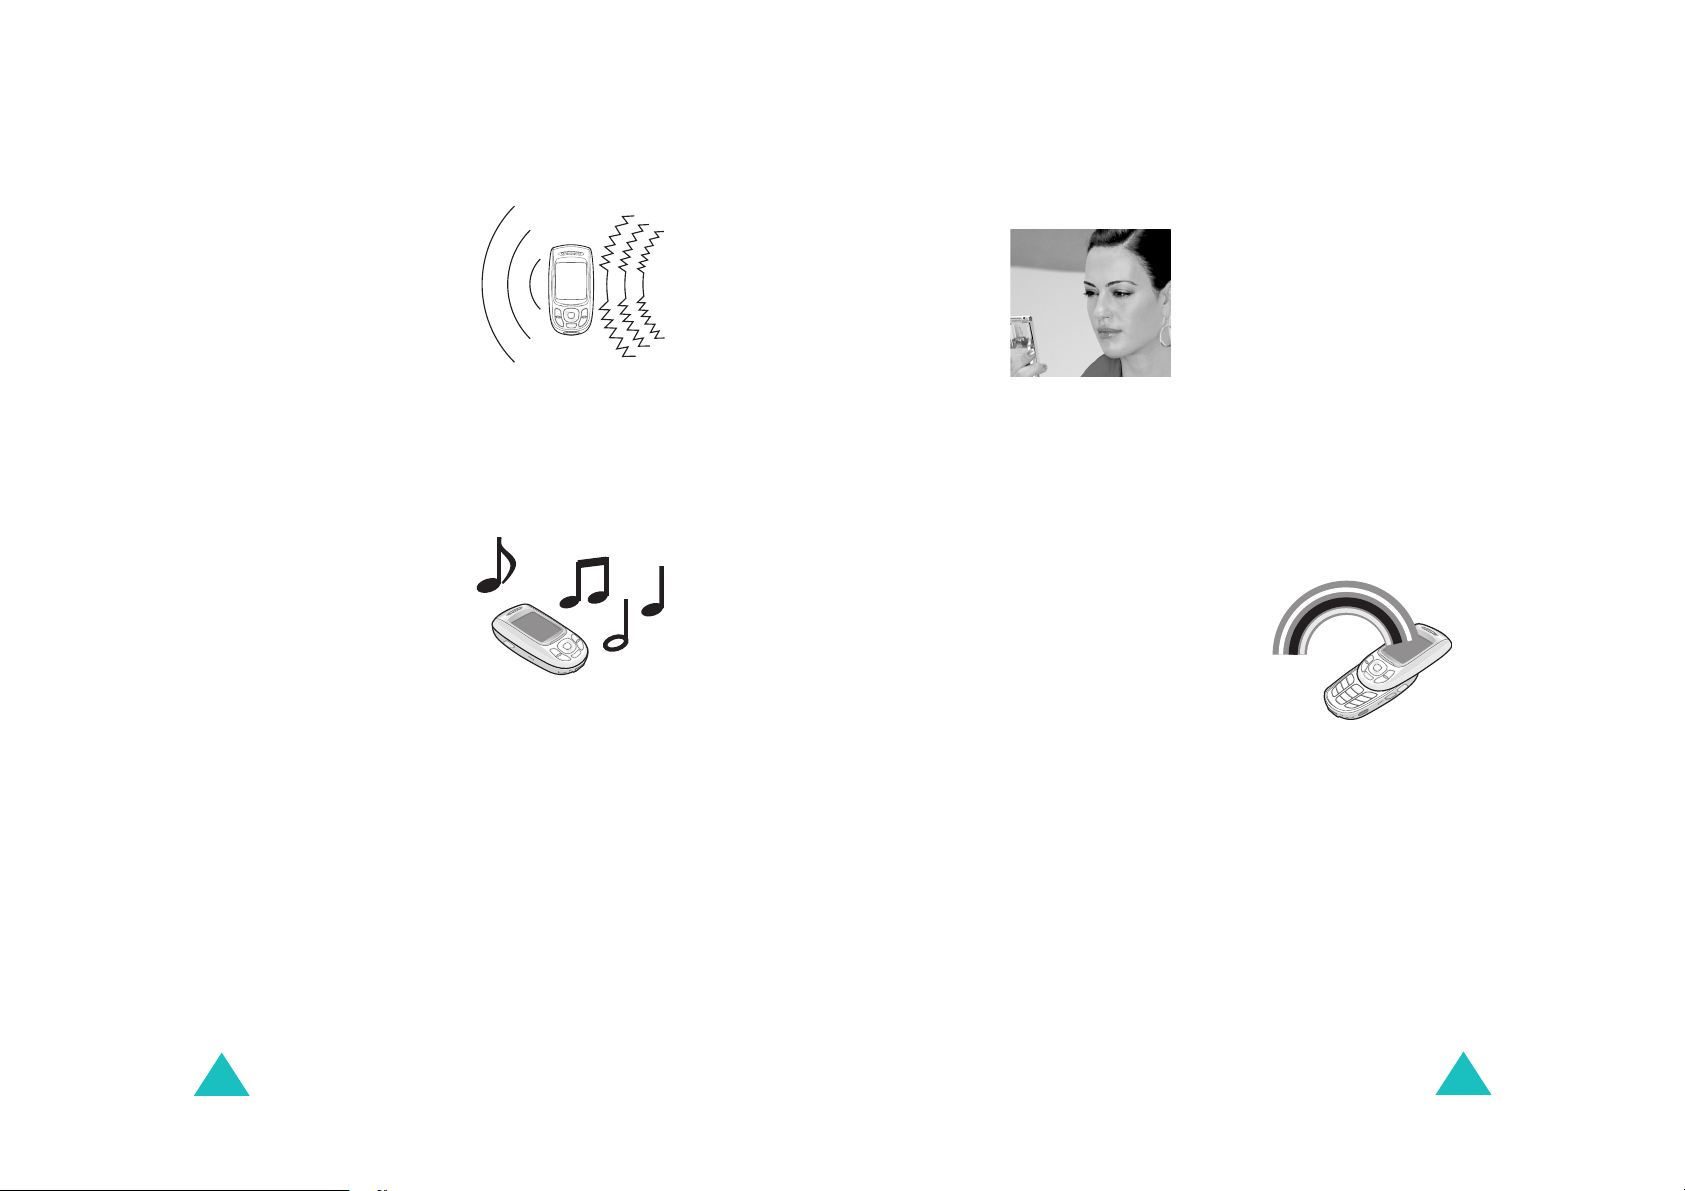
Background noise sensitivity
You can talk in the midst of
a crowd and the phone will
automatically increase the
volume and clarity of the
incoming call to make it
more audible.
Even better than simply
raising the volume on your
phone, the E820 automatically senses the volume
around you to enhance your conversation and keep
you from having to run out of the room.
64 poly ringtones (see page 102)
64 Polyphonic ringtones
will make your calls ring
through with unmistakable
clarity and great sound to
boot. This best in the
market sound will make
the difference between you
and the rest all the more
audible.
Get personal with photo caller ID ( see
page 141,166
the convenience of using your picture files in ways
that are impossible with other mobile phones. Step
up to the latest and greatest in convenience with
the E820.
)
Now you can see who's calling
you by his or her very own
photo. With the image saved in
your phone, you can view the
image of the person calling you,
before you answer the call. The
Samsung E820’s Photo Caller
ID function provides you with
65,536 color TFT LCD
As usual, Samsung leads
the way in mobile display
quality. The display of the
E820 will astounded you
with its vivid colors and
distinctive class. With its
65,536 color TFT screen
the quality of the VGA pictures will come out in true
force. The screen of the display lets the message
come through in vivid life and lets you view your
multimedia messages in bright delight.
10
11
Special features
MMS (see page 114)
Just shoot it and send it
along with Samsungs
Multimedia solution,
MMS. Multimedia
Messaging Service was
developed from SMS and
makes it possible to send message with a
combination of text, voice, music, and images to
other MMS capable mobile phones. Make
multimedia communication your message to the
world as you discover a new way to tell your story.
Unpacking
Your package contains the following items:
Phone
Trave l a d ap t e r
JAVA (see page 144)
Make your free time more
relaxing with a bit of mobile
entertainment.
TM
The Samsung E820s Java
based games bring the
challenges to you. Enjoy the
embedded games and download
TM
new Java
The Java
‚ based games for more amusement.
TM
‚ capabilities allow you to download
programs from wide variety of Java
more than just games.
‚
TM
‚ applications -
Battery
Owner’s manual
In addition, you can obtain the following
accessories for your phone from your local
Samsung dealer:
• Advanced handsfree car kit
• Simple handsfree car kit
• PC data link kit
•Headset
Note
: The items supplied with your phone and
available accessories may be different,
depending on your country or service provider.
12
13
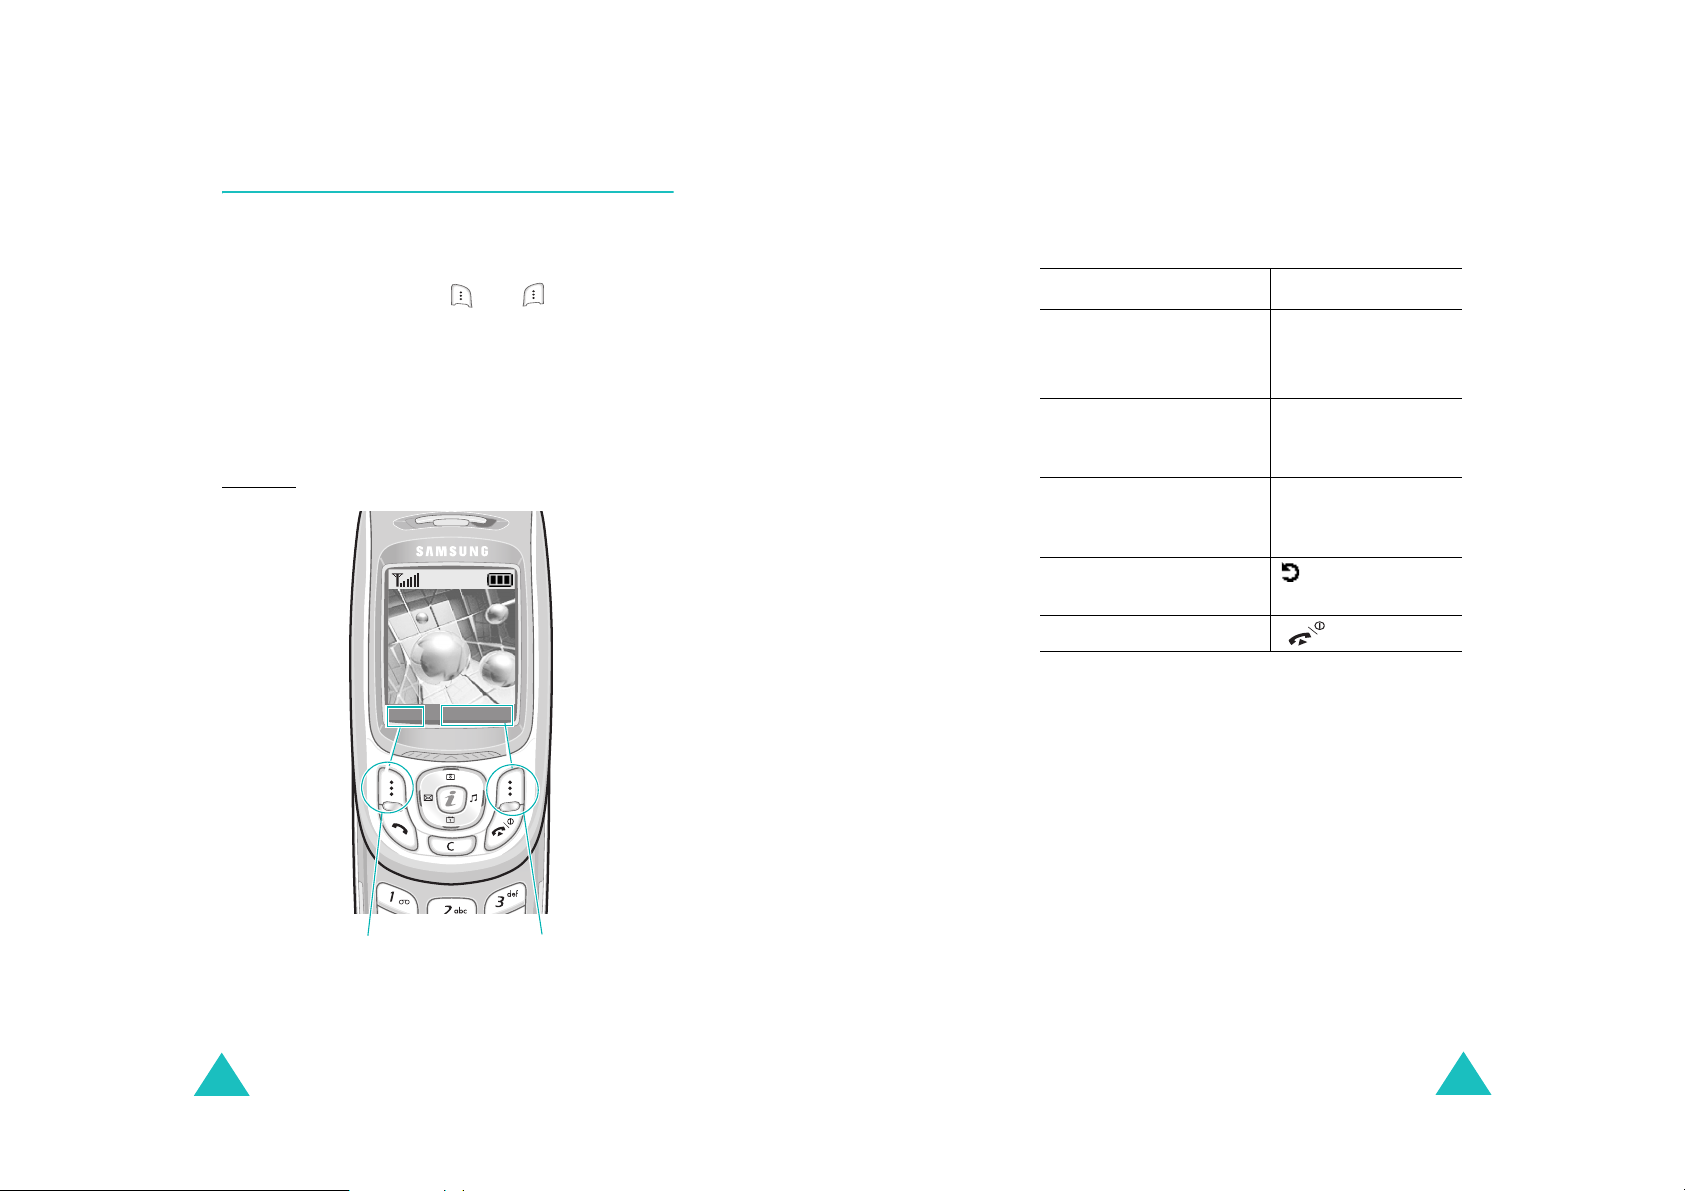
Your phone
Your phone
h
Phone layout
The following illustrations show the main elements
of your phone:
(Reverse side)
Mirror
Navigation keys
(Up/Down/Left/
confirmation key
Right)
Soft key (left)
Volu me key s
WAP Browser
Cancel/Back/
Correction key
function keys
key
Dial/Menu
Special
Camera
Flash
Earpiece
Display
Power On/Off /
Menu exit key
Soft key (right)
Ear-microphone
jack
PTT key
Alphanumeric
keys
IrDA port
Microphone
Key(s) Description
Perform the functions indicated by the
text above them, on the bottom line of
(soft keys)
the display.
In Menu Mode, scroll through the
menu options.
In Idle Mode, the Left key enters the
New SMS message writing
the Right key enters the
call’s melody setting
Down key enters the
menu. The Up key enters the
menu, when pressed and held it
switchs the phone to the capture
mode.
In Idle Mode, launches the WAP
(Wireless Application Protocol) browser
directly.
Makes or answers a call.
In Idle Mode, accesses the call log list.
In Menu Mode, selects a menu function
or stores information that you have
entered, such as a name in the phone
or SIM memory.
Deletes characters from the display.
When pressed and held in Idle Mode,
quickly accesses the
screen.
In Menu Mode, returns to previous
menu.
screen,
Incoming
menu and the
PTT group list
Camera
New memo
14
15
Your phone
Your phone
Key(s) Description
Ends a call.
When pressed and held, switches the
phone on or off.
In Menu Mode, cancells your input and
returns to Idle Mode.
When pressed and held in Idle Mode,
quickly accesses your voice mail
server.
Enter numbers, letters and some
special characters.
Used for various purposes in different
functions.
When pressed and held while entering
a phone number, the key enters a
pause.
When pressed and held in Idle Mode,
the key enters or exits the Quiet
Mode.
(continued)
Key(s) Description
(continued)
(on the right side of the phone)
Press the PTT key once and everyone
can hear you talk - release the key and
hear others talking back to you.
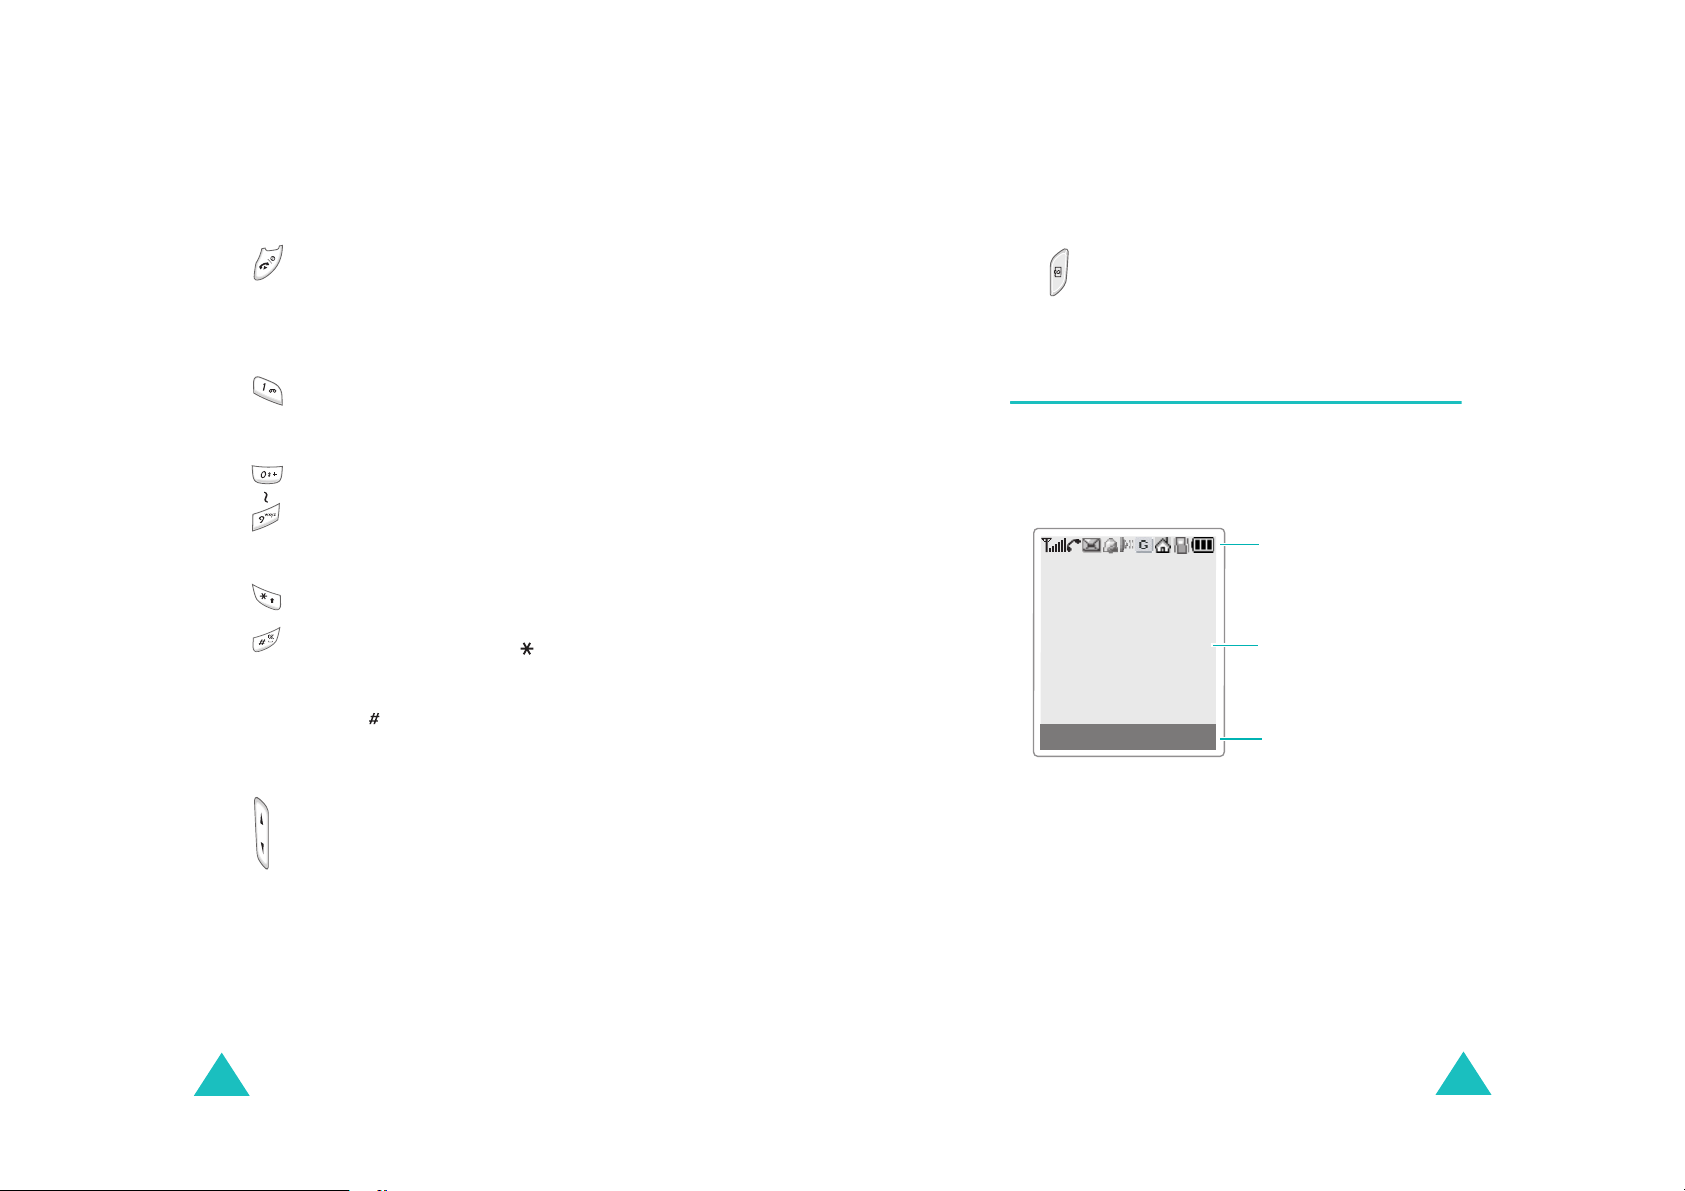
Display
Display layout
The display has three areas:
Menu Phonebook
Icons
Text and
graphic area
Soft keys
Indications
16
(on the left side of the phone)
During a call, adjust the earpiece
volume.
In Idle Mode, adjust the key tone
volume.
In the capture mode, flip the picture
vertically by pressing the volume up
key and horizontally by pressing the
volume down key.
Area Description
First line Displays various icons. See
page 18.
Middle lines Display messages, instructions
and any information that you
enter, such as number to be
dialled.
Last line Shows the functions currently
assigned to the two soft keys.
17

Your phone
Your phone
Icons
Icon Description
Shows the received signal strength. The
more the number of bars, the stronger
the signal.
Appears when a call is in progress.
Appears when you are out of a service
area. When it displays, you cannot make
or receive calls.
Appears when you have new or
unchecked voice messages. When your
SIM card supports ALS (Alternate Line
Service), this icon may appears like ,
, .
Appears when you have new or unread
messages.
Appears when you have new or
unchecked multimedia messages.
Appears when you are retrieving a
multimedia message.
Appears when you are sending a
multimedia message.
Appears when you set the alarms to ring
at a specified time.
Appears when the IrDA port is active. For
details, see page 180.
Appears when you connect the phone to
the computer by the IrDA port.
Icon Description
Appears when you are connected to the
(continued)
GPRS network.
Appears when the PTT service is available.
Appears when trying to login to the PTT
service.
Appears when the PTT service is unable to
use temporarily.
Appears when your SIM card supports the
Call diverting status indication and the
Call diverting feature is activated. When
your SIM card supports ALS (Alternate
Line Service), this icon may appears with
the number 1, 2, or both. For example:
, , .
Appears when you are at the home zone.
May be shown only if your service provider
(
supports this feature)
Appears when you are at the office zone.
May be shown only if your service provider
(
supports this feature)
Appears when you set the alert type for
incoming calls to
then melody
. For further details, see
Vibration
or
Vibration
page 103.
Appears when the Quiet Mode is active.
Shows the level of your battery. The more
bars you see, the more power you have
left.
18
19

Your phone
Your phone
Backlight
The display and the keypad are illuminated by a
backlight. When you press any key, the backlight
illuminates. It turns off if you don’t press any key
within a given period of time, depending on the
Backlight
page 173.
menu option. For further details, see
Service display
The service display works when the LCD turns off
.
and you are in a service area
activity depends on the
option. See page 173.
The service light’s
Service display
menu
Camera
The camera embedded in your phone allows you to
take a picture of people or events while on the
move.
Built-in antenna
Your phone has a built-in antenna. As with other
mobile radio transmitting equipment, do not touch
the antenna unnecessarily when the phone is
switched on. Contact with the antenna affects call
quality and may cause the phone to operate at a
higher power level than needed.
For further details about using the Camera feature,
see page 163.
(Reverse side)
20
21
Getting started
Inserting/Removing the SIM card
When you subscribe to a cellular network, you are
provided with a SIM card loaded with your
subscription details, such as your PIN, any optional
services available and so on.
• Keep all miniature SIM cards out of the reach of
small children.
• The SIM card and its data can be easily damaged
by scratches or bending, so be careful when
handling, inserting or removing the card.
Getting started
Removing the SIM card
To remove the SIM card, slide the card out of the
holder, as shown.
• When installing the SIM card, always make sure
that the phone is switched off before you remove
the battery.
Inserting the SIM card
1. If necessary, remove the battery by referring to
page 24.
2. Insert and slide the SIM card under the tab,
ensuring that the notched corner is top left and
the gold contacts of the card face into the
phone.
22
Installing/Removing/Charging the
battery
Your phone is powered by a rechargeable Li-ion
battery. Use only approved batteries and chargers.
Ask your local Samsung dealer for further details.
Note
: You must fully charge the battery before using
your phone for the first time. A discharged
standard battery is fully recharged in
approximately 150 minutes.
Installing the battery
1. Insert the teeth on the bottom of the battery
into the corresponding slots on the phone..
23
Getting started
Getting started
2. Press the battery against the back of the phone
until it clicks into place.
Removing the battery
1. Switch off the phone by pressing and holding the
key.
2. To remove the battery, pull the battery catch
toward the top of the phone and hold it in that
position. Lift the battery away from the phone.
Charging the battery by using the travel
adapter
Note
: The phone can be used while the battery is
being charged, but this causes the battery to
charge more slowly.
1. Plug the connector of the travel adapter into the
jack at the bottom of the phone.
Check that the arrow on the connector is facing
towards the front of the phone.
2. Plug the adapter into a standard AC wall outlet.
24
While charging, the battery icon at the top righthand corner of the display repeatedly fills to
show that the battery is charging.
25
Getting started
Getting started
3. When charging is finished, disconnect the
adapter from the power outlet and from the
phone by pressing the grey tabs on both sides of
the connector and pulling the connector out.
Low Battery Indicator
When the battery is weak and only a few minutes of
talk time remain, the battery sensor informs you in
the following ways: an empty battery icon flashes
( ), you hear a warning tone and a message
repeats at regular intervals on the display.
When the battery becomes too weak for the phone
to operate, it switches off automatically.
Switching the phone on or off
To switch the phone on:
1. Hold down the key until the phone
switches on.
2. If the phone asks for a PIN, enter the PIN and
Ok
press the
page 187.
The phone searches for your network and the
current date and time appear on the display.
After finding it, you can make or receive a call.
To switch the phone off:
Hold down the key until the power-off
animation displays.
soft key. For further details, see
Service Provider
Tue 1 Jun 04
12:53
Menu Phonebook
26
27
Getting started
Getting started
Selecting functions and options
Your phone offers a set of functions that allow you
to customise your phone. These functions are
arranged in menus and sub-menus, accessed via
the two soft keys marked and Each menu
and sub-menu allows you to view and alter the
settings of a particular function.
The roles of the soft keys vary according to the
current context; the labels or icons on the bottom
line of the display and just above the soft keys
indicate their current roles.
Example
:
Service Provider
Tue 1 Jun 04
12:53
Menu Phonebook
To view various functions/options available or select
the one is required:
1. Press the appropriate soft key.
To Press the
2.
select the:
Select
soft key.
• function displayed
• option highlighted
view the next function or
Down key.
highlight the next option
on a list
move back to the
Up key.
previous function or
option on a list
Back
C
) soft
key.
move back up one level
in the structure
(or
key or
return to Idle Mode key.
In some functions, you may be asked for a
password or PIN. Enter the required code and press
Ok
the
soft key.
Press the left soft
key to access the
menu functions.
28
Press the right soft
key to access the
Phonebook feature.
29

Getting started
Locking or unlocking the keypad
Call functions
You can lock the soft keys, navigation keys, WAP
brower key, volume keys and camera key to avoid
pressing keys by accident.
To lock the keys, slide the folder down.
If you set the
down operation
locks the keys automatically when you slide the
folder down.
Otherwise, if you set the
option in the
page 179), the confirming message appears on the
display when you slide the folder down in the Idle
Mode. In the message, you can lock the keys by
pressing the
Yes
or NO soft keys in the confirming message, the
phone locks the keys after a little while.
To unlock the keys, slide the folder up or press the
Unlock
again.
Stop operation
menu (see page 179), the phone
Slide down operation
Yes
soft key. If you don't press the
soft key and then press the OK soft key
option in the
Continue operation
menu (see
Slide
Making a call
Using the number keypad
When the idle screen is displayed, enter the area
code and phone number, and press the key.
Note:
If you have set the
the number is redialled automatically up to ten
times if the person you called does not answer
or the line is busy. For further details, see
page 178.
Correcting the number
To clear Press the
the last digit
displayed
any other digit in
the number
Auto redial
C
key.
Navigation keys until the
cursor (|) is immediately to
the right of the digit to be
cleared and press the
You can also insert a missing
digit simply by pressing the
appropriate key.
option to On,
C
key.
30
the all digits
displayed
C
key and hold it down for
more than one second.
31

Call functions
Call functions
Making an international call
1. Press and hold the 0 key for the international
prefix. The + character appears.
2. Enter the country code, area code and phone
number and press the key.
Making a call from phonebook
You can store the names and phone numbers called
regularly in the SIM card and phone’s memory,
which are jointly called the Phonebook. You then do
not need to remember all your numbers; simply
select the required name to recall the associated
number.
For further details about the Phonebook feature,
see page 63.
Using the call logs
The phone stores up to 20 calls dialled, received or
missed chronologically. The last call is saved in the
first position. If the same number occurs more than
once, only the latest occurrence is saved.
3. To dial the number, press the key.
To view each call record, see “Call records” on
page 90.
Using the PTT call logs
The phone stores up to 20 PTT calls dialled,
received or missed chronologically. The last PTT call
is saved in the first position. If the same PTT call
occurs more than once, only the latest occurrence is
saved.
To make a one-to-one call any of these records:
1. Press the key in Idle Mode to access the Call
log list.
2. Use the Up and Down keys to scroll through the
list until the PTT call record you want highlights.
The PTT call logs are listed with the following
icons:
• : PTT Dialled calls
• : PTT Received calls
• : PTT Missed calls
To recall any of these numbers:
1. Press the key in Idle Mode to access the Call
log list.
2. Use the Up and Down keys to scroll through the
list until the number you want highlights.
The call logs are listed with the following icons:
• : Dialled calls
• : Received calls
• : Missed calls
32
3. To make a one-to-one call, press the PTT key.
To view each PTT call record, see “PTT call records”
on page 86.
Viewing missed calls
If you have a subscription that includes the Caller
Line Identification (CLI) feature and you are unable
to answer a call for any reason, you can find out
who was calling you so that you can call the person
back.
33

Call functions
Call functions
The number of missed calls displays on the idle
screen immediately after a call was missed.
To view the missed calls immediately:
1. Press the
The list of the missed calls displays.
2. If necessary, scroll to the number you want by
pressing the Up or Down key.
3. To dial the number, press the key.
To use the missed call options, see “Missed calls” on
page 90.
Note
: To clear the missed call notification on the
Missed
display, press the key. When you also
have voice mails, short messages or
multimedia messages and multi CBs, the right
soft key indication changes in the following
Missed, Connect, View, CB
order:
Phonebook
soft key.
and
.
Speed-dialling from Phonebook
Once you have stored numbers in the Phonebook,
you can dial a number simply by pressing one or
two keys. For further details, see page 67.
Ending a call
When you want to finish your call, briefly press the
key. Or, slide the folder down if you set the
Stop operation
operation
option in the
menu (see page 179).
Slide down
Answering a call
When somebody calls you, the phone rings and
displays the incoming call animation.
If the caller can be identified, the caller’s phone
number, or name if stored in your Phonebook,
displays.
To answer a call, press the key or
key. Or, slide the folder up when the
option is set to on.
Note
: You can answer a call while using the
Phonebook or menu features. The current
operation stops.
Accept
Active slide
soft
Rejecting a call
To reject an incoming call, press the key. Or,
slide the folder down if you set the
option in the
page 179).
Slide down operation
Stop operation
menu (see
Adjusting the volume
During a call, if you wish to adjust the earpiece
volume, use the volume keys on the left side of the
phone.
When you hear a sound, such as ringtone, you can
also adjust the earpiece volume. But it is not fixed.
Note
: When a call comes in, you can mute the call
ringer by pressing and holding one of the
volume keys.
34
35

Call functions
Call functions
Accessing options during a call
Your phone provides a number of control functions
that you can use during a call.
Using the loudspeaker
You can speak and listen to the phone from a short
distance without holding the phone to your ear.
Turn on / off the loudspeaker
1. Press the
2. Press the Up or Down key to highlight the
Speaker on
(turn off the loudspeaker) option. Press the
Select
CAUTIONS
ear when you use the loudspeaker. Because the
volume may be extremely loud.
Note
: You can turn on/off the loudspeaker by
Options
soft key.
: Do not hold the phone near to your
pressing the
soft key.
(turn on the loudspeaker)/
Right
soft key during a call.
Normal
2. When
To switch the microphone back on:
1. Press the
2. When
Mute
highlights, press the
key.
The Mute icon ( ) appears on the bottom line
of the display and your correspondent can no
longer hear you.
Options
Unmute
key.
The Mute icon disappears and your
correspondent can hear you.
soft key.
highlights, press the
Select
Select
soft
soft
Searching for a number in Phonebook
You can search for a number in your Phonebook
during a call.
1. Press the
2. If necessary, press the Up or Down key to
highlight the
Select
Options
soft key.
soft key.
Phonebook
option. Press the
Switching the microphone off (Mute)
You can temporarily switch your phone’s
microphone off so that the other person cannot
hear you.
Example
1. Press the
36
: You may wish to say something to
another person in the room but do not
want the calling person to hear you.
Options
soft key.
3. Select the
Select
The Phonebook entries are listed.
4. Enter the first a few letters of the name that you
want to find.
The Phonebook entries are listed starting with
the first entry matching your input.
Note
Find name
soft key.
: You can also scroll through the Phonebook
from the beginning, by pressing
Down key
option and press the
the Up or
.
37

Call functions
Call functions
5. To view the highlighted entry, press the Ok soft
key.
For further details about the Phonebook feature,
see page 63.
Muting/Sending key tones
You can turn the key tones off or on during a call.
When the
Mute keys
option is selected, your phone
does not transmit the key tones. It allows you to
press keys without hearing annoying key tones
during a call.
To communicate with answering machines or
computerised telephone systems, the
Send keys
option must be selected.
Sending DTMF tones
You can send the DTMF(Dual Tone Multi-Frequency)
tones of the number on the display during a call.
This option is helpful for entering a password or
account number when you call an automated
system, like a banking service.
Using the message service
You can read or write a new message during a call.
1. Press the
Options
soft key.
2. Press the Up or Down key to highlight the
Message
3. To read a received message, select the
option. Press the
Select
soft key.
Inbox
option, and then scroll to the message that you
want to read.
To write a new message, select the
Create
option.
Select
4. Press the
soft key.
For further details about the SMS feature, see
page 108.
Using the voiceclarity
The voiceclarity function maintains the background
noise to acceptable level. You can hear the other
party louder and clearer thus it is a desired feature
especially in a noisy environment.
To send the DTMF tones:
1. When you are connected to the teleservice
system, press the
Options
2. Press the Up or Down key to highlight the
option. Press the
DTMF
soft key.
Select
Send
soft key.
3. Enter the number you want to send and press
OK
the
soft key.
The tones of the displayed number are sent.
38
You can manually turn on the voiceclarity feature
while engaged in a call.
Using the voiceclarity function
1. Press the
Options
soft key.
2. Press the Up or Down key to highlight the
Voiceclarity on / Voiceclarity off
Select
Press the
Note
: You cannot activate the voiceclarity when you
soft key.
option.
use the loudspeaker and the handsfree car kit.
39

Call functions
Call functions
Using the SAT (SIM Application Toolkit)
If you use a SAT card that provides additional
services, the SAT menu displays. For further details,
see your SIM card instructions.
Putting a call on hold
You can place the current call on hold whenever you
want. You can make another call while you have a
call in progress if this service is supported by the
network. Of these two calls, one is active and the
other is on hold and you can switch between the
calls.
Note
: You can not turn on/off the loudspeaker or
voiceclarity features when you hold a call.
To place a call on hold,
1. Press the
2. Press the Up or Down key to highlight the
option.
If you want to reactivate the call, press the
Retrieve
To make a call while you have a call in progress:
1. Enter the phone number that you want to dial or
look it up in the Phonebook.
2. Press the key to dial the second call.
The first call is automatically put on hold.
Options
soft key.
soft key.
Hold
3. Make the second call in the normal way.
To switch between the two calls, press the
Swap
soft key and then select the
option.
Options
The current call is placed on hold and the call on
hold is reactivated so that you can continue
conversing with the other person.
To end the call on hold, press the
and select the
End held call
option.
Options
soft key
When you want to finish, end each call normally by
pressing the key. If you want to finish all calls
at once and you set the
Slide down operation
the
Stop operation
menu (see page 179),
option in
slide the folder down.
Answering a second call
You can answer an incoming call while you have a
call in progress, if this service is supported by the
network and you have activated the
option (see page 99). You will be notified of an
incoming call by a call waiting tone.
To answer a call while you have another call in
progress:
1. Press the key to answer the incoming call.
The first call is automatically put on hold.
2. To switch between the two calls, press the
Options
soft key and then select the
option.
Call waiting
Swap
Or alternatively:
1. Press the
Options
soft key.
2. Put the current call on hold by selecting the
Hold
option.
40
3. To end the call on hold, press the
key and select the
End held call
Options
option.
To end the current call, press the key.
The call on hold is continued.
soft
41

Call functions
Call functions
Transferring a call
You can transfer the current call to the call on hold
if this service is supported by the network, so that
the callers can talk to each other. You are
disconnected from both of them.
1. During a call, answer or make a call in the
normal way, and press the
Options
2. Press the Up or Down key to select the
Select
option and press the
soft key.
soft key.
Transfer
The two people are connected to each other.
Making a multi-party call
A multi-party call feature is a network service that
allows up to six people to take part simultaneously
in a multi-party or conference call. For more
information, contact your service provider.
Setting up the multi-party call
1. Call the first participant in the normal way.
2. Call the second participant in the normal way.
The first call is automatically put on hold.
Having a second call during a multi-party call
To answer a call when you have the multi-party call:
1. Press the key to answer the incoming call.
The first call is automatically put on hold.
2. To switch between the two calls, press the
Options
soft key and then select the
Swap
option.
3. To end the call on hold, press the
key and select the
End held call
or
End held multiparty
option.
Options
option
soft
To end the current call, press the key.
The call on hold is continued.
To make a call when you have the multi-party call:
See “To make a call while you have a call in
progress:” on page 40.
To answer an incoming call when you have the
multi-party call in progress and another call on
hold:
1. Press the
2. Select the
Accept
soft key.
End held
option to end the call on
hold.
3. To join the first participant to the multi-party
call, press the
option. Press the
Join
Options
soft key and select the
Select
soft key.
4. To add a new person to the multi-party call, call
the person in the normal way. Then press the
Options
Press the
soft key and select the
Select
soft key.
Join
option.
You can add incoming callers by answering the call
and selecting the
42
Join
option. Repeat as needed.
Or, select the
in progress.
End current
option to end the call
And then you can answer the new call.
43

Call functions
Call functions
Having a private conversation with one
participant
1. Press the
option. Press the
Options
soft key and select the
Select
soft key.
2. Press the Up or Down key to highlight a
participant and press the
Select
soft key.
Now you can talk privately with that person. The
other participants can continue to converse with
each other
3. To return to the multi-party call, press the
Options
4. Press the
soft key and select the
Select
soft key.
Join
option.
All of the multi-party call participants can now
hear each other.
Removing one participant
1. Press the
Remove
Options
option.
soft key and select the
2. Press the Up or Down key to highlight a
Select
participant and press the
soft key.
Split
Using the ear-microphone
With the ear-microphone, you can make or answer
a call without holding the phone.
When you connect the ear-microphone to the jack
at the right side of the phone, the button on the
ear-microphone works as listed below:
To Press
redial the last call the button twice in Idle Mode.
answer a call and hold the button when you
receive the call.
end a call and hold the button when you
have finished the call.
The call ends with that participant, but you can
continue to talk with the other participants.
3. End the multi-party call by pressing the
key.
44
45

Call functions
Call functions
Using the Push to talk service
You can make and receive a Push to talk call. For
further details about using the Push to talk feature,
see page 76.
Making a Push to talk call
You can make a one-to-one call or group call using
the Push to talk service.
Note
: You first need to add PTT addresses to your
Phonebook.
To m a k e a o n e - t o- o ne c a l l :
1. Connect to the Push to talk service by selecting
the
Login to service
For further details about connecting to the Push
to talk service, see page 78.
2. Access the
contact using the Up or Down key.
You are connected with the selected person, if
he/she logged into the service.
3. When the contact you want highlights, press the
PTT key.
To m a k e a g r o u p ca l l:
1. Connect to the Push to talk service.
For further details about connecting to the Push
to talk service, see page 78.
Contact list
menu.
menu and scroll to a
3. When the group you want highlights, press the
PTT key.
You are connected with all of the members of
the selected group, if they logged into the
service.
You can also make a call to the default group by
pressing the PTT key while connected to the Push to
talk service.
Receiving a Push to talk call
You can receive a one-to-one call or group call using
the Push to talk service.
When you receive a one-to-one call or group call, a
short tone and vibration notifies you of the call.
For a one-to-one call, the phone displays
information about the sender, if stored in the
Contact list. If you set the
Notify
receive the call. Press the
receive the call.
For a group call, the phone displays the group name
and the nickname of the caller. If you press the PTT
key to try to respond to a group while another
member is talking, you hear a tone and “Queueing”
is displayed on your phone. Press and hold the
button, and wait for the other person to finish. Then
you can talk.
Note
(see page 85), the phone asks you to
: When you receive PTT calls in Quiet mode,
alerts for PTT calls do not sound.
1 to 1 call
Accept
menu to
soft key to
2. Access the
scroll to a group using the Up or Down key.
46
Group list
menu (
Menu 5.4
) and
47

Entering text
At many times while you are using your phone, you
need to enter text, such as when storing a name in
the Phonebook, writing a new message, creating
your personal greeting or scheduling events on your
calendar.
You are provided with the following text input
modes:
T9 mode
•
This mode allows you to enter words with only
one keystroke per letter. Each key on the keypad
has more than one letter – when you press the
key once, J, K or L may be displayed. The T9
mode automatically compares your keystrokes
with an internal linguistic dictionary to determine
the correct word, thus requiring far fewer
keystrokes than the traditional ABC mode.
ABC mode
•
This mode allows you to enter letters by pressing
the key labelled with the required letter once,
twice, three or four times until the letter displays.
Number mode
•
This mode allows you to enter numbers.
Symbolic mode
•
This mode allows you to enter special characters.
*
5
Entering text
Changing the text input mode
When you are in a field that allows characters to be
entered, you will see the text input mode indicator
at the bottom of the display.
Example
To change to another text input mode:
1. Press the right soft key indicating the current
2. Scroll to the mode you want to use by pressing
3. Press the
: Entering a name in the Phonebook
Enter name
16
Ok
Eng
text input mode.
the Up or Down key.
You can use the
Add word
words into the T9 dictionary. See page 51.
Note
: If you want to exit the menu without
changing the mode, press the soft key or
key.
Select
soft key to confirm the
highlighted text input mode.
Text input mode indicator:
T9 English mode
option to add new
*
is a registered trademark of Tegic Communications,
Inc. and is licensed under U.S. Patent 5,818,437/
5,953,541/ 6,011,554.
48
49
Entering text
Quickly changing the text input mode
To switch between the Press and hold the
Number and previous mode key.
Symbol and previous mode key.
ABC and T9 mode right soft key.
Using the T9 mode
To type a word in the T9 mode:
Entering text
If
Spell
appears above the left soft key while you
are entering text, the word does not exist in the T9
dictionary. To type words not found in the T9 mode,
change the text input mode to the ABC mode, or
proceed as follows:
Spell
1. Press the
key and select the
soft key, or press the right soft
Add word
option.
2. Enter the word you want to add using the ABC
Ok
mode (see page 52) and press the
soft key.
The word is saved in the T9 dictionary and
inserted in the input field.
2
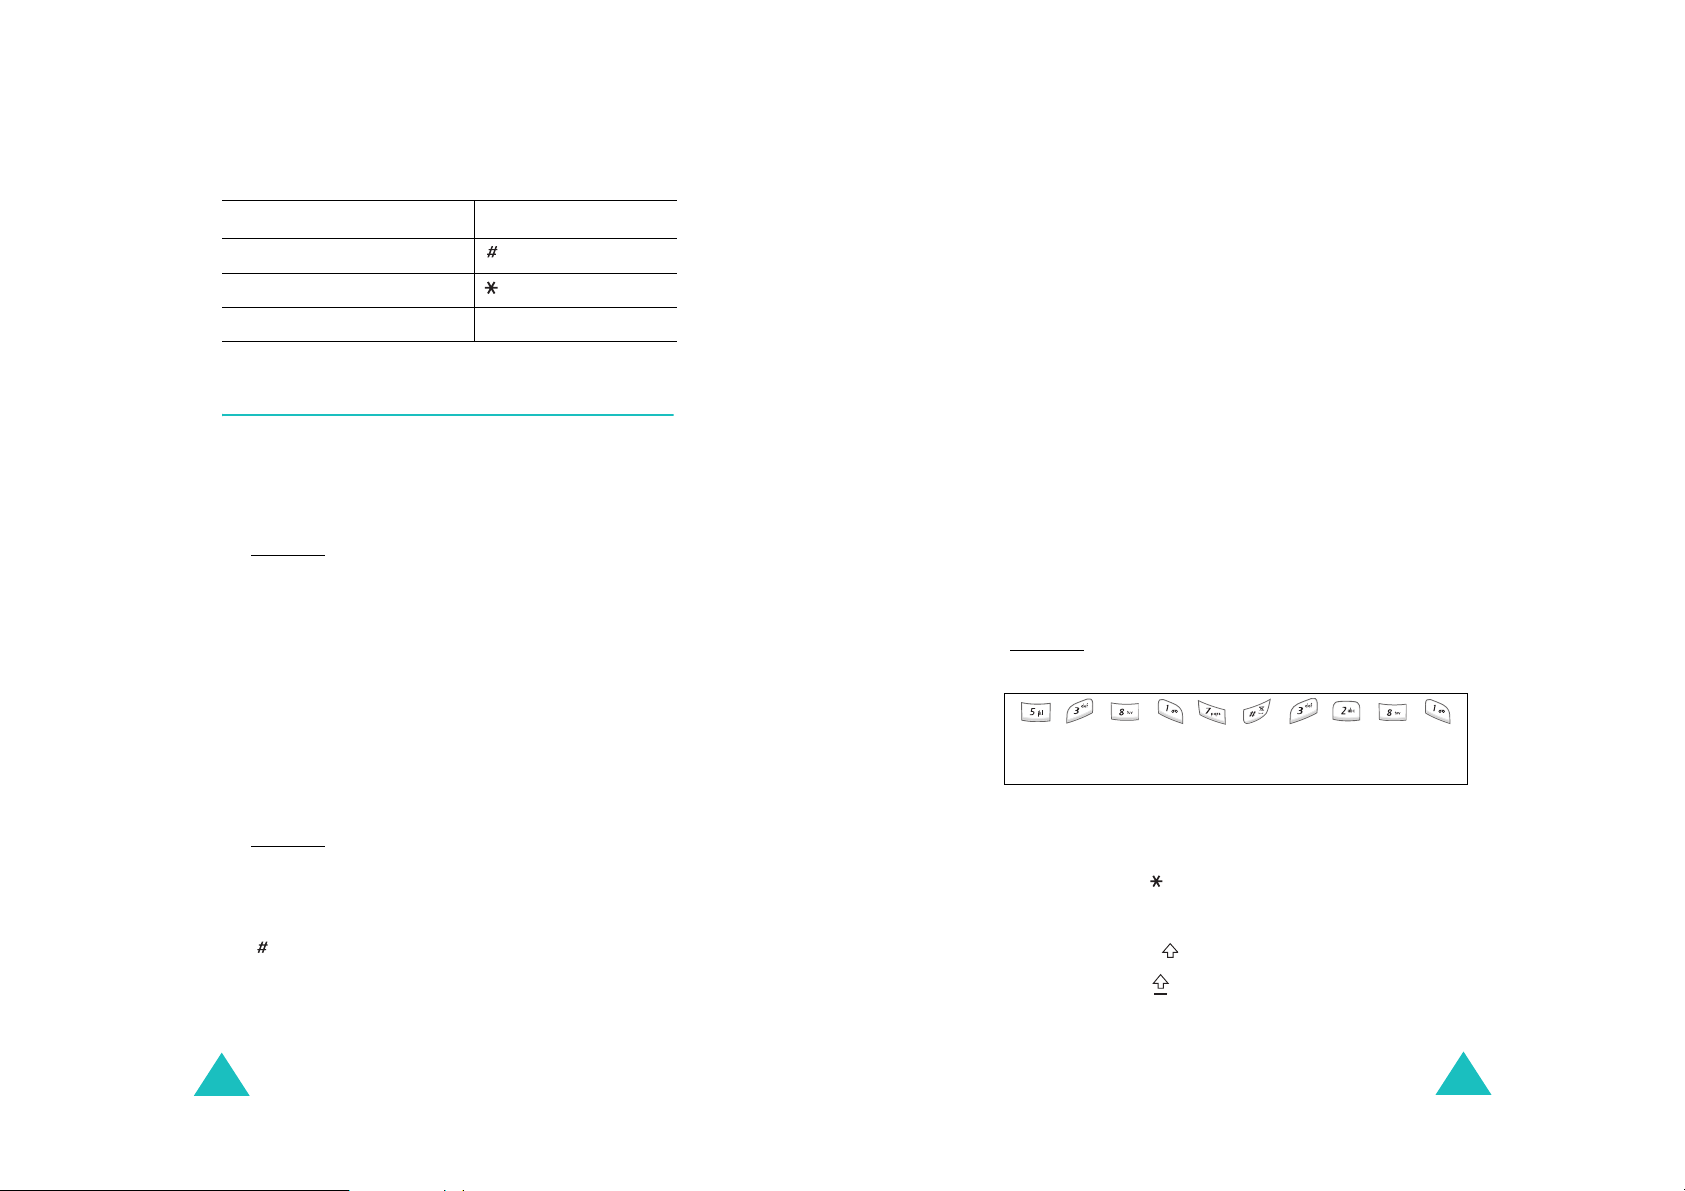
1. Start entering the word by pressing keys
to 9.
Press each key only once for each letter.
Example: To enter “hello” in the T9 mode, press
4, 3, 5, 5
the
, and 6 keys.
The word you are typing appears on the display.
It may change with each key that you press.
2. Enter the whole word before editing or deleting
any keystrokes.
3. If the word is correct, start entering the next
0
word. Otherwise, press the
key repeatedly to
display alternative word choices for the keys
that you have pressed.
Example
: Both “of” and “me” have the sequence
6
and 3. The phone displays the
of
most commonly used choice first.
4. Insert a space between words by pressing the
key.
5. Continue entering the next word.
3. Continue entering other words in the T9 mode.
Smart punctuation
To enter periods, hyphens or apostrophes, press the
1
key. The T9 mode applies rules of grammar to
insert the correct punctuation.
Example: The
1
key is used twice to display two
punctuation marks.
l e t ‘ s e a t .
Changing the case
To change the case of the next letter(s) that you
type, press the key. There are three cases:
• Lower Case (no indicator)
• Initial Capital ( )
•Capital Lock ( )
50
51

Entering text
Entering text
Inserting a space
To insert a space between words, press the key.
Entering a number directly
To enter a number, press and hold the number key.
Scrolling
To move the cursor to the left, right, up or down
within the text, press the navigation keys.
Clearing letters and words
To clear the letter to the left of the cursor, press the
C
key. You can clear all of the letters on the display
C
by pressing and holding the
key.
Returning to the previous screen
When the text input field is cleared, press and hold
C
key to return to the previous screen.
the
Using the ABC mode
When typing in the ABC mode, press the key
labelled with the required letter:
- Once for the first letter
- Twice for the second letter
- And so on
Example
: To display the letter “C”, quickly press the
2
key three times. To display the letter
5
“K”, press the
key twice. This method is
called Multi-tap typing.
Note
: The cursor moves to the right when you press a
different key. When entering the same letter
twice or a different letter on the same key, just
press the Right key or wait a few seconds for
the cursor to move to the right automatically,
and then enter the next letter.
Refer to the table for more information about the
characters available.
List of the characters available
Key characters in the order displayed
1 . , - ? ! ‘ @ : 1
2 A B C 2
3 D E F 3
4 G H I 4
5 J K L 5
6 M N O 6
7 P Q R S 7
8 T U V 8
9 W X Y Z 9
00
(Capital Lock mode in English
)
52
53
Entering text
Entering text
Changing the case
To change the case of the next letter(s) that you
type, press the key. There are three cases:
• Lower Case (no indicator)
• Initial Capital ( )
• Capital Lock ( )
Inserting a space
To insert a space between words, press the key.
Entering a number directly
To enter a number, press and hold the number key.
Scrolling
To move the cursor to the left, right, up or down
within the text, press the navigation keys.
Clearing letters and words
To clear the letter to the left of the cursor, press the
C
key. You can clear all of the letters on the display
C
by pressing and holding the
Returning to the previous screen
When the text input field is empty, press and hold
C
key to return to the previous screen.
the
key.
Using the symbolic mode
The Symbolic mode enables you to enter symbols in
your text.
To Press the
display more
symbols
enter a symbol corresponding number key.
return to the
previous text input
mode with entered
symbol(s)
return to the
previous text input
mode without
entered symbol(s)
Up or Down key.
Ok
soft key.
soft key.
Using the number mode
The Number mode enables you to enter numbers in
your text. Press the keys corresponding to the digits
you want to enter.
54
55

Using the menus
The phone offers a range of functions that allow you
to tailor the phone to your needs. These functions
are arranged in menus and sub-menus.
Accessing a menu function
The menus and sub-menus can be accessed by
Menu
or
pressing the
Mode, then scrolling with the navigation keys.
1. In Idle Mode, press the
the main menu or press the
key to access Phonebook menu.
2. Scroll through the menus using the navigation
keys. And then press the
access the main menu.
3. Find the sub-menu that you wish to use by
scrolling with the Up or Down key.
Phonebook
Menu
soft key in Idle
soft key to access
Phonebook
Select
soft key if you
soft
Using the menus
You can also access the menus and sub-menus by
quickly entering the corresponding menu number.
Example: Accessing the
1. Press the
2. Press the
3. Press the
Menu
5
for
5
for
Voice mail
soft key.
Messages
Voice mail
menu.
.
.
List of menu functions
Various menus let you check or change your phone
settings. The following list shows the menu
structure.
The numbers assigned to each menu option may
not match the menu number on the phone. It
depends on the services supported by your SIM
card.
Phonebook menu
Select
4. Press the
menu.
If the menu that you have selected contains
further sub-menus, repeat steps 3 and 4.
5. Scroll to the option you want to choose with the
Up or Down key.
6. Press the
Note
: You can return to the previous menu level by
56
Select
pressing the soft key.
soft key to access the sub-
soft key to choose the setting.
1. Phonebook
1. Find name
2. Add entry
3. Speed list
4. Copy all to phone
5. Send all via infrared
6. Delete all
(see page 63)
2. Management
1. Own number
2. Group setting
3. Memory status
3. Services
1. Service directory
(see page 75)
(see page 73)
57
 Loading...