

Samsung SCH-U640EKAVZW User Manual

Welcome to Verizon Wireless.
It’s the Network
®

2
CONTENTS
Contents
The Basics 0
G
etting Started 06
U
sing Bluetooth® 19
P
lacing and Receiving Calls 20
S
etting Up and Accessing Voice Mail 22
L
ocking/Unlocking Your Wireless Device 25
U
sing Speakerphone 26
C
hanging Ringtones 27
P
ush to Talk 29
Assistance
M
T
L
T
F
A
39
ay We Help You? 40
he My Verizon Advantage 41
oss or Theft 47
oll-Free Calls and Emergency Services 47
raud Prevention 47
ssistive Communication Devices 49
5

3
CONTENTS
Mobile Entertainment 50
T
ext Messaging 51
P
icture Messaging 53
V
ideo Messaging 56
M
obile Web 63
VZ Navigator
C
haperone® 68
M
edia Center 69
V C
AST 71
V C
AST Music with Rhapsody® (Subscription,
W
ireless & PC Downloads) 74
SM
66
Optional Services 8
S
afety and Protection 83
E
quipment Protection 83
V
oice Services 84
I
nternational Services 84
O
ther Products and Services 86
More Information 8
2
8

Welcome The Basics
Thank You for Choosing Verizon Wireless
You’re now connected to the power of America’s most
reliable w
understand your new wireless device and all the things
you can do with it. So let’s get started.
To order a printed copy of the Samsung User Manual,
please call 1-888-987-HELP (4357). To down l
copy, please visit support.vzw.com/phones.
4
ireless network. This guide will help you
oad a

THE BASICS
•GettingStarted
•UsingBluetooth®
•PlacingandReceivingCalls
ettingUpandAccessing
•S
Voice Mail
•L
ocking/UnlockingYour
Wireless D evice
•UsingSpeakerphone
•ChangingR
•PushtoTalk
ingtones
5

6
THE BASICS
The Basics
Getting Started
Just the basics; we’ll get into the fun stu later on.
1
2
3
4
5
6
7
8
9
10
11
12

7
THE BASICS
1. Earpiece: Allows you to
hear the other caller.
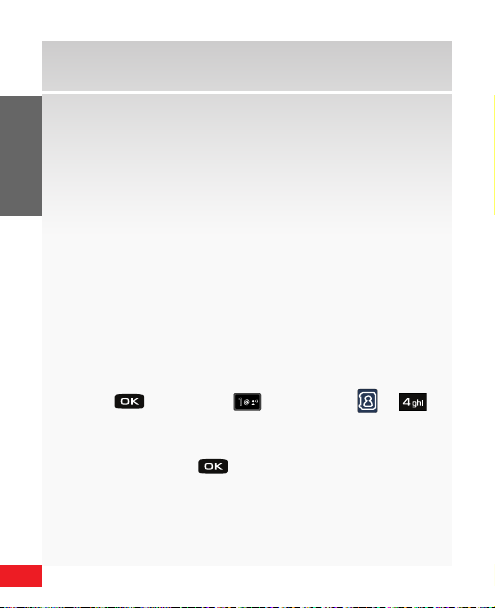
2. OK key
: Press the OK key to
select a menu, sub-menu or
option.
3. Lef t Soft key: Perform
functions identied by left
display prompt.
4. Camera/Camcorder
: Press to activate the
key
camera. Press and hold to
activate the camcorder.
5. Send key
: Make and
answer calls, view All Calls
list.
Voicemail Key: Press and
6.
hold to activate voicemail.
7. Directional key: Scroll
through menus and lists,
set feature valu es.
Press OK Key to select
highlighted option.
8. Right Sof t key
: Perform
functions identied by
right display prompt.
9. Voice Recognition Key
Press to ac tivate Voice
Commands.
End/Power key: Press to
10.
end call. Press and hold to
turn device On or O ff.
11. CLR Key
: Visit the previous
screen, or delete letters in
Text Messaging.
12. Vibration Mode key:
Press and hold to ac tivate
vibration mode.
:

8
THE BASICS
The Basics
Getting Started
Just the basics; we’ll get into the fun stu later on.
Refer to t he User Manua l for more det ails on the f unction of e xterna l keys.
1
2
8
3
4
5 6 7
9
10
11

9
THE BASICS
1. Camera Lens: Allows you
to take photos or record
video.
2
. Shortcut/Push To Talk
(PTT) key *: Press to
activate shortcut menu.
3
. Volume Key: Allows you to
adjust the mas ter volume
or adjust the earpiece
volume during a c all.
4. Charging p ort: Charge the
phone in this port.
5. Rewind key: During music
playback, press and hold to
rewind music. Press to go
to the previous song.
6. Play/Pause key: With
phone closed, press to
access an e xternal menu.
During music playback ,
press to pause music . Press
again to resume playback.
7. Fast For ward key: Press to
Lock/Unlock ex ternal keys.
During music playback ,
press and hold to fast forward music. Press to go to
the nex t song.
8
. Headset/Headphone jack:
Allows you to plug in an
optional headset for safe,
convenient conversations or
headphones when listening
to music.
9
. Speakerphone key: Pre ss
and hold to activate speakerphone.
1
0. MicroSD slot: Allows you to
add additional memory and
storage capacity.
1
1. Battery Cover Removal
Too l: Use to lock/unlock the
battery cover.
* Once PT T is activa ted on your pho ne
press t he PTT key to st art a PTT c all.
10
THE BASICS
The Basics
*Included
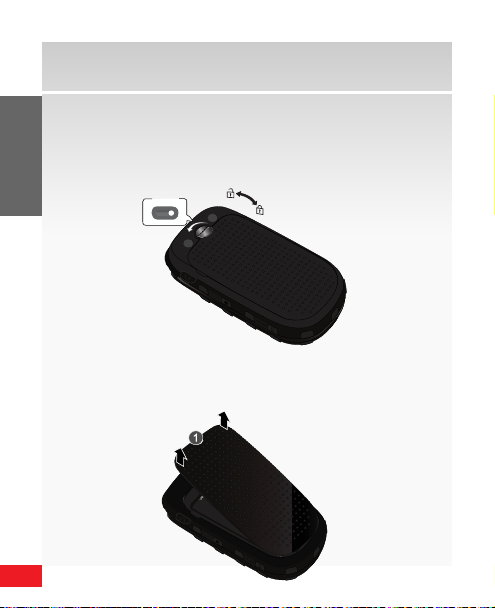
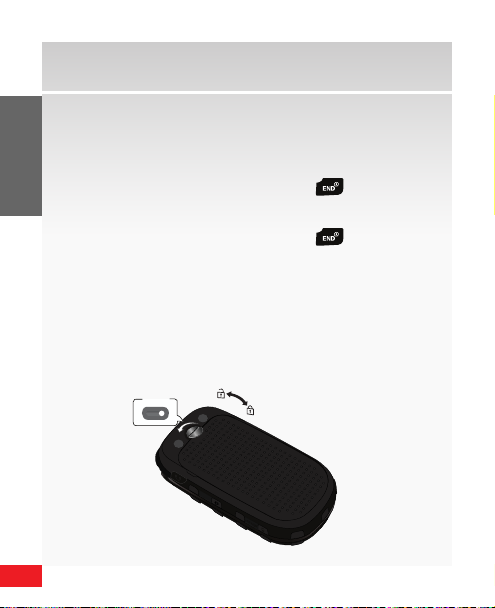
Installing the battery
1. I
nsert the battery cover removal tool into the slot on
the back cover and turn it counter clockwise to open
the battery cover (as shown).
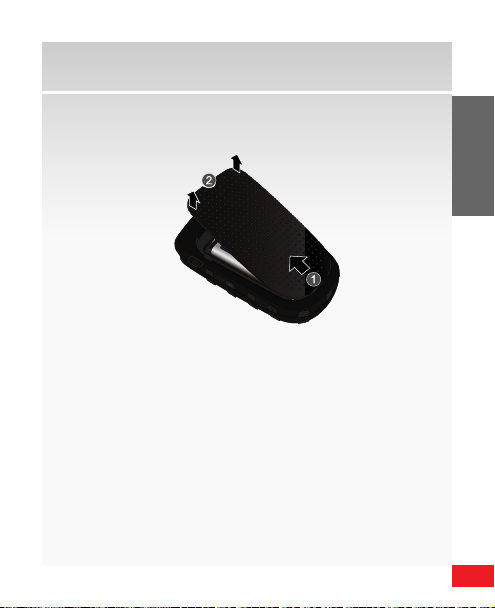
2. U
se the grooves at the top of the cover to lift the
cover up and away from the back of the phone.
WARNING! When remov ing the bat tery cover w ith a nger nai l, the nail can b e broken.
11
THE BASICS
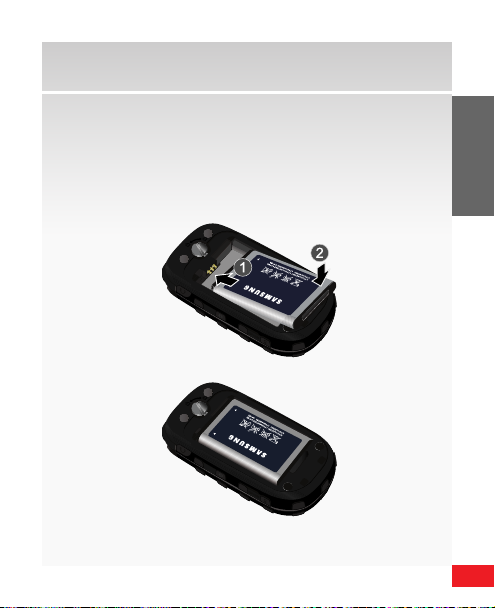
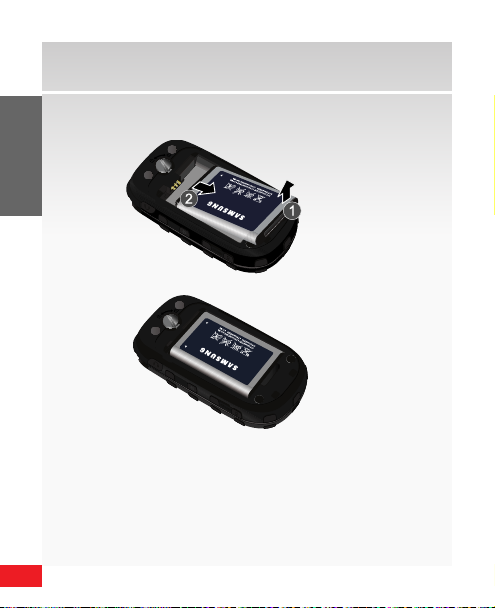
3. Insert the top end of the battery into the phone
housing using the directional arrow printed on the
battery. The gold contacts at the battery end must
align with contacts on the phone. Push bottom end
of the battery down until it snaps into place.
12
THE BASICS
The Basics
+
Incorrect
Correct
Correct
DATA LINK CABLE
Incorrect
Charging Head
USB Cable
*Included
4. With the battery in position on the phone, place the
cover back on the handset and use the battery cover
removal tool to turn the grooved dial clockwise until
the cover locks.
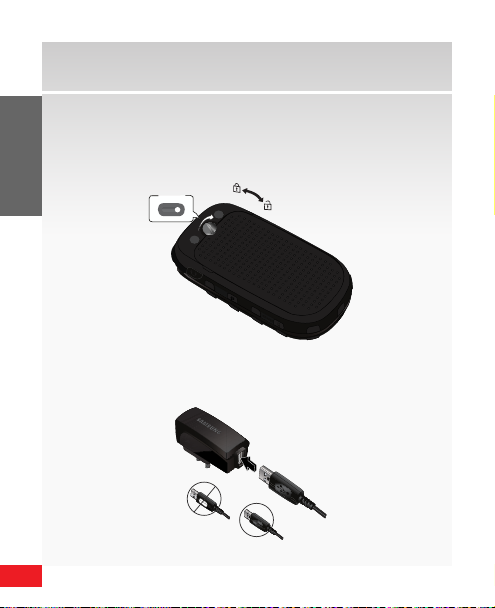
Charging the battery
1. C
onnect the USB cable to the charging head.
13
THE BASICS
2. Pull the charging port cover out and turn to expose
+
Incorrect
Correct
the connector.
I
nsert the Wall/USB charger adapter end with the
arrow up into the charging port on the left side of
t
he phone.
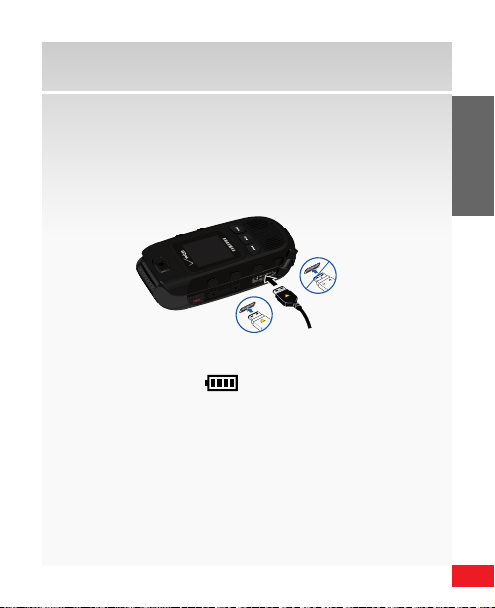
hen the phone is completely charged (the battery
3. W
icon becomes still)
, unplug the adapter from
the power outlet. Remove the adapter end from the
charging port and replace the charging port cover.
14
THE BASICS
The Basics
*Included
Powering your wireless device on for the rst time
It’s important to fully charge the battery before turning
on your wireless device.
1. Press and hold the End/Power key
Powering your wireless device o
1. Press and hold the End/Power key ( ).
WARNING! Please use o nly an approved ch arging accesso ry to charge you r phone.
Imp rope r ha ndlin g of the char ging p
cause dam age to your phone a nd void the warr anty.
or t, as well as t he u se of an i ncom pati ble char ger, m ay
Removing the battery
1. I
nsert the battery cover removal tool into the slot on
the back cover and turn it counter clockwise to open
the battery cover (as shown).
( ).
15
THE BASICS
2. U
se the grooves at the top of the cover to lift the
cover up and away from the back of the phone.
16
THE BASICS
The Basics
3. Lift the battery from the bottom end and remove.
17
THE BASICS
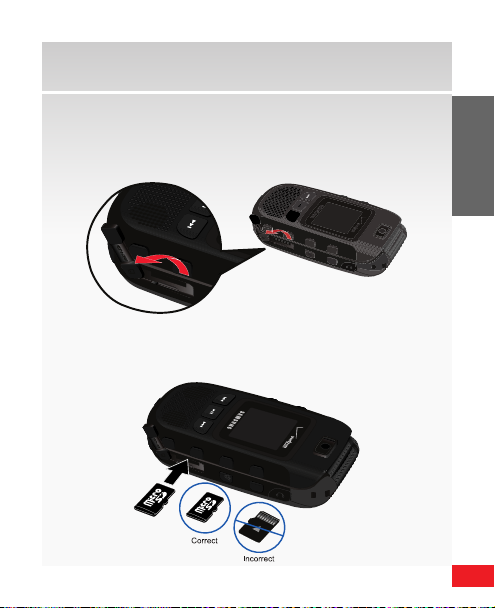
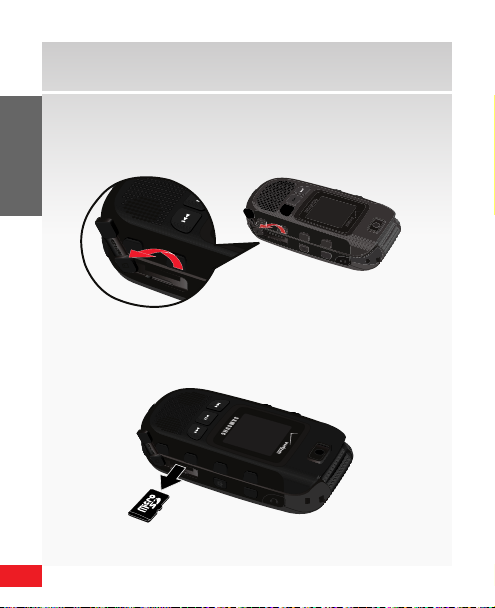
Installing the microSD (sold separately)
1. P
ull the microSD slot cover out and turn to expose
the card slot.
2. P
ush the microSD card into the slot until it locks into
place.
18
THE BASICS
The Basics
8
tuv8tuv
1
Removing the microSD
1. P
ull the microSD slot cover out and turn to expose
the card slot.
2. P
ush in on the memory card to release the lock and
remove memory card from the microSD slot.
19
THE BASICS
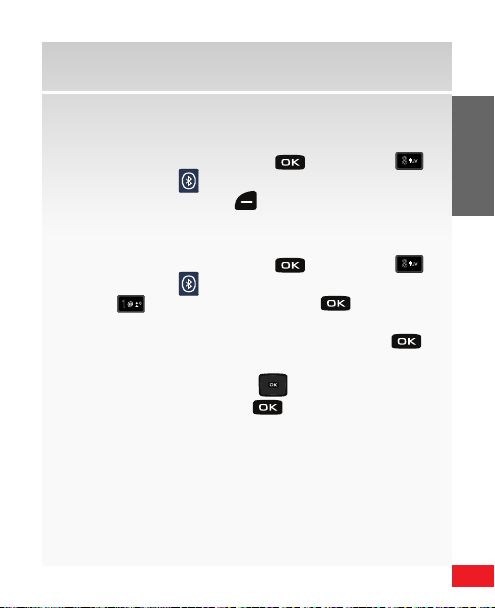
Using Bluetooth®
8
tuv
8
tuv
1
How to turn on Bluetooth
1. F
rom the home screen, press for MENU g
for Bluetooth (
2. P
ress the Left Soft key ( ) to turn Bluetooth On.
).
How to pair your Bluetooth headset with your
wireless de
1. F
for Bluetooth (
2. P r e s s
vice
rom the home screen, press for MENU g
).
for Add New Device, and when your
Bluetooth device is in discoverable mode.
3. P
lace the Bluetooth device in range and press .
4. A list of found Bluetooth device(s) will be displayed.
Press the Directional key ( ) or down to highlight
a Bluetooth device. Press to pair the device.
20
THE BASICS
The Basics
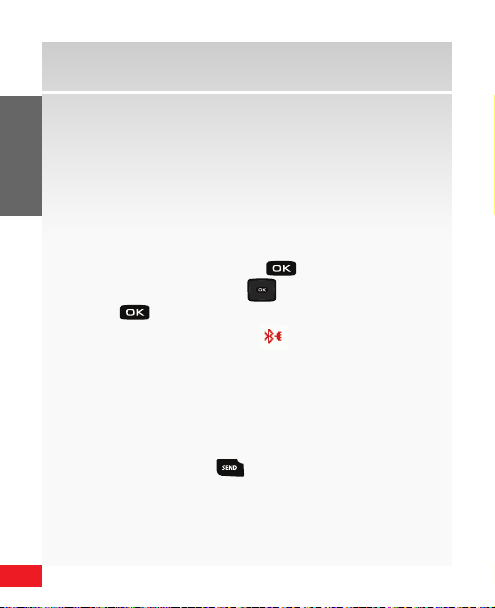
6. The phone automatically attempts to send a pass-
key of “0000” to a hands-free device and shows the
message “ATTEMPTING TO AUTO PAIR”.
If the default passkey is not successful, the phone
will display the message “AUTO PAIR FAILED. ENTER
PASSKEY”. (If you are attempting to pair with a car
kit, be sure to clear any error message on the car kit
display first.) Enter the correct passkey for the device
you want to pair, and press
7. Use the Directional key ( ) to highlight Ye s and
press to connect the devices. Once connected
the Bluetooth Connected icon appears in the
upper right of the display.
Placing and Receiving Calls
Placing calls
1. W
ith your phone powered on, enter the number you
want to call using the keypad.
2. P
ress the Send key ( ) to place the call.
.

21
THE BASICS
Receiving calls
1. When you receive an incoming call, the number
appears in the display, if available.
2. O
pen the phone to answer the call.
NOTE: If the ph one is already op en, press the Sen d key ( ).
Standard features included as part of your
Calling P
lan
With our Calling Plans, you can enjoy the value and
conve n
ience of these features at no extra monthly
access charge:
• BasicVoiceMail
• CallerID
• CallerIDBlocking
• 3-WayCalling
• CallForwarding
Please note that some of these features may incur usage
charges and/or depend on digital service, so they may
not be available in all areas.
22
THE BASICS
The Basics
8
tuv
6
mno
#
8
tuv
6
mno
8
tuv
6
mno
#
#
For step-by-step instructions on some of these calling
features, please refer to your Wireless Device Manual,
or go to verizonwireless.com/welcome and select:
Where can I nd help with features on my wireless
device? in the Frequently Asked Questions section.
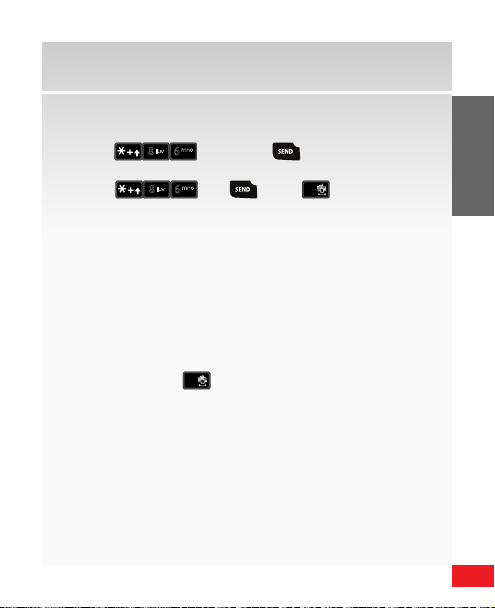
Setting Up and Accessing Voice Mail
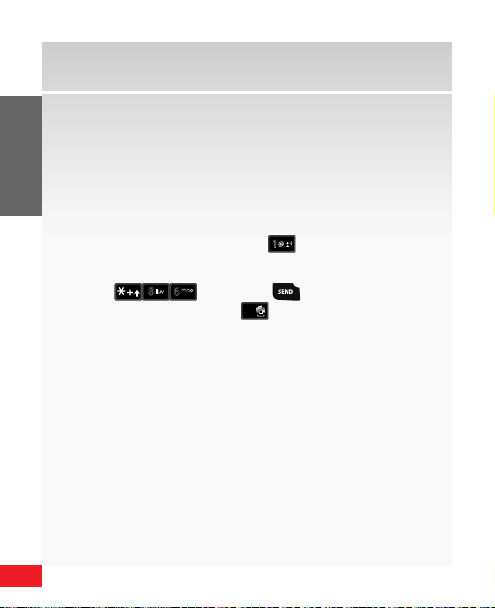
NOTE: To quick ly access voice mai l press and hold 1.
How to set up your voice mail
1. P r e s s
a system greeting, press
applicable.
2. F
ollow the setup tutorial.
3. S
elect a password.
4. R
ecord a voice signature and greeting for your
Voice Mailbox.
(*VM) and . If you hear
to interrupt it, if
23
THE BASICS
How to access your voice mail from your
8
tuv
6
mno
8
tuv
6
mno
#
wireless de
1. P r e s s
vice
(*VM) and . If you hear a
system greeting or your own greeting when you
press
and , press # immediately
to interrupt the greeting (if applicable) and follow the
prompts.
2. F
ollow the prompts to enter your password and
retrieve your messages.
How to access your voice mail from any phone, to
save your minutes
1. D
ial your wireless number.
2. O
nce you hear the system greeting or your own
greeting, press
immediately to interrupt the
greeting and follow the prompts.

24
THE BASICS
The Basics
6
mno
1
1
wxyz
9
6
mno
8
tuv
3
def
How to reset your voice mail password
1. P r e s s
from your wireless device or call 1-800-922-0204
(toll-free) from any phone to reach the easy-to-use
automated Customer Service menu.
2. E
nter or say your 10-digit wireless number
(if a
pplicable).
3. W
hen asked what you need assistance with, say
Voice M
ail password.
4. Y
ou will then be asked to conrm if you want to reset
your password—say Ye s.
5. A
ll responses going forward will be entered using
your key pad. You will be asked for your 5-digit
billing zip code. Then follow the prompts for security
verication and resetting your password.
NOTE: Voice Mai l may not be availabl e in some areas. Voic e Mailboxes not se t up within
ays will be c ance lled . You r Ver izon Wire les s Voic e Ma ilbox is n ot p assw ord prot ect ed
45 d
unt il yo u cr eate a pa sswo rd b y fol lowi ng t he se tup tuto ria l. Ai rti me an d ot her c harg es w ill
be incur red when using Voi ce Mail from your w ireless phone. M obile to Mobile mi nutes
do not appl y to Voice Mail retri evals; you will be c harged to mainta in your connec tion to
Voice Mail. Ver izon Wireless i s not liable for mis sed message s or deletions o f messages
from you r Voice Mailbox, eve n if you have saved t hem.
and (airtime-free)
25
THE BASICS
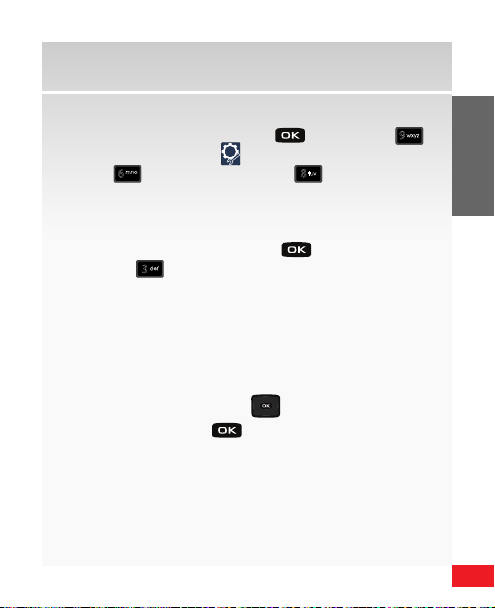
Locking/Unlocking Your Wireless Device
wxyz
9
6
mno
8
tuv
3
def
1. F
rom the home screen, press for MENU g
for Settings & Tools (
2. P r e s s
for Phone Settings g
).
for Security.
You’re prompted to enter the lock code. The Phone
Lock Code is the last four digits of your telephone
number.
3. Enter the Lock Code and press
4. Press for
for Phone Lock Setting. The following
.
options display:
• Unlocked: If On Power Up was previously select-
ed, selecting Unlocked will remove lock on power
up.
• On Power Up: The Phone Lock Code is required
whenever you power up the phone.
5. Press the Directional key (
) up or down to select
an option and press .

26
THE BASICS
The Basics
wxyz
9
4
ghi
2
abc
1
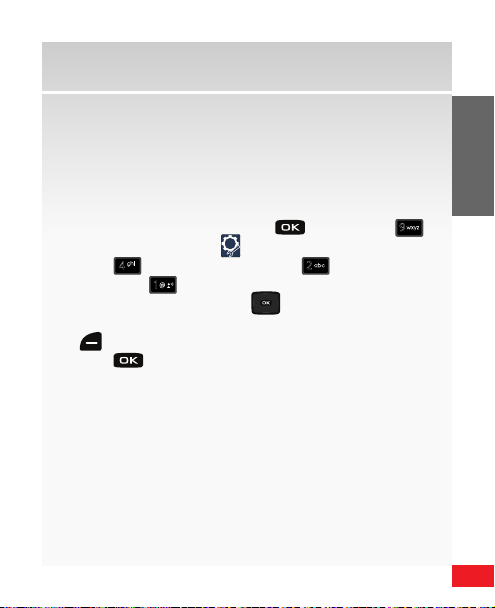
Using Speakerphone
With the phone open, press and hold the
Speakerphone key (on the right side of the device)
to switch from using the earpiece to the speakerphone
before or during a call. Use the volume keys (located on
the left side of your phone) to adjust the volume.
When answering a call, press and hold the
Speakerphone key
Power key (
phone function turns o automatically.
. To end the call, press the End/
). After the call has ended the speaker-
27
THE BASICS
Changing Ringtones
wxyz
9
4
ghi
2
abc
1
Your wireless device comes with a selection of
ringtones. Here’s how to manage your ringtone
preferences:
Selecting a ringtone
1. F
rom the home screen, press for MENU g
for Settings & Tools (
2. P r e s s
Sounds g
for Sounds Settings g
for Call Ringtone.
3. Press the Directional key (
).
for Call
) up or down to
highlight the desired ringtone. Press the Left Soft key
(
) Play to play the highlighted ringtone.
4. P r e s s
to set the ringtone as your incoming call
alert.
28
THE BASICS
The Basics
#
Adjusting ringtone volume
1. From the home screen, press the Volum e key
(
) up or down to adjust the ringer volume to
the desired setting.
2. P r e s s
Setting ringtone to vibrate
1. F
appears in the display.
2. T
to SET.
rom the home screen, press and hold the Pound
key (
) until PHONE SET TO VIBRATE ONLY
he vibrate icon appears above the Left Soft key,
indicating that your phone is set to vibrate for
incoming calls.

29
THE BASICS
Push to Talk
NOTE: User mus t subscribe t o PTT service w ith Verizon Wire less for PTT to b e enabled on
the devi ce.
The Push to Talk (PTT) feature on your Verizon Wireless
phone allows you to use your phone like a walkietalkie to communicate with an individual or group of
individuals who a
re also Verizon Wireless Push to Talk
subscribers. Highlight a PT T phone number in your
Contact List, then press and hold your phone’s Push
to Talk (PTT) Key (
) to talk. On a PTT call, only
one person can talk at a time. Once you have nished
talking, release the PTT Key (
) and listen for the
other party to reply.
30
THE BASICS
The Basics
1
Push to Talk call types
You can make two types of PTT calls:
• A
Barge call automatically connects to the other
party. The r
to ignore the call.
• A
nAlert call sends the receiving party a tone
indicating that someone wants to talk with them.
The call recipient has the option to either answer or
ignore the call.
Adding a PT T Contact
NOTE: For t he PTT Contac t List sub-me nu to display in the Con tacts menu, g o to
9. Settin g & Tools g 7. Call Set tings g 8. PTT M ode to turn on PT T mode.
To store a phone number in PTT Contacts:
1. Pr
ess for MENU g 1 for Contacts ( )g
for New PTT Contact.
2. E
nter a name and 10-digit phone number for the
c
ontact and press to SAVE.
eceiving party does not have the option
 Loading...