

Samsung SCHA301 Users Manual

Printed in Korea
Code No. : GH68-XXXXXA
HonKong China.
2001/04. Rev.1.0
PORTABLE CELLULAR
TELEPHONE
SCH-A301
User’s Manual
ELECTRONICS
World Wide Web
http://www.samsungmobile.com
Draft version
(2001.5.7)
* Some of the contents in this manual may differ from your phone
depending on the software of the phone or your service provider.

iii
CC RF EXPOSURE INFORMATION
In August 1996 the Federal Communications Commission (FCC)
of the United States with its action in Report and Order FCC 96326 adopted an updated safety standard for human exposure to
radio frequency electromagnetic energy emitted by FCC
regulated transmitters. Those guidelines are consistent with the
safety standard previously set by both U.S. and international
standards bodies. The design of this phone complies with the
FCC guidelines and these international standards.
Use only the supplied or an approved antenna. Unauthorized
antennas, modifications, or attachments could impair call
quality, damage the phone, or result in violation of FCC
regulations.
Do not use the phone with a damaged antenna. If a damaged
antenna comes into contact with the skin, a minor burn may
result. Please contact your local dealer for replacement
antenna.
Body-worn Operation
This device was tested for typical body-worn operations using
the optional belt-clip/holster placed 1.5cm from
the body. To comply with FCC RF exposure requirements, a
minimum separation distance of 1.5cm must be
maintained between the user’s body and the phone, including
the antenna, whether extended or retracted. The use of thirdparty belt-clips/ holsters with no metallic components that
provide the minimum separation distance of 1.5cm
can be used to satisfy FCC RF exposure requirements. The use
of non-tested accessories or other body-worn operations may
not comply with FCC RF exposure requirements and should be
avoided. Contact your local dealer for optional accessory items.
Vehicle Mounted External Antenna (optional, if available.)
A minimum separation distance of 7.9 inches (20cm) must be
maintained Between a person and the vehicle mounted external
antenna to satisfy FCC RF exposure requirements.
For more information about RF exposure, please visit the FCC
website at www
.fcc.gov
SAR Information & FCC ID Labeling
THIS MODEL PHONE MEETS THE GOVERNMENT’S
REQUIREMENTS FOR EXPOSURE TO RADIO WAVES.
Your wireless phone is a radio transmitter and receiver. It is
designed and manufactured not to exceed the emission limits
for exposure to radiofrequency (RF) energy set by the Federal
Communications Commission of the U.S. Government. These
limits are part of comprehensive guidelines and establish
permitted levels of RF energy for the general population. The
guidelines are based on standards that were developed by
independent scientific organizations through periodic and
thorough evaluation of scientific studies. The standards include
a substantial safety margin designed to assure the safety of all
persons, regardless of age and health.
The exposure standard for wireless mobile phones employs a
unit of measurement know as the Specific Absorption Rate, or
SAR. The SAR limit set by the FCC is 1.6W/kg.* Tests for SAR
are conducted using standard operating positions specified by
the FCC with the phone transmitting at its highest certified
power level in all tested frequency bands. Although the SAR is
determined at the highest certified power level, the actual SAR
level of the phone while operating can be well below the
maximum value. This is because the phone is designed to
operate at multiple power levels so as to use only the power
required to reach the network. In general, the closer you are to
a wireless base station antenna, the lower the power output.
Before a phone model is available for sale to the public, it
must be tested and certified to the FCC that it does not exceed
the limit established by the government-adopted requirement
for safe exposure. The tests are performed in positions and
locations (e.g., at the ear and worn on the body) as required by
the FCC for each model. The highest SAR value for this model
phone when tested for use at the ear is XXXXX
and when worn
on the body, as described in this user guide, is XXXXX
. (Bodyworn measurements differ among phone models, depending
upon available accessories and FCC requirements). While there
may be differences between the SAR levels of various phones
and at various positions, they all meet the government
requirement for safe exposure.

1iii
Contents
Unpacking . . . . . . . . . . . . . . . . . . . . . . . . . . . . . . . . . . . . 7
Your Phone
Phone Layout . . . . . . . . . . . . . . . . . . . . . . . . . . . . . . . . . . . . . 8
Display . . . . . . . . . . . . . . . . . . . . . . . . . . . . . . . . . . . . . . . . . 11
Backlight . . . . . . . . . . . . . . . . . . . . . . . . . . . . . . . . . . . . . . . . 13
Service Light . . . . . . . . . . . . . . . . . . . . . . . . . . . . . . . . . . . . . 13
Getting Started
Installing Battery . . . . . . . . . . . . . . . . . . . . . . . . . . . . . . . . . . 14
Charging a Battery . . . . . . . . . . . . . . . . . . . . . . . . . . . . . . . . . 15
Switching the Phone On/Off . . . . . . . . . . . . . . . . . . . . . . . . . . 18
Your Phone’s Modes . . . . . . . . . . . . . . . . . . . . . . . . . . . . . . . .19
Call Functions
Making a Call . . . . . . . . . . . . . . . . . . . . . . . . . . . . . . . . . . . . 21
Correcting the Number . . . . . . . . . . . . . . . . . . . . . . . . . . . . 21
Ending a Call . . . . . . . . . . . . . . . . . . . . . . . . . . . . . . . . . . . . 22
Redialing Last Number . . . . . . . . . . . . . . . . . . . . . . . . . . . . . 22
Speed Dialing from Phone Book Memory . . . . . . . . . . . . . . . . 23
Four-Digit Dialing . . . . . . . . . . . . . . . . . . . . . . . . . . . . . . . . . 25
Answering a Call . . . . . . . . . . . . . . . . . . . . . . . . . . . . . . . . . . 26
Quick Switching to Vibrate Mode . . . . . . . . . . . . . . . . . . . . . . . 27
In-Use Menu Options . . . . . . . . . . . . . . . . . . . . . . . . . . . . . . . 27
Viewing Missed Calls . . . . . . . . . . . . . . . . . . . . . . . . . . . . . . . . 29
Call Waiting . . . . . . . . . . . . . . . . . . . . . . . . . . . . . . . . . . . . . . 30
Three-Way Calling . . . . . . . . . . . . . . . . . . . . . . . . . . . . . . . . . 31
Call Forwarding . . . . . . . . . . . . . . . . . . . . . . . . . . . . . . . . . . . 32
Using the Display Notepad . . . . . . . . . . . . . . . . . . . . . . . . . . . 32
Adjusting the Volume . . . . . . . . . . . . . . . . . . . . . . . . . . . . . . . 33
The FCC has granted an Equipment Authorization for this model
phone with all reported SAR levels evaluated as in compliance
with the FCC RF emission guidelines. SAR information on this
model phone is on file with the FCC and can be found under
the Display Grant section of http://www
.fcc.gov/oet/fccid after
searching on FCC ID XXX XXXX
.
Additional information on Specific Absorption Rates (SAR) can
be found on the Cellular Telecommunications Industry
Association (CTIA) web-site at http://www
.wow-com (see
note).
* In the United States and Canada, the SAR limit for mobile
phones used by the public is 1.6 watts/kg (W/kg) averaged
over one gram of tissue. The standard incorporates a
substantial margin of safety to give additional protection for
the public and to account for any variations in measurements.
Note: The URL http://phonefacts.net
may be used in
place of http://www
.wow-com
for direct access to SAR
information.

32
PIM
Scheduler (MENU 5.1) . . . . . . . . . . . . . . . . . . . . . . . . . . . . 79
To Do List
(MENU 5.2) . . . . . . . . . . . . . . . . . . . . . . . . . . . . 81
Calculator
(MENU 5.3) . . . . . . . . . . . . . . . . . . . . . . . . . . . .82
Set Time
(MENU 5.4) . . . . . . . . . . . . . . . . . . . . . . . . . . . . .83
Alarm
(MENU 5.5) . . . . . . . . . . . . . . . . . . . . . . . . . . . . . . . 84
World Time
(MENU 5.6) . . . . . . . . . . . . . . . . . . . . . . . . . . .86
D-Day
(MENU 5.7) . . . . . . . . . . . . . . . . . . . . . . . . . . . . . . .87
Game
(MENU 5.8) . . . . . . . . . . . . . . . . . . . . . . . . . . . . . . . 88
Lady Function
(MENU 5.9) . . . . . . . . . . . . . . . . . . . . . . . . . 89
Message
Rx Message (MENU 6.1) . . . . . . . . . . . . . . . . . . . . . . . . . . 94
Display
Greetings (MENU 7.1) . . . . . . . . . . . . . . . . . . . . . . . . . . . . 98
Background
(MENU 7.2) . . . . . . . . . . . . . . . . . . . . . . . . . . 99
Date
(MENU 7.3) . . . . . . . . . . . . . . . . . . . . . . . . . . . . . . 102
Back/SVC Light
(MENU 7.4) . . . . . . . . . . . . . . . . . . . . . . . 103
Language
(MENU 7.5) . . . . . . . . . . . . . . . . . . . . . . . . . . . 104
Sounds
Ring Type (MENU 8.1) . . . . . . . . . . . . . . . . . . . . . . . . . . . 105
Ring Tone
(MENU 8.2) . . . . . . . . . . . . . . . . . . . . . . . . . . . 106
Ring Volume
(MENU 8.3) . . . . . . . . . . . . . . . . . . . . . . . . . 106
Connect Tone
(MENU 8.4) . . . . . . . . . . . . . . . . . . . . . . . . 107
Release Tone
(MENU 8.5) . . . . . . . . . . . . . . . . . . . . . . . . . 107
DTMF Tone
(MENU 8.6) . . . . . . . . . . . . . . . . . . . . . . . . . . 107
Contents(continued...)
Entering Text
Changing Text Input Mode . . . . . . . . . . . . . . . . . . . . . . . . . . . 35
T9 Stroke Mode . . . . . . . . . . . . . . . . . . . . . . . . . . . . . . . . . . . 36
T9 English Mode . . . . . . . . . . . . . . . . . . . . . . . . . . . . . . . . . . . 42
Alpha(ABC) Mode . . . . . . . . . . . . . . . . . . . . . . . . . . . . . . . . . . 47
Symbol Mode . . . . . . . . . . . . . . . . . . . . . . . . . . . . . . . . . . . . . 49
Number Mode . . . . . . . . . . . . . . . . . . . . . . . . . . . . . . . . . . . . 49
Using the Menus
Accessing a Menu Functions by Scrolling . . . . . . . . . . . . . . . . . . 50
Accessing a Menu Functions by Using its Shortcut . . . . . . . . . . . 53
List of the Menu Functions . . . . . . . . . . . . . . . . . . . . . . . . . . . 54
WAP Service
WAP Service (MENU 1.1) . . . . . . . . . . . . . . . . . . . . . . . . . 58
Modem Setting
(MENU 1. ) . . . . . . . . . . . . . . . . . . . . . . . . 64
Orange Menu . . . . . . . . . . . . . . . . . . . . . . . . . . . . . . . . . 66
Calls
Outgoing (MENU 3.1) . . . . . . . . . . . . . . . . . . . . . . . . . . . . 67
Incoming
(MENU 3.2) . . . . . . . . . . . . . . . . . . . . . . . . . . . . 68
Delete Number
(MENU 3.3) . . . . . . . . . . . . . . . . . . . . . . . . 69
Air Time
(MENU 3.4) . . . . . . . . . . . . . . . . . . . . . . . . . . . . . 69
Answer Mode
(MENU 3.5) . . . . . . . . . . . . . . . . . . . . . . . . . 70
Phone Book
Find Name (MENU 4.1) . . . . . . . . . . . . . . . . . . . . . . . . . . . 71
Add Entry
(MENU 4.2) . . . . . . . . . . . . . . . . . . . . . . . . . . . . 75
Edit Group
(MENU 4.3) . . . . . . . . . . . . . . . . . . . . . . . . . . . 77
My Phone Number
(MENU 4. ) . . . . . . . . . . . . . . . . . . . . . 78

54
Setup
Restrict (MENU 9.1) . . . . . . . . . . . . . . . . . . . . . . . . . . . . . 108
NAM Phone Number
(MENU 9.2) . . . . . . . . . . . . . . . . . . . 109
Send PIN
(MENU 9.3) . . . . . . . . . . . . . . . . . . . . . . . . . . . 110
Vocoder
(MENU 9.4) . . . . . . . . . . . . . . . . . . . . . . . . . . . . 110
Auto Lock
(MENU 9. ) . . . . . . . . . . . . . . . . . . . . . . . . . . 111
Initialize
(MENU 9. ) . . . . . . . . . . . . . . . . . . . . . . . . . . . 122
Reference Information
Accessories . . . . . . . . . . . . . . . . . . . . . . . . . . . . . . . . . . . . . 113
Using the Batteries . . . . . . . . . . . . . . . . . . . . . . . . . . . . . . . . 114
Precautions When Using Batteries . . . . . . . . . . . . . . . . . . . . 114
Safety Information . . . . . . . . . . . . . . . . . . . . . . . . . . . . . . . . 116
Road Safety . . . . . . . . . . . . . . . . . . . . . . . . . . . . . . . . . . . . 116
Operating Environment . . . . . . . . . . . . . . . . . . . . . . . . . . . . 117
Care and Maintenance . . . . . . . . . . . . . . . . . . . . . . . . . . . . 118
Emergency Calls . . . . . . . . . . . . . . . . . . . . . . . . . . . . . . . . . 120
Glossary . . . . . . . . . . . . . . . . . . . . . . . . . . . . . . . . 121
Safety Precautions and Important Notices
Read these simple guidelines. Failure to comply with
these guidelines may be dangerous or illegal. For
more detailed safety information, see “Safety
Information” on page 116.
Road safety comes first
Do not use a hand-held phone while driving; park the
vehicle first. Remember that in some countries, it is
illegal to use a hand-held phone while driving.
Switch off when refuelling
Do not use the phone at a refuelling point (service
station) or near fuels or chemicals.
Switch off in aircraft
Mobile phones can cause interference. Using them
on aircraft is both illegal and dangerous.
Switch off in hospital
Follow any regulations or rules. Switch the phone off
near medical equipment.
Respect special regulations
Follow any special regulations in force in any area
and always switch off your phone whenever it is
forbidden to use it, or when it may cause
interference or danger (in a hospital, for example).

76
SSaaffeettyy PPrreeccaauuttiioonnss
Interference
All mobile phone may be subject to radio
interference, which may affect their performance.
Use qualified service
Only qualified service personnel must install or repair
cellular equipment.
Use sensibly
Use only in the normal position (to ear). Do not touch
the antenna unnecessarily when the phone is
switched on.
IMPORTANT!Use only accessories approved by the
phone manufacturer. This apparatus is intended for
use when supplied with power from SAMSUNG
approved Travel charger. The use of any other types
will invalidate any approval or warranty applying to
the phone, and may be dangerous.
When you disconnect the power cord of any
accessory, grasp and pull the plug, not the cord.
Unpacking
Your package contains the following items.
Travel Charger
Handset
Hand Strap
Battery
User’s Manual
In addition, you can obtain the accessories for your
phone from your local SAMSUNG dealer. For
information on the accessories, see page 113.

9
YYoouurr PPhhoonnee
8
Your Phone
Phone Layout
The following illustrations shows the main elements
of your phone.
Microphone
Special
function keys
Display
Antenna
Service Light
External LCD
Clear key
Menu key
Alphanumeric
keys
OK/Messages
key
Navigation/
Hot keys
Send key
Earphone jack
Volume/Scroll
keys
Earpiece
Enters the menu facility. Also, scrolls
through the main menus.
In the menu facility, confirms the
selection and input.
In Standby mode, enters the Messages
menu.
In the menu facility, scroll through the
menu options and phone book memory,
and select a menu function or stores
information that you have entered.
In Standby mode, allow you to enter the
following menus depending on the
direction.
• : Phone Book (listed by names)
• : Lady function
• : Scheduler
• : WAP Service
Keys Functions
With the phone open
With the phone close
End key

11
YYoouurr PPhhoonnee
10
YYoouurr PPhhoonnee
Keys Functions
~
Makes or answers a call.
In Standby mode, recalls the last number
dialed.
Deletes characters from the display.
In the menu facility, returns to the previous
menu level.
In Standby mode, displays the digital clock
while pressed and held.
Ends a call. Also switches the phone on and
off when pressed and held.
In the menu facility, cancels your input and
returns to Standby mode.
Enters numbers, letters and some special
characters.
Use these keys for various purpose in
different functions.
(on the side of the phone)
In Standby mode, adjust the key volume.
During a call, adjust the earpiece volume.
In the menu facility, scrolls through the
menu options.
Display
The display comprises two areas: an upper line of
icons, and the lower text and graphic area. The
following icons display at power-on:
Icons
Text and graphic area
Signal strength : Shows the received
signal strength. The greater the number of
bars, the better the signal strength.
Service: Appears when a call is in
progress.
No service indicator: Appears when
you are outside a service area. When it
appears, you cannot make or receive
calls. Wait a little while for a signal or
move into an open area.
Alarm: Indicates that you have set an
alarm.

13
YYoouurr PPhhoonnee
12
YYoouurr PPhhoonnee
New message: Appears when a new
message has been received.
Text Input Mode: Indicates the current
text input mode when entering text.
For details on the text input modes, see
page 34.
Battery strength: Shows the level of
your battery power. The more bars you
see, the more power you have left.
Vibrator on: Appears when a vibrate
mode is on. An incoming call will vibrate
the phone rather than ring it.
To activate or deactivate use of the service light, set
the SVC LED menu option (7.4.3); see page 104 for
further details.
Backlight
The display and keypad are illuminated by a
backlight. When you press any key, the backlight
illuminates. It turns off if no key is pressed within a
given period of time, depending on the Backlight
option set in the Display menu. The backlight
remains on at all times when the phone is connected
to a Hands-Free Car Kit (optional).
To specify the length of time for which the backlight
is active, set the Backlight menu option (7.4.1) in
Display; see page 103 for further details.
Service light
The service light is at the top right of the phone. It
flashes to indicate incoming call or message. Also,
the service light flashes for a few seconds when you
turn on the phone.
Roaming: Appears when you are out of
your home area and have registered with
a different network (when travelling in
other countries, for example).
External LCD
Your phone has an external display on the cover. It
indicates that you have an incoming call or a
message, and notifies you at the specified time
when you have set an alarm.
When you press and hold down the volume keys on
the left side of the phone with the phone closed, the
backlight of the external display illuminates.

15
GGeettttiinngg SSttaarrtteedd
14
Getting Started
Installing Battery
To Install the Battery
1. Place the battery on the base of the phone, as
shown.
2. Slide the battery up towards the catch until it
snaps into place.
Make sure that you have installed the battery
correctly before switching the phone on.
To Remove the Battery
1. If necessary, switch off the phone by pressing and
holding down until the power-off animation
plays.
2. Push down the catch and hold it in the position.
(➀), then slide the battery away (➁).
Charging a Battery
Your phone is powered by a rechargeable Li-ion
battery.
A travel charger is provided with your phone. Use
only Samsung-approved batteries and chargers. Ask
you local SAMSUNG dealer for further details.
The phone can be used while the battery is charging.
Note: You must fully charge the battery before
using your phone for the first time. A
discharged battery is fully recharged in
approximately 180 minutes.
➀
➁
Low Battery Indicator
When the battery charge level is almost empty and
only a few minutes of talk time remain, an empty
battery icon (no bars displayed) blinks in the top right
corner of the display. You will hear a warning tone.
When the battery becomes too weak for the phone
to operate, it switches off automatically.
17
GGeettttiinngg SSttaarrtteedd
16
GGeettttiinngg SSttaarrtteedd
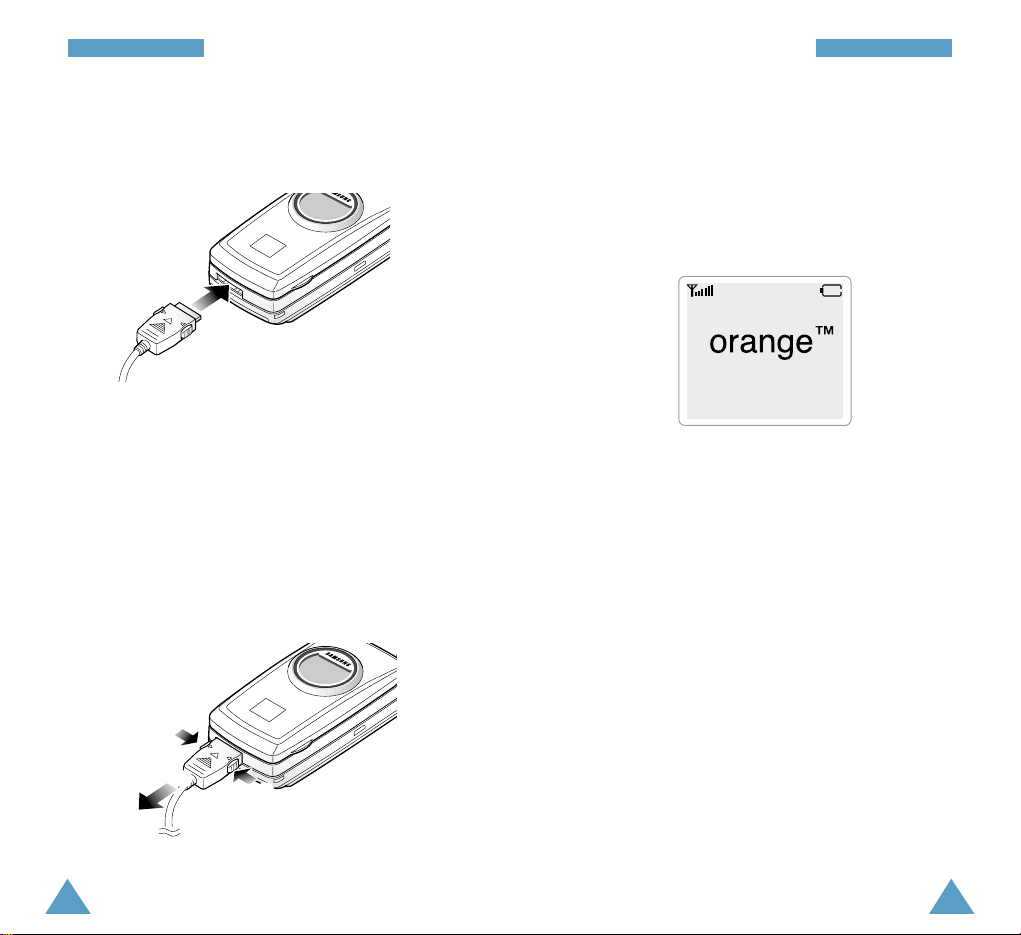
1. With the battery in position on the phone, connect
the lead from the travel charger to the jack on the
bottom of the phone.
2. Plug the power cord of the charger into a standard
wall outlet.
3. When charging finished (the indicator on the
connector of the charger turns green), disconnect
the charger from the power outlet and remove it
from the phone by squeezing the two tabs on the
lead(➀) and unplug the lead (➁).
SAMSUNG
05/03[THU] 10:08A
➀
➁
➀

19
GGeettttiinngg SSttaarrtteedd
18
GGeettttiinngg SSttaarrtteedd
Switching the Phone On/Off
1. Open the phone.
2. Press and hold down to switch the phone on.
The service light of the phone flashes, and an alert
sounds. When the system locates services, the
greeting message displays along with the date and
time. The external LCD shows the signal strength,
battery strength and current time and date.
• If the phone is out of service, the icon
appears in the display. In this case, you cannot
place and receive calls. You can try again later
when service is available.
• If your phone is locked, the Lock icon
displays. Enter the four-digit lock code to use the
phone.
To unlock your phone, deactivate the Auto Lock
menu option (Menu 9- ). For details, see page
111.
3. When you wish to switch the phone off, press and
hold down until the power off animation
begins to play.
WARNING!
Do not switch on the phone when the mobile
phone use is prohibited or when it may cause
interference or danger.
Note: Your phone has a built-in antenna. As with
any other radio-transmitting device, do not
touch the antenna unnecessarily when the
phone is switched on. Contact with the
antenna affects call quality and may cause
the phone to operate at a higher power level
than otherwise needed.
Your Phone’s Modes
Standby Mode
Standby is the most basic state of your phone. The
phone goes into Standby mode soon after you turn it
on, or whenever you briefly press . When your
phone is in Standby mode, you will typically see the
greeting message and current date and time. If you
enter a phone number, you can press to dial it.
Press at any time to return to Standby mode. Be
careful; if you are on a call when you press , you
will return to Standby mode, but it also disconnects
the call. Press several times or hold it down to
return to Standby mode without ending the call.
SAMSUNG
05/03[THU] 12:25P
12:25 PM
5/03 THU

2120
GGeettttiinngg SSttaarrtteedd
Talk Mode
You can place and answer calls only when your
phone is turned on. During a call, the phone is in Talk
mode. While you are in Talk mode, pressing
gives you a list of options referred to as “In-Use
Menu Options.” See page 27 for details on the
options.
Power Save Mode
Your phone comes with a Power Save feature that
will automatically be activated if your phone is
unable to find a signal after 15 minutes of searching.
While this feature is active, the phone’s battery
charge is conserved. The phone will automatically
recheck for a signal periodically. To manually force
the phone to recheck for a signal, press any key. A
message on the display will let you know when your
phone is operating in Power Save Mode.
Lock Mode
You can lock your phone to keep your phone away
from an unauthorized use.
When your phone in Lock mode, you can see the Lock
icon in the idle screen and no key operates,
except and the numeric keys for entering the
lock code. You can unlock the phone temporarily by
entering the lock code and use the phone.
For details on locking and unlocking your phone,
page 111.
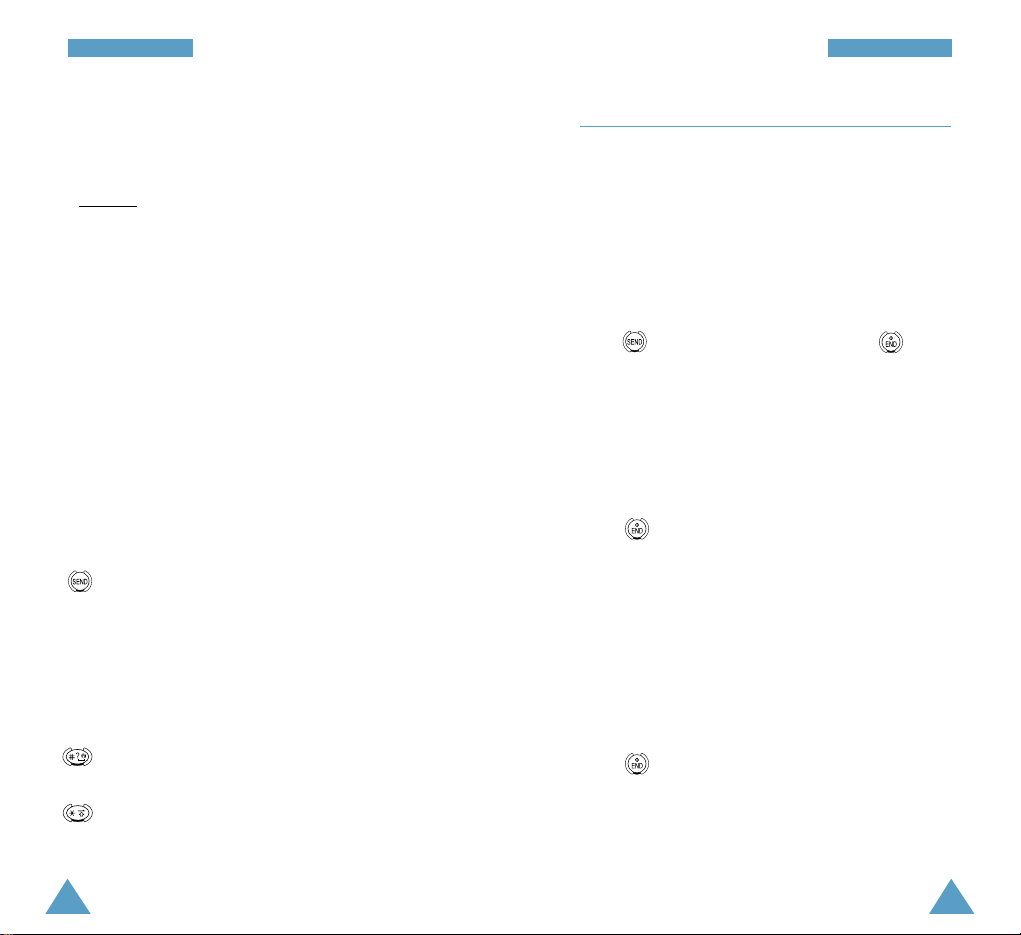
Call Functions
Making a Call
In Standby mode, enter the area code and phone
number, and press . The phone places the call to
the entered phone number.
When entering the phone number, pressing
allows you to access the following Dial options.
Phonebook: allows you to save the number in your
phone book. For details on saving a
numbers, see page 75.
Pose: inserts a pause. The numbers after a pause
will be dialed after a few seconds.
Press until the desired one is highlighted, and
press .
Correcting the Number
If you make a mistake while entering numbers, clear
the wrong number using and enter the correct
number.
To clear... Then press...
The last digit displayed .
The whole display and hold down for
more than one second.

23
CCaallll FFuunnccttiioonnss
22
CCaallll FFuunnccttiioonnss
Ending a Call
When you have finished your call, briefly press .
The call time (length of call) displays with the name
(if saved in phonebook) and number of the call party.
If the number is no stored in your Phone Book, your
phone prompts you to save the number. Press to
save the number. For further details on saving a
number, see page 75. If you do nothing, the phone
automatically returns to Standby mode after about
ten seconds.
Or, close the phone to end a call.
Redialing Last Number
To redial the last number you called, press
twice.
The phone stores the last 10 numbers dialed. To
recall any of these numbers, proceed as follows.
1. If necessary, press to return to Standby
mode.
2. Press to access the list of outgoing calls.
3. Press to scroll through the list until the
required number is displayed. Then, press
to dial the displayed number.
Speed Dialing from Phone Book Memory
Once you have stored phone numbers in the phone
book memory (001 through 199), you can dial them
easily whenever you want. See page 75 for details
on storing phone numbers.
One-Touch Dial
Memory locations 001 through 009 are special onetouch locations. Press and hold the last digit of the
memory location containing the number to be dialed.
For example
: Location no. 009
Press and hold.
The number (and name) stored is displayed, then
dialed.
Two-Touch Dial
Memory locations 010 through 099 are special twotouch locations. Press the second digit briefly, then
hold down the third digit of the memory cell.
For example
: Location no. 023
Press briefly and hold down .
The number (and name) stored is displayed, then
dialed.

25
CCaallll FFuunnccttiioonnss
24
CCaallll FFuunnccttiioonnss
Three-Touch Dial
Memory locations 100 through 199 are special threetouch locations. Press the first and the second digit
briefly, then hold down the third digit of the memory
cell.
For example
: Location no. 129
Press and briefly and hold
down .
The number (and name) stored is displayed, then
dialed.
Note: When several numbers are saved in one
location, only the first-saved number which
was automatically set as the speed dial
number for the location will be automatically
dialed. You can change the Speed Dial
number while editing. For details, see the
options in “Finding a Number by its Name”
on page 72.
Four-Digit Dialing
This feature allows you to enter any four consecutive
digits of a stored phone number, have your phone
remember the rest of the number and then dial the
entire number for you. This feature is convenient if
you have the number memorized, but you have
forgotten what Phone Book location the number is
stored in.
1. Enter any four digits of a phone number that you
have stored in Phone Book.
2. Press . The phone automatically dials the
entire number.
Note: If your Phone Book has more than one
phone number stored that contains the four
digits, The phone displays the number of the
phone numbers containing those four digits
with the name. Scroll through the listed
phone numbers using to select the
desired number.

27
CCaallll FFuunnccttiioonnss
26
CCaallll FFuunnccttiioonnss
Answering a Call
When somebody calls you, the phone rings and the
phone icon in the middle of the screen flashes.
If the caller can be identified, the caller’s phone
number (or name if stored in your phone book) is
displayed. If the caller cannot be identified, only the
phone icon flashes.
1. If necessary, open the phone and press to
answer a call.
If the Answer Mode menu (3.5) is set to
Anykey, you can press any key except .
2. End the call by closing the phone or pressing
.
Note: You can answer a call while using the Phone
Book or menu features. Your setting will be
canceled.
nnnn
Caller’s name or
number
Quick Switching to Vibrate Mode
You can quickly set your phone to vibrate when a call
comes in.
Press and hold in Standby mode.
If you press and hold the key again, the previously
set ring type will be resumed.
If you want to set the phone to ring or any other ring
type, see ‘Ring Type’ on page 105.
In-Use Menu Options
Your phone provides a number of functions that you
can use during a call. You cannot utilize all of these
functions at all times. Many of the In-Use Menu
Options are network services.
Press during a call to choose some or all of the
following In-Use Menu options:
Phone Book: allows you to access the Phone Book
menu (Menu 4).
Message: allows you to access the Messages menu
(Menu 6).
We cannot check this
screen from the phone.
29
CCaallll FFuunnccttiioonnss
28
CCaallll FFuunnccttiioonnss
(Un)Mute: allows you to switch your phone’s
microphone off, so that the other party
cannot hear you.
Example
: You wish to say something to another
person in the room but do not want the
other party to hear you.
Silent Key: does not transmit the key tones. It
allows you to press keys without
hearing annoying key tones during a
call.
Note: To communicate with answering
machines or computerized telephony
systems, the Silent Keys option must be
disabled.
Send Tel #: sends DTMF tones of your number.
During a call, some keys have special functions.
: sends DTMF tones of the currently displayed
number. DTMF (Dual Tone Multi Frequency)
tones can be used to control electronic phone
services such as bank-by-phone or voice mail.
During a call, key in the digits you want to send
as DTMF tones, for example, the bank account
number and password. Then, press this key.
: increases reception of the microphone so that
the other party can hear your voice more loudly.
: decreases reception of the microphone so that
you can make your voice lower.
Viewing Missed Calls
Your phone keeps a list of calls that you do not
answer when the phone is on and service is
available. The phone indicates a missed call by
displaying a text notification on the screen.
Additionally, if caller information is available, the
phone displays the phone number of the most recent
missed call.
Press to call the displayed number, or to
clear the message and return to Standby mode.
Dropped Calls
A dropped call can occur during a conversation in
response to a signal fade or leaving a service area. In
this case, the call ends and “Signal Faded” displays.
Press to clear the message and return to
Standby mode.
Failed Calls
A failed call can occur if your phone is out of calling
range or the network is temporarily busy. Your phone
responds to a failed call by displaying an appropriate
message: “Call Failed Out of Range” or “Call Failed
Network Busy”.
Press to clear the message and return to
Standby mode.

31
CCaallll FFuunnccttiioonnss
30
CCaallll FFuunnccttiioonnss
Call Waiting
Call Waiting lets you receive a second call during
conversation. Your phone notifies you of a call
waiting by beeping an displaying “Call Waiting.”
Your phone provides the option of turning the Call
Waiting feature on and off (if you have subscribed to
the service). Call Waiting is on by default in the
phone. If you choose to have a undisturbed
conversation, simply turn off the feature for the
current call.
Note: Contact your service provider to activate the
Call Waiting service.
To answer a waiting call:
1. To answer the call, press . The phone
connects the calling party, and places the current
party on hold.
2. Press again to switch between two parties.
Note: If you do not respond to a Call Waiting
notification, the phone will forward the call to
voice mail or another number that you have
set up. Contact your service provider for more
details.
Three-Way Calling
This feature enables you to conduct conference calls
with two separate parties at the same time. The
phone records each party into the Outgoing Calls
Log. Also, you are billed airtime for each of the
outgoing calls separately.
Note: Contact your service provider to activate
Three-Way Calling.
To place a Three-Way call:
1. During a conversation, press . The phone
places the other party on hold.
2. Enter the phone number for the third party, and
then press . The phone dials the third party.
3. When you are connected to the third party, press
again to begin your three-way call.
If one of the callers (not you) hangs up, you and
remaining caller stay connected. If you initiated the
call and you hang up first, all three parties are
disconnected.
33
CCaallll FFuunnccttiioonnss
32
CCaallll FFuunnccttiioonnss
Call Forwarding
This feature provides the option of forwarding
incoming calls to another phone number, even while
your phone is off. Activating Call Forwarding does
not affect outgoing calls made from this phone.
Contact your service provider to activate Call
Forwarding.
Using the Display Notepad
Your phone has a really convenient feature for
entering a phone number while on a call as if it were
a note pad.
Say you are talking to a friend who wants to give you
a phone number. Just enter the number using the
keypad, and the number appears on the display.
Then, when you hang up, the number remains in the
display so that you can press to be immediately
connected to that party. Or press , select
Phonebook and follow the prompts to store the
number into your phone book. For details on saving a
number, see page 75.
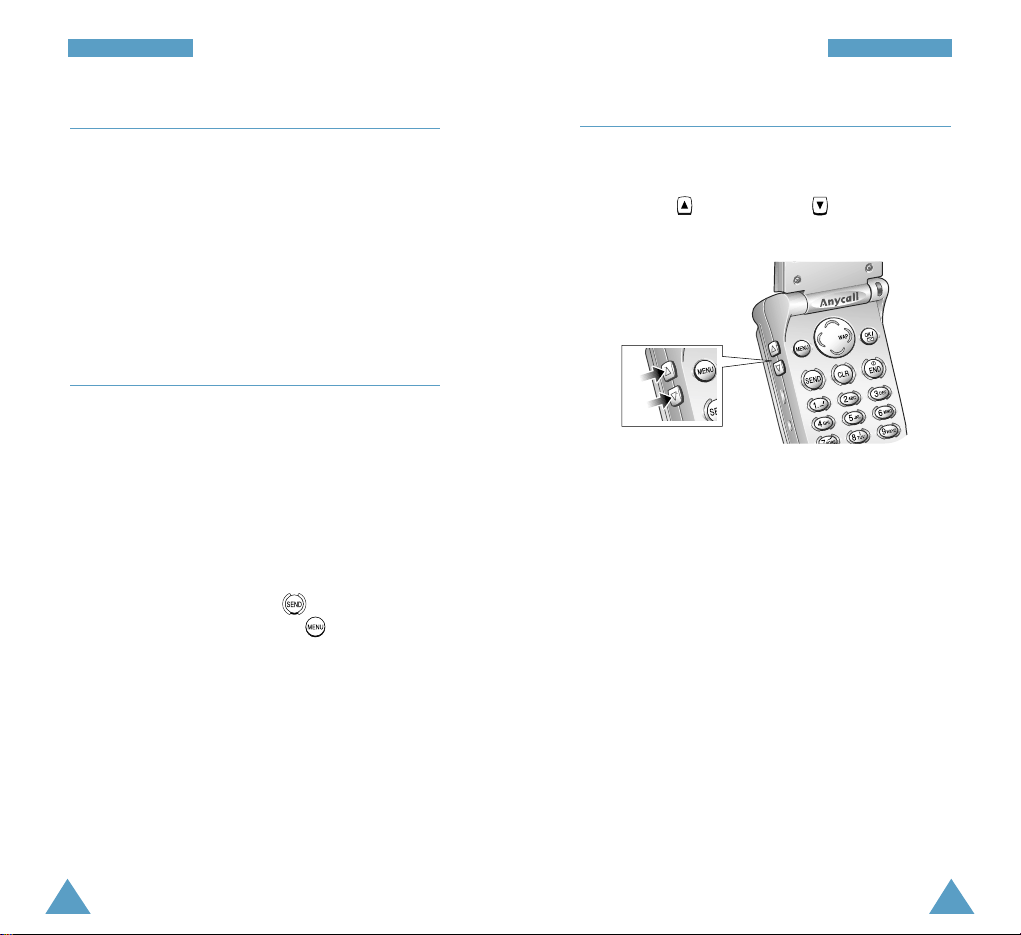
In Standby mode, you can adjust the key volume
using these keys.
Adjusting the Volume
During a call, if you want to adjust the earpiece
volume, use the volume keys on the left side of the
phone. Press to increase and to decrease the
volume.

35
EEnntteerriinngg TTeexxtt
34
Changing Text Input Mode
When you are in a field that allows character entry,
you should notice the text input mode indicator in the
bottom of the display.
You can change between Chinese input methods, and
English or to numbers input. To change to another
text input mode:
1. Press to access the Input Mode menu.
2. Scroll to the desired mode by pressing or
repeatedly. The following options are
available; Symbol, Number, T9 Stroke, T9 English
and Alpha(ABC).
3. When the mode is highlighted, press to select
it.
4. You will find the selected text input mode
indicator in the top line of the display.
Note: If you want to exit the Input Mode menu
without changing the mode, press .
Text mode
indicator
Entering Text
The phone allows you to enter characters for
messages and names in Chinese and English. To
enter Chinese text, the phone provides character
shape based (Stroke) input method allowing for
greater convenience and ease of use.
You can also enter any combination of English
alphabets, numbers, and special symbols including
punctuation marks.
You are provided with the following text input
modes;
• Symbol: allows you to enter various symbols and
special characters.
• Number: allows you to enter numbers.
• T9 Stroke: allows you to enter the Chinese
character using the individual strokes labeled on
keys.
• T9 English: allows you to enter the English
characters with only one keypress per character.
• Alpha(ABC): allows you to enter English
characters by pressing the key labeled with the
desired character repeatedly until the character
displays.
Note: You can enter numbers in each mode by
pressing and holding the keys corresponding
to the desired digits.
Currently
selected mode:
T9 English
 Loading...