

Samsung RS21-24NS Disassemble
CONFIDENTIAL
3 Disassembly and Reassembly
This section of the service manual describes the disassembly and reassembly procedures for the
RS21N*/RS24N* monitor.
WARNING: This monitor contains electrostatically sensitive devices. Use caution when handling
these components.
3-1 Disassembly
Cautions:1. Disconnect the monitor from the power source before disassembly.
2. Follow these directions carefully; never use metal instruments to pry apart the cabinet.
3-1-1 Removing the Stand
1. Disconnect power cord and signal cable.
2. Remove 2 screws and bushing on the each
side of stand.
3-1-2 Main Body Disassembly
1. Remove the tuner-box.
2. Remove 3 cap-screw and screws on the Rear
Cover.
3. Remove Rear Cover from the Front Cover.
4. Remove 1 screw on the PCB and remove the
tuner-guide.
5. Remove 9 screws on the shield and remove
the shield.
6.
Disconnect Inverter wire, Function PCB wire,
Audio wire, Interface wire, and IR sensor wire .
Remove 6 screws on the main PCB and 4
screws on the Inverter PCB.
7. Remove the main PCB Assembly and Inverter
PCB.
8. Remove 4 screws on the Rear Panel Bracket.
9. Remove the Bracket Assembly from the Front
Cover.
10. Remove 4 screws on the panel and then
remove the panel.
11. Remove 8 screws on the Bracket Hinge.
12. Remove the Braket Hinge.
RS21N*/RS24N* 3-1
3 Disassembly and Reassembly
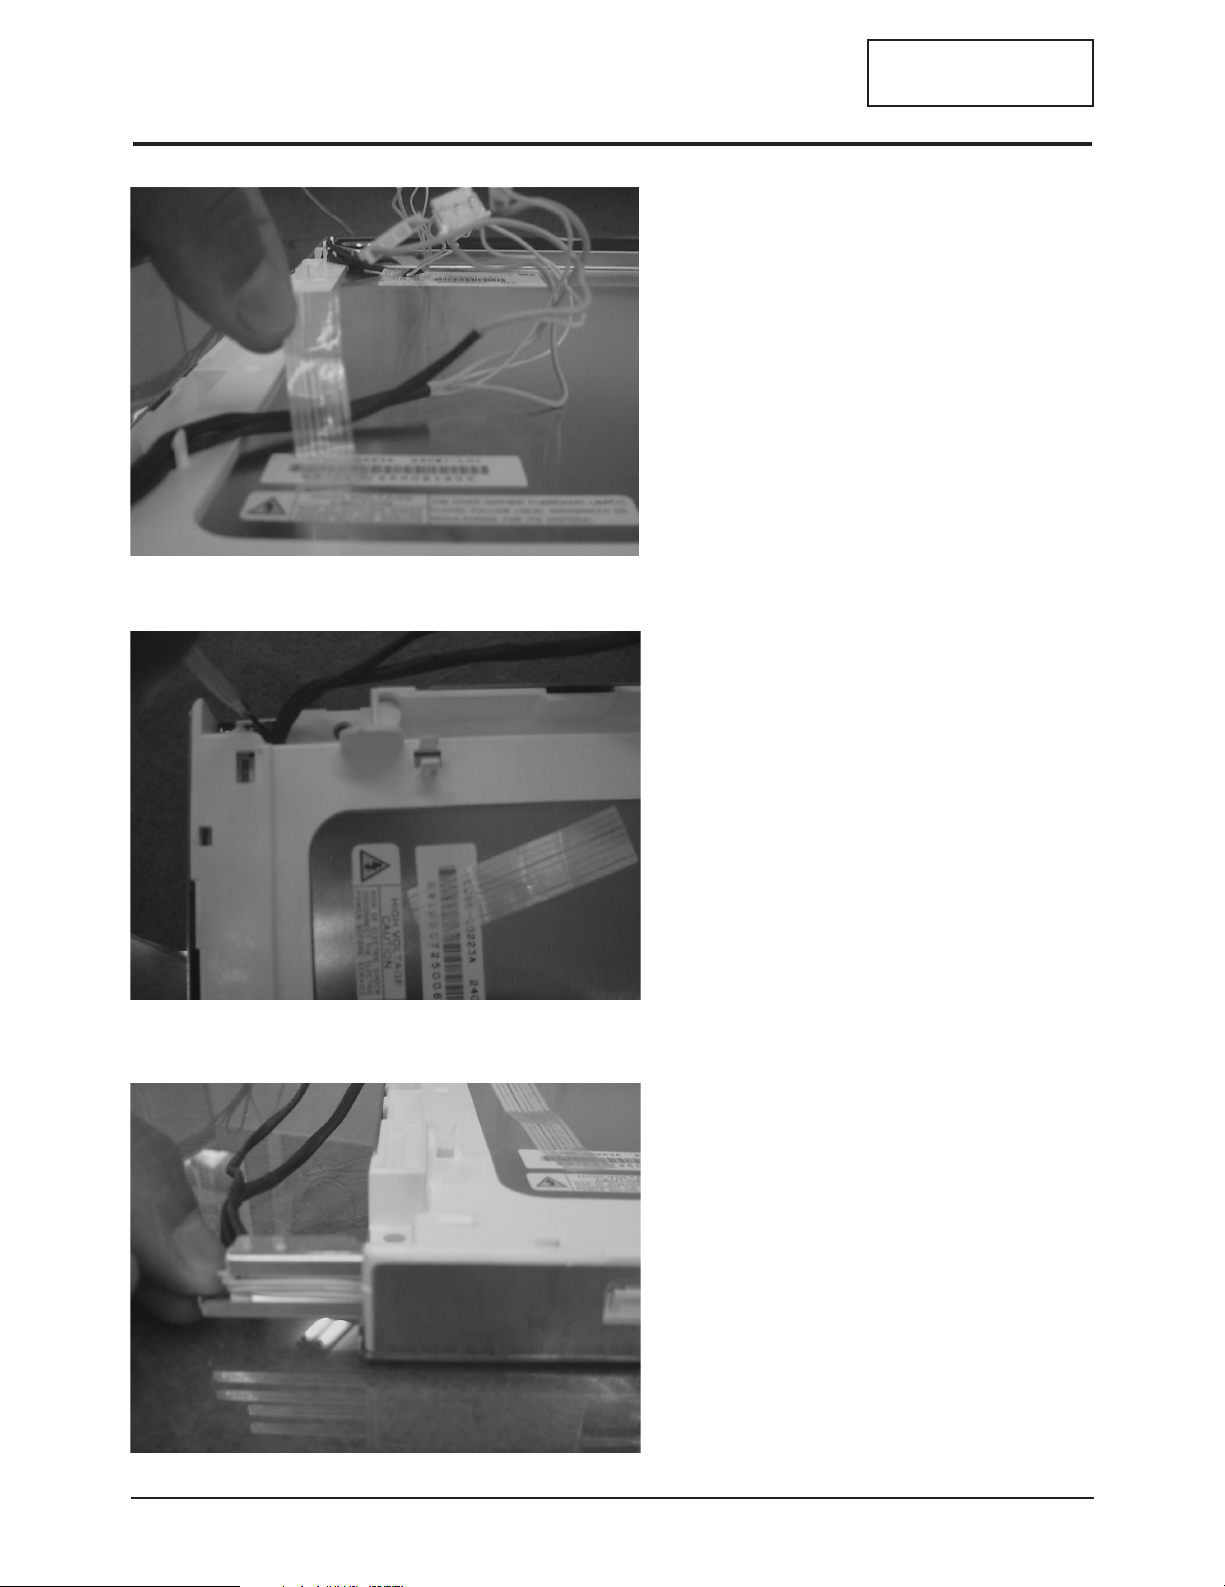
3-2 Replacement Order of Lamp Assemblies
CONFIDENTIAL
1. Remove the lamp wire holding tape from
the metal chassis on the bottom side.
1-1. Taking out the lamp wire from
the lamp wire holder.
2. Unscrewing the screw.
Unscrewing force : 0.8 ~ 1Kg - f.cm
3. Pulling out the lamp Assembly with
stable Power and direction slowly.
Be careful, do not twist the lamp reflector
when pulling the lamp.
3-2 RS21N*/RS24N*
 Loading...