


Contact SAMSUNG WORLD-WIDE
If you have any questions or comments relating to Samsung products, please contact the SAMSUNG customer care centre.
Country
AUSTRIA 0810 - SAMSUNG(7267864, € 0.07/min) www.samsung.com/at
BELGIUM 02 201 2418 www.samsung.com/be
CZECH REPUBLIC
DENMARK 8 - SAMSUNG(7267864) www.samsung.com/dk
EIRE 0818 717 100 www.samsung.com/ie
ESTONIA 800-7267 www.samsung.ee
FINLAND
FRANCE
GERMANY 01805 - SAMSUNG(7267864, € 0.14/Min) www.samsung.de
HUNGARY 06 - 80 - SAMSUNG(7267864) www.samsung.com/hu
ITALIA 800 - SAMSUNG(7267864) www.samsung.com/it
KAZAKHSTAN 8-10-800-500-55-500 www.samsung.com/kz_ru
KYRGYZSTAN 00-800-500-55-500
LATVIA 8000-7267 www.samsung.com/lv
LITHUANIA 8-800-77777 www.samsung.lt
LUXEMBURG 02 261 03 710 www.samsung.com/lu
NETHERLANDS 0900 - SAMSUNG(7267864, € 0.10/Min) www.samsung.com/nl
NORWAY 3 - SAMSUNG(7267864) www.samsung.com/no
POLAND
PORTUGAL 808 20 - SAMSUNG(7267864) www.samsung.com/pt
RUSSIA 8-800-555-55-55 www.samsung.ru
SLOVAKIA 0800 - SAMSUNG(7267864) www.samsung.com/sk
SPAIN 902 - 1 - SAMSUNG (902 172 678) www.samsung.com/es
SWEDEN 075 - SAMSUNG(726 78 64) www.samsung.com/se
SWITZERLAND 0848 - SAMSUNG(7267864, CHF 0.08/min) www.samsung.com/ch
TADJIKISTAN 8-10-800-500-55-500
TURKEY 444 77 11 www.samsung.com/tr
U.K 0845 SAMSUNG(7267864) www.samsung.com/uk
UKRAINE 8-800-502-0000 www.samsung.ua
UZBEKISTAN 8-10-800-500-55-500 www.samsung.com/kz_ru
800 - SAMSUNG (800-726786) www.samsung.com/cz
Samsung Zrt., česká organizační složka, Oasis Florenc, Sokolovská394/17, 180 00, Praha 8
30 - 6227 515
3260 'dites' SAMSUNG (€ 0,15/Min)
0825 08 65 65 (€ 0.15/Min)
0 - 801 - 1SAMSUNG(172678)
022 - 607 - 93 - 33
Customer Care Centre
www.samsung.com/fi
www.samsung.com/fr
www.samsung.com/pl
Web Site
Plasma TV
user manual
imagine the possibilities
Thank you for purchasing this Samsung product.
To receive more complete service, please register
your product at
www.samsung.com/register
BN68-02196C-01
Model Serial No.
User Instructions
Screen Image retention
Do not display a still image (such as on a video game or when hooking up a PC to this PDP) on the plasma monitor panel for more
than 2 hours as it can cause screen image retention. This image retention is also known as “screen burn”. To avoid such image
retention, reduce the degree of brightness and contrast of the screen when displaying a still image.
Height
The PDP can normally operate only under 2000m in height. It might abnormally function at a place over 2000m in height so do not
install and operate there.
Heat on the top of the PDP TV
The top side of the product may be hot after long period of use as heat dissipates from the panel through the vent hole in the upper
part of the product. This is normal and does not indicate any defect or operation failure of the product. However, children should be
prevented from touching the upper part of the product.
The product is making a ‘cracking’ noise.
A ‘cracking’ noise may occur when the product contracts or expands due to a change of surrounding environment such as
temperature or humidity. This is normal and not a defect of the unit.
Cell Defects
The PDP uses a panel consisting of 2,360,000(HD-level) to 6,221,000(FHD-level) pixels which require sophisticated technology to
produce. However, there may be few bright or dark pixels on the screen. These pixels will have no impact on the performance of
the product.
Avoid operating the TV at temperatures below 5°C(41°F)
A still image displayed too long may cause permanent damage to the PDP Panel.
Watching the PDP TV in 4:3 format for a long period of time may leave traces of borders displayed on the left,
right and centre of the screen caused by the difference of light emission on the screen. Playing a DVD or a
game console may cause similar effect to the screen. Damages caused by the above effect are not covered
by the Warranty.
Afterimage on the Screen.
Displaying still images from Video games and PC for longer than a certain period of time may produce partial afterimages.
To prevent this effect, reduce the ‘brightness’ and ‘contrast’ when displaying still images.
Warranty
Warranty does not cover any damage caused by image retention.
-
Burn-in is not covered by the warranty.
-
Installation
Be sure to contact an authorized service centre, when installing your set in a location with heavy dust, high or low temperatures,
high humidity, chemical substance and where it operates continually such as the airport, the train station etc. Failure to do so may
cause a serious damage to your set.
Digital TV Notice
1. Functionalities related to Digital TV(DVB) are only available in countries/areas where DVB-T (MPEG2 and MPEG4 AVC)
digital terrestrial signals are broadcasted or where you have access to a compatible DVB-C(MPEG2 and MPEG4 AAC)
cable-TV service. Please check with your local dealer the possibility to receive DVB-T or DVB-C signal.
2. DVB-T is the DVB European consortium standard for the broadcast transmission of digital terrestrial television and DVB-C
is that for the broadcast transmission of digital TV over cable.
However, some differentiated features like EPG (Electric Program Guide), VOD (Video on Demand) and so on, are not
included in this specication. So, they cannot be supported at this moment.
3. Although this TV set meets the latest DVB-T and DVB-C standards[August,2008], the compatibility with future DVB-T digital
terrestrial and DVB-C digital cable broadcasts cannot be guaranteed.
4. Some cable-TV providers may charge an additional fee for such a service and you may be required to agree to terms and
conditions of their business.
5. Some Digital TV functions might be unavailable in some countries or regions and DVB-C might not work correctly with all
providers.
6. For more information, please contact your local Samsung customer care centre.
Contact SAMSUNG WORLDWIDE
If you have any questions or comments relating to Samsung products, please contact the SAMSUNG
customer care centre. (See back cover for more informations.)
Figures and illustrations in this User Manual are provided for reference only and may differ from actual product appearance.
N
Product design and specications may be changed without notice in order to enhance product performance.
© 2009 Samsung Electronics Co., Ltd. All rights reserved.
English - 2

English - 3
Contents
English
Connecting and Preparing Your TV
Checking Parts ..........................................................................4
■
Using the Stand-Base ..............................................................4
■
How to assemble the Stand-Base (depending on the model) ...4
■
Viewing the Control Panel .........................................................5
■
Viewing the Connection Panel...................................................6
■
Remote Control .........................................................................8
■
Installing Batteries in the Remote Control .................................9
■
Using the Remote Control Backlight Buttons ............................9
■
Switching On and Off.................................................................9
■
Placing Your Television in Standby Mode ..................................9
■
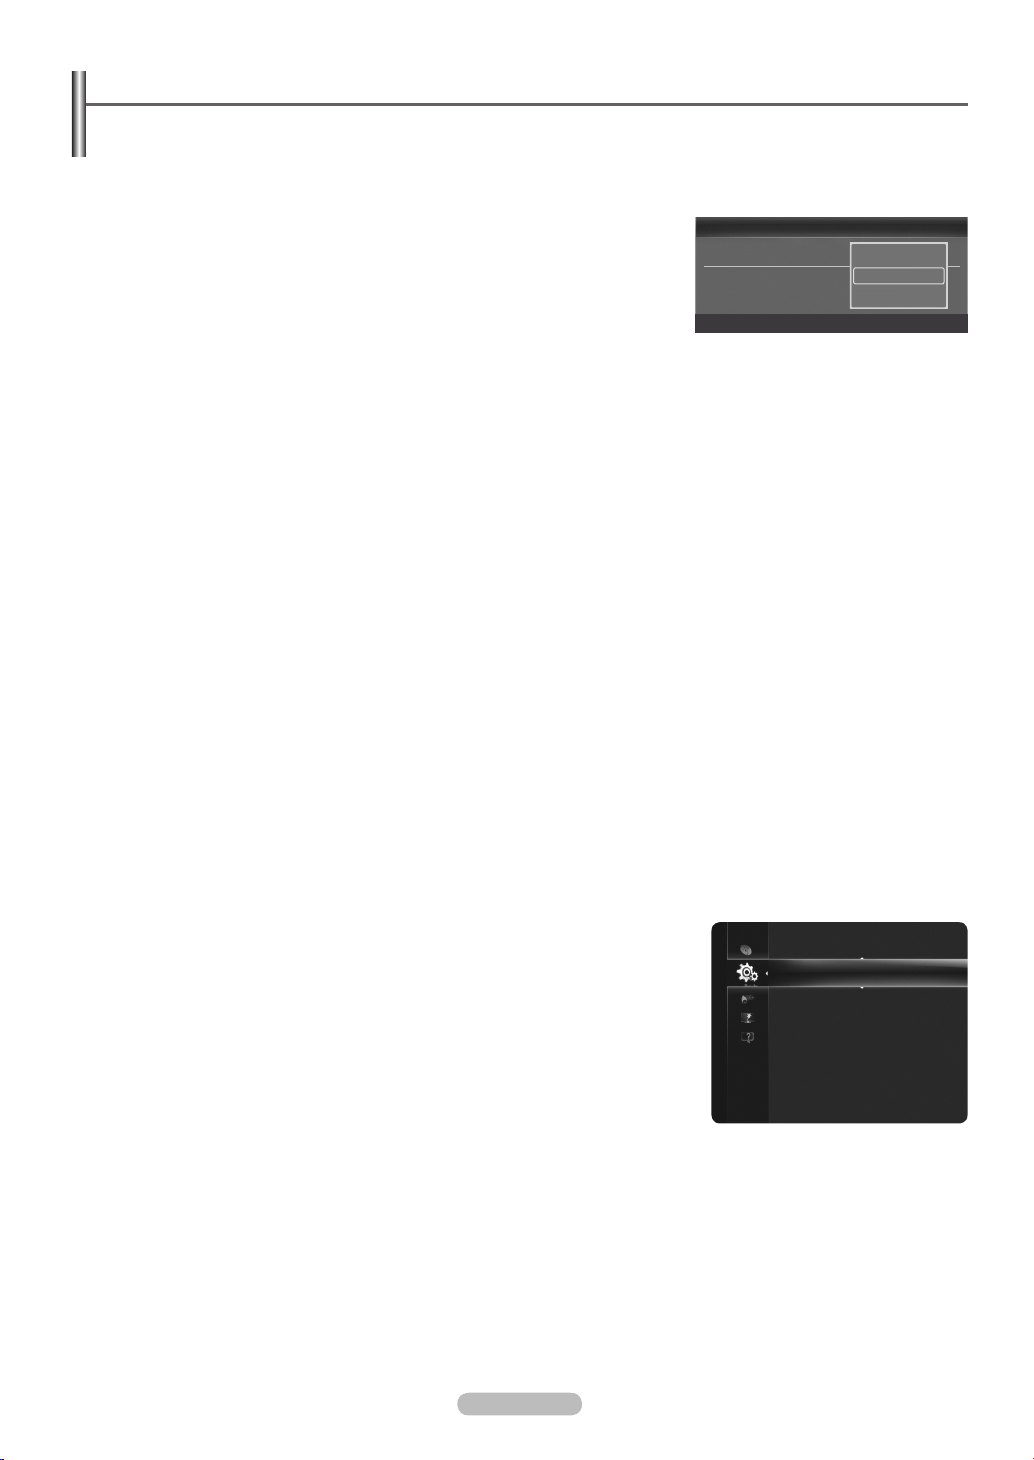
Viewing the Menus .................................................................. 10
■
Using the TOOLS Button ........................................................10
■
Plug & Play Feature ................................................................ 11
■
Channel Control
Storing Channels ................................................................... 12
■
Managing Channels ................................................................15
■
Picture Control
Changing the Picture Settings ................................................. 17
■
Setting up the TV with your PC ...............................................20
■
PC Display ...............................................................................21
■
Sound Control
Changing the Sound Setting ...................................................22
■
Selecting the Sound Mode ...................................................... 23
■
Function Description
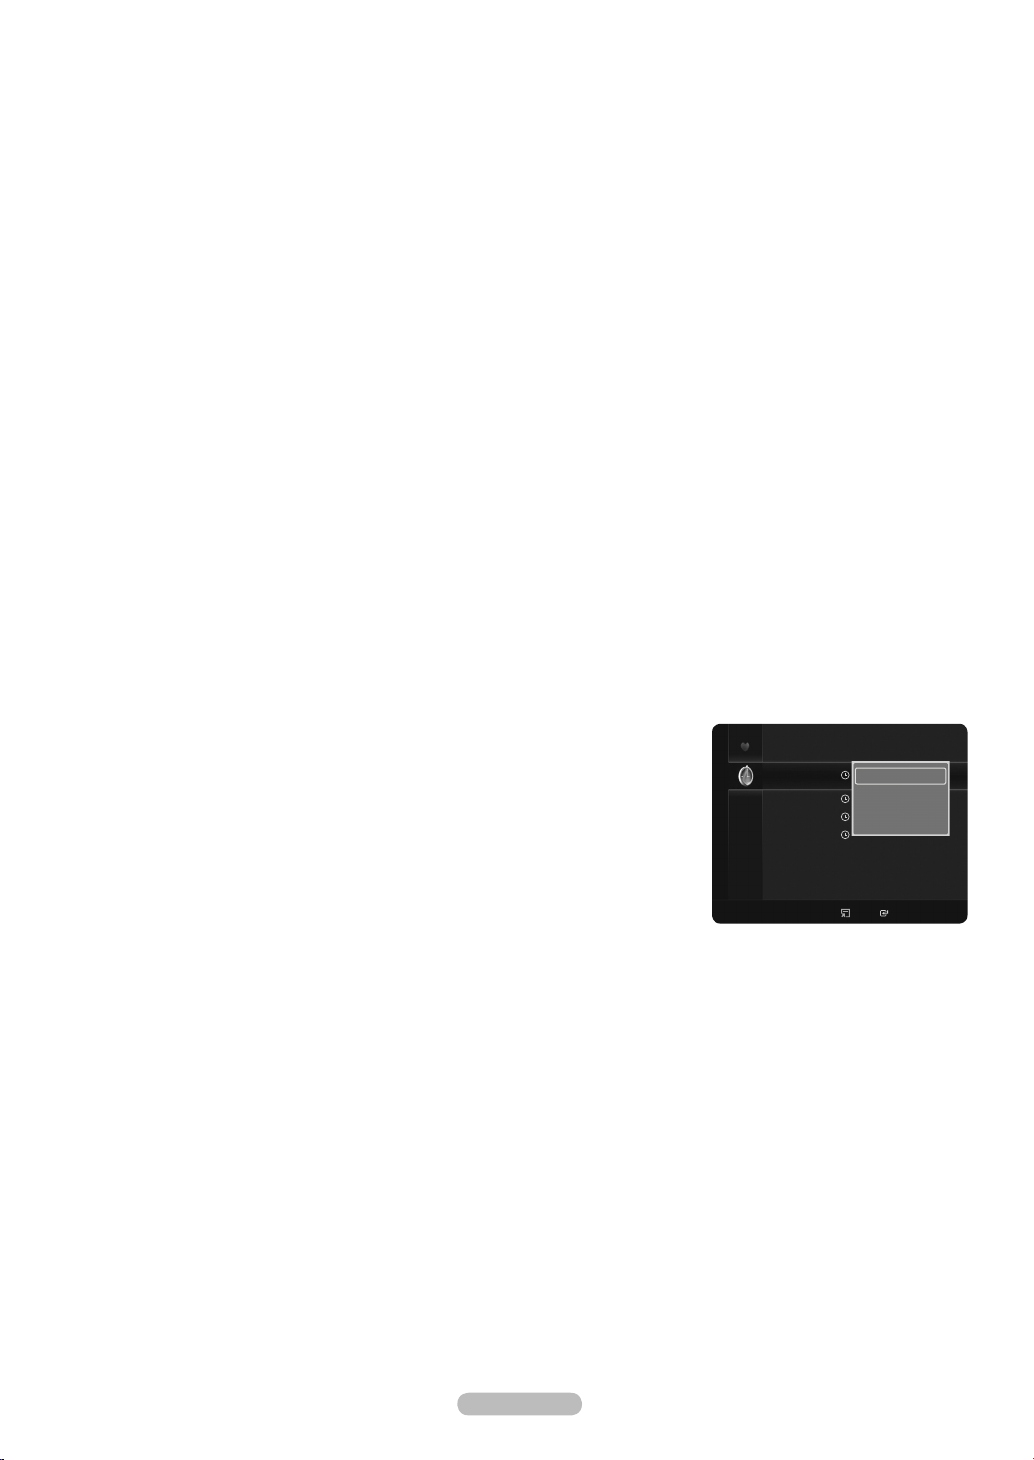
Setting the Time ......................................................................24
■
Conguring the Setup Menu ....................................................25
■
Viewing the Picture in Picture (PIP).........................................27
■
Support / Input
Supported Program ................................................................. 28
■
Source List / Edit Name ...........................................................29
■
Media Play-DLNA
Setting the DLNA Network .......................................................48
■
Installing the DLNA Application ...............................................48
■
Using the DLNA Application ....................................................50
■
Using the DLNA Function ........................................................ 53
■
About Anynet+
Connecting Anynet+ Devices ................................................... 54
■
Setting Up Anynet+ .................................................................55
■
Switching between Anynet+ Devices .......................................56
■
Recording ................................................................................ 57
■
Listening through a Receiver ................................................... 57
■
Troubleshooting for Anynet+ ...................................................58
■
Content Library
Activating the Content Library .................................................59
■
Using the Content Library ........................................................ 60
■
Home Network Centre
Home Network Centre ............................................................. 61
■
Setting Up the Home Network Centre ..................................... 62
■
Using the Message Function ................................................... 63
■
Using the Media Function ........................................................ 64
■
Recommendations for Use
Teletext Feature ....................................................................... 65
■
Wall Mount Kit Specications (VESA) ..................................... 66
■
Preparing before installing Wall- Mount ...................................67
■
Securing the TV to the Wall ..................................................... 67
■
Securing the Installation Space ............................................... 68
■
Assembling the Cables ............................................................ 69
■
Troubleshooting ....................................................................... 70
■
Specications ..........................................................................71
■
Software License ..................................................................... 72
■
Network
Network Connection ................................................................ 30
■
Network Setup ......................................................................... 33
■
Media Play
Connecting a USB Device ....................................................... 36
■
Using the Media Play Function ................................................37
■
Using and Sorting Photo List ................................................... 38
■
Viewing a Photo or Slide Show .............................................. 39
■
Using and Sorting the Music List ............................................. 41
■
Playing a Music ......................................................................42
■
Using and Sorting the Movie List .............................................43
■
Playing a Movie File ...............................................................44
■
Picture / Music Settings Using Media Play .............................. 46
■
Using the Setup Menu ............................................................. 47
■
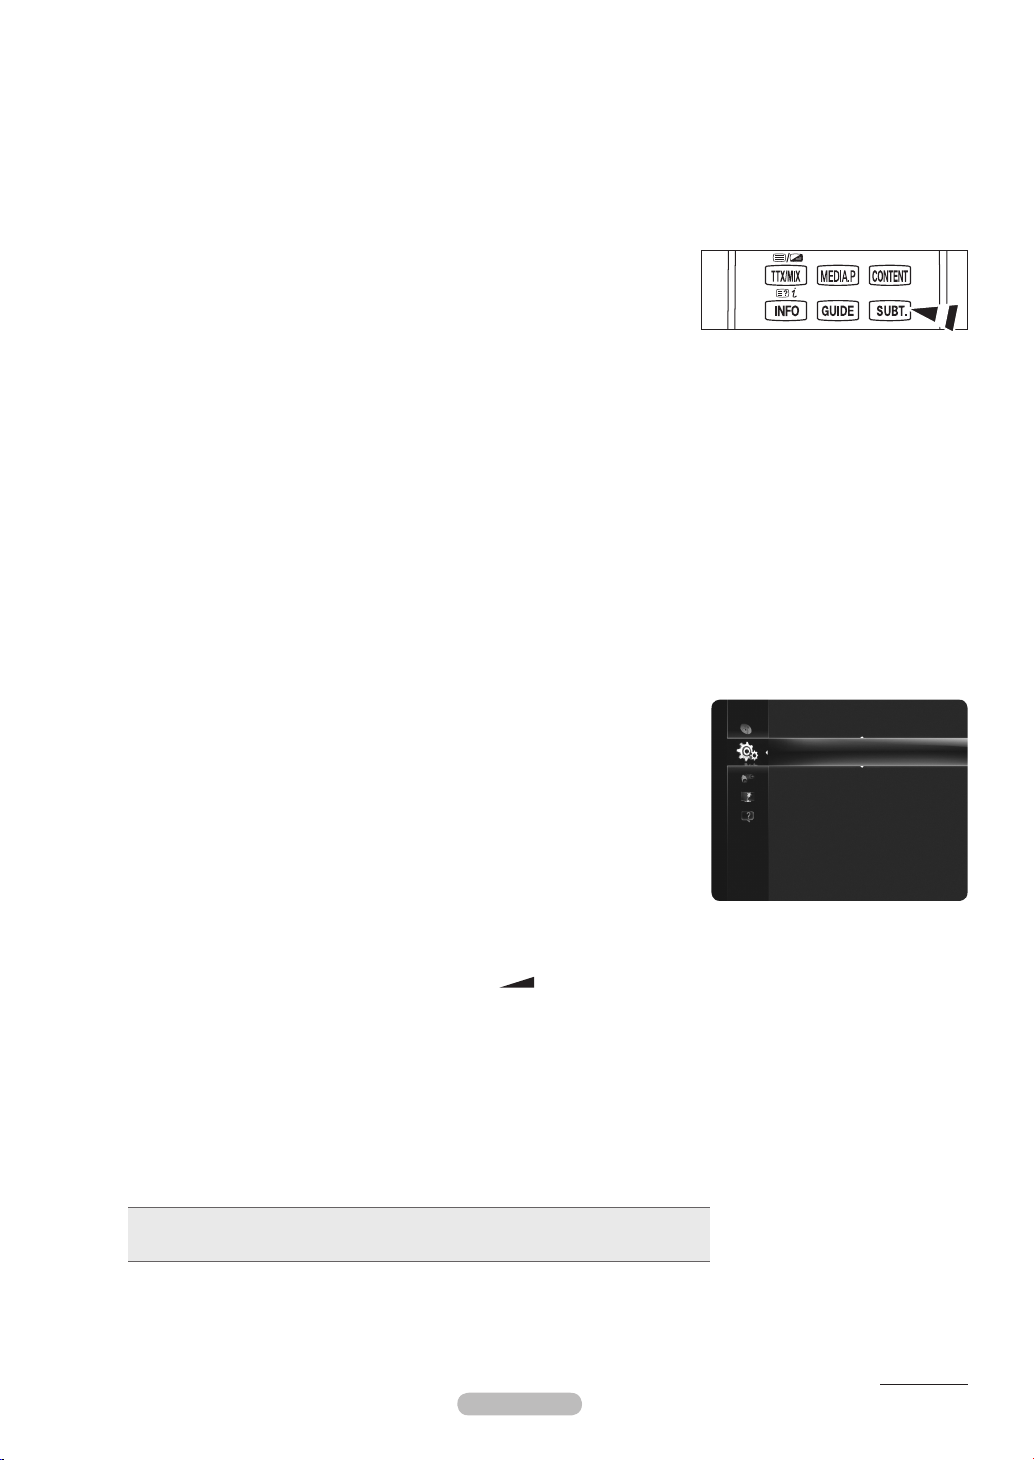
Symbol Press Note One-Touch Button TOOLS
N O T
Connecting and Preparing Your TV
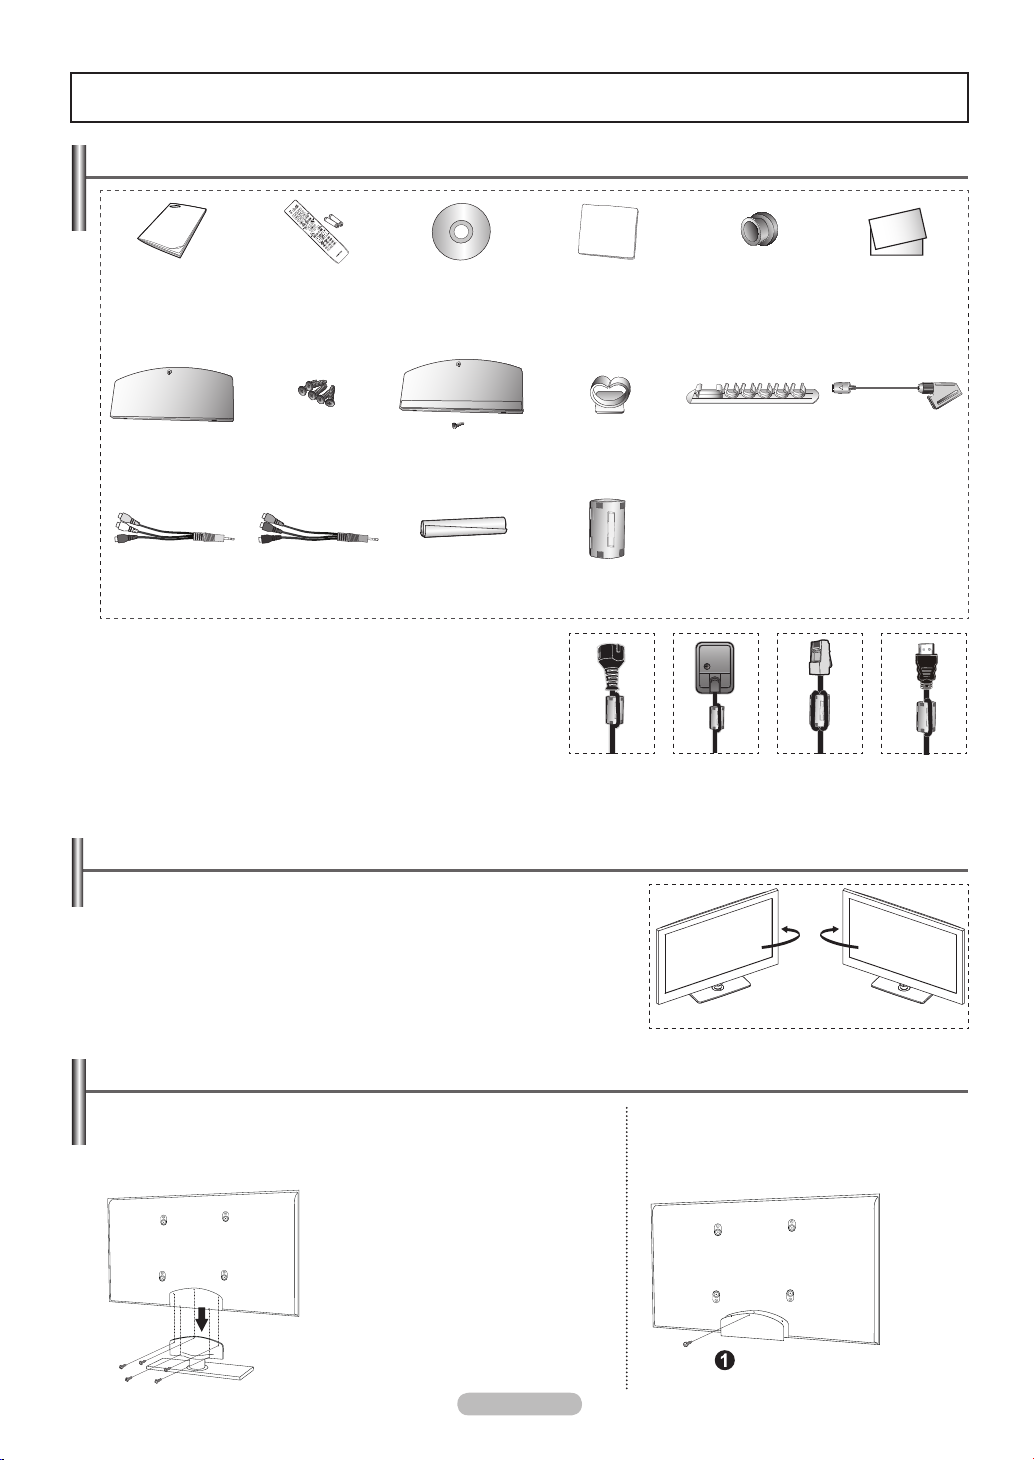
Checking Parts
Owner’s Instructions Remote Control/
Cover-Bottom
(PS50B850 only)
AV Cable Component Cable Holder-Wire Cable
Ferrite Core
N
The ferrite cores are used to shield the cables from interference.
When connecting a cable, open the ferrite core and clip it around
the cable near the plug.
AAA Batteries (2ea)
Screws (5ea)
(PS50B850 only)
Program CD
Cover-Bottom/Screw
(PS58B850 only)
(Refer to page 83)
Using the Stand-Base
Two or more people should carry the PDP. Never lay the PDP on the oor
N
because of possible damage to the screen. Always keep the PDP upright.
The PDP can rotate 20 degrees in right and left directions.
N
Cloth-Clean Holder-Ring (4ea)
Holder-Wire stand
(Refer to page 69)
Ferrite Core (4ea)
Power Cord (2ea) LAN Cable
(Refer to page 67 )
Holder-Wire (3ea)
(Refer to page 69)
Warranty Card/
Safety Guide Manual
(Not available in all
Ext Cable
(1ea)
locations)
HDMI Cable
(1ea)
How to assemble the Stand-Base (depending on the model)
Using the 5 screws for securing the stand base and the TV, firmly attach the TV
to the stand base.
(The exterior of the set may be different than the picture.)
Warning
Firmly secure the stand to the TV before moving
it, as the stand may fall and could cause serious
injury.
Two or more people should carry the TV.
N
Never lay the TV on the oor because of
possible damage to the screen.
Always store the TV upright.
English - 4
In case of installing your TV on the wall, close the
cover (1) on the stand-base connection part using
two screws for hiding.
-20° ~ 20°

English - 5
Viewing the Control Panel
The product colour and shape may vary depending on the model.
N
1
REMOTE CONTROL SENSOR
Aim the remote control towards this spot on the TV.
SOURCE
2
Toggles between all the available input sources
(TV, AV, Component, PC, HDMI1/DVI, HDMI2, HDMI3,
HDMI4, USB).
In the on-screen menu, use this button as you would use
N
the ENTERE button on the remote control.
MENU
3
Press to see an on-screen menu of your TV’s features.
+ VOL –
4
Press to increase or decrease the volume. In the on-screen
menu, use the + VOL – buttons as you would use the
◄ and ► buttons on the remote control.
Front Panel buttons
Touch each button to
operate.
5
Press to change channels. In the on-screen menu, use the
buttons as you would use the ▲ and ▼ buttons
on the remote control. You can use button to turn
on the TV without the remote control.
POWER INDICATOR
6
Blinks and turns off when the power is on and lights up in
stand-by mode.
(
POWER)
7
Press to turn the TV on and off.
SPEAKERS
8

Viewing the Connection Panel
4
TV Rear Panel
1
2
4 53
or
6
987
Cable Television
Network
The product colour and shape may vary depending on the model.
N
Whenever you connect an audio or video system to your set, ensure that all elements are switched off.
N
When connecting an external device, match the colour of the connection terminal to the cable.
N
English - 6
0
or
@
!

English - 7
COMMON INTERFACE Slot
1
Insert CI (Common Interface) card into the slot.
(refer to page 27)
When not inserting CI CARD in some channels, Scramble
-
Signal is displayed on the screen.
The pairing information containing a telephone number, CI
-
CARD ID, Host ID, and other information will be displayed
in about 2~3 minutes. If an error message is displayed,
please contact your service provider.
When the channel information conguration has nished,
-
the message Updating Completed is displayed, indicating
that the channel list is now updated.
Insert the CI-Card in the direction marked on it.
N
CAM is not supported in some countries and
N
regions,check with your authorized dealer.
USB 1 (HDD), USB 2
2
Connect a USB mass storage device to view photo les
(JPEG), play audio les (MP3) and movie les.
You can connect to SAMSUNG’s network wirelessly.
The USB 1 (HDD) port is also used as the HDD.
N
HDD (Hard disk drive) is device which stores digitally
encoded data
POWER IN
3
Connect the supplied power cord.
LAN
4
Connect a LAN cable to this port to connect to the Network
(SAMSUNG's Internet@TV Service).
ANT IN
5
75Ω Coaxial connector for Aerial/Cable Network.
6 EXT (RGB)
Inputs or outputs for external devices, such as VCR, DVD,
video game device or video disc players.
In EXT mode, DTV Out only supports MPEG SD Video
N
and Audio.
In EXT Mode, Game mode is not available
N
Input/Output Specification
Connector
Video Audio(L/R) RGB Video + Audio(L/R)
EXT ✔ ✔ ✔
Input Output
Only TV or DTV output
is available.
Video and audio inputs for external devices, such as a
camcorder or VCR.
COMPONENT IN
8
Audio (AUDIO L/R) and video (Y/PB/PR) inputs for Component.
PC IN / PC/DVI AUDIO IN
9
Connect to the video and audio output jack on your PC.
HDMI IN 1 (DVI), 2, 3, 4
0
No additional Audio connection is needed for an HDMI to
HDMI connection.
Whenusing an HDMI/DVI cable connection, you must use
-
the HDMI IN 1 (DVI) jack.
What is HDMI?
N
High Definition Multimedia interface allows the
-
transmission of high denition digital video data and
multiple channels of digital audio.
The HDMI/DVI terminal supports DVI connection to
-
an extended device with the appropriate cable (not
supplied). The difference between HDMI and DVI is
that the HDMI device is smaller in size, has the HDCP
(High Bandwidth Digital Copy Protection) coding feature
installed, and supports multi - channel digital audio.
We recommend using HDMI cables no more than 14mm
N
wide.
PC/DVI AUDIO IN
DVI audio outputs for external devices.
Supported modes for HDMI/DVI and Component
HDMI/DVI 50Hz X X X O O O O
HDMI/DVI 60Hz X O X X O O O
Component O O O O O O O
! SERVICE
Connector for service.
DIGITAL AUDIO OUT (OPTICAL)
@
Connect to a Digital Audio Component.
480i 480p 576i 576p 720p 1080i 1080p
AV IN (AUDIO L/R / VIDEO)
7
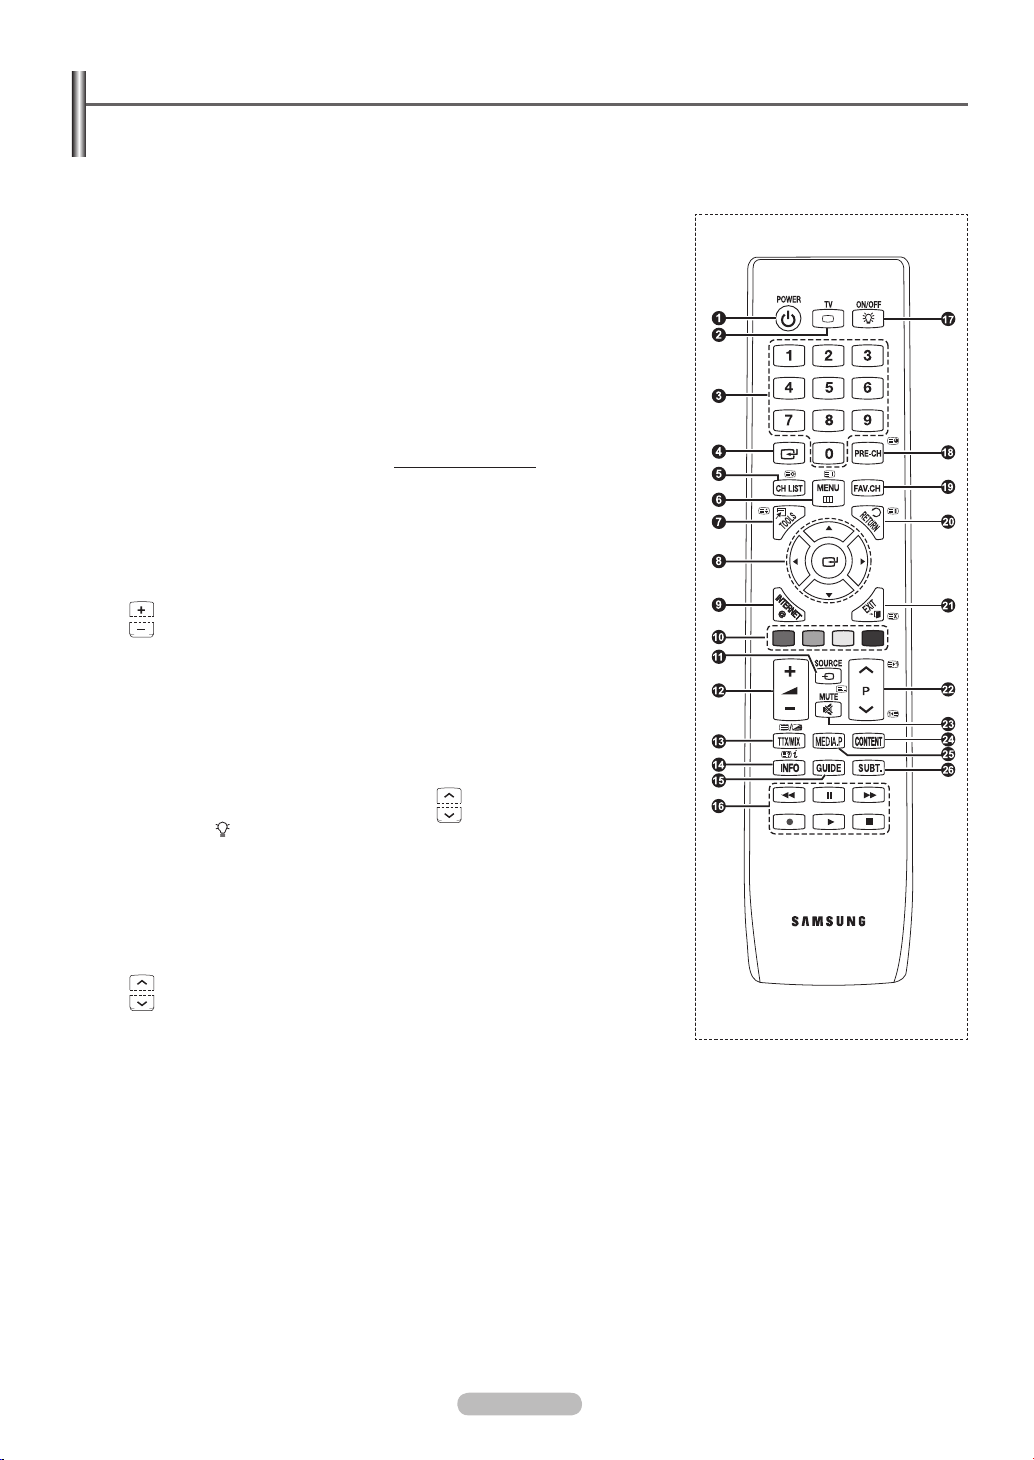
Remote Control
You can use the remote control up to a distance of about 23 feet from the TV.
The performance of the remote control may be affected by bright light.
N
POWER button
1
(turns the TV on and off)
Selects the TV mode directly.
2
Number buttons for direct channel
3
access.
Use to select on-screen menu items
4
Use to display Channel Lists on the
5
screen.
Displays the main on-screen menu.
6
Use to quickly select frequently used
7
functions.
Use to select on-screen menu items
8
and change menu values.
This function enables you to view
9
Internet@TV.
Use these buttons in the Channel list,
0
Media Play, and Internet@TV, etc.
Available source selection
!
Volume increase
@
Volume decrease
Use to see information on the current
$
broadcast.
Digital subtitle display
%
Use these buttons in the Anynet+ and
^
Media Play.
Press to backlight the buttons on the
&
remote. This function is convenient
for using at night or when the room is
dark. (Using the remote control with
the ON/OFF( ) light button set to On
will reduce the battery usage time.)
Previous channel
*
Press to switch to your favorite
(
channels.
Returns to the previous menu.
)
Exit the on-screen menu.
a
Next channel
b
Previous channel
Temporary sound switch-off.
c
This function enables you to view
d
Content Library.
This function enables you to view and
e
play photo, music and movie les from
an external device.
(Refer to pages 38 (Photo), 41 (Music),
and 43 (Movie))
Electronic Program Guide (EPG)
f
display
Teletext Functions
Exit from the teletext display
2
(depending on the model)
Teletext store
5
Teletext index
6
Teletext size
7
Fastext topic selection
0
Teletext mode selection (LIST/FLOF)
!
Teletext display/mix both
#
teletext information and the normal
broadcast
Teletext reveal
$
Teletext sub page
*
Teletext hold
)
Teletext cancel
a
P :Teletext next page
b
P :Teletext previous page
English - 8
English - 9
Installing Batteries in the Remote Control
1. Lift the cover at the back of the remote control upward as shown in the gure.
2. Install two AAA size batteries.
Make sure to match the ‘+’ and ‘–’ ends of the batteries with the diagram inside
N
the compartment.
3. Close the cover.
Remove the batteries and store them in a cool, dry place if you won’t be using the
N
remote control for a long time.
If the remote control doesn’t work, check the following
N
1. Is the TV power on?
2. Are the plus and minus ends of the batteries reversed?
3. Are the batteries drained?
4. Is there a power outage or is the power cord unplugged?
5. Is there a special uorescent light or neon sign nearby?
Using the Remote Control Backlight Buttons
Use this feature in dark surroundings and when you are unable to see the remote control buttons clearly.
1. Press the ON/OFF( ) light button
When ON, the button backlight is turned on for a moment.
N
Pressing a remote control button when the remote control is on turns the button backlight on for a moment. If you touch or move
N
the remote control and the motion is detected by the sensor of the remote control, the button backlight will be turned on for a
moment.
Since there is a vibrating device inside the remote control, shaking the remote control will result in a sound generated by the
N
device.
The button backlight will not be turned on when the remote control is turned off.
N
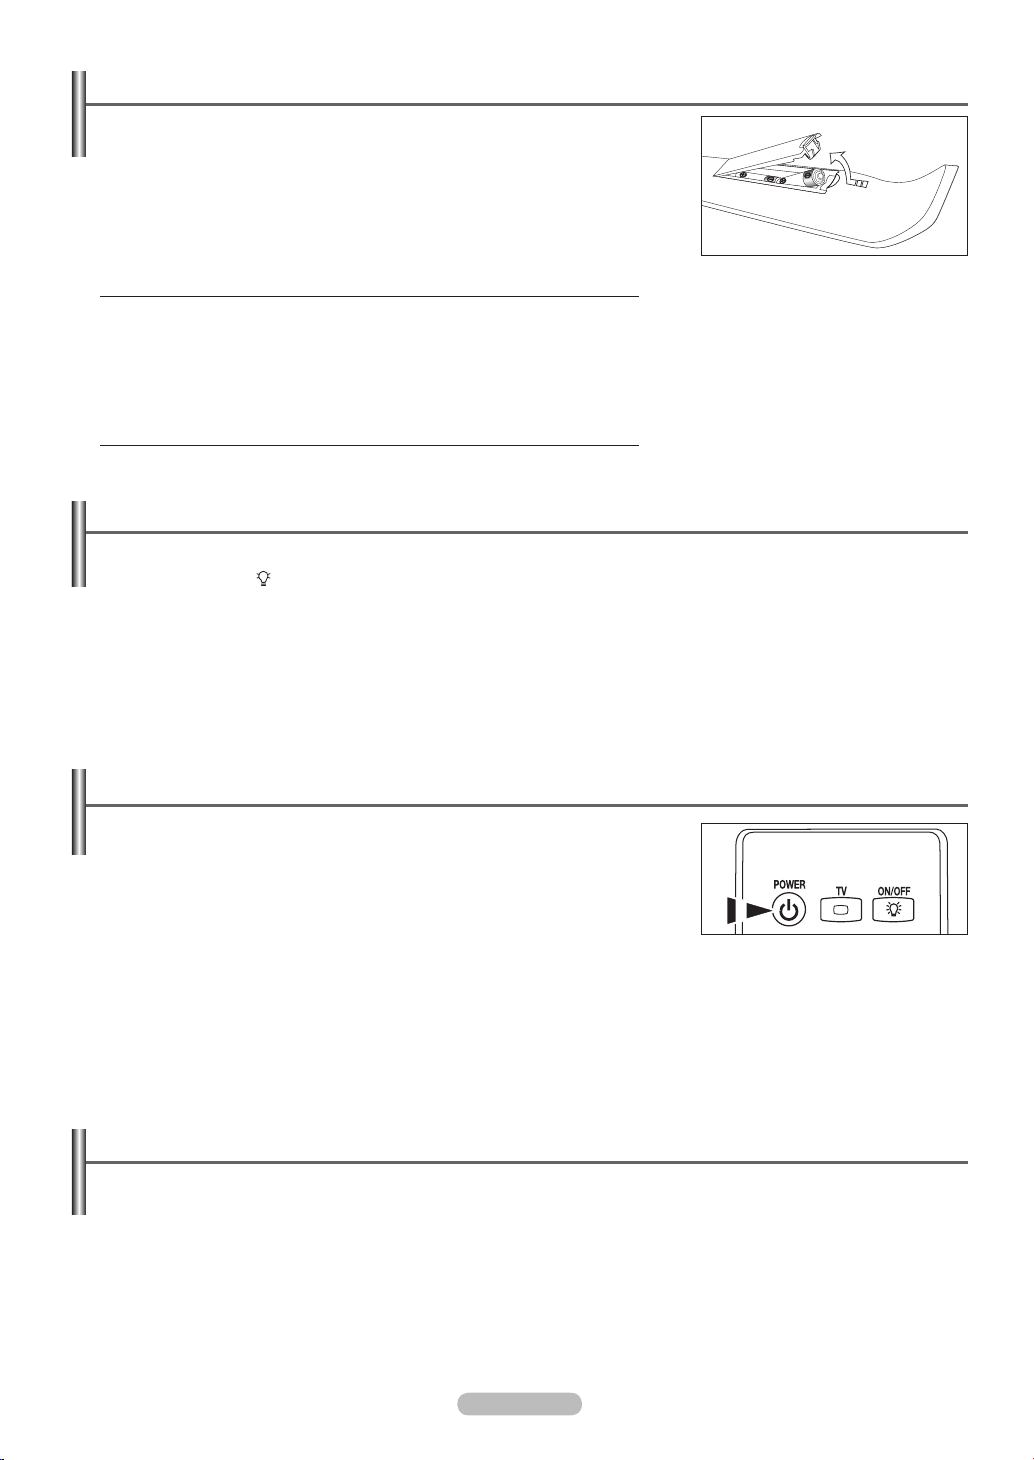
Switching On and Off
The mains lead is attached to the rear of your set.
1. Plug the mains lead into an appropriate socket.
The standby indicator lights up on your set.
N
2. Press the POWERP button on your set.
You also can press the POWERP button or the TV button on the remote control to
N
turn the TV on.
The programme that you were watching last is reselected automatically.
N
3. Press the numeric button (0~9) or channel up / down (< / >) button on the remote control or < CH> button on your set.
When you switch the set on for the very rst time, you will be asked to choose language in which the menus are to be displayed.
N
4. To switch your set off, press the POWERP button again.
Placing Your Television in Standby Mode
Your set can be placed in standby mode in order to reduce the power consumption. The standby mode can be useful when you wish to
interrupt viewing temporarily (during a meal, for example).
1. Press the POWERP button on the remote control.
The screen is turned off and a red standby indicator appears on your set.
N
2. To switch your set back on, simply press the POWERP, numeric buttons (0~9), TV button or channel up / down (< / >) button
again.
Do not leave your set in standby mode for long periods of time (when you are away on holiday, for example). It is best to unplug
N
the set from the mains and aerial.

Viewing the Menus
1. With the power on, press the MENU button. The main menu appears on the
screen. The menu’s left side has icons: Picture, Sound, Channel, Setup, Input,
Application, Support.
2. Press the ▲ or ▼ button to select one of the icons. Then press the ENTERE
button to access the icon’s sub-menu.
3. Press the EXIT button to exit.
The on-screen menus disappear from the screen after about one minute.
N
Using the TOOLS Button
You can use the TOOLS button to select your frequently used functions quickly and
easily. The Tools menu changes depending on which external input mode you are
viewing.
1. Press the TOOLS button. The Tools menu will appear.
2. Press the ▲ or ▼ button to select a menu, then press the ENTERE button.
3. Press the ▲ / ▼ / ◄ / ► / ENTERE buttons to display, change, or use the selected
items. For a more detailed description of each function, refer to the corresponding page.
Anynet+ (HDMI-CEC), see page 55
•
Picture Size, see page 18
•
Picture Mode, see page 17
•
Sound Mode, see page 22
•
Sleep Timer, see page 24
•
SRS TS HD, see page 22
•
Energy Saving, see page 26
•
Dual l ll, see page 23
•
Add to Favourite (or Delete from Favourite), see page 15
•
PIP, see page 27
•
Auto Adjustment, see page 20
•
Picture
Mode
Cell Light : 4
Contrast : 95
Brightness : 45
Sharpness : 50
Colour : 50
Tint (G/R) : G50/R50
Advanced Settings
Picture Size : Auto Wide
Picture Mode : Standard
Sound Mode : Custom
Sleep Timer : Off
SRS TS HD : Off
Energy Saving : Off
Dual l ll : Mono
Add to Favourite
:
Anynet+ (HDMI-CEC)
Standard
Tools
U
Move E Enter e Exit
English - 10
English - 11
Plug & Play Feature
When the TV is initially powered on, basic settings proceed automatically and subsequently.
The Screen Saver is activated if there is no remote control key input for longer than 1 minute while Plug & Play is running.
N
The Screen Saver is activated if there is no operating signal for longer than 15 minutes.
N
If you accidentally select the wrong country for your TV, the characters on the screen may be wrongly displayed.
N
1. Press the POWER button on the remote control. Select the OSD Language. menu
is automatically displayed. Select the appropriate language by pressing the ▲ or ▼
button. Press the ENTERE button to conrm your choice.
2. Press the ◄ or ► button to select Store Demo or Home Use, then press the
ENTER
N
E
button.
We recommend setting the TV to Home Use mode for the best picture in your
Select the OSD Language.
Language :
home environment.
Store Demo mode is only intended for use in retail environments.
N
If the unit is accidentally set to Store Demo mode and you want to return to Home Use (Standard): Press the Volume button on
N
the TV. When the volume OSD is displayed, press and hold the MENU button on the TV for 5 seconds.
3. Press the ENTERE. Select the appropriate country by pressing the ▲ or ▼ button. Press the ENTERE button to conrm your
choice.
4. Press the ▲ or ▼ button to memorize the channels of the selected connection, then press the ENTERE button.
Air: Air antenna signal.
•
Cable: Cable antenna signal.
•
5. Press the ▲ or ▼ button to select the Antenna source to memorize. Press the ENTER
Digital & Analogue: Digital and Analogue channels.
•
Digital: Digital channels.
•
Analogue: Analogue channels.
•
The channel search will start and end automatically.
N
For more detailed description of selecting Cable mode, refer to page 12.
N
E
button to select Start.
6. The message Set the Clock Mode is displayed. Press the ENTERE button. Press the ▲ or ▼ button to select Auto, then press
the ENTERE button.
If you select Manual, Set current date and time is displayed. (For a more detailed description of Manual, refer to page 24)
N
If you have received a digital signal, the time will be set automatically.
N
7. The brief instruction on How to get the best performance from your new HDTV is displayed. Press the ENTERE button.
This menu is available HD Connection Guide in the Support menu.
N
You can change previous or next page by pressing the ◄ / ► button.
N
8. The message Enjoy your TV. is displayed.
If you want to view the TV immediately, select the Watch TV.
N
If you want to view the See Product Guide, press the ENTERE button.
N
Plug & Play
Nederlands
English
Eesti
▲
▼
E Enter
If you want to reset this feature...
1. Press the MENU button to display the menu. Press the ▲ or ▼ button to select Setup,
then press the ENTER
2. Press the ENTER
E
button.
E
button again to select Plug & Play.
3. Enter your 4 digit PIN number. The default PIN number of a new TV set is ‘0-0-0-0’.
If you want to change PIN(Personal Identication Number), refer to page 25.
N
The Plug & Play feature is only available in the TV mode.
N
Setup
Plug & Play ►
Language : English
Time
Game Mode : Off
BD Wise : On
Network Type : Cable
Network Setup
Child Lock : On

Channel Control
Storing Channels
Country
❑
Digital Channel: You can change the country for digital channels.
Analogue Channel: You can change the country for analogue channels.
The PIN number input screen appears. Enter your 4 digit PIN number.
N
Auto Store
❑
Scans for all channels with active broadcast stations (and availability depends on your
country) and stores them in the TV's memory.
You set the TV to memorize the channels of the selected connection.
Air: Air antenna signal.
•
Cable: Cable antenna signal.
•
You can select the antenna source to memorize.
Digital & Analogue: Digital and Analogue channels.
•
Digital: Digital channels.
•
Analogue: Analogue channels.
•
When selecting Cable,
N
Search Mode: Displays the search mode. (Quick)
•
- Network ID: Displays the network identication code.
- Frequency: Displays the frequency for the channel.
- Modulation: Displays available modulation values.
- Symbol Rate: Displays available symbol rates.
Search Mode: Displays the search mode.(Full, Network)
•
- Start Frequency: Displays the frequency start values.
- End Frequency: Displays the frequency stop values.
- Modulation: Displays available modulation values.
- Symbol Rate : Displays available symbol rates.
For more detailed description of Full search mode, refer to page 13.
N
If you want to stop Auto Store, press the ENTER
N
The Stop Auto Store? message will be displayed.
N
Select Yes by pressing the ◄ or ► button, then press the ENTER
N
E
button.
E
button.
Channel
Country ►
Auto Store
Manual Store
Cable Search Option
Full Guide
Mini Guide
Default Guide : Full Guide
Channel List
English - 12
Continued...

English - 13
Manual Store
❑
Scans for a channel manually and stores it in the TV’s memory.
Digital Channel (Digital)
Digital Channel is only available in DTV mode.
N
Channel: Set the Channel number using the ▲, ▼ or number (0~9) buttons.
•
Frequency: Set the frequency using the number (0~9) buttons.
•
Bandwidth: Set the bandwidth using the ▲ or ▼ buttons.
•
When it has nished, channels are updated in the channel list.
N
Analogue Channel
Manual store for analogue channel.
Programme (Programme number to be assigned to a channel): Sets the programme number using the ▲, ▼ or number (0~9)
•
buttons.
Colour System → Auto / PAL / SECAM / NTSC 4.43: Sets the colour system value using the ▲ or ▼ button.
•
Sound System → BG / DK / I / L : Sets the sound system value using the ▲ or ▼ button.
•
Channel (When you know the number of the channel to be stored): Press the ▲ or ▼ button to select C (Air channel) or S
•
(Cable channel). Press the ► button, then press the ▲, ▼ or number (0~9) buttons to select the required number.
If there is abnormal sound or no sound, reselect the sound standard required.
N
Search (When you do not know the channel numbers): Press the ▲ or ▼ button to start the search. The tuner scans the
•
frequency range until the rst channel or the channel that you selected is received on the screen.
E
Store (When you store the channel and associated programme number): Set to OK by pressing the ENTER
•
Channel mode
N
- C (Air channel mode):
- S (Cable channel mode): You can select a channel by entering the assigned number for each cable channel in this mode.
Cable Search Option
❑
You can set additional search options such as frequency and symbol rate for cable network searching. (Depending on the each
country)
Freq.Start : Displays the frequency start values.
•
Freq.Stop : Displays the frequency stop values.
•
Modulation: Displays available modulation values.
•
Symbol Rate: Displays available symbol rates.
•
If the Freq.Start value is bigger than Freq.Stop value, the warning message is displayed.
N
You can select a channel by entering the assigned number to each air broadcasting station in this mode
button.
.
Full Guide / Mini Guide
❑
The EPG (Electronic Programme Guide) information is provided by the broadcasters. Programme entries may appear blank or out
of date as a result of the information broadcast on a given channel. The display will dynamically update as soon as new information
becomes available.
Full Guide: Displays the programme information as time ordered one hour segments. One hours of programme information is
•
displayed which may be scrolled forwards or backwards in time.
Mini Guide: The information of each programme is displayed by each line on the current channel Mini Guide screen from the
•
current programme onwards according to the programme starting time order.
Continued...

Default Guide
❑
Mini Guide / Full Guide
You can decide whether to display either the Mini Guide or the Full Guide when the
GUIDE button on the remote control is pressed.
You can also display the guide menu simply by pressing the GUIDE button.
O
Using the Full / Mini Guide
Full Guide
900 f tn
901 ITV Play
902 Kerrang!
903 Kiss
903 oneword
903 Smash Hits!
▼
DTV Cable 900 f tn 2:10 Tue 1 Jun
Freshmen On Campus
2:00 - 2:30
No Detailed Information
Today 2:00 - 3:00 3:00 - 4:00
Freshmen O..
Street Hypn..
Mint Extra
Loaded
Fresh 40 with Dynamite MC
The Distillery
Smash Hits! Sunday
INFO
Watch
Information
Mini Guide +24 Hours Exit
No Information
No Information
Kisstory
No Information
Mini Guide DTV Cable 900 f tn
2:00
2:30
▼
5:00
Watch
Freshmen On Campus
Street Hypnosis
Booze Britain
INFO
Information
Full Guide Next Page Exit
Full Guide
Mini Guide
Channel
Default Guide : Full Guide ►
Channel Mode
Channel List
Channel Mode : Added Ch.
Fine Tune
▲ / ▼ / ◄ / ►
ENTER
,
Select a programme by pressing the ▲/▼/◄/►/ENTERE button.
RED Toggle between the Mini Guide or Full Guide.
GREEN
YELLOW
Full Guide: Scroll backwards quickly (-24 hours).
Mini Guide: Display previous page quickly.
Full Guide: Scroll forwards quickly (+24 hours).
Mini Guide: Display next page quickly.
BLUE Exit the guide.
INFO INFO button for the detailed information.
Channel Mode
❑
When the press the P (</>) button, Channels will be switched within the selected channel list.
Added Ch.:
Favourite Ch.:
Fine Tune (Analogue channel only)
❑
Channels will be switched within the memorized channel list.
Channels will be switched within the favourite channel list.
If the reception is clear, you do not have to ne tune the channel, as this is done automatically during the search and store
operation. If the signal is weak or distorted, you may have to ne tune the channel manually.
Fine tuned channels that have been saved are marked with an asterisk * on the right-hand side of the channel number in the
N
channel banner.
If you do not store the ne-tuned channel in memory, adjustments are not saved.
N
To reset the ne-tuning, select Reset by pressing the ▼ button and then press the ENTER
N
E
button.
English - 14

English - 15
Managing Channels
Using this menu, you can Add / Delete or set Favourite channels and use the programme
guide for digital broadcasts.
Select a channel in the All Channels, Added Channels, Favourites, or Programmed
N
screen by pressing the ▲ or ▼ buttons, and pressing the ENTERE button.
Then you can watch the selected channel.
All Channels: Shows all currently available channels.Shows all currently available channels.
•
Added Channels: Shows all added channels.Shows all added channels.
•
Favourites: Shows all favourite channels.Shows all favourite channels.
•
Programmed: Shows all current reserved programmes.Shows all current reserved programmes.
•
Press the CH LIST button on the remote control to bring up the channel lists.
O
Using the Colour buttons with the Channel List
N
Red (Channel Type): Toggle between your TV, Radio, Data/Other and All.
-
Green (Zoom): Enlarges or shrinks a channel number.
-
Yellow (Select): Selects multiple channel lists.
-
T
TOOLS (Tools): Displays the Delete (or Add), Add to Favourite (or Delete from
-
Favourite), Lock (or Unlock), Timer Viewing, Edit Channel Name, Edit Channel
Number, Sort, Select All (or Deselect All), or Auto Store menu.
(The Tools menus may differ depending on the situation.)
Channel Status Display Icons
N
A channel selected by pressing the
An Analogue channel.
A
A channel set as a Favourite.
♥
\
A locked channel.
Channel List Tools Menu (in All Channels / Added Channels / Favourites)
❑
Press the TOOLS button to use the Tools menu.
N
The Tools menu items may differ depending on the channel status.
N
c
yellow button.
A programme currently being
(
broadcast.
)
A reserved programme
Mini Guide
Default Guide : Full Guide
Channel
Channel List
Channel Mode : Added Ch.
Fine Tune
824 UKTV Gold
All Channels
825 UKTV style
A 1 C --
A 2 C
A 3 ♥ C
A 4 C
A 5 C
A 6 C
A 7 C
A 8 C
All
Channel Type Zoom Select
--
--
--
--
--
--
--
Tools
Add / Delete
You can delete or add a channel to display the channels you want.
All deleted channels will be shown on All Channels menu.
N
A gray-coloured channel indicates the channel has been deleted.
N
The Add menu only appears for deleted channels.
N
You can also delete a channel to the Added Channels or Favourites menu in the
N
same manner.
Add to Favourite / Delete from Favourite
You can set channels you watch frequently as favourites.
Press the TOOLS button to display Tools menu.
T
824 UKTV Gold
All Channels
825 UKTV style
A 1 C --
A 2 C
A 3 C
A 4 C
A 5 C
A 6 C
A 7 C
A 8 C
All
Channel Type Zoom Select
Delete
Add to Favourite
--
Lock
--
Timer Viewing
--
Edit Channel Name
--
Sort
--
--
--
You can also add the favourite channel by selecting Tools → Add to Favourite
(or Delete from Favourite).
To select the Favourite channels you have set up, press the FAV.CH button on the
O
remote control.
The “♥” symbol will be displayed and the channel will be set as a favourite.
N
All favourite channels will be shown on Favourite menu.
N
Lock / Unlock
You can lock a channel so that the channel cannot be selected and viewed. This function is available only when the Child Lock is
set to on. (see page 25)
The PIN number input screen appears. Enter your 4 digit PIN number.
N
The default PIN number of a new TV set is ‘0-0-0-0’. You can change the PIN, by selecting Change PIN from the menu.
N
The “\” symbol will be displayed and the channel will be locked.
N
▼
Tools
Continued...
Timer Viewing
If you reserve a programme you want to watch, the channel is automatically switched to the reserved channel in the Channel List;
even when you are watching another channel. To reserve a programme set the current time rst. (See page 24)
Only memorized channels can be reserved.
N
You can set the channel, month, day, year, hour and minute directly by pressing the number buttons on the remote control.
N
Reserving a programme will be shown on Programmed menu.
N
Digital Programme Guide and Viewing Reservation
N
When a digital channel is selected, and you press the ► button, the Programme Guide for the channel appears.
You can reserve a programme according to the procedures described above.
Edit Channel Name (Analogue channel only)
Channels can be labeled so that their call letters appear whenever the channel is selected.
The names of digital broadcasting channels are automatically assigned and cannot be labeled.
N
Edit Channel NumberNumber (Analogue channel only)
You can also edit the channel number by pressing the number buttons on the remote control.
Sort (Analogue channel only)
This operation allows you to change the programme numbers of the stored channels. This operation may be necessary after using
the auto store.
Select All / Deselect All
You can deselect or select all channels in the channel list.
You can perform the Add / Delete, Add to Favourites / Delete from Favourites, or Lock / Unlock function for multiple channels at
N
the same time. Select the required channels and press the yellow button to set all the selected channels at the same time.
The c mark appears to the left of the selected channels.
N
You can only select Deselect All when there is a selected channel.
N
Auto Store
For further details on setting up options, refer to page 12.
N
If a channel is locked using the Child Lock function, the PIN input window appears.
N
Channel List Tools Menu (in Programmed )
❑
You can view, modify or delete a reservation.
Press the TOOLS button to use the Tools menu.
N
Change Info: Select to change a viewing reservation.
•
Cancel Schedules: Select to cancel a viewing reservation.
•
Information: Select to view a viewing reservation. (You can also change the reservation
•
information.)
Select All / Deselect All: Select or deselect all reserved programmes.
•
Programmed
1 / 1 / 2009
13:59 5 TV1 Quincy, M.E
18:59 2 TV3 The Equalizer
20:59 2 TV3 McMillan & Wife
21:59 2 TV3 M.Spillane’s mike Hammer
All
Zoom Select
Change Info
Cancel Schedules
Information
Select All
Tools Information
English - 16
English - 17
Picture Control
Changing the Picture Settings
Mode
❑
You can select the type of picture which best corresponds to your viewing requirements.
Dynamic / Standard / Eco / Movie
Press the TOOLS button to display Tools menu.
T
You can also set the picture mode by selecting Tools → Picture Mode.
When in PC mode, Eco is not available.
N
Cell Light / Contrast / Brightness / Sharpness / Colour / Tint (G/R)
❑
Your television has several setting options that allow you to control the picture quality.
Cell Light: Adjusts the pixel brightness.
•
Contrast: Adjusts the contrast level.
•
Brightness: Adjusts the brightness level.
•
Sharpness: Adjusts the sharpness.
•
Colour: Adjusts the colour saturation of the picture using the bar on the screen.
•
Tint (G/R): Adjusts the colour tint of the picture.
•
When you make changes to Cell Light, Contrast, Brightness, Sharpness, Colour or Tint (G/R), the OSD will be adjusted
N
accordingly.
The adjusted values are saved for each picture mode.
N
In Analogue TV, Ext., AV modes of the PAL system, you cannot use the Tint Function.
N
In PC mode, you can only make changes to Cell Light, Contrast and Brightness.
N
Each adjusted setting will be stored separately according to its input mode.
N
The energy consumed during use can be signicantly reduced if the level of brightness of the picture is reduced, and then this
N
will reduce the overall running cost.
Advanced Settings
❑
You can adjust the advanced settings for your screen including the colour and contrast.
Advanced Settings is available in Standard or Movie mode.
N
In PC mode, you can only make changes to Dynamic Contrast, Gamma and
N
White Balance from among the Advanced Settings items.
Black Tone →→ Off / Dark / Darker / Darkest
You can enhance the picture depth by adjusting the black colour density.
Dynamic Contrast →→ Off / Low / Medium / High
You can adjust the screen contrast so that the optimal contrast is provided.
Gamma
You can adjust the primary colour (Red, Green, Blue) Intensity.
Colour Space
Colour Space is a colour matrix composed of red, green and blue colours. Select your favourite Colour Space to experience the
most natural colour.
Auto: Automatically sets the colour range depending on the input video source.
•
Native: Sets the colour range wider than the that of the input video source.
•
Custom: Adjusts the colour range to suit your preference.
•
Customizing the Colour Space
N
- Adjusts the Colour range to suit your preference. Colour is available when Colour Space is set to Custom.
- Colour →→ Red / Green / Blue / Yellow / Cyan / Magenta
- Red / Green / Blue: You can adjust the RGB values for the selected colour.
- Reset: Resets the colour space to the default values.
Picture
Mode : Standard ►
Cell Light : 4
Contrast : 95
Brightness : 45
Sharpness : 50
Colour : 50
Tint (G/R) : G50/R50
Advanced Settings
Colour : 50
Tint (G/R) : G50/R50
Picture
Advanced Settings ►
Picture Options
Picture Reset
White Balance
You can adjust the colour temperature for more natural picture colours.
R-Offset / G-Offset / B-Offset / R-Gain / G-Gain / B-Gain: Changing the adjustment value will refresh the adjusted screen.
•
Reset: Resets the default white balance.
•
Continued...
Flesh Tone
You can adjust the esh tone to be more or less red.
Changing the adjustment value will refresh the adjusted screen.
N
Edge Enhancement →→ Off / On
You can emphasize object boundaries in the picture.
xvYCC → Off / On
Setting the xvYCC mode to on increases detail and colour space when watching movies from an external device (i.e. DVD player).
xvYCC is available when the picture mode is set to Movie, and the external input is set to HDMI or Component mode.
N
Picture Options
❑
You can customize the additional picture settings to suit your preference.
In PC mode, you can only make changes to the Colour Tone, Size and Screen
N
Burn Protection from among the items in Picture Options.
Colour Tone →→ Cool / Normal / Warm1 / Warm2 / Warm3
Tint (G/R) : G50/R50
Advanced Settings
Picture
Picture Options ►
Picture Reset
You can select the most comfortable colour tone to your eyes.
The adjusted values are stored according to the selected Picture mode.
N
Warm1, Warm2, or Warm3 is only activated when the picture mode is Movie.
N
Size → Auto Wide / 16:9 / Wide Zoom / Zoom / 4:3 / Screen Fit
You can select the picture size which best corresponds to your viewing requirements.
Auto Wide: Sets the picture in Auto Wide format.
•
16:9: Sets the picture to the 16:9 aspect ratio.
•
Wide Zoom: Select this menu to view 4:3 aspect ratio pictures over a 16:9 aspect ratio TV by stretching the 4:3 picture
•
vertically.
Zoom: Stretches the 16:9 aspect ratio picture vertically.
•
4:3: Sets the picture to the 4:3 aspect ratio.
•
Screen Fit: Displays the full native HD signal that cannot be viewed using a normal TV.
•
Depending on the input source, the picture size options may vary.
N
The items available may differ depending on the selected mode.
N
In PC Mode, only 16:9 and 4:3 mode can be adjusted.
N
When Double ( , ) mode has been set in PIP, the Picture Size cannot be set.
N
Settings can be adjusted and stored for each external device you have connected to an input of the TV.
N
Temporary image retention may occur when viewing a static image on the set for more than two hours.
N
Wide Zoom: Press the ► button to select Position, then press the ENTERE button.
N
Press the ▲ or ▼ button to move the screen up / down. Then press the ENTERE button.
Zoom: Press the ► button to select Position, then press the ENTERE button. Press the ▲ or ▼ button to move the
N
picture up and down. Then press the ENTERE button. Press the ► button to select Size, then press the ENTERE button.
Press the ▲ or ▼ button to magnify or reduce the picture size in the vertical direction. Then press the ENTERE button.
After selecting Screen Fit in HDMI (1080i / 1080p) or Component (1080i / 1080p) mode: Select Position by pressing
N
the ◄ or ►button. Use the ▲, ▼, ◄ or ► button to move the picture.
Reset: Press the ◄ or ► button to select Reset, then press the ENTERE button. You can initialize the setting.
N
If you use the Screen Fit function with HDMI 720p input, 1 line will be cut at the top, bottom, left and right as in the overscan
N
function.
Screen Mode → 16:9 / Wide Zoom / Zoom / 4:3
When setting the picture size to Auto Wide in a 16:9 wide TV, you can determine the picture size you want to see the 4:3 WSS
(Wide Screen Service) image or nothing. Each individual European country requires different picture size so this function is
intended for users to select it.
This function is available in Auto Wide mode.
N
This function is not available in PC, Component or HDMI mode.
N
Digital NR →→ Off / Low / Medium / High / Auto
If the broadcast signal received by your TV is weak, you can activate the Digital Noise Reduction feature to help reduce any static
and ghosting that may appear on the screen.
When the signal is weak, select one of the other options until the best picture is displayed.
N
HDMI Black Level →→ Normal / Low
You can directly select the black level on the screen to adjust the screen depth.
This function is active only when the external input connects to HDMI (RGB signals).
N
Continued...
English - 18
English - 19
1080 Full HD Motion Demo → Off / On
Samsung's new generation PDP panels deliver stunning Full HD motion clarity when viewing fast action sports, movies, and games.
This function is not available in PC, Game or Media Play mode.
N
Film Mode
You can optimize the picture mode for watching movies.
Off: Turn the Film Mode function off.
•
Auto1: Automatically adjusts the picture for the best quality when watching a lm.
•
Auto2: Automatically optimizes the video text when watching a lm.
•
Cinema Smooth: Offers the ultimate cinema experience.
•
Film mode is supported in TV, Video, Component(480i / 1080i) and HDMI(1080i).
N
Real 100Hz Demo → Off / On
You can get a clear distinction between Real 100Hz and 50Hz, especially when watching fast moving scenes. Therefore, when
seeing slow moving scenes, you will not be able to distinguish between Real 100Hz and 50Hz. Demo 100Hz works only with 50Hz
signal. Real 100Hz demo mode is provided for shop demonstration with special pictures.
Blue Only Mode → Off / On
This function is for AV device measurement experts. This function displays the blue signal only by removing the red and green
signals from the video signal so as to provide a Blue Filter effect that is used to adjust the Colour and Tint of video equipment such
as DVD players, Home Theaters, etc.
Blue Only Mode is available when the picture mode is set to Movie or Standard.
N
Screen Burn Protection
To reduce the possibility of screen burn, this unit is equipped with screen burn prevention technology. This technology enables you
to set picture movement up/down (Vertical) and side to side (Horizontal). The Time setting allows you to program the time between
movement of the picture in minutes.
Pixel Shift: Using this function, you can minutely move pixels on the PDP in horizontal or vertical direction to minimize after
•
image on the screen.
Optimum condition for pixel shift
N
Item TV/Ext./AV/Component/HDMI/PC
Horizontal 0~2 2
Vertical 0~4 4
Time (minute) 1~4 min 2 min
The Pixel Shift value may differ depending on the monitor size (inches) and mode.
N
This function is not available in the Screen Fit mode.
N
Scrolling: This function helps remove after images on the screen by moving all the pixels on the PDP according to a pattern.
•
Use this function when there are remaining after images or symbols on the screen especially when you displayed a still image
on the screen for a long time.
Side Grey: When you watch TV with the screen ratio of 4:3, the screen is prevented from any damage by adjusting the white
•
balance on both extreme left and right sides.
- Light: When you set the screen ratio to 4:3, it brightens the left and right sides.
- Dark: When you set the screen ratio to 4:3, it darkens the left and right sides.
Picture Reset →→ Reset Picture Mode / Cancel
❑
Resets all picture settings to the default values.
Select a picture mode to be reset. The reset is performed for each picture mode.
N
Advanced Settings
Picture
Picture Options
Picture
Picture Reset ►

Setting up the TV with your PC
Preset: Press the SOURCE button to select PC mode.
N
Auto Adjustment
❑
Auto Adjustment allows the PC screen of set to self-adjust to the incoming PC video
signal. The values of ne, coarse and position are adjusted automatically.
This function does not work in DVI-HDMI mode.
N
Press the TOOLS button to display Tools menu.
T
You can also set the auto adjustment by selecting Tools → Auto Adjustment.
Screen
❑
The purpose of picture quality adjustment is to remove or reduce picture noise. If the
noise is not removed by Fine-tuning alone, then adjust the frequency as best as possible
(Coarse) and Fine-tune again. After the noise has been reduced, readjust the picture so
that it is aligned on the center of screen.
Coarse
Adjusts the frequency when vertical noise appears on the screen.
Fine
Adjusts the screen to be clearer.
PC Position
Adjust the PC’s screen positioning if it does not t the TV screen. Press the ▲ or ▼ button to adjusting the Vertical-Position.
Press the ◄ or ► button to adjust the Horizontal-Position.
Image Reset
You can replace all image settings with the factory default values.
Brightness : 45
Sharpness : 50
Picture
Auto Adjustment ►
Screen
Advanced Settings
Picture Options
Picture Reset
English - 20
English - 21
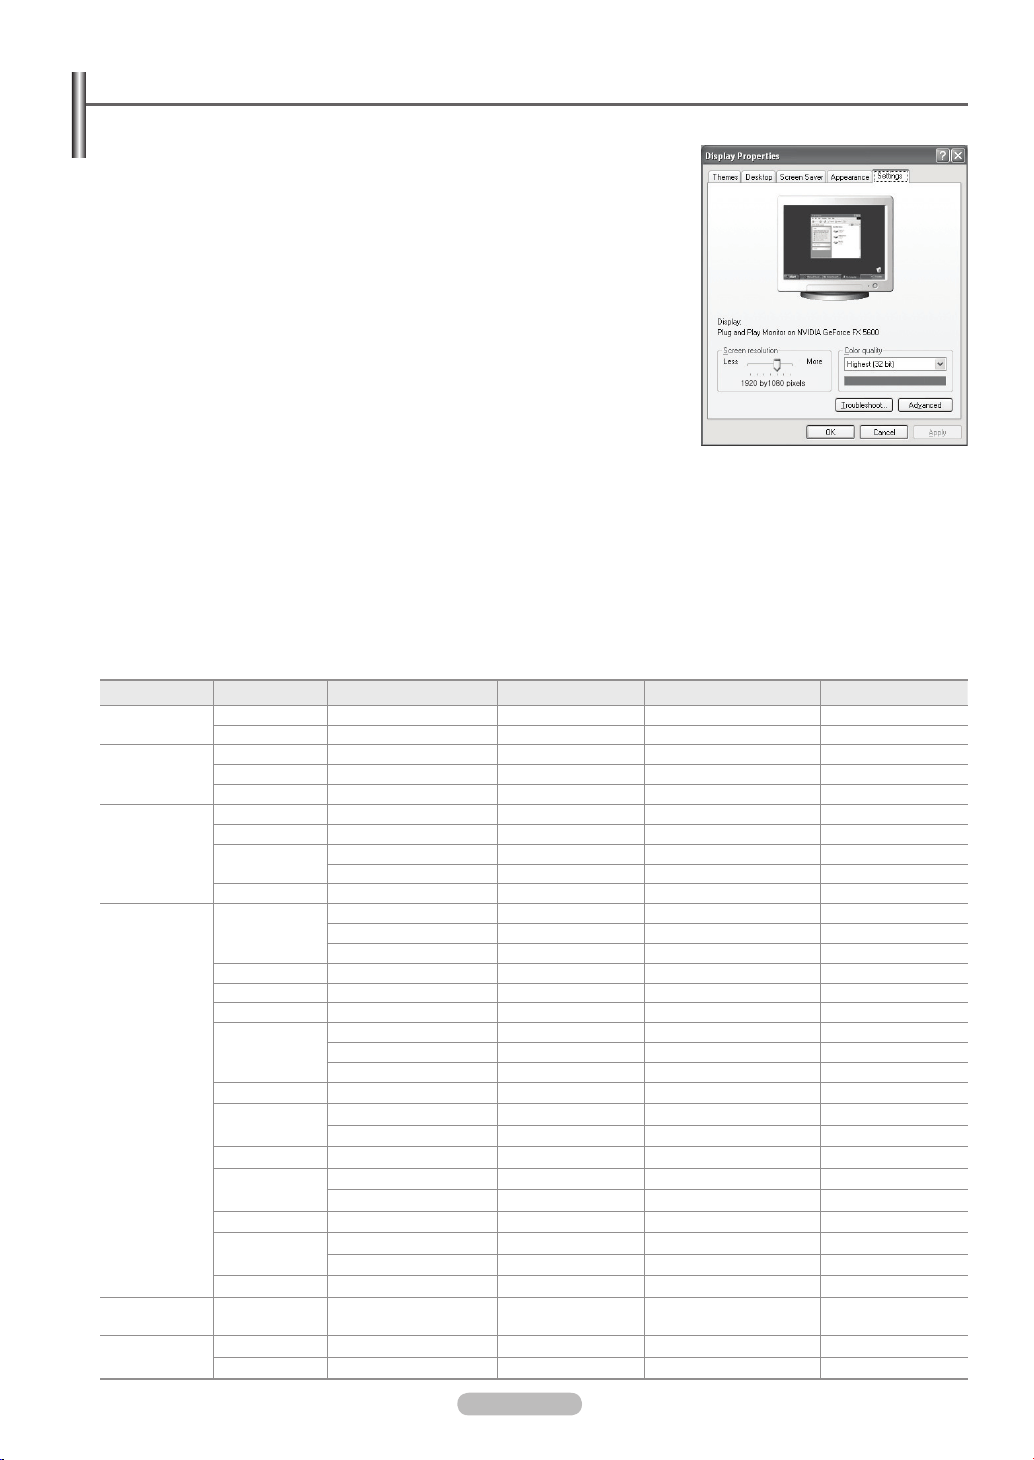
PC Display
Setting Up Your PC Software (Based on Windows XP)
❑
The Windows display-settings for a typical computer are shown below. The actual
screens on your PC will probably be different, depending upon your particular version
of Windows and your particular video card. However, even if your actual screens
look different, the same basic set-up information will apply in almost all cases. (If not,
contact your computer manufacturer or Samsung Dealer.)
1. First, click on ‘Control Panel’ on the Windows start menu.
2. When the control panel window appears, click on ‘Appearance and Themes’ and a
display dialog-box will appear.
3. When the control panel window appears, click on ‘Display’ and a display dialog-box
will appear.
4. Navigate to the ‘Settings’ tab on the display dialog-box.
The correct size setting (resolution)
Optimum: 1920 X 1080 pixels
If a vertical-frequency option exists on your display settings dialog box, the correct
value is ‘60’ or ‘60 Hz’. Otherwise, just click ‘OK’ and exit the dialog box.
Display Modes
❑
Both screen position and size will vary depending on the type of PC monitor and its resolution.
The resolutions in the table are recommended.
When using an HDMI/DVI cable connection, you must use the HDMI IN 1(DVI) jack.
N
The interlace mode is not supported.
N
The set might operate abnormally if a non-standard video format is selected.
N
Separate and Composite modes are supported. SOG is not supported.
N
Too long or low quality VGA cable can cause picture noise at high resolution modes (1920x1080).
N
D-Sub and HDMI/DVI Input
Mode Resolution Horizontal Frequency (kHz) Vertical Frequency (Hz) Pixel Clock Frequency (MHz) Sync Polarity (H/V)
IBM
MAC
VESA CVT
VESA DMT
VESA DMT /
DTV CEA
VESA GTF
640 x 350 31.469 70.086 25.175 + / 720 x 400 31.469 70.087 28.322 - / +
640 x 480 35.000 66.667 30.240 - / 832 x 624 49.726 74.551 57.284 - / -
1152 x 870 68.681 75.062 100.000 - / +
720 x 576 35.910 59.950 32.750 - / +
1152 x 864 53.783 59.959 81.750 - / +
1280 x 720
1280 x 960 75.231 74.857 130.000 - / +
640 x 480
800 x 600 37.879 60.317 40.000 + / +
800 x 600 48.077 72.188 50.000 + / +
800 x 600 46.875 75.000 49.500 + / +
1024 x 768
1152 x 864 67.500 75.000 108.000
1280 x 800
1280 x 960 60.000 60.000 108.000
1280 x 1024
1360 x 768 47.712 60.015 85.500
1440 x 900
1680 x 1050 65.290 59.954 146.250
1920 x 1080p 67.500 60.000 148.500
1280 x 720 52.500 70.000 89.040
1280 x 1024 74.620
44.772 59.855 74.500 - / +
56.456 74.777 95.750 - / +
31.469 59.940 25.175 - / -
37.861 72.809 31.500 - / -
37.500 75.000 31.500 - / -
48.363 60.004 65.000 - / -
56.476 70.069 75.000 - / -
60.023 75.029 78.750 + / +
49.702 59.810 83.500
62.795 74.934 106.500
63.981 60.020 108.000
79.976 75.025 135.000
55.935 59.887 106.500
70.635 74.984 136.750
70.000
128.943
+ / +
- / +
- / +
+ / +
+ / +
+ / +
+ / +
- / +
- / +
- / +
+ / +
- / +
- / -

Sound Control
Changing the Sound Setting
Mode
❑
You can select the type of special sound effect to be used when watching a given
broadcast.
Standard / Music / Movie / Clear Voice / Custom
Press the TOOLS button to display Tools menu.
T
You can also congure the sound mode by selecting Tools → Sound Mode.
Equalizer
❑
The sound settings can be adjusted to suit your personal preferences.
Mode: You can select a sound mode to suit your personal preferences.
•
Balance: Controls the balance between the right and left speakers.
•
100Hz / 300Hz / 1KHz / 3KHz / 10KHz (Bandwidth Adjustment): Adjusts the level of different bandwidth frequencies
•
Reset: Resets the equalizer settings to the default values.
•
SRS TruSurround HD → Off / On
❑
SRS TruSurround HD is the combined technology of TruSurround and FOCUS, TruBass.
SRS TruSurround HD enables you to enjoy a virtual 5.1 Surround Sound effect over the TV's two speakers.
This function provides not only rich deep bass also improves high frequency resolution.
Press the TOOLS button to display Tools menu.
T
You can also set the SRS TruSurround HD by selecting Tools → SRS TS HD.
Sound
Mode : Custom
Equalizer
SRS TruSurround HD : Off
Audio Language : ---Audio Format : ----
Audio Description
Auto Volume : Off
Speaker Select : TV Speaker
►
TruSurround HD, SRS and the symbol are trademarks of SRS Labs, Inc.
TruSurround HD technology is incorporated under license from SRS Labs, Inc.
If the sound is abnormal while TV is playing music, please adjust the equalizer and SRS TruSurround HD (Off/On).
N
Audio Language (Digital channel only)
❑
You can change the default value for audio languages. Displays the language information for the incoming stream.
You can only select the language among the actual languages being broadcast.
N
Audio Format → MPEG / Dolby Digital (Digital channel only)
❑
When sound is emitted from both the main speaker and the audio receiver, a sound echo may occur due to the decoding speed
difference between the main speaker and the audio receiver. In this case, use the TV Speaker function.
You can only select the language among the actual languages being broadcast.
N
Manufactured under license from Dolby Laboratories.
Dolby and the double-D symbol are trademarks of Dolby Laboratories.
Audio Description (Digital channel only)
❑
This is an auxiliary audio function that provides an additional audio track for visually challenged persons. This function handles the
Audio Stream for the AD (Audio Description), when it is sent along with the Main audio from the broadcaster. Users can turn the
Audio Description On or Off and control the volume.
Audio Description →→ Off / On
Turn the audio description function on or off.
Volume
Adjusts the audio description volume.
Volume is active when Audio Description is set to On.
N
English - 22
Continued...
English - 23
Auto Volume → Off / On
❑
Each broadcasting station has its own signal conditions, and so it is not easy to adjust the volume every time the channel is
changed. This feature lets you automatically adjust the volume of the desired channel by lowering the sound output when the
modulation signal is high or by raising the sound output when the modulation signal is low.
Speaker Select → External Speaker / TV Speaker
❑
If you want to hear the sound through separate speakers, cancel the internal amplier.
The – +, MMUTE buttons do not operate when the Speaker Select is set to External Speaker.
N
If you select External Speaker in the Speaker Select menu, the sound settings will be limited.
N
TV's Internal Speakers
TV / Ext. / AV / Component / PC / HDMI
Audio Out (Optical, L / R Out) to Sound System
TV / Ext. / AV / Component / PC / HDMI
TV Speaker Speaker Output Sound Output
External Speaker Mute Sound Output
Video No Signal Mute Mute
Sound Select
❑
When the PIP feature is activated, you can listen to the sound of the sub (PIP) picture.
Main: Listen to the sound of the main picture.
•
Sub: Listen to the sound of the sub picture.
•
Press the TOOLS button to to display Tools menu. You can also set the sound
T
of the sub picture by selecting Tools → PIP → Sound Select.
You can select this option when PIP is set to On.
N
Sound Reset
❑
Reset All / Reset Sound Mode / Cancel:
factory defaults.
You can restore the Sound settings to the
Speaker Select : TV Speaker
Sound Select : Main
Sound
Sound Reset ►
Selecting the Sound Mode
When you set to Dual l ll, the current sound mode is displayed on the screen.
Type of broadcast
Regular broadcast
(Standard audio)
NICAM
Stereo
A2
Stereo
If the stereo signal is weak and an automatic switching occurs, then switch to the mono.
N
This function is only activated in stereo sound signal. It is deactivated in mono sound signal.
N
This function is only available in TV mode.
N
Press the TOOLS button to to display Tools menu.
T
Regular + NICAM Mono
NICAM-Stereo
NICAM Dual-I/II
Regular broadcast
(Standard audio)
Bilingual or DUAL-I/II
Stereo Stereo
You can also select the sound mode by selecting Tools → Dual l ll.
NICAM
NICAM
Stereo
NICAM
Dual-1
Dual I Dual II
On-screen indication
Mono (Normal use)
NICAM
Dual-2
Mono (Normal use)
Mono
(Normal)
Mono
(Normal)
Mono
(Normal)
Mono
(Forced mono)
Function Description
Setting the Time
Clock
❑
Setting the clock is necessary in order to use the various timer features of the TV.
The current time will appear every time you press the INFO button.
N
If you disconnect the power cord, you have to set the clock again.
N
Clock Mode
You can set up the current time manually or automatically.
Auto: Set the current time automatically using the time from the digital broadcast.
•
Manual: Set the current time to a manually specied time.
•
Clock Set
You can set the current time manually.
Set up this item when you have set Clock Mode to Manual.
N
You can set the Day, Month, Year, Hour, Minute directly by pressing the number
N
buttons on the remote control.
Sleep Timer → Off / 30 min / 60 min / 90 min / 120 min / 150 min
❑
/ 180 min
Plug & Play
Language : English
Setup
Time ►
Game Mode : Off
BD Wise : On
Network Type : Cable
Network Setup
Child Lock : On
Change PIN
Parental Lock
Time
Clock : -- : -- ►
Sleep Timer : Off
Timer 1 : Inactivated
Timer 2 : Inactivated
Timer 3 : Inactivated
U
Move E Enter R Return
The sleep timer automatically shuts off the TV after a preset time.
(30, 60, 90, 120, 150 and 180 minutes).
The TV automatically switches to standby mode when the timer reaches 0.
N
To cancel the Sleep Timer function, select Off.
N
Press the TOOLS button to display Tools menu.
T
You can also set the sleep timer by selecting Tools → Sleep Timer.
Timer 1 / Timer 2 / Timer 3
❑
You can set the TV to turn on or off at a desired time.
On Time: Sets the time for the TV to turn on.
•
Off Time: Sets the time for the TV to turn off.
•
Volume: Set the required volume level.
•
Source : Selects TV, USB device.
•
When you select the TV, you can set the Antenna and Channel.
N
Antenna: Selects Air or Cable.
-
Channel: Select the desired channel.
When you select the USB, you can set the Contents.
N
Contents: Selects the desired contents on the USB.
-
Repeat : Select Once, Everyday, Mon~Fri, Mon~Sat, Sat~Sun or Manual.
•
When Manual is selected, press the ► button to select the desired day of the week. Press the ENTERE button over the
N
desired day and the c mark will appear.
The whole folder on the USB are supports English 64 character.
N
You must set the clock rst.
N
You can set the hour, minute and programme by pressing the number buttons on the remote control.
N
Auto Power Off
N
When you set the timer On, the television will eventually turn off, if no controls are operated for 3 hours after the TV was turned on
by the timer. This function is only available in timer On mode and prevents overheating, which may occur if a TV is on for too long
time.
English - 24

English - 25
Configuring the Setup Menu
Language
❑
You can set the menu language.
Plug & Play
Game Mode →→ Off / On
❑
When connecting to a game console such as PlayStationTM or XboxTM, you can enjoy
a more realistic gaming experience by selecting the game menu.
When the Game Mode is On
Picture Mode is automatically changed to Standard and users cannot change
•
the mode.
Sound Mode is automatically changed to Custom and users cannot change the
•
mode. Adjust the sound using the equalizer.
The Reset in the Sound menu is activated. Reset function initializes the Equalizer settings to the factory default setting.
•
Game Mode is not available in regular TV mode or Game Mode set to Off.
N
If the picture is poor when external device is connected to TV, check if Game Mode is On.
N
If you display the TV menu in Game mode, the screen shakes slightly.
N
The mark appears on the screen which means that Game Mode is on with the selected source.
N
This function supports only game function.
N
Game mode is not available in PC mode.
N
BD Wise → Off / On
❑
Wise is a function that enables you automatically to set the optimum condition all connected Samsung devices that support BD
Wise.
This function is active only when an external device is connected to the TV via HDMI.
N
When the BD Wise set to On, picture mode is automatically changed under the conditions
N
Setup
Language : English ►
Time
Game Mode : Off
BD Wise : On
Network Type : Cable
Network Setup
Child Lock : On
Change PIN
Child Lock → Off / On
❑
This feature allows you to prevent unauthorized users, such as children, from watching unsuitable programmes by muting out video
and audio.
Before the setup screen appears, the PIN number input screen appears. Enter your 4 digit PIN number.
N
The default PIN number of a new TV set is ‘0-0-0-0’. You can change the PIN by selecting Change PIN from the menu.
N
You can lock some channels in Channel List. (refer to page 15)
N
Child Lock is available only in TV mode.
N
Change PIN
❑
You can change your personal ID number that is required to set up the TV.
Before the setup screen appears, the PIN number input screen appears. Enter your 4 digit PIN number
N
(The default PIN number : ‘0-0-0-0’).
If you forget the PIN code, press the remote control buttons in the following sequence, which resets the PIN to ‘0-0-0-0’:
N
POWER (Off), MMUTE, 8, 2, 4, POWER (On).
Parental Lock
❑
This feature allows you to prevent unauthorized users, such as children, from watching unsuitable programmes by a 4-digit PIN
(Personal Identication Number) code that is dened by the user.
The Parental Rating item differs depending on the country.
N
Before the setup screen appears, the PIN number input screen appears. Enter your 4 digit PIN number.
N
The default PIN number of a new TV set is ‘0-0-0-0’. You can change the PIN by selecting Change PIN from the menu.
N
When the parental ratings are set, the “\” symbol is displayed.
N
Allow All / Block All: Press to unlock or lock all TV ratings.
N
Continued...
Subtitle
❑
You can activate and deactivate the subtitles. Use this menu to set the Subtitle Mode. Normal under the menu is the basic subtitle
and Hard of hearing is the subtitle for a hearing-impaired person.
Subtitle →→ Off / On: Switches subtitles off or on.
•
Mode →→ Normal / Hard of hearing: Sets the subtitle mode.
•
Subtitle Language: Set the subtitle language.
•
If the programme you are watching does not support the Hard of hearing function, Normal automatically activates even though
N
Hard of hearing mode is selected.
English is the default in cases where the selected language is unavailable in the
N
broadcast.
You can select these options simply by pressing the SUBT. button on the remote
O
control.
Teletext Language
❑
You can set the Teletext language by selecting the language type.
English is the default in cases where the selected language is unavailable in the broadcast.
N
Preference
❑
Primary Audio Language / Secondary Audio Language / Primary Subtitle Language / Secondary Subtitle Language /
Primary Teletext Language / Secondary Teletext Language
Using this feature, users can select one of the languages. The language selected here is the default when the user selects a
channel.
If you change the language setting, the Subtitle Language, Audio Language, and the Teletext Language of the Language menu are
automatically changed to the selected language.
The Subtitle Language, Audio Language, and the Teletext Language of the Language menu show a list of languages supported
by the current channel and the selection is highlighted. If you change this language setting, the new selection is only valid for the
current channel. The changed setting does not change the setting of the Primary Subtitle Language, Primary Audio Language, or
the Primary Teletext Language of the Preference menu.
Digital Text → Disable / Enable
❑
If the programme is broadcast with digital text, this feature is enabled.
MHEG (Multimedia and Hypermedia Information Coding Experts Group)
N
An International standard for data encoding systems used in multimedia and
hypermedia. This is at a higher level than the MPEG system which includes
data-linking hypermedia such as still images, character service, animation, graphic
and video les as well as multimedia data. MHEG is user runtime interaction
technology and is being applied to various elds including VOD (Video-OnDemand), ITV (Interactive TV), EC (Electronic Commerce), tele-education,
Teletext Language : ----
Preference
Setup
Digital Text : Enable
Melody : Medium
Energy Saving : Off
PIP
Common Interface
tele-conferencing, digital libraries and network games.
Melody → Off / Low / Medium / High
❑
The TV power on / off melody sound can be adjusted.
The Melody does not play
N
- When no sound is output from the TV because the MMUTE button has been pressed.
- When no sound is output from the TV because the – (Volume) button has been pressed.
- When the TV is turned off by Sleep Timer function.
Energy Saving
❑
This feature adjusts the brightness of the TV in order to reduce power consumption. When watching TV at night, set the
Energy Saving mode option to High to reduce eye fatigue as well as power consumption.
Off: Turns off the energy saving function.
•
Low: Sets the TV to low energy saving mode.
•
Medium: Sets the TV to medium energy saving mode.
•
High: Sets the TV to high energy saving mode.
•
Press the TOOLS button to display Tools menu.
T
You can also set the Energy Saving option by selecting Tools → Energy Saving.
►
English - 26
Continued...
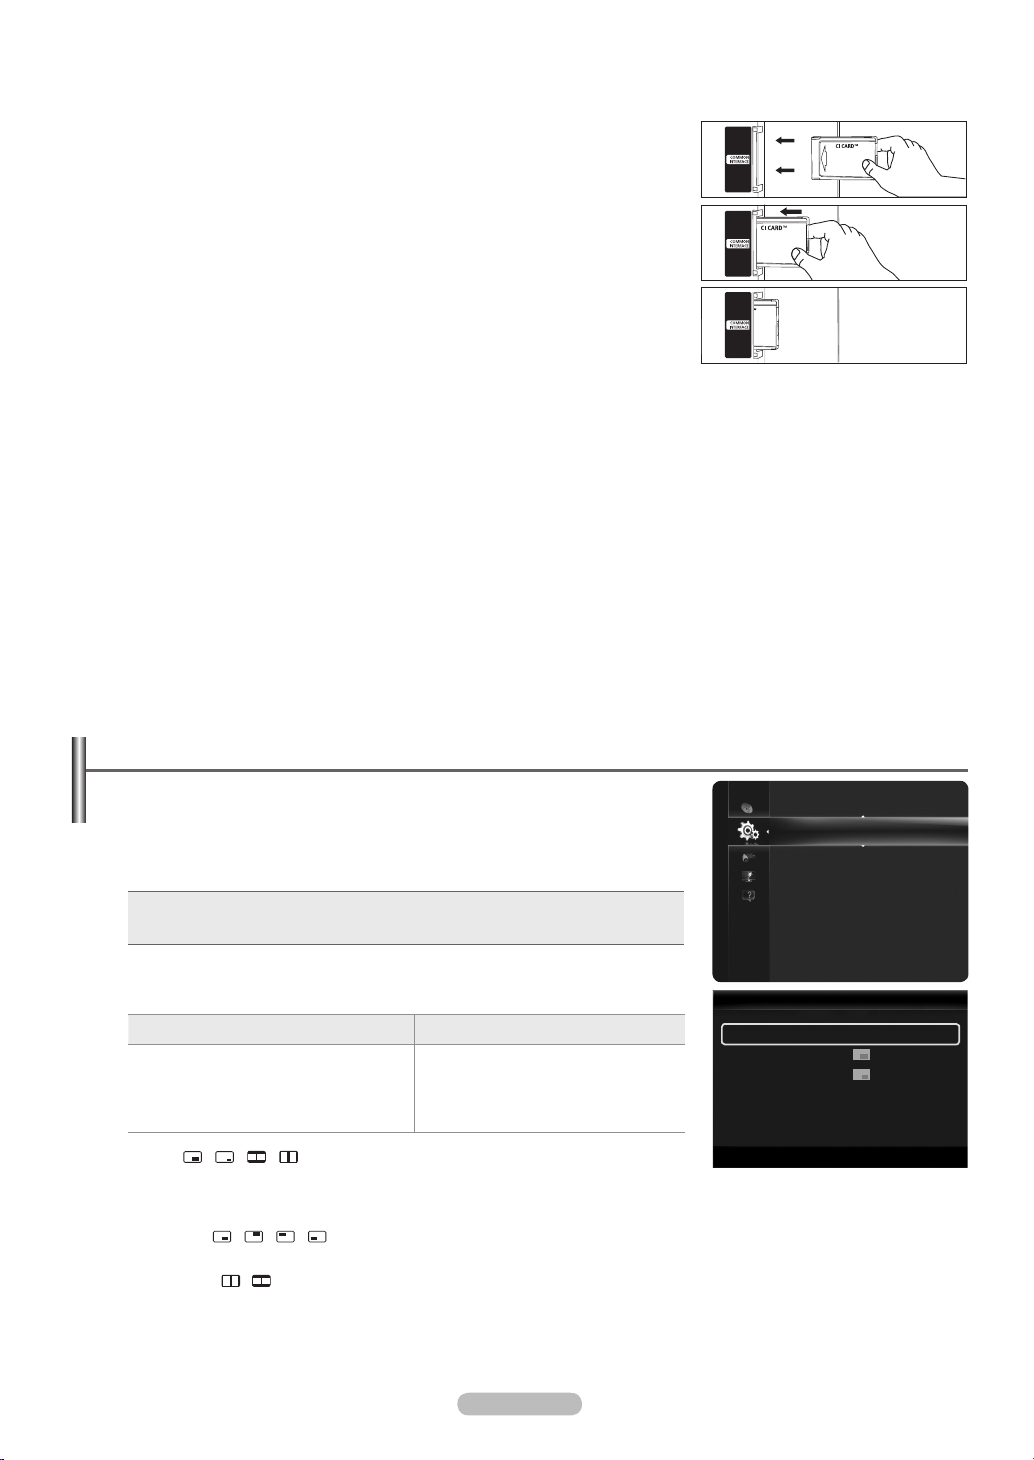
English - 27
Common Interface
❑
The CI+ function is only applicable to PS********P.
N
If you have some problems, please contact to service provider
Installing the CI Card
1. Purchase the CI CAM module by visiting your nearest dealer or by phone.
2. Insert the CI CARD into the CAM in the direction of the arrow until it ts.
3. Insert the CAM with the CI CARD installed into the common interface slot.
Insert the CAM in the direction of the arrow, right up to the end so that it is parallel
N
with the slot.
4. Check if you can see a picture on a scrambled signal channel.
CI Menu
This enables the user to select from the CAM-provided menu.
Select the CI Menu based on the menu PC Card.
Application Info.
This contains information on CAM inserted in the CI slot and displays it.
The Application Info inserting is about the CI CARD. You can install the CAM anytime whether the TV is ON or OFF.
CAM is not supported in some countries and regions, check with your authorized dealer.
N
Viewing the Picture in Picture (PIP)
You can display a sub picture within the main picture of set programme me or video
input. In this way, you can watch the picture of set programme me or video input from any
connected equipment while watching the main picture.
You may notice that the picture in the PIP window becomes slightly unnatural when you
N
use the main screen to view a game or karaoke.
Press the TOOLS button to display Tools menu. You can also congure PIP
T
related settings by selecting Tools → PIP.
PIP → Off / On
❑
You can activate or deactivate the PIP function.
Main picture Sub picture
Component
HDMI1/DVI , HDMI2, HDMI 3, HDMI 4
PC
Size → / / /
You can select a size of the sub-picture.
If main picture is in HDMI mode, Size is not available.
N
Position → / / /
You can select a position of the sub-picture.
In Double ( , ) mode, Position cannot be selected.
N
Channel
You can select a channel of the sub-picture.
TV
Melody : Medium
Energy Saving : Off
Setup
PIP
Common Interface
PIP
PIP : Off ►
Size :
Position :
Channel : ATV 1
U
Move E Enter R Return
►

Support / Input
Supported Program
Product Guide
❑
The Product Guide gives you information on the most important features of this TV.
For more detailed information, select the desired item.
N
Picture Quality : 1080 Full HD Motion, Ultra FilterBright, 100Hz Motion Plus, Cinema Smooth, Picture Mode
•
•
Mediⓐ2.0 : Content Library Flash, USB2.0 Movie, DLNA Wireless
•
Eco-Friendly : Energy Saving Mode
Self Diagnosis
❑
Picture Test
If you think you have a picture problem, perform the picture test. Check the colour pattern on the screen to see if the problem still
exists.
Does the problem still exist with this test photo? appears on the screen.
N
If the test pattern does not appear or there is noise in the test pattern, select Yes.
If the test pattern is properly displayed, select No.
Yes : There may be a problem with the TV. Contact Samsung’s Call Center for assistance.
•
•
No : There may be a problem with your external equipment. Please check your connections. If the problem still persists,
refer to the external device’s user manual.
Sound Test
If you think you have a sound problem, please perform the sound test.
You can check the sound by playing a built-in melody sound through the TV.
Does the problem still exist with this sound test? appears on the screen.
N
If during the sound test you can hear sound only from one speaker or not at all, select Yes.If you can hear sound from the
speakers, select No.
Yes : There may be a problem with the TV. Contact Samsung’s Call Center for assistance.
•
•
No : There may be a problem with your external equipment. Please check your connections. If the problem still persists, refer
to the external device’s user manual.
If you hear no sound from the TV’s speakers, before performing the sound test, make sure Speaker Select is set to TV speaker
N
in the Sound menu.
N
The melody will be heard during the test even if Speaker Select is set to External Speaker or the sound is muted by pressing
the MMUTE button.
N
If headphones are connected, the test melody will play through the headphones.
Signal Strength (Digital channels only)
You can adjust your antenna to improve the reception of available digital channels.
If the signal strength meter indicates that the signal is weak, physically adjust your antenna to increase the signal strength.
N
Continue to adjust the antenna until you nd the best position with the strongest signal.
Software Upgrade
❑
To keep your product up-to-date with new Digital Television features then software upgrades are periodically broadcast as part of
the normal Television signal. It will automatically detect these signals and display the software upgrade banner. You are given the
option to install the upgrade.
Continued...
English - 28
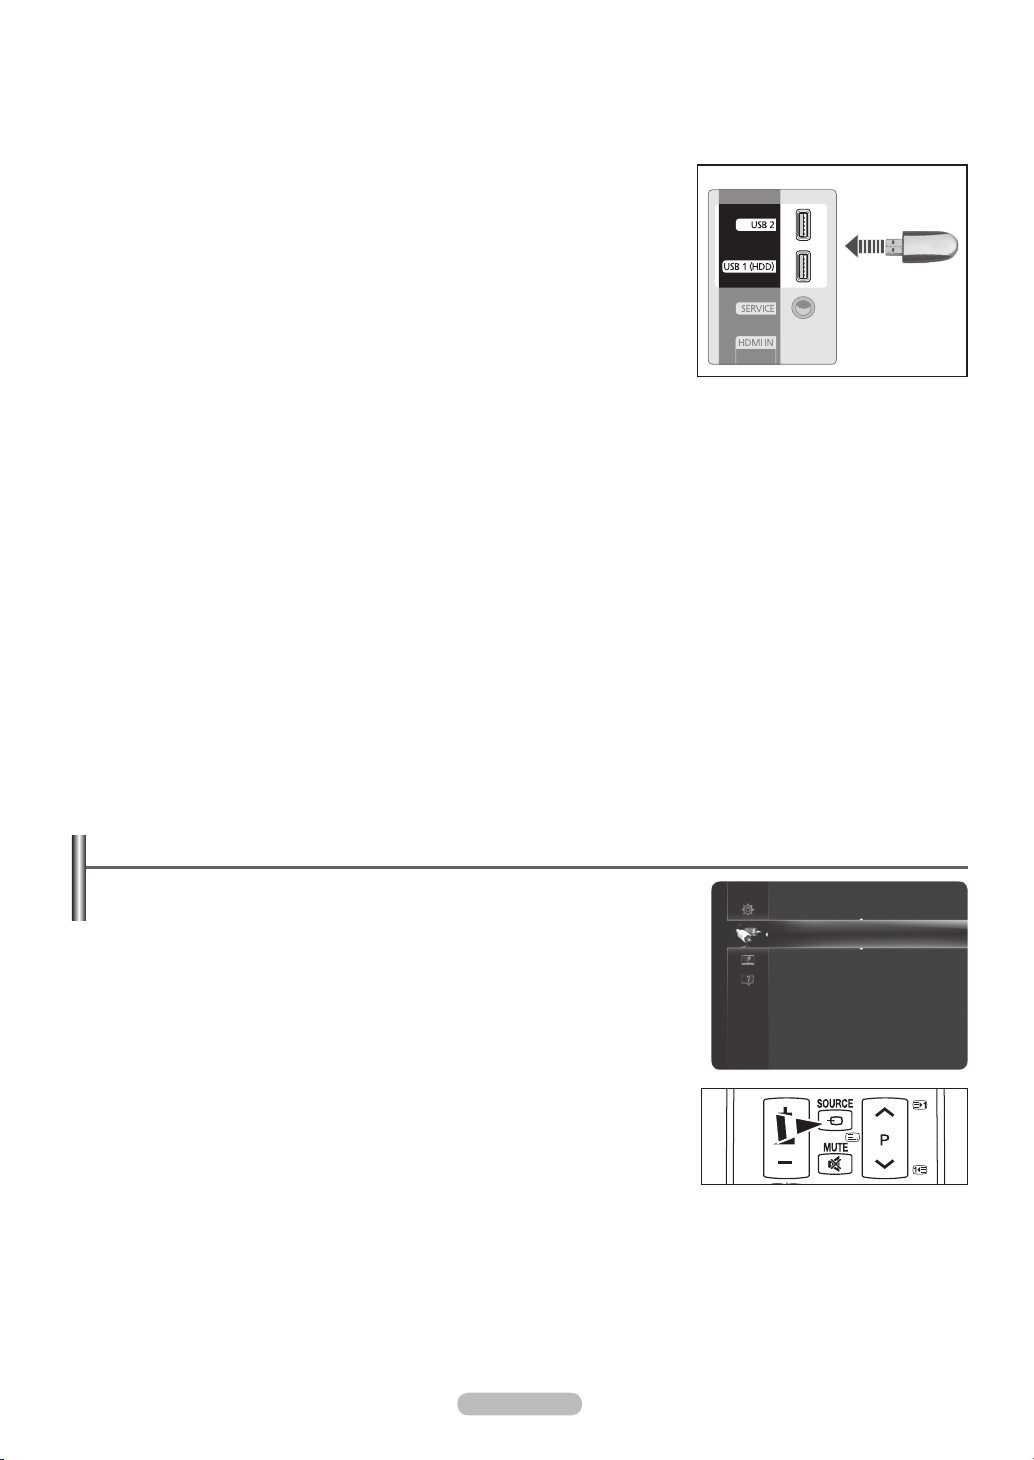
English - 29
By USB
Insert a USB drive containing the rmware upgrade into TV. Please be careful to not disconnect the power or remove the USB drive
while upgrades are being applied. The TV will turn off and turn on automatically after completing the rmware upgrade. Please
check the rmware version after the upgrades are complete. When software is upgraded, video and audio settings you have made
will return to their default (factory) settings.
By Channel
Upgrades the software using the broadcasting signal.
If the function is selected during the software transmission period, this function
N
searches for available software and downloads the software.
The time required to download the software is determined by the signal status.
N
Standby Mode Upgrade
To continue software upgrade with master power on, Select On by pressing the ▲ or
▼ button. 45 minutes after entering standby mode, a manual upgrade is automatically
conducted. Since the power of the unit is turned on internally, the screen may be on
slightly for the product. This phenomenon may continue for more than 1 hour until the
software upgrade is completed.
Alternative Software
Show the previous version that would be replaced.
If software was changed, existing software is displayed.
N
You can change current software to alternative software by Alternative Software.
N
HD Connection Guide
❑
The brief instruction on how to get the best performance from your new HDTV is displayed. We offer the connection method for HD
devices.
You can move the previous or next page by pressing the ◄ or ► button.
N
Contact Samsung
❑
You can know the Samsung Call center, website and information for product.
TV Rear Panel
USB Drive
Source List / Edit Name
❑
Source List
Use to select TV or other external input sources such as DVD players or Cable Box /
Satellite receivers (Set-Top Box) connected to the TV. Use to select the input source of
your choice.
TV, Ext., AV, Component, PC, HDMI1/DVI, HDMI2, HDMI3, HDMI4, USB.
You can choose only those external devices that are connected to the TV. In the
N
Source List, connected inputs will be highlighted and sorted to the top. Inputs that
are not connected will be sorted to the bottom.
Using the Colour buttons on the remote with the Source list
N
- Red (Refresh): Refreshes the connecting external devices.
- T TOOLS (Tools): Displays the Edit Name and Information menus.
Press the SOURCE button on the remote control to view an external signal
O
source.
Edit Name
❑
You can name the device connected to the input jacks to make your input source selection easier.
VCR / DVD / Cable STB / Satellite STB / PVR STB / AV Receiver / Game / Camcorder / PC / DVI / DVI PC / TV / IPTV /
Blu-ray / HD DVD / DMA
When a PC with a resolution of 1920 x 1080@60Hz is connected to the HDMI IN 1 (DVI) port, you should set the HDMI1/DVI
N
mode to PC in the Edit Name of the Input mode.
Input
Source List
Edit Name
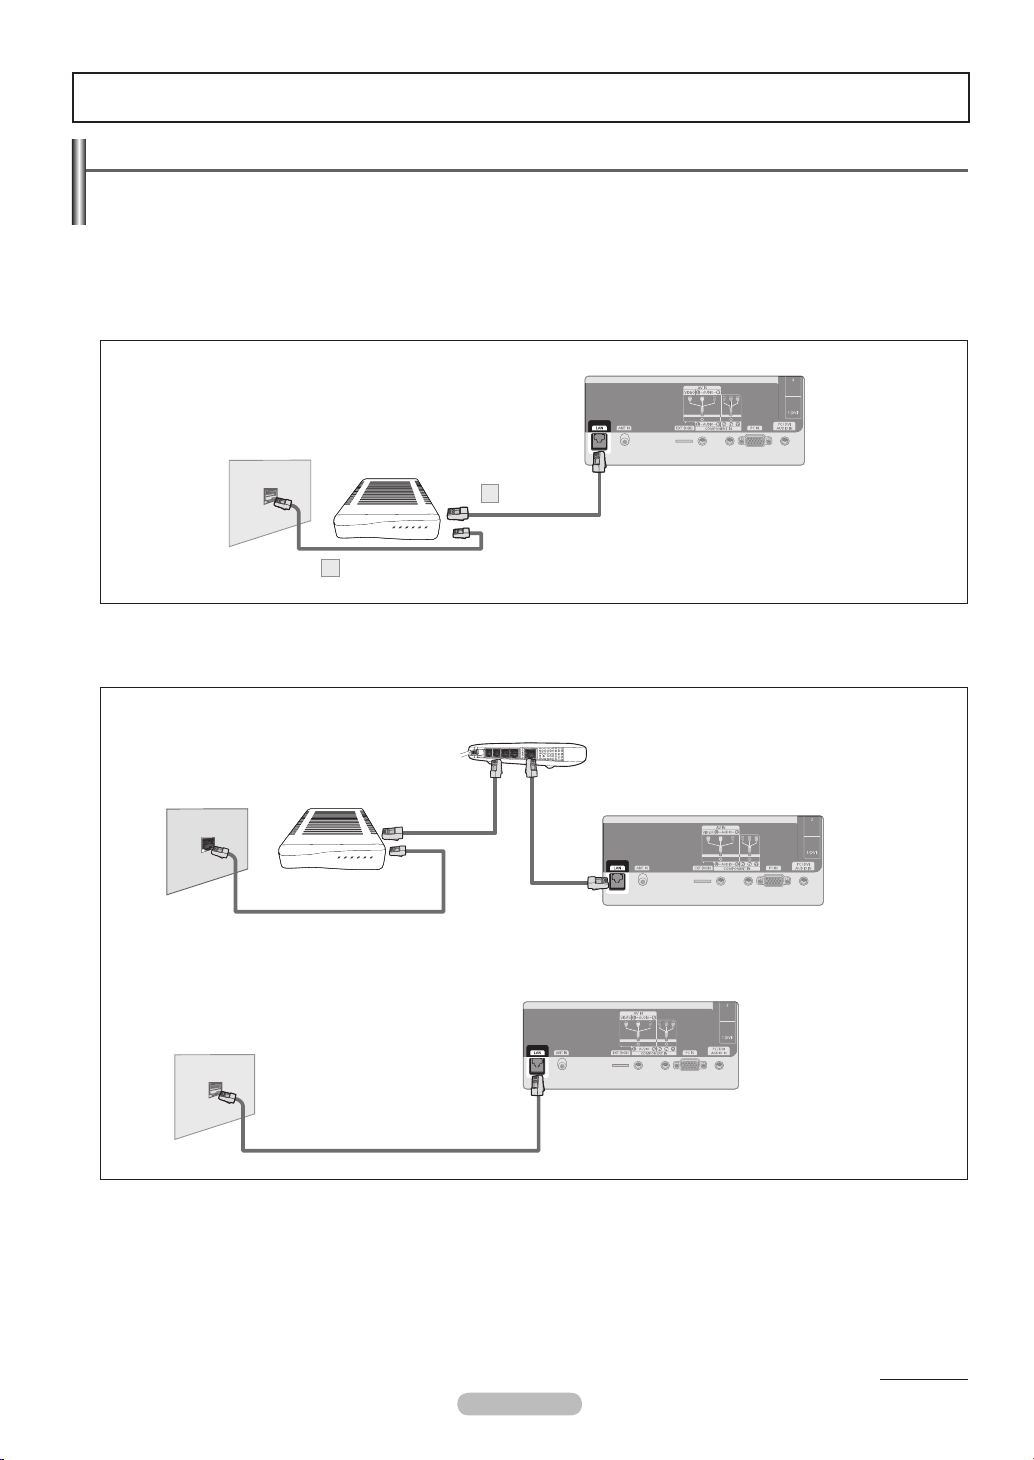
Network
Network Connection
Network Connection is for DLNA, Contents Library-Internet download, Internet@TV and Home Network Centre.
Network Connection - Cable
❑
LAN Connection for a DHCP Environment
The procedures to set up the network using Dynamic Host Conguration Protocol (DHCP) are described below.
Since an IP address, subnet mask, gateway, and DNS are automatically allocated when DHCP is selected, you do not have to enter
them manually.
TV Rear Panel
The Modem Port
on the Wall
1. Connect the LAN port on the rear panel of the TV and the external modem with a LAN Cable.
2. Connect the LAN port on the wall and the external modem with a Modem Cable.
External Modem
(ADSL/VDSL/Cable TV)
Modem Cable
2
LAN Cable
1
You can connect the LAN via a Sharer (Router).
IP Sharer
The Modem Port
on the Wall
You can connect the LAN port and the TV directly depending on your network status.
The LAN Port
on the Wall
The terminals (the position of the port and the type) of the external device may differ depending on the manufacturer.
N
If the IP address allocation by the DHCP server has failed, turn the external modem off, turn it on again after at least 10 seconds
N
External Modem
(ADSL/VDSL/
Cable TV)
Modem Cable
Modem Cable
TV Rear Panel
LAN Cable
LAN Cable
TV Rear Panel
and then try again.
For the connections between the external modem and the Sharer (Router), refer to the owner’s manual of the corresponding
N
product.
You can connect the TV to the LAN directly without connecting it through a Sharer (Router).
N
You cannot use a manual-connection-type ADSL modem because it does not support DHCP. You have to use an automatic-
N
connection-type ADSL modem.
Continued...
English - 30

English - 31
LAN Connection for Static IP Environment
The procedures to set up the network using a static IP address are described below. You have to manually enter the IP address,
subnet mask, gateway, and DNS that are provided by your Internet Service Provider (ISP).
TV Rear Panel
The LAN Port
on the Wall
LAN Cable
1
1. Connect the LAN port on the rear panel of the TV and the LAN port on the wall using the LAN cable.
You can connect the LAN via a Sharer (Router).
The LAN Port
on the Wall
LAN Cable
The terminals (the position of the port and the type) of the external device may differ depending on the manufacturer.
N
If you are using a static IP address, your ISP will inform you of the IP address, subnet mask, gateway, and DNS.
N
IP Sharer
TV Rear Panel
LAN Cable
You must enter these values to complete the network settings. If you do not know the values, ask your network administrator.
For the information on how to congure and connect a Sharer (Router), refer to the owner’s manual for the corresponding product.
N
You can connect the TV to the LAN directly without connecting it through a Sharer (Router).
N
If you use an IP Sharer (IP Router) that supports DHCP, you can set up the device as either DHCP or static IP.
N
For the procedures to use a static IP address, ask your Internet Service Provider.
N
Continued...

Network Connection - Wireless
❑
You can connect to the network wirelessly through a wireless IP sharer.
TV Rear Panel
Samsung Wireless LAN
Adapter
Wireless IP sharer
LAN Cable
The LAN Port
on the Wall
1. Connect the ‘Samsung Wireless LAN Adapter’ into the USB 1 (HDD) or USB 2 terminal of the TV.
You must use the ‘Samsung Wireless LAN Adapter to use a wireless network.
N
Samsung’s Wireless LAN adapter is sold separately. The WIS09ABGN Wireless LAN adapter is offered by select retailers,
N
Ecommerce sites and Samsungparts.com.
To use a wireless network, your TV must be connected to a wireless IP sharer.
N
If the wireless IP sharer supports DHCP, your TV can use a DHCP or static IP address to connect to the wireless network.
N
Samsung’s Wireless LAN adapter supports IEEE 802.11A, IEEE 802.11B, IEEE 802.11G, IEEE 802.11N. When you play DLNA
N
video over IEEE 802.11B/G connection, the video may not be played smoothly.
If the wireless IP sharer allows you to turn the Ping connection function on/off, turn it on.
N
Select a channel for the wireless IP sharer that is not currently being used. If the channel set for the wireless IP sharer is currently
N
being used by another device nearby, this will result in interference and communications may fail.
If you apply a security system other than the systems listed below, it will not work with the TV.
N
When applying the security key for the AP (wireless IP sharer), only the following is supported.
-
1) Authentication Mode : OPEN, SHARED, WPAPSK, WPA2PSK
2) Encryption Type : WEP, TKIP, AES
When applying the security key for the Ad-hoc mode, only the following is supported.
-
1) Authentication Mode : SHARED, WPANONE
2) Encryption Type : WEP, TKIP, AES
If your AP supports WPS(Wi-Fi Protected Setup), you can connect to the network via PBC (Push Button Conguration) or PIN
N
(Personal Indentication Number). WPS will automatically congure the SSID and WPA key in either mode.
If the device isn’t certied, it may not connect to the TV via the ‘Samsung Wireless LAN Adapter’.
N
English - 32

English - 33
Network Setup
Network Type
❑
Select Cable or Wireless as the method to connect to the network.
The menu is activated only if the ‘Samsung Wireless LAN Adapter’ is connected.
N
Cable: Connect to network using a cable.Connect to network using a cable.
•
Wireless: Connect to network wirelessly.Connect to network wirelessly.
•
Network Setup
❑
Cable Network Setup
Please check if the LAN cable is connected.
N
Internet Protocol Setup →→ Auto / Manual
•
Network Test: You can test or conrm the network connection status after setting up the network.You can test or conrm the network connection status after setting up the network.
•
When unable to connect to a wired network
N
(when Network Type is set to Cable)
Game Mode : Off
BD Wise : Off
Setup
Network Type : Cable
Network Setup
Child Lock : On
Change PIN
Parental Lock
Subtitle
Teletext Language
Preference
If your Internet service provider has registered the MAC address of the device used to connect to the Internet for the rst time
and authenticates the MAC address each time you connect to the Internet, your TV may not be able to connect to the Internet
as the MAC address differs from that of the device (PC).
In this case, ask your Internet service provider about the procedures to connect devices other than your PC (such as your TV) to
the Internet.
If your Internet service provider requires an ID or password to connect to the Internet (network), your TV may not be able to
N
connect to the Internet. In this case, you have to enter your ID or password when connecting to the Internet using an Internet
Sharer (Router). The internet connection may failure to a rewall problem. In this case, contact your Internet service provider.
If you cannot connect to the Internet even if you have followed the procedures of your Internet service provider, please contact a
Samsung Electronics.
Cable Network Setup
❑
Cable Network Setup-Auto
If you connect the LAN cable and it supports DHCP, the Internet Protocol (IP) Settings are automatically congured.
1. Set Network Type to Cable.
2. Select Cable Network Setup.
3. Set Internet Protocol Setup to Auto.
The Internet Protocol is set automatically.
N
4. Select Network Test to check the network connectivity.
Cable Network Setup-Manual
To connect the TV to the LAN using a static IP address, you must set up the Internet Protocol (IP).
Please check if the LAN cable is connected. (See page 30)
N
1. Set Network Type to Cable.
2. Select Cable Network Setup.
3. Set Internet Protocol Setup to Manual.
4. Set up IP Address, Subnet Mask, Gateway and DNS Server.
Press the number buttons on the remote control when you set the Network manually.
N
5. Select Network Test to check the network connectivity.
►
Wireless Network Setup
❑
The menu is activated only if the ‘Samsung Wireless LAN Adapter is connected. (See page 32)
N
Internet Protocol Setup →→ Auto / Manual
•
Network Test: You can test or conrm the network connection status after setting up the network.
•
When unable to connect to an AP
N
Your TV may fail to locate an AP that is congured as a private SSID type. In this case, please change the AP settings and try
again. If your Internet service provider has registered the MAC address of the device used to connect to the Internet for
the rst time and authenticates the MAC address each time you connect to the Internet, your TV may not be able to connect to
the Internet as the MAC address differs from that of the device (PC).
In this case, ask your Internet service provider about the procedures to connect devices other than your PC (such as your TV) to
the Internet.
If you cannot connect to the Internet even if you have followed the procedures of your Internet service provider, please contact a
N
Samsung Electronics at 1-800-SAMSUNG.
Continued...

Select a network
*
* *
*
*
*
*
* *
*
*
* *
* *
*
* *
*
*
*
* *
*
*
* *
* *
Access Point: You can select the IP sharer to use when using a wireless network.
-
If a wireless network is not in the Select a network list, press the Red button.
N
When the connection is made, you will be returned to the screen automatically.
N
If you have selected an Access Point with a security authentication:
N
The Security Key input screen appears. Enter the security key and press the Blue
button on the remote control.
If security encryption type is WEP, 0~9, A~F will be available when you input
N
security key.
Button Operations
▲/▼/◄/► Moves the selection up/down/left/right.
Wireless Network Setup
Security Key
A B C D E F G
H I J K L M N
O P Q R S T U
V W X Y Z
_
n
Move Number E Enter R Return
0~9
Number
Lowercase
Delete
Done
ENTER
Enters (Inputs) the selected character.
Red button Switch between Upper- and Lower-Case Letters
Green button You can delete an already entered character.
Blue button Press this button to finish entering the security key.
Connecting WPS (Wi-Fi Protected Setup)
❑
If Security Key is already set: In access point list, select WPS.
You can select PBC, PIN, Security Key.
N
Connecting by using PBC: Select a PBC (Push Button Conguration). Press the
•
PBC button on the AP (access point) within 2minutes, and wait for connection.
Connecting by using PIN: Select a PIN (Personal Identication Number).
•
The message showing the PIN Code is displayed. Input the PIN Code at AP
N
device within 2minutes. Select OK and wait for connection.
Try again if connecting operation doesn’t work
N
When the connection is not established although tried again, reset the access
N
point. Please refer to a manual of each access point.
Connecting by using Security Key: When selecting Security Key, the input
•
window is displayed. Input the security key and press Blue button.
Try again if connecting operation doesn’t work.
N
If Security Key is not set: When the security setting of AP that supports WPS
is NONE,
you can select PBC, PIN, None Security. None Security is capable of
connecting to AP directly without using WPS function.
Process of PBC, PIN is same as above. Refer to if Security Key is already set.
N
Try again if connecting operation doesn’t work.
N
Wireless Network Setup
Select a network
AP_1
AP_2
Search
Ad-hoc
Press the PBC button on the access point.
Access Point Name : AP_3
Press OK After input TV’s Pincode in the access
point’s setup.
Access Point Name : AP_3
PIN Code : 12345678
Security Key
A B C D E F G
H I J K L M N
O P Q R S T U
V W X Y Z
Select a network
Search
Ad-hoc
AP_3
AP_4
Wireless Network Setup
_
n
Move Number E Enter R Return
Wireless Network Setup
AP_1
AP_2
AP_3
AP_4
PBC
PIN
Security Key
n
Move E Enter R Return
Cancel
Cancel
OK
PBC
PIN
Security Key
0~9
3/9
Number
Lowercase
Delete
Done
3/9
n
Move E Enter R Return
English - 34
Continued...

English - 35
Ad-hoc: You can connect to a mobile device without an access point through the ‘Samsung Wireless LAN Adapter’ by
a peer to peer network.
How to connect to new Ad-hoc
•
1. Choose Select a network, then a device list is displayed.
2. While in the device list, press the Blue button on the remote or select Ad-hoc.
The message The existing network system may have limited functionality.
N
Do you want to change the network connection? is displayed.
The existing network system may have limited
functionality. Do you want to change the network
connection?
Yes
No
3. Input the generated Network Name(SSID) and Security Key into the device you
want to connect.
How to connect an existing Ad-hoc device
•
1. Choose Select a network, the device list is displayed.
2. Select the device you want in the Device list.
3. If security key was applied, input the security key again.
If network doesn’t operate normally, please check the Network Name(SSID) and Security Key again.
N
If the Security Key is incorrect, it may be the reason for the malfunction.
Wireless Network Setup - Auto
If you want to connect AP, AP should support DHCP.
Only devices which support Ad-hoc mode can be connected without DHCP.
1. Set Network Type to Wireless.
2. Select Wireless Network Setup.
3. Set Internet Protocol Setup to Auto.
The Internet Protocol is set automatically.
N
4. Select a network through Select a network.
5. Select Network Test to check the network connectivity.
Wireless Network Setup - Manual
To connect the network wirelessly using a static IP address, you must set up the Internet Protocol (IP). (See page 32)
For more detailed information of static IP address, refer to the user manual of your wireless IP sharer.
N
1. Set Network Type to Wireless.
2. Select Wireless Network Setup.
3. Set Internet Protocol Setup to Manual.
4. Set up IP Address, Subnet Mask, Gateway and DNS Server.
Press the number buttons on the remote control when you set the Network manually.
N
5. Select a network through Select a network.
6. Select Network Test to check the network connectivity.
using

Media Play
Connecting a USB Device
1. Press the POWER button to turn the TV on.
TV Rear Panel
2. Connect a USB device containing photo, music and movie les to the USB jack on the
side of the TV.
USB 1 (HDD) jack is also used as the HDD jack. HDD (Hard disk drive) is device which
N
USB Drive
stores digitally encoded data.
Media Play only supports USB Mass Storage Class devices (MSC). MSC is a Mass
N
Storage Class Bulk-Only Transport device. Examples of MSC are Thumb drives and
Flash Card Readers (Both USB HDD and HUB are not supported.)
MTP (Media Transfer Protocol) is not supported.
N
The le system only supports FAT16/32 (The NTFS le system is not supported).
N
Certain types of USB Digital camera and audio devices may not be compatible with this
N
TV.
Please connect directly to the USB port of your TV. If you are using a separate cable connection, there may be a USB compatibility
N
problem.
Before connecting your device to the TV, please back up your les to prevent them from damage or loss of data. SAMSUNG is not
N
responsible for any data le damage or data loss.
Do not disconnect the USB device while it is loading.
N
MSC supports MP3 and JPEG les, while a PTP device supports JPEG les only.
N
The sequential JPEG format is supported.
N
The higher the resolution of the image, the longer it takes to display on the screen.
N
The maximum supported JPEG resolution is 15360X8640 pixels.
N
For unsupported or corrupted les, the Not Supported File Format message is displayed.
N
If the number of photo les exceeds 4000 (or the number of music les exceeds 3000), any les exceeding the 4000 limit may not
N
be displayed in the Photo List (or Music List).
MP3 les with DRM that have been downloaded from a non-free site cannot be played.
N
DRM(Digital Rights Management) prevents illegal uses of digital media for copyright protection.
N
When moving to a photo, loading may take a few seconds.
N
Using the Remote Control Button in Media Play Menu
❑
Button Operations
▲/▼/◄/►
E
ENTER
Move the cursor and select an item.
Select the currently selected item.
Play or pause the files while playing the Slide Sow, Music, or Movie files.
Play or pause the Slide Show, Music, or Movie file.
RETURN Return to the previous menu.
TOOLS Run various functions from the Photo, Music and Movie menus.
Stop the current Slide Show, Music or Movie file.
Jump to previous group/Jump to next group.
INFO Show file information.
MEDIA.P Enter or Exit Media Play mode.
English - 36

English - 37
Using the Media Play Function
This function enables you to view and listen to photo, music and movie files saved on a USB Mass Storage Class (MSC) device.
It might not work properly with unlicensed multimedia files.
❑
Entering the Media Play Menu
1. Press the MENU button. Press the ▲ or ▼ button to select Application, then
press the ENTERE button.
2. Press the ▲ or ▼ button to select Media Play (USB & DLNA), then press the
ENTERE button.
O
Press the MEDIA.P button on the remote control to display the Media Play
menu.
O
Press the SOURCE button on the remote control repeatedly to select USB or
DLNA, then press the ENTERE button.
3. Press the Red button, then press the ▲ or ▼ button to select the corresponding
USB Memory Device (i.e. if connected through a hub). Press the ENTERE button.
N
This function differs depending on the USB Memory Device/ DLNA device
connected to TV.
N
The selected USB device name appears at the bottom left of the screen.
4. Press the ◄ or ► button to select an icon (Photo, Music, Movie, Setup), then
press the ENTERE button.
N
To exit Media Play mode, press the MEDIA.P button on the remote control.
N
In this mode, you can enjoy movie clips contained on a Game, but you cannot
play the Game itself.
❑
Removing a USB Memory Device Safely
You can remove the device safely from the TV.
1. Press the TOOLS button in the Media Play le list screen, or while a Slide Show,
music, or movie le is being played.
2. Press the ▲ or ▼ button to select Remove Safely, then press the ENTER
button.
3. Remove the USB device from the TV.
❑
Screen Display
E
Media Play
PHOTO
Photo Music Setup
USB Device
Photo
Folder
Preference
Folder 1
Folder 2
IMG_0349.
JPG
../ folder name/
USB Device
IMG_0335.JPG
Basic View
USB : USB
Movie
▶
1
▶
1
Select
851.98MB/995.00MB Free
Timeline
4/6
Slide Show
Play Current Group
Information
Remove Safely
T
Tools R Upper Folder
Colour
R
Return
Photo
Preference
IMG_03496
IMG_03496
.JPG
.JPG
5
USB Device
Basic
View
3
c
▶
Timeline
2
IMG_0335.JPG
1
2009
▶
Mar Apr Jun
▶
▶
6
Favorites Setting Select
Colour
Mar.01.2009
1/67
Folder
◀
IMG_0343
.JPG
4
1File(s) Selected
T
Tools R Return
Nov
IMG_03496
.JPG
1. Current Sort Standard: This eld shows the current standard for sorting les.
2. View Groups: The sorting group including the currently selected photo is highlighted.
3 Currently selected le: The currently selected le is highlighted.
4. Item Selection Information: Shows the number of photos that are selected by pressing the Yellow button.
5. Current Device: Shows the currently selected device name.
N
Red (Device) button: Selects a connected device.
6. Help Items
Green (Favourites Setting) button: Changes the Favourites Setting for the selected le.
•
Press this button repeatedly until the desired value appears.
Yellow (Select) button: Selects le from the le list. Selected les are marked with a symbol c.
•
Press the yellow button again to cancel a le selection.
TOOLS
•
R
•
(Tools) button: Displays the option menus. (The Tools menu changes according to the current status.)
RETURN (Return) button: Return to previous menu.

Using and Sorting Photo List
You can sort photos in the Photo List by a particular standard.
1. Press the MEDIA.P button on the remote control to display the Media Play menu.
2. Press the ◄ or ► button to select Photo, then press the ENTERE button.
3. Press the ▲ button twice, then press the ◄ or ► button to select a sorting standard
in the Photo list.
(Basic View, Timeline, Colour, Folder, Preference)
The photos are sorted according to the newly selected sorting standard.
N
To move to the previous/next group, press the (REW) or (FF) button.
N
4. Press the ▼ button twice, then press the (Play)/ENTERE button to start the
Slide Show in the order selected by the user.
The information of a photo le is automatically set.
N
The Colour information extracted from a photo le may be different from the user’s expectations.
N
You can change the Colour, and Preference.
N
Photos for which information cannot be displayed are set as Unclassied.
N
PTP does not support folder sort mode.
N
Sorting Standard for the Photo List
❑
Basic View
It shows whole folder. You can view the photo by selecting the folder.
When sorted according to the Basic View, you cannot set Favorite les.
N
Timeline
It sorts and shows photos by date. It sorts by year and month from the earliest photo.
Colour
It sorts photos by colour. You can change the photo colour information.
To use this function, set the Use Colour View in the Setup menus to On.
N
Colour options: Red, Yellow, Green, Blue, Magenta, Black, Gray, Unclassied.
N
Folder
It sorts photos by folder. The photo le in the root folder is shown rst and the others are shown in alphabetical order by name.
Preference
It sorts photos by preference (Favourites). You can change the photo preferences.
Changing the Favourites Settings.
N
Select the desired photo in the Photo list, then press the Green button repeatedly until the desired setting appears.
The stars are for grouping purposes only. For example, the 3 star setting does not have any priority over the one star setting.
N
Favourites options:
N
★ ★ ★, ★ ★ ★, ★ ★ ★, ★ ★ ★
Photo
Preference
IMG_03496
IMG_03496
.JPG
.JPG
USB Device
Basic View
▶
IMG_0335.JPG
Favorites Setting Select
Timeline
2009
Mar Apr Jun
▶
▶
▶
Mar.01.2009
1/67
Colour
◀
Folder
IMG_0343
.JPG
T
Tools R Return
Nov
IMG_03496
.JPG
Photo List Tools Menu
❑
Slide Show
You can play a Slide Show using the photo les on the USB memory device.
Play Current Group
You can play a Slide Show using only the photo les in the currently selected sorting
group.
Change Group
You can change the Colour information of photo les.
The group information of the current le is updated and the le is moved to the
N
new group.
To change the information of multiple les, select the les you want by pressing the yellow button.
N
English - 38
Photo
Basic View
Folder 1
USB Device
Folder 2
Timeline
IMG_0349
.JPG
Favorites Setting Select
Colour
▶
1
▶
1
IMG_0335.JPG
Preference
Folder
4/6
Slide Show
Play Current Group
Change Group
Information
Remove Safely
T
Tools R Return
Continued...

English - 39
Information
The photo le information including the name, the size, the resolution, the date modied and the path is displayed.
You can view the information of photo les during a Slide Show using the same procedures.
N
Alternatively, select a photo from the photo list and press the INFO button to view
O
the information.
Remove Safely
You can remove the device safely from the TV.
Viewing a Photo or Slide Show
Viewing a Slide Show
❑
1. Press the MEDIA.P button on the remote control to display the Media Play
menu.
2. Press the ◄ or ► button to select Photo, then press the ENTERE button.
3. Press the ◄ or ► button to select the desired photo in the Photo list.
4. Press the TOOLS button.
5. Press the ▲ or ▼ button to select Slide Show, then press the ENTER
E
button.
N
All les in the photo list will be used for the Slide Show.
During the slide show, les are displayed in order from the currently shown le.
N
N
The Slide Show progresses in the order sorted in the Photo list.
N
Music les can be automatically played during the Slide Show if the
Background Music is set to On. (Refer to page 40).
O
While a photo list is displayed, press the (Play)/ENTERE button on the
remote control to start slide show.
USB
IMG_0335.JPG
Normal 3648x2432 2009/3/15
r
E Pause lr Previous/Next
T
Tools R Return
1/4
N
SlideShow Control Buttons
E
ENTER
❑
Playing current group
Play/Pauses the Slide Show. Exit Slide Show and return to the photo list.
Play the Slide Show.
Pause the Slide Show.
T TOOLS
/
Run various functions from the Photo menus.
Change the SlideShow playing speed.
1. Press the ◄ or ► button to select a sorting standard. (Basic View, Timeline, Colour, Folder, Preference)
2. Press the ▼ button, then Press the ◄ or ► button to select the desired group.
3. Press the ▼ button, then press the TOOLS button.
4. Press the ▲ or ▼ button to select Play Current Group, then press the ENTERE button.
Playing the selected photo files
❑
1. Press the ◄ or ► button to select the desired photo in the Photo list.
2 . Press the yellow button. Repeat the above operation to select multiple photos.
N
The c mark appears to the left of the selected photo.
N
To deselect all selected les, press the TOOLS button and select Deselect All.
3. Press the (Play) / ENTERE button.
N
The selected les will be used for the slide show.
Continued...

Slide Show Tools Menu
❑
Stop Slide Show / Start Slide Show
You can start or stop a SlideShow.
Slide Show Speed → Normal / Fast / Slow
You can select the slide show speed only during the slide show.
You can also change the speed of the Slide Show by pressing the (REW) or
N
(FF) button during the Slide Show.
Slide Show Effect
You can set variously the slide show effect.
Fade1, Fade2, Blind, Spiral, Checker, Linear, Stairs, Wipe, Random, None
•
Rotate →→ 0˚/ 90˚ / 180˚ / 270˚
Stop Slide Show
Slide Show Speed : Normal
Slide Show Effect : Fade1
Rotate
Zoom
Background Music
Picture Setting
Sound Setting
Information
U
You can rotate photos saved on a USB memory device.
Whenever you press the ◄ button, it rotates by 270˚, 180˚, 90˚, and 0˚.
N
Whenever you press the ► button, it rotates by 90˚, 180˚, 270˚, and 0˚.
N
If you have select Zoom, the Rotate function is deactivate
N
The rotated le is not saved.
N
Zoom →→ x1 / x2 / x4
You can magnify photos saved on a USB memory device.
Press the ◄ or ► button repeatedly to increase or decrease the Zoom effect.
N
To move the enlarged photo image, press the ENTERE button, then press the ▲/▼/◄/► buttons. Note that when the
N
enlarged picture is smaller than the original screen size, the location change function doesn’t work.
The enlarged le is not saved.
N
Background Music
You can set and select background music when watching a Slide Show.
To use this feature, there must be music on the USB device.
N
Loading music les is needed to change BGM mode. Play music les in music category to load.
N
Background Music →→ On / Off
•
BGM Mode →→ Mood / Selected File / Shufe
•
BGM Mood →→ Energetic / Rhythmical / Sad / Exciting / Calm
•
N
If you set BGM Mode to Mood, you can select the BGM Mood.
Select Music File
•
N
If you set BGM Mode to Selected File, you can select a music le.
Tools
Tools
Move E Enter e Exit
Picture Setting / Sound Setting
Refer to page 46.
Information
The photo le information is displayed.
Remove Safely
You can remove the device safely from the TV.
English - 40

English - 41
Using and Sorting the Music List
You can sort music files in the Music List by a particular standard.
1. Press the MEDIA.P button on the remote control to display the Media Play menu.
2. Press the ◄ or ► button to select Music, then press the ENTEREbutton
3. Press the ▲ button twice, then press the ◄ or ► button to select a sorting standard
in the Music list. (Basic View, Title, Artist, Mood, Genre, Folder, Preference)
Music les are sorted according to the newly selected sorting standard.
N
To move to the previous/next group, press the (REW) or (FF) button.
N
4. Press the ▼ button twice, then press the ENTERE button to start playing music in
the order selected by the user.
The information of the music les is automatically set.
N
The Mood information extracted from a music le may differ from the expectations of the user.
N
You can change the Mood and Preference.
N
Music les for which information cannot be displayed are set to Unclassied.
N
If there is no title information for a music le, the lename is displayed.
N
Sorting Standard for the Music List
❑
Basic View: It shows whole folder. You can view the photo by selecting the folder. It shows whole folder. You can view the photo by selecting the folder.
•
When sorted according to the Basic View, you cannot set Favorite les.
N
Title: It sorts the Music titles in alphabetical order, and shows the music le.
•
Artist: It sorts the music le by artist in alphabetical order.
•
Mood: It sorts music les by the mood. You can change the music mood information.
•
Mood options: Energetic, Rhythmical, Sad, Exciting, Calm.
N
Genre: It sorts music les by the genre.
•
Folder: It sorts music les by the folder. The music le in the Root folder is shown rst and the others are shown in alphabeticalIt sorts music les by the folder. The music le in the Root folder is shown rst and the others are shown in alphabetical
•
order by name.
Preference: It sorts music les by preference (Favourites). You can change the music les preferences.
•
Changing the Favourites Settings
N
Select the desired music le in the Music list, then press the Green button repeatedly until the desired setting appears.
The stars are for grouping purposes only. For example, the 3 star setting does not have any priority over the one star setting.
N
Favourites options:
N
★ ★ ★, ★ ★ ★, ★ ★ ★, ★ ★ ★
Music
Folder
NPKI
../ folder name/
USB Device
usermanual
Preference
▶
Basic View
▶
1
▶
1
▶
3/4
Carol kidd
Mr A-Z
2009
Pop
When I Dream
Select
Title
▶
T
Tools R Upper Folder
Artist
Heaven
Music List Tools Menu
❑
Play Current Group
You can only play music les in the currently selected sorting group.
Change Group
You can change the mood information of music les.
The group information of the current le is updated and the le is moved to the
N
new group.
To change the information of multiple les, select les by pressing the yellow
N
button.
Information
The music le information including the name, the size, the date modied and the
path is displayed.
Alternatively, select a music le from the music list and press the INFO button to
O
view the information.
Remove Safely
You can remove the device safely from the TV.
Music
Folder
NPKI
NPKI
../ folder name/
USB Device
Preference
Basic View
▶
1
▶
1
Carol kidd
Mr A-Z
2009
Pop
When I Dream
Select
Title
3/4
Play Current Group
Information
Remove Safely
▶
Heavenusermanual
T
Tools R Upper Folder
Select
T
Tools R Upper Folder
Artist
Sky

Playing a Music
Playing a music file
❑
1. Press the MEDIA.P button on the remote control to display the Media Play
menu.
2. Press the ◄ or ► button to select Music, then press the ENTEREbutton
3. Pressing the ◄ or ► button to select a music le to be played.
4. Press the (Play)/ENTERE button.
N
This menu only shows les with the MP3 le extension. Files with other
le extensions are not displayed, even if they are saved on the same USB
device.
(REW) or (FF) buttons do not function during play.
N
N
The selected le is displayed at the top with its playing time.
N
To adjust the music volume, press the volumevolume button on the remote control. To mute the sound, press the MMUTE button on
the remote control.
N
The playing duration of a music le may be displayed as ‘00:00:00’ if its playing time information is not found at the start of
the le.
Music Play Control Buttons
N
E
ENTER
Music function information icon
N
Play/Pauses the music file. Exit play mode and return to the music list.
Play the music file
Pause the music file
T TOOLS
When all music files in the folder (or the selected file) are repeated. Repeat Mode is On.
When all music files in the folder (or the selected file) are played once. Repeat Mode is Off.
r
r
When I Dream
E Pause lr Previous/Next
r
T
Tools R Return
HeavenGeek In The Pink
USB
r
00:00:02 / 00:04:55
Run various functions from the Music menus.
1/3
Playing the music group
❑
1. Press the ◄ or ► button to select a sorting standard.
(Basic View, Title, Artist, Mood, Genre, Folder, Preference)
2. Press the ▼ button, then Press the ◄ or ► button to select the desired group.
3. Press the ▼ button, then press the TOOLS button.
4. Press the ▲ or ▼ button to select Play Current Group, then press the ENTERE button.
Playing the selected music files
❑
1. Press the ◄ or ► button to select the desired music le in the music list.
2. Press the yellow button. Repeat the above operation to select multiple music les.
N
The c mark appears to the left of the selected music le.
N
To deselect all selected les, press the TOOLS button and select Deselect All.
3. Press the (Play)/ENTERE button.
N
Only the selected le is played.
Music Play Tools Menu
❑
Repeat Mode → On / Off
You can play music les repeatedly.
Picture Setting / Sound Setting
Refer to page 46.
Information
The music le information is displayed.
Remove Safely
You can remove the device safely from the TV.
Repeat Mode
Picture Setting
Sound Setting
Information
Remove Safely
U
Tools
◄ On ►
Move Adjust e Exit
English - 42

English - 43
Using and Sorting the Movie List
You can sort movies in the Movie List by a particular standard.
1. Press the MEDIA.P button on the remote control to display the Media Play menu.
2. Press the ◄ or ► button to select Movie, then press the ENTERE button
3. Press the ▲ button twice, then press the ◄ or ► button to select a sorting standard
in the Movie list. (Basic View, Timeline, Title, Folder, Preference)
The movie les are sorted according to the newly selected sorting standard.
N
To move to the previous/next group, press the (REW) or (FF) button.
N
4. P
ress the ▼ button twice, then press
the (Play)/ENTERE button to play the
movie in the order selected by the user.
The information of the movie les is automatically set.
N
You can change the Preference.
N
Sorting Standard for the Movie List
❑
Basic View
It shows whole folder. You can view the photo by selecting the folder.
When sorted according to the Basic View, you cannot set Favorite les.
N
Timeline
It sorts and shows movies by date. It sorts by year and month from the earliest movie.
Title
It sorts and displays the Movie titles in Symbol/Number/Alphabet/Special order.
Folder
If there are many folders in USB, the movies les are shown in order in each folder. The movie le in the root folder is shown rst
and the others are shown in alphabetical order by name.
Preference
It sorts movies by preference (favourites). You can change the movie preferences.
Changing the Favourites Settings
N
Select the desired movie le in the movie list, then press the Green button repeatedly until the desired setting appears.
The stars are for grouping purposes only. For example, the 3 star setting does not have any priority over the one star setting.
N
Favourites options:
N
★ ★ ★, ★ ★ ★, ★ ★ ★, ★ ★ ★
Movie
Preference
MOVIE_005
MOVIE_006
.avi
.avi
USB Device
MOVIE_007
.avi
Basic View
▶
Timeline
▶
Apr
▶
Apr.27.2009
▶
1/5
MOVIE_001.avi
Favorites Settings Select
Tiltle
◀
MOVIE_003
MOVIE_000
.avi
.avi
T
Tools R Upper Folder
Folder
MOVIE_004
.avi
Movie List Tools Menu
❑
Play Current Group
You can only play movie les in the currently selected sorting group.
Information
The movie le information including the order of the le in the current directory, the
name, the size, the date modied and the path is displayed.
Alternatively, select a movie le from the list and press thelternatively, select a movie le from the list and press the INFO button to view
O
the information.
Remove Safely
You can remove the device safely from the TV.
Movie
Preference
MOVIE_005
MOVIE_006
.avi
.avi
USB Device
Basic View
MOVIE_007
.avi
Favorites Settings Select
Timeline
▶
Apr
▶
Apr.27.2009
MOVIE_001.avi
Tiltle
1/5
MOVIE_000
T
Folder
Play Current Group
Information
Remove Safely
MOVIE_004
MOVIE_003
.avi
.avi
.avi
Tools R Upper Folder

Playing a Movie File
Playing a movie file
❑
1. Press the MEDIA.P button on the remote control to display the Media Play
menu.
2. Press the ◄ or ► button to select Movie, then press the ENTERE button
3. Pressing the ◄ or ► button to select a movie to be played.
4. Press the (Play) / ENTERE button.
N
The selected le is displayed at the top with its playing time.
N
The playing duration of a movie le may be displayed as ‘00:00:00’ if its
playing time information is not found at the start of the le.
N
Press the ◄ button while playing a video le to rewind.
N
Press the ► button to fast forward.
N
Supported Video Formats
Video Codec
File Extention Container Video Decoder Max Resolution Sti
XviD 720x576
MPEG1 720x576
MPEG2 720x576
*.avi AVI
*.mp4 MP4
*.mpg
*.mpeg MPEG2 (Program Stream) 1920x1088
*.vro
PS
*.vob MPEG2 VRO 1920x1088
others
(ts)
TS
H.264 BP 1920x1088
H.264 BP 1920x1088
H.264 HP 1920x1088
MPEG-4 SP 720x576
MPEG-4 ASP 720x576
H.264 BP 1920x1088
H.264 MP 1920x1088
H.264 HP 1920x1088
MPEG-4 SP 720x576
MPEG-4 ASP 720x576
MPEG1 (Program Stream) 1920x1088
MPEG2 VOB 1920x1088
MPEG2 (Transport Stream) 1920x1088
H.264 (Transport Stream) 1920x1088
r
MOVIE_000.avi
USB
00:00:02 / 00:01:55
r
E Pause lr Jump
T
Tools R Return
1/3
Supported caption formats
N
Name File Extension Programming Language
MPEG-4(timed-text) .ttxt XML
SAMI .smi HTML
SubRip .srt Simple text
SubViewer .sub Simple text
Micro DVD .sub or .txt Simple text
Video Play Control Buttons
N
ENTER
E
Play/Pauses the movie file
Play the movie file
Pause the movie file
Exit play mode and return to the movie list.
T TOOLS
Run various functions from the movie menus.
◄/► Skip forwards or backwards through the movie file.
▲ Move to the last view of the current file.
▼ Move to the first view of the current file.
English - 44
Continued...

English - 45
Playing the movie group
❑
1. Press the ◄ or ► button to select a sorting standard.
(Basic View, Timeline, Title, Folder, Preference)
2. Press the ▼ button, then Press the ◄ or ► button to select the desired group.
3. Press the ▼ button, then press the TOOLS button.
4. Press the ▲ or ▼ button to select Play Current Group, then press the ENTERE button.
Playing the selected movie files
❑
1. Press the ◄ or ► button to select the desired movie le in the movie list.
2. Press the yellow button. Repeat the above operation to select multiple movie les.
N
The cmark appears to the left of the selected movie le.
N
To deselect all selected les, press the TOOLS button and select Deselect All.
3. Press the (Play)/ENTERE button.
N
Only the selected le is played.
Playing movie continuously
❑
If you exit playing movie, playing it continuously later is possible.
With Play continuously function, you can watch movie without watching again from beginning or bothering searching.
1. Select movie le you want to Play continuously by pressing ◄ or ► button from the Movie List.
2. Press the (Play)/ENTERE button.
3. Select Play continuously by pressing Blue button.
N
Movie will begin to play from where it was stopped being played.
N
If Cont. movie play help in the setup menu was set On, a pop-up message will appear when you play movie le you want
to Play continuously. (Refer to page 47)
Movie Play Tools Menu
❑
Picture Setting / Sound Setting
Refer to page 46.
Picture Size
Adjust the picture size for preference.
Fit: Play video at the TV screen size.
•
Original: Play video at the original size.
•
Caption Setting
Picture Setting
Sound Setting
Picture Size : Fit
Caption Setting
Information
Remove Safely
You can play the movies with caption.
Caption: On / Off
•
Caption Language: Select the caption language.
•
Caption Size: Large / Small / Standard
•
Caption Sync: Adjusts the caption output time.
•
Caption Sync Reset: Resets the Sync to the default values.
•
Information
The movie le information is displayed.
Remove Safely
You can remove the device safely from the TV.
Tools
U
Move Enter e Exit

Picture / Music Settings Using Media Play
When watching a SlideShow or listening to music using Media Play, you can set the picture and sound.
Picture Setting
❑
1. Press the TOOLS button during a Slide Show or while music or movie is playing.
2. Press the ▲ or ▼ button to select Picture Setting.
3. Press the ◄ or ► button to select the Picture Mode
(Standard, Eco, Movie, or Dynamic).
N
When selecting Dynamic, Eco, you can't adjust Dynamic Contrast, Black Tone.
4. Press the ▲ or ▼ button to move to an item.
(Contrast, Brightness, Cololur, Dynamic Contrast, Black Tone, or Reset)
N
Select Reset to initialize the picture settings.
5. Press the ◄ or ► button to adjust the settings.
For more information on the picture settings, refer to pages 17~20.
N
Picture Mode ◄ Standard ►
Contrast : 95
Brightness : 45
Cololur : 50
Dynamic Contrast : Medium
Black Tone : Off
Reset
Picture Setting
U
Move L Adjust Enter e Exit
Sound Setting
❑
1. Press the TOOLS button during a Slide Show or while music is playing.
2. Press the ▲ or ▼ button to select Sound Setting.
3. Press the ◄ o r ► button to select the Sound Mode.
(Standard, Music, Movie, Clear Voice, or Custom)
4. Press the ▲ or ▼ button to move to an item.
(Balance, 100Hz, 300Hz, 1KHz, 3KHz, 10KHz (Bandwidth Adjustment), or Reset)
N
Select Reset to initialize the sound settings.
5. Press the ◄ or ► button to adjust the settings.
For more information on the sound settings, refer to pages 22~23.
N
Sound Setting
Sound Mode ◄ Custom ►
Balance : L50 R50
100Hz : 0
300Hz : 0
1KHz : 0
3KHz : 0
10KHz : 0
Reset
U
Move L Adjust Enter e Exit
English - 46

English - 47
Using the Setup Menu
Setup displays the user settings of the Media Play menu.
1. Press the MEDIA.P button on the remote control to display the Media Play menu.
2. Press the ◄ or ► button to select Setup, then press the ENTERE button.
3. Press the ▲ or ▼ button to select the desired option.
Media Play
SETUP
USB : USB
851.98MB/995.00MB Free
4 . Press the ◄ or ► button to select the option.
To exit Media Play mode, press the MEDIA.P button on the remote control.
N
Use Colour View → On / Off
Select to view the colour information in the Photo menu.
If this is set to ON, the loading time increases for collecting the colour
N
information.
Music Repeat Mode →→ On / Off
Select to repeatedly play music les.
Cont. movie play help
→→ On / Off
Select to display the help pop-up message for continuous movie playback.
Get the DivX® VOD registration code
Photo Music SetupMovie
USB Device
Setup
Use Colour View ◄ Off ►
Music Repeat Mode On
Cont. movie play help On
Get the DivX® VOD registration code
Get the DivX® VOD deactivation code
Screen Saver Run Time 10 min
Information
Remove Safely
USB Device
Move Adjust Return
e
Shows the registration code authorized for the TV. If you connect to the DivX
web site and register the registration code with a personal account, you can download VOD registration le. If you play the VOD
registration using Media Play, the registration is completed. For more information on DivX® VOD, visit www.DivX.com.
Get the DivX® VOD deactivation code
When DivX® VOD is not registered, the registration deactivation code is displayed. If you execute this function when DivX® VOD is
registered, the current DivX® VOD registration is deactivated.
Screen Saver Run Time →→ 10 min / 20 min / 1 hour
Select to set the waiting time before the screen saver appears.
Information
Select to viewing the information of the connected device.
Remove Safely
You can remove the device safely from the TV.
Exit
DivX Certified to play DivX video, including premium content.

Media Play-DLNA
Setting the DLNA Network
DLNA allows you to watch videos and pictures saved on your PC on your TV through a network connection in Media Play mode.
This removes the need to copy them to a USB storage device and then connect the device to your TV. To use DLNA, the TV must be
connected to the network and the DLNA application must be installed on your PC.
Network Connections for Media Play DLNA.
❑
PC
LAN
LAN
TV
External Modem
(ADSL/VDSL/Cable TV)
1
1. Connect the LAN port on the rear panel of the TV to the external modem with a LAN Cable.
2. Connect the PC to which the DLNA PC Share Manager programme will be installed and the external modem using a LAN cable.
3. Connect the LAN port on the wall and the external modem with a Modem Cable.
Connecting to the Network
❑
1. When connecting to the network is complete, set up the network on the TV.
Three parts(subnet address) before the TV and PC IP addresses should be same. The last part (host address) should be
N
changed. (e.g. IP Address: 123.456.789.** )
2. Run a Network Test to check the network settings.
3
2
Installing the DLNA Application
To play content on the PC on the TV, you have to first install the application.
System Requirements
1. Insert the Programme CD supplied with this TV into your PC.
2. 20MB of free hard disk space is needed for the programme installation.
If you share les, up to 20MB of hard disk drive space is required for each 100 les.
N
If you cancel le sharing, the hard disk drive space used for the thumbnail information is also freed.
N
Supported Formats
1. Image: JPEG (jpg, jpeg)
2. Audio: MP3 (mp3)
3. Video: MPEG1(mpg, mpeg), MPEG2 PS/TS(mpg, mpeg, trp, ts, tp), divx(mpg, mpeg, avi), MPEG4/H.264 (mpg, mpeg)
English - 48
Continued...

English - 49
Install the application
1. Run the Setup.exe le on the Programme CD supplied with the product.
N
Alternatively, you can download the le from www.samsung.com.
2. Install the SAMSUNG PC Share Manager as shown in the gures below.
►
►
► ►
►
3. When the installation is complete, the PC Share Manager icon appears on your Desktop.
N
Double-click the icon to run the programme.
Continued...

Using the DLNA Application
Name Modied
Name
Name
Name
Name
Name
Name Modied
Name
Name
Name
Yes No
Programme Screen Display
1
2 3 4 5
8
6
7
1. Menus: The following application menus are provided : File, Share, Server, and Help.
2. Click to share the selected PC server folder.
3. Click to cancel sharing.
4. Click to refresh the PC folder and les.
5. Click to synchronize the share status.
6. The folders and les of the PC to be shared are listed.
7. Folders shared by the user are listed.
8. PC server name shown on the device list of the Media Play.
File
❑
Property: Shows information on the selected file or folder.
Method 1: Select a le or folder and select the File menu and then select the Property sub-menu.
•
Method 2: Select a le or folder, right-click over the selected le or folder and then select Property from the pop-up menu.
•
<Method 1> <Method 2>
Exit: Exits the DLNA application.
If you select Exit without applying the changes after changing the shared status, a message will appear asking if you want to apply
the changed settings to the PC. Select Yes to apply the changes and exit the application.
Continued...
English - 50

English - 51
Share
❑
Sharing a Folder
You can share a folder from your PC to the TV. The maximum number of folders that can be shared is 32.
Your PC will operate as a server to the TV.
N
Method 1: Select a folder in My Computer, select the Share menu and then select the Share Folder sub-menu.
•
Method 2: Select a folder in My Computer, right-click over the selected folder and then select Share Folder from the pop-up
•
menu.
Method 3: Locate the mouse pointer over a folder in the My Computer folder list in the left pane and drag&drop the folder into
•
the Shared Folders pane. If a message appears asking you to conrm the shared folder, select Yes.
<Method 1> <Method 2> <Method 3>
Cancelling a Shared Folder
You can cancel a shared folder on your PC. Select a folder from the Shared Folder pane and select Unshare Folder.
Method 1: Select a folder from the Shared Folder pane, select the Share menu and then select Unshare Folder.
•
Method 2: Select a folder from the Shared Folder pane, right-click over the selected folder and then select Unshare Folder
•
from the pop-up menu.
Method 3: Locate the mouse pointer over a folder in the Shared Folder pane and drag&drop the folder into the My Computer
•
pane. If a message appears asking you to conrm the cancelation, select Yes.
<Method 1> <Method 2> <Method 3>
Applying the Current Settings
Perform this when synchronization is necessary due to a new shared folder or canceling a shared folder. The Set Changed State
menu applies changes to shared folders to the data saved with the PC share programme.
Since applying changes to the internal data is a time-consuming process, this function enables users to apply changes to the data
only when required.
Until the Set Changed State menu is selected, the changed state of the shared folder is not applied to the server.
Changes to the shared folders are not applied to your PC until you select the Set Changed State menu.
Method 1: Select the Share menu and select the Refresh DB sub-menu.
•
Method 2: Click the Set Changed State icon.
•
Continued...

Setting the Access Permission
To enable the TV to nd your PC, the TV must be set to Set Device Policy in the Access Permission Settings window. In addition,
the PC server and the TV must be on the same subnet.
Method: Select the Share menu and select Set Device Policy. Rejected items are represented in gray. You can change the
•
access permissions by using the Allow Accept / Deny button. To delete an item, select the item and select Delete Item.
Server
❑
Server
You can run or stop using your PC as a server.
Start Server at Windows start
You can determine whether to start the PC server automatically when Windows starts.
Change server name
You can rename the PC server. Enter a new name and click OK. The new name will appear at the top right of the window and will
appear on the TV.
Help
❑
Version
The programme version information message box appears.
English - 52

English - 53
Using the DLNA Function
Using the DLNA Menu
DLNA (Digital Living Network Alliance) enables content saved on a DLNA server
(usually your PC) connected to your TV or over a network to be played.
Media Play enables playing content saved on a USB memory device connected to the
TV, while DLNA enables playing content saved on a DLNA server (your PC) connected
Media Play
PHOTO
to your TV or over the network. The procedures to use the content are the same as
those for Media Play.
If you install the PC share manager programme supplied with the TV onto a PC, you
can have the PC perform the role of a DLNA server over the network.
Photo Music Setup
USB Device
1. Press the MENU button. Press the ▲ or ▼ button to select Application, then press
the ENTERE button.
2. Press the ▲ or ▼ button to select Media Play (USB & DLNA), then press the ENTERE button.
3. Press the ◄ or ►button to select an icon (Photo, Music, Movie, Setup), then press the ENTERE button.
To exit DLNA mode, press the MEDIA.P button on the remote control.
N
Photo
❑
Photo List Tools menu
Slide Show / Copy / Play Current Group / Change Group / Copy Current Group / Information
Slide Show Tools menu
Stop Slide Show & Start Slide Show / Slide Show Speed / Slide Show Effect / Zoom / Rotate / Picture Setting / Sound Setting /
Information
Music
❑
USB : USB
Movie
851.98MB/995.00MB Free
Return
Music List Tools menu
Play Current Group / Copy / Change Group / Information
Music Play Tools Menu
Repeat Mode / Picture Setting / Sound Setting / Information
Movie
❑
Movie List Tools menu
Play Current Group / Copy / Copy Current Group / Information
Movie Play Tools Menu
Picture Setting / Sound Setting / Picture Size / Caption Setting / Information
Setup
❑
Use Colour View / Music Repeat Mode / Cont. movie play help / Get the DivX® VOD registration code / Get the DivX® VOD
deactivation code / Screen Saver Run Time / Information.
DLNA does not support the following functions.
N
The Background Music and Background Music Setting functions.
-
Sorting les by preference in the Photo, Music, and Movie folders.
-
The Change Group function.
-
The Remove Safely function.
-
The (REW) /REW) / (FF) button functions while a movie is playing.FF) button functions while a movie is playing.
-
The Skip (◄/► button) or Pause function may not work while a movie is playing for the DLNA of other manufacturers,
N
depending on the corresponding content information.
The playing time may not be displayed while a movie is playing.
N

About Anynet+
Connecting Anynet+ Devices
Anynet+ is a function that enables you to control all connected Samsung devices that support Anynet+ with your Samsung TV’s remote.
The Anynet+ system can be used only with Samsung devices that have the Anynet+ feature. To be sure your Samsung device has this
feature, check if there is an Anynet+ logo on it.
To connect to a TV
❑
TV
Anynet+
Device 4
Anynet+
Device 3
Anynet+
Device 2
Anynet+
Device 1
HDMI 1.3 Cable
HDMI 1.3 Cable
HDMI 1.3 Cable
HDMI 1.3 Cable
1. Connect the HDMI IN (1(DVI), 2, 3 or 4) jack on the TV and the HDMI OUT jack of the corresponding Anynet+ device using an
HDMI cable.
English - 54
Continued...

English - 55
To connect to Home Theater
❑
TV
HDMI 1.3 Cable
HDMI 1.3 Cable
Anynet+ Device 4
Home Theatre
Anynet+ Device 3
HDMI 1.3 Cable
Anynet+ Device 1
HDMI 1.3 Cable
HDMI 1.3 Cable
Anynet+ Device 2
1. Connect the HDMI IN (1(DVI), 2, 3 or 4) jack on the TV and the HDMI OUT jack of the corresponding Anynet+ device using an
HDMI cable.
2. Connect the HDMI IN jack of the home theater and the HDMI OUT jack of the corresponding Anynet+ device using an HDMI cable.
Connect the Optical cable between the DIGITAL AUDIO OUT (OPTICAL) jack on your TV and the Digital Audio Input on the Home
N
Theater.
When following the connection above, the Optical jack only outputs 2 channel audio. You will only hear sound from the Home
N
Theater’s Front Left and Right speakers and the subwoofer. If you want to hear 5.1 channel audio, connect the DIGITAL AUDIO
OUT (OPTICAL) jack on the DVD player or Cable/Satellite Box (ie Anynet Device 1 or 2) directly to the Amplier or Home Theater,
not the TV.
Connect only one Home Theater.
N
You can connect an Anynet+ device using the HDMI 1.3 cable. Some HDMI cables may not support Anynet+ functions.
N
Anynet+ works when the AV device supporting Anynet+ is in the Standby or On status.
N
Anynet+ supports up to 12 AV devices in total. Note that you can connect up to 3 devices of the same type.
N
Setting Up Anynet+
Anynet+(HDMI-CEC) Setup
❑
Press the TOOLS button to display Tools menu.
T
You can also display Anynet+ menu by selecting Tools → Anynet+(HDMI-CEC).
Anynet+(HDMI-CEC) → Off / On
To use the Anynet+ Function, Anynet+ (HDMI-CEC) must be set to On.
When the Anynet+ (HDMI-CEC) function is disabled, all the Anynet+ related
N
operations are deactivated.
Auto Turn Off → No / Yes
Setting an Anynet+ Device to turn Off Automatically when the TV is Turned Off
The active source on the TV remote must be set to TV to use the Anynet+ function.
N
If you set Auto Turn Off to Yes, connected external devices are also turned off
N
when the TV is turned off. If an external device is still recording, it may or may not
turn off.
Application
Media Play (USB & DLNA)
Anynet+ (HDMI-CEC)
Content Library
Internet@TV
Home Network Centre
Anynet+(HDMI-CEC) : On ▶
Auto Turn Off : Yes
U
Move E Enter R Return
►

Switching between Anynet+ Devices
1. Press the TOOLS button. Press the ENTERE button to select Anynet+ (HDMI-CEC).
2. Press the ▲ or ▼ button to select Device List, then press the ENTERE button.
Anynet+ devices connected to the TV are listed. If you cannot nd a device you
N
want, press the red button to scan for devices.
Only when you set Anynet+ (HDMI-CEC) to On in the Setup menu, the Device List
N
menu appears.
3. Press the ▲ or ▼ button to select to a particular device and press the ENTERE
button. It is switched to the selected device.
Switching to the selected devices may take up to 2 minutes. You cannot cancel the
N
operation during the switching operation.
The time required to scan for devices is determined by the number of connected devices.
N
If you have selected external input mode by pressing the SOURCE button, you cannot use the Anynet+ function. Make sure to
N
switch to an Anynet+ device by using the TOOLS button.
Anynet+ Menu
❑
The Anynet+ menu changes depending on the type and status of the Anynet+ devices connected to the TV.
Anynet+ Menu Description
View TV Anynet+ mode changes to TV broadcast mode.
Device List Shows the Anynet+ device list.
(device_name) MENU Shows the connected device menus. E.g.
If a DVD recorder is connected, the disc menu of the DVD recorder will appear.
(device_name) INFO Shows the play menu of the connected device. E.g.
If a DVD recorder is connected, the play menu of the DVD recorder will appear.
Recording: (*recorder) Starts recording immediately using the recorder.
(This is only available for devices that support the recording function.)
(*recorder) Reserve Recording Enables reserving a recording for the recorder.
(This is only available for devices that support the recording reservation function.)
Stop Recording: (*recorder) Stops recording.
Receiver Sound is played through the receiver.
View TV
Device List
Recording : DVDR
DVDR MENU
DVDR INFO
Receiver : On
Setup
U
Move E Enter R Return
TV Remote Control Buttons Available in Anynet+ Mode
❑
Device Type Operating Status Available Buttons
After switching to the device, when the
menu of the corresponding device is
Anynet+ Device
displayed on the screen.
After switching to the device, while
playing a file
Device with
built in Tuner
After switching to the device, when you
are watching a TV programme
Audio Device When Receiver is activated
The Anynet+ function only works when the active source on the TV remote control is set to TV.
N
The button works only while in the recordable state.
N
You cannot control Anynet+ devices using the buttons on the TV. You can control Anynet+ devices only using the TV remote control.
N
The TV remote control may not work under certain conditions. In this case, reselect the Anynet+ device.
N
The Anynet+ functions do not operate with other manufacturers’ products.
N
The , operations may differ depending on the device.
N
If more than one recording device is connected, they are displayed as (*recorder) and if only one recording device is connected, it
N
Numeric buttons
▲/▼/◄/►/ENTERE buttons
Colour buttons / EXIT button
(Backward search) / (Forward search) (Stop) /
(Play) / (Pause)
P / button
= / button
MMUTE button
will be represented as (*device_name).
English - 56

English - 57
Recording
You can make a recording of a TV programme using a Samsung recorder.
1. Press the TOOLS button. Press the ENTERE button to select Anynet+ (HDMI-CEC).
2. Press the ▲ or ▼ button to select Recording(recorder): then press the ENTERE
button. Recording begins.
When there is more than one recording device
N
When multiple recording devices are connected, the recording devices are listed.
Press the ▲ or ▼ button to select a recording device and press the ENTERE
button. Recording begins.
When the recording device is not displayed
N
Select Device List and press the red button to search devices.
Pressing the button will record whatever you are currently watching. If you are watching video from another device, the video
N
from the device is recorded.
Before recording, check whether the antenna jack is properly connected to the recording device. To properly connect an antenna to
N
a recording device, refer to the recording device’s users manual.
View TV
Device List
Recording : DVDR
DVDR MENU
DVDR INFO
Receiver : On
Setup
U
Move E Enter R Return
Listening through a Receiver
You can listen to sound through a receiver instead of the TV speaker.
1. Press the TOOLS button. Press the ENTERE button to select Anynet+ (HDMI-CEC).
2. Press the ▲ or ▼ button to select Receiver. Press the ◄ or ► button to select On or Off.
If your receiver supports audio only, it may not appear in the device list.
N
The receiver will work when you have properly connected the Optical IN jack of the
N
receiver to the Optical Out jack of the TV.
When the receiver (home theater) is set to On, you can hear sound output from the
N
TV’s Optical jack. When the TV is displaying a DTV(air) signal, the TV will send out 5.1
channel sound to the Home theater receiver. When the source is a digital component
such as a DVD and is connected to the TV via HDMI, only 2 channel sound will be heard from the Home Theater receiver.
When using the Media Play feature, sound may not output properly through the receiver.
N
When listening through the receiver, there are restrictions for using the audio-related (MTS, Preferred language) menus.
N
If there is a power interruption to the TV when the Receiver is set to On (by disconnecting the power cord or a power failure), the
N
Speaker Select may be set to External Speaker when you turn the TV on again. (see page 23)
View TV
Device List
Recording : DVDR
DVDR MENU
DVDR INFO
Receiver : On
Setup
U
Move E Enter R Return

Troubleshooting for Anynet+
Symptom Solution
Anynet+ does not work. Check if the device is an Anynet+ device. The Anynet+ system supports Anynet+ devices only.
I want to start Anynet+. Check if the Anynet+ device is properly connected to the TV and check if the Anynet+
I want to exit Anynet+. Select View TV in the Anynet+ menu.
The message Connecting to
Anynet+ device...
appears on the screen.
The Anynet+ device does not
play.
The connected device is not
displayed.
The TV programme cannot be
recorded.
The TV sound is not output
through the receiver.
•
Connect only one receiver (home theater).
•
Check if the Anynet+ device power cord is properly connected.
•
Check the Anynet+ device’s Video/Audio/HDMI 1.3 cable connections.
•
Check whether Anynet+ (HDMI-CEC) is set to On in the Anynet+ setup menu.
•
Check whether the TV remote control is in TV mode.
•
Check whether it is Anynet+ exclusive remote control.
•
Anynet+ doesn’t work in certain situations. (Searching channels, Plug & Play, etc.)
•
When connecting or removing the HDMI 1.3 cable, please make sure to search devices again
•
or turn your TV off and on again.
Check if the Anynet+ Function of Anynet+ device is set on.
•
•
(HDMI-CEC) is set to On in the Anynet+ Setup menu.
Press the TV button on the TV remote control to switch to TV. Then press the TOOLS button
•
to show the Anynet+ menu and select a menu you want.
•
Press the SOURCE button on the TV remote control and select a device other than Anynet
•
devices. (Note that the channel button operates only when a tuner-embedded Anynet+ device
is not connected.)
You cannot use the remote control when you are conguring Anynet+ or switching to a view
•
mode.
Use the remote control when the Anynet+ setting or switching to view mode is complete.
•
You cannot use the play function when Plug & Play is in progress.
•
Check whether or not the device supports Anynet+ functions.
•
Check whether or not the HDMI 1.3 cable is properly connected.
•
Check whether Anynet+ (HDMI-CEC) is set to On in the Anynet+ setup menu.
•
Search Anynet+ devices again.
•
You can connect an Anynet+ device using the HDMI 1.3 cable only. Some HDMI cables may
•
not support Anynet+ functions.
If it is terminated by an abnormal situation such as disconnecting the HDMI cable or power
•
cord or a power failure, please repeat the device scan.
Check whether the antenna jack on the recording device is properly connected.
•
Connect the optical cable between TV and the receiver.
•
+
English - 58

English - 59
Content Library
Activating the Content Library
The Content Library enables you to view or play the built-in contents on the TV or stored
on your USB device.
1. Press the MENU button. Press the ▲ or ▼ button to select Application,
then press the ENTERE button.
2. Press the ▲ or ▼ button to select Content Library, then press the ENTER
E
button. The Content Library main menu is displayed.
Press the CONTENT button on the remote control to display the
O
Content Library main menu.
3. Press the ◄ or ► button to select an icon (Gallery, Cooking, Children, Wellness,
Others, Content Management), then press the ENTERE button.
The selected item will be run.
N
Using the Remote Control Button in Content Library Menu
❑
Button Operations
▲/▼/◄/►
E
ENTER
Move the cursor and select an item.
Select the currently selected item.
RETURN Return to the previous menu.
EXIT Stop the current function and return to the Content Library main menu.
Colour Button
Button that provide functions are described on the corresponding page.
You can control the volume of the played content.
CONTENT Enter or Exit Content Library mode.
Media Play (USB & DLNA)
Application
Anynet+ (HDMI-CEC)
Content Library
Internet@TV
Home Network Centre
Content Library
Gallery
< >
Gallery
Cooking Children
Wellness Others
Return
Exit
If you press the Volume or MMUTE button, no OSD is displayed, but the function operates accordingly.
N
To return to TV mode, press the
N
CONTENTS LIBRARY CONTAINS TEXT, GRAPHICS, IMAGES, MULTIMEDIA, AND OTHER MATERIALS FOR
N
P
button on the remote control.
INFORMATIONAL AND PROMOTIONAL PURPOSES ONLY. MATERIALS IN CONTENTS LIBRARY HAS BEEN
MODIFIED AND KEEPS BEING REVISED AND UPDATED. THE MATERIALS IN THE CONTENTS LIBRARY MAY NOT
BE SUITABLE FOR ALL AUDIENCES.
INFORMATION IN THE CONTENTS LIBRARY IS PROVIDED “AS IS.” ALTHOUGH THE INFORMATION PROVIDED
N
TO YOU IN THE CONTENTS LIBRARY IS OBTAINED OR COMPLIED FROM SOURCES WE BELIEVE TO BE
RELIABLE, SAMSUNG CANNOT AND DOES NOT GUARANTEE THE ACCURACY, VALIDITY, TIMELINESS OR
COMPLETENESS OF ANY INFORMATION OR DATA MADE AVAILABLE TO YOU FOR ANY PARTICULAR PURPOSE.
UNDER NO CIRCUMSTANCES, INCLUDING NEGLIGENCE, SHALL SAMSUNG BE HELD LIABLE, WHETHER IN
CONTRACT OR TORT, FOR ANY DIRECT, INDIRECT, INCIDENTAL, SPECIAL OR CONSEQUENTIAL DAMAGES,
ATTORNEY FEES, EXPENSES, OR ANY OTHER DAMAGES WHATSOEVER ARISING OUT OF, OR IN CONNECTION
WITH, ANY INFORMATION CONTAINED IN, OR THE USE OF, THE CONTENTS LIBRARY, EVEN IF ADVISED OF THE
POSSIBILITY OF SUCH DAMAGES.

Using the Content Library
Gallery
❑
This function plays a Slide Show with high resolution images and background music and produces various atmospheres.
Using the Gallery function of the TV, you can change your home atmosphere.
Press INFO button to see the credit and detail information in English for the imagery (currently, the credit supports English only).
N
You can pause the slide show by pressing the ENTERE button during a slide show.
N
The copyrights of the Gallery contents and all issues related to them are reserved by Timespace / JoongAng M&B, Inc.
N
Cooking
❑
You can view various recipes that you can then easily follow step by step. Enjoy these contents which give you great ideas for
meals.
The recipes introduced in the Cooking contents on the Samsung TV are based on recipes published by Anness Publishing.
N
The copyrights of the Cooking contents and all issues related to them are reserved by Practical Pictures.
N
Children
❑
This is educational and interactive content that children can watch repeatedly. Enjoy existing stories, songs and plays with the
Boowa and Kwala characters.
The copyrights of the Children contents and issues related to them are reserved by UpToTen.
N
Wellness
❑
This is benecial health management content that provides stretching and massage exercises that can be enjoyed by the whole
family.
Content Management
❑
My contents
The use of contents is the same as in using the TV memory contents. Also, you can delete and play the each contents.
USB
You can download the contents onto a USB memory device and play them on your TV.
The contents on the external USB device are played directly.
Content Library only supports USB Mass Storage Class devices (MSC). MSC is a Mass Storage Class Bulk-Only TransportTransport
N
device. Examples of MSC are Thumb drives and Flash Card Readers (Both USB HDD and HUB are not supported.)
Playing a game using an external USB memory device will allow you to save your game (depending on the game).
N
Take care as removing the USB memory device while saving data to the USB memory device may cause the data to be lost.
Downloading New Contents New Contents
N
New content other than the built-in contents will be provided via the Samsung.com websitefree of charge.
When you download the paid contents, you need UDN number to download contents. Check the UDN number before
downloading a new content item.
1. Visit the www.samsung.com website.
2. Select a content item in the Contents Download page.
3. Download the contents onto the USB memory device.
4. Go to Content Library main menu by pressing CONTENT button or choosing Content Library
(Menu → Application → Content Library)
5. Plug the USB memory into USB port on the side of the TV.
6. You can see the content sub item which you downloaded.
7. Select a content item and press the enter button.
8. You can play the selected content item.
Setup
Screen Saver Run Time → 10 min. / 20 min. / 40 min. / 1 hour
•
Select to set the waiting time before the screen saver appears.
Save UDN (Unique Device Number)
•
The 18-digit number on the screen is the product code.
You can save the UDN to your USB memory.
An NTFS format USB storage device does not support saving UDN.We recommend using a FAT format USB storage device.
N
English - 60

English - 61
Home Network Centre
Home Network Centre
About the Home Network Centre
The Home Network Centre connects the TV and mobile phones through a network. You can view call arrivals, text message contents,
and schedules set on the mobile phone on the TV using the Home Network Centre. In addition, you can play the media contents saved
on the mobile phones such as videos, photos and music by controlling them onto the TV via the network.
If the device supports DLNA DMC (Digital Media Controller) function, Home Network Centre function is available.
N
This function is for compatibility with Samsung mobile phone which will be released later on. For more information, visit www.
N
samsung.com or contact Samsung call center. Other models will be added in the future. The mobile device may need additional
software installation. For details, refer to each user’s guide.
Connecting to the Home Network Centre
❑
For more information about the network settings, refer to ‘Network Setup’.
Connecting to a Wi-Fi Ad-hoc network
TV Rear Panel
Samsung Wireless
LAN Adapter
Mobile phone
1. Connect the ‘Samsung Wireless LAN Adapter’ to the USB 1 (HDD) or USB 2 port of the TV.
2. For more information on how to congure Ad-hoc network, refer to ‘Network Setup’.
For information on conguring the mobile phone’s network settings, refer to the mobile phone manual.
N
3. Set up the IP address, SSID and password for the mobile phone in the Ad-hoc Settings of the mobile phone using the Network
Name (SSID) and Security Key (password) displayed on the TV.
Connecting through a wire / wireless IP sharer
1. Connect the LAN port of the TV and the Wire/Wireless IP sharer using the LAN cable or connect the USB 1 (HDD) or USB 2
port of the TV and the ‘Samsung Wireless LAN Adapter’.
For the procedures to set up the wire/wireless sharer and the mobile phone, refer to the manual of the corresponding device.
N
TV Rear Panel
Samsung Wireless
LAN Adapter
Wire/Wireless IP sharer
Mobile phone
TV Rear Panel
Samsung Wireless
LAN Adapter
LAN Cable
LAN Cable
Wire/Wireless IP sharer
Mobile phone

Setting Up the Home Network Centre
Message
❑
Shows a list of mobile phones which have been set up with this TV to use the
message function (the call arrivals, text message contents and schedules set on the
mobile phone).
Allowed
Allows the mobile phone.
Denied
Blocks the mobile phone.
Delete
Deletes the mobile phone from the list.
This function just deletes the name from the list. If the deleted mobile device
N
turns on or tries to connect to the TV, it may be shown on the list.
Media
❑
Shows a list of mobile phones which is available to control Media contents
(videos, photos, music) from the phone.
Besides mobile phone, other mobile devices that support DLNA DMC are
N
available.
Allowed
Allows the mobile phone.
Denied
Blocks the mobile phone.
Delete
Deletes the mobile phone from the list.
This function just deletes the corresponding name on the list. If the deleted mobile device turns on or tries to connect to the TV,
N
it may be shown on the list.
Home Network Centre
Message
Media
Setup
111-1234-5671 : Allowed
111-1234-5672 : Allowed
111-1234-5673 : Denied
111-1234-5674 : Denied
Home Network Centre
Message
Media
Setup
111-1234-5671 : Allowed
111-1234-5672 : Allowed
111-1234-5673 : Denied
111-1234-5674 : Denied
Return
Return
Exit
Exit
Setup
❑
Message → On / Off
You can determine whether to use the message function (the call arrivals, text
message contents, and schedules set on the mobile phone).
Media → On / Off
You can select whether to use the play function that plays the contents (videos,
photos, music) from the mobile phone.
TV name
You can set the TV name so as to nd it easily on the mobile device.
If you selects User Input, you can type the TV name by OSK(On Screen
N
Keyboard).
Home Network Centre
Message
Media
Setup
Message : On
Media : On
TV name : TV
Return
Exit
English - 62

English - 63
Using the Message Function
Using this function, you can view the call arrivals, text message contents and schedules
set on the mobile phone through the alarm window while watching TV.
To disable this Message alarm window, set Message to Off in Setup of the Home
N
Network Centre.
The alarm window appears for 20 seconds. If no key is pressed or if Cancel is
N
selected, it appears up to three times at 5 minute intervals.
If OK is selected, or if OK is not selected while the message is displayed three
N
times, the message will be deleted. The message is not deleted from the mobile
phone.
The simple alarm window can be displayed, while using some applications such as
N
Media Play, Contents Library, etc. In this case, to view the contents of the message,
switch to TV viewing mode.
When the message of an unknown mobile phone is displayed, select the mobile
N
phone in the Message item of the Home Network Centre and select Denied to block
the phone.
Message View
❑
If a new text message (SMS) arrives while you are watching TV, the alarm window
appears. If you click the OK button, the contents of the message are displayed.
If you select the OK button, the contents of the message are displayed.
•
If you select the Cancel button, the alarm window appears up to three times at
•
5 minute intervals.
You can congure the viewing settings for the text message (SMS) contents on
N
the mobile phone. For the procedures, refer to the mobile phone manual.
Some special characters may be displayed as blank or broken characters.
N
Call Arrival Alarm
❑
If a call arrives while you are watching TV, the alarm window appears.
If you select the OK button, the call arrival alarm is conrmed and the alarm
•
window is closed.
If you select the Cancel button, the alarm window appears up to three times at 5
•
minute intervals.
Media Play
PHOTO
Photo Music Setup
USB Device
husband
SMS
New message received
Doyou want to view
the details?
Cancel
OK
851.98MB/995.00MB Free
USB : USB
husband
Movie
You have a phone call
011-298-2030
OK
e
husband
Call
Mom
Cancel
Return
Schedule Alarm
❑
While you are watching TV, the alarm window appears to display the registered
schedule.
If you select the OK button, you can view the contents of the schedule registered
•
on the mobile phone.
If you select the Cancel button, the alarm window appears up to three times at 5
•
minute intervals.
You can congure the viewing settings for the schedule contents on the mobile
N
phone.
For the procedures, refer to the mobile phone manual.
Some special characters may be displayed as blank or broken characters.
N
husband
Scheduled event
You have a schedule
Do you want to view
the details?
Cancel
OK

Using the Media Function
An alarm window appears informing the user that the media contents (videos, photos,
music) sent from the mobile phone will be displayed on the TV.
The contents are played automatically 3 seconds after the alarm window appears.
If you press the RETURN or EXIT button when the alarm window appears,
the Media Contents are not played.
To turn off the media contents transmission from the mobile phone, set Media to
N
Off in Setup of the Home Network Centre.
The contents may not be played on the TV depending on their resolution and
N
format.
Media play control buttons
❑
Button Operations
Move the cursor and select an item.
◄/►
ENTER
RETURN Return to the previous menu.
TOOLS Run various functions from the Photo, Music and Movie menus.
INFO Show file information.
EXIT Stop Media Play mode and Returns to TV mode.
The ENTERE and ◄/► buttons may not work depending on the type of media content.
N
Using the mobile device, you can control playing media. For details, refer to each user’s guide.
N
•
While playing a movie le: Skip forwards or backwards through the movie le.
•
Pressing the ENTERE button during play pauses the play.
•
Pressing the ENTERE button during pause resumes the play.
•
Media will be played from “Unknown Device 13”
English - 64

English - 65
Recommendations for Use
Teletext Feature
Most television stations provide written information services via Teletext. The index page of the teletext service gives you information on
how to use the service. In addition, you can select various options to suit your requirements by using the remote control buttons.
For teletext information to be displayed correctly, channel reception must be stable. Otherwise, information may be missing or some
N
pages may not be displayed.
1
: (exit)
Exit from the teletext display.
2
6 (index)
Used to display the index (contents) page at any time while you are viewing teletext.
3
8 (store)
Used to store the teletext pages.
4
4 (size)
Press to display the double-size letters in the upper half of the screen. For lower half
of the screen, press it again. To display normal screen, press it once again.
5
0 (mode)
Press to select the teletext mode (LIST/FLOF). If you press it in the LIST mode, it
switches into the List save mode. In the List save mode, you can save teletext page
into list using the 8(store) button.
6
/ (teletext on/mix)
Press to activate teletext mode after selecting the channel providing the teletext
service. Press it twice to overlap the teletext with the current broadcasting screen.
1
2
3
4
8
9
7
5 (reveal)
Used to display the hidden text (answers to quiz games, for example). To display
normal screen, press it again.
8
1 (sub-page)
Used to display the available sub-page.
9
9 (hold)
Used to hold the display on a given page if the selected page is linked with several
secondary pages which follow on automatically. To resume, press it again.
0
7 (cancel)
Used to display the broadcast when searching for a page.
!
Colour buttons (red/green/yellow/blue)
If the FASTEXT system is used by a broadcasting company, the different topics
covered on a teletext page are colour-coded and can be selected by pressing
the colour buttons. Press one of them corresponding to the required. The page is
displayed with other coloured information that can be selected in the same way.
To display the previous or next page, press the corresponding coloured button.
@
2 (page up)
Used to display the next teletext page.
#
3 (page down)
Used to display the previous teletext page.
You can change teletext pages by pressing the numeric buttons on the remote control.
N
0
!
5
@
#
6
7
Continued...

The teletext pages are organized according to six categories:
Part Contents
A Selected page number.
B Broadcasting channel identity.
C Current page number or search indications.
D Date and time.
E Text.
F Status information.
FASTEXT information.
Teletext information is often divided between several pages displayed in sequence,
N
which can be accessed by:
Entering the page number
Selecting a title in a list
-
Selecting a coloured heading (FASTEXT system)
-
Press the TV button to exit from the teletext display.
O
Wall Mount Kit Specifications (VESA)
Install your wall mount on a solid wall perpendicular to the floor.
When attaching to other building materials, please contact your nearest dealer.
If installed on a ceiling or slanted wall, it may fall and result in severe personal injury.
Product Family inch VESA Spec. (A * B) Standard Screw Quantity
19" ~22" 100 * 100
23"~29" 200 * 100
LCD-TV
PDP-TV
We provided the standard dimensions for wall mount kits as shown in the table above.
N
When purchasing our wall mount kit, a detailed installation manual and all parts necessary for assembly are provided.
N
Do not use screws longer than the standard dimension, as they may cause damage to the inside of the TV set.
N
For wall mounts that do not comply with the VESA standard screw specications, the length of the screws may differ depending on
N
their specications.
Do not use screws that do not comply with the VESA standard screw specications.
N
Do not use fasten the screws too strongly, this may damage the product or cause the product to fall, leading to personal injury.
Samsung is not liable for these kinds of accidents.
Samsung is not liable for product damage or personal injury when a non-VESA or non-specied wall mount is used or the consumer
N
fails to follow the product installation instructions.
Our 57” and 63” models do not comply with VESA Specications. Therefore, you should use our dedicated wall mount kit for this
N
model.
Do not exceed 15 degrees tilt when mounting this TV.
N
30"~40" 200 * 200 M6
46"~55" 400 * 400
80" ~ 1400 * 800
42"~ 50" 400 * 400
58"~ 63" 600 * 400
70" ~ 800 * 400
80" ~ 1400 * 800
Do not install your Wall Mount Kit while your TV is turned on.
It may result in personal injury due to electric shock.
M4
4
M857"~70" 800 * 400
M8 4
English - 66

English - 67
Preparing before installing Wall- Mount
Case A. Installing SAMSUNG Wall-Mount Case B. Installing other company’s Wall-Mount
1. Install Wall Mount with the torque range of 15kgf·cm or less. Make sure that parts can be damaged if the torque is out of the
specied range.
2. Accessory Kit containsHolder–Ring [2] for installing other company’s Wall-Mount on Samsung TV. (Case B)
Screw down the hole ��1] when installing wall-mount on the wall. when installing wall-mount on the wall.
N
Securing the TV to the Wall
Pulling, pushing, or climbing on the TV may cause the TV to fall. In particular, ensure your children do not hang
over or destabilize the TV; doing so may cause the TV to tip over, causing serious injuries or death. Follow all
safety precautions provided on the included Safety Flyer. For added stability, install the anti-fall device for safety
purposes, as follows.
Wall
To avoid the TV from falling
❑
1. Put the screws into the clamps and rmly fasten them onto the wall. Conrm that the screws have been rmly installed onto the wall.
You may need additional material such as an anchor depending on the type of wall.
N
Since the necessary clamps, screws, and string are not supplied, please purchase these additionally.
N
2. Remove the screws from the center back of the TV, put the screws into the clamps, and then fasten the screws onto the TV again.
Screws may not be supplied with the product.
N
3. Connect the clamps xed onto the TV and the clamps xed onto the wall with a strong string and then tie the string tightly.
Install the TV near to the wall so that it does not fall backwards
N
It is safe to connect the string so that the clamps xed on the wall are equal to or lower than the clamps xed on the TV.
N
Untie the string before moving the TV.
N
4. Verify all connections are properly secured. Periodically check connections for any sign of fatigue for failure. If you have any doubt
about the security of your connections,contact a professional installer.
.
Wall

Securing the Installation Space
10 cm
10 cm
10 cm
10 cm
10 cm
10 cm
10 cm
10 cm
10 cm
10 cm
Keep the required distances between the product and other objects (e.g. walls) to ensure proper ventilation.
Failing to do so may result in fire or a problem with the product due to an increase in the internal temperature of the product.
Install the product so the required distances shown in the figure are kept.
When using a stand or wall-mount, use parts provided by Samsung Electronics only.
N
If you use parts provided by another manufacturer, it may result in a problem with the product or an injury due to the product
falling.
If you use parts provided by another manufacturer, it may result in a problem with the product or re due to an increase in thethe
internal temperature of the product due to poor ventilation.
The appearance may differ depending on the product.
N
When installing the product with a stand
When installing the product with a wall-mount
English - 68

English - 69
1
3
2
1
3
2
1
3
2
1
1
2
3
2
1
2
Assembling the Cables
Enclose the cables in the Holder-Wire Cable so that the cables are not visible through the transparent stand.
The product colour and shape may vary depending on the model.
N
Stand Type
❑
Wall-Mount Type
❑

Troubleshooting
Before contacting the Samsung after-sales service, perform the following simple checks.
If you cannot solve the problem using the instructions below, note the model and serial number of the television and contact your local
dealer.
No sound or picture Check that the mains lead has been connected to a wall socket.
Normal picture but no sound Check the volume.
No picture or black and white
picture
Sound and picture
interference
Blurred or snowy picture,
distorted sound
Remote control malfunctions Replace the remote control batteries.
Screen is black and power
indicator light blinks steadily
The damaged picture appears
in the corner of the screen.
The "Resets all settings to
the default values" message
appears.
•
Check that you have pressed the button on your set.
•
Check the picture contrast and brightness settings.
•
Check the volume.
•
Check if Speaker Select is set to External Speaker.
•
•
Check whether the MMUTE button has been pressed on the remote control.
•
Adjust the colour settings.
•
Check that the broadcast system selected is correct.
•
Try to identify the electrical appliance that is affecting the television, then move it further away.
•
Plug the television into a different main socket.
•
Check the direction, location and connections of your aerial.
•
This interference often occurs due to the use of an indoor aerial.
•
•
Clean the upper edge of the remote control (transmission window).
•
Check that the + and – ends of the batteries are inserted correctly.
•
Check that the batteries are drained.
•
On your computer check; Power, Signal Cable.
•
Move the computer’s mouse or press any key on the keyboard.
•
On your equipment check (STB, DVD, etc) ; Power, Signal Cable.
•
The TV is using its power management system.
•
Press the Source button on the panel or remote control.
•
Turn the TV off and on.
•
If Screen Fit is selected in some external devices, the damaged picture may appear in the
•
corner of the screen. This symptom is caused by external devices, not TV.
This appears when you press and hold the EXIT button for a while. The product settings are
•
reset to the factory defaults.
English - 70

English - 71
Specifications
The descriptions and characteristics in this booklet are given for information purposes only and are subject to modification without
notice.
Model Name PS50B850
Screen Size (Diagonal) 50 inch
PC Resolution (Optimum) 1920 x 1080 @ 60 Hz
Sound (Output) 10 W x 2
Dimension (W x H x D)
Body
With stand
Weight
Body
With stand
Environmental Considerations
Operating Temperature
Operating Humidity
Storage Temperature
Storage Humidity
This device is a Class B digital apparatus.
N
Design and specications are subject to change without prior notice.
N
For the power supply and Power Consumption, refer to the label attached to the product.
N
1238 x 751.9 x 29.5 mm
1238 x 813.2 x 277.2 mm
26.1 kg
32.5 kg
50 °F to 104 °F (10 °C to 40 °C)
10% to 80%, non-condensing
-4 °F to 113 °F (-20 °C to 45 °C)
5% to 95%, non-condensing
PS58B850
58 inch
1920 x 1080 @ 60 Hz
15 W x 2
1423.6 x 853.8 x 36.8 mm
1423.6 x 920 x 337.2 mm
36.9 kg
45.6 kg

Software License
This product uses parts of the software from the Independent JPEG Group. This product uses parts of the software owned by the
Freetype Project (www.freetype.org). This product uses some software programs which are distributed under the GPL/LGPL license. Accordingly,
the following GPL and LGPL software source codes that have been used in this product can be provided after asking to vdswmanager@samsung.com.
GPL software: Linux Kernel, Busybox, Binutils LGPL software: Glibc, ffmpeg, smpeg, libgphoto, libusb, SDL
GNU GENERAL PUBLIC LICENSE
❑
GNU GENERAL PUBLIC LICENSE
Version 3, 29 June 2007
Pream ble
The licenses for most software and other practical works are designed to take away your freedom to share and change the works. By
contrast, the GNU General Public License is intended to guarantee your freedom to share and change all versions of a program--to
make sure it remains free software for all its users. We, the Free Software Foundation, use the GNU General Public License for most
of our software; it applies also to any other work released this way by its authors. You can apply it to your programs, too. When we
speak of free software, we are referring to freedom, not price. Our General Public Licenses are designed to make sure that you have
the freedom to distribute copies of free software (and charge for them if you wish), that you receive source code or can get it if you want
it, that you can change the software or use pieces of it in new free programs, and that you know you can do these things. To protect
your rights, we need to prevent others from denying you these rights or asking you to surrender the rights. Therefore, you have certain
responsibilities if you distribute copies of the software, or if you modify it: responsibilities to respect the freedom of others. For example,
if you distribute copies of such a program, whether gratis or for a fee, you must pass on to the recipients the same freedoms that you
received. You must make sure that they, too, receive or can get the source code. And you must show them these terms so they know
their rights. Developers that use the GNU GPL protect your rights with two steps: (1) assert copyright on the software, and (2) offer you
this License giving you legal permission to copy, distribute and/or modify it. For the developers’ and authors’ protection, the GPL clearly
explains that there is no warranty for this free software. For both users’ and authors’ sake, the GPL requires that modified versions
be marked as changed, so that their problems will not be attributed erroneously to authors of previous versions. Some devices are
designed to deny users access to install or run modified versions of the software inside them, although the manufacturer can do so. This
is fundamentally incompatible with the aim of protecting users’ freedom to change the software. The systematic pattern of such abuse
occurs in the area of products for individuals to use, which is precisely where it is most unacceptable. Therefore, we have designed this
version of the GPL to prohibit the practice for those products. If such problems arise substantially in other domains, we stand ready to
extend this provision to those domains in future versions of the GPL, as needed to protect the freedom of users. Finally, every program
is threatened constantly by software patents. States should not allow patents to restrict development and use of software on generalpurpose computers, but in those that do, we wish to avoid the special danger that patents applied to a free program could make it
effectively proprietary. To prevent this, the GPL assures that patents cannot be used to render the program non-free. The precise terms
and conditions for copying, distribution and modification follow.
Copyright (C) 2007 Free Software Foundation, Inc. <http://fsf.org/> Everyone is permitted to copy and distribute verbatim
copies of this license document, but changing it is not allowed.
The GNU General Public License is a free, copyleft license for software and other kinds of works.
TERMS AND CONDITIONS
0. Denitions.
“This License” refers to version 3 of the GNU General Public License.
“Copyright” also means copyright-like laws that apply to other kinds of works, such as semiconductor masks.
“The Program” refers to any copyrightable work licensed under this License. Each licensee is addressed as “you”. “Licensees” and “
recipients” may be individuals or organizations.
To “modify” a work means to copy from or adapt all or part of the work in a fashion requiring copyright permission, other than the
making of an exact copy. The resulting work is called a “modied version” of the earlier work or a work “based on” the earlier work.
A “covered work” means either the unmodied Program or a work based on the Program.
To “propagate” a work means to do anything with it that, without permission, would make you directly or secondarily liable for
infringement under applicable copyright law, except executing it on a computer or modifying a private copy. Propagation includes
copying, distribution (with or without modication), making available to the public, and in some countries other activities as well.
To “convey” a work means any kind of propagation that enables other parties to make or receive copies. Mere interaction with a
user through a computer network, with no transfer of a copy, is not conveying.
An interactive user interface displays “Appropriate Legal Notices” to the extent that it includes a convenient and prominently visible
feature that (1) displays an appropriate copyright notice, and (2) tells the user that there is no warranty for the work (except to the
extent that warranties are provided), that licensees may convey the work under this License, and how to view a copy of this License.
If the interface presents a list of user commands or options, such as a menu, a prominent item in the list meets this criterion.
1. Source Code.
The “source code” for a work means the preferred form of the work for making modications to it. “Object code” means any
nonsource form of a work.
A “Standard Interface” means an interface that either is an ofcial standard dened by a recognized standards body, or, in the case
of interfaces specied for a particular programming language, one that is widely used among developers working in that language.
The “System Libraries” of an executable work include anything, other than the work as a whole, that (a) is included in the normal
form of packaging a Major Component, but which is not part of that Major Component, and (b) serves only to enable use of the work
with that Major Component, or to implement a Standard Interface for which an implementation is available to the public in source
code form. A “Major Component”, in this context, means a major essential component (kernel, window system, and so on) of the
English - 72

English - 73
specic operating system (if any) on which the executable work runs, or a compiler used to produce the work, or an object code
interpreter used to run it.
The “Corresponding Source” for a work in object code form means all the source code needed to generate, install, and (for an
executable work) run the object code and to modify the work, including scripts to control those activities. However, it does not
include the work’s System Libraries, or general-purpose tools or generally available free programs which are used unmodied in
performing those activities but which are not part of the work. For example, Corresponding Source includes interface denition les
associated with source les for the work, and the source code for shared libraries and dynamically linked subprograms that the work
is specically designed to require, such as by intimate data communication or control ow between those subprograms and other
parts of the work.
The Corresponding Source need not include anything that users can regenerate automatically from other parts of the Corresponding
Source.
The Corresponding Source for a work in source code form is that same work.
2. Basic Permissions.
All rights granted under this License are granted for the term of copyright on the Program, and are irrevocable provided the stated
conditions are met. This License explicitly afrms your unlimited permission to run the unmodied Program. The output from
running a covered work is covered by this License only if the output, given its content, constitutes a covered work. This License
acknowledges your rights of fair use or other equivalent, as provided by copyright law. You may make, run and propagate covered
works that you do not convey, without conditions so long as your license otherwise remains in force. You may convey covered
works to others for the sole purpose of having them make modications exclusively for you, or provide you with facilities for running
those works, provided that you comply with the terms of this License in conveying all material for which you do not control copyright.
Those thus making or running the covered works for you must do so exclusively on your behalf, under your direction and control, on
terms that prohibit them from making any copies of your copyrighted material outside their relationship with you.
Conveying under any other circumstances is permitted solely under the conditions stated below. Sublicensing is not allowed; section
10 makes it unnecessary.
3. Protecting Users’ Legal Rights From Anti-Circumvention Law.
No covered work shall be deemed part of an effective technological measure under any applicable law fullling obligations under
article 11 of the WIPO copyright treaty adopted on 20 December 1996, or similar laws prohibiting or restricting circumvention of
such measures. When you convey a covered work, you waive any legal power to forbid circumvention of technological measures to
the extent such circumvention is effected by exercising rights under this License with respect to the covered work, and you disclaim
any intention to limit operation or modication of the work as a means of enforcing, against the work’s users, your or third parties’
legal rights to forbid circumvention of technological measures.
4. Conveying Verbatim Copies.
You may convey verbatim copies of the Program’s source code as you receive it, in any medium, provided that you conspicuously
and appropriately publish on each copy an appropriate copyright notice; keep intact all notices stating that this License and any
nonpermissive terms added in accord with section 7 apply to the code; keep intact all notices of the absence of any warranty; and
give all recipients a copy of this License along with the Program.
You may charge any price or no price for each copy that you convey, and you may offer support or warranty protection for a fee.
5. Conveying Modied Source Versions.
You may convey a work based on the Program, or the modications to produce it from the Program, in the form of source code
under the terms of section 4, provided that you also meet all of these conditions:
a) The work must carry prominent notices stating that you modied it, and giving a relevant date.
b) The work must carry prominent notices stating that it is released under this License and any conditions added under section 7.
This requirement modies the requirement in section 4 to “keep intact all notices”.
c) You must license the entire work, as a whole, under this License to anyone who comes into possession of a copy. This License
will therefore apply, along with any applicable section 7 additional terms, to the whole of the work, and all its parts, regardless of
how they are packaged. This License gives no permission to license the work in any other way, but it does not invalidate such
permission if you have separately received it.
d) If the work has interactive user interfaces, each must display Appropriate Legal Notices; however, if the Program has interactive
interfaces that do not display Appropriate Legal Notices, your work need not make them do so.
A compilation of a covered work with other separate and independent works, which are not by their nature extensions of the
covered work, and which are not combined with it such as to form a larger program, in or on a volume of a storage or distribution
medium, is called an “aggregate” if the compilation and its resulting copyright are not used to limit the access or legal rights of
the compilation’s users beyond what the individual works permit. Inclusion of a covered work in an aggregate does not cause
this License to apply to the other parts of the aggregate.
6. Conveying Non-Source Forms.
You may convey a covered work in object code form under the terms of sections 4 and 5, provided that you also convey the
machinereadable
Corresponding Source under the terms of this License, in one of these ways:
a) Convey the object code in, or embodied in, a physical product (including a physical distribution medium), accompanied by the
Corresponding Source xed on a durable physical medium customarily used for software interchange.
b) Convey the object code in, or embodied in, a physical product (including a physical distribution medium), accompanied by a
written offer, valid for at least three years and valid for as long as you offer spare parts or customer support for that product
model, to give anyone who possesses the object code either (1) a copy of the Corresponding Source for all the software in the
product that is covered by this License, on a durable physical medium customarily used for software interchange, for a price
no more than your reasonable cost of physically performing this conveying of source, or (2) access to copy the Corresponding
Source from a network server at no charge.
c) Convey individual copies of the object code with a copy of the written offer to provide the Corresponding Source. This alternative
is allowed only occasionally and noncommercially, and only if you received the object code with such an offer, in accord with
subsection 6b.

d) Convey the object code by offering access from a designated place (gratis or for a charge), and offer equivalent access to
the Corresponding Source in the same way through the same place at no further charge. You need not require recipients
to copy the Corresponding Source along with the object code. If the place to copy the object code is a network server, the
Corresponding Source may be on a different server (operated by you or a third party) that supports equivalent copying facilities,
provided you maintain clear directions next to the object code saying where to nd the Corresponding Source. Regardless of
what server hosts the Corresponding Source, you remain obligated to ensure that it is available for as long as needed to satisfy
these requirements.
e) Convey the object code using peer-to-peer transmission, provided you inform other peers where the object code and
Corresponding Source of the work are being offered to the general public at no charge under subsection 6d. A separable portion
of the object code, whose source code is excluded from the Corresponding Source as a System Library, need not be included in
conveying the object code work.
A “User Product” is either (1) a “consumer product”, which means any tangible personal property which is normally used for
personal, family, or household purposes, or (2) anything designed or sold for incorporation into a dwelling. In determining whether
a product is a consumer product, doubtful cases shall be resolved in favor of coverage. For a particular product received by a
particular user, “normally used” refers to a typical or common use of that class of product, regardless of the status of the particular
user or of the way in which the particular user actually uses, or expects or is expected to use, the product. A product is a consumer
product regardless of whether the product has substantial commercial, industrial or non-consumer uses, unless such uses represent
the only signicant mode of use of the product. “Installation Information” for a User Product means any methods, procedures,
authorization keys, or other information required to install and execute modied versions of a covered work in that User Product
from a modied version of its Corresponding Source. The information must sufce to ensure that the continued functioning of the
modied object code is in no case prevented or interfered with solely because modication has been made. If you convey an object
code work under this section in, or with, or specically for use in, a User Product, and the conveying occurs as part of a transaction
in which the right of possession and use of the User Product is transferred to the recipient in perpetuity or for a xed term
(regardless of how the transaction is characterized), the Corresponding Source conveyed under this section must be accompanied
by the Installation Information. But this requirement does not apply if neither you nor any third party retains the ability to install
modied object code on the User Product (for example, the work has been installed in ROM). The requirement to provide Installation
Information does not include a requirement to continue to provide support service, warranty, or updates for a work that has been
modied or installed by the recipient, or for the User Product in which it has been modied or installed. Access to a network may be
denied when the modication itself materially and adversely affects the operation of the network or violates the rules and protocols
for communication across the network. Corresponding Source conveyed, and Installation Information provided, in accord with this
section must be in a format that is publicly documented (and with an implementation available to the public in source code form),
and must require no special password or key for unpacking, reading or copying.
7. Additional Terms.
“Additional permissions” are terms that supplement the terms of this License by making exceptions from one or more of its
conditions. Additional permissions that are applicable to the entire Program shall be treated as though they were included in this
License, to the extent that they are valid under applicable law. If additional permissions apply only to part of the Program, that part
may be used separately under those permissions, but the entire Program remains governed by this License without regard to the
additional permissions.
When you convey a copy of a covered work, you may at your option remove any additional permissions from that copy, or from any
part of it. (Additional permissions may be written to require their own removal in certain cases when you modify the work.) You may
place additional permissions on material, added by you to a covered work, for which you have or can give appropriate copyright
permission. Notwithstanding any other provision of this License, for material you add to a covered work, you may (if authorized by
the copyright holders of that material) supplement the terms of this License with terms:
a) Disclaiming warranty or limiting liability differently from the terms of sections 15 and 16 of this License; or
b) Requiring preservation of specied reasonable legal notices or author attributions in that material or in the Appropriate Legal
Notices displayed by works containing it; or
c) Prohibiting misrepresentation of the origin of that material, or requiring that modied versions of such material be marked in
reasonable ways as different from the original version; or
d) Limiting the use for publicity purposes of names of licensors or authors of the material; or
e) Declining to grant rights under trademark law for use of some trade names, trademarks, or service marks; or
f) Requiring indemnication of licensors and authors of that material by anyone who conveys the material (or modied versions of
it) with contractual assumptions of liability to the recipient, for any liability that these contractual assumptions directly impose on
those licensors and authors.
All other non-permissive additional terms are considered “further restrictions” within the meaning of section 10. If the Program
as you received it, or any part of it, contains a notice stating that it is governed by this License along with a term that is a further
restriction, you may remove that term. If a license document contains a further restriction but permits relicensing or conveying under
this License, you may add to a covered work material governed by the terms of that license document, provided that the further
restriction does not survive such relicensing or conveying.
If you add terms to a covered work in accord with this section, you must place, in the relevant source les, a statement of
theadditional terms that apply to those les, or a notice indicating where to nd the applicable terms. Additional terms, permissive
or non-permissive, may be stated in the form of a separately written license, or stated as exceptions; the above requirements apply
either way.
8. Termination.
You may not propagate or modify a covered work except as expressly provided under this License. Any attempt otherwise to
propagate or modify it is void, and will automatically terminate your rights under this License (including any patent licenses granted
under the third paragraph of section 11).
However, if you cease all violation of this License, then your license from a particular copyright holder is reinstated (a) provisionally,
unless and until the copyright holder explicitly and nally terminates your license, and (b) permanently, if the copyright holder fails to
notify you of the violation by some reasonable means prior to 60 days after the cessation. Moreover, your license from a particular
English - 74

English - 75
copyright holder is reinstated permanently if the copyright holder noties you of the violation by some reasonable means, this is the rst
time you have received notice of violation of this License (for any work) from that copyright holder, and you cure the violation prior to
30 days after your receipt of the notice.
Termination of your rights under this section does not terminate the licenses of parties who have received copies or rights from you
under this License. If your rights have been terminated and not permanently reinstated, you do not qualify to receive new licenses
for the same material under section 10.
9. Acceptance Not Required for Having Copies.
You are not required to accept this License in order to receive or run a copy of the Program. Ancillary propagation of a covered work
occurring solely as a consequence of using peer-to-peer transmission to receive a copy likewise does not require acceptance.
However, nothing other than this License grants you permission to propagate or modify any covered work. These actions infringe
copyright if you do not accept this License. Therefore, by modifying or propagating a covered work, you indicate your acceptance of
this License to do so.
10. Automatic Licensing of Downstream Recipients.
Each time you convey a covered work, the recipient automatically receives a license from the original licensors, to run, modify and
propagate that work, subject to this License. You are not responsible for enforcing compliance by third parties with this License.
An “entity transaction” is a transaction transferring control of an organization, or substantially all assets of one, or subdividing
an organization, or merging organizations. If propagation of a covered work results from an entity transaction, each party to that
transaction who receives a copy of the work also receives whatever licenses to the work the party’s predecessor in interest had
or could give under the previous paragraph, plus a right to possession of the You may not impose any further restrictions on the
exercise of the rights granted or afrmed under this License. For example, you may not impose a license fee, royalty, or other
charge for exercise of rights granted under this License, and you may not initiate litigation (including a cross-claim or counterclaim
in a lawsuit) alleging that any patent claim is infringed by making, using, selling, offering for sale, or importing the Program or any
portion of it.
11. Patents.
A “contributor” is a copyright holder who authorizes use under this License of the Program or a work on which the Program is based.
The work thus licensed is called the contributor’s “contributor version”.
A contributor’s “essential patent claims” are all patent claims owned or controlled by the contributor, whether already acquired or
hereafter acquired, that would be infringed by some manner, permitted by this License, of making, using, or selling its contributor
version, but do not include claims that would be infringed only as a consequence of further modication of the contributor version.
For purposes of this denition, “control” includes the right to grant patent sublicenses in a manner consistent with the requirements
of this License.
Each contributor grants you a non-exclusive, worldwide, royalty-free patent license under the contributor’s essential patent claims,
to make, use, sell, offer for sale, import and otherwise run, modify and propagate the contents of its contributor version. In the
following three paragraphs, a “patent license” is any express agreement or commitment, however denominated, not to enforce a
patent (such as an express permission to practice a patent or covenant not to sue for patent infringement). To “grant” such a patent
license to a party means to make such an agreement or commitment not to enforce a patent against the party.
If you convey a covered work, knowingly relying on a patent license, and the Corresponding Source of the work is not available
for anyone to copy, free of charge and under the terms of this License, through a publicly available network server or other readily
accessible means, then you must either (1) cause the Corresponding Source to be so available, or (2) arrange to deprive yourself of
the benet of the patent license for this particular work, or (3) arrange, in a manner consistent with the requirements of this License,
to extend the patent license to downstream recipients. “Knowingly relying” means you have actual knowledge that, but for the patent
license, your conveying the covered work in a country, or your recipient’s use of the covered work in a country, would infringe one or
more identiable patents in that country that you have reason to believe are valid.
If, pursuant to or in connection with a single transaction or arrangement, you convey, or propagate by procuring conveyance of, a
covered work, and grant a patent license to some of the parties receiving the covered work authorizing them to use, propagate,
modify or convey a specic copy of the covered work, then the patent license you grant is automatically extended to all recipients of
the covered work and works based on it.
A patent license is “discriminatory” if it does not include within the scope of its coverage, prohibits the exercise of, or is conditioned
on the non-exercise of one or more of the rights that are specically granted under this License. You may not convey a covered
work if you are a party to an arrangement with a third party that is in the business of distributing software, under which you make
payment to the third party based on the extent of your activity of conveying the work, and under which the third party grants, to any
of the parties who would receive the covered work from you, a discriminatory patent license (a) in connection with copies of the
covered work conveyed by you (or copies made from those copies), or (b) primarily for and in connection with specic products or
compilations that contain the covered work, unless you entered into that arrangement, or that patent license was granted, prior to 28
March 2007.
Nothing in this License shall be construed as excluding or limiting any implied license or other defenses to infringement that may
otherwise be available to you under applicable patent law.
12. No Surrender of Others’ Freedom.
If conditions are imposed on you (whether by court order, agreement or otherwise) that contradict the conditions of this License,
they do not excuse you from the conditions of this License. If you cannot convey a covered work so as to satisfy simultaneously
your obligations under this License and any other pertinent obligations, then as a consequence you may not convey it at all. For
example, if you agree to terms that obligate you to collect a royalty for further conveying from those to whom you convey the
Program, the only way you could satisfy both those terms and this License would be to refrain entirely from conveying the Program.
13. Use with the GNU Affero General Public License.
Notwithstanding any other provision of this License, you have permission to link or combine any covered work with a work licensed
under version 3 of the GNU Affero General Public License into a single combined work, and to convey the resulting work. The terms
of this License will continue to apply to the part which is the covered work, but the special requirements of the GNU Affero General
Public License, section 13, concerning interaction through a network will apply to the combination as such.

14. Revised Versions of this License.
The Free Software Foundation may publish revised and/or new versions of the GNU General Public License from time to time. Such
new versions will be similar in spirit to the present version, but may differ in detail to address new problems or concerns.
Each version is given a distinguishing version number. If the Program species that a certain numbered version of the GNU General
Public License “or any later version” applies to it, you have the option of following the terms and conditions either of that numbered
version or of any later version published by the Free Software Foundation. If the Program does not specify a version number of the
GNU General Public License, you may choose any version ever published by the Free Software Foundation.
If the Program species that a proxy can decide which future versions of the GNU General Public License can be used, that proxy’s
public statement of acceptance of a version permanently authorizes you to choose that version for the Program.
Later license versions may give you additional or different permissions. However, no additional obligations are imposed on any
author or copyright holder as a result of your choosing to follow a later version.
15. Disclaimer of Warranty.
THERE IS NO WARRANTY FOR THE PROGRAM, TO THE EXTENT PERMITTED BY APPLICABLE LAW. EXCEPT WHEN
OTHERWISE STATED IN WRITING THE COPYRIGHT HOLDERS AND/OR OTHER PARTIES PROVIDE THE PROGRAM “
AS IS” WITHOUT WARRANTY OF ANY KIND, EITHER EXPRESSED OR IMPLIED, INCLUDING, BUT NOT LIMITED TO, THE
IMPLIED WARRANTIES OF MERCHANTABILITY AND FITNESS FOR A PARTICULAR PURPOSE. THE ENTIRE RISK AS TO
THE QUALITY AND PERFORMANCE OF THE PROGRAM IS WITH YOU. SHOULD THE PROGRAM PROVE DEFECTIVE, YOU
ASSUME THE COST OF ALL NECESSARY SERVICING, REPAIR OR CORRECTION.
16. Limitation of Liability.
IN NO EVENT UNLESS REQUIRED BY APPLICABLE LAW OR AGREED TO IN WRITING WILL ANY COPYRIGHT HOLDER, OR
ANY OTHER PARTY WHO MODIFIES AND/OR CONVEYS THE PROGRAM AS PERMITTED ABOVE, BE LIABLE TO YOU FOR
DAMAGES, INCLUDING ANY GENERAL, SPECIAL, INCIDENTAL OR CONSEQUENTIAL DAMAGES ARISING OUT OF THE
USE OR INABILITY TO USE THE PROGRAM (INCLUDING BUT NOT LIMITED TO LOSS OF DATA OR DATA BEING RENDERED
INACCURATE OR LOSSES SUSTAINED BY YOU OR THIRD PARTIES OR A FAILURE OF THE PROGRAM TO OPERATE WITH
ANY OTHER PROGRAMS), EVEN IF SUCH HOLDER OR OTHER PARTY HAS BEEN ADVISED OF THE POSSIBILITY OF SUCH
DAMAGES.
17. Interpretation of Sections 15 and 16.
If the disclaimer of warranty and limitation of liability provided above cannot be given local legal effect according to their terms,
reviewing courts shall apply local law that most closely approximates an absolute waiver of all civil liability in connection with the
Program, unless a warranty or assumption of liability accompanies a copy of the Program in return for a fee.
How to Apply These Terms to Your New Programs
If you develop a new program, and you want it to be of the greatest possible use to the public, the best way to achieve this is to make it
free software which everyone can redistribute and change under these terms. To do so, attach the following notices to the program. It is
safest to attach them to the start of each source file to most effectively state theexclusion of warranty; and each file should have at least
the “copyright” line and a pointer to where the full notice is found.
<one line to give the program’s name and a brief idea of what it does.> Copyright (C) <year> <name of author>
This program is free software: you can redistribute it and/or modify it under the terms of the GNU General Public License as
published by the Free Software Foundation, either version 3 of the License, or (at your option) any later version.
This program is distributed in the hope that it will be useful, but WITHOUT ANY WARRANTY; without even the implied
warranty of MERCHANTABILITY or FITNESS FOR A PARTICULAR PURPOSE. See the GNU General Public License for
more details.
You should have received a copy of the GNU General Public License along with this program. If not, see <http://www.gnu.
org/licenses/>.
Also add information on how to contact you by electronic and paper mail.
If the program does terminal interaction, make it output a short notice like this when it starts in an interactive mode:
<program> Copyright (C) <year> <name of author> This program comes with ABSOLUTELY NO WARRANTY; for details
type `show w’.
This is free software, and you are welcome to redistribute it under certain conditions; type `show c’ for details.
The hypothetical commands `show w’ and `show c’ should show the appropriate parts of the General Public License. Of course, your
program’s commands might be different; for a GUI interface, you would use an “about box”.
You should also get your employer (if you work as a programmer) or school, if any, to sign a “copyright disclaimer” for the program, if
necessary.
For more information on this, and how to apply and follow the GNU GPL, see <http://www.gnu.org/licenses/>.The GNU General Public
License does not permit incorporating your program into proprietary programs. If your program is a subroutine library, you may consider
it more useful to permit linking proprietary applications with the library. If this is what you want to do, use the GNU Lesser General Public
License instead of this License. But first, please read <http://www.gnu.org/philosophy/why-not-lgpl.html>.
English - 76

English - 77
GNU Lesser General Public License (LGPL)
❑
GNU GENERAL PUBLIC LICENSE
Version 3, 29 June 2007
Copyright (C) 2007 Free Software Foundation, Inc. <http://fsf.org/>
Everyone is permitted to copy and distribute verbatim copies of this license document, but changing it is not allowed.
Preamble
The GNU General Public License is a free, copyleft license for software and other kinds of works.
The licenses for most software and other practical works are designed to take away your freedom to share and change the works. By
contrast, the GNU General Public License is intended to guarantee your freedom to share and change all versions of a program--to
make sure it remains free software for all its users. We, the Free Software Foundation, use the GNU General Public License for most of
our software; it applies also to any other work released this way by its authors. You can apply it to your programs, too.
When we speak of free software, we are referring to freedom, not price. Our General Public Licenses are designed to make sure that
you have the freedom to distribute copies of free software (and charge for them if you wish), that you receive source code or can get it if
you want it, that you can change the software or use pieces of it in new free programs, and that you know you can do these things.
To protect your rights, we need to prevent others from denying you these rights or asking you to surrender the rights. Therefore, you
have certain responsibilities if you distribute copies of the software, or if you modify it: responsibilities to respect the freedom of others.
For example, if you distribute copies of such a program, whether gratis or for a fee, you must pass on to the recipients the same
freedoms that you received. You must make sure that they, too, receive or can get the source code. And you must show them these
terms so they know their rights.
Developers that use the GNU GPL protect your rights with two steps: (1) assert copyright on the software, and (2) offer you this License
giving you legal permission to copy, distribute and/or modify it.
For the developers’ and authors’ protection, the GPL clearly explains that there is no warranty for this free software. For both users’ and
authors’ sake, the GPL requires that modified versions be marked as changed, so that their problems will not be attributed erroneously
to authors of previous versions.
Some devices are designed to deny users access to install or run modified versions of the software inside them, although the
manufacturer can do so. This is fundamentally incompatible with the aim of protecting users’ freedom to change the software. The
systematic pattern of such abuse occurs in the area of products for individuals to use, which is precisely where it is most unacceptable.
Therefore, we have designed this version of the GPL to prohibit the practice for those products. If such problems arise substantially
in other domains, we stand ready to extend this provision to those domains in future versions of the GPL, as needed to protect the
freedom of users. Finally, every program is threatened constantly by software patents. States should not allow patents to restrict
development and use of software on general-purpose computers, but in those that do, we wish to avoid the special danger that patents
applied to a free program could make it effectively proprietary. To prevent this, the GPL assures that patents cannot be used to render
the program non-free. The precise terms and conditions for copying, distribution and modification follow.
TERMS AND CONDITIONS
0. Denitions.
“This License” refers to version 3 of the GNU General Public License.
“Copyright” also means copyright-like laws that apply to other kinds of works, such as semiconductor masks.
“The Program” refers to any copyrightable work licensed under this License. Each licensee is addressed as “you”. “Licensees” and “
recipients” may be individuals or organizations.
To “modify” a work means to copy from or adapt all or part of the work in a fashion requiring copyright permission, other than the
making of an exact copy. The resulting work is called a “modied version” of the earlier work or a work “based on” the earlier work.
A “covered work” means either the unmodied Program or a work based on the Program.
To “propagate” a work means to do anything with it that, without permission, would make you directly or secondarily liable for
infringement under applicable copyright law, except executing it on a computer or modifying a private copy. Propagation includes
copying, distribution (with or without modication), making available to the public, and in some countries other activities as well.
To “convey” a work means any kind of propagation that enables other parties to make or receive copies. Mere interaction with a
user through a computer network, with no transfer of a copy, is not conveying.
An interactive user interface displays “Appropriate Legal Notices” to the extent that it includes a convenient and prominently visible
feature that (1) displays an appropriate copyright notice, and (2) tells the user that there is no warranty for the work (except to the
extent that warranties are provided), that licensees may convey the work under this License, and how to view a copy of this License.
If the interface presents a list of user commands or options, such as a menu, a prominent item in the list meets this criterion.
1. Source Code.
The “source code” for a work means the preferred form of the work for making modications to it. “Object code” means any
nonsource form of a work.
A “Standard Interface” means an interface that either is an ofcial standard dened by a recognized standards body, or, in the case
of interfaces specied for a particular programming language, one that is widely used among developers working in that language.
The “System Libraries” of an executable work include anything, other than the work as a whole, that (a) is included in the normal
form of packaging a Major Component, but which is not part of that Major Component, and (b) serves only to enable use of the work
with that Major Component, or to implement a Standard Interface for which an implementation is available to the public in source
code form. A “Major Component”, in this context, means a major essential component (kernel, window system, and so on) of the
specic operating system (if any) on which the executable work runs, or a compiler used to produce the work, or an object code
interpreter used to run it. The “Corresponding Source” for a work in object code form means all the source code needed to generate,
install, and (for an executable work) run the object code and to modify the work, including scripts to control those activities.
However, it does not include the work’s System Libraries, or general-purpose tools or generally available free programs which are
used unmodied in performing those activities but which are not part of the work. For example, Corresponding Source includes
interface denition les associated with source les for the work, and the source code for shared libraries and dynamically linked

subprograms that the work is specically designed to require, such as by intimate data communication or control ow between
those subprograms and other parts of the work. The Corresponding Source need not include anything that users can regenerate
automatically from other parts of the Corresponding Source. The Corresponding Source for a work in source code form is that same
work.
2. Basic Permissions.
All rights granted under this License are granted for the term of copyright on the Program, and are irrevocable provided the stated
conditions are met. This License explicitly afrms your unlimited permission to run the unmodied Program. The output from
running a covered work is covered by this License only if the output, given its content, constitutes a covered work. This License
acknowledges your rights of fair use or other equivalent, as provided by copyright law. You may make, run and propagate covered
works that you do not convey, without conditions so long as your license otherwise remains in force. You may convey covered
works to others for the sole purpose of having them make modications exclusively for you, or provide you with facilities for running
those works, provided that you comply with the terms of this License in conveying all material for which you do not control copyright.
Those thus making or running the covered works for you must do so exclusively on your behalf, under your direction and control, on
terms that prohibit them from making any copies of your copyrighted material outside their relationship with you. Conveying under
any other circumstances is permitted solely under the conditions stated below. Sublicensing is not allowed; section 10 makes it
unnecessary.
3. Protecting Users’ Legal Rights From Anti-Circumvention Law.
No covered work shall be deemed part of an effective technological measure under any applicable law fullling obligations under
article 11 of the WIPO copyright treaty adopted on 20 December 1996, or similar laws prohibiting or restricting circumvention of
such measures. When you convey a covered work, you waive any legal power to forbid circumvention of technological measures to
the extent such circumvention is effected by exercising rights under this License with respect to the covered work, and you disclaim
any intention to limit operation or modication of the work as a means of enforcing, against the work’s users, your or third parties’
legal rights to forbid circumvention of technological measures.
4. Conveying Verbatim Copies.
You may convey verbatim copies of the Program’s source code as you receive it, in any medium, provided that you conspicuously
and appropriately publish on each copy an appropriate copyright notice; keep intact all notices stating that this License and any
nonpermissive terms added in accord with section 7 apply to the code; keep intact all notices of the absence of any warranty; and
give all recipients a copy of this License along with the Program. You may charge any price or no price for each copy that you
convey, and you may offer support or warranty protection for a fee.
5. Conveying Modied Source Versions. You may convey a work based on the Program, or the modications to produce it from the
Program, in the form of source code under the terms of section 4, provided that you also meet all of these conditions:
a) The work must carry prominent notices stating that you modied it, and giving a relevant date.
b) The work must carry prominent notices stating that it is released under this License and any conditions added under section 7.
This requirement modies the requirement in section 4 to “keep intact all notices”.
c) You must license the entire work, as a whole, under this License to anyone who comes into possession of a copy. This License
will therefore apply, along with any applicable section 7 additional terms, to the whole of the work, and all its parts, regardless of
how they are packaged. This License gives no permission to license the work in any other way, but it does not invalidate such
permission if you have separately received it.
d) If the work has interactive user interfaces, each must display Appropriate Legal Notices; however, if the Program has interactive
interfaces that do not display Appropriate Legal Notices, your work need not make them do so.
A compilation of a covered work with other separate and independent works, which are not by their nature extensions of the covered
work, and which are not combined with it such as to form a larger program, in or on a volume of a storage or distribution medium, is
called an “aggregate” if the compilation and its resulting copyright are not used to limit the access or legal rights of the compilation’s
users beyond what the individual works permit. Inclusion of a covered work in an aggregate does not cause this License to apply to
the other parts of the aggregate.
6. Conveying Non-Source Forms.
You may convey a covered work in object code form under the terms of sections 4 and 5, provided that you also convey the
machinereadable Corresponding Source under the terms of this License, in one of these ways:
a) Convey the object code in, or embodied in, a physical product (including a physical distribution medium), accompanied by the
Corresponding Source xed on a durable physical medium customarily used for software interchange.
b) Convey the object code in, or embodied in, a physical product (including a physical distribution medium), accompanied by a
written offer, valid for at least three years and valid for as long as you offer spare parts or customer support for that product
model, to give anyone who possesses the object code either (1) a copy of the Corresponding Source for all the software in the
product that is covered by this License, on a durable physical medium customarily used for software interchange, for a price
no more than your reasonable cost of physically performing this conveying of source, or (2) access to copy the Corresponding
Source from a network server at no charge.
c) Convey individual copies of the object code with a copy of the written offer to provide the Corresponding Source. This alternative
is allowed only occasionally and noncommercially, and only if you received the object code with such an offer, in accord with
subsection 6b.
d) Convey the object code by offering access from a designated place (gratis or for a charge), and offer equivalent access to
the Corresponding Source in the same way through the same place at no further charge. You need not require recipients
to copy the Corresponding Source along with the object code. If the place to copy the object code is a network server, the
Corresponding Source may be on a different server (operated by you or a third party) that supports equivalent copying facilities,
provided you maintain clear directions next to the object code saying where to nd the Corresponding Source. Regardless of
what server hosts the Corresponding Source, you remain obligated to ensure that it is available for as long as needed to satisfy
these requirements.
English - 78

English - 79
e) Convey the object code using peer-to-peer transmission, provided you inform other peers where the object code and
Corresponding Source of the work are being offered to the general public at no charge under subsection 6d. A separable portion
of the object code, whose source code is excluded from the Corresponding Source as a System Library, need not be included in
conveying the object code work.
A “User Product” is either (1) a “consumer product”, which means any tangible personal property which is normally used for
personal, family, or household purposes, or (2) anything designed or sold for incorporation into a dwelling. In determining whether
a product is a consumer product, doubtful cases shall be resolved in favor of coverage. For a particular product received by a
particular user, “normally used” refers to a typical or common use of that class of product, regardless of the status of the particular
user or of the way in which the particular user actually uses, or expects or is expected to use, the product. A product is a consumer
product regardless of whether the product has substantial commercial, industrial or non-consumer uses, unless such uses represent
the only signicant mode of use of the product. “Installation Information” for a User Product means any methods, procedures,
authorization keys, or other information required to install and execute modied versions of a covered work in that User Product
from a modied version of its Corresponding Source. The information must sufce to ensure that the continued functioning of the
modied object code is in no case prevented or interfered with solely because modication has been made. If you convey an object
code work under this section in, or with, or specically for use in, a User Product, and the conveying occurs as part of a transaction
in which the right of possession and use of the User Product is transferred to the recipient in perpetuity or for a xed term
(regardless of how the transaction is characterized), the Corresponding Source conveyed under this section must be accompanied
by the Installation Information. But this requirement does not apply if neither you nor any third party retains the ability to install
modied object code on the User Product (for example, the work has been installed in ROM). The requirement to provide Installation
Information does not include a requirement to continue to provide support service, warranty, or updates for a work that has been
modied or installed by the recipient, or for the User Product in which it has been modied or installed. Access to a network may be
denied when the modication itself materially and adversely affects the operation of the network or violates the rules and protocols
for communication across the network. Corresponding Source conveyed, and Installation Information provided, in accord with this
section must be in a format that is publicly documented (and with an implementation available to the public in source code form),
and must require no special password or key for unpacking, reading or copying.
7. Additional Terms.
“Additional permissions” are terms that supplement the terms of this License by making exceptions from one or more of its
conditions. Additional permissions that are applicable to the entire Program shall be treated as though they were included in this
License, to the extent that they are valid under applicable law. If additional permissions apply only to part of the Program, that part
may be used separately under those permissions, but the entire Program remains governed by this License without regard to the
additional permissions.
When you convey a copy of a covered work, you may at your option remove any additional permissions from that copy, or from any
part of it. (Additional permissions may be written to require their own removal in certain cases when you modify the work.) You may
place additional permissions on material, added by you to a covered work, for which you have or can give appropriate copyright
permission. Notwithstanding any other provision of this License, for material you add to a covered work, you may (if authorized by
the copyright holders of that material) supplement the terms of this License with terms:
a) Disclaiming warranty or limiting liability differently from the terms of sections 15 and 16 of this License; or
b) Requiring preservation of specied reasonable legal notices or author attributions in that material or in the Appropriate Legal
Notices displayed by works containing it; or
c) Prohibiting misrepresentation of the origin of that material, or requiring that modied versions of such material be marked in
reasonable ways as different from the original version; or
d) Limiting the use for publicity purposes of names of licensors or authors of the material; or
e) Declining to grant rights under trademark law for use of some trade names, trademarks, or service marks; or
f) Requiring indemnication of licensors and authors of that material by anyone who conveys the material (or modied versions of
it) with contractual assumptions of liability to the recipient, for any liability that these contractual assumptions directly impose on
those licensors and authors.
All other non-permissive additional terms are considered “further restrictions” within the meaning of section 10. If the Program
as you received it, or any part of it, contains a notice stating that it is governed by this License along with a term that is a further
restriction, you may remove that term. If a license document contains a further restriction but permits relicensing or conveying under
this License, you may add to a covered work material governed by the terms of that license document, provided that the further
restriction does not survive such relicensing or conveying. If you add terms to a covered work in accord with this section, you must
place, in the relevant source les, a statement of the additional terms that apply to those les, or a notice indicating where to nd the
applicable terms. Additional terms, permissive or non-permissive, may be stated in the form of a separately written license, or stated
as exceptions; the above requirements apply either way.
8. Termination.
You may not propagate or modify a covered work except as expressly provided under this License. Any attempt otherwise to
propagate or modify it is void, and will automatically terminate your rights under this License (including any patent licenses granted
under the third paragraph of section 11). However, if you cease all violation of this License, then your license from a particular
copyright holder is reinstated (a) provisionally, unless and until the copyright holder explicitly and nally terminates your license,
and (b) permanently, if the copyright holder fails to notify you of the violation by some reasonable means prior to 60 days after the
cessation. Moreover, your license from a particular copyright holder is reinstated permanently if the copyright holder noties you
of the violation by some reasonable means, this is the rst time you have received notice of violation of this License (for any work)
from that copyright holder, and you cure the violation prior to 30 days after your receipt of the notice. Termination of your rights
under this section does not terminate the licenses of parties who have received copies or rights from you under this License. If your
rights have been terminated and not permanently reinstated, you do not qualify to receive new licenses for the same material under
section 10.

9. Acceptance Not Required for Having Copies.
You are not required to accept this License in order to receive or run a copy of the Program. Ancillary propagation of a covered
work occurring solely as a consequence of using peer-to-peer transmission to receive a copy likewise does not require acceptance.
However, nothing other than this License grants you permission to propagate or modify any covered work. These actions infringe
copyright if you do not accept this License. Therefore, by modifying or propagating a covered work, you indicate your acceptance of
this License to do so.
10. Automatic Licensing of Downstream Recipients.
Each time you convey a covered work, the recipient automatically receives a license from the original licensors, to run, modify and
propagate that work, subject to this License. You are not responsible for enforcing compliance by third parties with this License.
An “entity transaction” is a transaction transferring control of an organization, or substantially all assets of one, or subdividing
an organization, or merging organizations. If propagation of a covered work results from an entity transaction, each party to that
transaction who receives a copy of the work also receives whatever licenses to the work the party’s predecessor in interest had or
could give under the previous paragraph, plus a right to possession of the Corresponding Source of the work from the predecessor
in interest, if the predecessor has it or can get it with reasonable efforts. You may not impose any further restrictions on the exercise
of the rights granted or afrmed under this License. For example, you may not impose a license fee, royalty, or other charge for
exercise of rights granted under this License, and you may not initiate litigation (including a cross-claim or counterclaim in a lawsuit)
alleging that any patent claim is infringed by making, using, selling, offering for sale, or importing the Program or any portion of it.
11. Patents.
A “contributor” is a copyright holder who authorizes use under this License of the Program or a work on which the Program is
based. The work thus licensed is called the contributor’s “contributor version”. A contributor’s “essential patent claims” are all
patent claims owned or controlled by the contributor, whether already acquired or hereafter acquired, that would be infringed by
some manner, permitted by this License, of making, using, or selling its contributor version, but do not include claims that would be
infringed only as a consequence of further modication of the contributor version. For purposes of this denition, “control” includes
the right to grant patent sublicenses in a manner consistent with the requirements of this License. Each contributor grants you a
non-exclusive, worldwide, royalty-free patent license under the contributor’s essential patent claims, to make, use, sell, offer for
sale, import and otherwise run, modify and propagate the contents of its contributor version. In the following three paragraphs,
a “patent license” is any express agreement or commitment, however denominated, not to enforce a patent (such as an express
permission to practice a patent or covenant not to sue for patent infringement). To “grant” such a patent license to a party means to
make such an agreement or commitment not to enforce a patent against the party. If you convey a covered work, knowingly relying
on a patent license, and the Corresponding Source of the work is not available for anyone to copy, free of charge and under the
terms of this License, through a publicly available network server or other readily accessible means, then you must either (1) cause
the Corresponding Source to be so available, or (2) arrange to deprive yourself of the benet of the patent license for this particular
work, or (3) arrange, in a manner consistent with the requirements of this License, to extend the patent license to downstream
recipients. “Knowingly relying” means you have actual knowledge that, but for the patent license, your conveying the covered work
in a country, or your recipient’s use of the covered work in a country, would infringe one or more identiable patents in that country
that you have reason to believe are valid. If, pursuant to or in connection with a single transaction or arrangement, you convey, or
propagate by procuring conveyance of, a covered work, and grant a patent license to some of the parties receiving the covered
work authorizing them to use, propagate, modify or convey a specic copy of the covered work, then the patent license you grant is
automatically extended to all recipients of the covered work and works based on it.
A patent license is “discriminatory” if it does not include within the scope of its coverage, prohibits the exercise of, or is conditioned
on the non-exercise of one or more of the rights that are specically granted under this License. You may not convey a covered
work if you are a party to an arrangement with a third party that is in the business of distributing software, under which you make
payment to the third party based on the extent of your activity of conveying the work, and under which the third party grants, to any
of the parties who would receive the covered work from you, a discriminatory patent license (a) in connection with copies of the
covered work conveyed by you (or copies made from those copies), or (b) primarily for and in connection with specic products or
compilations that contain the covered work, unless you entered into that arrangement, or that patent license was granted, prior to 28
March 2007.
Nothing in this License shall be construed as excluding or limiting any implied license or other defenses to infringement that may
otherwise be available to you under applicable patent law.
12. No Surrender of Others’ Freedom.
If conditions are imposed on you (whether by court order, agreement or otherwise) that contradict the conditions of this License,
they do not excuse you from the conditions of this License. If you cannot convey a covered work so as to satisfy simultaneously
your obligations under this License and any other pertinent obligations, then as a consequence you may not convey it at all. For
example, if you agree to terms that obligate you to collect a royalty for further conveying from those to whom you convey the
Program, the only way you could satisfy both those terms and this License would be to refrain entirely from conveying the Program.
13. Use with the GNU Affero General Public License.
Notwithstanding any other provision of this License, you have permission to link or combine any covered work with a work licensed
under version 3 of the GNU Affero General Public License into a single combined work, and to convey the resulting work. The terms
of this License will continue to apply to the part which is the covered work, but the special requirements of the GNU Affero General
Public License, section 13, concerning interaction through a network will apply to the combination as such.
14. Revised Versions of this License.
The Free Software Foundation may publish revised and/or new versions of the GNU General Public License from time to time.
Such new versions will be similar in spirit to the present version, but may differ in detail to address new problems or concerns. Each
version is given a distinguishing version number. If the Program species that a certain numbered version of the GNU General
Public License “or any later version” applies to it, you have the option of following the terms and conditions either of that numbered
version or of any later version published by the Free Software Foundation. If the Program does not specify a version number of
the GNU General Public License, you may choose any version ever published by the Free Software Foundation. If the Program
species that a proxy can decide which future versions of the GNU General Public License can be used, that proxy’s public
statement of acceptance of a version permanently authorizes you to choose that version for the Program. Later license versions
may give you additional or different permissions. However, no additional obligations are imposed on any author or copyright holder
as a result of your choosing to follow a later version.
English - 80

English - 81
15. Disclaimer of Warranty.
THERE IS NO WARRANTY FOR THE PROGRAM, TO THE EXTENT PERMITTED BY APPLICABLE LAW. EXCEPT WHEN
OTHERWISE STATED IN WRITING THE COPYRIGHT HOLDERS AND/OR OTHER PARTIES PROVIDE THE PROGRAM “
AS IS” WITHOUT WARRANTY OF ANY KIND, EITHER EXPRESSED OR IMPLIED, INCLUDING, BUT NOT LIMITED TO, THE
IMPLIED WARRANTIES OF MERCHANTABILITY AND FITNESS FOR A PARTICULAR PURPOSE. THE ENTIRE RISK AS TO
THE QUALITY AND PERFORMANCE OF THE PROGRAM IS WITH YOU. SHOULD THE PROGRAM PROVE DEFECTIVE, YOU
ASSUME THE COST OF ALL NECESSARY SERVICING, REPAIR OR CORRECTION.
16. Limitation of Liability.
IN NO EVENT UNLESS REQUIRED BY APPLICABLE LAW OR AGREED TO IN WRITING WILL ANY COPYRIGHT HOLDER, OR
ANY OTHER PARTY WHO MODIFIES AND/OR CONVEYS THE PROGRAM AS PERMITTED ABOVE, BE LIABLE TO YOU FOR
DAMAGES, INCLUDING ANY GENERAL, SPECIAL, INCIDENTAL OR CONSEQUENTIAL DAMAGES ARISING OUT OF THE
USE OR INABILITY TO USE THE PROGRAM (INCLUDING BUT NOT LIMITED TO LOSS OF DATA OR DATA BEING RENDERED
INACCURATE OR LOSSES SUSTAINED BY YOU OR THIRD PARTIES OR A FAILURE OF THE PROGRAM TO OPERATE WITH
ANY OTHER PROGRAMS), EVEN IF SUCH HOLDER OR OTHER PARTY HAS BEEN ADVISED OF THE POSSIBILITY OF SUCH
DAMAGES.
17. Interpretation of Sections 15 and 16.
If the disclaimer of warranty and limitation of liability provided above cannot be given local legal effect according to their terms,
reviewing courts shall apply local law that most closely approximates an absolute waiver of all civil liability in connection with the
Program, unless a warranty or assumption of liability accompanies a copy of the Program in return for a fee.
END OF TERMS AND CONDITIONS
❑
How to Apply These Terms to Your New Programs
If you develop a new program, and you want it to be of the greatest possible use to the public, the best way to achieve this is to make it
free software which everyone can redistribute and change under these terms. To do so, attach the following notices to the program. It is
safest to attach them to the start of each source file to most effectively state the exclusion of warranty; and each file should have at least
the “copyright” line and a pointer to where the full notice is found.
<one line to give the program’s name and a brief idea of what it does.> Copyright (C) <year> <name of author>
This program is free software: you can redistribute it and/or modify it under the terms of the GNU General Public License as
published by the Free Software Foundation, either version 3 of the License, or (at your option) any later version.
This program is distributed in the hope that it will be useful, but WITHOUT ANY WARRANTY; without even the implied warranty
of MERCHANTABILITY or FITNESS FOR A PARTICULAR PURPOSE. See the GNU General Public License for more details.
You should have received a copy of the GNU General Public License along with this program. If not, see <http://www.gnu.org/
licenses/>.
Also add information on how to contact you by electronic and paper mail.
If the program does terminal interaction, make it output a short notice like this when it starts in an interactive mode:
<program> Copyright (C) <year> <name of author> This program comes with ABSOLUTELY NO WARRANTY; for details type
`show w’. This is free software, and you are welcome to redistribute it under certain conditions; type `show c’ for details.
The hypothetical commands `show w’ and `show c’ should show the appropriate parts of the General Public License. Of course, your
program’s commands might be different; for a GUI interface, you would use an “about box”.
You should also get your employer (if you work as a programmer) or school, if any, to sign a “copyright disclaimer” for the program, if
necessary.
For more information on this, and how to apply and follow the GNU GPL, see <http://www.gnu.org/licenses/>.
The GNU General Public License does not permit incorporating your program into proprietary programs. If your program is a subroutine
library, you may consider it more useful to permit linking proprietary applications with the library. If this is what you want to do, use the
GNU Lesser General Public License instead of this License. But first, please read <http://www.gnu.org/philosophy/why-not-lgpl.html>.
The OpenSSL toolkit stays under a dual license, i.e. both the conditions of the OpenSSL License and the original SSLeay license apply
to the toolkit. See below for the actual license texts. Actually both licenses are BSD-style Open Source licenses. In case of any license
issues related to OpenSSL please contact openssl-core@openssl.org.
OpenSSL License
Copyright (c) 1998-2007 The OpenSSL Project. All rights reserved.
Redistribution and use in source and binary forms, with or without modification, are permitted provided that the following conditions are
met:
1. Redistributions of source code must retain the above copyright notice, this list of conditions and the following disclaimer.
2. Redistributions in binary form must reproduce the above copyright notice, this list of conditions and the following disclaimer in the
documentation and/or other materials provided with the distribution.
3. All advertising materials mentioning features or use of this software must display the following acknowledgment: “This product
includes software developed by the OpenSSL Project for use in the OpenSSL Toolkit. (http://www.openssl.org/)”
4. The names “OpenSSL Toolkit” and “OpenSSL Project” must not be used to endorse or promote products derived from this software
without prior written permission. For written permission, please contact openssl-core@openssl.org.
5. Products derived from this software may not be called “OpenSSL nor may “OpenSSL” appear in their names without prior written
permission of the OpenSSL Project.
6. Redistributions of any form whatsoever must retain the following acknowledgment: “This product includes software developed by
the OpenSSL Project for use in the OpenSSL Toolkit (http://www.openssl.org/)”

THIS SOFTWARE IS PROVIDED BY THE OpenSSL PROJECT ``AS IS’’ AND ANY EXPRESSED OR IMPLIED WARRANTIES,
INCLUDING, BUT NOT LIMITED TO, THE IMPLIED WARRANTIES OF MERCHANTABILITY AND FITNESS FOR A PARTICULAR
PURPOSE ARE DISCLAIMED. IN NO EVENT SHALL THE OpenSSL PROJECT OR ITS CONTRIBUTORS BE LIABLE FOR ANY
DIRECT, INDIRECT, INCIDENTAL, SPECIAL, EXEMPLARY, OR CONSEQUENTIAL DAMAGES (INCLUDING, BUT NOT LIMITED TO,
PROCUREMENT OF SUBSTITUTE GOODS OR SERVICES; LOSS OF USE, DATA, OR PROFITS; OR BUSINESS INTERRUPTION)
HOWEVER CAUSED AND ON ANY THEORY OF LIABILITY, WHETHER IN CONTRACT, STRICT LIABILITY, OR TORT (INCLUDING
NEGLIGENCE OR OTHERWISE) ARISING IN ANY WAY OUT OF THE USE OF THIS SOFTWARE, EVEN IF ADVISED OF THE
POSSIBILITY OF SUCH DAMAGE.
This product includes cryptographic software written by Eric Young (eay@cryptsoft.com). This product includes software written by Tim
Hudson (tjh@cryptsoft.com).
Original SSLeay License
Copyright (C) 1995-1998 Eric Young (eay@cryptsoft.com) All rights reserved.
This package is an SSL implementation written by Eric Young (eay@cryptsoft.com). The implementation was written so as to conform
with Netscapes SSL.
This library is free for commercial and non-commercial use as long as the following conditions are aheared to. The following conditions
apply to all code found in this distribution, be it the RC4, RSA, lhash, DES, etc., code; not just the SSL code. The SSL documentation
included with this distribution is covered by the same copyright terms except that the holder is Tim Hudson (tjh@cryptsoft.com).
Copyright remains Eric Young’s, and as such any Copyright notices in the code are not to be removed. If this package is used in
a product, Eric Young should be given attribution as the author of the parts of the library used. This can be in the form of a textual
message at program startup or in documentation (online or textual) provided with the package.
Redistribution and use in source and binary forms, with or without modification, are permitted provided that the following conditions are
met:
1. Redistributions of source code must retain the copyright notice, this list of conditions and the following disclaimer.
2. Redistributions in binary form must reproduce the above copyright notice, this list of conditions and the following disclaimer in the
documentation and/or other materials provided with the distribution.
3. All advertising materials mentioning features or use of this software must display the following acknowledgement: “This product
includes cryptographic software written by Eric Young (eay@cryptsoft.com)” The word ‘cryptographic’ can be left out if the rouines
from the library being used are not cryptographic related :-).
4. If you include any Windows specic code (or a derivative thereof) from the apps directory (application code) you must include an
acknowledgement: “This product includes software written by Tim Hudson (tjh@cryptsoft.com)”
THIS SOFTWARE IS PROVIDED BY ERIC YOUNG ``AS IS’’ AND ANY EXPRESS OR IMPLIED WARRANTIES, INCLUDING, BUT
NOT LIMITED TO, THE IMPLIED WARRANTIES OF MERCHANTABILITY AND FITNESS FOR A PARTICULAR PURPOSE ARE
DISCLAIMED. IN NO EVENT SHALL THE AUTHOR OR CONTRIBUTORS BE LIABLE FOR ANY DIRECT, INDIRECT, INCIDENTAL,
SPECIAL, EXEMPLARY, OR CONSEQUENTIAL DAMAGES (INCLUDING, BUT NOT LIMITED TO, PROCUREMENT OF
SUBSTITUTE GOODS OR SERVICES; LOSS OF USE, DATA, OR PROFITS; OR BUSINESS INTERRUPTION) HOWEVER CAUSED
AND ON ANY THEORY OF LIABILITY, WHETHER IN CONTRACT, STRICT LIABILITY, OR TORT (INCLUDING NEGLIGENCE OR
OTHERWISE) ARISING IN ANY WAY OUT OF THE USE OF THIS SOFTWARE, EVEN IF ADVISED OF THE POSSIBILITY OF SUCH
DAMAGE.
The licence and distribution terms for any publically available version or derivative of this code cannot be changed. i.e. this code cannot
simply be copied and put under another distribution licence [including the GNU Public Licence.]
English - 82

Latviski – 2
© 2009 Samsung Electronics Co., Ltd. All rights reserved.
Lietošanas rokasgrāmata
Ekrāna attēla aizkavēšanās
Šajā plazmas monitora panelī nav ieteicams ilgāk par divām stundām apskatīt nekustīgu attēlu (piemēram, videospēles laikā vai, savienojot datoru ar šo PDP), jo var rasties ekrāna attēla aizkavēšanās. Šāda attēla aizkavēšanās ir pazīstama arī kā “ekrāna izdegšana”.
Lai izvairītos no šāda veida aizkavēšanās, aplūkojot nekustīgu attēlu, samaziniet ekrāna spilgtumu un kontrastu.
Augstums
Lai PDP darbotos pareizi, izmantojiet to tikai vietās, kas zemākas par 2000m. Tas var nedarboties pareizi 2000m vai lielākā augstumā,
tādēļ neizmantojiet ierīci šādās vietās.
PDP televizora augšdaļas silšana
Pēc ilglaicīgas izstrādājuma lietošanas tā augšdaļa var būt karsta, jo siltums no paneļa izkliedējas caur ventilācijas atveri ierīces
augšdaļā. Tas ir normāli un nenorāda uz izstrādājuma defektu vai nepareizu darbību. Tomēr bērniem nevajadzētu ļaut aiztikt
izstrādājuma augšdaļu.
Izstrādājums izdod “krakšķošu” skaņu.
“Krakšķoša” skaņa var rasties, ierīcei saraujoties vai izplešoties apkārtējās vides faktoru, piemēram, temperatūras vai mitruma maiņu,
dēļ. Tas ir normāli un nav uzskatāms par izstrādājuma defektu.
Fotoelementu defekti
PDP tiek izmantots no 2,360,000(HD-level) līdz 6,221,000(FHD-level) panelis, tā ražošanai ir nepieciešama sarežģīta tehnoloģija. Taču
uz ekrāna var būt daži spilgti vai tumši pikseļi. Šie pikseļi neietekmēs izstrādājuma veiktspēju.
Neizmantojiet televizoru temperatūrā, kas zemāka par 5°C (41°F).
Pārāk ilgi rādīts nekustīgs attēls PDP panelim var radīt paliekošus bojājumus.
Ilglaicīga PDP televizora skatīšanās 4:3 formātā ekrāna centrā, kreisajā un labajā malā var atstāt attēlotā ekrāna
robežu pēdas, kas radušās dažāda gaismas starojuma intensitātes dēļ. Atskaņojot DVD vai spēlējot videospēles,
ekrānā var rasties līdzīgs efekts. Lietošanas garantija neattiecas uz bojājumiem, kas radušies šī efekta dēļ.
Pēcattēls uz ekrāna.
Rādot nekustīgus attēlus no videospēlēm un datora ilgāk par kādu noteiktu laika posmu, var rasties daļēji pēcattēli. Lai novērstu šo
efektu, nekustīgu attēlu rādīšanas laikā samaziniet ‘brightness’ un ‘contrast’.
Garantija
- Garantija neattiecas uz bojājumiem, kas radušies attēlu aizkavēšanās rezultātā.
- Garantijas pakalpojumi neattiecas uz izmēģinājuma pārbaudi.
Uzstādīšana
Ja iekārtu uzstādīsiet ļoti putekļainā un mitrā vietā vai ķīmisku vielu glabātuvē, kur ir augsta vai zema temperatūra, un ja tā nepārtraukti
darbosies (piemēram, lidostā, vilcienu stacijā u.c.), sazinieties ar pilnvarotu apkopes centru. Pretējā gadījumā iekārta var tikt nopietni
bojāta.
Piezīme par Digital TV
1. Ar Digital TV(DVB) saistītās funkcijas ir pieejamas tikai valstīs/reģionos, kur tiek raidīti DVB-T (MPEG2 un
MPEG4 AVC) digitālie virszemes apraides signāli vai kur jums ir piekļuve saderīgiem DVB-C(MPEG2 un MPEG4
AAC) kabeļtelevīzijas pakalpojumiem.
Par DVB-T vai DVB-C signāla saņemšanu, lūdzu, jautājiet vietējam izplatītājam.
2. DVB-T ir DVB Eiropas konsorcija standarts digitālās virszemes televīzijas pārraidei, bet DVB-C ir standarts
digitālās kabeļtelevīzijas pārraidei.
Tomēr, dažas no atšķirīgajām funkcijām, kā piemēram, EPG (elektroniskais programmu ceļvedis), VOD
(pieprasījumvideo) un citi, nav iekļauti šajā specikācijā. Tādēļ šobrīd tās netiek atbalstītas.
3.
Lai arī šis televizors atbilst jaunākajiem DVB-T un DVB-C standartiem [2008. gada augusts], nav iespējams garantēt
saderību ar nākotnes DVB-T digitālās virszemes apraides un DVB-C digitālās kabeļtelevīzijas sistēmām.
4. Daži kabeļtelevīzijas pakalpojumu sniedzēji var pieprasīt papildu samaksu par šādiem pakalpojumiem, un jums
var tikt pieprasīts piekrist viņu biznesa noteikumiem un nosacījumiem.
5. Dažas Digital TV funkcijas var nebūt pieejamas dažās valstīs vai reģionos, un DVB-C var nedarboties pareizi ar
visiem pakalpojumu sniedzējiem.
6. Lai iegūtu plašāku informāciju, lūdzu, sazinieties ar vietējo Samsung klientu apkalpošanas centru.
Sazinieties ar SAMSUNG WORLDWIDE (SAMSUNG VISĀ PASAULĒ)
Ja jums ir jautājumi vai komentāri par Samsung izstrādājumiem, lūdzu, sazinieties ar SAMSUNG klientu atbalsta centru.
(PAPILDUS informāciju skatiet uz aizmugures vāka.)

N O T
Simbols Nospiediet Piebilde Viena skāriena poga Poga TOOL
Latviski
Latviski – 3
TV pievienošana un sagatavošana darbībai
Komplektācija ............................................................................ 4
Statīva pamatnes lietošana ....................................................... 4
Statīva pamatnes uzstādīšana (atkarībā no modeļa) ................ 4
Vadības paneļa apskate ............................................................ 5
Savienojumu panelis .................................................................6
Tālvadības pults ........................................................................8
Bateriju ievietošana tālvadības pultī .......................................... 9
Tālvadības pults fona apgaismojuma pogu izmantošana .........9
Ieslēgšana un izslēgšana .......................................................... 9
Televizora pārslēgšana gaidīšanas režīmā ...............................9
Izvēlņu skatīšanās ................................................................... 10
TOOLS pogas izmantošana .................................................... 10
Funkcija Plug & Play ............................................................... 11
Kanālu kontrole
Kanālu saglabāšana ............................................................... 12
Kanālu pārvaldīšana ................................................................ 15
Attēlu kontrole
Attēlu iestatījumu mainīšana un atiestatīšana ......................... 17
TV iestatīšana, izmantojot PC ................................................. 20
Personālā datora displejs ........................................................ 21
Skaņas kontrole
Skaņas standarta iestatījuma mainīšana ................................22
Skaņas režīma atlasīšana ....................................................... 23
Funkcijas apraksts
Laika iestatīšana .....................................................................24
Uzstādīšanas izvēlnes kongurēšana ..................................... 25
Skatīšanās režīmā Picture in Picture (PIP) .............................27
Atbalsts / Ievade
Supported Program ................................................................. 28
Avotu saraksts / Rediģēt nosaukumu ...................................... 29
Tīkls
Tīkla pieslēgums .....................................................................30
Tīkla iestatīšana ......................................................................33
■
■
■
■
■
■
■
■
■
■
■
■
■
■
■
■
■
■
■
■
■
■
■
■
■
■
■
Multivides atskaņošana
USB ierīces pievienošana .......................................................36
Multivides atskaņošanas funkcijas izmantošana ..................... 37
Fotoattēlu saraksta izmantošana un kārtošana ....................... 38
Fotoattēla vai slīdrādes skatīšana .......................................... 39
Mūzikas saraksta izmantošana un kārtošana .........................41
Mūzikas atskaņošana ............................................................ 42
Filmu saraksta izmantošana un kārtošana .............................. 43
Filmas faila atskaņošana ....................................................... 44
Attēlu / mūzikas iestatījumi Multivides atskaņošanas
izmantošanay ..........................................................................46
Iestatījumu izvēlnes izmantošana ...........................................47
Media Play-DLNA
DLNA tīkla iestatīšana ............................................................. 48
Lietojumprogrammas DLNA instalēšana ................................. 48
Lietojumprogrammas DLNA izmantošanan ............................. 50
DLNA funkcijas izmantošana ...................................................53
Par Anynet
+
Anynet+ ierīču pievienošana ................................................... 54
Anynet+ iestatīšana ................................................................ 55
Pārslēgšanās starp Anynet+ ierīcēm ....................................... 56
Ierakstīšana ............................................................................. 57
Klausīšanās, izmantojot uztvērēju ........................................... 57
Anynet+ traucējummeklēšana ................................................ 58
Content Library
Satura bibliotēkas aktivizēšana ............................................... 59
Satura bibliotēkas izmantošana ..............................................60
Mājas tīkla centrs
Mājas tīkla centrs ....................................................................61
Mājas tīkla centra iestatīšana .................................................. 62
Ziņojumu funkcijas izmantošana .............................................63
Multivides funkcijas izmantošana ............................................ 64
Ieteikumi lietotājiem
Teleteksta funkcija ...................................................................65
Sienas kronšteinu specikācijas (VESA) ................................. 66
Sagatavošanās pirms Wall Mount uzstādīšanas pie sienas ....67
Televizora piestiprināšana pie sienas ...................................... 67
Uzstādīšanas vietas nodrošināšana ........................................ 68
Kabeļu nostiprināšana ............................................................. 69
Traucējummeklēšana .............................................................. 70
Specikācijas ........................................................................... 71
■
■
■
■
■
■
■
■
■
■
■
■
■
■
■
■
■
■
■
■
■
■
■
■
■
■
■
■
■
■
■
■
■
■
Satura rādītājs

Latviski – 4
TV pievienošana un sagatavošana darbībai
Statīva pamatnes lietošana
PDP pārvietošanu jāveic diviem vai vairāk cilvēkiem. Nekad nelieciet
PDP uz grīdas, jo šādi var sabojāt ekrānu. Vienmēr turiet PDP stateniski.
PDP var pagriezt par 20 grādiem uz labo un kreiso pusi.
N
N
Komplektācija
Lietošanas pamācība Tālvadības pults /
AAA baterijas
(2 gab.)
Programmas CD Lupatiņa tīrīšanai Turētāja gredzens (4
gab.) (skatiet 67. lpp.)
Garantijas kartīte/ Drošības
rokasgrāmata
(nav pieejama visās vietās)
AV kabelis Komponenšu
kabelis
Kabeļu turētājs
(skatiet 70. lpp.)
Ferīta serdes (4ea)
-20° ~ 20°
Statīva pamatnes uzstādīšana (atkarībā no modeļa)
Brīdinājums
Stingri nostipriniet televizoru statīvā
pirms to pārbīdāt, jo statīvs var nokrist
un izraisīt nopietnas traumas.
Televizora pārvietošanu jāveic
diviem vai vairākiem cilvēkiem.
Nekad nelieciet televizoru uz
grīdas, jo šādi var sabojāt ekrānu.
Vienmēr turiet televizoru stateniski.
N
Cieši piestipriniet TV pie standarta pamatnes, izmantojot 5 skrūves, lai
nostiprinātu statīva pamatni un TV.
(Televizora ārpuse var atšķirties no attēlā redzamā korpusa.)
Ja uzstādāt televizoru pie sienas,
aizveriet vāciņu (1) uz statīva
pamatnes savienojuma vietas,
noslēpjot to, izmantojot divas
skrūves.
Ferīta serdes
Ferīta serdes izmanto lai aizsargātu kabeļus no traucējumiem.
Kad pievienojat kabeli, attaisiet ferīta serdi un sastipriniet to ap
kabeli pie spraudņa.
N
Strāvas vads
(5ea)
LAN kabelis
(5ea)
HDMI kabelis
(5ea)
Apakšējais vāks
(
tikai
PS50B850)
(
skrūve (5ea)
tikai
PS50B850 )
Apakšējais vāks/
(
tikai
PS58B850)
Turētāja vada statīvs
skrūve
(skatiet 69. lpp.)
Turētāja vads (3ea)
(skatiet 69. lpp.)
Ārējais kabelis

Latviski – 5
1
Tālvadības Sensors
Pavērsiet tālvadības pulti pret šo punktu uz televizora.
2
SOURCE
Pārslēdzas starp visiem pieejamajiem ievades avotiem
(TV, Ext., AV, Component, PC, HDMI1/DVI, HDMI2,
HDMI3, HDMI4, USB).
Ekrāna izvēlnē izmantojiet šo pogu tāpat kā
ENTERE pogu uz tālvadības pults.
3
MENU
Nospiediet, lai redzētu televizora funkciju ekrāna izvēlni.
4
+
VOL
–
Nospiediet, lai palielinātu vai samazinātu skaļumu. Ekrāna
izvēlnē izmantojiet pogas + VOL – tāpat kā tālvadības
pults pogas ◄ un ►.
N
5
Nospiediet, lai pārslēgtu kanālus. Ekrāna izvēlnē
izmantojiet pogas tāpat kā tālvadības pults
pogas ▲ un ▼. Var izmantot pogu , lai ieslēgtu
TV, neizmantojot tālvadības pulti.
6
BAROŠANAS INDIKATORS
Iemirgojas un izslēdzas, kad strāvas padeve ieslēgta, un
iedegas, ieslēdzot gaidīšanas režīmu.
7
(BAROŠANA)
Nospiediet, lai ieslēgtu un izslēgtu televizoru.
8
Ska Ļru Ņi
Vadības paneļa apskate
Izstrādājuma krāsa un forma atkarībā no televizora modeļa var būt atšķirīga.
N
Priekšējā paneļa pogas
Pieskarieties katrai
pogai, lai to izmantotu.

Latviski – 6
Savienojumu panelis
Katrreiz, televizoram pievienojot audio vai video sistēmu, pārliecinieties, vai visas savienotās ierīces ir izslēgtas.
Pievienojot ārējo ierīci, raugieties, lai tiktu savienotas atbilstošo krāsu aparatūras spailes un kabeļi.
N
N
Izstrādājuma krāsa un forma atkarībā no televizora modeļa var būt atšķirīga.
N
Aizmugures panelis
987
Kabeļtelevīzijastīkls
vai
0
4 53
@
4
2
vai
!
6
1

Latviski – 7
1
COMMON INTERFACE Slota
Ievietojiet slotā CI (kopējās saskarnes) karti. (skatīt 27. lpp.)
Kad CI CARD nav ievietota dažos kanālos, uz ekrāna
parādās uzraksts Traucējumi kanālā.
Pēc aptuveni 2-3 minūtēm parādīsies informācija par
sapārošanu, kas ietver tālruņa numuru, CI KARTES
ID, saimnieka ID un citu informāciju. Ja parādās kļūdas
ziņojums, lūdzu, sazinieties ar savu pakalpojumu
sniedzēju.
Kad ir pabeigta kanālu informācijas kongurēšana,
parādās ziņojums Atjaunošana pabeigta, kas nozīmē,
ka kanālu saraksts ir atjaunināts+.
Ievietojiet CI karti virzienā, kas norādīts uz tās.
CAM netiek atbalstīts atsevišķās valstīs un reģionos,
jautājiet savam autorizētajam izplatītājam.
2
USB 1 (HDD), USB 2
Pievienojiet USB lielapjoma atmiņas ierīci, lai apskatītu foto
failus (JPEG) un atskaņotu audio (MP3) vai lmu failus.
Var izveidot bezvadu savienojumu ar SAMSUNG tīklu.
Kā cietā diska ligzda tiek izmantota arī USB1 (cietā
diska) ligzda. Cietais disks ir ierīce, kur tiek glabāti
digitāli kodēti dati.
3
POWER IN
Pievienojiet komplektācijā iekļauto strāvas vadu.
4
LAN
Lai izveidotu savienojumu ar tīklu, pievienojiet LAN kabeli
šim portam
(SAMSUNG Internet@TV pakalpojums).
5
ANT IN
75Ω Koaksiāls kontaktspraudnis gaisvadu/kabeļu tīklam.
6
EXT (RGB)
Ieejas vai izejas ārējām ierīcēm, piemēram,
videomagnetofonam, DVD atskaņotājam, videospēļu konsolei
vai videodisku atskaņotājam.
EXT režīmā DTV izeja atbalsta tikai MPEG SD video un audio.
EXT režīmā, Game mode (spēļu režīms) nav pieejams.
Ieejas/izejas specifikācija
Savienotājs
Ieeja Izeja
Video Audio(L/R) RGB
Video + Audio(L/R)
EXT
✔
✔
✔
Ir pieejama tikai TV vai
DTV izeja.
-
-
-
N
N
N
N
N
7
AV IN (AUDIO L/R / VIDEO)
Video un audio ieejas, kas paredzētas ārējām ierīcēm,
piemēram, videokamerai vai videomagnetofonam.
8
COMPONENT IN
Audio (AUDIO L/R) un video (Y / P
B
/ PR) komponentkabeļu
ieejas.
9
PC IN / PC/DVI AUDIO IN
Pievienojiet datora video un audio izejas ligzdām.
0
HDMI IN 1 (DVI), 2, 3, 4
HDMI-HDMI savienojumam nav vajadzīgs papildus audio
savienojums.
Kad lietojat HDMI/DVI kabeli, izmantojiet ligzdu HDMI IN
1 (DVI).
Kas ir HDMI?
Augstas izšķirtspējas multivides saskarne ļauj
pārsūtīt augstas izšķirtspējas digitālus video datus
un vairākus digitālā audio kanālus.
HDMI/DVI ligzda atbalsta DVI savienojumu ar papildus
ierīci, izmantojot atbilstošu kabeli (nav iekļauts
komplektācijā). Atšķirība starp HDMI un DVI: HDMI
ierīces ir mazākas, tajās ir instalēta HDCP (aizsardzība
pret platjoslas digitālā satura kopēšanu) kodēšanas
funkcija, un tās atbalsta vairākkanālu digitālo audio.
Mçs iesakâm izmantot HDMI kabeïus, kas nav platâki
par 14 mm.
PC/DVI AUDIO IN
DVI audio izejas, kas paredzētas ārējām ierīcēm.
Atbalsītie HDMI/DVI un Component režīmi
480i 480p 576i 576p 720p 1080i 1080p
HDMI/DVI 50Hz X X X O O O O
HDMI/DVI 60Hz X O X X O O O
Component O O O O O O O
!
SERVICE
Servisa kontaktspraudnis.
@
DIGITAL AUDIO OUT (OPTICAL)
Pievienojiet digitālajam audiokomponentam.
-
-
N
-
-
N

Latviski – 8
1
POWER poga
(ieslēdz un izslēdz televizoru)
2
Uzreiz atlasa TV režīmu
3
Ciparu pogas tiešai kanālu piekļuvei
4
Izmantojiet, lai izvēlētos ekrāna
izvēlnes vienumus
5
Lietot, lai ekrānā attēlotu kanālu
sarakstus.
6
Atver galveno ekrāna izvēlni
7
Izmantojiet, lai ātri atlasītu bieži
lietotās funkcijas.
8
Lietot, lai izvēlētos ekrānā redzamos
izvēlnes vienumus un mainītu izvēlnes
vērtības.
9
Nav pieejams
0
Izmantojiet šīs pogas kanālu sarakstā,
multivides atskaņošanā, utt.
!
Pieejamā avota atlase
@
Skaļuma palielināšana
Skaļuma samazināšana
$
Izmantojiet, lai apskatītu informāciju
par pašreizējo apraidi
%
Digitālo subtitru displejs
^
Izmantojiet šīs pogas Anynet+ un
multivides atskaņošanā.
&
Nospiediet, lai izgaismotu tālvadības
pults pogas. Šī funkcija ir ļoti
noderīga nakts laikā vai tumšā telpā.
(Izmantojot tālvadības pulti, kad pogas
ON/OFF ( ) apgaismojums ir iestatīts
uz On, tiek samazināts akumulatora
kalpošanas ilgums.)
*
Iepriekšējais kanāls
(
Attēlo izlases kanālu sarakstu.
)
Atgriež iepriekšējā izvēlnē
a
Aizver ekrāna izvēlni
b
Nākamais kanāls
Iepriekšējais kanāls
c
Īslaicīga skaņas izslēgšana
d
Šī funkcija nodrošina iespēju skatīt
sadaļu Content Library.
e
Šī funkcija ļauj no ārējas ierīces
skatīties un atskaņot fotoattēlu,
mūzikas un filmu failus. (Skatiet
38. (fotoattēli), 41. (mūzika) un 43.
(filmas) lappuses.)
f
Elektroniskā programmu ceļveža
(EPG) parādīšana
Teleteksta funkcijas
2
Aizver teleteksta ekrānu
(atkarībā no modeļa)
5
Teleteksta saglabāšana
6
Teleteksta alfabētiskais rādītājs
7
Teleteksta izmērs
0
Ātri piekļūstamo teleteksta lapu
tēmu atlase
!
Teleteksta režīma atlase
(LIST/FLOF)
#
Teleteksta atvēršana/atver gan
teleteksta informāciju, gan parasto
apraidi
$
Teleteksta parādīšana
*
Teleteksta apakšlapa
)
Teleteksta aizturēšana
a
Teleteksta atcelšana
b
P : nākamā teleteksta lapa
P
: iepriekšējā teleteksta lapa
Tālvadības pults
Tālvadības pulti varat izmantot līdz pat 7 metru attālumam no televizora.
Tālvadības pults darbību var ietekmēt spilgta gaisma.N

Latviski – 9
Bateriju ievietošana tālvadības pultī
1. Atveriet vāciņu tālvadības pults aizmugurē, kā parādīts attēlā.
2. Ievietojiet divas AAA izmēra baterijas.
Pārliecinieties, vai esat pareizi savietojis bateriju “+” un “–” polus atbilstoši
pults nodalījumā redzamajam attēlam.
3. Aizveriet vāku.
Ja ilgāku laika posmu neizmantosiet tālvadības pulti, izņemiet baterijas un
glabājiet tās vēsā un sausā vietā.
Ja tālvadības pults nestrādā! Pārbaudiet:
1. Vai televizoram ir pieslēgta strāva?
2. Vai bateriju plusa un mīnusa poli ir savietoti pretēji?
3. Vai baterijas nav izlādējušās?
4. Vai ir atslēgta elektrība, vai strāvas vads nav pievienots elektrībai?
5. Vai tuvumā neatrodas kāda īpaša fluorescējoša gaisma vai neona zīme?
N
N
N
Ieslēgšana un izslēgšana
Elektrības vads pievienots televizora aizmugurē.
1. Iespraudiet elektrības vadu atbilstošā kontaktligzdā.
Iedegas televizora gaidīšanas režīma indikators.
2. Nospiediet televizora pogu POWER .
Lai ieslēgtu televizoru, varat nospiest arī pogu POWER vai tālvadības pults
pogu TV.
3. Nospiediet ciparu pogas (0~9) vai kanālu augšup/lejup pārslēgšanas ( / ) pogas, kas atrodas uz tālvadības pults, vai arī
televizora pogas .
Kad ieslēgsiet televizoru pirmoreiz, jums lūgs izvēlēties valodu, kurā rādīt izvēlnes.
4. Lai izslēgtu televizoru, vēlreiz nospiediet pogu POWER .
N
N
N
Televizora pārslēgšana gaidīšanas režīmā
Lai samazinātu elektroenerģijas patēriņu, televizoru iespējams pārslēgt uz gaidīšanas režīmu. Gaidīšanas režīms noder, ja vēlaties
īslaicīgi pārtraukt skatīšanos (piemēram, maltītes laikā).
1. Nospiediet tālvadības pults pogu POWER .
Ekrāns tiek izslēgts, un televizorā redzams sarkans gaidīšanas režīma indikators.
2. Lai ieslēgtu televizoru, vēlreiz nospiediet pogu POWER , ciparu pogas (0~9), pogu TV vai kanālu augšup/lejup pārslēgšanas
( / ) pogas.
Neatstājiet televizoru gaidīšanas režīmā pārāk ilgi (piemēram, dodoties brīvdienās). Vislabāk televizoru atvienot arī no
elektrotīkla un antenas.
N
N
Tālvadības pults fona apgaismojuma pogu izmantošana
Izmantojiet šo funkciju, atrodoties tumsā un kad tālvadības pults pogas nav skaidri saredzamas.
1. Nospiediet apgaismojuma ON/OFF ( ) pogu
Ja apgaismojums ir ON, uz brīdi ieslēdzas pogu fona apgaismojums.
Nospiežot tālvadības pults pogu, kad tālvadības pults ir ieslēgta, uz brīdi tiek ieslēgts pogu fona apgaismojums.
Pieskaroties tālvadības pultij vai pārvietojot to, tālvadības pults sensors nosaka kustību un uz brīdi ieslēdzas fona
apgaismojums.
Tā kā tālvadības pultī ir vibroelements, tālvadības pults kratīšanas rezultātā elements atskaņos skaņu.
Pogu fona apgaismojums neieslēdzas, ja tālvadības pults ir izslēgta.
N
N
N
N

Latviski – 10
Izvēlņu skatīšanās
1. Kad televizors ir ieslēgts, nospiediet pogu MENU. Ekrānā parādās galvenā
izvēlne. Izvēlnes kreisajā pusē ir ikonas: Attēls, Skaņa, Kanāls, Uzstādīšana,
Ievade, Lietojumprogramma, Atbalsts.
2. Spiediet pogu ▲ vai ▼, lai izvēlētos vienu no ikonām. Lai piekļūtu ikonas
apakšizvēlnei, nospiediet pogu ENTERE.
3. Lai izietu, nospiediet pogu EXIT.
Pēc aptuveni vienas minūtes ekrānā redzamās izvēlnes no ekrāna pazudīs.
TOOLS pogas izmantošana
Varat izmantot TOOLS pogu, lai vienkārši un ātri atlasītu bieži
izmantojamāsunkcijas. Instrumenti izvēlne mainās atkarībā no tā, kādu ārējo
ievades avotu jūsskatāties.
1. Nospiediet TOOLS pogu. Parādīsies izvēlne Instrumenti.
2. Lai atlasītu izvēlni, nospiediet ▲ vai ▼ pogu,tad nospiediet pogu ENTERE.
3. Izmantojiet pogas ▲/▼/◄/►/ un ENTERE, lai redzētu, mainītu vai lietotu
atlasītos vienumus.Plašāku informāciju par katru funkciju skatiet atbilstošajā
lappusē.
Anynet+ (HDMI-CEC), skatiet 55. lappusē
Attēla izmērs, skatiet 18. lappusē
Attēla režīms, skatiet 17. lappusē
Skaņas režīms, skatiet 22. lappusē
Autom. izsl. taimeris, skatiet 24. lappusē
SRS TS HD, skatiet 22. lappusē
Enerģijas taup, skatiet 26. lappusē
Dual l ll, skatiet 23. lappusē
Pievienot favorītiem (vai Izdzēst no favorītiem), skatiet 15. lappusē
PIP, skatiet 27. lappusē
Automātiska regulēšana, skatiet 20. lappusē
•
•
•
•
•
•
•
•
•
•
•
N
Režīms
:
Standarts
Šūnas apg. : 4
Kontrasts : 95
Spilgtums : 45
Asums : 50
Krāsa : 50
Tonis (G/R) : G50/R50
Paplašinātie iestatījumi
Attēls
Instrumenti
Anynet+ (HDMI-CEC)
Attēla izmērs : Auto platums
Attēla režīms : Standarts
Skaņas režīms : Pielāgots
Autom. izsl. taimeris
: izslēgts
SRS TS HD : izslēgts
Enerģijas taup. : Izslēgts
Dual l ll : Mono
Pievienot favorītiem
U
Pārvietot E Ievadīt e Iziet

Latviski – 11
Funkcija Plug & Play
Kad TV tiek pirmoreiz ieslēgts, automātiski un secīgi tiek turpināti pamatiestatījumi.
Ja tad, kad darbojas Plug & Play, ilgāk par vienu minūti nav izmantota tālvadības pults, tiek aktivizēts ekrānsaudzētājs.
Ekrānsaudzētāju aktivizē, ja ilgāk nekā 15 minūtes netiek saņemts darbības signāls.
Ja netīšām televizoram atlasāt nepareizo valsti, ekrānā var parādīties bojātas rakstzīmes.
1. Nospiediet tālvadības pults pogu POWER, pēc tam automātiski parādīsies
izvēlne Select the OSD Language.
Nospiežot pogu ▲ vai ▼, atlasiet
vajadzīgo valodu. Nospiediet pogu ENTER
E
, lai apstiprinātu izvēli.
2. Nospiediet pogu ◄ vai ►, lai atlasītu Demo saglabāšana vai Lietošana
mājās, pēc tam nospiediet pogu ENTER
E
.
Mēs iesakām iestatīt TV režīmā Lietošana mājās, lai mājas vidē
nodrošinātu labāko attēla kvalitāti.
Režīms Demo saglabāšana ir paredzēts izmantošanai tikai mazumtirdzniecības vidē.
Ja ierīce ir nejauši iestatīta režīmā Demo saglabāšana un jūs vēlaties atgriezties režīmā Lietošana mājās (Standard):
nospiediet TV pogu Volume. Kad parādās skaļuma OSD, 5 sekundes turiet nospiestu TV pogu MENU.
3. Nospiediet pogu ENTERE. Nospiežot pogu ▲ vai ▼, atlasiet vajadzīgo valsti. Nospiediet pogu ENTERE, lai apstiprinātu
izvēli.
4. Nospiediet pogu ▲ vai ▼ lai saglabātu atmiņa izvēlētā savienojuma kanālus, tad nospiediet pogu ENTERE.
Ēters:Gaisa antenas signāls.
Kabelis:Kabeļa antenas signāls.
5. Lai atlasītu atmiņā saglabājamo kanāla avotu, nospiediet pogu ▲ vai ▼. Nospiediet pogu ENTERE, lai atlasītu Startēt.
Digitāls & Analogs: digitālie un analogie kanāli.
Digitāls: digitālie kanāli.
Analogs: analogie kanāli.
Kanālu meklēšana sāksies un beigsies automātiski.
Plašāku informāciju par kabeļu režīma atlasīšanu, skatiet 12. lapaspusē.
6. Tiek parādīts ziņojums Iestatiet pulksteņa režīmu. Nospiediet ENTERE pogu. Nospiediet pogu ▲ vai ▼, lai atlasītu Auto,
pēc tam nospiediet pogu ENTERE.
Ja atlasījāt Manual, parādīsies Set current date and time. Plašāku informāciju par Manuālu iestatīšanu, skatiet 24. lapaspusē.
Ja saņēmāt digitālo signālu, laiks tiks iestatīts automātiski.
7. Tiek parādītas vispārīgas instrukcijas par to Kā iegūt labāko veiktspēju no jūsu jaunā HDTV Nospiediet pogu ENTER
E
.
Šī izvēlne ir pieejama HD savienošanas rokasgrāmata rokasgrāmatā, izvēlnē Atbalsts.
Spiediet pogu ◄ vai ►, lai izvēlētos atmiņā saglabājamo antenas avotu
8. Parādīsies ziņojums Baudiet savu televizoru.
Ja vēlaties skatīties televīziju uzreiz, izvēlieties Skatīties televizoru.
Ja vēlaties skatīt Sk. Izstr. lie. rok., nospiediet pogu ENTERE.
Ja vēlaties atiestatīt šo funkciju...
1. Lai atvērtu izvēlni, nospiediet pogu MENU. Nospiediet pogu ▲ vai ▼, lai atlasītu
Uzstādīšana, pēc tam nospiediet pogu ENTER
E
.
2. Vēlreiz nospiediet pogu ENTER
E
, lai atlasītu Plug & Play.
3. Ievadiet četrciparu PIN kodu. Jauna TV noklusējuma PIN kods ir ‘0-0-0-0’.
Ja vēlaties mainīt PIN kodu (personisko identifikācijas numuru), skatiet 25. lappusi.
Funkcija Plug & Play ir pieejama tikai TV režīmā.
N
N
N
N
N
N
•
•
•
•
•
N
N
N
N
N
N
N
N
N
N
Plug & Play
Select the OSD Language.
Menu Language :
E Enter
▲
Nederlands
English
Eesti
▼
Iestatīšana
Plug & Play ►
Valoda : Angļu
Laiks
Spēļu režīms : Izslēgts
BD Wise : Ieslēgts
Tīkla veids : Kabelis
Tīkla iestatīšana
Bērnu piekļuves bloķēšana
: Ieslēgta

Latviski – 12
Kanālu kontrole
Kanālu saglabāšana
Valsts
Digitālais kanāli: iespējams mainīt valsti, kura nodrošina digitālo kanālu.
Analogais kanāli: iespējams mainīt valsti, kura nodrošina analogos kanālus.
Parādīsies PIN koda ievadīšanas ekrāns. Ievadiet četrciparu PIN kodu.
Automātiska uzglabāš.
Meklē visus kanālus ar aktīvām apraides stacijām (to pieejamība ir atkarīga no
jūsu valsts) un saglabā tos televizora atmiņā.
Pastāv iespēja iestatīt, lai televizors saglabā atmiņā izvēlētā savienojuma kanālus.
Antena: Gaisa antenas signāls.
Kabelis: Kabeļa antenas signāls.
Var izvēlēties saglabāt atmiņā antenas avotu.
Digitāls un analogs: digitālie un analogie kanāli.
Digitāls: digitālie kanāli.
Analogs: analogie kanāli.
Izvēloties kabeli,
Meklēšanas režīms: Parāda meklēšanas režīmu. (Ātrs)
Network ID: Parāda tīkla identikācijas kodu.
Frekvence: Parāda kanāla frekvenci.
Modul.: Attēlo pieejamās modulācijas vērtības.
Simbola līmenis: Attēlo pieejamo simbolu koecientu.
Meklēšanas režīms: Parāda meklēšanas režīmu. (Pilns, Tīkls)
Frekvence (Startēt~Apturēt): Parāda kanāla frekvenci.
Modul.: Attēlo pieejamās modulācijas vērtības.
Simbola līmenis: Attēlo pieejamo simbolu koecientu.
Plašākai informāciju par Pilnu meklēšanas parametru režīmu, skatiet 13. lappusē
Ja vēlaties pārtraukt Automātiska uzglabāš., nospiediet pogu ENTERE.
Parādīsies ziņojums Vai pārtraukt autom. programmēšanu?.
Atlasiet Jā, nospiežot pogu ◄ vai ►, pēc tam nospiediet pogu ENTERE.
❑
N
❑
•
•
•
•
•
N
•
-
-
-
-
•
-
-
-
N
N
N
N
Turpinājums sekos...
Kanāls
Valsts ►
Automātiska uzglabāš.
Manuāla saglabāšana
Kabeļa meklēšanas opcija
Pilna rokasgrāmata
Mazā rokasgrāmata
Noklusējuma rokasgrāmata
: Pilna rokasgr.
Kanālu saraksts

Latviski – 13
Manuāla saglabāšana
Manuāla kanālu meklēšana un to saglabāšana TV atmiņā.
Digitālais kanāli (Digital)
Digitālais kanāls ir pieejams tikai DTV režīmā.
Kanāls: iestatiet kanāla numuru, izmantojot ▲, ▼ vai ciparu (0~9) pogas.
Frekvence: izmantojot ciparu (0~9) pogas, iestatiet frekvenci.
Joslas platums: Iestatiet joslas platumu, izmantojot pogas ▲ un ▼.
Kad tas ir izdarīts, kanālu sarakstā tiek atjaunināti kanāli.
Analogais kanāls
Manuāla analogo kanālu saglabāšana.
Programma (kanālam piešķiramais programmas numurs): iestatiet programmas numuru, izmantojot ▲, ▼ vai ciparu (0~9)
pogas.
Krāsu sistēma → Autom. / PAL / SECAM / NTSC4.43: iestatiet krāsu sistēmas vērtību, izmantojot pogu ▲ vai ▼.
Skaņas sistēma → BG / DK / I / L: iestatiet skaņas sistēmas vērtību, izmantojot pogu ▲ vai ▼.
Kanāls (kad zināt saglabājamā kanāla numuru): nospiediet pogu ▲ vai ▼, lai atlasītu C (ētera kanāls) vai S (kabeļa kanāls).
Nospiediet pogu ►, pēc tam nospiediet ▲, ▼ vai ciparu (0~9) pogas, lai atlasītu vajadzīgo skaitli.
Ja dzirdama slikta skaņa vai skaņas nav, atkārtoti atlasiet vajadzīgo skaņas standartu.
Meklēt (kad nezināt kanālu numurus): lai sāktu meklēšanu, nospiediet pogu ▲ vai ▼. Uztvērējs meklē frekvences diapazonu
līdz brīdim, kad ekrānā parādās pirmais kanāls vai jūsu atlasītais kanāls.
Uzglabāt (kad saglabājat kanālu un saistīto programmas numuru): Iestatiet uz OK, nospiežot pogu ENTER
E
.
Kanālu režīms
C (ētera kanālu režīms): varat atlasīt kanālu, ievadot numuru, kas piešķirts katrai ētera apraides stacijai šajā režīmā.
S (kabeļkanālu režīms): varat atlasīt kanālu, ievadot numuru, kas piešķirts katram kabeļkanālam šajā režīmā.
Kabeļa meklēšanas opcija
Varat iestatīt papildu meklēšanas opcijas, piemēram, frekvenci un pārraides ātrumu kabeļtelevīzijas tīkla meklēšanai. (Atkarībā no valsts)
Sākuma frekvence: Attēlo frekvences sākuma vērtības.
Beigu frekvence: Attēlo frekvences beigu vērtības.
Modul.: Attēlo pieejamās modulācijas vērtības.
Simbola līmenis: Attēlo pieejamo simbolu koecientu.
Ja Sākuma frekvence vērtība ir liekāka, nekā Beigu frekvence, tiek parādīts brīdinājuma ziņojums.
Pilna rokasgrāmata / Mazā rokasgrāmata
EPG (Elektroniskais programmu ceļvedis) informāciju nodrošina raidstacijas. Attiecīgā kanāla informācijas pārraides rezultātā
programmu ieraksti var izskatīties tukši vai novecojuši. Displejs dinamiski atjaunināsies, kad būs pieejama jauna informācija.
Pilna rokasgrāmata: var apskatīt informāciju par programmu, kas sadalīta vienas stundas laika segmentos. Ir redzama
programma divām stundām, informāciju par laiku var paritināt uz priekšu vai atpakaļ.
Mazā rokasgrāmata: katras programmas informācija ir redzama pašreizējā kanāla Mini Guide ekrāna katrā līnijā, sākot no
pašreizējās programmas uz priekšu atbilstoši programmu sākuma laika secībai.
❑
N
•
•
•
N
•
•
•
•
N
•
•
N
-
-
❑
•
•
•
•
N
❑
•
•

Latviski – 14
Noklusējuma rokasgrāmata
Mazā rokasgrāmata / Pilna rokasgrāmata:
Varat izlemt rādīt Mazā rokasgrāmata vai Pilna rokasgrāmata, kad tiek nospiesta
tālvadības pults poga GUIDE.
❑
Ceļveža izvēlni iespējams arī parādīt, vienkārši nospiežot pogu GUIDE.
O
Kanāls
Pilna rokasgrāmata
Mazā rokasgrāmata
Noklusējuma rokasgrāmata
: Pilna rokasgrāmata
►
Kanālu saraksts
Kanālu režīms : Pievienotie kanāli
Precīza regulēšana
Pilna rokasgrāmata / Mazā rokasgrāmata izmantošana
Pilna rokasgrāmata
DTV Cable 900 f tn 2:10 Tue 1 Jun
Freshmen On Campus
2:00 - 2:30
No Detailed Information
Today 2:00 - 3:00 3:00 - 4:00
Mint Extra
Loaded
Fresh 40 with Dynamite MC
The Distillery
Smash Hits! Sunday
900 f tn
901 ITV Play
902 Kerrang!
903 Kiss
903 oneword
903 Smash Hits!
▼
Street Hypn..
Kisstory
No Information
No Information
No Information
Freshmen O..
Mazā rokasgrāmata
DTV Cable 900 f tn
Street Hypnosis
Booze Britain
2:00
2:30
5:00
▼
Freshmen On Campus
Skat
INFO
Informācija
Mazā rokasgrāmata +24 Hours Iziet
Skatīties
INFO
Informācija
Pilna rokasgrāmata Nāk. lpp. Iziet
▲/▼/◄/►,
ENTER
E
Atlasiet programmu, nospiežot pogu ▲/▼/◄/►/ENTERE.
RED Pārslēdzieties starp Mazā rokasgrāmata vai Pilna rokasgrāmata.
GREEN
Pilna rokasgrāmata: izmantojiet, lai ātri ritinātu atpakaļ (-24 stundas).
Mazā rokasgrāmata:
izmantojiet, lai ātri parādītu iepriekšējo lapu.
YELLOW
Pilna rokasgrāmata: izmantojiet, lai ātri ritinātu uz priekšu (+24 stundas).
Mazā rokasgrāmata:
izmantojiet, lai ātri parādītu nākamo lapu.
BLUE Izejiet no ceļveža.
INFO IIzmantojiet pogu INFO, lai skatītu detalizētu informāciju.
Kanālu režīms
Nospiežot pogu P /
, atlasītajā kanālu sarakstā tiks pārslēgti kanāli.
Pievienotie kanāli: Kanālus pārslēgs atmiņā saglabātajā kanālu sarakstā.
Iecienītie kanāli: Kanālus pārslēgs izlases kanālu sarakstā.
Precīza regulēšana (Tikai analogais kanāls)
Ja uztveres signāls ir skaidrs, kanālam nav vajadzīga smalkregulēšana, jo meklēšanas un saglabāšanas darbību laikā to dara
automātiski. Ja signāls ir vājš vai traucēts, iespējams, kanāla smalkregulēšana būs jāveic manuāli.
Saglabātie smalkregulētie kanāli kanālu reklāmkarogā tiek atzīmēti ar zvaigznīti “*” kanāla numura labajā pusē.
Ja nesaglabājat smalkregulēto kanālu atmiņā, pielāgotie iestatījumi netiek saglabāti.
Lai atiestatītu smalkregulēšanu, atlasiet Reset, nospiežot pogu ▼, pēc tam nospiediet pogu ENTER
E
.
❑
❑
N
N
N

Latviski – 15
Kanālu pārvaldīšana
Izmantojot šo izvēlni, varat pievienot / dzēst vai iestatīt izlases kanālus un izmantot
digitālo pārraižu programmu ceļvedi.
Atlasiet kanālu ekrānā Visi kanāli, Pievienotie kanāli, Favorīts vai
Ieprogrammēts, nospiežot pogas ▲ vai▼ un pogu ENTERE.
Tad varat skatīties atlasīto kanālu.
Visi kanāli: parāda visus šobrīd pieejamos kanālus.
Pievienotie kanāli: parāda visus pieejamos kanālus.
Favorīts: parāda visus izlases kanālus.
Ieprogrammēts: parāda visas pašreiz rezervētās programmas.
Nospiediet tālvadības pogu CH LIST, lai parādītu kanālu sarakstus.
Krāsaino pogu izmantošana kanālu sarakstā
Sarkanā (Kanāla tips): izmantojiet, lai pārslēgtos starp TV, Radio, Data /
Other un All.
Zaļā (Tālummaiņa): izmantojiet, lai palielinātu vai samazinātu kanāla numuru.
Dzeltenā (Izvēlēties): izmantojiet, lai atkasītu vairākus kanālu sarakstus.
T
TOOLS (Instrumenti): izmantojiet, lai parādītu izvēlni Izdzēst (vai Pievienot),
Pievienot favorītiem (vai Izdzēst no favorītiem), Izvēlēties visu (vai Atcelt
visu), Taimera pārskats, Kanāla nosaukumu izmainīšana , Kanāla numura
izmainīšana, Bloķēt (vai Atbloķēt), Izvēlēties visu (vai Atcelt visu) vai
Automātiska uzglabāš. (Rīku izvēlnes atkarībā no situācijas var būt atšķirīgas.)
Kanāla statusa displeja ikonas
A
Analogs kanāls.
c
Kanāls, kas atlasīts, nospiežot
dzelteno pogu.
♥
Kanāls, kas iestatīts kā izlases
kanāls.
(
Šobrīd raidītā programma.
\
Bloķēts kanāls.
)
Rezervēta programma.
Kanālu saraksta opciju izvēlne (sadaļās Visi kanāli / Pievienotie kanāli / Favorīts)
Lai izmantotu rīku izvēlni, nospiediet pogu TOOLS
Instrumenti izvēlnes vienumi var atšķirties atkarībā no kanāla statusa.
Pievienot / Izdzēst
Lai parādītu vajadzīgos kanālus, varat dzēst vai pievienot kanālu.
Visi dzēstie kanāli būs redzami izvēlnē Visi kanāli.
Pelēkā krāsā iezīmēts kanāls norāda, ka kanāls ir dzēsts.
Izvēlne Pievienot parādās tikai dzēstiem kanāliem.
Tādā paša veidā iespējams dzēst arī kanālu izvēlnē Pievienotie kanāli
vai Favorīts.
Pievienot favorītiem / Izdzēst no favorītiem
Kanālus, kurus skatāties biežāk, varat iestatīt kā izlases kanālus.
Lai izmantotu opciju izvēlni, nospiediet pogu TOOLS.
Jūs varat arī pievienot iemīļotāko kanālu, atlasot Instrumenti → Pievienot
favorītiem (vai Izdzēst no favorītiem).
T
Lai atlasītu savus iestatītos iemīļotākos kanālus, nospiediet tālvadības pogu
FAV.CH.
Būs redzams simbols "♥", un kanāls tiks iestatīts kā izlases kanāls.
Visi izlases kanāli būs redzami izvēlnē Favorīts.
Bloķēt / Atbloķēt
Varat bloķēt kanālu, lai to nebūtu iespējams atlasīt vai skatīt. Šī funkcija ir pieejama tikai tad, ja Bērnu piekļuves bloķēšana ir
iestatīta uz Ieslēgts. (Skatiet 25. lappusi)
Parādīsies PIN koda ievadīšanas ekrāns. Ievadiet četrciparu PIN kodu.
Jauna TV noklusējuma PIN kods ir ‘0-0-0-0’. Varat mainīt PIN kodu, izvēlnē atlasot Mainīt PIN.
Parādīsies simbols "\", un kanāls tiks bloķēts.
N
•
•
•
•
O
N
-
-
-
-
N
❑
N
N
N
N
N
N
O
N
N
N
N
N
Turpinājums sekos...
Kanāls
Pilna rokasgrāmata
Noklusējuma rokasgrāmata : Pilna rokasgrāmata
Kanālu saraksts
Kanālu režīms : Pievienotie kanāli
Precīza regulēšana
824 UKTV Gold
825 UKTV style
A 1 C --
A 2 C
--
A 3 ♥ C
--
A 4 C
--
A 5 C
--
A 6 C
--
A 7 C
--
A 8 C
--
Visi kanāli
Viss
Kanāla tips Tālummaiņa Izvēlēties
Instrumenti
824 UKTV Gold
825 UKTV style
A 1 C --
A 2 C
--
A 3 C
--
A 4 C
--
A 5 C
--
A 6 C
--
A 7 C
--
A 8 C
--
Visi kanāli
Viss
Kanāla tips Tālummaiņa Izvēlēties
Instrumenti
Izdzēst
Pievienot favorītiem
Bloķēt
Taimera pārskats
Kanāla nosaukumu izmainīšana
Sakārtot
▼

Latviski – 16
Taimera pārskats
Ja rezervēsiet programmu, ko vēlaties skatīties, kanālu automātiski p
ārslēgs uz kanālu sarakstā rezervēto kanālu arī tad, ja
skatīsieties citu kanālu. Lai rezervētu programmu vispirms iestatiet pašreizējo laiku. (Skatiet 24. lappusi.)
Rezervēt iespējams tikai atmiņā saglabātos kanālus.
Jūs varat iestatīt kanālu, mēnesi,dienu, gadu, stundu un minūti, spiežot tālvadības pults ciparu pogas.
Programmas rezervēšana tiks parādīta izvēlnē Ieprogrammēts.
Digitālais programmas ceļvedis un skatīšanas rezervēšana
Kad ir atlasīts digitāls kanāls un ir nospiesta poga ►, parādās kanāla programmas ceļvedis.
Programmu iespējams rezervēt, veicot iepriekš aprakstītās procedūras.
Kanāla nosaukumu izmainīšana (Tikai analogais kanāls)
Kanālus iespējams marķēt, lai atlasot kanālu, parādītos tā izsaukšanas burti.
Digitālās apraides kanālu nosaukumus piešķir automātiski, un tos nevar marķēt.
Kanāla numura izmainīšana (Tikai digitālais kanāls)
Kanāla numuru iespējams arī rediģēt, nospiežot tālvadības pults ciparu pogas.
Sakārtot (Tikai analogais kanāls)
Ar šo darbību iespējams mainīt saglabāto kanālu programmas numurus. Šī darbība var būt nepieciešama pēc automātiskās
kārtošanas izmantošanas.
Izvēlēties visu / Atcelt visu
Pastāv iespēja kanālu sarakstā atlasīt visus kanālus vai atcelt atlasi.
Vairākiem kanāliem vienlaicīgi var veikt add / delete, add to Favourites / delete from Favourites vai arī lock / unlock funkcijas.
Atlasiet vajadzīgos kanālus un nospiediet dzelteno pogu, lai vienlaicīgi iestatītu visus atlasītos kanālus.
Atlasīto kanālu kreisajā pusē parādās atzīme c.
Kad ir atlasīts kanāls, iespējams atlasīt tikai Atcelt visu.
Automātiska uzglabāš.
Plašāku informāciju par opciju iestatīšanu skatiet 12. lappusē.
Ja kanāls ir bloķēts, izmantojot funkciju Bērnu piekļuves bloķēšana, parādīsies PIN koda ievades ekrāns.
Kanālu saraksta Instrumenti izvēlne (režīmā Ieprogrammēts )
Jūs varat skatīt, modicēt vai dzēst rezervāciju.
Lai izmantotu Instrumenti izvēlni, nospiediet pogu TOOLS.
Izmainīt informāciju: izvēlieties, lai mainītu skatīšanās rezervāciju.
Atcelt grakus: izvēlieties, lai atceltu skatīšanās rezervāciju.
Informācija: izvēlieties, lai apskatītu skatīšanās rezervāciju. (Rezervācijas
informāciju var arī mainīt.)
Izvēlēties visu / Atcelt visu: izmantojiet, lai atlasītu visas rezervētās programmas.
N
N
N
N
N
N
N
N
N
N
❑
N
•
•
•
•
Ieprogrammēts
1 / 1 / 2009
13:59 5 TV1 Quincy, M.E
18:59 2 TV3 The Equalizer
20:59 2 TV3 McMillan & Wife
21:59 2 TV3 M.Spillane’s mike Hammer
Izmainīt informāciju
Atcelt grafikus
Informācija
Izvēlēties visu
Viss
Tālummaiņa Izvēlēties
Instrumenti Information

Latviski – 17
Attēlu iestatījumu mainīšana un atiestatīšana
Režīms
Varat atlasīt attēla veidu, kas vislabāk atbilst jūsu prasībām attiecībā uz
attēlu apskati.
Dinamika / Standarts / Eco / Filma
Nospiediet pogu TOOLS, lai parādītu izvēlni Instrumenti.
Varat arī iestatīt attēlu režīmu, atlasot Instrumenti → Picture Mode.
T
PC režīmā Eco nav pieejams.
Šūnas apg. / Kontrasts / Spilgtums / Asums / Krāsa / Tonis (G/R)
Jūsu televizoram ir vairākas iestatījumu opcijas, kas ļauj kontrolēt attēla kvalitāti.
Šūnas apg.: Regulē pikseļu spilgtumu.
Kontrasts: Regulē kontrasta līmeni.
Spilgtums: Regulē spilgtuma līmeni.
Asums: Regulē asumu.
Krāsa: Regulē attēla krāsu piesātinājumu, izmantojot joslu ekrānā.
Tonis (G/R): Regulē attēla krāsas toni.
Kad izdarāt izmaiņas iestatījumos Šūnas apg., Kontrasts, Spilgtums, Asums, Krāsa vai Tonis (G/R), atbilstoši tiks
regulēts arī OSD.
Katram attēla režīmam regulētās vērtības tiek saglabātas.
PAL sistēmas režīmos Analog TV, Ext., AV nevar izmantot funkciju Tint.
PC režīmā iespējams mainīt tikai iestatījumus Šūnas apg., Kontrasts un Spilgtums.
Katrs pielāgotais iestatījums tiks saglabāts atsevišķi, atbilstoši tā ievades režīmam.
Lietošanas laikā patērēto enerģiju iespējams ievērojami samazināt, pazeminot attēla spilgtuma līmeni, tādējādi samazinot
kopējo enerģijas patēriņu.
Paplašinātie iestatījumi
Jūs varat pielāgot ekrāna uzlabotos iestatījumus, ieskaitot krāsu un kontrastu.
Paplašinātie iestatījumi ir pieejami režīmā Standarts vai Filma.
PC režīmā iespējams mainīt tikai iestatījumus Dinamiskais kontrasts,
Gamma un Baltā balanss, kas pieejami izvēlnē Paplašinātie iestatījumi.
Melnais tonis → Izslēgts / Tumšs / Tumšāks / Tumšākais
Jūs varat uzlabot attēla dziļumu, pielāgojot melnās krāsas blīvumu.
Dinamiskais kontrasts → Izslēgts / Zems / Vidējs / Augsts
Lai panāktu optimālu kontrastu ekrāna kontrastu var regulēt.
Gamma
Ir iespējams regulēt primārās krāsas (sarkanas, zaļas, zilas) intensitāti.
Krāsu intervāls
Krāstelpa ir krāsu matrice, ko veido sarkanā, zaļā un zilā krāsa. Atlasiet izlases krāstelpu, lai izbaudītu
visdabiskāko krāsu.
Auto: Automātiski iestata krāsas diapazonu atbilstoši ieejas video avotam.
Dabisks: Iestata krāsu diapazonu plašāku kā ieejas video avotam.
Pielāgots: Pielāgo krāsu diapazonu pēc jūsu ieskatiem.
Krāstelpas pielāgošana
- Atbilstoši jūsu vēlmēm pielāgo krāsu diapazonu. Krāsa ir pieejama, kad
Krāsu intervāls ir iestatīta uz Pielāgots.
-
Krāsa → Sarkana / Zaļa / Zila / Dzeltena / Ciāna / Fuksīna
-
Sarkana / Zaļa / Zila: Varat pielāgot atlasītās krāsas RGB vērtības.
-
Atiestatīšana: atiestata krāstelpu līdz noklusējuma vērtībām.
Baltā balanss
Jūs varat regulēt krāsas temperatūru, lai panāktu dabiskākas attēlu krāsas.
R nobīde / G nobīde / B nobīde / R jutīgums / G jutīgums / B jutīgums: Mainot regulēto vērtību, tiks atsvaidzināts
regulētais ekrāns.
Atiestatīt: Atiestata noklusēto baltās krāsas balansu.
❑
N
❑
•
•
•
•
•
•
N
N
N
N
N
N
❑
N
N
•
•
•
N
•
•
Attēlu kontrole
Turpinājums sekos...
Režīms : Standarts ►
Šūnas apg. : 4
Kontrasts : 95
Spilgtums : 45
Asums : 50
Krāsa : 50
Tonis (G/R) : G50/R50
Paplašinātie iestatījumi
Attēls
Krāsa : 50
Tonis (G/R) : G50/R50
Paplašinātie iestatījumi
►
Attēla iespējas
Attēla atiestatīšana
Attēls

Latviski – 18
Ādas krāsa
Varat noregulēt, lai ādas nokrāsa būtu sārtāka vai mazāk sārta.
Mainot regulēto vērtību, tiks atsvaidzināts regulētais ekrāns.
Malas uzlabojums → Izslēgts / Ieslēgts
Attēlā ir iespējams izcelt objektu robežas.
xvYCC → Izslēgts / Ieslēgts
Iestatot režīmu xvYCC uz Ieslēgts, tiek palielinātas detaļas un krāstelpa, kad skatāties ārējās ierīcēs (piemēram, DVD
atskaņotājā) saglabātas lmas.
xvYCC ir pieejams, kad attēla režīms ir iestatīts uz Filma un ārējās ievades ir iestatītas režīmā HDMI vai Komponents.
Attēla iespējas
Jūs varat regulēt papildu attēla iestatījumus pēc saviem ieskatiem.
PC režīmā no izvēlnes Attēla iespējas vienumiem var mainīt tikai
Krāsu tonis, Izmērs un Ekr. iedegšanas aizs..
Krāsu tonis → Vēss / Normāls / Silts1 / Silts2 / Silts3
Varat atlasīt krāsas toni, kas vismazāk nogurdina jūsu acis.
Noregulētās vērtības tiek saglabātas atbilstoši atlasītajam Attēls režīmam.
Silts1, Silts2, Silts3 tiek aktivizēts tikai tad, ja attēla režīms ir iestatīts uz Filma.
Izmērs → Auto platums / 16:9 / Plašā tālummaiņa / Tālummaiņa / 4:3 /
Pielāgošana ekrānam
Varat atlasīt attēla lielumu, kas vislabāk atbilst jūsu prasībām attiecībā uz attēlu
apskati.
Auto platums: Iestata attēlu automātiskajā platuma formātā.
16:9: Iestata attēla izmēru attiecību 16:9.
Plašā tālummaiņa: Atlasiet šo izvēlni, lai skatītu attēlu 16:9 formātā, izvēršot 4:3 attēla daļas vertikāli, bet nepaplašinot
horizontāli.
Tālummaiņa: Vertikāli pastiepj 16:9 formāta attēlu.
4:3: Iestata attēla izmēru attiecību 4:3.
Pielāgošana ekrānam: Parāda pilnīgi dabisku augstas izšķirtspējas signālu, ko nav iespējams skatīt parasta televizora ekrānā.
Attēla izmēru opcijas var atšķirties atkarībā no ievades avota.
Pieejamie vienumi var atšķirties atkarībā no atlasītā režīma.
PC režīmā iespējams regulēt tikai 16:9 un 4:3.
Kad režīmā PIP ir iestatīts režīms Double ( , ), nav iespējams iestatīt attēla izmērus.
Katrai ārējai ierīcei, kas ir pievienota TV ievades ligzdai, iespējams regulēt un saglabāt iestatījumus.
Ja ilgāk nekā divas stundas skatīsiet nekustīgu attēlu, var notikt īslaicīga attēla aizkavēšanās.
Plašā tālummaiņa: nospiediet pogu ►, lai atlasītu Pozīcija, pēc tam nospiediet pogu ENTER
E
.
Lai pārvietotu ekrānu uz augšu / uz leju, nospiediet pogu ▲ vai ▼. Pēc tam nospiediet pogu ENTER
E
.
Tālummaiņa: nospiediet pogu ►, lai atlasītu Pozīcija, pēc tam nospiediet pogu ENTER
E
. Lai pārvietotu attēlu uz
augšu vai leju, nospiediet pogu ▲ vai ▼. Pēc tam nospiediet pogu ENTER
E
. Nospiediet pogu ►, lai atlasītu Izmērs,
pēc tam nospiediet pogu ENTER
E
. Lai palielinātu vai samazinātu attēla izmērus vertikālā virzienā, nospiediet pogu
▲ vai ▼. Pēc tam nospiediet pogu ENTER
E
.
Kad režīmā HDMI (1080i / 1080p) vai Komponents (1080i / 1080p) ir atlasīts
Pielāgošana ekrānam
: nospiežot
pogu ◄ vai ►, atlasiet Pozīcija. Lai pārvietotu attēlu, izmantojiet pogu ▲, ▼, ◄ vai ►.
Atiestatīt: nospiediet pogu ◄ vai ►, lai atlasītu Atiestatīt, pēc tam nospiediet pogu ENTER
E
. Jūs varat inicializēt
iestatījumu.
Ja izmantosiet funkciju
Pielāgošana ekrānam
kopā ar HDMI 720p ievadi, augšpusē, apakšā, pa kreisi un pa labi
tiks apcirpta viena līnija, tāpat kā funkcijā Overscan.
Ekrāna režīms: → 16:9 / Plašā tālummaiņa / Tālummaiņa / 4:3
Ja TV ar izmēru attiecību 16:9 iestatāt attēla izmērus uz Auto platums, varat noteikt, kādu izmēru attēlu vēlaties
redzēt: 4:3 WSS (platekrāna pakalpojums) attēlu vai neko. Katrā Eiropas valstī ir citādas attēla izmēra prasības,
tādēļ šī funkcija ir paredzēta, lai palīdzētu lietotājam to atlasīt.
Šī funkcija ir pieejama režīmā Auto platum.
Šī funkcija nav pieejama režīmā PC, Component vai HDMI.
Digitāla NR → Izslēgts / Zems / Vidējs / Augsts / Auto
Ja TV saņemtais pārraides signāls ir vājš, varat aktivizēt Digitālo trokšņa slāpēšanas līdzekli, lai mazinātu statisku vai dubultu
attēlu parādīšanos ekrānā.
Ja signāls ir vājš, izvēlieties kādu citu opciju, līdz ir redzams labākais attēls.
HDMI melnās krāsas līmenis → Normāls / Zems
Lai regulētu ekrāna dziļumu, varat uzreiz ekrānā atlasīt melnās krāsas līmeni.
Šī funkcija darbojas tikai tad, kad ārējais ievades avots ir savienots ar HDMI (RGB signāliem).
N
N
❑
N
N
N
•
•
•
•
•
•
N
N
N
N
N
N
N
N
N
N
N
N
N
N
N
Turpinājums sekos...
Tonis (G/R) : G50/R50
Paplašinātie iestatījumi
Attēla iespējas ►
Attēla atiestatīšana
Attēls

Latviski – 19
1080 Full HD kust. demo → Izslēgts/Ieslēgts
Samsung's jaunās paaudzes PDP paneļi nodrošina satriecošu Full HD kvalitātes kustīgu attēlu skaidrību, skatoties sporta
pārraides, lmas un spēlējot spēles.
Šī funkcija nav pieejama PC, Spēle vai Multimediju atskaņošanas režīmā.
Filmas režīms
Varat optimizçt attçla reþîmu lmu skatîðanai.
Izslēgts: Izslēdz Filmas režīms funkciju.
Auto1: Automātiski pielāgo attēlu, lai skatoties filmu iegūtu vislabāko kvalitāti.
Auto2
: Automātiski optimizē video tekstu, skatoties filmu.
Cinema Smooth : nodrošina kinoteātrim līdzvērtīgu baudījumu.
Filmas režīms ir atbalstīts TV, Video, Component (480i / 1080i) un HDMI(1080i).
Real 100Hz Demonstr. → Izslēgts / Ieslēgtsn
Varat skaidri redzēt atšķirību starp Real 100Hz un 50 Hz, galvenokārt skatoties pārraides, kurās attēlota strauja kustība.
Tādēļ, kad skatāties pārraides, kurās attēlota lēna kustība, atšķirību starp Real 100Hz un 50Hz nevarēs redzēt. Demo 100Hz
darbojas tikai ar 50Hz signālu. Real 100Hz demonstrācijas režīms ar speciāliem attēliem tiek nodrošināts demonstrācijām
veikalā.
Tikai zilās krāsas režīms → Izslēgts / Ieslēgts
Šī funkcija ir paredzēta AV ierīču mērījumu ekspertiem. Tā parāda zilo signālu, tikai tad, kad no video signāla ir noņemts
sarkanais un zaļais signāls, lai varētu nodrošināt zilās krāsas ltra efektu, kuru izmanto krāsas un tonējuma pielāgošanai tādās
video ierīcēs kā DVD atskaņotāji, mājas kinozāles u.c.
Tikai zilās krāsas režīms ir pieejams, kad attēla režīms ir iestatīts uz Filma vai Standard.
Ekrâna izdegðanas aizsardzîba
Lai samazinātu ekrāna izdegšanas risku, šī ierīce aprīkota ar tehnoloģiju, kas novērš ekrāna izdegšanu. Šī tehnoloģija ļauj
iestatīt attēlu kustību no augšas uz leju (vertikālā līnija) un no vienas puses uz otru (horizontālais punkts). Laika iestatījumi ļauj
minūtēs ieprogrammēt laiku starp attēla kustību.
Pikseļu maiņa: Izmantojot šo funkciju, varat precīzi horizontāli un vertikāli pārvietot pikseļus uz PDP, lai uz ekrāna
nerastos pēcattēls.
Optimālie apstākļi pikseļu nobīdei
Item TV/Ext./AV/Component/HDMI/PC
Horizontāli 0~2 2
Vertikāli 0~4 4
Laiks (Minūte) 1~4 min 2 min
Pikseļu nobīdes vērtība var atšķirties atkarībā no monitora izmēriem (collās) un režīma.
Šī funkcija nav pieejama režīmā Pielāgošana ekrānam.
Ritināšana: Šī funkcija palīdz likvidēt ekrāna pēcattēlus, pārvietojot visus pikseļus uz PDP atbilstoši attēlam. Izmantojiet
šo funkciju, kad ekrānā ir redzami pēcattēli vai simboli, īpaši tad, ja ekrānā ilgāku laiku esat rādījis nekustīgu attēlu.
Sānos pelēka: kad skatāties televizoru ar ekrāna malu attiecību 4:3, ekrāna bojājumi tiek novērsti, pielāgojot baltās krāsas
līdzsvaru pašā kreisajā un labajā ekrāna malā.
Gaiša: kad ekrāna malu attiecību iestatāt uz 4:3, labā un kreisā ekrāna mala kļūst gaišāka.
Tumša: kad ekrāna malu attiecību iestatāt uz 4:3, labā un kreisā ekrāna mala kļūst tumšāka.
N
•
•
•
•
N
N
•
N
N
N
•
•
-
-
Attēla atiestatīšana → Atiestatīt attēla režīmu / Atcelt
Atiestata visus attēla iestatījumus uz noklusējuma vērtībām.
Atlasiet attēla režīmu, kuru atiestatīt. Katram attēlu režīmam veic atiestatīšanu.
❑
N
Picture
Paplašinātie iestatījumi
Attēla iespējas
Attēla atiestatīšana ►
Attēls
 Loading...