

Page 1

Contact SAMSUNG WORLD-WIDE
If you have any questions or comments relating to Samsung products, please contact the SAMSUNG customer care centre.
Country
AUSTRIA 0810 - SAMSUNG(7267864, € 0.07/min) www.samsung.com/at
BELGIUM 02 201 2418 www.samsung.com/be
CZECH REPUBLIC
DENMARK 8 - SAMSUNG(7267864) www.samsung.com/dk
EIRE 0818 717 100 www.samsung.com/ie
ESTONIA 800-7267 www.samsung.ee
FINLAND
FRANCE
GERMANY 01805 - SAMSUNG(7267864, € 0.14/Min) www.samsung.de
HUNGARY 06 - 80 - SAMSUNG(7267864) www.samsung.com/hu
ITALIA 800 - SAMSUNG(7267864) www.samsung.com/it
KAZAKHSTAN 8-10-800-500-55-500 www.samsung.com/kz_ru
KYRGYZSTAN 00-800-500-55-500
LATVIA 8000-7267 www.samsung.com/lv
LITHUANIA 8-800-77777 www.samsung.lt
LUXEMBURG 02 261 03 710 www.samsung.com/lu
NETHERLANDS 0900 - SAMSUNG(7267864, € 0.10/Min) www.samsung.com/nl
NORWAY 3 - SAMSUNG(7267864) www.samsung.com/no
POLAND
PORTUGAL 808 20 - SAMSUNG(7267864) www.samsung.com/pt
RUSSIA 8-800-555-55-55 www.samsung.ru
SLOVAKIA 0800 - SAMSUNG(7267864) www.samsung.com/sk
SPAIN 902 - 1 - SAMSUNG (902 172 678) www.samsung.com/es
SWEDEN 075 - SAMSUNG(726 78 64) www.samsung.com/se
Switzerland 0848 - SAMSUNG(7267864, CHF 0.08/min) www.samsung.com/ch
TADJIKISTAN 8-10-800-500-55-500
Turkey 444 77 11 www.samsung.com/tr
U.K 0845 SAMSUNG(7267864) www.samsung.com/uk
UKRAINE 8-800-502-0000 www.samsung.ua
UZBEKISTAN 8-10-800-500-55-500 www.samsung.com/kz_ru
800 - SAMSUNG (800-726786) www.samsung.com/cz
Samsung Zrt., česká organizační složka, Oasis Florenc, Sokolovská394/17, 180 00, Praha 8
30 - 6227 515
3260 'dites' SAMSUNG (€ 0,15/Min)
0825 08 65 65 (€ 0.15/Min)
0 - 801 - 1SAMSUNG(172678)
022 - 607 - 93 - 33
Customer Care Centre
www.samsung.com/fi
www.samsung.com/fr
www.samsung.com/pl
Web Site
Plasma TV
user manual
imagine the possibilities
Thank you for purchasing this Samsung product.
To receive more complete service, please register
your product at
www.samsung.com/register
BN68-02147A-PR
Model Serial No.
Page 2
English - 2
User Instructions
Screen Image retention
Do not display a still image (such as on a video game or when hooking up a PC to this PDP) on the plasma monitor panel for more
than 2 hours as it can cause screen image retention. This image retention is also known as “screen burn”. To avoid such image
retention, reduce the degree of brightness and contrast of the screen when displaying a still image.
Height
The PDP can normally operate only under 2000m in height. It might abnormally function at a place over 2000m in height so do not
install and operate there.
Heat on the top of the PDP TV
The top side of the product may be hot after long period of use as heat dissipates from the panel through the vent hole in the upper
part of the product. This is normal and does not indicate any defect or operation failure of the product. However, children should be
prevented from touching the upper part of the product.
The product is making a ‘cracking’ noise.
A ‘cracking’ noise may occur when the product contracts or expands due to a change of surrounding environment such as
temperature or humidity. This is normal and not a defect of the unit.
Cell Defects
The PDP uses a panel consisting of 1,230,000(SD-level) to 3,150,000(HD-level) pixels which require sophisticated technology to
produce. However, there may be few bright or dark pixels on the screen. These pixels will have no impact on the performance of
the product.
Avoid operating the TV at temperatures below 5°C(41°F)
A still image displayed too long may cause permanent damage to the PDP Panel.
Watching the PDP TV in 4:3 format for a long period of time may leave traces of borders displayed on the left,
right and centre of the screen caused by the difference of light emission on the screen. Playing a DVD or a
game console may cause similar effect to the screen. Damages caused by the above effect are not covered by
the Warranty.
Afterimage on the Screen.
Displaying still images from Video games and PC for longer than a certain period of time may produce partial afterimages.
To prevent this effect, reduce the ‘brightness’ and ‘contrast’ when displaying still images.
Warranty
Warranty does not cover any damage caused by image retention. Burn-in is not covered by the warranty. -
Installation
Be sure to contact an authorized service centre, when installing your set in a location with heavy dust, high or low temperatures,
high humidity, chemical substance and where it operates continually such as the airport, the train station etc. Failure to do so may
cause a serious damage to your set.
Digital TV Notice
1. Functionalities related to Digital TV(DVB) are only available in countries/areas where DVB-T (MPEG2 and MPEG4 AVC)
digital terrestrial signals are broadcasted or where you have access to a compatible DVB-C(MPEG2 and MPEG4 AAC)
cable-TV service. Please check with your local dealer the possibility to receive DVB-T or DVB-C signal.
2. DVB-T is the DVB European consortium standard for the broadcast transmission of digital terrestrial television and DVB-C
is that for the broadcast transmission of digital TV over cable.
However, some differentiated features like EPG (Electric Program Guide), VOD (Video on Demand) and so on, are not
included in this specication. So, they cannot be supported at this moment.
3. Although this TV set meets the latest DVB-T and DVB-C standards[August,2008], the compatibility with future DVB-T digital
terrestrial and DVB-C digital cable broadcasts cannot be guaranteed.
4. Some cable-TV providers may charge an additional fee for such a service and you may be required to agree to terms and
conditions of their business.
5. Some Digital TV functions might be unavailable in some countries or regions and DVB-C might not work correctly with all
providers.
6. For more information, please contact your local Samsung customer care centre.
Contact SAMSUNG WORLDWIDE
If you have any questions or comments relating to Samsung products, please contact the SAMSUNG
customer care centre. (See back cover for more informations.)
N
Figures and illustrations in this User Manual are provided for reference only and may differ from actual product appearance.
Product design and specications may be changed without notice in order to enhance product performance.
© 2009 Samsung Electronics Co., Ltd. All rights reserved.
Page 3

English - 3
Contents
English
Connecting and Preparing Your TV
Checking Parts ■ ..........................................................................4
Using the Stand-Base ■ ............................................................... 4
How to assemble the Stand-Base (depending on the model) ■ ...4
Assembling the Cables ■ ..............................................................4
Viewing the Control Panel ■ .........................................................5
Viewing the Connection Panel ■ ...................................................6
Remote Control ■ .........................................................................8
Installing Batteries in the Remote Control ■ .................................9
Switching On and Off ■ .................................................................9
Placing Your Television in Standby Mode ■ .................................. 9
Viewing the Menus ■ ..................................................................10
Using the TOOLS Button ■ ........................................................10
Plug & Play Feature ■ ................................................................ 11
Channel Control
Storing Channels ■ ...................................................................12
Managing Channels ■ ................................................................16
Picture Control
Changing the Picture Settings ■ ................................................. 18
Setting up the TV with your PC ■ ...............................................21
PC Display ■ ............................................................................... 22
Sound Control
Changing the Sound Setting ■ ...................................................23
Selecting the Sound Mode ■ ......................................................24
Function Description
Setting the Time ■ ......................................................................25
Conguring the Setup Menu ■ .................................................... 26
Support / Input
Supported Program ■ .................................................................29
Source List / Edit Name ■ ...........................................................30
Media Play
Connecting a USB Device ■ .......................................................31
Using the Media Play Function ■ ................................................ 32
Using the Photo List ■ ................................................................33
Viewing a Photo or Slide Show ■ ..............................................34
Using the Music List ■ ................................................................35
Playing a Music ■ ......................................................................36
Picture / Music Settings Using Media Play ■ ..............................37
Using the Setup Menu ■ .............................................................37
About Anynet+
Connecting Anynet ■
Setting Up Anynet ■
Switching between Anynet+ Devices ■ .......................................39
Recording ■ ................................................................................40
Listening through a Receiver (Home theater) ■ .........................41
Troubleshooting for Anynet ■
+
Devices ................................................... 38
+
.................................................................39
+
...................................................41
Recommendations for Use
Teletext Feature ■ .......................................................................42
Wall Mount Kit Specications (VESA) ■ ..................................... 43
Preparing before installing Wall- Mount ■ ................................... 44
Securing the TV to the Wall ■ .....................................................44
Securing the Installation Space ■ ...............................................45
Troubleshooting ■ .......................................................................46
Specications ■ ..........................................................................47
Software License ■ ..................................................................... 48
N O T
Symbol Press Note One-Touch Button TOOLS
Page 4
English - 4
Connecting and Preparing Your TV
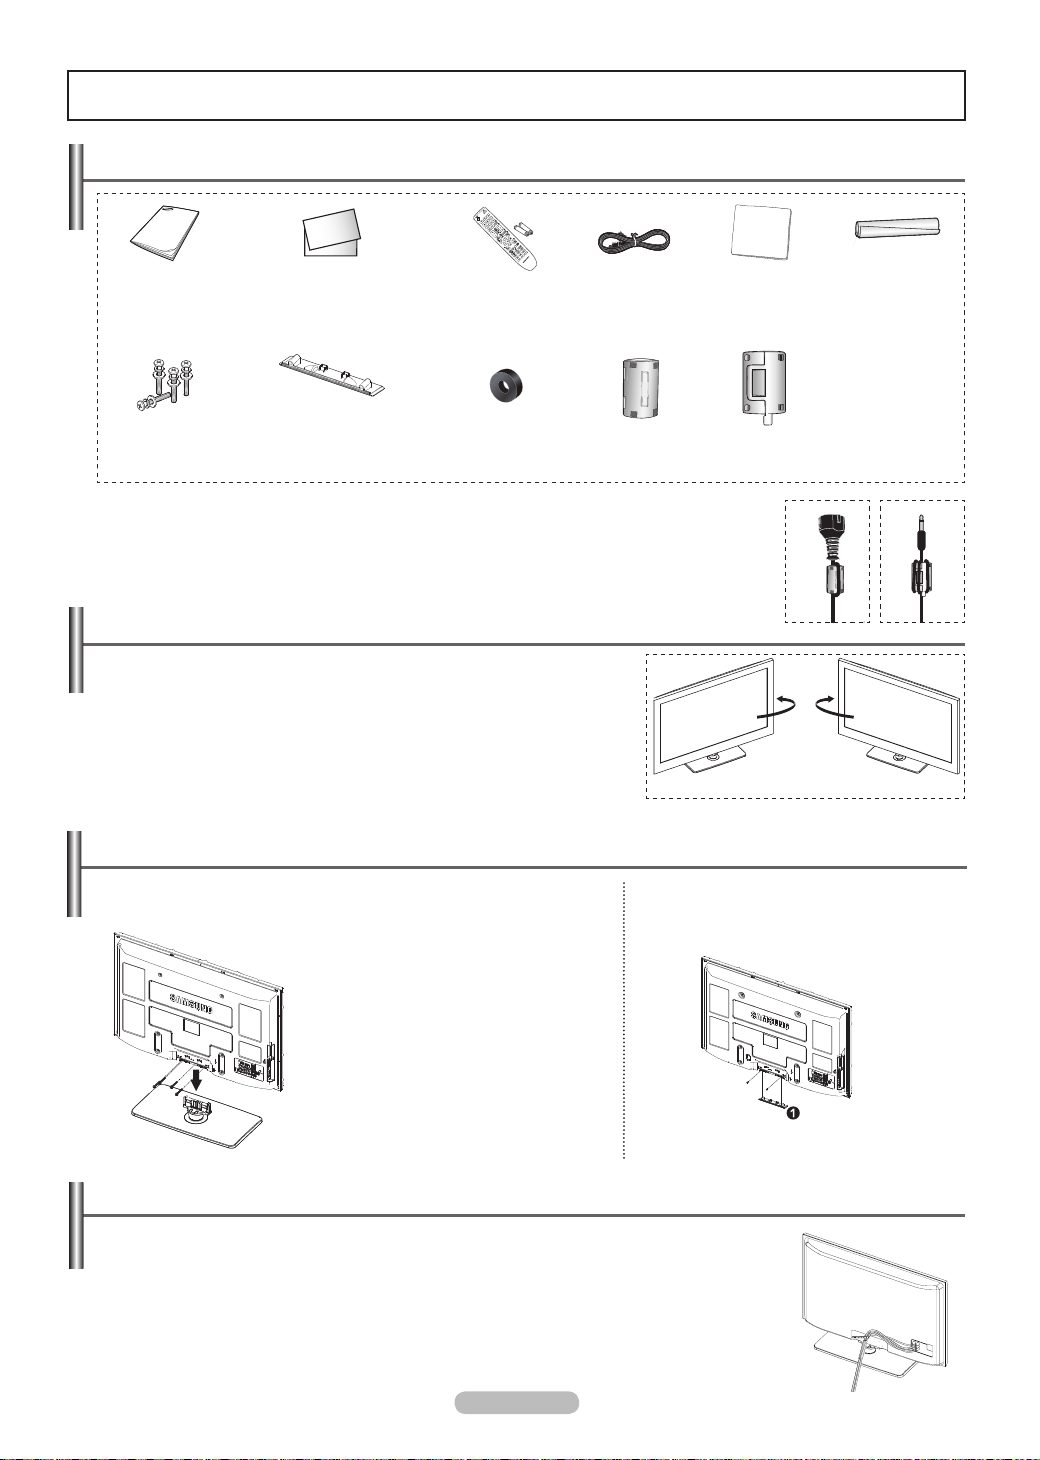
Checking Parts
Owner’s
Instructions
Screw (4ea) Cover-Bottom Holder-Ring (4ea)
Ferrite CoreThe ferrite cores are used to shield the cables from interference.When connecting a N
cable, open the ferrite core and clip it around the cable near the plug.
Warranty Card/
Safety Guide Manual
(Not available in all locations)
Remote Control/
AAA Batteries (2ea)
(Refer to page 44)
Power Cord Cloth-Clean Holder-Wire Cable
Ferrite Core for
Power Cord
Using the Stand-Base
Two or more people should carry the PDP. Never lay the PDP on the oor N
because of possible damage to the screen. Always keep the PDP upright.
The PDP can rotate 20 degrees in right and left directions.
N
How to assemble the Stand-Base (depending on the model)
Ferrite Core for
Headphone
-20° ~ 20°
Using the 4 screws for securing the stand base and the monitor, firmly attach the
monitor to the stand base.
Warning
Firmly secure the stand to the TV before
moving it, as the stand may fall and could
cause serious injury.
Two or more people should carry the TV.
N
Never lay the TV on the oor because of
possible damage to the screen. Always
store the TV upright.
The product colour and shape may vary
N
depending on the model.
In case of installing your TV on the wall, close the
cover (1) on the stand-base connection part using
two screws for hiding.
Assembling the Cables
Enclose the cables in the Holder-Wire Cable so that the cables are not visible through the transparent
stand.
Page 5

English - 5
Viewing the Control Panel
The product colour and shape may vary depending on the model. N
Front Panel buttons
Touch each button to
operate.
SOURCE
1
Toggles between all the available input sources
(TV, Ext1, Ext2, AV, PC, Component, HDMI1, HDMI2/DVI,
HDMI3, HDMI4, USB).
In the on-screen menu, use this button as you would use
N
the ENTERE button on the remote control.
MENU
2
Press to see an on-screen menu of your TV’s features.
+ –
3
Press to increase or decrease the volume. In the on-screen
menu, use the + – buttons as you would use the
◄ and ► buttons on the remote control.
CH
4
Press to change channels. In the on-screen menu, use the
CH buttons as you would use the ▲ and ▼ buttons
on the remote control. You can use CH button to turn
on the TV without the remote control.
POWER INDICATOR
5
Blinks and turns off when the power is on and lights up in
stand-by mode.
6
REMOTE CONTROL SENSOR
Aim the remote control towards this spot on the TV.
(
POWER)
7
Touch the silver sensor below the ( ) mark to turn the TV on
and off.
SPEAKERS
8
Page 6
English - 6
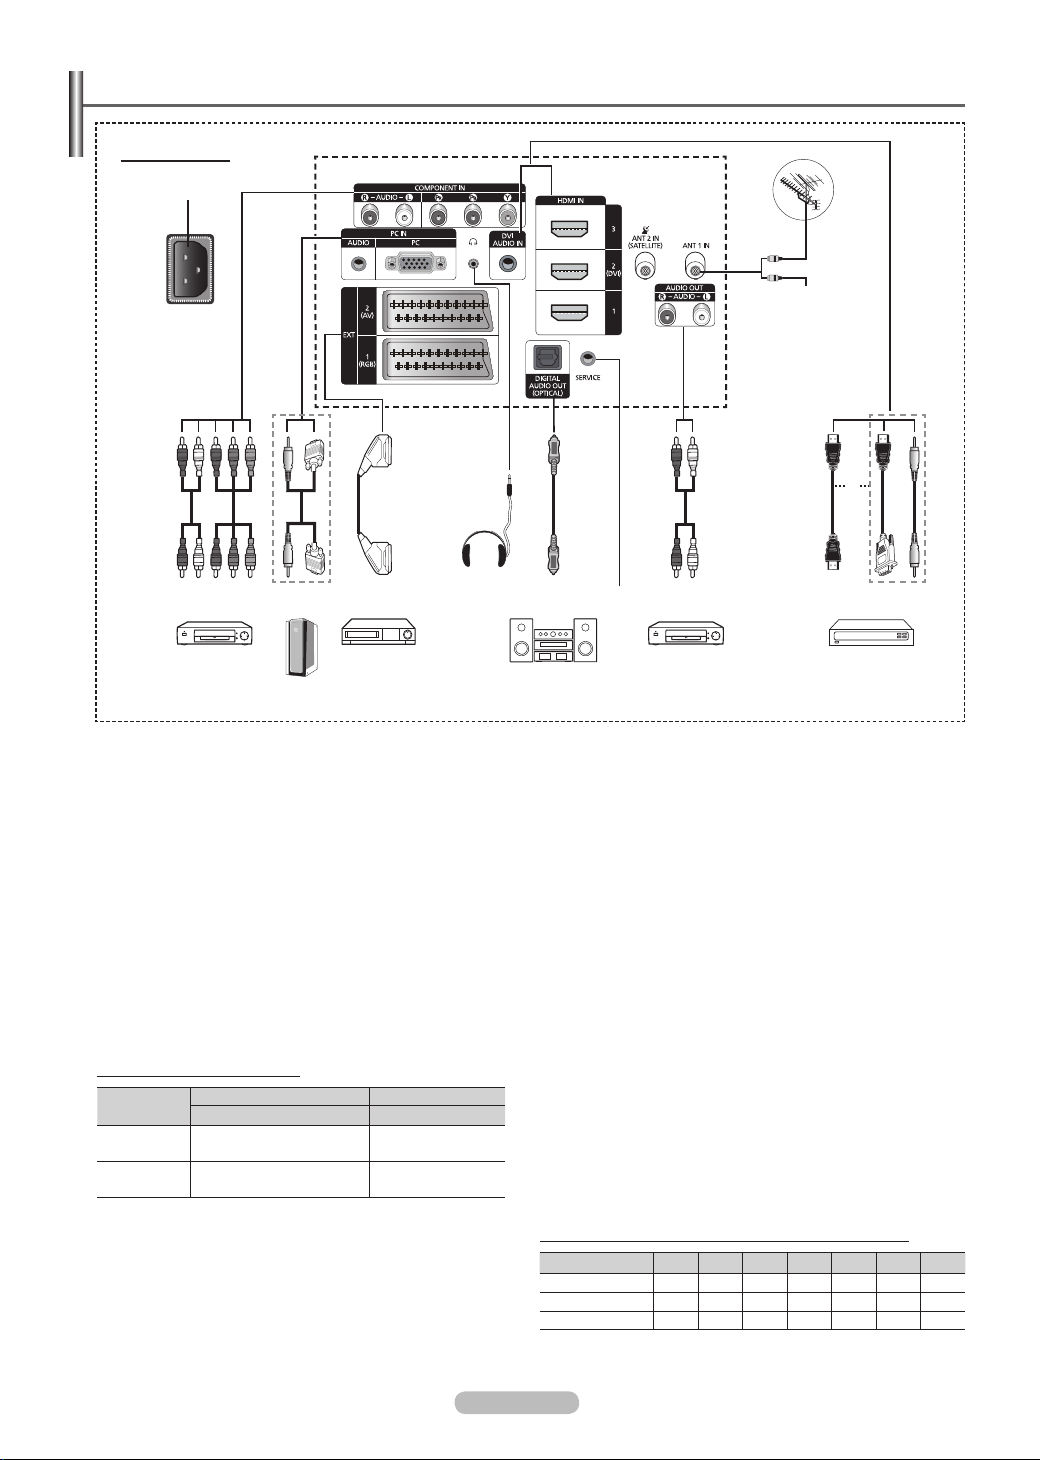
Viewing the Connection Panel
TV Rear Panel
1
or
9
Cable Television
Network
or
432 8 06
5
The product colour and shape may vary depending on the model. N
Whenever you connect an audio or video system to your set, ensure that all elements are switched off. N
When connecting an external device, match the colour of the connection terminal to the cable. N
POWER IN
1
Connect the supplied power cord.
COMPONENT IN
2
Audio (AUDIO L/R) and video (Y / P
/ PR) inputs for
B
Component.
PC IN (AUDIO / PC)
3
Connect to the video and audio output jack on your PC.
EXT 1, EXT 2
4
Inputs or outputs for external devices, such as VCR, DVD,
video game device or video disc players.
In EXT mode, DTV Out only supports MPEG SD Video
N
and Audio.
In EXT Mode, Game mode is not available
N
Input/Output Specification
Connector
EXT 1 ✔ ✔ ✔
EXT 2 ✔ ✔ Output you can choose.
HEADPHONE
5
Video Audio(L/R) RGB Video + Audio(L/R)
Connect a set of headphones if you wish to watch a television
program without disturbing other people in the room.
Prolonged use of headphones at a high volume may
N
damage your hearing.
DIGITAL AUDIO OUT (OPTICAL)
6
Connect to a Digital Audio Component.
SERVICE
7
Connector for service.
Input Output
Only TV or DTV output
is available.
7
AUDIO OUT(AUDIO R/L)
8
Connect RCA audio signals from the TV to an external source,
such as Audio equipment.
ANT 2 IN(SATELLITE), ANT 1 IN
9
75Ω Coaxial connector for SATELLITE/Aerial/Cable Network.
HDMI IN 1, 2(DVI), 3
0
No additional Audio connection is needed for an HDMI to
HDMI connection.
When using an HDMI/DVI cable connection, you must use the HDMI IN 2 (DVI) jack.
What is HDMI?
N
- High Definition Multimedia interface allows the
transmission of high denition digital video data and
multiple channels of digital audio.
- The HDMI/DVI terminal supports DVI connection to
an extended device with the appropriate cable (not
supplied). The difference between HDMI and DVI is
that the HDMI device is smaller in size, has the HDCP
(High Bandwidth Digital Copy Protection) coding feature
installed, and supports multi - channel digital audio.
DVI AUDIO IN
DVI audio outputs for external devices.
Supported modes for HDMI/DVI and Component
HDMI/DVI 50Hz X X X O O O O
HDMI/DVI 60Hz X O X X O O O
Component O O O O O O O
480i 480p 576i 576p 720p 1080i 1080p
Page 7
English - 7
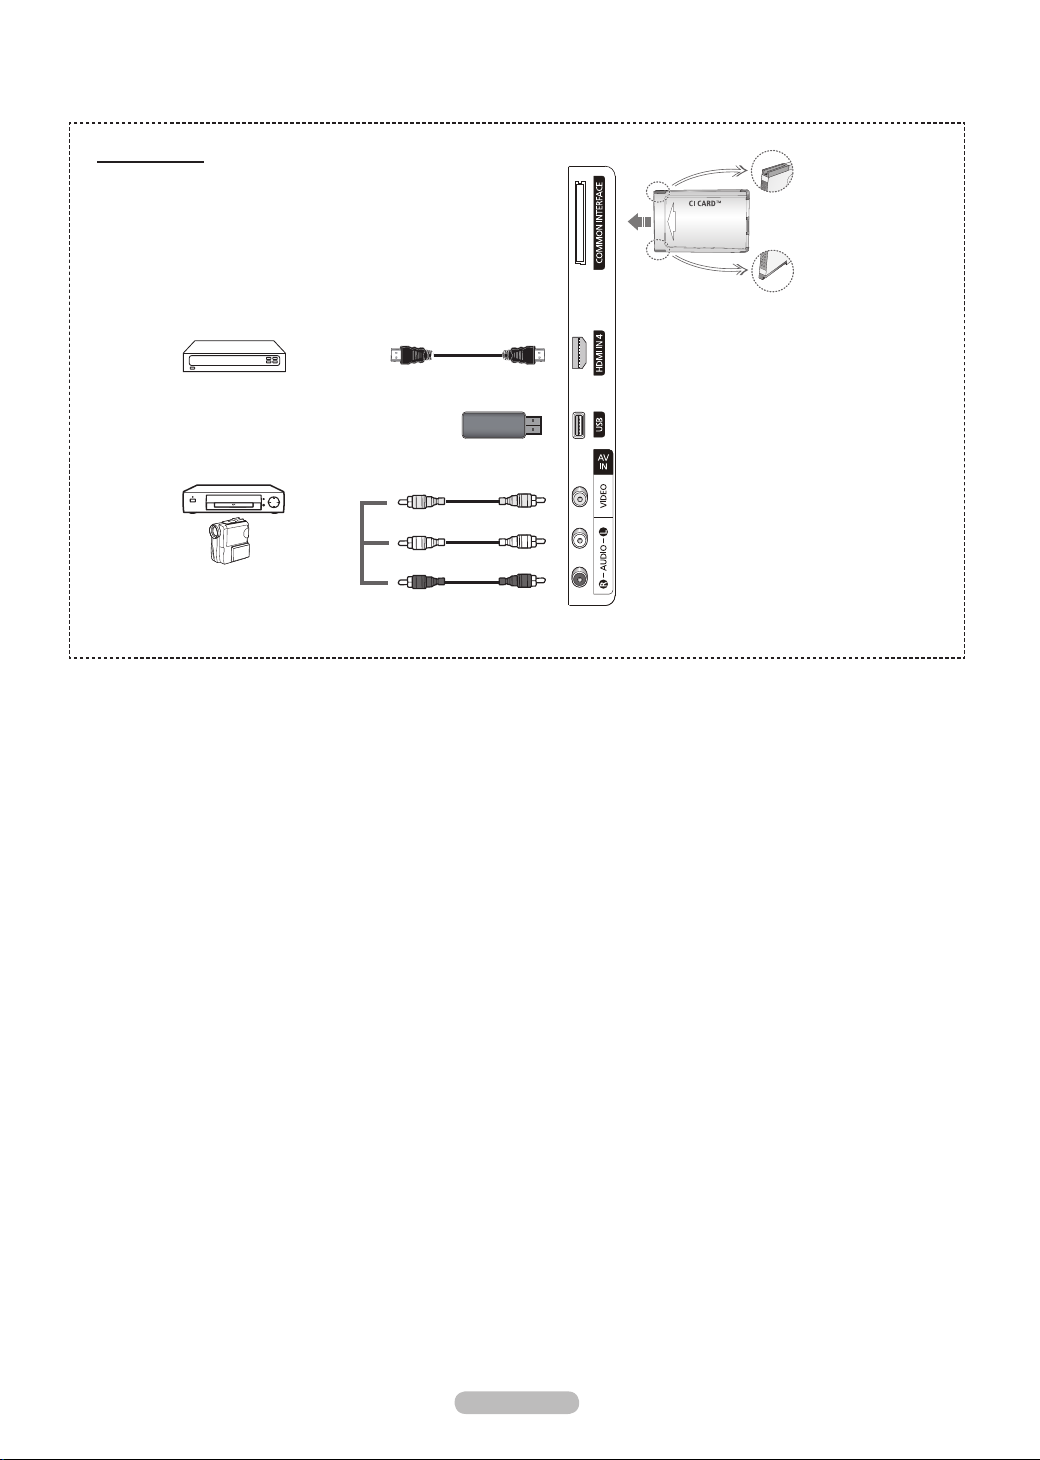
TV Side Panel
2
3
4
The product colour and shape may vary depending on the model. N
1
COMMON INTERFACE Slot
Insert CI (CI+) (Common Interface) card into the slot.
(refer to page 26)
When not in - serting CI (CI+) CARD in some channels,
Scramble Signal is displayed on the screen.
The - pairing information containing a telephone number,
CI (CI+) CARD ID, Host ID, and other information will be
displayed in about 2~3 minutes. If an error message is
displayed, please contact your service provider.
When the channel - information conguration has nished,
the message Updating Completed is displayed,
indicating that the channel list is now updated.
Insert the CI (CI+)-Card in the direction marked on it.
N
CAM is not supported in some countries, regions and N
satellite channels, check with your autorized dealer.
The
N CI (CI+) function is only applicable to PS********P.
model If you have some problems, please contact to
service provider
1
2
HDMI IN 4
Connect to the HDMI jack of a device with HDMI output.
3
USB
Connect a USB mass storage device to view and play photo
les (JPEG) and audio les (MP3).
4
AV IN (VIDEO, AUDIO L/R)
Video and audio inputs for external devices, such as a
camcorder or VCR.
Page 8

English - 8
Remote Control
You can use the remote control up to a distance of about 23 feet from the TV.
N
The performance of the remote control may be affected by bright light.
POWER button
1
(turns the TV on and off)
Selects the TV mode directly.
2
Number buttons for direct channel
3
access.
Press to switch to your Favourite
4
channels.
Temporary sound switch-off.
5
6
Volume increase.
Volume decrease.
Available source selection.
7
Use to see information on the current
8
broadcast.
Use to quickly select frequently used
9
functions.
Control the cursor in the menu.
0
Channel control button.
!
Use these buttons in the Channel List
@
and Media Play, etc.
Sound mode selection.
$
Use these buttons in the Media Play
%
and Anynet+.
Previous channel.
^
Next channel.
&
Previous channel.
Displays the main on-screen menu.
*
(
Electronic Program Guide (EPG)
display.
Returns to the previous menu.
)
Exit the on-screen menu.
a
This function enables you to view
b
and play the photo (JPEG) and music
(MP3) les from an external devices.
Picture size selection.
c
Digital subtitle display.
d
e
Turn the audio description function on
or off.
Teletext Functions
Exit from the teletext display
2
(depending on the model).
Teletext mode selection (LIST/FLOF).
7
Teletext reveal.
8
Teletext size.
9
Teletext store.
!
Fastext topic selection.
@
Teletext display/mix both
#
teletext information and the normal
broadcast.
Teletext sub page.
^
P :Teletext next page.
&
*
)
a
:Teletext previous page.
P
Teletext index.
Teletext hold.
Teletext cancel.
Page 9
English - 9
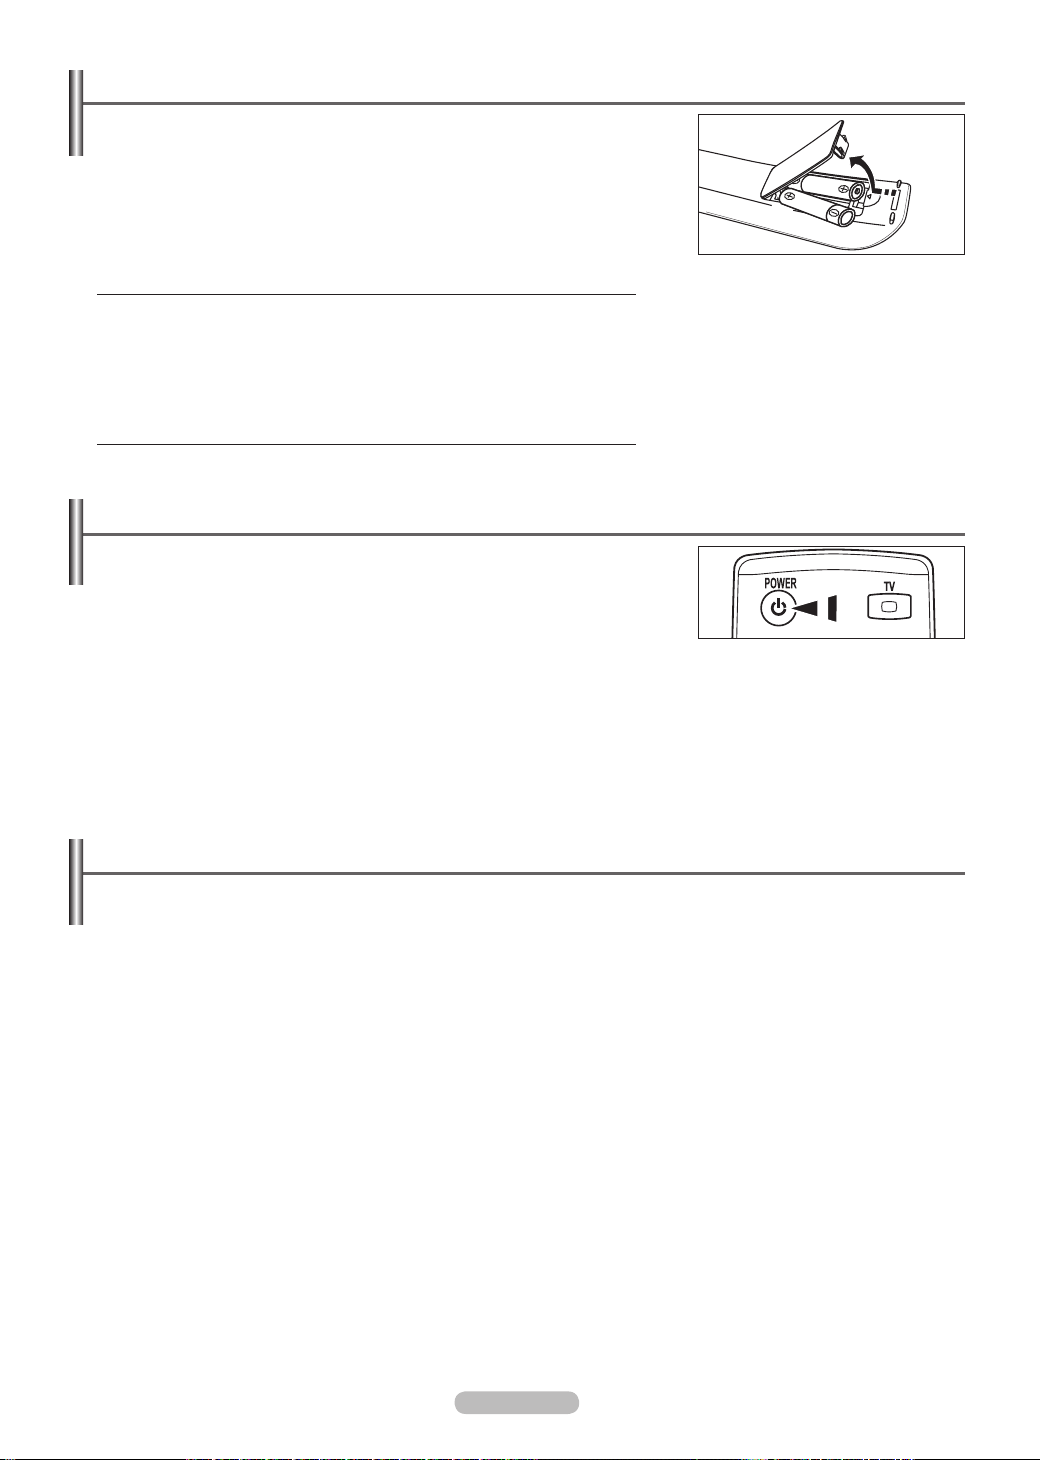
Installing Batteries in the Remote Control
1. Lift the cover at the back of the remote control upward as shown in the gure.
2. Install two AAA size batteries.
Make sure to match the ‘+’ and ‘–’ ends of the batteries with the diagram inside
N
the compartment.
3. Close the cover.
N
Remove the batteries and store them in a cool, dry place if you won’t be using the
remote control for a long time.
If the remote control doesn’t work, check the following N
1. Is the TV power on?
2. Are the plus and minus ends of the batteries reversed?
3. Are the batteries drained?
4. Is there a power outage or is the power cord unplugged?
5. Is there a special uorescent light or neon sign nearby?
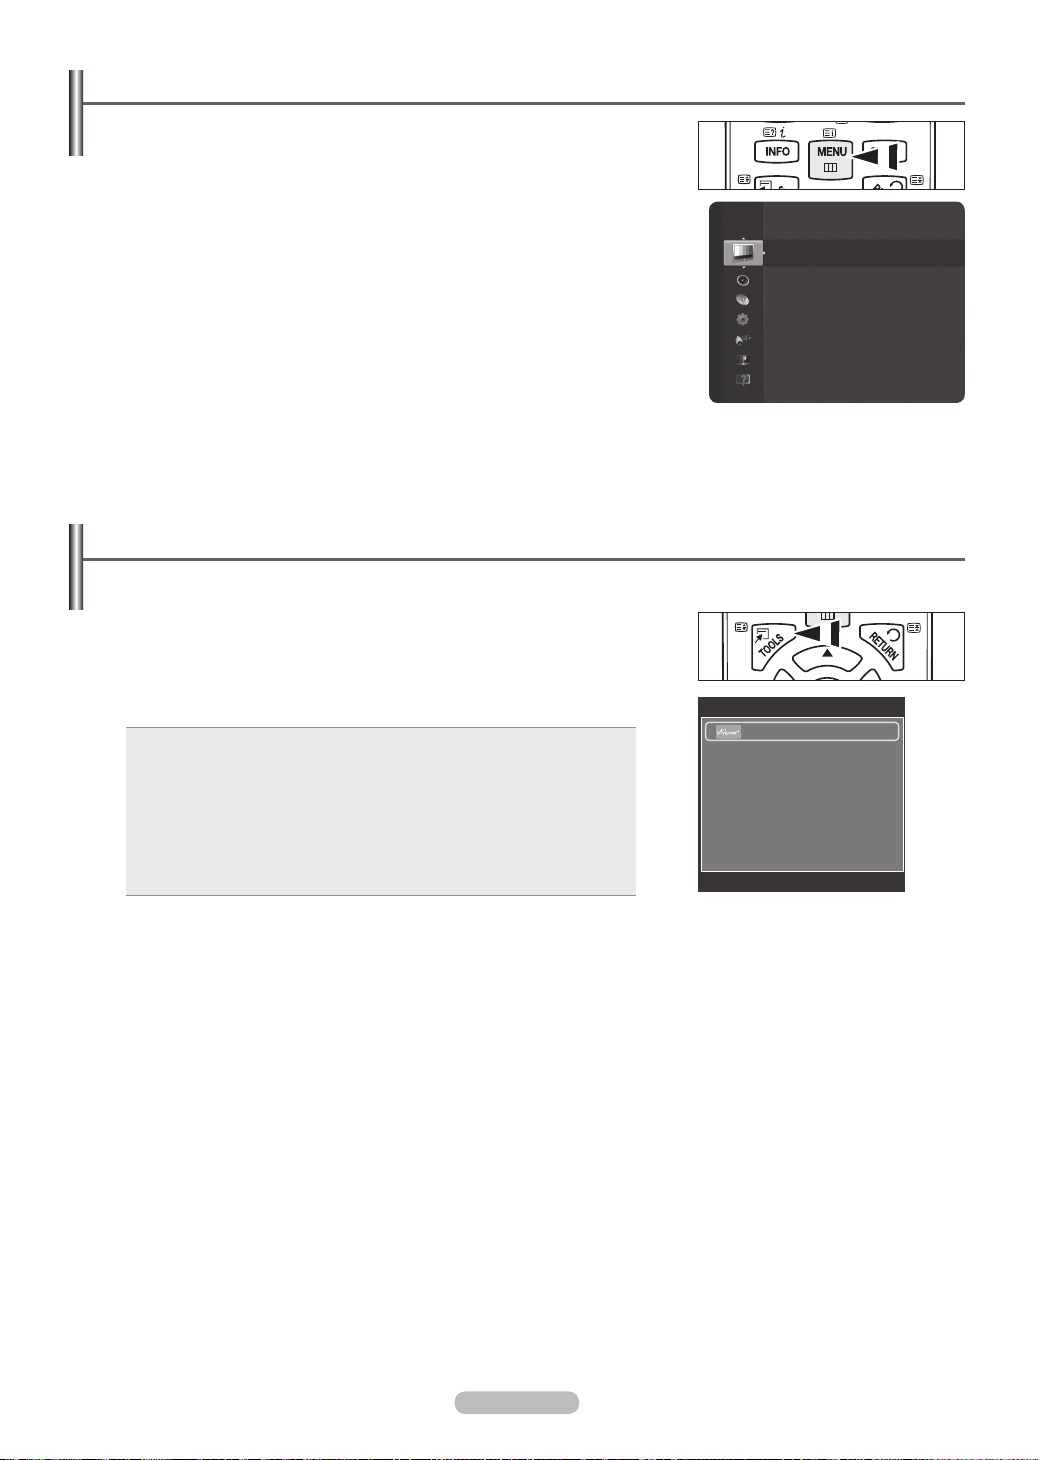
Switching On and Off
The mains lead is attached to the rear of your set.
1. Plug the mains lead into an appropriate socket.
N
The standby indicator lights up on your set.
2. Touch the sensor below the (P) mark to turn the TV on.
You also can press the
N POWER
The programme that you were watching last is reselected automatically.
N
3. Press the numeric button (0~9) or channel up / down (< / >) button on the remote control or < CH> button on your set.
When you switch the set on for the very rst time, you will be asked to choose language in which the menus are to be displayed.
N
4. To switch your set off, touch the sensor to turn the TV off again.
P
button or the TV button on the remote control to turn the TV on.
Placing Your Television in Standby Mode
Your set can be placed in standby mode in order to reduce the power consumption. The standby mode can be useful when you wish to
interrupt viewing temporarily (during a meal, for example).
1. Press the POWERP button on the remote control.
The screen is turned off and a red standby indicator appears on your set.
N
2. To switch your set back on, simply press the POWERP, numeric buttons (0~9), TV button or channel up / down (< / >) button
again.
Do not leave your set in standby mode for long periods of time (when you are away on holiday, for example). It is best to unplug
N
the set from the mains and aerial.
Page 10
English - 10
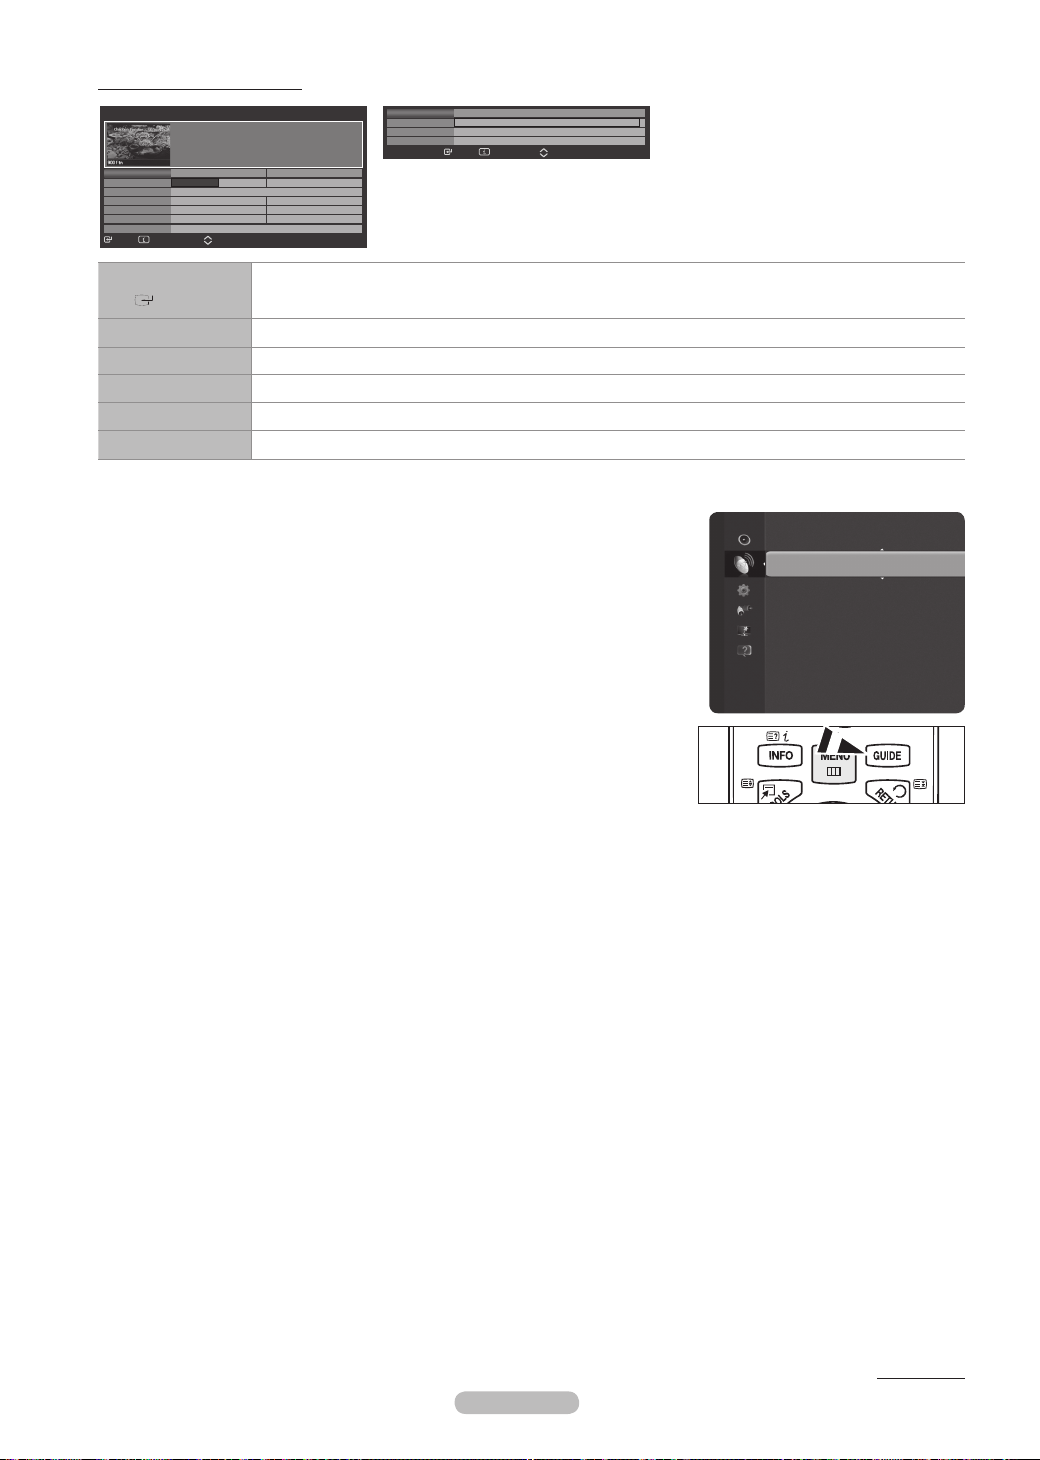
Viewing the Menus
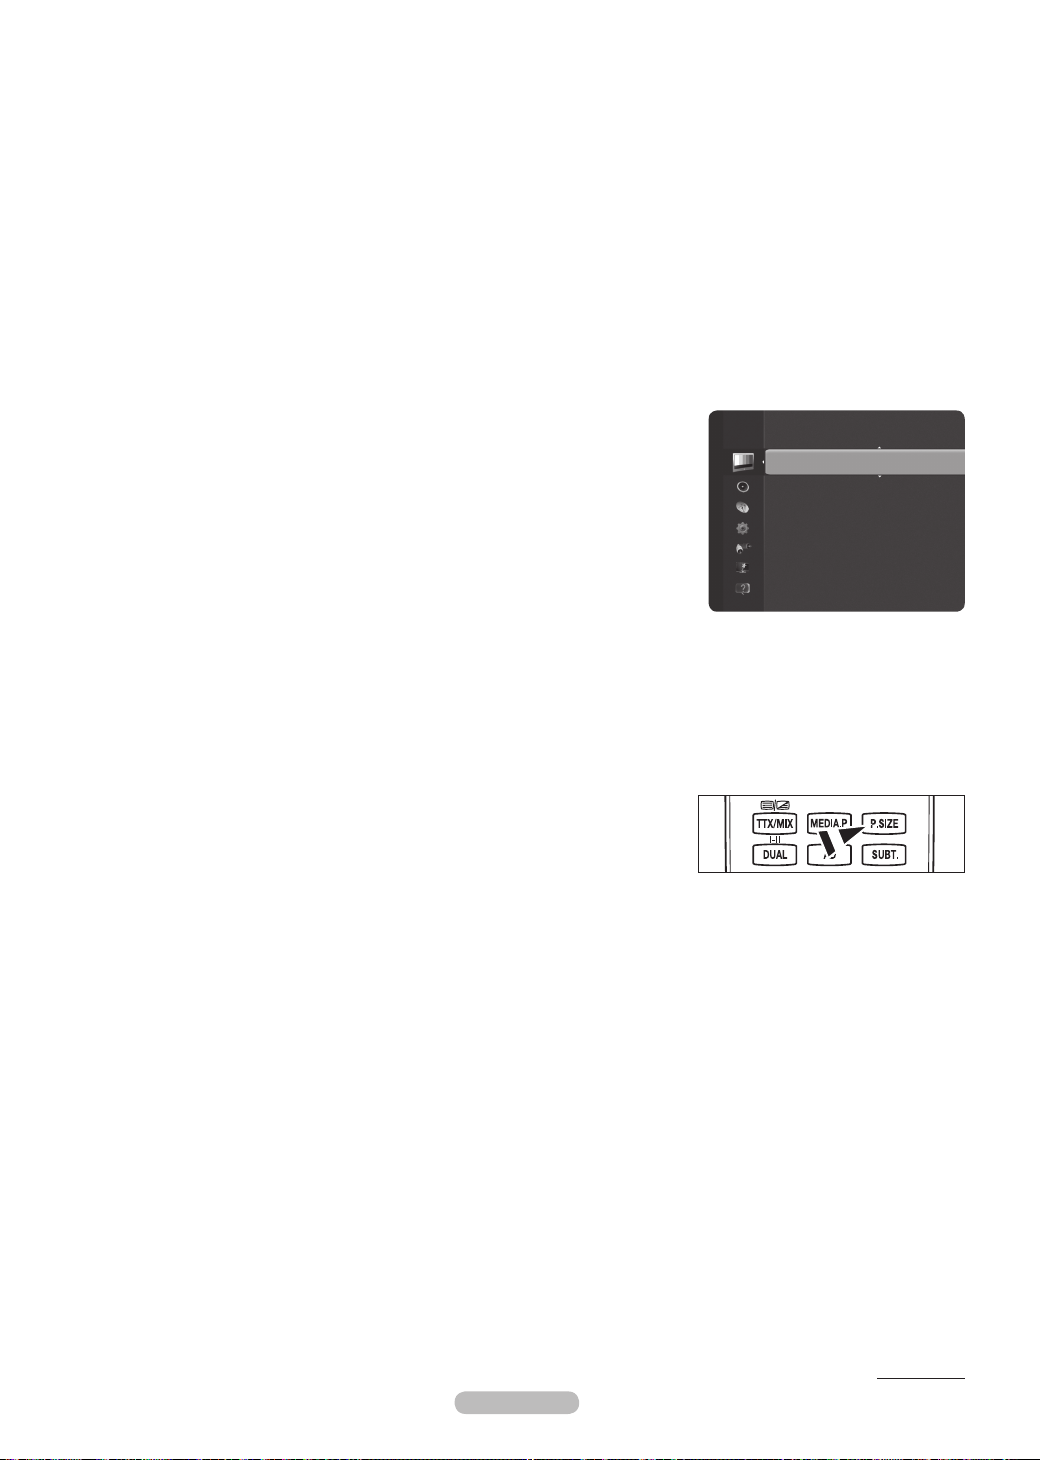
1. With the power on, press the MENU button. The main menu appears on the
screen. The menu’s left side has icons: Picture, Sound, Channel, Setup, Input,
Application, Support.
E
2. Press the ▲ or ▼ button to select one of the icons. Then press the ENTER
button to access the icon’s sub-menu.
3. Press the EXIT button to exit.
The on-screen menus disappear from the screen after about one minute.
N
Picture
Mode : Standard
Cell Light : 7
Contrast : 95
Brightness : 45
Sharpness : 50
Colour : 50
Tint (G/R) : G50/R50
Auto Adjustment
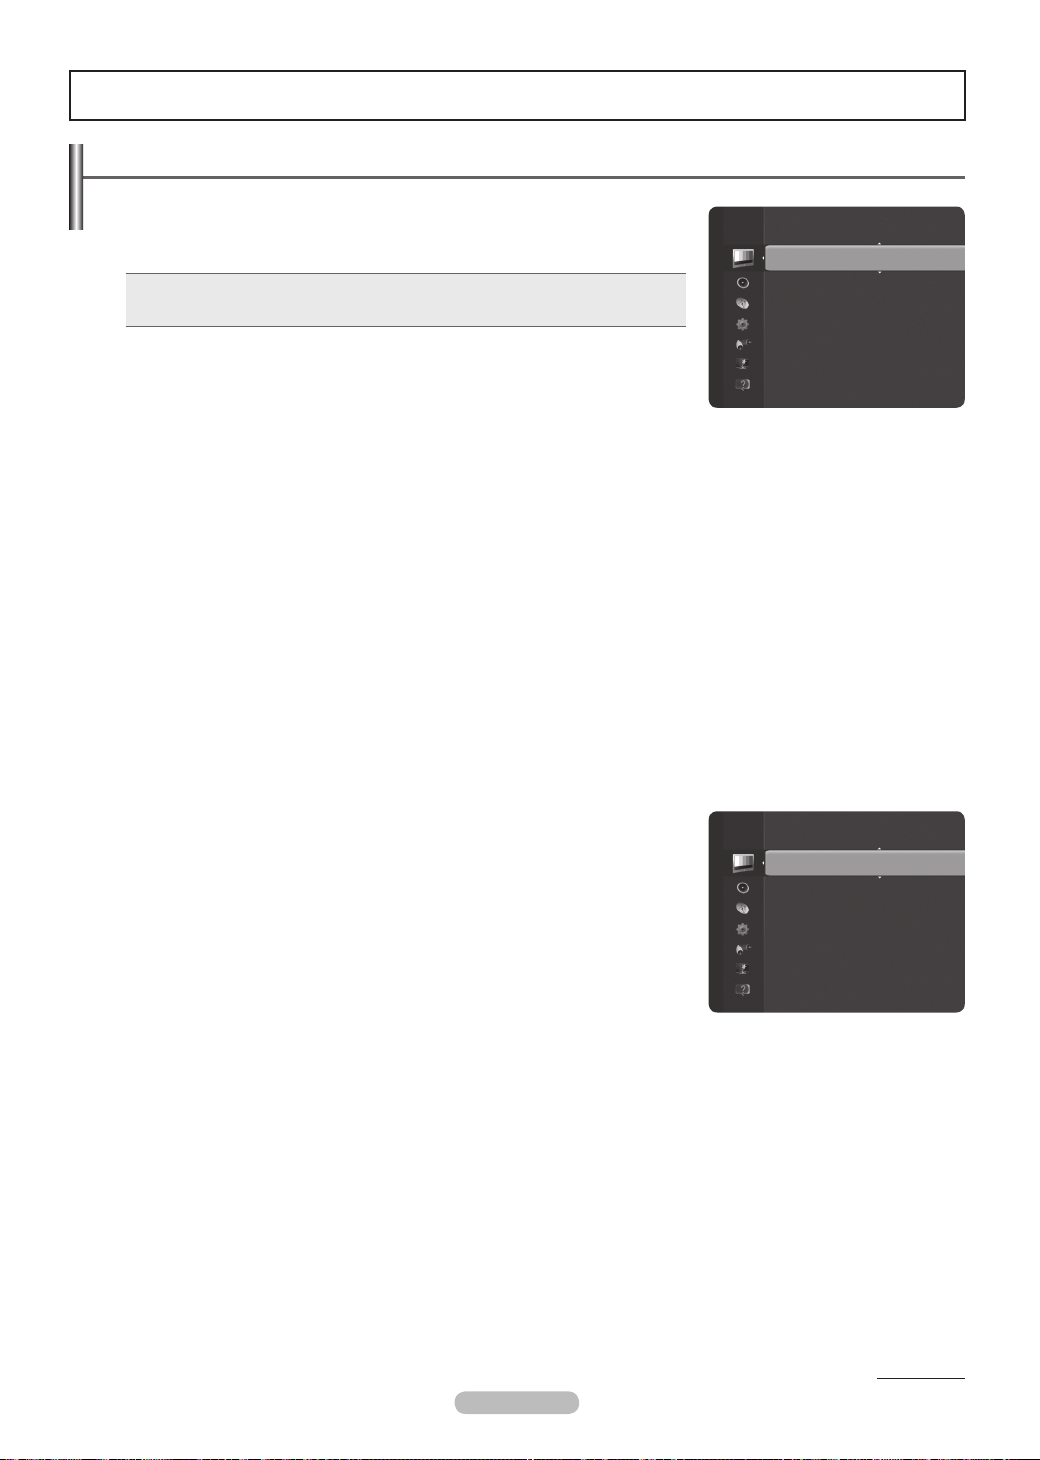
Using the TOOLS Button
You can use the TOOLS button to select your frequently used functions quickly and easily. The Tools menu changes depending on
which external input mode you are viewing.
1. Press the TOOLS button. The Tools menu will appear.
E
2. Press the ▲ or ▼ button to select a menu, then press the ENTER
3. Press the ▲ / ▼ / ◄ / ► / ENTER
E
buttons to display, change, or use the selected
items. For a more detailed description of each function, refer to the corresponding
page.
+
Anynet •
(HDMI-CEC), see page 39
Picture Mode, see page 18 •
Sound Mode, see page 23 •
Sleep Timer, see page 25 •
SRS TS HD, • see page 23
Energy Saving, see page 28 •
Edit My Channels, see page 16 •
Auto Adjus • tment, see page 21
button.
Tools
Anynet+ (HDMI-CEC)
Picture Mode : Standard
Sound Mode : Custom
Sleep Timer : Off
SRS TS HD : Off
Energy Saving : Off
Edit My Channels
U
Move E Ent er e Exit
Page 11

English - 11
Plug & Play Feature
When the TV is initially powered on, basic settings proceed automatically and subsequently.
N
The Screen Saver is activated if there is no remote control key input for longer than 1 minute while Plug & Play is running.
The Screen Saver is activated if there is no operating signal for longer than 15 minutes. N
If you accidentally select the wrong country for your TV, the characters on the screen may be wrongly displayed. N
1. Press the POWER button on the remote control. Select the OSD Language. menu
is automatically displayed. Select the appropriate language by pressing the ▲ or ▼
button. Press the ENTERE button to conrm your choice.
2. Press the ◄ or ► button to select Store Demo or Home Use, then press the
ENTER
E
button.
We recommend setting the TV to
N Home Use mode for the best picture in your
Select the OSD Language.
Menu Language :
home environment.
Store Demo
N mode is only intended for use in retail environments.
If the unit is accidentally set to
N Store Demo mode and you want to return to Home Use (Standard): Press the Volume button on
the TV. When the volume OSD is displayed, press and hold the MENU button on the TV for 5 seconds.
3. Press the ENTER
E
. Select the appropriate country by pressing the ▲ or ▼ button. Press the ENTERE button to conrm your
choice.
4. Press the ▲ or ▼ button to memorise the channels of the selected connection, then press the ENTER
Air • : Air antenna signal.
Cable • : Cable antenna signal.
Satellite • : Satellite antenna signal.
5. Press the ▲ or ▼ button to select the channel source to memorise. Press the ENTER
When selecting
N Air or Cable,
E
button to select Start.
Digital & Analogue • : Digital and Analogue channels.
Digital • : Digital channels.
Analogue • : Analogue channels.
For more detailed description of selecting Cable mode, refer to page 13.
N
When selecting N Satellite, you can congure LNB Setting. (Fore more detailed description of LNB Setting, refer to page 15.)
All • : Selects All as Channel type.
TV • : Selects TV as Channel type.
Radio • : Selects Radio ad Channel type.
Select the satellite and the scan mode to scan.
N
The channel search will start and end automatically. N
6. The message Set the Clock Mode is displayed. Press the ENTERE button. Press the ▲ or ▼ button to select Auto, then press the
ENTERE button.
If you select
N Manual, Set current date and time is displayed. (For a more detailed description of Manual, refer to 25 page)
If you have received a digital signal, the time will be set automatically.
N
7. The brief instruction on How to get the best performance from your new HDTV. is displayed. Press the ENTERE button.
This menu is available
N HD Connection Guide in the Support menu.
8. The message Enjoy your TV. is displayed. When you have nished, press the ENTER
E
button.
E
Plug & Play
button.
Nederlands
English
Eesti
U
Mov e E Enter
▲
▼
If you want to reset this feature...
1. Press the MENU button to display the menu. Press the ▲ or ▼ button to select Setup,
then press the ENTER
2. Press the ENTER
E
button.
E
button again to select Plug & Play.
3. Enter your 4 digit PIN number. The default PIN number of a new TV set is ‘0-0-0-0’.
If you want to change PIN number, refer to 27 page.
N
The N Plug & Play feature is only available in the TV mode.
Setup
Plug & Play ►
Time
Language
Subtitle
Digital Text : Enable
Security
Network
General
Page 12

English - 12
Channel Control
Storing Channels
Antenna
❑
Selects an appropriate type of antenna for digital broadcasts.
Air • : Select Air for receiving digital broadcasts.
Cable • : Select Cable for receiving digital broadcasts.
Satellite • : Selects the satellite for receiving digital broadcasts.
Country
❑
Digital Channel : You can change the country for digital channels.
Analogue Channel
: You can change the country for analogue channels.
The PIN number input screen appears. Enter your 4 digit PIN number. N
Auto Store ❑
You can scan for the frequency ranges available to you (and availability depends on your country). Automatically allocated
porgramme numbers may not correspond to actual or desired programme numbers.
If a channel is locked using the
N
Air / Cable / Satellite
Digital & Analogue • : Digital and Analogue channels.
Digital • : Digital channels.
Analogue • : Analogue channels.
When selecting Cable → ‘Digital & Analogue’ or ‘Cable → Digital’:
Provide a value to scan for cable channels.
Search Mode •
Quick
N
→
Full / Network / Quick
Network ID - : Displays the network identication code.
Frequency - : Displays the frequency for the channel. (Differs in each country)
Modulation - : Displays available modulation values.
Symbol Rate - : Displays available symbol rates.
Scans for all channels with active broadcast stations and stores them in the TV's memory.
N
If you want to stop N Auto Store, press the ENTER
The Stop Auto Store? message will be displayed.
Select Yes by pressing the ◄ or ► button, then press the ENTER
When selecting Satellite:
Satellite • : Selects the satellite to scan.
Scan Mode • → All / TV / Radio : Selects the scanning mode of the selected satellite.
Free channels only can be received.
N
After all the available channels are stored N
Detail - : Display the auto store result.
OK - : Exit the auto store menu.
Manual Store
❑
Scans for a channel manually and stores it in the TV’s memory.
Child Lock function, the PIN input window appears.
E
button.
E
button.
Channel
Antenna : Satellite ►
Country
Auto Store
Manual Store
Cable Search Option
Full Guide
Mini Guide
Default Guide : Full Guide
Continued...
Page 13

English - 13
Digital Channel (Digital)
Digital Channel is only available in DTV mode. N
Channel • : Set the Channel number using the ▲, ▼ or number (0~9) buttons.
Frequency • : Set the frequency using the number buttons.
Bandwidth • : Set the bandwidth using the ▲, ▼ or number (0~9) buttons.
When it has nished, channels are updated in the channel list.
N
Analogue Channel
Manual store for analogue channel.
Programme • (Programme number to be assigned to a channel): Sets the programme number using the ▲, ▼ or number (0~9)
buttons.
Colour System → Auto / PAL / SECAM / NTSC 4.43 • : Sets the colour system value using the ▲ or ▼ button.
Sound System • → BG / DK / I / L : Sets the sound system value using the ▲ or ▼ button.
Channel • (When you know the number of the channel to be stored): Press the ▲ or ▼ button to select C (Air channel) or S
(Cable channel). Press the ► button, then press the ▲, ▼ or number (0~9) buttons to select the required number.
If there is abnormal sound or no sound, reselect the sound standard required.
N
Search • (When you do not know the channel numbers): Press the ▲ or ▼ button to start the search. The tuner scans the
frequency range until the rst channel or the channel that you selected is received on the screen.
Store • (When you store the channel and associated programme number): Set to OK by pressing the ENTER
Channel mode
N
- C (Air channel mode):
- S (Cable channel mode): You can select a channel by entering the assigned number for each cable channel in this mode.
Satellite Manual Store
Satellite • : Selects the satellite using the up/down buttons.
Index • : Selects the transponder using the up/down buttons.
Scan Mode • : Selects either free or all channels to store.
Frequency • : Sets the frequency using the numeric buttons.
Symbol Rat • e : Sets the symbol rate using the numeric or up/down buttons.
Polarity • : Sets the Polarity using the up/down buttons.
Network Search • : Enable/Disable network search using the up/down buttons.
Signal Quality • : Display the current status of broadcasting signal.
Information on a satellite and its transponder is subject to change depending on the broadcasting conditions.
N
You can select a channel by entering the assigned number to each air broadcasting station in this mode
E
button.
.
Cable Search Option
❑
You can add directly the channel search range in the network search mode. (Dependingon the each country)
Freq.Start • : Displays the frequency start values.
Freq.Stop • : Displays the frequency stop values.
Modulation • : Displays available modulation values.
Symbol Rate • : Displays available symbol rates.
If the
N Freq.Start value is bigger than Freq.Stop value, the warning message is displayed.
Full Guide / Mini Guide
❑
The EPG (Electronic Programme Guide) information is provided by the broadcasters. Programme entries may appear blank or out
of date as a result of the information broadcast on a given channel. The display will dynamically update as soon as new information
becomes available.
Full Guide • : Displays the programme information as time ordered One hour segments. One hours of programme information is
displayed which may be scrolled forwards or backwards in time.
Mini Guide • : The information of each programme is displayed by each line on the current channel Mini Guide screen from the
current programme onwards according to the programme starting time order.
Continued...
Page 14
English - 14
Using the Full / Mini Guide
Full Guide
900 f tn
901 ITV Play
902 Kerrang!
903 Kiss
903 oneword
903 Smash Hits!
▼
Watch
DTV Cable 900 f tn 2:10 Tue 1 Jun
Freshmen On Campus
2:00 - 2:30
No Detailed Information
Today 2:00 - 3:00 3:00 - 4:00
Freshmen O..
Street Hypn..
Mint Extra
Loaded
Fresh 40 with Dynamite MC
The Distillery
Smash Hits! Sunday
Information
Page
No Information
No Information
Kisstory
No Information
Mini Guide +24 Hours Exit
Mini Guide DTV Cable 900 f tn
2:00
2:30
▼
5:00
Freshmen On Campus
Street Hypnosis
Booze Britain
Watch
Information
Full Guide Exit
Page
▲ / ▼ / ◄ / ►
(ENTER)
,
Select a programme by pressing the ▲/▼/◄/► button.
RED Toggle between the Mini Guide or Full Guide.
GREEN Full Guide: Scroll backwards quickly (-24 hours).
YELLOW Full Guide: Scroll forwards quickly (+24 hours).
BLUE Exit the guide.
INFO INFO button for the detailed information.
Default Guide
❑
Full Guide / Mini Guide
You can decide whether to display either the Mini Guide or the Full Guide when the
GUIDE button on the remote control is pressed.
You can also display the guide menu simply by pressing the
O GUIDE button.
Full Guide
Mini Guide
Channel
Default Guide : Full Guide ►
Channel List
Fine Tune
Satellite System Setup
Fine Tune ❑(only analogue channels)
If the reception is clear, you do not have to ne tune the channel, as this is done automatically during the search and store
operation. If the signal is weak or distorted, you may have to ne tune the channel manually.
Fine tuned channels that have been saved are marked with an asterisk
N * on the right-hand side of the channel number in the
channel banner.
If you do not store the ne-tuned channel in memory, adjustments are not saved.
N
To reset the ne-tuning, select N Reset by pressing the ▼ button and then press the ENTER
E
button.
Continued...
Page 15

English - 15
Satellite System Setup
❑
Set the LNB used for receiving broadcasting signal.
Satellite System Setup
N is available when Antenna is set to Satellite.
The PIN input window appears.
N
Before running N Auto Store, set Satellite System Setup. Then channel scan is run
LNB Power : On ►
LNB Settings
Positioner Settings
Reset All Settings
normally.
LNB Power
Enables or disables the power supply for the LNB.
Set whether TV provides power supply of LNB.
This function is for making only one TV can provide power supply when using one LNB connecting to two TVs.
Satellite System Setup
U
Move E Enter R Return
LNB Settings
Congures the outdoor equipment
Satellite • : Selects the satellite for receiving digital broadcasts.
Transponder • : Selects a transponder from the list or adds a new transponder.
DiSEqC Mode • : Selects DiSEqC mode for the selected LNB.
Lower LNB Oscillators • : Sets the LNB oscillators to a lower frequency.
Upper LNB Oscillators • : Sets the LNB oscillators to a higher frequency.
Tone 22 KHz • : Selects the 22kHz tone depending on the LNB type. For a universal
LNB it should be Auto.
Signal Quality • : Display the current status of broadcasting signal.
Positioner Settings
Positioner • : Enables or disables the positioner control
Positioner Type • : Sets the positioner type between DiSEqC 1.2 and USALS
(Universal Satellite Automatic Location Sysem).
User Mode • : Sets the position of satellite antenna according to each satellite. If you
Satellite : Astra_19.2E ►
Transponder : 10743 MHz, H/L
DiSEqC Mode : 2/4
Lower LNB Oscillators : 9750 MHz
Upper LNB Oscillators : 10600 MHz
Tone 22 KHz : Auto
Signal Quality 0
Positioner : On ►
Positioner Type : DiSEqC 1.2
User Mode
Installer Mode
LNB Settings
U
Move E Enter R Return
Positioner Settings
store the current position of satellite antenna according to a certain satellite, when
the signal of that satellite is needed, the satellite antenna can be moved to prepopulated position.
E
Satellite - : Selects the satellite to set the position for.
Transponder - : Selects a transponder from the list for signal reception.
Moving Mode - : Selects the movement mode between discrete and continuous movement.
Step Size - : Adjusts the step size degrees for the antenna rotation. Step Size is available when Moving Mode is set to Step.
Go To Stored Position - : Rotates the antenna to the stored satellite position.
Antenna Position - : Adjusts and stores the antenna position for the selected satellite.
Store Current Position - : Stores current position as the selected positioner limit.
Signal Quality - : Display the current status of broadcasting signal.
Installer Mode • : Sets the antenna movement limits.
Limit Position - : Selects the direction of the Positioner Limit.
Antenna Positio - n : Adjusts the antenna position for the Positioner Limit by pressing the left or right key.
Store Current Position - : Stores the current position as the selected Positioner Limit.
Go To Zero - : Moves the antenna to the reference position.
Reset Positioner Limit - : Allows the antenna to rotate over the full arc.
Enter R Return
Reset All settings
All satellite settings will be reset to the initial values.
Page 16

English - 16
Managing Channels
Using this menu, you can Add / Delete or set Favourite channels and use the programme
guide for digital broadcasts.
N Channels, My Channels, or Scheduled screen by pressing
Select a channel in the
the ▲ / ▼ buttons, and pressing the ENTERE button.
Then you can watch the selected channel.
Channels :
My Channels :
Scheduled :
Press the
O CH LIST button on the remote control to bring up the channel lists.
Using the Colour buttons with the Channel List
N
Shows all currently available channels.
Shows all favourite channels.
Shows all current reserved programmes.
Red - (Channel Type): Toggle among Air, Cable and Satellite.
Green - (Zoom): Enlarges or shrinks a channel number.
Yellow - (Select): Selects multiple channel lists.
Blue - (Sort): Sorts by channel name or number. (available when the Antenna was set
to Satellite)
T - (Tools): Displays the Search, Edit My Channels, Lock (or Unlock), Timer
Viewing, Edit Channel Name, Edit Channel Number, Sort, Delete, Select All
(or Deselect All), or Reorder menu.
(The Tools menus may differ depending on the situation.)
Channel Status Display Icons
N
A channel selected by pressing the
An Analogue channel.
A
A channel set as a Favourite.
♥
\
A locked channel.
c
yellow button.
A programme currently being
(
broadcast.
)
A reserved programme
Channel List Tools Menu ( ❑in Channels / My Channels / Scheduled)
Press the N TOOLS button to use the option menu.
The
N Tools menu items may differ depending on the channel status.
Mini Guide
Default Guide : Full Guide
Channel
Channel List ►
Fine Tune
Satellite System Setup
Channels
All
TV
Radio
Data/Other
Air
Antenna Zoom Select Sore
824 UKTV Gold
825 UKTV style
A
1 C --
A
2 C
--
A 3 ♥ C
--
A 4 C
--
A 5 C
--
A 6 C
--
A 7 C
--
A 8 C
--
Page
Tools
Search (Searched channel only)
Set the item (Channel Type, Satellite Name, Provider Name, Transponder, Scramble)
in order to search.
This menu is only supported when
N Antenna is Satellites.
Edit My Channels
You can set the selected channels to desired my channels group.
The ♥ symbol will be displayed and the channel will be set as a My Channel.
N
Lock / Unlock
You can lock a channel so that the channel cannot be selected and viewed. This function
is available only when the Child Lock is set to on. (see page 27)
The PIN number input screen appears. Enter your 4 digit PIN number.
N
The default PIN number of a new TV set is ‘0-0-0-0’. You can change the PIN, by selecting Change PIN from the menu. N
The “ N \” symbol will be displayed and the channel will be locked.
Channels
Air
824 UKTV Gold
825 UKTV style
All
TV
Radio
Data/Other
Antenna Zoom Select Sort
A
1 C --
A
2 C
A 3 ♥ C
A 4 C
A 5 C
A 6 C
A 7 C
A 8 C
Edit My Channels
--
Lock
--
Timer Viewing
--
Edit Channel Name
--
Sort
--
Delete
--
--
Page
▼
Tools
Continued...
Page 17

English - 17
Timer Viewing
If you reserve a programme you want to watch, the channel is automatically switched to the reserved channel in the Channel List;
even when you are watching another channel. To reserve a programme set the current time rst. (See page 25)
Only memorised channels can be reserved.
N
You can set the channel, month, day, year, hour and minute directly by pressing the number buttons on the remote control. N
Reserving a programme will be shown on N Schduled menu.
Digital Programme Guide and Viewing Reservation
N
When a digital channel is selected, and you press the ► button, the Programme Guide for the channel appears.
You can reserve a programme according to the procedures described above.
Edit Channel Name (only analogue channel)
Channels can labeled so that their call letters appear whenever the channel is selected.
The names of digital broadcasting channels are automatically assigned and cannot be labeled. N
Edit Channel Number (only digital channel)
You can also edit the channel number by pressing the number buttons on the remote control.
Sort (only analogue channel)
This operation allows you to change the programme numbers of the stored channels. This operation may be necessary after using
the auto store.
Reorder (when the Antenna was set to Satellite)
Rearrange the channel list in numerical order.
Delete
You can delete a channel to display the channels you want.
You can also delete a channel at the My Channels or Satellites menu in the same manner.
Select All / Deselect All
You can perform the add / delete, add to Favourites / delete from Favourites, or lock / unlock function for multiple channels at N
the same time. Select the required channels and press the yellow button to set all the selected channels at the same time.
The
N c mark appears to the left of the selected channels.
You can only select
N Deselect All when there is a selected channel.
Channel List Tools Menu ( ❑in Scheduled )
You can view, modify or delete a reservation.
Press the
N TOOLS button to use the Tools menu.
Change Info • : Select to change a viewing reservation.
Cancel Schedules • : Select to cancel a viewing reservation.
Information • : Select to view a viewing reservation. (You can also change the reservation
information.)
Select All / Deselect All • : Select or deselect all reserved programmes.
Scheduled
1 / 1 / 2009
13:59 5 TV1 Quincy, M.E
18:59 2 TV3 The Equalizer
20:59 2 TV3 McMillan & Wife
21:59 2 TV3 M.Spillane’s mike Hammer
Antenne
Zoom Select
Change Info
Cancel Schedules
Information
Select All
Tools Information
Page 18
English - 18
Picture Control
Changing the Picture Settings
Mode
❑
You can select the type of picture which best corresponds to your viewing requirements.
Dynamic / Standard / Eco / Movie
Press the TTOOLS button to display Tools menu.
You can also set the picture mode by selecting Tools → Picture Mode.
Cell Light / Contrast / Brightness / Sharpness / Colour / Tint (G/R)
❑
Your television has several setting options that allow you to control the picture quality.
Cell Light • : Increases or decreases the light being emitted from the panel with bright
images, giving you more depth to the picture.
Contrast • : Increases or decreases the brightness in white areas of the picture. Too little contrast and the picture may seem dark;
too much contrast and the picture will lose details in white images.
Brightness • : Increases or decreases the overall brightness of the picture, but best used to adjust the black level of the image.
Too little brightness and shadow detail will be lost; too much brightness and blacks will be gray and washed out.
Sharpness • : Increases or decreases the apparent detail in the picture. Too little sharpness and the image might look soft.
Too much sharpness can add false edges to objects or can make noise more noticeable.
Colour • : Increases or decreases colour saturation levels in the picture. Too little colour and the image will be black and white
(undersaturated); too much colour and the image will look oversaturated and cartoonish.
Tint (G/R) • : Changes the picture hue from reddish to a greenish appearance.
When you make changes to
N Cell Light, Contrast, Brightness, Sharpness, Colour or Tint (G/R), the OSD will be adjusted
accordingly.
The adjusted values are saved for each picture mode.
N
In Analogue TV, Ext., AV modes of the PAL system, you cannot use the Tint Function. N
In N PC mode, you can only make changes to Cell Light, Contrast and Brightness.
Each adjusted setting will be stored separately according to its input mode.
N
The energy consumed during use can be signicantly reduced if the level of brightness of the picture is reduced, and then this N
will reduce the overall running cost.
Advanced Settings
❑
You can adjust the advanced settings for your screen including the colour and contrast.
Advanced Settings
N is available in Standard or Movie mode.
In PC mode, you can only make changes to
N Dynamic Contrast, Gamma and White
Balance from among the Advanced Settings items.
Black Tone → Off / Dark / Darker / Darkest
You can enhance the picture depth by adjusting the black colour density.
Dynamic Contrast → Off / Low / Medium / High
You can adjust the screen contrast so that the optimal contrast is provided.
Gamma
You can adjust the primary colour (Red, Green, Blue) Intensity.
Colour Space
Colour Space is a colour matrix composed of red, green and blue colours. Select your favourite Colour Space to experience the
most natural colour.
Auto • : The TV will choose the colour range that is closest to the range used during TV and movie production.
Native • : Display’s the most enhanced, vibrant colours possible.
Custom • : Provides precise saturation and Colour point adjustment of Red, Green, Blue, Yellow, Cyan, and Magenta.
Recommended for advanced users only.
Customizing the Colour Space
N
- Adjusts the Colour range to suit your preference. Colour is available when Colour Space is set to Custom.
- Colour → Red / Green / Blue / Yellow / Cyan / Magenta
- Red / Green / Blue: In Colour, you can adjust the RGB values for the selected colour.
- Reset: Resets the colour space to the default values.
Picture
Mode : Standard ►
Cell Light : 7
Contrast : 95
Brightness : 45
Sharpness : 50
Colour : 50
Tint (G/R) : G50/R50
Auto Adjustment
Auto Adjustment
Screen
Picture
Advanced Settings ►
Picture Options
Picture Reset
Continued...
Page 19
English - 19
White Balance
You can adjust the colour temperature for more natural picture colours.
R-Offset / G-Offset / B-Offset / R-Gain / G-Gain / B-Gain • : Changing the adjustment value will refresh the adjusted screen.
Reset • : Resets the default white balance.
Flesh Tone
You can emphasize the pink esh tone in the picture.
Changing the adjustment value will refresh the adjusted screen.
N
Edge Enhancement → Off / On
You can emphasize object boundaries in the picture.
xvYCC → Off / On
Setting the xvYCC mode to on increases detail and colour space when watching movies from an external device (i.e. DVD player).
xvYCC
N is available when the picture mode is set to Movie, and the external input is set to HDMI or Component mode.
This function may not be supported depending on your external device.
N
Picture Options
❑
You can customize the additional picture settings to suit your preference.
In
N PC mode, you can only make changes to the Colour Tone, Size and Screen
Burn Protection from among the items in Picture Options.
Colour Tone → Cool / Normal / Warm1 / Warm2 / Warm3
You can select the most comfortable colour tone to your eyes.
The adjusted values are stored according to the selected
N Picture mode.
Warm1, Warm2,
N or Warm3 is only activated when the picture mode is Movie.
Size → Auto Wide / 16:9 / Wide Zoom / Zoom / 4:3 / Screen Fit
You can select the picture size which best corresponds to your viewing requirements.
Auto Wide • : Sets the picture in Auto Wide format.
16:9 • : Sets the picture to the 16:9 aspect ratio.
Wide Zoom • : Select this menu to view 4:3 aspect ratio pictures over a 16:9 aspect ratio TV by stretching the 4:3 picture
vertically.
Zoom • : Stretches the 16:9 aspect ratio picture vertically.
4:3 • : Sets the picture to the 4:3 aspect ratio.
Screen Fit • : Displays the full native HD signal that cannot be viewed using a normal TV.
Alternately, you can press the
O
change the picture size.
Depending on the input source, the picture size options may vary.
N
The items available may differ depending on the selected mode.
N
In NPC Mode, only 16:9 and 4:3 mode can be adjusted.
Settings can be adjusted and stored for each external device you have connected to an input of the TV.
N
Temporary image retention may occur when viewing a static image on the set for more than two hours.
N
Wide Zoom N: Press the ► button to select Position, then press the ENTERE button.
Press the ▲ or ▼ button to move the screen up / down. Then press the ENTERE button.
Zoom
: Press the ► button to select Position, then press the ENTERE button. Press the ▲ or ▼ button to move the
N
picture up and down. Then press the ENTERE button. Press the ► button to select Size, then press the ENTERE button.
Press the ▲ or ▼ button to magnify or reduce the picture size in the vertical direction. Then press the ENTERE button.
After selecting
N
the ◄ or ►button. Use the ▲, ▼, ◄ or ► button to move the picture.
Reset
N
If you use the
N
function.
Screen Fit in HDMI (1080i / 1080p) or Component (1080i / 1080p) mode: Select Position by pressing
: Press the ◄ or ► button to select Reset, then press the ENTERE button. You can initialize the setting.
Screen Fit function with HDMI 720p input, 1 line will be cut at the top, bottom, left and right as in the overscan
P.SIZE button on the remote control repeatedly to
Screen
Advanced Settings
Picture
Picture Options ►
Picture Reset
Screen Mode → 16:9 / Wide Zoom / Zoom / 4:3
When setting the picture size to Auto Wide in a 16:9 wide TV, you can determine the picture size you want to see the 4:3 WSS
(Wide Screen Service) image or nothing. Each individual European country requires different picture size so this function is
intended for users to select it.
This function is available in
N Auto Wide mode.
This function is not available in
N PC, Component or HDMI mode.
Continued...
Page 20

English - 20
Digital NR → Off / Low / Medium / High / Auto
If the broadcast signal received by your TV is weak, you can activate the Digital Noise Reduction feature to help reduce any static
and ghosting that may appear on the screen.
When the signal is weak, select one of the other options until the best picture is displayed.
N
HDMI Black Level → Normal / Low
You can directly select the black level on the screen to adjust the screen depth.
This function is active only when the external input connects to HDMI (RGB signals).
N
1080 Full HD Motion Demo → Off / On
Samsung' new generation PDP panels deliver stunning Full HD motion clarity when viewing fast action sports, movies, and games.
This function is not available in PC, Game or Media Play mode.
N
Film Mode
You can optimize the picture mode for watching movies.
Off • : Turn the Film Mode function off.
Auto1 • : Improves the picture quality for fast motion scenes.
Auto2 • : Allows a smoother text motion on fast motion scenes.
Film mode is supported in TV, Video, Component(480i / 1080i) and HDMI(1080i).
N
Cinema Smooth • : Reproduces movies as if you are in a Cinema.
An 1080p 24Hz HDMI signal must be input to use the Cinema Smooth function.
N
Blue Only Mode → Off / On
This function is for AV device measurement experts. This function displays the blue signal only by removing the red and green
signals from the video signal so as to provide a Blue Filter effect that is used to adjust the Colour and Tint of video equipment such
as DVD players, Home Theaters, etc.
Blue Only Mode
N is available when the picture mode is set to Movie or Standard.
Screen Burn Protection
To reduce the possibility of screen burn, this unit is equipped with screen burn prevention technology. This technology enables you
to set picture movement up/down (Vertical) and side to side (Horizontal). The Time setting allows you to program the time between
movement of the picture in minutes.
Pixel Shift • : Using this function, you can minutely move pixels on the PDP in horizontal or vertical direction to minimize after
image on the screen.
Optimum condition for pixel shift
N
Item TV/Ext/AV/Component/HDMI/PC
Horizontal 0~4 2
Vertical 0~4 4
Time (minute) 1~4 min 2 min
The Pixel Shift value may differ depending on the monitor size (inches) and mode.
N
This function is not available in the NScreen Fit mode.
Scrolling • : This function helps remove after images on the screen by moving all the pixels on the PDP according to a pattern
Use this function when there are remaining after images or symbols on the screen especially when you displayed a still image
on the screen for a long time.
Side Grey • : When you watch TV with the screen ratio of 4:3, the screen is prevented from any damage by adjusting the white
balance on both extreme left and right sides.
- Dark: When you set the screen ratio to 4:3, it darkens the left and right sides.
- Light: When you set the screen ratio to 4:3, it brightens the left and right sides.
Picture Reset → ❑Reset Picture Mode / Cancel
Resets all picture settings to the default values.
Select a picture mode to be reset. The reset is performed for each picture mode.
N
Advanced Settings
Picture
Picture Options
Picture
Picture Reset ►
Page 21

English - 21
Setting up the TV with your PC
Preset: Press the N SOURCE button to select PC mode.
Auto Adjustment
❑
Auto Adjustment allows the PC screen of set to self-adjust to the incoming PC video
signal. The values of ne, coarse and position are adjusted automatically.
This function does not work in DVI-HDMI mode.
N
Press the TTOOLS button to display Tools menu.
Colour : 55
Tint (G/R) : G50/R50
Picture
Auto Adjustment ►
Screen
Advanced Settings
Picture Options
Picture Reset
You can also set the adjustment by selecting Tools → Auto Adjustment.
Screen
❑
The purpose of picture quality adjustment is to remove or reduce picture noise. If the noise is not removed by Fine-tuning alone,
then adjust the frequency as best as possible (Coarse) and Fine-tune again. After the noise has been reduced, readjust the picture
so that it is aligned on the center of screen.
Coarse
Adjusts the frequency when vertical noise appears on the screen.
Fine
Adjusts the screen to be clearer.
PC Position
Adjust the PC’s screen positioning if it does not t the TV screen. Press the ▲ or ▼ button to adjusting the Vertical-Position.
Press the ◄ or ► button to adjust the Horizontal-Position.
Image Reset
You can replace all image settings with the factory default values.
Page 22
English - 22
PC Display
Setting Up Your PC Software (Based on Windows XP)
❑
The Windows display-settings for a typical computer are shown below. The actual
screens on your PC will probably be different, depending upon your particular version
of Windows and your particular video card. However, even if your actual screens
look different, the same basic set-up information will apply in almost all cases. (If not,
contact your computer manufacturer or Samsung Dealer.)
1. First, click on ‘Control Panel’ on the Windows start menu.
2. When the control panel window appears, click on ‘Appearance and Themes’ and a
display dialog-box will appear.
3. When the control panel window appears, click on ‘Display’ and a display dialog-box
will appear.
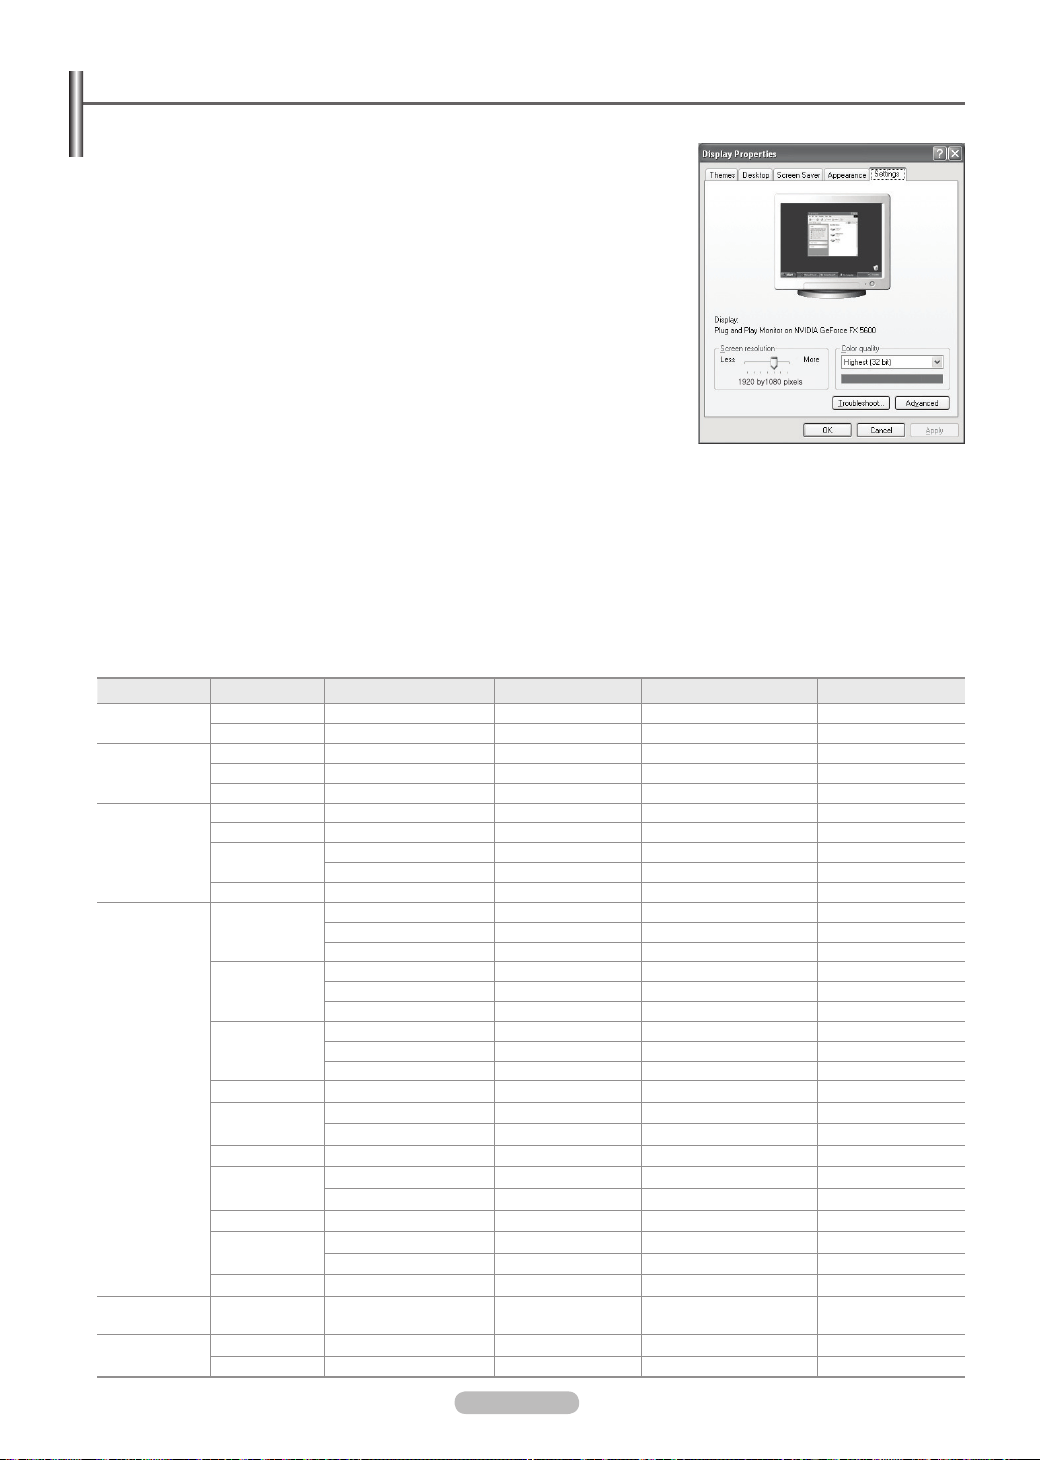
4. Navigate to the ‘Settings’ tab on the display dialog-box.
The correct size setting (resolution)
Optimum: 1920 X 1080 pixels
If a vertical-frequency option exists on your display settings dialog box, the correct
value is ‘60’ or ‘60 Hz’. Otherwise, just click ‘OK’ and exit the dialog box.
Display Modes
❑
Both screen position and size will vary depending on the type of PC monitor and its resolution.
The resolutions in the table are recommended.
When using an HDMI/DVI cable connection, you must use the HDMI IN 2(DVI) jack.
N
The interlace mode is not supported.
N
The set might operate abnormally if a non-standard video format is selected.
N
Separate and Composite modes are supported. SOG is not supported.
N
Too long or low quality VGA cable can cause picture noise at high resolution modes (1920x1080).
N
D-Sub and HDMI/DVI Input
Mode Resolution Horizontal Frequency (kHz) Vertical Frequency (Hz) Pixel Clock Frequency (MHz) Sync Polarity (H/V)
IBM
MAC
VESA CVT
VESA DMT
VESA DMT /
DTV CEA
VESA GTF
640 x 350 31.469 70.086 25.175 + / -
720 x 400 31.469 70.087 28.322 - / +
640 x 480 35.000 66.667 30.240 - / -
832 x 624 49.726 74.551 57.284 - / -
1152 x 870 68.681 75.062 100.000 - / +
720 x 576 35.910 59.950 32.750 - / +
1152 x 864 53.783 59.959 81.750 - / +
1280 x 720
1280 x 960 75.231 74.857 130.000 - / +
640 x 480
800 x 600
1024 x 768
1152 x 864 67.500 75.000 108.000
1280 x 800
1280 x 960 60.000 60.000 108.000
1280 x 1024
1360 x 768 47.712 60.015 85.500
1440 x 900
1680 x 1050 65.290 59.954 146.250
1920 x 1080p 67.500 60.000 148.500
1280 x 720 52.500 70.000 89.040
1280 x 1024 74.620
44.772 59.855 74.500 - / +
56.456 74.777 95.750 - / +
31.469 59.940 25.175 - / -
37.861 72.809 31.500 - / -
37.500 75.000 31.500 - / -
37.879 60.317 40.000 + / +
48.077 72.188 50.000 + / +
46.875 75.000 49.500 + / +
48.363 60.004 65.000 - / -
56.476 70.069 75.000 - / -
60.023 75.029 78.750 + / +
49.702 59.810 83.500
62.795 74.934 106.500
63.981 60.020 108.000
79.976 75.025 135.000
55.935 59.887 106.500
70.635 74.984 136.750
70.000
128.943
+ / +
- / +
- / +
+ / +
+ / +
+ / +
+ / +
- / +
- / +
- / +
+ / +
- / +
- / -
Page 23
English - 23
Sound Control
Changing the Sound Setting
Mode
❑
You can select the type of special sound effect to be used when watching a given
broadcast.
Standard / Music / Movie / Clear Voice / Custom
Press the T TOOLS button to display Tools menu.
You can also congure the sound mode by selecting Tools → Sound Mode.
Equalizer
❑
The sound settings can be adjusted to suit your personal preferences.
Mode : You can select a sound mode to suit your personal preferences.
: Controls the balance between the right and left speakers.
Balance
100Hz / 300Hz / 1KHz / 3KHz / 10KHz
(Bandwidth Adjustment): Adjusts the level of different bandwidth frequencies
Reset
: Resets the equalizer settings to the default values.
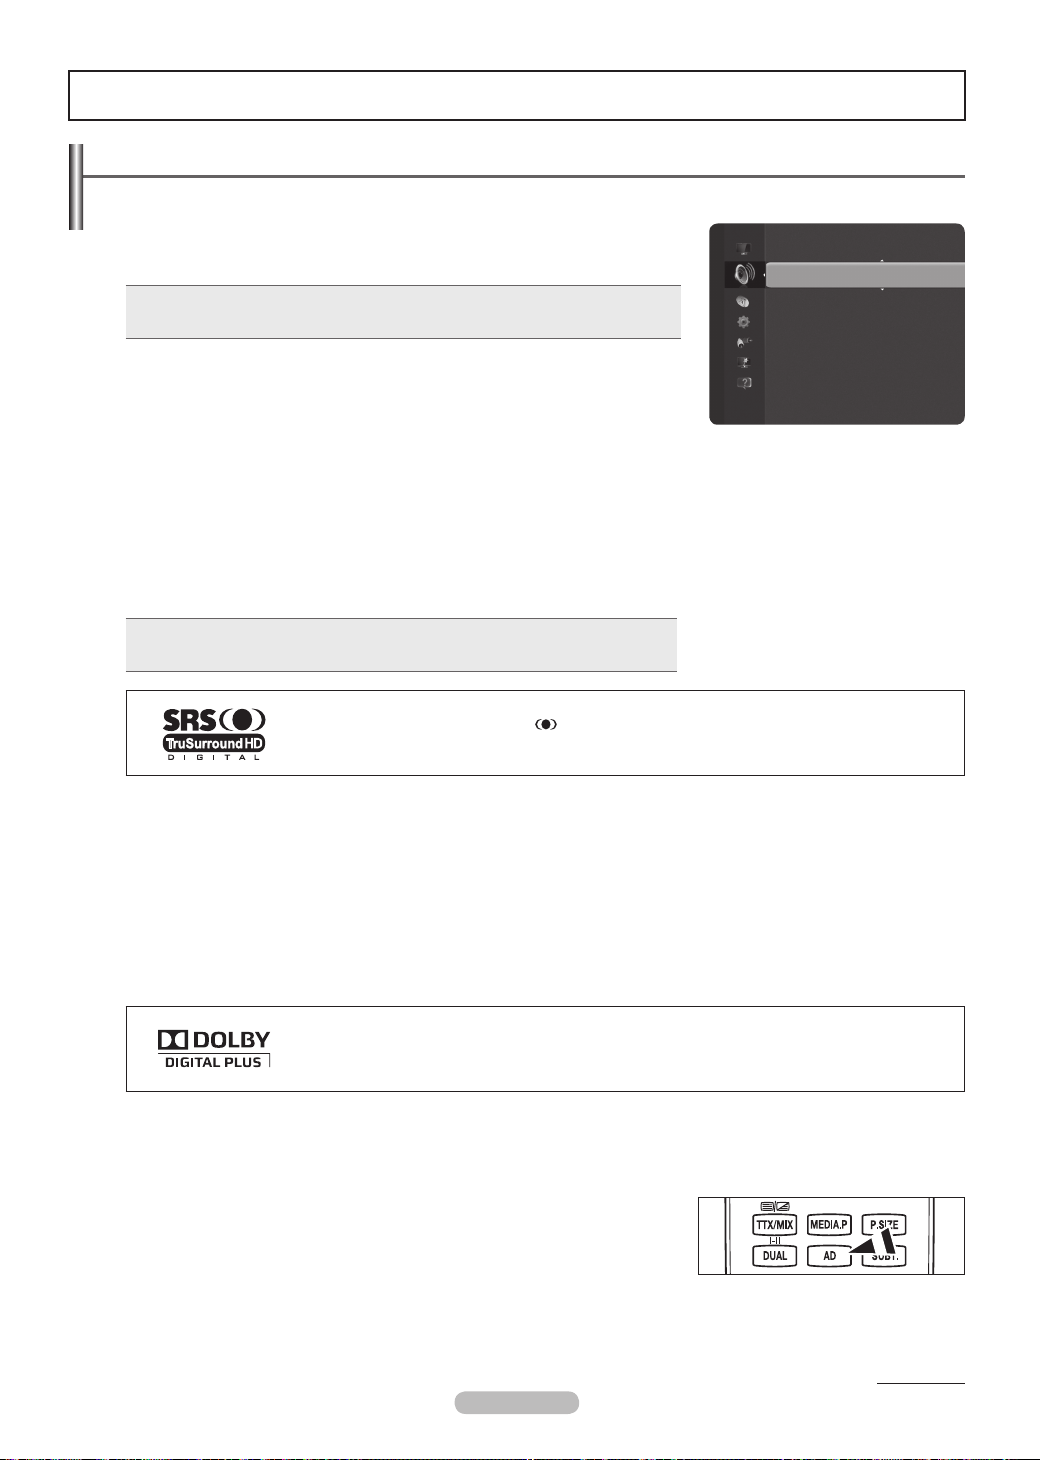
SRS TruSurround HD → Off / On
❑
SRS TruSurround HD is the combined technology of TruSurround and FOCUS, TruBass.
SRS TruSurround HD is down mixing technology that makes the Surround Sound effect of virtual 5.1 channel via two speakers.
This function provide not only rich deep bass at a low-pitched sound but also improve the resolution at a high-pitched sound.
Press the TTOOLS button to display Tools menu.
You can also set the SRS TruSurround HD by selecting Tools → SRS TS HD.
Sound
Mode : Custom
Equalizer
SRS TruSurround HD : Off
Audio Language : ---Audio Format : ----
Audio Description
Auto Volume : Off
Speaker Select : TV Speaker
►
TruSurround HD, SRS and the symbol are trademarks of SRS Labs, Inc.
TruSurround HD technology is incorporated under license from SRS Labs, Inc.
N SRS TruSurround HD (Off/On).
If the sound is abnormal while TV is playing music, please adjust the equalizer and
Audio Language ❑ (only digital channel)
You can change the default value for audio languages. Displays the language information for the incoming stream.
You can only select the language among the actual languages being broadcast.
N
Audio Format → MPEG / Dolby Digital ❑ (only digital channel)
When sound is emitted from both the main speaker and the audio receiver, a sound echo may occur due to the decoding speed
difference between the main speaker and the audio receiver. In this case, use the TV Speaker function.
You can only select the language among the actual languages being broadcast.
N
Manufactured under license from Dolby Laboratories.
Dolby and the double-D symbol are trademarks of Dolby Laboratories.
Audio Description ❑ (only digital channel)
This is an auxiliary audio function that provides an additional audio track for visually challenged persons. This function handles the
Audio Stream for the AD (Audio Description), when it is sent along with the Main audio from the broadcaster. Users can turn the
Audio Description On or Off and control the volume.
You can select these options simply by pressing the
O AD button on the remote control.
Audio Description → Off / On
Turn the audio description function on or off.
Volume
You can adjust the audio description volume.
Volume
N is active when Audio Description is set to On.
Continued...
Page 24

English - 24
Auto Volume → Off / On
❑
Each broadcasting station has its own signal conditions, and so it is not easy to adjust the volume every time the channel is
changed. This feature lets you automatically adjust the volume of the desired channel by lowering the sound output when the
modulation signal is high or by raising the sound output when the modulation signal is low.
Speaker Select → External Speaker / TV Speaker
❑
If you want to hear the sound through separate speakers, cancel the internal amplier.
The
N – +, M MUTE buttons do not operate when the Speaker Select is set to External Speaker.
If you select
N External Speaker in the Speaker Select menu, the sound settings will be limited.
TV's Internal Speakers
TV / Ext. / AV / Component / PC / HDMI
Audio Out (Optical, L / R Out) to Sound System
TV / Ext. / AV / Component / PC / HDMI
TV Speaker Speaker Output Sound Output
External Speaker Mute Sound Output
Video No Signal Mute Mute
Sound Reset
❑
Reset All / Reset Sound Mode / Cancel :
factory defaults.
You can restore the Sound settings to the
Auto Volume : Off
Speaker Select : TV Speaker
Sound
Sound Reset ►
Selecting the Sound Mode
When you set to Dual l ll, the current sound mode is displayed on the screen.
Type of broadcast
Regular broadcast
(Standard audio)
NICAM
Stereo
A2
Stereo
Regular + NICAM Mono
NICAM-Stereo
NICAM Dual-I/II
Regular broadcast
(Standard audio)
Bilingual or DUAL-I/II
Stereo Stereo
If the stereo signal is weak and an automatic switching occurs, then switch to the mono. N
This function is only activated in stereo sound signal. It is deactivated in mono sound signal. N
This function is only available in N TV mode.
You can select these options simply by pressing the
O DUAL button on the remote control.
NICAM
NICAM
Stereo
NICAM
Dual-1
Dual I Dual II
On-screen indication
Mono (Normal use)
NICAM
Dual-2
Mono (Normal use)
Mono
(Normal)
Mono
(Normal)
Mono
(Normal)
Mono
(Forced mono)
Page 25

English - 25
Function Description
Setting the Time
Clock
❑
Setting the clock is necessary in order to use the various timer features of the TV.
The current time will appear every time you press the
N INFO button.
If you disconnect the power cord, you have to set the clock again.
N
Clock Mode
You can set up the current time manually or automatically.
Auto • : Set the current time automatically using the time from the digital broadcast.
Manual • : Set the current time to a manually specied time.
Plug & Play
Setup
Time ►
Language
Subtitle
Digital Text : Enable
Security
Network
General
Clock Set
You can set the current time manually.
Set up this item when you have set
N Clock Mode to Manual.
You can set the
N Day, Month, Year, Hour, Minute directly by pressing the number
buttons on the remote control.
Sleep Timer
❑
Clock : -- : -- ►
Sleep Timer : Off
Timer 1 : Inactivated
Timer 2 : Inactivated
Timer 3 : Inactivated
Time
The sleep timer automatically shuts off the TV after a preset time.
(30, 60, 90, 120, 150 and 180 minutes).
The TV automatically switches to standby mode when the timer reaches 0.
N
U
Move E Enter R Return
To cancel the N Sleep Timer function, select Off.
Press the TTOOLS button to display Tools menu.
You can also set the sleep timer by selecting Tools → Sleep Timer.
Timer 1 / Timer 2 / Timer 3
❑
You can set the TV to turn on or off at a desired time.
On Time :
Sets the time for the TV to turn on. (To activate timer with the setting you’ve chosen, set to Activate.)
Off Time : Sets the time for the TV to turn off.
: Set the required volume level.
Volume
Source
: Selects TV or USB device.
When you select the TV, you can set the Antenna and Channel. N
Antenna - : You can select either DTV or ATV when the TV turns on automatically.
Channel - : Select the desired channel.
When you select the USB, you can set the Contents.
N
Contents - : Selects the desired contents on the USB.
Repeat : Select Once, Everyday, Mon~Fri, Mon~Sat, Sat~Sun or Manual.
When N Manual is selected, press the ► button to select the desired day of the week. Press the ENTERE button over the desired
day and the (c) mark will appear.
The whole folder on the USB are supports English 64 character.
N
You must set the clock rst. N
You can set the hour, minute and programme by pressing the number buttons on the remote control. N
Auto Power Off N
When you set the timer On, the television will eventually turn off, if no controls are operated for 3 hours after the TV was turned on
by the timer. This function is only available in timer On mode and prevents overheating, which may occur if a TV is on for too long
time.
Page 26
English - 26
Configuring the Setup Menu
Language
❑
You can set the menu language.
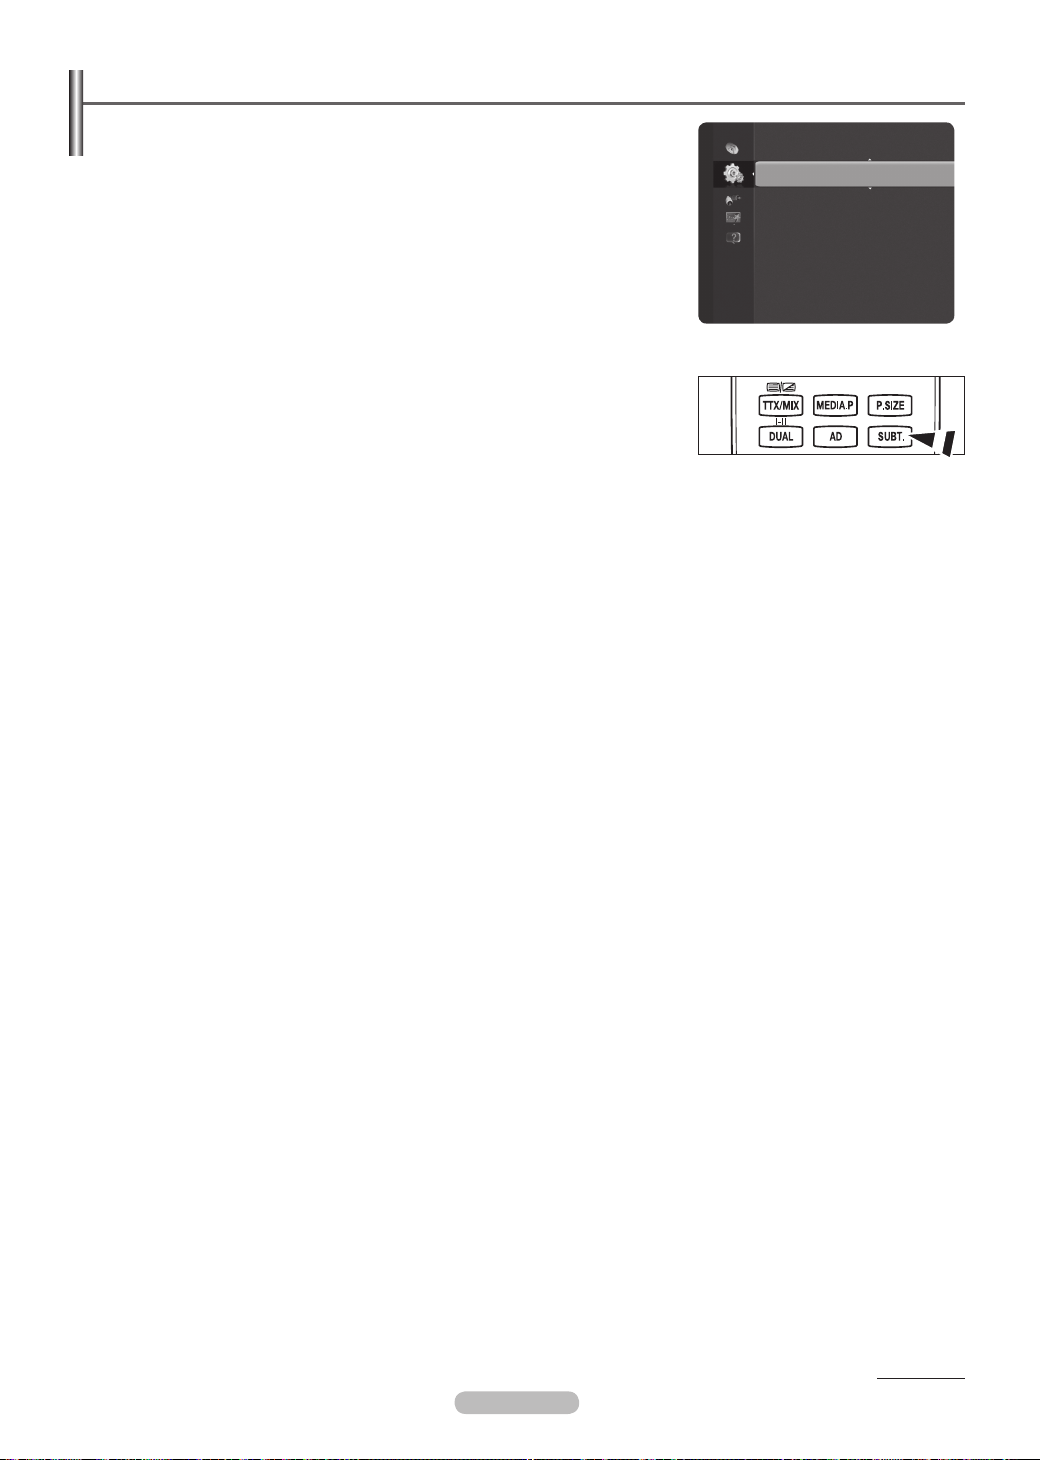
Subtitle
❑
You can activate and deactivate the subtitles. Use this menu to set the Subtitle Mode.
Normal under the menu is the basic subtitle and Hard of hearing is the subtitle for a
hearing-impaired person.
Subtitle → Off / On • : Switches subtitles off or on.
Mode → Normal / Hard of hearing • : Sets the subtitle mode.
Subtitle Language • : Set the subtitle language.
If the programme you are watching does not support the
N Hard of hearing
function, Normal automatically activates even though Hard of hearing mode is
selected.
English is the default in cases where the selected language is unavailable in the
N
broadcast.
You can select these options simply by pressing the
O SUBT. button on the remote
control.
Digital Text → Disable / Enable (UK Only)
❑
If the programme is broadcast with digital text, this feature is enabled.
MHEG (Multimedia and Hypermedia Information Coding Experts Group)
N
An International standard for data encoding systems used in multimedia and hypermedia. This is at a higher level than the
MPEG system which includes
data-linking hypermedia such as still images, character service, animation, graphic and video les as well as multimedia data.
MHEG is user runtime interaction technology and is being applied to various elds including VOD (Video-On-Demand), ITV
(Interactive TV), EC (Electronic Commerce), tele-education,
tele-conferencing, digital libraries and network games.
Security
❑
Before the setup screen appears, the PIN number input screen appears. Enter your 4 digit PIN number.
The default PIN number of a new TV set is ‘0-0-0-0’. You can change the PIN by selecting Change PIN from the menu.
Child Lock → Off / On
This feature allows you to prevent unauthorized users, such as children, from watching unsuitable programmes by muting out video
and audio.
Before the setup screen appears, the PIN number input screen appears. Enter your 4 digit PIN number.
N
The default PIN number of a new TV set is N ‘0-0-0-0’. You can change the PIN by selecting Change PIN from the menu.
You can lock some channels in Channel List.
N (refer to page 16)
Child Lock
N is available only in TV mode.
Plug & Play
Time
Setup
Language ►
Subtitle
Digital Text : Enable
Security
Network
General
Common Interface
Parental Lock
This feature allows you to prevent unauthorized users, such as children, from watching unsuitable programmes by a 4-digit PIN
(Personal Identication Number) code that is dened by the user.
The default PIN number of a new TV set is ‘0-0-0-0’. You can change the PIN by selecting
N Change PIN from the menu.
When the parental ratings are set, the
N
Allow
N All: Press to unlock all TV ratings.
3~18 : Press to prevent children under 3~18 from watching certain programs.
Change PIN
You can change your personal ID number that is required to set up the TV.
Before the setup screen appears, the PIN number input screen appears. Enter your 4 digit PIN number.
N
The default PIN number of a new TV set is N ‘0-0-0-0’.
If you forget the PIN code, press the remote control buttons in the following sequence, which resets the PIN to
N ‘0-0-0-0’:
POWER (Off), MMUTE, 8, 2, 4, POWER (On).
\
symbol is displayed.
Continued...
Page 27

English - 27
General
❑
Energy Saving → Off / Low / Medium / High / Picture Off
This feature adjusts the brightness of the TV in order to reduce power consumption. When watching TV at night, set the
Energy Saving mode option to High to reduce eye fatigue as well as power consumption.
If you select Picture Off, the screen is turned off and you can only hear the sound. Press any button to get out of Picture Off.
In the Tools menu,
N Picture Off function is not supported.
Press the TTOOLS button to display Tools menu.
You can also set the Energy Saving option by selecting Tools → Energy Saving.
Game Mode → Off / On
When connecting to a game console such as PlayStationTM or XboxTM, you can enjoy a more realistic gaming experience by
selecting the game menu.
When the Game Mode is On •
Picture Mode - is automatically changed to Standard and users cannot change the mode.
Sound Mode - is automatically changed to Custom and users cannot change the mode. Adjust the sound using the equalizer.
The - Reset in the Sound menu is activated. Reset function initializes the Equalizer settings to the factory default setting.
Game Mode
N is not available in regular TV mode or Game Mode set to Off.
If the picture is poor when external device is connected to TV, check if
N Game Mode is On.
If you display the TV menu in
N Game mode, the screen shakes slightly.
The mark (
N ) appears on the screen which means that Game Mode is on with the selected source.
This function supports only game function.
N
Game mode N is not available in PC mode.
Menu Transparency
You can set the transparency of the on-screen menu.
Bright • : Sets the on-screen menu to normal.
Dark • : changes the on-screen menu to opaque.
Melody → Off / Low / Medium / High
The TV power on / off melody sound can be adjusted.
The Melody does not play
N
When no sound is output from the TV because the - MUTE button has been pressed.
When no sound is output from the TV because the - –
When the TV is turned off by - Sleep Timer function.
Light Effect → Off / In Standby / Watching TV / Always
You can turn on/off the blue LED on the front of TV according to the situation. Use it for saving power or when the LED dazzles your
eyes.
Off • : The blue LED is always off.
In Standby • : The blue LED lights while in Standby mode and it turns off when your TV is turned on.
Watching TV • : The blue LED lights when watching TV and it turns off when your TV is turned off.
Always • : The blue LED always lights.
Set the Light Effect to Off to reduce the power consumption.
N
Common Interface
❑
Installing the CI Card •
(Volume) button has been pressed.
Continued...
Page 28
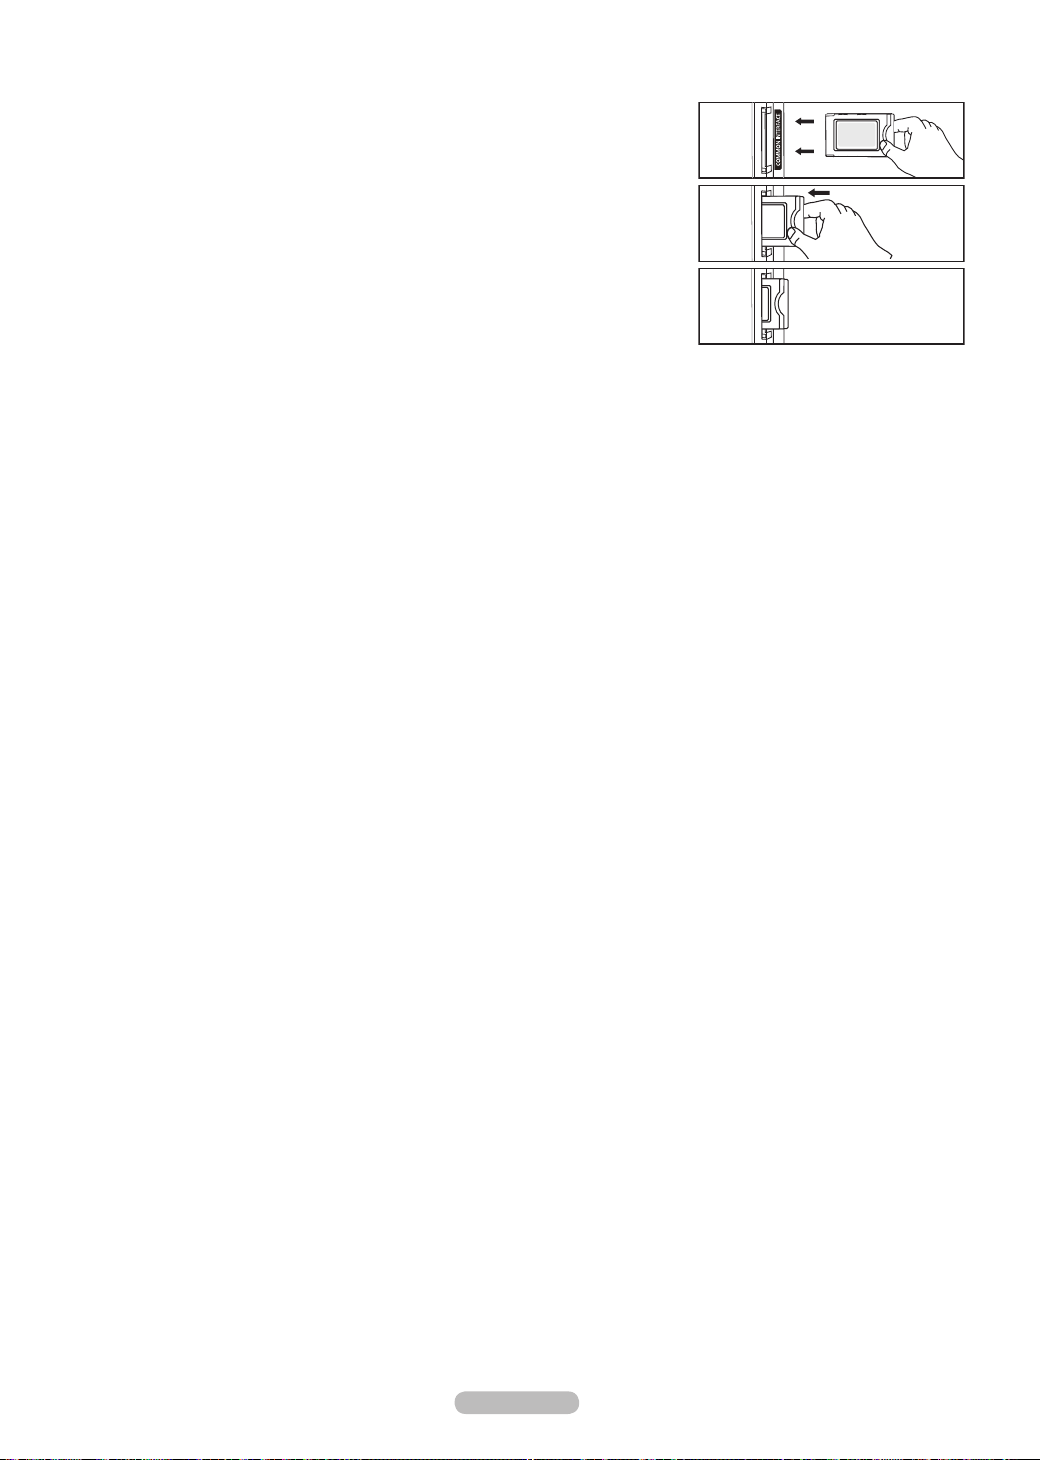
English - 28
1. Purchase the CI CAM module by visiting your nearest dealer or by phone.
2. Insert the CI CARD into the CAM in the direction of the arrow until it ts.
3. Insert the CAM with the CI CARD installed into the common interface slot.
Insert the CAM in the direction of the arrow, right up to the end so that it is parallel
N
with the slot.
4. Check if you can see a picture on a scrambled signal channel.
CI Menu •
This enables the user to select from the CAM-provided menu.
Select the CI Menu based on the menu PC Card.
Application Info. •
This contains information on CAM inserted in the CI slot and displays it.
The Application Info inserting is about the CI CARD. You can install the CAM anytime
whether the TV is ON or OFF.
CAM is not supported in some countries and regions,check with your authorized dealer.
N
Page 29
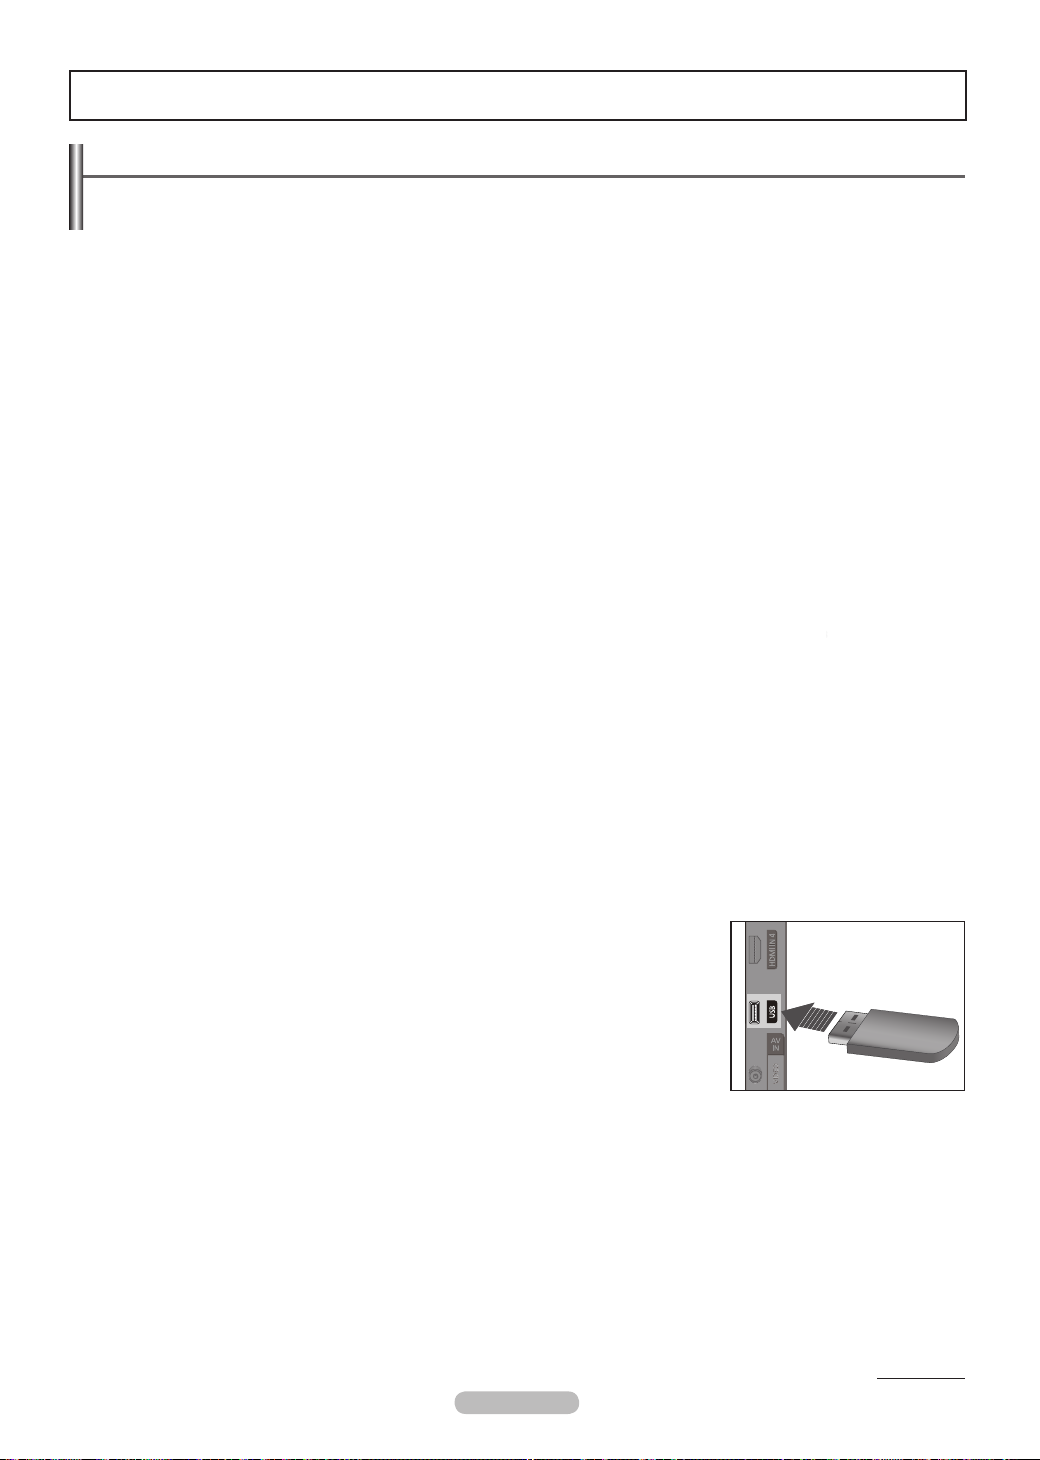
English - 29
Support / Input
Supported Program
Self Diagnosis
❑
Picture Test
If you think you have a picture problem, perform the picture test. Check the Colour pattern on the screen to see if the problem still
exists.
Does the problem still exist with this test photo?
N appears on the screen.
If the test pattern does not appear or there is noise in the test pattern, select Yes.
If the test pattern is properly displayed, select No.
Yes • : There may be a problem with the TV. Contact Samsung’s Call Center for assistance.
No • : There may be a problem with your external equipment. Please check your connections. If the problem still persists, refer
to the external device’s user manual.
Sound Test
❑
If you think you have a sound problem, please perform the sound test.
You can check the sound by playing a built-in melody sound through the TV.
Does the problem still exist with this sound test?
N appears on the screen.
If during the sound test you can hear sound only from one speaker or not at all, select Yes.If you can hear sound from the
speakers, select No.
Yes • : There may be a problem with the TV. Contact Samsung’s Call Center for assistance.
No • : There may be a problem with your external equipment. Please check your connections. If the problem still persists, refer
to the external device’s user manual.
If you hear
N no sound from the TV’s speakers, before performing the sound test, make sure Speaker Select is set to TV speaker
in the Sound menu.
The melody will be heard during the test even if
N Speaker Select is set to External Speaker or the sound is muted by pressing
the M MUTE button.
Signal Information (Digital channels only)
You can adjust your antenna to improve the reception of available digital channels.
If the signal strength meter indicates that the signal is weak, physically adjust your antenna to increase the signal strength.
N
Continue to adjust the antenna until you nd the best position with the strongest signal.
Software Upgrade
❑
To keep your product up-to-date with new Digital Television features then software upgrades are periodically broadcast as part of
the normal Television signal. It will automatically detect these signals and display the software upgrade banner. You are given the
option to install the upgrade.
By USB
Insert a USB drive containing the rmware upgrade into TV. Please be careful to not
disconnect the power or remove the USB drive while upgrades are being applied. The
TV will turn off and turn on automatically after completing the rmware upgrade. Please
check the rmware version after the upgrades are complete. When software is upgraded,
video and audio settings you have made will return to their default (factory) settings.
We recommend you write down your settings so that you can easily reset them after the
upgrade.
By Channel
Upgrades the software using the broadcasting signal.
If the function is selected during the software transmission period, this function searches for available software and downloads
N
the software.
The time required to download the software is determined by the signal status.
N
Standby Mode Upgrade
To continue software upgrade with master power on, Select On by pressing the ▲ or ▼ button. 45 minutes after entering standby
mode, a manual upgrade is automatically conducted. Since the power of the unit is turned on internally, the screen may be on
slightly for the product. This phenomenon may continue for more than 1 hour until the software upgrade is completed.
TV Side Panel
USB Drive
Continued...
Page 30
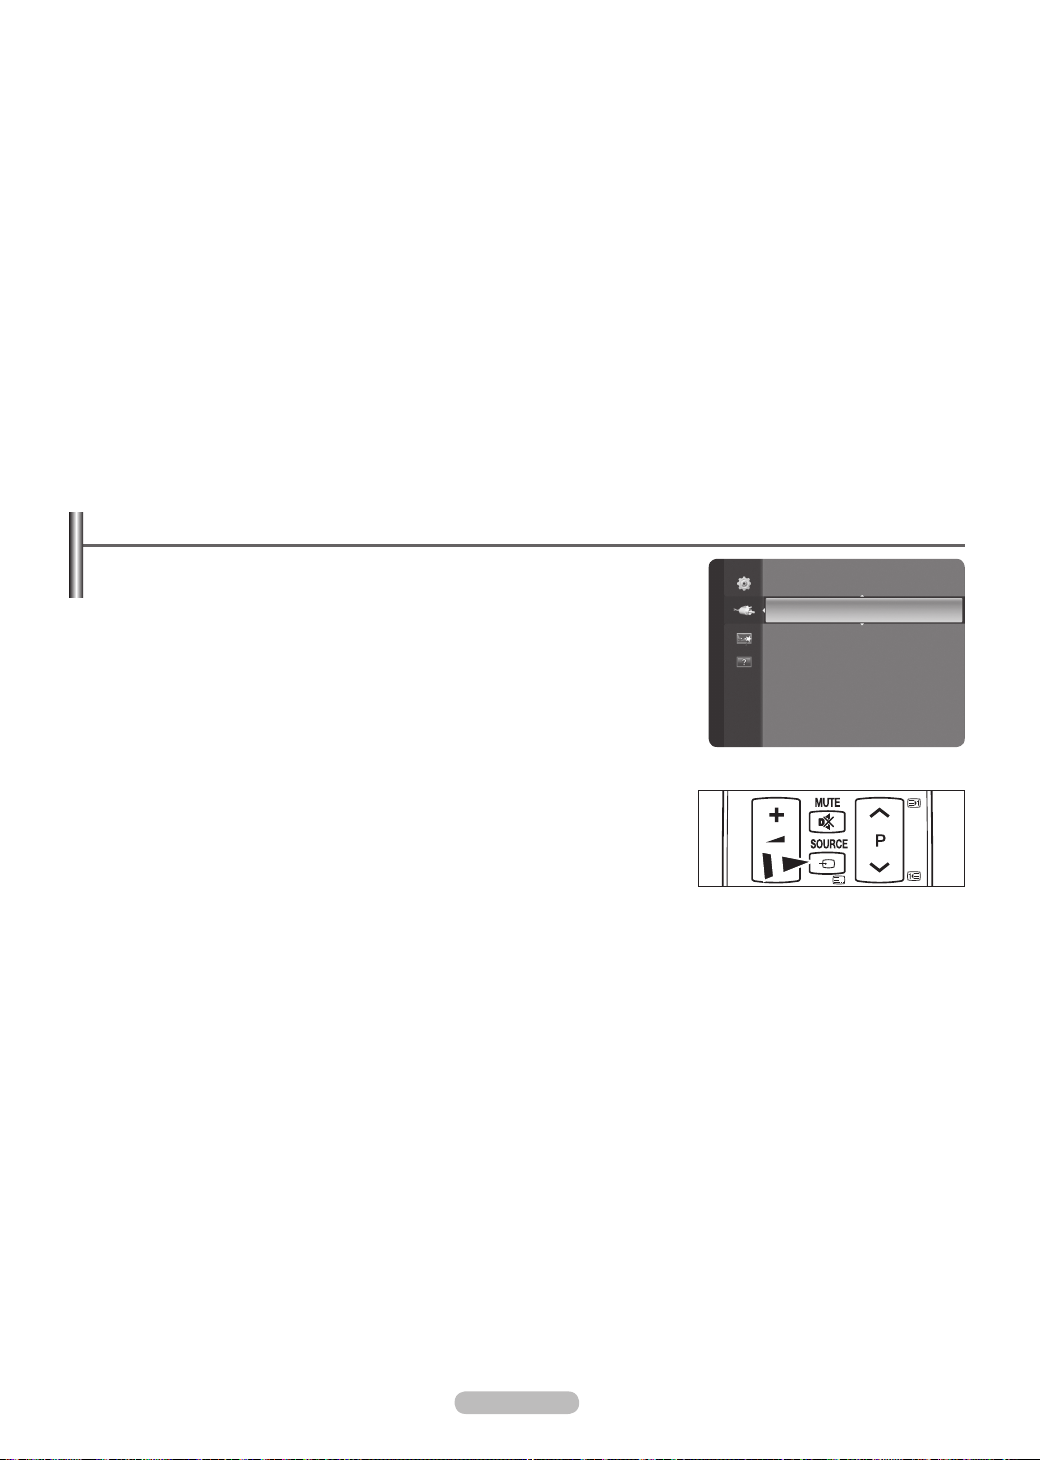
English - 30
Alternative Software
Replace the current software with the alternative.
If software was changed, existing software is displayed.
N
You can change current software to alternative software by Alternative Software. N
HD Connection Guide
❑
The brief instruction on How to get the best performance from your new HDTV is displayed. We offer the connection method for
HD devices.
You can move the previous or next page by pressing the ◄ or ► button.
N
Contact Samsung
❑
You can know the Samsung Call center, website and information for product.
Source List / Edit Name
Source List
❑
Use to select TV or other external input sources such as DVD players or Cable Box /
Satellite receivers (Set-Top Box) connected to the TV. Use to select the input source of
your choice.
TV, Ext.1, Ext.2, AV, PC, Component, HDMI1, HDMI2/DVI, HDMI3, HDMI4, USB.
You can choose only those external devices that are connected to the TV. In the N
Source List, connected inputs will be highlighted and sorted to the top. Inputs that
are not connected will be sorted to the bottom.
Using the Colour buttons on the remote with the Source list
N
- Red (Refresh): Refreshes the connecting external devices.
- T (Tools): Displays the Edit Name and Information menus.
Press the
O SOURCE button on the remote control to view an external signal
source.
Input
Source List
Edit Name
Edit Name
❑
You can name the device connected to the input jacks to make your input source selection easier.
VCR / DVD / Cable STB / Satellite STB / PVR STB / AV Receiver / Game / Camcorder / PC / DVI Devices / TV / IPTV /
Blu-ray / HD DVD / DMA
When a PC with a resolution of 1920 x 1080@60Hz is connected to the N HDMI IN 2(DVI) port, you should set the HDMI2 / DVI
mode to PC in the Edit Name of the Input mode.
When connecting an HDMI/DVI cable to the
N HDMI IN 2(DVI) port, you should set the HDMI2/DVI mode to DVI Devices in the
Edit Name of the Input mode. In this case, a separate sound connection is required.
Page 31

English - 31
Media Play
Connecting a USB Device
1. Press the POWER button to turn the TV on.
2. Connect a USB device containing photo, music and movie les to the USB jack on the side
of the TV.
Media Play only supports USB Mass Storage Class devices (MSC). MSC is a Mass
N
Storage Class Bulk-Only Transport device. ( Examples of MSC are Thumb drives, Flash
Card Readers and USB HDD (USB HUB are not supported.).)
MTP (Media Transfer Protocol) is not supported.
N
The le system only supports FAT16/32 (The NTFS le system is not supported). N
Certain types of USB Digital camera and audio devices may not be compatible with this TV. N
Please connect directly to the USB port of your TV. If you are using a separate cable connection, there may be a USB compatibility N
problem.
Before connecting your device to the TV, please back up your les to prevent them from damage or loss of data. SAMSUNG is not
N
responsible for any data le damage or data loss.
Do not disconnect the USB device while it is loading.
N
MSC supports MP3 and JPEG les, while a PTP device supports JPEG les only. N
The sequential JPEG format is supported. N
The higher the resolution of the image, the longer it takes to display on the screen. N
The maximum supported JPEG resolution is 15360X8640 pixels. N
For unsupported or corrupted les, the N Not Supported File Format message is displayed.
If the number of photo les exceeds 4000 (or the number of music les exceeds 3000), any les exceeding the 4000 limit may not
N
be displayed in the Photo List (or Music List).
MP3 les with DRM that have been downloaded from a non-free site cannot be played.
N
DRM(Digital Rights Management) prevents illegal uses of digital media for copyright protection. N
When moving to a photo, loading may take a few seconds. At this point, the loading icon will appear at the screen. N
TV Side Panel
USB Drive
Page 32

English - 32
Using the Media Play Function
This function enables you to view and listen to photo, music and movie files saved on a USB Mass Storage Class (MSC) device.
It might not work properly with unlicensed multimedia files.
Entering the Media Play Menu
❑
1. Press the MENU button. Press the ▲ or ▼ button to select Application, then
press the ENTERE button.
2. Press the ▲ or ▼ button to select Media Play (USB), then press the ENTER
button.
The
Media Play menu is displayed.
N
Press the
O SOURCE button on the remote control repeatedly to select USB,
then press the ENTERE button.
Press the
O MEDIA.P button on the remote control to display the Media Play
menu.
3. Press the Red button, then press the ▲ or ▼ button to select the corresponding
USB Memory Device (i.e. if connected through a hub). Press the ENTER
button.
This function differs depending on the USB Memory Device/ connected to TV.
N
The selected USB device name appears at the bottom left of the screen.
N
4. Press the ◄ or ► button to select an icon (Photo, Music, Setup), then press
the ENTERE button.
To exit
Media Play mode, press the MEDIA.P button on the remote control.
N
Removing a USB Memory Device Safely
❑
You can remove the device safely from the TV.
1. Press the TOOLS button in the Media Play le list screen, or while a Slide Show
or music le is being played.
2. Press the ▲ or ▼ button to select Remove Safely, then press the ENTER
button.
3. Remove the USB device from the TV.
Screen Display
❑
E
E
E
Media Play
PHOTO
Photo Music Setup
USB Device
IMG_0345.
IMG_0346.
IMG_0349.
JPG
JPG
JPG
../folder name/
USB Device
USB : USB name
IMG_0335.JPG
▶
1
▶
1
Select
148.48MB/995.00MB Free
R
4/6
Slide Show
Play Current Group
Information
Remove Safely
T
Tools R Upper Folder
Return
2
IMG_03496.
IMG_03496.
JPG
JPG
../folder name/
3
USB Device
1
▶
5
▶
▶
1
▶
▶
1
▶
IMG_0335.JPG
1/67
◀
4
Select
IMG_03496.
IMG_0343.
JPG
1File(s) Selected
T
T o ols R Upper Folder
JPG
1. Currently selected le: The currently selected le is highlighted.
2. View Groups: The sorting group including the currently selected photo is highlighted.
One group involves the nine photos.
N
3. Current Device: Shows the currently selected device name.
4. Item Selection Information: Shows the number of photos that are selected by pressing the Yellow button.
5. Help Items
Red ( • Device) button: Selects a connected device.
Yellow ( • Select) button: Selects le from the le list. Selected les are marked with a symbol c. Press the yellow button again
to cancel a le selection.
• (Tools) button: Displays the option menus. (The tools menu changes according to the current status.)
R • (Return) button: Return to previous menu.
Continued...
Page 33

English - 33
Using the Remote Control Button in Media Play Menu
❑
Button Operations
▲/▼/◄/► Move the cursor and select an item.
ENTER
E
Select the currently selected item.
Play or pause the files while playing the slide show or music files.
Play or pause the Slide Show or Music file.
RETURN
TOOLS
Return to the previous menu.
Run various functions from the Photo, Music and Movie menus.
Stop the current slide show, Music or Movie file.
Jump to previous group/Jump to next group.
INFO
MEDIA.P
/
P
EXIT
Show file information.
Exit Media Play mode.
Stop Media Play mode and Returns to TV mode.
Stop the current function and return to the Media Play main menu.
Using the Photo List
1. Press the MEDIA.P button on the remote control to display the Media Play menu.
2. Press the ◄ or ► button to select Photo, then press the ENTER
3. Press the
(Play)/
ENTER
E
button to start the Slide Show in the order selected
by the user.
The information of a photo le is automatically set.
N
PTP does not support folder sort mode. N
Photo List Tools Menu
❑
Slide Show
You can play a Slide Show using the photo les on the USB memory device.
Play Current Group
You can play a Slide Show using only the photo les in the currently selected sorting
group.
Information
The photo le information including the name, the size, the resolution, the date
modied and the path is displayed.
You can view the information of photo les during a Slide Show using the same
N
procedures.
Alternatively, select a photo from the photo list and press the
O INFO button to
view the information.
Remove Safely
You can remove the device safely from the TV.
E
button.
IMG_03496.
IMG_03496.
JPG
JPG
../folder name/
USB Device
IMG_0345.
IMG_0346.
JPG
JPG
../folder name/
USB Device
IMG_0349.
▶
JPG
▶
▶
▶
IMG_0335.JPG
IMG_0335.JPG
▶
1
▶
1
1/67
◀
IMG_03496.
IMG_0343.
JPG
JPG
Select
T
T o ols R Return
▶
1
▶
1
4/6
Slide Show
Play Current Group
Information
Remove Safely
Select
T
Tools R Return
Page 34

English - 34
Viewing a Photo or Slide Show
Viewing a Slide Show
❑
1. Press the ◄ or ► button to select the desired photo in the Photo list.
2. Press the TOOLS button.
3. Press the ▲ or ▼ button to select Slide Show, then press the ENTER
All les in the photo list will be used for the Slide Show.
N
During the slide show, les are displayed in order from the currently shown le. N
The Slide Show progresses in the order sorted in the Photo list. N
Music les can be automatically played during the Slide Show if the Background N
Music is set to On.
While a photo list is displayed, press the
O (Play)/ ENTER
remote control to start slide show.
Slide Show Control Buttons
N
E
ENTER
Play/Pauses the Slide Show. Exit Slide Show and return to the photo list.
Play the Slide Show.
Pause the Slide Show.
Playing the selected photo files
❑
1. Press the ◄ or ► button to select the desired photo in the Photo list.
2 . Press the yellow button. Repeat the above operation to select multiple photos.
3. Press the
c
The
mark appears to the left of the selected photo.
N
To deselect all selected les, press the
N
TOOLS button and select Deselect All.
(Play) / ENTERE button.
The selected les will be used for the Slide Show.
N
E
E
button on the
T TOOLS
/
button.
Normal 3648x2432 2008/3/15
r
SNv11114.JPG
USB
E Pause lr Previous/Next
T
Tools R Return
1/4
Run various functions from the Photo menus.
Change the Slide Show playing speed.
Slide Show Tools Menu
❑
Stop Slide Show / Start Slide Show
You can start or stop a Slide Show.
Slide Show Speed → Normal / Slow / Fast
You can select the slide show speed only during the slide show.
You can also change the speed of the Slide Show by pressing the
N (REW) or
(FF) button during the Slide Show.
Rotate → 0˚/ 90˚ / 180˚ / 270˚
You can rotate photos saved on a USB memory device.
The rotated le is not saved.
N
Zoom → x1 / x2 / x4
You can magnify photos saved on a USB memory device.
To move the enlarged photo image, press the
N ENTER
E
button, then press the ▲/▼/◄/► buttons. Note that when the
enlarged picture is smaller than the original screen size, the location change function doesn’t work.
The enlarged le is not saved.
N
Background Music
You can set and select background music when watching a Slide Show.
To use this feature, there must be music on the USB device.
N
Loading music les is needed to change BGM mode. Play music les in music category to load. N
Background Music • → On / Off
Select Music File •
If you set
N
Background Music to On, you can select a music le.
Picture Setting / Sound Setting
Refer to page 37.
Information
The photo le information is displayed.
Remove Safely
You can remove the device safely from the TV.
Tools
Stop Slide Show
Slide Show Speed : Normal
Rotate
Zoom
Background Music
Picture Setting
Sound Setting
Information
Remove Safely
Tools
U
Mov e E Ent er e Exit
Page 35

English - 35
Using the Music List
You can sort music files in the Music List by a particular standard.
1. Press the MEDIA.P button on the remote control to display the Media Play menu.
2. Press the ◄ or ► button to select Music, then press the ENTER
3. Press the ENTER
The information of the music les is automatically set.
N
E
button to start playing music in the order selected by the user.
If there is no title information for a music le, the lename is displayed. N
Music List Tools Menu
❑
Play Current Group
You can only play music les in the currently selected sorting group.
Information
The music le information including the name, the size, the date modied and the
path is displayed.
Alternatively, select a music le from the music list and press the
O INFO button to
view the information.
Remove Safely
You can remove the device safely from the TV.
E
button.
NPKI
../folder name/
USB Device
NPKI
NPKI
../folder name/
USB Device
usermanual
Energetic
▶
Energetic
▶
1
▶
1
▶
3/4
Carol kidd
Mr A-Z
2005
Pop
When I Dream
Select
▶
1
▶
1
Carol kidd
Mr A-Z
2005
Pop
When I Dream
Select
▶
Heaven
T
To ols R Upper Folder
Play Current Group
3/4
Information
Remove Safely
Heavenusermanual
T
Tools R Upper FolderSelect
T
Tools R Upper Folder
Sky
Page 36

English - 36
Playing a Music
Playing a music file
❑
1. Pressing the ◄ or ► button to select a music le to be played.
2. Press the
This menu only shows les with the MP3 le extension. Files with other
N
le extensions are not displayed, even if they are saved on the same USB
device.
N
The selected le is displayed at the top with its playing time.
N
To adjust the music volume, press the volume button on the remote control.
N
To mute the sound, press the M MUTE button on the remote control.
The playing duration of a music le may be displayed as ‘00:00:00’ if its
N
playing time information is not found at the start of the le.
N
Music Play Control Buttons
ENTER
Music function information icon
N
Playing the selected music files
❑
1. Press the ◄ or ► button to select the desired music le in the music list.
2. Press the yellow button. Repeat the above operation to select multiple music les.
The
N
To deselect all selected les, press the
N
3. Press the
Only the selected le is played.
N
(Play)/ENTERE button.
(REW) or (FF) buttons do not function during play.
Play/Pauses the music file. Exit play mode and return to the music list.
E
Play the music file
Pause the music file
T TOOLS
When all music files in the folder (or the selected file) are repeated. Repeat Mode is On.
When all music files in the folder (or the selected file) are played once. Repeat Mode is Off.
c
mark appears to the left of the selected music le.
TOOLS button and select Deselect All.
(Play)/ENTERE button.
r
r
When I Dream
E Pause lr Previous/Next
r
T
Tools R Return
HeavenGeek In The Pink
USB
r
00:00:02 / 00:04:55
Run various functions from the Music menus.
1/2
Music Play Tools Menu
❑
Repeat Mode → On/Off
You can play music les repeatedly.
Picture Setting / Sound Setting
Refer to page 37.
Information
The music le information is displayed.
Remove Safely
You can remove the device safely from the TV.
Repeat Mode
Picture Setting
Sound Setting
Information
Remove Safely
U
Tools
◄ On ►
Mov e Ad jus t e Exit
Page 37

English - 37
Picture / Music Settings Using Media Play
When watching a Slide Show or listening to music using Media Play, you can set the picture and sound.
Picture Setting
❑
1. Press the TOOLS button during a Slide Show or while music is playing.
2. Press the ▲ or ▼ button to select Picture Setting.
3. Press the ◄ or ► button to select the Picture Mode
(Dynamic, Standard, Eco, or Movie).
When selecting
N
Dynamic, Eco, you can't adjust Dynamic Contrast, Black
Tone.
4. Press the ▲ or ▼ button to move to an item.
(Contrast, Brightness, Colour, Dynamic Contrast, Black Tone, or Reset)
Select Reset to initialize the picture settings.
N
5. Press the ◄ or ► button to adjust the settings.
Picture Mode ◄ Standard ►
Contrast : 95
Brightness : 45
Color : 50
Dynamic Contrast : Medium
Black Tone : Off
Reset
U
Move L Adjust E Enter R Return
Picture Setting
Sound Setting
❑
1. Press the TOOLS button during a Slide Show or while music is playing.
2. Press the ▲ or ▼ button to select Sound Setting.
3. Press the ◄ or ► button to select the Sound Mode.
(Standard, Music, Movie, Clear voice, or Custom)
4. Press the ▲ or ▼ button to move to an item.
(Balance, 100Hz, 300Hz, 1kHz, 3kHz,10kHz (Bandwidth Adjustment), or Reset)
Select Reset to initialize the sound settings.
N
5. Press the ◄ or ► button to adjust the settings.
Using the Setup Menu
Setup displays the user settings of the Media Play menu.
1. Press the MEDIA.P button on the remote control to display the Media Play menu.
E
2. Press the ◄ or ► button to select Setup, then press the ENTER
3. Press the ▲ or ▼ button to select the desired option.
4 . Press the ◄ or ► button to select the option, then press the ENTER
To exit
N Media Play mode, press the MEDIA.P button on the remote control.
Music Repeat Mode → On / Off
Select to repeatedly play music les.
Screen Saver Run Time → 10 min / 20 min / 40 min / 1 hour
Select to set the waiting time before the screen saver appears.
Information
Select to viewing the information of the connected device.
Remove Safely
You can remove the device safely from the TV.
button.
E
button.
Sound Setting
Sound Mode ◄ Custom ►
Balance : L50 R50
100Hz : 0
300Hz : 0
1KHz : 0
3KHz : 0
10KHz : 0
Reset
U
Move L Adjust E Enter R Return
U Move
851.98MB/995.00MB Free
lr
Adjust R Return
Media Play
Photo Music Setup
USB Device
Music Repeat Mode ◄ Off ►
Screen Saver Run Time 10 min
Information
Remove Safely
USB Device
USB : USB name
SETUP
e
Exit
Page 38

English - 38
About Anynet+
Connecting Anynet+ Devices
Anynet+ is a function that enables you to control all connected Samsung devices that support Anynet+ with your Samsung TV’s remote.
The Anynet+ system can be used only with Samsung devices that have the Anynet+ feature. To be sure your Samsung device has this
feature, check if there is an Anynet+ logo on it.
To connect to a TV
❑
TV
HDMI 1.3 Cable
Anynet+
Device 1
HDMI 1.3 Cable
Anynet+
Device 2
HDMI 1.3 Cable
Anynet+
Device 3
HDMI 1.3 Cable
Anynet+
Device 4
1. Connect the HDMI IN (1, 2(DVI), 3 or 4) jack on the TV and the HDMI OUT jack of the corresponding Anynet+ device using an
HDMI cable.
To connect to Home Theater
❑
TV
Optical Cable
HDMI 1.3 Cable
Anynet+ Device 2
Home Theatre
Anynet+ Device 3
Anynet+ Device 1
HDMI 1.3 Cable
Anynet+ Device 4
HDMI 1.3 Cable
HDMI 1.3 Cable
HDMI 1.3 Cable
1. Connect the HDMI IN (1, 2(DVI), 3 or 4) jack on the TV and the HDMI OUT jack of the corresponding Anynet+ device using an
HDMI cable.
2. Connect the HDMI IN jack of the home theater and the HDMI OUT jack of the corresponding Anynet+ device using an HDMI cable.
Connect the Optical cable between the DIGITAL AUDIO OUT (OPTICAL) jack on your TV and the Digital Audio Input on the Home
N
Theater.
When following the connection above, the Optical jack only outputs 2 channel audio. You will only hear sound from the Home
N
Theater’s Front Left and Right speakers and the subwoofer. If you want to hear 5.1 channel audio, connect the DIGITAL AUDIO
OUT (OPTICAL) jack on the DVD player or Cable/Satellite Box (ie Anynet Device 1 or 2) directly to the Amplier or Home Theater,
not the TV.
Connect only one Home Theater.
N
You can connect an Anynet N
Anynet
N
Anynet
N
Anynet
N
+
works when the AV device supporting Anynet+ is in the Standby or On status.
+
supports up to 12 AV devices in total. Note that you can connect up to 3 devices of the same type.
+
supports up to 3 devices simultaneously.
+
device using the HDMI 1.3 cable. Some HDMI cables may not support Anynet+ functions.
Page 39

English - 39
Setting Up Anynet+
+
Anynet
❑
(HDMI-CEC) Setup
Press the TTOOLS button to display Tools menu.
Application
Media Play (USB)
Anynet+ (HDMI-CEC)
►
You can also display Anynet+ menu by selecting Tools → Anynet+(HDMI-CEC).
+
Anynet
(HDMI-CEC) → Off / On
To use the Anynet+ Function, Anynet+ (HDMI-CEC) must be set to On.
When the
N Anynet
+
(HDMI-CEC) function is disabled, all the Anynet+ related
operations are deactivated.
Auto Turn Off → No / Yes
Setting an Anynet+ Device to turn Off Automatically when the TV is Turned Off
The active source on the TV remote must be set to TV to use the Anynet+ function.
N
If you set N Auto Turn Off to Yes, connected external devices are also turned off when
Anynet+ (HDMI-CEC) : ON
Auto Turn Off : Yes
Setup
No
Yes
the TV is turned off. If an external device is still recording, it may or may not turn off.
U
Move E Enter R Return
Switching between Anynet+ Devices
1. Press the TOOLS button. Press the ENTERE button to select Anynet+ (HDMI-CEC).
2. Press the ▲ or ▼ button to select Device List, then press the ENTER
Anynet+ devices connected to the TV are listed. If you cannot nd a device you
N
want, press the red button to scan for devices.
Only when you set
N Anynet+ (HDMI-CEC) to On in the Setup menu, the Device List
menu appears.
3. Press the ▲ or ▼ button to select to a particular device and press the ENTER
button. It is switched to the selected device.
Switching to the selected devices may take up to 2 minutes. You cannot cancel the
N
operation during the switching operation.
The time required to scan for devices is determined by the number of connected devices.
N
If you have selected external input mode by pressing the N SOURCE button, you cannot use the Anynet+ function. Make sure to
switch to an Anynet+ device by using the Device List.
+
Anynet
❑
Menu
The Anynet+ menu changes depending on the type and status of the Anynet+ devices connected to the TV.
E
button.
E
View TV
Device List
Record : DVDR
DVDR MENU
DVDR INFO
Receiver : On
Setup
U
Move L Adjust R Return
Anynet+ Menu Description
View TV Anynet+ mode changes to TV broadcast mode.
Device List Shows the Anynet+ device list.
(device_name) MENU Shows the connected device menus. E.g. If a DVD recorder is connected, the disc menu of the
DVD recorder will appear.
(device_name) INFO Shows the play menu of the connected device. E.g. If a DVD recorder is connected, the play menu
of the DVD recorder will appear.
Record: (*recorder) Starts recording immediately using the recorder. (This is only available for devices that support the
recording function.)
(*recorder) Reserve Recording Enables reserving a recording for the recorder. (This is only available for devices that support the
recording reservation function.)
Stop Recording: (*recorder) Stops recording.
Receiver Sound is played through the receiver.
Continued...
Page 40

English - 40
TV Remote Control Buttons Available in Anynet+ Mode
❑
Device Type Operating Status Available Buttons
After switching to the device, when the
menu of the corresponding device is
Anynet
+
Device
displayed on the screen.
After switching to the device, while
playing a file
Device with built-in
Tuner
After switching to the device, when you
are watching a TV programme
Audio Device When Receiver is activated
The Anynet
N
The
N button works only while in the recordable state.
You cannot control Anynet+ devices using the buttons on the TV. You can control
N Anynet
The TV remote control may not work under certain conditions. In this case, reselect the Anynet+ device.
N
+
function only works when the active source on the TV remote control is set to TV.
Numeric buttons
E
▲/▼/◄/►/ENTER
buttons
Colour buttons / EXIT button
(Backward search) / (Forward search) (Stop) /
(Play) / (Pause)
/ button
P
/ button
=
M MUTE button
+
devices only using the TV remote control.
The N Anynet+ functions do not operate with other manufacturers’ products.
The
N , operations may differ depending on the device.
If more than one recording device is connected, they are displayed as (*recorder) and if only one recording device is connected, it
N
will be represented as (*device_name).
Recording
You can make a recording of a TV programme using a Samsung recorder.
E
1. Press the TOOLS button. Press the ENTER
2. Press the ▲ or ▼ button to select Record(recorder): then press the ENTER
Recording begins.
When there is more than one recording device
N
When multiple recording devices are connected, the recording devices are listed.
Press the ▲ or ▼ button to select a recording device and press the ENTERE
button. Recording begins.
When the recording device is not displayed
N
Select Device List and press the red button to search devices.
Pressing the
N button will record whatever you are currently watching. If you are watching video from another device, the video
from the device is recorded.
Before recording, check whether the antenna jack is properly connected to the recording device. To properly connect an antenna to
N
a recording device, refer to the recording device’s users manual.
button to select Anynet+ (HDMI-CEC).
E
button.
View TV
Device List
Record : DVDR
DVDR MENU
DVDR INFO
Receiver : On
Setup
U
Move L Adjust R Return
Page 41

English - 41
Listening through a Receiver (Home theater)
You can listen to sound through a receiver instead of the TV speaker.
1. Press the TOOLS button. Press the ENTER
2. Press the ▲ or ▼ button to select Receiver. Press the ◄ or ► button to select On or Off.
If your receiver supports audio only, it may not appear in the device list.
N
The receiver will work when you have properly connected the Optical IN jack of the N
receiver to the Optical Out jack of the TV.
When the receiver (home theater) is set to On, you can hear sound output from the
N
TV’s Optical jack. When the TV is displaying a DTV(air) signal, the TV will send out 5.1
E
button to select Anynet+ (HDMI-CEC).
View TV
Device List
Record : DVDR
DVDR MENU
DVDR INFO
Receiver ◄ On ►
Setup
U
Move L Adjust R Return
channel sound to the Home theater receiver. When the source is a digital component
such as a DVD and is connected to the TV via HDMI, only 2 channel sound will be heard from the Home Theater receiver.
When using the Media Play feature, sound may not output properly through the receiver.
N
When listening through the receiver, there are restrictions for using the audio-related (MTS, Preferred language) menus. N
If there is a power interruption to the TV when the N Receiver is set to On (by disconnecting the power cord or a power failure), the
Speaker Select may be set to External Speaker when you turn the TV on again. (see page 24)
Troubleshooting for Anynet+
Symptom Solution
Anynet+ does not work. Check if the device is an • Anynet
Connect only one receiver (home theater). •
Check if the • Anynet
Check the • Anynet
Check whether • Anynet
Check whether the TV remote control is in TV mode. •
Check whether it is • Anynet
+
device power cord is properly connected.
+
device’s Video/Audio/HDMI 1.3 cable connections.
+
(HDMI-CEC) is set to On in the Anynet+ setup menu.
+
exclusive remote control.
Anynet+ doesn’t work in certain situations. (Searching channels, Plug & Play, etc.) •
When connecting or removing the HDMI 1.3 cable, please make sure to search devices again •
or turn your TV off and on again.
Check if the • Anynet
I want to start Anynet+. Check if the Anynet •
+
Function of Anynet+ device is set on.
+
device is properly connected to the TV and check if the Anynet+
(HDMI-CEC) is set to On in the Anynet+ Setup menu.
Press the • TV button on the TV remote control to switch to TV. Then press the TOOLS button
to show the Anynet
I want to exit Anynet+. Select View TV in the • Anynet
+
menu and select a menu you want.
+
menu.
Press the • SOURCE button on the TV remote control and select a device other than Anynet
devices.
(Note that the channel button operates only when a tuner-embedded Anynet+ device is not •
connected.)
The message Connecting to
Anynet+ device...
appears on the screen.
The Anynet+ device does not
You cannot use the remote control when you are conguring Anynet+ or switching to a view •
mode.
Use the remote control when the Anynet+ setting or switching to view mode is complete. •
You cannot use the play function when • Plug & Play is in progress.
play.
The connected device is not
displayed.
Check whether or not the device supports • Anynet
Check whether or not the HDMI 1.3 cable is properly connected. •
Check whether • Anynet
Search • Anynet
You can connect an • Anynet
+
(HDMI-CEC) is set to On in the Anynet+ setup menu.
+
devices again.
+
device using the HDMI 1.3 cable only. Some HDMI cables may
not support Anynet+ functions.
If it is terminated by an abnormal situation such as disconnecting the HDMI cable or power •
cord or a power failure, please repeat the device scan.
The TV programme cannot be
Check whether the antenna jack on the recording device is properly connected. •
recorded.
The TV sound is not output
Connect the optical cable between TV and the receiver. •
through the receiver.
+
device. The Anynet+ system supports Anynet+ devices only.
+
functions.
+
Page 42

English - 42
Recommendations for Use
Teletext Feature
Most television stations provide written information services via Teletext. The index page of the teletext service gives you information on
how to use the service. In addition, you can select various options to suit your requirements by using the remote control buttons.
N
For teletext information to be displayed correctly, channel reception must be stable. Otherwise, information may be missing or some
pages may not be displayed.
1
: (exit)
Exit from the teletext display.
2
6 (index)
Used to display the index (contents) page at any time while you are viewing teletext.
3
5 (reveal)
Used to display the hidden text (answers to quiz games, for example). To display
normal screen, press it again.
4
4 (size)
Press to display the double-size letters in the upper half of the screen. For lower half
of the screen, press it again. To display normal screen, press it once again.
5
8 (store)
Used to store the teletext pages.
6
/ (teletext on/mix)
Press to activate teletext mode after selecting the channel providing the teletext
service. Press it twice to overlap the teletext with the current broadcasting screen.
7
1 (sub-page)
Used to display the available sub-page.
8
2 (page up)
Used to display the next teletext page.
9
3 (page down)
Used to display the previous teletext page.
0
0 (mode)
Press to select the teletext mode (LIST/FLOF). If you press it in the LIST mode, it
switches into the List save mode. In the List save mode, you can save teletext page
into list using the 8(store) button.
!
9 (hold)
Used to hold the display on a given page if the selected page is linked with several
secondary pages which follow on automatically. To resume, press it again.
@
7 (cancel)
Used to display the broadcast when searching for a page.
#
Colour buttons (red/green/yellow/blue)
If the FASTEXT system is used by a broadcasting company, the different topics
covered on a teletext page are colour-coded and can be selected by pressing the
coloured buttons. Press one of them corresponding to the required. The page is
displayed with other coloured information that can be selected in the same way. To
display the previous or next page, press the corresponding coloured button.
You can change teletext pages by pressing the numeric buttons on the remote control.
N
1
2
3
4
5
6
7
8
9
0
!
@
#
Continued...
Page 43

English - 43
The teletext pages are organized according to six categories:
Part Contents
A Selected page number.
B Broadcasting channel identity.
C Current page number or search indications.
D Date and time.
E Text.
F Status information.
FASTEXT information.
N
Teletext information is often divided between several pages displayed in sequence,
which can be accessed by:
Entering the page number Selecting a title in a list Selecting a coloured heading (FASTEXT system) -
Press the
O TV button to exit from the teletext display.
Wall Mount Kit Specifications (VESA)
Install your wall mount on a solid wall perpendicular to the floor.
When attaching to other building materials, please contact your nearest dealer.
If installed on a ceiling or slanted wall, it may fall and result in severe personal injury.
Product Family inch VESA Spec. (A * B) Standard Screw Quantity
19" ~22" 100 * 100
23"~29" 200 * 100
LCD-TV
PDP-TV
N
We provided the standard dimensions for wall mount kits as shown in the table above.
When purchasing our wall mount kit, a detailed installation manual and all parts necessary for assembly are provided. N
Do not use screws longer than the standard dimension, as they may cause damage to the inside of the TV set. N
For wall mounts that do not comply with the VESA standard screw specications, the length of the screws may differ depending on N
their specications.
Do not use screws that do not comply with the VESA standard screw specications.
N
Do not use fasten the screws too strongly, this may damage the product or cause the product to fall, leading to personal injury.
Samsung is not liable for these kinds of accidents.
Samsung is not liable for product damage or personal injury when a non-VESA or non-specied wall mount is used or the consumer
N
fails to follow the product installation instructions.
Our 57” and 63” models do not comply with VESA Specications. Therefore, you should use our dedicated wall mount kit for this
N
model.
Do not exceed 15 degrees tilt when mounting this TV.
N
30"~40" 200 * 200 M6
46"~55" 400 * 400
80" ~ 1400 * 800
42"~ 50" 400 * 400
58"~ 63" 600 * 400
70" ~ 800 * 400
80" ~ 1400 * 800
Do not install your Wall Mount Kit while your TV is turned on.
It may result in personal injury due to electric shock.
M4
4
M857"~70" 800 * 400
M8 4
Page 44

English - 44
Preparing before installing Wall- Mount
주의
Case A. Installing SAMSUNG Wall-Mount Case B. Installing other company’s Wall-Mount
1. Install Wall Mount with the torque range of 15kgf·cm or less. Make sure that parts can be damaged if the torque is out of the
specied range.
2. Accessory Kit contains Holder–Ring [
Screw down the hole
N
] when installing wall-mount on the wall.
[
1
] for installing other company’s Wall-Mount on Samsung TV. (Case B)
2
Securing the TV to the Wall
Pulling, pushing, or climbing on the TV may cause the TV to fall. In particular, ensure your children do not hang
over or destabilize the TV; doing so may cause the TV to tip over, causing serious injuries or death. Follow all
safety precautions provided on the included Safety Flyer. For added stability, install the anti-fall device for safety
purposes, as follows.
Wall
Wall
To avoid the TV from falling
1. Put the screws into the clamps and rmly fasten them onto the wall. Conrm that the screws have been rmly installed onto the wall.
You may need additional material such as an anchor depending on the type of wall.
N
Since the necessary clamps, screws, and string are not supplied, please purchase these additionally. N
2. Remove the screws from the center back of the TV, put the screws into the clamps, and then fasten the screws onto the TV again.
Screws may not be supplied with the product.
N
3. Connect the clamps xed onto the TV and the clamps xed onto the wall with a strong string and then tie the string tightly.
Install the TV near to the wall so that it does not fall backwards
N
It is safe to connect the string so that the clamps xed on the wall are equal to or lower than the clamps xed on the TV. N
Untie the string before moving the TV. N
4. Verify all connections are properly secured. Periodically check connections for any sign of fatigue for failure. If you have any doubt
about the security of your connections,contact a professional installer.
.
Page 45

English - 45
Securing the Installation Space
10 cm
10 cm
10 cm
10 cm
10 cm
10 cm
10 cm
10 cm
10 cm
10 cm
10 cm
Keep the required distances between the product and other objects (e.g. walls) to ensure proper ventilation.
Failing to do so may result in fire or a problem with the product due to an increase in the internal temperature of the product.
Install the product so the required distances shown in the figure are kept.
When using a stand or wall-mount, use parts provided by Samsung Electronics only.
N
If you use parts provided by another manufacturer, it may result in a problem with the product or an injury due to the product falling.
If you use parts provided by another manufacturer, it may result in a problem with the product or re due to an increase in the internal temperature of the product due to poor ventilation.
The appearance may differ depending on the product.
N
When installing the product with a stand When installing the product with a wall-mount
Page 46

English - 46
Troubleshooting
Before contacting the Samsung after-sales service, perform the following simple checks.
If you cannot solve the problem using the instructions below, note the model and serial number of the television and contact your local
dealer.
No sound or picture Check that the mains lead has been connected to a wall socket. •
Check that you have pressed the button on your set. •
Check the picture contrast and brightness settings. •
Check the volume. •
Check if • Speaker Select is set to External Speaker.
Normal picture but no sound Check the volume. •
No picture or black and white
picture
Sound and picture
interference
Blurred or snowy picture,
distorted sound
Remote control malfunctions Replace the remote control batteries. •
Screen is black and power
indicator light blinks steadily
The damaged picture appears
in the corner of the screen.
The "Resets all settings to
the default values" message
appears.
Check whether the •
Adjust the colour settings. •
Check that the broadcast system selected is correct. •
Try to identify the electrical appliance that is affecting the television, then move it further away. •
Plug the television into a different main socket. •
Check the direction, location and connections of your aerial. •
This interference often occurs due to the use of an indoor aerial. •
Clean the upper edge of the remote control (transmission window). •
Check that the • + and – ends of the batteries are inserted correctly.
Check that the batteries are drained. •
On your computer check; Power, Signal Cable. •
Move the computer’s mouse or press any key on the keyboard. •
On your equipment check (STB, DVD, etc) ; Power, Signal Cable. •
The TV is using its power management system. •
Press the Source button on the panel or remote control. •
Turn the TV off and on. •
If • Screen Fit is selected in some external devices, the damaged picture may appear in the
corner of the screen. This symptom is caused by external devices, not TV.
This appears when you press and hold the • EXIT button for a while. The product settings are
reset to the factory defaults.
Keep a panel out of reach of children to prevent them from being damaged by heat. •
Don't throw an object on a panel to prevent it from being broken. •
Make sure to remove a dust on a cloth before cleaning the glass. •
Make sure to spray not alcohol but water 4~6 times onto the cloth and then dry a glass with •
the cloth in one direction.
After cleaning, be sure to wipe the panel to eliminate any moisture with a dry cloth. •
M
MUTE button has been pressed on the remote control.
Page 47

English - 47
Specifications
The descriptions and characteristics in this booklet are given for information purposes only and are subject to modification without
notice.
Model Name PS50B579
Screen Size (Diagonal) 50 inch
PC Resolution (Optimum) 1920 x 1080 @ 60 Hz
Sound (Output) 10 W x 2
Dimension (W x H x D)
Body
With stand
Weight
Body
With stand
Environmental Considerations
Operating Temperature
Operating Humidity
Storage Temperature
Storage Humidity
N
This device is a Class B digital apparatus.
Design and specications are subject to change without prior notice. N
For the power supply and Power Consumption, refer to the label attached to the product. N
1240 x 74 x 766 mm
1240 x 290 x 822 mm
33 kg
38 kg
50 °F to 104 °F (10 °C to 40 °C)
10% to 80%, non-condensing
-4 °F to 113 °F (-20 °C to 45 °C)
5% to 95%, non-condensing
Page 48

English - 48
Software License
This product uses parts of the software from the Independent JPEG Group. This product uses parts of the software owned by the
Freetype Project (www.freetype.org). This product uses some software pr
the following GPL and LGPL software source codes that have been used in this product can be provided after asking to vdswmanager@samsung.com.
GPL software: Linux Kernel, Busybox, Binutils LGPL software: Glibc, ffmpeg, smpeg, libgphoto, libusb, SDL
GNU GENERAL PUBLIC LICENSE
❑
ograms which are distributed under the GPL/LGPL license. Accordingly,
GNU GENERAL PUBLIC LICENSE
Version 3, 29 June 2007
Copyright (C) 2007 Free Software Foundation, Inc. <http://fsf.org/> Everyone is permitted to copy and distribute verbatim
copies of this license document, but changing it is not allowed.
Pream ble
The GNU General Public License is a free, copyleft license for software and other kinds of works.
The licenses for most software and other practical works are designed to take away your freedom to share and change the works. By
contrast, the GNU General Public License is intended to guarantee your freedom to share and change all versions of a program--to
make sure it remains free software for all its users. We, the Free Software Foundation, use the GNU General Public License for most
of our software; it applies also to any other work released this way by its authors. You can apply it to your programs, too. When we
speak of free software, we are referring to freedom, not price. Our General Public Licenses are designed to make sure that you have
the freedom to distribute copies of free software (and charge for them if you wish), that you receive source code or can get it if you want
it, that you can change the software or use pieces of it in new free programs, and that you know you can do these things. To protect
your rights, we need to prevent others from denying you these rights or asking you to surrender the rights. Therefore, you have certain
responsibilities if you distribute copies of the software, or if you modify it: responsibilities to respect the freedom of others. For example,
if you distribute copies of such a program, whether gratis or for a fee, you must pass on to the recipients the same freedoms that you
received. You must make sure that they, too, receive or can get the source code. And you must show them these terms so they know
their rights. Developers that use the GNU GPL protect your rights with two steps: (1) assert copyright on the software, and (2) offer you
this License giving you legal permission to copy, distribute and/or modify it. For the developers’ and authors’ protection, the GPL clearly
explains that there is no warranty for this free software. For both users’ and authors’ sake, the GPL requires that modified versions
be marked as changed, so that their problems will not be attributed erroneously to authors of previous versions. Some devices are
designed to deny users access to install or run modified versions of the software inside them, although the manufacturer can do so. This
is fundamentally incompatible with the aim of protecting users’ freedom to change the software. The systematic pattern of such abuse
occurs in the area of products for individuals to use, which is precisely where it is most unacceptable. Therefore, we have designed this
version of the GPL to prohibit the practice for those products. If such problems arise substantially in other domains, we stand ready to
extend this provision to those domains in future versions of the GPL, as needed to protect the freedom of users. Finally, every program
is threatened constantly by software patents. States should not allow patents to restrict development and use of software on general-
purpose computers, but in those that do, we wish to avoid the special danger that patents applied to a free program could make it
effectively proprietary. To prevent this, the GPL assures that patents cannot be used to render the program non-free. The precise terms
and conditions for copying, distribution and modification follow.
TERMS AND CONDITIONS
0. Denitions.
“This License” refers to version 3 of the GNU General Public License.
“Copyright” also means copyright-like laws that apply to other kinds of works, such as semiconductor masks.
“The Program” refers to any copyrightable work licensed under this License. Each licensee is addressed as “you”. “Licensees” and
“recipients” may be individuals or organizations.
To “modify” a work means to copy from or adapt all or part of the work in a fashion requiring copyright permission, other than the
making of an exact copy. The resulting work is called a “modied version” of the earlier work or a work “based on” the earlier work.
A “covered work” means either the unmodied Program or a work based on the Program.
To “propagate” a work means to do anything with it that, without permission, would make you directly or secondarily liable for
infringement under applicable copyright law, except executing it on a computer or modifying a private copy. Propagation includes
copying, distribution (with or without modication), making available to the public, and in some countries other activities as well.
To “convey” a work means any kind of propagation that enables other parties to make or receive copies. Mere interaction with a
user through a computer network, with no transfer of a copy, is not conveying.
An interactive user interface displays “Appropriate Legal Notices” to the extent that it includes a convenient and prominently visible
feature that (1) displays an appropriate copyright notice, and (2) tells the user that there is no warranty for the work (except to the
extent that warranties are provided), that licensees may convey the work under this License, and how to view a copy of this License.
If the interface presents a list of user commands or options, such as a menu, a prominent item in the list meets this criterion.
1. Source Code.
The “source code” for a work means the preferred form of the work for making modications to it. “Object code” means any
nonsource form of a work.
A “Standard Interface” means an interface that either is an ofcial standard dened by a recognized standards body, or, in the case
of interfaces specied for a particular programming language, one that is widely used among developers working in that language.
The “System Libraries” of an executable work include anything, other than the work as a whole, that (a) is included in the normal
form of packaging a Major Component, but which is not part of that Major Component, and (b) serves only to enable use of the
work with that Major Component, or to implement a Standard Interface for which an implementation is available to the public in
source code form. A “Major Component”, in this context, means a major essential component (kernel, window system, and so on)
Page 49

English - 49
of the specic operating system (if any) on which the executable work runs, or a compiler used to produce the work, or an object code
interpreter used to run it.
The “Corresponding Source” for a work in object code form means all the source code needed to generate, install, and (for an
executable work) run the object code and to modify the work, including scripts to control those activities. However, it does not include the
work’s System Libraries, or general-purpose tools or generally available free programs which are used unmodied in performing those
activities but which are not part of the work. For example, Corresponding Source includes interface denition les associated with source
les for the work, and the source code for shared libraries and dynamically linked subprograms that the work is specically designed to
require, such as by intimate data communication or control ow between those subprograms and other parts of the work.
The Corresponding Source need not include anything that users can regenerate automatically from other parts of the Corresponding
Source.
The Corresponding Source for a work in source code form is that same work.
2. Basic Permissions.
All rights granted under this License are granted for the term of copyright on the Program, and are irrevocable provided the stated
conditions are met. This License explicitly afrms your unlimited permission to run the unmodied Program. The output from running
a covered work is covered by this License only if the output, given its content, constitutes a covered work. This License acknowledges
your rights of fair use or other equivalent, as provided by copyright law. You may make, run and propagate covered works that you do
not convey, without conditions so long as your license otherwise remains in force. You may convey covered works to others for the sole
purpose of having them make modications exclusively for you, or provide you with facilities for running those works, provided that you
comply with the terms of this License in conveying all material for which you do not control copyright. Those thus making or running the
covered works for you must do so exclusively on your behalf, under your direction and control, on terms that prohibit them from making
any copies of your copyrighted material outside their relationship with you.
Conveying under any other circumstances is permitted solely under the conditions stated below. Sublicensing is not allowed; section 10
makes it unnecessary.
3. Protecting Users’ Legal Rights From Anti-Circumvention Law.
No covered work shall be deemed part of an effective technological measure under any applicable law fullling obligations under
article 11 of the WIPO copyright treaty adopted on 20 December 1996, or similar laws prohibiting or restricting circumvention of such
measures. When you convey a covered work, you waive any legal power to forbid circumvention of technological measures to the extent
such circumvention is effected by exercising rights under this License with respect to the covered work, and you disclaim any intention
to limit operation or modication of the work as a means of enforcing, against the work’s users, your or third parties’ legal rights to forbid
circumvention of technological measures.
4. Conveying Verbatim Copies.
You may convey verbatim copies of the Program’s source code as you receive it, in any medium, provided that you conspicuously
and appropriately publish on each copy an appropriate copyright notice; keep intact all notices stating that this License and any
nonpermissive terms added in accord with section 7 apply to the code; keep intact all notices of the absence of any warranty; and give
all recipients a copy of this License along with the Program.
You may charge any price or no price for each copy that you convey, and you may offer support or warranty protection for a fee.
5. Conveying Modied Source Versions.
You may convey a work based on the Program, or the modications to produce it from the Program, in the form of source code under
the terms of section 4, provided that you also meet all of these conditions:
a) The work must carry prominent notices stating that you modied it, and giving a relevant date.
b) The work must carry prominent notices stating that it is released under this License and any conditions added under section 7.
This requirement modies the requirement in section 4 to “keep intact all notices”.
c) You must license the entire work, as a whole, under this License to anyone who comes into possession of a copy. This License will
therefore apply, along with any applicable section 7 additional terms, to the whole of the work, and all its parts, regardless of how
they are packaged. This License gives no permission to license the work in any other way, but it does not invalidate such permission
if you have separately received it.
d) If the work has interactive user interfaces, each must display Appropriate Legal Notices; however, if the Program has interactive
interfaces that do not display Appropriate Legal Notices, your work need not make them do so.
A compilation of a covered work with other separate and independent works, which are not by their nature extensions of the covered
work, and which are not combined with it such as to form a larger program, in or on a volume of a storage or distribution medium, is
called an “aggregate” if the compilation and its resulting copyright are not used to limit the access or legal rights of the compilation’s
users beyond what the individual works permit. Inclusion of a covered work in an aggregate does not cause this License to apply to
the other parts of the aggregate.
6. Conveying Non-Source Forms.
You may convey a covered work in object code form under the terms of sections 4 and 5, provided that you also convey the
machinereadable
Corresponding Source under the terms of this License, in one of these ways:
a) Convey the object code in, or embodied in, a physical product (including a physical distribution medium), accompanied by the
Corresponding Source xed on a durable physical medium customarily used for software interchange.
b) Convey the object code in, or embodied in, a physical product (including a physical distribution medium), accompanied by a written
offer, valid for at least three years and valid for as long as you offer spare parts or customer support for that product model, to give
anyone who possesses the object code either (1) a copy of the Corresponding Source for all the software in the product that is
covered by this License, on a durable physical medium customarily used for software interchange, for a price no more than your
reasonable cost of physically performing this conveying of source, or (2) access to copy the Corresponding Source from a network
server at no charge.
c) Convey individual copies of the object code with a copy of the written offer to provide the Corresponding Source. This alternative
is allowed only occasionally and noncommercially, and only if you received the object code with such an offer, in accord with
subsection 6b.
Page 50

English - 50
d) Convey the object code by offering access from a designated place (gratis or for a charge), and offer equivalent access to the
Corresponding Source in the same way through the same place at no further charge. You need not require recipients to copy the
Corresponding Source along with the object code. If the place to copy the object code is a network server, the Corresponding
Source may be on a different server (operated by you or a third party) that supports equivalent copying facilities, provided you
maintain clear directions next to the object code saying where to nd the Corresponding Source. Regardless of what server hosts
the Corresponding Source, you remain obligated to ensure that it is available for as long as needed to satisfy these requirements.
e) Convey the object code using peer-to-peer transmission, provided you inform other peers where the object code and Corresponding
Source of the work are being offered to the general public at no charge under subsection 6d. A separable portion of the object code,
whose source code is excluded from the Corresponding Source as a System Library, need not be included in conveying the object
code work.
A “User Product” is either (1) a “consumer product”, which means any tangible personal property which is normally used for personal,
family, or household purposes, or (2) anything designed or sold for incorporation into a dwelling. In determining whether a product is a
consumer product, doubtful cases shall be resolved in favor of coverage. For a particular product received by a particular user, “normally
used” refers to a typical or common use of that class of product, regardless of the status of the particular user or of the way in which the
particular user actually uses, or expects or is expected to use, the product. A product is a consumer product regardless of whether the
product has substantial commercial, industrial or non-consumer uses, unless such uses represent the only signicant mode of use of the
product. “Installation Information” for a User Product means any methods, procedures, authorization keys, or other information required
to install and execute modied versions of a covered work in that User Product from a modied version of its Corresponding Source.
The information must sufce to ensure that the continued functioning of the modied object code is in no case prevented or interfered
with solely because modication has been made. If you convey an object code work under this section in, or with, or specically for
use in, a User Product, and the conveying occurs as part of a transaction in which the right of possession and use of the User Product
is transferred to the recipient in perpetuity or for a xed term (regardless of how the transaction is characterized), the Corresponding
Source conveyed under this section must be accompanied by the Installation Information. But this requirement does not apply if neither
you nor any third party retains the ability to install modied object code on the User Product (for example, the work has been installed
in ROM). The requirement to provide Installation Information does not include a requirement to continue to provide support service,
warranty, or updates for a work that has been modied or installed by the recipient, or for the User Product in which it has been modied
or installed. Access to a network may be denied when the modication itself materially and adversely affects the operation of the network
or violates the rules and protocols for communication across the network. Corresponding Source conveyed, and Installation Information
provided, in accord with this section must be in a format that is publicly documented (and with an implementation available to the public
in source code form), and must require no special password or key for unpacking, reading or copying.
7. Additional Terms.
“Additional permissions” are terms that supplement the terms of this License by making exceptions from one or more of its conditions.
Additional permissions that are applicable to the entire Program shall be treated as though they were included in this License, to
the extent that they are valid under applicable law. If additional permissions apply only to part of the Program, that part may be
used separately under those permissions, but the entire Program remains governed by this License without regard to the additional
permissions.
When you convey a copy of a covered work, you may at your option remove any additional permissions from that copy, or from any part
of it. (Additional permissions may be written to require their own removal in certain cases when you modify the work.) You may place
additional permissions on material, added by you to a covered work, for which you have or can give appropriate copyright permission.
Notwithstanding any other provision of this License, for material you add to a covered work, you may (if authorized by the copyright
holders of that material) supplement the terms of this License with terms:
a) Disclaiming warranty or limiting liability differently from the terms of sections 15 and 16 of this License; or
b) Requiring preservation of specied reasonable legal notices or author attributions in that material or in the Appropriate Legal Notices
displayed by works containing it; or
c) Prohibiting misrepresentation of the origin of that material, or requiring that modied versions of such material be marked in
reasonable ways as different from the original version; or
d) Limiting the use for publicity purposes of names of licensors or authors of the material; or
e) Declining to grant rights under trademark law for use of some trade names, trademarks, or service marks; or
f) Requiring indemnication of licensors and authors of that material by anyone who conveys the material (or modied versions of it)
with contractual assumptions of liability to the recipient, for any liability that these contractual assumptions directly impose on those
licensors and authors.
All other non-permissive additional terms are considered “further restrictions” within the meaning of section 10. If the Program as you
received it, or any part of it, contains a notice stating that it is governed by this License along with a term that is a further restriction,
you may remove that term. If a license document contains a further restriction but permits relicensing or conveying under this License,
you may add to a covered work material governed by the terms of that license document, provided that the further restriction does not
survive such relicensing or conveying.
If you add terms to a covered work in accord with this section, you must place, in the relevant source les, a statement of theadditional
terms that apply to those les, or a notice indicating where to nd the applicable terms. Additional terms, permissive or non-permissive,
may be stated in the form of a separately written license, or stated as exceptions; the above requirements apply either way.
8. Termination.
You may not propagate or modify a covered work except as expressly provided under this License. Any attempt otherwise to propagate
or modify it is void, and will automatically terminate your rights under this License (including any patent licenses granted under the third
paragraph of section 11).
However, if you cease all violation of this License, then your license from a particular copyright holder is reinstated (a) provisionally,
unless and until the copyright holder explicitly and nally terminates your license, and (b) permanently, if the copyright holder fails to
notify you of the violation by some reasonable means prior to 60 days after the cessation. Moreover, your license from a particular
copyright holder is reinstated permanently if the copyright holder noties you of the violation by some reasonable means, this is the rst
time you have received notice of violation of this License (for any work) from that copyright holder, and you cure the violation prior to 30
days after your receipt of the notice.
Page 51

English - 51
Termination of your rights under this section does not terminate the licenses of parties who have received copies or rights from you
under this License. If your rights have been terminated and not permanently reinstated, you do not qualify to receive new licenses for
the same material under section 10.
9. Acceptance Not Required for Having Copies.
You are not required to accept this License in order to receive or run a copy of the Program. Ancillary propagation of a covered work
occurring solely as a consequence of using peer-to-peer transmission to receive a copy likewise does not require acceptance.
However, nothing other than this License grants you permission to propagate or modify any covered work. These actions infringe
copyright if you do not accept this License. Therefore, by modifying or propagating a covered work, you indicate your acceptance of this
License to do so.
10. Automatic Licensing of Downstream Recipients.
Each time you convey a covered work, the recipient automatically receives a license from the original licensors, to run, modify and
propagate that work, subject to this License. You are not responsible for enforcing compliance by third parties with this License.
An “entity transaction” is a transaction transferring control of an organization, or substantially all assets of one, or subdividing an
organization, or merging organizations. If propagation of a covered work results from an entity transaction, each party to that transaction
who receives a copy of the work also receives whatever licenses to the work the party’s predecessor in interest had or could give under
the previous paragraph, plus a right to possession of the You may not impose any further restrictions on the exercise of the rights
granted or afrmed under this License. For example, you may not impose a license fee, royalty, or other charge for exercise of rights
granted under this License, and you may not initiate litigation (including a cross-claim or counterclaim in a lawsuit) alleging that any
patent claim is infringed by making, using, selling, offering for sale, or importing the Program or any portion of it.
11. Patents.
A “contributor” is a copyright holder who authorizes use under this License of the Program or a work on which the Program is based.
The work thus licensed is called the contributor’s “contributor version”.
A contributor’s “essential patent claims” are all patent claims owned or controlled by the contributor, whether already acquired or
hereafter acquired, that would be infringed by some manner, permitted by this License, of making, using, or selling its contributor
version, but do not include claims that would be infringed only as a consequence of further modication of the contributor version.
For purposes of this denition, “control” includes the right to grant patent sublicenses in a manner consistent with the requirements of
this License.
Each contributor grants you a non-exclusive, worldwide, royalty-free patent license under the contributor’s essential patent claims, to
make, use, sell, offer for sale, import and otherwise run, modify and propagate the contents of its contributor version. In the following
three paragraphs, a “patent license” is any express agreement or commitment, however denominated, not to enforce a patent (such as
an express permission to practice a patent or covenant not to sue for patent infringement). To “grant” such a patent license to a party
means to make such an agreement or commitment not to enforce a patent against the party.
If you convey a covered work, knowingly relying on a patent license, and the Corresponding Source of the work is not available
for anyone to copy, free of charge and under the terms of this License, through a publicly available network server or other readily
accessible means, then you must either (1) cause the Corresponding Source to be so available, or (2) arrange to deprive yourself of
the benet of the patent license for this particular work, or (3) arrange, in a manner consistent with the requirements of this License,
to extend the patent license to downstream recipients. “Knowingly relying” means you have actual knowledge that, but for the patent
license, your conveying the covered work in a country, or your recipient’s use of the covered work in a country, would infringe one or
more identiable patents in that country that you have reason to believe are valid.
If, pursuant to or in connection with a single transaction or arrangement, you convey, or propagate by procuring conveyance of, a
covered work, and grant a patent license to some of the parties receiving the covered work authorizing them to use, propagate, modify
or convey a specic copy of the covered work, then the patent license you grant is automatically extended to all recipients of the covered
work and works based on it.
A patent license is “discriminatory” if it does not include within the scope of its coverage, prohibits the exercise of, or is conditioned on
the non-exercise of one or more of the rights that are specically granted under this License. You may not convey a covered work if you
are a party to an arrangement with a third party that is in the business of distributing software, under which you make payment to the
third party based on the extent of your activity of conveying the work, and under which the third party grants, to any of the parties who
would receive the covered work from you, a discriminatory patent license (a) in connection with copies of the covered work conveyed
by you (or copies made from those copies), or (b) primarily for and in connection with specic products or compilations that contain the
covered work, unless you entered into that arrangement, or that patent license was granted, prior to 28 March 2007.
Nothing in this License shall be construed as excluding or limiting any implied license or other defenses to infringement that may
otherwise be available to you under applicable patent law.
12. No Surrender of Others’ Freedom.
If conditions are imposed on you (whether by court order, agreement or otherwise) that contradict the conditions of this License, they do
not excuse you from the conditions of this License. If you cannot convey a covered work so as to satisfy simultaneously your obligations
under this License and any other pertinent obligations, then as a consequence you may not convey it at all. For example, if you agree
to terms that obligate you to collect a royalty for further conveying from those to whom you convey the Program, the only way you could
satisfy both those terms and this License would be to refrain entirely from conveying the Program.
13. Use with the GNU Affero General Public License.
Notwithstanding any other provision of this License, you have permission to link or combine any covered work with a work licensed
under version 3 of the GNU Affero General Public License into a single combined work, and to convey the resulting work. The terms of
this License will continue to apply to the part which is the covered work, but the special requirements of the GNU Affero General
Public License, section 13, concerning interaction through a network will apply to the combination as such.
14. Revised Versions of this License.
The Free Software Foundation may publish revised and/or new versions of the GNU General Public License from time to time. Such
new versions will be similar in spirit to the present version, but may differ in detail to address new problems or concerns.
Each version is given a distinguishing version number. If the Program species that a certain numbered version of the GNU General
Public License “or any later version” applies to it, you have the option of following the terms and conditions either of that numbered
version or of any later version published by the Free Software Foundation. If the Program does not specify a version number of the GNU
General Public License, you may choose any version ever published by the Free Software Foundation.
Page 52

English - 52
If the Program species that a proxy can decide which future versions of the GNU General Public License can be used, that proxy’s
public statement of acceptance of a version permanently authorizes you to choose that version for the Program.
Later license versions may give you additional or different permissions. However, no additional obligations are imposed on any author or
copyright holder as a result of your choosing to follow a later version.
15. Disclaimer of Warranty.
THERE IS NO WARRANTY FOR THE PROGRAM, TO THE EXTENT PERMITTED BY APPLICABLE LAW. EXCEPT WHEN
OTHERWISE STATED IN WRITING THE COPYRIGHT HOLDERS AND/OR OTHER PARTIES PROVIDE THE PROGRAM “AS IS”
WITHOUT WARRANTY OF ANY KIND, EITHER EXPRESSED OR IMPLIED, INCLUDING, BUT NOT LIMITED TO, THE IMPLIED
WARRANTIES OF MERCHANTABILITY AND FITNESS FOR A PARTICULAR PURPOSE. THE ENTIRE RISK AS TO THE QUALITY
AND PERFORMANCE OF THE PROGRAM IS WITH YOU. SHOULD THE PROGRAM PROVE DEFECTIVE, YOU ASSUME THE
COST OF ALL NECESSARY SERVICING, REPAIR OR CORRECTION.
16. Limitation of Liability.
IN NO EVENT UNLESS REQUIRED BY APPLICABLE LAW OR AGREED TO IN WRITING WILL ANY COPYRIGHT HOLDER, OR
ANY OTHER PARTY WHO MODIFIES AND/OR CONVEYS THE PROGRAM AS PERMITTED ABOVE, BE LIABLE TO YOU FOR
DAMAGES, INCLUDING ANY GENERAL, SPECIAL, INCIDENTAL OR CONSEQUENTIAL DAMAGES ARISING OUT OF THE
USE OR INABILITY TO USE THE PROGRAM (INCLUDING BUT NOT LIMITED TO LOSS OF DATA OR DATA BEING RENDERED
INACCURATE OR LOSSES SUSTAINED BY YOU OR THIRD PARTIES OR A FAILURE OF THE PROGRAM TO OPERATE WITH
ANY OTHER PROGRAMS), EVEN IF SUCH HOLDER OR OTHER PARTY HAS BEEN ADVISED OF THE POSSIBILITY OF SUCH
DAMAGES.
17. Interpretation of Sections 15 and 16.
If the disclaimer of warranty and limitation of liability provided above cannot be given local legal effect according to their terms, reviewing
courts shall apply local law that most closely approximates an absolute waiver of all civil liability in connection with the Program, unless
a warranty or assumption of liability accompanies a copy of the Program in return for a fee.
How to Apply These Terms to Your New Programs
If you develop a new program, and you want it to be of the greatest possible use to the public, the best way to achieve this is to make it
free software which everyone can redistribute and change under these terms. To do so, attach the following notices to the program. It is
safest to attach them to the start of each source file to most effectively state theexclusion of warranty; and each file should have at least the
“copyright” line and a pointer to where the full notice is found.
<one line to give the program’s name and a brief idea of what it does.> Copyright (C) <year> <name of author>
This program is free software: you can redistribute it and/or modify it under the terms of the GNU General Public License as
published by the Free Software Foundation, either version 3 of the License, or (at your option) any later version.
This program is distributed in the hope that it will be useful, but WITHOUT ANY WARRANTY; without even the implied warranty
of MERCHANTABILITY or FITNESS FOR A PARTICULAR PURPOSE. See the GNU General Public License for more details.
You should have received a copy of the GNU General Public License along with this program. If not, see <http://www.gnu.org/
licenses/>.
Also add information on how to contact you by electronic and paper mail.
If the program does terminal interaction, make it output a short notice like this when it starts in an interactive mode:
<program> Copyright (C) <year> <name of author> This program comes with ABSOLUTELY NO WARRANTY; for details type
`show w’.
This is free software, and you are welcome to redistribute it under certain conditions; type `show c’ for details.
The hypothetical commands `show w’ and `show c’ should show the appropriate parts of the General Public License. Of course, your
program’s commands might be different; for a GUI interface, you would use an “about box”.
You should also get your employer (if you work as a programmer) or school, if any, to sign a “copyright disclaimer” for the program, if
necessary.
For more information on this, and how to apply and follow the GNU GPL, see <http://www.gnu.org/licenses/>.The GNU General Public
License does not permit incorporating your program into proprietary programs. If your program is a subroutine library, you may consider
it more useful to permit linking proprietary applications with the library. If this is what you want to do, use the GNU Lesser General Public
License instead of this License. But first, please read <http://www.gnu.org/philosophy/why-not-lgpl.html>.
GNU Lesser General Public License (LGPL)
❑
GNU GENERAL PUBLIC LICENSE
Version 3, 29 June 2007
Copyright (C) 2007 Free Software Foundation, Inc. <http://fsf.org/>
Everyone is permitted to copy and distribute verbatim copies of this license document, but changing it is not allowed.
Preamble
The GNU General Public License is a free, copyleft license for software and other kinds of works.
The licenses for most software and other practical works are designed to take away your freedom to share and change the works. By
contrast, the GNU General Public License is intended to guarantee your freedom to share and change all versions of a program--to make
sure it remains free software for all its users. We, the Free Software Foundation, use the GNU General Public License for most of our
software; it applies also to any other work released this way by its authors. You can apply it to your programs, too.
When we speak of free software, we are referring to freedom, not price. Our General Public Licenses are designed to make sure that you
Page 53

English - 53
have the freedom to distribute copies of free software (and charge for them if you wish), that you receive source code or can get it if you
want it, that you can change the software or use pieces of it in new free programs, and that you know you can do these things.
To protect your rights, we need to prevent others from denying you these rights or asking you to surrender the rights. Therefore, you have
certain responsibilities if you distribute copies of the software, or if you modify it: responsibilities to respect the freedom of others.
For example, if you distribute copies of such a program, whether gratis or for a fee, you must pass on to the recipients the same freedoms
that you received. You must make sure that they, too, receive or can get the source code. And you must show them these terms so they
know their rights.
Developers that use the GNU GPL protect your rights with two steps: (1) assert copyright on the software, and (2) offer you this License
giving you legal permission to copy, distribute and/or modify it.
For the developers’ and authors’ protection, the GPL clearly explains that there is no warranty for this free software. For both users’ and
authors’ sake, the GPL requires that modified versions be marked as changed, so that their problems will not be attributed erroneously to
authors of previous versions.
Some devices are designed to deny users access to install or run modified versions of the software inside them, although the manufacturer
can do so. This is fundamentally incompatible with the aim of protecting users’ freedom to change the software. The systematic pattern
of such abuse occurs in the area of products for individuals to use, which is precisely where it is most unacceptable. Therefore, we have
designed this version of the GPL to prohibit the practice for those products. If such problems arise substantially in other domains, we stand
ready to extend this provision to those domains in future versions of the GPL, as needed to protect the freedom of users. Finally, every
program is threatened constantly by software patents. States should not allow patents to restrict development and use of software on
general-purpose computers, but in those that do, we wish to avoid the special danger that patents applied to a free program could make it
effectively proprietary. To prevent this, the GPL assures that patents cannot be used to render the program non-free. The precise terms and
conditions for copying, distribution and modification follow.
TERMS AND CONDITIONS
0. Denitions.
“This License” refers to version 3 of the GNU General Public License.
“Copyright” also means copyright-like laws that apply to other kinds of works, such as semiconductor masks.
“The Program” refers to any copyrightable work licensed under this License. Each licensee is addressed as “you”. “Licensees” and
“recipients” may be individuals or organizations.
To “modify” a work means to copy from or adapt all or part of the work in a fashion requiring copyright permission, other than the making
of an exact copy. The resulting work is called a “modied version” of the earlier work or a work “based on” the earlier work.
A “covered work” means either the unmodied Program or a work based on the Program.
To “propagate” a work means to do anything with it that, without permission, would make you directly or secondarily liable for
infringement under applicable copyright law, except executing it on a computer or modifying a private copy. Propagation includes
copying, distribution (with or without modication), making available to the public, and in some countries other activities as well.
To “convey” a work means any kind of propagation that enables other parties to make or receive copies. Mere interaction with a user
through a computer network, with no transfer of a copy, is not conveying.
An interactive user interface displays “Appropriate Legal Notices” to the extent that it includes a convenient and prominently visible
feature that (1) displays an appropriate copyright notice, and (2) tells the user that there is no warranty for the work (except to the extent
that warranties are provided), that licensees may convey the work under this License, and how to view a copy of this License. If the
interface presents a list of user commands or options, such as a menu, a prominent item in the list meets this criterion.
1. Source Code.
The “source code” for a work means the preferred form of the work for making modications to it. “Object code” means any nonsource
form of a work.
A “Standard Interface” means an interface that either is an ofcial standard dened by a recognized standards body, or, in the case of
interfaces specied for a particular programming language, one that is widely used among developers working in that language. The
“System Libraries” of an executable work include anything, other than the work as a whole, that (a) is included in the normal form of
packaging a Major Component, but which is not part of that Major Component, and (b) serves only to enable use of the work with that
Major Component, or to implement a Standard Interface for which an implementation is available to the public in source code form. A
“Major Component”, in this context, means a major essential component (kernel, window system, and so on) of the specic operating
system (if any) on which the executable work runs, or a compiler used to produce the work, or an object code interpreter used to
run it. The “Corresponding Source” for a work in object code form means all the source code needed to generate, install, and (for an
executable work) run the object code and to modify the work, including scripts to control those activities. However, it does not include
the work’s System Libraries, or general-purpose tools or generally available free programs which are used unmodied in performing
those activities but which are not part of the work. For example, Corresponding Source includes interface denition les associated
with source les for the work, and the source code for shared libraries and dynamically linked subprograms that the work is specically
designed to require, such as by intimate data communication or control ow between those subprograms and other parts of the work.
The Corresponding Source need not include anything that users can regenerate automatically from other parts of the Corresponding
Source. The Corresponding Source for a work in source code form is that same work.
2. Basic Permissions.
All rights granted under this License are granted for the term of copyright on the Program, and are irrevocable provided the stated
conditions are met. This License explicitly afrms your unlimited permission to run the unmodied Program. The output from running
a covered work is covered by this License only if the output, given its content, constitutes a covered work. This License acknowledges
your rights of fair use or other equivalent, as provided by copyright law. You may make, run and propagate covered works that you do
not convey, without conditions so long as your license otherwise remains in force. You may convey covered works to others for the sole
purpose of having them make modications exclusively for you, or provide you with facilities for running those works, provided that you
comply with the terms of this License in conveying all material for which you do not control copyright. Those thus making or running the
covered works for you must do so exclusively on your behalf, under your direction and control, on terms that prohibit them from making
any copies of your copyrighted material outside their relationship with you. Conveying under any other circumstances is permitted solely
under the conditions stated below. Sublicensing is not allowed; section 10 makes it unnecessary.
Page 54

English - 54
3. Protecting Users’ Legal Rights From Anti-Circumvention Law.
No covered work shall be deemed part of an effective technological measure under any applicable law fullling obligations under
article 11 of the WIPO copyright treaty adopted on 20 December 1996, or similar laws prohibiting or restricting circumvention of such
measures. When you convey a covered work, you waive any legal power to forbid circumvention of technological measures to the extent
such circumvention is effected by exercising rights under this License with respect to the covered work, and you disclaim any intention
to limit operation or modication of the work as a means of enforcing, against the work’s users, your or third parties’ legal rights to forbid
circumvention of technological measures.
4. Conveying Verbatim Copies.
You may convey verbatim copies of the Program’s source code as you receive it, in any medium, provided that you conspicuously
and appropriately publish on each copy an appropriate copyright notice; keep intact all notices stating that this License and any
nonpermissive terms added in accord with section 7 apply to the code; keep intact all notices of the absence of any warranty; and give
all recipients a copy of this License along with the Program. You may charge any price or no price for each copy that you convey, and
you may offer support or warranty protection for a fee.
5. Conveying Modied Source Versions. You may convey a work based on the Program, or the modications to produce it from the
Program, in the form of source code under the terms of section 4, provided that you also meet all of these conditions:
a) The work must carry prominent notices stating that you modied it, and giving a relevant date.
b) The work must carry prominent notices stating that it is released under this License and any conditions added under section 7.
This requirement modies the requirement in section 4 to “keep intact all notices”.
c) You must license the entire work, as a whole, under this License to anyone who comes into possession of a copy. This License will
therefore apply, along with any applicable section 7 additional terms, to the whole of the work, and all its parts, regardless of how
they are packaged. This License gives no permission to license the work in any other way, but it does not invalidate such permission
if you have separately received it.
d) If the work has interactive user interfaces, each must display Appropriate Legal Notices; however, if the Program has interactive
interfaces that do not display Appropriate Legal Notices, your work need not make them do so.
A compilation of a covered work with other separate and independent works, which are not by their nature extensions of the covered
work, and which are not combined with it such as to form a larger program, in or on a volume of a storage or distribution medium, is
called an “aggregate” if the compilation and its resulting copyright are not used to limit the access or legal rights of the compilation’s
users beyond what the individual works permit. Inclusion of a covered work in an aggregate does not cause this License to apply to the
other parts of the aggregate.
6. Conveying Non-Source Forms.
You may convey a covered work in object code form under the terms of sections 4 and 5, provided that you also convey the
machinereadable Corresponding Source under the terms of this License, in one of these ways:
a) Convey the object code in, or embodied in, a physical product (including a physical distribution medium), accompanied by the
Corresponding Source xed on a durable physical medium customarily used for software interchange.
b) Convey the object code in, or embodied in, a physical product (including a physical distribution medium), accompanied by a written
offer, valid for at least three years and valid for as long as you offer spare parts or customer support for that product model, to give
anyone who possesses the object code either (1) a copy of the Corresponding Source for all the software in the product that is
covered by this License, on a durable physical medium customarily used for software interchange, for a price no more than your
reasonable cost of physically performing this conveying of source, or (2) access to copy the Corresponding Source from a network
server at no charge.
c) Convey individual copies of the object code with a copy of the written offer to provide the Corresponding Source. This alternative
is allowed only occasionally and noncommercially, and only if you received the object code with such an offer, in accord with
subsection 6b.
d) Convey the object code by offering access from a designated place (gratis or for a charge), and offer equivalent access to the
Corresponding Source in the same way through the same place at no further charge. You need not require recipients to copy the
Corresponding Source along with the object code. If the place to copy the object code is a network server, the Corresponding
Source may be on a different server (operated by you or a third party) that supports equivalent copying facilities, provided you
maintain clear directions next to the object code saying where to nd the Corresponding Source. Regardless of what server hosts
the Corresponding Source, you remain obligated to ensure that it is available for as long as needed to satisfy these requirements.
e) Convey the object code using peer-to-peer transmission, provided you inform other peers where the object code and Corresponding
Source of the work are being offered to the general public at no charge under subsection 6d. A separable portion of the object code,
whose source code is excluded from the Corresponding Source as a System Library, need not be included in conveying the object
code work.
A “User Product” is either (1) a “consumer product”, which means any tangible personal property which is normally used for personal,
family, or household purposes, or (2) anything designed or sold for incorporation into a dwelling. In determining whether a product is a
consumer product, doubtful cases shall be resolved in favor of coverage. For a particular product received by a particular user, “normally
used” refers to a typical or common use of that class of product, regardless of the status of the particular user or of the way in which the
particular user actually uses, or expects or is expected to use, the product. A product is a consumer product regardless of whether the
product has substantial commercial, industrial or non-consumer uses, unless such uses represent the only signicant mode of use of the
product. “Installation Information” for a User Product means any methods, procedures, authorization keys, or other information required
to install and execute modied versions of a covered work in that User Product from a modied version of its Corresponding Source.
The information must sufce to ensure that the continued functioning of the modied object code is in no case prevented or interfered
with solely because modication has been made. If you convey an object code work under this section in, or with, or specically for
use in, a User Product, and the conveying occurs as part of a transaction in which the right of possession and use of the User Product
is transferred to the recipient in perpetuity or for a xed term (regardless of how the transaction is characterized), the Corresponding
Source conveyed under this section must be accompanied by the Installation Information. But this requirement does not apply if neither
you nor any third party retains the ability to install modied object code on the User Product (for example, the work has been installed
Page 55

English - 55
in ROM). The requirement to provide Installation Information does not include a requirement to continue to provide support service,
warranty, or updates for a work that has been modied or installed by the recipient, or for the User Product in which it has been modied
or installed. Access to a network may be denied when the modication itself materially and adversely affects the operation of the network
or violates the rules and protocols for communication across the network. Corresponding Source conveyed, and Installation Information
provided, in accord with this section must be in a format that is publicly documented (and with an implementation available to the public
in source code form), and must require no special password or key for unpacking, reading or copying.
7. Additional Terms.
“Additional permissions” are terms that supplement the terms of this License by making exceptions from one or more of its conditions.
Additional permissions that are applicable to the entire Program shall be treated as though they were included in this License, to
the extent that they are valid under applicable law. If additional permissions apply only to part of the Program, that part may be
used separately under those permissions, but the entire Program remains governed by this License without regard to the additional
permissions.
When you convey a copy of a covered work, you may at your option remove any additional permissions from that copy, or from any part
of it. (Additional permissions may be written to require their own removal in certain cases when you modify the work.) You may place
additional permissions on material, added by you to a covered work, for which you have or can give appropriate copyright permission.
Notwithstanding any other provision of this License, for material you add to a covered work, you may (if authorized by the copyright
holders of that material) supplement the terms of this License with terms:
a) Disclaiming warranty or limiting liability differently from the terms of sections 15 and 16 of this License; or
b) Requiring preservation of specied reasonable legal notices or author attributions in that material or in the Appropriate Legal Notices
displayed by works containing it; or
c) Prohibiting misrepresentation of the origin of that material, or requiring that modied versions of such material be marked in
reasonable ways as different from the original version; or
d) Limiting the use for publicity purposes of names of licensors or authors of the material; or
e) Declining to grant rights under trademark law for use of some trade names, trademarks, or service marks; or
f) Requiring indemnication of licensors and authors of that material by anyone who conveys the material (or modied versions of it)
with contractual assumptions of liability to the recipient, for any liability that these contractual assumptions directly impose on those
licensors and authors.
All other non-permissive additional terms are considered “further restrictions” within the meaning of section 10. If the Program as you
received it, or any part of it, contains a notice stating that it is governed by this License along with a term that is a further restriction,
you may remove that term. If a license document contains a further restriction but permits relicensing or conveying under this License,
you may add to a covered work material governed by the terms of that license document, provided that the further restriction does not
survive such relicensing or conveying. If you add terms to a covered work in accord with this section, you must place, in the relevant
source les, a statement of the additional terms that apply to those les, or a notice indicating where to nd the applicable terms.
Additional terms, permissive or non-permissive, may be stated in the form of a separately written license, or stated as exceptions; the
above requirements apply either way.
8. Termination.
You may not propagate or modify a covered work except as expressly provided under this License. Any attempt otherwise to propagate
or modify it is void, and will automatically terminate your rights under this License (including any patent licenses granted under the
third paragraph of section 11). However, if you cease all violation of this License, then your license from a particular copyright holder is
reinstated (a) provisionally, unless and until the copyright holder explicitly and nally terminates your license, and (b) permanently, if the
copyright holder fails to notify you of the violation by some reasonable means prior to 60 days after the cessation. Moreover, your license
from a particular copyright holder is reinstated permanently if the copyright holder noties you of the violation by some reasonable
means, this is the rst time you have received notice of violation of this License (for any work) from that copyright holder, and you cure
the violation prior to 30 days after your receipt of the notice. Termination of your rights under this section does not terminate the licenses
of parties who have received copies or rights from you under this License. If your rights have been terminated and not permanently
reinstated, you do not qualify to receive new licenses for the same material under section 10.
9. Acceptance Not Required for Having Copies.
You are not required to accept this License in order to receive or run a copy of the Program. Ancillary propagation of a covered work
occurring solely as a consequence of using peer-to-peer transmission to receive a copy likewise does not require acceptance. However,
nothing other than this License grants you permission to propagate or modify any covered work. These actions infringe copyright if you
do not accept this License. Therefore, by modifying or propagating a covered work, you indicate your acceptance of this License to do
so.
10. Automatic Licensing of Downstream Recipients.
Each time you convey a covered work, the recipient automatically receives a license from the original licensors, to run, modify and
propagate that work, subject to this License. You are not responsible for enforcing compliance by third parties with this License.
An “entity transaction” is a transaction transferring control of an organization, or substantially all assets of one, or subdividing an
organization, or merging organizations. If propagation of a covered work results from an entity transaction, each party to that transaction
who receives a copy of the work also receives whatever licenses to the work the party’s predecessor in interest had or could give under
the previous paragraph, plus a right to possession of the Corresponding Source of the work from the predecessor in interest, if the
predecessor has it or can get it with reasonable efforts. You may not impose any further restrictions on the exercise of the rights granted
or afrmed under this License. For example, you may not impose a license fee, royalty, or other charge for exercise of rights granted
under this License, and you may not initiate litigation (including a cross-claim or counterclaim in a lawsuit) alleging that any patent claim
is infringed by making, using, selling, offering for sale, or importing the Program or any portion of it.
11. Patents.
A “contributor” is a copyright holder who authorizes use under this License of the Program or a work on which the Program is based. The
work thus licensed is called the contributor’s “contributor version”. A contributor’s “essential patent claims” are all patent claims owned
or controlled by the contributor, whether already acquired or hereafter acquired, that would be infringed by some manner, permitted by
Page 56

English - 56
this License, of making, using, or selling its contributor version, but do not include claims that would be infringed only as a consequence
of further modication of the contributor version. For purposes of this denition, “control” includes the right to grant patent sublicenses in
a manner consistent with the requirements of this License. Each contributor grants you a non-exclusive, worldwide, royalty-free patent
license under the contributor’s essential patent claims, to make, use, sell, offer for sale, import and otherwise run, modify and propagate
the contents of its contributor version. In the following three paragraphs, a “patent license” is any express agreement or commitment,
however denominated, not to enforce a patent (such as an express permission to practice a patent or covenant not to sue for patent
infringement). To “grant” such a patent license to a party means to make such an agreement or commitment not to enforce a patent
against the party. If you convey a covered work, knowingly relying on a patent license, and the Corresponding Source of the work is
not available for anyone to copy, free of charge and under the terms of this License, through a publicly available network server or
other readily accessible means, then you must either (1) cause the Corresponding Source to be so available, or (2) arrange to deprive
yourself of the benet of the patent license for this particular work, or (3) arrange, in a manner consistent with the requirements of this
License, to extend the patent license to downstream recipients. “Knowingly relying” means you have actual knowledge that, but for the
patent license, your conveying the covered work in a country, or your recipient’s use of the covered work in a country, would infringe
one or more identiable patents in that country that you have reason to believe are valid. If, pursuant to or in connection with a single
transaction or arrangement, you convey, or propagate by procuring conveyance of, a covered work, and grant a patent license to some
of the parties receiving the covered work authorizing them to use, propagate, modify or convey a specic copy of the covered work, then
the patent license you grant is automatically extended to all recipients of the covered work and works based on it.
A patent license is “discriminatory” if it does not include within the scope of its coverage, prohibits the exercise of, or is conditioned on
the non-exercise of one or more of the rights that are specically granted under this License. You may not convey a covered work if you
are a party to an arrangement with a third party that is in the business of distributing software, under which you make payment to the
third party based on the extent of your activity of conveying the work, and under which the third party grants, to any of the parties who
would receive the covered work from you, a discriminatory patent license (a) in connection with copies of the covered work conveyed
by you (or copies made from those copies), or (b) primarily for and in connection with specic products or compilations that contain the
covered work, unless you entered into that arrangement, or that patent license was granted, prior to 28 March 2007.
Nothing in this License shall be construed as excluding or limiting any implied license or other defenses to infringement that may
otherwise be available to you under applicable patent law.
12. No Surrender of Others’ Freedom.
If conditions are imposed on you (whether by court order, agreement or otherwise) that contradict the conditions of this License, they do
not excuse you from the conditions of this License. If you cannot convey a covered work so as to satisfy simultaneously your obligations
under this License and any other pertinent obligations, then as a consequence you may not convey it at all. For example, if you agree
to terms that obligate you to collect a royalty for further conveying from those to whom you convey the Program, the only way you could
satisfy both those terms and this License would be to refrain entirely from conveying the Program.
13. Use with the GNU Affero General Public License.
Notwithstanding any other provision of this License, you have permission to link or combine any covered work with a work licensed
under version 3 of the GNU Affero General Public License into a single combined work, and to convey the resulting work. The terms of
this License will continue to apply to the part which is the covered work, but the special requirements of the GNU Affero General Public
License, section 13, concerning interaction through a network will apply to the combination as such.
14. Revised Versions of this License.
The Free Software Foundation may publish revised and/or new versions of the GNU General Public License from time to time. Such
new versions will be similar in spirit to the present version, but may differ in detail to address new problems or concerns. Each version
is given a distinguishing version number. If the Program species that a certain numbered version of the GNU General Public License
“or any later version” applies to it, you have the option of following the terms and conditions either of that numbered version or of
any later version published by the Free Software Foundation. If the Program does not specify a version number of the GNU General
Public License, you may choose any version ever published by the Free Software Foundation. If the Program species that a proxy
can decide which future versions of the GNU General Public License can be used, that proxy’s public statement of acceptance of a
version permanently authorizes you to choose that version for the Program. Later license versions may give you additional or different
permissions. However, no additional obligations are imposed on any author or copyright holder as a result of your choosing to follow a
later version.
15. Disclaimer of Warranty.
THERE IS NO WARRANTY FOR THE PROGRAM, TO THE EXTENT PERMITTED BY APPLICABLE LAW. EXCEPT WHEN
OTHERWISE STATED IN WRITING THE COPYRIGHT HOLDERS AND/OR OTHER PARTIES PROVIDE THE PROGRAM “AS IS”
WITHOUT WARRANTY OF ANY KIND, EITHER EXPRESSED OR IMPLIED, INCLUDING, BUT NOT LIMITED TO, THE IMPLIED
WARRANTIES OF MERCHANTABILITY AND FITNESS FOR A PARTICULAR PURPOSE. THE ENTIRE RISK AS TO THE QUALITY
AND PERFORMANCE OF THE PROGRAM IS WITH YOU. SHOULD THE PROGRAM PROVE DEFECTIVE, YOU ASSUME THE
COST OF ALL NECESSARY SERVICING, REPAIR OR CORRECTION.
16. Limitation of Liability.
IN NO EVENT UNLESS REQUIRED BY APPLICABLE LAW OR AGREED TO IN WRITING WILL ANY COPYRIGHT HOLDER, OR
ANY OTHER PARTY WHO MODIFIES AND/OR CONVEYS THE PROGRAM AS PERMITTED ABOVE, BE LIABLE TO YOU FOR
DAMAGES, INCLUDING ANY GENERAL, SPECIAL, INCIDENTAL OR CONSEQUENTIAL DAMAGES ARISING OUT OF THE
USE OR INABILITY TO USE THE PROGRAM (INCLUDING BUT NOT LIMITED TO LOSS OF DATA OR DATA BEING RENDERED
INACCURATE OR LOSSES SUSTAINED BY YOU OR THIRD PARTIES OR A FAILURE OF THE PROGRAM TO OPERATE WITH
ANY OTHER PROGRAMS), EVEN IF SUCH HOLDER OR OTHER PARTY HAS BEEN ADVISED OF THE POSSIBILITY OF SUCH
DAMAGES.
17. Interpretation of Sections 15 and 16.
If the disclaimer of warranty and limitation of liability provided above cannot be given local legal effect according to their terms, reviewing
courts shall apply local law that most closely approximates an absolute waiver of all civil liability in connection with the Program, unless
a warranty or assumption of liability accompanies a copy of the Program in return for a fee.
Page 57

English - 57
END OF TERMS AND CONDITIONS
❑
How to Apply These Terms to Your New Programs
If you develop a new program, and you want it to be of the greatest possible use to the public, the best way to achieve this is to make it
free software which everyone can redistribute and change under these terms. To do so, attach the following notices to the program. It is
safest to attach them to the start of each source file to most effectively state the exclusion of warranty; and each file should have at least the
“copyright” line and a pointer to where the full notice is found.
<one line to give the program’s name and a brief idea of what it does.> Copyright (C) <year> <name of author>
This program is free software: you can redistribute it and/or modify it under the terms of the GNU General Public License as
published by the Free Software Foundation, either version 3 of the License, or (at your option) any later version.
This program is distributed in the hope that it will be useful, but WITHOUT ANY WARRANTY; without even the implied warranty of
MERCHANTABILITY or FITNESS FOR A PARTICULAR PURPOSE. See the GNU General Public License for more details.
You should have received a copy of the GNU General Public License along with this program. If not, see <http://www.gnu.org/
licenses/>.
Also add information on how to contact you by electronic and paper mail.
If the program does terminal interaction, make it output a short notice like this when it starts in an interactive mode:
<program> Copyright (C) <year> <name of author> This program comes with ABSOLUTELY NO WARRANTY; for details type
`show w’. This is free software, and you are welcome to redistribute it under certain conditions; type `show c’ for details.
The hypothetical commands `show w’ and `show c’ should show the appropriate parts of the General Public License. Of course, your
program’s commands might be different; for a GUI interface, you would use an “about box”.
You should also get your employer (if you work as a programmer) or school, if any, to sign a “copyright disclaimer” for the program, if
necessary.
For more information on this, and how to apply and follow the GNU GPL, see <http://www.gnu.org/licenses/>.
The GNU General Public License does not permit incorporating your program into proprietary programs. If your program is a subroutine
library, you may consider it more useful to permit linking proprietary applications with the library. If this is what you want to do, use the GNU
Lesser General Public License instead of this License. But first, please read <http://www.gnu.org/philosophy/why-not-lgpl.html>.
The OpenSSL toolkit stays under a dual license, i.e. both the conditions of the OpenSSL License and the original SSLeay license apply to
the toolkit. See below for the actual license texts. Actually both licenses are BSD-style Open Source licenses. In case of any license issues
related to OpenSSL please contact openssl-core@openssl.org.
OpenSSL License
Copyright (c) 1998-2007 The OpenSSL Project. All rights reserved.
Redistribution and use in source and binary forms, with or without modification, are permitted provided that the following conditions are met:
1. Redistributions of source code must retain the above copyright notice, this list of conditions and the following disclaimer.
2. Redistributions in binary form must reproduce the above copyright notice, this list of conditions and the following disclaimer in the
documentation and/or other materials provided with the distribution.
3. All advertising materials mentioning features or use of this software must display the following acknowledgment: “This product includes
software developed by the OpenSSL Project for use in the OpenSSL Toolkit. (http://www.openssl.org/)”
4. The names “OpenSSL Toolkit” and “OpenSSL Project” must not be used to endorse or promote products derived from this software
without prior written permission. For written permission, please contact openssl-core@openssl.org.
5. Products derived from this software may not be called “OpenSSL nor may “OpenSSL” appear in their names without prior written
permission of the OpenSSL Project.
6. Redistributions of any form whatsoever must retain the following acknowledgment: “This product includes software developed by the
OpenSSL Project for use in the OpenSSL Toolkit (http://www.openssl.org/)”
THIS SOFTWARE IS PROVIDED BY THE OpenSSL PROJECT ``AS IS’’ AND ANY EXPRESSED OR IMPLIED WARRANTIES,
INCLUDING, BUT NOT LIMITED TO, THE IMPLIED WARRANTIES OF MERCHANTABILITY AND FITNESS FOR A PARTICULAR
PURPOSE ARE DISCLAIMED. IN NO EVENT SHALL THE OpenSSL PROJECT OR ITS CONTRIBUTORS BE LIABLE FOR ANY
DIRECT, INDIRECT, INCIDENTAL, SPECIAL, EXEMPLARY, OR CONSEQUENTIAL DAMAGES (INCLUDING, BUT NOT LIMITED TO,
PROCUREMENT OF SUBSTITUTE GOODS OR SERVICES; LOSS OF USE, DATA, OR PROFITS; OR BUSINESS INTERRUPTION)
HOWEVER CAUSED AND ON ANY THEORY OF LIABILITY, WHETHER IN CONTRACT, STRICT LIABILITY, OR TORT (INCLUDING
NEGLIGENCE OR OTHERWISE) ARISING IN ANY WAY OUT OF THE USE OF THIS SOFTWARE, EVEN IF ADVISED OF THE
POSSIBILITY OF SUCH DAMAGE.
This product includes cryptographic software written by Eric Young (eay@cryptsoft.com). This product includes software written by Tim
Hudson (tjh@cryptsoft.com).
Original SSLeay License
Copyright (C) 1995-1998 Eric Young (eay@cryptsoft.com) All rights reserved.
This package is an SSL implementation written by Eric Young (eay@cryptsoft.com). The implementation was written so as to conform with
Netscapes SSL.
This library is free for commercial and non-commercial use as long as the following conditions are aheared to. The following conditions apply
to all code found in this distribution, be it the RC4, RSA, lhash, DES, etc., code; not just the SSL code. The SSL documentation included with
this distribution is covered by the same copyright terms except that the holder is Tim Hudson (tjh@cryptsoft.com).
Copyright remains Eric Young’s, and as such any Copyright notices in the code are not to be removed. If this package is used in a product,
Eric Young should be given attribution as the author of the parts of the library used. This can be in the form of a textual message at program
startup or in documentation (online or textual) provided with the package.
Page 58

Redistribution and use in source and binary forms, with or without modification, are permitted provided that the following conditions are met:
1. Redistributions of source code must retain the copyright notice, this list of conditions and the following disclaimer.
2. Redistributions in binary form must reproduce the above copyright notice, this list of conditions and the following disclaimer in the
documentation and/or other materials provided with the distribution.
3. All advertising materials mentioning features or use of this software must display the following acknowledgement: “This product includes
cryptographic software written by Eric Young (eay@cryptsoft.com)” The word ‘cryptographic’ can be left out if the rouines from the library
being used are not cryptographic related :-).
4. If you include any Windows specic code (or a derivative thereof) from the apps directory (application code) you must include an
acknowledgement: “This product includes software written by Tim Hudson (tjh@cryptsoft.com)”
THIS SOFTWARE IS PROVIDED BY ERIC YOUNG ``AS IS’’ AND ANY EXPRESS OR IMPLIED WARRANTIES, INCLUDING, BUT NOT
LIMITED TO, THE IMPLIED WARRANTIES OF MERCHANTABILITY AND FITNESS FOR A PARTICULAR PURPOSE ARE DISCLAIMED.
IN NO EVENT SHALL THE AUTHOR OR CONTRIBUTORS BE LIABLE FOR ANY DIRECT, INDIRECT, INCIDENTAL, SPECIAL,
EXEMPLARY, OR CONSEQUENTIAL DAMAGES (INCLUDING, BUT NOT LIMITED TO, PROCUREMENT OF SUBSTITUTE GOODS OR
SERVICES; LOSS OF USE, DATA, OR PROFITS; OR BUSINESS INTERRUPTION) HOWEVER CAUSED AND ON ANY THEORY OF
LIABILITY, WHETHER IN CONTRACT, STRICT LIABILITY, OR TORT (INCLUDING NEGLIGENCE OR OTHERWISE) ARISING IN ANY
WAY OUT OF THE USE OF THIS SOFTWARE, EVEN IF ADVISED OF THE POSSIBILITY OF SUCH DAMAGE.
The licence and distribution terms for any publically available version or derivative of this code cannot be changed. i.e. this code cannot
simply be copied and put under another distribution licence [including the GNU Public Licence.]
English - 58
Page 59

Deutsch - 2
Benutzerhinweise
Einbrennen von Standbildern
Zeigen Sie Standbilder (z. B. bei einem Videospiel oder bei Anschluss eines PC an diesen Plasmamonitor) niemals länger als
2 Stunden auf dem Plasmabildschirm an, da das Bild auf diese Weise einbrennen kann. Das Einbrennen von Standbildern wird
auch als „Bildkonservierung“ bezeichnet. Sie können das Einbrennen vermeiden, indem Sie die Helligkeit und den Kontrast des
Bildschirms beim Anzeigen von Standbildern verringern.
Höhe
Um normalen Betrieb zu gewährleisten, muss der Plasmabildschirm in einer Höhe unter 2000 m aufgestellt werden. Der Betrieb
des Monitors wird möglicherweise gestört, wenn er in mehr als 2000 m Höhe betrieben wird. Sie dürfen den Plasmabildschirm
deshalb nicht in einer Höhe von über 2000 m aufstellen und betreiben.
Wärmeentwicklung auf der Oberseite des Plasmabildschirms
Die Oberseite des Produkts kann nach längerem Betrieb warm werden, da die Wärme aus dem Monitor über die Entlüftungsöffnung
im oberen Teil des Geräts abgeführt wird. Dies ist normal und weist nicht auf einen Defekt oder eine Fehlfunktion des Geräts hin.
Allerdings sollten Kinder von dem oberen Teil des Geräts ferngehalten werden.
Das Gerät verursacht ein „knackendes“ Geräusch.
Ein „knackendes“ Geräusch entsteht, wenn das Gerätematerial sich aufgrund einer Änderung der Umgebung, wie z. B.
Temperaturschwankungen oder Änderung der Luftfeuchtigkeit, zusammenzieht oder ausdehnt. Das ist normal und stellt keinen
Defekt des Geräts dar.
Pixelfehler
Der Plasmabildschirm besitzt eine Bildäche mit 2.360.000 (bei HD-Auösung) bis 6.221.000 (bei Full-HD-Auösung) Pixeln, für
dessen Herstellung hoch entwickelte Technologie eingesetzt wird. Allerdings können ein paar zu helle oder zu dunkle Pixel auf der
Bildäche zu sehen sein. Diese Pixelfehler haben keinen Einuss auf die Geräteleistung.
Vermeiden Sie den Betrieb des Plasmabildschirms bei Temperaturen unter 5° C.
Ein Standbild, dass zu lange angezeigt wird, kann zu einer bleibenden Beschädigung des Plasmabildschirms führen.
Nachbilder auf dem Monitor
Das Anzeigen von Standbildern von Videospielen und PC-Anwendungen über einen bestimmten Zeitraum kann zu partiellen
Nachbildern führen. Um diesen Effekt zu verhindern, verringern Sie Helligkeit und Kontrast, wenn Sie Standbilder anzeigen
möchten.
Garantie
Durch diese Garantie nicht abgedeckt sind Schäden, die durch Einbrennen von Bildern entstehen. Das Einbrennen von Bildern wird von der Garantie nicht abgedeckt. -
Installation
Wenden Sie sich an den autorisierten Kundendienst, wenn das Gerät an einem Ort mit hoher Konzentration an Staubpartikeln,
außergewöhnlich hoher oder geringer Raumtemperatur, extrem hoher Luftfeuchtigkeit, in unmittelbarer Nähe zu chemischen
Lösungsmitteln oder für den Dauerbetrieb, z.B. auf Bahn- oder Flughäfen, aufgestellt werden soll. Eine nicht fachgerechte
Aufstellung kann zu schweren Schäden am Gerät führen.
Hinweis zu Digitalfernsehgeräten
1. Die Funktionalitäten für Digital TV (DVB) stehen nur in Ländern/Regionen zur Verfügung, in denen digitale terrestrische
DVB-T-Signale (MPEG2 und MPEG4 AVC) gesendet werden oder in denen Sie Zugang zu einem kompatiblen
Kabelfernsehdienst mit DVB-C (MPEG2 und MPEG4 AAC) haben. Fragen Sie Ihren örtlichen Händler, wenn Sie
Informationen über die Verfügbarkeit von DVB-T oder DVB-C in Ihrer Gegend benötigen.
2. DVB-T ist der Standard des europäischen DVB-Konsortiums für die terrestrische Versorgung mit digitalem terrestrischem
Fernsehen, und DVB-C ist das Konsortium für die Versorgung mit digitalem Kabelfernsehen. Allerdings werden
manche Unterscheidungsmerkmale wie EPG (elektrische Programmzeitschrift), VOD (Video on Demand) usw. in dieser
Spezikation nicht berücksichtigt. Deshalb können sie zum jetzigen Zeitpunkt noch nicht unterstützt werden.
3. Zwar hält dieses Fernsehgerät die aktuellen Standards der DVB-T- und DVB-C-Spezikationen [August 2008] ein, aber es
kann nicht garantiert werden, dass die Kompatibilität mit zukünftigen digitalen terrestrischen DVB-T- und DBV-C-Signalen
gewahrt bleibt.
4. Manche Kabelfernsehanbieter verlangen zusätzliche Gebühren für solch einen Dienst, und möglicherweise wird verlangt,
dass Sie den Vertragsbedingungen des Unternehmens zustimmen.
5. Manche Digitalfernsehfunktionen sind in einigen Ländern oder Regionen möglicherweise nicht verfügbar, und bei DVB-C
kann das Gerät möglicherweise nicht mit allen Anbietern störungsfrei zusammenarbeiten.
6. Für weitere Informationen setzen Sie sich bitte mit dem Samsung-Kundendienstzentrum in Verbindung.
Der Betrieb des Plasmabildschirms im Format 4:3 für einen längeren Zeitraum kann links, rechts und in der
Mitte des Monitors Spuren der Bildränder hinterlassen, die durch die unterschiedliche Lichtemission auf dem
Monitor verursacht werden. Durch die Wiedergabe einer DVD oder der Betrieb einer Spielkonsole kann es auf
dem Bildschirm zu ähnlichen Effekten kommen. Schäden, die durch die o. g. Effekte verursacht wurden, fallen
nicht unter die Garantie.
Wenden Sie sich an SAMSUNG WORLDWIDE
Bei Fragen oder Hinweisen zu Produkten von Samsung setzen Sie sich bitte mit dem SAMSUNG-Kundendienstzentrum in
Verbindung. (Siehe Abschnitt “Wenden Sie sich an Samsung”)
N
Die Abbildungen und Illustrationen in diesem Handbuch dienen nur zur Information und können vom tatsächlichen
Aussehen des Geräts abweichen. Technische Änderungen und Änderungen am Design des Geräts, insbesondere zur
Verbesserung der Leistungsfähigkeit des Geräts, sind jederzeit vorbehalten.
© 2009 Samsung Electronics Co., Ltd. Alle Rechte vorbehalten.
Page 60

Deutsch - 3
Inhalt
Anschließen und Vorbereiten des Fernsehgeräts
Lieferumfang ■ .............................................................................4
Standfuß verwenden ■ .................................................................4
Montieren des Standfußes (modellabhängig) ■ ...........................4
Verlegen der Kabel ■ ....................................................................4
Bedienfeld ■ .................................................................................5
Anschlussfeld ■ ............................................................................6
Fernbedienung ■ ..........................................................................8
Batterien in die Fernbedienung einsetzen ■ .................................9
Ein-und Ausschalten ■ .................................................................. 9
Fernsehgerät in den Standby-Modus schalten ■ ..........................9
Menüs anzeigen ■ ......................................................................10
Verwenden der Taste TOOLS ■ ................................................. 10
Plug & Play-Funktion ■ ............................................................... 11
Sender
Speichern von Sendern ■ .........................................................12
Verwalten von Sendern ■ ...........................................................16
Bild
Ändern der Bildeinstellungen ■ .................................................. 18
Fernsehgerät mithilfe des PCs einstellen ■ ................................21
PC-Anzeige ■ .............................................................................22
Ton
Tonstandard wählen ■ ................................................................23
Tonmodus wählen ■ ...................................................................24
Media Play
Anschließen eines USB-Geräts ■ ...............................................31
Verwenden der Medienwiedergabefunktion ■ ............................ 32
Verwenden der Fotoliste ■ .......................................................... 33
Anzeigen eines Fotos oder einer Diashow ■ .............................. 34
Verwenden der Musiklistee ■ .....................................................35
Wiedergeben von Musik ■ .......................................................... 36
Bild-/Musikeinstellungen mit Media Play ■ ................................. 37
Verwenden des Menüs Einstellungen ■ ..................................... 37
Informationen zu Anynet+
Anschließen von Anynet+ -Geräten ■ .........................................38
Einrichten von Anynet ■
Wechseln zwischen Anynet+-Geräten ■ ..................................... 39
Aufnahme ■ ................................................................................40
Tonwiedergabe mit einem Receiver ■ ........................................41
Fehlerbehebung für Anynet+ ■ ................................................... 41
+
...........................................................39
Empfehlungen für den Betrieb
Videotextfunktion ■ ..................................................................... 42
Spezikation (VESA) der Wandhalterung ■ ................................ 43
Vorbereitung für die Befestigung der Wandhalterung an der Wand ■
Befestigen des Fernsehgeräts an der Wand ■ ........................... 44
Absichern des Einbaubereichs ■ ................................................ 45
Fehlerbehebung ■ ......................................................................46
Technische Daten ■ .................................................................... 47
Deutsch
.... 44
Funktionen
Einstellen der Uhrzeit ■ ..............................................................25
Kongurieren der Menüeinstellungen ■ ...................................... 26
Unterstützung / Eingang
Unterstützung ■ .......................................................................... 29
Quellen / Name bearbeiten ■ .....................................................30
Symbol Drücken Hinweis Zielwahltaste TOOLS
N O T
Page 61

Deutsch - 4
Anschließen und Vorbereiten des Fernsehgeräts
Lieferumfang
Bedienungsanleitung Garantiekarte / Kurzanleitung
zur Konfiguration / Kurze
Aufstellanleitung
(Nicht überall verfügbar)
Schrauben (4 Stück) Untere Abdeckung Kabelschlauch Ferritkern für Netzkabel Ferritkern für
Ferritkern N
Mit dem Ferritkern werden die Kabel vor Störungen geschützt. Wenn Sie ein Kabel
anschließen, öffnen Sie den Ferritkern und legen Sie ihn in der Nähe des Steckers mit
einem deutlich hörbaren Klicken um das Kabel.
Fernbedienung /
AAA-Batterien (2 Stück)
Netzkabel Reinigungstuch Haltering (4 Stück)
Kopfhörerkabel
Standfuß verwenden
Der PDP-Fernseher sollte von mindestens zwei Personen getragen werden. N
Um Beschädigungen zu vermeiden, legen Sie den Plasmafernseher nie auf
den Fußboden. Der Plasmabildschirm muss sich immer in aufrechter Position
benden.
Der Plasmabildschirm kann um 20 Grad nach recht und links gedreht werden.
N
Montieren des Standfußes (modellabhängig)
(Informationen hierzu
finden Sie auf Seite 44)
-20° ~ 20°
Verwenden Sie die 4 mitgelieferten Schrauben, um den Monitor fest mit der
Bodenplatte zu verschrauben.
Achtung
Befestigen Sie den Standfuß sicher am
Fernseher, ehe Sie ihn bewegen, denn das
Gerät könnte herunterfallen und Verletzungen
verursachen.
Der Fernseher sollte von mindestens
N
zwei Personen getragen werden. Um
Beschädigungen zu vermeiden, legen Sie
den Fernseher nie auf den Fußboden. Der
Fernseher muss sich immer in aufrechter
Position benden.
Form und Farbe des Geräts können sich je
N
nach Modell unterscheiden.
Bei Wandinstallation Ihres Fernsehgeräts
schließen Sie die Abdeckung 1 am
Verbindungsteil des Standfußes mithilfe der
zwei Verblendschrauben.
Verlegen der Kabel
Verstecken Sie die Kabel im Kabelschlauch, damit Sie durch den transparenten Standfuß hindurch
nicht zu sehen sind.
Page 62

Deutsch - 5
Bedienfeld
Die Produktfarbe und -form können sich je nach Modell unterscheiden. N
Tasten auf der Vorderseite
Berühren Sie die
verschiedenen Tasten, um
die gewünschten Funktionen
zu nutzen.
SOURCE
1
Schaltet zwischen den verfügbaren Signalquellen um
(TV, Ext1, Ext2, AV, PC, Component, HDMI1, HDMI2/DVI,
HDMI3, HDMI4, USB).
Im Bildschirmmenü können Sie diese Schaltäche
N
genauso wie die ENTERE-Taste auf der Fernbedienung
verwenden.
MENU
2
Drücken Sie diese Taste, um ein Bildschirmmenü zu den
Funktionen des Fernsehgeräts einzublenden.
+ –
3
Hiermit erhöhen oder verringern Sie die Lautstärke. Im
Bildschirmmenü können Sie die Schaltächen +
die Tasten ◄ und ► auf der Fernbedienung verwenden.
– wie
CH
4
Hiermit wechseln Sie den Sender. Im Bildschirmmenü
können Sie die
und ▼ auf der Fernbedienung verwenden. Verwnden Sie die
CH -Taste verwenden, um das Fernsehgerät ohne
Fernbedienung anzuschalten.
BETRIEBSANZEIGE
5
Beim Einschalten des Fernsehgeräts blinkt die Netzleuchte
kurz und erlischt anschließend. Im Standbymodus leuchtet
die Anzeige permanent.
FERNBEDIENUNGSSENSOR
6
Richten Sie die Fernbedienung auf diesen Sensor am
Fernsehgerät.
(
POWER)
7
Berühren Sie den Sensor unterhalb der ( )-Markierung, um
das Fernsehgerät an- bzw. auszuschalten.
LAUTSPRECHER
8
CH -Schaltächen wie die Tasten ▲
Page 63

Deutsch - 6
Anschlussfeld
Rückseite
1
oder
9
Kabelfernsehen
Netzwerk
oder
432 8 06
N
Form und Farbe des Geräts können sich je nach Modell unterscheiden.
Stellen Sie sicher, dass der Fernseher und alle angeschlossenen Geräte ausgeschaltet sind, bevor Sie weitere Geräte anschließen. N
Achten Sie beim Anschließen eines externen Geräts auf die Farbcodierung: Stecker und Buchse müssen die gleiche Farbe N
aufweisen.
POWER IN
1
Anschluss für das Netzkabel.
COMPONENT IN
2
Audio- (L/R) UND Videoeingänge (Y/PB/PR) für
Komponentensignale.
PC IN (AUDIO / PC)
3
Anschließen an den Video- und Audioausgang eines
Computers.
4 EXT 1, EXT 2
Ein- und Ausgänge für externe Geräte wie z. B.
Videorecorder, DVD-Player, Spielekonsolen oder Video-Disc-
Player.
N
Im EXT-Modus unterstützt DTV Out nur MPEG SD-Video
und Audio.
Im EXT-Modus ist der Spielemodus nicht verfügbar.
N
5
Anschlussmöglichkeiten
Anschluss
EXT 1 ✔ ✔ ✔
EXT 2 ✔ ✔ Ausgang frei wählbar.
Video Audio(L/R) RGB Video + Audio(L/R)
Eingang Ausgang
Nur TV- oder DTV-
Ausgang verfügbar.
7
5 KOPFHÖRER
Wenn Sie beim Fernsehen andere Personen im Zimmer nicht
stören möchten, können Sie Kopfhörer an das Fernsehgerät
anschließen.
Das Verwenden von Kopfhörern bei hoher Lautstärke über
N
einen längeren Zeitraum kann zu Hörschäden führen.
DIGITAL AUDIO OUT (OPTICAL)
6
Anschließen an ein digitales Audiogerät.
7 SERVICE
Anschluss für Servicezwecke.
AUDIO OUT(AUDIO R/L)
8
Schließen Sie die Cinch-Audiosignale des Fernsehgeräts an
eine externe Quelle an, z. B. an ein Audiogerät.
9 ANT 2 IN(SATELLITE), ANT 1 IN
Koaxialanschluss (75Ù) für SATELLIT/Antenne/
Kabelanschluss.
Page 64

Deutsch - 7
HDMI IN 1, 2(DVI), 3
0
Beim Anschluss von Geräten über eine HDMI-Schnittstelle ist
keine zusätzliche Audioverbindung erforderlich.
Eine Verbindung über HDMI/DVI-Kabel kann nur über HDMI IN 2 (DVI) erfolgen.
DVI AUDIO IN DVI-Audioausgänge für externe Geräte.
Was ist HDMI?
N
- Die hochauösende Multimediaschnittstelle HDMI
ermöglicht die Übertragung von hochauösenden
digitalen Videodaten und mehreren Kanälen mit
Digitalaudio.
Seitenverkleidung
- Mit dem entsprechenden Kabel ermöglicht der HDMI/
DVI-Anschluss DVI-Verbindungen zu einem erweiterten
Gerät (nicht mitgeliefert). Der Unterschied zwischen
HDMI und DVI besteht darin, dass ein Gerät mit HDMI
kleiner ist, mit dem Kopierschutz HDCP (High Bandwidth
Digital Copy Protection/ digitaler Kopierschutz)
ausgestattet ist und digitalen Mehrkanalton unterstützt.
DVI AUDIO IN
DVI-Audioausgänge für externe Geräte.
Unterstützte Modi für HDMI/DVI und Component
480i 480p 576i 576p 720p 1080i 1080p
HDMI/DVI 50Hz X X X O O O O
HDMI/DVI 60Hz X O X X O O O
Komponenteneingang O O O O O O O
1
2
3
4
Form und Farbe des Geräts können sich je nach Modell unterscheiden. N
1
COMMON INTERFACE Slot
Setzen Sie eine CI(CI+)-Karte (Common Interface) in den
Steckplatz ein. (Informationen hierzu finden Sie auf Seite 26)
Ohne eingelegte CI(CI+)-Karte zeigt das Fernsehgerät -
auf einigen Kanälen ein gestörtes Signal an.
Die Verbindungsinformationen mit Telefonnummer, -
Kennung der CI(CI+)-Karte, Hostkennung und anderen
Angaben wird in ungefähr 2 bis 3 Minuten angezeigt.
Wenn eine Fehlermeldung angezeigt wird, wenden Sie
sich bitte an Ihren Dienstanbieter.
Wenn die Senderinformationskonguration -
abgeschlossen ist, wird die Meldung angezeigt. Dies
bedeutet, dass die Senderliste jetzt aktualisiert ist.
Die Richtung, in der Sie die Karte einlegen müssen, ist
N
darauf mit einem Pfeil markiert.
Zugangsmodule werden in einigen Ländern und
N
Regionen nicht unterstützt. Fragen Sie diesbezüglich
Ihren ofziellen Samsung-Händler.
Die CI+-Funktion steht nur im Modell PS********P zur
N
Verfügung.NNBei Problemen wenden Sie sich an den
Dienstanbieter.
2
HDMI IN 4
Zum Anschließen an die HDMI-Buchse von Geräten mit
HDMI-Ausgang.
3
USB
Schließen Sie ein USB-Massenspeichergerät an, um
Fotodateien (JPEG) anzuzeigen und Audiodateien (MP3)
abzuspielen.
4
AV IN (VIDEO, AUDIO L/R)
Video- und Audioeingänge für externe Geräte wie z. B.
Camcorder oder Videorecorder.
Page 65

Deutsch - 8
Fernbedienung
Die Reichweite der Fernbedienung beträgt ca. 7 m.
N
Die Leistungsfähigkeit der Fernbedienung kann durch starke Lichteinstrahlung beeinträchtigt werden.
POWER Taste
1
(Netztaste zum An- und Ausschalten
des Fernsehgeräts)
TV-Modus direkt aufrufen
2
Zifferntasten für direkte
3
Programmplatzeingabe
Anzeigen von Informationen zur
4
aktuellen Sendung.
Ton vorübergehend ausschalten
5
6
Lautstärke erhöhen /
Lautstärke verringern
Verfügbare Signalquelle auswählen.
7
Auswählen von Optionen im
8
Bildschirmmenü und Ändern von
Menüwerten.
Hiermit können Sie häug verwendete
9
Funktionen schnell auswählen.
Drücken Sie diese Taste, um zu Ihren
0
Favoriten zu wechseln.
Anzeigen von Senderlisten auf dem
!
Bildschirm.
Verwenden Sie diese Tasten bei der
@
Arbeit mit der Senderliste, Media Play
und usw.
Auswahl des Tonmodus.
$
Verwenden Sie diese Tasten bei der
%
Arbeit mit der Media Play und Anynet+.
Vorheriger Sender
^
: Nächster Sender
&
: Vorheriger Sender
Bildschirmmenü anzeigen.
*
Zurück zum vorherigen Menü.
)
Bildschirmmenü schließen.
a
Mit dieser Funktion können Sie Foto-
b
(JPEG) und Musikdateien (MP3) von
einem externen Gerät anzeigen bzw.
wiedergeben.
Auswahl der Bildgröße.
c
Mit dieser Taste können Sie digitale
d
Untertitel anzeigen
(
EPG-Anzeige (Elektronischer
Programmführer)
e
Hiermit schalten Sie die Funktion für
Audiobeschreibungen ein bzw. aus.
Teletextfunktionen
Teletextanzeige beenden
2
(modellabhängig)
Teletext-Modus auswählen
7
(LIST/FLOF)
Teletext anzeigen
8
Teletextgrösse
9
Teletextseite speichern
!
Fastext-Thema auswählen
@
Teletext anzeigen / Teletext und
#
Fernsehsendung zugleich anzeigen
Untergeordnete Teletextseite
^
P :Nächste Teletextseite
&
*
)
a
:Vorige Teletextseite
P
Teletext-Index
Seite weiter anzeigen (nicht
umblättern)
Teletext abbreche
Page 66

Deutsch - 9
Batterien in die Fernbedienung einsetzen
1. Heben Sie die Abdeckung auf der Rückseite der Fernbedienung an, wie in der
Abbildung dargestellt.
2. Legen Sie zwei AAA-Batterien ein.
Achten Sie darauf, dass die Pole der Batterien wie im Batteriefach angezeigt
N
ausgerichtet sind.
3. Schließen Sie den Deckel.
N
Wenn die Fernbedienung für einen längeren Zeitraum nicht verwendet wird,
nehmenSie die Batterien heraus, und lagern Sie sie an einem kühlen, trockenen
Ort.
Sollte die Fernbedienung nicht funktionieren, überprüfen Sie Folgendes: N
1. Ist das Fernsehgerät eingeschaltet?
2. Wurden Plus- und Minuspol der Batterien vertauscht?
3. Sind die Batterien leer?
4. Liegt ein Stromausfall vor oder ist das Netzkabel des Fernsehgeräts nicht
eingesteckt?
5. Bendet sich eine Leuchtstoffröhre oder ein Neonschild in der Nähe?
Als Verbraucher sind Sie verpichtet, alte Batterien und Akkus zur umweltschonenden Entsorgung zurückzugeben. Sie können
N
alte Batterien und Akkus bei den öffentlichen Sammelstellen in Ihrer Gemeinde oder überall dort abgeben, wo Batterien und
Akkus der betreffenden Art verkauft werden.
Ein-und Ausschalten
Das Netzkabel wird auf der Rückseite des Fernsehgeräts angeschlossen.
1. Schließen Sie das Netzkabel an eine geeignete Netzsteckdose an.
N
Am Gerät leuchtet die Standby-Anzeige auf.
2. Berühren Sie den Sensor unterhalb der (P)-Markierung, um das Fernsehgerät
anzuschalten.
Zum Einschalten des Fernsehgeräts können Sie auch die Netytaste
N
Der Sender, den Sie zuletzt gesehen haben, wird automatisch wieder aufgerufen.
N
3. Drücken Sie auf der Fernbedienung die Zifferntasten (0-9) bzw. eine der Programmwahltasten (< / >) oder drücken Sie die Taste
< CH> am Gerät.
Wenn Sie das Gerät zum ersten Mal einschalten, können Sie die Sprache auswählen, in der die Menüs angezeigt werden.
N
4. Berühren Sie den Sensor, um das Fernsehgerät wieder auszuschalten.
P
oder die TV-Taste auf der Fernbedienung drücken.
Fernsehgerät in den Standby-Modus schalten
Um den Stromverbrauchs zu senken, kann das Gerät in den Standby-Modus geschaltet werden. Der Standby-Modus ist nützlich, wenn
Sie das Gerät vorübergehend ausschalten möchten (z. B. während einer Mahlzeit).
1. Drücken Sie die NetztasteP auf der Fernbedienung.
N
Der Bildschirm wird ausgeschaltet, und auf der Vorderseite des Fernsehgeräts leuchtet die rote Standby-Anzeige auf.
2. Drücken Sie einfach erneut die NetztasteP, eine Zifferntaste (0-9) bzw. die Taste TV oder die Programmwahltaste (< / >),
um das Gerät wieder einzuschalte.
Der Standby-Modus ist nicht für längere Phasen der Abwesenheit gedacht (z. B. wenn Sie verreist sind). Ziehen Sie dann
N
sicherheitshalber den Netzstecker und das Antennenkabel.
Page 67

Deutsch - 10
Menüs anzeigen
1. Drücken Sie die Taste MENU bei angeschaltetem Gerät.
Das Hauptmenü wird auf dem Bildschirm angezeigt. Links im Menü sind Symbole zu
sehen Bild, Ton , Sender, Einstellungen, Eingang, Anwendung, Unterstützung.
2. Wählen Sie mit den Tasten ▲ oder ▼ eines der Symbole aus. Drücken Sie dann die
Taste ENTER
3. Zum Beenden drücken Sie die Taste EXIT.
Das Bildschirmmenü wird nach etwa einer Minute vom Bildschirm gelöscht.
N
E
, um in das Untermenü des Symbols zu wechseln.
Bild
Modus
:
Zellhelligkeit : 7
Kontrast : 95
Helligkeit : 45
Schärfe : 50
Farbe : 50
Farbton (G/R) : G50/R50
Autom. Einstellung
Verwenden der Taste TOOLS
Sie können die Taste TOOLS verwenden, um häufig verwendete Funktionen schnell und einfach auszuwählen.
Der Inhalt des Menüs Extras hängt davon ab, welche externe Signalquelle Sie für die Anzeige verwenden.
1. Drücken Sie die Taste TOOLS. Das Menü Extras wird geöffnet.
2. Wählen Sie mit der Taste ▲ oder ▼ eine Menüoption aus, und drücken Sie dann die
Taste ENTER
3. Drücken Sie die Tasten ▲ / ▼ / ◄ / ► / ENTER
anzuzeigen, zu ändern oder zu verwenden.
Ausführliche Beschreibungen der einzelnen Funktionen nden Sie auf der jeweiligen
Seite
E
.
+
Anynet •
(HDMI-CEC), Siehe Seite 39
Bildmodus, • Siehe Seite 18
Tonmodus, • Siehe Seite 23
Sleep-Timer, • Siehe Seite 25
SRS TS HD, • Siehe Seite 23
Energiesparmodus, • Siehe Seite 28
Eigene Kanäle bearbeiten, Siehe Seite 16 •
Autom. Einstellung, Siehe Seite 21 •
E
, um die markierten Elemente
Extras
Anynet+ (HDMI-CEC)
Bildmodus : Standard
Ton Modus : Benutzerd.
Sleep-Timer : Aus
SRS TS HD : Aus
Energiesparmod. : Aus
Eigene Kanäle bearbeiten
U
Navig. E Ein gab e e Beenden
Standard
Page 68

Deutsch - 11
Plug & Play-Funktion
Wenn das Fernsehgerät zum ersten Mal eingeschaltet wird, werden automatisch die Grundeinstellungen vorgenommen.
N Plug & Play Betrieb länger als 1 Minute keine Eingabe mit der Fernbedienung erfolgt.
Der Bildschirmschoner wird aktiviert, wenn im
Der Bildschirmschoner wird aktiviert, wenn länger als 15 Minuten kein Betriebssignal anliegt.
N
Wenn Sie versehentlich das falsche Land für Ihren Fernseher einstellen, werden die Zeichen auf dem Bildschirm möglicherweise N
falsch angezeigt.
1. Drücken Sie die Taste POWER auf der Fernbedienung. Das Menü Select the OSD
Language. (Sprache des Bildschirmmenüs wählen) wird automatisch angezeigt.
Drücken Sie die ENTERE. Wählen Sie die gewünschte Sprache mit den Tasten
▲ oder ▼ aus.
Select the OSD Language.
Menu Language :
Bestätigen Sie Ihre Auswahl mit der Taste ENTERE.
2. Wählen Sie durch Drücken der Tasten ◄ oder ► die Option Shop Demo oder
Privatgebrauch, und drücken Sie dann auf ENTERE
N Privatgebrauch zu verwenden, um das optimale Bild für den Privatgebrauch
Wir empfehlen Ihnen, das Fernsehgerät im Modus
zu erzielen.
Der Modus
N Shop Demo ist nur geeignet, wenn das Gerät in einem Verkaufsbereich verwendet wird.
Wenn das Gerät versehentlich auf den Modus “Shop Demo” eingestellt ist, und Sie möchten wieder zurück zu “Privatgebrauch”
N
wechseln : Drücken Sie die Lautstärketaste am Fernsehgerät. Wenn das Menü “Lautstärke” angezeigt wird, halten Sie die Taste
MENU am Fernsehgerät 5 Sekunden lang gedrückt.
3. Drücken Sie die ENTERE. Wählen Sie das gewünschte Land mit der Taste ▲ oder ▼ aus. Bestätigen Sie Ihre Auswahl mit der
Taste ENTERE.
4. Drücken Sie die Taste ▲ oder ▼, um die Sender der gewählten Verbindung zu speichern, und drücken Sie dann die Taste
Terrestrisch • : Terrestrisches Antennensignal.
Kabel • : Kabelgebundenes Antennensignal.
Satellit • : Satellitensignal.
5. Wählen Sie durch Drücken der Tasten ▲ oder ▼ den Sendertyp zum Speichern aus. Drücken Sie die Taste ENTERE, um Start
auszuwählen.
Wählen Sie
N Antenne oder Kabel,
Digital und Analog • : Digitale und analoge Kanäle.
Digital • : Digitale Kanäle.
Analog • : Analoge Kanäle.
Eine genauere Beschreibung zur Auswahl des Kabelmodus nden Sie im Kapitel Automatisch speichern,
N
Informationen hierzu nden Sie auf Seite 13.
Wenn Sie Satellit wählen, können Sie die LNB-Einstellungen kongurieren.
N
Alle • : Auswählen von Alle als Kanaltyp.
T • V: Auswählen von TV als Kanaltyp.
Ra • dio: Auswählen von Radio als Kanaltyp.
Wählen Sie den Satelliten und den Suchmodus.
N
Die Sendersuche wird automatisch gestartet und beendet. N
6. Die Meldung Uhrmodus einstellen. wird angezeigt. Drücken Sie die ENTERE-Taste.
Wählen Sie durch Drücken der Tasten ▲ oder ▼ die Option Auto, und drücken Sie dann die Taste ENTERE.
Wenn Sie Manuell wählen, wird Datum und Uhrzeit einstellen angezeigt. (Detailliertere Informationen nden Sie im Kapiel
N
Einstellen der Uhrzeit, Informationen hierzu nden Sie auf Seite 25)
Wenn Sie ein digitales Signal empfangen, wird die Zeit automatisch eingestellt.
N
7. Die kurze Einführung So erzielen Sie mit Ihrem HD-Fernsehgerät optimale Leistung wird angezeigt. Drücken Sie die Taste
Dieses Menü ist im N HD-Anschlussplanim Menü Unterstützung verfügbar.
8. Die Meldung. Enjoy your TV. (Wir wünschen gute Unterhaltung!) wird angezeigt.
Drücken Sie abschließend die Taste ENTERE.
So setzen Sie diese Funktion zurück...
1. Drücken Sie die Taste MENU, um das Menü anzuzeigen. Drücken Sie die Taste ▲ oder
Einstellungen
▼, um Einstellungen auszuwählen, und drücken Sie dann die Taste ENTERE.
2. Drücken Sie die Taste ENTERE erneut, um Plug & Play auszuwählen.
3. Geben Sie nun Ihre vierstellige PIN ein. Der Standard-PIN-Code eines neuen
Fernsehgeräts lautet ‘0-0-0-0’.
Informationen zum Ändern der PIN erhalten Sie im Kapitel PIN ändern, Informationen
N
hierzu nden Sie auf Seite 27.
Die
N Plug & Play-Funktion gibt es nur im TV-Modus.
Plug & Play
▲
Nederlands
English
Eesti
▼
U
Mov e E Enter
ENTERE
.
ENTERE
Plug & Play ►
Zeit
Sprache
Untertitel
Digitaltext : Aktivieren
Sicherheit
Netzwerk
Allgemein
.
Page 69

Deutsch - 12
Sender
Speichern von Sendern
TV-Empfang ❑
Auswählen eines für digitale Übertragungen geeigneten TV-Empfangstyps.
Antenne • : Wählen Sie Antenne für den Empfang von Digitalsendungen.
Kabel • : Wählen Sie Kabel für den Empfang von Digitalsendungen.
Satellit • : Auswählen des Satelliten für den Empfang von Digitalsendungen.
Land
❑
Digitaler Sender : Sie können das Land für digitale Sender ändern.
: Sie können das Land für die analogen Sender ändern.
Analog Sender
Der Eingabebildschirm für die PIN wird geöffnet. Geben Sie nun Ihre vierstellige PIN ein. N
Sender
TV-Empfang : Satellit ►
Land
Autom. speichern
Sender manuell speichern
Suchoptionen für Kabel
Ausführlich
Übersicht
Standard : Ausführlich
Autom. speichern ❑
Sie können den verfügbaren Frequenzbereich nach Sendern durchsuchen (verfügbare Sender und Frequenzbereiche sind vom
jeweiligen Land abhängig). Die automatisch zugewiesenen Programmplätze entsprechen unter Umständen nicht den gewünschten
Programmplätzen.
Wenn ein Kanal mit der Kindersicherung gesperrt wurde, wird das Eingabefenster für die PIN geöffnet.
N
Antenne / Kabel / Satellit
Digital und Analog • : Digitale und analoge Kanäle.
Digital • : Digitale Kanäle.
Analogue • : Analoge Kanäle.
Bei Auswahl von Kabel → Digital und Analog oder Kabel → Digital:
Provide a value to scan for cable channels.
Suchmodus • → Voll / Netzwerk / Schnell
Schnell
N
Network ID - : Anzeigen der Netzwerkkennung.
Frequenz - : Hiermit zeigen Sie die Frequenz des Senders an.
Modulation - : Hiermit zeigen Sie die verfügbaren Modulationswerte an.
Symbolrate - : Hiermit zeigen Sie die verfügbaren Symbolraten an.
Das Fernsehgerät durchsucht automatisch alle Kanäle mit aktiven Sendern und speichert sie im Speicher des Fernsehgeräts.
N
Wenn Sie NAutom. speichern anhalten möchten, drücken Sie auf ENTERE.
Die Meldung Automatische Senderspeicherung beenden? wird angezeigt.
Wählen Sie mit den Tasten ◄ oder ► die Option JA, und drücken Sie dann die Taste ENTERE.
When selecting Satellite:
Satellit • : Auswählen des Satelliten zum Durchsuchen.
Suchmodus • → Alle / TV / Radio: Auswählen des Suchmodus für den gewählten Satelliten.
Es können nur kostenfreie Kanäle empfangen werden.
N
Nachdem alle verfügbaren Sender gespeichert wurden.
N
Detail - : Zeigen Sie die Ergebnisse der automatischen Speicherung an.
OK - : Schließen Sie das Menü für die automatische Speicherung.
Sender manuell speichern
❑
Hiermit wird ein Sender manuell gesucht und im Fernsehspeicher abgelegt.
Fortsetzung...
Page 70

Deutsch - 13
Digitaler Sender (Digital)
Manuelles Speichern von digitalen Kanälen.
Digitalsender sind nur im DTV-Modus verfügbar. N
Sender • : Stellen Sie die Sendernummer mit den Tasten ▲, ▼ oder einer Zifferntaste (0 – 9) ein.
Frequency • : Einstellen der Frequenz mit Hilfe der Zifferntasten (0–9).
Bandwidth • : Einstellen der Bandbreite mit den Tasten ▲, ▼.
Nach Abschluss des Suchlaufs werden die Kanäle in der Senderliste aktualisiert.
N
Analog Sender
Manuelles Speichern von analogen Kanälen.
Programm • : Stellen Sie den Programmplatz mit den Tasten ▲, ▼ oder einer Zifferntaste (0–9) ein.
Fernsehnorm → Auto / PAL / SECAM / NTSC 4.43 • : Einstellen der Fernsehnorm mithilfe der Tasten ▲ oder ▼.
onsystem • → BG / DK / I / L : Einstellen des Tonsystems mithilfe der Tasten ▲ oder ▼.
Sender • (Wenn Ihnen die Nummer des zu speichernden Senders bekannt ist) : Wählen Sie mit den Tasten ▲ oder ▼ die Option
C (Terrestrischer Sender) oder S (Kabelsender) aus. Drücken Sie die Taste ► und dann die Tasten ▲, ▼ oder eine Zifferntaste
(0–9) , um die gewünschte Nummer auszuwählen.
Falls kein oder nur schlechter Ton zu hören sein sollte, wählen Sie einen anderen Audiostandard aus.
N
Suchlauf • ((Wenn Ihnen die Sendernummern nicht bekannt sind)
Drücken Sie zum Starten des Suchlaufs die Taste ▲ oder ▼. Der Tuner durchsucht den Frequenzbereich, bis der erste Sender
bzw. der ausgewählte Sender empfangen wird.
Sichern • (Zum Speichern des Senders und des zugehörigen Programmplatzes)
Wählen Sie zum Bestätigen Ihrer Auswahl mit der Taste ENTERE die Option OK.
N
Sendermodus
- C (Antennenempfangsmodus):
Antennensender zugeordnet ist.
- S (Kabelsendermodus): In diesem Modus können Sie Sender durch Eingabe der Nummer wählen, die jedem Kabelsender
zugeordnet ist.
In diesem Modus können Sie Kanäle durch Eingabe der Nummer anwählen, die jedem
Satelliten manuell speichern
Satellit • : Auswählen des Satelliten mit den Auf/Ab-Tasten.
Transponder • : Auswählen des Transponders mit den Auf/Ab-Tasten.
Suchmodus • : Auswählen der freien oder aller Kanäle zum Speichern.
Frequenz • : Einstellen der Frequenz mithilfe der Zifferntasten.
Symbolrate • : Einstellen der Symbolrate mithilfe der Zifferntasten oder der Auf/Ab-Tasten.
Polarität • : Einstellen der Polarität mithilfe der Auf/Ab-Tasten.
Netzwerksuche • : Aktivieren/Deaktivieren der Netzwerksuche mithilfe der Auf/Ab-Tasten.
Signalqualität • : Anzeigen des aktuellen Status des Sendesignals.
Die Informationen zu Satelliten und ihren Transpondern können von den Sendern jederzeit geändert werden.
N
Suchoptionen für Kabel
❑
Hiermit können Sie (je nach Land) weitere Suchoptionen für die Sendersuche im Kabelnetz einstellen (z. B. Frequenz oder
Symbolrate).
Startfrequenz • : Hiermit zeigen Sie die Startfrequenz an.
Stoppfrequenz • : Hiermit zeigen Sie die Stoppfrequenz an.
Modulation • : Hiermit zeigen Sie die verfügbaren Modulationswerte an.
Symbolrate • : Hiermit zeigen Sie die verfügbaren Symbolraten an.
Wenn der Wert von
N Startfrequenz größer ist als der von Stoppfrequenz, wird eine Warnmeldung angezeigt.
Ausführlich / Übersicht
❑
Die Informationen des elektronischen Programmführers werden von den Sendern zur Verfügung gestellt. Es kann sein,
dass Programmeinträge leer oder veraltet sind. Dies ist auf die für einen bestimmten Sender übertragenen Informationen
zurückzuführen. Die Anzeige wird dynamisch aktualisiert, sobald neue Informationen verfügbar sind.
Ausführlich • : Hier werden die Programminformationen in einem Zeitplan mit einer Unterteilung von jeweils 1 Stunde angezeigt.
Es wird ein Zeitfenster von 2 Stunden mit Programminformationen angezeigt. Dieses Fenster kann jedoch in der Zeit nach
vorne oder nach hinten verschoben werden.
Übersicht • : Die Informationen für die einzelnen Programme werden im Fenster für den Mini-Programmführer in chronologischer
Reihenfolge des Programmstarts zeilenweise ab dem aktuell laufenden Programm angezeigt.
Verwenden von Ausführlichem Programmführers / Übersicht
Fortsetzung...
Page 71

Deutsch - 14
Ausführlich
900 f tn
901 ITV Play
902 Kerrang!
903 Kiss
903 oneword
903 Smash Hits!
▼
DTV - Kabel 900 f tn 2:10 Di 1 Jun
Freshmen On Campus
2:00 - 2:30
Keine detaillierten Information.
Today 2:00 - 3:00 3:00 - 4:00
Freshmen O..
Street Hypn..
Mint Extra
Loaded
Fresh 40 with Dynamite MC
The Distillery
Smash Hits! Sunday
Ansehen Information
▲ / ▼ / ◄ / ►
ENTER
Seite
Übersicht
Wählen Sie mit den Tasten ▲/▼/◄/►ENTERE ein Programm aus.
No Information
No Information
Kisstory
No Information
+24 Std. Beenden
Übersicht DTV - Kabel 900 f tn
2:00
2:30
▼
5:00
Freshmen On Campus
Street Hypnosis
Booze Britain
Ansehen Information
Seite
Ausführlich Nächste Seite Beenden
RED Schalten Sie zwischen dem Ausführlich und der Übersicht um.
GREEN Ausführlich: Schnell zurückblättern. (-24 hours)
YELLOW Ausführlich: Schnell weiterblättern. (+24 hours)
BLUE Programmführer beenden.
INFO INFO-Taste, für detailliertere Informationen.
Standard
❑
Ausführlich / Übersicht
Mit der Taste GUIDE auf der Fernbedienung können Sie einstellen, ob der ausführliche Programmführer oder die Übersicht
angezeigt werden soll.
Ausführlich
Übersicht
Sender
Standard : Ausführlich ►
Senderliste
Feinabstimmung
Satellitensystem einrichten
Sie können das Programmführermenü auch durch Drücken der Taste
O GUIDE
aufrufen.
Feinabstimmung ❑(nur analoge Kanäle)
Bei klarem Empfang ist keine Feinabstimmung nötig, da diese automatisch während
der Sendersuche erfolgt. Falls das Signal jedoch schwach oder das Bild verzerrt ist,
müssen Sie unter Umständen eine manuelle Feinabstimmung durchführen.
Feinabgestimmte Sender, die gespeichert wurden, werden mit einem Sternchen * rechts neben der Sendernummer im Sender-
N
Banner gekennzeichnet.
Wenn Sie den feinabgestimmten Sender nicht speichern, werden Ihre Einstellungen nicht gesichert.
N
Wählen Sie zum Zurücksetzen der Feinabstimmung die Option N Reset. Drücken Sie dazu die Taste ▲ oder ▼ und dann die
Taste ENTERE.
Page 72

Deutsch - 15
Satellitensystem einrichten
❑
Stellen Sie das LNB für den Empfang des gesendeten Signals ein.
Die Option
N Satellitensystem einrichten ist verfügbar, wenn TV-Empfang auf
Satellit eingestellt ist.
Der Eingabefenster für die PIN wird geöffnet.
N
Ehe Sie Automatisch Speichern ausführen, nehmen Sie die Einstellungen unter N
Satellitensystem einrichten
LNB-Versorgung : Ein ►
LNB-Einstellungen
Positionierereinstellungen
Alle Einstellungen zurücksetzen
Satellitensystem einrichten vor. Dann wir die Kanalsuche normal durchgeführt.
U
LNB-Versorgung
Aktivieren bzw. Deaktivieren der Stromversorgung des LNB.
Mit dieser Funktion stellen Sie ein, dass nur ein Fernsehgerät die Stromversorgung des
LNB übernimmt, wenn zwei Fernsehgeräte angeschlossen sind.
LNB-Einstellungen
Kongurieren der Außenanlagen.
Satellit • : Auswählen des Satelliten für den Empfang von Digitalsendungen.
Index • : Auswählen eines Transponders aus der Liste oder Hinzufügen eines neuen
Transponders.
DiSEqC-Modus • : Auswählen des DiSEqC-Modus für das gewählte LNB.
Satellit : Astra_19.2E ►
Transponder : 10743 MHz, H/L
DiSEqC-Modus : 2/4
Unterste LNB-Frequenz : 9750 MHz
Oberste LNB-Frequenz : 10600 MHz
Trägerton 22 KHz : Auto
Signalqualität 0
Navig. E Eingabe R Zurück
LNB-Einstellungen
U
Navig. E Eingabe R Zurück
Unterste LNB-Frequenz • : Niedrigere LNB-Frequenz einstellen.
Oberste LNB-Frequenz • : Höhere LNB-Frequenz einstellen.
Trägerton 22 KHz • : Auswählen eines Trägertons mit 22kHz je nach LNB-Typ. Bei einem universellen LNB wählen Sie Auto.
Signalqualität • : Anzeigen des aktuellen Status für das Sendesignal.
Positionierereinstellungen
Positionierer • : Aktivieren oder Deaktivieren der Positionssteuerung
Positionierertyp • : Umschalten des Positionierertyps zwischen DiSEqC 1.2 und
USALS (Universal Satellite Automatic Location System).
Benutzermodus • : Einstellen der Satellitenantenne auf die Positionen der
verschiedenen Satelliten. Wenn Sie die aktuelle Position der Satellitenantenne für
Positionierer : Ein ►
Positionierertyp : DiSEqC 1.2
Benutzermodus
Installationsmodus
Positionierereinstellungen
einen bestimmten Satelliten speichern, kann die Satellitenantenne in die denierte
Position geschwenkt werden, wenn das Signal dieses Satelliten gewünscht wird.
Satellit - : Auswählen des Satelliten, um dessen Position einzustellen.
E
Eingabe R Zurück
Transponder - : Auswählen eines Transponders für den Signalempfang aus der Liste.
Bewegungsmodus - : Auswählen des Bewegungsmodus: Schritte oder kontinuierlich.
Schrittweite - : Einstellen der Schrittweite für die Antennendrehung in Winkelgrad.
Die Schrittweite können Sie nur einstellen, wenn der Bewegungsmodus auf Schritt eingestellt ist.
Zu gespeicherter Position wechseln - : Schwenken der Antenne zur gespeicherten Satellitenpositionen.
Antennenposition - : Einstellen und Speichern der Antennenposition des gewählten Satelliten.
Aktuelle Position speichern - : Speichern der aktuellen Position als gewähltes Positionierlimit.
Signalqualität - : Anzeigen des aktuellen Status für das Sendesignal.
Installationsmodus • : Sets the antenna movement limits.
Limit Position - : Selects the direction of the Positioner Limit.
Antenna Position - : Adjusts the antenna position for the Positioner Limit by pressing the left or right key.
Aktuelle Position speichern - : Speichern der aktuellen Position als Positionierergrenze.
Zum Nullpunkt wechseln - : Bewegen der Antenne in die Bezugsposition.
Positionierergrenze zurücksetzen - : Zulassen, dass die Antenne über den gesamten Schwenkbereich gedreht werden kann.
Alle Einstellungen zurücksetzen
Die Satelliteneinstellungen werden auf die Werkseinstellungen zurückgesetzt.
Page 73

Deutsch - 16
Verwalten von Sendern
Mit diesem Menü können Sie Favoriten hinzufügen, löschen oder einstellen und den
Programmführer für Digitalsendungen verwenden.
N
Wählen Sie im Fenster Alle, oder Eigene Kanäle oder Vorgemerkt einen Sender.
Drücken Sie hierzu die Tasten ▲ oder ▼ und dann die Taste ENTERE. Nun
können Sie den gewählten Sender ansehen.
Alle : Hiermit zeigen Sie alle verfügbaren Sender an.
Eigene Kanäle
: Hiermit zeigen Sie alle Favoritensender an.
Vorgemerkt
: Hiermit zeigen Sie alle vorgemerkten Programme an.
Sie öffnen die Senderlisten durch Drücken der Taste O CH LIST auf der
Fernbedienung.
Verwenden der Farbtasten in Verbindung mit der Senderliste.
N
Rot - (Sendertyp): Umschalten zwischen Antenne, Kabel und Satellit.
Grün - (Zoom): Hiermit vergrößern oder verkleinern Sie die Sendernummer.
Gelb - (Wählen): Hiermit wählen Sie mehrere Senderlisten aus.
Blau - (Sortieren): Sortieren nach Sendernamen oder Programmplatz. (verfügbar,
wenn TV-Empfang auf Satellit eingestellt wurde)
T - TOOLS (Extras): Hiermit zeigen Sie die Menüs
Suchlauf
, Eigene Kanäle
bearbeiten, Sperren (oder Freigabe), Timer-Wiedergabe, Name bearb.,
Programmplatz bearbeiten, Sortieren, Löschen, Alle wählen, oder Alle wählen
Neu sortieren
oder
an.
(Der Inhalt des Menüs Extras hängt von der jeweiligen Situation ab.)
Symbole zur Anzeige des Senderstatus
N
Ein Sender, der durch Drücken der
Ein analoger Sender.
A
Ein Sender, der als Favorit
♥
eingestellt ist.
\
Ein gesperrter Sender.
c
gelben Taste gewählt wurde.
Ein Programm, das gerade
(
gesendet wird.
)
Ein vorgemerktes Programm
Übersicht
Standard : Ausführlich
Sender
Senderliste ►
Feinabstimmung
Satellitensystem einrichten
Sender
Alle
TV
Radio
Daten/And.
Antenne
TV-Empfang Zoom Wählen Sortieren
824 UKTV Gold
825 UKTV style
A
1 C --
A
2 C
A 3 ♥ C
A 4 C
A 5 C
A 6 C
A 7 C
A 8 C
--
--
--
--
--
--
--
Extras
Seite
Menü Extras für Senderlisten (in Sender / Eigene Kanäle / Vorgemerkt)
❑
Drücken Sie die Taste N TOOLS, um das Menü Extras anzuzeigen.
Der Inhalt des Menüs Extras hängt vom jeweiligen Senderstatus ab.
N
Suchlauf (nur gesuchter Sender) Stellen Sie die Optionen (Sendertyp, Name des
Satelliten, Name des Anbieters, Transponder, Scramble) für den Suchlauf ein.
Sender
Dieses Menü wird nur angezeigt, wenn TV-Empfang auf Satelliten eingestellt ist. N
Eigene Kanäle bearbeiten
Sie können die gewählten Kanäle in die gewünschte Gruppe der eigenen Sender
übernehmen.
Das Symbol “♥” wird angezeigt, und der Sender wird als eigener Sender festgelegt.
N
Sperren / Freigabe
Antenne
Sie können einen Sender sperren, sodass er nicht ausgewählt und angezeigt werden
kann. Diese Funktion ist nur verfügbar, wenn die Kindersicherung aktiviert ist (Ein). (siehe Seite 27)
Der Eingabebildschirm für die PIN wird geöffnet. Geben Sie nun Ihre vierstellige PIN ein.
N
Der Standard-PIN-Code eines neuen Fernsehgeräts lautet ‘0-0-0-0’. Sie können die PIN ändern, indem Sie im Menü den N
Befehl PIN ändern wählen.
Das Symbol “
N \” wird angezeigt, und der Sender wird gesperrt.
824 UKTV Gold
825 UKTV style
A
Alle
1 C --
A
2 C
--
TV
A 3 ♥ C
A 4 C
A 5 C
A 6 C
A 7 C
A 8 C
--
--
--
--
--
--
Radio
Daten/And.
TV-Empfang Zoom Wählen Sortieren
Eigene Kanäle bearbeiten
Sperren
Timer-Wiedergabe
Sendernamen bearbeiten
Sortieren
Löschen
▼
Extras
Seite
Fortsetzung...
Page 74

Deutsch - 17
Timer-Wiedergabe
Wenn Sie ein Programm zum Anschauen vorgemerkt haben, wechselt das Fernsehgerät automatisch zum vorgemerkten Sender in
der Senderliste, auch wenn Sie gerade einen anderen Sender anschauen. Um ein Programm vorzumerken, müssen Sie zuerst die
Uhrzeit einstellen. (siehe Seite 25)
Sie können nur gespeicherte Kanäle vormerken.
N
Sie können Sender, Monat, Tag, Jahr, Stunde oder Minute auch direkt über die Zifferntasten auf der Fernbedienung einstellen. N
Das Vormerken eines Programms wird im Menü N Vorgemerkt angezeigt.
Digitaler Programmführer und Vormerken von Sendungen Wenn Sie einen digitalen Sender gewählt haben und die Taste ►
N
drücken, wird der Programmführer für diesen Sender angezeigt. Gehen Sie in der oben beschriebenen Weise vor, wenn Sie ein
Programm vormerken möchten.
Sendernamen bearbeiten (nur Analogsender)
Sie können Kanäle mit Beschriftungen versehen, sodass die ersten Buchstaben des Namens immer dann angezeigt werden, wenn
Sie den Sender wählen.
Die Namen der digitalen Sender werden automatisch zugewiesen und können nicht geändert werden. N
Programmplatz bearbeiten (nur Digitalkanal)
Sie können die Sendernummer auch mit den Zifferntasten der Fernbedienung einstellen.
Sortieren (nur Analogkanal)
Mit diesem Vorgang können Sie die Programmnummern gespeicherter Sender ändern. Das ist möglicherweise nach dem
automatischen Speichern von Sendern erforderlich.
Neu sortieren (sofern TV-Empfang auf Satellit eingestellt wurde)
Sortieren der Senderliste in numerischer Reihenfolge.
Löschen
Sie können Kanäle löschen, damit nur die gewünschten Kanäle angezeigt werden.
Sie können einen Kanal aus dem Menü Eigene Sender oder Satelliten in gleicher Weise löschen.
Alle abwählen / Alle wählen
Sie können die Funktionen zum Hinzufügen / Löschen / Hinzufügen zu Favoriten / Löschen aus Favoriten oder Sperren / N
Freigeben gleichzeitig verwenden. Markieren Sie die gewünschten Kanäle und drücken Sie die gelbe Taste, um alle markierten
Kanäle zugleich einzustellen.
Links neben dem Namen des gewählten Senders wird das Symbol
N c angezeigt.
Alle abwählen
N können Sie nur wählen, wenn mindestens ein Sender gewählt ist.
Menü Tools (Extras) für Senderlisten ( ❑in Vorgemerkt)
Mit dieser Menüoption können Sie eine Vormerkung anzeigen, ändern oder löschen.
Drücken Sie die Taste
N TOOLS, um das Menü Tools (Extras) anzuzeigen.
Info ändern • : Wählen Sie diese Option, um eine Vormerkung zu ändern.
Programmierung abbrechen • : Wählen Sie diese Option, um eine Vormerkung zu
stornieren.
Information • : Wählen Sie diese Option, um eine Vormerkung anzuzeigen. (Sie können die
Vormerkinformationen auch ändern).
Alle wählen / Alle abwählen • : Wählen oder abwählen aller vorgemerkten Programme.
Vorgemerkt
1 / 1 / 2009
13:59 5 TV1 Quincy, M.E
18:59 2 TV3 The Equalizer
20:59 2 TV3 McMillan & Wife
21:59 2 TV3 M.Spillane’s mike Hammer
Antenne
Zoom Wählen
Info ändern
Programmierung abbrechen
Information
Alle wählen
Extras
Information
Page 75

Deutsch - 18
Bild
Ändern der Bildeinstellungen
Modus
❑
Sie können den Bildstandard auswählen, der für Ihre Sehgewohnheiten am besten
geeignet ist.
Dynamisch / Standard / Eco / Film
Drücken Sie die Taste TTOOLS, um das Menü Extras anzuzeigen. Sie können den
Bildmodus durch Auswahl von Extras → Bildmodus einstellen.
Zellhelligkeit / Kontrast / Helligkeit / Schärfe / Farbe / Farbton (G/R)
❑
Das Gerät verfügt über mehrere Einstellmöglichkeiten für die Bildqualität.
Zellhelligkeit • : Zum Anpassen der Pixelhelligkeit.
Kontrast • : Hiermit stellen Sie den Kontrast.
Helligkeit • : Hiermit stellen Sie die Helligkeit.
Schärfe • : Hiermit stellen Sie die Kantenauösung.
Farbe • : Dient zum Anpassen der Farbsättigung des Bilds.
Farbton (G/R) • : Hiermit stellen Sie den Farbton ein.
Wenn Sie Änderungen an
N Zellenhelligkeit, Kontrast, Helligkeit, Schärfe, Farbe oder Farbton (G/R) vornehmen, wird das
Bildschirmmenü entsprechend angepasst.
Die eingestellten Werte werden auf jeden Bildmodus angewendet.
N
Sie können die Funktion Farbton im Analog N TV, Ext. oder AV Modus des PAL Systems nicht verwenden.
Im
N PC Modus können Sie nur Zellhelligkeit, Kontrast und Helligkeit einstellen.
Jede angepasste Einstellung wird je nach Eingabemodus separat gespeichert.
N
Die im Betrieb verbrauchte Energiemenge geht deutlich zurück, wenn Sie die Helligkeit des Bildes reduzieren. Damit senken Sie N
die Betriebskosten.
Erweiterte Einstellungen
❑
Sie können verschiedene erweiterte Einstellungen für Ihren Fernseher vornehmen,
unter anderem für Farbe und Kontrast.
Erweiterte Einstellungen
N stehen in den Modi Standard oder Film zur Verfügung.
Im
N PC Modus können von den Advanced Settings nur Optimalkontrast, Gamma
und Weißabgleich eingestellt werden.
Schwarzton → Aus / Dunkel / Dunkler / Dunkelst
Verbesserung der Bildtiefe durch Anpassen der schwarzen Farbdichte.
Optimalkontrast → Aus / Gering / Mittel / Hoch
Sie können den Bildschirmkontrast so anpassen, dass ein optimaler Kontrast
gewährleistet ist.
Gamma
Sie können die Intensität der Primärfarben (Rot, Grün und Blau) einstellen.
Farbraum
Der Farbraum ist eine Farbmatrix bestehend aus den Farben Rot, Grün und Blau. Wählen Sie Ihren bevorzugten Farbraum, um die
Welt in den natürlichsten Farben zu erfahren.
Auto • : Automatische Anpassung des Farbbereichs an die Bildsignalquelle.
Nativ • : Hiermit stellen Sie einen Farbereich ein, der breiter als der des Eingangssignals ist.
Benutzerd • : Hiermit stellen Sie den Farbbereich wunschgemäß ein.
Anpassen des Farbraums
N
- Hiermit stellen Sie den Farbbereich wunschgemäß ein. Die Option “Farbe” ist verfügbar, wenn der Farbraum als
benutzerdeniert eingestellt ist.
- Farbe → Rot / Grün / Blau / Gelb / Zyan / Magenta
- Rot / Grün / Blau: Sie können die RGB-Werte der jeweils ausgewählten Farbe einstellen.
- Reset: Setzt den Farbraum auf die Standardwerte zurück.
Bild
Modus : Standard ►
Zellhelligkeit : 7
Kontrast : 95
Helligkeit : 45
Schärfe : 50
Farbe : 50
Farbton (G/R) : G50/R50
Autom. Einstellung
Autom. Einstellung
PC-Bildschirm
Bild
Erweiterte Einstellungen ►
Bildoptionen
Bild zurücksetzen
Fortsetzung...
Page 76

Deutsch - 19
Weißabgleich
Um natürlichere Bildfarben zu erhalten, können Sie die Farbtemperatur anpassen.
R-Offset / G-Offset / B-Offset / R-Gain / G-Gain / B-Gain • : Wenn Sie den Wert anpassen, wird der Bildschirm aktualisiert und
neu angezeigt.
Reset • : Hiermit stellen Sie den Standard-Weißabgleich wieder ein.
Hautton
Hiermit reichern Sie den Farbton für Haut mit Rot an oder ab.
Wenn Sie den Anpassungswert ändern, wird der angepasste Bildschirm aktualisiert.
N
Kantenglättung → Aus / Ein
Sie können die Objektbegrenzungen im Bild betonen.
xvYCC → Aus / Ein
Durch Aktivieren des xvYCC-Modus werden Detailgenauigkeit und Farbtiefe bei der Anzeige von Filmen von einem externen Gerät
(z. B. DVD-Player) verbessert.
xvYCC
N ist verfügbar, wenn der Bildmodus auf Film und der externe Eingang auf HDMI oder Komp. eingestellt ist.
Diese Funktion wird, je nach externem Gerät, möglicherweise nicht unterstützt. Funktion zum Fortsetzen der Filmwiedergabe
N
(Wiedergabe fortsetzen).
Bildoptionen
❑
Die weiteren Bildeinstellungen können an Ihre Bedürfnisse angepasst werden.
Im
N PC-Modus können von den Bildoptionen nur Farbtemp., Größe und Screen
Burn Protection (Bildschirm-Einbrennschutz) eingestellt werden.
Farbtemp. → Kalt / Normal / Warm1 / Warm2 / Warm3
PC-Bildschirm
Erweiterte Einstellungen
Bild
Bildoptionen ►
Bild zurücksetzen
Sie können den für Ihre Augen angenehmsten Farbton auswählen.Die
eingestellten Werte werden entsprechend dem jeweils ausgewählten Bildmodus
N
gespeichert.
Warm1, Warm2
N oder Warm3 werden nur aktiviert, wenn der Bildmodus auf Film
eingestellt ist.
Größe → Autom. Breit / 16:9 / Breitenzoom / Zoom / 4:3 / Bildanpassung
Sie können ein Bildformat auswählen, das Ihren Sehgewohnheiten am besten entspricht.
Autom. Breit • : Hiermit stellen Sie das Bildformat auf automatische Breite ein.
16:9 • : Stellt das Bildformat auf den Breitbildmodus 16:9 ein.
Breitenzoom • : Diese Option vergrößert das Bild auf mehr als 4:3. Verschieben Sie das Bild mit den Tasten ▲ oder ▼ nach oben
oder nach unten, nachdem Sie mit der Taste ◄ oder ► eine Auswahl getroffen haben.
Zoom • : Vergrößert das Bild vertikal.
4:3 • : Stellt das Bildformat auf den Normalmodus 4:3 ein.
Bildanpassung • : Zeigt ein volles, natives HD-Signal an, das mit einem normalen
Fernseher nicht angezeigt werden kann.
Sie können aber auch die Taste
O
P.SIZE auf der Fernbedienung drücken, um die
Bildgröße zu ändern.
Je nach Signalquelle können die Bildgrößenoptionen variieren.
N
Die verfügbaren Elemente können in Abhängigkeit vom ausgewählten Modus variieren.
N
Im NPC Modus können nur die Modi 16:9 und 4:3 eingestellt werden.
Sie können die Einstellungen für jedes externe Gerät festlegen und speichern, das Sie an einen Eingang des Fernsehgeräts
N
angeschlossen haben.
Es kann zu vorübergehender Bildkonservierung kommen, wenn Sie auf dem Gerät mehr als zwei Stunden lang ein
N
unbewegten Bild angezeigt haben.
BreitZoom
N
: Wählen Sie durch Drücken der Taste ► die Option Position, und drücken Sie dann die Taste ENTERE. Mit der
Taste ▲ oder ▼ können Sie das Bild nach oben oder nach unten verschieben. Drücken Sie dann die Taste ENTERE.
Zoom
: Wählen Sie durch Drücken der Taste ► die Option Position, und drücken Sie dann die Taste ENTERE. Mit der
N
Taste ▲ oder ▼ können Sie das Bild nach oben oder nach unten verschieben. Drücken Sie dann die Taste ENTERE.
Wählen Sie durch Drücken der Taste ► die Option Größe, und drücken Sie dann die Taste ENTERE.
Drücken Sie die Tasten ▲ oder ▼, um das Bild in vertikaler Richtung zu vergrößern oder zu verkleinern. Drücken Sie dann
die Taste ENTERE.
Nach Auswahl von
N
Bildschirmanpassung im Modus HDMI (1080i / 1080p) oder Component (1080i/1080p) : Wählen Sie
durch Drücken der Tasten ◄ oder ► die Option Position. Mit den Tasten ▲, ▼, ◄ oder ► können Sie das Bild verschieben.
▲, ▼, ◄ or ► button to move the picture.
Reset
: Wählen Sie mit den Tasten ◄ oder ► die Option Reset, und drücken Sie dann die ENTERE-Taste. Sie können die
N
Einstellung initialisieren.
Wenn Sie die Funktion
N
Bildschirmanpassung zusammen mit einem HDMI 720p-Signal verwenden, wird eine Zeile wie bei
Overscan oben, unten, links und rechts abgeschnitten.
Fortsetzung...
Page 77

Deutsch - 20
Bildschirmmodus → 16:9 / Wide Zoom / Zoom / 4:3
Wenn Sie die Bildgröße bei einem Fernsehgerät im 16:9-Format auf Autom. Breit einstellen, können Sie bestimmen, dass das Bild
als 4:3 WSS (Breitbilddienst) oder gar nicht angezeigt werden soll.
Da jedes europäische Land eine andere Bildgröße verwendet, können die Benutzer sie damit einstellen.
Diese Funktion ist im Modus
N Auto Breit verfügbar.
Diese Funktion ist im Modus
N PC, Component oder HDMI nicht verfügbar.
Digitale RM → Aus / Gering / Mittel / Hoch / Auto
Wenn das vom Fernsehgerät empfangene Sendesignal schwach ist, können Sie die digitale Rauschunterdrückung aktivieren, um
ggf. statische Bilder oder Doppelbilder auf dem Bildschirm zu verringern.
Bei schwachem Signal wählen Sie diejenige der anderen Optionen, bei der das beste Bild angezeigt wird.
N
HDMI-Schwarzp. → Normal / Gering
Sie können direkt auf dem Bildschirm den Schwarzwert auswählen, um die Bildschirmtiefe anzupassen.
Diese Funktion ist nur bei einer Verbindung des externen Eingangs mit HDMI (RGB-Signal) aktiv.
N
1080 Full-HD Motion Demo → Aus / Ein
SaDie neue Generation der Samsung Plasmabildschirme bietet höchste Klarheit der Bewegungen bei Full HD - optimal für
Sportsendungen, Filme und Spiele mit schnellen Bewegungen.
Diese Funktion ist im PC-, Soiele- oder Media Play-Modus nicht verfügbar.
N
Filmmodus
Hiermit optimieren Sie den Bildmodus für die Wiedergabe von Filmen.
Aus • : Deaktiviert den Filmmodus.
Auto1 • : Hiermit wird das Bild bei Filmanzeige automatisch auf die beste Qualität eingestellt.
Auto2 • : Automatische Optimierung von Teletext, wenn Sie einen Film sehen.
Der Film-Modus wird bei TV, Video, Component (480i / 1080i) und HDMI (480i / 1080i) unterstützt.
N
Cinema Smooth • : Ermöglicht das ultimative Kinoerlebnis.
Damit Cinema Smooth verwendet werden kann, muss ein HDMI-Signal mit 1080p bei 24 Hz anliegen.
N
Blaumodus
Diese Funktion ist für Experten zum Ausmessen von AV-Geräten bestimmt. Mit dieser Funktion werden das rote und das grüne
Signal aus dem Videosignal entfernt, sodass nur das blaue Signal angezeigt wird. Damit wird ein Blaulter erzeugt, mithilfe dessen
die Farbe und der Farbton von Videogeräten wie DVD-Playern, Heimkinosystemen usw. eingestellt werden können.
Der
N Blaumodus ist verfügbar, wenn der Bildmodus auf Film oder Standard eingestellt ist.
Einbrennschutz
(Bildschirm-Einbrennschutz)Dieses Gerät ist mit Einbrennschutz-Technologie ausgestattet, um die Möglichkeit des Einbrennens
des Monitorbildes zu verringern. Diese Technologie ermöglicht das Einstellen von senkrechten (Vertikal) und seitlichen (Horizontal)
Bildbewegungen. Die Zeiteinstellung ermöglicht das Programmieren der Dauer zwischen Bildbewegungen in Minuten.
Pixelabstand • : Diese Funktion verschiebt Pixel auf dem Plasmabildschirm horizontal oder vertikal, um die Möglichkeit des
Einbrennens des Bildes zu minimieren.
Optimale Einstellung für PixelShift
N
Komponente TV/Ext/AV/Component/HDMI PC
Horizontal 0~4 2
Vertikal 0~4 4
Zeit (Minuten) 1~4 min 2 min
Der PixelShift-Wert kann in Abhängigkeit von der Monitorgröße (Zoll) und dem ausgewählten Modus variieren.
N
Diese Funktion ist im Modus NBildschirmanpassung nicht verfügbar.
Bildlauf: • Diese Funktion dient zum Entfernen von Nachbildern auf dem Bildschirm, indem alle Pixel des Plasmabildschirms
nach einem bestimmten Muster verschoben werden. Verwenden Sie diese Funktion, wenn Nachbilder oder -symbole auf dem
Bildschirm angezeigt werden. Diese können insbesondere dann auftreten, wenn auf dem Bildschirm über längere Zeit ein
Standbild angezeigt wurde.
Seite grau • : Sie verhindern bei Anzeige im Format 4:3 Beschädigungen des Bildschirms, indem Sie einen Weißabgleich an den
beiden linken Bildschirmrändern vornehmen.
- Hell: Bei Anzeige im Format 4:3 werden die beiden seitlichen Bildschirmränder aufgehellt.
- Dunkel: Bei Anzeige im Format 4:3 werden die beiden seitlichen Bildschirmränder
abgedunkelt.
Bild zurücksetzen → ❑Bildmodus zurücksetzen / Abbrechen
Erweiterte Einstellungen
Bild
Bildoptionen
Bild zurücksetzen ►
Die Reset-Funktion wird für jeden Bildmodus durchgeführt.
Setzt alle Bildeinstellungen auf die Standardwerte zurück.Wählen Sie zuerst einen
N
Bildmodus zum Zurücksetzen.
Page 78

Deutsch - 21
Fernsehgerät mithilfe des PCs einstellen
Voreinstellung: Drücken Sie die Taste SOURCE, um den Modus PC einzustellen. N
Autom. Einstellung
❑
Die automatische Einstellung ermöglicht eine automatische Anpassung des PC-Monitors
an das eingehende PC-Videosignal. Die Werte für “Fein”, “Grob” und “position” werden
automatisch eingestellt.
Diese Funktion ist im DVI-HDMI-Modus nicht verfügbar.
N
Farbe : 55
Farbton (G/R) : G50/R50
Bild
Autom. Einstellung ►
PC-Bildschirm
Erweiterte Einstellungen
Bildoptionen
Bild zurücksetzen
Drücken Sie die Taste TTOOLS, um das Menü Extras anzuzeigen. Sie können die
Autom. Einstellung auch durch Auswahl von Extras → Autom. Einstellung
durchführen.
PC-Bildschirm
❑
Durch das Einstellen der Bildqualität können Bildstörungen und Rauschen beseitigt oder verringert werden. Falls sich Bildrauschen
durch die Feinabstimmung allein nicht beheben lässt, stellen Sie zunächst die Frequenz möglichst genau ein (Grob). Führen
Sie dann erneut eine Feinabstimmung durch. Nachdem Sie das Bildrauschen durch die Grob- und Feinabstimmung des Bildes
verringert haben, stellen Sie die Position des Bildes so ein, dass es auf dem Bildschirm zentriert ist.
Grob
Hiermit stellen Sie die Frequenzein, wenn vertikales Rauschen im Bild vorhanden ist.
Fein
Hiermit stellen Sie den Bildschirm klarer ein.
PC-Position
Passen Sie die Position des PC-Bilds an, wenn es nicht auf den Fernsehbildschirm passt.
Stellen Sie mit den Tasten ▲ oder ▼ die vertikale Position ein. Stellen Sie mit den Tasten ◄ oder ► die horizontale Position ein.
Bild zurücksetzen
Sie können alle Bildeinstellungen auf die werkseitig eingestellten Ausgangswerte zurücksetzen.
Page 79

Deutsch - 22
PC-Anzeige
Konfigurieren Ihrer PC-Software (unter Windows XP)
❑
Im Folgenden sind die typischen Anzeigeeinstellungen für einen Windows-Computer
aufgeführt. Die von Ihrem PC angezeigten Fenster entsprechen je nach installierter
Windows-Version und verwendeter Grakkarte möglicherweise nicht genau der
Abbildung.
1. Klicken Sie im Startmenü von Windows auf die Systemsteuerung.
2. Wenn das Fenster der Systemsteuerung angezeigt wird, klicken Sie auf „Darstellung
und Designs”. Ein Dialogfeld wird geöffnet.
3. Wenn das Fenster der Systemsteuerung angezeigt wird, klicken Sie auf „Anzeige“.
Anschließend wird ein Dialogfeld angezeigt.
4. Klicken Sie nun im Dialogfeld „Anzeige“ auf die Registerkarte „Einstellungen”.
Stellen Sie die Bildschirmauösung auf folgenden Wert: 1920 x 1080 Pixel. Wenn
das Dialogfeld eine Option für die Bildschirmfrequenz enthält, muss als Einstellung
60 oder 60 Hz ausgewählt werden. Andernfalls klicken Sie einfach auf OK, um das
Dialogfeld zu schließen.
Anzeigemodi
❑
Bildschirmposition und -größe hängen vom Typ des PC-Monitors und seiner Auösung ab.
Bei den in der Tabelle angegebenen Auösungen handelt es sich um die empfohlenen Auösungen.
Eine Verbindung über HDMI/DVI-Kabel kann nur über HDMI IN 2(DVI) erfolgen.
N
Das Zeilensprungverfahren wird nicht unterstützt.
N
Das Fernsehgerät funktioniert möglicherweise nicht ordnungsgemäß, wenn kein Standardmodus ausgewählt wird.
N
Separate- und Composite-Modus werden unterstützt. SOG wird nicht unterstützt.
N
Ein zu langes oder qualitativ geringwertiges VGA-Kabel kann in hochauösenden Modi (1920 x 1080) zu Bildrauschen führen.
N
D-Sub- und HDMI/DVI-Eingang
Modus Auflösung
IBM
MAC
VESA CVT
VESA DMT
VESA DMT /
DTV CEA
VESA GTF
640 x 350 31.469 70.086 25.175 + / 720 x 400 31.469 70.087 28.322 - / +
640 x 480 35.000 66.667 30.240 - / 832 x 624 49.726 74.551 57.284 - / -
1152 x 870 68.681 75.062 100.000 - / +
720 x 576 35.910 59.950 32.750 - / +
1152 x 864 53.783 59.959 81.750 - / +
1280 x 720
1280 x 960 75.231 74.857 130.000 - / +
640 x 480
800 x 600 37.879 60.317 40.000 + / +
800 x 600 48.077 72.188 50.000 + / +
800 x 600 46.875 75.000 49.500 + / +
1024 x 768
1152 x 864 67.500 75.000 108.000
1280 x 800
1280 x 960 60.000 60.000 108.000
1280 x 1024
1360 x 768 47.712 60.015 85.500
1440 x 900
1680 x 1050 65.290 59.954 146.250
1920 x 1080p 67.500 60.000 148.500
1280 x 720 52.500 70.000 89.040
1280 x 1024 74.620
Horizontal
Frequenz (kHz)
44.772 59.855 74.500 - / +
56.456 74.777 95.750 - / +
31.469 59.940 25.175 - / -
37.861 72.809 31.500 - / -
37.500 75.000 31.500 - / -
48.363 60.004 65.000 - / -
56.476 70.069 75.000 - / -
60.023 75.029 78.750 + / +
49.702 59.810 83.500
62.795 74.934 106.500
63.981 60.020 108.000
79.976 75.025 135.000
55.935 59.887 106.500
70.635 74.984 136.750
Vertikalfrequenz (Hz)
70.000
Pixeltakt
Frequenz (MHz)
128.943
Polarität (HxV)
Sync-
+ / +
- / +
- / +
+ / +
+ / +
+ / +
+ / +
- / +
- / +
- / +
+ / +
- / +
- / -
Page 80

Deutsch - 23
Ton
Tonstandard wählen
Modus
❑
Stellen Sie den Audiomodus ein, der am besten zur jeweiligen Sendung passt.
Standard / Musik / Film / Klare Stimme / Benutzerd.
Drücken Sie die Taste T TOOLS, um das Menü Extras anzuzeigen. Sie können
den Tonmodus durch Auswahl von Extras → Tonmodus kongurieren.
Equalizer
❑
Sie können den Ton Ihrem persönlichen Geschmack anpassen.
Modus • : Sie können einen Audiomodus gemäß Ihrem persönlichen Geschmack
einstellen.
Balance • : Steuert die Balance zwischen dem linken und dem rechten Lautsprecher.
100Hz / 300Hz / 1KHz / 3KHz / 10KHz • (Bandbreitenanpassung): Zum Einstellen der unterschiedlichen Bandbreitenfrequenzen.
Reset • : Setzt die Equalizereinstellungen auf die Standardwerte zurück.
SRS TruSurround HD → Aus / Ein
❑
Mit SRS TruSurround HD können Sie virtuelle 5.1 Surroundeffekte mit zwei Lautsprechern genießen.
Diese Funktion sorgt nicht nur für kräftige Bässe sondern sie verbessert auch die Widergabe hoher Frequenzen.
Drücken Sie die Taste TTOOLS, um das Menü Extras anzuzeigen. Sie können
SRS TruSurround HD durch Auswahl von Extras → SRS TS HD auswählen.
Ton
Modus : Benutzerd.
Equalizer
SRS TruSurround HD : Aus
Wiedergabesprache : ---Audioformat : ----
Audio für Sehgeschädigte
Auto. Lautst. : Aus
Lautsprecher auswählen
: TV-Lautsprecher
►
TruSurround HD, SRS und das Symbol sind eingetragene Marken von SRS Labs, Inc. Die
TruSurround HD-Technologie wird unter Lizenz von SRS Labs, Inc. in das System integriert.
N SRS TruSurround HD (Aus/Ein) ein.
Wenn der Ton beim Fernsehen gestört ist stellen Sie den Equalizer und
Wiedergabesprache ❑ (nur Digitalkanal)
Sie können die Standardsprache für Audio ändern. Zeigt die Sprachinformationen für den eingehenden Audiostream an.
Sie können nur Sprachen auswählen, die auch tatsächlich übertragen werden.
N
Audioformat → MPEG / Dolby Digital ❑ (nur Digitalkanäle)
Wenn Sie für die Tonausgabe sowohl den Hauptlautsprecher als auch den Audioreceiver verwenden, kann es aufgrund der
Geschwindigkeitsunterschiede beim Dekodieren durch die beiden Systeme zu einem Echoeffekt kommen. Verwenden Sie in diesen
Fall die TV-Lautsprecher.
Sie können nur Sprachen auswählen, die auch tatsächlich übertragen werden.
N
Hergestellt unter Lizenz der Dolby Laboratories.
Dolby und das Doppel-D-Symbol sind Warenzeichen von Dolby Laboratories.
Audio für Sehgeschädigte ❑ (nur Digitalkanal)
Dies ist eine zusätzliche Audiofunktion, mit der für sehbehinderte Personen eine zusätzliche Tonspur wiedergegeben wird.
Diese Funktion verarbeitet den Audiostream für die AB (Audio-Beschreibung), sofern diese vom Sender zusammen mit dem
Vordergrundton übertragen wird. Der Benutzer kann die Audio-Beschreibung aktivieren oder deaktivieren und die Lautstärke
einstellen.
Drücken Sie die Taste AD auf der Fernbedienung, um Off oder On zu wählen.
O
Audio für Sehgeschädigte → Aus / Ein
Hiermit schalten Sie die Funktion für Audiobeschreibungen ein bzw. aus.
Lautstärke
Hiermit regeln Sie die Lautstärke der Audiobeschreibungen für Sehgeschädigte.
Lautstärke
N ist aktiv, wenn Audio für Sehgeschädigte aktiviert (Ein) ist.
Fortsetzung...
Page 81

Deutsch - 24
Auto. Lautst. → Aus / Ein
❑
Aufgrund unterschiedlicher Signalbedingungen unterscheiden sich Fernsehsender in der Lautstärke, so dass es erforderlich
sein kann, die Lautstärke beim Umschalten zwischen Sendern jedes Mal nachzuregeln. Mit der Funktion für automatische
Lautstärkeeinstellung wird die Lautstärke automatisch bei starkem Modulationssignal verringert und bei schwachem
Modulationssignal erhöht.
Lautsprecher auswählen → Ext. Lautsprecher / TV-Lautsprecher
❑
Wenn Sie den Ton über separate Lautsprecher hören möchten, deaktivieren Sie den internen Verstärker.
Die Tasten
N – +, M MUTE funktionieren nicht, wenn Lautsprecher auswählen auf Ext. Lautsprecher geschaltet ist.
Wenn Sie im Menü
N Lautsprecher auswählen die Option Ext. Lautsprecher wählen, werden die Audioeinstellungen
eingeschränkt.
Eingebauter Lautsprecher des Fernsehgeräts
TV / Ext. / AV / Component / PC / HDMI
Audioausgang (Optisch, L/R-Out) zum
Soundsystem
TV / Ext. / AV / Component / PC / HDMI
TV-Lautsprecher Lautsprecherausgang Audioausgang
Externer Lautsprecher Mute Audioausgang
Kein Videosignal Mute Mute
Ton zurücksetzen
❑
Alle zurücksetzen / Ton-Modus reset / Abbrechen :
Sie können alle
Ton
Audioeinstellungen wieder auf die Werkseinstellungen zurücksetzen.
Tonmodus wählen
Wenn Sie Dual l ll einstellen, wird der aktuelle Tonwiedergabemodus auf dem Bildschirm angezeigt.
NICAM
Stereo
Art der Sendung
Standardsendung (Standardtonwiedergabe) Mono (normale Verwendung)
Standard und NICAM-Mono
NICAM-Stereo
NICAM Dual-I/II
NICAM
NICAM
Stereo
NICAM
Dual-1
Bildschirmanzeige
NICAM
Dual-2
Auto. Lautst. : Aus
Lautsprecher auswählen
Ton zurücksetzen ►
: TV-Lautsprecher
Mono
(Normal)
Mono
(Normal)
Mono
(Normal)
A2
Stereo
Standardsendung (Standardtonwiedergabe) Mono (normale Verwendung)
Zweisprachig oder Dual-I/II
Stereo Stereo
Dual I Dual II
Falls das Stereosignal schwach ist und automatisch umgeschaltet wird, sollten Sie zu mono wechseln. N
Diese Funktion ist nur bei einem Stereosignal aktiviert. Bei Monosignalen ist es deaktiviert. N
Diese Funktion ist nur im TV-Modus verfügbar. N
Sie können diese Optionen auswählen, indem Sie einfach die Taste O DUAL auf der
Fernbedienung drücken.
Mono
(erzwungen)
Page 82

Deutsch - 25
Funktionen
Einstellen der Uhrzeit
Uhr
❑
Die Uhr muss eingestellt werden, damit Sie die verschiedenen Timerfunktionen des
Fernsehgeräts verwenden können.
Jedes Mal, wenn Sie die Taste INFO drücken, wird die aktuelle Zeit angezeigt.
N
Wenn Sie das Netzkabel ziehen, müssen Sie die Uhr erneut einstellen. N
Uhr-Modus
Sie können die aktuelle Zeit manuell oder automatisch einstellen.
Auto • : Hiermit stellen Sie die Uhrzeit automatisch anhand der Zeit aus den digitalen
Plug & Play
Einstellungen
Zeit ►
Sprache
Untertitel
Digitaltext : Aktivieren
Sicherheit
Netzwerk
Allgemein
Übertragungen ein.
Manual • : Hiermit stellen Sie die aktuelle Zeit auf einen manuell eingestellten Wert ein.
Zeit einstellen
Sie können die aktuelle Zeit manuell einstellen.
Kongurieren Sie diese Option, nachdem Sie
N Uhr-Modus auf Manuell eingestellt
haben.
Sie können
N Tag, Monat, Jahr, Stunde, Minute durch Drücken der Zifferntasten auf
Uhr : -- : -- ►
Sleep-Timer : Aus
Timer 1 : Deaktiviert
Timer 2 : Deaktiviert
Timer 3 : Deaktiviert
Zeit
der Fernbedienung direkt einstellen.
U
Sleep-Timer
❑
Navig. E Eingabe R Zurück
Der Sleep-Timer schaltet das Fernsehgerät automatisch nach einer eingestellten Zeit
(30, 60, 90, 120, 150, 180 Minuten) aus.
Wenn die eingestellte Zeit abgelaufen ist, schaltet das Fernsehgerät automatisch in den Standby-Modus.
N
Um die Sleep-Timer-Funktion abzubrechen, wählen Sie Aus. N
Drücken Sie die Taste TTOOLS, um das Menü Extras anzuzeigen. Sie können
den Sleep-Timer durch Auswahl von Extras → Sleep-Timer einstellen.
Zeit 1 / Zeit 2 / Zeit 3
❑
Sie können den Fernseher so einstellen, dass er sich zu einer bestimmten Zeit automatisch an- oder abschaltet.
Anschaltzeit : Hiermit stellen Sie die Uhrzeit ein, zu der das Fernsehgerät angehen soll.
(
Zum Aktivieren des Timers, wenn Sie mit den Einstellungen fertig sind, wählen Sie Aktiviert)
Ausschaltzeit
: Hiermit stellen Sie die Uhrzeit ein, zu der das Fernsehgerät ausgehen soll.
Lautstärke
: Einstellen der Lautstärke.
: Wählen Sie TV oder USB.
Quelle
Wenn Sie N TV wählen, können Sie TV-Empfang und Sender einstellen.
TV-Empfang - : Wählen Sie Terrestrisch oder Kabel.
Sender - : Wählen Sie den gewünschten Senden.
Wenn Sie
N USB wählen, können Sie den Inhalt einstellen.
Inhalt - : Auswählen der gewünschten Inhalte vom USB.
Wiederholmodus : Wählen Sie Einmal, Täglich, Mo~Fr, Mo~Sa, Sa~So oder Manuell.
Wenn Sie Manuell gewählt haben, drücken Sie die Taste N ►, um den gewünschten Wochentag einzustellen.
Wenn Sie die ENTERE-Taste drücken, nachdem Sie den gewünschten Tag gewählt haben, wird das Symbol c angezeigt.
Der ganz Ordner auf dem USB-Speicher unterstützt 64 englisch Zeichen.
N
Voraussetzung dafür ist, dass Sie die Uhr gestellt haben. N
Sie können die Stunden, Minuten und den Sender auch über die Zifferntasten auf der Fernbedienung einstellen. N
Automatisch Ausschalten N
Wenn Sie den Timer aktivieren, schaltet sich das Fernsehgerät drei Stunden nach dem Einschalten durch den Timer ab, wenn in
dieser Zeit keine Funktionen verwendet wurden Diese Funktion ist nur verfügbar, wenn der Timer aktiviert ist, und sie verhindert
Schäden durch Überhitzung, wenn das Fernsehgerät zu lange eingeschaltet ist.
Page 83

Deutsch - 26
Konfigurieren der Menüeinstellungen
Sprache
❑
Sie können die Menüsprache festlegen.
Untertitel
❑
Sie können Untertitel aktivieren und deaktivieren. Mit diesem Menü legen Sie den
Untertitelmodus fest. Die Option “Normal” im Menü ist die Basisoption für Untertitel,
und “Schwerhörig” ist für hörgeschädigte Personen bestimmt.
Untertitel → • Aus / Ein: Untertitel aktivieren oder deaktivieren.
Modus → • Normal / Schwerhörig: Hiermit können Sie den Untertitelmodus
festlegen.
Untertitelsprache • : Hiermit können Sie die Untertitelsprache festlegen.
Wenn das Programm, das Sie gerade sehen, die Funktion
N Schwerhörig nicht
unterstützt, wird selbst bei der Einstellung Schwerhörig automatisch die
Einstellung Normal aktiviert.
Englisch ist der Standardwert in Fällen, wo die ausgewählte Sprache für die
N
Sendung nicht verfügbar ist.
Sie können diese Optionen auswählen, indem Sie einfach die Taste
O SUBT. auf
der Fernbedienung drücken.
Digitaltext → ❑Deaktivieren / Aktivieren (Nur Großbritannien)
Wenn das Programm mit Digitaltext gesendet wird, ist diese Funktion aktiviert.
MHEG (Multimedia und Hypermedia Information Coding Experts Group)
N
Ein internationaler Standard für Datenkompressionssysteme für Multimedia- und Hypermedia-Anwendungen. Dies ist ein
höheres Niveau als das MPEG-System, das solche datenverknüpfenden Hypertextmedien wie Standbilder, Zeichendienst,
Animations-, Grak- und Videodateien sowie Multimediadateien umfasst. MHEG ist eine Technologie für Laufzeitinteraktion mit
dem Benutzer, und sie wird auf verschiedenen Gebieten verwendet, z. B. VOD (Video-On-Demand), ITV (Interactive TV), EC
(Electronic Commerce), Teleweiterbildung, Telekonferenzen, digitale Bibliotheken und Netzwerkspiele.
Plug & Play
Zeit
Einstellungen
Sprache ►
Untertitel
Digitaltext : Aktivieren
Sicherheit
Netzwerk
Allgemein
Common Interface
Sicherheit ❑
Ehe das Einstellungsfenster angezeigt wird, wird das Fenster zur. Eingabe der PIN geöffnet. Geben Sie nun Ihre vierstellige PIN
ein.
Der Standard-PIN-Code eines neuen Fernsehgeräts lautet 0000. Sie können die PIN ändern, indem Sie im Menü den Befehl
PIN ändern wählen.
Kinderscherung → Aus / Ein
This feature allows you to prevent unauthorized users, such as children, from watching unsuitable programmes by muting out video
and audio.
Sie können einige der Kanäle in der Senderliste sperren.
N (Informationen hierzu nden Sie auf Seite 16)
Die
N Kindersicherung ist nur im TV-Modus verfügbar.
Sicherungsstufe
Mit dieser Funktion können Sie nicht autorisierte Benutzer, z. B. Kinder, daran hindern, ungeeignete Programme anzuschauen.
Hierzu verwenden Sie eine benutzerdenierte vierstellige PIN.
Die angezeigte Sicherungsstufe hängt vom jeweiligen Land ab.
N
Der Standard-PIN-Code eines neuen Fernsehgeräts lautet ‘0-0-0-0’. Sie können die N PIN ändern, indem Sie im Menü den Befehl
PIN ändern wählen.
Nachdem die Sicherungsstufe eingestellt ist, wird das Symbol “
N
Alle zul.
N : Drücken Sie diese Taste, um alle Altersbeschränkungen aufzuheben.
3~18 : Verhindert, dass Kinder unter 3–18 Jahren bestimmte Programme sehen.
\
” angezeigt.
Fortsetzung...
Page 84

Deutsch - 27
PIN ändern
Sie können Ihre zum Einrichten des Fernsehgeräts benötigte persönliche Kennnummer ändern.
Ehe das Einstellungsfenster angezeigt wird, wird das Fenster zur Eingabe der NNPIN geöffnet. Geben Sie nun Ihre vierstellige
N
PIN ein. (Die Standard-PIN lautet ‘0-0-0-0’.)
Wenn Sie den PIN-Code vergessen haben, drücken Sie die Fernbedienungstasten in der angegebenen Reihenfolge, um die
N
PIN auf ‘0-0-0-0’ zurückzusetzen : POWER (Off), MMUTE, 8, 2, 4, POWER (On).
Allgemein ❑
Energiesparmod. → Aus / Gering / Mittel / Hoch / Bild aus
Mit dieser Funktion stellen Sie die Helligkeit des Fernsehgeräts ein, um den Stromverbrauch zu senken. Wenn Sie nachts
fernsehen, stellen Sie Energiesparmod. auf “Hoch” ein, um sowohl die Augenermüdung als auch den Stromverbrauch zu senken.
Wenn Sie Bild aus wählen, wird der Bildschirm abgeschaltet und Sie können nur noch den Ton hören. Drücken Sie eine beliebige
Taste, um Bild aus zu beenden.
Im Menü Extras wird die Funktion Bild aus nicht unterstützt.
N
Drücken Sie die Taste TTOOLS, um das Menü Extras anzuzeigen. Sie können
zudem die Energiesparmod option durch Auswahl von Extras → Energiesparmod.
anpassen.
Spielemodus → Aus / Ein
Wenn Sie eine Spielekonsole wie PlayStationTM oder XboxTM anschließen, können Sie durch Auswählen des Spielemodus ein
realistischeres Spielerlebnis genießen.
Bei aktiviertem Spielemodus •
Der Bildmodus wird automatisch auf Standard eingestellt und kann nicht geändert werden. Der Tonmodus wird automatisch als benutzerdeniert eingestellt und kann nicht geändert werden. Passen Sie den Ton unter -
Verwendung des Equalizers an.
Die Reset-Funktion im Audiomenü ist aktiviert. Mit Hilfe der Reset-Funktion können die Einstellungen für den Equalizer auf die -
Werkseinstellungen zurückgesetzt werden.
Spielemodus ist im normalen TV-Modus nicht verfügbar, ode der Spielemodus ist deaktiviert.
N
Kontrollieren Sie, ob der Spielemodus noch aktiviert ist, wenn die Bildqualität bei angeschlossenem externem Gerät schlecht ist. N
Wenn Sie im Spielemodus das Fernsehmenü anzeigen, zittert das Bild leicht. N
Das Zeichen N wird auf dem Bildschirm angezeigt. Dies bedeutet, dass der Spielemodus für die gewählte Signalquelle
angeschaltet ist.
Diese Funktion unterstützt nur den Spielemodus.
N
Der Spielemodus ist im PC-Modus nicht verfügbar. N
BD Wise → Aus / Ein
BD Wise ist eine Funktion, mit der Sie automatisch für alle angeschlossenen Geräte von Samsung, die BD Wise unterstützen, den
optimalen Zustand einstellen können.
Diese Funktion ist nur aktiv, wenn ein externes Gerät über HDMI mit dem TV verbunden ist.
N
Wenn N BD Wise aktiviert ist (Ein), wird der Bildmodus automatisch an die jeweiligen Bedingungen angepasst.
Menütransparenz
Sie können die Transparenz des Bildschirmmenüs einstellen.
Hell • : Hiermit stellen Sie normale Transparenz ein.
Dunkel • : Hiermit stellen Sie das Bildschirmmenü als undurchsichtig ein.
Fortsetzung...
Page 85

Deutsch - 28
Melodie → Aus / Gering / Mittel / Hoch
Sie können die Melodie auswählen, die beim Ein- und Ausschalten des Fernsehers abgespielt wird.
Die Melodie wird nicht abgespielt.
N
- Das Fernsehgerät gibt keinen Ton aus, weil die M MUTE Taste gedrückt wurde.
- Das Fernsehgerät gibt keinen –
- Das Fernsehgerät wurde vom Sleep-Timer ausgeschaltet.
Common Interface
❑
Installieren der CI-Karte •
1. Sie können das CI-CAM-Modul bei Ihrem nächsten Händler oder durch telefonische
Bestellung erwerben.
2. Schieben Sie die CI-Karte in Richtung des Pfeils in das CAM-Modul ein, bis sie fest
sitzt.
3. Schieben Sie das CAM-Modul mit installierter CI-Karte in den CI-Steckplatz.
Schieben Sie das CAM-Modul parallel zum Steckplatz in Pfeilrichtung bis zum
N
Anschlag.
4. Kontrollieren Sie, ob Sie ein Bild sehen oder ein gestörtes Signal.
CI-Menü •
Hiermit kann der Benutzer seine Auswahl in dem vom CAM-Modul bereitgestellten
Menü treffen. Wählen Sie das CI-Menü ausgehend vom Menü “PC Card” (PC-Karte).
Anwendungsinformationen •
Die folgenden Erklärungen gelten für den Fall, dass ein CAM-Modul in den CI-
Steckplatz eingesetzt ist und angezeigt wird.
In den Anwendungsinformationen wird die CI-Karte beschrieben. Sie können das CAM-Modul unabhängig davon anschließen, ob
das Fernsehgerät angeschaltet ist oder nicht.
Zugangsmodule werden in einigen Ländern und Regionen nicht unterstützt. Fragen Sie diesbezüglich Ihren ofziellen Samsung-
N
Händler.
Ton aus, weil die Lautstärketaste gedrückt wurde.
Page 86

Deutsch - 29
Unterstützung / Eingang
Unterstützung
Eigendiagnose
❑
Bildtest
If Bei schlechter Bildqualität führen Sie einen Bildtest durch. Prüfen Sie das bunte Testbild auf dem Bildschirm um festzustellen, ob
das Problem weiterhin besteht.
Die Meldung
N Besteht das Problem für dieses Bild weiterhin? wird angezeigt.
Wenn das Testbild nicht angezeigt wird oder wenn es verrauscht ist, wählen Sie Ja.
Wenn das Testbild fehlerlos angezeigt wird, wählen Sie Nein.
Ja • : Möglicherweise liegt ein Problem mit dem Fernsehgerät vor. Hilfe erhalten Sie beim Callcenter von Samsung.
Nein • : Möglicherweise liegt ein Problem mit einem externen Gerät vor. Bitte überprüfen Sie sämtliche Anschlüsse noch
einmal. Wenn das Problem weiterhin besteht, schlagen Sie im Benutzerhandbuch für das externe Gerät nach.
Audiotest
Bei schlechter Tonqualität führen Sie einen Audiotest durch.
Sie können die Tonqualität kontrollieren, indem Sie über den Fernseher eine im Gerät gespeicherte Melodie abspielen.
Die Meldung
N Besteht das Problem für diesen Audiotest weiterhin? wird angezeigt.
Wenn Sie den Ton beim Test nur durch einen Lautsprecher oder gar nicht hören, wählen Sie Ja. Wenn Sie den Ton über die
Lautsprecher hören können, wählen Sie Nein.
Ja • : Möglicherweise liegt ein Problem mit dem Fernsehgerät vor. Hilfe erhalten Sie beim Callcenter von Samsung.
Nein • : Möglicherweise liegt ein Problem mit einem externen Gerät vor. Bitte überprüfen Sie sämtliche Anschlüsse noch
einmal. Wenn das Problem weiterhin besteht, schlagen Sie im Benutzerhandbuch für das externe Gerät nach.
Wenn die Fernsehlautsprecher keinen Ton ausgeben, müssen Sie vor dem Audiotest sicherstellen, dass
N Lautsprecher
auswählen im Audiomenü auf TV-Lautsprecher eingestellt ist.
Im Test ist auch dann eine Melodie zu hören, wenn
N Lautsprecher auswählen auf TV-Lautsprecher eingestellt ist, oder wenn
der Ton mit der Taste M MUTE stumm geschaltet wurde.
Signalinformation (nur Digitalkanäle)
Sie können Ihre Antenne so einstellen, dass der Empfang der verfügbaren Digitalkanäle besser wird.
Wenn die Signalstärkeanzeige ein schwaches Signal anzeigt, verändern Sie die Position Ihre Antenne so, dass die Signalstärke
N
zunimmt. Machen Sie dies solange, bis Sie die optimale Ausrichtung mit dem stärksten Signal gefunden haben.
Software-Update
❑
Damit Ihr Produkt stets mit den neuesten Funktionen des Digitalfernsehens ausgerüstet ist, werden zusammen mit dem normalen
TV-Signal regelmäßig Softwareaktualisierungen übertragen. Das Gerät erkennt diese Signale automatisch und zeigt einen Hinweis
auf die Softwareaktualisierung an. Sie haben die Wahl, ob die Aktualisierung installiert werden soll.
PER USB
Legen Sie ein USB-Laufwerk mit dem gespeicherten Firmwareupgrade in das
Fernsehgerät ein. Achten Sie beim Einspielen des Upgrades darauf, die Stromversorgung
nicht zu unterbrechen und das USB-Laufwerk nicht zu entfernen. Das Fernsehgerät wird
automatisch ab- und wieder angeschaltet, sobald das Firmwareupgrade abgeschlossen
ist. Kontrollieren Sie die Firmwareversion, wenn das Upgrade abgeschlossen ist.
Nachdem die Software aktualisiert wurde, sind die Video- und Audioeinstellungen wieder
auf die werkseitigen Standardwerte zurückgesetzt.
PER Channel
Aktualisierung der Software über das Sendesignal.
Wenn diese Funktion während der Zeit für Softwareübertragungen gewählt wird, sucht sie nach verfügbarer Software und lädt
N
sie herunter.
Die zum Herunterladen der Software erforderliche Zeit hängt von der Signalqualität ab.
N
Update im Standby
Um die Softwareaktualisierung mit eingeschalteter Stromversorgung fortzusetzen, wählen Sie mit den Tasten ▲ oder ▼ “Ein”
aus. 45 Minuten nach Beginn des Standbymodus wird die manuelle Aktualisierung automatisch ausgeführt. Da intern die
Stromversorgung für das Gerät eingeschaltet ist, kann der Bildschirm leicht beleuchtet sein. Dieser Zustand kann etwas mehr als
eine Stunde andauern, bis die Softwareaktualisierung abgeschlossen ist.
Seitenverkleidung des
Fernsehgeräts
USB-Laufwerk
Fortsetzung...
Page 87

Alternative Software
Ersetzten Sie die aktuelle Software durch eine Alternative.
Wenn die Software geändert wurde, wird die vorhandene Software angezeigt.
N
Sie können die aktuelle Software durch die alternative Software ersetzen, indem Sie N Alternative Software wählen.
HD-AnschlussplanDie kurze Einführung
❑
So erzielen Sie mit Ihrem HD-Fernsehgerät optimale Leistung wird angezeigt. Wir bieten Anschlüsse für HD-Geräte an.
Mit den Tasten ◄ oder ► können Sie zur vorigen oder zur nächsten Seite wechseln.
N
Samsung kontaktieren
❑
Wenden Sie sich an das Callcenter von Samsung oder suchen Sie auf der Website nach Informationen für das Gerät.
Quellen / Name bearbeiten
Quellen
❑
Hiermit wählen Sie das Fernsehgerät oder andere externe Signaleingänge wie z. B.
DVD-Player oder Kabelbox/Satellitenreceiver (Set-Top-Box), die mit dem Fernsehgerät
verbunden sind. Stellen Sie die gewünschte Signalquelle ein.
TV, Ext.1, Ext.2, AV, PC, Component, HDMI1, HDMI2/DVI, HDMI3, HDMI4, USB.
Sie können nur solche externen Geräte wählen, die an das Fernsehgerät N
angeschlossen sind. Bei den Quellen werden die angeschlossenen Signalquellen
hervorgehoben und am Anfang dargestellt. Nicht angeschlossene Signalquellen
werden am Ende der Liste dargestellt.
Verwenden der Farbtasten auf der Fernbedienung in Verbindung mit der
N
Kanalliste.
- Aktualisieren: Aktualisieren der angeschlossenen externen Geräte.
- T TOOLS (Extras): Anzeigen der Menüs “Name bearb.” und “Information”.
Drücken Sie die Taste
O SOURCE auf der Fernbedienung, um eine externe
Signalquelle anzuzeigen.
Edit Name
❑
Vergeben Sie Namen für die an die Eingangsbuchsen angeschlossenen Geräte, um die Auswahl der Signalquelle zu vereinfachen.
VCR / DVD / Cable STB / Satellite STB / PVR STB / AV Receiver / Game / Camcorder / PC / DVI-Geräte / TV / IPTV /
Blu-ray / HD DVD / DMA
Wenn ein PC mit einer Auösung von 1920 x 1080 bei 60 Hz an den Anschluss N HDMI IN 2(DVI) angeschlossen wird, sollten Sie
in Name bearb. im Modus “Eingang” den HDMI2/DVI Modus auf PC festlegen.
Wenn Sie ein HDMI/DVI-Kabel mit dem
N HDMI IN 2(DVI)-Anschluss verbinden, stellen Sie den HDMI2/DVI-Modus im Bereich
Name bearbeiten des Modus Eingang auf DVI-Geräte. In diesem Fall ist ein gesonderter Audioanschluss erforderlich.
Eingang
Quellen
Name bearb.
Deutsch - 30
Page 88

Media Play
Anschließen eines USB-Geräts
1. Drücken Sie zum Einschalten des Computers die POWER-Taste.
Seitenverkleidung des
Fernsehgeräts
2. Schließen Sie ein USB-Gerät mit Foto- oder Musikdateien an die USB-Buchse seitlich am
Fernsehgerät an.
Media Play
N unterstützt ausschließlich USB-Massenspeichergeräte vom Typ MSC (Mass
Storage Class). Beispiele für MSC sind Thumb-Laufwerke und Flash Card-Lesegeräte
sowie USB HDD (USB-HUB wird nicht unterstützt).
MTP (Media Transfer Protocol) wird nicht unterstützt.
N
Als Dateisystem wird ausschließlich FAT16/32 unterstützt. NTFS-Dateisysteme werden N
USB-Laufwerk
nicht unterstützt.
Einige Typen von USB-Digitalkameras und -Audiogeräten sind eventuell nicht mit diesem Fernseher kompatibel.
N
Schließen Sie diese direkt an den USB-Anschluss Ihres Fernsehgeräts an. Wenn Sie eine gesonderte Kabelverbindung verwenden, N
können USB-Kompatibilitätsprobleme auftreten.
Ehe Sie Ihr Gerät an das Fernsehgerät anschließen, sichern Sie Ihre Dateien, um eventuellem Datenverlust vorzubeugen.
N
SAMSUNG haftet nicht für Verlust und Beschädigung von Daten.
Trennen Sie das USB-Gerät nicht, solange Daten geladen werden.
N
MSC unterstützt MP3- und JPEG-Dateien, wogegen PTP-Geräte nur JPEG-Dateien unterstützen. N
Das sequentielle JPEG-Format wird unterstützt. N
Je höher die Auösung des Bilds, desto länger dauert es, um es auf dem Bildschirm anzuzeigen. N
Die maximal unterstützte JPEG-Auösung beträgt 15.360 x 8.640 Pixel. N
Bei nicht unterstützten oder beschädigten Dateien wird die Meldung N Nicht unterstütztes Dateiformat angezeigt.
Wenn mehr als 4000 Fotodateien (oder mehr als 3000 Musikdateien), vorhanden sind, werden die Dateien ab 4000 (3000)
N
möglicherweise nicht in der Fotoliste (oder Musikliste) angezeigt.
MP3-Dateien mit DRM, die von einer nicht-lizenzfreien Site heruntergeladen worden sind, können nicht abgespielt werden.
N
DRM(Digital Rights Management) verhindert illegale Verwendung von digitalen Medien zum Schutz der Urheberrechte. N
Wenn Sie zu einem anderen Foto wechseln, kann das Laden einige Sekunden dauern. In diesem Fall wird das Ladesymbol N
angezeigt.
Deutsch - 31
Page 89

Deutsch - 32
Verwenden der Medienwiedergabefunktion
Mit dieser Funktion können Sie auf einem USB-Speichermedium (MSC) gespeicherte Foto- und Musik anzeigen bzw. wiedergeben.
Möglicherweise treten bei lizenzfreien Multimediadateien weniger Probleme auf.
Starten der Medienwiedergabefunktion
❑
1. Drücken Sie die MENU-Taste. Wählen Sie durch Drücken der Tasten ▲ oder ▼
die Option Anwendung, und drücken Sie dann die Taste ENTERE.
2. Wählen Sie durch Drücken der Tasten ▲ oder ▼ die Option Media Play (USB),
und drücken Sie dann die Taste ENTER
N
Das Menü
Drücken Sie die
O SOURCE-Taste auf der Fernbedienung, und wählen Sie
Media Play wird geöffnet.
USB. Drücken Sie dann die Taste ENTERE.
Drücken Sie die O MEDIA.P-Taste auf der Fernbedienung, um das Media
Play-Menü anzuzeigen.
3. Drücken Sie zuerst die rote Taste und dann ▲ oder ▼, um das entsprechende
USB-Speichergerät auszuwählen (sofern es über einen Hub angeschlossen ist).
Drücken Sie die
N
Diese Funktion hängt vom Typ des an das Fernsehgerät angeschlossenen
ENTERE.
USB-Speichers.
N
Der Name des USB-Geräts wird links unten auf dem Bildschirm angezeigt.
4. Drücken Sie die Tasten ◄ oder ►, um ein Symbol (Photo, Music, Setup)
auszuwählen, und drücken Sie dann die Taste ENTERE.
N
Um den
Media Play-Modus zu beenden, drücken Sie auf der Fernbedienung die Taste MEDIA.P.
Sicheres Entfernen von USB-Geräten
❑
Sie können das Gerät sicher vom Fernsehgerät entfernen.
1. Drücken Sie die Taste TOOLS im Dateilistenfenster von Media Play oder
während eine Diashow bzw. Musikdatei wiedergegeben wird.
2. Wählen Sie durch Drücken der Tasten ▲ oder ▼ die Option Sicher entfernen,
und drücken Sie dann die Taste ENTER
3. Entfernen Sie das USB-Gerät sicher vom Fernsehgerät.
Bildschirmanzeige
❑
E
E
.
.
Media Play
PHOTO
Photo Music Setup
USB Gerät
Ordner 1
Ordner 2
IMG_0349.
JPG
../Ordnername/
USB Gerät
USB : USB-Name
IMG_0335.JPG
▶
1
▶
1
Wählen
851.98MB/995.00MB Frei
4/6
Diashow
Gruppe abspielen
Information
Sicher entfernen
T
Extras R
R
Ordner darüber
Zurück
2
IMG_03496.
IMG_03496.
JPG
JPG
../Ordnername/
3
USB Gerät
1
c
▶
▶
▶
1
▶
▶
1
▶
IMG_0335.JPG
1/67
5
Wählen
◀
4
IMG_0343.
JPG
T
IMG_03496.
JPG
1Datei(en) gew.
Extras
R Ordner darüber
1. Anzeigegruppen: Die ausgewählte Datei ist hervorgehoben.
2. Ausgewählte Datei: Die Sortiergruppe mit dem ausgewählten Foto wird hervorgehoben.
Eine Grupp enthält neun Fotos.
N
3. Informationen zur Auswahl von Elementen: Zeigt die Anzahl der Fotos an, die durch Drücken der gelben Taste ausgewählt wurden.
Rote Taste
N (Gerät): Dient zur Auswahl eines angeschlossenen Geräts.
4. Aktuelles Gerät: Zeigt den Namen des aktuell ausgewählten Geräts an.
5. Aktuelles Gerät
Gelbe Taste ( • Auswählen): Hiermit wählen Sie eine Datei aus der Dateiliste aus. Die ausgewählten Dateien werden mit dem
Symbol c gekennzeichnet. Drücken Sie die gelbe Taste noch einmal, um die Auswahl einer Datei zu stornieren.
(Extras): Hiermit zeigen Sie die Optionsmenüs an. (Der Inhalt der Extras richtet sich nach dem jeweiligen Status.)
•
R •
(Zurück): Zurück zum vorherigem Menü.
Fortsetzung...
Page 90

Deutsch - 33
Verwenden der Fernbedienungstasten im Menü Media Play ❑
Taste Vorgang
▲/▼/◄/►
E
ENTER
Cursor bewegen und Elemente auswählen.
Markiertes Element auswählen.
Abspielen oder Anhalten der Dateien wahrend der Wiedergabe von Diashows oder Musikdateien.
Abspielen oder Anhalten der Präsentation, Musik oder Film-Datei.
RETURN Kehren Sie zum vorherigen Menü zurück.
TOOLS Ausführen verschiedener Funktionen aus dem Foto, Musik- und Filmmenü.
Anhalten der aktuellen Präsentation, Musik oder Film-Datei.
Wechsel zur vorherigen Gruppe/nächsten Gruppe.
INFO Anzeigen von Dateiinformationen.
MEDIA.P Starten oder beenden Sie den Media Play-Modus.
Verwenden der Fotoliste
1. Drücken Sie die MEDIA.P-Taste auf der Fernbedienung, um das Media Play-Menü
anzuzeigen.
2. Wählen Sie durch Drücken der Tasten ◄ oder ► die Option Photo, und drücken Sie
dann die Taste ENTER
3. Drücken Sie die Taste
ausgewählten Sortierung zu starten.
Die Informationen einer Fotodateiw erden automatisch eingestellt.
N
PTP ermöglicht keine Ordnersortierung. N
E
.
(Play)/ENTERE, um die Diashow in der vom Benutzer
IMG_03496.
IMG_03496.
JPG
JPG
../Ordnername/
USB Gerät
▶
▶
▶
▶
IMG_0335.JPG
▶
1
▶
1
1/67
◀
IMG_03496.
IMG_0343.
JPG
JPG
Wählen
T
Extras R Zurück
Menü der Extras für Fotolisten
❑
Diashow
Sie können eine Diashow mit den Fotodateien auf dem USB-Speicher ablaufen
lassen.
Gruppe abspielen
Sie können eine Diashow nur mit den Fotodateien aus der aktuell ausgewählten
Gruppe ablaufen lassen.
Informationen
Die Informationen der Fotodatei wie Name, Größe, Auösung, Änderungsdatum und
Pfad werden angezeigt.
Sie konnen die Informationen von Fotodateien mit den gleichen Verfahren auch
N
wahrend einer Diashow anzeigen
Alternativ wählen Sie ein Foto aus der Fotoliste und drücken die Taste
O INFO, um
die Informationen anzuzeigen.
Sicher entfernen
Sie können das Gerät sicher vom Fernsehgerät entfernen.
IMG_0345.
IMG_0346.
JPG
JPG
../Ordnername/
USB Gerät
IMG_0349.
JPG
▶
1
▶
1
IMG_0335.JPG
4/6
Wählen
Diashow
Gruppe abspielen
Information
Sicher entfernen
T
Extras R Zurück
Page 91

Deutsch - 34
Anzeigen eines Fotos oder einer Diashow
Anzeigen von Diashows
❑
Normal 3648x2432 2009/3/15
IMG_0335.JPG
USB
r
E Pause lr Zurück/Weiter
1. Wählen Sie das gewünschte Foto mit den Tasten ◄ or ► aus der Fotoliste aus.
2. Drücken Sie die Taste TOOLS.
3. Wählen Sie durch Drücken der Tasten ▲ oder ▼ die Option Diashow, und
drücken Sie dann die Taste ENTER
N
Alle Dateien in der Fotoliste werden für die Diashow verwendet.
E
.
Die Bilder werden nacheinander, beginnend mit der aktuell angezeigten Datei N
angezeigt.
Die Diashow wird entsprechend der Sortierreihenfolge in der Fotoliste ausgeführt. N
Musikdateien können während der Diashow automatisch abgespielt werden, N
wenn die Hintergrundmusik aktiviert Ein ist.
Drücken Sie die Fernbedienungstaste
O (Play)/ENTER
E
button , um die
Diashow zu starten.
Diashow-Steuerungstasten N
E
ENTER
Abspielen/Anhalten der Diashow.
Abspielen der Diashow.
Diashow anhalten.
Abspielen ausgewählter Fotodateien
❑
T TOOLS
/
Beenden Sie die Diashow und wechseln Sie
wieder zur Fotoliste.
Hiermit führen Sie verschiedene Funktionen aus
den Fotomenüs aus.
Ändern der Abspielgeschwindigkeit der Diashow.
1. Wählen Sie das gewünschte Foto mit den Tasten ◄ or ► aus der Fotoliste aus.
2. Drücken Sie die gelbe Taste. Wiederholen Sie den obigen Vorgang, um mehrere Fotodateien auszuwählen.
N
Links neben dem Namen des gewählten Kanals wird das Symbol
N
Um die Auswahl sämtlicher Dateien aufzuheben, drücken Sie die Taste
3. Drücken Sie die Taste
N
Die ausgewählten Dateien werden für die Diashow verwendet.
(Play)/ENTERE.
c
angezeigt.
TOOLS und wählen Sie dann Alle abwählen.
T
Extras R Zurück
1/4
Menü der Extras für Diashows
❑
Diashow anhalten / starten
Sie können eine Diashow starten und anhalten.
Diashow-Geschwindigkeit → Normal / Schnell / Langsam
Sie können die Geschwindigkeit der Diashow nur während einer Diashow
auswählen.
Wenn Sie die Tasten
N (REW) oder (FF) während einer Diashow drücken,
können Sie auch deren Abspielgeschwindigkeit ändern.
Drehen → 0˚ / 90˚ / 180˚ / 270˚
Sie können alle auf einem USB-Speichergerät gespeicherten Dateien drehen.
Die gedrehte Datei wird nicht gespeichert.
N
Diashow anhalten
Diashow-Geschw. : Normal
Drehen
Zoom
Hintergrundmusik
Bildeinstellungen
Toneinstellungen
Information
Sicher entfernen
U
Navig. E Eingabe e Beenden
Zoom → x1 / x2 / x4
Sie können alle auf einem USB-Speichergerät gespeicherten Fotos vergrößern.
Um das vergrößerte Foto zu verschieben, drücken sie die Taste
N ENTER
E
und anschließend ▲/▼/ ◄ /►. Beachten Sie, dass
die Funktion zum Verschieben deaktiviert ist, wenn das vergrößerte Bild kleiner als das ursprüngliche Fenster ist.
Die vergrößerte Datei wird nicht gespeichert.
N
Hintergrundmusik
Sie können die Hintergrundmusik auswählen und einstellen, während Sie eine Diashow anzeigen.
Um diese Funktion zu verwenden, müssen auf dem UB-Speicher Musikdateien gespeichert sein.
N
Laden der Musikdateien erforderlich, um in den Hintergrundmusikmodus zu wechseln. Musikdateien aus der Kategorie N
abspielen, die geladen werden soll.
Hintergrundmusik • → Ein / Aus
Musikdatei wählen •
N
Wenn Sie
Hintergrundmusik aktivieren (Ein), können Sie eine Musikdatei wählen.
Bildeinstellungen / Toneinstellungen
Informationen hierzu nden Sie auf Seite 37
Informationen
Die Informationen zur Fotodatei werden angezeigt.
Sicher entfernen
Sie können das Gerät sicher vom Fernsehgerät entfernen.
Extras
Tools
Page 92

Deutsch - 35
Verwenden der Musiklistee
1. Drücken Sie die MEDIA.P-Taste auf der Fernbedienung, um das Media Play-Menü
anzuzeigen.
2. Wählen Sie durch Drücken der Tasten ◄ oder ► die Option Music, und drücken Sie
dann die Taste ENTER
3. Drücken Sie die Taste ENTER
Reihenfolge zu starten.
Die Informationen der Musikdateien werden automatisch eingestellt.
N
Wenn es für eine Musikdatei keine Titelinformationen gibt, wird der Dateiname N
angezeigt.
Menü der Extras für Musiklisten
❑
Gruppe abspielen
Mit diesem Menübefehl können Sie nur die Musikdateien aus der aktuell
ausgewählten Gruppe abspielen.
Informationen
Die Informationen der Fotodatei wie Name, Größe, Änderungsdatum und Pfad
werden angezeigt.
Alternativ wählen Sie eine Musikdatei aus der Musikliste und drücken die Taste
O
INFO, um die Informationen anzuzeigen.
Sicher entfernen
Sie können das Gerät sicher vom Fernsehgerät entfernen.
E
button.
E
, um die Musik in der vom Benutzer gewählten
NPKI
../ Ordnername/
USB Gerät
NPKI
NPKI
../ Ordnername/
USB Gerät
usermanual
Energetic
▶
Energetic
▶
1
▶
1
▶
3/4
Carol kidd
Mr A-Z
2005
Pop
When I Dream
Wählen
▶
1
▶
1
Carol kidd
Mr A-Z
2005
Pop
When I Dream
Wählen
Select
T
3/4
T
Extras R
Extras R
▶
Heaven
Ordner darüber
Gruppe abspielen
Information
Sicher entfernen
Heavenusermanual
T
Tools R Upper Folder
Ordner darüber
Sky
Page 93

Deutsch - 36
Wiedergeben von Musik
Wiedergeben einer Musikdatei
❑
1. Wählen Sie mit den Tasten ◄ oder ► eine Musikdatei, die abgespielt werden
soll.
2. Drücken Sie die Taste
N
Dieses Menü zeigt nur Dateien mit der Dateinamenserweiterung MP3.
Dateien mit anderer Dateinamenserweiterung werden nicht angezeigt, auch
wenn sie auf dem gleichen USB-Gerät gespeichert wurden.
(REW) und (FF) sind bei der Wiedergabe funktionslos.
N
N
Die ausgewählte Datei wird zusammen mit der Abspieldauer oben angezeigt.
N
Um die Musiklautstärke anzupassen, drücken Sie auf der Fernbedienung die
Lautstärketaste auf der Fernbedienung.
Wenn Sie den Ton ausschalten möchten, drücken Sie die MMUTE -Taste auf der Fernbedienung.
N
Die Abspieldauer einer Musikdatei wird möglicherweise als
Informationen über die Abspieldauer gefunden werden.
Regler für Musikwiedergabe
N
E
ENTER
Wiedergabe/Pause einer Musikdatei.
Spielen Sie die Musikdatei ab.
Hiermit wird die Musikdatei angehalten.
Symbol für Informationen zur Musik-Funktion
N
Hiermit werden alle Musikdateien im Ordner (oder die markierte Datei) wiederholt abgespielt.
Wiederholmodus ist aktiviert Ein.
Hiermit werden alle Musikdateien im Ordner (oder die markierte Datei) einmal abgespielt. Wiederholmodus ist
deaktiviert Aus.
(Play)/ENTERE.
00:00:00 angezeigt, wenn am Anfang der Datei keine
T TOOLS
r
r
When I Dream
E Pause lr Zurück/Weiter
r
T
Extras R Zurück
HeavenGeek In The Pink
USB
r
00:00:02 / 00:04:55
Beenden des Wiedergabemodus und
Rückkehr zur Musikliste.
Hiermit führen Sie verschiedene Funktionen
aus den Musikmenüs aus.
1/3
Abspielen ausgewählter Musikdateien
❑
1. Wählen Sie die gewünschte Musikdatei mit den Tasten ◄ or ► aus der Musikliste aus.
2. Drücken Sie die gelbe Taste. Wiederholen Sie den obigen Vorgang, um mehrere Filmdateien auszuwählen.
N
Links neben dem Namen der Musikdatei wird das Symbol
N
Um die Auswahl sämtlicher Dateien aufzuheben, drücken Sie die Taste
3. Drücken Sie die Taste
N
Nur die gewählte Datei wird wiedergegeben.
Menü der Extras für die Musikwiedergabe
❑
(Play)/ENTERE.
c
angezeigt.
TOOLS und wählen Sie dann Alle abwählen.
Wiederholmodus → Ein / Aus
Sie können Musikdateien wiederholt abspielen.
Bildeinstellungen / Toneinstellungen
Informationen hierzu nden Sie auf Seite 37
Informationen
Wiederhol-Modus
Bildeinstellungen
Toneinstellungen
Information
Sicher entfernen
Die Informationen zur Musikdatei werden angezeigt.
Sicher entfernen
Sie können das Gerät sicher vom Fernsehgerät entfernen.
Extras
◄ Ein ►
U
Navig. Einst. e Beenden
Page 94

Deutsch - 37
Bild-/Musikeinstellungen mit Media Play
Während Sie mit Media Play eine Diashow abspielen oder Musik hören, können Sie das Bild und den Ton einstellen.
Bildeinstellungen
❑
1. Drücken Sie während einer Diashow oder beim Abspielen von Musik die Taste
TOOLS.
2. Wählen Sie mit den Tasten ▲ oder ▼ die Option Bildoptionen aus.
3. Wählen Sie mit ◄ oder ► den Bildmodus
(Dynamisch, Standard, Eco (Sparen) oder Film).
N
Nach Auswahl von
Dynamisch oder Eco können Sie Optimalkontrast und
Schwarzton nicht mehr einstellen.
4. Navigieren Sie mit der Taste ▲ oder ▼ zum gewünschten Menüpunkt
(Kontrast, Helligkeit, Farbe, Optimalkontrast, Schwarzton oder Reset)
N
Wählen Sie
Reset, um die Bildeinstellungen zurückzusetzen.
5. Passen Sie mit der ◄ oder ►-Taste die Einstellungen an.
Weitere Informationen zu den Bildeinstellungen nden Sie auf den Seiten 17~20.
N
Toneinstellungen
❑
1. Drücken Sie während einer Diashow oder beim Abspielen von Musik die Taste
TOOLS.
2. Wählen Sie mit den Tasten ▲ oder ▼ die Option Bild aus.
3. Wählen Sie mit den Tasten ◄ oder ► die Option Tonmodus aus.
(Standard, Musik, Film, Klare Stimme oder Sprache)
4. Navigieren Sie mit der Taste ▲ oder ▼ zum gewünschten Menüpunkt
(Balance, 100Hz, 300Hz, 1KHz, 3KHz, 10KHz (Bandbreitenanpassung) oder
Reset)
N
Wählen Sie
Reset, um die Toneinstellungen zurückzusetzen.
5. Passen Sie mit der ◄ oder ►-Taste die Einstellungen an.
Weitere Informationen zu den Bildeinstellungen nden Sie auf den Seiten 22~23.
N
Bildmodus ◄ Standard ►
Kontrast : 95
Helligkeit : 45
Farbe : 50
Optimalkontrast : Mittel
Schwarzton : Aus
Reset
Tonmodus ◄ Benutzerd. ►
Balance : L50 R50
100Hz : 0
300Hz : 0
1KHz : 0
3KHz : 0
10KHz : 0
Reset
Bildeinstellungen
U
Na vig . L Ei nst . Ei nga be
Toneinstellungen
U
Na vig . L Ei nst . Ei nga be
R
R
Zurück
Zurück
Verwenden des Menüs Einstellungen
Bei den Einstellungen zeigen Sie die im Media Play-Menü vorgenommenen
Benutzereinstellungen an.
1. Drücken Sie die MEDIA.P-Taste auf der Fernbedienung, um das Media Play-Menü
anzuzeigen.
2. Drücken Sie die Taste ◄ oder ►, um Setup auszuwählen,
und drücken Sie dann die Taste ENTER
3. Wählen Sie mit den Tasten ▲ oder ▼ die gewünschte Option aus.
4. Wählen Sie mit den Tasten ◄ oder ► die gewünschte Option,
und drücken Sie dann die Taste ENTER
Um den
N Media Play-Modus zu beenden, drücken Sie auf der Fernbedienung die
Taste MEDIA.P.
Wiederholmodus → Ein / Aus
Hiermit können Sie Musikdateien wiederholt abspielen.
Laufzeit für Bildschirmschoner → Aus / 10 min / 20 min / 40 min/ 1 Stunde
Wählen Sie die Wartezeit bis zum Aktivieren des Bildschirmschoners.
Informationen
Hiermit zeigen Sie die Informationen zum angeschlossenen Gerät an.
Sicher entfernen
Sie können das Gerät sicher vom Fernsehgerät entfernen.
E
E
.
.
Media Play
Photo Music Setup
USB Device
Wiederholmodus ◄ Aus ►
Laufzeit Bildschirmsch. 10 min
Information
Sicher entfernen
USB Gerät
USB : USB-Name
SETUP
UNavig. LEinst. Zurück
851.98MB/995.00MB Frei
e
Beenden
Page 95

Deutsch - 38
Informationen zu Anynet+
Anschließen von Anynet+ -Geräten
Bei Anynet+ handelt es sich um eine Funktion, mit der Sie alle angeschlossenen Samsung-Geräte, die Anynet+ unterstützen, mit der
Fernbedienung für Ihr Samsung-Fernsehgerätsteuern können. Das Anynet+-System unterstützt nur Anynet+-fähige Samsung-Geräte.
Wenn Sie wissen möchten, ob Ihr Samsung-Gerät diese Funktion unterstützt, suchen Sie das Anynet+-Logo auf Ihrem Gerät.
Anschließen an ein Fernsehgerät
❑
TV
HDMI 1.3-Kabel
Anynet+
-Gerät 1
HDMI 1.3-Kabel
Anynet+
-Gerät 2
HDMI 1.3-Kabel
Anynet+
-Gerät 3
HDMI 1.3-Kabel
Anynet+
-Gerät 4
1. Verbinden Sie einen der Anschlüsse [HDMI IN 1], [HDMI IN 2(DVI)], [HDMI IN 3] oder [HDMI IN 4] am Fernsehgerät mit dem HDMI
OUT-Anschluss am entsprechenden Anynet+-Gerät. Verwenden Sie hierfür ein HDMI-Kabel.
Anschluss an das Heimkinosystem
❑
TV
Optical kable
HDMI 1.3-Kabel
Anynet+ -Gerät 3
Home Theatre
Anynet+ -Gerät 3
Anynet+ -Gerät 1
HDMI 1.3-Kabel
Anynet+ -Gerät 4
HDMI 1.3-Kabel
HDMI 1.3-Kabel
HDMI 1.3-Kabel
1. Verbinden Sie einen der Anschlüsse [HDMI IN 1], [HDMI IN 2(DVI)], [HDMI IN 3] oder [HDMI IN 4] am Fernsehgerät mit dem HDMI
OUT-Anschluss am entsprechenden Anynet+-Gerät. Verwenden Sie hierfür ein HDMI-Kabel.
2. Verbinden Sie den HDMI IN-Anschluss des Heimkinosystems mit dem HDMI OUT-Anschluss des entsprechenden Anynet+-Geräts.
Verwenden Sie hierfür ein HDMI-Kabel.
Verbinden Sie den (optischen) digitalen Audioausgang am Fernsehgerät und den digitalen Audioeingang des Heimkinosystems
N
ausschließlich mit Hilfe des Glasfaserkabels.
Bei obiger Vorgehensweise überträgt der optische Anschluss nur 2-Kanalaudio. Die Tonausgabe erfolgt also nur über den linken
N
und rechten Frontlautsprecher sowie den Subwoofer des Heimkinosystems. Wenn Sie 5.1-Kanalton wünschen, müssen Sie
den digitalen (optischen) Audioausgang des DVD-Players oder der Kabel-/Sat-Box (also Anynet-Gerät 1 oder 2) direkt an einen
Verstärker oder ein Heimkinosystem und nicht an das Fernsehgerät anschließen.
Schließen Sie nur ein Heimkinosystem an.
N
Sie können Anynet+-Geräte mithilfe eines HDMI 1.3-Kabels verbinden. Einige HDMI-Kabel unterstützen möglicherweise keine N
Anynet+-Funktionen.
Anynet+ arbeitet, wenn das AV-Gerät, das Anynet+ unterstützt, im Standby-Modus oder angeschaltet ist.
N
Anynet+ unterstützt maximal 12 AV-Geräte. Beachten Sie, dass Sie maximal 3 Geräte des gleichen Typs anschließen können. N
Anynet + unterstützt maximal 3 Geräte gleichzeitig. N
Page 96

Deutsch - 39
Einrichten von Anynet+
Einrichten von ❑Anynet+(HDMI-CEC)
Drücken Sie die Taste TOOLS, um das Menü. Extras anzuzeigen. Sie können das
T
Anwendung
Media Play (USB)
Anynet+ (HDMI-CEC)
Anynet+ -Menü auch durch Auswahl von Extras → Anynet+(HDMI-CEC) auswählen.
Anynet+ (HDMI-CEC)
→ Aus / Ein
Damit Sie die Funktionen von Anynet+ nutzen können, muss Anynet+ (HDMI-CEC)
aktiviert (Ein) sein.
Wenn die Funktion
N Anynet+ (HDMI-CEC) deaktiviert wird, sind auch alle Vorgänge
in Verbindung mit Anynet+ deaktiviert.
Autom. Ausschalten → Nein / Ja
Automatisches Abschalten von Anynet+ Geraten durch Abschalten des Fernsehgerats.
Automatisches Abschalten von Anynet+-Geräten durch Abschalten des
N
FernsehgerätsDamit Sie Anynet+ verwenden können, muss die Geräteauswahl der
Anynet+ (HDMI-CEC) : ON
Autom. Ausschalten : Yes
Einstellungen
Nein
Ja
Fernbedienung auf TV eingestellt sein.
U
Wenn Sie
N Autom. Ausschalten aktivieren (auf Ja setzen), werden auch die
Navig. E Eingabe R Zurück
angeschlossenen externen Geräte ausgeschaltet, wenn Sie das Fernsehgerät
ausschalten. Wenn das externe Gerät jedoch gerade aufnimmt, wird es möglicherweise abgeschaltet oder auch nicht.
Wechseln zwischen Anynet+-Geräten
1. Drücken Sie die Taste TOOLS. Drücken Sie die Taste ENTERE, um
Anynet+ (HDMI-CEC) auszuwählen.
2. Wählen Sie durch Drücken der Tasten ▲ oder ▼ die Option Geräteliste, und drücken
Sie dann die Taste ENTER
Nun werden die an das Fernsehgerät angeschlossenen Anynet+-Geräte aufgelistet.
N
E
.
Wenn Sie das gewünschte Gerät nicht nden, drücken Sie die rote Taste, um nach
Geräten zu suchen.
Nur wenn Sie
N Anynet+ (HDMI-CEC) im Menü Einstellungen aktivieren *Ein, wird
das Menü Geräteliste angezeigt.
3. Wählen Sie ein bestimmtes Gerät durch Drücken der Tasten ▲ oder ▼, und drücken Sie dann die Taste ENTER
wechselt zum ausgewählten Gerät.
Das Umschalten zu den ausgewählten Geräten kann bis zu 2 Minuten dauern.
N
Die zum Suchen nach Geräten erforderliche Zeit hängt von der Anzahl der angeschlossenen Geräte ab. N
Wenn Sie mit der Taste N SOURCE eine externe Signalquelle eingestellt haben, können Sie die Anynet+-Funktion nicht verwenden.
Achten Sie darauf, immer nur mit der Geräteliste zu einem Anynet-Gerät zu wechseln.
Fernsehen
Geräteliste
Aufnehmen : DVDR
DVDR MENU
DVDR INFO
Empfänger : Ein
Einstellungen
U
Navig. L Einst. R Zurück
E
. Das System
►
Anynet+-Menü
❑
Der Inhalt des Anynet+-Menüs hängt vom Typ und Status der an das Fernsehgerät angeschlossenen Anynet+-Geräte ab.
Anynet+-Menü Beschreibung
Fernsehen Wechsel vom Anynet+-Modus zum Fernsehmodus.
Geräteliste Anzeige der Anynet+-Geräteliste.
(Geräte_Name)-MENU Hiermit öffnen Sie die Menüs der angeschlossenen Geräte. Wenn z. B. ein DVD-Recorder
angeschlossen ist, wird das DVD-Menü des DVD-Recorders angezeigt.
(Geräte_Name). INFO Zeigt das Wiedergabemenü des angeschlossenen Geräts an. Wenn z. B. ein DVD-Recorder
angeschlossen ist, wird das Wiedergabemenü des DVD-Recorders angezeigt.
Aufnehmen (*Aufnahmegerät) Startet ein Aufnahme. (Diese Menüption funktioniert nur bei aufnahmefähigen Geräten.)
(*Rekorder) Reserve Recording
(Aufnahme vormerken)
Aufnahme anhalten:
Hiermit können Sie eine Aufnahme mit dem Rekorder vormerken. (Diese Funktion ist nur für Geräte
mit Vormerkfunktion für Aufnahmen verfügbar.)
Beenden der Aufnahme.
(*Aufnahmegerät)
Receiver Die Tonausgabe erfolgt über den Receiver.
Fortsetzung...
Page 97

Deutsch - 40
Im Anynet+-Modus verfügbare Tasten der TV-Fernbedienung
❑
Gerätetyp Betriebsstatus Verfügbare Tasten
Nach dem Wechseln zum Gerät wird
das Menü des entsprechenden Geräts
Anynet+-Gerät
auf dem Bildschirm angezeigt.
Nach dem Wechseln zum Gerät beim
Abspielen einer Datei
Gerät mit eingebautem
Tuner
Nach dem Wechseln zum Gerät beim
Fernsehen
Audiogerät Beim Aktivieren des Receivers
Die Anynet+-Funktion ist nur nutzbar, wenn auf der Fernbedienung das Fernsehgerät als Empfänger eingestellt ist.
N
Zifferntasten
E
▲/▼/◄/►/ENTER
-Tasten
Farbtasten / EXIT-Taste
(Rückwärts suchen) / (Vorwärts suchen) (Stopp) /
(Wiedergabe) / (Pause)
/ -Taste
P
/ -Taste
=
M MUTE -Taste
Die N -Taste ist nur im Aufnahmestatus belegt.
Sie können Anynet+-Geräte nicht mit den Tasten an Ihrem Fernsehgerät bedienen. Sie können Anynet+-Geräte nur mit der TV-
N
Fernbedienung steuern.
Die TV-Fernbedienung funktioniert unter bestimmten Umständen nicht. Wählen Sie in diesem Fall erneut das Anynet+-Gerät.
N
Die Anynet+-Funktionen sind für Geräte anderer Hersteller nicht verfügbar. N
Die N , / -Vorgänge können sich je nach Gerät unterscheiden.
Bei Anschluss von mehr als einem Aufnahmegerät werden sie als (*Aufnahmegerät) angezeigt, bei Anschluss eines einzigen
N
Aufnahmegeräts erfolgt die Anzeige als (*Geräte_Name).
Aufnahme
Sie können Fernsehprogramme mit einem Samsung-Recorder aufnehmen.
E
1. Drücken Sie die Taste TOOLS. Drücken Sie die Taste ENTER
Anynet+ (HDMI-CEC) auszuwählen.
2. Wählen Sie durch Drücken der Tasten ▲ oder ▼ Aufnehmen, und drücken Sie dann
die Taste ENTER
Wenn mehrere Aufnahmegeräte angeschlossen sind, werden diese in einer Liste
N
E
. Die Aufnahme beginnt.
angezeigt. Wählen Sie durch Drücken der Tasten ▲ oder ▼ ein Aufnahmegerät,
und drücken Sie dann die Taste ENTERE. Die Aufnahme beginnt.
Wenn das Aufnahmegerät nicht angezeigt wird, wählen Sie
N Geräteliste und drücken
Sie die rote Taste, um nach Geräten zu suchen.
Durch Drücken von
N wird die laufende Sendung aufgenommen. Wenn Sie Bilder aus einer anderen Signalquelle anzeigen, wird
das Videosignal aus dieser Quelle aufgenommen.
Überprüfen Sie vor der Aufnahme, ob der Antennenstecker ordnungsgemäß am Aufnahmegerät angeschlossen ist.
N
, um
Fernsehen
Geräteliste
Aufnehmen : DVDR
DVDR MENU
DVDR INFO
Empfänger : Ein
Einstellungen
U
Navig. L Einst. R Zurück
Page 98

Deutsch - 41
Tonwiedergabe mit einem Receiver
Sie können die Tonwiedergabe über einen Receiver anstelle des TV-Lautsprechers laufen
lassen.
1. Drücken Sie die Taste TOOLS. Drücken Sie die Taste ENTER
E
, um
Anynet+ (HDMI-CEC) auszuwählen.
2. Wählen Sie mit den Tasten ▲ oder ▼ die Option Receiver. Drücken Sie die Taste
◄ oder ►, um Ein oder Aus zu wählen.
Wenn Ihr Receiver nur Audiosignale unterstützt, wird er in der Geräteliste
N
möglicherweise nicht angezeigt.
Der Receiver kann eingesetzt werden, wenn Sie den optischen Eingang des Receivers
N
Fernsehen
Geräteliste
Aufnehmen : DVDR
DVDR MENU
DVDR INFO
Empfänger : Ein
Einstellungen
U
Navig. L Einst. R Zurück
mit dem optischen Ausgang des Fernsehgeräts verbunden haben.
Wenn der Receiver (Heimkinosystem) angeschaltet ist, können Sie den Ton so hören, wie er vom optischen Ausgang der
N
Fernsehgeräts zur Verfügung gestellt wird. Wenn das Fernsehgerät ein (terrestrisches) DTV-Signal anzeigt, überträgt das
Fernsehgerät 5.1-Kanalton an den Receiver des Heimkinosystems. Wenn es sich bei der Signalquelle um eine digitale Komponente
wie beispielsweise einen DVD-Player handelt, der über HDMI an das Fernsehgerät angeschlossen ist, kann der Receiver des
Heimkinosystems nur 2-Kanalton wiedergeben.
Bei Verwendung von
N Media Play wird der Ton über den Receiver möglicherweise nicht korrekt ausgegeben.
Bei Betrieb über den Receiver bestehen Einschränkungen hinsichtlich der Audio-Menüs.
N
Wenn es zu einer Unterbrechung der Stromversorgung des Fernsehgeräts kommt, wenn der N Receiver angeschaltet Ein ist, wird
Lautsprecher auswählen möglicherweise auf Ext. Lautsprecher eingestellt, wenn Sie das Fernsehgerät wieder einschalten.
(siehe Seite 24)
Fehlerbehebung für Anynet+
Symptom Lösung
Anynet+ funktioniert nicht. Überprüfen Sie, ob das Gerät Anynet+-tauglich ist. Das Anynet+-System unterstützt nur •
Ich möchte Anynet+ starten. Prüfen Sie, ob das Anynet+-Gerät ordnungsgemäß an das Fernsehgerät angeschlossen ist, •
Ich möchte Anynet+ beenden. Wählen Sie im Anynet+-Menü die Option • Fernsehen.
Die Meldung Connecting to
Anynet+-Gerät (Verbinden mit
Anynet+-Gerät) wird angezeigt.
Keine Wiedergabe mit dem
Anynet+-Gerät.
Das angeschlossene Gerät wird
nicht angezeigt.
Das Fernsehprogramm kann
nicht aufgezeichnet werden.
Die Ausgabe des Fernsehtons
erfolgt über den Receiver.
Anynet+-fähige Geräte.
Schließen Sie nur einen Receiver (Heimkinosystem) an. •
Prüfen Sie, ob das Netzkabel des Anynet+-Geräts richtig angeschlossen ist. •
Prüfen Sie die Video/Audio/HDMI 1.3-Kabelverbindungen des Anynet+-Geräts. •
Prüfen Sie, ob • Anynet+ (HDMI-CEC) im Setupmenü von Anynet + aktiviert ist Ein.
Überprüfen Sie, ob die Fernbedienung im TV-Modus arbeitet. •
Prüfen Sie, ob es sich um eine ausschließlich für Anynet+ geeignete Fernbedienung handelt. •
Anynet+ funktioniert unter bestimmten Umständen nicht. (Kanalsuche, Bedienung von Media •
Play, Plug&Play usw.)
Stellen Sie nach dem Anschließen oder Entfernen des HDMI 1.3-Kabels sicher, dass die •
Geräte wieder gesucht werden, oder schalten Sie das TV-Gerät aus und wieder ein.
Überprüfen Sie, ob die Anynet+-Funktion des Anynet+ -Geräts eingeschaltet ist. •
und kontrollieren Sie zudem, ob Anynet+ (HDMICEC) im Setupmenü von Anynet+ aktiviert
(Ein) ist.
Drücken Sie die TV-Taste auf der TV-Fernbedienung, um zu TV zu wechseln. Drücken Sie •
dann die TOOLS-Taste, um das Anynet+ -Menü anzuzeigen und die gewünschte Menüoption
auszuwählen.
Drücken Sie die Taste • SOURCE auf der TV-Fernbedienung, und wählen Sie ein Gerät, bei
dem es sich nicht um ein Anynet+ handelt. (Beachten Sie, dass die Kanaltaste nur funktioniert,
wenn kein in den Tuner integriertes Anynet+-Gerät angeschlossen ist.)
Sie können die Fernbedienung nicht verwenden, während Sie Anynet+ kongurieren oder in •
einen anderen Anzeigemodus wechseln.
Verwenden Sie die Fernbedienung, wenn das Kongurieren von Anynet+ oder das Ändern des •
Anzeigemodus abgeschlossen ist.
Die Wiedergabefunktion kann nicht verwendet werden, wenn der • Plug & Play-Vorgang läuft.
Prüfen Sie, ob das Gerät die Anynet+-Funktionen unterstützt. •
Prüfen Sie, ob das HDMI 1.3-Kabel ordnungsgemäß ••angeschlossen wurde. •
Prüfen Sie, ob • Anynet+ (HDMI-CEC) im Setupmenü von Anynet+ aktiviert (Ein) wurde.
Suchen Sie noch mal nach Anynet+-Geräten •
Sie können Anynet+-Geräte nur mithilfe eines HDMI 1.3-Kabels verbinden. Einige HDMI-Kabel •
unterstützen möglicherweise keine Anynet+ -Funktionen.
Wenn es durch eine Störung (z. B. Trennen des HDMI-Kabels, des Netzkabels oder •
Stromausfall) zu einer Beendigung kommt, wiederholen Sie die Gerätesuche.
Prüfen Sie, ob der Antennenstecker des Aufnahmegeräts ordnungsgemäß angeschlossen ist. •
Schließen Sie das Glasfaserkabel an das Fernsehgerät und den Receiver an. •
Page 99

Deutsch - 42
Empfehlungen für den Betrieb
Videotextfunktion
Die meisten Fernsehsender bieten über Videotext Informationen an. Auf der Videotext-Indexseite finden Sie Verwendungshinweise zum
Videotext. Darüber hinaus können Sie über die Tasten der Fernbedienung nach Bedarf verschiedene Optionen einstellen.
N
Für die korrekte Anzeige von Videotextinformationen muss der Senderempfang einwandfrei sein. Andernfalls können Informationen
unvollständig sein oder einige Seiten nicht angezeigt werden.
1
: (exit)
Videotextanzeige beenden.
2
6 (index)
Drücken Sie diese Taste, um die Videotext-Indexseite (Inhaltsverzeichnis)
anzuzeigen.
3
5 (reveal)
Drücken Sie diese Taste, um verborgenen Text anzuzeigen (z. B. Antworten bei
Quizsendungen). Drücken Sie die Taste erneut, um den Videotext auszublenden.
4
4 (size)
Drücken Sie diese Taste, um Videotext in doppelt so großen Buchstaben in der
oberen Hälfte des Bildschirms anzuzeigen. Drücken Sie die Taste erneut, um
den Text in der unteren Hälfte des Bildschirms anzuzeigen. Zum Ausblenden des
Videotextes drücken Sie die Taste erneut.
5
8 (store)
Drücken Sie diese Taste, um Videotextseiten zu speichern.
6
/ (teletext on/mix)
Drücken Sie diese Taste, um den Videotextmodus zu aktivieren, nachdem Sie einen
Sender ausgewählt haben, der Videotext anbietet. Drücken Sie die Taste zweimal, um
die Videotextinformationen gleichzeitig mit der aktuellen Sendung auf dem Bildschirm
einzublenden.
7
1 (sub-page)
Drücken Sie diese Taste, um eine verfügbare untergeordnete Seite anzuzeigen.
8
2 (page up)
Drücken Sie
9
3 (page down)
Drücken Sie diese Taste, um die vorherige Videotextseite anzuzeigen.
0
0 (mode)
Drücken Sie diese Taste, um den Videotextmodus auszuwählen (LISTE/FLOF)
Wenn Sie diese Taste im Modus LIST (Liste) drücken, wird in den
Listenspeichermodus umgeschaltet. Im Listenspeichermodus können Sie mit der
Taste 8(store) Videotextseiten in einer Liste speichern.
!
9 (hold)
Drücken Sie diese Taste, um bei einer angezeigten Seite, die mit weiteren,
untergeordnete Seiten verknüpft ist, das automatische Umblättern zu verhindern.
Drücken Sie zum Fortfahren die Taste erneut.
@
7 (cancel)
Drücken Sie diese Taste, um beim Suchen nach einer Seite die Sendung anzuzeigen.
#
Farbtasten (rot/grün/gelb/blau)
Wenn der Sender das FASTEXT-System verwendet, sind die verschiedenen Themen
auf den Videotextseiten farbig gekennzeichnet und können mit den Farbtasten auf
der Fernbedienung angewählt werden. Drücken Sie die Farbtaste, die dem Thema
entspricht, das Sie anzeigen möchten. Die Seite wird mit anderen farbig markierten
Informationen angezeigt, die auf dieselbe Art ausgewählt werden können.
Drücken Sie die entsprechende Farbtaste, um die vorherige oder nächste Seite
anzuzeigen.
Sie können die Videotextseiten durch Drücken der Zifferntasten auf der Fernbedienung wechseln.
N
1
2
3
4
5
6
7
8
9
0
!
@
#
Fortsetzung...
Page 100

Deutsch - 43
Die Videotextseiten sind in sechs Kategorien unterteilt :
Abschnitt Inhalt
A Gewählte Seitennummer
B Senderkennung
C Aktuelle Seitenzahl oder Suchhinweise
D Datum und Uhrzeit
E Text.
F Statusinformationen
FASTEXT-Informationen.
N
Videotextinformationen sind oft auf mehrere, aufeinander folgende Seiten verteilt, die
wie folgt aufgerufen werden können :
Eingabe der Seitennummer Auswahl eines Titels in einer Liste -
Auswahl einer farbigen Überschrift (FASTEXT-System)
-
Drücken Sie die Taste
O TV, um Videotext zu beenden.
Spezifikation (VESA) der Wandhalterung
Montieren Sie die Wandhalterung an einer soliden Wand, die senkrecht zum Boden steht.
Bei Installation auf anderen Trägermaterialien wenden Sie sich bitte an Ihren Fachhändler.
Bei Montage an einer Decke oder schrägen Wand kann es herunterfallen und zu Verletzungen kommen.
Produktfamilie Zoll
19" ~22" 100 * 100
23"~29" 200 * 100
LCD-
Fernsehgerät
Plasma-
bildschirm
30"~40" 200 * 200 M6
46"~55" 400 * 400
80" ~ 1400 * 800
42"~ 50" 400 * 400
58"~ 63" 600 * 400
70" ~ 800 * 400
80" ~ 1400 * 800
VESA-Spezifikation
(A * B)
Standard
Schraube
M4
M857"~70" 800 * 400
M8 4
Menge
4
N
Die von uns empfohlenen Standardabmessungen der Wandhalterung nden Sie in der obigen Tabelle.
Beim Kauf unserer Wandhalterung erhalten Sie ein detailliertes Installationshandbuch sowie alle für die Montage erforderlichen N
Teile.
Verwenden Sie keine Schrauben, die länger sind als hier angegeben, da damit innen liegende Bauteile des Fernsehers beschädigt
N
werden können.
Bei Wandhalterungen, die nicht der VESA-Standardspezikation für Schrauben entsprechen, kann die Länge der Schrauben je
N
nach Spezikation unterschiedlich sein.
Verwenden Sie keine Schrauben, die nicht der VESA-Standardspezikation für Schrauben entsprechen. Ziehen Sie die
N
Schrauben nicht zu fest an, weil Sie so das Produkt beschädigen könnten oder das Produkt dadurch herunterfallen könnte, was zu
Verletzungen führen kann.
Samsung haftet nicht bei derartigen Unfällen. Samsung haftet nicht für Geräteschäden oder Verletzungen, wenn eine
N
Wandhalterung verwendet wird, die nicht dem VESA-Standard entspricht oder nicht speziziert ist, oder wenn der Verbraucher die
Installationsanleitung für das Produkt nicht befolgt.
Unsere 57- und 63-Zoll-Modelle entsprechen nicht der VESA-Spezikation. Verwenden Sie für dieses Modell deshalb unseren
N
speziellen Wandmontagesatz.
Bei der Montage dieses Fernsehgeräts dürfen Sie eine Neigung von 15 Grad nicht überschreiten.
N
Installieren Sie die Wandhalterung nicht bei angeschaltetem Fernsehgerät.
Sie könnten dabei einen Stromschlag erhalten und sich verletzen.
 Loading...