

Page 1
Contact SAMSUNG WORLD-WIDE
If you have any questions or comments relating to Samsung products, please contact the SAMSUNG customer care centre.
Country
AUSTRIA 0810 - SAMSUNG(7267864, € 0.07/min) www.samsung.com/at
BELGIUM 02 201 2418
CZECH REPUBLIC 800 - SAMSUNG (800-726786) www.samsung.com/cz
DENMARK 8 - SAMSUNG(7267864) www.samsung.com/dk
EIRE 0818 717 100 www.samsung.com/ie
FINLAND 30 - 6227 515 www.samsung.com/fi
FRANCE 01 4863 0000 www.samsung.com/fr
GERMANY 01805 - SAMSUNG(726-7864 € 0,14/Min) www.samsung.de
HUNGARY 06-80-SAMSUNG(726-7864) www.samsung.com/hu
ITALIA 800-SAMSUNG(726-7864) www.samsung.com/it
LUXEMBURG 02 261 03 710 www.samsung.com/lu
NETHERLANDS 0900-SAMSUNG (0900-7267864) (€ 0,10/Min) www.samsung.com/nl
NORWAY 3 - SAMSUNG(7267864) www.samsung.com/no
POLAND
"0 801 1SAMSUNG(172678)
022-607-93-33"
Customer Care Centre
www.samsung.com/be (Dutch)
www.samsung.com/be_fr (French)
www.samsung.com/pl
Web Site
Plasma TV
user manual
PORTUGAL 80820-SAMSUNG(726-7864) www.samsung.com/pt
SLOVAKIA 0800-SAMSUNG(726-7864) www.samsung.com/sk
SPAIN 902 - 1 - SAMSUNG (902 172 678) www.samsung.com/es
SWEDEN 0771 726 7864 (SAMSUNG) www.samsung.com/se
Switzerland 0848 - SAMSUNG(7267864, CHF 0.08/min)
U.K 0845 SAMSUNG (7267864) www.samsung.com/uk
www.samsung.com/ch
www.samsung.com/ch_fr/(French)
BN68-02354J-03
imagine the possibilities
Thank you for purchasing this Samsung product.
To receive more complete service, please register
your product at
www.samsung.com/register
Model Serial No.
Page 2

User Instructions
Screen Image retention
Do not display a still image (such as on a video game or when hooking up a PC to this PDP) on the plasma monitor panel for more
than 2 hours as it can cause screen image retention. This image retention is also known as “screen burn”. To avoid such image
retention, reduce the degree of brightness and contrast of the screen when displaying a still image.
Heat on the top of the PDP TV
The top side of the product may be hot after long period of use as heat dissipates from the panel through the vent hole in the upper
part of the product. This is normal and does not indicate any defect or operation failure of the product. However, children should be
prevented from touching the upper part of the product.
The product is making a ‘cracking’ noise.
A ‘cracking’ noise may occur when the product contracts or expands due to a change of surrounding environment such as
temperature or humidity. This is normal and not a defect of the unit.
Cell Defects
The PDP uses a panel consisting of 2,360,000(HD-level) to 6,221,000(FHD-level) pixels which require sophisticated technology to
produce. However, there may be few bright or dark pixels on the screen. These pixels will have no impact on the performance of
the product.
Avoid operating the TV at temperatures below 5°C(41°F)
A still image displayed too long may cause permanent damage to the PDP Panel.
Watching the PDP TV in 4:3 format for a long period of time may leave traces of borders displayed on the left,
right and centre of the screen caused by the difference of light emission on the screen. Playing a DVD or a
game console may cause similar effect to the screen. Damages caused by the above effect are not covered by
the Warranty.
Afterimage on the Screen.
Displaying still images from Video games and PC for longer than a certain period of time may produce partial afterimages.
To prevent this effect, reduce the ‘brightness’ and ‘contrast’ when displaying still images.
Warranty
Warranty does not cover any damage caused by image retention. Burn-in is not covered by the warranty. -
Installation
Be sure to contact an authorized service centre, when installing your set in a location with heavy dust, high or low temperatures,
high humidity, chemical substance and where it operates continually such as the airport, the train station etc. Failure to do so may
cause a serious damage to your set.
Digital TV Notice
1. Functionalities related to Digital TV(DVB) are only available in countries/areas where DVB-T (MPEG2 and MPEG4 AVC)
digital terrestrial signals are broadcasted or where you have access to a compatible DVB-C(MPEG2 and MPEG4 AAC)
cable-TV service. Please check with your local dealer the possibility to receive DVB-T or DVB-C signal.
2. DVB-T is the DVB European consortium standard for the broadcast transmission of digital terrestrial television and DVB-C
is that for the broadcast transmission of digital TV over cable.
However, some differentiated features like EPG (Electric Program Guide), VOD (Video on Demand) and so on, are not
included in this specication. So, they cannot be supported at this moment.
3. Although this TV set meets the latest DVB-T and DVB-C standards[August,2008], the compatibility with future DVB-T digital
terrestrial and DVB-C digital cable broadcasts cannot be guaranteed.
4. Some cable-TV providers may charge an additional fee for such a service and you may be required to agree to terms and
conditions of their business.
5. Some Digital TV functions might be unavailable in some countries or regions and DVB-C might not work correctly with all
providers.
6. For more information, please contact your local Samsung customer care centre.
Contact SAMSUNG WORLDWIDE
If you have any questions or comments relating to Samsung products, please contact the SAMSUNG
customer care centre. (See back cover for more informations.)
© 2009 Samsung Electronics Co., Ltd. All rights reserved.
English - 2
Page 3

Contents
English
Connecting and Preparing Your TV
Checking Parts ■ ..........................................................................4
Using the Stand-Base ■ ...............................................................4
How to assemble the Stand-Base (depending on the model) ■ ...4
Viewing the Control Panel ■ ......................................................... 5
Viewing the Connection Panel ■ ...................................................6
Remote Control ■ .........................................................................8
Installing Batteries in the Remote Control ■ .................................9
Switching On and Off ■ .................................................................9
Placing Your Television in Standby Mode ■ ..................................9
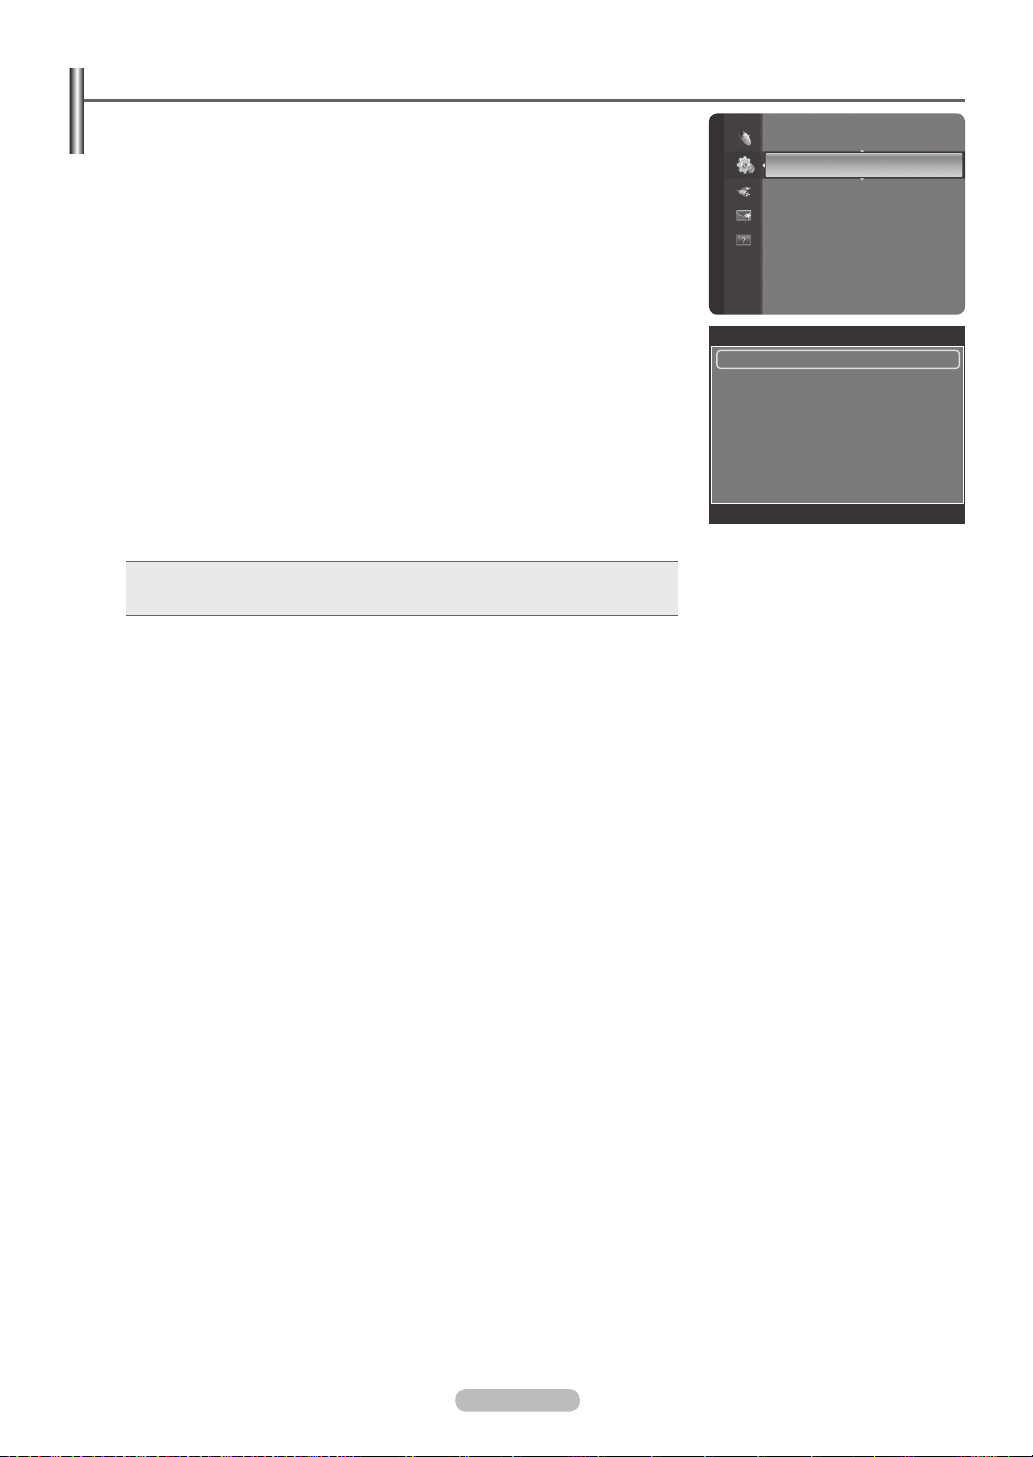
Viewing the Menus ■ ..................................................................10
Using the TOOLS Button ■ .........................................................10
Viewing the Display ■ .................................................................10
Plug & Play Feature ■ ................................................................ 11
Channel Control
Storing Channels ■ ................................................................... 12
Managing Channels ■ ................................................................15
Picture Control
Changing the Picture Settings ■ ................................................. 17
Using the 3D Function ■ ............................................................. 20
Setting up the TV with your PC ■ ...............................................21
PC Display ■ ...............................................................................22
Sound Control
Changing the Sound Setting ■ ...................................................23
Selecting the Sound Mode ■ ...................................................... 24
Function Description
Conguring the Setup Menu ■ .................................................... 25
Setting the Time ■ ......................................................................27
Source ■ List / Edit Name ...........................................................28
Supported Program ■ .................................................................28
About Anynet+
Connecting Anynet ■ + Devices ..................................................29
Setting Up Anynet+ ■ .................................................................30
Scanning and Switching between Anynet ■
Recording ■ ................................................................................31
Listening through a Receiver (Home theater) ■ .........................32
Troubleshooting for Anynet ■
+
..................................................32
+
Devices................30
Recommendations for Use
Teletext Feature ■ .......................................................................33
Wall Mount Kit Specications (VESA) ■ ..................................... 34
Preparing before installing Wall- Mount on the wall ■ ................35
Securing the TV to the Wall ■ ..................................................... 35
Securing the Installation Space ■ ...............................................36
Troubleshooting ■ ....................................................................... 37
Specications ■ ..........................................................................40
N O T
Symbol Press Note One-Touch Button TOOLS
English - 3
Page 4

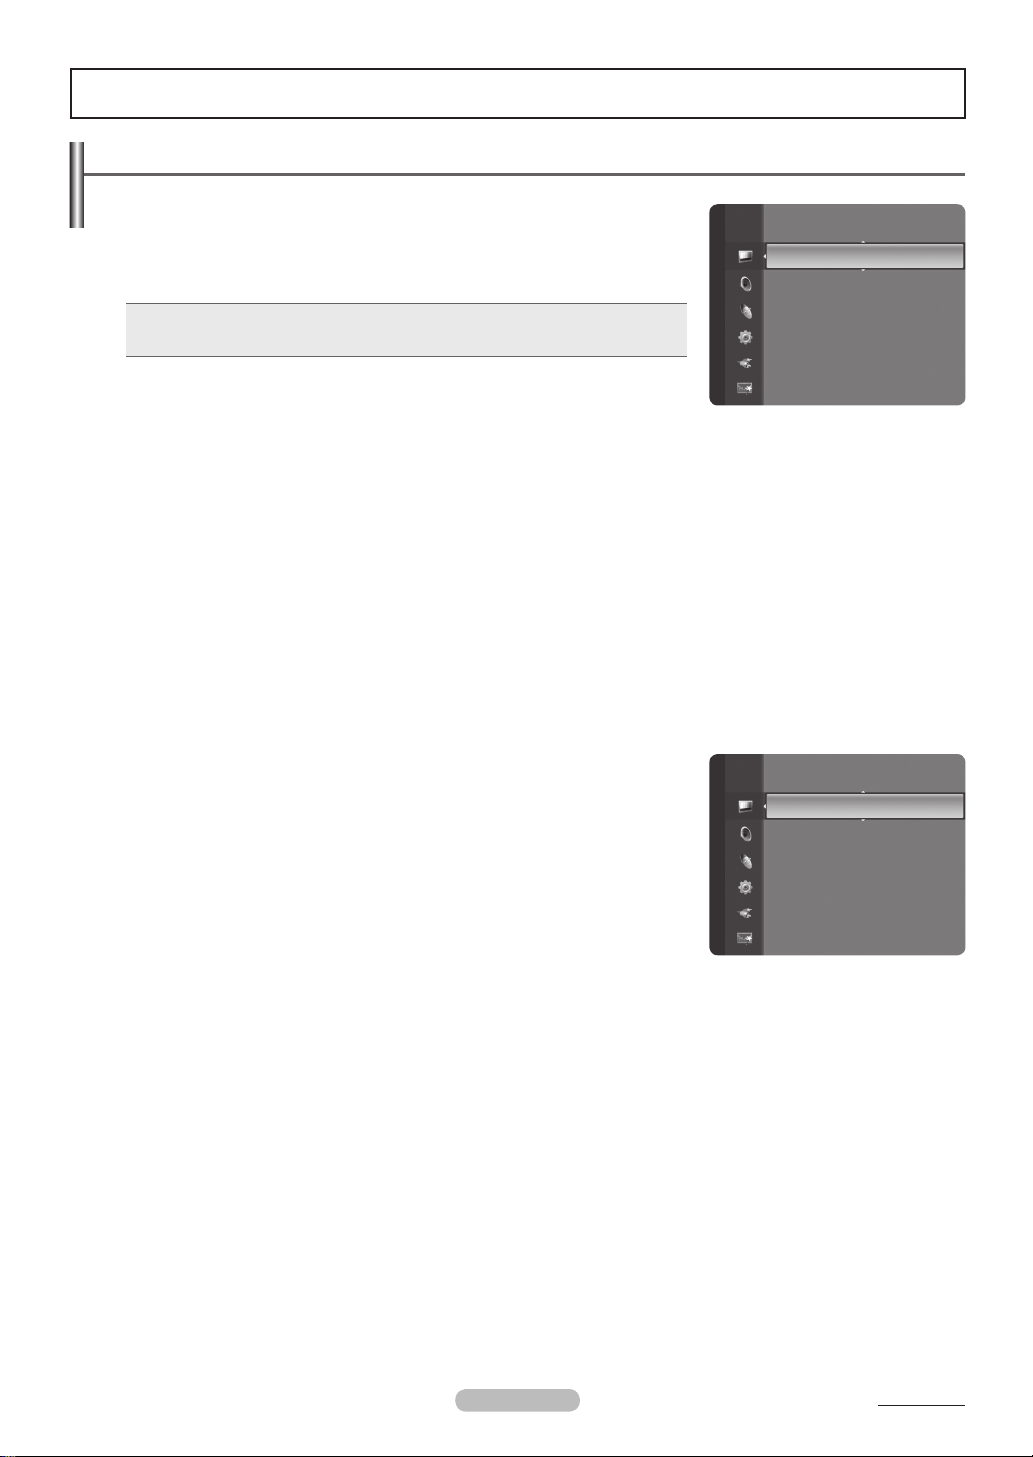
Connecting and Preparing Your TV
Checking Parts
Owner’s Instructions Remote Control/
AAA Batteries (2ea)
Screw (4ea) Cover-Bottom Holder-Ring (4ea)
The ferrite core is used to shield the cable from interference. When connecting a cable, open the ferrite N
core and clip it around the cable near the plug.
Power Cord Cloth-Clean Warranty Card/
(Refer to page 35)
Using the Stand-Base
Two or more people should carry the PDP. Never lay the PDP on the oor N
because of possible damage to the screen. Always keep the PDP upright.
The PDP can rotate 20 degrees in right and left directions.
N
Ferrite Core for Power
Cord (1ea)
Safety Guide Manual
(Not available in all locations)
-20° ~ 20°
How to assemble the Stand-Base (depending on the model)
Using the 4 screws for securing the stand base and the monitor, firmly attach the
monitor to the stand base.
(The exterior of the set may be different than the picture.)
Warning
Firmly secure the stand to the TV before moving
it, as the stand may fall and could cause serious
injury.
N
Two or more people should carry the TV.
Never lay the TV on the oor because of
possible damage to the screen.
Always store the TV upright.
English - 4
In case of installing your TV on the wall, close the
cover (1) on the stand-base connection part using
two screws for hiding.
Page 5

English - 5
Viewing the Control Panel
The product colour and shape may vary depending on the model. N
Front Panel buttons
Touch each button to
operate.
SOURCE
1
Toggles between all the available input sources
(TV, Ext. AV, PC, Component, HDMI1, HDMI2/DVI, HDMI3).
In the on-screen menu, use this button as you would use
N
the ENTERE button on the remote control.
MENU
2
Press to see an on-screen menu of your TV’s features.
+ –
3
Press to increase or decrease the volume. In the on-screen
menu, use the + – buttons as you would use the
◄ and ► buttons on the remote control.
CH
4
Press to change channels. In the on-screen menu, use the
CH buttons as you would use the ▲ and ▼ buttons
on the remote control.
POWER INDICATOR
5
Lights up when the power is on.
(
POWER)
6
Press to turn the TV on and off.
REMOTE CONTROL SENSOR
7
Aim the remote control towards this spot on the TV.
SPEAKERS
8
Page 6
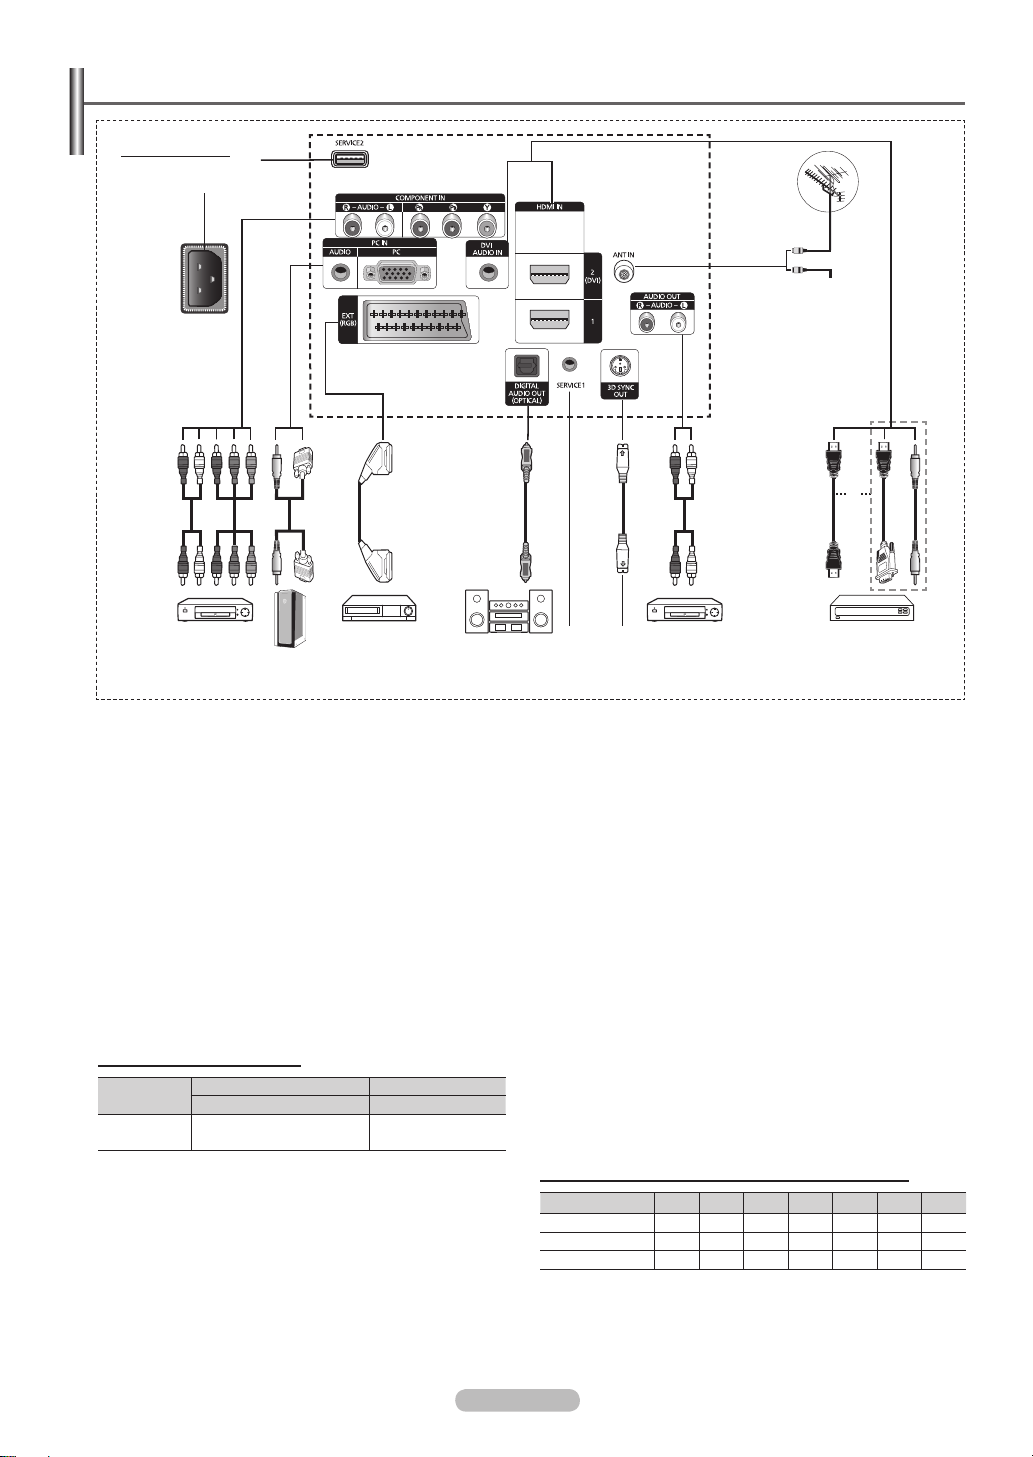
Viewing the Connection Panel
TV Rear Panel
2
The product colour and shape may vary depending on the model. N
1
543 8 96
1 7
or
0
Cable Television
Network
or
Whenever you connect an audio or video system to your set, ensure that all elements are switched off. N
When connecting an external device, match the colour of the connection terminal to the cable. N
SERVICE1, 2
1
Connector for service.
POWER IN
2
Connect the supplied power cord.
COMPONENT IN
3
Audio (AUDIO L/R) and video (Y / P
/ PR) inputs for
B
Component.
PC IN(PC) / (AUDIO)
4
Connect to the video and audio output jack on your PC.
EXT (RGB)
5
Inputs or outputs for external devices, such as VCR, DVD,
video game device or video disc players.
Input/Output Specification
Connector
DIGITAL AUDIO OUT (OPTICAL)
6
Video Audio(L/R) RGB Video + Audio(L/R)
EXT ✔ ✔ ✔
Connect to a Digital Audio Component.
3D SYNC OUT
7
Connect to 3D IR Emitter.
AUDIO OUT(AUDIO R/L)
8
Connect RCA audio signals from the TV to an external source,
such as Audio equipment.
Input Output
Only TV or DTV output
is available.
HDMI IN 1, 2(DVI)
9
No additional Audio connection is needed for an HDMI to
HDMI connection.
When using an HDMI/DVI cable connection, you must use the HDMI IN 2 (DVI) jack.
What is HDMI?
N
High Definition Multimedia interface - allows the
transmission of high denition digital video data and
multiple channels of digital audio.
The HDMI/DVI terminal supports DVI connection to -
an extended device with the appropriate cable (not
supplied). The difference between HDMI and DVI is
that the HDMI device is smaller in size, has the HDCP
(High Bandwidth Digital Copy Protection) coding feature
installed, and supports multi - channel digital audio.
DVI AUDIO IN
DVI audio outputs for external devices.
ANT IN
0
75Ω Coaxial connector for Aerial/Cable Network.
Supported modes for HDMI/DVI and Component
HDMI/DVI 50Hz X X X O O O O
HDMI/DVI 60Hz X O X X O O O
Component O O O O O O O
480i 480p 576i 576p 720p 1080i 1080p
English - 6
Page 7
English - 7
TV Side Panel
2
3
The product colour and shape may vary depending on the model. N
1
COMMON INTERFACE Slot
Insert CI (Common Interface) card into the slot.
(refer to page 26)
When not in - serting CI CARD in some channels,
Scramble Signal is displayed on the screen.
The - pairing information containing a telephone number,
CI CARD ID, Host ID, and other information will be
displayed in about 2~3 minutes. If an error message is
displayed, please contact your service provider.
When the channel - information conguration has nished,
the message Updating Completed is displayed,
indicating that the channel list is now updated.
N
Insert the CI-Card in the direction marked on it.
CAM is not supported in some countries and N
regions,check with your authorized dealer.
1
2
HDMI IN 3
Connect to the HDMI jack of a device with HDMI output.
3
AV IN (VIDEO, AUDIO L/R)
Video and audio inputs for external devices, such as a
camcorder or VCR.
Page 8
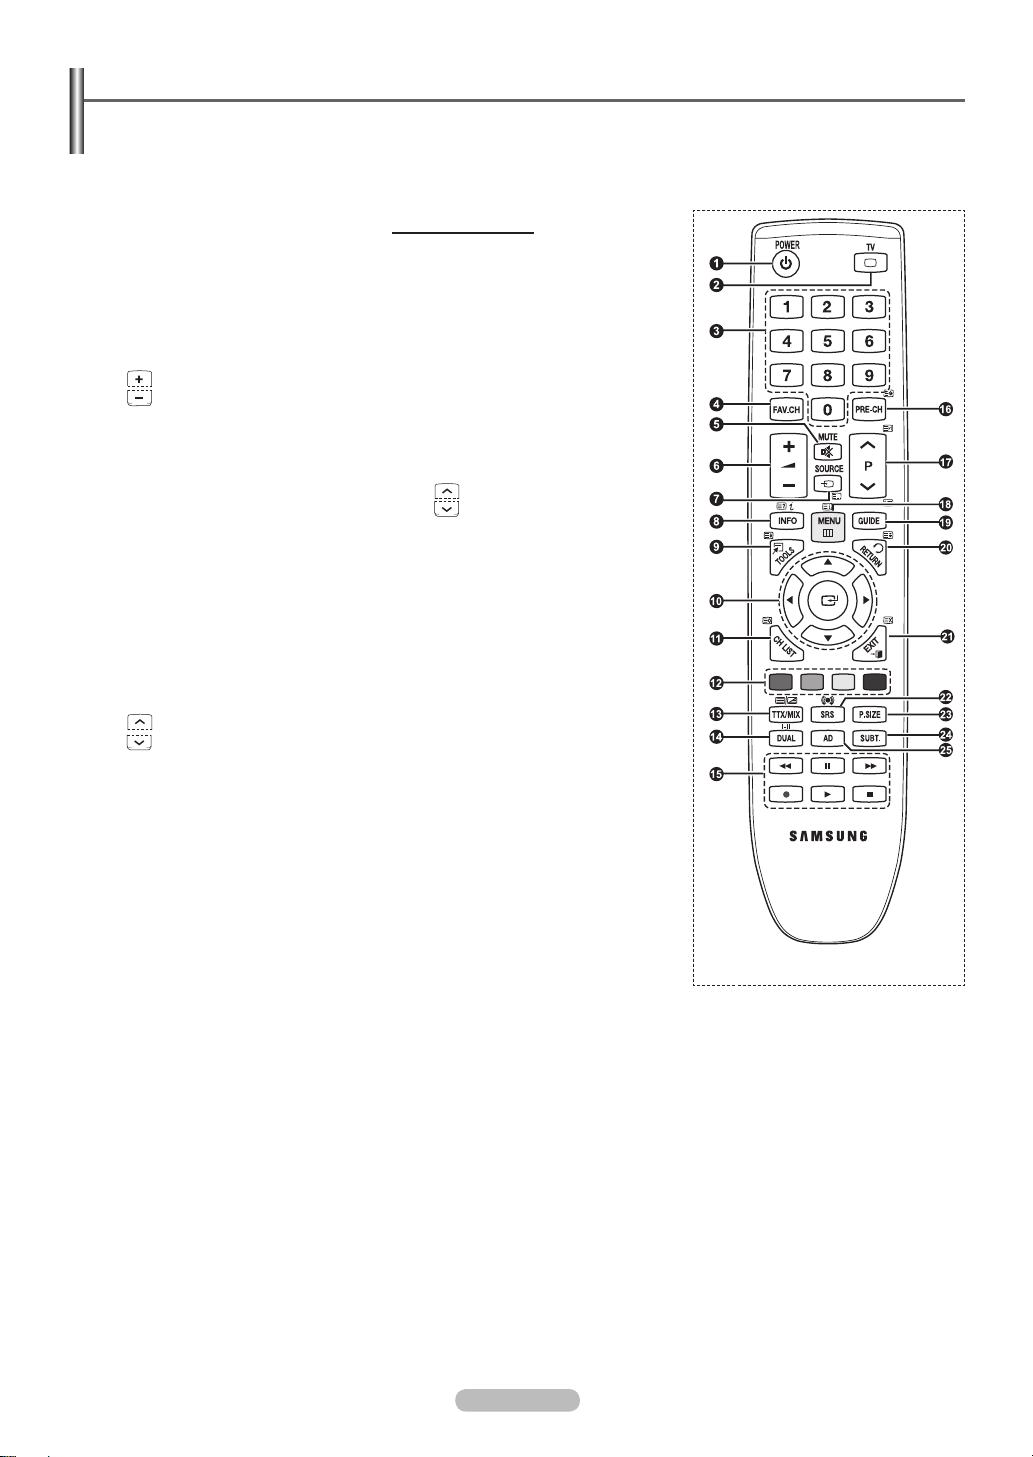
Remote Control
You can use the remote control up to a distance of about 23 feet from the TV.
N
The performance of the remote control may be affected by bright light.
POWER button
1
(turns the TV on and off)
Selects the TV mode directly.
2
Number buttons for direct channel
3
access
Displays the favourites channel list.
4
Temporary sound switch-off
5
6
Volume increase
Volume decrease
Available source selection
7
Use to see information on the current
8
broadcast
Use to quickly select frequently used
9
functions.
Control the cursor in the menu
0
Used to display Channel Lists on the
!
screen
Use these buttons in the Channel list,
@
etc.
Sound mode selection
$
Use these buttons in the Channel list,
%
and Anynet+.
Previous channel
^
Next channel
&
Previous channel
Displays the main on-screen menu
*
Electronic Program Guide (EPG)
(
display
Returns to the previous menu
)
Exit the on-screen menu
a
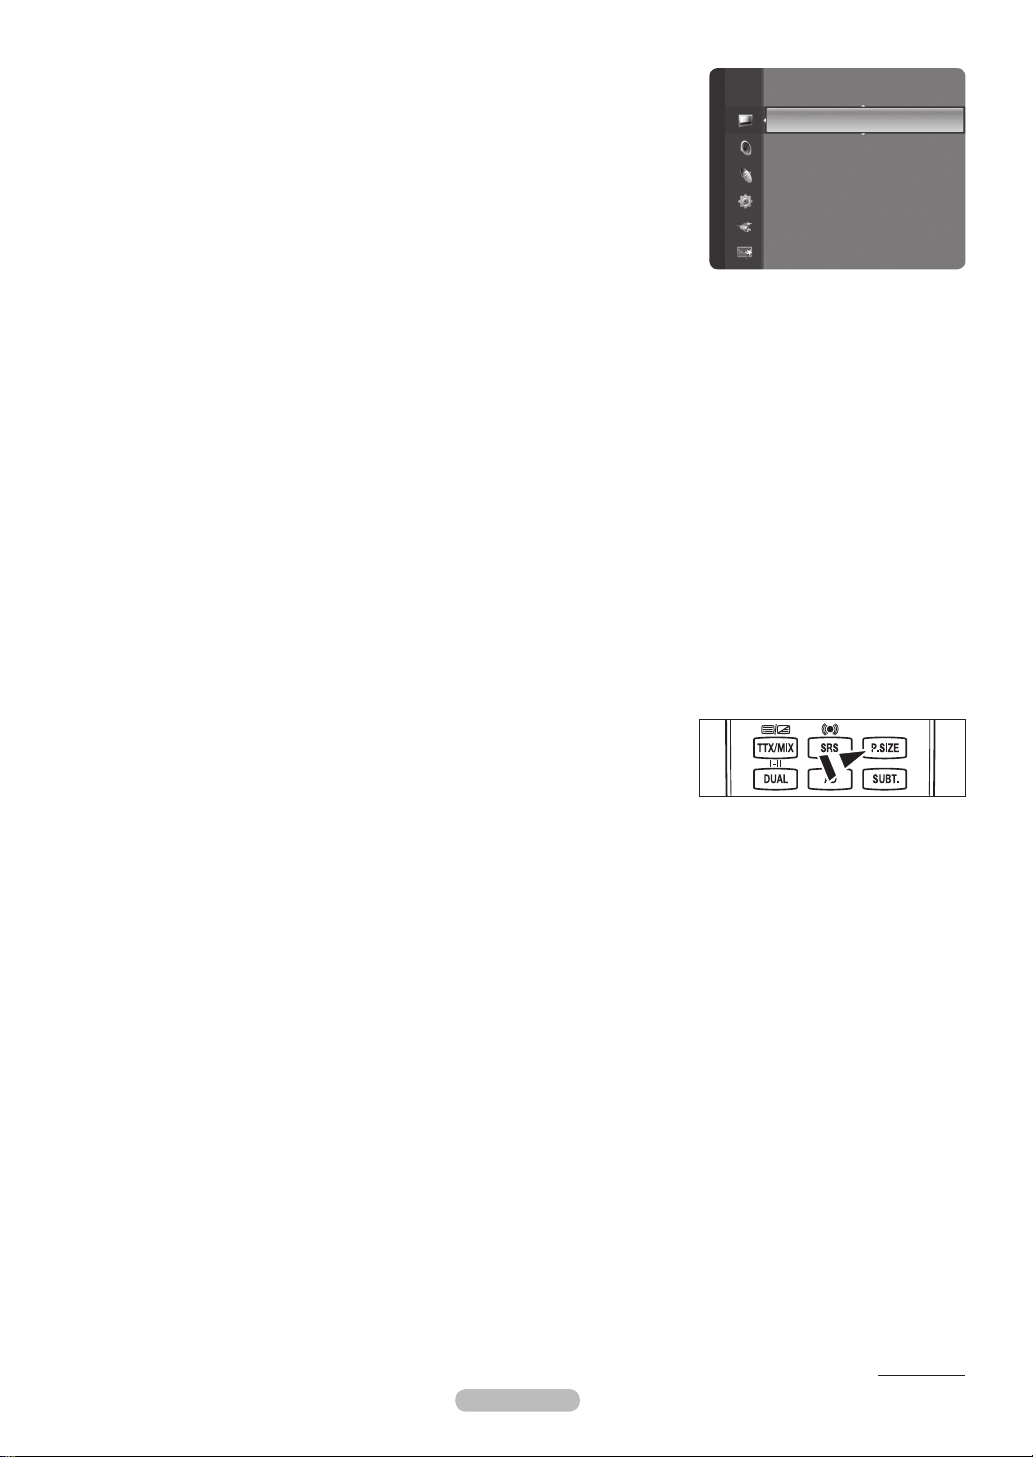
Selects SRS TruSurround HD mode.
b
Picture size selection
c
Digital subtitle display
d
e
Turn the audio description function on
or off.
Teletext Functions
Exit from the teletext display
2
(depending on the model)
Teletext mode selection (LIST/FLOF)
7
Teletext reveal
8
Teletext size
9
Fastext topic selection
!
Teletext store
@
Teletext display/mix both
#
teletext information and the normal
broadcast
Teletext sub page
^
P :Teletext next page
&
*
)
a
:Teletext previous page
P
Teletext index
Teletext hold
Teletext cancel
English - 8
Page 9
English - 9
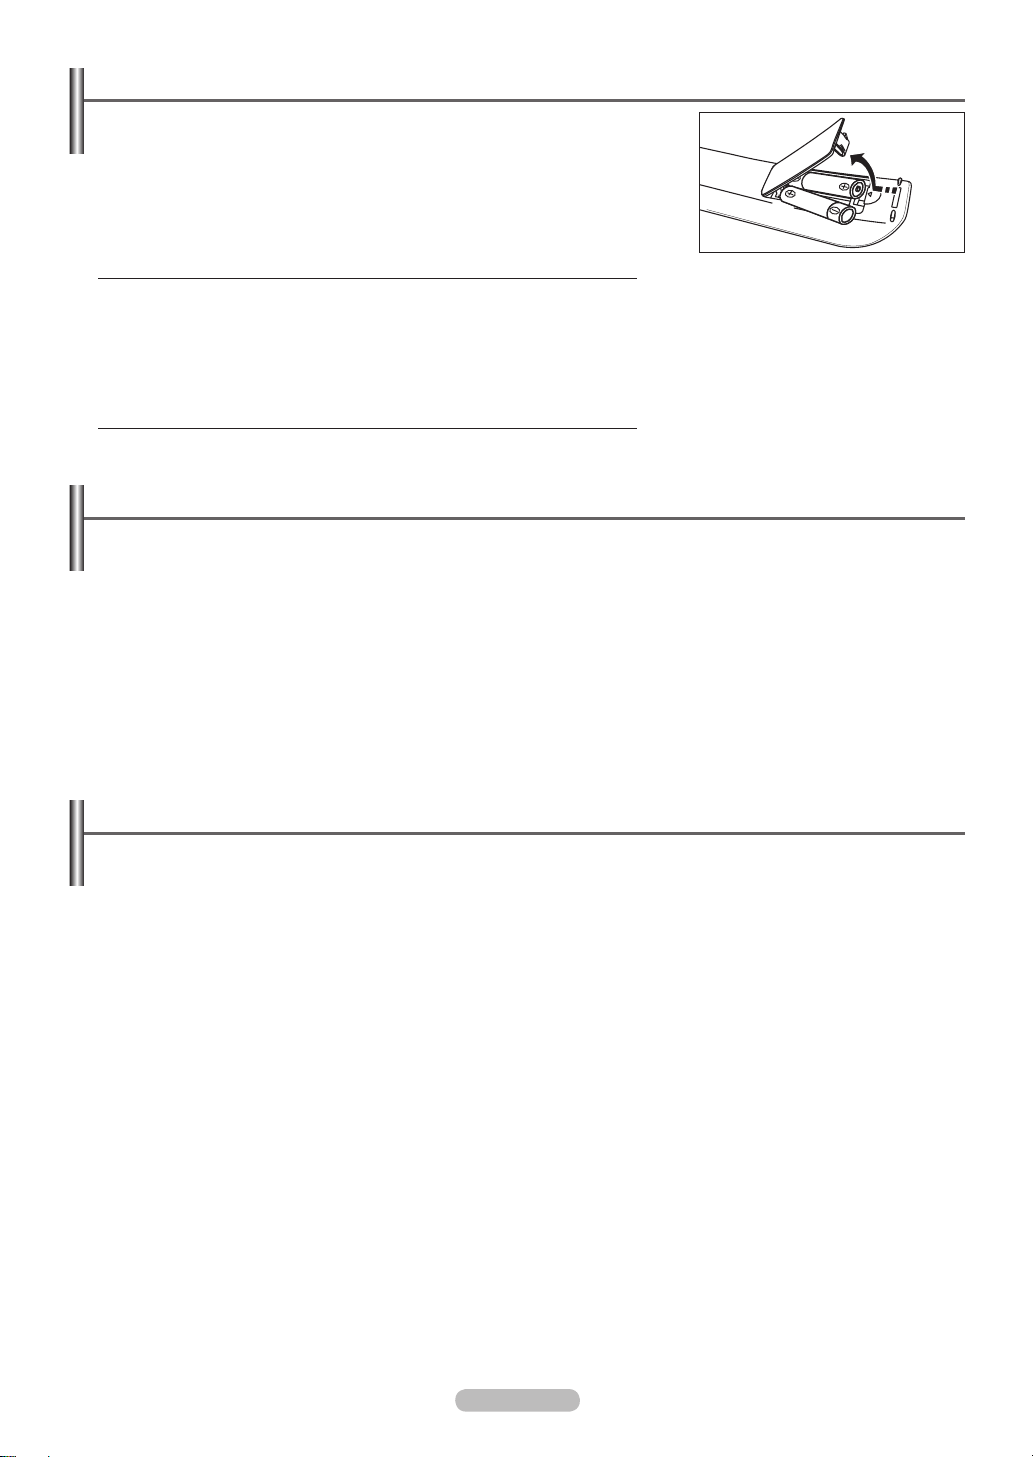
Installing Batteries in the Remote Control
1. Lift the cover at the back of the remote control upward as shown in the gure.
2. Install two AAA size batteries.
Make sure to match the ‘+’ and ‘–’ ends of the batteries with the diagram inside
N
the compartment.
3. Close the cover.
N
Remove the batteries and store them in a cool, dry place if you won’t be using the
remote control for a long time.
If the remote control doesn’t work, check the following N
1. Is the TV power on?
2. Are the plus and minus ends of the batteries reversed?
3. Are the batteries drained?
4. Is there a power outage or is the power cord unplugged?
5. Is there a special uorescent light or neon sign nearby?
Switching On and Off
The mains lead is attached to the rear of your set.
1. Plug the mains lead into an appropriate socket.
N
The standby indicator lights up on your set.
2. Press the POWERP button on your set.
N
Yo
u also can press the POWERP button or the TV button on the remote control to turn the TV on.
The programme that you were watching last is reselected automatically.
3. Press the numeric button (0~9) or channel up / down (< / >) button on the remote control or < CH > button on your set.
N
When
you switch the set on for the very rst time, you will be asked to choose language in which the menus are to be displayed.
4. To switch your set off, press the POWERP button again.
Placing Your Television in Standby Mode
Your set can be placed in standby mode in order to reduce the power consumption. The standby mode can be useful when you wish to
interrupt viewing temporarily (during a meal, for example).
1. Press the POWER
N
T
he screen is turned off and a red standby indicator appears on your set.
2. To switch your set back on, simply press the POWER
again.
N
Do
not leave your set in standby mode for long periods of time (when you are away on holiday, for example). It is best to unplug
the set from the mains and aerial.
P
button on the remote control.
P
, numeric buttons (0~9), TV button or channel up / down (< / >) button
Page 10

Viewing the Menus
DTV Air
15
abc1
18:11 Thu 6 Jan
Life On Venus Avenue
Unclassified
No Detaild Information
E Watch
' Information
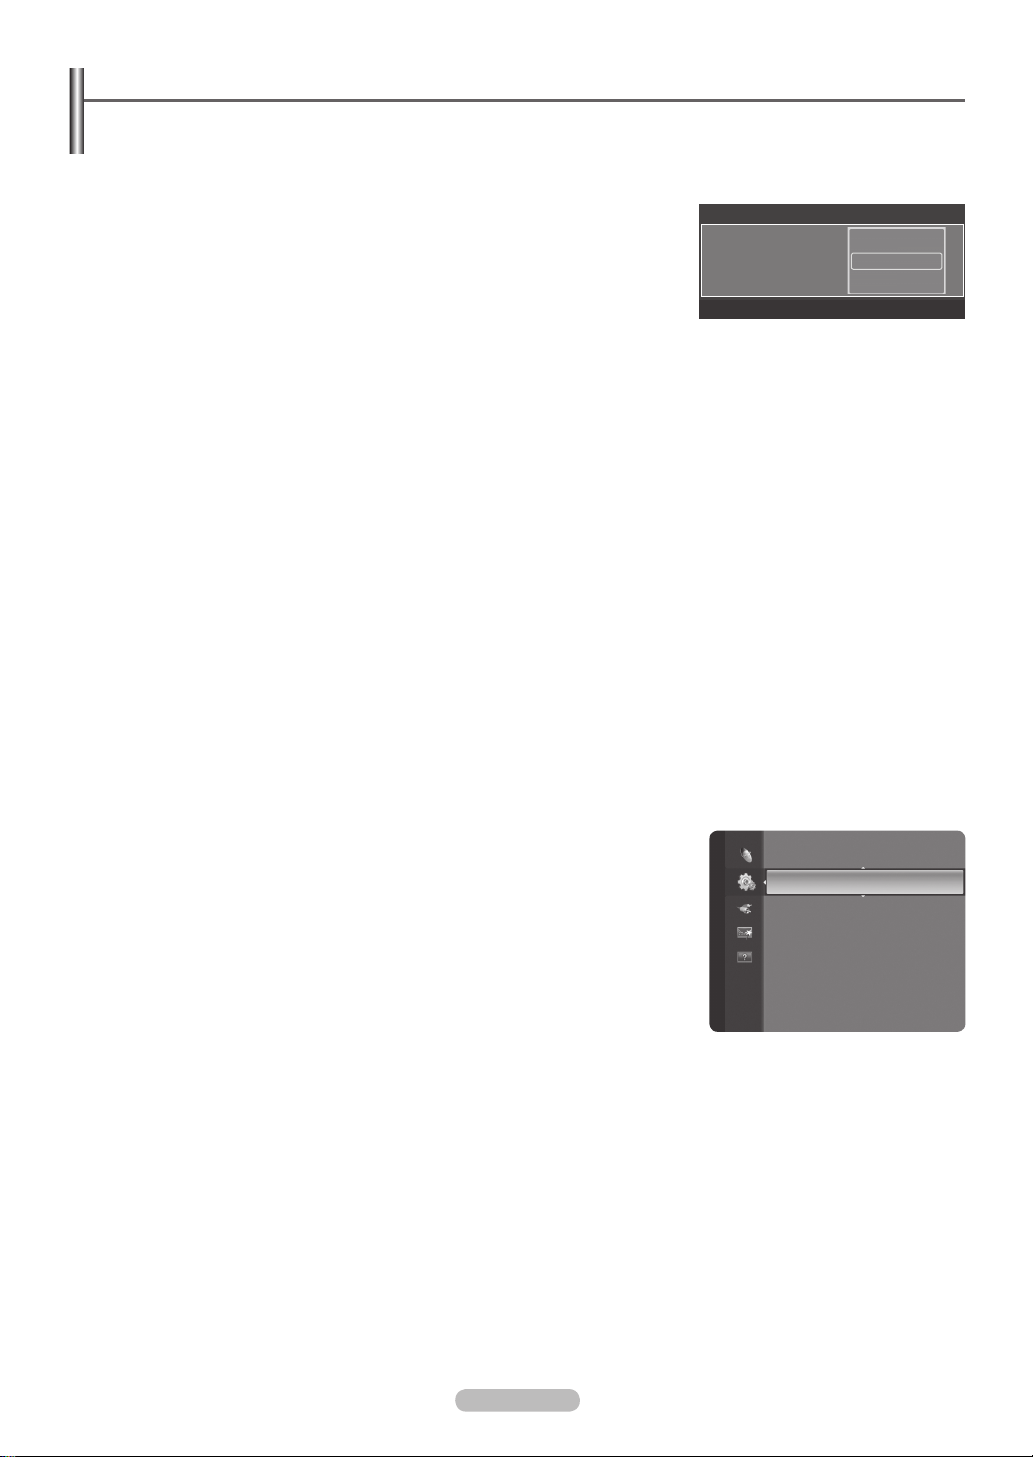
1. With the power on, press the MENU button. The main menu appears on the
screen. The menu’s left side has icons: Picture, Sound, Channel, Setup, Input,
Application, Support.
2. Press the ▲ or ▼ button to select one of the icons. Then press the ENTER
E
button
to access the icon’s sub-menu.
3. Press the EXIT button to exit.
The on-screen menus disappear from the screen after about one minute.
N
Picture
Mode : Standard
Cell Light : 4
Contrast : 95
Brightness : 45
Sharpness : 50
Colour : 50
Tint (G/R) : G50/R50
Using the TOOLS Button
You can use the TOOLS button to select your frequently used functions quickly and easily. The Tools menu changes depending on
which external input mode you are viewing.
1. Press the TOOLS button. The Tools menu will appear.
2. Press the ▲ or ▼ button to select a menu, then press the ENTER
3. Press the ▲ / ▼ / ◄ / ► / ENTER
E
buttons to display, change, or use the selected
items. For a more detailed description of each function, refer to the corresponding
page.
+
Anynet •
(HDMI-CEC), see page 30
Picture Mode, see page 17 •
Sound Mode, see page 23 •
Sleep Timer, see page 27 •
Energy Saving, see page 26 •
Add to Favourite (or Delete from Favourite), see page 15 •
Auto Adjus • tment, see page 21
E
button.
Tools
Anynet+ (HDMI-CEC)
Picture Mode : Standard
Sound Mode : Custom
Sleep Timer : Off
Energy Saving : Off
Add to Favourite
U
Move E Ent er e Exit
Viewing the Display
The display identifies the current channel and the status of certain audio-video settings.
O INFO button to viewing the information.
Press the
Press the INFO button on the remote control. The TV will display the channel, the type of
sound, and the status of certain picture and sound settings.
▲, ▼: You can view other channel’s information. If you want to move to the currently •
selected channel, press ENTER
◄, ►: You can view the desired program’s information at the current channel. •
Press the
N INFO button once more or wait approximately 10 seconds and the display
disappears automatically.
E
button.
English - 10
Page 11
English - 11
Plug & Play Feature
When the TV is initially powered on, basic settings proceed automatically and subsequently.
The Screen Saver is activated if there is no remote control key input for longer than 1 minute while Plug & Play is running.
N
The Screen Saver is activated if there is no operating signal for longer than 15 minutes. N
1. Press the POWER button on the remote control. You can set the menu language. menu is automatically displayed. Select the
appropriate language by pressing the ▲ or ▼ button.
Press the ENTERE button to conrm your choice.
2. Press the ◄ or ► button to select Store Demo or Home Use, then the ENTER
button.
We recommend setting the TV to
N Home Use mode for the best picture in your home
E
You can set the menu language.
Menu Language :
environment.
Store Demo
N mode is only intended for use in retail environments.
If the unit is accidentally set to
N Store Demo mode and you want to return to Home Use (Standard): Press the Volume button on
the TV. When the volume OSD is displayed, press and hold the MENU button on the TV for 5 seconds.
3. Press the ENTER
E
button. Select the appropriate country by pressing the ▲ or ▼ button. Press the ENTERE button to conrm
your choice.
4. Press the ▲ or ▼ button to memorize the channels of the selected connection, then press the ENTER
Air: • Air antenna signal.
Cable: • Cable antenna signal.
5. Press the ▲ or ▼ button to select the channel source to memorize. Press the ENTER
E
button to select Start.
Digital & Analogue • : Digital and Analogue channels.
Digital • : Digital channels.
Analogue • : Analogue channels.
For more de
N tailed description of selecting Cable mode,, refer to page 12.
N
The
channel search will start and end automatically.
N
Pr
ess the ENTER
N
A
fter all the available channels are stored, the message Set the Clock Mode. is displayed.
6. Press the ENTER
N
If
you select Manual, Set current date and time is displayed. (refer to page 27)
N
If
you have received a digital signal, the time will be set automatically. If not, see page 27 to set the clock.
E
button at any time to interrupt the memorization process.
E
button. Press the ▲ or ▼ button to select Auto, then Press the ENTERE button.
7. The brief instruction on How to get the best performance from your new HDTV. is displayed. Press the ENTER
N
Th
is menu is available HD Connection Guide in the Support menu.
8. The message Enjoy your TV is displayed. When you have nished, press the ENTER
E
button.
E
Plug & Play
button.
Nederlands
English
Eesti
U
Mov e E Enter
E
button.
▲
▼
If you want to reset this feature...
1. Press the MENU button to display the menu. Press the ▲ or ▼ button to select Setup,
then press the ENTER
2. Press the ENTER
E
button.
E
button again to select Plug & Play.
3. Enter your 4 digit PIN number. The default PIN number of a new TV set is ‘0-0-0-0’.
If you want to change PIN number, refer to 25 page.
N
The N Plug & Play feature is only available in the TV mode.
Setup
Plug & Play
Menu Language : English
Time
Broadcast
Security
General
►
Page 12

Channel Control
Storing Channels
Country
❑
Digital Channel : You can change the country for digital channels.
Analogue Channel
: You can change the country for analogue channels.
The PIN number input screen appears. Enter your 4 digit PIN number. N
Auto Store
❑
Scans for all channels with active broadcast stations (and availability depends on your
country) and stores them in the TV's memory.
You can memorize the channels of the selected connection.
Air • : Air antenna signal.
Cable • : Cable antenna signal.
When selecting Cable,
N
Search Mode • : Displays the search mode. (Quick)
Network ID - : Displays the network identication code.
Frequency - : Displays the frequency for the channel.
Modulation - : Displays available modulation values.
Symbol Rate - : Displays available symbol rates.
Search Mode • : Displays the search mode. (Full, Network)
Frequency (Start~Stop) - : Displays the frequency for the channel.
Modulation - : Displays available modulation values.
Symbol Rate - : Displays available symbol rates.
You can memorize the Channel source
Digital & Analogue • : Digital and Analogue channels.
Digital • : Digital channels.
Analogue • : Analogue channels.
If you want to stop
N Auto Store, press the ENTER
The
N Stop Auto Store? message will be displayed.
Select
N Yes by pressing the ◄ or ► button, then press the ENTER
If a channel is locked using the
N Child Lock function, the PIN input window appears.
E
button.
E
button.
Channel
Country
Auto Store
Manual Store
Cable Search Option
Now & Next Guide
Full Guide
Default Guide : Now/Next
►
English - 12
Continued...
Page 13

English - 13
Manual Store
❑
Scans for a channel manually and stores it in the TV’s memory.
Digital Channel (Digital)
Manual store for digital channels.
Digital Channel is only available in DTV mode.
N
Channel • : Set the Channel number using the ▲, ▼ or number (0~9) buttons.
Frequency • : Set the frequency using the number buttons.
Bandwidth • : Set the bandwidth using the ▲, ▼ or number (0~9) buttons.
When it has nished, channels are updated in the channel list.
N
Analogue Channel
Manual store for analogue channel.
Programme • (Programme number to be assigned to a channel): Sets the programme number using the ▲, ▼ or number (0~9)
buttons.
Colour System → Auto / PAL / SECAM / NTSC4.43 • : Sets the colour system value using the ▲ or ▼ button.
Sound System • → BG / L / I / DK: Sets the sound system value using the ▲ or ▼ button.
Channel • (When you know the number of the channel to be stored): Press the ▲ or ▼ button to select C (Air channel) or S
(Cable channel). Press the ► button, then press the ▲, ▼ or number (0~9) buttons to select the required number.
N
You can also select the channel number directly by pressing the number (
N
If there is abnormal sound or no sound, reselect the sound standard required.
Search • (When you do not know the channel numbers): Press the ▲ or ▼ button to start the search. The tuner scans the
frequency range until the rst channel or the channel that you selected is received on the screen.
Store • (When you store the channel and associated programme number): Set to OK by pressing the ENTER
Channel mode
N
C - (Air channel mode): You can select a channel by entering the assigned number to each air broadcasting station in this
mode.
S - (Cable channel mode): You can select a channel by entering the assigned number for each cable channel in this mode.
0~9) buttons.
E
button.
Cable Search Options (Cable)
❑
You can add directly the channel search range in the network search mode. (Dependingon the each country)
Frequency (Start~Stop) • : Displays the frequency for the channel.
Modulation • : Displays available modulation values.
Symbol Rate • : Displays available symbol rates.
Set the
N Frequency (Start~Stop) and Symbol Rate using the number (0~9) buttons.
Now & Next Guide / Full Guide
❑
The EPG (Electronic Programme Guide) information is provided by the broadcasters. Programme entries may appear blank or out
of date as a result of the information broadcast on a given channel. The display will dynamically update as soon as new information
becomes available.
Now & Next Guide
programme information.
Full Guide :
displayed which may be scrolled forwards or backwards in time.
: For the six channels indicated in the left-hand column, displays the Current programme and the Next
Displays the programme information as time ordered One hour segments. One hours of programme information is
Continued...
Page 14

Default Guide
❑
Now/Next / Full Guide :
You can decide whether to display either the Now/Next or
the Full Guide when the GUIDE button on the remote control is pressed.
Now & Next Guide
Full Guide
Channel
Default Guide : Now/Next
Channel List
Channel Mode : Added Ch.
Fine Tune
►
O
You can also display the guide menu simply by pressing the
Using the Now & Next Guide / Full Guide
Now & Next Guide
900 f tn
901 ITV Play
902 Kerrang!
903 Kiss
903 oneword
903 Smash Hits!
▼
DTV Cable 900 f tn 2:10 Tue 1 Jun
Freshmen On Campus
2:00 - 2:30
No Detailed Information
Now Next
Freshmen O..
Street Hypn..
No Information
No Information
Kisstory
No Information
Page
Mint Extra
Loaded
Fresh 40 with Dynamite MC
The Distillery
Smash Hits! Sunday
Watch Information
Full Guide Exit
Select a programme by pressing the ▲/▼/◄/► button.
▲ / ▼ / ◄ / ►
(ENTER)
If the next progrmme is selected, it is scheduled with the clock icon displayed. If the ENTERE button is
pressed again, press the ▲/▼/◄/► button to select Cancel Schedules, the scheduling is canceled with the
clock icon gone.
For details about scheduling programmes, refer to the section.
RED Toggle between the Now/Next or Full Guide.
GREEN Full Guide: Scroll backwards quickly (-24 hours).
YELLOW Full Guide: Scroll forwards quickly (+24 hours).
BLUE Exit the guide.
INFO button for the detailed information. Channel Number, Running Time, Status Bar, Parental Level, Video
INFO
Quality Information (HD/SD), Sound Modes, Subtitle or Teletext, languages of Subtitle or Teletext and brief
summary of the highlighted programme are included on the detailed information. “…” will be appeared if the
summary is long.
Full Guide
900 f tn
901 ITV Play
902 Kerrang!
903 Kiss
903 oneword
903 Smash Hits!
▼
DTV Cable 900 f tn 2:10 Tue 1 Jun
Freshmen On Campus
2:00 - 2:30
No Detailed Information
Today 2:00 - 3:00 3:00 - 4:00
Freshmen O..
Mint Extra
Loaded
Fresh 40 with Dynamite MC
The Distillery
Smash Hits! Sunday
Watch Information
GUIDE button.
Street Hypn..
Page
No Information
No Information
Kisstory
No Information
Now/Next Exit
Channel List
❑
For the detailed procedures on using the Channel List, refer to the descriptions on pages 15~16.
Channel Mode
❑
When the press the P </> button, Channels will be switched within the selected channel list.
Added Ch.
Favourite Ch.
: Channels will be switched within the memorized channel list.
: Channels will be switched within the favourite channel list.
Fine Tune ❑(only analogue channels)
If the reception is clear, you do not have to ne tune the channel, as this is done automatically during the search and store
operation. If the signal is weak or distorted, you may have to ne tune the channel manually.
Fine tuned channels that have been saved are marked with an asterisk
N * on the right-hand side of the channel number in the
channel banner.
If you do not store the ne-tuned channel in memory, adjustments are not saved.
N
To reset the ne-tuning, select N Reset by pressing the ▼ button and then press the ENTER
English - 14
E
button.
Page 15
English - 15
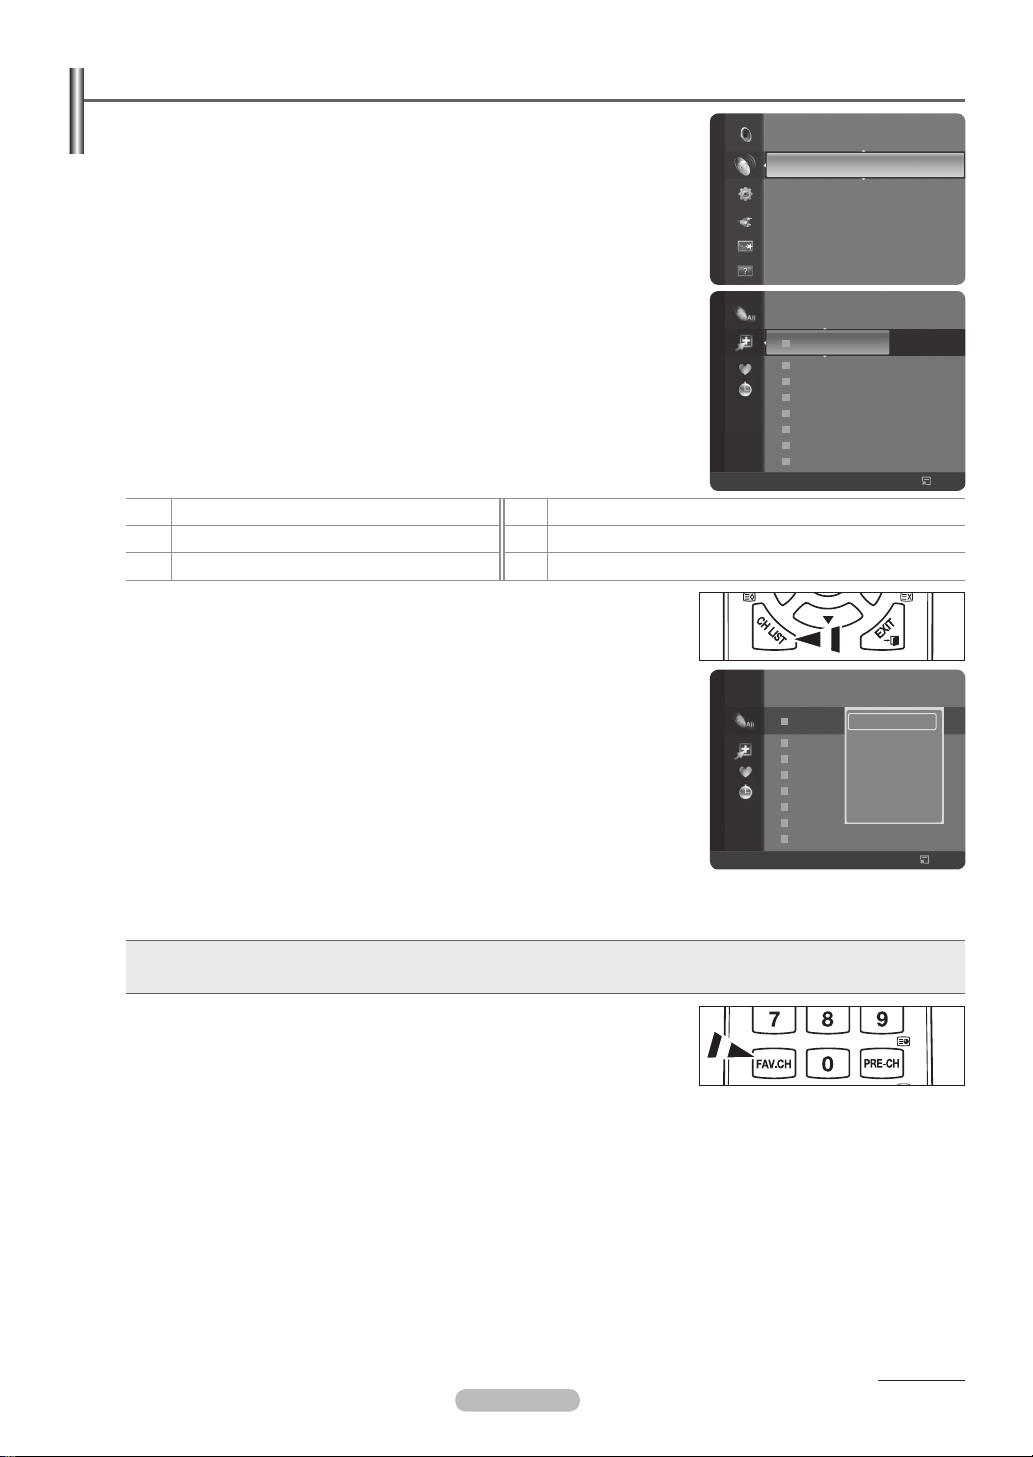
Managing Channels
Using this menu, you can Add / Delete or set Favourite channels and use the programme
guide for digital broadcasts.
Select a channel in the
N All Channels, Added Channels, Favourites, or Programmed
screen by pressing the ▲ / ▼ buttons, and pressing the ENTERE button.
Then you can watch the selected channel.
All Channels :
Added Channels :
Favourites :
Programmed :
Using the Colour buttons with the Channel List
N
Shows all currently available channels.
Shows all added channels.
Shows all favourite channels.
Shows all current reserved programmes.
Red ( - Channel Type): Toggle between your TV, Radio, Data/Other and All.
Green ( - Zoom): Enlarges or shrinks a channel number.
Yellow ( - Select): Selects multiple channel lists.
T - TOOLS (Tools): Displays the Delete (or Add), Add to Favourite (or Delete from
Favourite), Timer Viewing, Edit Channel Name, Edit Channel Number, Sort, Lock
(or Unlock), Select All (or Deselect All), or Auto Store menu.
(The Options menus may differ depending on the situation.)
Channel Status Display Icons
N
An Analogue channel.
A
A channel set as a Favourite.
♥
\
A locked channel.
Press the
O CH LIST button on the remote control to bring up the channel lists.
Channel List Tools Menu (in All Channels / Added Channels /
❑
c
A channel selected by pressing the yellow button.
(
A programme currently being broadcast.
)
A reserved programme
Favourites)
Press the N TOOLS button to use the Tools menu.
Option menu items may differ depending on the channel status.
N
Add / Delete
You can delete or add a channel to display the channels you want.
All deleted channels will be shown on
N All Channels menu.
A gray-coloured channel indicates the channel has been deleted.
N
The N Add menu only appears for deleted channels.
You can also delete a channel to the
N Added Channels or Favourite menu in the
same manner.
Full Guide
Default Guide : Now/Next
Channel
Channel List
Channel Mode : Added Ch.
Fine Tune
824 UKTV Gold
Added Channels
825 UKTV style
A
1 C --
A
2 C
A 3 ♥ C
A 4 C
A 5 C
A 6 C
A 7 C
A 8 C
All
Channel Type Zoom Select
824 UKTV Gold
All Channels
825 UKTV style
A
1 C --
A
2 C
A 3 C
A 4 C
A 5 C
A 6 C
A 7 C
A 8 C
All
Channel Type Zoom Select
--
--
--
--
--
--
--
Delete
Add to Favourite
--
Timer Viewing
--
Edit Channel Name
--
Sort
--
Lock
--
--
--
Tools
▼
Tools
Add to Favourite / Delete from Favourite
You can set channels you watch frequently as favourites.
Press the T TOOLS button to display Tools menu.
You can also add the favourite channel by selecting Tools → Add to Favourite (or Delete from Favourite).
N
The “♥” symbol will be displayed and the channel will be set as a favourite.
All favourite channels will be shown on N Favourite menu.
To select the Favourite channels you have set up, press the
O FAV.CH button on the
remote control.
Timer Viewing
If you reserve a programme you want to watch, the channel is automatically switched to the reserved channel in the Channel List;
even when you are watching another channel. To reserve a programme set the current time rst. (See page 27)
Only memorized channels can be reserved.
N
You can set the channel, month, day, year, hour and minute directly by pressing the number buttons on the remote control. N
Reserving a programme will be shown on N Programmed menu.
Digital Programme Guide and Viewing Reservation
N
When a digital channel is selected, and you press the ► button, the Programme Guide for the channel appears.
You can reserve a programme according to the procedures described above.
Continued...
Page 16
Edit Channel Name (only analogue channel)
Channels can labeled so that their call letters appear whenever the channel is selected.
The names of digital broadcasting channels are automatically assigned and cannot be labeled. N
Edit Channel Number (only digital channel)
You can also edit the channel number by pressing the number buttons on the remote control.
Sort (only analogue channel)
This operation allows you to change the programme numbers of the stored channels. This operation may be necessary after using
the auto store.
Lock / Unlock
You can lock a channel so that the channel cannot be selected and viewed. This function is available only when the Child Lock is
set to on. (see page 25)
N
The PIN nu
N
The default PIN number of a new TV set is ‘0-0-0-0’
N
The
mber input screen appears. Enter your 4 digit PIN number.
. You can change the PIN, by selecting Change PIN from the menu.
“\” symbol will be displayed and the channel will be locked.
Select All / Deselect All
Select All • : You can select all the channels in the channel list.
Deselect Al • l: You can deselect all the selected channels in the channel list.
You can perform the add / delete, add to Favourites / delete from Favourites, or lock / unlock function for multiple channels at
N
the same time. Select the required channels and press the yellow button to set all the selected channels at the same time.
The
N c mark appears to the left of the selected channels.
You can only select
N Deselect All when there is a selected channel.
Auto Store
For further details on setting up options, refer to page 12. N
If a channel is locked using the N Child Lock function, the PIN input window appears.
Channel List Option Menu (in Programmed)
❑
You can view, modify or delete a reservation.
Press the
N TOOLS button to use the option menu.
Change Info • : Select to change a viewing reservation.
Cancel Schedules • : Select to cancel a viewing reservation.
Information • : Select to view a viewing reservation.
(You can also change the reservation information.)
Select • All: Select all reserved programmes.
Programmed
1 / 1 / 2009
13:59 5 TV1 Quincy, M.E
18:59 2 TV3 The Equalizer
20:59 2 TV3 McMillan & Wife
21:59 2 TV3 M.Spillane’s mike Hammer
All
Change Info
Cancel Schedules
Information
Select All
Zoom Select
Tools Information
English - 16
Page 17
English - 17
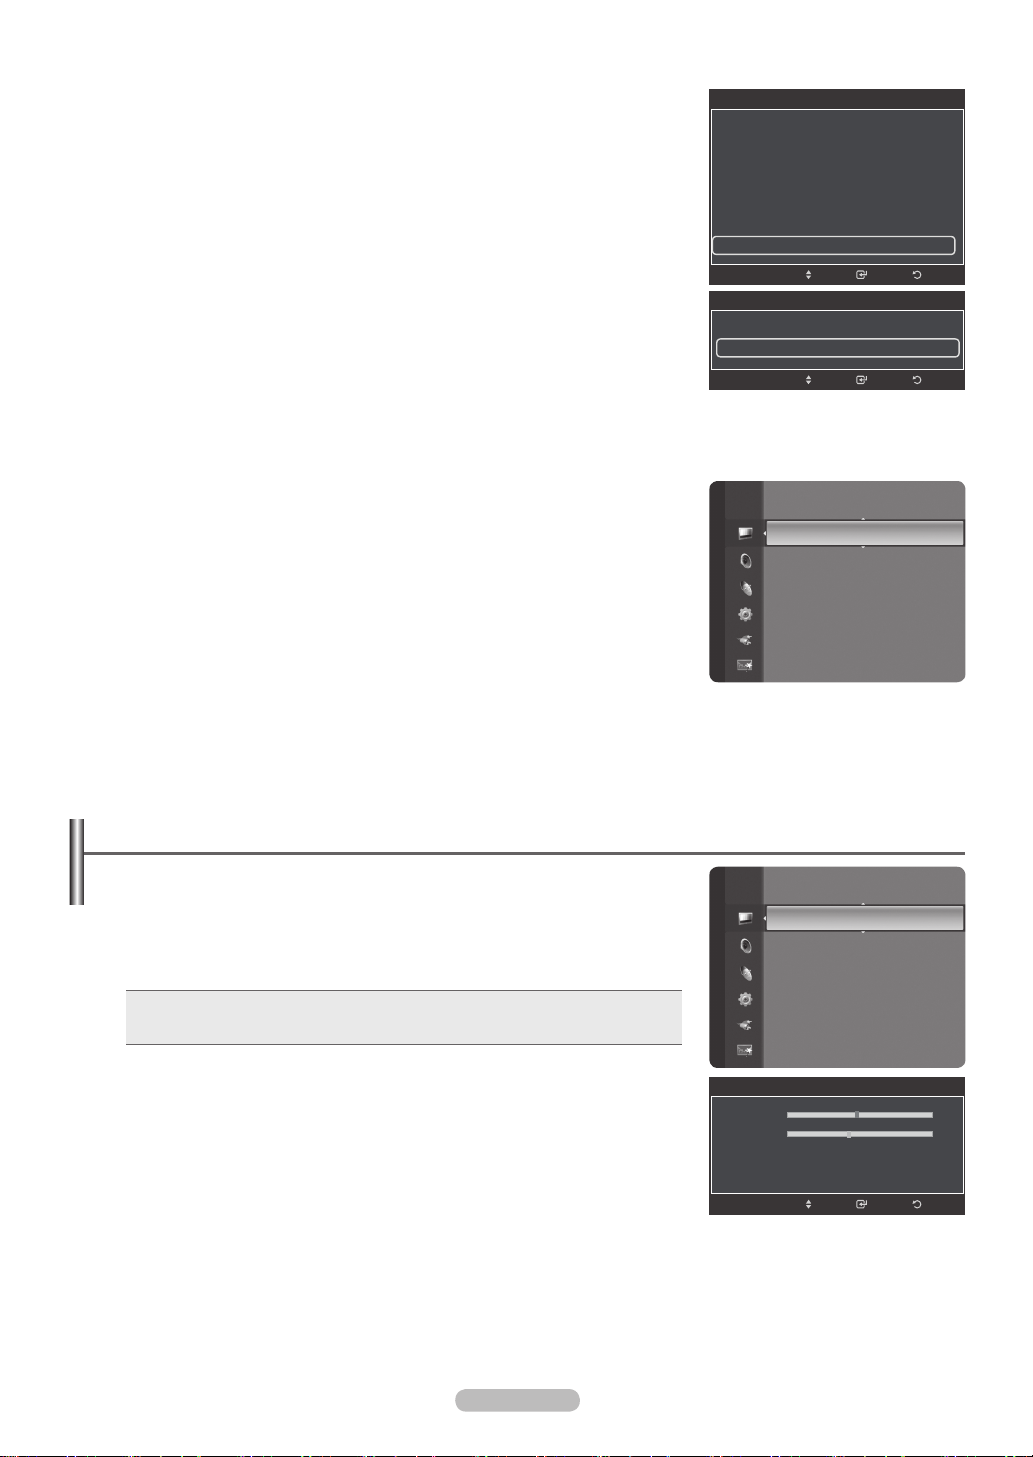
Picture Control
Changing the Picture Settings
Mode
❑
You can select the type of picture which best corresponds to your viewing requirements.
Dynamic • : Selects a high-denition picture for bright environments.
Standard • : Selects the optimal picture display for normal environments.
Movie • : Selects a comfortable picture display for dark environments.
Press the TTOOLS button to display Tools menu.
You can also set the picture mode by selecting Tools → Picture Mode.
Cell Light / Contrast / Brightness / Sharpness / Colour / Tint (G/R)
❑
Your television has several setting options that allow you to control the picture quality.
Cell Light • : Adjusts the pixel brightness.
Contrast • : Adjusts the contrast level.
Brightness • : Adjusts the brightness level.
Sharpness • : Adjusts the sharpness.
Colour • : Adjusts the colour saturation of the picture using the bar on the screen.
Tint (G/R) • : The closer to Red 100, the more saturated the red colour becomes.
Select a picture mode to be adjusted rst. The adjusted values are saved for each picture mode.
N
When you make changes to N Cell Light, Contrast, Brightness, Sharpness, Colour or Tint (G/R), the OSD will be adjusted
accordingly.
In Analogue TV, Ext., AV modes of the PAL system, you cannot use the Tint Function.
N
In N PC mode, you can only make changes to Cell Light, Contrast and Brightness.
Settings can be adjusted and stored for each external device you have connected to an input of the TV.
N
The energy consumed during use can be signicantly reduced if the level of brightness of the picture is reduced, and then this N
will reduce the overall running cost.
Picture
Mode : Standard
Cell Light : 4
Contrast : 95
Brightness : 45
Sharpness : 50
Colour : 50
Tint (G/R) : G50/R50
►
Advanced Settings
❑
Samsung’s new TVs allow you to make even more precise picture settings than
previous models. See below to adjust detailed picture settings.
Advanced Settings
N is available in Standard or Movie mode.
In PC mode, you can only make changes to
N Gamma and White Balance from
among the Advanced Settings items.
Colour : 50
Tint (G/R) : G50/R50
Picture
Advanced Settings
Picture Options
Picture Reset
►
Black Tone → Off / Dark / Darker / Darkest
You can select the black level on the screen to adjust the screen depth.
Dynamic Contrast → Off / Low / Medium / High
You can adjust the screen contrast so that the optimal contrast is provided.
Gamma
You can adjust the primary colour (Red, Green, Blue) Intensity.
Colour Space
Colour Space is a colour matrix composed of red, green and blue colours. Select your favourite Colour Space to experience the
most natural colour.
Auto • : Automatically sets the colour range depending on the input video source.
Native • : Sets a colour range wider than that of the input video source.
White Balance
You can adjust the colour temperature for more natural picture colours.
R-Offset / G-Offset / B-Offset / R-Gain / G-Gain / B-Gain • : Changing the adjustment value will refresh the adjusted screen.
Reset • : Resets the default white balance.
Flesh Tone
You can emphasize the pink esh tone in the picture.
Changing the adjustment value will refresh the adjusted screen.
N
Edge Enhancement → Off / On
You can emphasize object boundaries in the picture.
Continued...
Page 18
Picture Options
❑
In N PC mode, you can only make changes to the Colour Tone, Size and Screen
Burn Protection from among the items in Picture Options.
Colour Tone → Cool / Normal / Warm1 / Warm2
Tint (G/R) : G50/R50
Advanced Settings
Picture
Picture Options
Picture Reset
You can select the most comfortable colour tone to your eyes.
The adjusted values are stored according to the selected
N Picture mode.
Warm1
N or Warm2 is only activated when the picture mode is Movie.
Size
You can select the picture size which best corresponds to your viewing requirements.
Auto Wide • : Sets the picture in Auto Wide format.
16:9 • : Sets the picture to the 16:9 aspect ratio.
Wide Zoom • : Select this menu to view 4:3 aspect ratio pictures over a 16:9 aspect ratio TV by stretching the 4:3 picture
vertically.
Zoom • : Stretches the 16:9 aspect ratio picture vertically.
4:3 • : Sets the picture to the 4:3 aspect ratio.
Screen Fit • : Displays the full native HD signal that cannot be viewed using a normal TV.
The picture size options may vary depending on the input source.
The items available may differ depending on the selected mode.
N
In N PC Mode, only 16:9 and 4:3 mode can be adjusted.
Settings can be adjusted and stored for each external device you have connected to an input of the TV.
N
Temporary image retention may occur when viewing a static image on the set for more than two hours. N
E
Wide Zoom N : Press the ► button to select Position, then press the ENTER
Press the ▲ or ▼ button to move the screen up / down. Then press the ENTER
Zoom
N : Press the ► button to select Position, then press the ENTER
up and down. Then press the ENTER
E
button. Press the ► button to select Size, then press the ENTER
▲ or ▼ button to magnify or reduce the picture size in the vertical direction. Then press the ENTER
After selecting
N Screen Fit in HDMI (1080i / 1080p) or Component (1080i / 1080p) mode: Select Position by pressing
button.
E
E
button. Press the ▲ or ▼ button to move the picture
button.
E
E
button. Press the
button.
the ◄ or ►button. Use the ▲, ▼, ◄ or ► button to move the picture.
E
Reset
N : Press the ◄ or ► button to select Reset, then press the ENTER
If you use the
N Screen Fit function with HDMI 720p input, 1 line will be cut at the top, bottom, left and right as in the overscan
function.
O
You can select these options simply by pressing the
P.SIZE button on the remote
button. You can initialize the setting.
control.
►
Screen Mode
When setting the picture size to Auto Wide in a 16:9 wide TV, you can determine the picture size you want to see the 4:3 WSS
(Wide Screen Service) image or nothing. Each individual European country requires different picture size so this function is
intended for users to select it.
16:9 • : Sets the picture to the 16:9 aspect ratio.
Wide Zoom • : Select this menu to view 4:3 aspect ratio pictures over a 16:9 aspect ratio TV by stretching the 4:3 picture
vertically.
Zoom • : Stretches the 16:9 aspect ratio picture vertically.
4:3 • : Selects the screen mode as 4:3.
N
This function is available in
N
This function is not available in
Auto Wide mode.
PC, Component or HDMI mode.
Digital NR → Off / Low / Medium / High / Auto
If the broadcast signal received by your TV is weak, you can activate the Digital Noise Reduction feature to help reduce any static
and ghosting that may appear on the screen.
When the signal is weak, select one of the other options until the best picture is displayed.
N
HDMI Black Level → Normal / Low
You can directly select the black level on the screen to adjust the screen depth.
This function is active only when the external input connects to HDMI (RGB signals).
N
Continued...
English - 18
Page 19
English - 19
Film Mode
You can optimize the picture mode for watching movies.
Off • : Basic video image processing applied and No auto-detection for lm-based programs.
Auto • : Automatically adjusts for the best image quality between lm and video programs.
Screen Burn Protection
Congures the Screen Burn Protection Options to prevent and reduce pixel burn.
When an image remains in one position too long, it may cause a permanent burn on the screen.
Pixel Shift • : To reduce the possibility of screen burn, this unit is equipped with screen burn prevention technology. This
technology enables you to set picture movement up/down (Vertical) and side to side (Horizontal). The Time setting allows you to
program the time between movement of the picture in minutes.
N
Set
Pixel Shift to On by pressing the ▲ or ▼ button, then press the ENTEREbutton.
N
Select the required option by pressing the ▲ or ▼ button, then press the
N
Available options:
N
Optimum condition for pixel shift
Horizontal, Vertical, Time.
ENTERE button.
Item TV/Ext/AV/Component/HDMI/PC
Horizontal 0~4 2
Vertical 0~4 2
Time (minute) 1~4 min 3 min
N
The Pixel Shift value may differ depending on the monitor size (inches) and mode.
This function is not available in the NScreen Fit mode.
Scrolling • : This function helps remove after images on the screen by moving all the pixels on the PDP according to a pattern
Use this function when there are remaining after images or symbols on the screen especially when you displayed a still image
on the screen for a long time.
Side Grey • : When you watch TV with the screen ratio of 4:3, the screen is prevented from any damage by adjusting the white
balance on both extreme left and right sides.
Dark - : When you set the screen ratio to 4:3, it darkens the left and right sides.
Light - : When you set the screen ratio to 4:3, it brightens the left and right sides.
Page 20

Using the 3D Function
You can enjoy 3D movies and games on your TV. The 3D effects function enables you to view 3D images using special 3D glasses.
Connections
❑
3D Glasses
(Not supplied)
3D IR Emitter
(Not supplied)
PC
2
3.5mm Stereo Audio Cable
1
HDMI/DVI Cable (Not supplied)
N
The appearance of the 3D glasses (including Emitter) may differ depending on the model of your glasses.
TV Rear Panel
1. Connect a HDMI/DVI cable between the HDMI IN 2(DVI) jack on the TV and the PC output jack on your computer.
2. Connect a 3.5mm Stereo Audio Cable between the DVI AUDIO IN jack on the TV and the Audio Out jack of the sound card on your
computer.
3. Connect the Emitter to the 3D SYNC OUT port on the rear panel of the TV.
4. Turn the TV on and set the source of the TV to HDMI2/DVI.
For more information on the 3D glasses (including the Emitter), refer to the user manual of your 3D glasses.
N
Adjust the PC resolution N : - PS42B450/PS42B451 : 1024 x 768@60Hz
- PS50B450/PS50B451 : 1024 x 768@60Hz, 1360 x 768@60Hz
Optimum PC resolution for PS50B450/PS50B451 is 1360x768. When 1024x768 signal is connected in 3D mode, the picture will be
N
shown in 4:3 format with left and right side grey bars appeared.
The 3D IR Emitter communicates with the 3D glasses.
N
Therefore, the 3D IR Emitter should be located near the 3D glasses.
It is activated when the HDMI or DVI input signal is RGB, and DVI Sound is supported.
N
When the power is turned on or off, the mode changes to the default ( N Off) and the Format is saved.
To use the 3D Effect function, a graphics card supporting 3D or 3D software is required.
N
The 3D glasses and the Emitter must be manufacturer by the same company. N
If you play a game or watch TV while wearing the 3D glasses for long periods of time, you may experience eyestrain or a headache. N
3D glasses (including the Emitter) not manufactured by Samsung may not be supported. N
If you nd the screen ickering while the 3D function is used, change the environmental lighting darker or turn off the uorescent N
lamp to watch the screen for its best condition.
English - 20
Continued...
Page 21
English - 21
Changing the Mode
❑
Provides the function to turn on the 3D Effect. You can choose between Mode1 and
Mode2. To achieve the 3D effect, the 3D glasses shutter back and forth from the left to
right and vice versa (left/right sync).
Off • : Turns the 3D Effect function off.
Mode1 • : Mode 1 operates with right sync rst.
Mode2 • : Mode 2 operates with left sync rst.
2D • : Provides picture converted 3D to 2D. You can choose this to watch 2D
picture temporally when you feel dizzy, but you should choose Off to end 3D Effect
completely.
N
If the 3D effect is not working properly, it means the Mode and 3D glasses may not
be syncing properly. To put them in sync, switch to the other mode.
Changing the Format
❑
Select the optimal input format to match your graphic cards or 3D Software.
Size : 16:9
Screen Mode : 16:9
Digital NR : Auto
HDMI Black Level : Normal
Film Mode : Off
Screen Burn Protection
3D Effect ▶
Mode : Off
Format : Checker Board ▶
Picture Options
▲
3D Effect
Checker Board • : If the output format of your graphic card or 3D software is
Checkerboard, select this input format.
Horizontal • : If the output format of your graphic card or 3D software is Horizontal interleaved, select this input format.
Vertical • : If the output format of your graphic card or 3D software is Vertical interleaved, select this input format.
Picture Reset → Reset Picture Mode / Cancel
❑
Resets all picture settings to the default values.
Select a picture mode to be reset. The reset is performed for each picture mode.
N
Picture
Advanced Settings
Picture Options
Picture Reset
ReturnEnterMove
Return Enter Move
►
Setting up the TV with your PC
Preset: Press the N SOURCE button to select PC mode.
Auto Adjustment
❑
Auto Adjustment allows the PC screen of set to self-adjust to the incoming PC video
signal. The values of ne, coarse and position are adjusted automatically.
This function does not work in DVI-HDMI mode.
N
Press the TTOOLS button to display Tools menu.
You can also set the adjustment by selecting Tools → Auto Adjustment.
Screen
❑
Coarse
Adjusts the frequency when vertical noise appears on the screen.
Fine
Adjusts the screen to be clearer.
PC Position
Adjust the PC’s screen positioning if it does not t the TV screen. Press the ▲ or ▼
button to adjusting the Vertical-Position. Press the ◄ or ► button to adjust the
Horizontal-Position.
Image Reset
You can replace all image settings with the factory default values.
Brightness : 45
Sharpness : 50
PicturePicture
Auto Adjustment
Screen
Advanced Settings
Picture Options
Picture Reset
Screen
Coarse 50
Fine 44
PC Position
Image Reset
►
Return Enter Move
Page 22
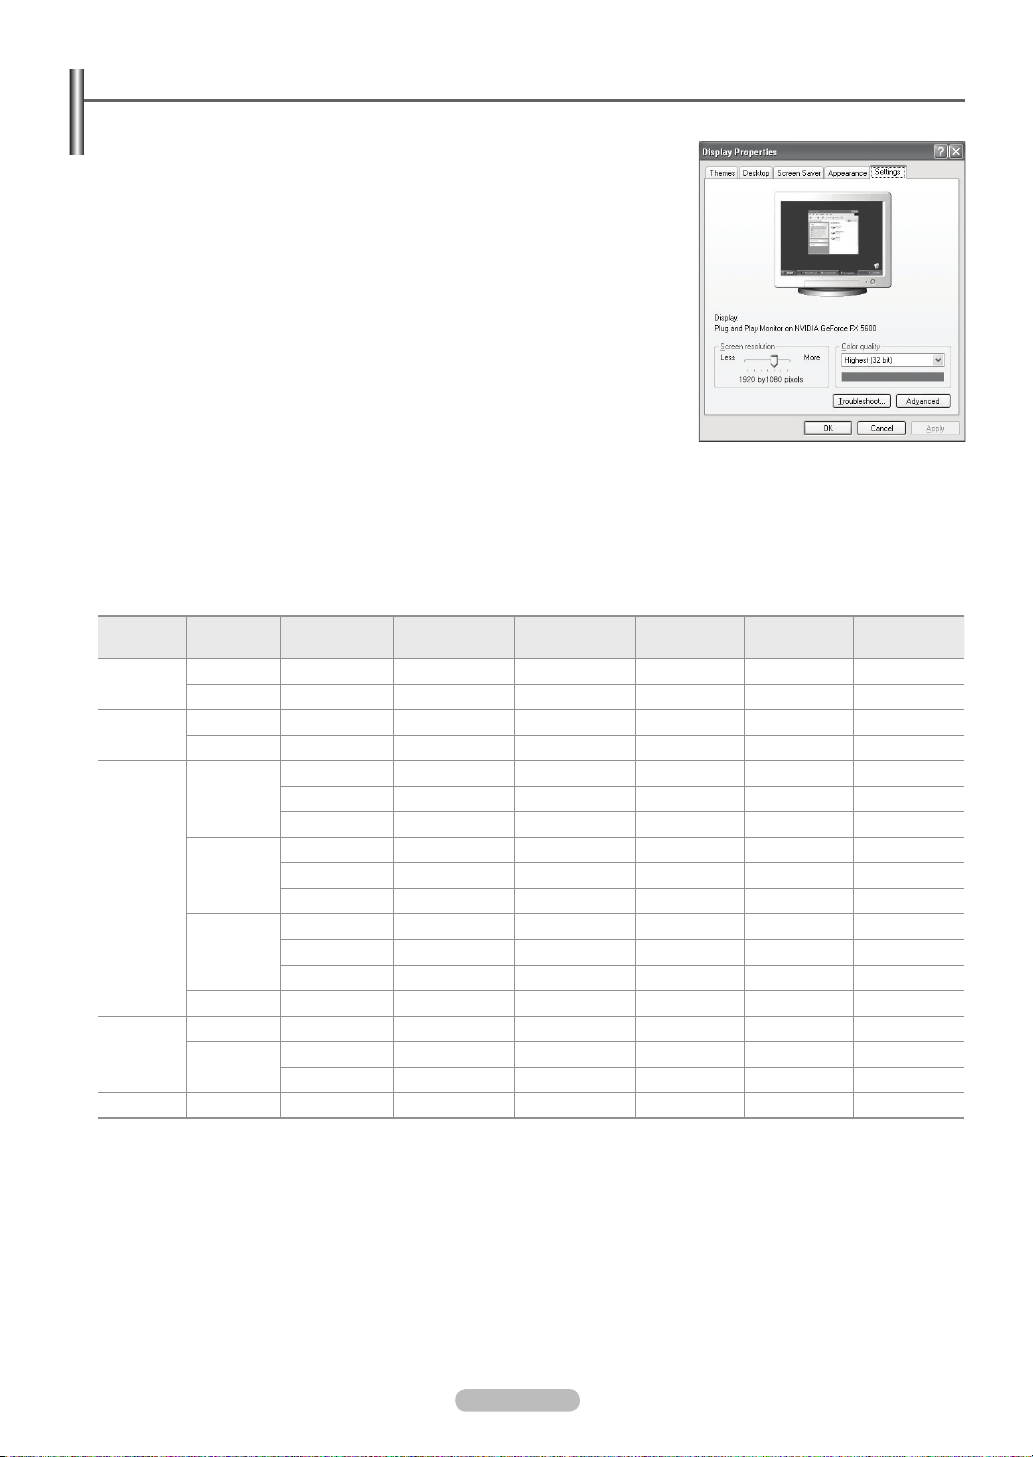
PC Display
Setting Up Your PC Software (Based on Windows XP)
❑
The Windows display-settings for a typical computer are shown below. The actual
screens on your PC will probably be different, depending upon your particular version
of Windows and your particular video card. However, even if your actual screens
look different, the same basic set-up information will apply in almost all cases. (If not,
contact your computer manufacturer or Samsung Dealer.)
1. First, click on ‘Control Panel’ on the Windows start menu.
2. When the control panel window appears, click on ‘Appearance and Themes’ and a
display dialog-box will appear.
3. When the control panel window appears, click on ‘Display’ and a display dialog-box
will appear.
4. Navigate to the ‘Settings’ tab on the display dialog-box.
The correct size setting (resolution)
Optimum
PS42B450/PS42B451 : 1024x768 pixels PS50B450/PS50B451 : 1360x768 pixels -
If a vertical-frequency option exists on your display settings dialog box, the correct
value is ‘60’ or ‘60 Hz’. Otherwise, just click ‘OK’ and exit the dialog box.
Display Modes
❑
Both screen position and size will vary depending on the type of PC monitor and its resolution.
The resolutions in the table are recommended.
D-Sub and HDMI/DVI Input
Mode Resolution
IBM
MAC
VESA DMT
VESA CVT
VESA GTF 1280 x 720 52.500 70.000 89.040 - / +
640 x 350 31.469 70.086 25.175 + / -
720 x 400 31.469 70.087 28.322 - / +
640 x 480 35.000 66.667 30.240 - / -
832 x 624 49.726 74.551 57.284 - / -
640 x 480
800 x 600
1024 x 768
1360 x 768 47.712 60.015 85.500 + / +
720 x 576 35.910 59.950 32.750 - / +
1280 x 720
Horizontal
Frequency (kHz)
31.469 59.940 25.175 - / -
37.861 72.809 31.500 - / -
37.500 75.000 31.500 - / -
37.879 60.317 40.000 + / +
48.077 72.188 50.000 + / +
46.875 75.000 49.500 + / +
48.363 60.004 65.000 - / -
56.476 70.069 75.000 - / -
60.023 75.029 78.750 + / +
44.772 59.855 74.500 - / +
56.456 74.777 95.750 - / +
Vertical
Frequency (Hz)
Pixel Clock
Frequency (MHz)
Sync Polarity
(H/V)
PS42B450/
PS42B451
✓ ✓
✓ ✓
✓ ✓
✓ ✓
✓ ✓
✓ ✓
✓ ✓
✓ ✓
✓ ✓
✓ ✓
✓ ✓
✓ ✓
✓ ✓
✓
✓ ✓
✓
✓
✓
PS50B450/
PS50B451
When using an HDMI/DVI cable connection, you must use the N HDMI IN 2 (DVI) jack.
The interlace mode is not supported. N
The set might operate abnormally if a non-standard video format is selected. N
English - 22
Page 23
English - 23
Sound Control
Changing the Sound Setting
Mode → Standard / Music / Movie / Clear Voice / Custom
❑
You can select the type of special sound effect to be used when watching a given
broadcast.
Press the T TOOLS button to display Tools menu.
You can also congure the sound mode by selecting Tools → Sound Mode.
Equalizer
❑
The sound settings can be adjusted to suit your personal preferences.
Mode • : You can select a sound mode to suit your personal preferences.
Balance • : Controls the balance between the right and left speakers.
100Hz / 300Hz / 1KHz / 3KHz / 10KHz • (Bandwidth Adjustment): To adjust the level of different bandwidth frequencies
Reset • : Resets the equalizer settings to the default values.
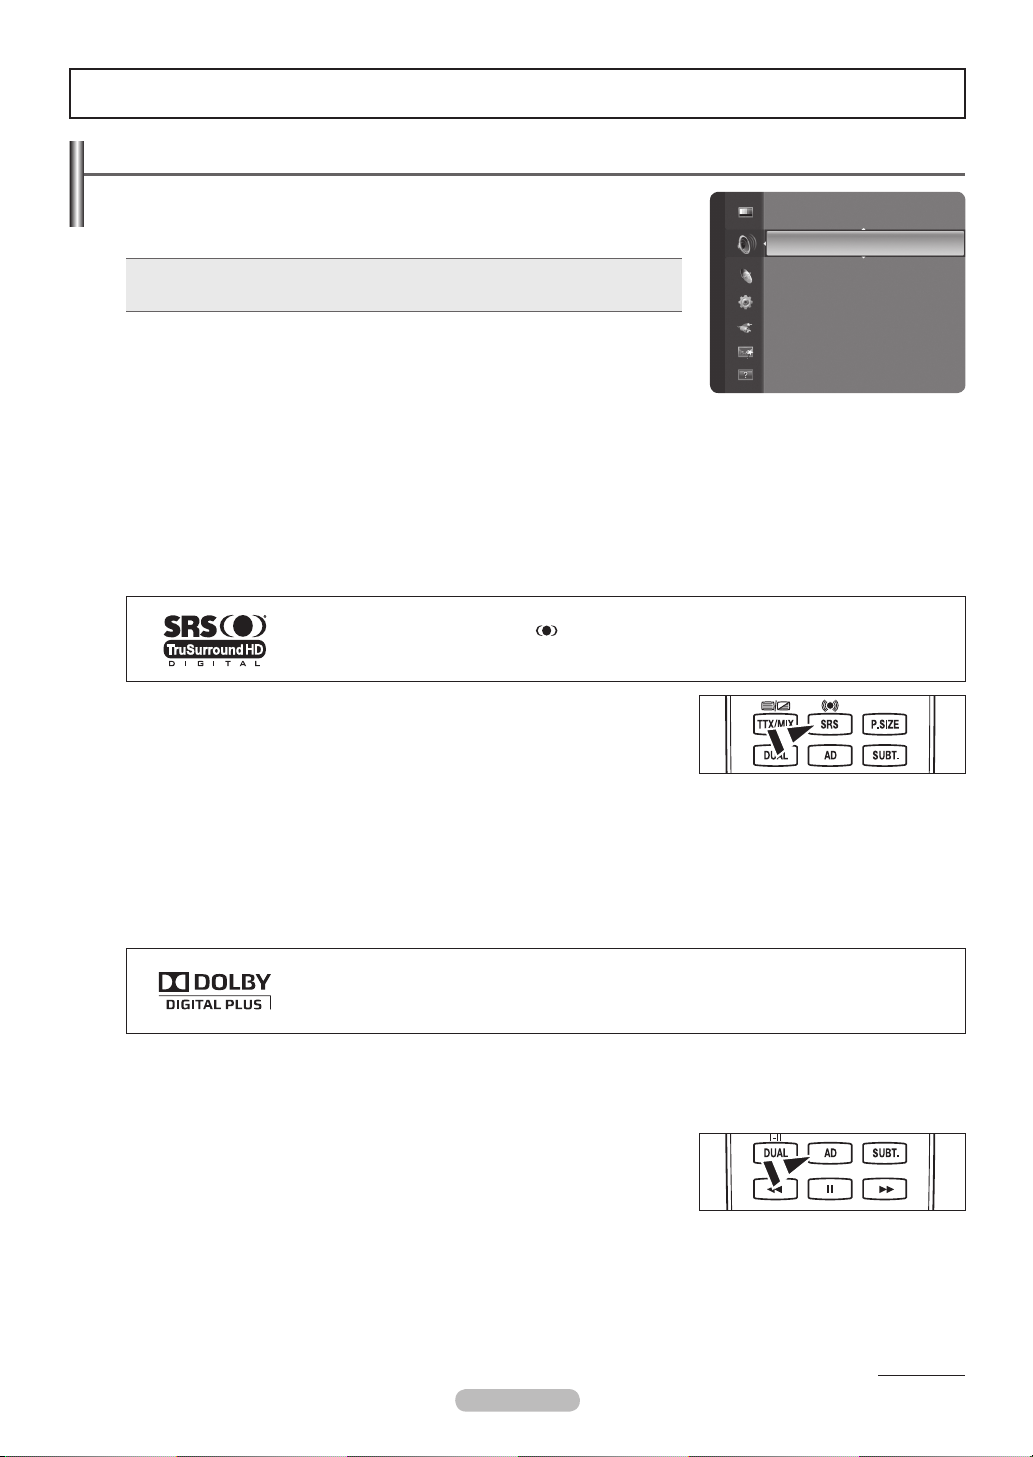
SRS TruSurround HD → Off / On
❑
SRS TruSurround HD is the combined technology of TruSurround and FOCUS, TruBass.
SRS TruSurround HD is down mixing technology that makes the Surround Sound effect of virtual 5.1 channel via two speakers.
This function provide not only rich deep bass at a low-pitched sound but also improve the resolution at a high-pitched sound.
If the sound is abnormal while TV is playing music, please adjust the equalizer and
N SRS TruSurround HD (Off/On).
TruSurround HD, SRS and the symbol are trademarks of SRS Labs, Inc.
TruSurround HD technology is incorporated under license from SRS Labs, Inc.
Sound
Mode : Custom
Equalizer
SRS TruSurround HD : Off
Audio Language : ---Audio Format : ---Audio Description
Auto Volume : Off
►
O SRS button on the remote
You can select these options simply by pressing the
control.
Audio Language ❑ (only digital channel)
You can change the default value for audio languages. Displays the language
information for the incoming stream.
You can only select the language among the actual languages being broadcast.
N
Audio Format → MPEG / Dolby Digital ❑ (only digital channel)
When sound is emitted from both the main speaker and the audio receiver, a sound echo may occur due to the decoding speed
difference between the main speaker and the audio receiver. In this case, use the TV Speaker function.
You can only select the language among the actual languages being broadcast.
N
Manufactured under license from Dolby Laboratories.
Dolby and the double-D symbol are trademarks of Dolby Laboratories.
Audio Description ❑ (only digital channel)
This is an auxiliary audio function that provides an additional audio track for visually challenged persons. This function handles the
Audio Stream for the AD (Audio Description), when it is sent along with the Main audio from the broadcaster. Users can turn the
Audio Description On or Off and control the volume.
You can select these options simply by pressing the
O AD button on the remote control.
Audio Description → Off / On
Turn the audio description function on or off.
Volume
You can adjust the audio description volume.
Volume
N is active when Audio Description is set to On.
Continued...
Page 24
Auto Volume → Off / On
❑
Each broadcasting station has its own signal conditions, and so it is not easy to adjust the volume every time the channel is
changed. This feature lets you automatically adjust the volume of the desired channel by lowering the sound output when the
modulation signal is high or by raising the sound output when the modulation signal is low.
Speaker Select → External Speaker / TV Speaker
❑
If you want to hear the sound through separate speakers, cancel the internal amplier.
The
N – +, M MUTE buttons do not operate when the Speaker Select is set to External Speaker.
If you select
N External Speaker in the Speaker Select menu, the sound settings will be limited.
TV's Internal Speakers
TV / Ext. / AV / Component / PC / HDMI
Audio Out (Optical, L / R Out) to Sound System
TV / Ext. / AV / Component / PC / HDMI
TV Speaker Speaker Output Sound Output
External Speaker Mute Sound Output
Video No Signal Mute Mute
Sound Reset → Reset All / Reset Sound Mode / Cancel
❑
You can restore the Sound settings to the factory defaults.
Selecting the Sound Mode
When you set to Dual l ll, the current sound mode is displayed on the screen.
Type of broadcast
Regular broadcast
(Standard audio)
NICAM
Stereo
A2
Stereo
Regular + NICAM Mono
NICAM-Stereo
NICAM Dual-I/II
Regular broadcast
(Standard audio)
Bilingual or DUAL-I/II
Stereo Stereo
NICAM
NICAM
Stereo
NICAM
Dual-1
Dual I Dual II
Auto Volume : Off
Speaker Select : TV Speaker
Sound
Sound Reset
On-screen indication
Mono (Normal use)
NICAM
Dual-2
Mono (Normal use)
►
Mono
(Normal)
Mono
(Normal)
Mono
(Normal)
Mono
(Forced mono)
If the stereo signal is weak and an automatic switching occurs, then switch to the mono. N
This function is only activated in stereo sound signal. It is deactivated in mono sound signal. N
This function is only available in N TV mode.
You can select these options simply by pressing the
O DUAL button on the remote control.
English - 24
Page 25
English - 25
Function Description
Configuring the Setup Menu
Menu Language
❑
You can set the menu language.
Broadcast
❑
Subtitle
You can activate and deactivate the subtitles. Use this menu to set the Subtitle Mode.
Normal under the menu is the basic subtitle and Hard of hearing is the subtitle for a
hearing-impaired person.
Subtitle → Off / On • : Switches subtitles off or on.
Mode → Normal / Hard of hearing • : Sets the subtitle mode.
Subtitle Language • : Set the subtitle language.
If the programme you are watching does not support the
N Hard of hearing function,
Normal automatically activates even though Hard of hearing mode is selected.
English is the default in cases where the selected language is unavailable in the
N
broadcast.
You can select these options simply by pressing the
O SUBT. button on the remote
control.
Digital Text → Disable / Enable
If the programme is broadcast with digital text, this feature is enabled.
MHEG (Multimedia and Hypermedia Information Coding Experts Group)
N
An International standard for data encoding systems used in multimedia and hypermedia. This is at a higher level than the
MPEG system which includes
data-linking hypermedia such as still images, character service, animation, graphic and video les as well as multimedia data.
MHEG is user runtime interaction technology and is being applied to various elds including VOD (Video-On-Demand), ITV
(Interactive TV), EC (Electronic Commerce), tele-education,
tele-conferencing, digital libraries and network games.
Plug & Play
Setup
Menu Language : English
Time
Broadcast
Security
General
►
Teletext Language
You can set the Teletext language by selecting the language type.
English is the default in cases where the selected language is unavailable in the broadcast.
N
Preference
Primary Audio Language / Secondary Audio Language / Primary Subtitle Language / Secondary Subtitle Language / •
Primary Teletext Language / Secondary Teletext Language
Using this feature, users can select one of the languages. The language selected here is the default when the user selects
a channel. If you change the language setting, the Subtitle Language, Audio Language, and the Teletext Language of the
Language menu are automatically changed to the selected language. The Subtitle Language, Audio Language, and the Teletext
Language of the Language menu show a list of languages supported by the current channel and the selection is highlighted. If
you change this language setting, the new selection is only valid for the current channel. The changed setting does not change
the setting of the Primary Subtitle Language, Primary Audio Language, or the Primary Teletext Language of the Preference
menu.
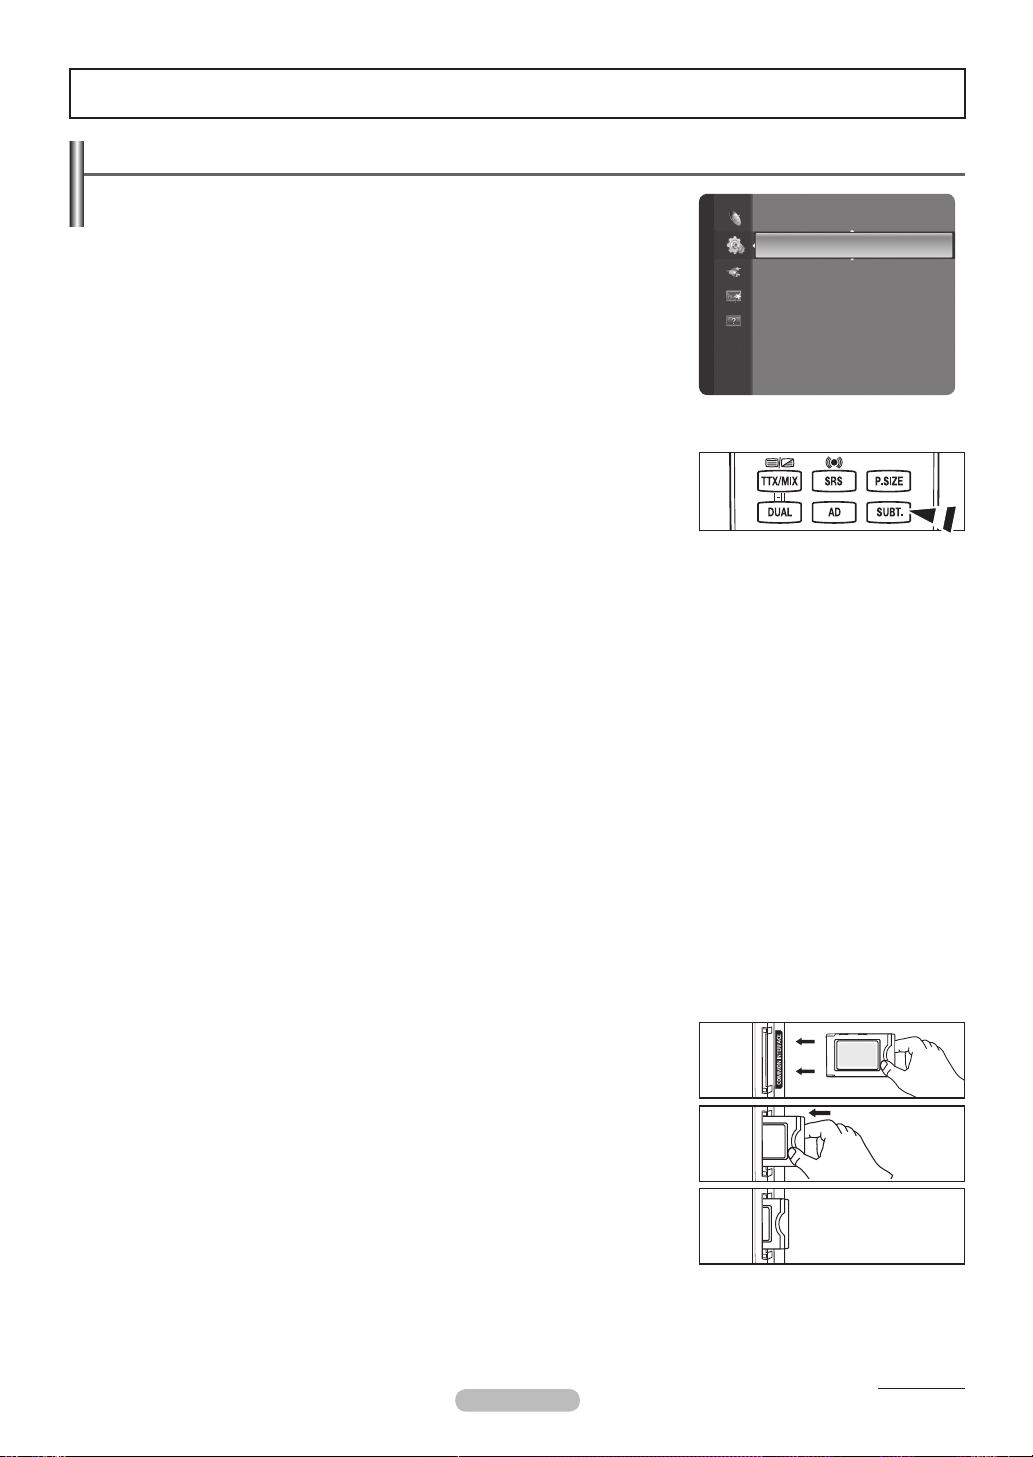
Common Interface
Installing the CI Card •
1. Purchase the CI CAM module by visiting your nearest dealer or by phone.
2. Insert the CI CARD into the CAM in the direction of the arrow until it ts.
3. Insert the CAM with the CI CARD installed into the common interface slot.
Insert the CAM in the direction of the arrow, right up to the end so that it is parallel
N
with the slot.
4. Check if you can see a picture on a scrambled signal channel.
CI Menu •
This enables the user to select from the CAM-provided menu.
Select the CI Menu based on the menu PC Card.
Application Info. •
This contains information on CAM inserted in the CI slot and displays it.
The Application Info inserting is about the CI CARD. You can install the CAM anytime whether the TV is ON or OFF.
CAM is not supported in some countries and regions,check with your authorized dealer.
N
Continued...
Page 26

Security
❑
Child Lock → Off / On
This feature allows you to prevent unauthorized users, such as children, from watching unsuitable programmes by muting out video
and audio.
Before the setup screen appears, the PIN number input screen appears. Enter your 4 digit PIN number.
N
The default PIN number of a new TV set is N '0-0-0-0'. You can change the PIN by selecting Change PIN from the menu.
You can lock some channels in Channel List.
N (refer to page 15)
Child Lock
N is available only in TV mode.
Parental Lock
This feature allows you to prevent unauthorized users, such as children, from watching unsuitable programmes by a 4-digit PIN
(Personal Identication Number) code that is dened by the user.
Before the setup screen appears, the PIN number input screen appears. Enter your 4 digit PIN number.
N
The default PIN number of a new TV set is '0-0-0-0'. You can change the PIN by selecting N Change PIN from the menu.
When the parental ratings are set, the
N
Allow All
N : Press to unlock all TV ratings.
\
symbol is displayed.
Block All: Press to lock all TV ratings
Change PIN
You can change your personal ID number that is required to set up the TV.
Before the setup screen appears, the PIN number input screen appears. Enter your 4 digit PIN number.
N
The default PIN number of a new TV set is N '0-0-0-0'.
If you forget the PIN code, press the remote control buttons in the following sequence, which resets the PIN to
N '0-0-0-0':
POWER (Off), MMUTE, 8, 2, 4, POWER (On).
General
❑
Game Mode → Off / On
When connecting to a game console such as PlayStationTM or XboxTM, you can enjoy a more realistic gaming experience by
selecting the game menu.
When the Game Mode is On •
Picture Mode - is automatically changed to Standard and users cannot change the mode.
Sound Mode - is automatically changed to Custom and users cannot change the mode. Adjust the sound using the equalizer.
The - Reset in the Sound menu is activated. Reset function initializes the Equalizer settings to the factory default setting.
Game Mode
N is not available in regular TV mode or Game Mode set to Off.
If the picture is poor when external device is connected to TV, check if
N Game Mode is On.
If you display the TV menu in
N Game mode, the screen shakes slightly.
The mark (
N ) appears on the screen which means that Game Mode is on with the selected source.
This function supports only game function.
N
Game mode N is not available in PC mode.
Energy Saving → Off / Low / Medium / High / Picture Off
This feature adjusts the brightness of the TV in order to reduce power consumption. When watching TV at night, set the
Energy Saving mode option to High to reduce eye fatigue as well as power consumption.
If you select Picture Off, the screen is turned off and you can only hear the sound. Press any button to get out of Picture Off.
In the
N Tools menu, Picture Off function is not supported.
Press the TTOOLS button to display Tools menu.
You can also set the Energy Saving option by selecting Tools → Energy Saving.
Melody → Off / Low / Medium / High
The TV power on / off melody sound can be adjusted.
The Melody does not play
N
When no sound is output from the TV because the - MUTE button has been pressed.
When no sound is output from the TV because the - –
(Volume) button has been pressed.
When the TV is turned off by - Sleep Timer function.
English - 26
Page 27
English - 27
Setting the Time
Clock
❑
Setting the clock is necessary in order to use the various timer features of the TV.
The current time will appear every time you press the
N INFO button.
If you disconnect the power cord, you have to set the clock again.
N
Clock Mode
Plug & Play
Menu Language : English
Setup
Time
Broadcast
Security
General
You can set up the current time manually or automatically.
Auto • : Set the current time automatically using the time from the digital broadcast.
Manual • : Set the current time to a manually specied time.
Clock Set
You can set the current time manually.
Set up this item when you have set
N Clock Mode to Manual.
You can set the
N Day, Month, Year, Hour, Minute directly by pressing the number
buttons on the remote control.
Sleep Timer → Off / 30 min / 60 min / 90 min / 120 min / 150 min /
❑
Cl ock : - - : - - ►
Sleep Timer : Off
Timer 1 : Inactivated
Timer 2 : Inactivated
Timer 3 : Inactivated
Time
180 min
The sleep timer automatically shuts off the TV after a preset time.
The TV automatically switches to standby mode when the timer reaches 0.
N
To cancel the N Sleep Timer function, select Off.
Press the TTOOLS button to display Tools menu.
You can also set the sleep timer by selecting Tools → Sleep Timer.
Timer 1 / Timer 2 / Timer 3
❑
Three different on / off timer settings can be made.
On Time :
Set the hour, minute, am/pm, and Activate/Inactivate.
(To activate timer with the setting you’ve chosen, set to Activate.)
Off Time :
Set the hour, minute, am/pm, and Activate/Inactivate.
(To activate timer with the setting you’ve chosen, set to Activate.)
Volume
:
Set the required volume level.
Antenna
: You can select either DTV or ATV when the TV turns on automatically.
Channel
: Select the desired channel.
Repeat
:
Select Once, Everyday, Mon~Fri, Mon~Sat, Sat~Sun, or Manual.
N
When
Manual is selected, press the ► button to select the desired day of the week. Press the ENTER
desired day and the c mark will appear.
You must set the clock rst.
N
You can set the hour, minute and programme by pressing the number buttons on the remote control. N
Auto Power Off N
When you set the timer On, the television will eventually turn off, if no controls are operated for 3 hours after the TV was turned on
by the timer. This function is only available in timer On mode and prevents overheating, which may occur if a TV is on for too long
time.
U
Move E Enter R Return
E
button over the
►
Page 28

Source List / Edit Name
Source List
❑
Use to select TV or other external input sources such as DVD players or Cable Box /
Satellite receivers (Set-Top Box) connected to the TV. Use to select the input source of
your choice.
TV, Ext., AV, PC, Component, HDMI1, HDMI2/DVI, HDMI3.
You can choose only those external devices that are connected to the TV. In the N
Source List, connected inputs will be highlighted and sorted to the top. Inputs that
are not connected will be sorted to the bottom.
Using the Colour buttons on the remote with the Source list
N
Red - (Refresh): Refreshes the connecting external devices.
T - TOOLS (Tools): Displays the Edit Name and Information menus.
Press the
O SOURCE button on the remote control to view an external signal source.
TV mode can be selected by pressing the TV button, number buttons (0~9), and the
P < / > button on the remote control.
Edit Name
❑
You can name the device connected to the input jacks to make your input source selection easier.
VCR / DVD / Cable STB / Satellite STB / PVR STB / AV Receiver / Game / Camcorder / PC / DVI PC / DVI / TV / IPTV / Blu-ray /
HD DVD / DMA
N
When a PC with a resolution of PS42B450/PS42B451: 640x480@60Hz, PS50B450/PS50B451: 640x480@60Hz,
1280x720@60Hz is connected to the HDMI IN 2 (DVI) port, you should set the HDMI2 / DVI mode to PC in the Edit Name of
the Input mode.
Input
Source List
Edit Name
Supported Program
Self Diagnosis
❑
Picture Test, Sound Test, Signal Information
If you think you have the Picture, Sound, Signal problem, perform the test. You can check the problem state.
N Speaker Select is set to TV speaker
If you hear no sound from the TV’s speakers, before performing the sound test, make sure
in the Sound menu.
The melody will be heard during the test even if
N Speaker Select is set to External Speaker or the sound is muted by pressing
the MMUTE button.
If the signal strength meter indicates that the signal is weak, physically adjust your antenna to increase the signal strength.
N
Continue to adjust the antenna until you nd the best position with the strongest signal.
Software Upgrade
❑
To keep your product up-to-date with new Digital Television features then software upgrades are periodically broadcast as part of
the normal Television signal. It will automatically detect these signals and display the software upgrade banner. You are given the
option to install the upgrade.
By USB
Insert a USB drive containing the rmware upgrade into TV. Please be careful to not disconnect
the power or remove the USB drive while upgrades are being applied. The TV will turn off and
turn on automatically after completing the rmware upgrade. Please check the rmware version
after the upgrades are complete. When software is upgraded, video and audio settings you
have made will return to their default (factory) settings. We recommend you write down your
settings so that you can easily reset them after the upgrade.
By Channel
Upgrades the software using the broadcasting signal.
Standby Mode Upgrade
To continue software upgrade with master power on, Select On by pressing the ▲ or ▼ button. 45 minutes after entering standby
mode, a manual upgrade is automatically conducted. Since the power of the unit is turned on internally, the screen may be on
slightly for the product. This phenomenon may continue for more than 1 hour until the software upgrade is completed.
Alternative Software
Replace the current software with the alternative.
TV Rear Panel
USB Drive
HD Connection Guide
❑
The brief instruction on How to get the best performance from your new HDTV is displayed. We offer the connection method for
HD devices.
Contact Samsung
❑
You can know the Samsung Call center, website and information for product.
You can move the previous or next page by pressing the ▲ or
N ▼ button.
English - 28
Page 29
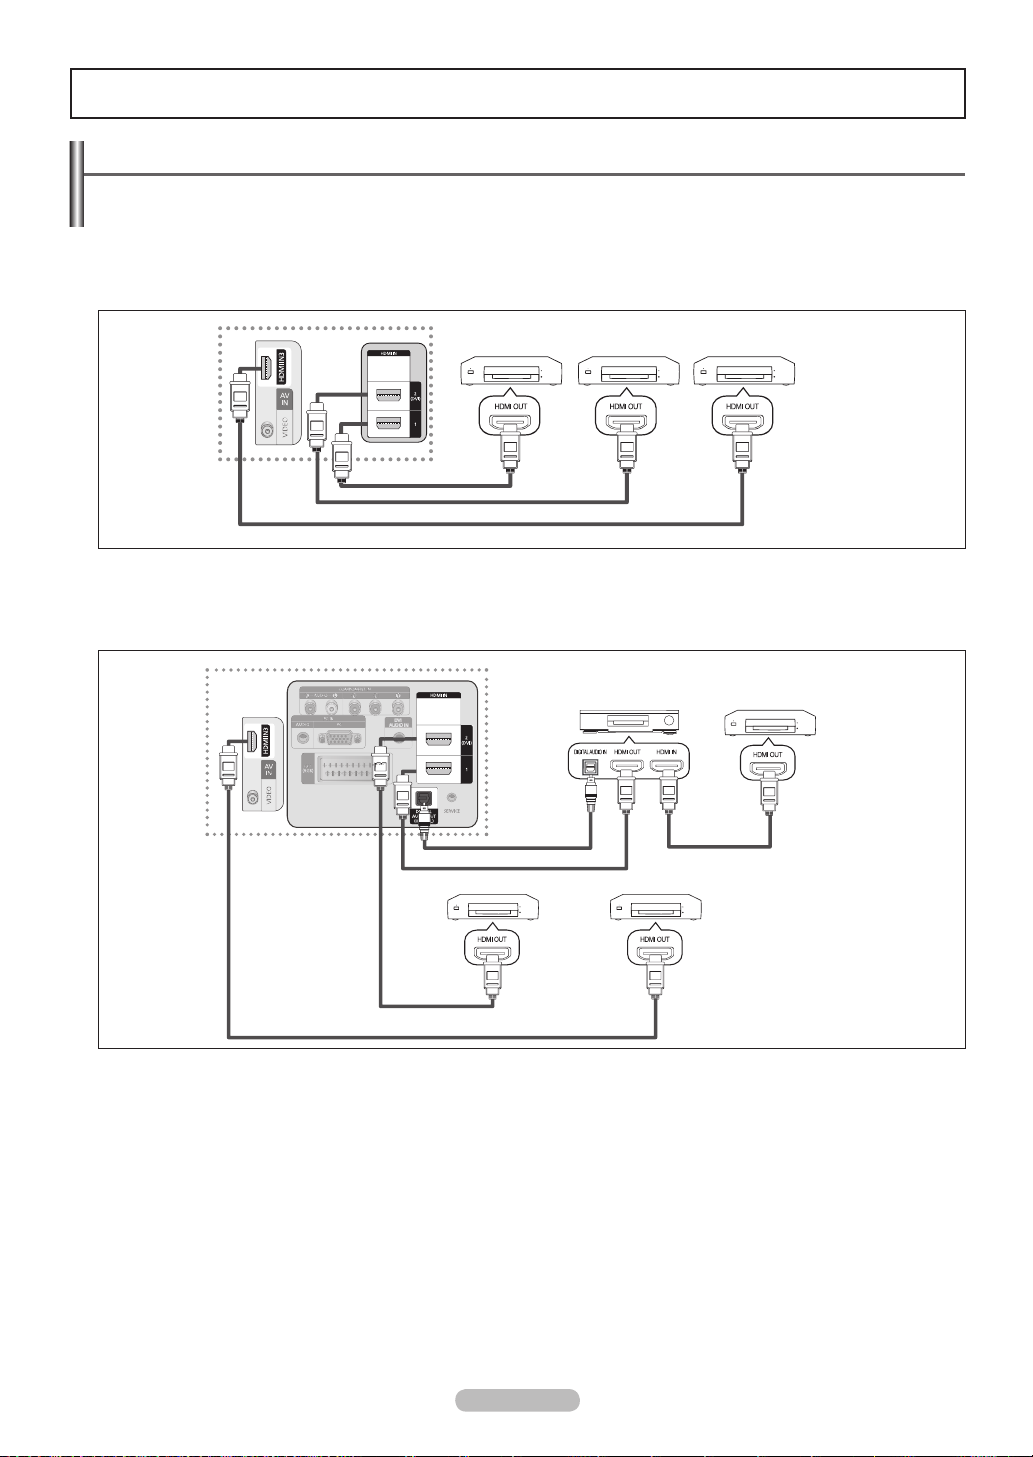
English - 29
About Anynet+
Connecting Anynet+ Devices
Anynet+ is a function that enables you to control all connected Samsung devices that support Anynet+ with your Samsung TV’s remote.
The Anynet+ system can be used only with Samsung devices that have the Anynet+ feature. To be sure your Samsung device has this
feature, check if there is an Anynet+ logo on it.
To connect to a TV
❑
TV
HDMI 1.3 Cable
Anynet+
Device 1
HDMI 1.3 Cable
Anynet+
Device 2
HDMI 1.3 Cable
Anynet+
Device 3
1. Connect the [HDMI IN 1], [HDMI IN 2(DVI)] or [HDMI IN 3] jack on the TV and the HDMI OUT jack of the corresponding Anynet+
device using an HDMI cable.
To connect to Home Theater
❑
TV
Optical Cable
HDMI 1.3 Cable
Anynet+ Device 2
Home Theatre
Anynet+ Device 3
Anynet+ Device 1
HDMI 1.3 Cable
HDMI 1.3 Cable
HDMI 1.3 Cable
1. Connect the [HDMI IN 1], [HDMI IN 2(DVI)] or [HDMI IN 3] jack on the TV and the HDMI OUT jack of the corresponding Anynet+
device using an HDMI cable.
2. Connect the HDMI IN jack of the home theater and the HDMI OUT jack of the corresponding Anynet+ device using an HDMI cable.
Connect the Optical cable between the DIGITAL AUDIO OUT (OPTICAL) jack on your TV and the Digital Audio Input on the Home
N
Theater.
When following the connection above, the Optical jack only outputs 2 channel audio. You will only hear sound from the Home
N
Theater’s Front Left and Right speakers and the subwoofer. If you want to hear 5.1 channel audio, connect the DIGITAL AUDIO
OUT (OPTICAL) jack on the DVD player or Cable/Satellite Box (ie Anynet Device 1 or 2) directly to the Amplier or Home Theater,
not the TV.
Connect only one Home Theater.
N
You can connect an Anynet N
Anynet
N
Anynet
N
+
works when the AV device supporting Anynet+ is in the Standby or On status.
+
supports up to 12 AV devices in total. Note that you can connect up to 3 devices of the same type.
+
device using the HDMI 1.3 cable. Some HDMI cables may not support Anynet+ functions.
Page 30
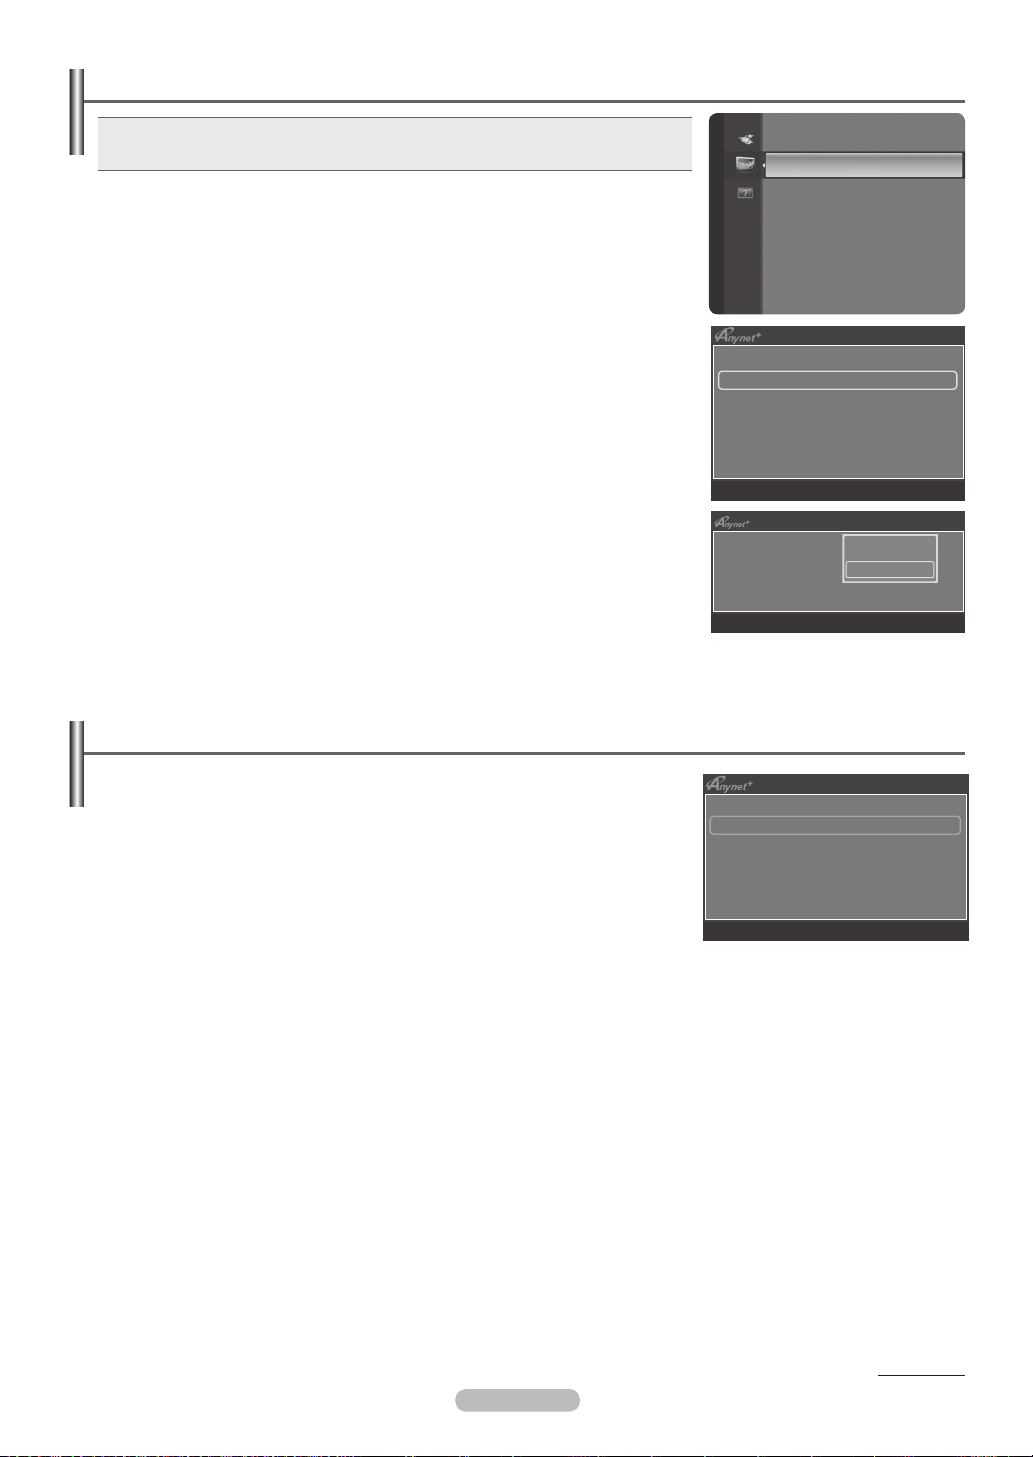
Setting Up Anynet+
Press the TTOOLS button to display Tools menu.
You can also display Anynet+ menu by selecting Tools → Anynet+(HDMI-CEC).
Setup
❑
Anynet+(HDMI-CEC) → Off / On
To use the Anynet+ Function, Anynet+ (HDMI-CEC) must be set to On.
When the N Anynet+ (HDMI-CEC) function is disabled, all the Anynet+ related
operations are deactivated.
Auto Turn Off → Yes / No
Setting an Anynet+ Device to turn Off Automatically when the TV is Turned Off
+
The active source on the TV remote must be set to TV to use the Anynet N
If you set
N Auto Turn Off to Yes, connected external devices are also turned off when
function.
the TV is turned off. If an external device is still recording, it may or may not turn off.
Application
Anynet+ (HDMI-CEC)
Device List
Setup
U
Move E Enter R Return
Setup
Anynet+ (HDMI-CEC) : ON
Auto Turn Off : Yes
U
Move E Enter R Return
►
Off
On
Scanning and Switching between Anynet+ Devices
1. Press the TOOLS button. Press the ENTERE button to select
Anynet+ (HDMI-CEC).
2. Press the ▲ or ▼ button to select Device List, then press the ENTER
Anynet+ devices connected to the TV are listed. If you cannot nd a device you want,
N
E
button.
press the red button to scan for devices.
Only when you set
N Anynet+ (HDMI-CEC) to On in the Setup menu, the Device List
menu appears.
3. Press the ▲ or ▼ button to select to a particular device and press the ENTER
E
button.
It is switched to the selected device.
Switching to the selected devices may take up to 2 minutes. You cannot cancel the operation during the switching operation.
N
The time required to scan for devices is determined by the number of connected devices. N
When the device scan is complete, the number of devices found are not displayed. N
Although the TV automatically searches the device list when the TV is turned on via the power button, devices connected to the TV N
when the TV is on or under some conditions are not automatically displayed in the device list. Press the red button to search for the
connected device.
If you have selected external input mode by pressing the
N SOURCE button, you cannot use the Anynet+ function. Make sure to
switch to an Anynet+ device by using the Device List.
View TV
Device List
Record : DVDR
DVDR MENU
DVDR INFO
Receiver On
Setup
U
Move L Adjust R Return
English - 30
Continued...
Page 31

English - 31
+
Anynet
❑
Menu
The Anynet+ menu changes depending on the type and status of the Anynet+ devices connected to the TV.
Anynet+ Menu Description
View TV Anynet+ mode changes to TV broadcast mode.
Device List Shows the Anynet+ device list.
(device_name) MENU Shows the connected device menus. E.g. If a DVD recorder is connected, the disc menu of the
DVD recorder will appear.
(device_name) INFO Shows the play menu of the connected device. E.g. If a DVD recorder is connected, the play menu
of the DVD recorder will appear.
Record: (*recorder) Starts recording immediately using the recorder. (This is only available for devices that support the
recording function.)
(*recorder) Reserve Recording Enables reserving a recording for the recorder. (This is only available for devices that support the
recording reservation function.)
Stop Recording: (*recorder) Stops recording.
Receiver Sound is played through the receiver.
N
If more than one recording device is connected, they are displayed as (*recorder) and if only one recording device is connected, it
will be represented as (*device_name).
TV Remote Control Buttons Available in Anynet+ Mode
❑
Device Type Operating Status Available Buttons
After switching to the device, when the
menu of the corresponding device is
Anynet+ Device
displayed on the screen.
After switching to the device, while
playing a file
Device with builtin Tuner
After switching to the device, when you
are watching a TV programme
Audio Device When Receiver is activated
The Anynet+ function only works when the active source on the TV remote control is set to TV.
N
Numeric buttons
E
▲/▼/◄/►/ENTER
buttons
Colour buttons / EXIT button
(Backward search) / (Forward search) (Stop) / (Play) /
(Pause)
/ button
P
/ button
=
M MUTE button
The N button works only while in the recordable state.
You cannot control Anynet+ devices using the buttons on the TV. You can control Anynet+ devices only using the TV remote control.
N
The TV remote control may not work under certain conditions. In this case, reselect the Anynet+ device. N
The Anynet+ functions do not operate with other manufacturers’ products. N
The N , operations may differ depending on the device.
Recording
You can make a recording of a TV programme using a Samsung recorder.
1. Press the TOOLS button. Press the ENTER
2. Press the ▲ or ▼ button to select Record: (device_name), then press the ENTER
button. Recording begins.
When there is more than one recording device
N
When multiple recording devices are connected, the recording devices are listed.
Press the ▲ or ▼ button to select a recording device and press the ENTERE
button. Recording begins.
When the recording device is not displayed
N
Select Device List and press the red button to search devices.
You can record the source streams by selecting
N Record: (device_name).
Pressing the
N button will record whatever you are currently watching. If you are watching video from another device, the video
from the device is recorded.
Before recording, check whether the antenna jack is properly connected to the recording device. To properly connect an antenna to
N
a recording device, refer to the recording device’s users manual.
E
button to select Anynet+ (HDMI-CEC).
View TV
E
Device List
Record : DVDR
DVDR MENU
DVDR INFO
Receiver On
Setup
U
Move L Adjust R Return
Page 32

Listening through a Receiver (Home theater)
You can listen to sound through a receiver instead of the TV speaker.
1. Press the TOOLS button. Press the ENTER
2. Press the ▲ or ▼ button to select Receiver. Press the ◄ or ► button to select On or Off.
If your receiver supports audio only, it may not appear in the device list.
N
The receiver will work when you have properly connected the Optical IN jack of the N
receiver to the Optical Out jack of the TV.
When the receiver (home theater) is set to On, you can hear sound output from the
N
TV’s Optical jack. When the TV is displaying a DTV(air) signal, the TV will send out 5.1
E
button to select Anynet+ (HDMI-CEC).
View TV
Device List
Record : DVDR
DVDR MENU
DVDR INFO
Receiver ◄ On ►
Setup
U
Move L Adjust R Return
channel sound to the Home theater receiver. When the source is a digital component
such as a DVD and is connected to the TV via HDMI, only 2 channel sound will be heard from the Home Theater receiver.
If there is a power interruption to the TV when the
N Receiver is set to On (by disconnecting the power cord or a power failure), the
Speaker Select may be set to External Speaker when you turn the TV on again. (see page 24)
Troubleshooting for Anynet+
Symptom Solution
Anynet+ does not work. Check if the device is an • Anynet+ device. The Anynet+ system supports Anynet+ devices only.
Connect only one receiver (home theater). •
Check if the • Anynet+ device power cord is properly connected.
Check the • Anynet+ device’s Video/Audio/HDMI 1.3 cable connections.
Check whether • Anynet+ (HDMI-CEC) is set to On in the Anynet+ setup menu.
I want to start Anynet+. Check if the Anynet •
I want to exit Anynet+. Select View TV in the Anynet •
The message Connecting to
Anynet+ device...
appears on the screen.
The Anynet+ device does not
play.
The connected device is not
displayed.
The TV programme cannot be
recorded.
The TV sound is not output
through the receiver.
Check whether the TV remote control is in TV mode. •
Check whether it is Anynet •
+
Anynet •
doesn’t work in certain situations. (Searching channels, Plug & Play, etc.)
When connecting or removing the HDMI 1.3 cable, please make sure to search devices again •
or turn your TV off and on again.
Check if the Anynet •
(HDMI-CEC) is set to On in the Anynet+ Setup menu.
Press the • TV button on the TV remote control to switch to TV. Then press the TOOLS button
to show the Anynet+ menu and select a menu you want.
Press the • SOURCE button on the TV remote control and select a device other than Anynet+
devices.
(Note that the channel button operates only when a tuner-embedded Anynet •
connected.)
You cannot use the remote control when you are conguring Anynet •
mode.
Use the remote control when the Anynet •
You cannot use the play function when • Plug & Play is in progress.
Check whether or not the device supports Anynet •
Check whether or not the HDMI 1.3 cable is properly connected. •
Check whether • Anynet+ (HDMI-CEC) is set to On in the Anynet+ setup menu.
Search Anynet •
+
devices again.
You can connect an Anynet •
not support Anynet+ functions.
If it is terminated by an abnormal situation such as disconnecting the HDMI cable or power •
cord or a power failure, please repeat the device scan.
Check whether the antenna jack on the recording device is properly connected. •
Connect the optical cable between TV and the receiver. •
+
exclusive remote control.
+
Function of Anynet+ device is set on.
+
device is properly connected to the TV and check if the Anynet+
+
menu.
+
device is not
+
or switching to a view
+
setting or switching to view mode is complete.
+
functions.
+
device using the HDMI 1.3 cable only. Some HDMI cables may
English - 32
Page 33

English - 33
Recommendations for Use
Teletext Feature
Most television stations provide written information services via Teletext. The index page of the teletext service gives you information on
how to use the service. In addition, you can select various options to suit your requirements by using the remote control buttons.
N
For teletext information to be displayed correctly, channel reception must be stable. Otherwise, information may be missing or some
pages may not be displayed.
1
: (exit)
Exit from the teletext display.
2
6 (index)
Used to display the index (contents) page at any time while you are viewing teletext.
3
5 (reveal)
Used to display the hidden text (answers to quiz games, for example). To display
normal screen, press it again.
4
4 (size)
Press to display the double-size letters in the upper half of the screen. For lower half of
the screen, press it again. To display normal screen, press it once again.
5
8 (store)
Used to store the teletext pages.
6
/ (teletext on/mix)
Press to activate teletext mode after selecting the channel providing the teletext
service. Press it twice to overlap the teletext with the current broadcasting screen.
7
1 (sub-page)
Used to display the available sub-page.
8
2 (page up)
Used to display the next teletext page.
9
3 (page down)
Used to display the previous teletext page.
0
0 (mode)
Press to select the teletext mode (LIST/FLOF). If you press it in the LIST mode, it
switches into the List save mode. In the List save mode, you can save teletext page
into list using the 8(store) button.
!
9 (hold)
Used to hold the display on a given page if the selected page is linked with several
secondary pages which follow on automatically. To resume, press it again.
@
7 (cancel)
Used to display the broadcast when searching for a page.
#
Colour buttons (red/green/yellow/blue)
If the FASTEXT system is used by a broadcasting company, the different topics covered
on a teletext page are colour-coded and can be selected by pressing the coloured
buttons. Press one of them corresponding to the required. The page is displayed
with other coloured information that can be selected in the same way. To display the
previous or next page, press the corresponding coloured button.
You can change teletext pages by pressing the numeric buttons on the remote control.
N
1
2
3
4
5
6
7
8
9
0
!
@
#
Continued...
Page 34

The teletext pages are organized according to six categories:
Part Contents
A Selected page number.
B Broadcasting channel identity.
C Current page number or search indications.
D Date and time.
E Text.
F Status information.
FASTEXT information.
N
Teletext information is often divided between several pages displayed in sequence,
which can be accessed by:
Entering the page number Selecting a title in a list Selecting a coloured heading (FASTEXT system) -
Press the
O TV button to exit from the teletext display.
Wall Mount Kit Specifications (VESA)
Install your wall mount on a solid wall perpendicular to the floor.
When attaching to other building materials, please contact your nearest dealer.
If installed on a ceiling or slanted wall, it may fall and result in severe personal injury.
Product Family inch VESA Spec. (A * B) Standard Screw Quantity
19" ~22" 100 * 100
M4
23"~29" 200 * 100
30"~40" 200 * 200 M6
LCD-TV
4
46"~55" 400 * 400
M857"~70" 800 * 400
80" ~ 1400 * 800
42"~ 50" 400 * 400
58"~ 63" 600 * 400
PDP-TV
M8 4
70" ~ 800 * 400
80" ~ 1400 * 800
We provided the standard dimensions for wall mount kits as shown in the table above. N
When purchasing our wall mount kit, a detailed N installation manual and all parts necessary for assembly are provided.
Do not use screws longer than the standard dimension, as they may cause damage to the inside of the TV set.
N
For wall mounts that do not comply with the VESA standard screw specications, the length of the screws may differ depending on N
their specications.
Do not use screws that do not comply with the VESA standard screw specications.
N
Do not use fasten the screws too strongly, this may damage the product or cause the product to fall, leading to personal injury.
Samsung is not liable for these kinds of accidents.
Samsung is not liable for product damage or personal injury when a non-VESA or non-specied wall mount is used or the consumer
N
fails to follow the product installation instructions.
Our 57” and 63” models do not comply with VESA Specications. Therefore, you should use our dedicated wall mount kit for this
N
model.
Do not exceed 15 degrees tilt when mounting this TV.
N
Do not install your Wall Mount Kit while your TV is turned on.
It may result in personal injury due to electric shock.
English - 34
Page 35

English - 35
주의
Preparing before installing Wall- Mount on the wall
Case A. Installing SAMSUNG Wall-Mount Case B. Installing other company’s Wall-Mount
1. Install Wall Mount with the torque range of 15kgf·cm or less. Make sure that parts can be damaged if the torque is out of the specied
range.
2. Accessory Kit contains Holder–Ring
N
Screw down the hole
[
①
[②] for installing other company’s Wall-Mount on Samsung TV. (Case B)
] when installing wall-mount on the wall.
Securing the TV to the Wall
Pulling, pushing, or climbing on the TV may cause the TV to fall. In particular, ensure your children do not hang
over or destabilize the TV; doing so may cause the TV to tip over, causing serious injuries or death. Follow all
safety precautions provided on the included Safety Flyer. For added stability, install the anti-fall device for safety
purposes, as follows.
Wall
To avoid the TV from falling
❑
1. Put the screws into the clamps and rmly fasten them onto the wall. Conrm that the screws have been rmly installed onto the wall.
You may need additional material such as an anchor depending on the type of wall.
N
Since the necessary clamps, screws, and string are not supplied, please purchase these additionally. N
2. Remove the screws from the center back of the TV, put the screws into the clamps, and then fasten the screws onto the TV again.
Screws may not be supplied with the product.
N
3. Connect the clamps xed onto the TV and the clamps xed onto the wall with a strong string and then tie the string tightly.
Install the TV near to the wall so that it does not fall backwards
N
It is safe to connect the string so that the clamps xed on the wall are equal to or lower than the clamps xed on the TV. N
Untie the string before moving the TV. N
4. Verify all connections are properly secured. Periodically check connections for any sign of fatigue for failure. If you have any doubt
about the security of your connections,contact a professional installer.
.
Wall
Page 36

Securing the Installation Space
10 cm
10 cm
10 cm
10 cm
10 cm
10 cm
10 cm
10 cm
10 cm
10 cm
10 cm
Keep the required distances between the product and other objects (e.g. walls) to ensure proper ventilation.
Failing to do so may result in fire or a problem with the product due to an increase in the internal temperature of the product.
Install the product so the required distances shown in the figure are kept.
N
When using a stand or wall-mount, use parts provided by Samsung Electronics only.
If you use parts provided by another manufacturer, it may result in a problem with the product or an injury due to the product falling.
If you use parts provided by another manufacturer, it may result in a problem with the product or re due to an increase in the internal temperature of the product due to poor ventilation.
N
The appearance may differ depending on the product.
When installing the product with a stand When installing the product with a wall-mount
English - 36
Page 37

English - 37
Troubleshooting
If you have any questions of TV, first refer to this list. If none of these troubleshooting tips apply, please visit ‘www.samsung.com’ site,
then click on Support or contact Call Center on list of last page.
N
Firmware Upgrade can be as rst possible solution.
Problem Possible Solution
Picture Quality
First of all, please perform the Picture Test to confirm that your TV is properly displaying test image.
* Go to MENU → Support → Self Diagnosis → Picture Test
If the test image is properly displayed, the poor picture may caused by the source or signal.
If you have an analog Cable/Set top box, upgrade to an Box. •
Use HDMI or Component cables to deliver HD picture quality.
TV image does not look as good as it
did in the store.
Picture is distorted: macroblock,small
block, dots,pixelization.
Wrong or missing Colour with
Component connection.
Poor Colour or brightness.
Dotted line on the edge of screen.
Picture is black and white with AV
(Composite) input only.
Picture freezes or is distorted when
changing channels or picture is
delayed.
Cable/Satellite subscriber : Try HD (High Denition) stations from channel line up. •
Antenna connection: Try HD stations after performing Auto program •
Many HD channels are upscaled from SD (Standard Denition) contents.
N
Adjust Cable/Set top video output resolution to 1080i or 720p. •
Compression of video contents may cause picture distortion especially on fast moving •
pictures such as sports and action movies.
Low signal level or bad quality can cause picture distortion. This is not a TV issue. •
Make sure the Component cables are connected to the correct jacks. •
Incorrect or loose connections may cause Colour problems or the screen will be blank.
Adjust • Picture options in the TV menu (Picture Mode, Colour, Brightness,
Sharpness).
Adjust • Energy Saving option in Setup menu.
Try picture reset to view the default picture setting. •
(Go to MENU → Picture → Picture Reset)
If picture size is set to • Just scan, change to 16:9.
Change cable/Set top box resolution. •
Connect video cable (Yellow) to Green jack of component input 1 of the TV. •
If connected with cable box, please try to reset cable box. (reconnect AC cord and •
wait until cable box reboots. It may take up to 20 minutes)
Set output resolution of cable box to 1080i or 720p •
Sound Quality
First of all, please perform the Sound Test to confirm that your TV audio is properly operating.
* Go to MENU → Support → Self Diagnosis → Sound Test
If the audio is OK, the sound problem may caused by the source or signal.
No sound or sound is too low at
maximum volume.
Picture is good but no sound.
Noise from speaker.
Please check the volume of device (Cable/Sat Box, DVD, Blu-ray etc) connected to •
your TV.
Then, adjust the TV volume accordingly.
Set the • Speaker Select option to TV speaker in the sound menu.
Make sure audio cables from an external device are connected to correct audio input •
jacks on the TV.
Check connected device's audio output option. •
Ex) You may need to change your cable box' audio option to HDMI when you have
HDMI connected to your TV.
If you are using a DVI to HDMI cable, a separate audio cable is required. •
Deactivate SRS function if you are setting the volume over 30 value. •
Remove plug from headphone jack (if available on your TV). •
Check cable connections. Make sure a video cable is not connected to an audio input. •
For Antenna/Cable connection, check signal strength. Low signal level may cause •
sound distortion.
Page 38

Problem Possible Solution
No Picture, No Video
TV won't turn on. Make sure the AC power cord is plugged in securely to the wall outlet and the TV. •
Make sure the wall outlet is working. •
Try pressing the Power button on the TV to make sure the remote is working properly. •
If the TV turns on, it may be caused by Remote Control.
To x the Remote problem, refer to "Remote control does not work" below.
Check if the • Sleep Timer is set to On in the Setup menu.
If connected the TV to your PC, check your PC power settings. •
TV turns off automatically.
Make sure the AC power cord is plugged in securely to the wall outlet and the TV. •
If there is no signal for about 10 ~ 15 minutes with Antenna/Cable connection, the TV •
will turn off.
Check cable connections. (remove and reconnect all cables of TV and external •
devices)
Set your external device's (Cable/Set top Box, DVD, Blu-ray etc) video output to •
match the connections to the TV input. For example, external device's output : HDMI ,
No picture/Video.
TV's input : HDMI.
Make sure your connected device is powered on. •
Make sure to select the TV's correct source by pressing the • SOURCE button on the
remote control.
Reboot the connected device by reconnecting the device’s power cable. •
RF (Cable/Antenna) Connection
Make sure Antenna cable is connected securely. •
Cannot receive all channels.
Please try • Plug & Play to add available channels to the channel list.
Go to MENU → Setup → Plug & Play and wait for all avaiable channels are stored.
Verify Antenna is positioned correctly. •
Picture is distorted : macroblock,small
block,dots,pixelization.
Compression of video contents may cause picture distortion especially on fast moving •
pictures such as sports and action movies.
Low signal level can cause picture distortion. This is not a TV issue. •
PC Connection
“Not Supported Mode” message.
PC is always shown on source list even
if not connected.
Video is OK but there is no audio with
HDMI connection.
Others
Picture is not shown in full screen. Black bars on each side will be shown on HD channels when displaying upscaled SD •
Remote control does not work.
Set your PC's output resolution and frequency so it matches the resolutions supported •
by the TV.
This is normal; PC is always shown on the source list even though a PC is not •
connected.
Check the audio output setting on your PC. •
(4:3) contents.
Black bars on Top & Bottom will be shown on movies that have aspect ratios different •
from your TV.
Adjust picture size option on your external device or TV to full screen. •
Replace the remote control batteries with correct polarity (+ -). •
Clean the transmission window located on the top of the remote. •
Try pointing the remote directly at the TV from 5~6 feet away. •
English - 38
Page 39

English - 39
Problem Possible Solution
Plasma TVs typically make a soft humming sound. This is normal. It’s caused by the •
electrical charges that are used to create the images on the screen.
If the humming sound is loud, you may have set the brightness on the TV too high. •
Plasma TV is making humming noise.
Try setting the brightness lower.
You can also have loud humming if the back of your Plasma TV is too close to a wall •
or other hard surface. Also try rerouting your connection cables.
Improper installation of wall mount can create excessive noise. •
To minimize the possibility of screen burn, this unit is equipped with screen burn •
Image Retention (Burn In) Issue.
reduction technology. Pixel Shift technology enables you to set picture movement up/
down (Vertical Line) and side to side (Horizontal Dot).
Can not control TV power or volume
with Cable/Set top box remote control.
“Not Supported Mode” message.
Plastic smell from TV.
TV Signal Strength is unavailable in the
Self Diagnostic Test menu.
TV is tilted to right or left side.
Can not assemble stand base.
Channel menu is grey out (unavailable).
Program the Cable/Set top remote control to operate the TV. •
Refer to Cable/Sat user manual for SAMSUNG TV code.
Check the supported resolution of the TV and adjust the external device's output •
resolution accordingly. Refer to resolution settings in this manual.
This smell is normal and will dissipate over time. •
This function is only available with digital channels with an Antenna (RF/Coax) •
connection.
Remove the stand base from TV and reassemble. •
Make sure TV is placed on at surface. •
If can not remove screws from TV, please use magnetized screw driver.
Channel menu is only available when TV source is selected. •
If TV is in the • Store Demo mode, it will reset audio and picture settings every
30 minutes.
Your settings are lost after 30 minutes
or every time TV is turned off.
Please change from Store Demo mode to Home Use mode in the Plug & Play
procedure.
Press the SOURCE button to select TV mode, go to MENU → Setup → Plug & Play
→ ENTER
Check cable connections and reconnect. •
Intermittent loss of audio or video.
Can be caused by using overly rigid or thick cables. •
Make sure the cables are exible enough for long term use.
If wall mounting, we recommend using cables with 90 degree connectors.
You may see small particles if you
look closely at the edge of the bezel
This is part of the product’s design and is not a defect. •
surrounding the TV screen.
PIP menu is not available.
‘Scramble signal’ or ‘No signal/Weak
signal’ with CAM CARD(CI/CI+)
Recurrent picture/sound issue
N
Some of above pictures and functions are available at specic models only.
PIP functionality is only available when you are watching an HDMI, PC or components •
source.
Check that CAM has CI(CI+) Card installed into the common interface slot. •
It is normal, the TV operate OTA(Over The Air) function itself to upgrade rmware •
downloaded during watching.
Check and change signal/source. •
Page 40

Specifications
The descriptions and characteristics in this booklet are given for information purposes only and are subject to modification without
notice.
Model Name PS42B450/PS42B451 PS50B450/PS50B451
Screen Size (Diagonal) 42 inch 50 inch
PC Resolution (Optimum) 1024 x 768 @ 60 Hz 1360 x 768 @ 60 Hz
Sound (Output) 10 W x 2 10 W x 2
Dimension (WxHxD)
Body
With stand
Weight
Body
With stand
Environmental Considerations
Operating Temperature
Operating Humidity
Storage Temperature
Storage Humidity
N
This device is a Class B digital apparatus.
Design and specications are subject to change without prior notice. N
For the power supply and Power Consumption, refer to the label attached to the product. N
1056 x 74 x 660 mm
1056 x 316 x 721 mm
24 kg
28 kg
50 °F to 104 °F (10 °C to 40 °C)
10% to 80%, non-condensing
-4 °F to 113 °F (-20 °C to 45 °C)
5% to 95%, non-condensing
1221 x 74 x749 mm
1221 x 316 x 810 mm
31 kg
35 kg
English - 40
Page 41

© 2009 Samsung Electronics Co., Ltd. All rights reserved.
Használati útmutató
Képernyőbeégés
Két óránál hosszabb ideig ne jelenítsen meg állóképet a plazmaképernyőn (pl. egy videojátékról vagy a készülékhez
csatlakoztatott számítógépről), mert ilyenkor a megjelenő képek tartósan a képernyőn maradhatnak. Ezt a jelenséget
képernyőbeégésnek is nevezik. A képernyőbeégés elkerülése érdekében állókép megjelenítésekor csökkentse a kép
fényerejét és kontrasztját.
A PDP TV-készülék felső részén keletkező hő
A készülék felső része huzamosabb használatot követően felmelegedhet, mivel a működés közben keletkező hő a készülék
felső részén kialakított szellőzőnyíláson keresztül távozik. Ez normális jelenség, nem utal meghibásodásra vagy egyéb
működési rendellenességre. Arra azonban ügyelni kell, hogy gyermekek ne érinthessék meg a készülék felső részét.
A készülék kattogó hangot ad.
A kattogó hangot okozhatja a készüléknek a környezeti hőmérséklet-ingadozások és a páratartalom-változások által előidézett
tágulása vagy zsugorodása. Ez általános jelenség, nem utal meghibásodásra vagy egyéb működési rendellenességre.
Cellahiba
A PDP-eljárást alkalmazó panel 2 360 000 (HD-szint) és 6 221 000 (FHD-szint) közötti számú képpontból áll. A panel
előállításához a gyártó magas szintű műszaki felkészültséget és felszereltséget alkalmaz. Előfordulhat azonban, hogy a
képernyőn ennek ellenére néhány világos és sötét képpont jelenik meg. Ezek a képpontok a készülék teljesítményét nem
befolyásolják.
Ne üzemeltesse a televíziókészüléket 5 °C(41°F) alatti hőmérsékleten
A huzamosabb ideig megjelenített állóképek a PDP-paneljének maradandó károsodását okozhatják
A PDP-készülék huzamosabb ideig tartó, 4:3 képarányú módban történő használata esetén a
kibocsátott fényerősség eltérése miatt a képernyő közepén, valamint bal és jobb oldalán sávok
alakulhatnak ki. A DVD-filmek lejátszása és a játékprogramok is hasonló jelenséget okozhatnak. A
garancia az ilyen esetekben keletkezett károkra nem terjed ki.
A képernyőn megjelenő utókép
A PDP kialakításából eredően állóképek (pl. videojátékok) bizonyos időt meghaladó megjelenítését követően a képernyőn ún.
utókép jelenhet meg. A jelenség megelőzése érdekében állóképek megjelenítése esetén csökkentse a fényerőt és kontrasztot.
Garancia
- A garancia nem vonatkozik a monitor képernyőbeégésére.
- A garancia nem vonatkozik a képbeégésre.
Felszerelés
Ha a készüléket szélsőséges hőmérsékleti körülmények között, kifejezetten poros, magas páratartalmú vagy kémiai
anyagoknak kitett környezetben használja, vagy folyamatosan üzemelteti például repülőtéri vagy vasútállomási várótermekben,
az üzembe helyezés előtt kérje hivatalos szakember tanácsát. Ha ezt elmulasztja, azzal a készülék komoly károsodását
okozhatja.
A digitális televízióval kapcsolatos figyelmeztetés
1. A digitális TV-hez (DVB) kapcsolódó funkciók csak azokban az országokban, illetve régiókban elérhetők, ahol DVB-T
(MPEG2 és MPEG4 AVC) digitális földi jeleket sugároznak, illetve elérhető a kompatibilis DVB-C (MPEG2 és MPEG4 AAC)
kábeltelevízió-szolgáltatás. A DVB-T vagy DVB-C jelek vételének lehetőségét illetően tájékozódjon a helyi szolgáltatónál.
2. A DVB-T nem más, mint az európai konzorciumnak a földfelszíni digitális televíziós műsorszórásra vonatkozó szabványa,
a DVB-C pedig a kábeles digitális műsorszórásra vonatkozó szabvány. Ebben a specikációban nem szerepel néhány
megkülönböztetett funkció, például az EPG (elektronikus műsorújság), a VOD (igény szerinti videoszolgáltatás) stb. Így
ezek jelenleg nem támogatottak.
3. Bár ez a TV-készülék megfelel a legújabb DVB-T és DVB-C szabványnak [2008. augusztus], nem garantált, hogy a jövőben
is meg fog felelni a mindenkori DVB-T földi digitális és a DVB-C kábeles digitális műsorszórásra vonatkozó szabványoknak.
4. Bizonyos kábeltelevízió-szolgáltatók külön díjat számolhatnak fel ezért a szolgáltatásért, az előzetőnek pedig szerződést
kell kötnie a szolgáltatóval.
5. Előfordulhat, hogy bizonyos digitális televízióval kapcsolatos funkciók egyes országokban vagy régiókban nem elérhetők,
és hogy a DVB-C nem minden szolgáltató esetén működik megfelelően.
6. Amennyiben további információra van szüksége, kérjük, lépjen kapcsolatba a legközelebbi Samsung ügyfélszolgálattal.
Kapcsolatfelvétel: SAMSUNG WORLDWIDE
Ha a Samsung termékekkel kapcsolatban kérdése vagy megjegyzése van, vegye fel a kapcsolatot a SAMSUNG
ügyfélszolgálatával. (További információ a hátoldalon)
Magyar - 2
Page 42

Magyar
N O T
Jelzés Gombnyomás Megjegyzés Nyomógomb TOOL gomb
Magyar - 3
Tartalom
A televízió csatlakoztatása és előkészítése
Tartozékok ellenőrzése .........................................................4
Az állvány használata ...........................................................4
Az állvány összeszerelése (modelltől függő) .......................4
A vezérlőpanel áttekintése ...................................................5
Csatlakoztató panel .............................................................. 6
Távirányító ............................................................................8
Elemek behelyezése a távirányítóba ....................................9
A készülék be- és kikapcsolása ............................................9
A televízió készenléti üzemmódba helyezése ...................... 9
A menü megtekintése .........................................................10
A TOOLS gomb használata ................................................ 10
A képerny ..........................................................................10
A Plug & Play funkció ......................................................... 11
Csatornakezelés
Csatornák tárolása ...........................................................12
Csatornák kezelése ............................................................ 15
Képkezelés
A kép beállításainak módosítása, és visszaállítása ............17
A 3D funkció használata .....................................................20
A TV beállítása a számítógéppel ........................................21
A számítógép képernyője ................................................... 22
Hangszabályzás
A hang alapbeállításának módosítása ................................23
A hangmód kiválasztása .....................................................24
■
■
■
■
■
■
■
■
■
■
■
■
■
■
■
■
■
■
■
■
■
Funkcióleírás
A Beállítások menü kongurálása ......................................25
A pontos idő beállítása .......................................................27
Forráslista / Névszerkesztés ..............................................28
Támogatott program ........................................................... 28
Az Anynet+ funkció
Anynet+ eszközök csatlakoztatása ....................................29
Az Anynet+ beállítása .......................................................30
Keresés és váltás az Anynet+ eszközök között..................30
Felvétel ............................................................................... 31
A hang vevőegységen keresztül történő hallgatása
(Házimozi rendszer) ...........................................................32
Hibaelhárítás az Anynet+ esetében ..................................32
Tanácsok a készülék használatával kapcsolatban
Teletext funkció ...................................................................33
A fali konzol tartozékainak szabványadatai (VESA) ...........34
A fali konzol felszerelésének előkészületei ........................35
A TV falra rögzítése ............................................................35
A biztonságos felszerelés ...................................................36
Hibaelhárítás ......................................................................37
Műszaki leírás ....................................................................40
■
■
■
■
■
■
■
■
■
■
■
■
■
■
■
■
■
Használati útmutató
Kérjük, hogy a készülék működtetése előtt gondosan
olvassa végig a kezelési útmutatót és őrizze meg, mert
később szüksége lehet rá.
Page 43

Magyar - 4
A televízió csatlakoztatása és előkészítése
Tartozékok ellenőrzése
Használati utasítás Távirányító /
AAA elemek (2db)
Tápkábel Törlőkendő Garanciakártya/
Biztonsági útmutató
(nem minden régióban)
Csavarok (4db) Takarólemez Rögzítőgyűrű (4b)
(Lásd a 35. oldalt.)
Ferritgyűrű a
tápvezetékhez (1db)
Az állvány használata
A plazmaképernyő áthelyezéséhez legalább két ember szükséges.
Ne helyezze a plazmaképernyőt a padlóra, mert ez a készülék
megrongálódásához vezethet. A plazmaképernyőt mindig függőlegesen
kell tárolni.
A PDP jobbra és balra 20 fokkal elforgatható.
N
N
Az állvány összeszerelése (modelltől függő)
Helyezze a monitort az állványra, és szilárdan rögzítse monitort az
állványhoz a kapott 4 csavarral.
(A készülék kinézetében különbözhet az ábrán szereplőtől.)
Ha a készüléket a falra szereli, takarja el az állvány
felszerelésére szolgáló nyílást a borítóval (1), és
rögzítse két csavarral.
Figyelem
Az állványt szilárdan rögzítse a készülékhez,
mielőtt a helyére tenné, mert az állvány
kieshet, és súlyos sérülést okozhat.
A TV elhelyezéséhez legalább két
ember szükséges. Ne helyezze a
készüléket a padlóra, mert ez a készülék
megrongálódásához vezethet.
A plazmaképernyőt mindig függőlegesen
kell tárolni.
N
A ferritgyűrű célja, hogy megóvja a kábelt az interferenciától. A kábel csatlakoztatásakor nyissa
fel a ferritgyűrűt, és az ábrán látható módon kapcsolja a kábel köré, közel a csatlakozóhoz.
N
-20° ~ 20°
Page 44

Magyar - 5
A vezérlőpanel áttekintése
A termék színe és formája típusonként különbözhet.
N
Az előlapon lévő gombok
Működtetésükhöz érintse
meg mindegyik gombot.
1
SOURCE
Választhat az összes elérhető bemeneti jelforrás közül.
(TV, Külső, AV, PC, Komponens, HDMI1, HDMI2/DVI,
HDMI3).
A képernyőn megjelenő menüben ezt a gombot úgy
használja, ahogyan a távirányítón az ENTERE
gombot.
2
MENU
Nyomja meg, ha a képernyőmenüt kívánja megjeleníteni.
3
+ –
Megnyomásával növeli vagy csökkenti a hangerőt.
A képernyőn úgy használja a + – gombot, mint a
távirányító ◄ és ► gombját használná.
N
4
CH
Csatornaváltáshoz használható.
A képernyőn úgy használja a CH gombot, mint a
távirányító ▲ és ▼ gombját használná.
5 TÁPFESZÜLTSÉGJELZŐ
Világít, ha a készülék áram alatt van.
6 (BE- ÉS KIKAPCSOLÓ GOMB
)
A televízió be- és kikapcsolása.
7
TÁVIRÁNYÍTÓ ÉRZÉKELŐJE
A távvezérlőt a TV-nek erre a pontjára kell irányítani.
8
HANGSZÓRÓ
Page 45

Magyar - 6
Csatlakoztató panel
Ha audio- vagy videoeszközt csatlakoztat a készülékhez, győződjön meg arról, hogy minden egység ki van-e kapcsolva.
Külső eszköz csatlakoztatása esetén ügyeljen a csatlakozó és a kábel színének egyeztetésére.
N
N
1
SERVICE1, 2
Csak szervizeléshez.
2
ELEKTROMOS CSATLAKOZÓ
A készülék tápkábelének csatlakoztatásához.
3
COMPONENT IN
Csak (AUDIO L/R) és video (Y/PB/PR) csatlakoztatható
bemenetként.
4
PC IN(PC) / (AUDIO)
A számítógép video- és audiokimenetét lehet rá
csatlakoztatni.
5
EXT (RGB)
Bemenetek és kimenetek külső berendezések, például
videomagnó, DVD-, videojáték- vagy videolemez-lejátszó
számára.
Bemenetek/kimenetek műszaki adatai
Csatlakozó
Bemenet Kimenet
Videó Audió(bal/jobb) RGB Videó + Audió (bal/jobb)
EXT
✔ ✔ ✔
Csak TV vagy DTV
csatlakoztatható.
6
DIGITAL AUDIO OUT (OPTICAL)
Csatlakoztatás digitális audiokomponenshez
7
3D SYNC OUT
Csatlakozás a 3D infravörös jeladóhoz.
8
AUDIO OUT(AUDIO R/L)
RCA-audiokábelek csatlakoztatása a TV-készülékről külső
forrásra, például audioeszközre.
9
HDMI IN 1, 2(DVI)
HDMI–HDMI összeköttetés esetén nincs szükség
kiegészítő hangkapcsolatra.
− HDMI/DVI csatlakoztatás esetén HDMI IN 2 (DVI)
csatlakozót kell használni.
Mi az a HDMI?
−
A Magas Definition Multimedia interface (nagy
felbontású multimédiás interfész) nagy felbontású
digitális videoanyag és digitális audiofelvételek
többcsatornás átvitelét teszi lehetővé.
− A HDMI/DVI-csatlakozó támogatja a DVIkapcsolatot egy kiterjesztett eszközre, a megfelelő
kábelen keresztül (nincs mellékelve). A HDMI és a
DVI között az a különbség, hogy a HDMI-eszköz
mérete kisebb, telepítve van rá a HDCP (Nagy
sávszélességű digitális másolásvédelem) kódolási
funkció, valamint támogatja a többcsatornás digitális
hangátvitelt.
DVI AUDIO IN
DVI audiokimenetek külső eszközökhöz.
0
ANT IN
75 Ω-os koaxiális csatlakozó az antennához /
kábeltelevíziós hálózathoz.
A HDMI/DVI és a komponens csatlakoztató támogatása
480i 480p 576i 576p 720p 1080i 1080p
HDMI/DVI 50Hz X X X O O O O
HDMI/DVI 60Hz X O X X O O O
Komponens O O O O O O O
N
A termék színe és formája típusonként különbözhet.
N
A TV hátlapja
Kábeltelevíziós
hálózat
vagy
vagy
2
543 8 96
0
1
1 7
Page 46

Magyar -
1
COMMON INTERFACE nyílás
Ide csatlakoztatható be a CI kártya (CI CARD).
(Lásd a 26. oldalt)
− Ha nincs behelyezve
CI-kártya, bizonyos csatornáknál a
Kódolt jel üzenet jelenik meg a képernyőn.
− Körülbelül 2~3 perc múlva megjelenik a telefonszámot,
a kártya azonosítóját, a készülék azonosítóját és egyéb
adatot tartalmazó egyeztetési információ. Ha hibaüzenet
jelenik meg, lépjen kapcsolatba a szolgáltatóval.
− Ha a csatornaadatok konfigurálása befejeződött,
megjelenik a Frissítés kész üzenet jelezve, hogy a
csatornák listájának módosítása megtörtént.
Helyezze be a CI-kártyát a jelzett irányban.
A CAM modul bizonyos országokban és régiókban
nem támogatott. Tájékoztatásért forduljon
márkakereskedőjéhez.
N
N
2
HDMI IN 3
Csatlakoztatás HDMI-kimenettel rendelkező eszköz
HDMI-csatlakozójához.
3
AV IN (VIDEO, AUDIO L/R)
Video és audiobemenetek külső készülékek, például
videokamera vagy videomagnó számára.
A termék színe és formája típusonként különbözhet.
N
A TV-készülék oldallapja
2
3
1
Page 47

Magyar -
Távirányító
A távirányítót a televíziótól 7 méteres távolságon belül használhatja.
Az éles fény befolyásolhatja a távirányító teljesítményét.
N
1
Bekapcsológomb
(a televízió be- és kikapcsolása)
2
A TV-üzemmód közvetlen
kiválasztása
3
Számgombok közvetlen
csatornaeléréshez
4
A kedvenc csatornák listájának
megjelenítése.
5 Hang ideiglenes kikapcsolása
6
Hangerő növelése
Hangerő csökkentése
7
Elérhető forrás kiválasztása
8 A sugárzott műsor információinak
megtekintésére szolgál
9
A gyakran használt funkciók gyors
kiválasztásához használható.
0 A kurzor mozgatása a menüben
!
A Csatornalisták megjelenítése a
képernyőn
@ Használja a Csatornalistában
Pro
-
menüben stb. szereplő gombokat.
$ Hangmód kiválasztása
% A Csatornalista és az Anynet+ kezelése.
^
Előző csatorna
&
Következő csatorna
Előző csatorna
*
A fő képernyőmenü megjelenítése
(
Elektronikus műsorfüzet (EPG)
megjelenítése
)
Visszatérés az előző menühöz
a
Kilépés a képernyőmenüből
b
Az SRS TruSurround HD mód
kiválasztása
c
Képméret kiválasztása
d
Digitális felirat megjelenítése
e
A hangjellemzők kiválasztása.
Teletext funkciók
2
Kilépés a teletext képernyőről
(típusfüggő)
7
Teletext mód kiválasztása (LIST
vagy FLOF)
8
Teletext megjelenítése
9
Teletext mérete
!
Teletext tárolása
@
Fastext témaválasztás
#
Teletext megjelenítése/a normál
adás és a teletext együtt
^
Teletext aloldal
&
P : Teletext következő oldala
P :Teletext előző oldala
*
Teletext tartalomjegyzék
)
Teletext kimerevítése
a
Teletext törlése
Page 48

Magyar -
Elemek behelyezése a távirányítóba
1.
Az ábrán látható módon tolja felfelé a távvezérlő hátlapját.
2.
Tegyen be két AAA méretű elemet.
Az elemek „+” és „–” pólus helyzete az elemtartóban lévő jelzésnek
megfelelő legyen.
3.
Csukja le a fedelet.
Ha hosszabb ideig nem használja a távirányítót, vegye ki az elemeket, és
tárolja őket hűvös, száraz helyen.
Ha a távirányító nem működik, ellenőrizze a következőket:
1. Be van kapcsolva a TV?
2. Felcserélődött az elemek plusz és mínusz pólusa?
3. Kifogytak az elemek?
4. Áramkimaradás van vagy nincs csatlakoztatva a tápkábel?
5. Van a közelben fluoreszkáló fény vagy neonfényjel?
N
A készülék be- és kikapcsolása
A tápkábel a készülék hátoldalához csatlakozik.
1.
Csatlakoztassa a tápkábelt egy megfelelő aljzathoz.
A készenléti állapotot jelző fény világítani kezd a készüléken.
2.
Nyomja meg a készüléken a POWERP gombot.
A POWERP vagy a távirányító TV gombjával is bekapcsolhatja a TV-készüléket.
A készülék automatikusan a legutoljára megtekintett csatornát választja ki.
3.
Nyomja meg a távirányítón a megfelelő számgombot (0~9) vagy valamelyik csatornaváltó gombot (< / >), vagy a
készüléken a < CH > gombot.
A készülék első használatakor ki kell választani, hogy melyik nyelven jelenjenek meg a menük és az üzenetek.
4.
A televíziót a POWERP button again.
A televízió készenléti üzemmódba helyezése
A televízió készenléti üzemmódba kapcsolásával csökkenthető a készülék áramfogyasztása. A készenléti üzemmód a tévénézés
átmeneti megszakításakor (például étkezések alkalmával) lehet hasznos.
1.
Nyomja meg a távirányító POWERP gombját.
A képernyő elsötétül, és a készüléken világítani kezd a készenléti állapotot jelző vörös fény.
2.
A készülék visszakapcsolásához nyomja meg újra a POWERP gombot, a számgombokat (0~9), a TV gombot vagy
valamelyik csatornaváltó (< / >) gombot.
A televíziót ne hagyja hosszabb ideig (például nyaralás idejére) készenléti állapotban. Ilyenkor tanácsos kihúzni a
televízió táp- és antennakábelét.
N
N
N
N
N
N
N
Page 49

Magyar - 10
DTV Air
15
abc1
18:00 ~ 6:00
18:11 Thu 6 Jan
Life On Venus Ave nue
Unclassif ied
No Deta ild Informa tion
E Watch
' Informa tion
A képerny
A képernyőn látható az aktuális csatorna, valamint az egyes képi és hangi
beállítások állapota.
Az információk megjelenítéséhez nyomja meg az INFO gombot.
Nyomja meg a távirányító INFO gombját. A TV-n megjelenik a csatorna, a hang
típusa, az egyes képi és hangi beállítások állapota.
▲, ▼: Megtekintheti a többi csatornára vonatkozó információkat. Ha át
szeretne váltani a jelenleg kiválasztott csatornára, nyomja meg az
ENTERE gombot.
◄, ►: Az aktuális csatornán futó program információinak megjelenítése.
Nyomja meg ismét az INFO gombot, vagy várjon körülbelül 10 másodpercig,
és a kijelzés automatikusan eltűnik.
O
•
•
N
A menü megtekintése
1. A készülék bekapcsolása után nyomja meg a MENU gombot. A képernyőn
megjelenik a főmenü. A menü bal oldalán látható ikonok: Kép, Hang, Csatorna,
Beállítások, Bemenet, alkalmazás, Terméktámogatás.
2.
A ▲ vagy a ▼ gombbal válassza ki az egyik ikont. Majd az ENTERE gomb
megnyomásával beléphet az ikon almenüjébe.
3.
A kilépéshez nyomja meg az EXIT gombot.
A képernyőmenü körülbelül egy perc múlva eltűnik.
A TOOLS gomb használata
A TOOLS gombbal gyorsan és könnyen kiválaszthatja a leggyakrabban használt funkciókat. Az Eszközök menü a megtekintés
külső bemeneti módjától függően változik.
1.
Nyomja meg a TOOLS gombot. Megjelenik az Eszközök menü.
2.
A ▲ vagy a ▼ gombbal válasszon menüt, majd nyomja meg az ENTERE
gombot.
3.
A ▲/▼/◄/►/ENTERE gombbal megjelenítheti, módosíthatja vagy
használhatja a kiválasztott tételeket. Az egyes funkciók részletesebb
ismertetését a megfelelő oldalon találja.
Anynet+ (HDMI-CEC), lásd a 30. oldalt
Kép Üzemmód, lásd a 17. oldalt
Hang üzemmód, lásd a 23. oldalt
Auto kikapcs., lásd a 27. oldalt
Energiagazdálkodás, lásd a 26. oldalt
Kedvencekhez adás (vagy Törlés a Kedvencekből), lásd a 15. oldalt
Autom. beállítás, lásd a 21. oldalt
•
•
•
•
•
•
•
N
Üzemmód : Normál
Képpontok fényereje : 4
Kontraszt : 95
Fényerő : 45
Élesség : 50
Szín : 50
Árnyalat (Z/V) : Z50/V50
Kép
Eszközök
Anynet+ (HDMI-CEC)
Kép Üzemmód : Normál
Hang üzemmód : Egyedi
Auto kikapcs. : Ki
Energiagazdálkodás : Ki
Kedvencekhez adás
U
Mozgatás E Belépés e Kilépés
Page 50

Magyar - 11
A Plug & Play funkció
A TV-készülék legelső bekapcsolásakor az alapvető felhasználói beállítások egymás után automatikusan elvégezhetők.
Ha a Plug & Play funkció futása közben legalább egy percen keresztül nem érkezik bemenő jel a távirányítóról, a
képernyővédő bekapcsol.
Bekapcsol a képernyővédő, ha legalább 15 percen keresztül nincs működést jelző jel.
1.
Nyomja meg a távirányító POWER gombját. ekkor automatikusan megjelenik
a You can set the menu language. menü. A ▲ és ▼ gombok segítségével
kiválaszthatja a megfelelő nyelvet.
Az ENTERE gombbal hagyhatja jóvá választását.
2.
A ◄ vagy ► gombbal válassza ki a Üzlet mód vagy Otthon lehetőséget, majd
nyomja meg az ENTERE gombot.
Azt javasoljuk, hogy TV-készülékét állítsa Otthon üzemmódra, hogy a
legkiválóbb képminőséget élvezhesse otthonában.
A Üzlet mód üzemmód alkalmazása kereskedelmi környezetben javasolt.
Ha a készüléket véletlenül Üzlet mód üzemmódba állította, és szeretne visszatérni a Otthon (Normál) beállításra:
Nyomja meg a TV hangerőszabályzó gombját. Amikor megjelenik a hangerő képernyőmenüje, tartsa lenyomva 5
másodpercig a MENU gombot a TV-n.
3.
Nyomja meg az ENTERE gombot. A ▲ és ▼ gombok segítségével kiválaszthatja a megfelelő országot. Az ENTERE
gombbal hagyhatja jóvá választását.
4.
A ▲ vagy ▼ gomb megnyomásával tárolhatja a kiválasztott csatlakoztatási mód csatornáit, majd nyomja meg az ENTERE
gombot.
Antenna: Hagyományos antennajel.
Kábel: Kábeles antennajel.
5. A ▲ és ▼ gombok segítségével kiválaszthatja a tárolni kívánt csatornaforrást. Nyomja meg az ENTERE gombot a Start
kiválasztásához.
Digitális és Analóg: Digitális és analóg csatornák
Digitális: Digitális csatornák.
Analóg: Analóg csatornák.
A keresési módok részletes leírása a 12. oldalon található.
A csatornakeresés automatikusan indul el és áll le.
Az ENTERE gomb lenyomásával bármikor megszakíthatja a tárolás folyamatát.
Miután az összes csatorna elmentése megtörtént, megjelenik a Az Óra üzemmód beállítása. üzenet.
6. Nyomja meg az ENTERE gombot. A ▲ és ▼ gombokkal válassza ki a Auto. lehetőséget, majd nyomja meg az
ENTERE gombot.
Ha a Kézi lehetőséget választja, megjelenik a Az aktuális dátum és idő megadása üzenet. (lásd a 27. oldalt)
A pontos idő beállítása automatikusan megtörténik, amint megérkezik a digitál is jel. Ha mégsem, az óra beállításához
lásd a 27. oldalt.
.
Megjelenik a Hogyan hozhatja ki a legtöbbet új HDTV-készülékéből üzenet. Nyomja meg az ENTERE gombot.
Ez a menü a Terméktámogatás menü HD csatlakoztatási útmutató pontjából érhető el.
.
Megjelenik az Kellemes tévézést. üzenet. Ha végzett, nyomja meg az ENTERE gombot.
Ha vissza kívánja állítani ezt a funkciót...
1. A menü megjelenítéséhez nyomja meg a MENU gombot. A ▲ és ▼ gombokkal
válassza ki a Beállítás lehetőséget, majd nyomja meg az ENTERE gombot.
2. A Plug & Play opció kiválasztáshoz ismételten nyomja meg az ENTER
E
gombot.
3. Adja meg 4 számjegyű PIN kódját. Az új készülék alapértelmezett PIN-kódja a
„0-0-0-0”.
A PIN kód megváltoztatásáról a 25. oldalon tájékozódhat.
A Plug & Play funkció csak TV üzemmódban áll rendelkezésre.
N
N
N
N
N
•
•
•
•
•
N
N
N
N
N
N
N
N
N
Beállítás
Plug & Play
►
Menü nyelve : Hungarian
Idő
Műsorszórás
Biztonság
Általános
Plug & Play
You can set the menu language.
U
Move E Enter
▲
Nederlands
English
Eesti
▼
Menu Language :
Page 51

Magyar - 12
Csatornák tárolása
Ország
Digitális csatorna: Digitális csatornáknál az ország beállítható.
Analóg csatorna: Analóg csatornáknál az ország beállítható.
Megjelenik a PIN kód megadásához szükséges képernyőablak. Gépelje be 4
számjegyű PIN kódját.
Automata tárolás
Az összes aktív sugárzási állomással rendelkező csatorna megkeresése és
eltárolása a TV memóriájában (az elérhető csatornák száma országonként
eltérő).
Elmentheti a kiválasztott csatlakoztatási mód csatornáit.
Antenna: Hagyományos antennajel.
Kábel: Kábeles antennajel.
A Kábel lehetőség kiválasztása esetén,
Keresés mód: A keresési mód megjelenítése. (Gyors)
-
Network ID (Hálózati azonosító): A hálózati azonosító kód megjelenése.
-
Frekvencia: A csatorna frekvenciájának megjelenítése.
-
Moduláció: Az elérhető modulációértékek megjelenítése.
-
Jelátviteli sebesség: Az elérhető jelátviteli sebességek megjelenítése.
Keresés mód: A keresési mód megjelenítése. (teljes, hálózat)
-
Frekvencia (Kezdeti – Végső): A csatorna frekvenciájának megjelenítése.
-
Moduláció: Az elérhető modulációértékek megjelenítése.
-
Jelátviteli sebesség: Az elérhető jelátviteli sebességek megjelenítése.
Tárolhatja a csatornaforrást
Digitális és Analóg: Digitális és Analóg csatornák.
Digitális: Digitális csatornák.
Analóg: Analóg csatornák.
Ha fel szeretné függeszteni az Automata tárolás műveletet, nyomja meg az ENTERE gombot.
Megjelenik a Leállítja az Automatikus programozást? üzenet.
A ◄ és ► gombokkal válassza ki a Igen lehetőséget, majd nyomja meg az ENTERE gombot.
Ha a csatorna a Gyermekzár funkciónak köszönhetően zárolva van, megjelenik a PIN kód begépeléséhez szükséges ablak.
❑
N
❑
•
•
N
•
•
•
•
•
N
N
N
N
Csatornakezelés
Csatorna
Ország
►
Automata tárolás
Kézi tárolás
Kábeles keresési opciók
Jelenlegi és következő műsor
Teljes útmutató
Alapértelmezett útmutató : Ma/Holnap
Folytatás…
Page 52

Magyar - 13
Kézi tárolás
Csatorna manuális keresése és tárolása a TV memóriájában.
Digitális csatorna
Digitális csatornák kézi tárolása.
A digitális csatornák csak DTV üzemmódban elérhetők.
Csatorna: Adja meg a csatorna számát a
▲ vagy ▼
gombokkal vagy a számgombokkal (0–).
Frekvencia: A frekvencia beállítása a számgombokkal.
Sávszélesség: A sávszélesség megadása a
▲ vagy ▼
gombokkal vagy a számgombokkal (0–).
Miután kész, a csatornák frissülnek a csatornalistában.
Analóg csatorna
Analóg csatornák kézi tárolása.
Program (A csatornához rendelt programszám) A programszám beállítása a számgombokkal vagy a ▲,
▼ gombokkal.
Színrendszer → Auto. / PAL / SECAM / NTSC4.43: A színrendszer értékének beállítása a ▲ vagy ▼ gombokkal.
Hangrendszer → BG / L / I / DK: A hangrendszer értékének beállítása a ▲ vagy ▼gombokkal.
Csatorna (A tárolni kívánt csatornaszám ismeretében): A ▲ vagy a ▼ gombbal kiválaszthatja a C (antenna)
vagy az S (kábeles) csatornatípust. Nyomja meg a ► gombot, majd a ▲ vagy ▼ gombbal válassza ki a kívánt
számot (0~).
A csatorna számát a távirányítón a (0~) számgombok segítségével közvetlenül is kiválaszthatja.
Ha nincs vagy nem megfelelő a hang, válasszon másik hangnormát.
Keresés (Ha nem ismeri a csatornák számát): A ▲ vagy a ▼ gombbal elindíthatja a keresést. A
hangolóegység addig pásztázza a frekvenciatartományt, amíg az első csatorna vagy a kiválasztott csatorna
meg nem jelenik a képernyőn.
Tárolás (A csatorna és a hozzá társított programszám tárolásakor): Az OK lehetőséget az ENTERE
gombbal választhatja ki.
Csatorna üzemmód
C (Antennás csatorna mód): Ebben a módban úgy választhat csatornát, hogy megadja az adott, antennával fogható
csatornához tartozó számot.
S (Kábelcsatorna mód): Ebben az üzemmódban az egyes kábelcsatornákhoz hozzárendelt szám megadásával
választhat csatornát.
Kábeles keresési opciók
Közvetlenül hozzáadhatja a csatornakeresési tartományt a hálózatkeresési módhoz. (Országonként eltérő.)
Frekvencia (Kezdeti – Végső): A csatorna frekvenciájának megjelenítése.
Moduláció: Az elérhető modulációértékek megjelenítése.
Jelátviteli sebesség: Az elérhető jelátviteli sebességek megjelenítése.
Adja meg a Frekvencia (
Kezdeti – Végső)
és a Jelátviteli sebesség értékét a számgombok (0–) segítségével.
Jelenlegi és következő műsor / Teljes útmutató
Az elektronikus műsorújság (EPG) információit a műsorszórók szolgáltatják. A programra vonatkozó bejegyzések üresek vagy
elavultak lehetnek az adott csatornán sugárzott információktól függően. A megjelenítés dinamikusan azonnal frissül, amint az
új információ rendelkezésre áll.
Jelenlegi és következő műsor: A bal oldali oszlopban jelzett hat csatorna aktuális és következő műsorainak, illetve
azok információnak megjelenítése.
Teljes útmutató: A műsoradatok sorrendben, óránkénti bontásban történő megjelenítése. Egyszerre kétórányi
műsoradat látható, amelyet előre- és hátrafelé lehet görgetni.
❑
N
•
•
•
N
•
•
•
•
N
N
•
•
N
-
-
❑
•
•
•
N
❑
Folytatás…
Page 53

Magyar - 14
Alapértelmezett útmutató
Ma/Holnap / Teljes útmutató: Eldöntheti, hogy a Ma/Holnap vagy a Teljes
útmutató lehetőséget jelenítí-e meg, amikor a távirányítón megnyomja a
GUIDE gombot.
A műsorújság menüjét a GUIDE gomb megnyomásával is megjelenítheti.
A Jelenlegi és következő műsor / Teljesműsorújság használata
▲/▼/◄/►
(ENTER)
A ▲/▼/ ◄/► gombok megnyomásával választhat ki egy műsort.
A műsor kiválasztása után az bekerül az ütemezésbe, amit az óra ikon jelez. Ha törölni szeretné az
ütemezést, ismételten nyomja meg az ENTERE gombot, majd a ▲/▼/◄/► gombokat, és válassza a
Ütemezés törlése lehetőséget, ekkor az ütemezés törlődik, amit az óra ikon eltűnése is jelez.
Az ütemezés további részleteivel kapcsolatban lásd a következő oldalt.
VÖRÖS Választhat a Ma/Holnap és a Teljes útmutató közül.
ZÖLD
Teljes útmutató: Gyors visszagörgetés (-24 órával).
SÁRGA Teljes útmutató: Gyors előre görgetés (+24 órával).
KÉK Kilépés az útmutatóból.
INFO
INFO gomb a részletes információk eléréséhez. A részletes adatok közé tartozik a csatornaszám, a
pontos idő, az állapotsáv, a korhatár, a képminőség (HD/SD), a hang mód, a felirat vagy teletext, a
felirat vagy teletext nyelve, valamint a kijelölt műsor rövid összefoglalója. … látható, ha az összefoglaló
hosszú.
Csatornalista
A Csatornalista használatára vonatkozó további részletes leírást lásd a 15.-16. oldalon.
Csatorna mód
A P< / > gomb megnyomásakor, a csatornák a kiválasztott csatornalistán belül váltanak.
Új csatornák: A csatornaváltás csak a tárolt csatornalistán belül lehetséges.
Kedvencek: A csatornaváltás csak a kedvenc csatornák listáján szereplő csatornák között lehetséges.
Finomhangolás (
csak analóg csatornánál
)
Ha a vétel teljesen tiszta, akkor nem kell a csatornát finomra hangolni, mivel a készülék ezt a keresés és tárolás során
automatikusan elvégezte. Ha gyenge a jel, akkor lehetséges, hogy kézileg kell csatornát finomra hangolnia.
Az elmentett nomhangolt csatornák száma mellett, a csatornacímben, a jobb oldalon egy csillag (*) szerepel.
Ha nem tárolja a nomhangolással beállított csatornákat a memóriában, a beállítások elvesznek.
Ha a nomhangolást vissza szeretné állítani, válassza ki a Visszaáll. lehetőséget, nyomja meg a ▲ vagy ▼ gombot,
majd az ENTERE gombot.
❑
O
❑
❑
❑
N
N
N
Csatorna
Jelenlegi és következő műsor
Teljes útmutató
Alapértelmezett útmutató : Ma/Holnap
►
Csatornalista
Csatorna mód : Új csatornák
Finomhangolás
Teljes útmutató
DTV Cable 900 f tn 2:10 Tue 1 Jun
Freshmen On Campus
2:00 - 2:30
No Detailed Information
Today 2:00 - 3:00 3:00 - 4:00
Mint Extra
Loaded
Fresh 40 with Dynamite MC
The Distillery
Smash Hits! Sunday
900 f tn
901 ITV Play
902 Kerrang!
903 Kiss
903 oneword
903 Smash Hits!
▼
Street Hypn..
Kisstory
No Information
No Information
No Information
Freshmen O..
Jelenlegi és következő műsor
DTV Cable 900 f tn 2:10 Tue 1 Jun
Freshmen On Campus
2:00 - 2:30
No Detailed Information
Mint Extra
Loaded
Fresh 40 with Dynamite MC
The Distillery
Smash Hits! Sunday
900 f tn
901 ITV Play
902 Kerrang!
903 Kiss
903 oneword
903 Smash Hits!
▼
Street Hypn..
Kisstory
No Information
No Information
No Information
Freshmen O..
Ma Következő
Megnéz Információ
Oldal
Ma/Holnap Kilépés
Megnéz Információ
Oldal
Teljes útmutató Kilépés
Page 54

Magyar - 15
Csatornák kezelése
Ezzel a menüvel digitális műsorszórás esetén hozzáadhat és kitörölhet csatornákat,
illetve beállíthatja a kedvenceket, és használhatja a műsorfüzetet.
A ▲ vagy ▼ gombok megnyomásával válassza ki a csatornát a Minden csat.,
Hozzáadott csatornák, Kedvencek vagy Programozva képernyőn, majd
nyomja meg az ENTERE gombot.
Minden csat.
: Az összes, jelenleg elérhető csatorna megjelenítése.
Hozzáadott csatornák:
Az összes hozzáadott csatorna megjelenítése.
Kedvencek:
Az összes kedvenc csatorna megjelenítése.
Programozva: Az összes jelenleg tárolt műsor megjelenítése.
A színes gombok használata a Csatornalistán
Vörös (Csatorna típusa): Lépegethet a TV, Rádió, Adat/egyéb és az Összes
lehetőségek között.
Zöld (Nagyítás): A csatorna számának felnagyítása és lekicsinyítése.
Sárga (Választás): Több csatornalista kiválasztása.
TTOOLS (Opciók): A Törlés (vagy Hozzáadás), Kedvencekhez adás (vagy
Törlés a Kedvencekből), Időzített megtekintés, Csatornanév szerkesztése,
Csatornaszám szerk., Sorrend, Gyermekzár be (vagy Gyermekzár ki),
Mind kiválasztása (vagy
Öszkiv.visszav.),
vagy Automata tárolás menük
megjelenítése. (A beállításokhoz szükséges menük a helyzettől függően eltérőek
lehetnek.)
Csatornaállapot megjelenítő ikonok
A
Az analóg csatorna.
c
Sárga gombbal kiválasztott műsor.
♥
Kedvencnek beállított csatorna.
(
Éppen sugárzott műsor.
\
Lezárt csatorna.
)
Tárolt műsor
A csatornalisták megjelenítéséhez nyomja meg a távirányító CH LIST gombját.
A Csatornalista Eszközmenüje (Minden csat. / Hozzáadott
csatornák / Kedvencek)
Az eszközmenü megjelenítéséhez nyomja meg a TOOLS gombot.
Az opciómenü elemei eltérhetnek a csatorna állapotától függően.
Hozzáadás/Törlés
Törölhet és hozzáadhat csatornát a megjeleníteni kívánt csatornákhoz.
Az összes törölt csatorna megjelenik az Minden csat. menüben,
A szürke szín törölt csatornát jelöl.
Az Hozzáadás menü csak a törölt csatornák esetében jelenik meg.
Az Hozzáadott csatornák vagy a Kedvencek menüben is ugyanígy törölhet
csatornát.
Kedvencekhez adás/Törlés a Kedvencekből
A gyakran nézett csatornákat felveheti kedvenc csatornái közé.
A Eszközök menü megjelenítéséhez nyomja meg a TOOLS gombot.
Kedvenc csatornáját az Eszközök→ Kedvencekhez adás (vagy a Törlés a kedvencekből) menüpont kiválasztásával
is hozzáadhatja.
T
Megjelenik a “♥” jel, és a csatorna bekerül a kedvenc csatornák közé.
Az összes törölt csatorna megjelenik a Kedvencek menüben.
Az Ön által beállított Kedvenc csatornák kiválasztásához nyomja meg a
távirányító FAV.CH gombját.
Időzítős megtekintés
Ha tárolni kíván egy műsort, amit később majd szeretne megnézni, a TV-készülék automatikusan átvált a csatornalistában
tárolt csatornára, még akkor is, ha épp más adót néz. A műsor tárolásához először állítsa be a pontos időt. (Lásd a 27. oldalt)
Csak a már tárolt csatornákat lehet beprogramozni.
A távirányító számgombjainak segítségével közvetlenül beállíthatja a csatornát, a hónapot, a napot, az évet, az órát és a percet.
A beprogramozott műsor megjelenik a Programozva med menüben.
Digitális Műsorfüzet és a Beprogramozott tévézés
Ha kiválaszt egy digitális adót, és megnyomja a ► gombot, megjelenik az adott csatornához tartozó műsorújság.
A fent részletezett módon tud műsorokat beprogramozni.
N
N
-
-
-
-
N
O
❑
N
N
N
N
N
N
N
N
O
N
N
N
N
Csatorna
Teljes útmutató
Alapértelmezett útmutató : Ma/Holnap
Csatornalista
Csatorna mód : Új csatornák
Finomhangolás
824 UKTV Gold
825 UKTV style
A 1 C --
A 2 C
--
A 3 ♥ C
--
A 4 C
--
A 5 C
--
A 6 C
--
A 7 C
--
A 8 C
--
Hozzáadott csatornák
Összes
Csatorna Típus Nagyítás Választás
Eszközök
824 UKTV Gold
825 UKTV style
A 1 C --
A 2 C
--
A 3 C
--
A 4 C
--
A 5 C
--
A 6 C
--
A 7 C
--
A 8 C
--
Minden csat.
Összes
Csatorna Típus Nagyítás Választás
Eszközök
Törlés
Kedvencekhez adás
Időzített megtekintés
Csatornanév szerkesztése
Sorrend
Gyermekzár be
▼
Folytatás…
Page 55

Magyar - 16
Csatornanév szerkesztése (csak analóg csatornánál)
A csatornák megjelölhetőek, így mikor kiválasztja az adott csatornát, megjelennek a hívóbetűi.
A digitális sugárzású csatornák nevei automatikusan kerülnek hozzárendelésre, és nem lehet megváltoztatni őket.
Csatornaszám szerk. (csak digitális csatornánál)
A távirányító számgombjainak segítségével is beállíthatja a csatorna számát.
Sorrend (csak analóg csatornánál)
Ezzel a művelettel módosíthatja a tárolt csatornák programszámát. Erre a műveletre az automatikus mentés használata után
lehet szüksége.
Gyermekzár be/Gyermekzár ki
Lezárhat egy csatornát, hogy azt ne lehessen kiválasztani és megtekinteni. Ez a funkció csak akkor érhető el, amikor a
Gyermekzár beállítása, tehát Be van kapcsolva. (lásd a 25. oldalt)
Megjelenik a PIN kód begépeléséhez szükséges képernyőablak. Gépelje be 4 számjegyű PIN kódját.
Az új készülék alapértelmezett PIN-kódja a ‘0-0-0-0’. A PIN kód megváltoztatható, ha a menüből kiválasztja a PIN
módosítás lehetőséget.
Megjelenik a "\" jel,és a csatorna lezáródik.
Mind kiválasztása/
Öszkiv.visszav.
Mind kiválasztása: Kiválaszthatja az összes csatornát a csatornalistából.
Öszkiv.visszav.: Megszüntetheti az összes kijelölt csatorna kijelölését a csatornalistában.
Egyszerre több csatornánál is Hozzáadhat/törölhet, hozzáadhat a Kedvencekhez/törölhet a Kedvencek közül, vagy
zárolhat/feloldhat funkciókat. Válassza ki a kívánt csatornákat, majd a sárga gombbal állítsa be az összes kiválasztott
csatornát egy időben.
A c jel megjelenik a kiválasztott csatornák bal oldalán.
Csak akkor választhatja a Öszkiv.visszav. lehetőséget, ha már legalább egy csatornát kiválasztott.
Automata tárolás
A beállításokra vonatkozó további részletek a 12. oldalon találhatóak.
Ha a csatorna a Gyermekzár funkciónak köszönhetően zárolva van, megjelenik
a PIN kód begépeléséhez szükséges ablak.
A Csatornalista Eszközmenüje (a Programozva menüben)
Megnézheti, módosíthatja vagy törölheti a beprogramozást.
Az eszközmenü megjelenítéséhez nyomja meg a TOOLS gombot.
Infó módosítása: A beprogramozott tévézés módosítása.
Ütemezés törlése: A beprogramozott tévézés törlése.
Információ: A beprogramozott tévézés megtekintése.
(Megváltoztathatja a beprogramozott tévézés adatait is.)
Mind kiválasztása: Az össze tárolt műsor kiválasztása.
N
N
N
N
-
•
•
N
N
N
N
N
❑
N
•
•
•
•
Programozva
1 / 1 / 2009
13:59 5 TV1 Quincy, M.E
18:59 2 TV3 The Equalizer
20:59 2 TV3 McMillan & Wife
21:59 2 TV3 M.Spillane’s mike Hammer
Infó módosítása
Ütemezés törlése
Információ
Mind kiválasztása
Összes
Nagyítás Kiválasztás
Eszközök Információ
Page 56

Magyar - 1
Képkezelés
A kép beállításainak módosítása, és visszaállítása
Üzemmód
Kiválaszthatja az elvárásainak leginkább megfelelő képtípust.
Kiemelt: Nagyfelbontású kép kiválasztása fényes környezet esetén.
Normál: Az optimális képminőség kiválasztása normál környezethez.
Film: A legmegfelelőbb képminőség kiválasztása sötét környezethez.
A Eszközök menü megjelenítéséhez nyomja meg a TOOLS gombot.
A képi módot is beállíthatja, ha kiválasztja a Eszközök → Kép üzemmód
lehetőséget.
T
Cellafény / Kontraszt / Fényerő / Élesség / Szín / Árnyalat (Z/V)
A TV-készülék számos olyan beállítással rendelkezik, amelyekkel szabályozni lehet a képminőséget.
Cellafény: A képpontok fényerejének beállítása.
Kontraszt: A kontraszt szintjének beállítása.
Fényerő: A fényerő szintjének beállítása.
Élesség: Az Élesség beállítása.
Szín: A kép színtelítettségének beállítása a képernyőn látható sáv segítségével.
Árnyalat (Z/V): Minél közelebb van a vörös értéke a 100 értékhez, annál telítettebb a vörös szín.
Válassza ki az elsőként beállítandó képi üzemmódot. A beállított értékek mindegyik képi üzemmód esetében mentésre
kerülnek.
Ha változtat a Cellafény, Kontraszt, Fényerő, Élesség, Szín vagy Árnyalat (Z/V) lehetőségeken, a képernyőmenü
ennek megfelelően módosul.
PAL-rendszer esetén Analóg TV, Külső, AV és S-Video üzemmódban a Árnyalat funkció nem használható.
PC üzemmódban csak a Cellafény, Kontraszt és a Fényerő beállításának módosítására van lehetőség.
A TV-készülék bemenetéhez csatlakoztatott minden külső eszköz beállításai módosíthatók és tárolhatók.
A kisebb fényerő jelentõsen kevesebb energiafogyasztással jár, ami csökkenti az üzemeltetési költséget.
Speciális beállítások
Az újabb Samsung TV-k a korábbi modelleknél még precízebb képi beállításokat
tesznek lehetővé. A képi beállítások részletes információit lásd alább.
Speciális beállítások, Normál vagy Film üzemmódban használható.
PC üzemmódban a Fehéregyensúly elemei közül csak a Gamma és a
Speciális beállítások értékét módosíthatja.
Fekete tónus → Ki / Sötét / Sötétebb / Legsötétebb
Beállíthatja a képernyő mélységét a képernyő feketeszintjének kiválasztásával.
Dinamikus kontraszt → Ki / Alacsony / Közepes / Magas
Beállíthatja a képernyő kontrasztját, hogy a legjobb kontrasztot biztosítsa.
Gamma
Beállíthatja az elsődleges színek (piros, zöld, kék) erősségét.
Színköz
A színtér vörös, zöld és kék színből álló mátrix. Kedvenc színterének kiválasztásával fedezze fel a legtermészetesebb
színeket.
Auto.: A színtartomány automatikus beállítása a bemeneti videoforrástól függően.
Természetes: A színtartomány szélesebbre állítása, mint a bemeneti videoforrásé.
Fehéregyensúly
A színhőmérsékletet természetesebb színekre állíthatja be.
P-eltolás / Z-eltolás/ K-eltolás / P-nyereség / Z-nyereség / K-nyereség: A módosított értékek megjelennek a
képernyőn.
Vissza: A korábban beállított fehéregyensúly visszaáll a gyári alapértékekre.
Bőrszín tónus
Hangsúlyozhatja a képen a rózsaszín bőrtónus árnyalatát.
A módosított értékek megjelennek a képernyőn.
Éljavítás → Ki/Be
Hangsúlyozhatja az objektumok határait a képen.
❑
•
•
•
❑
•
•
•
•
•
•
N
N
N
N
N
N
❑
N
N
•
•
•
•
N
Üzemmód : Normál
►
Cellafény : 4
Kontraszt : 95
Fényerő : 45
Élesség : 50
Szín : 50
Árnyalat (Z/V) : Z50/V50
Kép
Szín : 50
Árnyalat (Z/V) : Z50/V50
Speciális beállítások
►
Képopciók
Kép visszaállítása
Kép
Folytatás…
Page 57

Magyar - 1
Képopciók
PC üzemmódban a Képopciók elemei közül csak a Színtónus, a Méret és
a Képernyő beégésvéd. opció módosítható.
Színtónus → Hideg / Normál / Meleg1 / Meleg2
Beállíthatja a szemének legkellemesebb színtónust is.
A beállított értékeket a rendszer a kiválasztott Kép üzemmódtól függően tárolja.
A Meleg1 és a Meleg2 csak akkor használható, ha a képmód beállítása Film.
Méret
Beállíthatja az igényeinek legjobban megfelelő képméretet.
Auto széles: A kép Auto. széles formátumra állítása.
16:
: A kép 16:9 arányúra történő beállítása.
Széles nagyítás: A kép 4:3 arányúra történő állítása 16:9 képméret arányú TV-készülék esetén a 4:3 arányú
kép vízszintes megnyújtásával.
Nagyítás: 16:9 képméretarányú kép függőleges megnyújtása.
4:3: A kép 4:3 arányúra történő beállítása.
Képernyőhöz igazítás: Az eredi HD-ben készített jel megjelenítése, amelyet normál TV-készüléken nem
lehet megjeleníteni.
A képméret opciók a bemeneti forrás jellegétől függően eltérőek.
Az elérhető elemek a kiválasztott módtól függően eltérőek lehetnek.
PC üzemmódban csak a 16: és a 4:3 üzemmód állítható be.
A TV-készülék bemenetéhez csatlakoztatott minden külső eszköz beállításai módosíthatók és tárolhatók.
Ha az eszközön több mint két órán keresztül állókép jelenik meg, időleges képernyőbeégés fordulhat elő.
Széles nagyítás: A ◄ vagy ► gombbal kiválaszthatja a Helyzet lehetőséget, majd nyomja meg az ENTERE gombot.
A képernyő felfelé vagy lefelé tolásához használja a ▲ vagy ▼ gombot. Majd nyomja meg az ENTERE gombot.
Nagyítás: A ◄ vagy ► gombbal kiválaszthatja a Helyzet lehetőséget, majd nyomja meg az ENTERE gombot.
A kép felfelé vagy lefelé tolásához használja a ▲ vagy ▼ gombot. Majd nyomja meg az ENTERE gombot. A ◄ vagy ►
gombbal kiválaszthatja a Méret lehetőséget, majd nyomja meg az ENTERE gombot. A ▲ vagy a ▼ gombot
használhatja a képméret függőleges irányú növeléséhez, illetve csökkentéséhez. Majd nyomja meg az ENTER
E
gombot.
A Képernyőhöz igazítás kiválasztása után HDMI (1080i/1080p) vagy Komponens (1080i/1080p) üzemmódban:
A ◄ vagy a ► gombbal válassza ki a Helyzet lehetőséget. A képet a ▲, ▼, ◄ vagy ► gombbal mozgathatja.
Vissza: A◄ vagy ► gombbal válassza ki a Vissza lehetőséget, majd nyomja meg az ENTER
E
gombot. A beállítás
alaphelyzetbe állítható.
Ha HDMI 720p bemenettel használja a Képernyőhöz igazítás funkciót, 1 sor le lesz vágva fönt, lent, a jobb és a bal
oldalon, akárcsak a Túlpásztázás funkciónál.
Ezeket az opciókat a távirányító P.SIZE gombjával választhatja ki.
Képernyő mód
Ha a képméretet az Auto széles lehetőségre állítja 16:9 arányú, szélesképernyős TV-n, megadhatja a képméretet a 4:3 széles
képernyős képhez. Az egyes európai országok eltérő képméretet használnak, ezt a funkciót tehát ezeknek a felhasználóknak
szántuk.
16:: A kép 16:9 arányúra történő beállítása.
Széles nagyítás: A kép 4:3 arányúra történő állítása 16:9 képméret arányú TV-készülék esetén a 4:3 arányú
kép vízszintes megnyújtásával.
Nagyítás: 16:9 képméretarányú kép függőleges megnyújtása.
4:3: 4:3 képernyőmód kiválasztása.
Ez a funkció csak Auto széles módban használható.
A funkció a PC, Komponens és a HDMI módban nem használható.
Dig. Zajcsökk. → Ki / Alacsony / Közepes / Magas / Auto.
Ha gyenge a TV-készülék által fogadott sugárzási jel, bekapcsolhatja a digitális zajcsökkentés funkciót, amely segít
lecsökkenteni a statikus és szellemképet, amely megjelenhet a képernyőn.
Ha gyenge a jel, válasszon másik opciót a jobb képminőség elérése érdekében.
HDMI feketeszint → Normál / Alacsony
A feketeség szintje a képernyőn a képmélység szabályozása érdekében közvetlenül is megválasztható.
Ez a funkció csak akkor aktív, ha a külső bemenet HDMI csatlakozóhoz csatlakozik (RGB-jel).
❑
N
N
N
•
•
•
•
•
•
N
N
N
N
N
N
N
N
N
O
•
•
•
•
N
N
N
N
Árnyalat (Z/V) : Z50/V50
Speciális beállítások
Képopciók
►
Kép visszaállítása
Kép
Folytatás…
Page 58

Magyar - 1
Film mód
A filmnézéshez optimális képi mód beállítása
Ki: Filmek esetén az alapvető videokép-feldolgozás alkalmazása és az automatikus érzékelés kikapcsolása.
Auto.: Filmek és videoműsorok között a legjobb képminőség automatikus beállítása.
Képernyő beégésvéd.
A Képernyőbeégés elleni védelem beállítása a képpontok beégésének megelőzése és csökkentése érdekében.
Ha egy kép túlságosan hosszú ideig egy helyen marad, az tartós beégést okozhat a képernyőn.
Pixel-eltolódás:
A képernyőbeégés lehetőségének csökkentése érdekében a készüléket képernyőbeégés-védelmi
technológiával látták el. Ez az eljárás lehetővé teszi a kép fel/le (Függőleges) és oldaltól oldalig (Vízszintes) mozgatását.
A Időbeállítások menüpont segítségével percekben adhatja meg a kép mozgatása közötti időt.
Állítsa a Pixel-eltolódás beállítást Be értékre a ▲ vagy ▼ gomb segítségével, majd nyomja meg az ENTERE
gombot.
A ▲ vagy ▼ gombbal válassza ki a megfelelő lehetőséget, majd nyomja meg az ENTERE gombot.
Választható opciók: Vízszintes, Függőleges, Idő.
A Pixel-eltolódás optimális beállítása
Elem TV/Külső/AV/Komponens/HDMI/
PC
Vízszintes 0~4 2
Függőleges 0~4 2
Idő (Perc) 1~4 perc 3 perc
A Pixel-eltolódás értéke a képernyő méretétől, illetve az üzemmódtól függően eltérő lehet.
Ez a funkció a Képernyőhöz igazítás módban nem használható.
Lapozás: Ez a funkció úgy távolítja el a beégett utóképet, hogy egy mintának megfelelően mozgatja a
képpontokat a plazmaképernyőn. Olyankor használja ezt a funkciót, a képernyőbe maradandó utóképek vagy
szimbólumok égtek be, főként ugyanazon állókép hosszabb idejű megjelenítése után.
Szürke oldal: A TV képernyőjének 4:3 oldalarányú beállításánál a fehéregyensúly mindkét oldali beállításával
megelőzhető a képernyő károsodása tévénézés közben.
Sötét: A képernyő 4:3 oldalarányú beállításánál a képernyő bal és jobb széle sötétebb lesz.
Fényes: A képernyő 4:3 oldalarányú beállításánál a képernyő bal és jobb széle világosabb lesz.
•
•
•
N
N
N
N
N
N
•
•
-
-
Page 59

Magyar - 20
A 3D funkció használata
Televízióján 3D filmeket nézhet meg és 3D játékokat játszhat. A 3D hatás funkcióval 3D képeket nézhet meg speciális 3D
szemüveggel.
Csatlakoztatás
❑
1. HDMI-DVI kábellel kösse össze a HDMI IN 2(DVI) aljzatát a számítógép PC kimeneti aljzatával.
2. 3,5 mm-es sztereó audiokábellel csatlakoztassa a the DVI AUDIO IN aljzatát a számítógép hangkártyájának hangkimeneti
csatlakozójával.
3. Csatlakoztassa a jeladót a TV hátlapján lévő 3D SYNC OUT csatlakozóhoz.
4. Kapcsolja be a TV-t, majd állítsa a TV forrását HDMI2-re.
Bővebb tájékoztatás a 3D szemüvegről (és a jeladóról) a 3D szemüveg használati utasításában található.
A számítógép felbontásának beállítása: - PS42B450 / PS42B451: 1024 x 768@60Hz
- PS50B450 / PS50B451: 1024 x 768@60Hz, 1360 x 768@60Hz
A PS50B450 / PS50B451 esetén az optimális PC felbontás 1360x768. 3D módban 1024 x 768 jel esetén a kép 4:3
formátumban jelenik meg, a jobb és a bal szélen szürke csíkkal.
A 3D infravörös jeladó kommunikál a 3D szemüveggel. Ezért a 3D infravörös jeladót a 3D szemüveg közelében kell elhelyezni.
Akkor kapcsol be, ha a HDMI vagy a DVI bemeneti jel RGB, és a DVI hang támogatott.
Ha a készüléket be- vagy kikapcsolják, az üzemmód az alapértelmezett (Ki) értékre vált, és a Formátum mentésre kerül.
A 3D hatás funkció használatához 3D-t támogató gra kus kártya vagy 3D szoftver szükséges.
A 3D szemüvegnek és a jeladónak ugyanolyan gyártmányúnak kell lennie.
Ha hosszabb ideig játszik vagy tévézik a 3D szemüvegben, elfáradhat a szeme és megfájdulhat a feje.
Előfordulhat, hogy a nem a Samsung által gyártott 3D szemüveg (és jeladó) nem használható.
Ha a 3D funkció használatakor a képernyő vibrál, a jobb képminőség érdekében tompítsa, vagy fénycső esetén kapcsolja le a
környezeti világítást.
N
N
N
N
N
N
N
N
N
N
A 3D szemüveg (és a jeladó) külseje a szemüveg típusától függően eltérő lehet.
N
3D szemüveg (külön
megvásárolható)
3D infravörös
jeladó (külön
megvásárolható)
PC
A TV hátlapja
3,5 mm sztereó audiokábel
2
HDMI-DVI kábel (külön megvásárolható)
1
Folytatás…
Page 60

Magyar - 21
A TV beállítása a számítógéppel
Beállítás: A FORRÁS gomb megnyomásával válassza ki a PC-üzemmódot.
Autom. beállítás
Az automatikus beállítás segítségével a számítógép képernyője önmagát állítja be
a bejövő videojel alapján. A finom, durva és a helyzet funkció értékei automatikusan
beállítottak.
DVI-HDMI módban ez a funkció nem működik.
Az TOOLS gomb megnyomásával megjelenítheti a Eszközök menüt.
Az automatikus beállítást a Eszközök → Autom. beállítás lehetőséget
választva is elvégezheti.
T
Képernyő
Durva
A frekvencia beállítása a képernyőn megjelenő függőleges zaj esetén.
Finom
A képernyő beállítása a tisztább kép érdekében.
PC helyzete
A számítógép képernyő helyzetének módosítása, ha az nem illeszkedik a TV-képernyőre. A ▲ vagy a ▼ gombbal állíthatja be
a függőleges pozíciót. A ◄ vagy a ► gombbal állíthatja be a vízszintes pozíciót.
Kép visszaáll.
Valamennyi képbeállítást helyettesítheti a gyári alapbeállítás értékeivel.
N
❑
N
❑
Az üzemmód megváltoztatása
A 3D hatás bekapcsolásához szükséges funkció Választhat a Üzemmód1 és a
Üzemmód2 közül. 3D képek akkor jönnek létre, ha a 3D szemüveg egyszer a bal,
másszor a jobb szem képét takarja el (jobb és bal oldal szinkronizálása).
Ki: A 3D hatás kikapcsolása.
Üzemmód1: Az 1. mód először a jobb oldalt szinkronizálja.
Üzemmód2: A 2. mód először a bal oldalt szinkronizálja.
2D: Képek konvertálása 3D-ről 2D-re. Akkor válassza, ha ideiglenesen 2D képet
kíván nézni, mert szédül a 3D képtől. A 3D hatás kikapcsolásához válassza a Ki
beállítást.
Ha a 3D hatás nem működik megfelelően, meglehet, hogy az üzemmód
és a 3D szemüveg nincs megfelelően szinkronizálva. A szinkronizáláshoz
kapcsoljon a másik üzemmódba.
A formátum módosítása
Válassza ki a viedokártyához vagy a 3D szoftverhez legjobban illő bemeneti
formátumot.
Tábla: Akkor válassza ezt a bemeneti formátumot, ha a grakus kártya vagy a 3D szoftver kimeneti formátuma Tábla.
Vízszintes: Akkor válassza ezt a bemeneti formátumot, ha a grakus kártya vagy a 3D szoftver kimeneti formátuma
Vízszintes osztású.
Függőleges: Akkor válassza ezt a bemeneti formátumot, ha a videokártya vagy a 3D szoftver kimeneti formátuma
Függőleges osztású.
Kép visszaállítása → Képmód visszaállítása / Kilépés
Az összes képi alapértelmezett beállítás visszaállítása.
A visszaállítandó képi üzemmód kiválasztása. A visszaállítás funkció minden
képmódhoz be van állítva.
❑
•
•
•
•
N
❑
•
•
•
❑
N
Képopciók
Méret : 16:9
Képernyő mód : 16:9
Dig. Zajcsökk. : Auto.
HDMI feketeszint : Normál
Film mód : Ki
Képernyőbeégés elleni védelem
3D hatás ▶
VisszaBelépés
Mozgatás
▲
3D hatás
Üzemmód : Ki
Formátum : Tábla
▶
Vissza Belépés
Mozgatás
Képernyő
Durva 50
Finom 44
PC helyzete
Kép visszaáll.
Vissza Belépés Mozgatás
Fényerő : 45
Élesség : 50
Autom. beállítás
►
Képernyő
Speciális beállítások
Képopciók
Kép visszaállítása
Kép
Kép
Speciális beállítások
Képopciók
Kép visszaállítása
►
Kép
Page 61

Magyar - 22
A számítógép képernyője
A (Windows XP alapú) számítógépes szoftver beállítása
Az alábbiakban a Windows képernyőbeállításait láthatja egy
szokványos számítógép esetében. A számítógépen megjelenő képek az
adott Windows verziótól és a videokártyától függően eltérőek lehetnek.
Ha a tényleges képernyők különböznek is, az esetek többségében
ugyanazok az alapbeállítási információk érvényesek. (Ellenkező
esetben lépjen kapcsolatba a számítógép gyártójával vagy a Samsung
márkakereskedőjével.)
1. Először kattintson a Windows Start menüjében a Control Panel
(Vezérlőpult) lehetőségére.
2. Mikor megjelenik a vezérlőpult, válassza azAppeanarnce and
Themes (Megjelenés és témák) kategóriát. Ekkor megjelenik egy
párbeszédablak.
3. Amikor megjelenik a vezérlőpult ablak, kattintson a Display (Képernyő)
ikonra. Ekkor megjelenik egy párbeszédablak.
4. Az ablakban kattintson a Settings (Beállítások) fülre.
A méret (felbontás) helyes beállítása
Optimális
- PS42B450 / PS42B451: 1024x768 képpont
- PS50B450 / PS50B451: 1360x768 képpont
Ha van függőleges frekvenciaopció a képernyő-beállítások párbeszédablakában, annak megfelelő értéke 60 vagy
60 Hz. Egyébként kattintson az OK gombra, és lépjen ki a párbeszédablakból.
Képernyőmódok
A képernyő pozíciója és mérete a számítógép monitorától és annak felbontásától függően egyaránt változik.
A táblázatban szereplő felbontásokat javasoljuk.
D-sub/HDMI/DVI bemenet
Üzemmód Felbontás
Vízszintes
frekvencia (kHz)
Függőleges
frekvencia (Hz)
Képpontóra-
frekvencia
(MHz)
Szink. polaritás
(V/F)
PS42B450
/ PS42B451
PS50B450
/ PS50B451
IBM
640 x 350 31.469 70.086 25.175 + / -
✓ ✓
720 x 400 31.469 70.087 28.322 - / +
✓ ✓
MAC
640 x 480 35.000 66.667 30.240 - / -
✓ ✓
832 x 624 49.726 74.551 57.284 - / -
✓ ✓
VESA DMT
640 x 480
31.469 59.940 25.175 - / -
✓ ✓
37.861 72.809 31.500 - / -
✓ ✓
37.500 75.000 31.500 - / -
✓ ✓
800 x 600
37.879 60.317 40.000 + / +
✓ ✓
48.077 72.188 50.000 + / +
✓ ✓
46.875 75.000 49.500 + / +
✓ ✓
1024 x 768
48.363 60.004 65.000 - / -
✓ ✓
56.476 70.069 75.000 - / -
✓ ✓
60.023 75.029 78.750 + / +
✓ ✓
1360 x 768 47.712 60.015 85.500 + / +
✓
VESA CVT
720 x 576 35.910 59.950 32.750 - / +
✓ ✓
1280 x 720
44.772 59.855 74.500 - / +
✓
56.456 74.777 95.750 - / +
✓
VESA GTF 1280 x 720 52.500 70.000 89.040 - / +
✓
HDMI/DVI csatlakoztatás esetén HDMI IN 2 (DVI) csatlakozót kell használni.
A sorváltós módot a rendszer nem támogatja.
Nem szabványos videoformátum kiválasztása esetén az egység működése rendellenes lehet.
❑
❑
N
N
N
Page 62

Magyar - 23
Hangszabályzás
A hang alapbeállításának módosítása
Üzemmód → Normál / Zene / Film / Tiszta hang / Egyedi
Kiválaszthatja az adott műsor megtekintéséhez használni kívánt speciális
hanghatásokat.
A TOOLS gomb megnyomásával megjelenítheti a Eszközök menüt.
A hang üzemmódot beállíthatja, ha a Eszközök → Hang üzemmód
lehetőséget választva is.
T
Hangszínszabályzó
A hangbeállításokat a saját igényeinek megfelelően adhatja meg.
Üzemmód: Kiválaszthatja a saját igényeinek megfelelő hang üzemmódot.
Balansz: A balansz szabályozása a jobb és baloldali hangszóró között.
100Hz / 300Hz / 1KHz / 3KHz / 10KHz (Sávszélesség beállítása): A különböző sávszélességű frekvenciák beállítása
Vissza: A hangszínszabályozó alapértelmezett beállításainak visszaállítása.
SRS TruSurround HD → Ki / Be
Az SRS TruSurround HD egy, a TruSurround és a FOCUS, valamint a TruBass technológiákat ötvöző technológia.
Az SRS TruSurround HD egy olyan lekeverési technológia, mely két hangszóróból teszi hallhatóvá a virtuális 5.1 csatornás
térhatású hangot. Ez a funkció nem csak a gazdag, mély basszusról gondoskodik, hanem a magas hangok hangzását is
javítja.
Ha rendellenes hangot tapasztal, miközben a TV-n zenét hallgat, állítsa be a hangszínszabályozót és az
SRS TruSurround HD funkciót (Ki/Be).
TruSurround HD Az, SRS és a szimbólum az SRS Labs, Inc. védjegye.
A TruSurround HD technológia beépítése az SRS Labs, Inc. engedélyével valósult meg.
Ezeket az opciókat könnyedén kiválaszthatja a távirányító SRS gombjával is.
Szinkronhangnyelv (csak analóg csatornánál)
A hang alapértelmezett nyelvének kiválasztása. A bejövő jelsorozatra vonatkozó
nyelvi információk megjelenítése.
Csak a ténylegesen sugárzott nyelvek közül választhatja ki a kívánt nyelvet.
Audioformátum → MPEG / Dolby Digital (csak analóg csatornánál)
Ha a hangkibocsátás egyszerre történik a fő hangszóróból és a hangosító berendezésből, visszhangosság is előfordulhat a fő
hangszóró és a hangosító berendezés eltérő dekódolási gyorsasága miatt. Ilyenkor használja a TV hangszóró funkcióját.
Csak a ténylegesen sugárzott nyelvek közül választhatja ki a kívánt nyelvet.
A termék a Dolby Laboratories engedélyével készült.
A Dolby és a dupla D szimbólum a Dolby Laboratories védjegye.
Hangjellemzők (csak analóg csatornánál)
Ez a kiegészítő hangfunkció a gyengén látók számára nyújt segítséget egy további hangsáv biztosításával. A funkció
lényege, hogy műsorszórótól érkező fő hang mellett a hangismertetés hangsávja is hallható. A hangalámondás funkció be- és
kikapcsolható, hangereje pedig állítható.
Ezeket az opciókat egyszerűen kiválaszthatja a távirányító AD gombjával is.
Hangjellemzők → Ki / Be
A hangalámondás funkció be- és kikapcsolása.
Hangerő
A hangalámondás funkció hangerejének beállítása.
A Hangerő olyankor aktív, amikor a Hangjellemzők funkció Be, tehát be van kapcsolva.
❑
❑
•
•
•
•
❑
N
O
❑
N
❑
N
❑
O
N
Üzemmód : Egyedi
►
Hangszínszabályzó
SRS TruSurround HD : Ki
Szinkronhangnyelv : ---Audioformátum : ---Hangjellemzők
Autom. hangerő : Ki
Hang
Page 63

Magyar - 24
Autom. hangerő → Ki / Be
Valamennyi műsorszóró állomás saját jelviszonyokkal rendelkezik, ezért nem egyszerű és nem kényelmes, ha minden egyes
csatornaváltáskor be kell állítania a hangerőt. Ez a funkció lehetővé teszi a csatornák hangerejének automatikus beállítását:
magas moduláló jel esetén a hangkimenet csökkentésével, alacsony moduláló jel esetén pedig a hangkimenet növelésével.
Hangszóró vál. → Külső hangszóró / TV hangszóró
Ha külön hangszórókból szeretné hallgatni a hangokat, kapcsolja ki a belső erősítőt.
A – +, a MMUTE gomb nem használható, ha a Hangszóró vál. menüpont beállítása Külső hangszóró.
Ha az Külső hangszóró lehetőséget választja a Hangszóró vál. menüben, a hangbeállítások korlátozva érhetők el.
A TV belső hangszórói Audio kimenet (optikai, B / J kimenet) a hangrendszerhez
TV / Külső / AV / Komponens / PC / HDMI TV / Külső / AV / Komponens / PC / HDMI
TV hangszóró Hangszóró kimenet Hangkimenet
Külső hangszóró Némítás Hangkimenet
Nincs videojel Némítás Némítás
Hang visszaállítása → Összes vissza / Hangmód visszaá. /
Kilépés
Visszaállíthatja a hangbeállításokat a gyári alapértékekre.
❑
❑
N
N
❑
A hangmód kiválasztása
Kettős l ll beállításnál az aktuális hangmód megjelenik a képernyőn.
Műsorszórás típusa
Képernyőkijelzés
NICAM
Sztereó
Normál műsorszórás
(Szabványos audió)
Mono (Normál használat)
Általános + NICAM monó NICAM
Monó
(Normál)
NICAM Sztereó
NICAM
Sztereó
Monó
(Normál)
NICAM Kettős-I/II
NICAM
Kettős-1
NICAM
Kettős-2
Monó
(Normál)
A2
Sztereó
Normál műsorszórás
(Szabványos audió)
Mono (Normál használat)
Kétnyelvű vagy Kettős-I/II Kettős-I Kettős-II
Sztereó Sztereó
Monó
(Mono saját
választásként)
Gyenge sztereójel és automatikus váltás esetén állítsa a készüléket mono módba.
Ez a funkció csak sztereó hangjel esetén aktív. Monó hangjel esetén kikapcsol.
Ez a funkció csak TV módban használható.
Ezeket az opciókat könnyedén kiválaszthatja a távirányító DUAL gombjával is.
N
N
N
O
Autom. hangerő : Ki
Hangszóró vál. : TV hangszóró
Hang visszaállítása
►
Hang
Page 64

Magyar - 25
A Beállítások menü konfigurálása
Menü nyelve
A menü nyelvének kiválasztása.
Műsorszórás
Felirat
A feliratok be vagy kikapcsolása. Ez a menü használható a Felirat mód
beállításához. A Normál menüpont a szokásos beállítást jelenti, a Nagyothalló
pedig a halláskárosultak részére szólót.
Felirat → Be / Ki: A feliratok be- és kikapcsolása.
Üzemmód → Normál / Nagyothalló: A felirat mód beállítása.
Felirat nyelve: A felirat nyelvének beállítása.
Ha a nézett műsor nem támogatja a Nagyothalló funkciót, automatikusan
bekapcsol a Normál mód, akkor is, ha a Nagyothalló mód lett kiválasztva.
Abban az esetben, ha a választott nyelv nincs a sugárzott nyelvek között, az
angol lesz az alapnyelv.
Ezeket az opciókat egyszerűen kiválaszthatja a távirányító SUBT. gombjával is.
Digitális szöveg → Tiltás/Engedélyezés
Ha a műsort digitális szöveggel együtt sugározzák, ez a funkció engedélyezett.
MHEG (Multimedia and Hypermedia Information Coding Experts Group)
A Multimédiás és hipermédiás adatkódolási rendszer egyik nemzetközi szabványa. Az MPEG rendszernél magasabb szintű és olyan
adatcsatolt hipermédiás anyagokat tartalmaz, mint állókép, szerepjáték, animáció, grafikus és videofájlok, valamint multimédiás
adatok. Az MHEG egy, a felhasználói interaktivitást valós időben támogató technológia, és különböző területeken használható,
például a VOD (videó igény szerint), ITV (interaktív TV), EC (elektronikus kereskedelem), távoktatás, távkonferencia, digitális
könyvtárak és hálózatos játékok.
Teletext nyelv
A nyelvtípus kiválasztásával beállíthatja a Teletext nyelvezetét.
Abban az esetben, ha a választott nyelv nincs a sugárzott nyelvek között, az angol lesz az alapnyelv.
Beállítás
Elsődleges nyelv - audio / Másodlagos nyelv - audio / Elsődleges felirat nyelv / Másodlagos felirat nyelv / Első
teletext nyelv / Második teletext nyelv
Ezzel a funkcióval a felhasználók kiválaszthatják az egyik nyelvet. Az itt választott nyelv lesz az alapértelmezett a csatorna
kiválasztásakor.
Ha megváltoztatja a nyelvi beállítást, akkor a Nyelv menüben a felirat nyelve, a szinkronhangnyelv és a teletext nyelve beállítása
is automatikusan megváltozik a kiválasztott nyelvre.
A nyelv menüben a felirat nyelve, a szinkronhangnyelv és a teletext nyelve alatt megjelenik azon nyelvek listája, amelyek az
adott csatornán elérhetők, a kiválasztott nyelv pedig ki van jelölve. Ha megváltoztatja ezeket a nyelvi beállításokat, akkor az
csak az aktuális csatornára vonatkozik. Az a módosított nyelvi beállítás nem változtatja meg a Beállítás menünek az Elsődleges
feliratnyelv, az Elsődleges nyelv - audio, és az Első teletext nyelv feliratú menüpontjainak a beállítását.
Közös illesztőfelület
A CI CARD kártya behelyezése
1. A CI CAM modul külön vásárolható, illetve rendelhető meg a forgalmazótól.
2. Helyezze be a CI CARD kártyát a CAM modulba a nyíl irányának megfelelően, amíg
a helyére nem illeszkedik.
3. Helyezze be a CI CARD kártyával ellátott CAM modult a közös felület (CI)
kártyacsatlakozójába.
A CAM behelyezése a nyílnak megfelelően történjék, a nyílással párhuzamosan.)
4. Ellenőrizze, hogy látható-e kép a kódolt csatornán is.
CI menü
Ezzel válik használhatóvá a CAM modul által biztosított menü.
Ezt követően választhat a CI kártya által biztosított CI menüben.
Alkalmazási info.
Ezzel jeleníthetők meg a CI (Közös felület) kártyahelyre behelyezett CAM (feltételes
elérési modul) adatai.
Az Alkalmazás adatok a behelyezett CI CARD adatait jelzi ki. A CAM bármikor telepíthető, a TV bekapcsolt és kikapcsolt állapotában is.
A CAM modul bizonyos országokban és régiókban nem támogatott. Tájékoztatásért forduljon márkakereskedőjéhez.
❑
❑
•
•
•
N
N
O
N
N
•
•
N
•
•
N
Funkcióleírás
Beállítás
Plug & Play
Menü nyelve : Hungarian
►
Idő
Műsorszórás
Biztonság
Általános
Folytatás…
Page 65

Magyar - 26
Biztonság
Gyermekzár → Be / Ki
Ez a funkció lehetővé teszi a kép eltüntetését és a hang némítását, hogy illetéktelen személyek, például gyermekek, ne
nézhessék a számukra nem megfelelő műsorokat.
Mielőtt megjelenik a telepítés képernyő, előjön a PIN kód megadását kérő képernyő. Gépelje be 4 számjegyű PIN kódját.
Az új készülék alapértelmezett PIN-kódja a '0-0-0-0'. A PIN kód megváltoztatható, ha a menüből kiválasztja a PIN
módosítás lehetőséget.
Bizonyos csatornák lezárása a Csatornalistában. (lásd a 15. oldalt)
A Gyermekzár funkció csak a TV módban használható.
Szülői zár
Ez a funkció a felhasználó által választott 4 számjegyű PIN kód segítségével megakadályozza, hogy illetéktelen személyek,
például gyermekek nézhessék a számukra nem megfelelő műsort.
Mielőtt megjelenik a telepítés képernyő, előjön a PIN kód megadását kérő képernyő. Írja be 4 számjegyű PIN kódját.
Az új készülék alapértelmezett PIN-kódja a '0-0-0-0'. A PIN kód megváltoztatható, ha a menüből kiválasztja a PIN
módosítás lehetőséget.
Miután beállította a szülői értékeléseket, megjelenik a “
\
”
szimbólum.
Össz. eng.: Az összes TV korlátozás kikapcsolása.
Össz. zár.: Az összes TV korlátozás bekapcsolása.
PIN módosítás
Módosíthatja személyi azonosítóját, amely ahhoz szükséges, hogy üzembe helyezze a TV készüléket.
Mielőtt megjelenik a telepítés képernyő, előjön a PIN kód megadását kérő képernyő. Írja be 4 számjegyű PIN kódját.
Az új készülék alapértelmezett PIN-kódja a '0-0-0-0'.
Ha elfelejtette a PIN kódot, nyomja le a távirányító alábbi gombjait a következő sorrendben a kód '0-0-0-0' –ra történő
visszaállításához: POWER (Ki),
MMUTE, , 2, 4, POWER
(Be).
Általános
Játék mód → Be / Ki
Játékkonzolokhoz, például PlayStationTM-höz vagy XboxTM-hoz csatlakozva valósághűbbé válik a játékélmény, ha kiválasztja
a játék menüt
Bekapcsolt játék mód esetén
A Kép üzemmód automatikusan Normál beállításra vált, és a felhasználó nem változtathatja meg a módot.
A Hang üzemmód automatikusan Egyedi beállításra vált, és a felhasználó nem változtathatja meg a módot. Állítsa be a
hangot a hangszínszabályzóval.
A Hang menüben aktiválódik a Visszaáll. funkció. A Visszaáll. funkció visszaállítja a Hangszínszabályzó beállításait a
gyári alapbeállításokra.
A Játék mód normál TV módban vagy Ki kapcsolt Játék mód mellett nem elérhető.
Ha rossz a képminőség, amikor külső eszközt csatlakoztat a televízióhoz, ellenőrizze, hogy nincs-e be kapcsolva a Játék mód.
Ha a TV menüt Játék mód ban jeleníti meg, a képernyőkép enyhén remeg.
A képernyőn megjelenő ( ) jel azt mutatja, hogy a Játék mód a kiválasztott forrással bekapcsolt állapotban van.
Ez a funkció csak a játékfunkciót támogatja.
A Játék mód PC módban nem elérhető.
Energiagazd. → Ki / Alacsony / Közepes / Magas / Kép kikapcsolása / Auto.
A funkció úgy szabályozza a TV-képernyő fényerejét, hogy az energiafelhasználás minimális legyen. Ha éjszaka nézi a TV-t, állítsa az
Energiagazdálkodás üzemmódot a Magas lehetőségre, így nem fárad el annyira a szeme, és csökken az energiafogyasztás.
A Kép kikapcsolása lehetőség kiválasztásakor a képernyő kikapcsol, és csak a hang hallható.
A Eszközök menüben nem a Kép kikapcsolása funkció nem támogatott.
A TOOLS gomb megnyomásával megjelenítheti a Eszközök menüt.
Az energiatakarékos. Opciót beállíthatja a Eszközök → Energiagazdálkodás
lehetőség kiválasztásával is.
T
Dallam → Ki / Alacsony / Közepes / Magas
A TV be- és kikapcsolásakor hallható dallam beállítása.
Nem hallható a dallam
A TV-ről nem érkezik hang, mert megnyomta a MUTE gombot.
A TV-ről nem érkezik hang, mert megnyomta a – (Hangerő) gombot.
Ha az Auto kikapcs. funkció kapcsolta ki a TV készüléket.
❑
N
N
N
N
N
N
N
N
N
N
N
❑
•
-
-
-
N
N
N
N
N
N
N
N
-
-
-
Page 66

Magyar - 2
A pontos idő beállítása
Óra
Az órát azért kell beállítani, hogy használni lehessen a TV különböző időzítős
funkcióit.
Az INFO gomb minden megnyomásakor megjelenik az aktuális idő.
Ne húzza ki a tápkábelt a fali aljzatból, mert az órát újból be kell állítania.
Óra mód
Manuálisan és automatikusan is beállíthatja a pontos időt .
Auto.: A digitális sugárzáson keresztül érkező pontos idő segítségével
állítsa be a pontos időt.
Kézi: A pontos idő manuális beállítása.
Órabeállítás
Beállíthatja az aktuális időt manuálisan.
Az elem beállítása, miután átállította a Óra mód lehetőséget Kézi-ra.
A távirányító számgombjainak segítségével közvetlenül beállíthatja a Nap, a
Hónap, az Év, az Óra és a Perc.
Auto kikapcs. → Ki / 30 perc / 60 perc / 0 perc / 120 perc /
150 perc / 10 perc
Az előre beállított idő elteltével az ébresztő automatikusan kikapcsolja a TV-t.
Amikor az időzítő 0-hoz ér, a TV-készülék automatikusan készenléti üzemmódba kapcsol.
A Auto kikapcs. funkció kikapcsolásához válassza az Ki lehetőséget.
A TOOLS gomb megnyomásával megjelenítheti a Eszközök menüt.
Az ébresztőt beállíthatja a Eszközök → Auto kikapcs. lehetőséget választva is.
T
1. időzítő / 2. időzítő / 3. időzítő
Az időzítő be- és kikapcsolásához három különböző beállítás adható meg.
Bekapcsolási idő:
Az óra, a perc és az aktiválás/kikapcsolás beállítása.
(Az időzítésnek a kiválasztott beállítással történő aktiválásához válassza az Bekapcsol opciót.)
Kikapcsolási idő:
Az óra, a perc és az aktiválás/kikapcsolás beállítása.
(Az időzítésnek a kiválasztott beállítással történő aktiválásához válassza az Bekapcsol opciót.)
Hangerő:
A kívánt hangerő beállítása.
Antenna: A TV automatikus bekapcsolásakor választhat analóg vagy digitális csatornát is.
Csatorna: A kívánt csatorna kiválasztása.
Ismétlés:
A Egyszer, Mindennap, H~P, H~Szo, Szo ~ V, vagy Kézi.
Ha a Kézi beállítás van kiválasztva, a ► gomb megnyomásával választhatja ki a hét megfelelő napját. Az ENTER
E
gomb megnyomásával a kívánt nap és a c jelölés fog megjelenni.
Először az órát kell beállítania.
A távirányító számgombjainak segítségével beállíthatja az órát, a percet és a csatornát.
Automatikus kikapcsolás
Az időzítő bekapcsolt állapotában a televízió végül kikapcsol, ha az időzítő kapcsolta be a készüléket, és 3 órán keresztül nem
működtetik a kezelőszerveket. Ez a funkció kizárólag az időzítő bekapcsolt állapotában működik ,és megakadályozza, hogy a
TV a túlságosan hosszú használat során felmelegedjen.
❑
N
N
•
•
N
N
❑
N
N
❑
N
N
N
N
Beállítás
Plug & Play
Menü nyelve : Hungarian
Idő
►
Műsorszórás
Biztonság
Általános
Idő
Óra : -- : --
►
Auto kikapcs. : Ki
1. időzítő : Kikapcsol
2. időzítő : Kikapcsol
3. időzítő : Kikapcsol
U
Mozgatás E Belépés R Vissza
Page 67

Magyar - 2
A TV hátlapja
USB-háttértár
Forráslista / Névszerkesztés
Forráslista
A TV vagy egyéb, a TV-hez kapcsolódó külső bemeneti forrás, pl. DVD-lejátszó
vagy Kábeles beltéri egység / Műholdvevő-készülékek kiválasztása. Kiválaszthatja
a kívánt bemeneti forrást.
TV, Külső, AV, PC, Komponens, HDMI1, HDMI2/DVI, HDMI3.
Csak a TV-készülékhez csatlakoztatott külső eszközök választhatók.
A Forráslista listában a csatlakoztatott bemenetek kiemelve a lista elejére
kerülnek. A nem csatlakoztatott bemenetek a lista aljára kerülnek.
A színes gombok használata a távirányítón a Forrás listával.
Vörös (Frissítés): A kapcsolódó külső eszközök frissítése.
T
TOOLS (Opciók): Az Névszerkesztés és az Információ menük
megjelenítése.
A SOURCE gomb használata a távirányítón a külső jelforrások
megtekintéséhez. A TV üzemmód a távirányító TV gombja, a számgombok
(0~), és a P< / > gombja segítségével is kiválasztható.
Névszerkesztés
A bemeneti csatlakozókhoz csatlakoztatott eszközök nevének megadásával a
bemeneti SOURCEválasztás megkönnyíthető.
Videomagnó / DVD / Kábelvevő egység / Műholdvevő / PVR-vevő / AV-vevő egység / Játék / Videokamera / PC /
DVI PC / DVI / TV / IPTV / Blu-ray / HD DVD / DMA
Amennyiben PS42B450 / PS42B451: 640x480@60Hz, PS50B450 / PS50B451: 640x480@60Hz, 1280x720@60Hz-es
felbontással rendelkező számítógépet csatlakoztat a HDMI IN 2 (DVI) porthoz, át kell állítania a HDMI2 / DVI üzemmódot
PC módra az Bemenet üzemmód Névszerkesztés lehetőségénél.
Támogatott program
Öndiagnosztika
Öndiagnosztika, Hangteszt, Jelinformáció
Akkor végezze el a tesztet, ha úgy gondolja, gond van a kép, a hang vagy a jel minőségével. Felderítheti a problémát.
Ha a teszt végrehajtása előtt nem hallható hang a TV hangszóróiból, ellenőrizze, hogy a Hangszóró vál. beállítása a
Hang menüben TV hangszóró legyen.
A dallam akkor is hallható lesz a teszt során, ha a Hangszóró vál. a Külső hangszóró lehetőségre van állítva, vagy ha a
készülék le lett némítva a MMUTE gombbal.
Ha a jelerősségmérő azt mutatja, hogy gyenge a jel, zikailag állítsa be az antennát a jelerősség növelése értelmében.
Addig folytassa az antenna helyzetének változtatását, amíg meg nem találja azt a helyzetet, amelyben a legnagyobb a jelerősség.
Szoftver frissítés
Hogy a készüléke a digitális televíziózás szolgáltatásainak megfelelően naprakész legyen, a szoftverfrissítéseket időnként a
műsorszórási jelekkel együtt sugározzák. A készülék automatikusan észleli ezeket a jeleket, és megjelenik a szoftverfrissítő
felhívás. Ekkor lehetőséget kap a frissítés telepítésére.
USB-n
Egy USB meghajtó behelyezése, amely tartalmazza a firmware frissítést a TV-hez.
Ügyeljen arra, hogy frissítés közben ne húzza ki a főcsatlakozót vagy ne távolítsa el az
USB-eszközt. A firmware frissítésének befejeztével a TV automatikusan ki- és bekapcsol.
A frissítés befejeztével ellenőrizze a firmware verzióját. Mikor a szoftverfrissítés
befejeződött, a saját videó és audio beállítások visszaállnak a a gyári beállításokra.
Azt tanácsoljuk, hogy jegyezze fel az egyéni beállítások értékeit, így könnyedén
visszaállíthatja őket a frissítést követően.
Csatornán
A szoftver frissítése sugárzott jelen keresztül.
Készenléti frissítés
Ahhoz, hogy a főkapcsolót bekapcsolva hagyva folytathassa a frissítést, válassza ki az
Be lehetőséget a ▲ és ▼ gombokkal A készülék készenléti állapotba helyezése után 45 perccel a kézi frissítés automatikusan
végrehajtódik. Mivel a készülék belsőleg bekapcsolt állapotba kerül, a képernyő is kissé bekapcsolt állapotba kerül. Ez a
jelenség több, mint egy óráig is tarthat, addig, amíg a szoftverfrissítés be nem fejeződik.
Másik szoftver
A jelenlegi szoftver másikra cserélése.
HD csatlakoztatási útmutató
Megjelenik egy rövid ismertető arról, Hogyan hozhatja ki a legtöbbet új HDTV-készülékéből. Bemutatjuk, hogyan
csatlakoztassa a HD-eszközöket.
Samsung ügyfélszolgálat
Tájékozódhat a Samsung telefonos ügyfélszolgálatával és honlapjával kapcsolatban, valamint megtekintheti a termékadatokat.
Az előző vagy következő oldalra történő ugráshoz nyomja meg a ▲ vagy ▼ gombot.
❑
N
N
-
-
O
❑
N
❑
N
N
N
❑
❑
❑
N
Forráslista
Névszerkesztés
Bemenet
Page 68

Magyar - 2
Anynet+ eszközök csatlakoztatása
Az Anynet + egy olyan funkció, amely lehetővé teszi, hogy a Samsung TV távírányítójával az összes csatlakoztatott Samsung
eszközt vezérelhesse, amennyiben azok támogatják az Anynet +-t.
Az Anynet + rendszer csak azokkal a Samsung eszközökkel használható, amelyek rendelkeznek Anynet + funkcióval. Ha meg
szeretne győződni arról, hogy az ön Samsung készüléke rendelkezik-e ezzel a funkcióval, ellenőrizze, hogy megtalálható-e rajta
az Anynet + logó.
Csatlakoztatás a TV-készülékhez
1. HDMI-kábellel csatlakoztassa a TV [HDMI IN 1], [HDMI IN 2(DVI)] vagy [HDMI IN 3] csatlakozóját a megfelelő Anynet + eszköz
HDMI OUT csatlakozójához.
Csatlakoztatás házimozi rendszerhez
1. HDMI-kábellel csatlakoztassa a TV [HDMI IN 1], [HDMI IN 2(DVI)] vagy [HDMI IN 3] csatlakozóját a megfelelő Anynet+
készülék HDMI OUT csatlakozójához.
2. HDMI-kábellel csatlakoztassa a házimozirendszer HDMI IN csatlakozóját a megfelelő Anynet+ készülék HDMI OUT
csatlakozójához.
Az optikai kábelt csatlakoztassa a TV DIGITÁLIS HANGKIMENETI (OPTIKAI) A fenti csatlakoztatási móddal az optikai
csatlakozó csak 2 csatornás hangot eredményez.
Csak a házimozi elülső bal és jobb oldali hangszórójából, illetve a mélynyomó hangszóróból esz hallható a hang. Ha 5.1
csatornás hangot szeretnei, a DVD-lejátszó vagy a kábel/műholdvevő készülék (ami az 1. vagy 2. Anynet-eszköz) optikai
csatlakozóját csatlakoztassa a televízió helyett közvetlenül az erősítőhöz vagy a házimozihoz.
Csak egy házimozi rendszert csatlakoztasson.
Anynet+ eszközt a HDMI 1.3 kábellel csatlakoztathat. Előfordulhat, hogy bizonyos HDMI-kábelekkel az Anynet+ funkciók nem
működnek.
Az Anynet+ akkor működik, ha az Anynet+-t támogató AV-készülék készenléti vagy bekapcsolt állapotban van.
Az Anynet+ összesen legfeljebb 12 AV-eszközt támogat. Legfeljebb 3 ugyanolyan típusú eszköz csatlakoztatására van mód.
❑
❑
N
N
N
N
N
N
Az Anynet+ funkció
1.
Anynet+
eszköz
2.
Anynet+
eszköz
3.
Anynet+
eszköz
TV-készülék
HDMI 1.3 kábel
HDMI 1.3 kábel
HDMI 1.3 kábel
TV-
készülék
1.
Anynet+ eszköz
2.
Anynet+ eszköz
3.
Anynet+ eszköz
HDMI 1.3 kábel
HDMI 1.3 kábel
HDMI 1.3 kábel
HDMI 1.3 kábel
Home Theatre
Optical kábel
Page 69

Magyar - 30
Keresés és váltás az Anynet+ eszközök között
1. Nyomja meg az TOOLS gombot. Nyomja meg az ENTERE gombot az Anynet+
(HDMI-CEC) kiválasztásához.
2.
A ▲ és ▼ gombok segítségével válassza ki a Eszközlista lehetőséget, majd
nyomja meg az ENTERE gombot.
Megjelenik a TV-készülékhez csatlakoztatott Anynet+ eszközök listája. Ha
nám találja a keresett eszközt, az eszközök kereséséhez nyomja meg a piros
gombot.
Csak azután jelenik meg a Eszközlista menü, miután be kapcsolta az
Anynet+ (HDMI-CEC) funkciót a Beállítás menüben.
3. A ▲ és ▼ gombok segítségével válassza ki a kívánt eszközt, majd nyomja meg az ENTERE gombot. A készülék a
kiválasztott eszközre vált.
A kiválasztott eszközre történő váltás akár 2 percet is igénybe vehet. Miközben a készülék a kiválasztott eszközre vált,
műveletet nem lehet megszakítani.
Az eszközök kereséséhez szükséges idő a csatlakoztatott eszközök számától függ.
Ha az eszközök keresése véget ért, a talált eszközök száma nem jelenik meg.
Annak ellenére, hogy bekapcsolás után a TV automatikusan elindítja a keresést az eszközlistában, a TV-hez csatlakoztatott
eszközök nem jelennek meg automatikusan az eszközlistában. A csatlakoztatott eszközök kereséséhez nyomja meg a piros
gombot.
Amennyiben a külső bemeneti módot választotta a SOURCE gomb megnyomásával, nem használhatja az Anynet+ funkciót.
A Eszközlista gombbal váltson Anynet+ eszközre.
N
N
N
N
N
N
N
Az Anynet+ beállítása
A TOOLS gomb megnyomásával megjelenítheti a Eszközök menüt.
Az Anynet+ menüjét az Eszközök → Anynet+(HDMI-CEC) pont kiválasztásával
is megjelenítheti.
T
Beállítás
Anynet+ (HDMI-CEC) → Ki / Be
Ha az Anynet+ funkciót kívánja használni, Be kell kapcsolnia az Anynet+
(HDMI-CEC) opciót.
Ha az Anynet+ (HDMI-CEC) funkció ki van kapcsolva, egyetlen Anynet+-hoz
kapcsolódó művelet sem működik.
Automatikus kikapcsolás → Igen / Nem
Az Anynet+ eszköz automatikus kikapcsolása a TV-készülék kikapcsolásakor.
Ha az Anynet+ funkciót kívánja használni, a TV távirányítóján az aktív forrást
TV lehetőségre kell állítani.
Ha az Automatikus kikapcsolás beállítása Igen, akkor a TV kikapcsolásakor
a csatlakoztatott külső eszközök is kikapcsolnak. Ha az egyik külső eszköz
éppen rögzít, lehet, hogy kikapcsol, de elképzelhető, hogy mégsem.
❑
N
N
N
Folytatás…
Alkalmazás
Anynet+ (HDMI-CEC)
►
Eszközlista
Beállítás
U
Mozgatás E Belépés R Vissza
Anynet+ (HDMI-CEC) : Be
Automatikus kikapcsolás : Yes
U
Mozgatás E Belépés R Vissza
Beállítás
Ki
Be
TV-nézés
Eszközlista
Felvétel : DVDR
DVDR MENU
DVDR INFO
Vevő Be
Beállítás
U
Mozgatás L Beáll. R Vissza
Page 70

Magyar - 31
Anynet+ menü
Az Anynet+ funkció menüje a TV készülékhez csatlakoztatott Anynet+ eszközök típusától és állapotától függően változik.
Anynet+ menü Leírás
TV-nézés Az Anynet+ mód TV sugárzás módra vált.
Eszközlista Az Anynet+ eszközlista megjelenítése.
(készülék_név) Menü A csatlakoztatott eszközök menüinek megjelenítéset. Például, ha a DVD-felvevő
csatlakoztatva van, a DVD-felvevő lemezmenüje jelenik meg.
(készülék_név) INFO Megjeleníti a csatlakoztatott eszközök lejátszás menüjét. Például, ha a DVD-felvevő
csatlakoztatva van, a DVD-felvevő lejátszás menüje jelenik meg.
Felvétel: (*recorder) A felvétel azonnali elindítása a felvevő bekapcsolásával. (Ez a funkció csak azoknál a
készülékeknél érhető el, amelyek támogatják a felvétel funkciót.)
(*felvevő) Előre programozott
felvétel
Felvétel beprogramozása a felvevőbe. (Ez a funkció csak azoknál a készülékeknél érhető el,
amelyek támogatják a felvétel funkciót.)
Felv. megszak.: (*recorder) A felvétel leállítása.
Vevő A vevőkészüléken keresztül érkező hang hallatszik.
Ha több felvevő készülék is csatlakoztatva van, a (*recorder) kijelzés jelenik meg, ha viszont csak egy felvevlő készülék van
csatlakoztatva, a (*készülék_név) jelenik meg.
A TV távirányítójának Anynet+ módban használható gombjai
Eszköz típusa Mikor működtethető Használható gombok
Anynethez+ eszköz
Az eszközre történő váltás után,
amikor az adott eszköz menüje
megjelenik a képernyőn.
Számgombok
▲/▼/◄/►/ENTERE
gombok
Színes gombok/ EXIT gomb
Az eszközre történő váltás után,
fájl lejátszása közben
(Keresés visszafelé) / (Keresés előre) (Leállítás) /
(Lejátszás) / (Szünet)
Beépített
hangolóegységgel
rendelkező
készülék
Az eszközre történő váltás után,
tévézés közben
P / gomb
Hangberendezés Bekapcsolt vevőegység esetén
= /
gomb
MMUTE
gomb
Az Anynet+ funkció használatához a TV távirányítójának aktív forrását TV lehetőségre kell állítani.
A gomb csak felvételi módban működik.
A TV-készüléken található gombokkal nem vezérelhet Anynet+ eszközöket. Az Anynet+ eszközök csak a TV távirányítójával
vezérelhetők.
Előfordulhat, hogy a TV távirányítója bizonyos körülmények között nem működik. Ilyen esetben válassza ki újra az Anynet+
eszközt.
Az Anynet+ funkciók nem működnek más gyártók termékeivel.
A , működése a kiválasztott eszköztől függően eltérő lehet.
Felvétel
Samsung felvevővel rögzítheti a TV-műsorokokat.
1. Nyomja meg a TOOLS gombot. Nyomja meg az ENTERE gombot az Anynet+
(HDMI-CEC) kiválasztásához.
2. A ▲ és ▼ gombok segítségével válassza ki a Felvétel: (készülék_név)
lehetőséget, majd nyomja meg az ENTERE gombot. A felvétel elindul.
Több felvevő eszköz esetén
Amikor több felvevő eszköz van csatlakoztatva, ezekről egy lista jelenik meg.
A ▲ és ▼ gombok segítségével válassza ki a felvevő eszközt, és nyomja meg
az ENTERE gombot. A felvétel elindul.
Amikor nem jelenik meg a felvevő eszköz
Az eszközök kereséséhez válassza ki a Eszközlista lehetőséget, és nyomja meg a piros gombot.
A sugárzott műsorokról a Felvétel: (készülék_név) kiválasztásával is készíthet felvételt.
A gomb megnyomásával az a program kerül rögzítésre, amit éppen néz. Ha másik eszközről éppen videofelvételt néz,
akkor a készülék azt a videofelvételt rögzíti.
Felvétel előtt ellenőrizze, hogy az antenna csatlakozóját megfelelően csatlakoztatta-e a felvevőhöz. A felvevő kezelési
útmutatójában megtalálja, hogyan kell megfelelően csatlakoztatni az antennát a felvevőzöz.
❑
N
❑
N
N
N
N
N
N
N
N
N
N
N
TV-nézés
Eszközlista
Felvétel : DVDR
DVDR MENU
DVDR INFO
Vevő Be
Beállítás
U
Mozgatás L Beáll. R Vissza
Page 71

Magyar - 32
A hang vevőegységen keresztül történő hallgatása (Házimozi rendszer)
A hangot vevőegységen keresztül is hallgathatja a TV hangszórói helyett.
1. Nyomja meg a TOOLS gombot. Nyomja meg az ENTERE gombot az Anynet+
(HDMI-CEC) kiválasztásához.
2. A ▲ és ▼ gombok segítségével válassza ki a Vevő lehetőséget. A ◄ vagy ► a
gombbal válassza a Be vagy a Ki lehetőséget.
Ha a vevőegység csak a hangot támogatja, lehet, hogy nem jelenik meg az
eszközlistában.
A vevőegység csak akkor működik, ha a külső eszköz optikai bemeneti
csatlakozóját megfelelően csatlakoztatta a TV-készülék optikai kimeneti
csatlakozójához.
Mikor a vevőegység (házimozi rendszer) be van kapcsolva, a hang a TV optikai csatlakozójából hallható. Ha a TV-készülék
DTV (sugárzási) jelet jelenít meg, a TV 5.1 csatornás hangot küld a házimozi rendszer vevőegységének. Mikor a forrás
valamilyen digitális komponens, például DVD, és HDMI kábelen keresztül csatlakozik a TV-hez, a házimozi vevőegységéből
csak 2 csatornás hang hallható .
Ha áramkimaradás van a televízión (a tápkábel kihúzása vagy áramszünet miatt), miközben a Vevő beállítása Be, a
Hangszóró vál. beállítás a televízió újbóli bekacsolásakor Külső hangszóró lehetőségre változhat. (lásd a 24. oldalt)
Hibaelhárítás az Anynet+ esetében
Hiba Megoldás
Az Anynet+ nem működik.
Ellenőrizze, hogy a készülék Anynet+ funkcióval rendelkező készülék-e. Az Anynet+ rendszer
kizárólag az Anynet+ eszközöket támogatja.
Csak egy vevőegyéget (házimozi rendszert) csatlakoztasson
Ellenőrizze, hogy az Anynet+ eszköz tápkábele megfelelően van-e csatlakoztatva.
Ellenőrizze az Anynet+ eszköz Video/Audio/HDMI 1.3 kábelcsatlakozásait.
Az Anynet+ beállítás menüjében ellenőrizze, hogy az Anynet+ (HDMI-CEC) be van-e kapcsolva.
Ellenőrizze, hogy a TV távirányítója TV módban van-e.
Ellenőrizze, hogy az adott távirányító alkalmas-e Anynet
+ eszközök vezérlésére.
Bizonyos esetekben az Anynet+ nem működik. (Csatornák keresése, a WISELINK Pro müködése,
Plug & Play stb.)
A HDMI 1.3 kábelt csatlakoztatása vagy kihúzása esetén, újra keresse meg az eszközöket vagy
kapcsolja újra ki majd be a televíziót.
Ellenőrizze, hogy az Anynet+ eszköz Anynet+ funkciója be van-e kapcsolva.
•
•
•
•
•
•
•
•
•
•
El szeretném indítani az
Anynet+ funkciót.
Ellenőrizze, hogy az Anynet+ eszköz megfelelően csatlakozik-e a TV-készülékhez, illetve hogy az
Anynet+ (HDMI-CEC) be van kapcsolva az Anynet+ beállítások menüjében.
A TV-re történő váltáshoz nyomja meg a TV távirányítójának TV gombot. Nyomja meg a TOOLS
gombot az Anynet+ menü megjelenítéséhez, majd válassza ki a megfelelő menüt.
•
•
Ki szeretnék lépni az Anynet+
funkcióból.
Az Anynet+ menüjében válassza a TV-nézés opciót.
Nyomja meg a SOURCE gombot a TV-távirányítóján, és válasszon ki egy olyan eszközt, amely
nem Anynet+ eszköz.
(Ne feledje, hogy a csatornagomb csak akkor működik, ha nincs csatlakoztatott hangolóegységbe
épített Anynet+ eszköz.)
•
•
•
A képernyőn megjelenik
a Connecting to Anynet+
device… üzenet.
Nem használhatja a távirányítót az Anynet+ beállításakor és megtekintési módra váltáskor.
A távirányítót az Anynet+ beállítása vagy a megtekintési módra váltás befejezésekor használja.
•
•
Az Anynet+ eszköz nem
játszik le.
A Plug & Play funckió használata közben nem működik a lejátszás funkció.•
A csatlakoztatott eszköz nem
jelenik meg.
Ellenőrizze, hogy az eszköz támogatja-e az Anynet+ funkciókat.
Ellenőrizze, hogy a HDMI 1.3-kábel megfelelően van-e csatlakoztatva.
Ellenőrizze, hogy az Anynet+ (HDMI-CEC) be van-e kapcsolva az Anynet+ beállítások menüben.
Keressen újra az Anynet+ eszközöket.
Anynet+ eszközt csak HDMI 1.3 kábellel csatlakoztathat. Előfordulhat, hogy bizonyos HDMIkábelekkel az Anynet+ funkciók nem működnek.
Ha a folyamat rendellenesség (pl. a HDMI kábel vagy a tápkábel kihúzása, illetve áramszünet)
miatt megszakad, ismételje meg az eszközkeresést.
•
•
•
•
•
•
Nem lehet TV-műsort rögzíteni.
Ellenőrizze, hogy az antenna csatlakozóját megfelelően csatlakoztatta-e a vevőeszközhöz.•
A televízió hangja nem fogható
a vevőegységen.
Optikai kábellel csatlakoztassa a televíziót és a vevőegységet .•
N
N
N
N
TV-nézés
Eszközlista
Felvétel : DVDR
DVDR MENU
DVDR INFO
Vevő ◄ Be ►
Beállítás
U
Mozgatás L Beáll. R Vissza
Page 72

Magyar - 33
Tanácsok a készülék használatával kapcsolatban
Teletext funkció
A legtöbb televíziós csatorna a teletexten keresztül írásos információt szolgáltat. A teletext szolgáltatás tartalommutató oldala leírja,
hogyan használhatja ezt a szolgáltatást. Továbbá tetszés szerint választhat a különböző opciók közül a távvezérlő gombjainak
segítségével.
A teletextinformáció pontos megjelenítéséhez megbízható vételre van szükség. Különben információ veszhet el, vagy
bizonyos oldalak nem jelennek meg.
1
: (kilépés)
Kilépés a teletext módból.
2
6 (tartalomjegyzék)
A tartalomjegyzék oldal megjelenítése a teletext használata közben bármikor.
3
5 (felfedés)
Rejtett szöveg (pl. fejtörők megfejtései) megjelenítése. A normál képernyőhöz a
gomb ismételt megnyomásával térhet vissza.
4 4 (méret)
Megnyomásával dupla méretben jelenítheti meg a betűket a képernyő felső
részén. A képernyő alsó részén ugyanehhez a művelethez nyomja meg ismét a
gombot. A normál képernyőhöz a gomb ismételt megnyomásával térhet vissza.
5 8 (tárolás)
A teletext oldalak tárolására szolgál.
6 / (teletext be/vegyes))
A teletext mód aktiválása egy teletext szolgáltatást nyújtó csatorna kiválasztását
követően. Ismételt megnyomásával egyszerre jelenítheti meg, átfedésben, a
teletext oldalt és a csatornán vett képet.
7 1 (aloldal)
Az elérhető aloldal megjelenítése.
8 2 (következő oldal)
A következő teletext oldal megjelenítése.
9 3 (előző oldal)
Az előző teletext oldal megjelenítése.
0 0 (mód)
A teletext mód kiválasztása (LIST/FLOF). Ha LIST módban nyomja meg, Lista
mentése módra vált. Lista mentése módban a 8 (tárolás) gombbal mentheti el a
listára a teletext oldalt.
! 9 (tartás)
A képernyő tartása egy adott oldalon, ha az oldalhoz még további, automatikusan
betöltődő oldalak is tartoznak. Az üzemmódból a gomb ismételt lenyomásával
léphet ki.
@ 7 (mégse)
Oldal keresése közben látható a tévéadás.
# Színes gombok (piros/zöld/sárga/kék)
Ha a műsorszolgáltató FASTEXT rendszert használ, a teletext oldalon található,
színkóddal jelölt különböző témák a színes gombokkal is kiválaszthatók. A kívánt
művelethez nyomja meg a megfelelő színű gombot. Megjelenik egy további
színes információkat tartalmazó oldal, amelyek között ugyanezzel a módszerrel
válogathat. Az előző vagy a következő oldal megjelenítéséhez nyomja meg a
megfelelő színes gombot.
A távirányítón található számgombok megnyomásával közvetlenül válthat a
teletext oldalak között.
N
N
Folytatás…
1
3
4
5
6
2
7
8
9
0
!
@
#
Page 73

Magyar - 34
A teletext oldalak hat kategóriába vannak besorolva.
Betűjel Funkció
A A kiválasztott oldalszám.
B A sugárzó csatorna azonosítója.
C Aktuális oldalszám vagy kereséssel kapcsolatos jelzések.
D A dátum és az idő.
E A szöveg.
F Állapotinformáció.
FASTEXT információ.
A teletext információ gyakran több, egymás után megjelenő oldalon jelenik meg,
amelyek az alábbi módokon érhetők el:
Az oldalszám beírásával
Egy cím kiválasztásával a listából
Egy színes címsor kiválasztásával (FASTEXT rendszer)
A teletext módból a TV gomb megnyomásával léphet ki.
N
-
-
-
O
A fali konzol tartozékainak szabványadatai (VESA)
A fali konzolt szilárd falra, a padlóra merőlegesen szerelje fel.
Ha a fali konzolt más felületre szereli fel, lépjen kapcsolatba a legközelebbi márkakereskedővel.
A mennyezetre vagy ferde falra történő felszerelés súlyos személyi sérüléseket okozhat.
Termékcsalád hüvelyk VESA szabv. (A * B)
Szabványos
csavar
Mennyiség
LCD-TV
19" ~22" 100 * 100
M4
4
23"~29" 200 * 100
30"~40" 200 * 200 M6
46"~55" 400 * 400
M857"~70" 800 * 400
80" ~ 1400 * 800
PDP-TV
42"~ 50" 400 * 400
M8 4
58"~ 63" 600 * 400
70" ~ 800 * 400
80" ~ 1400 * 800
Az általunk forgalmazott fali konzol tartozékainak méretei a fenti táblázatban bemutatott szabványnak felelnek meg.
Ha a mi fali konzolunkat vásárolja meg, a felszereléshez szükséges tartozékokat és a részletes felszerelési útmutatót is
megkapja.
Ne használjon a szabványos méretnél hosszabb csavarokat, mert ezek károsíthatják a készülék belsejét.
A VESA csavarszabványnak nem megfelelő falikarok használata esetén a csavarok hossza a specifikációtól függően
változhat.
Ne használjon a VESA csavarszabvány előírásainak nem megfelelő csavarokat.
Ne húzza meg túl erősen a csavarokat, mivel ez károsíthatja a terméket, vagy a termék földre esését okozhatja, ami személyi
sérüléshez vezethet. A Samsung semmilyen felelősséget nem vállal az ilyen balesetekért.
A Samsung nem felel azokért a károkért vagy sérülésekért, melyeket a nem VESA szabványnak megfelelő falikar használata,
vagy a termék szerelési utasításának figyelmen kívül hagyása okoz.
Az 57 és 63 hüvelyk átmérőjű modelljeink nem felelnek meg egyik VESA szabványnak sem. Ezért célszerű az ehhez a
modellhez kialakított saját fali konzol használata.
A TV felszerelésekor legfeljebb 15 fokban döntse meg a készüléket.
N
N
N
N
N
N
N
N
Ne szerelje fel a falikart, ha a TV be van kapcsolva.
Ez áramütés miatti sérülést okozhat.
Page 74

Magyar - 35
Fal
Fal
A TV falra rögzítése
A TV leeshet, ha elhúzzák, eltolják, vagy a tetejére másznak. Különösen arra ügyeljen, hogy gyermekei ne borítsák
fel a TV-t, mert az súlyos sérülést, sőt akár halált is okozhat. Tartsa be a mellékelt biztonsági tájékoztatóban foglalt
összes biztonsági előírást.
A még nagyobb stabilitás és biztonság érdekében az alábbiak szerint szerelje fel a leesés elleni eszközt.
A TV leesésének megakadályozása
1.
Illessze a csavarokat a kapcsokba, és szorosan rögzítse a falhoz. Ellenőrizze a csavarok szoros illeszkedését a falhoz.
A fal típusától függően más anyag, például tipli használata is szükséges lehet.
A szükséges kapcsok, csavarok és zsineg nincs a készülékhez mellékelve, ezért azokat külön kell beszerezni.
2.
Távolítsa el a csavarokat a TV hátoldalának közepéről, helyezze a csavarokat a kapcsokba, majd erősítse a csavarokat ismét
a TV-hez.
Előfordulhat, hogy a csavarok nincsenek mellékelve a termékhez.
3.
A TV-hez és a falhoz rögzített kapcsokat kösse össze erős zsineggel, majd húzza meg szorosan a zsineget.
Helyezze a TV-t a
fal közelébe, nehogy hátraessen.
Helyezze a TV-t a fal közelébe, nehogy hátraessen.
A zsineg akkor köthető meg biztonságosan, ha a falhoz rögzített kapcsok a TV-hez rögzített kapcsokkal egyforma magasságban
vagy azoknál alacsonyabban vannak.
A TV elmozdítása előtt oldja ki a zsineget.
4.
Ellenőrizze a csatlakozások biztonságosságát. Időnként ellenőrizze a csatlakozások megfelelőségét. Ha kétsége támad a
csatlakozások biztonságát illetően, forduljon szakemberhez.
❑
N
N
N
N
N
N
A fali konzol felszerelésének előkészületei
1. Rögzítse a fali konzolt legfeljebb 1,5 Nm nyomatékkal. Az alkatrészek megrongálódhatnak, ha a nyomaték kívül esik a
meghatározott tartományon!
2. A tartozékok között talál egy rögzítőpántot [②], melynek segítésével más gyártó fali konzolját is felszerelheti a Samsung
televízióra. (B eset)
A fali konzol falra történő szerelésekor csavarozza le a lyukat [①].
N
A) Samsung gyártmányú fali konzol esetén
B) Más cég által gyártott fali konzol esetén
Page 75

Magyar - 36
A biztonságos felszerelés
Tartsa be az előírt távolságot a készülék és más tárgyak (pl. a fal) között a megfelelő szellőzés biztosítása érdekében. Ennek
elmulasztása tüzet okozhat, vagy a készülék meghibásodását eredményezheti a megemelkedő belső hőmérséklet miatt. A termék
felszerelésénél tartsa be az ábrán előírt távolságokat.
Állvány vagy fali konzol használata esetén csak a Samsung Electronics termékeit használja.
Ha más gyártó alkatrészeit használja, az a készülék meghibásodását, vagy a készülék leesése miatt bekövetkező
személyi sérülést okozhat.
Ha más gyártó alkatrészeit használja, az a készülék meghibásodását vagy a nem megfelelő szellőzés miatt megemelkedő
belső hőmérsékletből fakadó tűz keletkezését okozhatja.
A termék külseje típustól függően eltérhet a képen láthatótól.
A készülék állványra történő felszerelése esetén
A készülék fali konzolra történő felszerelése esetén
10 kum.m
10 kum.m
10 kum.m
10 kum.m
10 kum.m
10 kum.m
10 kum.m
10 kum.m
10 kum.m
10 kum.m
10 kum.m
N
-
-
N
Page 76

Magyar - 3
Hibaelhárítás
Ha kérdése van a TV-készülékkel kapcsolatban, először tekintse át az alábbi listát. Ha ezek közül a hibaelhárítási ötletek közül
egyik sem vezet eredményre, látogasson el a „www.samsung.com” honlapra, majd kattintson a Támogatás pontra, vagy forduljon
az Ügyfélszolgálathoz, melynek elérhetősége az utolsó oldalon található.
A legkézenfekvőbb megoldás a termékszoftver frissítése lehet.
Probléma Probléma Lehetséges megoldás
Képminőség
Mindenekelőtt, az Öndiagnosztika elvégzésével bizonyosodjon meg róla, hogy a TV-készülék megfelelően jeleníti-e meg a
tesztképet.
* Lépjen be a MENU → Terméktámogatás → Öndiagnosztika → Öndiagnosztika pontba.
Ha a tesztkép megfelelően jelenik meg, a rossz képminőséget valószínűleg a forrás vagy a jel okozza.
A TV képe nem olyan jó, mint
amilyen a boltban volt.
Ha analóg dekódert/beltéri egységet használ, frissítse a beltéri egységet.
A HD képminőséghez használjon HDMI- vagy komponenskábelt.
Kábeles/Műholdas előzető : Próbálja ki a csatornalistában szereplő HD (nagy
felbontású) csatornákat.
Hagyományos antennacsatlakozás : Az automatikus programozás után próbálja ki a
HD-csatornákat.
Sok HD-csatorna átkonvertált SD (normál felbontású) tartalmat sugároz.
Állítsa a dekóder/beltériegység videokimeneti felbontását 1080i vagy 720p értékre.
•
•
•
N
•
Torz a kép : makroblokk, kis blokk,
pontok, képpontosítás.
A kép torzulását okozhatja a videotartalom tömörítése is, főként gyorsan mozgó
képek, például sportközvetítések és akciólmek esetén.
A kép torzulását okozhatja az alacsony jelszint vagy a rossz minőségű jel. Ez nem a
TV-készülék hibája.
•
•
Komponenscsatlakoztatás esetén
rosszak a színek, vagy nem színes
a kép.
Ellenőrizze, hogy a komponenskábelek a megfelelő csatlakozóhoz vannak-e
csatlakoztatva. A színproblémákat okozhatja a nem megfelelő vagy laza
csatlakoztatás. Ilyenkor az is előfordulhat, hogy nincs kép.
•
Gyenge szín vagy fényerő.
A TV menüjében állítsa be a Kép opciókat (Kép üzemmód, Szín, Fényerő,
Élesség).
Állítsa be az Energiagazdálkodás opciót a Beállítások menüben.
Állítsa vissza a képet, így megnézheti, milyenek az alapértelmezett képbeállítások.
(Lépjen be a MENU → Kép → Kép visszaállítása pontba).
•
•
•
A képernyő oldalán pontozott vonal
látható.
Ha a képméret a Illesztés a képernyőhöz lehetőségre van állítva, változtassa meg
16:-re.
Módosítsa a dekóder/beltéri egység felbontását.
•
•
Csak AV (kompozit) bemenet
esetén a kép fekete-fehér.
Csatlakoztassa a videokábelt (sárga) a TV 1. komponensbemenetének zöld
csatlakozójához.
•
Csatornaváltásnál vagy késleltetett
képnél a kép lefagy, vagy torz.
Ha van csatlakoztatott dekóder, indítsa újra. (Csatlakoztassa újra a tápkábelt, és
várjon, amíg a dekóder újraindul. Ez akár 20 percet is igénybe vehet).
A dekóder kimeneti felbontását állítsa 1080i vagy 720p értékre.
•
•
Hangminőség
Mindenekelőtt a Hangteszt elvégzésével bizonyosodjon meg róla, hogy megfelelően működik-e a hang a TV-készüléken.
* Lépjen be a MENU → Terméktámogatás → Öndiagnosztika → Hangteszt
pontba. Ha a teszt során a hang megfelelő, a hang problémáját valószínűleg a forrás vagy a jel okozza.
Nincs hang, vagy maximális
hangerőn is túl halk.
Ellenőrizze a TV-hez csatlakoztatott eszköz hangerejét (dekóder/beltéri egység,
DVD, Blu-ray stb.). Majd annak megfelelően állítsa be a TV hangerejét.
•
A kép jó, de nincs hang.
A hang menüben állítsa a Hangszóróválasztás opciót TV hangszóró lehetőségre.
Ellenőrizze, hogy a külső eszköz hangkábelei a TV megfelelő hangbemeneti
csatlakozójához vannak-e csatlakoztatva.
Ellenőrizze a csatlakoztatott eszköz hangkimeneti beállításait.
Pl.) Ha HDMI-eszközt csatlakoztatott a TV-készülékhez, lehet, hogy módosítani kell a
dekóder hangbeállításait a HDMI-nek megfelelően.
Ha DVI-HDMI kábelt használ, külön hangkábelre is szükség van.
Ha a 30-as érték fölé állítja a hangerőt, kapcsolja ki az SRS funkciót.
Húzza ki a fejhallgató-csatlakozót (ha van a TV-n).
•
•
•
•
•
•
N
Folytatás…
Page 77

Magyar - 3
Probléma Probléma Lehetséges megoldás
Zajos a hangszóró.
Ellenőrizze a kábelcsatlakozásokat. Ellenőrizze, hogy a videokábel nem a
hangbemenethez van-e csatlakoztatva.
Antenna-/kábelcsatlakozás esetén ellenőrizze a jelerősséget. A hang torzulását okozhatja
a gyenge jelszint.
•
•
Nincs sem álló-, sem mozgókép
A TV--t nem lehet bekapcsolni. Ellenőrizze, hogy a tápkábel megfelelően van-e csatlakoztatva a fali aljzathoz, illetve a
TV-készülékhez.
Ellenőrizze, van-e áram a fali aljzatban.
Nyomja meg a TV POWER gombját, és ellenőrizze, hogy megfelelően működik-e a
távirányító.
Ha a TV-t be lehet kapcsolni, előfordulhat, hogy a hibát a távirányító okozza. A távirányító
problémájának megoldását lásd alább, a „Nem működik a távirányító” részben.
•
•
•
A TV-készülék automatikusan
kikapcsol.
Ellenőrizze, hogy az Auto kikapcs. Be van-e kapcsolva a Beállítások menüben.
Ha a TV számítógéphez van csatlakoztatva, ellenőrizze a számítógép energiabeállításait.
Ellenőrizze, hogy a tápkábel megfelelően van-e csatlakoztatva a fali aljzathoz, illetve a
TV-készülékhez.
Ha antenna-/kábelcsatlakozás esetén kb. 10–15 percig nincs jel, a TV kikapcsol.
•
•
•
•
Nincs álló-/mozgókép.
Ellenőrizze a kábelcsatlakozásokat. (Húzza ki, majd csatlakoztassa újra a TV és a külső
eszközök valamennyi kábelét).
Állítsa be a külső eszköz (dekóder/beltéri egység, DVD, Blu-ray stb.) videokimenetét,
hogy az megfeleljen a TV bemenő csatlakozásainak.
Például ha a külső eszköz kimenete : HDMI, a TV bemenete : HDMI.
Ellenőrizze, hogy a csatlakoztatott eszköz be van-e kapcsolva.
A TV-távirányító SOURCE gombjának megnyomásával ellenőrizze, hogy a TVkészüléken
a megfelelő forrás van-e beállítva.
Az eszköz tápkábelének újracsatlakoztatásávál indítsa újra a csatlakoztatott eszközt.
•
•
•
•
•
RF (Kábel/Antenna) csatlakozás
Nem minden csatorna fogható.
Ellenőrizze, hogy az antennakábel megfelelően van-e csatlakoztatva.
A Plug & Play funkció segítségével adja hozzá az elérhető csatornákat a
csatornalistához.
Lépjen be a MENU → Beállítások → Plug & Play pontba, és várja meg, amíg a rendszer
tárolja az összes elérhető csatornát.
Ellenőrizze, hogy az antenna megfelelően van-e pozícionálva.
•
•
•
Torz a kép : makroblokk, kis blokk,
pontok, képpontosítás.
A kép torzulását okozhatja a videotartalom tömörítése is, főként gyorsan mozgó képek,
például sportközvetítések és akciólmek esetén.
A kép torzulását a gyenge jelszint is okozhatja. Ez nem a TV-készülék hibája.
•
•
Számítógép csatlakoztatása
„Nem támogatott mód” üzenet.
Állítsa be a számítógép kimeneti felbontását és frekvenciáját úgy, hogy az megfeleljen a
TV által támogatott felbontásoknak.
•
A számítógép mindig megjelenik
a forráslistán, akkor is, ha nincs
csatlakoztatva.
Ez nem rendellenes, a számítógép lehetőség mindig megjelenik a forráslistán, akkor is,
ha nincs csatlakoztatva számítógép.
•
A kép rendben, de HDMIcsatlakoztatás esetén nincs hang.
Ellenőrizze a számítógép hangkimeneti beállításait.
•
Egyéb
A kép nem jelenik meg a teljes
képernyőn.
HD-csatornák esetén minden oldalon fekete sáv látható átkonvertált SD (4:3) tartalom
megjelenítése esetén.
A képernyő tetején és alján fekete sáv látható az olyan lmek esetén, amelyek
oldalaránya eltér a TV-készülékétől.
Állítsa a képméretet teljes képernyőre a külső eszközön vagy a TV-n.
•
•
•
Nem működik a távirányító.
Cseréljen elemet a távirányítóban. A behelyezésnél ügyeljen azok polaritására (+/-).
Tisztítsa meg a távirányító felső részén található átviteli ablakot.
Próbálja meg a távirányítót közvetlenül a TV-re irányítani másfél–két méterről.
•
•
•
Folytatás…
Page 78

Magyar - 3
Probléma Probléma Lehetséges megoldás
A plazma TV zúg.
A plazma TV •• esetében normális a halk zúgás. Ez a jelenség nem rendellenes. Azok az
elektromos töltések okozzák, amelyek a képalkotásban vesznek részt.
Ha a zúgás hangos, előfordulhat, hogy túl nagy a TV fényereje. Állítsa alacsonyabbra a
fényerőt.
Az is okozhat hangos zúgást, ha a plazma TV hátulja túlságosan közel van a falhoz vagy
más kemény felülethez. Csatlakoztassa újra a kábeleket.
A fali konzol nem megfelelő felszerelése is okozhat hangos zajt.
•
•
•
•
A képernyőbeégés kérdése.
A képernyőbeégés lehetőségének minimálisra csökkentése érdekében a készüléket
képernyőbeégés elleni technológiával látták el. A képpont-eltolásos technológia lehetővé
teszi a kép fel/le irányú (függőleges képsor), illetve oldaltól oldalig történő (vízszintes
képpont) mozgatását.
•
A dekóder/beltéri egység
távirányítójával nem lehet ki- vagy
bekapcsolni a TV-t, és nem lehet
szabályozni a hangerőt sem.
Programozza be a dekóder/beltéri egység távirányítóját a TV működtetésére.
A SAMSUNG TV kódját megtalálja a dekóder/beltéri egység használati útmutatójában.
•
„Nem támogatott mód” üzenet.
Ellenőrizze a TV által támogatott felbontásokat, és annak megfelelően állítsa be a külső
eszköz kimeneti felbontását. A felbontás beállítását lásd a jelen használati útmutatóban.
•
A TV-nek műanyagszaga van.
Ez a szag normális, és idővel megszűnik.
•
A TV Jelerősség funkciója az
Öndiagnosztika menüben nem
elérhető.
Ez a funkció csak digitális csatornáknál elérhető antenna (RF/koax) csatlakoztatás
esetén.
•
A TV jobbra vagy balra dől.
Szerelje le a talpat a TV-ről, majd ismét szerelje fel.
•
A talpat nem lehet felszerelni.
Ellenőrizze, hogy a TV sima felületen áll-e.
Ha nem tudja eltávolítani a csavarokat a TV-készülékből, használjon mágneses
csavarhúzót.
•
A csatorna menü szürkén jelenik
meg (nem elérhető).
A csatorna menü csak akkor elérhető, ha a TV forrás ki van választva.
•
A beállítások 30 perc után vagy a TV
kikapcsolásakor elvesznek.
Ha a TV Üzlet módban van, 30 percenként visszaállítja a hang- és képbeállításokat.
Változtassa meg az Üzlet módot Otthon módra a Plug & Play eljárással. Nyomja meg
a SOURCE gombot, és válassza ki a TV módot, majd MENU → Beállítások → Plug &
Play → ENTER.
•
Időnként megszűnik a hang és a
kép.
Ellenőrizze a kábelcsatlakozásokat és csatlakoztassa újra a kábeleket.
A hibát túlságosan merev vagy vastag kábelek használata okozhatja. Ellenőrizze, hogy
a kábelek elég rugalmasak-e hosszú távú használatra. Fali konzol használta esetén
javasoljuk, hogy a kábelekhez használjon derékszögű csatlakozókat.
•
•
A TV-képernyő szélét közelről
szemügyre véve apró részecskék
láthatók.
Ez a készülék kialakításának része, nem hiba.
•
A PIP menü nem elérhető.
A PIP funkció csak akkor elérhető, amikor HDMI, számítógép vagy komponens forrást
néz.
•
„Kódolt jel” vagy „Nincs jel/Gyenge
jel” CAM CARD(CI/CI+) kártyával.
Ellenőrizze, hogy a a CI(CI+) kártya be van-e helyezve a CAM modul közös felületének
nyílásába.
Ez normális, az OTA (műholdról automatikusan letölthető szoftver) funkcióval rendelkező
TV magától bekapcsol, hogy telepítse a tévézés közben letöltött szoftverfrissítéseket.
•
•
Visszatérő kép-/hangproblémák.
Ellenőrizze és változtassa meg a jelet vagy a forrást.
•
Egyes fent látható képek és funkciók csak bizonyos modellek esetében elérhetők.
N
Page 79

Magyar - 40
Műszaki leírás
A SAMSUNG mindenkor termékei javítását, fejlesztését tartja szem elôtt. Ezért a mûszaki adatok és a használati útmutató
megváltoztatásának jogát fenntartja. A 2/1984. (III. 10.) BkM–IpM számú együttes rendelet alapján tanúsítjuk, hogy a PS42B450 /
PS42B451 / PS50B450 / PS50B451 típusú SAMSUNG gyártmányú színes televíziók megfelelnek az alábbi mûszaki jellemzôknek:
Model Name
PS42B450
/ PS42B451
PS50B450
/ PS50B451
Képernyőméret (Átló) 42 inch 50 inch
A PC felbontása
(Optimális)
1024 x 768 @ 60 Hz 1360 x 768 @ 60 Hz
Hangkimenet
10 W x 2 10 W x 2
Méretek (Sz x Mé x Ma)
Készülékház
Állvánnyal
1056 x 660 x 74 mm
1056 x 721 x 316 mm
1221 x749 x 74 mm
1221 x 810 x 316 mm
Súly
Készülékház
Állvánnyal
24 kg
28 kg
31 kg
35 kg
Környezeti feltételek
Üzemelési hőmérséklet
Üzemelési páratartalom
Tárolási hőmérséklet
Tárolási páratartalom
10 °C – 40 °C
10% – 80%, lecsapódásmentes
-20 °C – 45 °C
5% – 95%, lecsapódásmentes
A kivitel és a műszaki jellemzők előzetes értesítés nélkül változhatnak.
Ez a készülék a B osztályba tartozó digitális készülék.
A tápellátásra és energiafogyasztásra vonatkozó adatok a termékre ragasztott címkén találhatók.
N
N
N
Page 80

Polski - 2
Instrukcja obsługi
Utrwalanie obrazu
Na ekranie plazmowym nie należy wyświetlać nieruchomego obrazu (np. gry komputerowej, gdy ekran podłączony jest do
komputera PC) przez czas dłuższy niż 2 godziny, ponieważ może to spowodować utrwalanie obrazu. Utrwalenie obrazu
określa się także mianem wypalania ekranu. Aby uniknąć tego zjawiska, w trakcie wyświetlania nieruchomego obrazu należy
obniżyć jasność i kontrast ekranu.
Nagrzewanie się górnej ścianki telewizora plazmowego
Przy dłuższym używaniu produktu górna ścianka może nagrzewać się do bardzo wysokiej temperatury, ponieważ ciepło
powstające w trakcie pracy urządzenia jest odprowadzane przez otwór wentylacyjny na górze obudowy. Jest to normalny
objaw i nie oznacza usterki lub uszkodzenia produktu. Należy jednak uważać, aby dzieci nie dotykały górnej części
urządzenia.
Odgłosy trzaskania
Przy zmianie warunków otoczenia, takich jak temperatura czy wilgotność, telewizor może nieznacznie kurczyć się lub
rozszerzać — efektom takim mogą towarzyszyć charakterystyczne dźwięki. Jest to normalny objaw i nie oznacza uszkodzenia
produktu.
Uszkodzone komórki
Telewizor plazmowy wyposażony jest w ekran zawierający od 2 360 000 (jakość HD) do 6 221 000 (jakość FHD) pikseli, do
wytworzenia których wymagane jest zastosowanie zaawansowanych technologii. Mimo tego na ekranie może występować
kilka jasnych lub ciemnych pikseli. Nie mają one negatywnego wpływu na działanie urządzenia.
Nie korzystać z telewizora przy temperaturze poniżej 5°C(41°F)
Zbyt długie wyświetlanie nieruchomego obrazu może spowodować trwałe uszkodzenie panelu plazmowego.
W wyniku długotrwałego wyświetlania na telewizorze plazmowym obrazu w formacie 4:3 na środku
ekranu, a także po jego lewej i prawej stronie, mogą utrwalić się ślady ramki spowodowane różnicą w
emisji światła na ekranie. Podobny efekt może wystąpić przy odtwarzaniu filmów DVD lub używaniu
konsoli do gier. Uszkodzenia spowodowane tym efektem nie są objęte gwarancją.
Efekt powidokowy
Wyświetlanie przez dłuższy czas nieruchomych obrazów z konsoli do gry lub komputera może być przyczyną powstania
efektu powidokowego. Aby uniknąć tego zjawiska, w trakcie wyświetlania nieruchomego obrazu należy obniżyć jasność i
kontrast wyświetlanego obrazu.
Gwarancja
- Gwarancja nie obejmuje uszkodzeń związanych z utrwalaniem obrazu.
- Gwarancja nie obejmuje wypalenia ekranu.
Montaż
W przypadku gdy produkt ma pracować w miejscu o dużym zapyleniu, w wysokiej lub niskiej temperaturze, przy wysokiej
wilgotności, gdy może być narażony na działanie substancji chemicznych lub gdy ma pracować w trybie ciągłym (np. na
lotniskach, stacjach kolejowych itp.), należy skontaktować się z autoryzowanym serwisem. Niedopełnienie tego wymogu może
doprowadzić do poważnego uszkodzenia produktu.
Informacja dotycząca telewizji cyfrowej
1.
Funkcje telewizji cyfrowej (DVB) są dostępne tylko w krajach/regionach, gdzie emitowane są sygnały naziemnej telewizji
cyfrowej DVB-T (MPEG2 i MPEG4 AVC) lub gdzie obsługiwana jest kompatybilna cyfrowa telewizja kablowa DVB-C
(MPEG2 i MPEG4 AAC). Aby dowiedzieć się, czy sygnał DVB-T lub DVB-C jest dostępny, należy zapytać sprzedawcę.
2. DVB-T to europejski standard emisji sygnału naziemnej telewizji cyfrowej, DVB-C jest standardem emisji sygnału
kablowej telewizji cyfrowej. Niniejsze opracowanie nie zawiera jednak niektórych zróżnicowanych funkcji, takich jak
EPG (Electronic Program Guide - Elektroniczny przewodnik po programach), VOD (Video on Demand - Wideo na
żądanie) itp. Z tego powodu funkcje mogą nie być obecnie obsługiwane.
3. Pomimo, iż telewizor jest zgodny ze standardami telewizji DVB-T i DVB-C na miesiąc sierpień 2008 r., nie jest możliwe
zagwarantowanie obsługi przyszłych standardów emisji naziemnej telewizji cyfrowej DVB-T i kablowej telewizji
cyfrowej DVB-C.
4. Niektórzy dostawcy telewizji kablowych mogą żądać dodatkowej opłaty za taką usługę lub może być wymagana zgoda
na ustalane przez nich warunki handlowe.
5. Niektóre funkcje telewizji cyfrowej mogą być niedostępne w niektórych krajach lub regionach oraz cyfrowa telewizja
kablowa może nie działać poprawnie u niektórych dostawców.
6. Aby uzyskać dalsze informacje, skontaktuj się z lokalnym działem obsługi klienta Samsung.
Skontaktuj się z firmą SAMSUNG na całym świecie
Jeśli masz uwagi lub pytania w sprawie produktów marki Samsung, skontaktuj się z infolinią SAMSUNG.(Dalsze informacje
znajdują się na ostatniej stronie.)
© 2009 Samsung Electronics Co., Ltd. All rights reserved.
Page 81

Polski - 3
Polski
N O T
Symbol
Naciśnij Uwaga Przycisk jednodotykowy Przycisk TOOL
Polski - 3
Spis treści
Podłączanie i przygotowanie telewizora
Lista elementów ....................................................................4
Korzystanie z podstawy .........................................................4
Montaż podstawy (w zależności od modelu) .........................4
Panel przedni ........................................................................5
Panel złączy ..........................................................................6
Pilot .......................................................................................8
Wkładanie baterii do pilota ....................................................9
Włączanie i wyłączanie zasilania ..........................................9
Przełączanie telewizora w tryb gotowości .............................9
Korzystanie z menu .............................................................10
Korzystanie z przycisku TOOLS ..........................................10
Opis ekranu .........................................................................10
Funkcja Plug & Play ............................................................11
Obsługa kanałów
Programowanie kanałów ....................................................12
Managing Channels ............................................................15
Ustawienia obrazu
Zmiana i przywracanie domyślnych ustawień obrazu .........17
Korzystanie z funkcji obrazu trójwymiarowego ....................20
Konguracja telewizora za pośrednictwem komputera .......21
Tryb monitora komputerowego ............................................22
Ustawianie dźwięku
Zmienianie prolu dźwięku ..................................................23
Wybieranie trybu dźwięku ...................................................24
■
■
■
■
■
■
■
■
■
■
■
■
■
■
■
■
■
■
■
■
■
Opis funkcji
Konguracja w menu Setup ................................................25
Ustawianie czasu ................................................................27
Wybierz źródło / Edytuj nazwę ............................................28
Obsługiwane programy .......................................................28
Informacje na temat Anynet+
Podłączanie urządzeń Anynet+ ...........................................29
Konguracja systemu Anynet+ ...........................................30
Wyszukiwanie urządzeń Anynet+ i
przełączanie między nimi ....................................................30
Nagrywanie .........................................................................31
Odbiór dźwięku za pomocą odbiornika (kina domowego) ... 32
Rozwiązywanie problemów związanych z systemem Anynet+
.. 32
Zalecenia dotyczące użytkowania
Cyfrowy teletekst .................................................................33
Dane techniczne zestawu wspornika do montażu
naściennego (VESA) ...........................................................34
Przygotowanie do montażu wspornika ściennego ..............35
Przymocowanie telewizora do ściany ..................................35
Zabezpieczanie przestrzeni instalacyjnej ............................36
Rozwiązywanie problemów .................................................37
Dane techniczne ..................................................................40
■
■
■
■
■
■
■
■
■
■
■
■
■
■
■
■
■
Page 82

Polski - 4
Podłączanie i przygotowanie telewizora
Lista elementów
Instrukcja obsługi
Pilot zdalnego sterowania/
baterie AAA (2ea)
Kabel zasilający Szmatka do czyszczenia
Karta gwarancyjna/
podręcznik zasad
bezpieczeństwa (nie jest
dostępny we wszystkich
krajach)
wkręt (4ea)
Pokrywa spodnia
Uchwyt (4ea)
(patrz strona 35)
Rdzeń ferrytowy
do kabla zasilania (1ea)
Korzystanie z podstawy
Telewizor powinny przenosić dwie osoby lub więcej. Nie wolno go kłaść na
podłodze, gdyż grozi to uszkodzeniem ekranu. Telewizor należy zawsze
utrzymywać w pozycji pionowej.
Telewizor plazmowy można obracać o 20 stopni w lewo i w prawo.
N
N
Montaż podstawy (w zależności od modelu)
Za pomocą 4 wkrętów przymocuj dokładnie monitor do podstawy.
(Wygląd zewnętrzny telewizora może się różnić od przedstawionego
na ilustracji).
W przypadku instalowania telewizora na ścianie
zamknij pokrywę (1) w miejscu podłączenia
podstawy przy użyciu dwóch wkrętów.
Ostrzeżenie
Podstawę należy dokładnie
przymocować do telewizora przed jego
przenoszeniem, ponieważ może ona
wysunąć się i spowodować poważne
obrażenia.
Telewizor powinny przenosić dwie
osoby lub więcej. Nie wolno go
kłaść na podłodze, gdyż grozi to
uszkodzeniem ekranu. Telewizor
należy zawsze przechowywać w
pozycji pionowej.
N
Rdzenie ferrytowe służą do ekranowania przewodów przed zakłóceniami. Quando ligar um cabo,
abra o núcleo de ferrite e prenda-o à volta do cabo junto da ficha como ilustrado na figura.
N
-20° ~ 20°
Page 83

Polski - 5
Panel przedni
1
SOURCE
Przełącza pomiędzy dostępnymi żródłami sygnału
wejściowego (TV, Zewn. AV, PC, Moduł, HDMI1,
HDMI2/DVI, HDMI3).
Podczas poruszania się po menu przycisk ten pełni
taką samą funkcję jak przycisk ENTERE na pilocie
2
MENU
Wyświetlanie menu ekranowego z funkcjami telewizora.
3
+ –
Naciśnij, aby zwiększyć lub zmniejszyć głośność. W menu
ekranowym przyciski + – spełniają tę samą rolę co
przyciski ◄ lub ► na pilocie.
N
4
CH
Zmiana kanału. W menu ekranowym przyciski CH
spełniają tę samą rolę co przyciski ▲ lub ▼ na pilocie.
5
WSKAŹNIK ZASILANIA
Zaświeci się po włączeniu zasilania.
6 (POWER
)
Naciśnij, aby włączyć lub wyłączyć telewizor.
7
CZUJNIK PILOTA
Naciśnij, aby włączyć lub wyłączyć telewizor.
8
GŁOŚNIK
Kolor i kształt produktu mogą się różnić w zależności od modelu.
N
Przyciski panelu przedniego.
Przyciski działają po ich
dotknięciu.
Page 84

Polski - 6
Panel złączy
Przed podłączeniem dowolnego urządzenia audio lub wideo do telewizora należy się upewnić, że wszystkie urządzenia są wyłączone
.
Podczas podłączania urządzenia zewnętrznego należy uważać, aby złącza kabli były podłączane do gniazd w tym samym kolorze.
N
N
Kolor i kształt produktu mogą się różnić w zależności od modelu.
N
1
SERVICE 1, 2
Złącze do użytku serwisu.
2
WEJŚCIE ZASILANIA
Wejście do podłączenia dostarczonego kabla zasilającego.
3
COMPONENT IN
Wejścia audio (AUDIO L/R) i wideo (Y/P
B/PR) dla sygnału o
rozdzielonych składowych.
4
PC IN (PC) / (AUDIO)
Złącza wejść audio i wideo do podłączenia komputera.
5
EXT (RGB)
Wejścia i wyjścia do urządzeń zewnętrznych, np.
magnetowidu, odtwarzacza DVD, urządzenia do gier wideo
lub odtwarzacza płyt wizyjnych.
Specyfikacja wejść/wyjść
Złącze
Sygnał wejściowy Sygnał wyjściowy
Wideo Audio (L/P) RGB
Wideo + Audio (L/P)
Złącze
✔ ✔ ✔
Dostępny jest tylko
sygnał TV lub DTV
cyfrowej.
6
DIGITAL AUDIO OUT (OPTICAL)
Służy do podłączania cyfrowych urządzeń audio.
7
3D SYNC OUT
Podłączanie nadajnika trójwymiarowego obrazu w
podczerwieni
8
AUDIO OUT(AUDIO R/L)
Służą do podłączania sygnałów dźwiękowych z gniazd
RCA na telewizorze do gniazd źródeł zewnętrznych, np.
zestawu audio.
9
HDMI IN 1, 2 (DVI)
Połączenie HDMI nie wymaga dodatkowego połączenia
doprowadzającego sygnał dźwiękowy.
- Korzystając z połączenia kablowego HDMI/DVI należy
użyć gniazda HDMI IN 2 (DVI).
Co to jest HDMI?
-
High Definition Multimedia interface (HDMI)
to połączenie umożliwiające przesyłanie
cyfrowego obrazu o wysokiej rozdzielczości oraz
wielokanałowego cyfrowego dźwięku.
- Interfejs HDMI/DVI służy do doprowadzania
sygnału DVI do dodanego urządzenia za pomocą
odpowiedniego przewodu (dostępnego oddzielnie).
Różnica pomiędzy interfejsem HDMI i DVI polega
na tym, że interfejs HDMI jest mniejszy, ma
zainstalowany mechanizm ochrony praw autorskich
HDCP oraz obsługuje wielokanałowy dźwięk cyfrowy.
DVI AUDIO IN
Złącza wyjść audio DVI do podłączenia zewnętrznych
urządzeń.
0
ANT IN
Złącze kabla koncentrycznego 75Ω do anteny lub
przewodu telewizji kablowej.
Obsługiwane tryby dla złączy HDMI/DVI i Component
480i 480p 576i 576p 720p 1080i 1080p
HDMI/DVI 50Hz X X X O O O O
HDMI/DVI 60Hz X O X X O O O
Moduł
O O O O O O O
N
Panel tylny telewizora
Sieć telewizji
kablowej
lub
lub
2
543 8 96
0
1
1 7
Page 85

Polski - 7
Kolor i kształt produktu mogą się różnić w zależności od modelu.
N
1
GNIAZDO COMMON INTERFACE
Wsuń do gniazda kartę CI (Common Interface).
(patrz strona 26)
− W przypadku niektórych kanałów, jeśli nie zostanie
włożona karta CI CARD, na ekranie zostanie
wyświetlony zakodowany sygnał.
− Przez około 2-3 minuty będzie wyświetlany komunikat
o zestawianiu zawierający numer telefonu, identyfikator
karty CI CARD, identyfikator hosta i inne informacje. W
przypadku wyświetlenia komunikatu o błędzie należy
skontaktować się z dostawcą usług.
− Po zakończeniu konfiguracjiinformacji dotyczących
kanału wyświetlany jest komunikat Aktualizacja
zakończona , który oznacza, że lista kanałów została
zaktualizowana.
Włóż kartę CI-Card zgodnie ze wskazanym na niej kie
runkiem.
Moduły CAM nie są dostępne w niektórych krajach,
informacji na ten temat udziela autoryzowany
sprzedawca.
N
N
2
HDMI IN 3
Gniazdo HDMI służy do podłączania urządzeń z wyjściem
HDMI.
3
AV IN (VIDEO, AUDIO L/R)
Złącza wejść wideo i audio służą do podłączania urządzeń
zewnętrznych, np. kamery wideo lub magnetowidu.
Panel boczny
2
3
1
Page 86

Polski - 8
Pilot
Pilota można używać w odległości do 7 m od telewizora.
Silne źródło światła może być przyczyną nieprawidłowego działania pilota.
N
1
Przycisk POWER (zasilanie)
2
Bezpośrednie wybieranie trybu TV
3
Przyciski numeryczne
umożliwiające bezpośrednie
wybieranie kanałów
4
Wyświetla listę ulubionych kanałów.
5
Chwilowe wyciszenie dźwięku
6
Zwiększanie głośności
Zmniejszanie głośności
7
Wybieranie źródła sygnału
wejściowego
8
Wyświetlanie informacji o aktualnie
oglądanym programie
9
Szybkie wybieranie często
używanych funkcji.
0
Sterowanie kursorem w menu
!
Służy do wyświetlania listy kanałów
na ekranie.
@
Korzystaj z tych przycisków na
liście kanałów, przy opcji itp.
$ Wybieranie formatu dźwięku
%
Korzystaj z tych przycisków na
liście kanałów, przy opcji i Anynet+.
^
Poprzedni kanał
&
Następny kanał
Poprzedni kanał
*
Wyświetlanie głównego menu
ekranowego
(
Wyświetlanie Elektronicznego
Informatora Programowego (EPG)
)
Przejście do poprzedniego menu
a Zamknięcie menu ekranowego
b
Uruchamia tryb SRS TruSurround
HD.
c Wybór rozmiaru obrazu
d Wyświetlanie napisów w formacie
cyfrowym
e
Wybór Opisu Audio.
Funkcje telegazety
2 Zamknięcie ekranu telegazety
(w zależności od modelu)
7
Wybieranie trybu telegazety
(LIST/FLOF)
8
Wyświetlanie ukrytego tekstu
9
Rozmiar telegazety
!
Zapisywanie stron telegazety
@
Wybieranie tematu Fastext
#
Wyświetlanie telegazety /
wyświetlanie jednocześnie
telegazety i normalnego obrazu
^
Wyświetlanie podstrony
&
P : Następna strona telegazety
P : Poprzednia strona
telegazety
*
Spis treści telegazety
)
Zatrzymanie telegazety
a
Wyjście z trybu telegazety
Page 87

Polski - 9
Wkładanie baterii do pilota
1.
Unieś do góry pokrywę z tyłu pilota w sposób przedstawiony na rysunku.
2.
Włóż dwie baterie o rozmiarze AAA (R03).
Dopasuj bieguny + i – baterii do znaków wewnątrz komory.
3.
Zamknij pokrywę.
Jeśli pilot nie będzie używany przez dłuższy czas, wyjmij baterie i umieść je
w suchym i chłodnym miejscu.
Jeśli pilot nie działa! Sprawdź
1. Czy włączone jest zasilanie telewizora?
2. Czy bieguny plus i minus baterii nie zostały zamienione?
3. Czy baterie nie są wyczerpane?
4. Czy kabel zasilający jest podłączony i jest prąd w sieci elektrycznej?
5. Czy w pobliżu nie ma żadnych specjalnych lamp jarzeniowych lub neonów?
N
Włączanie i wyłączanie zasilania
Przewód zasilający podłącza się z tyłu telewizora.
1.
Podłącz przewód zasilający do odpowiedniego gniazda.
Wskaźnik trybu gotowości zaświeci się.
2.
Naciśnij przycisk POWERP na telewizorze.
Telewizor można także włączyć naciskając przyciski POWERP lub TV na pilocie.
3.
Naciśnij przyciski numeryczne (0~9) lub zmiany kanału (< / >) na pilocie lub przycisk <CH> na telewizorze.
Po włączeniu telewizora po raz pierwszy, na ekranie pojawi się monit o wybranie języka, w jakim mają być wyświetlane
menu.
4.
Aby wyłączyć telewizor, naciśnij ponownie przycisk POWERP.
Przełączanie telewizora w tryb gotowości
Przełączenie telewizora w tryb gotowości pozwala zmniejszyć zużycie energii. Włączenie trybu gotowości jest wskazane, jeśli
przerwa w oglądaniu telewizji ma być krótka (np. w celu zjedzenia posiłku).
1.
Naciśnij przycisk POWERP na pilocie.
Ekran zgaśnie, zaś z przodu telewizora zaświeci się czerwony wskaźnik trybu gotowości.
2.
Aby ponownie włączyć telewizor, naciśnij przycisk POWERP, przyciski numeryczne (0~9), przycisk TV lub zmiany kanału (< / >).
Nie jest wskazane pozostawianie telewizora w trybie gotowości przez dłuższy czas (np. na czas wyjazdu na urlop). Zaleca
się także odłączenie odbiornika od sieci zasilającej oraz wyjęcie przewodu antenowego z gniazdka.
N
N
N
N
N
N
N
Page 88

Polski - 10
Korzystanie z menu
1. Gdy telewizor jest włączony, naciśnij przycisk MENU. Spowoduje to wyświetlenie
na ekranie głównego menu. Lewa strona menu zawiera ikony: Obraz, Dźwięk,
Kanał, Ustawienia, Wejście i Aplikacja, Pomoc techniczna.
2.
Wybierz jedną z ikon za pomocą przycisku ▲ lub ▼. Następnie naciśnij przycisk
ENTERE, aby uzyskać dostęp do podmenu.
3.
Naciśnij przycisk EXIT, aby zamknąć menu.
Menu ekranowe zniknie po upływie około minuty.
Korzystanie z przycisku TOOLS
Za pomocą przycisku TOOLS można szybko i łatwo wybrać najczęściej używane funkcje. Menu Narzędzia zmienia wygląd w
zależności od tego, z jakiego trybu pracy z urządzeniem zewnętrznym się korzysta.
1.
Naciśnij przycisk TOOLS. Pojawi się menu Narzędzia.
2.
Za pomocą przycisku ▲ lub ▼ wybierz menu, a następnie naciśnij przycisk
ENTERE.
3.
Naciśnij przyciski ▲/▼/◄/►/ENTERE, aby wyświetlić, zmienić lub użyć
wybranych elementów. Więcej informacji na temat określonej funkcji znajduje
się na odpowiedniej stronie.
• Anynet+ (HDMI-CEC), patrz str 30.
•
Tryb obrazu
, patrz str 17.
•
Tryb dźwięku
, patrz str 23.
•
Automatycz. wył.
, patrz str 27.
• Oszcz. energii, patrz str 26.
• Dodaj do Ulubionych (lub Usuń z Ulubionych), patrz str 15.
• Auto dopasowanie, patrz str 21.
N
Narzędzia
Anynet+ (HDMI-CEC)
Tryb obrazu
: Standardowy
Tryb dźwięku
:
Użytkownika
Automatycz. wył.
:
Wył
Oszcz. energii
:
Wył
Dodaj do Ulubionych
U
Nawigacja
E
Wejdź
e
Wyjdź
Tryb
:
Standardowy
Podświetlenie komórki
: 4
Kontrast
: 95
Jasność
: 45
Ostrość
: 50
Kolor
: 50
Odcień (Z/C) : Z50/C50
Obraz
Opis ekranu
Na ekranie widoczny jest bieżący kanał oraz status ustawień dźwięku i obrazu.
Naciśnij przycisk INFO, aby wyświetlić informacje.
Naciśnij przycisk INFO na pilocie zdalnego sterowania. Na ekranie telewizora pojawi
się kanał, typ dźwięku oraz status niektórych ustawień obrazu i dźwięku.
▲, ▼: Można przeglądać inne informacje o kanale. Jeśli chcesz przejść do
wybranego programu, naciśnij przycisk ENTERE.
◄, ►: Można przeglądać informacje o wybranym programie na bieżącym
kanale.
Powtórnie naciśnij przycisk INFO lub poczekaj ok. 10 sekund, a ekran zniknie
automatycznie.
O
•
•
N
DTV Air
15
abc1
18:00 ~ 6:00
18:11 Thu 6 Jan
Life On Venus Ave nue
Unclassif ied
No Deta ild Informa tion
E Watch
' Informa tion
Page 89

Polski - 11
Funkcja Plug & Play
Gdy zasilanie telewizora jest włączane po raz pierwszy, podstawowe ustawienia są wyświetlane automatycznie w odpowiedniej
kolejności.
Wygaszacz ekranu włącza się, jesli nie otrzyma sygnału z pilota przez 1 minutę, gdy włączona jest funkcja Plug & Play.
Wygaszasz ekranu włącza się po 15 minutach od otrzymania ostatniego sygnału.
1.
Naciśnij przycisk POWER na pilocie. Zostanie wyświetlone menu You can
set the menu language. umożliwiające wybór języka ekranowego. Wybierz
odpowiedni język, naciskając przycisk ▲ lub ▼.
Naciśnij przycisk ENTERE, aby potwierdzić wybór.
2.
Naciśnij przycisk ◄ lub ►, aby wybrać opcję Tryb sklepowy lub Tryb dom., a
następnie przycisk ENTERE.
Aby cieszyć się w domu najlepszą jakością obrazu, zalecane jest wybranie
trybu Tryb dom..
Επίδειξη καταστ. jest przeznaczony tylko do użytku w sklepie.
Jeśli urządzenie ustawiono przez przypadek na tryb Tryb sklepowy, aby powrócić do trybu Tryb dom. (
Standardowy
),
należy nacisnąć na telewizorze przycisk głośności. Gdy pojawi się menu ekranowe głośności, naciśnij i przytrzymaj przez
5 sekund przycisk MENU znajdujący się na panelu telewizora.
3.
Naciśnij przycisk ENTERE. Wybierz odpowiedni kraj, naciskając przycisk ▲ lub ▼. Aby potwierdzić wybór, naciśnij przycisk
ENTERE.
4. Naciśnij przycisk ▲ lub ▼, aby zapamiętać kanały dla wybranego połączenia, następnie naciśnij przycisk ENTERE.
Naz.: Sygnał anteny zewnętrznej.
Kablowa: Sygnał anteny kablowej.
5.
Za pomocą przycisków ▲ i ▼ wybierz kanały, które chcesz zapisać. Naciśnij przycisk ENTERE, aby wybrać opcję
Uruchom.
Cyfrowy & Analogue: Kanały cyfrowe i analogowe.
Cyfrowy: Kanały cyfrowe.
Analogue: Kanały analogowe.
Aby dowiedzieć się więcej o trybach wyszukiwania, zapoznaj się z informacjami na stronie 12.
Wyszukiwanie kanałów rozpocznie się i zakończy automatycznie.
Aby przerwać proces zapamiętywania, naciśnij przycisk ENTERE.
Po zapisaniu wszystkich dostępnych kanałów pojawi się komunikat Ustaw tryb zegara.
6.
Naciśnij przycisk ENTERE. Za pomocą przycisków ▲ lub ▼ wybierz opcję Auto, a następnie naciśnij przycisk ENTERE.
Po wybraniu opcji Ręczny pojawi się komunikat Ustaw aktualną datę i godzinę (patrz strona 27)
Jeśli dostępny jest sygnał cyfrowy, godzina zostanie ustawiona automatycznie. W przeciwnym przypadku przejdź na
stronę 27, na której znajdują się informacje o sposobie ustawiania godziny.
7. Wyświetlona zostanie krótka instrukcja Jak osiągnąć najlepszą wydajność nowego telewizora HD. Naciśnij przycisk
ENTERE.
W menu Pomoc techniczna dostępny jest poradnik Instrukcja Połączeń HD.
8.
Pojawi się komunikat Miłego oglądania!. Po zakończeniu naciśnij przycisk ENTERE.
Ponowne uaktywnianie funkcji…
1.
Naciśnij przycisk MENU, aby wyświetlić menu. Za pomocą przycisków ▲ lub ▼
wybierz opcję
Ustawienia
, a następnie naciśnij przycisk ENTERE.
2.
Naciśnij ponownie przycisk ENTERE, aby wybrać opcję Plug & Play.
3.
Wprowadź czterocyfrowy numer PIN. Domyślny numer PIN w nowym telewizorze
to 0-0-0-0.
Informacje dotyczące zmiany numeru PIN znajdują się na str. 25.
Funkcja Plug & Play dostępna jest tylko w trybie TV.
N
N
N
N
N
•
•
•
•
•
N
N
N
N
N
N
N
N
N
Ustawienia
Plug & Play
►
Język menu : Polski
Czas
Nadawanie
Zabezpieczenia
Ogólne
Plug & Play
You can set the menu language.
U
Move E Enter
▲
Nederlands
English
Eesti
▼
Menu Language :
Page 90

Polski - 12
Obsługa kanałów
Programowanie kanałów
Kraj
Kanał Cyfrowy: Funkcja zmiany kraju dla kanałów cyfrowych.
Kanał analogowy: Funkcja zmiany kraju dla kanałów analogowych.
Pojawi się ekran z monitem o wprowadzenie kodu PIN. Wprowadź czterocyfrowy
numer PIN.
Automat. zapam.
Uruchamia skanowanie wszystkich kanałów aktywnie nadających program
(dostępność zależna od miejsca zamieszkania) i zapisuje je w pamięci telewizora.
Umożliwia zapisanie kanałów dla wybranego połączenia.
Naz.: Sygnał anteny zewnętrznej.
Kablowa: Sygnał anteny kablowej.
Po wybraniu Anteny kablowej:
Tryb wyszukiwania: Wyświetlenie trybu wyszukiwania (Szybkie)
ID sieci: Wyświetla kod identyfikacyjny sieci.
Częstotliwość: Wyświetla częstotliwość dla danego kanału.
Modulation: Wyświetla dostępne wartości modulacji.
Prędkość symbolu: Wyświetla dostępne prędkości symbolu.
Tryb wyszukiwania: Wyświetlenie trybu wyszukiwania (Pełne, Sieć)
Częstotliwość (Pocz.~Końc.): Wyświetla częstotliwość dla danego kanału.
Modulation: Wyświetla dostępne wartości modulacji.
Prędkość symbolu: Wyświetla dostępne prędkości symbolu.
Umożliwia zapamiętanie źródła kanału
Cyfrowy & Analogue: Kanały cyfrowe i analogowe.
Cyfrowy: Kanały cyfrowe.
Analogue: Kanały analogowe.
Aby zatrzymać funkcję Wyszukiwanie automatyczne naciśnij przycisk ENTERE.
Pojawi się komunikat Przerwać programowanie automatyczne?.
Wybierz opcję Yes, naciskając przycisk ◄ lub ►, a następnie naciśnij przycisk ENTERE.
Jeśli kanał został zablokowany za pomocą funkcji
Blokada rodzicielska
, pojawi się monit o wprowadzenie kodu PIN.
❑
N
❑
•
•
N
•
-
-
-
-
•
-
-
-
•
•
•
N
N
N
N
Kanał
Kraj
►
Automat. zapam.
Wyszukiwanie ręczne
Opcje wyszukiwania sieci kablowej
Przewodnik Teraz i Nast.
Pełny przew.
Domyślny przewodnik :
Akt./Nast.
Ciąg dalszy...
Page 91

Polski - 13
Wyszukiwanie ręczne
Funkcja umożliwiająca ręczne wyszukanie kanałów i zapamiętanie ich w pamięci telewizora.
Zarządzanie kanałami cyfrowymi (Cyfrowymi)
Ręczne zapamiętywanie kanałów cyfrowych.
Opcja Digital Channel jest dostępna wyłącznie w trybie telewizji cyfrowej.
Kanał
: Wybierz numer kanału za pomocą przycisków ▲ i ▼ lub przycisków (0~9).
Częstotliwość: Wybierz częstotliwość za pomocą przycisków numerycznych.
Szer. pasma: Wybierz przepustowość za pomocą przycisków ▲ i ▼ lub przycisków numerycznych (0~9).
Po zakończeniu lista kanałów zostanie odpowiednio zaktualizowana.
Kanał analogowy
Ręczne zapamiętywanie kanałów analogowych.
Program (Numer programu przydzielony do danego kanału): Wybierz numer kanału za pomocą przycisków ▲ i ▼ lub
przycisków numerycznych (0~9).
System obrazu → Auto / PAL / SECAM / NTSC4.43: Za pomocą przycisku ▲ lub ▼ wybierz system obsługi kolorów.
System fonii → BG / L / I / DK: Za pomocą przycisku ▲ lub ▼ wybierz system obsługi dźwięku.
Kanał
(Jeśli znasz numer kanału, który chcesz zapamiętać): Naciśnij przycisk ▲ lub ▼, aby wybrać opcje C (kanał
antenowy) lub S (kanał kablowy). Aby wprowadzić wymaganą liczbę, naciśnij przycisk ►, a następnie naciśnij przycisk
▲, ▼ lub przycisk numeryczny (0~9).
Kanał można również wybrać bezpośrednio za pomocą przycisków numerycznych (0~9).
Jeśli występują zakłócenia dźwięku lub nie ma dźwięku, wybierz inny standard obsługi dźwięku.
Szukaj (Jeśli nie znasz numerów kanałów): Rozpocznij wyszukiwanie za pomocą przycisków ▲ lub ▼. Tuner przeszukuje
pasma częstotliwości do momentu odebrania sygnału pierwszego kanału lub kanału wybranego przez użytkownika na
ekranie.
Zapisz (Gdy kanał i związany z nim numer programu zostaną zapisane): Wybierz opcję OK, naciskając przycisk
ENTERE.
Tryb kanałów
C (tryb kanału antenowego): W tym trybie można wybrać kanał poprzez wprowadzenie numeru przypisanego każdej
stacji nadawanej drogą antenową.
S (tryb kanału kablowego): W tym trybie można wybrać kanał poprzez wprowadzenie numeru przypisanego każdej
stacji telewizji kablowej.
Opcje wyszukiwania anteny kablowej (Kabel)
Umożliwia bezpośrednie dodawanie zakresu wyszukiwania kanałów do trybu wyszukiwania sieciowego. (W zależności od
kraju)
Częstotliwość (Pocz.~Końc.): Wyświetla częstotliwość dla danego kanału.
Modulation: Wyświetla dostępne wartości modulacji.
Symbol Rate: Wyświetla dostępne prędkości symbolu.
Ustaw Częstotliwość (Pocz.~Końc.) i Prędkość symbolu za pomocą klawiszy numerycznych (0~9).
Przewodnik Teraz i Nast. / Pełny przew.
Informacje elektronicznego przewodnika po programach (Electronic Programme Guide, EPG) są dostarczane przez
nadawców. Ze względu na informacje przekazywane dla danego kanału pozycje programów mogą być puste lub nieaktualne.
Wyświetlane dane są automatycznie aktualizowane natychmiast po odebraniu nowych informacji.
Przewodnik Teraz i Nast.: Umożliwia wyświetlenie informacji o bieżącym oraz następnym programie dla sześciu kanałów
wybranych w kolumnie po lewej stronie.
Pełny przew.
: Ta opcja umożliwia wyświetlenie informacji o programach w postaci jednogodzinnych segmentów. Wyświetlane
są informacje o dwóch kolejnych godzinach dla danego programu, które można przewijać do przodu oraz wstecz.
❑
N
•
•
•
N
•
•
•
•
N
N
•
•
N
-
-
❑
•
•
•
N
❑
Ciąg dalszy...
Page 92

Polski - 14
Domyślny przewodnik
Akt./Nast.
/
Pełny przew.
: Wybór wyświetlanego przewodnika
Akt./Nast.
lub
Pełny przew.
po naciśnięciu na pilocie przycisku GUIDE.
Menu przewodnika można również wyświetlić, naciskając przycisk GUIDE.
Korzystanie z Przewodnik Teraz i Nast. /
Pełny przew.
▲/▼/◄/►
(ENTER)
Wybierz program naciskając przycisk (▲/▼/◄/►).
Po wybraniu następnego programu zostanie on dodany do listy zadań i zostanie wyświetlona ikona
zegara. Po ponownym naciśnięciu przycisku ENTERE naciśnij przycisk (▲/▼/◄/►), aby wybrać
opcję Anuluj wpisy harmon.; dodanie do listy zadań zostanie anulowane i ikona zegara zniknie.
Więcej informacji na temat dodawania programów do listy zadań można znaleźć w sekcji.
CZERWONY Przełączanie pomiędzy opcją Akt./Nast. i Pełny przew.
ZIELONY Pełny przew.: Szybkie przewijanie w tył (-24 godziny).
ŻÓŁTY Pełny przew.: Szybkie przewijanie do przodu (+24 godziny).
NIEBIESKI Wyjście z przewodnika.
INFO
Przycisk INFO wyświetla szczegółowe informacje. Numer kanału, Czas trwania, Pasek stanu, Poziom
kontroli rodzicielskiej, Informacje o jakości obrazu (HD/SD), Tryby dźwięku, Napisy lub Telegazeta,
języki Napisów lub Telegazety i krótkie streszczenie podświetlonego programu są dostępne w
szczegółowych informacjach. „…” pojawi się, jeśli streszczenie jest zbyt długie.
Lista kanałów
Szczegółowe informacje dotyczące korzystania z opcji
Lista kanałów
znajdują się na str. 15~16.
Tryb kanałów
Po naciśnięciu przycisku P >/< kanały będą przełączane w ramach wybranej listy kanałów.
Dodano kanały
: Kanały będą przełączane w ramach listy zapamiętanych kanałów.
Ulubione kanały: Kanały będą przełączane w ramach listy ulubionych kanałów.
Dostrój
(tylko kanały analogowe)
Jeśli sygnał stacji jest dobrze odbierany, nie ma potrzeby dostrajania kanału. Czynność ta jest wykonywana automatycznie w
czasie wyszukiwania i zapisywania. Jeśli sygnał jest słaby lub zniekształcony, konieczne może być ręczne dostrojenie kanału.
Dostrojone kanały, które zostały zapisane oznaczane są gwiazdką * po prawej stronie numeru kanału w nagłówku kanału.
Zmiany nie zostaną zachowane, jeżeli dostrojony kanał nie zostanie zapisany w pamięci.
W celu zresetowania dostrojenia należy za pomocą przycisku ▼ wybrać opcję Zeruj, a następnie nacisnąć przycisk
ENTERE.
❑
O
❑
❑
❑
N
N
N
Kanał
Przewodnik Teraz i Nast.
Pełny przew.
Domyślny przewodnik
: Akt./Nast.
►
Lista kanałów
Tryb kanałów : Dodane kanały
Dostrój
Pełny przew.
DTV Cable 900 f tn 2:10 Tue 1 Jun
Freshmen On Campus
2:00 - 2:30
No Detailed Information
Today 2:00 - 3:00 3:00 - 4:00
Mint Extra
Loaded
Fresh 40 with Dynamite MC
The Distillery
Smash Hits! Sunday
900 f tn
901 ITV Play
902 Kerrang!
903 Kiss
903 oneword
903 Smash Hits!
▼
Street Hypn..
Kisstory
No Information
No Information
No Information
Freshmen O..
Oglądaj
Informacja
Strona
Akt./Nast.
Wyjdź
Przewodnik Teraz i Nast.
DTV Cable 900 f tn 2:10 Tue 1 Jun
Freshmen On Campus
2:00 - 2:30
No Detailed Information
Mint Extra
Loaded
Fresh 40 with Dynamite MC
The Distillery
Smash Hits! Sunday
900 f tn
901 ITV Play
902 Kerrang!
903 Kiss
903 oneword
903 Smash Hits!
▼
Street Hypn..
Kisstory
No Information
No Information
No Information
Freshmen O..
Oglądaj
Informacja Strona
Pełny przew.
Wyjdź
Akt. Nast.
Page 93

Polski - 15
Managing Channels
Za pomocą tego menu można dodawać i usuwać kanały, ustawiać ulubione kanały
oraz skorzystać z przewodnika dla kanałów cyfrowych.
Na ekranie
Wszystkie kanały, Dodano kanały, Ulubione lub Zaprogramowane
wybierz kanał naciskając przyciski ▲ lub ▼ i naciskając przycisk ENTER
E
Wszystkie kanały
: Wyświetlenie wszystkich dostępnych aktualnie kanałów.
Dodano kanały
: Wyświetlenie wszystkich dodanych kanałów.
Ulubione: Wyświetlenie wszystkich ulubionych kanałów.
Zaprogramowane: Wyświetlenie wszystkich aktualnie zarezerwowanych
programów.
Funkcje kolorowych przycisków na liście kanałów
Czerw. (
Typ kanału
): Przełączenie między trybami TV, Radio, Dane/Inne i
Wszystkie.
Zielony (Zoom): Wydłużenie lub skrócenie numeru kanału.
Żółty (
Wybierz
): Wybranie wielu list kanałów.
TTOOLS (
Narzędzia
): Wyświetlenie menu
Usuń
(lub Dodaj), Dodaj do
Ulubionych (lub Usuń z Ulubionych),
Wyśw. z wyk. wył. czas.
, Edycja nazwy
kanału, Edycja numeru kanału,
Sortuj, Zablokuj
(lub Odblokuj),
Zaznacz
wszystkie
(lub Odznacz wszystkie) lub
Automat. zapam.
. (Dostępne elementy
menu opcji mogą się różnić w zależności od sytuacji).
Ikony stanu kanału
A
Kanał analogowy
c
Kanał wybrany za pomocą żółtego przycisku.
♥
Kanał ustawiony jako ulubiony.
(
Program aktualnie wyświetlany.
\
Kanał zablokowany.
)
Kanał zarezerwowany
Naciśnij przycisk CH LIST na pilocie, aby wywołać listę kanałów.
Menu Narzędzi listy kanałów (we wszystkich kanałach /
dodanych kanałach / ulubionych kanałach)
Naciśnij przycisk TOOLS, aby wyświetlić menu narzędzi.
Elementy menu mogą się różnić w zależności od stanu kanału.
Dodaj /
Usuń
Aby wyświetlać żądane kanały, można dodawać lub usuwać poszczególne kanały.
Wszystkie usunięte kanały będą wyświetlane w menu
Wszystkie kanały
.
Kanał wyświetlany na szaro oznacza usunięty kanał.
Menu Dodaj jest wyświetlane wyłącznie dla usuniętych kanałów.
W ten sam sposób można usunąć kanał z menu
Dodano kanały
lub
Ulubione.
Dodaj do Ulubionych / Usuń z Ulubionych
Często oglądane kanały można ustawić jako ulubione.
Naciśnij przycisk TOOLS, aby wyświetlić menu Narzędzia.
Ulubione kanały można także dodać wybierając Narzędzia → Dodaj do Ulubionych (lub Usuń z Ulubionych).
T
Pojawi się symbol “♥”, a kanał zostanie ustawiony jako ulubiony.
Wszystkie ulubione kanały będą wyświetlane w menu Ulubione.
Aby wybrać jeden z Ulubionych kanałów, naciśnij przycisk FAV.CH na pilocie
zdalnego sterowania.
Wyśw. z wyk. wył. czas.
Istnieje możliwość zarezerwowania programu, który chcesz obejrzeć. O wybranej godzinie zostanie automatycznie włączony
wybrany kanał, nawet jeśli aktualnie oglądany był inny. Aby zarezerwować program należy najpierw ustawić bieżącą godzinę.
(patrz str. 27).
Zarezerwować można tylko zapamiętane kanały.
Kanał, miesiąc, dzień, rok, godzinę i minuty można wprowadzić bezpośrednio za pomocą przycisków numerycznych na pilocie
.
Zarezerwowany program będzie wyświetlany w menu Zaprogramowane.
Elektroniczny przewodnik po programach i wyświetlanie rezerwacji
Po wybraniu kanału cyfrowego i naciśnięciu przycisku ► pojawi się Przewodnik po programach dla danego kanału.
Program można zarezerwować zgodnie z podaną powyżej procedurą.
N
N
-
-
-
-
N
O
❑
N
N
N
N
N
N
N
N
O
N
N
N
N
Ciąg dalszy...
824 UKTV Gold
825 UKTV style
A 1 C --
A 2 C
--
A 3 ♥ C
--
A 4 C
--
A 5 C
--
A 6 C
--
A 7 C
--
A 8 C
--
Dodano kanały
Wszystkie
Typ kanału Powiększenie Wybierz
Narzędzia
824 UKTV Gold
825 UKTV style
A 1 C --
A 2 C
--
A 3 C
--
A 4 C
--
A 5 C
--
A 6 C
--
A 7 C
--
A 8 C
--
Wszystkie kanały
Wszystkie
Typ kanału Powiększenie Wybierz
Narzędzia
Usuń
Dodaj do Ulubionych
Wyśw. z wyk. wył. czas.
Edycja nazwy kanału
Sortuj
Zablokuj
▼
Kanał
Miniprzew.
Domyślny przewodnik :
Akt./Nast.
Lista kanałów
Tryb kanałów : Dodane kanały
Dostrój
Page 94

Polski - 16
Edycja nazwy kanału (tylko kanały analogowe)
Można wprowadzić etykietę kanału, która pojawi się na ekranie za każdym razem po wybraniu tego kanału.
Nazwy kanałów emitowanych cyfrowo są przydzielane automatycznie i nie można ich zmienić.
Edycja numeru kanału (tylko kanały cyfrowe)
Numer kanału można także ustawić za pomocą przycisków numerycznych na pilocie.
Sortuj
(tylko kanały analogowe)
Za pomocą tej funkcji można zmienić numery programów dla zapisanych kanałów. Czynność ta może być konieczna po
wykonaniu automatycznego zapamiętywania.
Zablokuj
/ Odblokuj
Kanały, które mają być niemożliwe do wybrania i oglądania, można zablokować. Funkcja jest dostępna tylko wtedy, gdy opcja
Blokada rodzicielska
zostanie ustawiona na Wł.. (patrz str. 25).
Pojawi się ekran z monitem o wprowadzenie kodu PIN. Wprowadź czterocyfrowy numer PIN.
Domyślny numer PIN w nowym telewizorze to 0-0-0-0. Aby zmienić kod PIN, wybierz z menu opcję Zmień kod PIN.
Pojawi się symbol “
\
”
, a kanał zostanie zablokowany.
Zaznacz wszystkie
/ Odznacz wszystkie
Zaznacz wszystkie
: Wybranie wszystkich kanałów z listy kanałów.
Odznacz wszystkie: Na liście kanałów możesz zaznaczać i odznaczać kanały.
Operacje dodawania i usuwania, dodawania do Ulubionych i usuwania z Ulubionych oraz blokowania i odblokowywania
można wykonać dla wielu kanałów jednocześnie. Wybierz kanały i naciśnij żółty przycisk. Wybrane kanały zostaną
ustawione jednocześnie.
Na lewo od wybranych kanałów pojawi się znak c.
Opcja Odznacz wszystkie jest dostępna tylko po wybraniu kanału.
Automat. zapam.
Więcej informacji na temat opcji ustawień znajduje się na stronie 12.
Jeśli kanał został zablokowany za pomocą funkcji
Blokada rodzicielska
,
pojawi się monit o wprowadzenie kodu PIN.
Menu Narzędzi listy kanałów (w trybie Zaprogramowane)
Pozwala na wyświetlenie, zmianę lub usunięcie rezerwacji.
Naciśnij przycisk TOOLS, aby wyświetlić menu narzędzi.
Zmień informację
: Zmiana wyświetlanej rezerwacji.
Anuluj wpisy harmon.
: Anulowanie wyświetlanej rezerwacji.
Informacja
: Pokazanie wyświetlanej rezerwacji.
(Możliwa jest również zmiana informacji o rezerwacji).
Zaznacz wszystkie
: Zaznaczenie wszystkich zarezerwowanych programów.
N
N
N
N
•
•
N
N
N
N
N
❑
N
•
•
•
•
Zaprogramowane
1 / 1 / 2009
13:59 5 TV1 Quincy, M.E
18:59 2 TV3 The
Korektor
20:59 2 TV3 McMillan & Wife
21:59 2 TV3 M.Spillane’s mike Hammer
Zmień informację
Anuluj wpisy harmon.
Informacja
Zaznacz wszystkie
Wszystkie
Powiększenie Wybierz
Narzędzia Informacja
Page 95

Polski - 17
Ustawienia obrazu
Zmiana i przywracanie domyślnych ustawień obrazu
Tryb
Tryb wyświetlania obrazu można dostosować do indywidualnych upodobań.
Dynamiczne: Obraz w wysokiej rozdzielczości do oglądania w jasnym otoczeniu.
Standardowy: Tryb wyświetlania obrazu odpowiedni do normalnego otoczenia.
Film: Obraz dopasowany do komfortowego oglądania w ciemnym otoczeniu.
Naciśnij przycisk TOOLS, aby wyświetlić menu Narzędzia.
Tryb obrazu można również wybrać za pomocą opcji Narzędzia →
Tryb obrazu
.
T
Podświetlenie
/
Kontrast
/
Jasność
/
Ostrość
/
Kolor /
Odcień (Z/C)
Telewizor dysponuje opcjami pozwalającymi na regulację jakości obrazu.
Podświetlenie
: Regulowanie jasności pikseli Wartość.
Kontrast: Dostosowanie kontrastu.
Jasność: Dostosowanie jasności.
Ostrość: Dostosowanie ostrości.
Kolor: Dostosowanie poziomu nasycenia barw obrazu za pomocą paska ekranowego.
Odcień (Z/C): Im bliżej wartości Czerw. 100, tym bardziej nasycona jest barwa czerwona.
Wybierz tryb obrazu, który chcesz w pierwszej kolejności dostosować. Zmienione wartości zostaną zapamiętane dla
każdego trybu obrazu.
Po wprowadzeniu zmian do opcji
Podświetlenie, Kontrast, Jasność, Ostrość, Kolor
i Odcień (Z/C) wartości wyświetlane
na ekranie zostaną odpowiednio zmienione.
W trybach systemu PAL – Analog TV, Ext., AV, S-Video – nie można używać funkcji Tint.
W trybie PC można dokonywać zm ian jedynie w opcjach
Podświetlenie komórki, Kontrast
i
Jasność
.
Można zmieniać i zapisywać ustawienia każdego urządzenia zewnętrznego, które zostało podłączone do telewizora.
Zmniejszenie jasności obrazu spowoduje spadek ilości energii zużywanej w czasie działania urządzenia, co w rezultacie
prowadzi do obniżenia ogólnych kosztów eksploatacji.
Ustawienia zaawansowane
Nowy telewizor Samsung pozwala na wprowadzenie jeszcze dokładniejszych
ustawień niż poprzednie modele. Informacje o szczegółowych ustawieniach
znajdują się poniżej.
Opcja
Ustawienia zaawansowane
jest dostępna w trybach
Standardowy
i
Film.
W trybie PC, w ramach ustawień
Ustawienia zaawansowane
można
dokonywać zmian jedynie w opcjach Gamma oraz Balans bieli.
Tonacja czerni → Wył. / Ciemna / Ciemniejsza / Najciemniejsza
Umożliwia wybór poziomu czerni na ekranie w celu dopasowania głębi obrazu.
Kontrast dynamiczny →
Wył
/ Niska / Średnia / Wysoka
Umożliwia wybranie optymalnego kontrastu obrazu.
Gamma
Istnieje możliwość regulacji intensywności kolorów podstawowych (czerwony, zielony, niebieski).
Przestrzeń kolorów
Przestrzeń kolorów jest to matryca kolorów, składająca się z kolorów czerwonego, zielonego i niebieskiego. Wybierz ulubioną
przestrzeń kolorów, aby uzyskać obraz w możliwie naturalnych barwach.
Auto: Automatycznie dostosowuje zakres kolorów w zależności od źródła obrazu.
Oryginalne: Uruchamia poszerzony zakres barw w stosunku do źródła obrazu.
Balans bieli
Umożliwia regulację temperatury koloru w celu uzyskania bardziej naturalnych kolorów.
Przes. R / Przes.ziel. / Przes.nieb. / Wzm. R. / Wzm. ziel. / Wzm. nieb.: Zmiana wartości regulacji powoduje odświeżenie
dostosowywanego ekranu.
Zeruj: Przywrócenie ustawień fabrycznych balansu bieli.
Odcień skóry
Umożliwia zwiększenie nasycenia koloru, odpowiadającego barwom skóry.
Zmiana wartości regulacji powoduje odświeżenie dostosowywanego ekranu.
Uwydatn. krawędzi →
Wył
/
Wł
Umożliwia uwydatnienie krawędzi obiektów w obrazie.
❑
•
•
•
❑
•
•
•
•
•
•
N
N
N
N
N
N
❑
N
N
•
•
•
•
N
Kolor
: 50
Odcień (Z/C) : Z50/C50
Ustawienia zaawansowane
►
Opcje obrazu
Reset obrazu
Obraz
Ciąg dalszy...
Obraz
Tryb :
Standardowy
►
Podświetlenie
: 4
Kontrast
: 95
Jasność
: 45
Ostrość
: 50
Kolor
: 50
Odcień(Z/C) : Z50/C50
Page 96

Polski - 18
Opcje obrazu
W trybie PC, w funkcji możliwe jest dostosowywanie ustawień wyłącznie w
przypadku opcji Ton kolorów, Rozmiar i Ochrona przed wypalaniem.
Ton kolorów → Zimny
/ Normalny / Ciep.1 / Ciep.2
Można wybrać preferowaną i dostosowaną do wzroku użytkownika temperaturę
kolorów.
Zmienione wartości są zapisywane zgodnie z wybranym trybem
Obraz
.
Opcje Ciep.1 lub Ciep.2 są aktywowane wyłącznie wtedy, gdy używany jest
tryb obrazu Film.
Rozmiar
Istnieje możliwość wyboru rozmiaru obrazu najlepiej odpowiadającego aktualnym wymaganiom użytkownika.
Auto szeroko.: Tryb automatyczny szerokokątny.
16:9: Obraz o proporcjach ekranu 16:9.
Szer. pow.: Opcja narzuca proporcje ekranu 4:3 zamiast 16:9 poprzez pionowe rozciągnięcie obrazu w formacie 4:3.
Pow.: Pionowe rozciągnięcie obrazu o proporcjach 16:9.
4:3: Obraz o proporcjach ekranu 4:3.
Dopas. do ekranu: Wyświetla obraz w natywnej rozdzielczości HD, która nie jest obsługiwana przez zwyczajne telewizory.
Dostępne rozmiary obrazu są zależne od źródła sygnału wejściowego.
Dostępne elementy zależą od wybranego trybu.
W trybie PC można wybierać tylko tryby 16:9 i 4:3.
Można zmieniać i zapisywać ustawienia każdego urządzenia zewnętrznego, które zostało podłączone do telewizora.
Pozostawienie statycznego obrazu na czas dłuższy niż dwie godziny może stać się przyczyną tymczasowego utrwalenia
obrazu.
Szer. pow.: Za pomocą przycisku ► wybierz opcję
Pozycja
, a następnie naciśnij przycisk ENTERE.
Przesuwaj obraz w górę i w dół za pomocą przycisku ▲ lub ▼. Następnie naciśnij przycisk ENTERE.
Pow.: Za pomocą przycisku ► wybierz opcję
Pozycja
, a następnie naciśnij przycisk ENTERE. Przesuwaj obraz w górę i w
dół za pomocą przycisku ▲ lub ▼. Następnie naciśnij przycisk ENTERE. Za pomocą przycisku ► wybierz opcję
Rozmiar
,
a następnie naciśnij przycisk ENTERE. Naciśnij przycisk ▲ lub ▼, aby powiększyć lub zmniejszyć obraz w pionie.
Następnie naciśnij przycisk ENTERE.
Po wybraniu opcji Dopas. do ekranu w trybie HDMI (1080i / 1080p) lub Component (1080i / 1080p): Wybierz opcję
Położenie
za pomocą przycisku ◄ lub ►. Aby przesuwać obraz, należy użyć przycisków ▲, ▼, ◄ lub ►.
Zeruj: Za pomocą przycisków ◄ lub ► wybierz opcję Zeruj, a następnie naciśnij przycisk ENTERE. Możesz rozpocząć
ustawianie wartości.
Użycie funkcji Dopas. do ekranu przy sygnale wejściowym HDMI 720p spowoduje odcięcie jednej linii na górze, dole, z
prawej oraz z lewej strony ekranu (podobnie jak przy funkcji overscan).
Opcje te można wybrać w prosty sposób, naciskając przycisk P.SIZE na pilocie.
Tryb ekranu
Po wybraniu rozmiaru obrazu
Auto szeroko.
w formacie panoramicznym 16:9
można określić rozmiar obrazu wyłącznie jako 4:3 WSS (Wide Screen Service). W każdym państwie europejskim obowiązują
inne wymagania dotyczące rozmiaru obrazu. Dlatego tę funkcję pozostawiono do skongurowania użytkownikom.
16:9: Obraz o proporcjach ekranu 16:9.
Szer. pow.: Opcja narzuca proporcje ekranu 4:3 zamiast 16:9 poprzez pionowe rozciągnięcie obrazu w formacie 4:3.
Pow.: Pionowe rozciągnięcie obrazu o proporcjach 16:9.
4:3: Tryb obrazu 4:3.
Ta funkcja jest dostępna w trybie
Auto szeroko.
.
Ta funkcja nie jest dostępna w trybie PC, Moduł lub HDMI.
Cyf. red. szumu
→
Wył
/ Niska / Średnia / Wysoka / Auto
Jeśli sygnał wejściowy odbierany przez telewizor jest słaby, włączając układ cyfrowej redukcji szumów można do pewnego
stopnia zredukować zakłócenia i odbicia na ekranie.
Jeśli sygnał jest słaby, wybierz poszczególne opcje do momentu wyświetlenia obrazu o najlepszej jakości.
Poziom czerni HDMI
→
Normalna / Niska
Umożliwia wybór poziomu czerni na ekranie w celu dopasowania głębi obrazu.
Funkcja ta jest aktywna tylko wówczas, kiedy wejście zewnętrzne podłączone jest do złącza HDMI (sygnały RGB).
❑
N
N
N
•
•
•
•
•
•
N
N
N
N
N
N
N
N
N
O
•
•
•
•
N
N
N
N
Odcień (Z/C) : Z50/G50
Ustawienia zaawansowane
Opcje obrazu
►
Reset obrazu
Obraz
Ciąg dalszy...
Page 97

Polski - 19
Tryb Film
Obraz zoptymalizowany pod kątem oglądania lmów.
Wył.: Włączone podstawowe przetwarzanie obrazu oraz brak automatycznej detekcji dla lmów.
Auto: Automatyczne dobranie jakości obrazu pomiędzy lmem i programem wideo.
Ochrona przed wypalaniem ekranu
Konguracja Opcji ochrony przed wypalaniem ekranu w celu zapobiegania i redukcji wypalania pikseli.
Jeżeli nieruchomy obraz wyświetlony jest zbyt długo, może spowodować trwałe uszkodzenie ekranu.
Skok pikseli: Aby zmniejszyć prawdopodobieństwo wypalenia ekranu, telewizor został wyposażony w technologię
zapobiegania wypaleniu ekranu. Pozwala ona ustawić ruch obrazu w górę lub w dół (pionie) oraz w prawo i w lewo
(poziomie). Ustawienie czasu umożliwia zaprogramowanie odstępu czasu w minutach pomiędzy kolejnymi ruchami obrazu.
Za pomocą przycisków ▲ lub ▼ zmień ustawienie opcji Skok pikseli na Wł, a następnie naciśnij przycisk ENTERE.
Za pomocą przycisków ▲ i ▼ wybierz żądaną opcję, a następnie naciśnij przycisk ENTERE.
Dostępne opcje: Poziomy, Pionowy, Czas
Optymalne warunki do przesuwania pikseli
Element TV/Złącze/AV/Moduł/HDMI/PC
Poziomy 0~4 2
Pionowy 0~4 2
Czas
( minut) 1~4 min 3 min
Wartość skoku pikseli może być różna w zależności od rozmiaru monitora (w calach) i trybu pracy.
Funkcja ta jest niedostępna w trybie Dopas. do ekranu.
Przewijanie: Funkcja ta pomaga usunąć obraz szczątkowy z ekranu przez przesuwanie wszystkich pikseli na panelu
według specjalnego wzoru. Tej funkcji należy użyć w celu usunięcia widocznego na ekranie obrazu szczątkowego,
szczególnie powstałego w wyniku długotrwałego wyświetlania zdjęć
Wyszarzenie boków: Podczas oglądania telewizji przy ustawionych proporcjach obrazu 4:3, ekran jest chroniony przed
uszkodzeniem przez regulację balansu bieli przy lewej i prawej krawędzi.
Ciemne: Po ustawieniu proporcji obrazu 4:3 przyciemniana jest jego lewa i prawa krawędź.
Jasne: Po ustawieniu proporcji obrazu 4:3 rozjaśniana jest jego lewa i prawa krawędź.
•
•
•
N
N
N
N
N
N
•
•
-
-
Page 98

Polski - 20
Korzystanie z funkcji obrazu trójwymiarowego
Telewizor umożliwia oglądanie filmów i odtwarzanie gier w formacie trójwymiarowym. Funkcja efektu 3D umożliwia oglądanie
obrazów trójwymiarowych przez specjalne okulary.
Połączenia
❑
1. Podłącz kabel HDMI/DVI do wejścia HDMI IN 2 (DVI) w telewizorze i gniazda wyjściowego w komputerze.
2. Za pomocą kabla 3.5mm Stereo połącz gniazdo DVI AUDIO IN na telewizorze i gniazdo Audio Out na karcie dźwiękowej
komputera.
3. Podłącz nadajnik do gniazda wyjściowego 3D SYNC OUT na panelu tylnym telewizora.
4. Włącz telewizor i ustaw źródło sygnału na HDMI2/DVI.
Więcej informacji na temat okularów 3D (i nadajnika) można znaleźć w instrukcji obsługi okularów 3D.
Dostosowywanie rozdzielczości do sygnału z komputera:: - PS42B450/PS42B451: 1024 x 768 przy 60 Hz
- PS50B450/PS50B451: 1024 x 768 przy 60 Hz,
1360 x 768 przy 60 Hz
Optymalna rozdzielczość dla PS50B450/PS50B451 wynosi 1360 x 768. Jeżeli sygnał o rozdzielczości 1024x768 podłączony
jest w trybie 3D, obraz zostanie wyświetlony w formacie 4:3, z szarymi pasami po obu stronach obrazu.
Nadajnik trójwymiarowego obrazu w podczerwieni komunikuje się z okularami 3D.
W związku z tym nadajnik powinien być umieszczony blisko okularów 3D.
Jest on aktywowany, kiedy sygnałem wejściowym odbieranym przez gniazda HDMI lub DVI jest sygnał RGB, a dźwięk DVI
Sound jest obsługiwany.
Po wyłączeniu lub włączeniu tryb zmieniany jest na domyślny – Wył. (Off) – i zapisywane są ustawienia elementu Format
(Format).
Aby możliwe było używanie funkcji Efekt 3D (3D Effect), konieczne jest posiadanie karty gra cznej z obsługą 3D lub
oprogramowania 3D.
Okulary 3D i nadajnik muszą być produktami tej samej rmy.
Używanie okularów 3D do oglądania telewizji lub grania przez dłuższy czas może wywołać zmęczenie oczu lub ból głowy.
Okulary 3D (i nadajnik) rmy innej niż rma Samsung mogą nie być obsługiwane.
Jeżeli ekran zacznie migotać podczas korzystania z funkcji 3D, zmniejsz natężenie światła otoczenia lub wyłącz lampę
fl uorescencyjną, aby określić najlepsze warunki pracy ekranu.
N
N
N
N
N
N
N
N
N
N
N
Wygląd okularów 3D (i nadajnika) może się różnić w zależności od modelu.
N
Okulary 3D
(dostępne osobno)
Nadajnik 3D IR
(dostępny osobno)
PC
Panel tylny telewizora
Kabel audio 3.5mm Stereo
2
Kabel HDMI/DVI (dostępny osobno)
1
Ciąg dalszy...
Page 99

Polski - 21
Konfiguracja telewizora za pośrednictwem komputera
Ustawienie fabryczne: Tryb PC ustawia się za pomocą przycisku SOURCE.
Auto dopasowanie
Automatyczna regulacja umożliwia samoczynne dopasowanie obrazu telewizora
do sygnału wideo odbieranego z komputera. Urządzenie samoczynnie dobiera
właściwe korekcje i położenie obrazu.
Funkcja ta jest nieaktywna w trybie DVI-HDMI.
Naciśnij przycisk TOOLS, aby wyświetlić menu Narzędzia.
Automatyczną regulację można również wybrać za pomocą opcji
Narzędzia →
Auto dopasowanie
.
T
Ekran
Ziarnisty
Dostosowanie częstotliwości w przypadku pojawienia się poziomego szumu na
ekranie.
Gładki
Dostosowanie ekranu w celu uzyskania większej przejrzystości.
Położenie obrazu PC
Jeśli ekran komputera nie mieści się na ekranie telewizora, należy dopasować jego
położenie. Za pomocą przycisków ▲ lub ▼ wyreguluj pozycję w pionie. Za pomocą przycisków ◄ oraz ► wyreguluj pozycję w
poziomie.
Reset obrazu
Istnieje możliwość przywrócenia fabrycznych ustawień wszystkich parametrów obrazu.
N
❑
N
❑
Zmiana trybu
Umożliwia włączenie Efektu 3D. Dostępne opcje to Tryb1 i Tryb2. Obrazy 3D
można osiągnąć, gdy migawka okularów 3D jest odpowiednio zsynchronizowana
między lewą a prawą stroną.
Wył.: Wyłącza funkcję Efekt 3D.
Tryb1: W tym trybie jako pierwsze synchronizowane jest prawe źródło sygnału.
Tryb2: W tym trybie jako pierwsze synchronizowane jest lewe źródło sygnału.
2D : Umożliwia konwersję obrazu trójwymiarowego na dwuwymiarowy. Jeżeli
obraz 3D wywołuje zawroty głowy, można użyć tej opcji, aby czasowo przełączyć
obraz na tryb dwuwymiarowy. Do całkowitego zakończenia efektu 3D należy
wybrać opcję „Off” (Wył).
Jeśli funkcja efektu trójwymiarowego nie działa poprawnie, oznacza
to, że okulary 3D i Tryb nie są odpowiednio synchronizowane. Aby je
zsynchronizować, przełącz tryb.
Zmiana formatu
Wybierz optymalny sygnał wejściowy, odpowiedni dla karty gracznej i oprogramowania 3D.
Szachownica: Jeśli format wyjściowy karty graficznej lub oprogramowania 3D to Szachownica (Checker Board), wybierz
ten format sygnału wejściowego.
Poziomy: Jeśli format wyjściowy karty graficznej lub oprogramowania 3D to Poziomy (Horizontal), wybierz ten format
sygnału wejściowego.
Pionowy: Jeśli format wyjściowy karty graficznej lub oprogramowania 3D to Pionowy (Vertical), wybierz ten format sygnału
wejściowego.
Reset obrazu → Reset trybu obrazu / Anuluj
Przywrócenie wszystkich ustawień obrazu do wartości domyślnych.
Wybierz tryb obrazu, którego wartości domyślne chcesz przywrócić w pierwszej
kolejności. Przywracanie wartości domyślnych jest wykonywane dla każdego
trybu obrazu.
❑
•
•
•
•
N
❑
•
•
•
❑
N
Opcje obrazu
Rozm. : 16:9
Tryb ekranu : 16:9
Cyf. red. szumu : Auto
Poziom czerni HDMI : Normalna
Tryb Film : Wył.
Ochrona przed wypalaniem ekranu
Efektu 3D ▶
WróćWejdź
Nawigacja
▲
Efektu 3D
Tryb : Wył.
Format : Szachownica ▶
Wróć Wejdź
Nawigacja
Ekran
Ziarnisty 50
Gładki 44
Położenie obrazu PC
Reset obrazu
Wróć Wejdź
Nawigacja
Jasność : 45
Ostrość : 50
Auto dopasowanie
►
Ekran
Ustawienia zaawansowane
Opcje obrazu
Reset obrazu
Obraz
Picture
Ustawienia zaawansowane
Opcje obrazu
Reset obrazu
►
Obraz
Page 100

Polski - 22
Tryb monitora komputerowego
Konfigurowanie oprogramowania na komputerze (na przykładzie systemu Windows XP)
Poniżej przedstawiono ustawienia ekranu w systemie Windows w przypadku
typowego zestawu komputerowego. Wygląd ekranów na poszczególnych
komputerach będzie się prawdopodobnie różnić w zależności od wersji
systemu Windows i typu karty gracznej. Jednak pomimo różnic w wyglądzie
podstawowe opcje konguracji są na ogół takie same. (W przeciwnym wypadku
należy skontaktować się z producentem komputera lub sprzedawcą produktów
rmy Samsung).
1.
W menu Start systemu Windows kliknij opcję Panel sterowania.
2.
W oknie panelu sterowania wybierz kategorię Wygląd i kompozycje, aby
wyświetlić kolejne okno.
3.
W oknie panelu sterowania wybierz kategorię Ekran, aby wyświetlić kolejne
okno.
4.
W wyświetlonym oknie przejdź na kartę Ustawienia.
Poprawne ustawienie rozmiaru ekranu (rozdzielczości):
Optymalnie
- PS42B450/PS42B451 : 1024x768 pikseli
- PS50B450/PS50B451 : 1360x768 pikseli
Jeśli jest dostępna opcja pionowej częstotliwości odświeżania ekranu, poprawną wartością będzie 60 lub 60 Hz. W
przeciwnym wypadku kliknij przycisk OK, aby zamknąć okno.
Tryby wyświetlania
Położenie i rozmiar ekranu różnią się w zależności od typu monitora komputera i wybranej rozdzielczości.
Zaleca się stosowanie wartości rozdzielczości podanych w tabeli.
Wejście
D-Sub
i
HDMI/DVI
Tryb Rozdzielczość
Częstotliwość
pozioma (kHz)
Częstotliwość
pionowa (Hz)
Częstotliwość
taktowania
pikseli (MHz)
Polaryzacja
synchronizacji
(pozioma/
pionowa)
PS42B450/
PS42B451
PS50B450/
PS50B451
IBM
640 x 350 31.469 70.086 25.175 + / -
✓ ✓
720 x 400 31.469 70.087 28.322 - / +
✓ ✓
MAC
640 x 480 35.000 66.667 30.240 - / -
✓ ✓
832 x 624 49.726 74.551 57.284 - / -
✓ ✓
VESA DMT
640 x 480
31.469 59.940 25.175 - / -
✓ ✓
37.861 72.809 31.500 - / -
✓ ✓
37.500 75.000 31.500 - / -
✓ ✓
800 x 600
37.879 60.317 40.000 + / +
✓ ✓
48.077 72.188 50.000 + / +
✓ ✓
46.875 75.000 49.500 + / +
✓ ✓
1024 x 768
48.363 60.004 65.000 - / -
✓ ✓
56.476 70.069 75.000 - / -
✓ ✓
60.023 75.029 78.750 + / +
✓ ✓
1360 x 768 47.712 60.015 85.500 + / +
✓
VESA CVT
720 x 576 35.910 59.950 32.750 - / +
✓ ✓
1280 x 720
44.772 59.855 74.500 - / +
✓
56.456 74.777 95.750 - / +
✓
VESA GTF 1280 x 720 52.500 70.000 89.040 - / +
✓
Korzystając z połączenia kablowego HDMI/DVI należy użyć gniazda HDMI IN 2 (DVI).
Tryb z przeplotem nie jest obsługiwany.
Telewizor może nie działać poprawnie, jeśli zostanie wybrany niestandardowy format wideo.
❑
❑
N
N
N
 Loading...