

Samsung MT1066SE User Manual
Toast & Bake Microwave Oven
Owner’s Manual
MT1066SE
Code No.: DE68-03180A

Safety
PRECAUTIONS TO AVOID POSSIBLE EXPOSURE TO
EXCESSIVE MICROWAVE ENERGY
Failure to observe the following safety precautions may result in harmful
exposure microwave energy.
(a) Under no circumstances should any attempt be made to operate the
oven with the door open or to tamper with the safety interlocks (door
latches) or to insert anything into the safety interlock holes.
(b) Do not place any object between the oven door and front face or
allow food or cleaner residues to accumulate on sealing surfaces.
Ensure that the door and door sealing surfaces are kept clean by
wiping after use first with a damp cloth and then with a soft dry cloth.
(c) Do not operate the oven if it is damaged until it has been repaired by
a qualified microwave service technician trained by the
manufacturer.
It is particularly important that the oven door closes properly and that
there is no damage to the:
(1) Door, door seals and sealing surfaces
(2) Door hinges (broken or loose)
(3) Power cable
(d) The oven should not be adjusted or repaired by anyone other than a
properly qualified microwave service technician trained by the
manufacturer.
IMPORTANT SAFETY INSTRUCTIONS.
READ CAREFULLY AND KEEP FOR FUTURE
REFERENCE.
Before cooking food or liquids in your microwave
oven, please check that the following safety
precautions are taken.
1. DO NOT use any metallic cookware in the microwave oven:
• Metallic containers
• Dinnerware with gold or silver trimmings
• Skewers, forks, etc.
Reason
2. DO NOT
• Airtight or vacuum-sealed bottles, jars, containers
• Airtight food.
Reason
Tip
3. DO NOT
Reason
Tip
4. DO NOT
Reason
5. ALWAYS
Reason
6. DO NOT
Reason
7.
To reduce the risk of fire in the oven cavity:
• Do not store flammable materials in the oven
• Remove wire twist ties from paper or plastic bags
• Do not use your microwave oven to dry newspapers
• If smoke is observed, keep the oven door closed and switch off or
8.
Take particular care when heating liquids and baby foods.
•
• Stir during heating, if necessary, and
: Electric arcing or sparking may occur and may damage the
oven.
heat:
Ex) Baby food jars
Ex) Eggs, nuts in shells, tomatoes
: The increase in pressure may cause them to explode.
: Remove lids and pierce skins, bags, etc.
operate the microwave oven when it is empty.
: The oven walls may be damaged.
: Leave a glass of water inside the oven at all times. The water
will absorb the microwaves if you accidentally set the oven
going when it is empty.
cover the rear ventilation slots with cloths or paper.
: The cloths or paper may catch fire as hot air is evacuated from
the oven.
use oven gloves when removing a dish from the oven.
: Some dishes absorb microwaves and heat is always
transferred from the food to the dish.The dishes are therefore
hot.
touch heating elements or interior oven walls.
: These walls may be hot enough to burn even after cooking has
finished, even though they do not appear to be so. Do not allow
inflammable materials to come into contact with any interior
area of the oven. Let the oven cool down first.
disconnect the oven from the power supply.
ALWAYS
has been switched off so that the temperature can equalize.
allow a standing time of at least 20 seconds after the oven
ALWAYS
stir after heating.
2

Safety
• Take care when handling the container after heating.
You may burn yourself if the container is too hot.
• A risk of delayed eruptive boiling exists.
• To prevent delayed boiling and possible scalding, you should put a
plastic spoon or glass stick into the beverages and stir before, during
and after heating.
Reason
this means that eruptive boiling can start after the container is removed
from the oven. You may scald yourself.
• In the event of scalding, follow these
• NEVER fill the container to the top and choose a container that is
wider at the top than at the bottom to prevent the liquid from boiling
over. Bottles with narrow necks may also explode if overheated.
• ALWAYS check the temperature of baby food or milk before giving it
to the baby.
• NEVER heat a baby’s bottle with the teat on, as the bottle may
explode if overheated.
9.
Be careful not to damage the power cable.
• Do not immerse the power cable or plug in water and keep the power
cable away from heated surfaces.
• Do not operate this appliance if it has a damaged power cable or
plug.
10.
Stand at arm’s length from the oven when opening the door.
Reason
11.
Keep the inside of the oven clean.
Stand at arm’s length from the oven when opening the door.
Reason: Food particles or spattered oils stuck to oven walls or floor can
cause paint damage and reduce the efficiency of the oven.
12. °Clicking°±sound might be noticed while operating, especially at
defrosting mode.
Reason
13. When the microwave oven is operating without any load, the power
will be cut off automatically for safety. You can operate normally after
letting it stand for over 30 minutes.
14. Before use, the user should check that utensils are suitable for use in
microwave ovens. If smoke is observed, keep the oven door closed.
:
During the heating of liquids the boiling point can be delayed;
• Immerse the scalded area in cold water for at least 10 minutes.
• Cover with a clean, dry dressing.
• Do not apply any creams, oils or lotions.
: The hot air or steam released may cause scalding.
:
When the electrical power output is changing, you may hear that
sound. This is normal.
FIRST AID
instructions:
IMPORTANT SAFETY INSTRUCTIONS
During cooking, you should look into the oven from time to time when
food is being heated or cooked in disposable containers of plastic, paper
or other combustible materials.
IMPORTANT
Young children should NEVER be allowed to use or play with the
microwave oven. Nor should they be left unattended near the microwave
oven when it is in use. Items of interest to children should not be stored
or hidden just above the oven.
WARNING:
If the door or door seals are damaged, the oven must not be operated
until it has been repaired by a competent person.
WARNING:
It is hazardous for anyone other than a comperent person to carry out
any service or repair operation which involves the removal of a cover
which gives protection against exposure to microwave enegry.
WARNING:
Liquids and other foods must not be heated in sealed containers since
they are liable to explode.
WARNING:
Only allow children to use the oven without supervicion when adequate
instructions have been given so that the child is able to use the in a safe
way and understands the hazads of improper use.
3
Installing Your Microwave Oven
Your New Toast & Bake Microwave
oven
Place the oven on a flat, level surface that strong enough to safely
bear the weight of the oven.
20 cm
above
85 cm of
the floor
10 cm
behind
10 cm on
the side
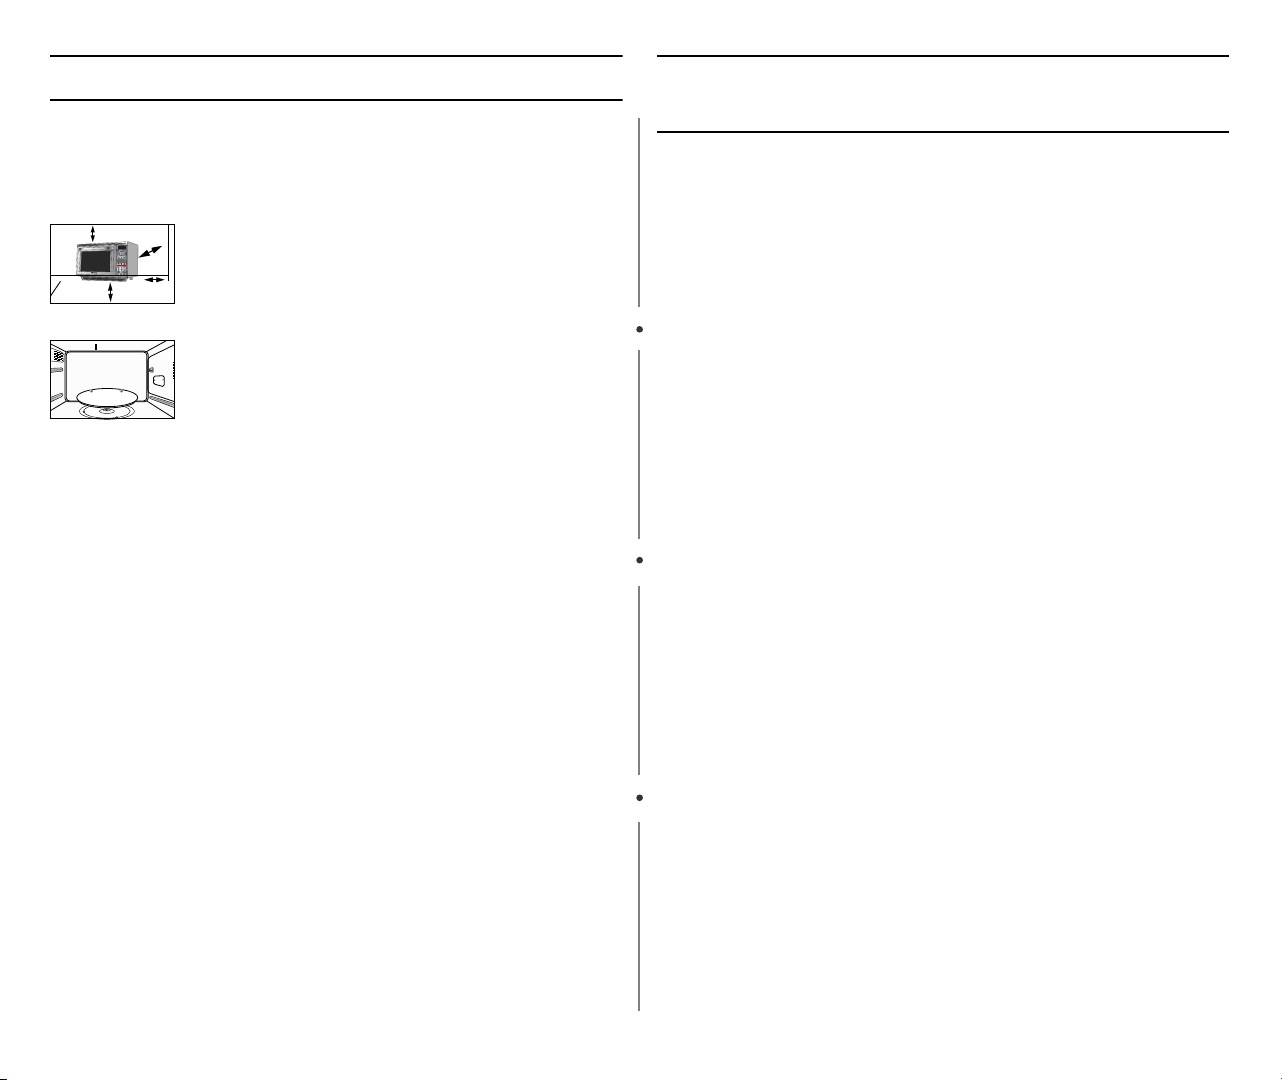
1. When you install your oven, make sure there is
adequate ventilation for your oven by leaving at
least 10 cm (4 inches) of space behind, and on the
sides of the oven and 20 cm (8 inches) of space
above the oven and 85 cm (33 inches) of the floor.
2. Remove all packing materials inside the oven.
Install the roller ring and turntable.
Check that the turntable rotates freely.
3. This microwave oven has to be positioned so that
plug is accessible.
•
Never
block the air vents as the oven may overheat and automatically
switch itself off. It will remain inoperable until it has cooled sufficiently.
• Plug the cable into a 3-pin, earthed socket. If the power cable of this
appliance is damaged, it must be replaced by a special cable
(references I-SHENG SP022, KDK KKP 4819 D, SAMIL SP-106B,
MOONSUNG EP-48E or EUROELECTRIC 3410). Contact your local
dealer to have it replaced. The power cable of S/AFRICA, U.A.E is
EUROELECTRIC (3183Y), ISRAEL is PENCON (ZD16A) and
NIGERIA, GHANA and KENYA is PENCON (UD 13A1) and SAUDI
ARABIA is MOON SUNG SJT 14AWG, PENCON (UD13A1).
• DO NOT install the microwave oven in hot or damp surroundings.
• Example: Next to a traditional oven or radiator.
• The power supply specifications of the oven must be respected and
any extension cable used must be of the same standard as the power
cable supplied with the oven.
• Wipe the interior and the door seal with a damp cloth before using
your microwave oven for the first time.
• This microwave oven has to be connected to the plug endurable to proper
power consumption.
This microwave oven has to be positioned so that the plug is accessible.
Table of Contents
Safety.............................................................................................2
Your New Toast & Bake Microwave oven ..................................4
Checking Parts ................................................................................. 5
Setting Up ......................................................................................... 5
Control Panel Buttons....................................................................... 6
Operation.......................................................................................7
Selecting the Display Weight ............................................................ 7
Setting the Clock............................................................................... 7
Using the Stop/Clear Button ............................................................. 8
Using the Instant Cook Buttons ........................................................ 8
Using the Handy Helper Button ........................................................ 9
Using the Kids Meals Button............................................................. 9
Using the Snack Bar Button............................................................ 10
Using the Start/+1 Min. Button........................................................10
Defrosting Automatically ................................................................. 11
Setting Cooking Times & Power Levels..........................................11
Using the Kitchen Timer ................................................................. 12
Toaster............................................................................................ 13
Preheat ........................................................................................... 13
Baking............................................................................................. 14
Warming ......................................................................................... 15
Top Browning.................................................................................. 15
Broiling............................................................................................ 16
Speed Cooking ............................................................................... 16
Switching the Beep Sound On/Off .................................................. 17
Using the More/Less Buttons..........................................................17
Using the Easy Clean Button .......................................................... 17
Demonstration Mode ...................................................................... 17
Setting the Child Protection Lock.................................................... 17
Cooking Instructions..................................................................18
Cooking Utensils............................................................................. 18
Testing Utensils .............................................................................. 19
Cooking Techniques ....................................................................... 19
General Tips .................................................................................. 20
General Tips for the Heater Features ............................................. 20
Guide for Cooking Meat in Your Microwave ................................... 20
Guide for Cooking Poultry in Your Microwave ................................ 21
Guide for Cooking Seafood in Your Microwave.............................. 21
Guide for Cooking Eggs in Your Microwave...................................22
Guide for Cooking Vegetables in Your Microwave ......................... 22
Auto Defrosting Guide .................................................................... 22
Recipes........................................................................................... 23
Guide for Cooking with Heater........................................................ 25
Appendix .....................................................................................29
Troubleshooting Guide ................................................................... 29
Care and Cleaning.......................................................................... 30
Specifications.................................................................................. 30
Quick Reference .........................................................................31
4
Your New Toast & Bake Microwave oven
Checking Parts
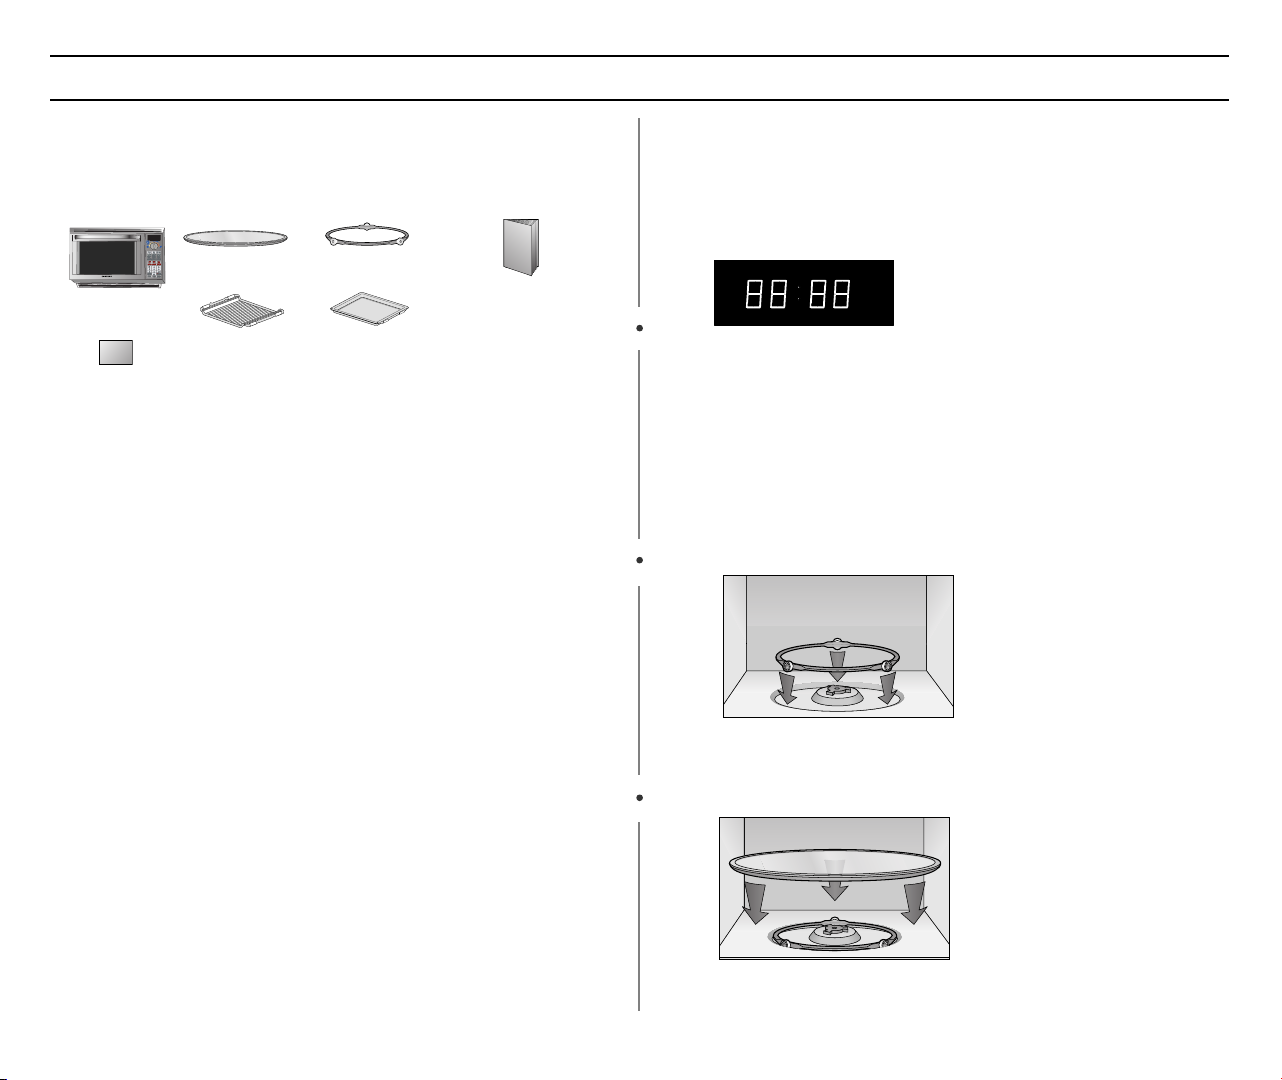
Unpack your oven and check to make sure that you have all the parts
shown here. If any part is missing or broken, call your dealer.
roller guide ring
Instruction manual
crumb tray
(DE97-00327A)
oven
registration card
glass tray
metal wire rack
(DE97-00318B)
Note :
The white plastic tubing on the crumb tray and wire rack must not be
removed.
Warranty and Service Information
To help us better serve you, please complete the enclosed registration
card and promptly return it by mail. If the registration card is missing. you
can call united Matbouli group at 800-2-444-999 or register on line at
www.samsungmea.com.When contacting Samsung, please provide the
specific model and serial number information which is usually located on
the back or bottom of the product. Please record these numbers below,
along with the other requested information. Keep this information in a
safe place as a permanent record of your purchase to aid in identification in case of theft or loss, and a copy of your sales receipt as a proof of
purchase if warranty service is needed.
MODEL NUMBER ____________________
SERIAL NUMBER ____________________
DATE PURCHASED ____________________
PURCHASED FROM ____________________
Warranty service can only be performed by a Samsung Authorized
Service Center. If you should require warranty service, provide the
above information with a copy of your sales receipt to the Samsung
Authorized Service Center. For service assistance and the location of
the nearest service center please call 800-2-444-999 or go on line to
umg.com.sa
Setting Up
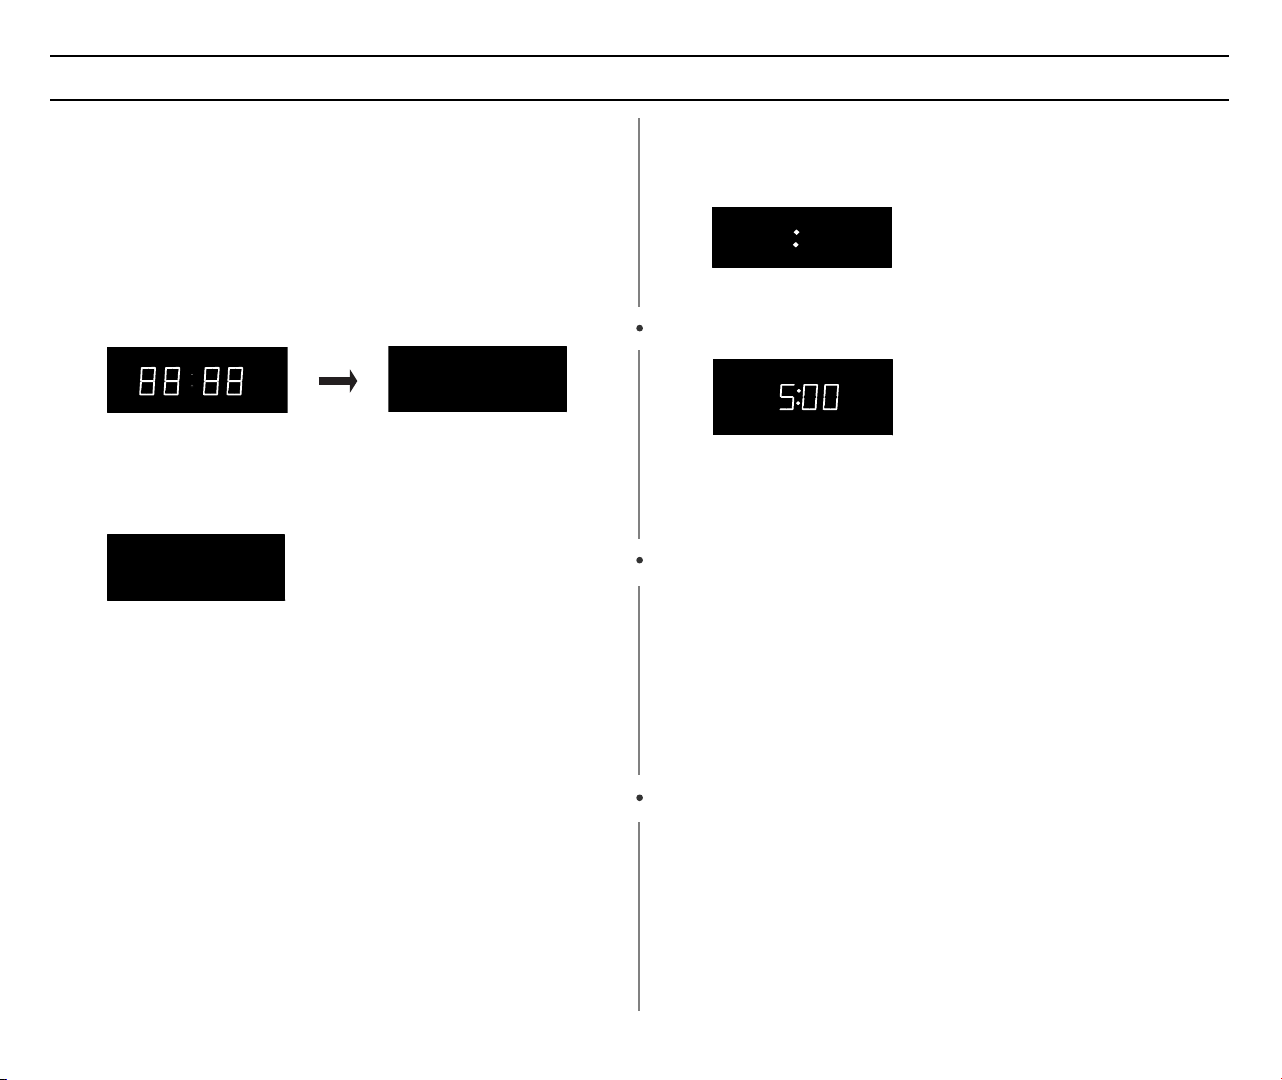
1 Place the oven on a flat, sturdy surface and plug the cord into a
grounded outlet. Once plugged in, the display on your oven will
show::
START ENTER TIME HEAT MICRO
Kg g Oz Lbs QTY
Make sure there is adequate ventilation for your oven by leaving
at least four inches of space behind, above, and to the sides of
the oven.
2 Open the oven door by pulling the handle at the top of the door.
3 Wipe the inside of the oven with a damp cloth.
4 Place the pre-assembled ring in the indentation in the center of
the oven.
5 Place the glass tray on top of the ring so that the three glass tabs
in the center of the tray fit securely into the tabs on the floor of
the oven.
5
Your New Toast & Bake Microwave oven
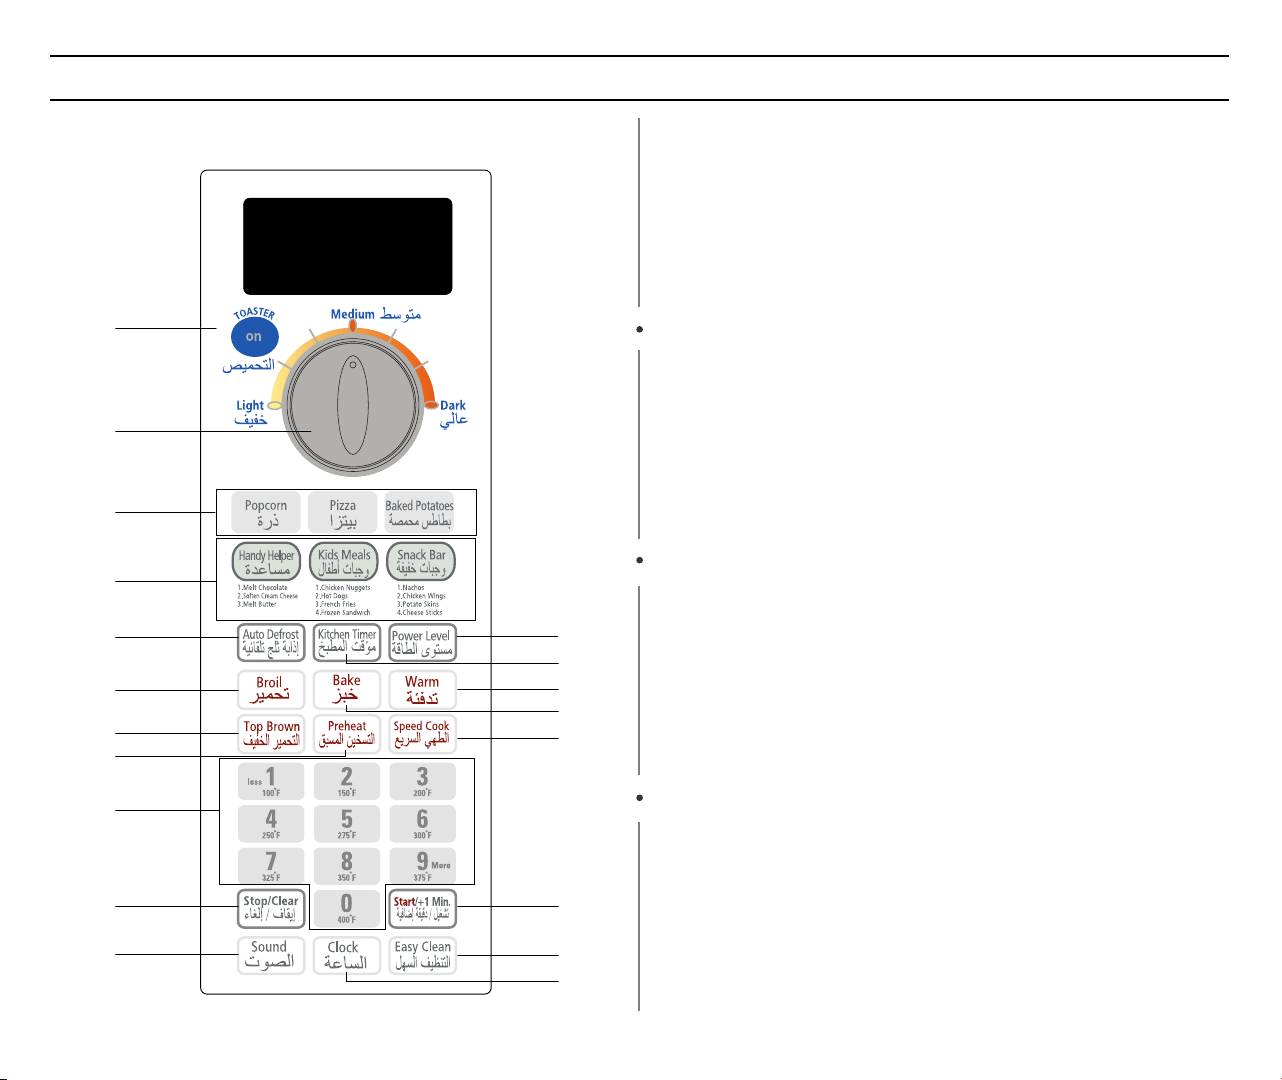
Control Panel Buttons
1
2
3
4
5
6
7
8
9
10
11
12
13
14
15
16
17
18
19
1. Toast On Button p. 13
Press to start toasting after setting Adjustment Knob.
2. Toasting Adjustment Knob p. 13
Adjust to select darkness.
3. Instant Cook Buttons p. 8
Instant microwave settings for frequently prepared foods.
4. Handy Helper, Kids Meals, Snack Bar p. 9
Useful microwave menus to help prepare common recipe
ingredients, popular snacks, and tasty entrées for kids.
5. Auto Defrost p. 11
Quickly thaws frozen food automatically by weight.
6. Broil p. 16
Broils meats and fish up to 45 minutes at 400 °F.
7. Top Brown p. 15
Browns toppings, open-faced sandwiches, and more.
8. Preheat p. 13
For better results, preheat to desired temperature before
cooking.
9. Number/Cooking Temperature Buttons
Sets Baking temperature, cooking time, amount, and power
level.
10. Stop/Clear p. 8
Stops oven and clears instructions.
11. Sound p. 17
End Signal can be turned off and on.
12. Power Level p. 11
Press to select power level for up to two (2) stages of
microwave cooking.
13. Kitchen Timer p. 12
Sets kitchen timer.
14. Warm p. 15
Keeps food warm at 200 °F for up to one (1) hour.
15. Bake p. 14
Bakes at up to 400 °F. Maximum baking time is 45 minutes.
16. Speed Cook p. 16
This time-saving function cooks by combining both microwaving
and heating.
17. Start/ +1 Min p. 10
Press to start cooking. Adds one (1) minute while oven is
operating.
18. Easy Clean p. 17
Rotates side-located heaters into a horizontal position to ease
cleaning the cavity interior.
19. Clock p. 7
Sets current time.
6
Operation
Selecting the Display Weight
The first time you plug the power cord into an outlet, or after there has
been an interruption in power, the display will show all indicators. At this
point, you can select the weight system for the display. You can choose
between pounds(LBS) or kilograms (KG). To do so you can choose
between pounds(LBS) and kilograms(KG).
1 Press “0” immediately after plugging in your microwave. The
display will show:
START ENTER TIME HEAT MICRO
g Oz. Lbs. QTY.
Kg g Oz Lbs QTY
If the display does not shows “Kg”, you will need to unplug the
microwave and then plug it in again in order to change to the
weight selection.
Kg
2 Press “0” repeatedly to select the weight system you wish to use:
. QTY.
Kg g Oz.
When you have selected the weight system you want to use,
press the Stop/Clear button to end this procedure.
Lbs
Setting the Clock
1 Press the Clock Button. The display will show:
START ENTER COOK TIME HEAT MICRO
Kg g Oz Lbs QTY
2 Use the Number buttons to enter the current time. You must
press at least three numbers to set the clock. For example, if the
current time is 5:00, enter 5,0,0.
3 Press the Clock button again. A colon will blink, indicating that
the time is set.
If there is a power interruption, you will need to reset the clock.
You can check the current time while cooking is in progress by
pressing the Clock button.
7
Operation
Using the Stop/Clear Button
The Stop/Clear button allows you to clear instructions you have
entered. It also allows you to pause the oven’s cooking cycle, so that
you can check the food.
• To pause the oven during cooking: press Stop/Clear once. To
restart, press Start.
• To stop cooking, erase instructions, and return the oven display to
the time of day: Press Stop/Clear twice.
• To clear instructions you have just entered: press Stop/Clear once,
then re-enter the instructions.
• To cancel a timer setting: press Stop/Clear once.
* Upon completion of cooking operation, if the oven
temperature has risen above 250°F, the fan will
automatically continue running for 3 minutes. To stop the
fan, press the Stop/Cancel key.
Using the Instant Cook Buttons
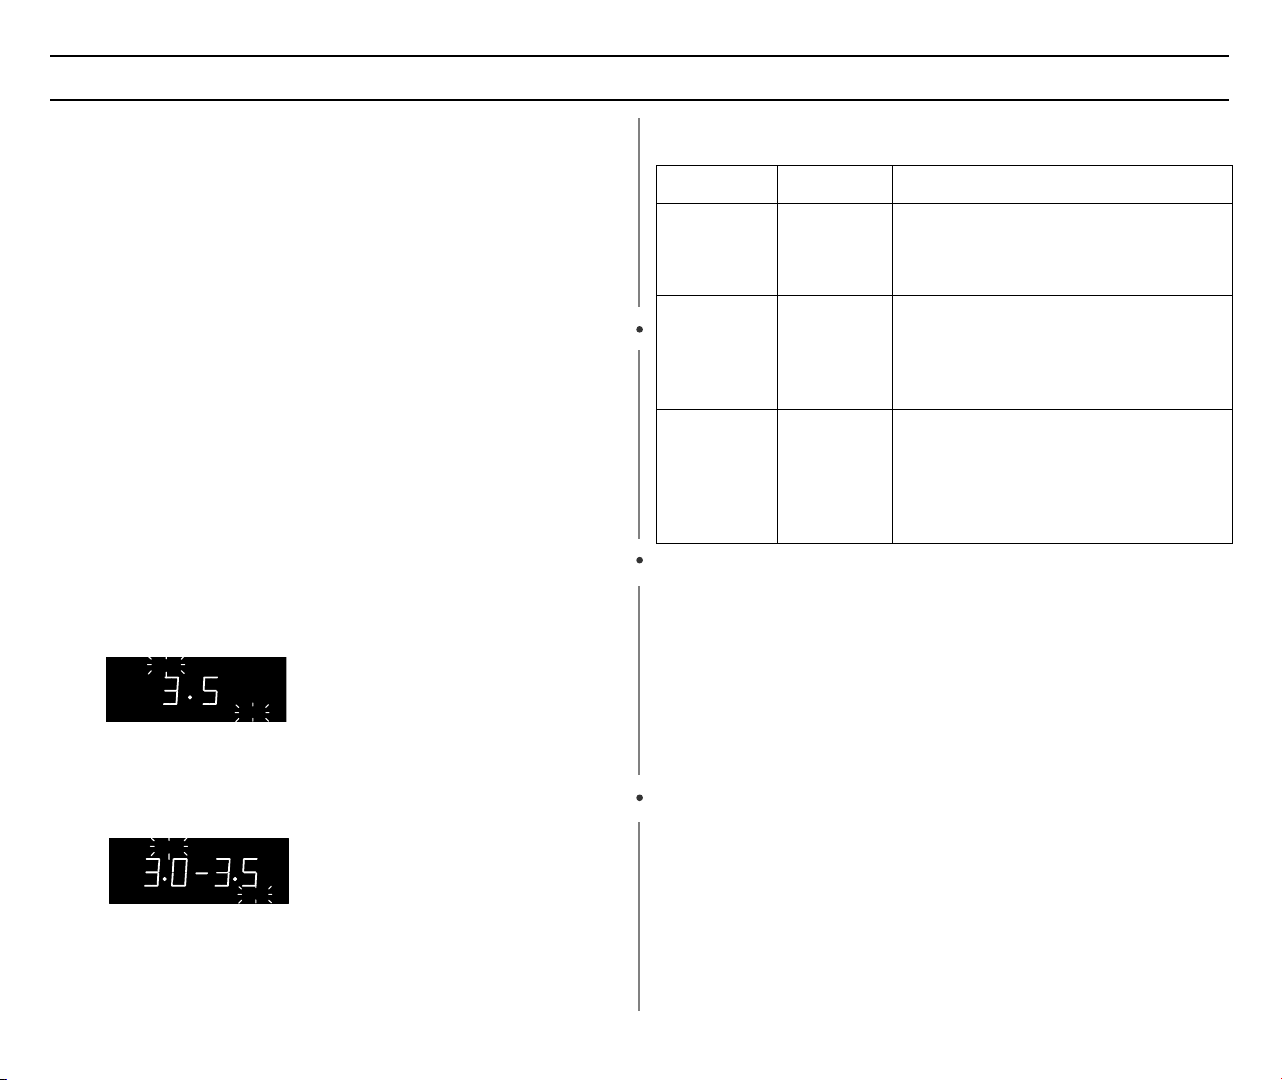
1 Press the Instant Cook button corresponding to the food you are
cooking ( for example, Popcorn). The display shows the first
serving size:
START ENTER COOK TIME TIME2
Kg g Oz Ls. QTY
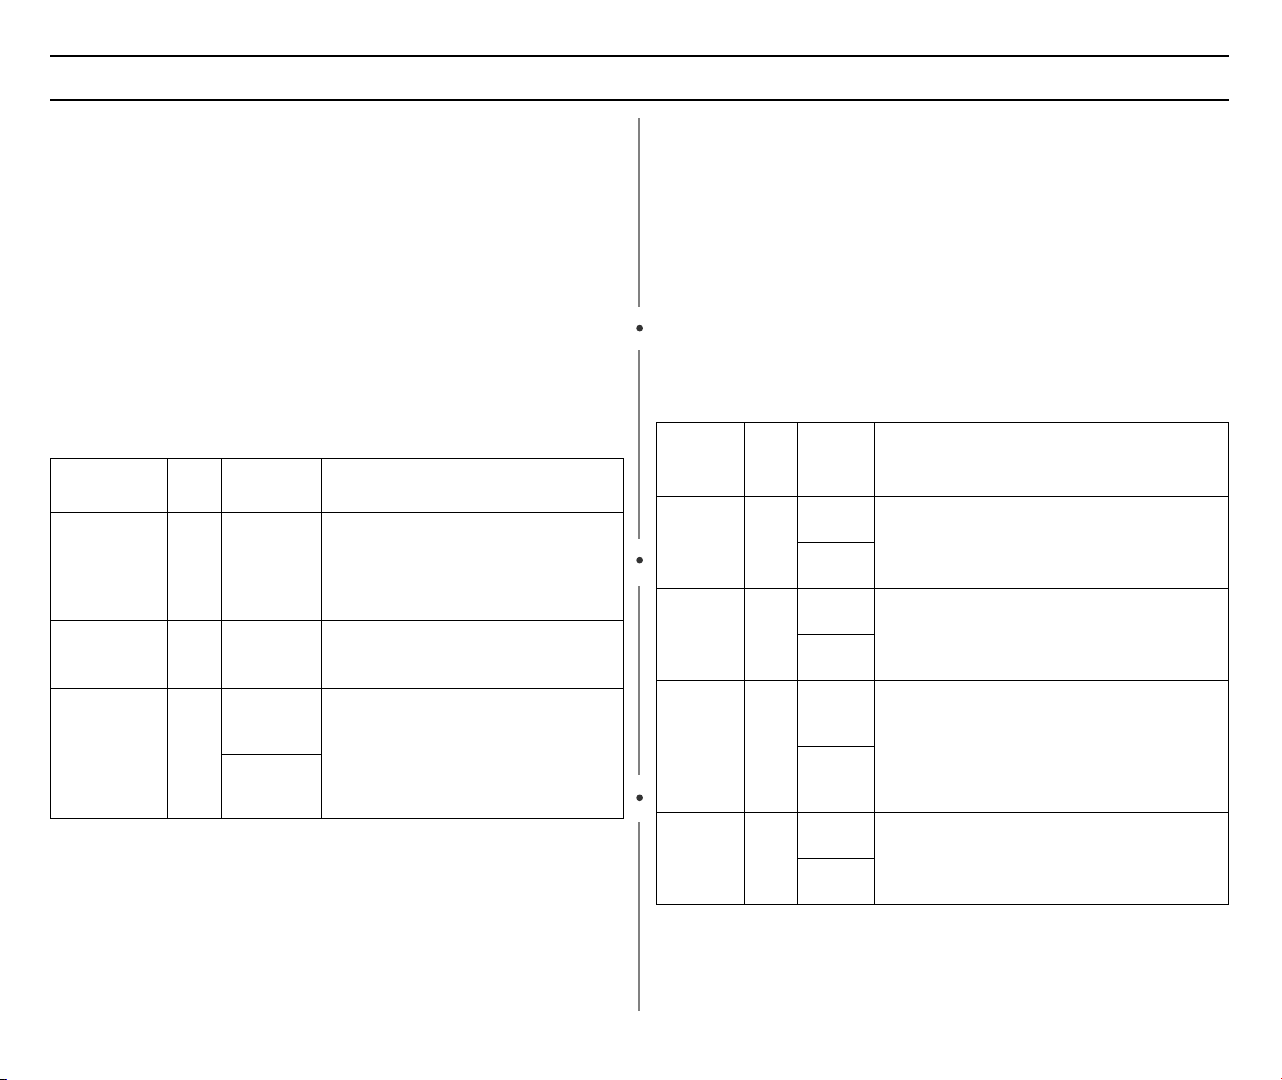
Instant Cook Chart
I t e m Weight Remarks
Popcorn 3.0-3.5 oz
Pizza Reheat 1 Slice
Baked
Potatoes
3.5 oz
2 Slice
3 Slice
1 EA
2 EA
3 EA
4 EA
5 EA
6 EA
• Use one microwave-only bag of
popcorn.
• Use caution when removing and
opening hot bag from oven.
• Put the pizza on a microwave-safe
plate with wide end of slice towards
the outside edge of the plate.
• Do not let slices overlap. Do not cover.
• Before serving, let stand 1-2 min.
• Prick each potato several times with
fork.
• Place on turntable in spoke-like
fashion.
• Remove from oven, wrap in foil and let
stand 3-5 min.
2 Press the button repeatedly to select the serving size you want.
The display will cycle through all available serving sizes. Once
you select the correct serving size, the microwave will begin
cooking automatically.
START ENTER COOK TIME TIME2
Kg g Oz Ls. QTY
8
Operation
Using the Handy Helper Button
1. Press the Handy Helper button corresponding to the food you are
cooking. The display shows “A-1”(code of item). Press the Handy
Helper button repeatedly to select the item you want.(Refer to the
Handy Helper Chart below)
2. Press the Number button to select the serving size you want.
You can press the 1 or 2 button to select the serving size. Only “1”
serving size is available for Soften Cream Cheese and Melt
Chocolate items.(Refer to the Handy Helper Chart below for the
serving)
3. Press the Start button to begin cooking.
Handy Helper Chart
Item Code
Melt
Chocolate
Soften
Cream
Cheese
Melt Butter A-3 1 stick
A-1 2 squares
A-2 1 package
Serving
Size
or 1 cup
chips
(8 oz.)
(1/4 lb.)
2 sticks
(1/2 lb.)
Remarks
• Place chocolate chips or square
in a microwave-safe dish.
• Stir well at half time when the
oven beeps, and re-start the
oven.
• Unwrap cream cheese and place
on microwave-safe dish.
• Let stand 1-2minutes.
• Remove wrapping and cut butter
in half vertically.
• Place butter in dish, cover with
wax paper.
• Stir well after finishing and let
stand 1-2 minutes.
Note:
Using the Kids Meals Button
1. Press the Kids Meals button corresponding to the food you are
cooking. The display shows “A-1”(code of item). Press the Kids
Meals button repeatedly to select the item you want.(Refer to the
Kids Meals Chart below)
2. Press the Number button to select the serving size you want.
You can press the 1 or 2 button to select the serving size.
(Refer to the Kids Meals Chart below for the serving.)
3. Press the Start button to begin cooking.
Kids Meals Chart
Item code
Chicken
Nuggets
Hot Dogs A-2 2 EA • Prick hot dogs, place on plate. When
French
Fries
Frozen
Sandwich
Serving
Size/
Weight
A-1 4-5 oz • Put a paper towel on top of plate and
arrange nuggets in spoke fashion on
6-7 oz
4 EA
A-3 4-5 oz • Place 2 paper towels on plate and
6-7 oz
A-4 1 EA • Place frozen sandwich in susceptor
2 EA
paper towel.
• Do not cover. Let stand 1 minute.
the oven beeps, add buns and re-start
the oven.
arrange french fries on towels, do not
overlap.
• Blot with additional paper towel after
removal from oven.
"sleeve" (which is in package) and put
on plate.
Remarks
Melt chocolate
- Unless stirred at half time, the
Chocolate keeps its shape even when heating time is over.
Note
9
Hot Dogs
- For the best texture, buns should be added to
hot dogs when the oven beeps.

Operation
Using the Snack Bar Button
1. Press the Snack Bar button corresponding to the food you are
cooking. The display shows “A-1”(code of item). Press the Snack
Bar button repeatedly to select the item you want.(Refer to the
Snack Bar Chart below)
2. Press the Number button to select the serving size you want.
You can press the 1 or 2 button to select the serving size.
Only the 1 servi ng siz e is ava ilabl e for N acho s.
(Refer to the Snack Bar Chart below for the serving)
3. Press Start button to begin cooking.
Snack Bar Chart
Item code
Nachos A-1 1 serving • Place tortilla chips on plate without
Chicken
Wings
Potato
Skins
Cheese
Sticks
Serving
Size/
Weight
overlapping.
• Sprinkle evenly with cheese.
•Contents :
-2 cups tortilla chips
-1/3 cup grated cheese
A-2 5-6 oz • Use pre-cooked, refrigerated chicken
wings.
7-8 oz
A-3 1 cooked
potato
2 cooked
potatoes
A-4 5-6 pcs • Place cheese sticks on plate in spoke
7-10 pcs
• Place chicken wings around plate in
spoke fashion and cover with wax paper.
• Cut cooked potato into 4 even wedges.
Scoop or cut out potato flesh, leaving
about 1/4" of skin.
• Place skins in spoke fashion around plate.
• Sprinkle with bacon, onions and cheese.
Do not cover.
fashion.
• Do not cover.
Remarks
Using the Start/+1 Min. Button
This button offers a convenient way to heat food in one-minute
increments at the High power level.
1 Press the Start/+1 Min. button once for each minute you wish to
cook the food. For example, press it twice for two minutes. The
time will display, and the oven starts automatically.
Add minutes to a program in progress by pressing the
button for each minute you want to add.
Min.
Start/+1
10
Operation
Defrosting Automatically
To thaw frozen food, set the weight of the food and the microwave
automatically sets the defrosting time, power level and standing time.
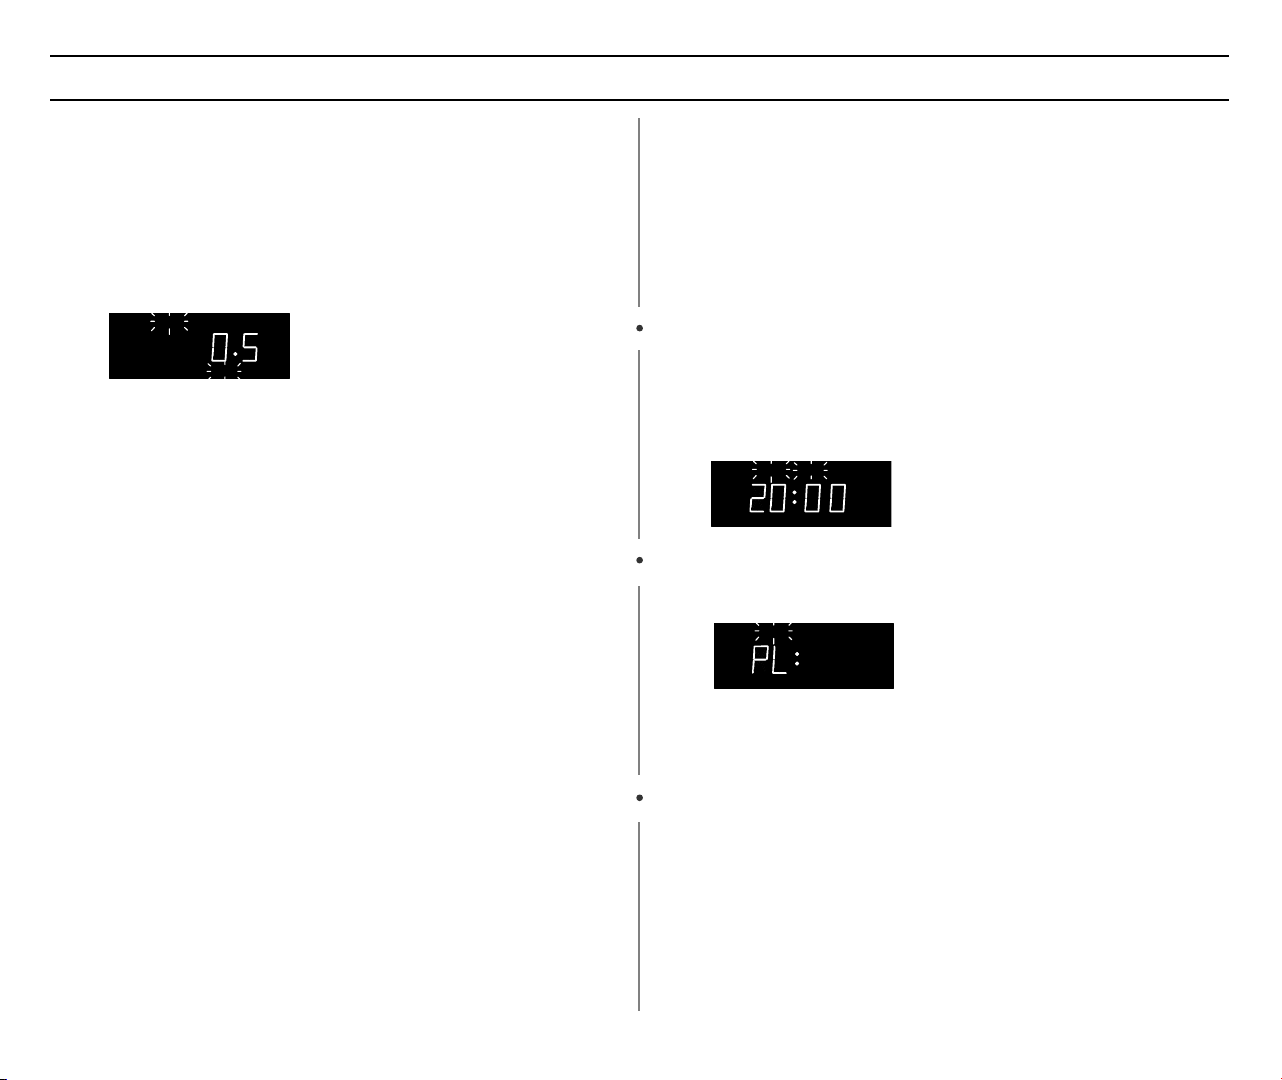
1 Press the Auto Defrost button. The display shows “0.5
lbs.”(0.2Kg if you have set your oven for metric measure).
(“ENTER” and “Lbs” will flash)..
START ENTER COOK TIME TIME2
Kg g OzOz Lbs. QTY
2 To set the weight of your food, press the Auto Defrost button
repeatedly. This increases the weight by 0.5 lb increments, up to
6.0 lbs.(The Auto Defrost button will increase the weight by 0.2Kg
up to 2.6kg if you are using metric measurement).
You can also use the number buttons to enter the weight of the
food directly.
The oven calculates the defrosting time and starts automatically.
Twice during defrosting, the oven will beep to let you know to turn
the food over.
3 Press the Stop/Clear button, open the oven door, and turn the
food over.
4 Press the Start button to resume defrosting.
• See Page 20 for the Auto Defrosting Guide.
Setting Cooking Times & Power Levels
Your microwave allows you to set up to two different stages of cooking,
each with its own time length and power level. The power level button
lets you control the heating intensity from Warm(1) to High(0).
One-stage Microwave Cooking
For simple one-stage cooking, you only need to set a cooking time. The
power level is automatically set to High. If you want to set the power to
any other level, you must set it using the Power Level button.
1 Use the Number buttons to set a cooking time. You can set a
time from one second to 99 minutes, 99 seconds. For example,
to set 20 minutes, enter 2, 0, 0, 0.
START ENTER TIME TIME TIME2
Kg g OzOz Lbs. QTY
2 If you want to set the power level to something other than High,
press the Power Level button, then use the Number buttons to
enter a power level.
START ENTER TIME TIME TIME2
Power Levels:
1 = PL:10(Warm) 6 = PL:60(Simmer)
2 = PL:20(Low) 7 = PL:70(Medium high)
3 = PL:30(Defrost) 8 = PL:80(Reheat)
4 = PL:40(Medium low) 9 = PL:90(Sauté)
5 = PL:50(Medium) 0 = PL:Hi(High)
3 Press the Start button to begin cooking. If you want to change
the power level, press Stop/Clear before you press Start, and
re-enter all of the instructions.
11
 Loading...