

Page 1
MR-16SA1
Owner’s Instructions
Before operating the unit,
please read this manual thoroughly,
and retain it for future reference.
Specification
System
CPU X86 Processor
Resolution 480p/720p/1080i
Power AC 100 ~ 240V (DC 14V), 50~60Hz
HDD 160GB
Video MPEG2 Transport Stream
Audio Dolby Digital AC3
Video Output Video/S-Video/Component/HDMI
Audio Output Analog R+L/Coaxial
Interface USB2.0
Dimension (W x H x D) 90 x 199 x 192 mm
Weight 2.0Kg
Page 2
Warning! Important Safety Instructions
(Please read the appropriate section that corresponds to the marking on your Samsung product
before attempting to install the product.)
CAUTION
RISK OF ELECTRIC SHOCK DO NOT OPEN
CAUTION: TO REDUCE THE RISK OF
ELECTRIC SHOCK, DO NOT REMOVE COVER
(OR BACK). THERE ARE NO USER
SERVICEABLE PARTS INSIDE. REFER ALL
SERVICING TO QUALIFIED PERSONNEL.
●
Insert the power plug firmly into the wall outlet to avoid risk of fire.
●
Do not use a damaged power cord, power plug or loose outlet. There is a danger of electric shock or fire.
●
Do not touch the power cord with wet hands, as there is a risk of electric shock.
●
Do not connect more than one electric appliance to a single power outlet. There may be risk of fire.
●
Do not bend or pull the power cord excessively and do not place a heavy object over the power cord.
This symbol indicates that high voltage
is present inside. It is dangerous to
make any kind of contact with any
internal part of this product.
This symbol alerts you that important
literature concerning operation and
maintenance has been included with
this product.
There may be risk of fire.
●
Do not place candles, mosquito-repellent or cigarettes over the product. There may be risk of fire.
●
Do not install the product on a shelf or a cabinet so that the front end of the product extends out of the shelf
or cabinet. A falling product may cause injury or damage the product.
●
Keep the product away from any heating devices. There may be a danger of electric shock or fire.
●
Do not install the product in a location exposed to oil, smoke, water (such as rain drops), dust or moisture,
or in a vehicle. There is a danger of electric shock and fire.
●
Do not install the product in a badly ventilated place such as a bookshelf or closet. There may be a danger
of fire.
●
Do not install to an unstable place such as a stand which is smaller than the product. Children playing may
cause the product to fall and may cause injury.
●
Before moving the product, make sure to turn the power off and disconnect the power cord from the wall
outlet. In addition, make sure to disconnect the aerial and connection cables from the other devices before
moving the product. There may be a danger of electric shock and fire if moving the product with the power
cord connected to the wall outlet.
English - 2
Page 3
Contents
■ Accessories............................................................................................................ 3
■ Operating .............................................................................................................. 4
-
Front Panel .................................................................................................. 4
-
Rear Panel .................................................................................................. 5
-
Remote Control............................................................................................ 6
■ Connecting to the Component .............................................................................. 7
■ Connecting to the Video or S-Video ...................................................................... 7
■ Connecting to the HDMI ........................................................................................ 7
■ Copying of Video Files .......................................................................................... 8
-
Connecting to PC ........................................................................................ 8
-
Transferring Video Files .............................................................................. 8
-
Removing the USB cable from the PC ........................................................ 8
■ Play List ................................................................................................................ 9
■ Playing Banners .................................................................................................... 10
■ Setup...................................................................................................................... 11
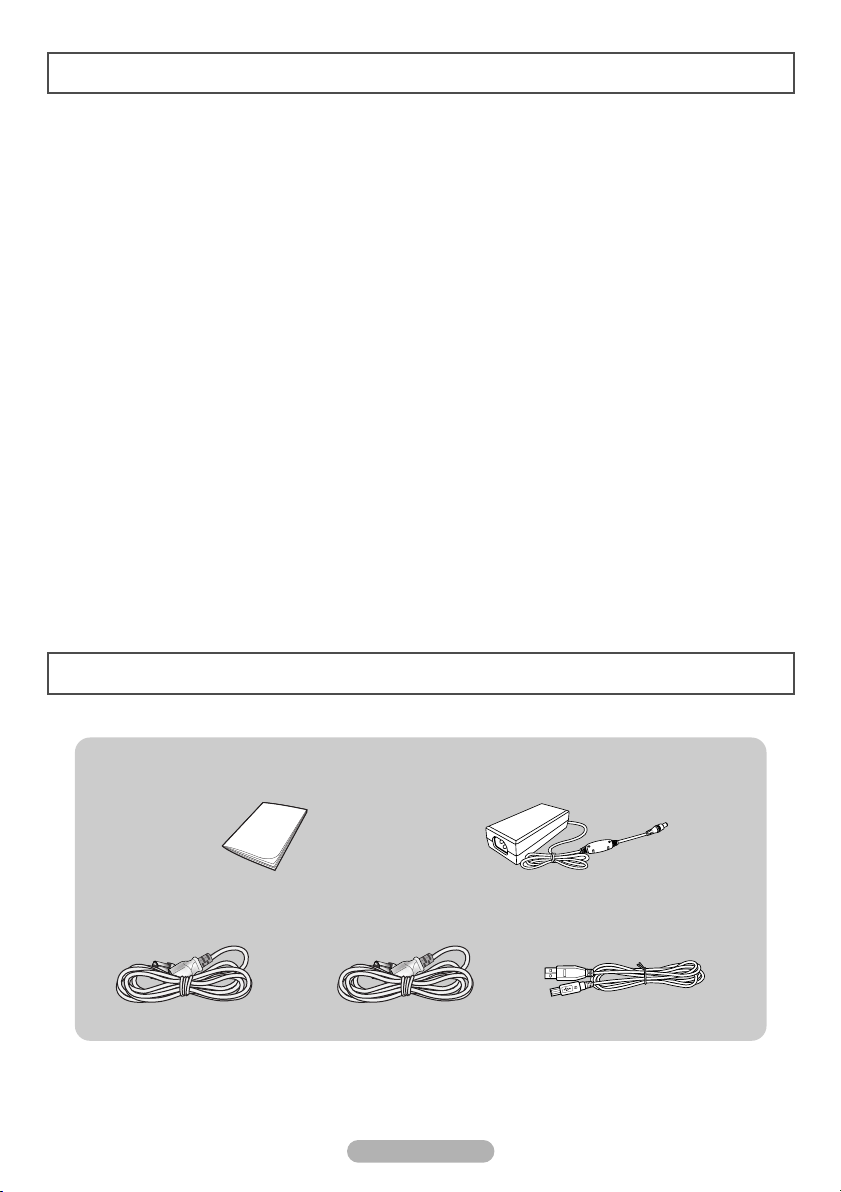
Accessories
Power Cord (110V) Power Cord (220V) USB Cable
Owner’s Instructions Adapter
English - 3
Page 4
Operating
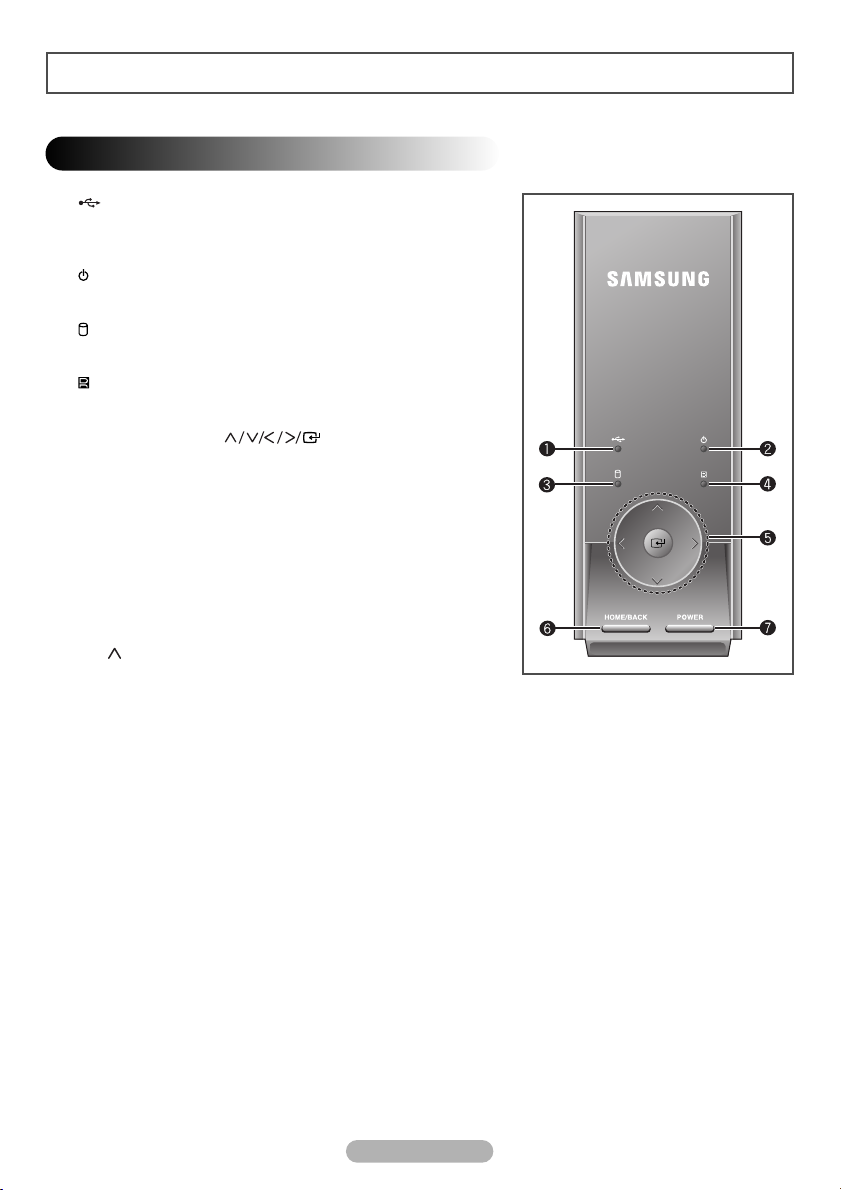
Front Panel
1) USB LED Indicator
Lights up in blue when the unit is connected to PC using USB
cable.
2) POWER LED Indicator
Lights up in red when the unit is on.
3) HDD LED Indicator
Lights up in blue when the HDD is accessed during operation.
4) IR LED Indicator
Lights up in blue when the remote control signal is received.
5) Navigation Buttons ( )
Press to navigate and select the menu items.
6) HOME/BACK Button
Press it to move to the main menu or the previous menu.
7) POWER Button
Press to turn the MR-16SA1 on and off.
◆
In the event that the MR-16SA1 becomes inoperative,
reset the unit. To reset, press and hold the HOME/BACK
and buttons together for about 3 seconds.
English - 4
Page 5

Operating
Rear Panel
1) S-Video Output
2) Audio Output (R/L)
3) Video Output
4) Component Video Output (Y/PB/PR)
5) Component Audio Output (R/L)
6) Digital Audio Output (COAXIAL)
7) HDMI Output
8) USB HOST
9) USB 2.0
10) AnyView Port
11) Power Input
12) A/S
(Not available)
(Not available)
(Not available)
English - 5
Page 6
Operating
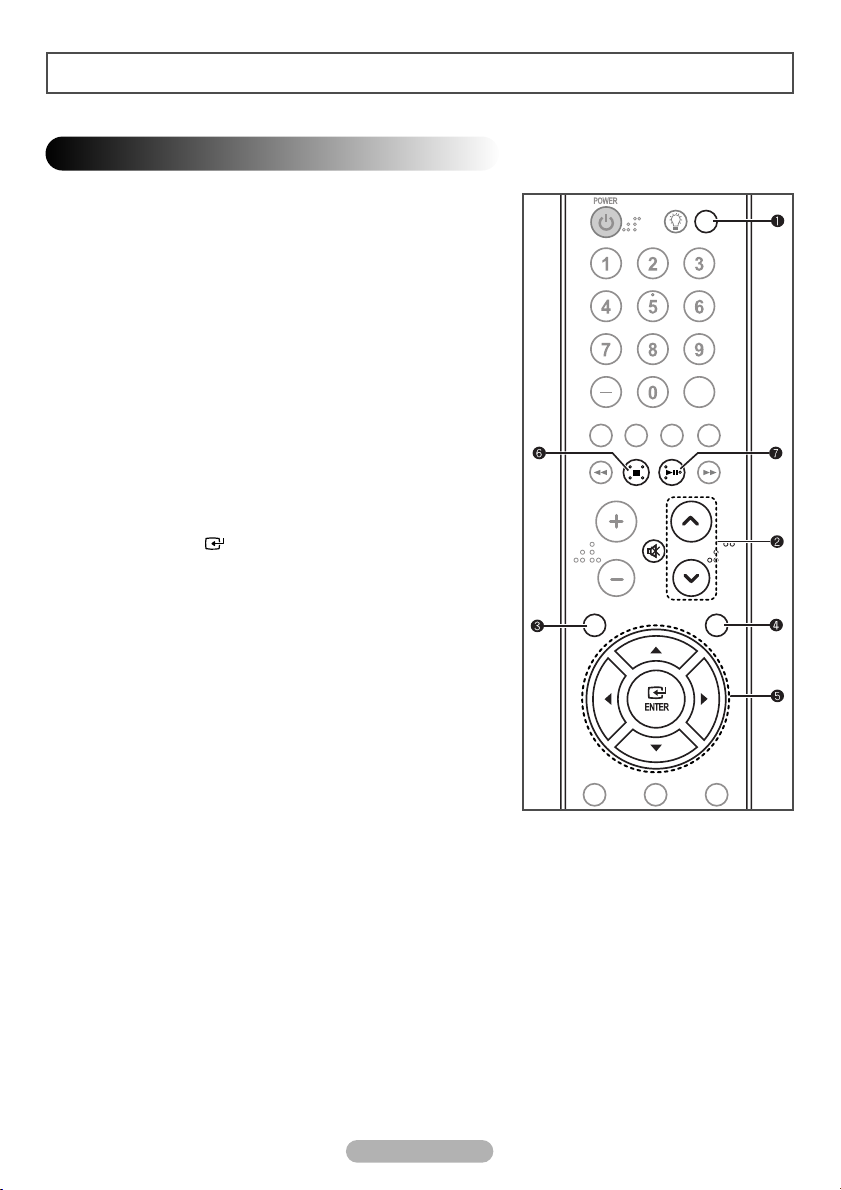
Remote Control
MR-16SA1 only supports the Samsung universal remote
control. Press the MODE button on your remote control until
STB (Set-Top Box) mode is selected. Depending on the model
of the remote control, STB may be displayed on the LCD or the
STB LED lamp may be lit.
1) SOURCE
Press to change the video output resolution of the unit.
2) PAGE UP/DOWN
Press to move to the next or previous page in the play list.
3) HOME
When pressed, the main menu is displayed.
4) BACK
Press to return to the previous menu or stop playing of video.
5) ▲/▼/œœ/√√/ENTER
Press to navigate and select the menu items.
6) STOP
Press to stop playing the video.
7) PLAY/PAUSE
Press to pause during play. To resume, press it again.
◆
The location of the STOP and PLAY/PAUSE buttons may
differ depending on the model of remote control.
English - 6
Page 7

Connecting to the Component
Connect the component cables between the component output (1
and one of the 2 or 3) jacks on the MR-16SA1 and the component
input jacks on the TV.
Supply power to the MR-16SA1 and TV after making all the
connections.
◆
Please be sure to match the color coded terminals and cable
jacks.
Connecting to the Video or S-Video
Connect the video or S-video cable between the video (4 and 5) or
S-video (6 and 5) output jacks on the MR-16SA1 and the video or
S-video input jacks on the TV.
Supply power to the MR-16SA1 and TV after making all the
connections.
◆
Please be sure to match the color coded terminals and cable
jacks.
◆
For better video, use an S-video cable .
Connecting to the HDMI
Connect the HDMI cable between the HDMI OUT (7) jack on the
MR-16SA1 and the HDMI input jack on the TV.
Supply power to the MR-16SA1 and TV after making all the
connections.
◆ MR-16SA1 doesn't support DVI output.
English - 7
Page 8
Copying of Video Files
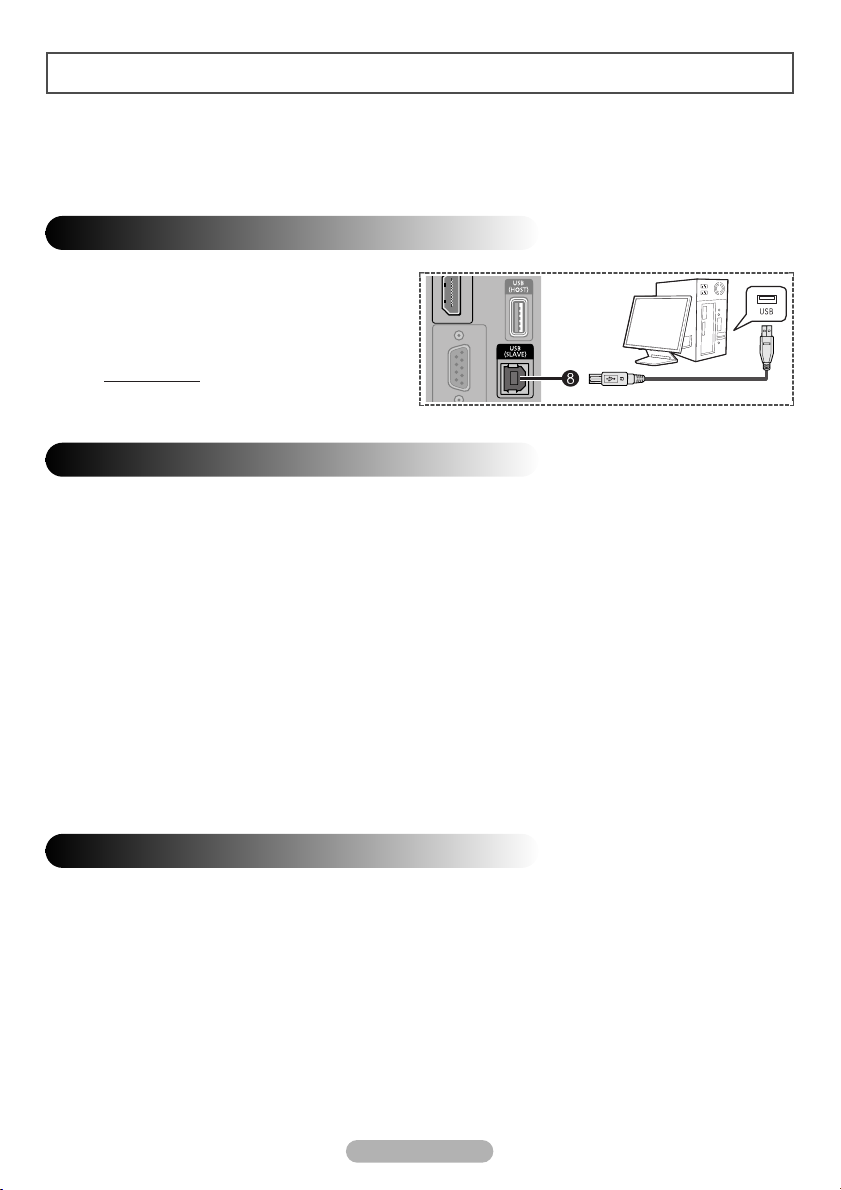
Connecting MR-16SA1 to PC using USB cable allows you to copy or delete the video file from
the MR-16SA1.
Connecting to PC
Connect the USB cable between the USB (8) jack
on the MR-16SA1 and USB port of PC to copy the
video files from your PC.
MR-16SA1 is compatible only with
☛
Windows XP.
Transferring Video Files
1 When MR-16SA1 is connected to the PC using USB cable, the unit automatically turns on and appears as an
external HDD to your PC.
2 Once the USB connection is successfully established, the unit is recognized as a removable disk (ex. E:, F:, G:).
You may identify the unit's HDD by its volume label "MR-16SA1".
3 When the unit's HDD is identified on your PC, you may copy or delete the video files in the unit's HDD in the
same manner as you would operate on your PC.
4
Copy movie files into the "Movie" folder, and commercial images into the "AD" folder.
Otherwise, you cannot play the files using MR-16SA1.
◆
The drive letter of the local disk (e.g. E:, F:, G:, etc.) may differ depending on the computer
configuration.
The MR-16SA1 only supports MPEG2 transport stream files and commercial image
☛
files distributed by Samsung Electronics.
Removing the USB cable from the PC
When you are done copying or deleting the video files, it is recommended to safely remove the unit's
HDD.
1 Click the Safely Remove Hardware icon in the notification area of the PC. When the Safely Remove
Hardware window is displayed, select USB Mass Storage Device and click Stop.
2 When the USB Mass Storage Device can be safely removed from the system message is
displayed, remove the USB cable.
3 The unit turns off automatically when the cable is disconnected.
English - 8
Page 9

Play List
1 Press the HOME button.
Result
: The main menu is displayed.
2 Press the œ or √ button to select Movie. Press the ENTER
() button.
Result
: The Movie menu is displayed.
3 Press the … or † buttons to move to the file to be played.
To go to the next or previous page of the list, press the
➢
or button.
4 Press the √ button to move to the selection column of each
file. To select or deselect the file, press the ENTER ()
button.
The check-box indicates whether the file is selected.
➢
5 Press the œ button to move back to the filename column and
press the ENTER () button.
Result
:Apop-up menu is displayed.
6 Within the pop-up menu, press the … or † button to select an
action and press the ENTER () button.
Result
: Play - The current file will be played.
Play Sel. - The selected file(s) will be played.
Repeat - Activate/deactivate repeat mode.
Delete - Delete current file.
Delete Sel. - Delete selected file(s).
Previous - Quit the pop-up menu.
◆
Only alphabetic characters are allowed for file names on the list.
◆
All files in the list are sorted in alphabetic order.
◆
If you want to stop, press the STOP or EXIT button during play.
◆
If you want to pause the video, press the PLAY/PAUSE button during play. In pause mode,
no sound is played. To resume, press it again.
◆
If you don't select any file, Play All and Delete All items will be shown instead of the
Play Sel. and Delete Sel. in the pop-up menu.
English - 9
Page 10

Setting Up Banners
1 Press the ENTER () button while playing a video.
Result
:Apop-up menu is displayed.
2 Select Ad List by using the œ or √ button and press the
ENTER () button.
Result
: The banner list is displayed.
3 Select a banner item by using the … or † button and press
the ENTER () button.
Result
: The selected item is marked with the symbol.
4 Press the HOME button to exit.
Playing the Configured Banners
1 Press the ENTER () button while playing a video.
Result
:Apop-up menu is displayed.
2 Select Ad Set by using the œ or √ button and press the
ENTER () button. A pop-up menu of Ad Set is displayed
at the top-left corner.
Pressing the ENTER () button alternates between Banner
On and Banner Off.
Banner On: Plays the configured banner items.
Banner Off: Cancels playing the banner items.
-
3 Select Close by using the œ or √ button and press the
ENTER () button to exit.
English - 10
Page 11

Setup
1 Press the HOME button.
Result
: The main menu is displayed.
2 Press the œ or √ button to select Setup.
Press the ENTER () button.
Result
: The Setup menu is displayed.
3 Press the … or † button to move to the desired menu item.
Press the ENTER () button.
11
Video Out: Video / S-Video / Component / HDMI
You can select video output.
22
Resolution: 480p / 720p / 1080i 50Hz /
This resolution is only available when connected to HDMI
and Component.
33
Aspect Ratio: Wide TV (16:9) / TV (4:3)
You can choose the screen size to match your TV screen
format.
44
Digital Audio:
Select DOLBY/DTS to connect to a HomeTheater,
and PCM to connect to a TV.
You can turn on and off digital audio output. When it is on, the raw Dolby Digital signal will be sent
out on coaxial output.
55
Auto Start (On / Off)
If Auto Start option is set to On, the MR-16SA1 will automatically play the first video from the
programmed play list. If off, the main menu is displayed when the unit is turned on.
66
SW Version
You can see the current software version.
77
SW Update
You can update the software when it's available.
1080i 60Hz
DOLBY/DTS:Connect HomeTheater
PCM:Connect TV
/
4 Press œ or √ button to move between menu items and option items.
5 In option items, press the … or † button to move to the desired option setting.
6 Press the ENTER () button.
Result
: It is set to your requirement.
◆ For the Video Out, the change will apply right away.
If the TV cannot support the new setting, you may not see the proper menu. In that case, wait for
10 seconds, then it will return to the previous setting.
◆ You may see a message; Output Setting is changed. Do you want to keep the
setting?
To change to your new setting, select Yes by using the œ or √ button and press the ENTER ()
button. If you select No or selection is not done in 20 seconds, it returns to the previous setting.
English - 11
Page 12

-
AFTER SALES SERVICE
-
Do not hesitate to contact your retailer if a change
in the performance of your product indicates that
a faulty condition may be present.
MD68-00297A-01
 Loading...