

Samsung ML2510 Users Manual
Condition Suggested solutions
Condition Suggested solutions
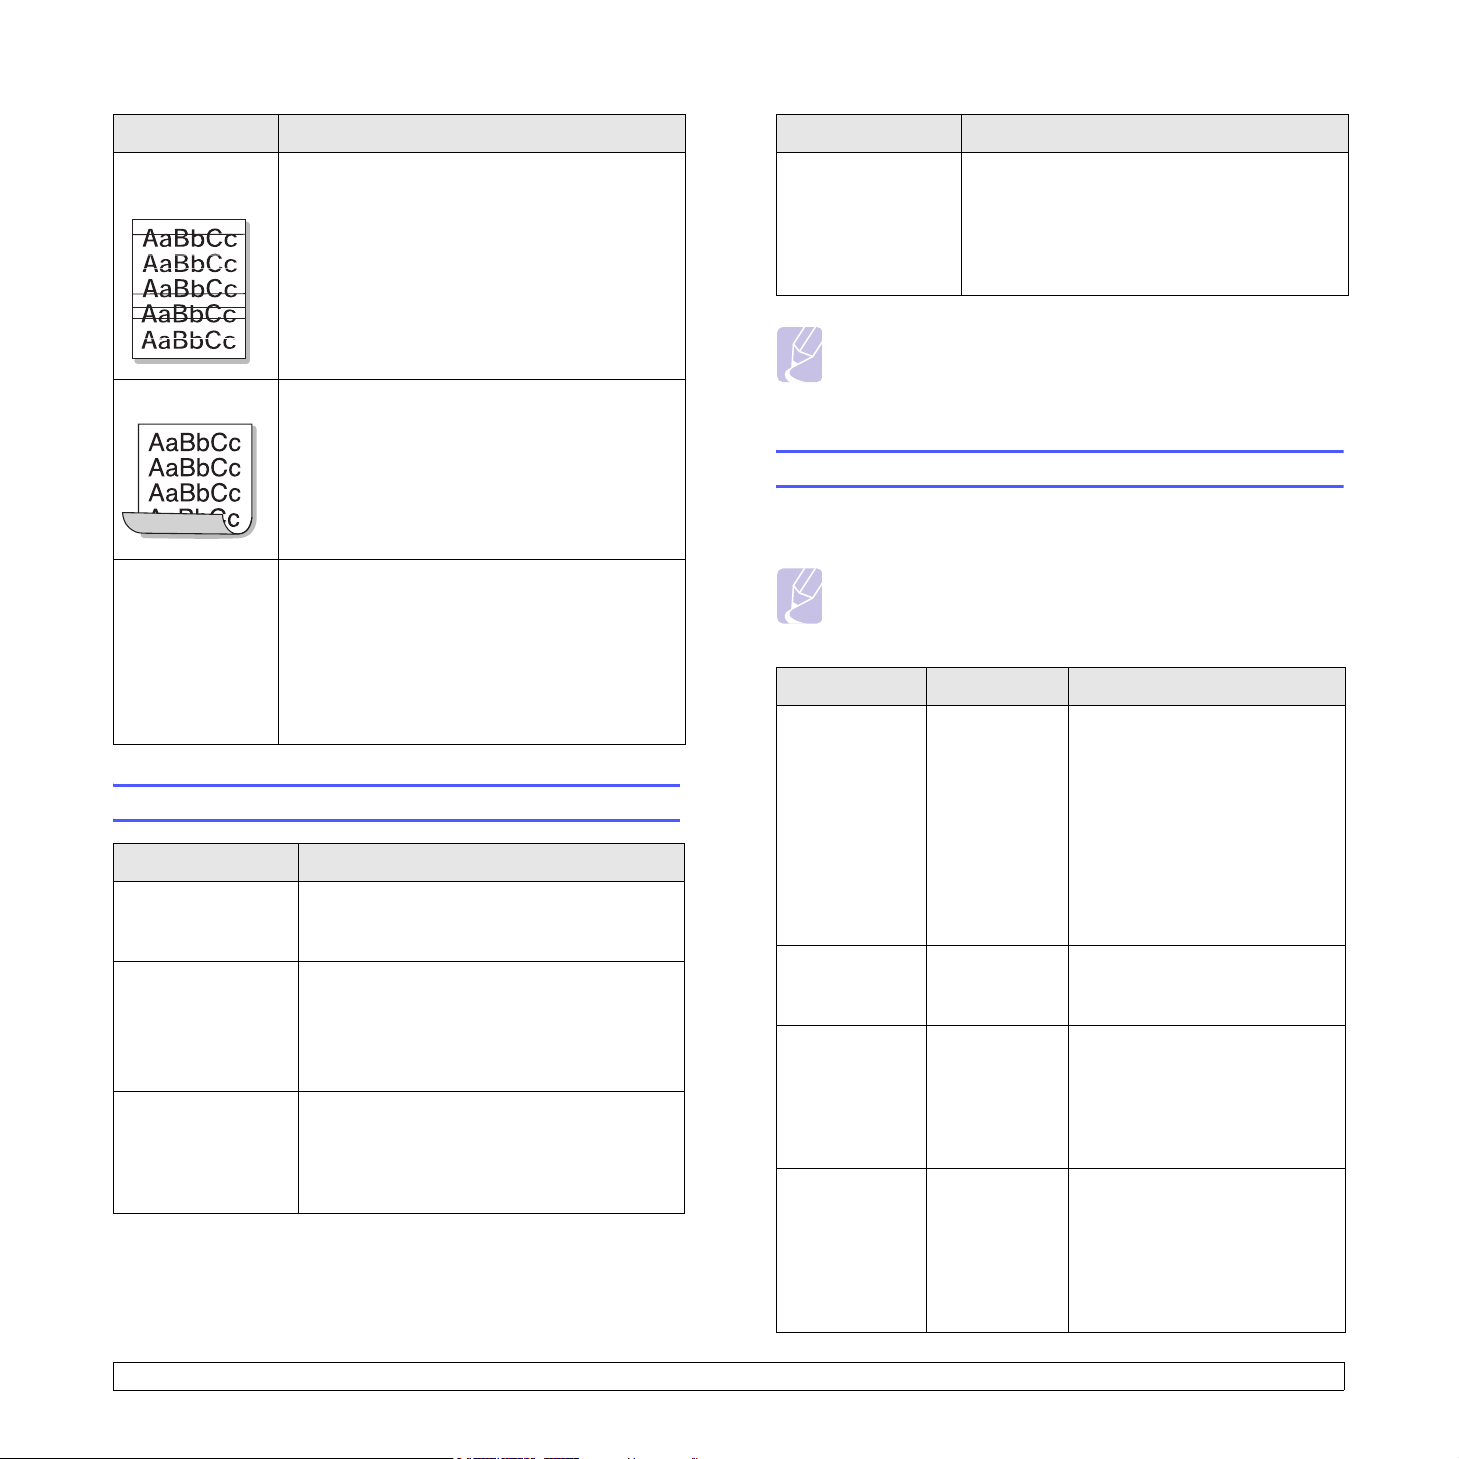
Horizontal
stripes
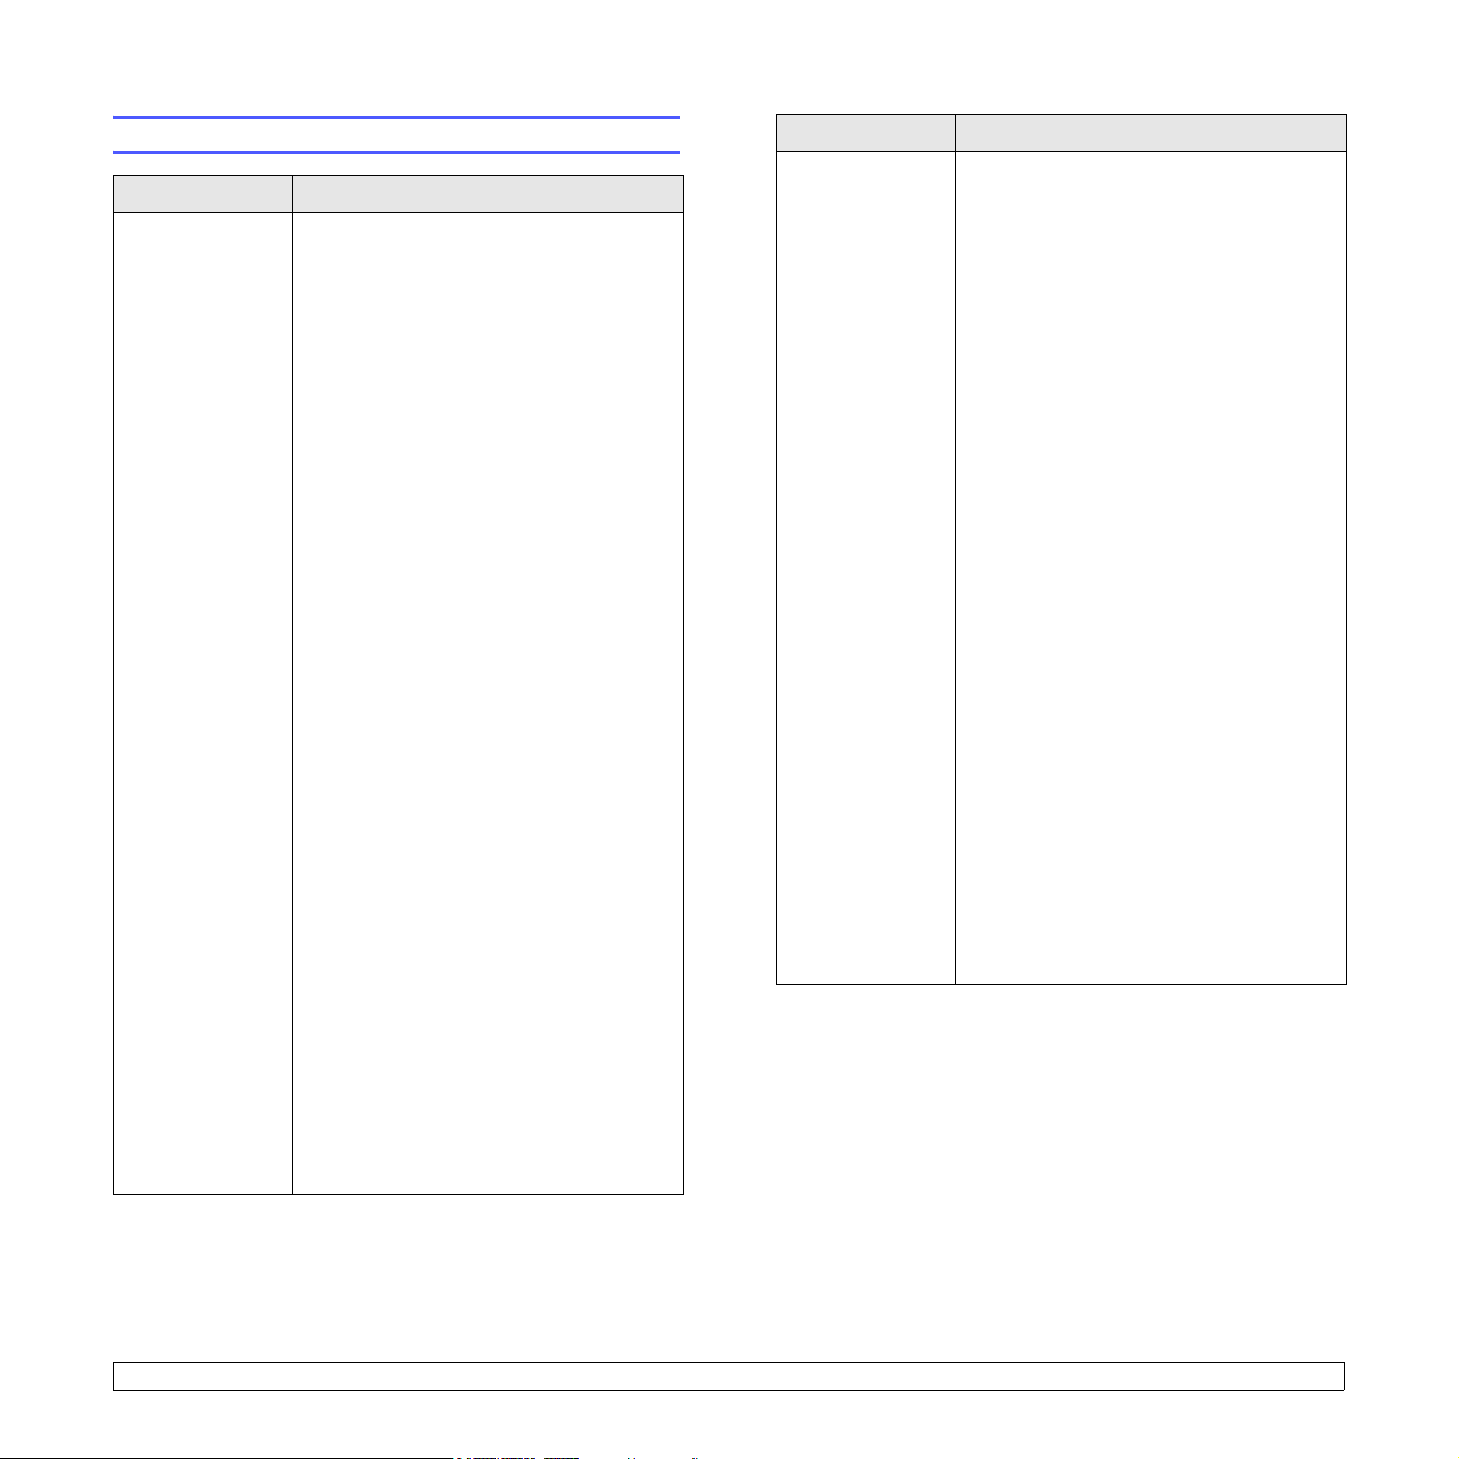
Curl If the printed paper is curled or paper does not
An unknown
image repetitively
appears on a
next few sheets
or loose toner,
light print or
contamination
occurs.
If horizontally aligned black streaks or smears
appear:
• The toner cartridge may be installed
improperly. Remove the cartridge and
reinsert.
• The toner cartridge may be defective. Install a
new toner cartridge. See page 8.4.
• If the problem persists, the printer may require
repair. Contact a service representative.
feed into the printer:
• Turn over the stack of paper in the tray. Also
try rotating the paper 180° in the tray.
Your printer is probably being used at an altitude
of 2,500 m (8,200 ft) or above.
The high altitude may affect the print quality
such as loose toner or light imaging. You can set
this option through Printer Settings Utility or
Printer Tab in printer driver’s properties. Refer
to the Software Section for detail.
Common Windows problems
Condition Suggested solutions
“File in Use”
message appears
during installation.
“Error Writing to
LPTx” message
appears.
“General Protection
Fault”, “Exception
OE”, “Spool32”, or
“Illegal Operation”
messages appear.
Exit all software applications. Remove all
software from the StartUp Group, then restart
Windows. Reinstall the printer driver.
• Ensure that the cables are connected
correctly and the printer is on.
• If bi-directional communication is not turned
on in the driver, it will also cause this
message.
Close all other applications, reboot Windows,
and try printing again.
“Fail To Print,” “A
printer timeout error
occurred,”
messages appear.
These messages may appear during printing.
Just keep waiting until the printer finishes
printing. If the message appears in standby
mode or after printing has been completed,
check the connection and/or whether an error
has occurred.
Note
• Refer to Microsoft Windows 98/Me/NT 4.0/2000/XP/2003
User’s Guide that came with your PC for further information on
Windows error messages.
Common PostScript problems
The following situations are PostScript language specific and may occur
when several printer languages are being used.
Note
• To receive a printed or screen displayed message when
PostScript errors occur, open the Print Options window and
click the desired selection next to the PostScript errors section.
Condition Possible cause Suggested solutions
PostScript file
can not be
printed.
“Limit Check
Error” message
appears.
A PostScript
error page
prints.
When print a
document in
Macintosh with
Acrobat Reader
6.0 or higher,
colors print
incorrectly.
The PostScript
driver may not
be installed
correctly.
The print job
was too
complex.
Print job may
not be
PostScript.
The resolution
setting in the
printer driver
may not be
matched with
that in Acrobat
Reader.
• Print a configuration page
and verify that the PostScript
version is available for
printing.
• Install the PostScript driver;
to installing the PS printer
driver, see the Software
Section.
• If problem consists, contact a
service representative.
You might need to reduce the
complexity of the page or install
more memory.
Make sure that the print job is a
PostScript job. Check to see
whether the software
application expected a setup or
PostScript header file to be sent
to the printer.
Make sure that the resolution
setting in your printer driver
matches that in Acrobat
Reader.
9.9 <
Troubleshooting>
Common Linux problems
Condition Suggested solutions
• Check if the printer driver is installed in your
system. Open Unified Driver Configurator
and switch to the Printers tab in Printers
configuration window to look at the list of
available printers. Make sure that your
machine is displayed on the list. If not,
please, invoke Add new printer wizard to set
up your device.
• Check if the printer is started. Open Printers
configuration and select your machine on
the printers list. Look at the description in
the Selected printer pane. If its status
contains “(stopped)” string, please, press
the Start button. After that normal operation
of the printer should be restored. The
"stopped" status might be activated when
some problems in printing occurred. For
instance, this could be an attempt to print
document when MFP port is claimed by a
scanning application.
The print doesn’t
print.
• Check if the port is not busy. Since
functional components of MFP (printer and
scanner) share the same I/O interface (MFP
port), the situation of simultaneous access
of different “consumer” application to the
same MFP port is possible. To avoid
possible conflicts, only one of them at a time
is allowed to gain control over the device.
The other “consumer” will encounter “device
busy” response. You should open port
configuration and select the port assigned to
your printer. In the Selected port pane you
can see if the port is occupied by some
other application. If this is the case, you
should wait for completion of the current job
or should press Release port button, if you
are sure that the present owner is not
functioning properly.
Check if your application has special print
option such as “-oraw”. If “-oraw” is specified
in the command line parameter then remove it
to print properly. For Gimp front-end, select
“print” -> “Setup printer” and edit command
line parameter in the command item.
Condition Suggested solutions
• Check if your machine is attached to your
computer. Make sure that it is connected
properly via the USB port and is turned on.
• Check if the scanner driver for you machine
is installed in your system. Open Unified
Driver Configurator, switch to Scanners
configuration, then press Drivers. Make
sure that driver with a name corresponding
to your machine's name is listed in the
window.
• Check if the port is not busy. Since
functional components of MFP (printer and
scanner) share the same I/O interface (MFP
port), the situation of simultaneous access
of different “consumer” application to the
same MFP port is possible. To avoid
possible conflicts, only one of them at a time
The printer does
not appear on the
scanners list.
is allowed to gain control over the device.
The other “consumer” will encounter “device
busy” response. This can usually happen
while starting scan procedure, and
appropriate message box displays. To
identify the source of the problem, you
should open port configuration and select
the port assigned to your scanner. MFP
port's symbol /dev/mfp0 corresponds to
LP:0 designation displayed in the scanners’
options, /dev/mfp1 relates to LP:1 and so
on. USB ports start at /dev/mfp4, so scanner
on USB:0 relates to /dev/mfp4 respectively
and so forth sequentially. In the Selected
port pane you can see if the port is occupied
by some other application. If this is the case,
you should wait for completion of the current
job or should press Release port button, if
you are sure that the present port's owner is
not functioning properly.
9.10 <
Troubleshooting>
Condition Suggested solutions
Condition Suggested solutions
The printer doesn’t
scan.
• Check if a document is loaded into the
machine.
• Check if your machine is connected to the
computer. Make sure if it is connected
properly if I/O error is reported while
scanning.
• Check if port is not busy. Since functional
components of MFP (printer and scanner)
share the same I/O interface (MFP port), the
situation of simultaneous access of different
“consumer” application to the same MFP
port is possible. To avoid possible conflicts,
only one of them at a time is allowed to gain
control over the device. The other
“consumer” will encounter “device busy”
response. This can usually happen while
starting scan procedure, and appropriate
message box will be displayed.
To identify the source of the problem, you
should open port configuration and select
the port assigned to your scanner. MFP
port’s symbol /dev/mfp0 corresponds to
LP:0 designation displayed in the scanners’
options, /dev/mfp1 relates to LP:1 and so
on. USB ports start at /dev/mfp4, so scanner
on USB:0 relates to /dev/mfp4 respectively
and so forth sequentially. In the Selected
port pane you can see if the port is occupied
by some other application. If this is the case,
you should wait for completion of the current
job or should press Release port button, if
you are sure that the present port’s owner is
not functioning properly.
Please avoid changing print job parameters
(via LPR GUI, for example) while a print job is
in progress. Known versions of CUPS server
I encounter error
“Unable to open
MFP port device
file!” when printing
a document.
break the print job whenever print options are
changed and then try to restart the job from
the beginning. Since Unified Linux Driver
locks MFP port while printing, the abrupt
termination of the driver keeps the port locked
and therefore unavailable for subsequent print
jobs. If this situation occurred, please, try to
release the MFP port.
Common Macintosh problems
Condition Suggested solutions
The printer does not
print a document from
Acrobat Reader.
The document has
printed, but the print job
has not disappeared
from the spooler in Mac
OS 10.3.2.
The printer does not
print a document from
Illustrator on IPP
printing.
Change the Print Method option to Print
as Image when you print from Acrobat
Reader.
Update your Mac OS to OS 10.3.3 or
higher.
Change the Data type option in the
Adobe Illustrator print menu to Binary.
Or, you can use Appletalk printing.
Can’t scan via
Gimp Front-end.
• Check if Gimp Front-end has “Xsane:Device
dialog..” on the “Acquire” menu. If not, you
should install Xsane plug-in for Gimp on the
your computer. You can find Xsane plug-in
package for Gimp on Linux distribution CD
or Gimp home page. For the detail
information, refer to the Help for Linux
distribution CD or Gimp Front-end
application.
If you wish to use other kind of scan
application, refer to the Help for application.
9.11 <
Troubleshooting>
10 Specifications
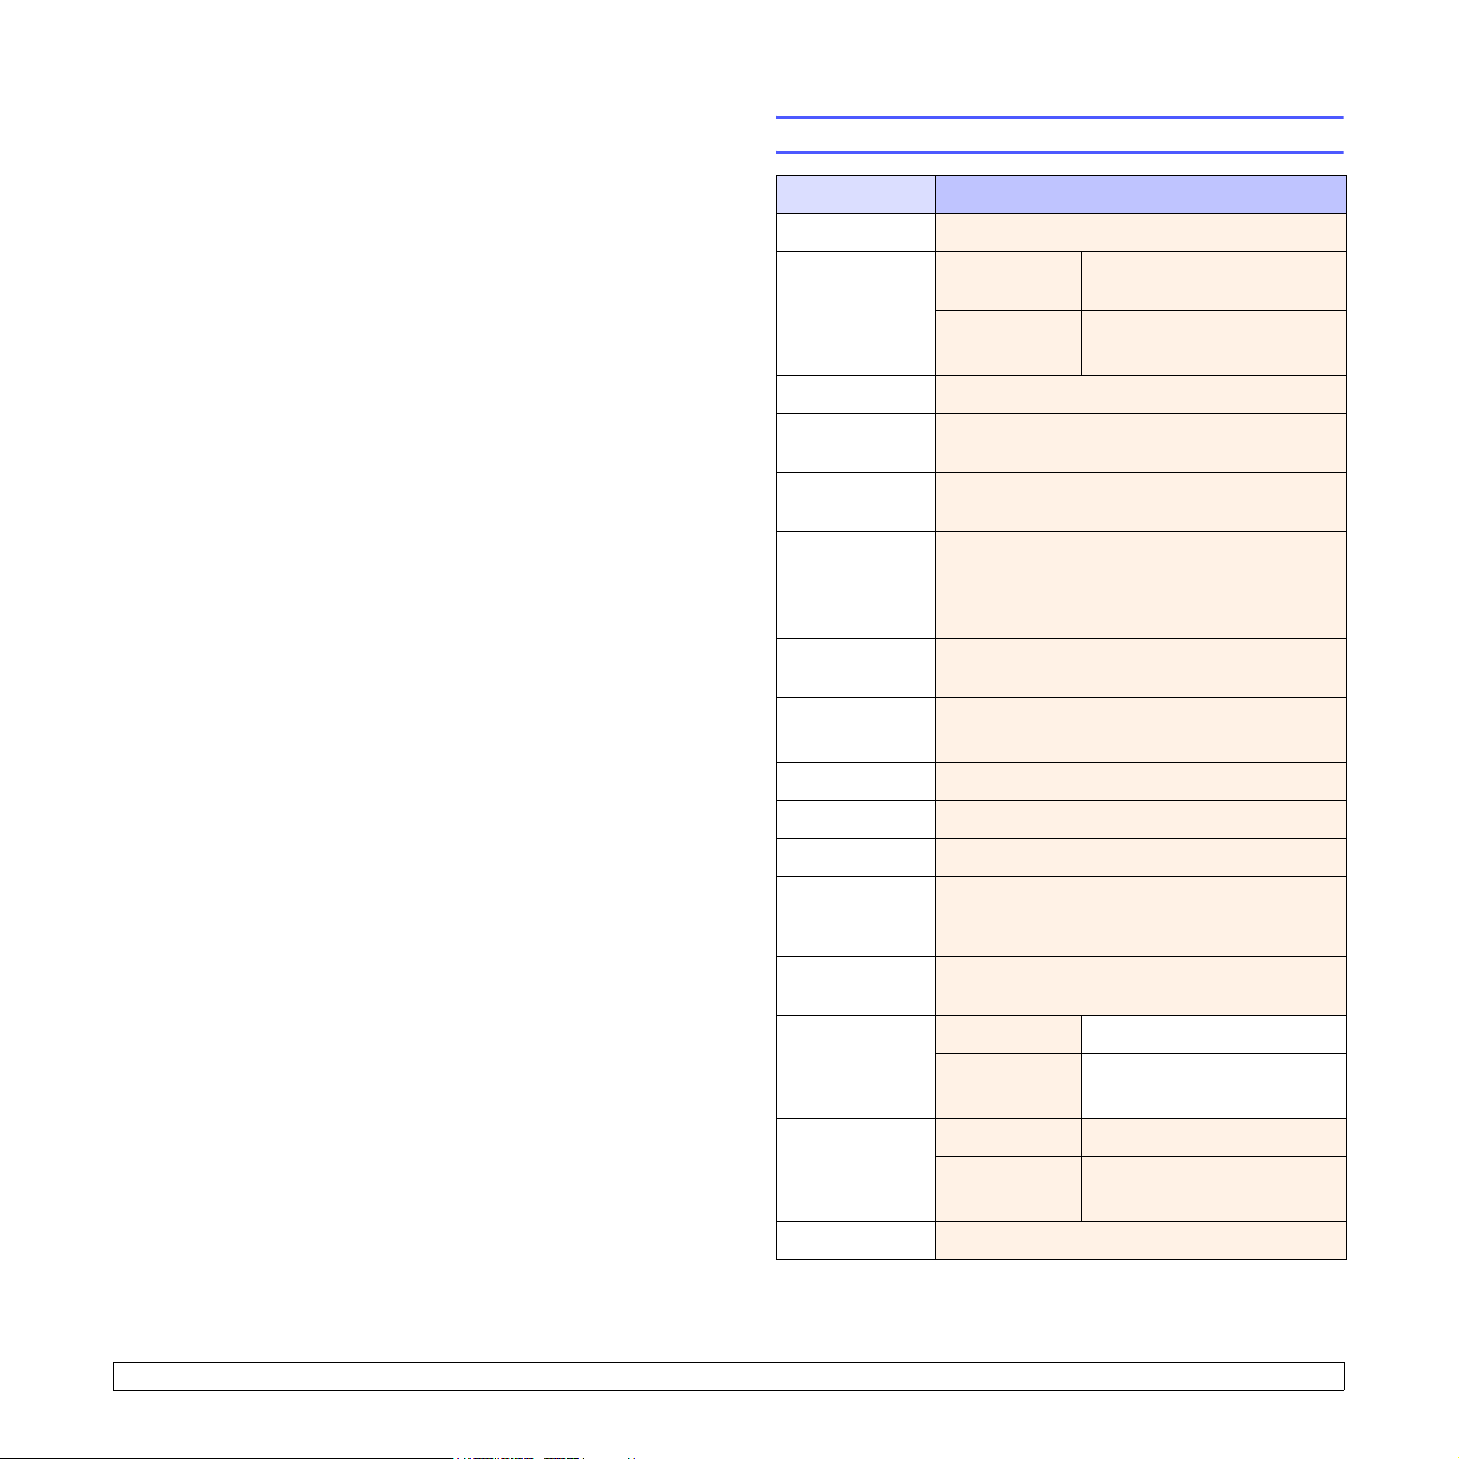
Printer specifications
Item Specifications and description
a
Printing speed
Up to 24 ppm in A4 (25 ppm in Letter)
Resolution
Warm-up time
First print out
time
Power rating 110 ~ 127 VAC, 50 / 60 Hz, 10 A
Power
consumption
Noise level
Toner cartridge
c
life
Duty cycle
Weight
b
ML-2510 Up to 1200 x 600 dpi effective
output
ML-2570,
ML-2571N
Less than 15 seconds
9 seconds (From Ready)
Sleep mode: 25 seconds
220 ~ 240 VAC, 50 / 60 Hz, 5 A
Average: 380 W (ML-2510), 480 W (ML-2570,
ML-2571N)
Power save mode: Less than 5 W (ML-2510),
8.5 W (ML-2570, ML-2571N)
Standby mode: Less than 35 dBA
Printing mode: Less than 52 dBA
3,000 pages at ISO 19752 5% coverage
(ships with 1,000 pages starter toner cartridge)
Monthly: Up to 10,000 pages
8 Kg (including consumables)
Up to 1200 x 1200 dpi
effective output
10.1 <
Package weight
External
dimensions
(W x D x H)
Operating
environment
Printer language
Memory
Fonts
Specifications>
Paper: 2.5 Kg, Plastic: 0.6 Kg
15.6 X 17.8 X 13.9 inches (378 X 299 X 277 mm)
Temperature: 50° F to 90° F (10° C to 32° C)
Humidity: 20% to 80% RH
ML-2510 SPL
ML-2570,
ML-2571N
ML-2510 8 MB (non expandable)
ML-2570,
ML-2571N
Windows fonts
SPL, PostScript 3, PCL6d,
PCL5e
32 MB (non expandable)

Item Specifications and description
Interface • IEEE 1284 Bidirectional Parallel Standard
- Modes supported: Compatible, Nibble, Byte,
ECP
• USB Interface Standard
- USB 1.1 compliant (ML-2510 only)
- USB 2.0: High Speed USB 2.0 (ML-2570, ML2571N only)
- 480 Mbps 1 port
• Network Interface
- Ethernet 10/100 Base TX wired LAN (optional
item in the ML-2510, ML-2570)
OS compatibility
• Windows 98/Me/NT 4.0/2000/XP/2003
• Various Linux OS
• Mac 10.3 (ML-2510) or 8.6 ~ 9.2/10.1 ~ 10.4
(ML-2570, ML-2571N)
Printer drivers
e
• SPL: Windows, Linux
• PCL6 driver (ML-2570, ML-2571N only):
Windows 98/Me/NT 4.0/2000/XP/2003
• PostScript driver (ML-2570, ML-2571N only):
Windows 98/Me/NT 4.0/2000/XP/2003,
Macintosh OS 8.6 ~ 9.2/10.1 ~ 10.4
Options Ethernet 10/100 Base TX wired network
interface server
(ML-2510, ML-2570 only)
a. Print speed will be affected by operating system used, computing perfor-
mance, application software, connection method, print media type, print media
size, and job complexity.
b. Sound pressure Level, ISO7779
c. The number of pages may be affected by operating environment, printing inter-
val, print media type, and print media size.
d. Compatible with PCL6 version 2.1
e. Please visit www.samsungprinter.com
to download the latest software version.
10.2 <
Specifications>

INDEX
A
accessories, order information 7.1
C
cleaning
inside 8.1
outside 8.1
component location
configuration page, print 8.5
control panel
9.4
LED
overview 1.3
1.2
D
demo page, print 2.1
J
jam, clear 9.1
L
LED, meaning 9.4
Linux problems 9.10
loading paper
manual tray
standard tray 5.4
5.5
O
output location 5.6
P
paper guidelines 5.3
paper jam, clear
around the toner cartridge 9.2
manual tray
paper exit area 9.3
standard tray 9.1
paper load
manual tray
standard tray 5.4
paper size, specifications
paper type, specifications 5.2
PostScript problems 9.9
print quality problems, solve
printing
configuration page 8.5
demo page
problems 9.5
problem, solve
checklist
Linux 9.10
Macintosh 9.11
paper jams
printing 9.5
printing quality 9.7
PS errors
Windows 9.9
9.2
5.5
5.2
2.1
9.4
9.1
9.9
9.7
S
special print media, guidelines 5.3
specification, printer 10.1
supplies, order information
system requirements
Linux 3.3
Macintosh
Windows 3.2
3.3
7.1
T
toner cartridge
maintaining 8.3
redistributing 8.3
replacing
toner save mode, use 2.1
troubleshooting 9.1
8.4
W
Windows problems 9.9
M
Macintosh problems 9.11
maintenance parts 8.5
manual feed mode, use
manual tray, use 5.5
5.5
N
network interface server, install 4.2
network operating systems 4.1
Q
quality problems 9.7
R
redistributing, toner cartridge 8.3
replacing, toner cartridge 8.4
1

Samsung Printer
Software section

SOFTWARE SECTION
CONTENTS
Chapter 1:
Chapter 2:
INSTALLING PRINTER SOFTWARE IN WINDOWS
Installing Printer Software ........................................................................................................ 4
Installing Software for Local Printing ................................................................................. 4
Installing Software for Network Printing ............................................................................. 7
Changing the Software Language ............................................................................................ 10
Reinstalling Printer Software ................................................................................................... 10
Removing Printer Software ..................................................................................................... 11
BASIC PRINTING
Printing a Document .............................................................................................................. 12
Printer Settings ..................................................................................................................... 13
Layout Tab .................................................................................................................. 13
Paper Tab .................................................................................................................... 14
Graphics Tab ............................................................................................................... 15
Extras Tab ................................................................................................................... 16
About Tab ................................................................................................................... 16
Printer Tab .................................................................................................................. 16
Using a Favorite Setting ................................................................................................ 17
Using Help ................................................................................................................... 17
1

Chapter 3:
ADVANCED PRINTING
Printing Multiple Pages on One Sheet of Paper (N-Up Printing) ..................................................... 18
Printing Posters ..................................................................................................................... 19
Printing Booklets .................................................................................................................. 19
Printing on Both Sides of Paper ............................................................................................... 20
Printing a Reduced or Enlarged Document ................................................................................ 20
Fitting Your Document to a Selected Paper Size ......................................................................... 20
Using Watermarks ................................................................................................................. 21
Using an Existing Watermark ......................................................................................... 21
Creating a Watermark ................................................................................................... 21
Editing a Watermark ..................................................................................................... 21
Deleting a Watermark ................................................................................................... 21
Using Overlays ...................................................................................................................... 22
What is an Overlay? ...................................................................................................... 22
Creating a New Page Overlay ......................................................................................... 22
Using a Page Overlay .................................................................................................... 22
Deleting a Page Overlay ................................................................................................ 22
Chapter 4:
Chapter 5:
Chapter 6:
USING WINDOWS POSTSCRIPT DRIVER
Printer Settings ..................................................................................................................... 23
Advanced
Using Help ................................................................................................................... 23
.................................................................................................................. 23
SHARING THE PRINTER LOCALLY
Setting Up a Host Computer ................................................................................................... 24
Setting Up a Client Computer .................................................................................................. 24
USING SMART PANEL
Understanding Smart Panel .................................................................................................... 25
Opening the Troubleshooting Guide ......................................................................................... 26
Changing the Smart Panel Program Settings ............................................................................. 26
2

Chapter 7:
USING YOUR PRINTER IN LINUX
Getting Started ..................................................................................................................... 27
Installing the Unified Linux Driver ............................................................................................ 27
Installing the Unified Linux Driver ................................................................................... 27
Uninstalling the Unified Linux Driver ............................................................................... 28
Using the Unified Driver Configurator ....................................................................................... 29
Opening the Unified Driver Configurator .......................................................................... 29
Printers Configuration ................................................................................................... 29
Scanners Configuration (for MFP device only) ................................................................... 30
Ports Configuration ....................................................................................................... 30
Configuring Printer Properties ................................................................................................. 31
Printing a Document .............................................................................................................. 31
Printing from Applications .............................................................................................. 31
Printing Files ................................................................................................................ 32
Scanning a Document (for MFP device only) .............................................................................. 32
Using the Image Manager .............................................................................................. 33
Chapter 8:
USING YOUR PRINTER WITH A MACINTOSH
Installing printer driver for Macintosh ....................................................................................... 35
ML-2510 only ............................................................................................................... 35
ML-2570/ML-2571N only ............................................................................................... 36
Setting Up the Printer ............................................................................................................ 36
ML-2510/2570 only ...................................................................................................... 36
ML-2571N only ............................................................................................................ 37
Printing ................................................................................................................................ 37
Printing a Document ..................................................................................................... 37
Changing Printer Settings .............................................................................................. 38
Printing Multiple Pages on One Sheet of Paper .................................................................. 39
3
Typical Installation
1 Installing Printer
Software in Windows
This chapter includes:
• Installing Printer Software
• Changing the Software Language
• Reinstalling Printer Software
• Removing Printer Software
Installing Printer Software
You can install the printer software for local printing or network
printing. To install the printer software on the computer,
perform the appropriate installation procedure depending on
the printer in use.
A printer driver is software that lets your computer
communicate with your printer. The procedure to install drivers
may differ depending on the operating system you are using.
All applications should be closed on your PC before beginning
installation.
This is recommended for most users. All components necessary
for printer operations will be installed.
1
Make sure that the printer is connected to your computer
and powered on.
2
Insert the supplied CD-ROM into your CD-ROM drive.
The CD-ROM should automatically run, and an installation
window appears.
Start
If the installation window does not appear, click
then
Run
. Type
X:\Setup.exe
letter which represents your drive and click
, replacing “X” with the
OK
and
.
Installing Software for Local Printing
A local printer is a printer directly attached to your computer
using the printer cable supplied with your printer, such as a USB
or parallel cable. If your printer is attached to a network, skip
this step and go to “Installing Software for Network Printing” on
page 7.
You can install the printer software using the typical or custom
method.
NOTE
: If the “New Hardware Wizard” window appears during
the installation procedure, click in the upper right corner of
the box to close the window, or click
Cancel
.
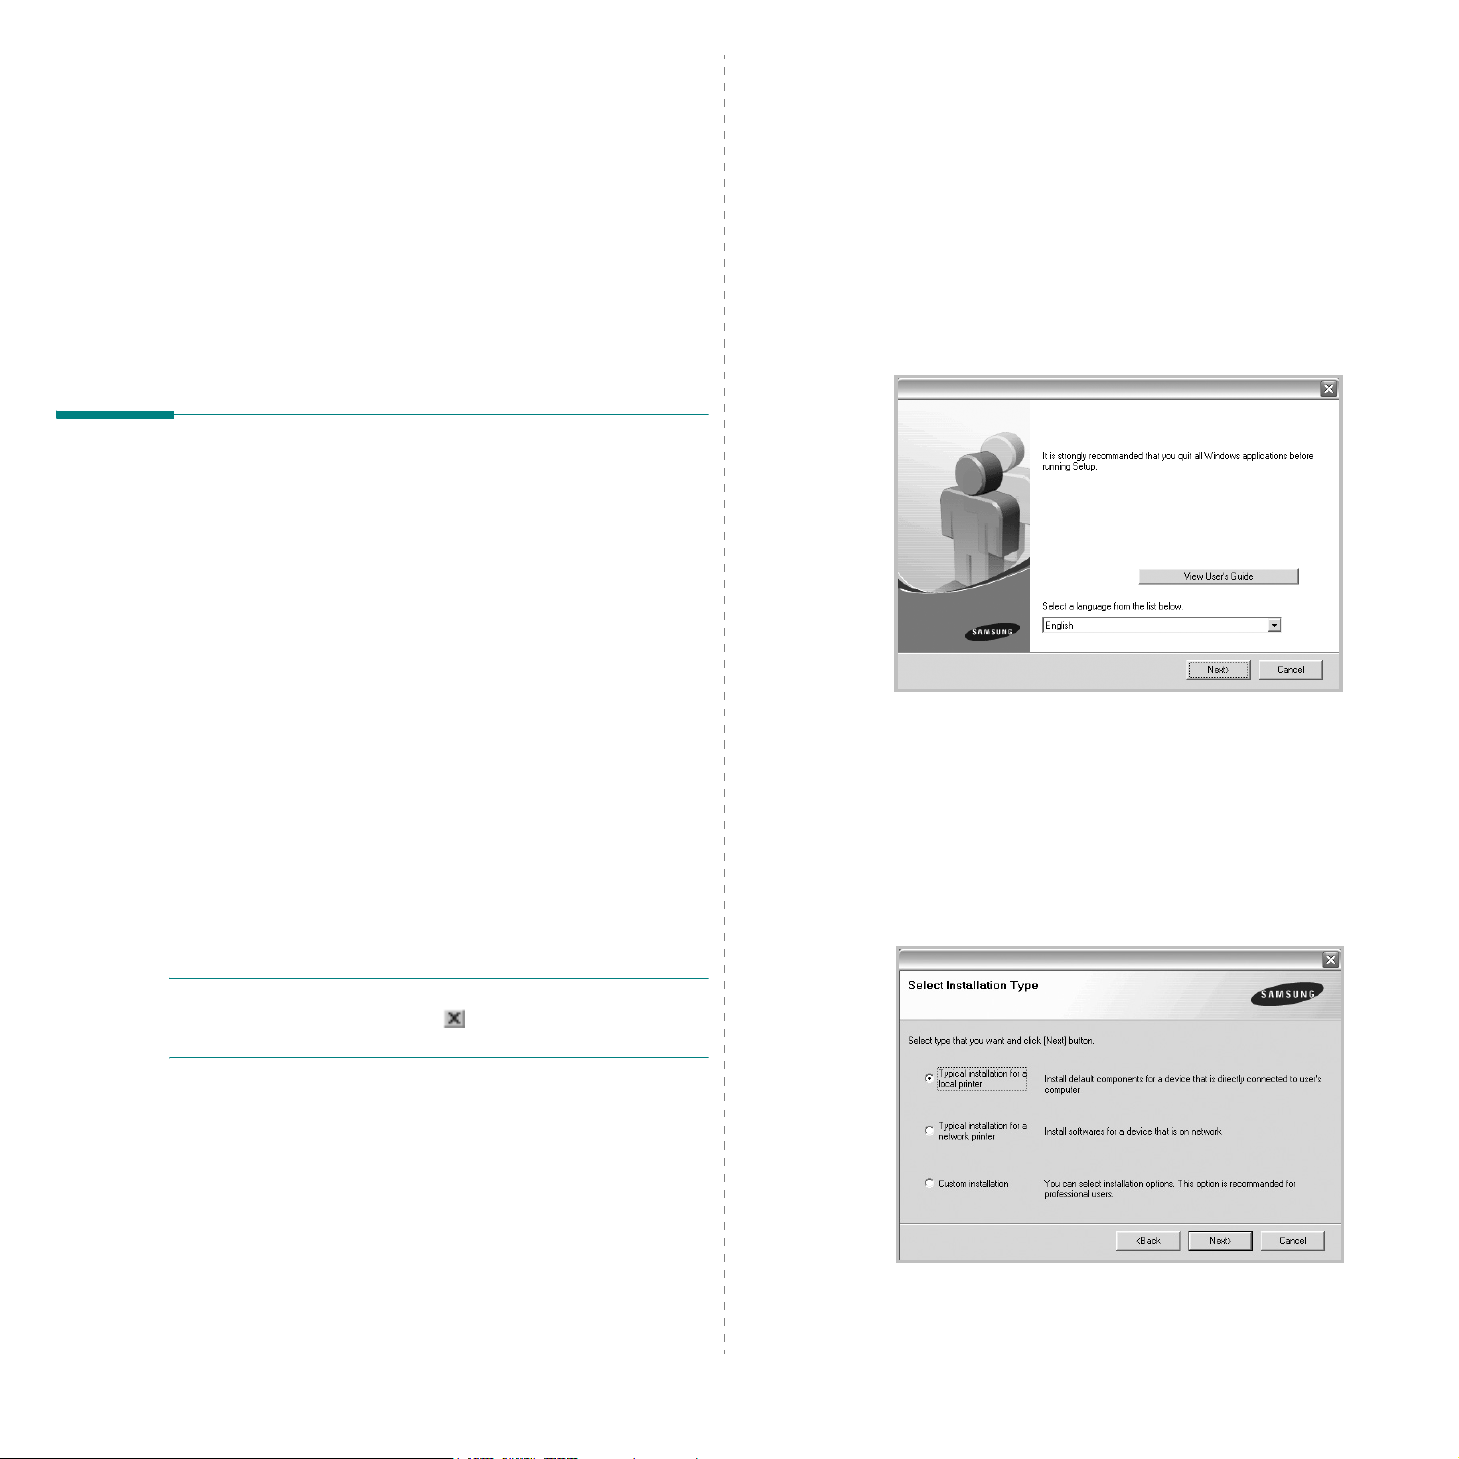
3
Click
Next
.
• If necessary, select a language from the drop-down list.
•
View User’s Guide
Guide. If your computer doesn’t have Adobe Acrobat,
click on this option and it will automatically install Adobe
Acrobat Reader for you.
4
Select
Typical installation for a local printer
Next
.
: Allows you to view the User’s
. Click
4
Installing Printer Software in Windows
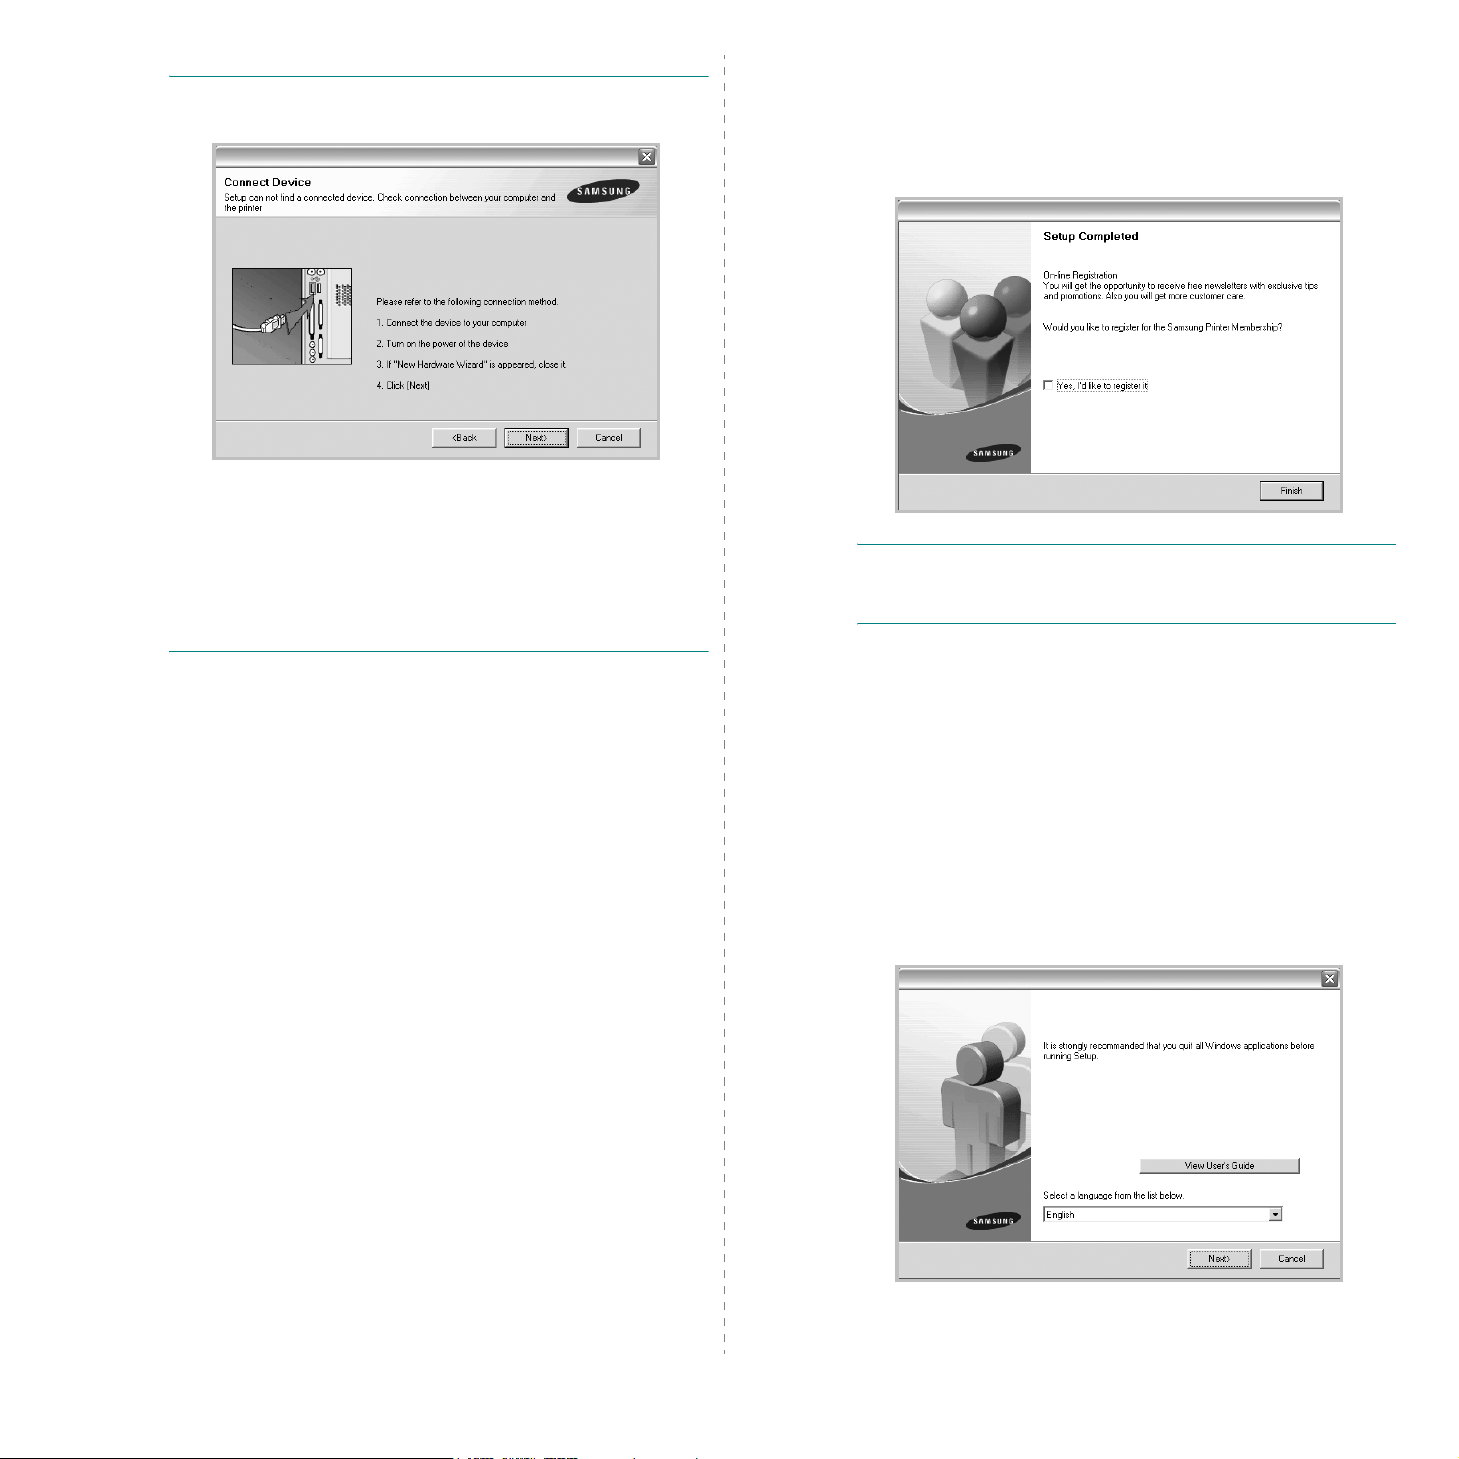
NOTE
: If your printer is not already connected to the
computer, the following window will appear.
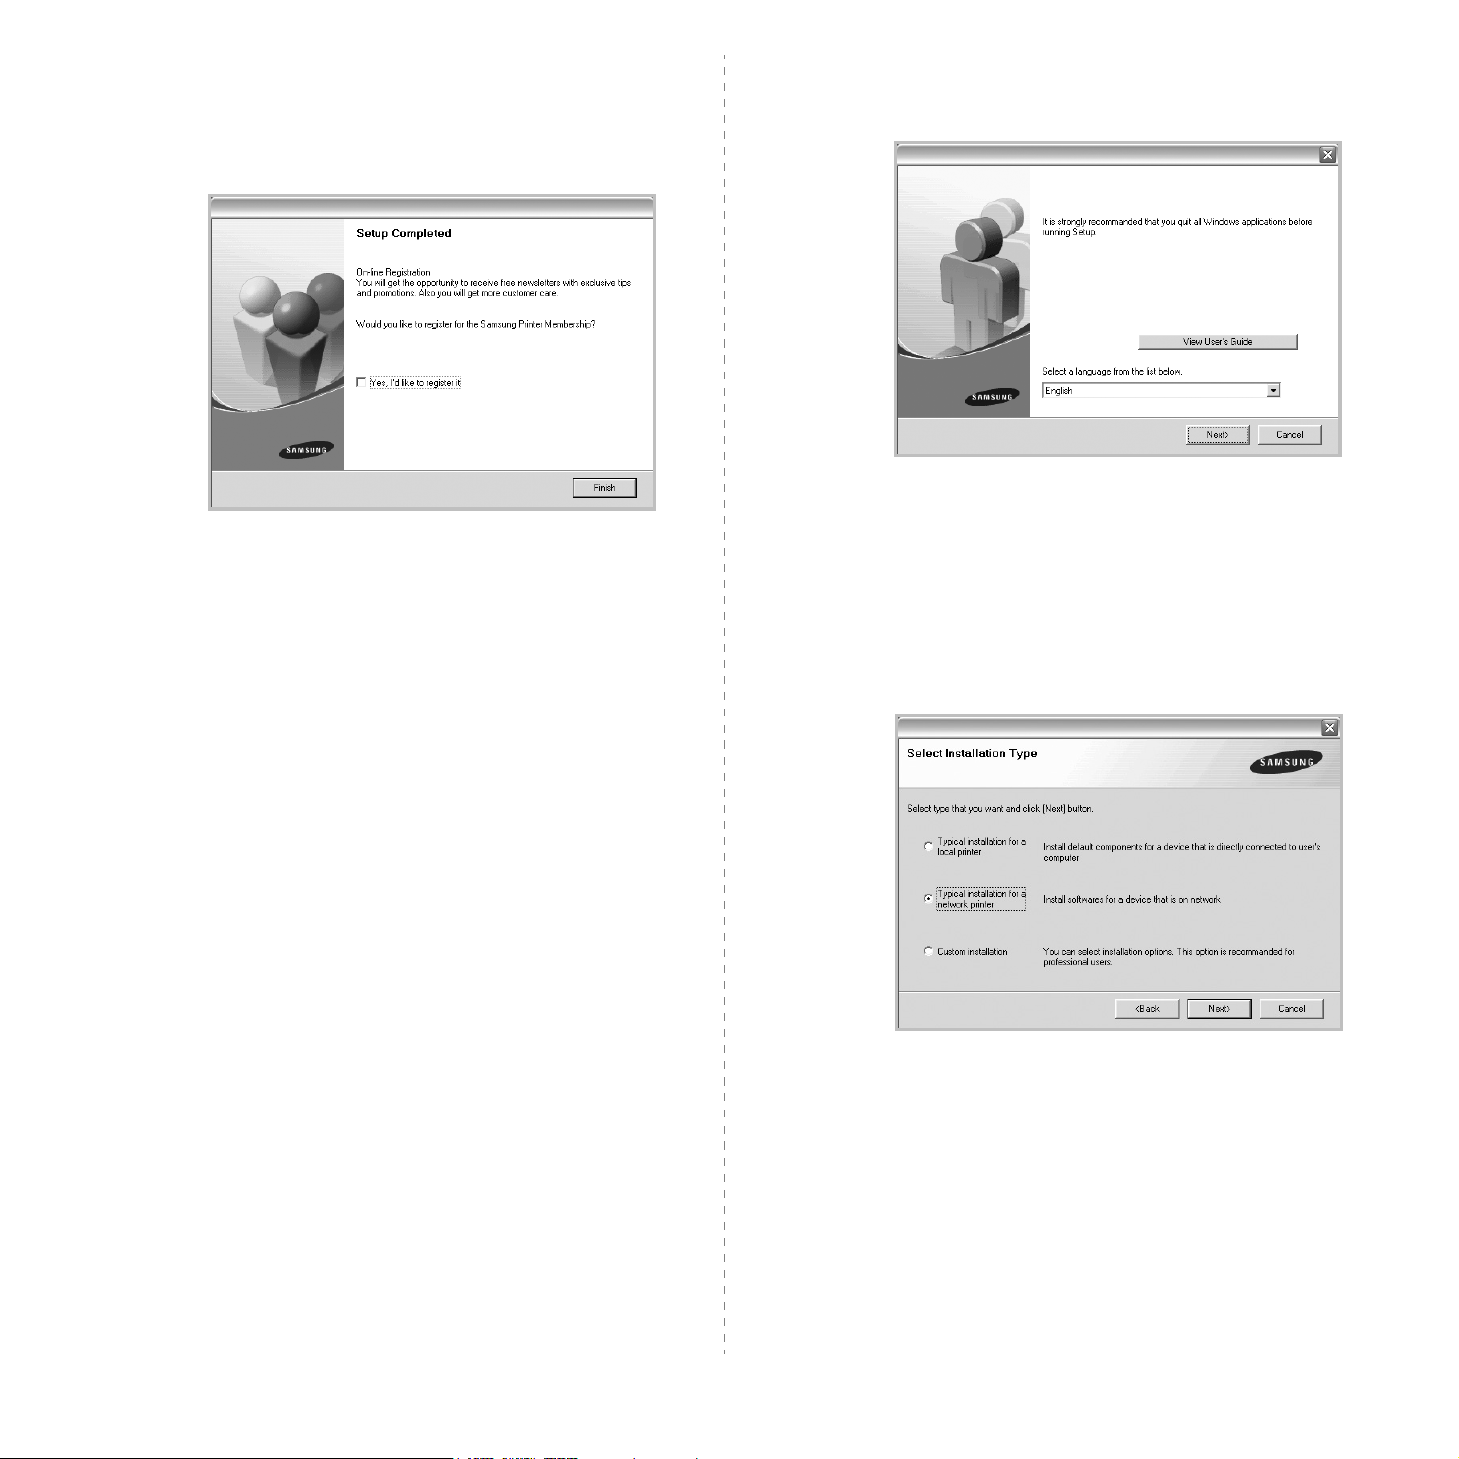
7
To register yourself as a user of Samsung Printers in order
to receive information from Samsung, select the checkbox
and click
site.
Otherwise, just click
Finish
. You are now sent to the Samsung web
Finish
.
• After connecting the printer, click
• If you don’t want to connect the printer at this time, click
Next
, and No on the following screen. Then the installation
will start and a test page will not be printed at the end of the
installation.
• The installation window that appears in this User’s
Guide may differ depending on the printer and
interface in use.
5
After the installation is finished, a window asking you to
print a test page appears. If you choose to print a test
page, select the checkbox and click
Otherwise, just click
6
If the test page prints out correctly, click
If not, click
No
Next
to reprint it.
Next
.
Next
.
and skip to step 7.
Yes
.
NOTE
: After setup is complete, if your printer driver doesn’t
work properly, reinstall the printer driver. See “Reinstalling
Printer Software” on page 10.
Custom Installation
You can choose individual components to install.
1
Make sure that the printer is connected to your computer
and powered on.
2
Insert the supplied CD-ROM into your CD-ROM drive.
The CD-ROM should automatically run, and an installation
window appears.
OK
Start
.
If the installation window does not appear, click
then
Run
. Type
X:\Setup.exe
letter which represents your drive and click
, replacing “X” with the
and
5
Installing Printer Software in Windows

3
Click
Next
.
• If necessary, select a language from the drop-down list.
View User’s Guide
•
Guide. If your computer doesn’t have Adobe Acrobat,
click on this option and it will automatically install Adobe
Acrobat Reader for you.
4
Select
Custom installation
5
Select your printer and click
: Allows you to view the User’s
. Click
Next
.
Next
.
NOTE
: If your printer is not already connected to the
computer, the following window will appear.
Next
• After connecting the printer, click
• If you don’t want to connect the printer at this time, click
Next
, and No on the following screen. Then the installation
will start and a test page will not be printed at the end of the
installation.
• The installation window that appears in this User’s
Guide may differ depending on the printer and
interface in use.
.
6
Select the components to be installed and click
NOTE
: You can change the desired installation folder by
clicking [
7
Browse
After the installation is finished, a window asking you to
print a test page appears. If you choose to print a test
page, select the checkbox and click
Otherwise, just click
].
Next
.
Next
and skip to step 9.
Next
.
8
6
Installing Printer Software in Windows
If the test page prints out correctly, click
If not, click
No
to reprint it.
Yes
.
9
To register yourself as a user of Samsung Printers in order
to receive information from Samsung, select the checkbox
and click
site.
Otherwise, just click
Finish
. You are now sent to the Samsung web
Finish
.
Installing Software for Network
Printing
When you connect your printer to a network, you must first
configure the TCP/IP settings for the printer. After you have
assigned and verified the TCP/IP settings, you are ready to
install the software on each computer on the network.
You can install the printer software using the typical or custom
method.
If the installation window does not appear, click
then
Run
. Type
X:\Setup.exe
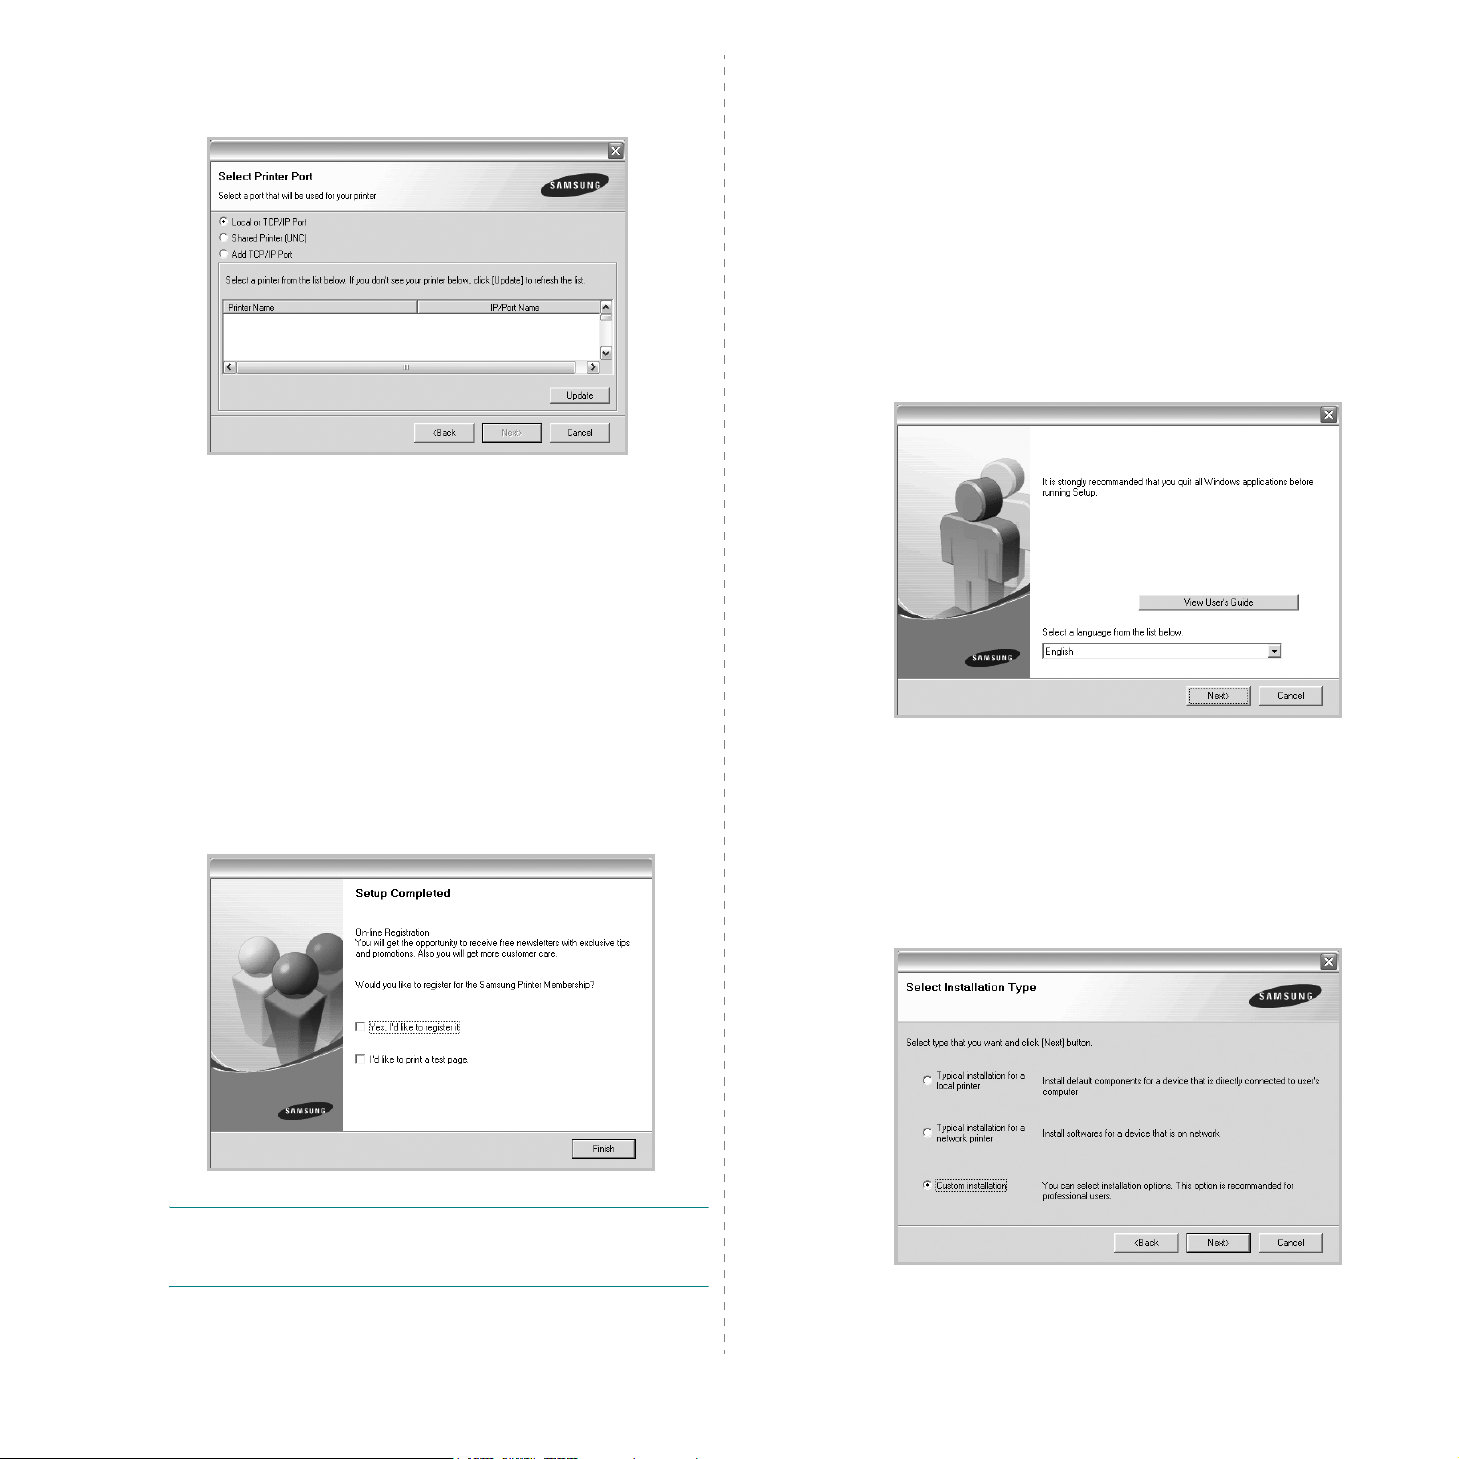
letter which represents your drive and click
3
Click
Next
.
• If necessary, select a language from the drop-down list.
•
View User’s Guide
Guide. If your computer doesn’t have Adobe Acrobat,
click on this option and it will automatically install Adobe
Acrobat Reader for you.
4
Select
Typical installation for a network printer
Next
.
: Allows you to view the User’s
, replacing “X” with the
OK
.
Start
and
. Click
Typical Installation
This is recommended for most users. All components necessary
for printer operations will be installed.
1
Make sure that the printer is connected to your network
and powered on. For details about connecting to the
network, see the supplied printer’s User’s Guide.
2
Insert the supplied CD-ROM into your CD-ROM drive.
The CD-ROM should automatically run, and an installation
window appears.
Installing Printer Software in Windows
7
5
The list of printers available on the network appears.
Select the printer you want to install from the list and then
click
Next
.
Custom Installation
You can choose individual components to install and set a
specific IP address.
1
Make sure that the printer is connected to your network
and powered on. For details about connecting to the
network, see the supplied printer’s User’s Guide.
2
Insert the supplied CD-ROM into your CD-ROM drive.
The CD-ROM should automatically run, and an installation
window appears.
If the installation window does not appear, click
then
Run
. Type
X:\Setup.exe
letter which represents your drive and click
, replacing “X” with the
OK
Start
.
and
• If you do not see your printer on the list, click
refresh the list, or select
printer to the network. To add the printer to the
network, enter the port name and the IP address for the
printer.
• To find a shared network printer (UNC Path), select
Shared Printer [UNC]
manually or find a shared printer by clicking the
button.
6
After the installation is finished, a window appears asking
you to print a test page and to register yourself as a user
of Samsung Printers in order to receive information from
Samsung. If you so desire, select the corresponding
checkbox(es) and click
Otherwise, just click
Add TCP/IP Port
and enter the shared name
Finish
.
Finish
.
Update
to add your
to
Browse
3
Click
Next
.
• If necessary, select a language from the drop-down list.
View User’s Guide
•
Guide. If your computer doesn’t have Adobe Acrobat,
click on this option and it will automatically install Adobe
Acrobat Reader for you.
4
Select
Custom installation
: Allows you to view the User’s
. Click
Next
.
NOTE
: After setup is complete, if your printer driver doesn’t
work properly, reinstall the printer driver. See “Reinstalling
Printer Software” on page 10.
Installing Printer Software in Windows
8
 Loading...