

Page 1
Contact SAMSUNG WORLD-WIDE
If you have any comments or questions regarding a Samsung products,
please contact the SAMSUNG customer care center.
Contacte con SAMSUNG WORLD-WIDE
Si tiene alguna pregunta o comentario referente a nuestros productos,
por favor contacte con nuestro Servicio de Atención al Cliente.
Contate a SAMSUNG EM TODO O MUNDO
Caso tenha dúvidas ou comentários sobre os produtos da Samsung,
entre em contato com o centro de atendimento ao cliente da SAMSUNG.
Country
ARGENTINE
BRAZIL
CHILE
COSTA RICA
ECUADOR
EL SALVADOR
GUATEMALA
JAMAICA
MEXICO
PANAMA
PUERTO RICO
REP. DOMINICA
TRINIDAD & TOBAGO
VENEZUELA
Customer Care Center
0800-333-3733
0800-124-421
800-726-7864 (SAMSUNG)
0-800-507-7267
1-800-10-7267
800-6225
1-800-299-0013
1-800-234-7267
01-800-SAMSUNG (7267864)
800-7267
1-800-682-3180
1-800-751-2676
1-800-7267-864
1-800-100-5303
www.samsung.com/ar
www.samsung.com/br
www.samsung.com/cl
www.samsung.com/latin
www.samsung.com/latin
www.samsung.com/latin
www.samsung.com/latin
www.samsung.com/latin
www.samsung.com/mx
www.samsung.com/latin
www.samsung.com/latin
www.samsung.com/latin
www.samsung.com/latin
www.samsung.com/latin
Web Site
LN15S51BP
LN20S51BP
TFT-LCD TELEVISION
IMPORTADO POR: SAMSUNG ELECTRONICS MÉXICO. S.A. de C.V.
Vía Lopez Portillo No. 6,
Col. San Fco. Chilpan
Tultitlán, Estado de México, C.P. 54940
TEL. 01-55-5747-5100 / 01-800-726-7864
EXPORTADO POR: Samsung Electronics CO.,LTD.
416, Mae tan-3dong, Yeongtong - gu,
Suwon City, Gyeonggi-do Korea
BN68-00940B-01
Owner’s
Instructions
This device is a Class B digital apparatus.
Register your product at
www.samsung.com/global/register
Page 2
Precautions When Displaying a Still Image
A still image may cause permanent damage to the TV screen.
• Do not display a still image on the LCD panel for more than 2 hours as it can cause screen image retention.
This image retention is also known as "screen burn".
To avoid such image retention, reduce the degree of brightness and contrast of the screen when displaying a still image.
• Watching the LCD TV in 4:3 format for a long period of time may leave traces of borders displayed on the left, right and center of the screen
• Displaying still images from Video games and PC for longer than a certain period of time may produce partial after-images.
To prevent this effect, reduce the ‘brightness’ and ‘contrast’ when displaying still images.
Precauciones al mostrar en la pantalla una imagen fija
La imagen fija puede causar daños permanentes en la pantalla del televisor.
• No deje una imagen fija en la pantalla LCD durante más de dos horas ya que se podría producir una retención de la imagen en la pantalla. Este fenómeno de
retención de imágenes también se denomina "quemadura de pantalla".
Para evitar que se produzca esa persistencia de la imagen, reduzca el nivel de luminosidad y de contraste de la pantalla cuando muestre imágenes fijas.
• El uso del televisor LCD en formato 4:3 durante un tiempo prolongado puede dejar rastros de bordes en las partes izquierda,
• Ver imágenes fijas de videojuegos y PC durante más tiempo del indicado puede producir restos de imágenes parciales.
Para evitar este efecto, reduzca el 'brillo' y el 'contraste' cuando vea imágenes fijas.
Precauções ao exibir uma imagem estática
Uma imagem estática pode causar dano permanente em uma tela de TV.
• Não exiba uma imagem estática no painel LCD por mais de 2 horas, pois isso poderá causar retenção de imagem na tela.
Essa retenção de imagem também é conhecida como "queima da tela".
Para evitar essa retenção de imagem, reduza o grau de brilho e de contraste da tela ao exibir uma imagem estática.
• O fato de assistir a TV LCD no formato 4:3 por um longo período de tempo pode deixar traços de bordas exibidos nas partes esquerda,
• A exibição de imagens estáticas de Video games e PC por mais tempo que um determinado período pode produzir pós-imagens parciais.
Para evitar esse efeito, reduza o ‘brilho’ e o ‘contraste’ ao exibir imagens estáticas.
caused by the difference of light emission on the screen.
Playing a DVD or a game console may cause a similar effect to the screen.
Damages caused by the above effect are not covered by the Warranty.
derecha y central de la pantalla debido a las diferencias en la emisión lumínica de la pantalla.
La reproducción de un DVD o el uso de una consola de videojuegos pueden provocar un efecto similar en la pantalla.
Reproducir un DVD o una videoconsola puede causar un efecto similar en la pantalla. La garantía no cubre estos daños.
direita e central da tela, causados pela diferença da emissão de luz na tela.
A utilização de um DVD ou de um console de jogo pode causar um efeito similar na tela.
Danos provocados pelo efeito acima não são cobertos pela Garantia.
Page 3
Contents
GENERAL INFORMATION
List of Features .................................................................................. 2
List of Parts ........................................................................................ 2
How to Adjust the Stand .................................................................... 2
How to Adjust the Angle of the TV..................................................... 2
Installing the Wall Mount Kit ......................................................... 3
Installing VESA compliant mounting devices ............................... 3
Viewing the Control Panel.................................................................. 3
Viewing the Connection Panel........................................................... 4
Viewing the Remote Control .............................................................. 5
Installing Batteries in the Remote Control ......................................... 6
OPERATION
Turning the TV On and Off................................................................. 6
Changing Channels ........................................................................... 6
Adjusting the Volume ......................................................................... 6
Viewing the Display............................................................................ 7
Plug and Play Feature ....................................................................... 7
Selecting the Video Signal-source..................................................... 7
Storing Channels Automatically......................................................... 8
Storing Channels Manually................................................................ 8
Fine Tuning Channels........................................................................ 8
English
PC DISPLAY
Setting Up Your PC Software (Based on Windows XP)............... 13
Setting the PC .............................................................................. 14
TROUBLESHOOTING
Identifying Problems ..................................................................... 15
APPENDIX
Specifications ............................................................................... 16
Display Modes .............................................................................. 16
PICTURE CONTROL
Using Automatic Picture Settings ...................................................... 9
Customizing the Picture ..................................................................... 9
Adjusting the Color Tone.................................................................... 9
SOUND CONTROL
Using Automatic Sound Settings.................................................. 10
Choosing a Multi-Channel Sound (MTS) Soundtrack .................. 10
Using the Auto Volume ................................................................. 10
TIME SETTING
Setting the Clock .......................................................................... 11
Setting the Sleep Timer ............................................................... 11
Setting the On/Off Timer............................................................... 11
FUNCTION DESCRIPTION
Viewing Closed Captions ............................................................. 12
Selecting a Menu Language......................................................... 12
Setting the Blue Screen Mode...................................................... 12
Selecting the Source .................................................................... 13
Editing the Input Source Name .................................................... 13
Symbol Press Important Note One-Touch
Button
English-1
Page 4
General Information
List of Features
Your TV is designed with the latest technology.
This TV is a high-performance unit that includes the following special features:
Easy-to-use remote control
Easy-to-use on-screen menu system
Automatic timer to turn the TV on and off
Adjustable picture and sound settings that can be stored in the TV’s memory
Aspecial filter to reduce or eliminate reception problems
Fine tuning control for the sharpest picture possible
Abuilt-in multi-channel sound decoder for stereo and bilingual listening
Built-in, dual channel speakers
Headphone jack for private listening
List of Parts
Please make sure the following items are included with your LCD TV.
If any items are missing, contact your dealer.
Remote Control
& Batteries (AAA x 2)
Power Cord Wall Mount kit Owner’s Instructions
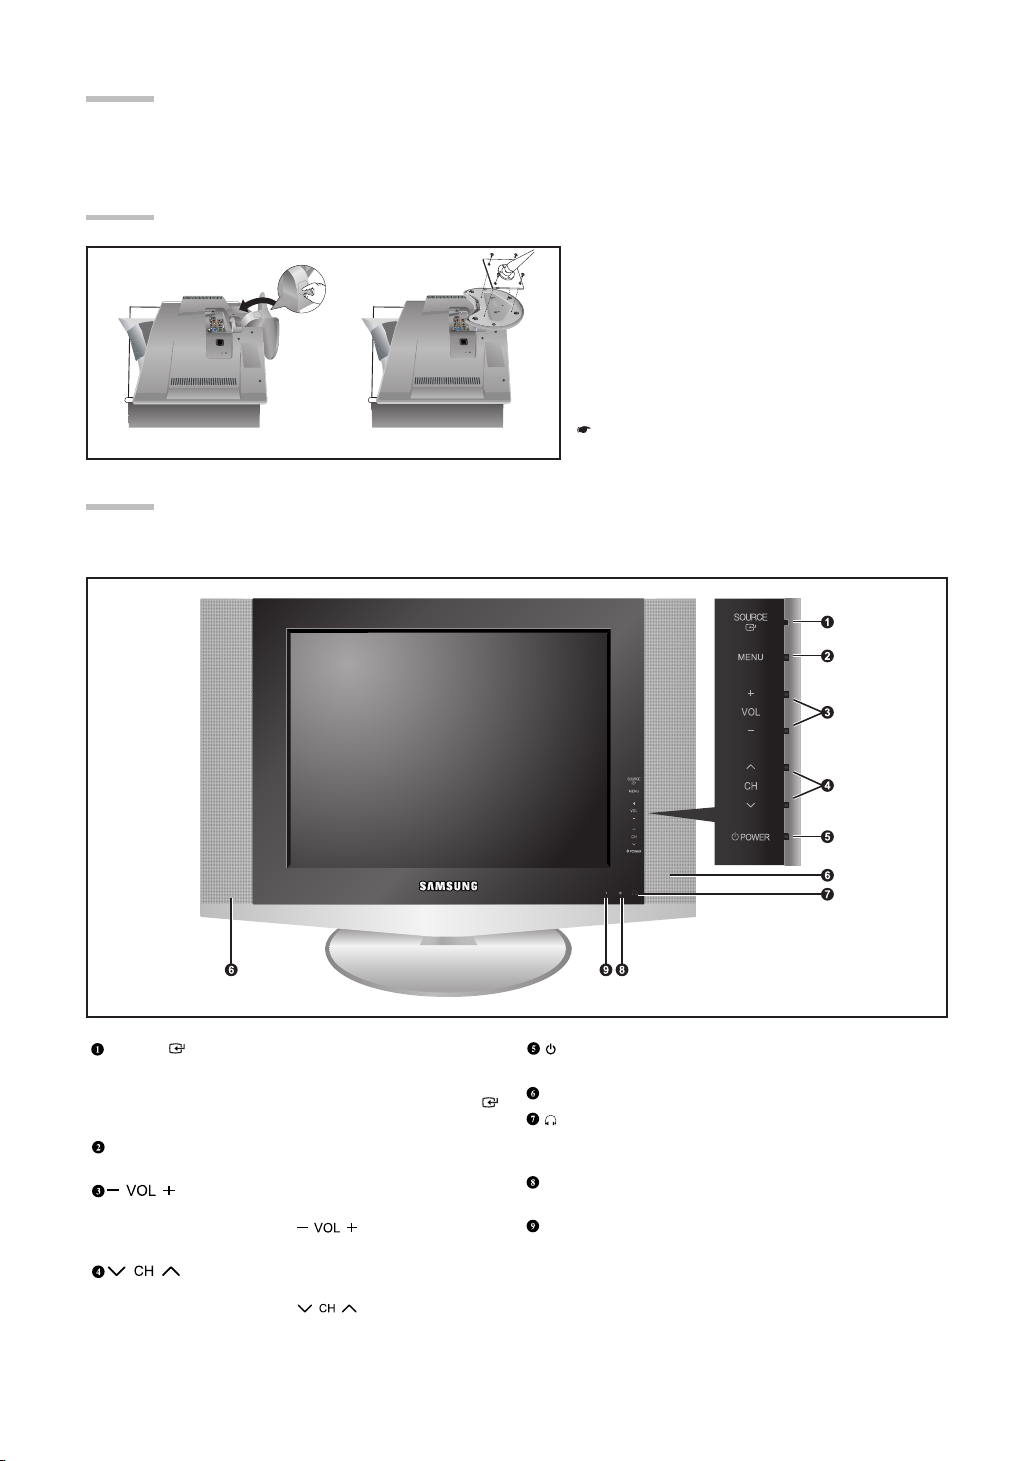
How to Adjust the Stand
1. Place the front of the TV onto a soft cloth or
cushion on a table as in Figure (1).
- Align the TV bottom along the table edge.
2. Press on the center of the TV back.
Adjust the stand as in Figure (2) while pressing
the “PUSH” button on the back of the stand.
3. Place the TV on the table so that the TV sits
safely.
(1) (2)
PUSH button
When you adjust the stand, press the “PUSH" button
on the back of the stand.
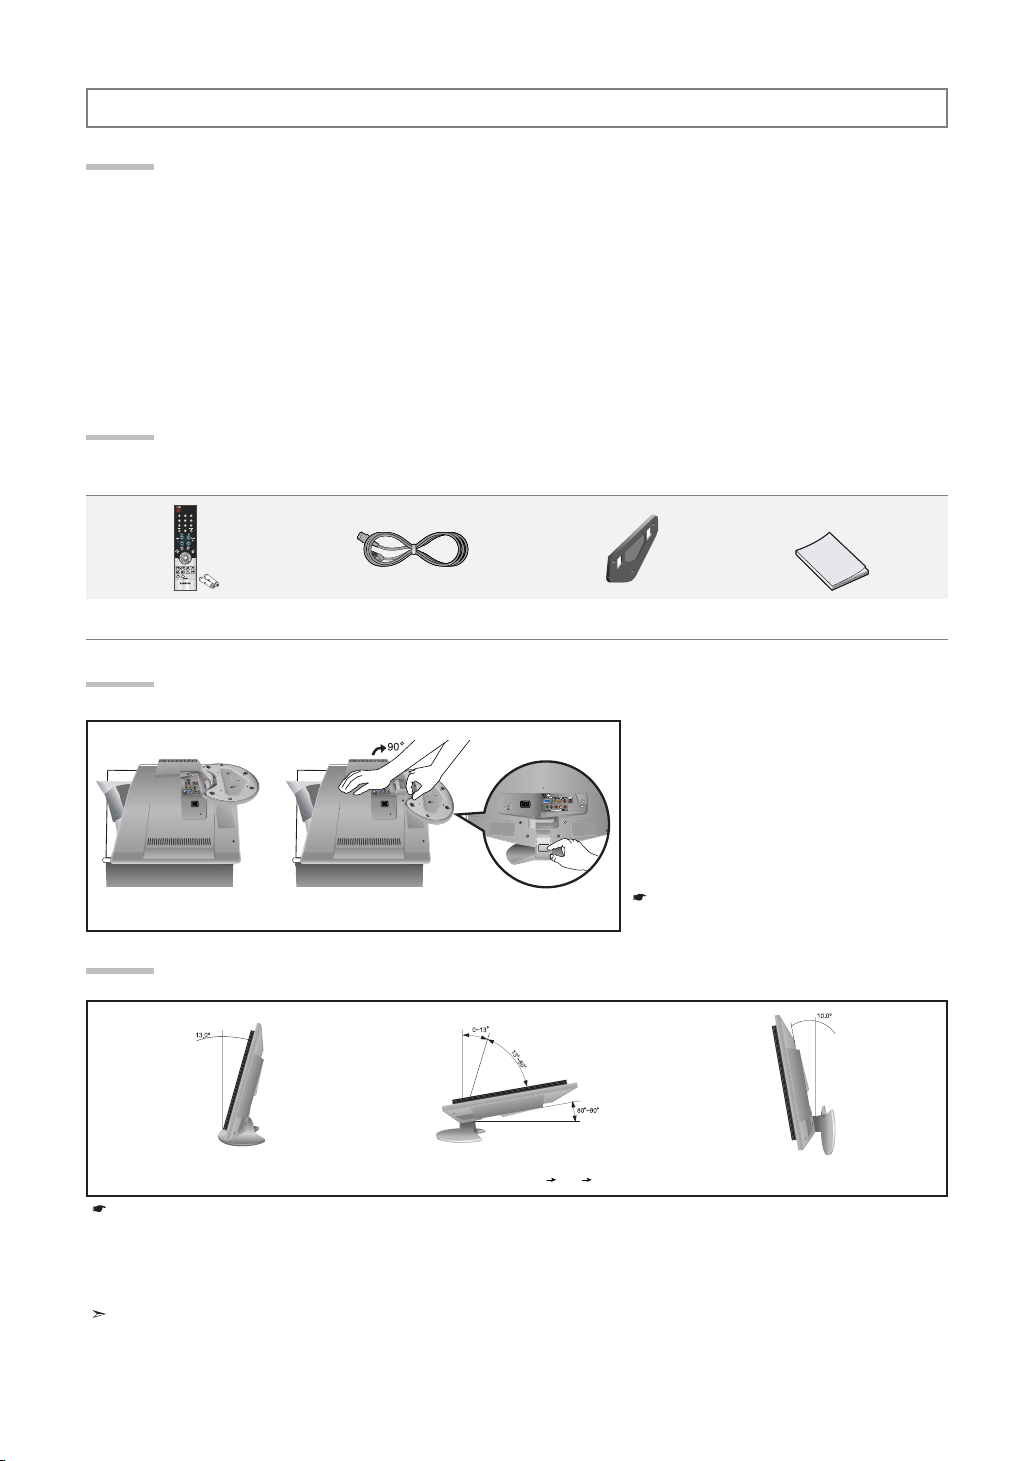
How to Adjust the Angle of the TV
(1) Angle adjustment when using the
TV on its stand.
When you adjust the stand, press the “PUSH" button on the back of the stand.
1. Figure (1) shows the adjustment angle (0°~13°) when you use the LCD on its stand.
Excessive tilting can turn the LCD TV over which may cause damage.
2. Figure (2) shows the adjustment angle (13°~80°) when you convert the LCD from stand-based use to wall-mount.
3. Figure (3) shows the adjustment angle (0°~10°) when you mount the LCD TV to a wall.
You will hear a “Click ” sound when changing the angle from 1 to 2 or 3 to 2.
(2) Angle adjustment when converting from
Stand to Wall mount (1 3, 3 1)
(3) Angle adjustment when LCD
TV is wall-mounted
English-2
Page 5
Installing the Wall Mount Kit
Wall mount items (sold separately) allow you to mount the TV on the wall. For the detailed information on installing the Wall Mount,
see the instruction in the Wall Mount items. Contact a technician for installing the wall bracket.
Samsung Electronics is not responsible for any damage to the product or injury to yourself or others if you elect to install the TV on your own.
Installing VESA compliant mounting devices
Mounting pad
(Sold separately)
1. Place the TV faced down on a soft cloth or cushion
on a table.
2. Adjust the stand, pressing the "PUSH" button on the back
PUSH button
of the stand.
3. Align the mounting interface pad (not supplied) with the
holes in the stand bottom and secure it with the four
screws that come with the arm-type base, wall mount
hanger or other bases (not supplied).
(2) (3)
When you adjust the stand, press the “PUSH" button on the back
of the stand.
Viewing the Control Panel
The buttons on the lower-right panel control your TV’s basic features, including the on-screen menu.
To use the more advanced features, you must use the remote control.
SOURCE
Toggles between all the available input sources
(TV, AV, S-Video, Component, PC).
In the on-screen menu, use this button as you use the
ENTER
button on the remote control.
MENU
Press to see an on-screen menu of your TV’s features.
Press to decrease or increase the volume.
In the on-screen menu, use the buttons as you use the
and buttons on the remote control.
Press to change channels.
In the on-screen menu, use the buttons as you use the
and buttons on the remote control.
POWER
Press to turn the TV on and off.
SPEAKERS
(HEADPHONE JACK)
Connect a set of external headphones to this jack for private
listening.
REMOTE CONTROL SENSOR
Aim the remote control towards this spot on the TV.
POWER INDICATOR
Lights up when you turn the power off.
(The Power indicator is red in stand-by mode, blinks red when
you turn the power on, and turns off after the power comes on
fully. The indicator is green when you set the Timer on or off.)
English-3
Page 6
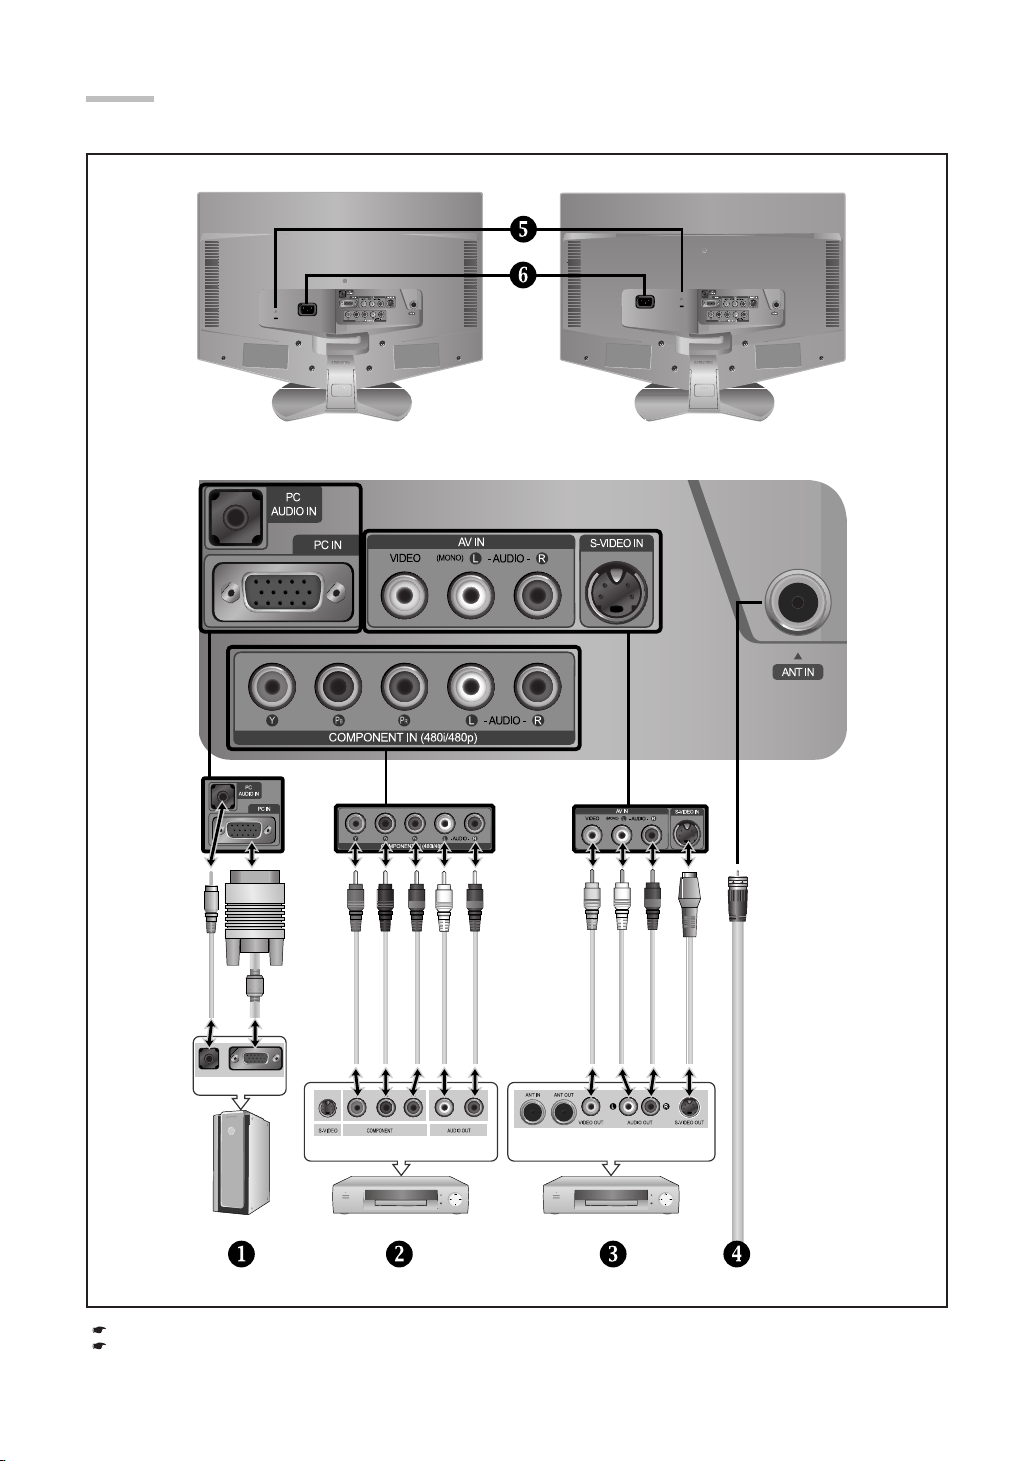
Viewing the Connection Panel
Use the rear panel jacks to connect an A/V component such as a VCR or a DVD player.
LN15S51BP LN20S51BP
Blue
Red
White
English-4
Yellow
White
VCR Rear
Green
PC
DVD Player Rear
Whenever you connect an external device to your TV, make sure that power on the unit is turned off.
When connecting an external device, match the color of the connection terminal to the cable.
Red
Red
Page 7

Viewing the Connection Panel
PC IN / PC AUDIO IN
Connect to the video and audio output jack on your PC.
COMPONENT IN (480i/480p)
Connect component video/audio.
AV I N
Video and audio inputs for external devices, such as a camcorder or VCR.
S-VIDEO IN
Connect an S-Video signal from a camcorder or VCR.
ANT IN
Connect to an antenna or to a cable TV system.
KENSINGTON LOCK
The Kensington lock (optional) is a device used to physically fix the system when used in a public place.
If you want to use a locking device, contact the dealer where you purchased the TV.
POWER INPUT
Connect the supplied power cord.
Viewing the Remote Control
Turns the TV on and off.
Press to select channels directly on the TV.
Press to select channels over 100. For example, to select channel 121,
press “+100”, then press “2” and “1”.
Press to increase or decrease the volume.
Press to temporarily cut off the sound.
Press to select a time for the TV to turn off automatically.
Displays the main on-screen menu.
Use to select on-screen menu items and change menu values.
Press to automatically store selected TV/Cable channels.
Adjust the TV picture by selecting one of the preset factory settings.
(or selects your personal, customized picture settings)
Returns to the previous channel.
Press CH
Input source selection
Use to see information on the current broadcast.
Press to exit the on-screen menu.
Use to store and delete channels to/from memory.
Press to set caption on/off.
Press to choose stereo, mono or Separate Audio Program (SAP broadcast).
Adjust the TV sound by selecting one of the preset factory settings.
(or selects your personal, customized sound settings)
buttons to change channels.
/
The performance of the remote control may be affected by bright light.
English-5
Page 8
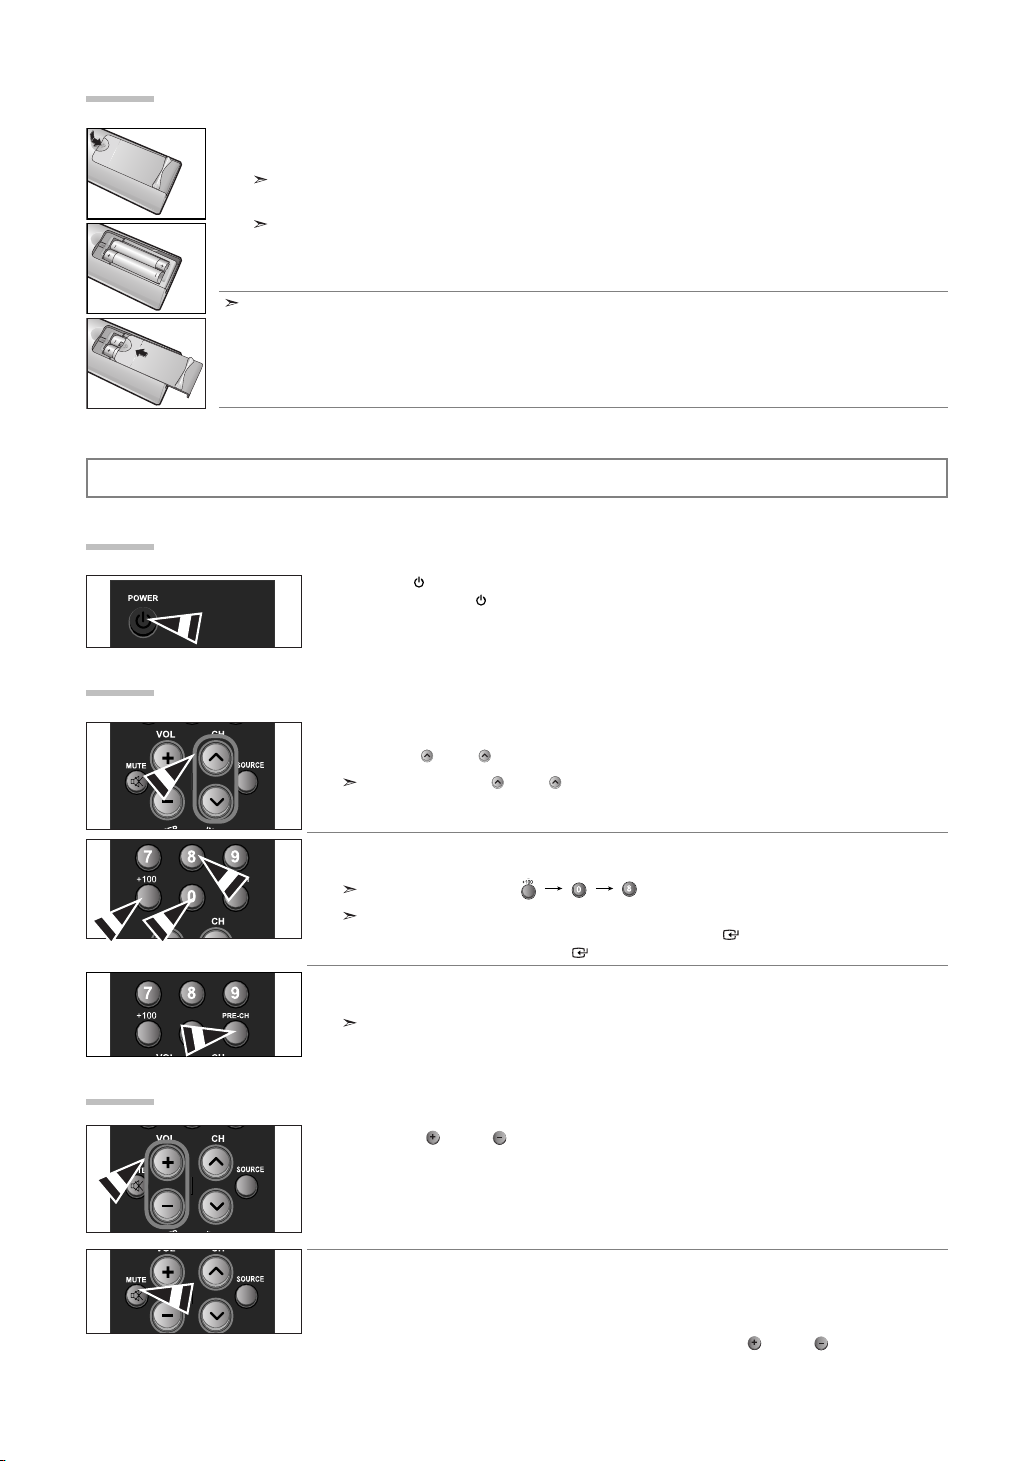
Installing Batteries in the Remote Control
1. Slide the cover out completely.
2. Install two AAA size batteries.
Make sure to match the “+” and “–” ends of the batteries with the diagram inside the compartment.
3. Replace the cover.
Remove the batteries and store them in a cool, dry place if you won’t be using the remote control for a long time. The remote control
can be used up to about 23 feet from the TV.
(Assuming typical TV usage, the batteries last for about one year.)
If the remote control doesn’t work, check the following:
1. Is the TV power on?
2. Are the plus and minus ends of the batteries reversed?
3. Are the batteries drained?
4. Is there a power outage, or is the power cord unplugged?
5. Is there a special fluorescent light or neon sign nearby?
Operation
Turning the TV On and Off
Press the POWER button on the remote control.
You can also use the
POWER button on the lower - right side of the panel of the TV.
Changing Channels
Using the Channel Buttons:
1. Press the CH or CH button to change channels.
Using the Number Buttons:
1. Press the number buttons to go directly to a channel.
Using the PRE-CH Button to select the Previous Channel:
1. Press the PRE-CH button. The TV will switch to the last channel viewed.
Adjusting the Volume
1.
Using MUTE button:
At any time, you can temporarily cut off the sound using the MUTE button.
1.
2.
When you press the CH or CH button, the TV changes channels in sequence.
You will see all the channels that the TV has memorized. (The TV must have memorized at least three channels).
You will not see channels that were either erased or not memorized.
To select channel 108, press “ ” “ ” “ ”.
When you use the number buttons, you can directly select channels that were either erased or not memorized.
To change the channel faster, press the channel buttons, then
(For channel “4” press “4”, then “ENTER ”)
To quickly switch between two channels that are far apart, tune to one channel, then use the number button to
select the second channel. Then use the PRE-CH button to quickly alternate between them.
ENTER .
Press the VOL or VOL button to increase or decrease the volume.
Press MUTE and the sound cuts off.
To turn mute off, press the MUTE button again, or simply press the VOL or VOL button.
English-6
Page 9

Viewing the Display
Plug and Play Feature
When the TV is initially powered on, several basic settings proceed automatically and subsequently.
The following settings are available.
1. Press the POWER button on the remote control.
2. Select the appropriate language by pressing the or button.
3. The message “Check antenna input.” is displayed with “OK” selected.
4. Press the or button to select the Video signal source, then press the ENTER button.
5. Press the ENTER button to select “Start”.
6. Press the ENTER button.
7. Press the ENTER button to confirm your setting.
Press the INFO button on the remote control to view current channel and the status of certain audio-video settings.
The on-screen displays disappear after about ten seconds.
Press the button once more or wait approximately 10 seconds and it disappears automatically.
The message “Start Plug & Play” is displayed with “OK” selected.
Press the
Press the
Press the
Set the “Hour”, “Minute” or “am/pm” by pressing the
ENTER button to confirm your choice.
ENTER button.
Please check that the antenna cable is connected correctly.
The channel search will start and end automatically.
After all the available channels are stored, the “Clock Set” menu appears.
Press the ENTER button at any time to interrupt the memorization process.
or button to move to the “Hour”, “Minute” or “am/pm”.
or button.
The message “Enjoy your watching.” is displayed.
Language: Select your language.
Air/Cable: Select your local cable company TV system.
Auto Program: Selects between terrestrial antenna connection or your local cable company TV system.
Clock Set: Sets the current time for the TV clock.
You can also set the hour and minute by pressing the number buttons on the remote control.
The TV automatically cycles through all of the available channels and stores them in memory.
This takes about one to two minutes.
If you want to reset this feature...
1. Press the MENU button to display the menu.
Press the
or button to select “Setup”, then press the ENTER button.
2. Press the or button to select “Plug & Play”, then press the ENTER button.
3. This will change or reset the settings.
Selecting the Video Signal-source
Before your television can begin memorizing the available channels, you must specify the type of signal source that is
connected to the TV (i.e. an antenna or a cable system).
1. Press the MENU button to display the menu.
Press the
2. Press the ENTER button to select “Air/Cable”.
3. Press the or button to select the Video signal source, then press the ENTER button.
4. Press the EXIT button to exit.
STD, HRC and IRC identify various types of cable TV systems.
Contact your local cable company to identify the type of cable system that exists in your particular area.
At this point, the signal source has been selected. Proceed to “Storing Channels Automatically”.
or button to select “Channel”, then press the ENTER button.
English-7
Page 10

Storing Channels Automatically
The TV automatically cycles through all of the available channels and stores them in memory.
This takes about one to two minutes.
1. To select the signal source, follow the “Selecting the Video Signal-source” instructions number 1 to 3
on Page 7.
2. Press the or button to select “Auto Program”. Press the ENTER button.
3. Press the ENTER button. The TV will begin memorizing all of the available channels.
Press the ENTER button at any time to interrupt the memorization process and return to the “Channel” menu.
4. After all the available channels are stored, the “Channel” menu reappears.
5. Press the EXIT button to exit.
Press the AUTO PROG. button on the remote control.
Storing Channels Manually
You can store up to 100 channels, including those received via cable networks.
1. Use the number buttons to directly select the channel that will be added or deleted.
2. Press the MENU button to display the menu.
Press the
3. Press the or button to select “Add/Delete”.
Press the
4. Repeatedly pressing the ENTER button will alternate between add channel and delete channel.
5. Press the CH or CH button to switch to the appropriate channel, then repeat above.
6. Press the EXIT button to exit.
You can view any channel (including an erased channel) by using the number buttons on the remote control.
Use the number buttons to directly select the channel that will be added or erased.
Press the
ADD/DEL button on the remote control.
or button to select “Channel”, then press the ENTER button.
ENTER button.
Fine Tuning Channels
Use fine tuning to manually adjust a particular channel for optimal reception.
1. Use the number buttons to directly select the channel that you want to fine tune.
2. Press the MENU button to display the menu.
3. Press the or button to select “Fine Tune”, then press the ENTER button.
4. Press the or button to adjust the fine tuning.
5. To store the fine tuning setting in the TV’s memory, press the ENTER button.
6. Press the EXIT button to exit.
Press the
If you do not store the fine-tuned channel in memory, adjustments are not saved.
Fine tuned channels that have been saved are marked with an asterisk “ * ”
on the right-hand side of the channel number in the channel banner.
To reset the fine-tuning, select “Reset” by pressing the or button and then press the ENTER button.
or button to select “Channel”, then press the ENTER button.
English-8
Page 11
Picture Control
Contrast 100
Brightness 45
Sharpness 75
Color 55
Tint G 50 R 50
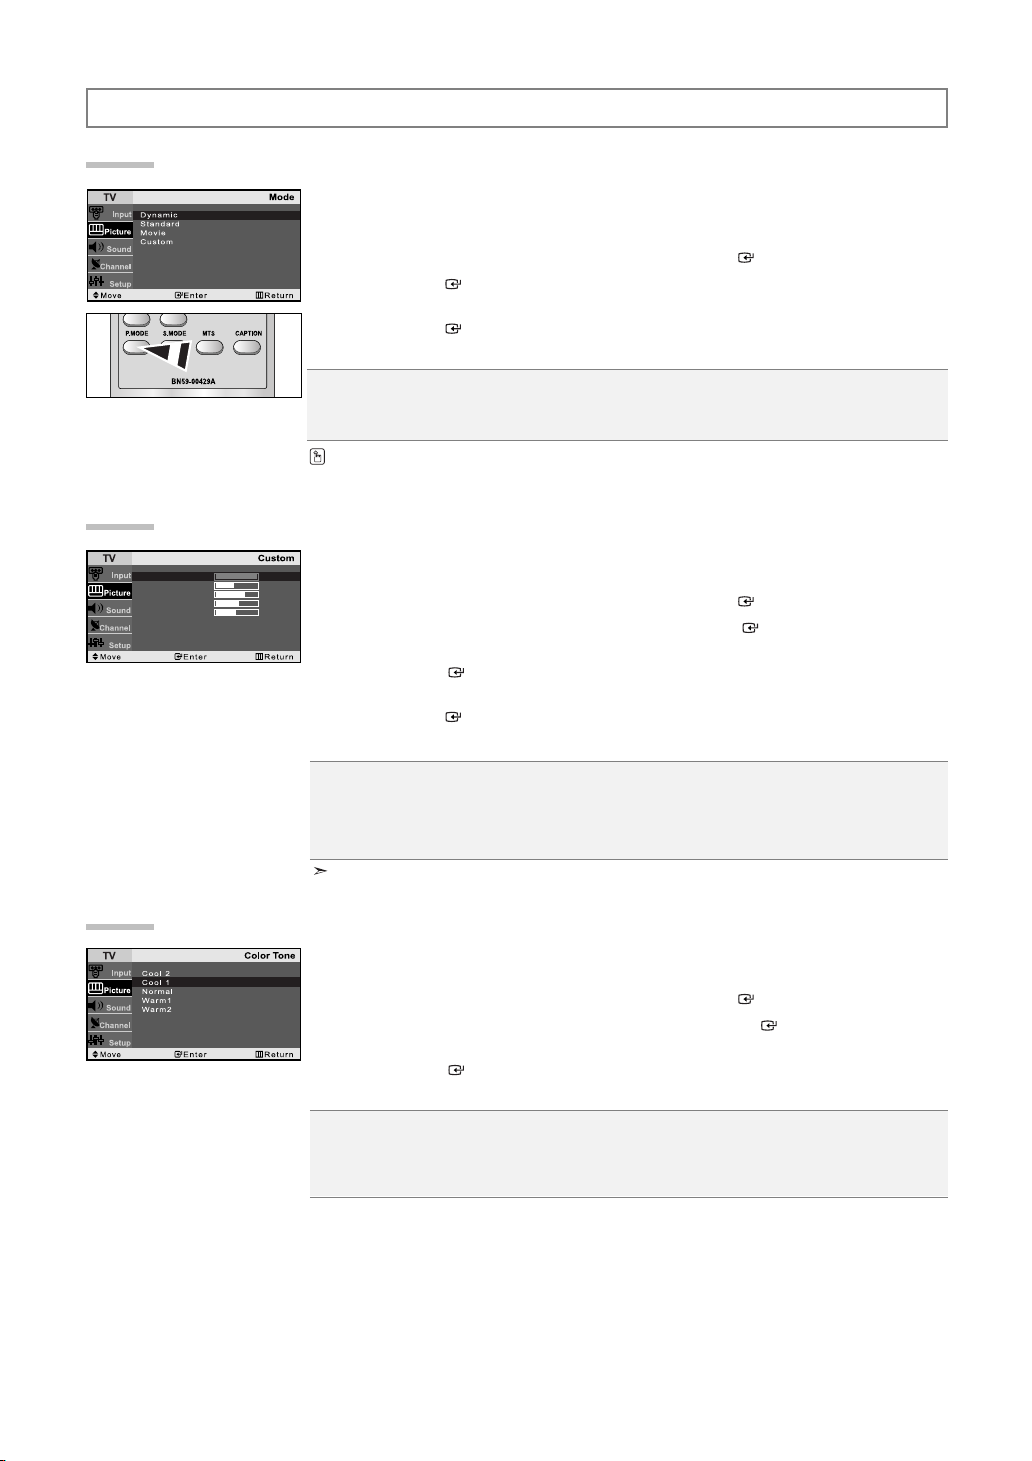
Using Automatic Picture Settings
Customizing the Picture
Your TV has four automatic picture settings (“Dynamic”, “Standard”, “Movie”, and “Custom”)
that are preset at the factory.
1. Press the MENU button to display the menu.
Press the
or button to select “Picture”, then press the ENTER button.
2. Press the ENTER button to select “Mode”.
3. Press the or button to select the desired picture effect.
Press the
ENTER button.
4. Press the EXIT button to exit.
Dynamic: Selects the picture for high-definition in a bright room.
Standard: Selects the picture for optimum display in a normal environment.
Movie: Selects the picture for comfortable display in a dark room.
Custom: Select to view your favorite display settings.
You can also press the P.MODE button on the remote control to select one of the picture settings.
Your set has several settings which allow you to control picture quality.
1. Press the MENU button to display the menu.
Press the
or button to select “Picture”, then press the ENTER button.
2. Press the or button to select “Custom”, then press the ENTER button.
3.
4.
Press the
Press the
Press the
or button
ENTER
button.
or button
to select a particular item.
to decrease or increase the value of a particular item.
Press the ENTER button.
5.
Press the EXIT button to exit.
Contrast: Adjusts the lightness and darkness between objects and the background.
Brightness: Adjusts the brightness of the whole screen.
Sharpness:
Color: Adjusts the colors, making them lighter or darker.
Tint:
Adjusts the outline of objects to either sharpen them or make them more dull.
Adjusts the color of objects, making them more red or green for a more natural look.
If you make any changes to these settings, the Picture Mode is automatically switched to “Custom”.
Adjusting the Color Tone
Yo u can Change the color of the entire screen according to your preference.
1. Press the MENU button to display the menu.
Press the
or button to select “Picture”, then press the ENTER button.
2. Press the or button to select “Color Tone”, then press the ENTER button.
3.
Press the
Press the
4.
Press the EXIT button to exit.
Cool2: Makes the color temperature bluer than “Cool1” menu.
Cool1: Makes whites bluish.
Normal: Keeps whites white.
Warm1: Makes whites reddish.
Warm2: Makes the color temperature redder than “Warm1” menu.
or button
ENTER
button.
to select the desired color tone setting.
English-9
Page 12
Sound Control
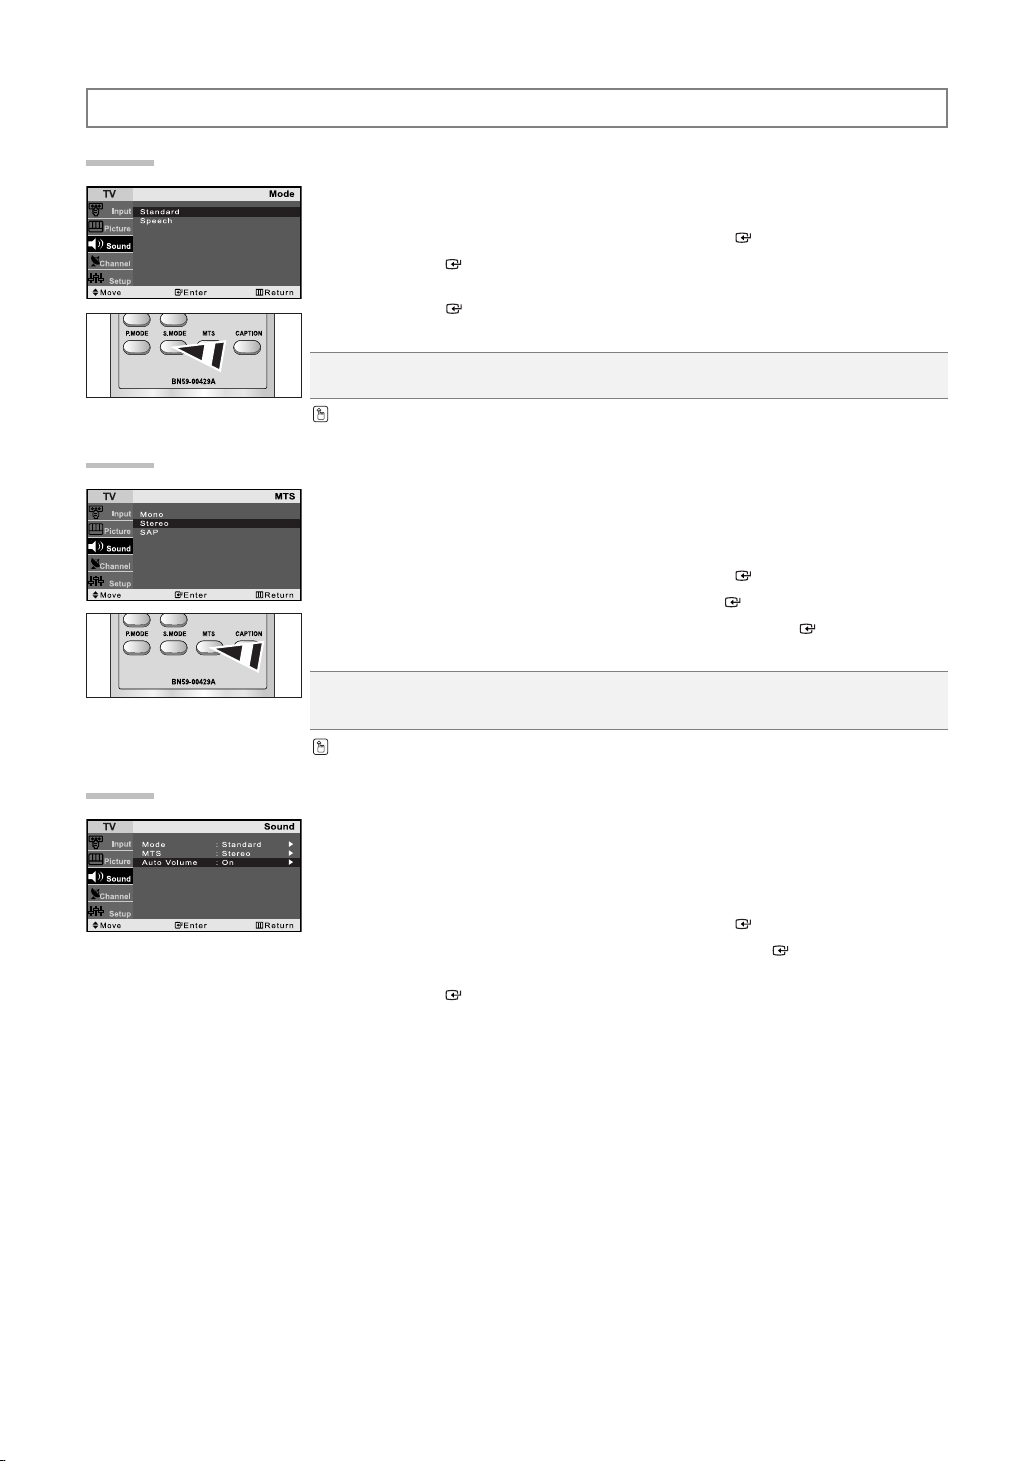
Using Automatic Sound Settings
You can select the type of the special sound effect to be used when watching a given broadcast.
1. Press the MENU button to display the menu.
Press the
2. Press the ENTER button to select “Mode”.
3. Press the or button to select the “Standard” or “Speech” sound setting.
Press the
4. Press the EXIT button to exit.
Standard: Selects the normal sound mode.
Speech: Emphasizes voices over other sounds.
You can also press the S.MODE button on the remote control to select the “Standard” or “Speech” sound setting.
Choosing a Multi-Channel Sound (MTS) Soundtrack
Depending on the particular program being broadcast, you can listen to stereo, mono or a Separate Audio Program.
(SAP audio is usually a foreign-language translation. Sometimes SAP has unrelated information like
news or weather).
1. Press the MENU button to display the menu.
Press the
2. Press the or button to select “MTS”, then press the ENTER button.
3. Press the or button to select the required option, then press the ENTER button.
4. Press the EXIT button to exit.
Mono: Select for channels that are broadcast in mono, or if you are having difficulty receiving a stereo signal.
Stereo: Select for channels that are broadcast in stereo.
SAP: Select to listen to the Separate Audio Program, which is usually a foreign-language translation.
You can also press the MTS button on the remote control to change the MTS settings.
or button to select “Sound”, then press the ENTER button.
ENTER button.
or button to select “Sound”, then press the ENTER button.
Using the Auto Volume
Each broadcasting station has its own signal conditions, and it is inconvenient to adjust the volume every time
the channel is changed.
“Auto Volume” automatically adjusts the volume of the desired channel by lowering the sound output
when the modulation signal is high or by raising the sound output when the modulation signal is low.
1. Press the MENU button to display the menu.
2. Press the or button to select “Auto Volume”, then press the ENTER button.
3. Press the or button to select “On” or “Off”.
4. Press the EXIT button to exit.
Press the
Press the
or button to select “Sound”, then press the ENTER button.
ENTER button.
English-10
Page 13

Time Setting
Setting the Clock
Setting the Sleep Timer
You can set the TV’s clock so that the current time is displayed when you press the INFO button. You must also set
the time if you wish to use the automatic On/Off timers.
1. Press the MENU button to display the on-screen menu.
Press the
or button to select “Setup”, then press the ENTER button.
2. Press the ENTER button to select "Time".
3. Press the ENTER button to select "Clock Set".
4. Press the or button to adjust “Hour”, then press the button to move to the next step.
Set other items using the same method as above.
When finished, press the
ENTER button to return.
5. Press the EXIT button to exit.
If you disconnect the power cord, you have to set the clock again.
You can also set the hour and minute by pressing the number buttons on the remote control.
Set the timer for the TV to turn off at the preset time automatically.
1. Press the MENU button to display the on-screen menu.
Press the
or button to select “Setup”, then press the ENTER button.
2. Press the ENTER button to select "Time".
3. Press the or button to select “Sleep Timer”, then press the ENTER button.
4. Press the or button repeatedly until the desired time appears. (Off, 30, 60, 90, 120, 150, 180)
Press the
ENTER
button.
5. Press the EXIT button to exit.
The TV automatically turn off when the timer reaches 0.
You can also press the SLEEP button on the remote control to set the sleep time.
Setting the On/Off Timer
You can set the On/Off timers so that the set will:
1. Press the MENU button to display the on-screen menu.
Press the
2. Press the ENTER button to select "Time".
3. Press the or button to select “On Timer”, then press the ENTER button.
4. Press the or button to adjust “Hour”, then press the button to move to the next step.
Set other items using the same method as above.
When finished, press the
5. Press the or button to select “Off Timer”, then press the ENTER button.
6. Press the or button to adjust “Hour”, then press the button to move to the next step.
Set other items using the same method as above.
When finished, press the
7. Press the EXIT button to exit.
The clock must be set (see above) before you can set the On/Off timer.
You can also set the hour and minute by pressing the number buttons on the remote control.
The "Activation" setting must be set to "On" in order for the timers to work.
Auto Power Off: When you set the timer on, your television will be turned off if you do not operate any controls for 3
hours after the TV has been turned on with the “Timer On” function.
Switch on automatically and tune to the channel of your choice at the time you select.
Switch off automatically at the time you select.
or button to select “Setup”, then press the ENTER button.
ENTER button to return.
ENTER button to return.
English-11
Page 14
Function Description
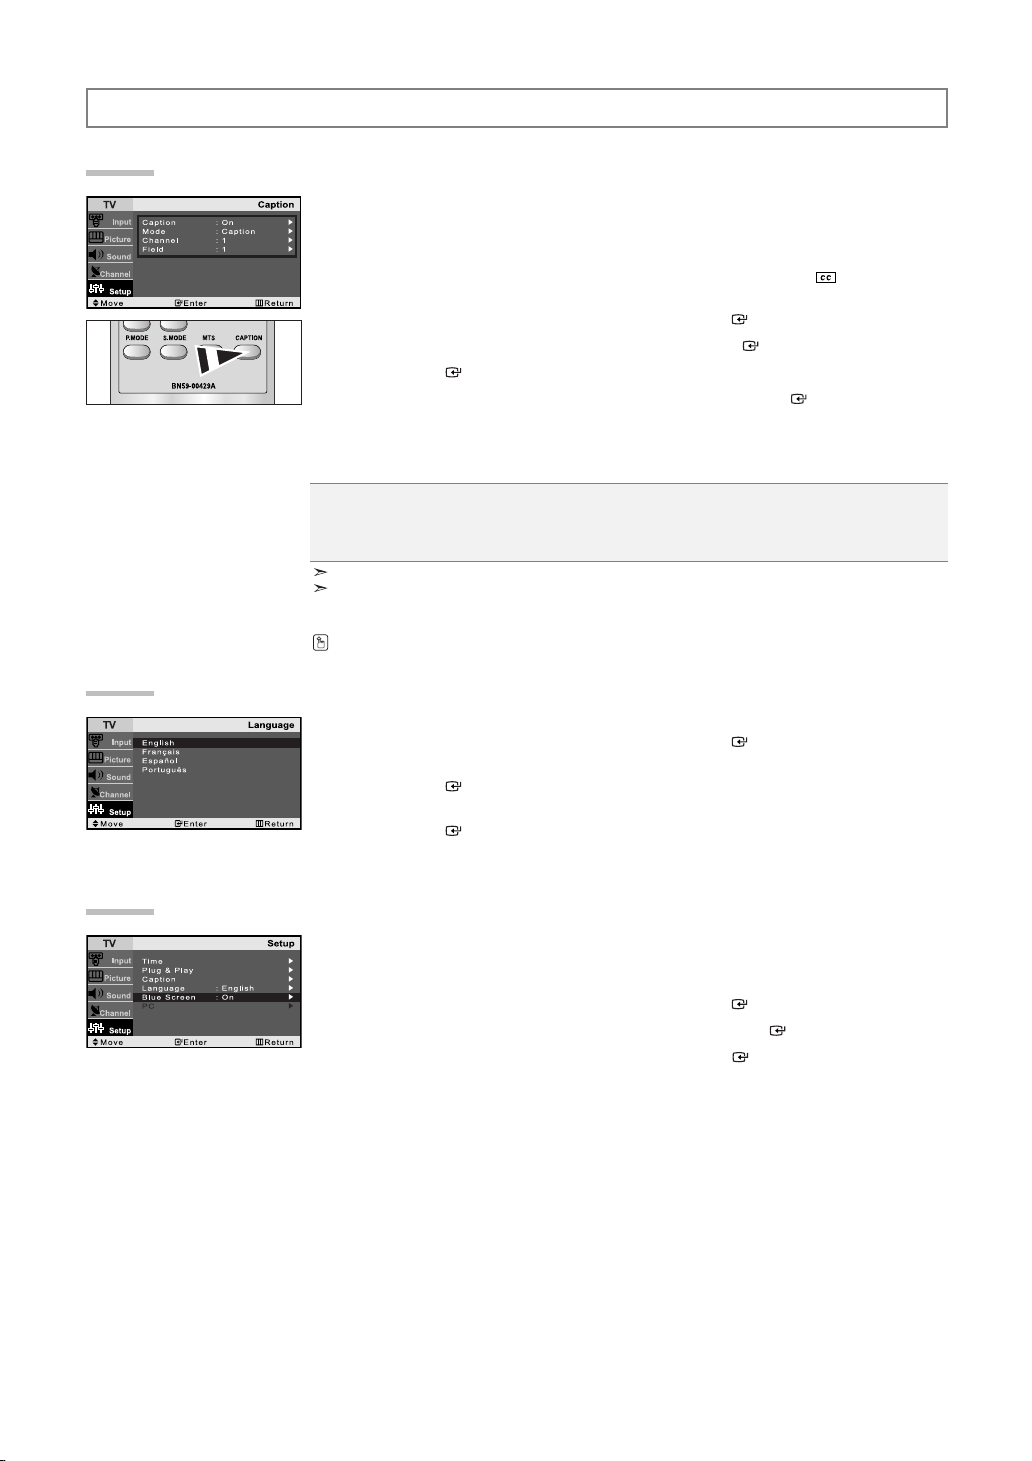
Viewing Closed Captions
Your TV decodes and displays the closed captions that are broadcast with certain TV shows.
These captions are usually subtitles for the hearing impaired or foreign-language translations.
All VCRs record the closed caption signal from television programs, so home-recorded video tapes also provide
closed captions. Most pre-recorded commercial video tapes provide closed captions as well.
Check for the closed caption symbol in your television schedule and on the tape’s packaging: .
1. Press the MENU button to display the on-screen menu.
Press the
or button to select “Setup”, then press the ENTER button.
2. Press the or button to select “Caption”, then press the ENTER button.
3. Press the ENTER button to select "Caption".
4. Press the or button to set caption “Off” or “On”, then press the ENTER button.
5. Depending on the particular broadcast, it might be necessary to make changes to
“Channel” and “Field”.
6. Press the EXIT button to exit.
Caption: Off / On
Mode: Caption / Text
Channel: 1 / 2
Field: 1 / 2
The Caption feature does not work with DVD or Set-top box signals.
Different channels and fields display different information:
Field 2 carries additional information that supplements the information in Field 1.
(For example, Channel 1 may have subtitles in English, while Channel 2 has subtitles in Spanish).
Press the CAPTION button on the remote control.
Selecting a Menu Language
1. Press the MENU button to display the menu.
Press the
2. Press the or button to select “Language”.
Press the
3. Press the or button to select the appropriate language.
Press the
4. Press the EXIT button to exit.
Setting the Blue Screen Mode
If no signal is being received or the signal is very weak, a blue screen automatically replaces the noisy picture
background. If you wish to continue viewing the poor picture, you must set the “Blue Screen” mode to “Off”.
1. Press the MENU button to display the on-screen menu.
Press the
2. Press the or button to select “Blue Screen”, then press the ENTER button.
3. Press the or button to select “On” or “Off”. Press the ENTER button.
4. Press the EXIT button to exit.
or button to select “Setup”, then press the ENTER button.
ENTER button.
ENTER button.
or button to select “Setup”, then press the ENTER button.
English-12
Page 15
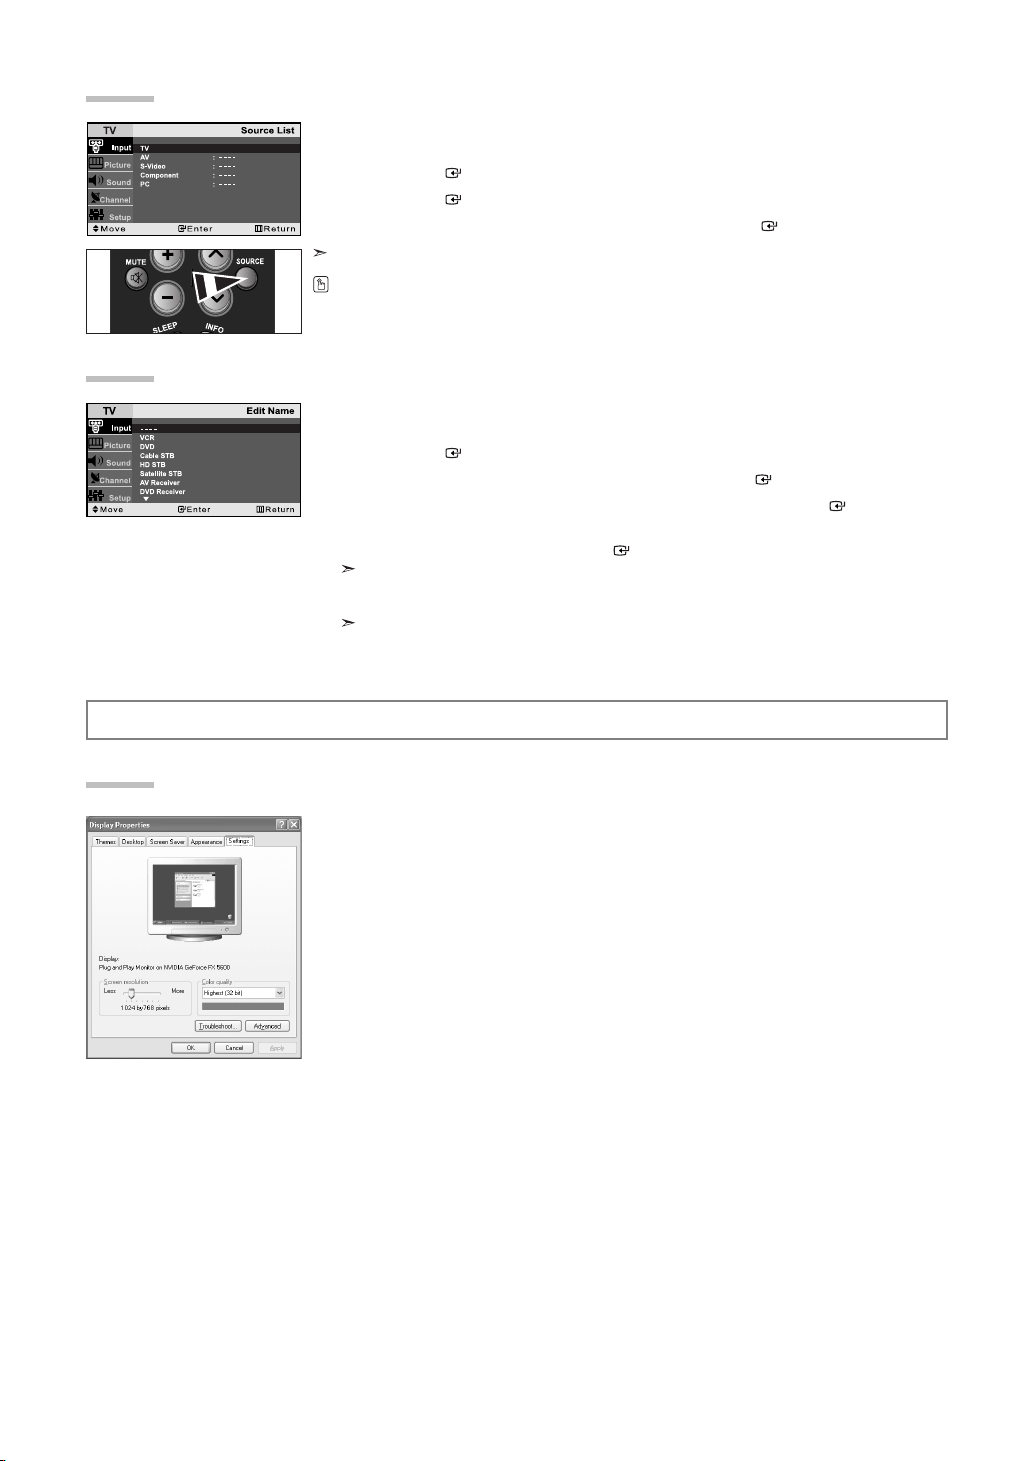
Selecting the Source
You can select among external sources connected to your TV's input jacks.
1. Press the MENU button to display the on-screen menu.
Press the
2. Press the ENTER button to select the “Source List”.
3. Press the or button to select the Input source, then press ENTER button.
You can only select a source if it is connected to your TV.
You can also press the SOURCE button on the remote to choose the Input source.
Editing the Input Source Name
You can name the input device connected to the input jacks to make your input source selection easier.
1. Press the MENU button to display the menu.
Press the
2. Press the or button to select “Edit Name” then press the ENTER button.
3. Press the or button to select the desired input device, then press the ENTER button.
4. Press the or button repeatedly until the appropriate source name appears.
After the source is selected, press the
The following options are available:
---- - VCR - DVD - Cable STB - HD STB - Satellite STB - AV Receiver - DVD Receiver - Game Camcorder - DVD Combo - DHR - PC
DHR: DVD HDD Recorder
5. Press the EXIT button to exit.
ENTER button to select “Input”.
ENTER button.
ENTER button.
PC Display
Setting Up Your PC Software (Based on Windows XP)
The Windows display-settings for a typical computer are shown below.
The actual screens on your PC may be different depending upon your particular version of Windows and your
particular video card. Even if your actual screens look different, the same, basic set-up information will apply
in almost all cases. (If not, contact your computer manufacturer or Samsung Dealer.)
1. First, click on “Control Panel” on the Windows start menu.
2. When the control panel window appears, click on “Appearance and Themes” and a display
dialog-box will appear.
3. When the control panel window appears, click on “Display” and a display dialog-box will appear.
4. Navigate to the “Settings” tab on the display dialog-box.
The correct size setting (resolution):
Optimum- LN15S51BP: 1024 x 768 / LN20S51BP: 800 x 600
If a vertical-frequency option exists on your display settings dialog box,
the correct value is “60” or “60 Hz”.
Otherwise, just click “OK” and exit the dialog box.
English-13
Page 16

Setting the PC
Image Lock:
The purpose of picture quality adjustment is to remove or reduce picture noise.
If the noise is not removed by Fine-tuning alone, then adjust the frequency as best as possible (coarse)
and Fine-tune again.
After the noise has been reduced, re-adjust the picture so that it is aligned on the center of screen.
1. Preset: Press the SOURCE button to select PC mode.
2. Press the MENU button to display the menu.
Press the
3. Press the or button to select “PC”, then press the ENTER button.
4. Press the ENTER button to select “Image Lock”.
5. Press the or button to select “Coarse” or “Fine”, then press the ENTER button.
6. Press the or button to adjust the screen quality, vertical stripes may appear or the
picture may be blurry.
Press the
7. Press the EXIT button to exit.
Position:
Adjust the PC’s screen positioning if it does not fit the TV screen.
1. Preset: Press the SOURCE button to select PC mode.
2. Press the MENU button to display the menu.
Press the
3. Press the or button to select “PC”, then press the ENTER button.
4. Press the or button to select “Position”, then press the ENTER button.
5. Press the or button to adjust the V-Position.
Press the
Press the
6. Press the EXIT button to exit.
Image Reset:
You can replace all image settings with the factory default values.
1. Preset: Press the SOURCE button to select PC mode.
2. Press the MENU button to display the menu.
Press the
3. Press the or button to select “PC”, then press the ENTER button.
4. Press the or button to select “Image Reset”, then press the ENTER button.
5. Press the EXIT button to exit.
Auto Adjustment:
Auto adjustment allows you to set the TV to self-adjust to the incoming PC video signal.
The fine, coarse and position values are adjusted automatically.
1. Preset: Press the SOURCE button to select PC mode.
2. Press the MENU button to display the menu.
Press the
3. Press the or button to select “PC”, then press the ENTER button.
4. Press the or button to select “Auto Adjustment”, then press the ENTER button.
5. Press the EXIT button to exit.
or button to select “Setup”, then press the ENTER button.
ENTER button.
or button to select “Setup”, then press the ENTER button.
or button to adjust the H-Position.
ENTER button.
or button to select “Setup”, then press the ENTER button.
or button to select “Setup”, then press the ENTER button.
English-14
Page 17

Troubleshooting
Identifying Problems
If the TV seems to have a problem, first try this list of possible problems and solutions.
If none of these troubleshooting tips apply, call your nearest Samsung service center.
Problem
Poor picture
Poor sound quality.
No picture or sound.
No sound or sound is too low at
maximum volume.
Picture rolls vertically.
The TV operates erratically.
Remote control
malfunctions
“Check signal cable”message.
Possible Solution
Try another channel.
Adjust the antenna.
Check all wire connections.
Try another channel.
Adjust the antenna.
Try another channel.
Press the SOURCE button.
Make sure the TV is plugged in.
Check the antenna connections.
First, check the volume of units connected to your TV
(Digital broadcasting receiver, DTV, DVD, cable broadcasting receiver, VCR, etc.).
Then, adjust the TV volume accordingly.
Check all wire connections.
Unplug the TV for 30 seconds, then try operating it again.
Replace the remote control batteries.
Clean the upper edge of the remote control (transmission window).
Check the battery terminals.
Ensure that the signal cable is firmly connected to the PC sources.
“Not Supported Mode”message.
The image is too light or too dark.
Horizontal bars appear to flicker,
jitter or shimmer on the image.
The TFT LCD panel uses a panel consisting of sub pixels (LN15S51BP - 2,359,296/LN20S51BP- 1,440,000) which require sophisticated
technology to produce. However, there may be few bright or dark pixels on the screen.
These pixels will have no impact on the performance of the product.
Check the maximum resolution and the frequency of the Video Adaptor.
Compare these values with the data in the Display Modes.
Adjust the Brightness and Contrast.
Adjust the Coarse tuning and then adjust the Fine tuning.
English-15
Page 18

Appendix
Specifications
Model Name
Panel
Size
Display Size
Frequency
Horizontal
Vertical
PC Resolution
Optimum
Power Supply
Power Consumption
Normal
Power Saving
Dimension (WxDxH)
Body
With stand
Weight
With stand
Environmental Considerations
Operating Temperature
Operating Humidity
Storage Temperature
Storage Humidity
Display Modes
LN15S51BP
15” Diagonal
11.97 (H) x 8.98 (V) inches
(304.1 (H) x 228.1 (V) mm)
30 ~ 69 kHz
50 ~ 75 Hz
1024 x 768 @ 60 Hz
AC100-240V~60Hz
40 W
<3 W
19.52 x 3.22 x 13.11 inches
(496.0 x 82.0 x 333.0 mm)
19.52 x 6.69 x 14.13 inches
(496.0 x 170.0 x 359.0 mm)
8.81 lbs (4.0 kg)
50 °F to 104 °F (10 °C to 40 °C)
10 % to 80 %, non-condensing
-4 °F to 113 °F (-20 °C to 45 °C)
5 % to 95 %, non-condensing
LN20S51BP
20” Diagonal
16.06 (H) x 12.05 (V) inches
(408.0 (H) x 306.0 (V) mm)
28 ~ 47 kHz
50 ~ 75 Hz
800 x 600 @ 60 Hz
AC100-240V~60Hz
55 W
<3 W
23.89 x 3.70 x 17.16 inches
(607.0 x 94.0 x 436.0 mm)
23.89 x 8.46 x 18.26 inches
(607.0 x 215.0 x 464.0 mm)
17.19 lbs (7.8 kg)
50 °F to 104 °F (10 °C to 40 °C)
10 % to 80 %, non-condensing
-4 °F to 113 °F (-20 °C to 45 °C)
5 % to 95 %, non-condensing
Both screen position and size will vary depending on the type of PC monitor and its resolution.
The resolutions in the table are recommended. (All resolutions between the supported limits are supported)
Mode
VGA
LN15S51BP
LN20S51BP
SVGA
LN15S51BP
Resolution
720X400
640X480
640X480
800X600
800X600
Horizontal
Frequency (kHz)
31.469
31.469
37.500
46.875
37.879
Vertical
Frequency (Hz)
70.087
59.940
75.000
75.000
60.317
LN20S51BP
XGA
LN15S51BP
The interlace mode is not supported.
The set might operate abnormally if a non-standard video format is selected.
1024X768
1024X768
48.363
60.023
60.004
75.029
English-16
Pixel Clock
Frequency (MHz)
28.322
25.175
31.500
49.500
40.000
65.000
78.750
Sync Polarity
(H/V)
- / +
- / -
- / -
+ / +
+ / +
- / -
+ / +
Page 19

Índice
INFORMACIÓN GENERAL
Listado de características .................................................................. 2
Listado de piezas ............................................................................... 2
Cómo ajustar el soporte..................................................................... 2
Cómo ajustar el ángulo del televisor ................................................. 2
Instalación del equipo de montaje en la pared ............................ 3
Instalación de dispositivos de montaje conforme con VESA ....... 3
Aspecto general del panel de control ................................................ 3
Aspecto general del panel de conexiones......................................... 4
Visualización del mando a distancia.................................................. 5
Instalación de las pilas en el mando a distancia ............................... 6
FUNCIONAMIENTO
Encendido o apagado del TV ............................................................ 6
Cambio de canales ............................................................................ 6
Ajuste del volumen............................................................................. 6
Visualización de la pantalla................................................................ 7
Función Plug & Play........................................................................... 7
Selección del origen de la señal de vídeo......................................... 7
Memorización automática de canales ............................................... 8
Memorización manual de canales ..................................................... 8
Ajuste preciso de los canales ............................................................ 8
CONTROL DE LA IMAGEN
Uso de los parámetros de imagen automáticos ................................ 9
Personalización de la imagen............................................................ 9
Ajuste del Color del fondo.................................................................. 9
PANTALLA DE PC
Instalación del software en el equipo (según Windows XP) ........ 13
Configuración del PC.................................................................... 14
SOLUCIÓN DE PROBLEMAS
Identificación de problemas.......................................................... 15
APÉNDICE
Especificaciones ........................................................................... 16
Modos de visualización ................................................................ 16
Español
CONTROL DEL SONIDO
Uso de los parámetros de sonido automáticos............................ 10
Elección de una pista sonora multicanal (MTS)........................... 10
Utilización del volumen automático .............................................. 10
CONFIGURACIÓN DE LA HORA
Configuración del reloj.................................................................. 11
Configuración del temporizador de sueño.................................... 11
Activación y desactivación del temporizador................................ 11
DESCRIPCIÓN DE LAS FUNCIONES
Visualización de los subtítulos...................................................... 12
Selección del idioma de menú ..................................................... 12
Ajuste del modo pantalla azul ...................................................... 12
Para seleccionar la fuente............................................................ 13
Edición del nombre de la fuente de entrada ................................ 13
Símbolo Pulse Importante Nota Botón de una
pulsación
Antes de usar el equipo lea este manual para evitar
fallas y guarde para futuras referencias.
Español-1
Page 20

INFORMACIÓN GENERAL
Listado de características
El TV se ha diseñado con la tecnología más reciente.
Este TV es una unidad de alto rendimiento que incluye las siguientes características especiales:
Mando a distancia fácil de utilizar
Sistema de menús en pantalla fácil de utilizar
Temporizador automático para apagado y encendido del TV
Configuración ajustable de imagen y sonido que se puede almacenar en la memoria del TV
Un filtro especial para reducir o eliminar problemas de recepción
Control de ajuste fino para la imagen más definida posible
Un decodificador de sonido de varios canales incorporado para audición estéreo y bilingüe
Altavoces incorporados de canal dual
Toma de auricular para audición privada
Listado de piezas
Compruebe que las opciones siguientes se incluyen con su TV LCD.
Si falta alguna opción, póngase en contacto con el proveedor.
Mando A Distancia
y Pilas (AAA x 2)
Cable de alimentación Kie de Montaje en Pared Manual de Instrucciones
Cómo ajustar el soporte
1. Coloque el frontal del televisor sobre un paño
suave o una almohadilla encima de una mesa tal
como se muestra en la figura (1).
- Alinee la parte inferior del televisor con el borde
de la mesa.
2. Presione el centro de la parte posterior del
televisor. Ajuste el soporte como se indica en la
Figura (2) mientras pulsa el botón "PUSH" en la
parte posterior del soporte.
(1) (2)
Botón PUSH
3. Coloque el televisor sobre la mesa, de manera
que se asiente firmemente.
Cuando ajuste el soporte, pulse el botón "PUSH"
que se encuentra en la parte posterior del soporte.
Cómo ajustar el ángulo del televisor
(1) Ajuste del ángulo del televisor
sobre el soporte.
do ajuste el soporte, pulse el botón "PUSH" que se encuentra en la parte posterior del soporte.
1. La Figura (1) muestra el ángulo de ajuste (0°~13°) cuando utiliza la pantalla LCD en su soporte.
Una inclinación excesiva puede hacer que el TV LCD vuelque y que se produzcan daños.
2. La Figura (2) muestra el ángulo de ajuste (13°~80°) cuando la pantalla LCD pase del soporte al montaje en la pared.
3. La Figura (3) muestra el ángulo de ajuste (0°~10°) cuando monta la pantalla LCD en una pared.
Oirá un "clic" cuando cambie el ángulo de 1 a 2 o de 3 a 2.
(2) Ajuste del ángulo cuando pase del soporte
al montaje en la pared (1 3, 3 1)
(3) Ajuste del ángulo cuando el televisor
LCD esté montado en la pared.
Español-2
Page 21

Instalación del equipo de montaje en la pared
Los elementos del montaje en la pared (se venden por separado) permiten instalar el televisor en una pared. Si desea más información sobre la instalación de los
componentes para montaje en la pared, consulte las instrucciones que se facilitan con dichos elementos. Para la instalación del soporte mural, póngase en contacto con
un técnico. Samsung Electronics no se hace responsable de los daños causados al producto o al usuario si éste ha efectuado la instalación del televisor.
Instalación de dispositivos de montaje conforme con VESA
Montaje
(Vendido por separado)
1. Sitúe el televisor boca abajo sobre un paño suave o un
2. Ajuste el soporte presionando el botón "PUSH" de la parte
Botón PUSH
(2) (3)
3. Alinee el adaptador de montaje (no suministrado) con los
Aspecto general del panel de control
Los botones del panel (inferior derecha) controlan las funciones básicas del TV, incluyendo los
menús en pantalla. Para usar las funciones más avanzadas, debe usar el mando a distancia.
cojín, encima de una mesa.
posterior.
orificios de la parte inferior del soporte y sujételo con los
cuatro tornillos que se suministran con el brazo basculante,
el soporte de montaje en pared o cualquier otro mecanismo de soporte (no suministrado).
Cuando ajuste el soporte, pulse el botón "PUSH" que se
encuentra en la parte posterior del soporte.
SOURCE
Cambia entre todas las fuentes de entrada disponibles
(TV, AV, S-Video, Componente, PC).
En el menú de la pantalla, utilice este botón del mismo modo
que el botón
ENTER del mando a distancia.
MENU
Pulse para ver en pantalla un menú con las características del
TV.
Pulse para aumentar o reducir el volumen. En el menú de la
pantalla, utilice los botones de la même manière que
les boutons
y del mando a distancia.
Pulse para cambiar de canal. En el menú de la pantalla, utilice
estos botones del mismo modo que los botoness
y del mando a distancia.
POWER
Pulse para encender o apagar el TV.
ALTAVOCES
(TOMA DE AURICULARES)
Conecte unos auriculares externos a este conector para
audiciones privadas.
SENSOR DEL MANDO A DISTANCIA
Dirija el mando a distancia hacia este punto del TV.
INDICADOR DE ALIMENTACIÓN
Se ilumina cuando se apaga.
(El indicador de alimentación está de color rojo en modo de
espera, parpadea en rojo cuando enciende el aparato y se apaga
cuando se enciende completamente. El indicador se enciende de
color verde cuando enciende o apaga el temporizador.)
Español-3
Page 22

Aspecto general del panel de conexiones
Use las tomas del panel posterior para conectar componentes de A/V, como un vídeo o un reproductor de DVD.
LN15S51BP LN20S51BP
Blanco
Verde
Azul
PC
Panel posterior del reproductor de DVD
Cada vez que conecte un dispositivo externo al televisor, compruebe que la unidad esté desconectada de la alimentación.
Cuando conecte un dispositivo externo, debe hacer coincidir los colores del terminal de conexión y del cable.
Rojo
Rojo
Español-4
Amarillo
Blanco
Rojo
Panel trasero del VCR
Page 23

Aspecto general del panel de conexiones
PC IN / PC AUDIO IN
Se conecta a la toma de salida de audio y vídeo del PC.
COMPONENT IN (480i/480p)
Conecte el componente de vídeo/audio.
AV I N
Entradas de vídeo y audio para dispositivos externos, como una videocámara o un reproductor de vídeo.
S-VIDEO IN
Conecta de se ñal de audio desde una c ámara o un VCR.
ANT IN
Efectuar una conexión con una antena o con un sistema de televisión por cable.
KENSINGTON LOCK
El bloqueo Kensington (opcional) es un dispositivo que se utiliza para fijar físicamente el sistema cuando se utiliza en un sitio público.
Si desea usar un dispositivo de bloqueo, póngase en contacto con el distribuidor donde adquirió el televisor.
ENTRADA DE ALIMENTACIÓN DC
Conecte el cable de alimentación suministrado.
Visualización del mando a distancia
Enciende o apaga el TV.
Pulsar para seleccionar los canales directamente en el televisor.
Púlselo para seleccionar los canales por encima del n.º 100. Por ejemplo, para
seleccionar el canal 121 pulse “+100” y, a continuación, pulse “2” y “1”.
Pulse para aumentar o reducir el volumen.
Pulse para desactivar momentáneamente el sonido.
Pulse para seleccionar una hora en la cual se apagará el TV automáticamente.
Muestra el menú de pantalla principal.
Sirve para seleccionar los elementos del menú en pantalla y cambiar los valores
del menú.
Se pulsa para memorizar automáticamente los canales
seleccionados de TV/Cable.
Ajusta la imagen del TV al seleccionar uno de los valores predeterminados en
fábrica (También selecciona los valores de imagen personalizados.)
Vuelve al canal anterior.
CH / para cambiar los canales.
Pulse
Selección de lista de entrada.
Pulse para visualizar el canal actual y los ajustes de audio y vídeo.
Se pulsa para salir del menú en pantalla.
Se utiliza para seleccionar los canales manualmente, y para guardarlos o
eliminarlos de la memoria.
Púlselo para activar o desactivar los subtítulos.
Pulse para elegir estéreo, mono o programa de audio independiente
(emisión SAP).
Ajusta el sonido del TV seleccionado una de las configuraciones
predeterminadas de fábrica
(También selecciona los valores de sonido personalizados.)
El exceso de luz puede influir en el rendimiento del mando a distancia.
Español-5
Page 24

Instalación de las pilas en el mando a distancia
1. Haga deslizar totalmente la tapa.
2. Coloque dos pilas de tamaño AAA.
Compruebe que los extremos “+” y “-” de las pilas concuerdan con el diagrama del interior del ompartimiento.
3. Vuelva a colocar la tapa.
Si no va a usar el mando a distancia durante un largo período de tiempo, extraiga las pilas y guárdelas en un lugar fresco y seco.
El mando se puede utilizar hasta una distancia de unos 7 metros del televisor.
(Con un uso normal del TV, las pilas duran alrededor de un año).
Si el mando a distancia no funciona, compruebe:
1. ¿Está encendido el TV?
2. ¿Están invertidos los polos positivo y negativo de la batería?
3. ¿Se han agotado las baterías?
4. ¿Ha habido un corte de luz o el cable está desenchufado?
5. ¿Hay un fluorescente o un neón a poca distancia?
Funcionamiento
Encendido o apagado del TV
Pulse el botón POWER del mando a distancia.
También puede utilizar el botón
POWER que se encuentra en la parte inferior derecha del panel del televisor.
Cambio de canales
Ajuste del volumen
Mediante los botones de canal
1. Pulse el botón CH o CH para cambiar los canales.
Cuando pulse el botón CH o CH el TV cambiará los canales por orden. Verá todos los canales
que ha memorizado el TV (El TV deberá haber memorizado como mínimo tres canales).
No verá los canales borrados o no memorizados.
Utilización de los botones numéricos:
1. Utilice los botones numéricos para ir directamente a un canal.
Para seleccionar el canal 108, pulse “ ” “ ” “ ”.
Si utiliza los botones numéricos podrá seleccionar directamente los canales eliminados o no memorizados.
Para cambiar el canal más rápidamente, pulse los botones de canales y después
(Por ejemplo, para el canal “4” pulse “4” y “ENTER ”)
ENTER .
Utilización del botón PRE-CH para seleccionar el canal anterior:
1. Pulse el botón PRE-CH. El TV volverá al último canal visualizado.
Para conmutar rápidamente entre dos canales bastante distantes, sintonice un canal y use los botones numéricos
para seleccionar el segundo. Después use el botón PRE-CH para conmutar rápidamente entre ellos.
1.
Pulse el botón VOL o VOL para subir o bajar el volumen.
Uso del botón MUTE:
Puede interrumpir el sonido en cualquier momento pulsando el botón MUTE.
1.
Pulse el botón MUTE y el sonido se desconectará.
2.
Para recuperar el sonido vuelva a pulsar MUTE o, simplemente, pulse el botón VOL o VOL .
Español-6
Page 25

Visualización de la pantalla
Pulse el botón INFO del mando a distancia para ver el canal actual y el estado de determinados ajustes de
audio-vídeo.
La información en pantalla desaparece pasados unos diez segundos.
Presione el botón una vez más, o espere aproximadamente 10 segundos, y desaparecerá automáticamente.
Función Plug & Play
Cuando el televisor se enciende por primera vez, algunos valores se establecen de forma automática y correlativa:
Están disponibles los ajustes siguientes.
1. Pulse el botón POWER en el mando a distancia.
Aparece el mensaje “Start Plug & Play”, con el “OK” seleccionado.
2. Seleccione el idioma correspondiente pulsando el botón o .
Pulse el botón
3. Aparece el mensaje “Verif. entrada de antena”, con el “Aceptar” seleccionado.
Pulse el botón
4. Pulse el botón o para seleccionar origen de la señal de video y, después,
pulse el botón
5. Pulse el botón ENTER para seleccionar “Iniciar”.
6. Pulse el botón ENTER .
Pulse el botón
Defina el valor de “Hora”, “Minuto” o “am/pm” pulsando el botón
7. Pulse el botón ENTER para confirmar su elección.
Se visualiza el mensaje “Disfrute”.
Idioma: Seleccione el idioma.
Aire/Cable: Seleccione el sistema de su compañía local de televisión por cable.
Prog. Auto: Selecciona entre la conexión de una antena terrestre o el sistema de televisión de la compañía de
Config. Reloj: Ajusta la hora actual del reloj del televisor.
También puede ajustar la hora y los minutos pulsando los botones numéricos del mando a distancia.
Si desea reiniciar esta función...
1. Pulse el botón MENU para visualizar el menú.
Pulse el botón
2. Pulse el botón o para seleccionar “Plug&Play” y, después, pulse el botón ENTER .
3. De este modo se cambiará o restablecerá la configuración.
ENTER para confirmar la selección.
ENTER .
Compruebe que el cable de la antena esté conectado correctamente.
ENTER .
La búsqueda de canales se iniciará y terminará automáticamente.
Después de memorizar todos los canales, se muestra “Config. Reloj”.
Pulse el botón ENTER en cualquier momento para interrumpir el proceso de memorización.
o para desplazarse a la “Hora”, “Minuto” o “am/pm”.
o .
televisión por cable. El televisor pasará automáticamente por todos los canales disponibles y los guardará
en la memoria. El proceso dura un par de minutos.
o para seleccionar “Configuración” y, después, pulse el botón ENTER .
Selección del origen de la señal de vídeo
Antes de empezar a memorizar los canales disponibles, debe indicar el tipo de origen de la señal conectada al TV
(es decir, antena o sistema de cable).
1. Pulse el botón MENU para visualizar el menú.
Pulse el botón
2. Pulse el botón ENTER para seleccionar "Aire/Cable".
3. Pulse el botón o para seleccionar origen de la señal de video y, después,
pulse el botón
4. Pulse el botón EXIT para salir.
STD, HRC e IRC identifican los distintos tipos de sistemas de TV por cable. Póngase en contacto con su proveedor
de cable para averiguar el tipo de sistema de cable existente en su zona.
En este momento ya se ha seleccionado el origen de la señal. Siga con “Memorización automática de canales”
o para seleccionar “Canal” y, después, pulse el botón ENTER .
ENTER .
Español-7
Page 26

Memorización automática de canales
El TV conmutará automáticamente entre todos los canales disponibles y los guardará en la memoria.
El proceso dura un par de minutos.
1. Si desea seleccionar una fuente de señal, siga los pasos del 1 al 3 de la sección
"Selección del origen de la señal de vídeo" en la página 7.
2. Pulse el botón o para seleccionar “Prog. Auto” y, después, pulse el botón ENTER .
3. Pulse el botón ENTER . El TV comenzará a memorizar todos los canales disponibles.
Pulse el botón ENTER en cualquier momento si desea interrumpir el proceso de memorización y
volver al menú “Canal”.
4. Una vez memorizados todos los canales disponibles, el menú “Canal”, volverá a aparecer.
5. Pulse el botón EXIT para salir.
Pulse el botón AUTO PROG. del mando a distancia.
Memorización manual de canales
Puede memorizar hasta 100 canales, incluidos aquellos que se reciben mediante redes por cable.
1. Utilice los botones numéricos para seleccionar directamente el canal que desea agregar o borrar.
2. Pulse el botón MENU para visualizar el menú.
Pulse el botón
3. Pulse el botón ENTER para seleccionar "Agregar/Borrar".
Pulse el botón
4. Si pulsa varias veces este botón se alternará entre agregar y borrar ENTER .
5. Pulse el botón CH o CH para cambiar al canal apropiado y repita el proceso anterior.
6. Pulse el botón EXIT para salir.
Puede ver cualquier canal (incluido un canal eliminado) utilizando los botones numéricos del mando a distancia.
Utilice los botones numéricos para seleccionar directamente el canal que desea agregar o borrar.
Pulse el botón
o para seleccionar “Canal” y, después, pulse el botón ENTER .
ENTER .
ADD/DEL del mando a distancia.
Ajuste preciso de los canales
Utilice el ajuste preciso para sintonizar manualmente un canal concreto para que la recepción sea óptima.
1. Use los botones numéricos para seleccionar directamente el canal que desee ajustar con precisión.
2. Pulse el botón MENU para visualizar el menú.
Pulse el botón
3. Pulse el botón o para seleccionar “Sintonia Fina” y, después, pulse el botón ENTER .
4. Pulse el botón o para ajustar la sintonización fina.
5. Para guardar el ajuste preciso en la memoria del TV, pulse el botón ENTER .
6. Pulse el botón EXIT para salir.
Si no guarda en la memoria el canal ajustado con precisión, los ajustes se perderán.
Los canales ajustados por el usuario que se han guardado, están marcados con un asterisco “*” enel lado derecho
del número de canal en el rótulo de canales.
Para reiniciar la sintonía fina, seleccione "Rein." pulsando el botón o y pulse el botón
o para seleccionar “Canal” y, después, pulse el botón ENTER .
ENTER
.
Español-8
Page 27

CONTROL DE LA IMAGEN
Uso de los parámetros de imagen automáticos
El TV tiene cuatro valores de imagen automáticos (“Dinámico”, “Normal”, “Cine”, y “Favorito”)
predeterminados de fábrica.
1. Pulse el botón MENU para visualizar el menú.
Pulse el botón
2. Pulse el botón ENTER para seleccionar "Modo".
3. Pulse el botón o para seleccionar el efecto de imagen deseado.
Pulse el botón
4. Pulse el botón EXIT para salir.
Dynámico: Selecciona la alta definición en la imagen, en una habitación luminosa.
Normal: Selecciona la visualización óptima de la imagen, en un entorno normal.
Cine: Selecciona una visualización agradable de la imagen, en una sala oscura.
Favorito: Selecciónelo para ver los ajustes de pantalla favoritos.
Pulse el botón P.MODE del mando a distancia para seleccionar uno de los ajustes de imagen.
Personalización de la imagen
El aparato tiene varios valores que le permiten controlar la calidad de imagen.
1. Pulse el botón MENU para visualizar el menú.
Pulse el botón
2. Pulse el botón o para seleccionar “Favorito” y, después, pulse el botón ENTER .
3.
Pulse el botón
Pulse el botón ENTER .
4.
Pulse el botón
Pulse el botón ENTER .
5. Pulse el botón EXIT para salir.
Contraste: Ajusta la claridad y oscuridad entre los objetos y el fondo.
Luminosidad: Ajusta el brillo de toda la pantalla.
Definición: Ajusta el contorno de los objetos para que estén más o menos nítidos.
Color: Ajusta los colores para que aparezcan más claros o más oscuros.
Tinte: Ajusta el color de los objetos haciendo que sean más rojos o verdes para que tengan un aspecto más natural.
Si efectúa algún cambio en esta configuración, el modo “Imagen” cambiará automáticamente a “Favorito”.
o para seleccionar “Imagen” y, después, pulse el botón ENTER .
ENTER .
o para seleccionar “Imagen” y, después, pulse el botón ENTER .
o
para seleccionar una opción concreta.
o
para aumentar o reducir el valor de una opción concreta.
Ajuste del Color del fondo
Puede cambiar el color de toda la pantalla según sus preferencias.
1. Pulse el botón MENU para visualizar el menú.
Pulse el botón
2. Pulse el botón o para seleccionar “Tono Color” y, después, pulse el botón ENTER .
3.
Pulse el botón
Pulse el botón ENTER .
4. Pulse el botón EXIT para salir.
Frío2: Hace que la temperatura del color sea más azul que en el menú “Frío1”.
Frío1: Hace que el blanco sea azulado.
Normal: Mantiene el color blanco sin modificaciones.
Tibio1: Hace que el blanco sea rojizo.
Tibio2: Hace que la temperatura del color sea más roja que en el menú “Tibio1”.
o para seleccionar “Imagen” y, después, pulse el botón ENTER .
o
para seleccionar el ajuste deseado para "Tono Color".
Español-9
Page 28

CONTROL DEL SONIDO
Uso de los parámetros de sonido automáticos
Puede seleccionar un tipo de efecto de sonido especial que se usará cuando se visualice una emisión concreta.
1. Pulse el botón MENU para visualizar el menú.
Pulse el botón
2. Pulse el botón ENTER para seleccionar "Modo".
3. Pulse el botón o para seleccionar el ajuste de sonido “Normal” o “Diálogo”.
Pulse el botón
4. Pulse el botón EXIT para salir.
Normal: Selecciona el modo de sonido normal.
Diálogo: Realza las voces respecto de los sonidos.
También puede pulsar el botón S.MODE del mando a distancia para seleccionar los ajustes de sonido
“Normal” o “Diálogo”.
Elección de una pista sonora multicanal (MTS)
En función del programa concreto emitido, puede escuchar en estéreo, mono o escuchar un Programa de audio
independiente. (SAP; normalmente es la versión en otro idioma. A veces SAP incluye información no relacionada,
como por ejemplo noticias o el tiempo.)
1. Pulse el botón MENU para visualizar el menú.
Pulse el botón
2. Pulse el botón o para seleccionar “MTS” y, después, pulse el botón ENTER .
3. Pulse el botón o para seleccionar la opción deseada; después, pulse el botón ENTER .
4. Pulse el botón EXIT para salir.
Mono: Seleccione esta opción para los canales que emiten en monoaural o si tiene dificultades con la recepción
de señales estéreo.
Estéreo: Seleccione esta opción para canales que emiten en estéreo.
SAP: Seleccione esta opción para escuchar el Programa de audio independiente, que normalmente es una traducción
de otro idioma.
También puede pulsar el botón MTS del mando a distancia para cambiar la configuración MTS.
o para seleccionar “Sonido” y, después, pulse el botón ENTER .
ENTER .
o para seleccionar “Sonido” y, después, pulse el botón ENTER .
Utilización del volumen automático
Cada emisora tiene sus propias condiciones de señal y es muy incómodo ajustar el volumen cada vez que se cambia
de canal. Con la función “Vol. Auto” el volumen del canal deseado se ajusta de forma automática reduciendo la salida
de sonido cuando la señal de modulación es alta o aumentándola cuando es baja.
1. Pulse el botón MENU para visualizar el menú.
Pulse el botón
2. Pulse el botón o para seleccionar “Vol. Auto” y, después, pulse el botón ENTER .
3. Pulse el botón o para seleccionar “Enc.” o “Apag.”.
Pulse el botón
4. Pulse el botón EXIT para salir.
o para seleccionar “Sonido” y, después, pulse el botón ENTER .
ENTER .
Español-10
Page 29

CONFIGURACIÓN DE LA HORA
Configuración del reloj
Puede establecer el reloj del TV para que aparezca la hora actual al pulsar el botón "INFO". También se debe ajustar
la hora si se desea utilizar los temporizadores de encendido/apagado automático.
1. Pulse el botón MENU para visualizar el menú.
Pulse el botón
2. Pulse el botón ENTER para seleccionar “Tiempo”.
3. Pulse el botón ENTER para seleccionar “Config. Reloj”
4. Pulse el botón o para ajustar “Hora” y pulse el botón para ir al paso siguiente.
Ajuste otras opciones utilizando el mismo método que se indica anteriormente.
Cuando haya terminado, pulse el botón
5. Pulse el botón EXIT para salir.
Si desconecta el cable de alimentación, debe configurar el reloj de nuevo.
Puede ajustar la hora, los minutos, el canal y el volumen directamente pulsando los botones numéricos del mando
a distancia.
Configuración del temporizador de sueño
Règle le minuteur pour éteindre automatiquement la télévision à un moment prédéfini.
1. Pulse el botón MENU para visualizar el menú.
Pulse el botón
2. Pulse el botón ENTER para seleccionar “Tiempo”.
3. Pulse el botón o para seleccionar “Temporizador” y, después, pulse el botón ENTER .
4. Pulse el botón o varias veces hasta que aparezca la hora deseada.
(Apag., 30, 60, 90, 120, 150, 180)
5. Pulse el botón EXIT para salir.
El televisor se apaga automáticamente cuando el temporizador llega a 0.
También puede pulsar el botón SLEEP del mando a distancia para ajustar el temporizador.
o para seleccionar “Configuración” y, después, pulse el botón ENTER .
ENTER para volver.
o para seleccionar “Configuración” y, después, pulse el botón ENTER .
Activación y desactivación del temporizador
Puede establecer los temporizadores Enc./Apag. para que el equipo:
Se encienda de forma automática y sintonice el canal que desee a la hora que elija.
Se apague automáticamente a la hora que elija.
1. Pulse el botón MENU para visualizar el menú.
Pulse el botón
2. Pulse el botón ENTER para seleccionar “Tiempo”.
3. Pulse el botón o para seleccionar “Temp. enc.” y, después, pulse el botón ENTER .
4. Pulse el botón o para ajustar “Hora” y pulse el botón para ir al paso siguiente.
Ajuste otras opciones utilizando el mismo método que se indica anteriormente.
Cuando haya terminado, pulse el botón
5. Pulse el botón o para seleccionar “Temp. apag” y, después, pulse el botón ENTER .
6. Pulse el botón o para ajustar “Hora” y pulse el botón para ir al paso siguiente.
Ajuste otras opciones utilizando el mismo método que se indica anteriormente.
Cuando haya terminado, pulse el botón
7. Pulse el botón EXIT para salir.
El reloj se debe ajustar (consulte las instrucciones anteriores) antes de activar o desactivar el temporizador.
También puede ajustar la hora y los minutos pulsando los botones numéricos del mando a distancia.
El ajuste “Activación” debe estar establecido en “Enc.” para que los temporizadores funcionen.
Apagado automático: Cuando se activa el temporizador, su televisión se apagará si no se utiliza ningún control
durante 3 horas después de que el TV se haya encendido con la función “Temp. enc.”.
o para seleccionar “Configuración” y, después, pulse el botón ENTER .
ENTER para volver.
ENTER para volver.
Español-11
Page 30

DESCRIPCIÓN DE LAS FUNCIONES
Visualización de los subtítulos
El TV descodifica y muestra los subtítulos emitidos con algunos programas de TV.
Suele tratarse de subtítulos para sordos o de traducciones. Todos los vídeos graban la señal de los subtítulos de los
programas televisivos, por lo que las cintas de vídeo domésticas también ofrecen subtítulos. La mayoría de DVD y
cintas de vídeo comerciales también ofrecen subtítulos.
Compruebe el símbolo de los subtítulos del programade televisión y en el embalaje de la cinta: .
1. Pulse el botón MENU para visualizar el menú.
Pulse el botón
2. Pulse el botón o para seleccionar “Subtítulo” y, después, pulse el botón ENTER .
3. Pulse el botón ENTER para seleccionar “Subtítulo”.
4. Pulse el botón o para configurar la función de subtítulos en “Apag.” u “Enc.” y,
a continuación, pulse el botón
5. Dependiendo de cada emisión, puede ser necesario modificar la configuración de “Canal” y “Campo”.
6. Pulse el botón EXIT para salir.
Subtítulo: Apag. / Enc.
Modo: Subtítulo / Texto
Canal: 1 / 2
Campo: 1 / 2
La función Caption no funciona con señales de DVD ni televisión digital.
Canales y campos distintos muestran información diferente: Campo 2 incorpora información adicional que
complementa la información en Campo 1.
(Por ejemplo, Canal 1 puede ofrecer subtítulos en inglés, mientras que Canal 2, subtítulos en español).
Pulse el botón CAPTION en el mando a distancia.
Selección del idioma de menú
1. Pulse el botón MENU para visualizar el menú.
Pulse el botón
2. Pulse el botón o para seleccionar “Idioma”.
Pulse el botón
3. Pulse el botón o para seleccionar el idioma apropiado.
Pulse el botón
4. Pulse el botón EXIT para salir.
o para seleccionar “Configuración” y, después, pulse el botón ENTER .
o para seleccionar “Configuración” y, después, pulse el botón ENTER .
ENTER .
ENTER .
ENTER .
Ajuste del modo pantalla azul
Si no se recibe ninguna señal o la señal es muy débil, una pantalla azul sustituirá automáticamente el fondo ruidoso de
la imagen. Si desea continuar visualizando la imagen deficiente, debe ajustar el modo “Pantalla Azul” en “Apagado”.
1. Pulse el botón MENU para visualizar el menú.
Pulse el botón
2. Pulse el botón o para seleccionar “Pantalla Azul” y, después, pulse el botón ENTER .
3. Pulse el botón o para seleccionar “Enc.” u “Apag.” y, después, pulse el botón ENTER .
4. Pulse el botón EXIT para salir.
o para seleccionar “Configuración” y, después, pulse el botón ENTER .
Español-12
Page 31

Para seleccionar la fuente
Puede elegir entre varias fuentes externas conectadas a los conectores de entrada del televisor.
1. Pulse el botón MENU para visualizar el menú.
Pulse el botón
2. Pulse el botón o para seleccionar “Lista de origen”.
3. Pulse el botón o para seleccionar origen entrada, en seguida y, después ENTER .
Sólo puede seleccionar una fuente si está conectada al TV.
Pulse el botón SOURCE del mando a distancia para ver una fuente de señal externa.
o para seleccionar “Entrada”.
Edición del nombre de la fuente de entrada
Puede dar un nombre al dispositivo conectado en las tomas de entrada; de esta manera será más fácil seleccionar el
dispositivo de entrada.
1. Pulse el botón MENU para visualizar el menú.
Pulse el botón
2. Pulse el botón o para seleccionar “Editar Nombre” y, después, pulse el botón ENTER .
3.
Pulse el botón o para seleccionar el dispositivo de entrada deseado y pulse el botón ENTER .
4. Pulse el botón o para seleccionar el dispositivo de entrada deseado y
pulse el botón
Las opciones disponibles son las siguientes.
---- - Vídeo - DVD - Cable STB - HD STB - Satélite STB - Receptor AV - Receptor DVD
Juego - Filmadora - DVD combo - DHR - PC
DHR: Receptor DVD HDD
5. Pulse el botón EXIT para salir.
ENTER .
ENTER . Después de seleccionado el origen, pulse el botón ENTER .
PANTALLA DE PC
Instalación del software en el equipo (según Windows XP)
A continuación se muestra la configuración de visualización de Windows para un ordenador típico.
Probablemente la pantalla real de su PC sea distinta; dependerá de la versión concreta de Windows y de la
tarjeta de vídeo que tenga. Pero aunque las pantallas reales tengan un aspecto diferente, se aplicarán los mismos ajustes básicos y la misma información en la mayoría de los casos.
(En caso contrario, póngase en contacto con el fabricante del ordenador o con el distribuidor de Samsung.)
1. Primero, haga clic en “Control Panel (Panel de control)” en el menú Inicio de Windows.
2. Cuando aparezca la pantalla del Panel de control, haga clic en
“Appearance and Themes (Apariencia y Temas)” y aparecerá un cuadro de diálogo.
3. Cuando aparezca la pantalla del Panel de control, haga clic en “Dispiay (Pantalla)” y aparecerá un
cuadro de diálogo.
4. Seleccione la ficha “Settings (Configuración)” en el cuadro de diálogo.
La configuración de tamaño correcto (resolución):
óptimo- LN15S51BP: 1024 x 768 / LN20S51BP: 800 x 600
Si existe una opción de frecuencia vertical en el cuadro de diálogo de configuración de la pantalla,
el valor correcto es “60” o “60 Hz”. Si no, haga clic en “OK (Aceptar)” y salga del cuadro de diálogo.
Español-13
Page 32

Configuración del PC
Fijar la Imagen:
El propósito del ajuste de la calidad de imagen es eliminar o reducir el ruido de la imagen.
Si el ruido no desaparece sólo con la sintonización fina, realice los ajustes de frecuencia hasta el máximo y vuelva a
realizar la sintonización fina.
Después de reducir el ruido, vuelva a ajustar la imagen para que quede alineada en el centro de la pantalla.
1. Ajustes predefinidos: Pulse el botón SOURCE para seleccionar el modo PC.
2. Pulse el botón MENU para visualizar el menú.
3. Pulse el botón o para seleccionar “PC” y, después, pulse el botón ENTER .
4. Pulse el botón ENTER para seleccionar “Fijar la Imagen”.
5. Pulse el botón o para seleccionar “Grueso” o “Fino”, y, después, pulse el botón ENTER .
6. Pulse el botón o para ajustar la calidad de la pantalla. Pueden aparecer rayas verticales o
7. Pulse el botón EXIT para salir.
Posición:
Ajuste la posición de la pantalla del PC si no se acopla a la pantalla del TV.
1. Ajustes predefinidos: Pulse el botón SOURCE para seleccionar el modo PC.
2. Pulse el botón MENU para visualizar el menú.
3. Pulse el botón o para seleccionar “PC” y, después, pulse el botón ENTER .
4. Pulse el botón o para seleccionar “Posición” y, después, pulse el botón ENTER .
5. Pulse el botón o para ajustar la posición V.
6. Pulse el botón EXIT para salir.
Reiniciar imagen:
Puede recuperar todos los ajustes de imagen predeterminados de fábrica.
1. Ajustes predefinidos: Pulse el botón SOURCE para seleccionar el modo PC.
2. Pulse el botón MENU para visualizar el menú.
3. Pulse el botón o para seleccionar “PC” y, después, pulse el botón ENTER .
4. Pulse el botón o para seleccionar “Reiniciar imagen” y, después, pulse el botón ENTER .
5. Pulse el botón EXIT para salir.
Ajuste Automáioco:
La función de ajuste automático permite que el televisor se ajuste automáticamente a la señal de vídeo del PC.
Los valores de fine (fino), coarse (grueso) y position (posición) se ajustan automáticamente.
1. Ajustes predefinidos: Pulse el botón SOURCE para seleccionar el modo PC.
2. Pulse el botón MENU para visualizar el menú.
3. Pulse el botón o para seleccionar “PC” y, después, pulse el botón ENTER .
4.
5. Pulse el botón EXIT para salir.
Pulse el botón
la imagen tener poca definición.
Pulse el botón
Pulse el botón
Pulse el botón
Pulse el botón
Pulse el botón
Pulse el botón
Pulse el botón o para seleccionar “Ajuste Automáioco” y, después, pulse el botón ENTER .
o para seleccionar “Configuración” y, después, pulse el botón ENTER .
ENTER .
o para seleccionar “Configuración” y, después, pulse el botón ENTER .
o para ajustar la posición H.
ENTER .
o para seleccionar “Configuración” y, después, pulse el botón ENTER .
o para seleccionar “Configuración” y, después, pulse el botón ENTER .
Español-14
Page 33

SOLUCIÓN DE PROBLEMAS
Identificación de problemas
Si parece que el TV no funciona correctamente, en primer lugar compruebe esta lista de posibles problemas y soluciones.
Si no funciona ninguno de estos consejos, llame al centro de servicio más cercano.
Problema
Imagen deficiente.
Calidad de sonido deficiente.
No hay imagen o sonido.
No se percibe ningún sonido, o muy
bajo, con el volumen al máximo.
La imagen rueda verticalmente.
El TV funciona de forma irregular.
Anomalías del mando a distancia.
Mensaje “Verificar cable señal”.
Mensaje “Modo no compatible”.
La imagen es demasiado clara o
demasiado oscura.
Unas barras horizontales parpadean,
tiemblan u oscilan en la imagen.
El panel LCD TFT utiliza un panel que consta de muchos píxeles de ínfimo tamaño (LN15S51BP - 2.359.296, LN20S51BP - 1.440.000) que
requieren de una tecnología altamente sofisticada para su fabricación. Sin embargo, pueden haber unos pocos píxeles poco iluminados u
oscuros en pantalla. Estos píxeles no suponen una merma en el funcionamiento del producto.
Posible solución
Intente sintonizar otro canal.
Ajuste la antena.
Compruebe las conexiones de todos los cables.
Intente sintonizar otro canal.
Ajuste la antena.
Intente sintonizar otro canal.
Pulse el botón SOURCE.
Compruebe que el TV esté enchufado.
Compruebe las conexiones de la antena.
Primero, compruebe el volumen de los aparatos conectados al TV
(Receptor de emisiones digitales, DTV, DVD, receptor de emisiones por cable, vídeo, etc.).
A continuación, ajuste el volumen del TV según sea más conveniente.
Compruebe todas las conexiones de cable.
Desenchufe el TV durante 30 segundos y, después, intente que funcione otra vez.
Remplacez les piles de la télécommande.
Limpie el borde superior del mando a distancia (ventana de transmisión).
Compruebe los terminales de la pila.
Compruebe que el cable de señal esté conectado firmemente con las fuentes del PC.
Compruebe la resolución máxima y la frecuencia del adaptador de vídeo.
Compare estos valores con los datos de los modos de Pantalla.
Ajuste Brillo y Contraste.
Ajuste la función Grueso y después ajuste la función Fino.
Español-15
Page 34

APÉNDICE
Especificaciones
Nombre del Modelo
Panel
Tamaño
Tamaño de pantalla
Frecuencia
Horizontal
Vertical
Resolución del PC
óptimo
Fuente de alimentación
Consumo de energía
Normal
Energía máximo
Dimensiones (AlxAnxPr)
Cuerpo principal
Con el soporte
Peso
Con el soporte
Consideraciones sobre el entorno
Temperatura de funcionamiento
Humedad de funcionamiento
Temperatura de almacenamiento
Humedad de almacenamiento
Modos de visualización
LN15S51BP
15 pulg. diagonal
304,1 (H) x 228,1 (V) mm
(11,97 (H) x 8,98 (V) pulgadas)
30 ~ 69 kHz
50 ~ 75 Hz
1024 x 768 @ 60 Hz
AC100-240V~60Hz
40 W
<3 W
496,0 x 82,0 x 333,0 mm
(19,52 x 3,22 x 13,11 pulgadas)
496,0 x 170,0 x 359,0 mm
(19,52 x 6,69 x 14,13 pulgadas)
4,0 kg (8,81 lbs)
10 °C al 40 °C (50 °F al 104 °F)
10 % al 80 %, sin condensación
-20 °C al 45 °C (-4 °F al 113 °F)
5 % al 95 %, sin condensación
LN20S51BP
20 pulg. diagonal
408,0 (H) x 306,0 (V) mm
(16,06 (H) x 12,05 (V) pulgadas)
28 ~ 47 kHz
50 ~ 75 Hz
800 x 600 @ 60 Hz
AC100-240V~60Hz
55 W
<3 W
607,0 x 94,0 x 436,0 mm
(23.89 x 3,70 x 17,16 pulgadas)
607,0 x 215,0 x 464,0 mm
(23,89 x 8,46 x 18,26 pulgadas)
7,8 kg (17,19 lbs)
10 °C al 40 °C (50 °F al 104 °F)
10 % al 80 %, sin condensación
-20 °C al 45 °C (-4 °F al 113 °F)
5 % al 95 %, sin condensación
Tanto la posición en la pantalla como el tamaño varían dependiendo del tipo de monitor del PC y de su resolución.
Se recomiendan las resoluciones de la tabla. (Son compatibles todas las resoluciones entre los límites admitidos)
Modo
VGA
LN15S51BP
LN20S51BP
SVGA
LN15S51BP
Resolución
720X400
640X480
640X480
800X600
800X600
Frecuencia
horizontal (kHz)
31,469
31,469
37,500
46,875
37,879
Frecuenci
a vertical (Hz)
70,087
59,940
75,000
75,000
60,317
Frecuencia del reloj
de píxeles (MHz)
28,322
25,175
31,500
49,500
40,000
LN20S51BP
XGA
LN15S51BP
No se admite el modo entrelazado.
El aparato puede funcionar incorrectamente si se selecciona un formato de vídeo que no sea estándar.
1024X768
1024X768
48,363
60,023
Español-16
60,004
75,029
65,000
78,750
Polaridad de
sincronización (H/V)
- / +
- / -
- / -
+ / +
+ / +
- / -
+ / +
Page 35

ÍNDICE
GENERALIDADES
Lista de funções................................................................................. 2
Lista de peças.................................................................................... 2
Como ajustar a base.......................................................................... 2
Como ajustar a angulação da TV ...................................................... 2
Como instalar o Kit de montagem em parede.............................. 3
Instalação de dispositivos de montagem VESA compatíveis....... 3
Visualização do Painel de Controle................................................... 3
Visualização do Painel de Conexão .................................................. 4
Visualização do Controle Remoto...................................................... 5
Colocar pilhas controle remoto .......................................................... 6
OPERAÇÃO
On/Off o televisor ............................................................................... 6
Mudar de canal .................................................................................. 6
Regular o volume............................................................................... 6
Ver as telas ........................................................................................ 7
Função Plug & Play ........................................................................... 7
Selecionar a fonte do sinal de vídeo ................................................. 7
Como armazenar canais automaticamente ....................................... 8
Como armazenar canais manualmente............................................. 8
Sintonia fina de canais....................................................................... 8
CONTROLE DE IMAGEM
Utilizar as programações de imagem automáticas ......................... 9
Personalizar a imagem ...................................................................... 9
Ajustar a cor de fundo........................................................................ 9
EXIBIÇÃO DO PC
Como configurar o software do PC (baseado no Windows XP)
Configuração do PC ..................................................................... 14
RESOLUÇÃO DE PROBLEMAS
Identificação de problemas........................................................... 15
APÊNDICE
Especificações ............................................................................. 16
Modos de tela ............................................................................... 16
....... 13
Português
CONTROLE DE SOM
Utilizar as programações de som automáticas ............................ 10
Selecionar uma banda sonora com som multi-canais (MTS) ...... 10
Utilização da função Volume automático ..................................... 10
AJUSTE DE TEMPO
Definir o relógio ............................................................................ 11
Definir o temporizador ................................................................. 11
Programar o temporizador............................................................ 11
DESCRIÇÃO DAS FUNÇÕES
Ver ‘legendas ocultas’ (closed captions) ..................................... 12
Selecionar um idioma do menu.................................................... 12
Programar o modo tela azul ......................................................... 12
Seleção da fonte........................................................................... 13
Como editar o nome da fonte de entrada .................................... 13
Símbolo Pressione Importante Nota Um toque no
botão
Português-1
Page 36

Generalidades
Lista de funções
Sua TV é projetada com a mais recente tecnologia.
Esta TV é um aparelho de altodesempenho que inclui os recursos especiais a seguir:
Controle remoto fácil de usar
Sistema de menu na tela fácil de usar
Timer automático para ligar e desligar a TV
Imagem ajustável e definições de som que podem ser armazenadas na memória da TV
Um filtro especial para reduzir ou eliminar problemas na recepção
Controle de sintonização fina para obter a imagem mais nítida possível
Um decodificador de áudio de multicanais embutido para estéreo e audição em dois idiomas
Alto-falantes de canal duplo, embutidos
Conector de fones de ouvido para audição particular
Lista de peças
Verifique se recebeu os seguintes acessórios com o televisor LCD.
Se faltar algum dos acessórios, contacte o vendedor.
Controle Remoto
(AAA x 2)
e Pilhas
Cabo de Alimentação
Kit para montagem em parede
Manual de Instruções
Como ajustar a base
1. Coloque a parte frontal da TV em um pano ou em
uma almofada macia em cima da mesa, como
mostra a Figura (1).
- Alinhe a parte inferior da TV com a borda da mesa.
2. Pressione o centro da parte traseira da TV.
Ajuste a base conforme a Figura (2) enquanto
pressiona o botão "PUSH" na parte traseira da base.
3. Coloque a TV sobre a mesa de uma maneira que
(1) (2)
Botão PUSH
ela fique segura.
Ao ajustar a base, pressione o botão "PUSH" na parte
traseira da mesma.
Como ajustar a angulação da TV
(1) Ajuste da inclinação com o uso da
TV sobre sua base.
Ao ajustar a base, pressione o botão "PUSH" na parte traseira da mesma.
1. AFigura (1) mostra o ajuste da inclinação (0°~13°) quando se utiliza o LCD sobre sua base.
Ainclinação excessiva pode fazer a TV de LCD virar, causando danos.
2. A Figura (2) mostra o ajuste da inclinação (13°~80°) quando o LCD é convertido de utilização em base para a montagem em parede.
3. AFigura (3) mostra o ajuste da inclinação (0°~10°) quando a TV de LCD é montada em parede.
Você ouvirá um "clique" quando alterar a inclinação de 1 para 2 ou de 3 para 2.
(2) Ajuste da inclinação na conversão de Base para a
montagem na parede (1 3, 3 1)
(3) Ajuste da inclinação quando a TV de
LCD é montada na parede.
Português-2
Page 37

Como instalar o Kit de montagem em parede
Os itens para montagem em parede (vendidos separadamente) permitem instalar a TV na parede. Para obter informações detalhadas sobre como instalar
a Montagem em parede, consulte as instruções dos respectivos itens. Entre em contato com um técnico para instalação do suporte de parede.
A Samsung Electronics não se responsabiliza por qualquer dano ao produto ou ferimento a si próprio ou a outras pessoas quando você decide instalar a
TV por sua conta.
Instalação de dispositivos de montagem VESA compatíveis
Suporte de montagem
(vendido separadamente)
1. Coloque a TV com a tela para baixo em um pano ou em
uma almofada macia em cima da mesa.
2. Ajuste a base, pressionando o botão "PUSH" na parte
Botão PUSH
traseira da mesma.
3. Alinhe o suporte da interface de montagem (não fornecido)
com os orifícios na parte inferior da base e prenda-o com
os quatro parafusos fornecidos com a base tipo-braço, o
gancho para montagem em parede ou outras bases (não
fornecidas).
(2) (3)
Ao ajustar a base, pressione o botão "PUSH" na parte traseira
da mesma.
Visualização do Painel de Controle
Os botões do painel inferior à direita controlam as características básicas da sua TV incluindo o menu digital na tela.
Para utilizar as funções mais avançadas, usar o controle remoto.
SOURCE
Alterna entre todas as fontes de entrada disponíveis
(TV, AV, S-Video, Componente, PC).
No menu de tela, use este botão para substituir o botão
ENTER no controle remoto.
MENU
Pressione este botão para ver um menu das funções do televisor.
Pressione este botão para aumentar ou diminuir o volume.
No menu de tela, use os botões para substituir os
e no controle remoto.
botões
Pressione para mudar de canal.
No menu de tela, use os botões para substituir os
e no controle remoto.
botões
ALIMENTAÇÃO
Pressione liga/desliga o televisor.
ALTO-FALANTES
(TOMADA DO FONE DE OUVIDO)
Conecta um conjunto de alto-falantes externos a esta tomada
para audição particular.
SENSOR DO CONTROLE REMOTO
Posicione o controle remoto em direção a este local no televisor.
INDICADOR DE ALIMENTAÇÃO
Acende quando você desliga a alimentação.
(O indicador de energia é vermelho no modo stand-by, pisca em
vermelho quando o aparelho é ligado e se apaga depois que a
energia é totalmente fornecida. Ele torna-se verde quando você
ajusta o timer para ligado ou desligado.)
Português-3
Page 38

Visualização do Painel de Conexão
Utilize as tomadas do painel traseiro para conectar um componente A/V, como um VCR ou um DVD player.
LN15S51BP LN20S51BP
Blue
Red
White
Português-4
Yellow
White
VCR Rear
Green
PC
DVD Player Rear
Sempre que conectar um dispositivo externo à sua TV, verifique se ele está desligado.
Quando conectar um dispositivo externo, use um terminal de conexão com a mesma cor do cabo.
Red
Red
Page 39

Visualização do Painel de Conexão
PC IN / PC AUDIO IN
Conecte na tomada de saída de vídeo e de áudio do PC.
COMPONENT IN (480i/480p)
Conecte um componente de vídeo/áudio
AV I N
Entradas de vídeo e áudio para dispositivos externos, como uma filmadora ou um VCR.
S-VIDEO IN
Conecte o sinal de S-Video de uma camcorder ou VCR.
ANT IN
Conecte uma antena ou ao sistema de televisor a cabo.
KENSINGTON LOCK
A trava Kensington (opcional) é um dispositivo usado para proteger fisicamente o sistema quando usado em um local público.
Se deseja usar o dispositivo de trava, entre em contato com o revendedor no qual a TV foi adquirida.
ENTRADA DE ENERGIA
Conecte o cabo de força fornecido.
Visualização do Controle Remoto
Liga/desliga o televisor.
Pressione para selecionar os canais diretamente na TV.
Pressione para selecionar canais acima de 100.
o canal 121, pressione “+100” e depois “2” e “1”.
Pressione este botão para aumentar ou diminuir o volume.
Pressione este botão para cortar temporariamente o som.
Pressione para selecionar uma hora em que o aparelho de televisão deverá
desligar-se automaticamente.
Mostra o menu principal.
Use para selecionar itens de menu na tela e alterar valores no menu.
Pressione para gravar automaticamente os canais de TV/cabo.
Regule a imagem do televisor seleccionando uma das definições de fábrica.
(ou selecione as definições de imagem personalizadas)
Volta ao canal anterior.
Pressione CH / para mudar de canal.
Seleção da fonte de entrada
Utilize para visualizar informações sobre a programação atual.
Pressione para sair do menu na tela.
Utilize para escolher canais de gravá-los ou eliminá-los da memória.
Pressione definir o caption como ligado/desligado.
Pressione para selecionar estéreo, mono ou programa de áudio separado
(transmissão SAP).
Ajuste o som da TV selecionando uma das definições de fábrica.
(ou selecione as definições de som personalizadas)
O desempenho do controle remoto pode ser afetado por luzes fortes.
Por exemplo, para selecionar
Português-5
Page 40

Colocar pilhas controle remoto
1. Retire completamente a tampa.
2. Colocar duas pilhas de tamanho AAA.
As polaridades “+” e “-” das pilhas têm de coincidir com o diagrama no interior do compartimento das pilhas.
3. Volte a colocar a tampa.
Se o controle remoto não for ser utilizado por muito tempo, retirar as pilhas e guardá-la s em um local fresco e seco. O controle
remoto deve ser utilizado a uma distância máxima de cerca de 7 metros do televisor.
(Em circunstâncias normais de funcionamento, as pilhas de um controle remoto duram cerca de um ano).
Se o controle remoto não funcionar
1. A TV está ligada?
2. Os terminais com sinais de menos e mais da baterias estão trocados?
3. As baterias estão esgotadas?
4. Há falta de energia ou o cabo de energia está fora da tomada?
5. Existe uma luz fluorescente ou um sinal de néon nas proximidades?
Operação
On/Off o televisor
Pressione o botão POWER no controle remoto.
Utilize também o botão
POWER no painel frontal.
Mudar de canal
Regular o volume
Utilizar os botões de canais:
1. Pressione os botões CH
Pressionando-se os botões CH/,o televisor muda de canal em seqüência.
Vão aparecer todos os canais que o televisor memorizou. (O televisor tem de memorizar pelo menos três canais).
Não aparecem os canais que foram apagados ou que não foram memorizados.
Utilizando os botões de números
para mudar de canal.
/
:
1. Pressione os botões com números para ir diretamente para um canal.
Por exemplo, para selecionar o canal 108, pressione “ ” “ ” “ ”.
Ao utilizar os botões com números, você pode selecionar diretamente os canais apagados ou não memorizados.
Para mudar de canal rapidamente, pressione os botões de canais e, em seguida,
(Para o canal “4” pressione “4”, e depois “ENTER ”)
ENTER .
Utilizando o botão PRE-CH para selecionar o canal anterior:
1. Pressione o botão PRE-CH. O televisor muda para o último canal exibido.
Para alternar rapidamente entre dois canais muito afastados, sintonize um canal e depois utilizar os botões
numéricos para selecionar o segundo canal. Depois, utilizar o botão PRE-CH para alternar rapidamente entre eles.
1.
Pressione os botões VOL ou VOL para aumentar ou diminuir o volume.
Utilização do botão MUTE:
A qualquer momento é possível bloquear o som temporariamente pressionando o botão MUTE.
1.
Pressione MUTE para que o som desapareça.
2.
Para desativar mute, pressione o botão MUTE
novamente,
ou simplesmente pressione o botão
VOL ou VOL .
Português-6
Page 41

Ve r as telas
Função Plug & Play
Quando a TV é ligada inicialmente, diversos ajustes básicos são automaticamente realizados em seqüência para o cliente.
As seguintes definições estão disponíveis.
1. Pressione o botão POWER no controle remoto.
2. Selecione o Idioma apropriado pressionando os botões /.
3. Amensagem “Verif. entrada de antena” é exibida ao selecionar “OK”.
4. Pressione o botão ou para selecionar uma fonte de sinal de Vídeo, e pressione o botão ENTER .
5. Pressione o botão ENTER para selecionar “Iniciar”.
6. Pressione o botão ENTER .
7. Pressione o ENTER para confirmar a seleção.
Pressione o botão INFO no controle remoto para exibir o canal atual e o estado de determinadas definições de audio/vídeo.
Os displays de tela desaparecem após cerca de dez segundos.
Pressione o botão mais uma vez ou aguarde aproximadamente 10 segundos e a imagem desaparece automaticamente.
Amensagem “Start Plug & Play” é exibida ao selecionar “OK”.
Pressione o botão
Pressione o botão
Verifique se o cabo da antena está corretamente conectado.
A pesquisa de canais começará e terminará automaticamente.
Após a memorização dos canais disponíveis, o menu “Acert. relóg” aparece.
Pressione o botão ENTER quando desejar para interromper o processo de memorização.
Pressione o botão
Configure “Hora”, “Minuto” ou “am/pm” pressionando o botão
ENTER para confirmar a seleção.
ENTER .
ou para se mover para as “Hora”, “Minuto” ou “am/pm”.
/.
Amensagem “Bom filme.” aparece na tela.
Idioma: Selecione o seu idioma.
Ar/cabo: Selecione o sistema local da operadora de TV a cabo.
Prog. Auto: Selecione a conexão da antena terrestre ou o sistema local da operadora de TV a cabo.
Acert. relóg: Ajusta o horário atual no relógio da TV.
A TV exibe automaticamente todos os canais disponíveis e os armazena na memória.
Este armazenamento leva cerca de dois minutos.
Defina também a hora e os minutos, pressionando os botões numéricos no controle remoto.
Se você quiser reinicializar esse recurso...
1. Pressione o botão MENU para exibir o menu.
Pressione o botão
2. Pressione o botão ou para selecionar “Plug & Play” e pressione o botão ENTER .
3. Dessa maneira, as definições serão alteradas ou redefinidas.
Selecionar a fonte do sinal de vídeo
Antes que o televisor possa começar a memorizar os canais disponíveis, é preciso especificar o tipo de fonte de sinal
ligada ao televisor (ex. uma antena ou um sistema de televisão a cabo).
1. Pressione o botão MENU para exibir o menu.
Pressione o botão
2. Pressione o botão ENTER para selecionar “Ar/Cabo”.
3. Pressione o botão ou para selecionar uma fonte de sinal de Vídeo, e pressione o botão ENTER .
4. Pressione o botão EXIT para sair.
Neste ponto, a fonte do sinal foi selecionada. Prossiga para ("Como armazenar canais automaticamente")
(próxima página).
ou para selecionar “Configurar”, e pressione o botão ENTER .
ou para selecionar “Canal”, e pressione o botão ENTER .
Português-7
Page 42

Como armazenar canais automaticamente
O televisor percorre automaticamente todos os canais disponíveis e grava-os na memória.
Esta operação demora de um a dois minutos.
1. Para selecionar a fonte de vídeo, siga as instruções 1 a 3 de “Selecionar a fonte do sinal de vídeo”,
na página 7.
2. Pressione os botões / para selecionar “Prog. Auto”. Pressione o botão ENTER .
3. Pressione o botão ENTER . O televisor começa a memorizar todos os canais disponíveis.
Pressione o botão ENTER em qualquer momento para interromper o processo de memorização e retornar
ao menu “Canal”.
4. Concluída a memorização de todos os canais, o menu “Canal” reaparece na tela.
5. Pressione o botão EXIT para sair.
Pressione o botão AUTO PROG. no controle remoto.
Como armazenar canais manualmente
É possível armazenar até 100 canais, incluindo aqueles recebidos através das redes de cabo.
1. Utilize os botões numéricos para selecionar diretamente o canal que será adicionado ou apagado.
2. Pressione o botão MENU para exibir o menu.
Pressione o botão
3. Pressione o botão ou para selecionar “Adicionar/Apagar”.
Pressione o botão
4. Pressione o botão ENTER várias vezes para alternar a adição e a exclusão de canais.
5. Pressione o botão CH ou CH para selecionar o canal desejado e repita as etapas acima.
6. Pressione o botão EXIT para sair.
Visualize qualquer canal (incluindo um canal apagado) usando os botões numéricos no controle remoto.
Utilize os botões numéricos para selecionar diretamente o canal que será adicionado ou apagado.
Pressione o botão
ou para selecionar “Canal”, e pressione o botão ENTER .
ENTER .
ADD/DEL no controle remoto.
Sintonia fina de canais
Utilizar a sintonia fina para obter a melhor recepção de um determinado canal.
1. Utilize os botões numéricos para selecionar diretamente o canal que deseja submeter à sintonização fina.
2. Pressione o botão MENU para ver o menu.
3. Pressione os botões / para selecionar “Sintonia fina” e depois pressione o botão ENTER .
4. Pressione os botões / para regular a sintonia fina.
5. Para gravar a programação de sintonia fina na memória do televisor, pressione o botão ENTER .
6. Pressione o botão EXIT para sair.
Pressione os botões
Se não armazenar o canal de sintonização fina na memória, os ajustes não serão salvos.
Canais de sintonização fina que foram salvos são marcados com um asterisco “ * ”
no lado direito do número de canal do anúncio.
Para redefinir a sintonização fina, selecione "Reset" pressionando o botão ou , e pressione o botão ENTER .
/ para selecionar “Canal” e depois pressione o botão ENTER .
Português-8
Page 43

Controle de Imagem
Utilizar as programações de imagem automáticas
O televisor tem quatro programações de imagem automáticas (“Dinâmico”, “Padrão”, “Filme”, e “Personalizado”)
definidas de fábrica.
1. Pressione o botão MENU para ver o menu.
Pressione os botões
2. Pressione o botão ENTER botão para selecionar “Mode”.
3. Pressione o botão ou para selecionar o efeito de imagem desejado.
Pressione o botão
4. Pressione o botão EXIT para sair.
Dinâmico: Seleciona a imagem para alta definição em uma sala clara.
Padrão: Seleciona a imagem para a exibição otimizada em um ambiente normal.
Filme: Seleciona a imagem para a exibição confortável em uma sala escura.
Personalizado: Selecione para ver suas definições favoritas de exibição.
Também é possível pressionar o botão P.MODE no controle remoto para selecionar uma das definições de imagem.
Personalizar a imagem
O seu aparelho possui diversos ajustes que permitem controlar a qualidade da imagem.
1. Pressione o botão MENU para ver o menu.
Pressione os botões
2. Pressione os botões / para selecionar “Personalizado” e depois pressione o botão ENTER .
3. Pressione o botão / para selecionar um item determinado.
Pressione o botão
4. Pressione os botões / para aumentar ou diminuir o valor de uma determinada opção.
Pressione o botão
5. Pressione o botão EXIT para sair.
Contraste: Ajusta a claridade e a escuridão entre objetos e a cor de fundo.
Brilho: Ajusta o brilho da tela inteira.
Nitidez: Ajusta o contorno dos objetos para deixá-lo mais nítidos ou mais imprecisos.
Cor: Ajusta as cores, tornando-as mais claras ou mais escuras.
Matiz: Ajusta a cor dos objetos, tornando-os mais vermelhos ou verdes para ficar com uma aparência mais natural.
Se os ajustes forem alterados, o modo de imagem passará automaticamente para “Personalizado”.
/ para selecionar “Imagem” e depois pressione o botão ENTER .
ENTER .
/ para selecionar “Imagem” e depois pressione o botão ENTER .
ENTER
ENTER
.
.
Ajustar a cor de fundo
Pode-se alterar a cor de toda a tela conforme a preferência.
1. Pressione o botão MENU para ver o menu.
2. Pressione os botões / para selecionar “Ton. cores” e depois prima o botão ENTER .
3.
4. Pressione o botão EXIT para sair.
Frio2: Torna a temperatura das cores mais azul que no menu “Frio1”.
Frio1: Torna os brancos mais azulados.
Normal: Mantém a tonalidade dos brancos.
Quente1: Torna os brancos mais avermelhados.
Quente2: Torna a temperatura das cores mais vermelha que no menu “Quente1”.
Pressione os botões
Pressione o botão
Pressione o botão
ENTER
/ para selecionar “Imagem” e depois pressione o botão ENTER .
ou para selecionar a definição de tonalidade da cor desejada.
.
Português-9
Page 44

Controle de som
Utilizar as programações de som automáticas
É possível selecionar o tipo de efeito sonoro especial a ser usado ao assistir determinado tipo de transmissão.
1. Pressione o botão MENU para ver o menu.
Pressione os botões
2. Pressione o botão ENTER para selecionar “Mode”.
3. Pressione o botão ou para selecionar a definição de som “Padrão” ou “Diálogo”.
Pressione o botão
4. Pressione o botão EXIT para sair.
Padrão: Seleciona o modo de som normal.
Diálogo: Enfatiza as vozes em relação a outros sons.
Também é possível pressionar o botão S.MODE no controle remoto para selecionar a definição de som “Padrão” ou “Diálogo”.
Selecionar uma banda sonora com som multi-canais (MTS)
É possível ouvir estéreo, mono ou um programa de áudio separado; tudo depende do programa que estiver sendo
transmitido. (O SAP é normalmente um programa em língua estrangeira. Por vezes, o SAP tem informações como,
por exemplo, serviços de notícias ou boletins meteorológicos).
1. Pressione o botão MENU para ver o menu.
Pressione os botões
2. Pressione os botões / para selecionar “MTS” e depois pressione o botão ENTER .
3. Pressione o botão ou para selecionar a opção desejada e então pressione o botão ENTER .
4. Pressione o botão EXIT para sair.
Mono: Selecione para canais transmitidos em mono, ou se houver algum problema na recepção do sinal estéreo.
Estéreo: Selecione para canais transmitidos em estéreo.
SAP: Selecione para ouvir o Programa de áudio separado; geralmente, trata-se da tradução de um idioma estrangeiro.
Também é possível pressionar o botão
/ para selecionar “Som” e depois pressione o botão ENTER .
ENTER .
/ para selecionar “Som” e depois pressione o botão ENTER .
MTS no controle remoto para alterar a configuração MTS.
Utilização da função Volume automático
Cada estação de transmissão possui suas próprias condições de sinais, e isso faz com que seja necessário ajustar o volume quando o canal é alterado.
A opção “Volume automático” permite ajustar automaticamente o volume do canal desejado, diminuindo a saída de
som quando o sinal de modulação estiver alto, ou aumentando a saída de som quando o sinal de modulação estiver
baixo.
1. Pressione o botão MENU para ver o menu.
Pressione os botões
2. Pressione os botões / para selecionar “Auto Volume” e depois pressione o botão ENTER .
3. Pressione o botão ou para selecionar “On” ou “Off”.
Pressione o botão
4. Pressione o botão EXIT para sair.
ENTER .
/ para selecionar “Som” e depois pressione o botão ENTER .
Português-10
Page 45

Ajuste de Tempo
Definir o relógio
Definir o temporizador
É possível ajustar o relógio da TV, para que a hora atual seja exibida pressionando-se o botão INFO. Também é
necessário ajustar a hora para usar os timers automáticos para ligar e desligar a TV.
1. Pressione o botão MENU para exibir o menu de tela.
Pressione os botões
/ para selecionar “Configurar” e depois pressione o botão ENTER .
2. Pressione o botão ENTER para selecionar “Tempo”.
3. Pressione o botão ENTER para selecionar “Acert. relóg”.
4. Pressione o botão ou para ajustar “Hora” e pressione o botão para avançar para a próxima etapa.
Defina os outros itens usando o mesmo método acima.
Ao terminar, pressione o botão
ENTER para retornar.
5. Pressione o botão EXIT para sair.
Se o cabo de força for desconectado, será necessário definir novamente no relógio.
Defina também a hora e os minutos, pressionando os botões numéricos no controle remoto.
Definir o temporizador da TV para se desligar na hora predefinida automaticamente.
1. Pressione o botão MENU para exibir o menu de tela.
Pressione os botões
/ para selecionar “Configurar” e depois pressione o botão ENTER .
2. Pressione o botão ENTER para selecionar “Tempo”.
3. Pressione o botão ou para selecionar “Sleep Timer” e depois pressione o botão ENTER .
4. Pressione o botão ou várias vezes até exibir o tempo desejado (Off, 30, 60, 90, 120, 150, 180).
Pressione o botão
ENTER
.
5. Pressione o botão EXIT para sair.
A TV desliga automaticamente quando o timer chegar ao 0.
Você também pode pressionar o botão SLEEP no controle remoto para definir o tempo do sleep.
Programar o temporizador
Ajuste os timers para Ligar/Desligar para que o aparelho:
Seja ligado automaticamente no canal escolhido na hora selecionada.
Seja desligado automaticamente na hora selecionada.
1. Pressione o botão MENU para exibir o menu de tela.
Pressione os botões
2. Pressione o botão ENTER para selecionar “Tempo”.
3. Pressione os botões / para selecionar “Timer On” e depois pressione o botão ENTER .
4. Pressione o botão ou para ajustar “Hora” e pressione o botão para avançar para a próxima etapa.
Defina os outros itens usando o mesmo método acima.
Ao terminar, pressione o botão
5. Pressione os botões / para selecionar “Timer Off” e depois pressione o botão ENTER .
6. Pressione o botão ou para ajustar “Hora” e pressione o botão para avançar para a próxima etapa.
Defina os outros itens usando o mesmo método acima.
Ao terminar, pressione o botão
7. Pressione o botão EXIT para sair.
O relógio deve ser definido (ver acima) antes de definir o timer em Ligar/Desligar.
Defina também a hora e os minutos, pressionando os botões numéricos no controle remoto.
A definição "Ativar" deve estar em "On" para que os timers funcionem.
Desligamento automático: Ao ajustar o timer “Ligado”, sua TV será desligada se você não operar o controle por 3
horas após ter sido ligada com a função “Timer On”.
/ para selecionar “Configurar” e depois pressione o botão ENTER .
ENTER para retornar.
ENTER para retornar.
Português-11
Page 46

Descrição das Funções
Ve r ‘legendas ocultas’ (closed caption)
O televisor decodifica e mostra as ‘legendas ocultas’ transmitidas com certos programas de televisão. Estas ‘legendas
ocultas’ são dirigidas aos deficientes auditivos ou são traduções em língua estrangeira. Como todos os vídeo cassete
gravam o sinal da ‘legenda oculta’ dos programas de televisão, as fitas de vídeo gravadas em casa também fornecem
‘closed captions’. A maioria das cassetes de vídeo pré-gravadas à venda no mercado também fornecem ‘legendas
ocultas’. Procurar o símbolo de ‘closed caption’ no guia de programas e na caixa da fitas de vídeo: .
1. Pressione o botão MENU para exibir o menu de tela.
2. Pressione os botões / para selecionar “Closed Caption” e depois pressione o botão ENTER .
3. Pressione os botões ENTER para selecionar “Closed Caption”.
4. Pressione o botão ou para selecionar o caption como “Off” ou” On”, e pressione o botão ENTER .
5. Dependendo do tipo de transmissão específica, talvez seja necessário fazer alterações em
6. Pressione o botão EXIT para sair.
Closed Caption: Off / On
Mode: Caption/Texto
Canal: 1 / 2
Campo: 1 / 2
Selecionar um idioma do menu
1. Pressione o botão MENU para ver o menu.
2. Pressione os botões / para selecionar “Idioma” e depois pressione o botão ENTER .
3. Pressione o botão ou para selecionar o idioma desejado.
4. Pressione o botão EXIT para sair.
Pressione os botões
/ para selecionar “Configurar” e depois pressione o botão ENTER .
“Canal” e “Campo”.
O recurso Caption não funciona com sinais de DVD e decodificador.
Canais e campos diferentes exibem informações diferentes:
O campo 2 fornece informações adicionais que suplementam as informações no campo 1.
(Por exemplo, o canal 1 pode ter títulos em inglês, ao passo que o canal 2 tem títulos em espanhol).
Pressione o botão CAPTION no controle remoto.
Pressione os botões
Pressione o botão
/ para selecionar “Configurar” e depois pressione o botão ENTER .
ENTER .
Programar o modo tela azul
Se não for recebido sinal ou se o sinal for muito fraco, uma tela azul substitui automaticamente o fundo da imagem
com ruído. Para continuar vendo uma imagem de má qualidade, é preciso programar o modo “Tela Azul” para “Off”.
1. Pressione o botão MENU para exibir o menu de tela.
Pressione os botões
2. Pressione os botões ou para selecionar “Tela Azul” e depois pressione o botão ENTER .
3. Pressione o botão ou para selecionar “On” ou "Off". Pressione o botão ENTER .
4. Pressione o botão EXIT para sair.
ou para selecionar “Configurar” e depois pressione o botão ENTER .
Português-12
Page 47

Seleção da fonte
É possível selecionar fontes externas conectadas às tomadas de entrada da sua TV.
1. Pressione o botão MENU para exibir o menu de tela.
Pressione o botão
2. Pressione o botão ENTER para selecionar “Lista de fonte”.
3. Pressione o botão ou para selecionar a fonte de entrada, e depois pressione ENTER .
Só será possível selecionar uma fonte se esta estiver conectada à sua TV.
Também é possível pressionar o botão SOURCE no controle remoto para escolher a fonte de entrada.
ENTER
Como editar o nome da fonte de entrada
Nomeie o dispositivo de entrada conectado às respectivas tomadas, para facilitar a seleção da fonte de entrada.
1. Pressione o botão MENU para ver o menu.
Pressione o botão
2. Pressione o botão ou “Editar Nome” e depois pressione o botão ENTER .
3. Pressione o botão ou para selecionar um dispositivo de entrada desejado,
e pressione o botão
4. Pressione o botão ou várias vezes até que o nome da fonte adequada seja exibido.
Depois de ter selecionado a fonte, pressione o botão
As seguintes opções estão disponíveis:
---- - VCR - DVD - Sinal Cabo - Sinal HD - Sinal Satélite - Receiver AV - Receiver DVD - Jogo Filmadora - DVD Combo - DHR - PC
DHR: Grav.DVD HDD
5. Pressione o botão EXIT para sair.
ENTER .
ENTER .
para selecionar “Entrada”.
ENTER .
Exibição do PC
Como configurar o software do PC (baseado no Windows XP)
As programações de visualização do Windows de um computador normal são apresentadas abaixo.
No entanto, é provável que as telas que aparecem no PC sejam diferentes; tudo depende da versão do Windows
e da placa de vídeo. Mesmo que as telas pareçam diferentes, são aplicadas, na maioria dos casos, as mesmas
informações de configuração básicas. (Se isso não acontecer, consultar o fabricante do computador ou um
agente Samsung).
1. Primeiro, clicar em “Control Panel” no menu Iniciar do Windows.
2. Quando aparecer a tela do painel de controle, clicar em “Appearance and Themes” aparece uma
caixa de diálogo
3. Quando aparecer a tela do painel de controle, clicar em “Display” aparece uma caixa de diálogo.
4. Ir para a guia “Settings” na caixa de diálogo.
A configuração correto do tamanho (resolução):
Otimizado- LN15S51BP: 1024 x 768 / LN20S51BP: 800 x 600
Se existir uma opção de freqüência vertical na caixa de diálogo de programações de visualização,
o valor corret é “60” ou “60 Hz”. Caso contrário, clicar em “OK” e sair da caixa de diálogo.
.
Português-13
Page 48

Configuração do PC
Bloq. Imagem:
A regulação da qualidade da imagem permite remover ou reduzir o ruído da imagem.
Se a interferência não for removida somente com a Sintonização Fina, então ajuste a freqüência o melhor
possível (básico) e efetue novamente a sintonização fina.
Depois de reduzir o ruído, voltar a regular a imagem de forma a ficar alinhada no centro da tela.
1. Predefinição: Pressione o botão SOURCE para selecionar o modo PC.
2. Pressione o botão MENU para exibir o menu.
3. Pressione o botão ou para selecionar “PC”, e pressione o botão ENTER .
4. Pressione o botão ENTER para selecionar “Bloq. Imagem”.
5. Pressione o botão ou
6. Pressione o botão ou
7. Pressione o botão EXIT para sair.
Posição:
Ajuste o posicionamento de tela do PC se não se encaixar na tela da TV.
1. Predefinição: Pressione o botão SOURCE para selecionar o modo PC.
2. Pressione o botão MENU para exibir o menu.
3. Pressione o botão ou para selecionar “PC”, e pressione o botão ENTER .
4. Pressione o botão ou para selecionar “Posição”, e pressione o botão ENTER .
5. Pressione o botão ou para ajustar a Posição-V.
6. Pressione o botão EXIT para sair.
Reset Imagem:
É possível retornar todos os ajustes de imagem aos valores definidos de fábrica.
1. Predefinição: Pressione o botão SOURCE para selecionar o modo PC.
2. Pressione o botão MENU para exibir o menu.
3. Pressione o botão ou para selecionar “PC”, e pressione o botão ENTER .
4. Pressione o botão ou para selecionar “Reset Imagem”, e pressione o botão ENTER .
5. Pressione o botão EXIT para sair.
Auto Ajuste:
O ajuste automático permite configurar a TV para ajustar-se automaticamente à entrada de sinal de vídeo do PC.
Os valores de ajuste básico, fino e posição são ajustados automaticamente.
1. Predefinição: Pressione o botão SOURCE para selecionar o modo PC.
2. Pressione o botão MENU para exibir o menu.
3. Pressione o botão ou para selecionar “PC”, e pressione o botão ENTER .
4. Pressione o botão ou para selecionar “Auto Ajuste”, e pressione o botão ENTER .
5. Pressione o botão EXIT para sair.
Pressione o botão
ENTER .
botão
ou a imagem ficar sem nitidez.
Pressione o botão ENTER .
Pressione o botão
Pressione o botão
Pressione o botão
Pressione o botão
Pressione o botão
ou para selecionar “Configurar”, e pressione o botão ENTER .
para selecionar “Grosso” ou “Ajuste fino” e depois pressione o
para ajustar a qualidade da tela. É possível aparecer faixas verticais
ou para selecionar “Configurar”, e pressione o botão ENTER .
ou para ajustar a Posição-H.
ENTER .
ou para selecionar “Configurar”, e pressione o botão ENTER .
ou para selecionar “Configurar”, e pressione o botão ENTER .
Português-14
Page 49

Resolução de problemas
Identificação de problemas
Se o televisor parecer estar com problemas consultar antes esta lista de possíveis problemas e soluções.
Caso nada disto funcione, consultar o centro de assistência Samsung mais próximo.
Problema
Má qualidade de imagem
Má qualidade de som.
Sem imagem ou som.
Nenhum som ou som baixo
demais no volume máximo.
Aimagem desfila verticalmente.
O televisor não está funcionando
devidamente.
O controle remoto não
funciona
Mensagem
“Verif. cabo de sinal”.
Mensagem
“Função Não Disponível”.
Aimagem está demasiadamente
clara ou escura.
As barras horizontais parecem
estar tremendo na imagem.
O TFT LCD usa um painel com sub-pixels
produção. Portanto, é possível ocorrer alguns pixels claros e escuros na tela.
Estes pixels não causam impacto no desempenho do produto.
Solução possível
Tentar outro canal.
Regular a antena.
Verificar todas as ligações de cabos.
Tentar outro canal.
Regular a antena.
Tentar outro canal.
Pressione o botão SOURCE.
Verificar se o televisor está ligado.
Verificar as ligações da antena.
Primeiro, Verificar o volume das unidades ligadas à TV
(receptor de difusão digital, DTV, DVD, receptor de difusão a cabo, vídeo, etc.).
Em seguida, ajustar o volume da TV em conformidade.
Verificar todas as ligações de cabos.
Desligar o televisor da tomada durante 30 segundos e liga-lo novamente.
Substituir as pilhas do controle remoto.
Limpar a parte superior do controle remoto (janela de transmissão).
Verificar os terminais das pilhas.
Verificar se de que o cabo de sinal está firmemente ligado às entradas do computador.
Verificar as resoluções máximas e a freqüência do transformador de vídeo.
Compare estes valores com os dados dos modos de exibição.
Regular o brilho e o contraste.
Regular a função Básico e depois a função Sintonia Fina.
(LN15S51BP - 2.359.296/LN20S51BP- 1.440.000)
que utiliza tecnologia sofisticada para
Português-15
Page 50

Apêndice
Especificações
Modelo
Painel
Tamanho
Tamanho da tela
Freqüência
Horizontal
Vertical
Resolução do PC
Otimizado
Fonte de alimentação
Consumo da tela
Cores Normais
De energia
Dimensões (LxPxA)
Corpo
Com suporte
Peso
Com suporte
Considerações ambientais
Temperatura funcionamento
Umidade funcionamento
Temperatura armazenamento
Umidade armazenamento
Modos de tela
LN15S51BP
15”
pol diagonal
304,1 (H) x 228,1 (V) mm
(11
,
97 (H) x 8,98 (V) inches)
30 ~ 69 kHz
50 ~ 75 Hz
1024 x 768 @ 60 Hz
AC100-240V~60Hz
40 W
<3 W
,
0 x 82,0 x 333,0 mm
496
(19
,
52 x 3,22 x 13,11 inches)
496
,
0 x 170,0 x 359,0 mm
(19
,
52 x 6,69 x 14,13 inches)
,
0 kg (8,81 lbs)
4
10 °C a 40 °C (50 °F a 104 °F)
10 % a 80 %, não-condensação
-20 °C a 45 °C (-4 °F a 113 °F)
5 % a 95 %, não-condensação
LN20S51BP
20” pol diagonal
408,0 (H) x 306,0 (V) mm
(16,06 (H) x 12,05 (V) inches)
28 ~ 47 kHz
50 ~ 75 Hz
800 x 600 @ 60 Hz
AC100-240V~60Hz
55 W
<3 W
607,0 x 94,0 x 436,0 mm
(23,89 x 3,70 x 17,16 inches)
607,0 x 215,0 x 464,0 mm
(23,89 x 8,46 x 18,26 inches)
7,8 kg (17,19 lbs)
10 °C a 40 °C (50 °F a 104 °F)
10 % a 80 %, não-condensação
-20 °C a 45 °C (-4 °F a 113 °F)
5 % a 95 %, não-condensação
A posição e o tamanho da tela variam dependendo do tipo e da resolução do monitor do PC.
As resoluções fornecidas na tabela são as recomendadas. (Todas as resoluções entre os limites suportados são compatíveis)
Mode
VGA
LN15S51BP
LN20S51BP
SVGA
LN15S51BP
Resolução
720X400
640X480
640X480
800X600
800X600
Freqüência
horizontal (kHz)
31.469
31.469
37.500
46.875
37.879
Freqüência
horária em pixels (Hz)
70.087
59.940
75.000
75.000
60.317
Polaridade
Sinc (MHz)
28.322
25.175
31.500
49.500
40.000
LN20S51BP
XGA
LN15S51BP
O modo entrelaçado não é compatível.
O aparelho pode operar de forma anormal se for selecionado um formato de vídeo fora do padrão.
1024X768
1024X768
48.363
60.023
Português-16
60.004
75.029
65.000
78.750
Sync
Polarity (H/V)
- / +
- / -
- / -
+ / +
+ / +
- / -
+ / +
 Loading...