

Page 1
LCD TV
LE32R8
Contact SAMSUNG WORLDWIDE
If you have any questions or comments relating to Samsung products,
please contact the SAMSUNG customer care centre.
Ota yhteyttä Samsungiin
Jos sinulla on kysymyksiä tai kommentteja koskien Samsung tuotteita
voitte ottaa yhtyettä Samsung tukeen.
Kontakta SAMSUNG
Om du har några frågor eller synpunkter om Samsungs produkter,
är du välkommen att kontakta Samsung Support.
Country
BELGIUM 02 201 2418 www.samsung.com/be
CZECH REPUBLIC 844 000 844 www.samsung.com/cz
DENMARK 70 70 19 70 www.samsung.com/dk
FINLAND 030-6227 515 www.samsung.com/fi
FRANCE 3260 SAMSUNG(7267864) (€ 0,15/min) www.samsung.com/fr
GERMANY 01805-121213 (€ 0,14/Min) www.samsung.de
HUNGARY 06-80-SAMSUNG (7267864) www.samsung.com/hu
ITALIA 800 SAMSUNG(7267864) www.samsung.com/it
LUXEMBURG 0032 (0)2 201 24 18 www.samsung.lu
NETHERLANDS 0900 20 200 88 (€ 0,10/Min) www.samsung.com/nl
NORWAY 815-56 480 www.samsung.com/no
POLAND 0 801 801 881 www.samsung.com/pl
PORTUGAL 80 8 200 128 www.samsung.com/pt
REPUBLIC OF IRELAND 0818 717 100 www.samsung.com/uk
SLOVAKIA 0800-SAMSUNG (7267864) www.samsung.com/sk
SPAIN 902 10 11 30 www.samsung.com/es
SWEDEN 0771-400 200 www.samsung.com/se
SWITZERLAND 0800-7267864 www.samsung.com/ch
U.K 0870 SAMSUNG (7267864) www.samsung.com/uk
ESTONIA 800-7267 www.samsung.ee
LATVIA 800-7267 www.samsung.com/lv
LITHUANIA 8-800-77777 www.samsung.lt
KAZAKHSTAN 8 800 080 1188 www.samsung.kz
RUSSIA 8-800-200-0400 www.samsung.ru
UKRAINE 8-800-502-0000 www.samsung.com/ur
UZBEKISTAN 140-1234 www.samsung.uz
Customer Care Centre
“Distributor pro Českou republiku:
Samsung Zrt., česka organizační složka Vyskočilova 4, 14000 Praha 4”
Web Site
Owner’s Instructions
Before operating the unit,
please read this manual thoroughly,
and retain it for future reference.
ON-SCREEN MENUS
PC DISPLAY
LE37R8
LE40R8
BN68-01169K-00
PICTURE IN PICTURE (PIP)
TELETEXT
This product is only applicable in Finland. Its quality is not guaranteed in other countries.
Tämä tuote soveltuu vain Suomessa. Sen laatua ei taata muissa maissa
Den här produkten är endast tillämplig i Finland. Dess kvalitet garanteras inte i andra länder.
Register your product at www.samsung.com/global/register
Record your Model and Serial number here for future reference.
▪ Model _______________ ▪ Serial No. _______________
Page 2

Precautions When Displaying a Still Image
A still image may cause permanent damage to the TV screen.
• Do not display a still image on the LCD panel for more than 2 hours as it can cause screen image retention.
This image retention is also known as "screen burn".
To avoid such image retention, reduce the degree of brightness and contrast of the screen when displaying a still image.
• Watching the LCD TV in 4:3 format for a long period of time may leave traces of borders displayed on the left, right and center of
• Displaying still images from Video games and PC for longer than a certain period of time may produce partial after-images.
To prevent this effect, reduce the ‘brightness’ and ‘contrast’ when displaying still images.
the screen caused by the difference of light emission on the screen. Playing a DVD or a game console may cause a similar effect
to the screen. Damages caused by the above effect are not covered by the Warranty.
© 2007 Samsung Electronics Co., Ltd. All rights reserved.
Page 3

Contents
CONNECTING AND PREPARING YOUR TV
List of Parts ........................................................ 3
Installing the Stand ............................................. 3
Installing the Wall Mount Kit ............................... 3
Viewing the Control Panel .................................. 4
Viewing the Connection Panel ........................... 5
Viewing the Remote Control............................... 7
Installing Batteries in the Remote Control .......... 8
Switching On and Off ......................................... 8
Placing Your Television in Standby Mode........... 8
Plug & Play ......................................................... 9
SETTING THE SOUND
Changing the Sound Standard ......................... 22
Adjusting the Sound Settings ........................... 23
Setting the TruSurround XT (SRS TS XT) ........ 23
Connecting Headphones .................................. 24
Selecting the Sound Mode ............................... 24
Adjusting the Volume Automatically ................. 24
Selecting the Internal Mute .............................. 25
Listening to the Sound of the Sub Picture ........ 25
Resetting the Sound Settings to the Factory
Defaults ............................................................ 26
English
SETTING THE CHANNELS
Storing Channels Automatically ....................... 10
Storing Channels Manually ...............................11
Setting the Channel Lists ................................. 12
Activating the Child Lock .................................. 12
Sorting the Stored Channels ............................ 13
Assigning Channels Names ............................. 13
Fine Tuning Channel Reception ....................... 14
SETTING THE PICTURE
Changing the Picture Standard ........................ 15
Adjusting the Custom Picture ........................... 15
Changing the Colour Tone................................ 16
Activating Backlight .......................................... 16
Conguring Detailed Settings on the Picture ... 17
Changing the Picture Size ................................ 18
Freezing the Current Picture ............................ 19
Selecting the Screen Mode .............................. 19
Resetting the Picture Settings to the
Factory Defaults ............................................... 19
Digital NR / Active Colour / DNIe /
Movie Plus ....................................................... 20
Viewing the Picture In Picture (PIP) ................. 21
HDMI Black Level ............................................. 22
SETTING THE TIME
Setting and Displaying the Current Time .......... 26
Setting the Sleep Timer .................................... 27
Switching the Television On and Off
Automatically .................................................... 27
FUNCTION DESCRIPTION
Choosing Your Language ................................. 28
Using Game Mode ........................................... 28
Setting the Blue Screen Mode / Selecting the
Melody ............................................................. 29
Setting the Home Theatre PC .......................... 29
Setting the Light Effect ..................................... 30
Using the Energy Saving Feature .................... 30
Selecting the Source ........................................ 31
Editing the Input Source Names ...................... 31
English - 1
Page 4

USING THE DTV FEATURE
Previewing the DTV Menu System .................. 32
Updating the Channel List Automatically .......... 33
Updating the Channel List Manually ................ 33
Editing Your Favourite Channels ...................... 34
Selecting Channel List ..................................... 36
Displaying Programme Information .................. 36
Viewing the EPG
(Electronic Programme Guide) Information ...... 37
Using the Scheduled List ................................. 38
Setting the Default Guide ................................. 38
Viewing All Channels and
Favourite Channels .......................................... 39
Adjusting the Menu Translucency .................... 40
Setting up the Parental Lock ............................ 40
Setting the Subtitle ........................................... 41
Setting the Subtitle Mode ................................. 41
Selecting the Audio Format .............................. 41
Selecting the Digital Text (UK only) .................. 42
Selecting the Time Zone (Spain only) .............. 42
Viewing Product Information ............................ 42
Checking the Signal Information ...................... 43
Upgrading the Software ................................... 43
Viewing Common Interface .............................. 44
Selecting the CI (Common Interface) Menu ..... 44
Resetting .......................................................... 45
Selecting the Preferred Language
(Audio, Subtitle or Teletext) .............................. 45
Preference ........................................................ 46
USING THE TELETEXT FEATURE
Teletext Decoder .............................................. 46
Displaying the Teletext Information .................. 47
Selecting a Specic Teletext Page ................... 47
Using Fastext to Select a Teletext Page........... 48
Setting Up Your Remote Control ...................... 48
Remote Control Codes ..................................... 49
SETTING THE PC
Setting up Your PC Software
(Based on Windows XP) .................................. 52
Display Modes .................................................. 52
Setting the PC .................................................. 53
Wall-Mount Adjustment (LE40R8)
(Sold separately) .............................................. 54
ABOUT ANYNET
What is Anynet+? ............................................ 55
Connecting Anynet+ Devices ........................... 55
Setting Up Anynet+ .......................................... 56
Scanning and Switching between Anynet+
Devices ............................................................ 56
Recording ......................................................... 57
Listening through a Receiver ........................... 58
Check Points before Requesting Service ......... 58
+
RECOMMENDATIONS FOR USE
Using the Anti-Theft Kensington Lock .............. 59
Troubleshooting: Before Contacting Service
Personnel ......................................................... 59
Technical and Environmental Specications ... 60
Symbol Press Important Note One-Touch
English - 2
Button
Page 5
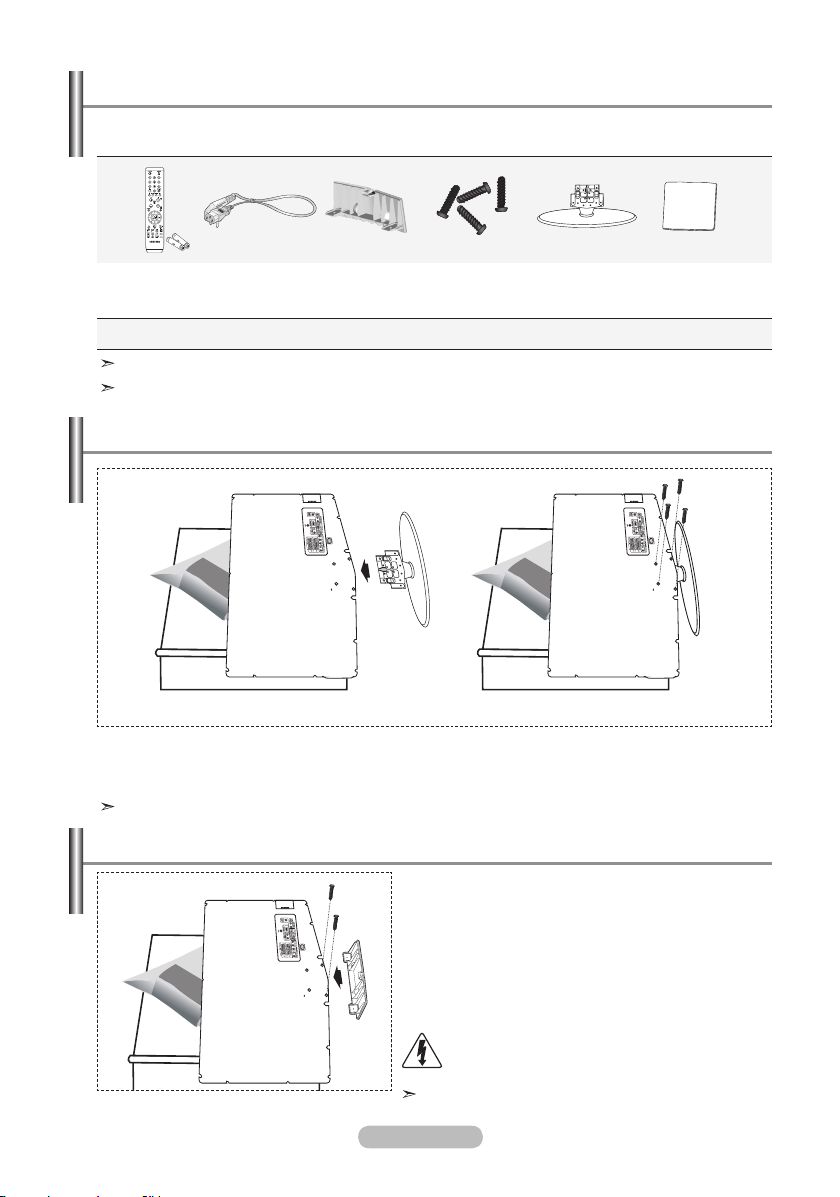
List of Parts
Please make sure the following items are included with your LCD TV.
If any items are missing, contact your dealer.
M4 X L16
Remote Control
& Batteries
(AAA x 2)
Owner’s Instructions
Warranty card / Safety Guide /
The stand and stand screw may not be included depending on the model.
Power Cord Cover-Bottom
Warranty card
Registration Cards (Not available in all locations)
Stand Screw
X 4
Safety Guide
Installing the Stand
Stand Cleaning Cloth
Registration Cards
< 2 >
1. Place the TV faced down on a soft cloth or cushion on a table.
2. Put the stand into the hole at the bottom of the TV.
3.
Insert screw into the hole indicated and tighten.
The stand is installed for models with the screen size of 37 inch and above.
Installing the Wall Mount Kit
Wall mount items (sold separately) allow you to mount
the TV on the wall.
For detailed information on installing the wall mount,
see the instructions provided with the Wall Mount items.
Contact a technician for assistance when installing the
wall mounted bracket.
Samsung Electronics is not responsible for any damage
to the product or injury to yourself or others
if you elect to install the TV on your own.
Do not install your Wall Mount Kit while your TV
is turned on. It may result in personal injury due
to electric shock
Remove the stand and cover the bottom hole with a
cap and fasten with two screws.
English - 3
< 3 >
Page 6
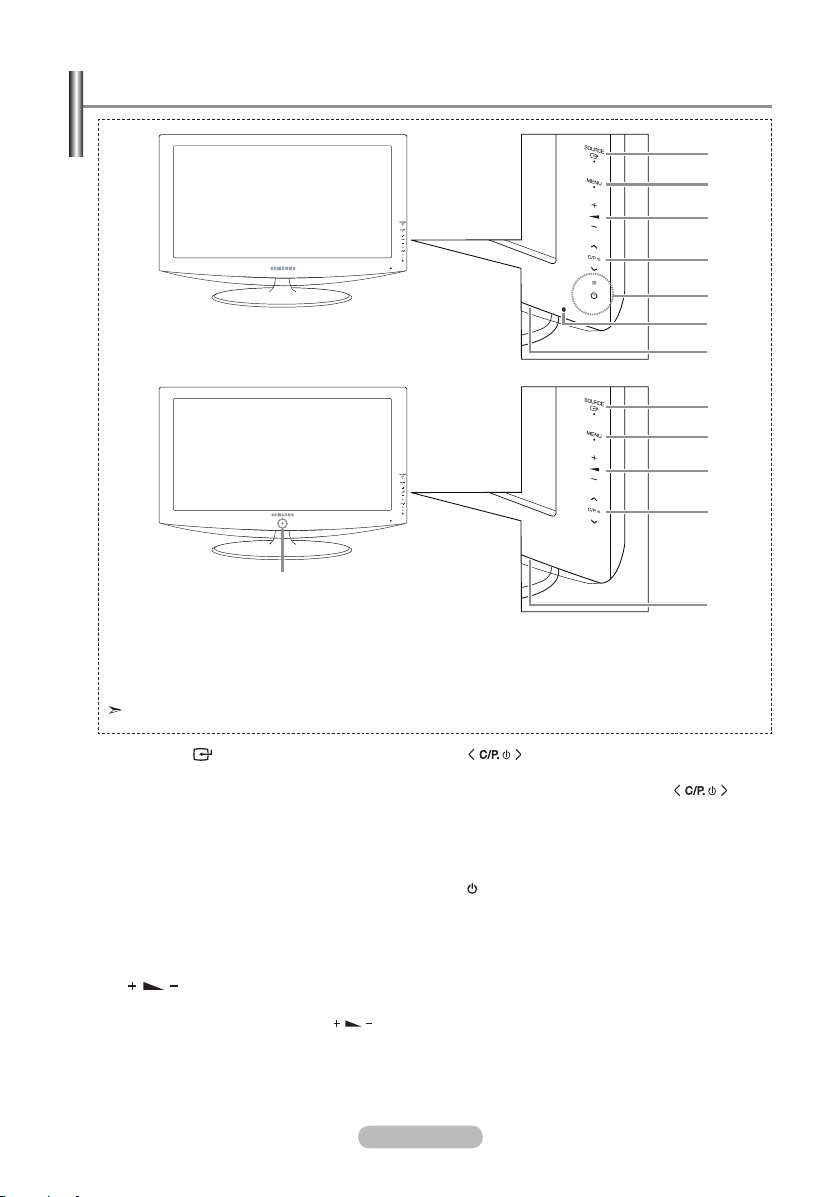
Viewing the Control Panel
[LE32R86, LE37R86, LE40R86,
LE32R88, LE37R88, LE40R88]
5,6
[LE32R87, LE37R87, LE40R87,
LE32R89, LE37R89, LE40R89]
1
2
3
4
5
6
7
1
2
3
4
7
Front Panel buttons
Touch the right side of
each button to operate.
The product colour and shape may vary depending on the model.
1 SOURCE
Toggles between all the available input
sources (TV, Ext.1, Ext.2, AV, S-Video,
Component, PC, HDMI1, HDMI2, HDMI3,
DTV). In the on-screen menu, use this button
as you use the ENTER/OK button on the
remote control.
2 MENU
Press to see an on-screen menu of your TV’s
features.
In case of DTV mode, the DTV menu
appears.
3
Press to decrease or increase the volume.
In the on-screen menu, use the
buttons as you use the and buttons on
the remote control.
4
Press to change channels.
In the on-screen menu, use the
buttons as you use the 5 and 6 buttons on
the remote control.
(Without the Remote Control, you can turn on
the TV by using the Channel buttons.)
5 (Power)
Press to turn the TV on and off.
Power Indicator
Blinks and turns off when the power is on and
lights up in stand-by mode.
6 Remote Control Sensor
Aim the remote control towards this spot on
the TV.
7 Speakers
English - 4
Page 7
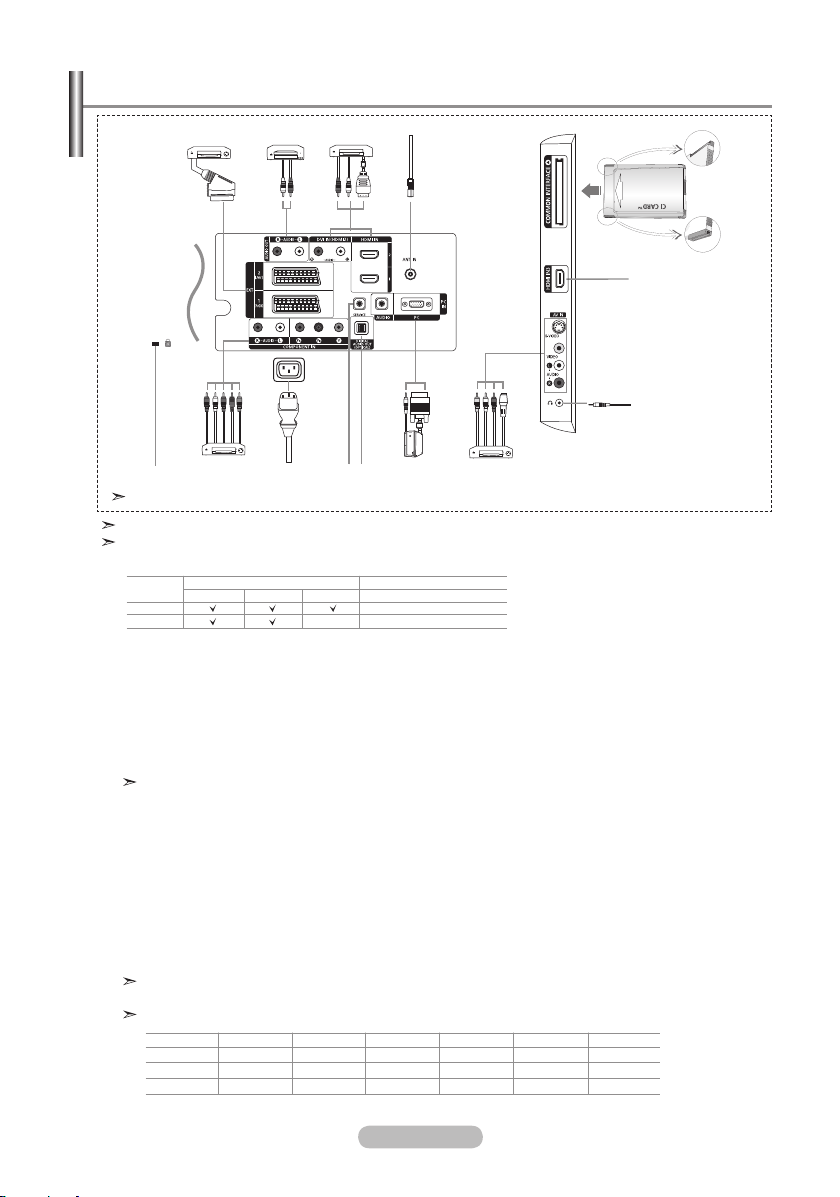
Viewing the Connection Panel
1 2 3 4
5
3
6
Power Input
7890!@
The product colour and shape may vary depending on the model.
Whenever you connect an external device to your TV, make sure that power on the unit is turned off.
When connecting an external device, match the colour of the connection terminal to the cable.
1 Connecting Set-Top Box, VCR or DVD
Connector
EXT 1
EXT 2
Video
Input
Audio (L/R)
RGB
Output
Video + Audio (L/R)
Only TV or DTV output is available.
Output you can choose.
-Inputs or outputs for external devices, such as VCR, DVD, video game device or video disc players.
2 Connecting AUDIO
- Connect RCA audio cables to "R - AUDIO - L" on the rear of your set and the other ends to
corresponding audio in connectors on the Amplifier or DVD Home Theater.
3 HDMI IN 1,HDMI IN 2, HDMI IN 3
- Supports connections between HDMI-connection-enabled AV devices (Set-Top Boxes, DVD
players)
- No additional Audio connection is needed for an HDMI to HDMI connection.
What is HDMI?
- “High Definition Multimedia interface” allows the transmission of high definition digital video data
and multiple channels of digital audio (5. 1 channels).
- The HDMI/DVI terminal supports DVI connection to an extended device with the appropriate cable
(not supplied). The difference between HDMI and DVI is that the HDMI device is smaller in size,
has the HDCP (High Bandwidth Digital Copy Protection) coding feature installed, and supports
multi - channel digital audio.
DVI IN (HDMI 2) (AUDIO R/L)
- When connecting this product via HDMI or DVI to a Set Top Box, DVD Player or Games Console
etc, make sure that it has been set to a compatible video output mode as shown in the table
below. Failure to observe this may result in picture distortion, image breakup or no picture.
- When using an HDMI/DVI cable connection, it is only possible from the HDMI 2 terminal.
You should use the DVI-to-HDMI cable or DVI-HDMI Adapter for the connection, and the
“R - AUDIO - L” terminal on DVI for sound output.
Supported modes for HDMI/DVI and Component
HDMI/DVI 50Hz
HDMI/DVI 60Hz
Component
480i
O
X
X
480p
X
O
O
576i
O
X
X
576p
O
X
O
720p
O
O
O
1080i
O
O
O
English - 5
Page 8

4 Connecting an Aerial or Cable Television Network
To view television channels correctly, a signal must be received by the set from one of the following
sources:
- An outdoor aerial / A cable television network / A satellite network
5 Connecting CI (Common Interface) CARD
- When not inserting "CI CARD" in some channels,"Scrambled Signal" is displayed on the screen.
- The pairing information containing a telephone number, CI CARD ID, Host ID and other information
will be displayed in about 2~3 minutes. If an error message is displayed, please contact your
service provider.
- When the channel information configuration has finished, the message "Updating Completed" is
displayed, indicating that the channel list is now updated.
You must obtain a CI CARD from a local cable service provider.
Remove the CI CARD by carefully pulling it out with your hands since dropping the CI CARD
may cause damage to it.
Insert the CI-Card in the direction marked on it.
7 Connecting External A/V Devices
- Connect RCA or S-VIDEO cable to an appropriate external A/V device such as VCR, DVD or
Camcorder.
- Connect RCA audio cables to "R - AUDIO - L" on the rear of your set and the other ends to corre
sponding audio out connectors on the A/V device.
- Headphone may be connected to the headphone output (
6) on the rear of your set. While the
head phone is connected, the sound from the built-in speakers will be disabled.
8 Connecting Computer
- Connect the D- Sub cable (optional) to "PC (PC IN)" on the rear of your set and the other end to
the Video Card of your computer.
- Connect the stereo audio cable (optional) to "AUDIO (PC IN)" on the rear of your set and the other
end to "Audio Out" of the sound card on your computer.
9 DIGITAL AUDIO OUT (OPTICAL)
- Connect to a Digital Audio Component.
0 SERVICE
- Service connection for qualified service engineer.
! Connecting Component Devices (DTV/DVD)
- Connect component video cables (optional) to component connector ("P
your set and the other ends to corresponding component video out connectors on the DTV or DVD.
", "PB", "Y") on the rear of
R
- If you wish to connect both the Set-Top Box and DTV (or DVD), you should connect the Set-Top Box
to the DTV (or DVD) and connect the DTV (or DVD) to component connector ("PR", "PB", "Y") on your
set.
- The P
, PB and Y connectors on your component devices (DTV or DVD) are sometimes labeled Y,
R
B-Y and R-Y or Y, Cb and Cr.
- Connect RCA audio cables (optional) to "R - AUDIO - L" on the rear of your set and the other ends
to corresponding audio out connectors on the DTV or DVD.
- This LCD TV displays its optimum picture resolution in 720p mode.
- This LCD TV displays its maximum picture resolution in 1080i mode.
@ Kensington Lock
- The Kensington lock (optional) is a device used to physically fix the system when used in a public
place.
- If you want to use a locking device, contact the dealer where you purchased the TV.
- The place of the Kensington Lock may be different depending on its model.
English - 6
Page 9
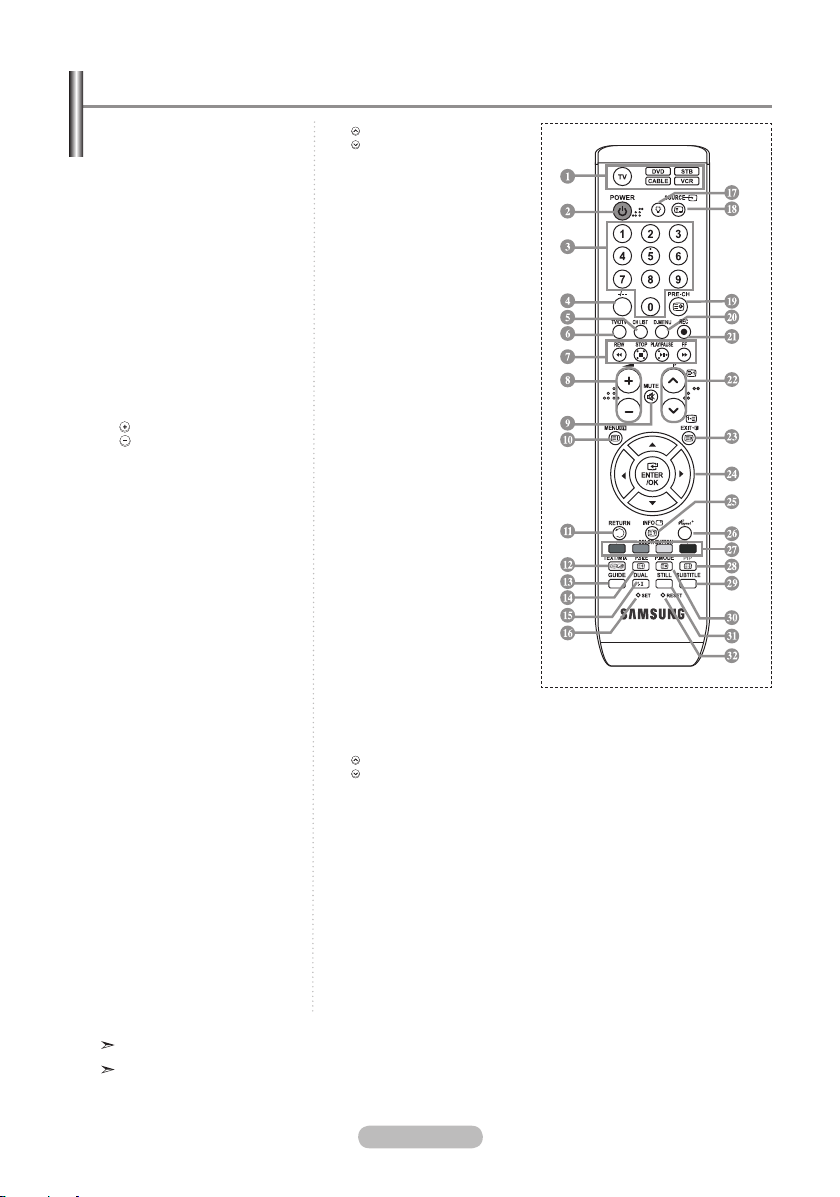
Viewing the Remote Control
1 Selects a target device to be
controlled by the Samsung
remote control (TV, DVD,
STB, CABLE, VCR)
(Refer to page 49~51)
2 Television Standby button
3 Number buttons for direct
channel access
4
One/Two-digit channel
selection
5 It display "Channel List"
on the screen.
6 Selects the TV and DTV
mode directly
7 VCR/DVD Functions
Rewind, Stop, Play/Pause,
Fast/Forward
8 Volume increase
Volume decrease
9 Temporary sound switch-off
0 Menu display and
change confirmation
! Returns to the previous
menu
# Electronic Program Guide
(EPG) display
$ Picture size selection
% Sound effect selection
^
Adjusts 5 separate devices
- TV, DVD, STB, CABLE, or
VCR
.
& When pressing this button, a
number of buttons on the
remote control (e.g. Selects
a target device, volume,
channel buttons) light up
for a few seconds and then
turn off to save power. This
function is to conveniently use
the remote control at night or
when dark.
* Available source selection
( Previous channel
) DTV menu display
a Records for Live
Broadcasting
(Anynet+ function only)
(Refer to page 57)
b P : Next channel
P
: Previous channel
c Exit the OSD
d Control the cursor in the
menu
e Use to see information on
the current broadcast
f Runs the Anynet view
functions and sets up Anynet
devices.
g Colour buttons :
Press to add or delete
channels and to store
channels to the favorite
channel list in the “Channel
List” menu.
h Picture-In-Picture On / Off
i Digital subtitle display
j Picture effect selection
k Picture freeze
l When your remote does not
work, change the batteries
and press the "RESET"
button for 2-3 seconds before
use.
Teletext Functions
6 Exit from the teletext display
0 Teletext index
@ Alternately select Teletext,
Double, or Mix.
$ Teletext size selection
* Teletext mode selection
(LIST/FLOF)
( Teletext sub page
b P : Teletext next page
P
: Teletext previous page
c Teletext cancel
e Teletext reveal
g Fastext topic selection
h Teletext hold
j Teletext store
The performance of the remote control may be affected by bright light.
This is a special remote control for the visually impaired, and has Braille points on the Power,
Channel, STOP, PLAY/PAUSE and Volume buttons.
English - 7
Page 10
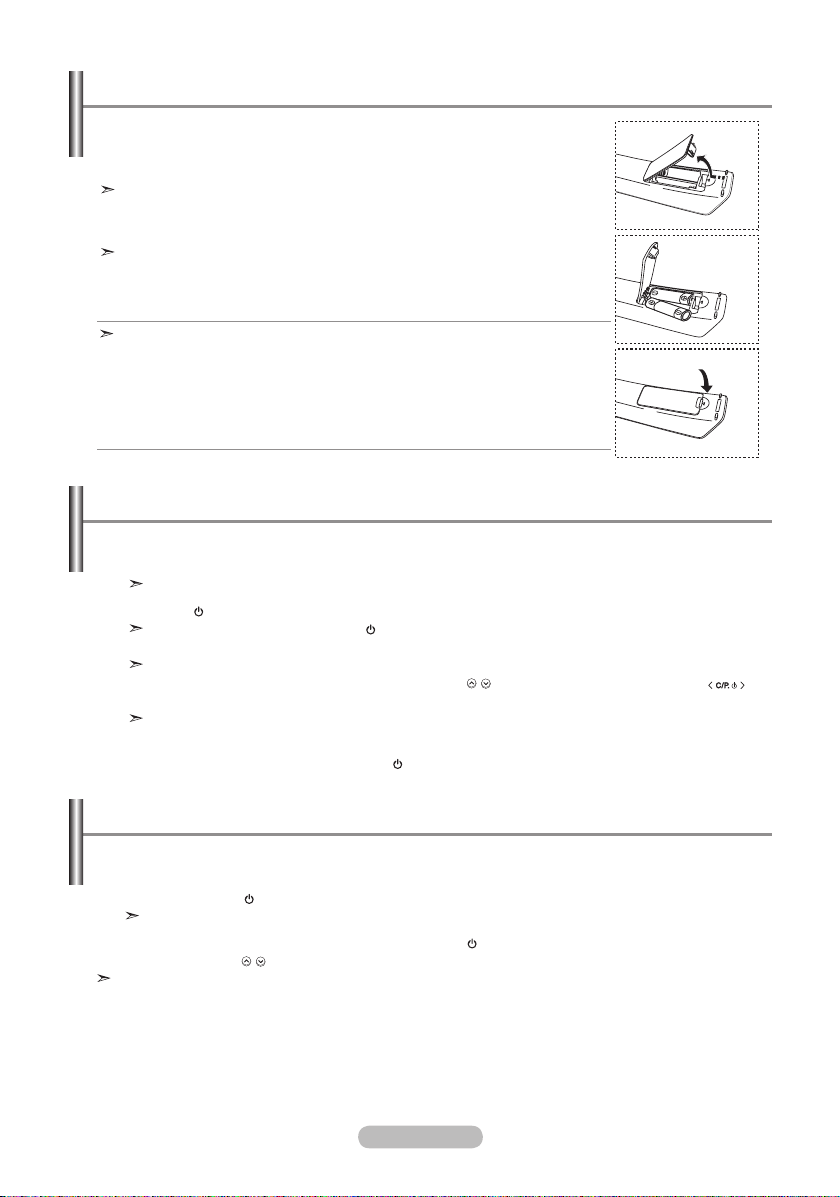
Installing Batteries in the Remote Control
1. Lift the cover at the back of the remote control upward as shown in the
figure.
2. Install two AAA size batteries.
Make sure to match the "+" and "–" ends of the batteries with the
diagram inside the compartment.
3. Replace the cover.
Remove the batteries and store them in a cool, dry place if you won’t be
using the remote control for a long time. The remote control can be used
up to about 23 feet from the TV.
(Assuming typical TV usage, the batteries last for about one year.)
If the remote control doesn’t work, check the following:
1. Is the TV power on?
2. Are the plus and minus ends of the batteries reversed?
3. Are the batteries drained?
4. Is there a power outage, or is the power cord unplugged?
5. Is there a special fluorescent light or neon sign nearby?
Switching On and Off
The mains lead is attached to the rear of your set.
1. Plug the mains lead into an appropriate socket.
The standby indicator lights up on the front of the set.
2. Press the button on the front of the set.
You also can press the POWER button or the TV/DTV button on the remote control to turn
the TV on.
The programme that you were watching last is reselected automatically.
3. Press the numeric button (0~9) or channel up/down ( / ) button on the remote control or
button on the right side of the set.
When you switch the set on for the very first time, you will be asked to choose language in
which the menus are to be displayed.
4. To switch your set off, press the POWER
button again.
Placing Your Television in Standby Mode
Your set can be placed in standby mode in order to reduce the power consumption. The standby
mode can be useful when you wish to interrupt viewing temporarily (during a meal, for example).
1. Press the POWER button on the remote control.
The screen is turned off and a red standby indicator appears on the front of your set.
2. To switch your set back on, simply press the POWER , numeric buttons (0~9), TV/DTV button or
channel up/down ( / ) button again.
Do not leave your set in standby mode for long periods of time (when you are away on holiday, for
example).
It is best to unplug the set from the mains and aerial.
English - 8
Page 11
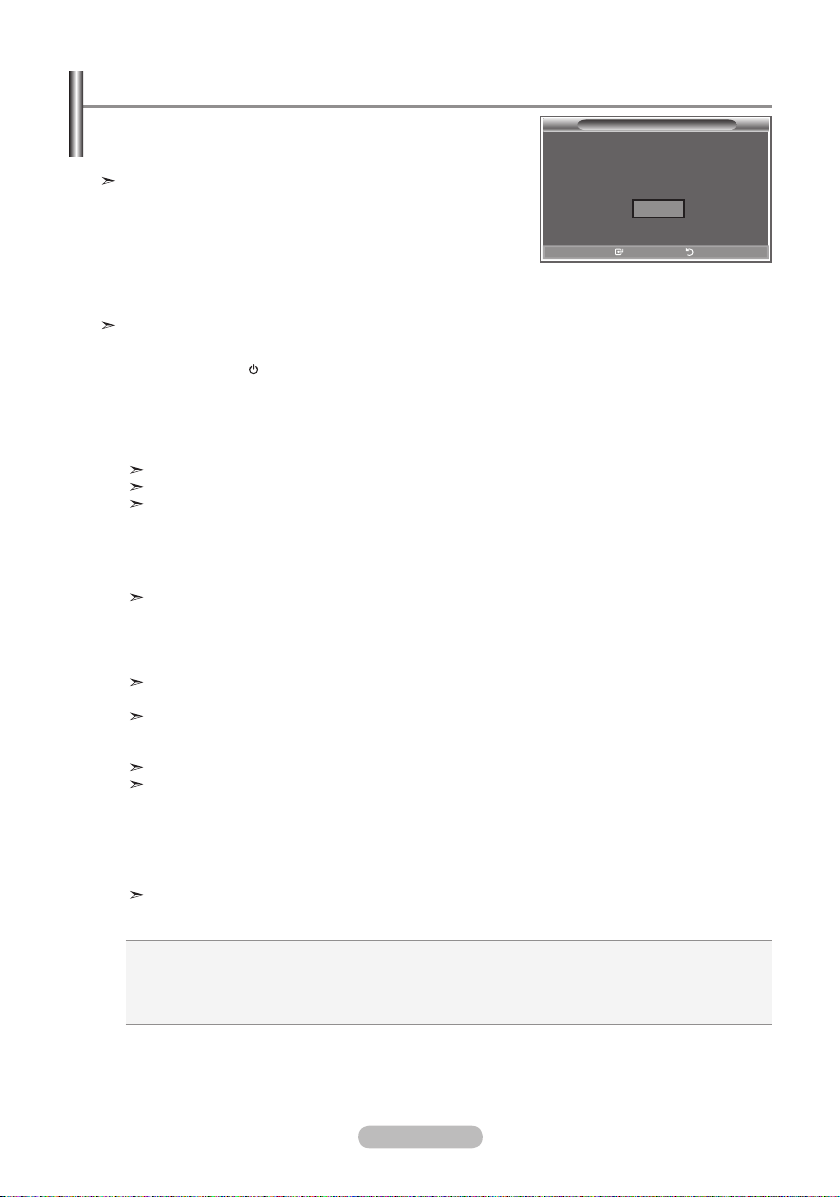
Plug & Play
When the TV is initially powered on, several basic settings
proceed automatically and subsequently. The following
settings are available.
Any functions related to Digital TV (DVB) will only work in
countries or areas where DVB-T (MPEG2) digital terrestrial
signals are broadcasted. Please confirm with your local
dealer if you can receive DVB-T signals. Although this TV set
follows the DVB-T specification, maintaining compatibility with
the future coming DVB-T digital terrestrial broadcasts is not
guaranteed. Several functions may not be available in some
countries.
This product is only applicable to Finnish broadcasts. Broadcasts are not supported in other
countries.
1. Press the POWER button on the remote control.
The message "Start Plug & Play" is displayed with "OK" selected.
2. Select the appropriate language by pressing the ▲ or ▼ buttons.
Press the ENTER/OK
button to confirm your choice.
3. Press the ◄ or ► buttons to select “Shop” or “Home”, then the ENTER/OK button.
We recommend setting the TV to Home mode for the best picture in your home environment.
Shop mode is only intended for use in retail environments.
If the unit is accidentally set to Shop mode and you want to return to Dynamic (Home) mode,
press the Volume button and then hold down the
MENU button for five seconds on the side
panel of the TV.
4. The message "Check antenna input." is displayed with "OK" selected.
Press the ENTER/OK
button.
Please check that the antenna cable is connected correctly.
5. Select the appropriate country by pressing the ▲ or ▼ button.
Press the ENTER/OK
The "Auto Store" menu is displayed with the "Start" selected. Press the
6.
button to confirm your choice.
ENTER/OK
The channel search will start and end automatically.
The DTV channel scan menu appears and the DTV channel is automatically updated.
If the DTV channel is updated, the Source in the source list of the Input menu is automatically
changed to DTV.
After all the available channels are stored, the "Clock Set" menu appears.
Press the ENTER/OK button at any time to interrupt the memorization process.
For detailed descriptions about DTV channel update, refer to page 33 of this manual.
After all the available digital channels are stored, the screen to select a time zone is displayed
depending on the country.
7. Press the ENTER/OK button.
Select the "Month", "Day", "Year", "Hour" and "Minute" by pressing the
Set the "Month", "Day", "Year", "Hour" and "Minute" by pressing the
▲
You can also set the hour and minute by pressing the number buttons on the remote control.
8. Press the ENTER/OK button to confirm your setting.
Language
Country
Auto Store
Clock Set
: Select your language.
: Select your country.
: Automatically scans for and stores channels available in the local area.
: Sets the current time for the TV clock.
Plug & Play
Start Plug & Play.
OK
Enter Exit
button.
◄
or ► buttons.
or ▼ buttons.
English - 9
Page 12
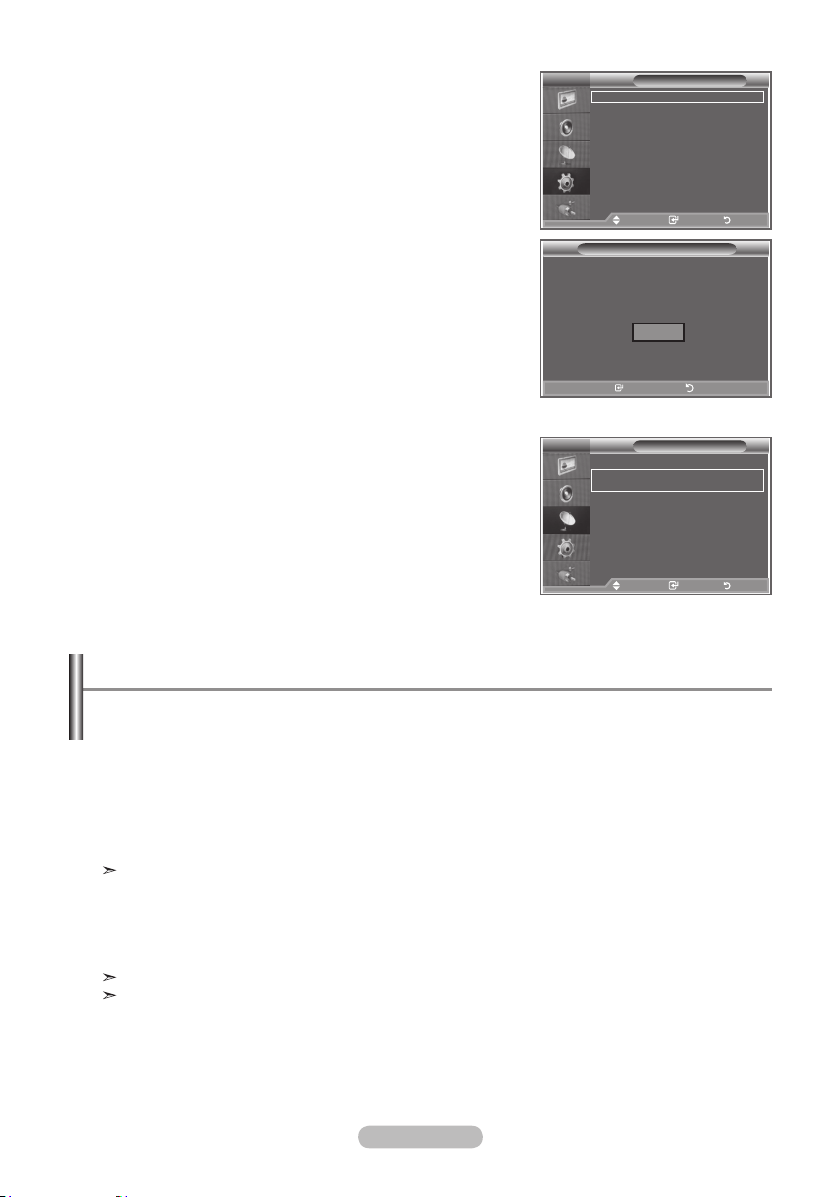
If you want to reset this feature...
1. Press the MENU button to display the menu.
Press the ▲ or ▼ button to select "Setup", then press the
ENTER/OK button.
2. Press the ENTER/OK button again, to select "Plug & Play".
3. The message "Start Plug & Play" is displayed.
TV
Plug & Play
Language : English
Time
Game Mode : Off
Blue Screen : Off
Melody : Off
PC
Home Theatre PC
Light Effect :
More
Move Enter Return
: Off
Plug & Play
Start Plug & Play.
OK
Enter Return
Setup
Watchung Mode On
Channel
- Storing Channels Automatically
- Storing Channels Manually
TV
Country : Belgium
Auto Store
Manual Store
Channel Manager
Sort
Name
Fine Tune
Move Enter Return
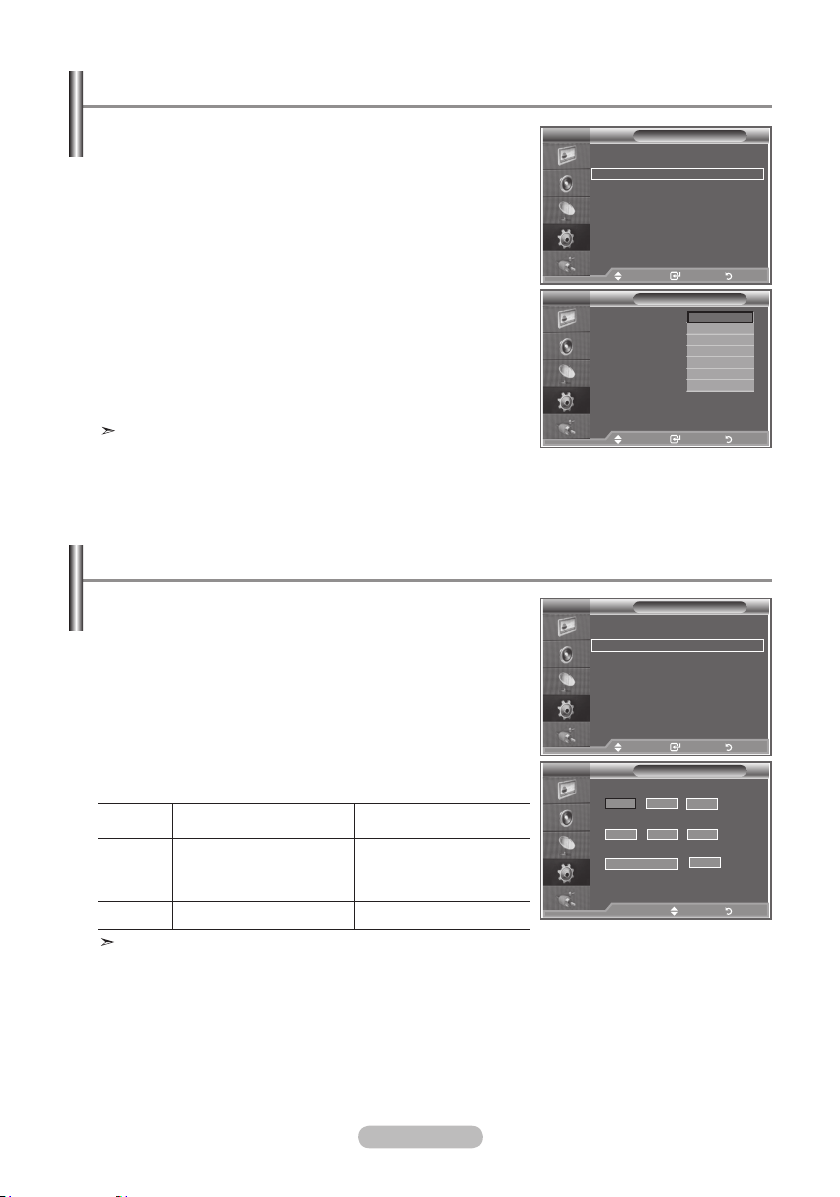
Storing Channels Automatically
You can scan for the frequency ranges available to you (and availability depends on your country).
Automatically allocated programme numbers may not correspond to actual or desired programme
numbers. However, you can sort numbers manually and clear any channels you do not wish to watch.
1. Press the MENU button to display the menu.
Press the ▲ or ▼ button to select "Channel", then press the ENTER/OK button.
2. Press the ENTER/OK
3. Select the appropriate country by pressing the
Press the ENTER/OK button to confirm your choice.
Even though you have changed the country setting in this menu, the country setting for DTV is not
changed. Use the Plug & Play function to change the country setting for DTV.
(Refer to page 9)
4. Press the
▲
5. Press the ENTER/OK
The TV will begin memorizing all of the available channels.
Press the ENTER/OK button at any time to interrupt the memorization process and return to the
"Channel" menu.
6. After all the available channels are stored, the "Sort" menu appears.
button to select "Country".
▲
or ▼ button.
or ▼ button to select "Auto Store", then press the ENTER/OK button.
button.
English - 10
Page 13
Storing Channels Manually
You can store up to 100 channels, including those received via cable networks.
When storing channels manually, you can choose:
Whether or not to store each of the channels found.
The programme number of each stored channel which you wish to identify.
1. Press the MENU button to display the menu.
Press the ▲ or ▼ button to select "Channel", then press the ENTER/OK button.
2. Press the ▲ or ▼ button to select "Manual Store", then press the ENTER/OK button.
3. Press the ENTER/OK
4. To assign a programme number to a channel, find the correct number by pressing the ▲ or ▼
button and then press the ENTER/OK button.
You can also set a programme number by pressing number buttons on the remote control.
5. Press the ▲ or ▼ button to select "Colour System", then press the ENTER/OK
6.
Select the colour standard required by pressing the ▲ or ▼ button then, press the ENTER/OK button.
7. Press the ▲ or ▼ button to select "Sound System", then press the ENTER/OK button.
8.
Select the sound standard required by pressing the ▲ or ▼ button, then press the ENTER/OK button.
If there is an abnormal sound or no sound, re-select the sound system required.
9. If you know the number of the channel to be stored, press the ▲ or ▼ button to select "Channel".
Press the ENTER/OK button. Select C (Air channel) or S (Cable channel) by pressing the 5 or 6
button. Press the button to select channel.
Select the required number by pressing the ▲ or ▼ button and then press the ENTER/OK button.
Channel mode: P (Programme mode), C (Air channel mode), S (Cable channel mode)
You can also set a channel number by pressing number buttons on the remote control.
10.
If you do not know the channel numbers, press the ▲ or ▼ button to select "Search".
Press the ENTER/OK button. Search by pressing the ▲ or ▼ button and then press the ENTER/OK button.
11. Press the ▲ or ▼ button to select "Store". Press the ENTER/OK button to select "OK".
12. Repeat steps 3 to 11 for each channel to be stored.
Programme: Selects a program number for the channel.
Colour System: Sets the colour supporting system.
Sound System: Sets the sound supporting system.
Channel: Selects a channel.
Search: Scans for the frequency value for the channel.
Store: Saves your settings.
button to select "Programme".
button.
English - 11
Page 14
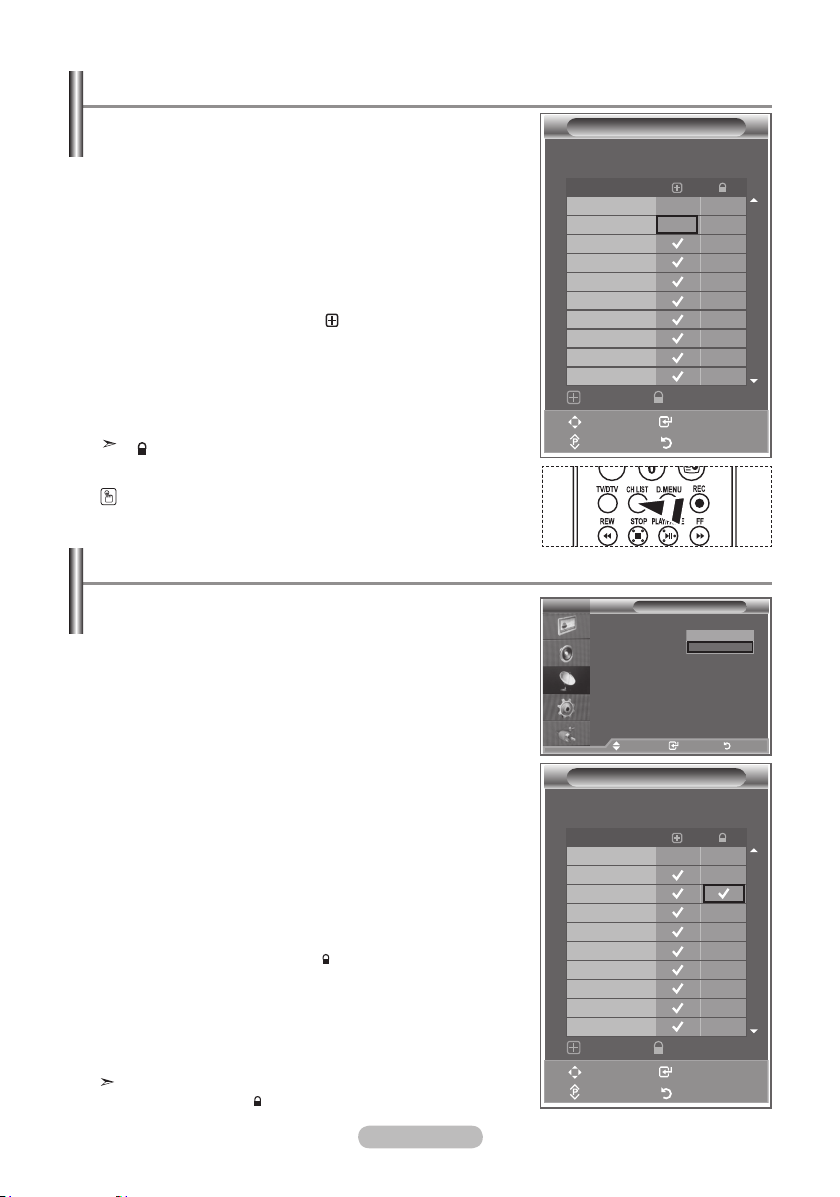
Setting the Channel Lists
Set the channels according to your preference.
You can easily delete, add, or lock the channel you want.
1. Press the MENU button to display the menu.
Press the ▲ or ▼ button to select "Channel", then press the
ENTER/OK button.
2. Press the ▲ or ▼ button to select "Channel Manager",
then press the ENTER/OK button.
3. Press the ENTER/OK button again, to select "Channel
List".
►
4. Press the
5. Press the
button to select " " line.
▲
or ▼ button to select the undesired channel,
then press the ENTER/OK button to cancel.
6. Repeat steps 5 for each channel to be selected or canceled
7. Press the EXIT
button to exit.
" " is active when "Child Lock" is selected to "On".
You can select these options by simply pressing the CH LIST
button on the remote control
Activating the Child Lock
This feature allows you to prevent unauthorized users, such
as children, from watching unsuitable programmes by muting
out video and audio.
Child Lock cannot be released using the buttons on the side.
Only the remote control can release the Child Lock setting,
so keep the remote control away from children.
1. Press the MENU button to display the menu.
Press the ▲ or ▼ button to select "Channel", then press the
ENTER/OK button.
2. Press the ▲ or ▼ button to select "Channel Manager",
then press the ENTER/OK button.
▲
3. Press the
the ENTER/OK button.
4. Press the
ENTER/OK button.
5. Press the
then press the ENTER/OK button.
6. Press the
7. Press the
lock, then press the ENTER/OK button.
8. Repeat steps
9. Press the EXIT button to exit.
Select "On" or "Off" in "Child Lock" to easily turn the channels
which selected on " " to be active or inactive.
or ▼ button to select "Child Lock", then press
▲
or ▼ button to select "On" or "Off". Press the
▲
or ▼ button to select "Channel List",
►
button to select " " line.
▲
or ▼ button to select the channels you want to
7 for each channel to be locked or unlocked.
Channel List
P 1 C3
Prog.
0 C--
1 C3
2 BBC 1
3 C74
4 C75
5 C76
6 S3
7 S4
8 S6
9 S7
Add Lock
Move Enter
Page Return
TV
P 2 C4 BBC1
Prog.
0 C-1 C3
2 BBC 1
3 C74
4 C75
5 C76
6 S3
7 S4
8 S6
9 S7
Add Lock
Move Enter
Page Return
Channel Manager
Channel List
Child Lock :
Move Enter Return
Channel Liat
1 / 10
Off
On
1 / 10
English - 12
Page 15
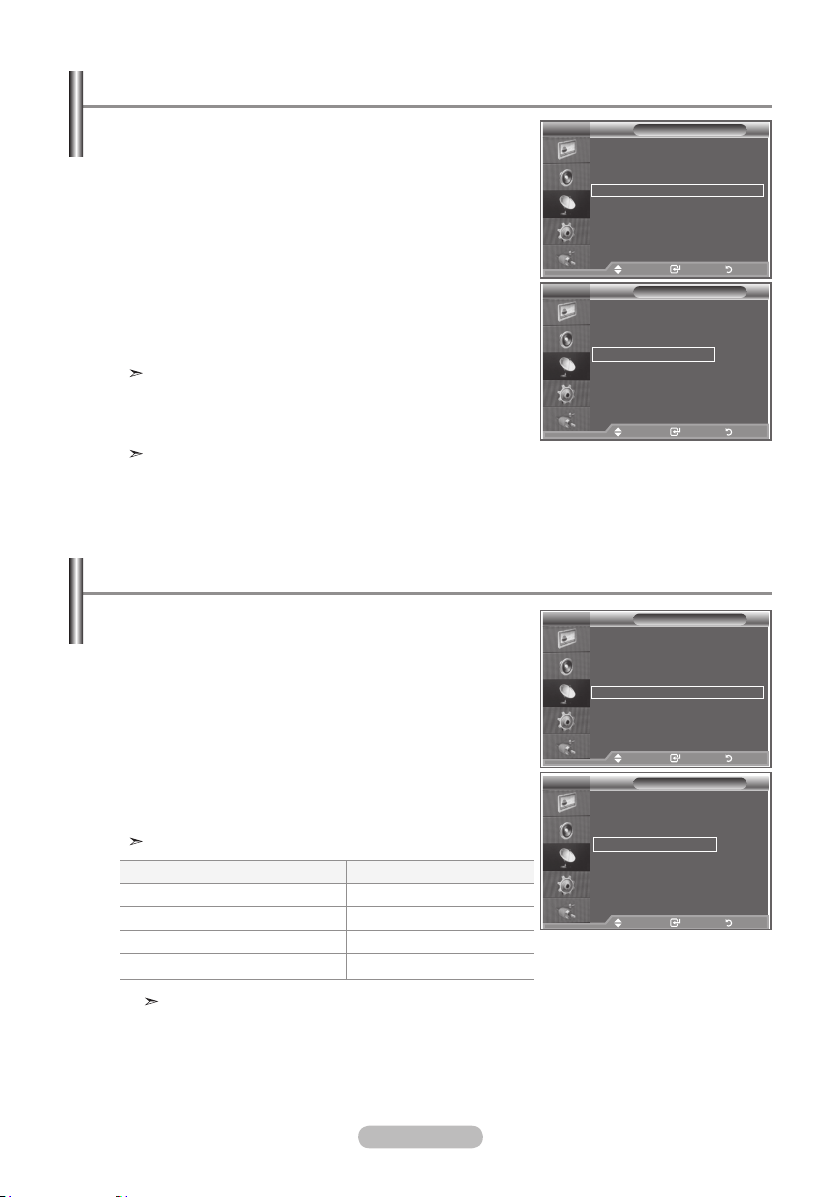
Sorting the Stored Channels
You can exchange the numbers of two channels, in order to:
Modify the numeric order in which the channels have
been automatically stored.
Give easily remembered numbers to the channels
that you watch most often.
1.
Press the MENU button to display the menu. Press the ▲ or ▼
TV
Country : Belgium
Auto Store
Manual Store
Channel Manager
Sort
Name
Fine Tune
button to select "Channel", then press the ENTER/OK button.
2. Press the ▲ or ▼ button to select "Sort", then press the
ENTER/OK button.
3. Select the channel number that you wish to change by press
▲
ing the
or ▼ button repeatedly. Press the ENTER/OK
button.
The selected channel number and name are moved to
right side.
4. Press the
▲
or ▼ button to move to the position in which you
would like to change and then press the ENTER/OK button.
Move Enter Return
TV
Prog. Ch. Name
0 C--
1 C23
2 C16
3 C3
4 S1
Move Enter Return
The selected channel is exchanged with the one
previously stored to the chosen number.
5. Repeat steps 3 to 4 for another channel to be sorted.
6. Press the EXIT
button to exit.
Assigning Channels Names
Channel names will be assigned automatically when channel
information is broadcast. These names can be changed,
allowing you to assign new names.
1. Press the MENU button to display the menu.
Press the ▲ or ▼ button to select "Channel", then press the
ENTER/OK button.
2. Press the ▲ or ▼ button to select "Name", then press the
ENTER/OK button.
3. If necessary, select the channel to be assigned to a new
name by pressing the ▲ or ▼ button. Press the ENTER/OK
button.
The selection bar is displayed around the name box.
4.
To...
Select a letter, number or symbol
Move on the next letter
Move back the previous letter
Confirm the name
Then...
Press the ▲ or ▼ button
Press the ► button
Press the ◄ button
Press the ENTER/OK button
The characters available are : Letters of the alphabet (A~Z) / Numbers (0~9) /
Special characters ( -, space)
5. Repeat steps
6. Press the EXIT
3 to 4 for each channel to be assigned to a new name.
button to exit.
TV
Country : Belgium
Auto Store
Manual Store
Channel Manager
Sort
Name
Fine Tune
Move Enter Return
TV
Prog. Ch. Name
0 C-- -----
1 C23 -----
2 C16
3 C3
4 S1
Move Enter Return
Channel
Channel
Sort
Name
-----
-----
-----
English - 13
Page 16
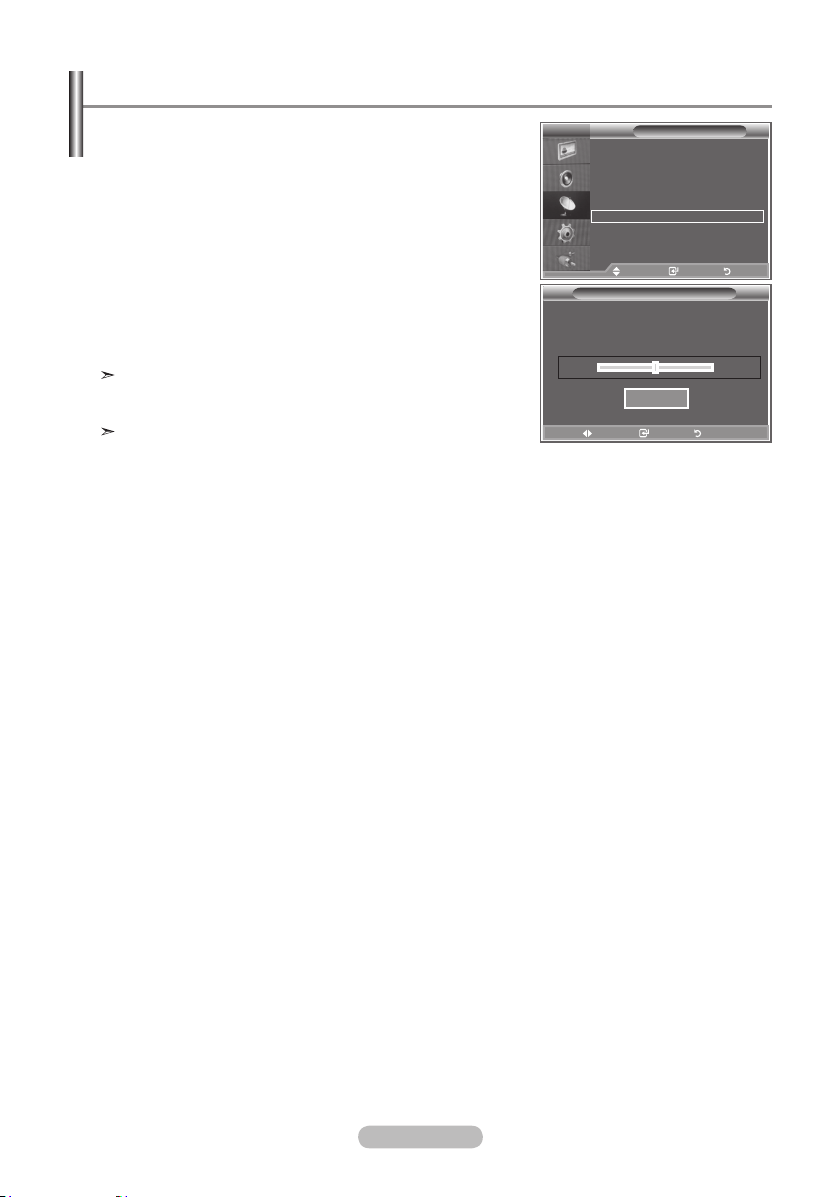
Fine Tuning Channel Reception
Use fine tuning to manually adjust a particular channel for
optimal reception.
1. Use the number buttons to directly select the channel that
you want to fine tune.
2. Press the MENU button to display the menu.
Press the ▲ or ▼ button to select "Channel", then press the
ENTER/OK button.
3. Press the
▲
or ▼ button to select "Fine Tune", then press
the ENTER/OK button.
◄
4. Press the
Press the ENTER/OK button.
5. Press the EXIT
or ► button to adjust the fine tuning.
button to exit.
Fine tuned channels that have been saved are marked with
an asterisk "*" on the right-hand side of the channel number
in the channel banner. And the channel number turns red.
To reset the fine-tuning, select "Reset" by pressing the
▲ or ▼ button and then press the ENTER/OK button.
TV
Country : Belgium
Auto Store
Manual Store
Channel Manager
Sort
Name
Fine Tune
Move Enter Return
P 1
Adjust Save Return
Channel
Fine Tune
Reset
0
English - 14
Page 17
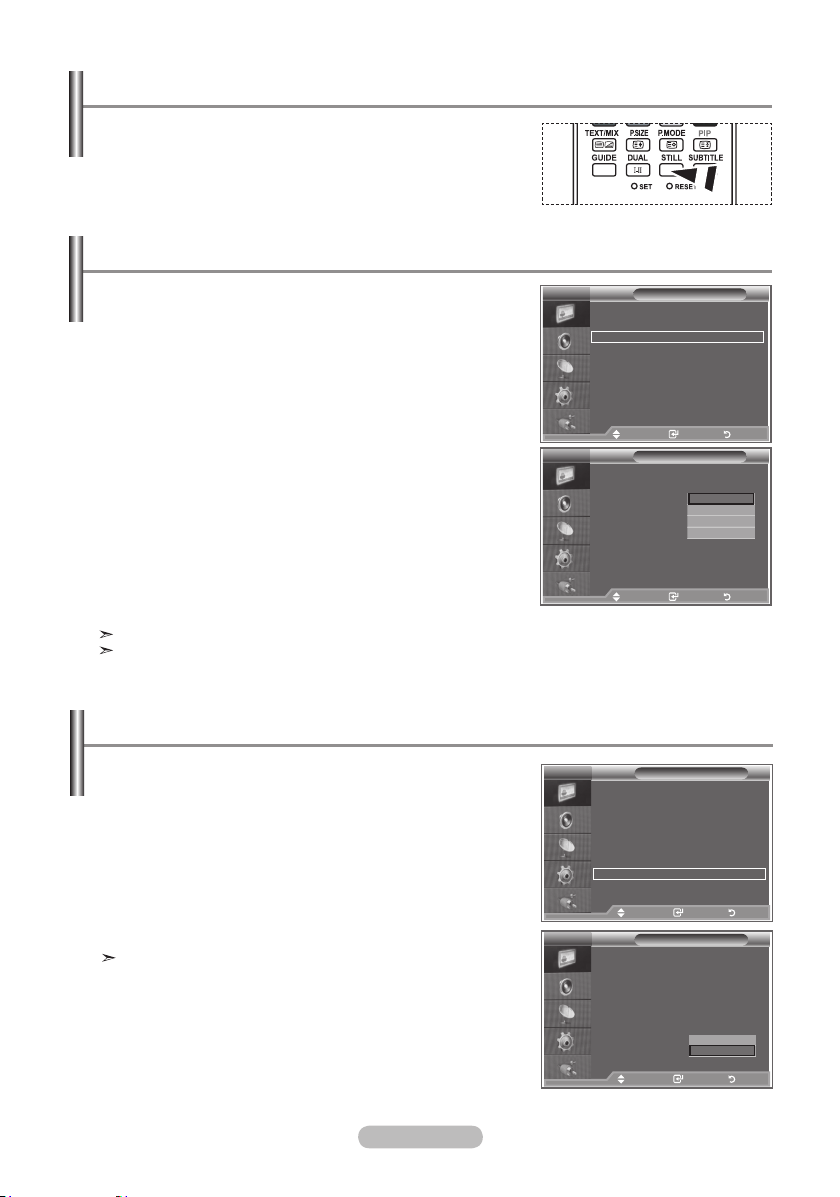
Changing the Picture Standard
You can select the type of picture which best corresponds to
your viewing requirements.
1. Press the MENU button to display the menu.
Press the ENTER/OK button, to select "Picture".
2. Press the ENTER/OK button again, to select "Mode".
3. Press the
▲
or ▼ button to select the desired picture effect.
Press the ENTER/OK button.
4. Press the EXIT
button to exit.
Dynamic: Selects the picture for high-definition in a bright
room.
Standard: Selects the picture for optimum display in a
normal environment.
Movie: Selects the picture for comfortable display in a
dark room.
The Picture mode must be adjusted separately for each input
source.
You can return to the factory defaults picture settings by
selecting the "Reset".
(Refer to "Resetting the Picture Settings to the Factory
Defaults" on page 19)
Adjusting the Custom Picture
Your set has several settings which allow you to control
picture quality.
1. To select the desired picture effect, follow the
"Changing the Picture Standard" instructions number 1 to 3.
2. Press the ▲ or ▼ button to select a particular item. Press the
ENTER/OK button.
◄
3. Press the
a particular item. Press the ENTER/OK button.
4. Press the EXIT
or ► button to decrease or increase the value of
button to exit.
TV
Mode : Dynamic
Contrast 100
Brightness 45
Sharpness
Colour
Tint G50 R50
Colour Tone : Cool1
Detailed Settings
Backlight : 10
More
Move Enter Return
TV
Mode : Dynamic
Contrast
Brightness 45
Sharpness
Colour 55
Tint G50 R50
Colour Tone : Cool1
Detailed Settings
Backlight : 10
More
Move Enter Return
Picture
Picture
Dynamic
Standard
Movie
You can also press the
P.MODE button on the remote
control to select one of the
picture settings.
TV
Mode : Dynamic
Contrast 100
Brightness
Sharpness 75
Colour 55
Tint G50 R50
Colour Tone : Cool1
Detailed Settings
Backlight : 10
More
Move Enter Return
Picture
75
55
100
75
45
Contrast: Adjusts the lightness and darkness between objects and the background.
Brightness: Adjusts the brightness of the whole screen.
Sharpness: Adjusts the outline of objects to either sharpen them or make them more dull.
Colour: Adjusts the colours, making them lighter or darker.
Tint (NTSC or DTV only):
Adjusts the colour of objects, making them more red or green for a more
natural look.
The adjusted values are stored according to the selected Picture mode.
In PC Mode, Only "Contrast" and "Brightness" can be adjusted.
“Tint” function is available only in “HDMI” and “Component” mode.
English - 15
Page 18
Changing the Colour Tone
You can select the most comfortable colour tone to your
eyes.
1. To select the desired picture effect, follow the
"Changing the Picture Standard" instructions number 1 to 3.
(On page 15)
2. Press the 5 or 6 button to select "Colour Tone", then press
the ENTER/OK button.
3. Press the
5 or 6 button to select the desired colour tone
setting. Press the ENTER/OKbutton.
4. Press the EXIT
button to exit
Cool2: Makes the colour temperature bluer than "Cool1"
menu.
Cool1: Makes whites bluish.
Normal: Keeps whites white.
Warm1: Makes whites reddish.
Warm2: Makes the colour temperature redder than
"Warm1" menu.
TV
Mode : Dynamic
Contrast 100
Brightness
Sharpness 75
Colour
Tint G50 R50
Colour Tone : Cool1
Detailed Settings
Backlight : 10
More
Move Enter Return
TV
Mode : Dynamic
Contrast
Brightness 45
Sharpness 75
Colour
Tint G50 R50
Colour Tone : Cool1
Detailed Settings
Backlight : 10
More
Move Enter Return
The adjusted values are stored according to the selected Picture mode.
When the picture mode is set to Dynamic or Standard, Warm1 and Warm2 cannot be selected.
Activating Backlight
You can adjust the screen brightness by adjusting the LCD
backlight brightness. (0~10)
1. To select the desired picture effect, follow the
"Changing the Picture Standard" instructions number 1 to 3.
(On page 15)
2. Press the ▲ or ▼ button to select “Backlight”, then press the
ENTER/OK button.
3. Press the ◄ or ► button to decrease or increase the value of
a particular item.
4. Press the ENTER/OK button.
Press the EXIT
button to exit.
TV
Mode : Dynamic
Contrast 100
Brightness
Sharpness 75
Colour 55
Tint G50 R50
Colour Tone : Cool1
Detailed Settings
Backlight : 10
More
Move Enter Return
Backlight
Adjust Return
Picture
Picture
Picture
Cool 2
Cool 1
Normal
Warm 1
Warm 2
45
55
100
55
45
10
English - 16
Page 19
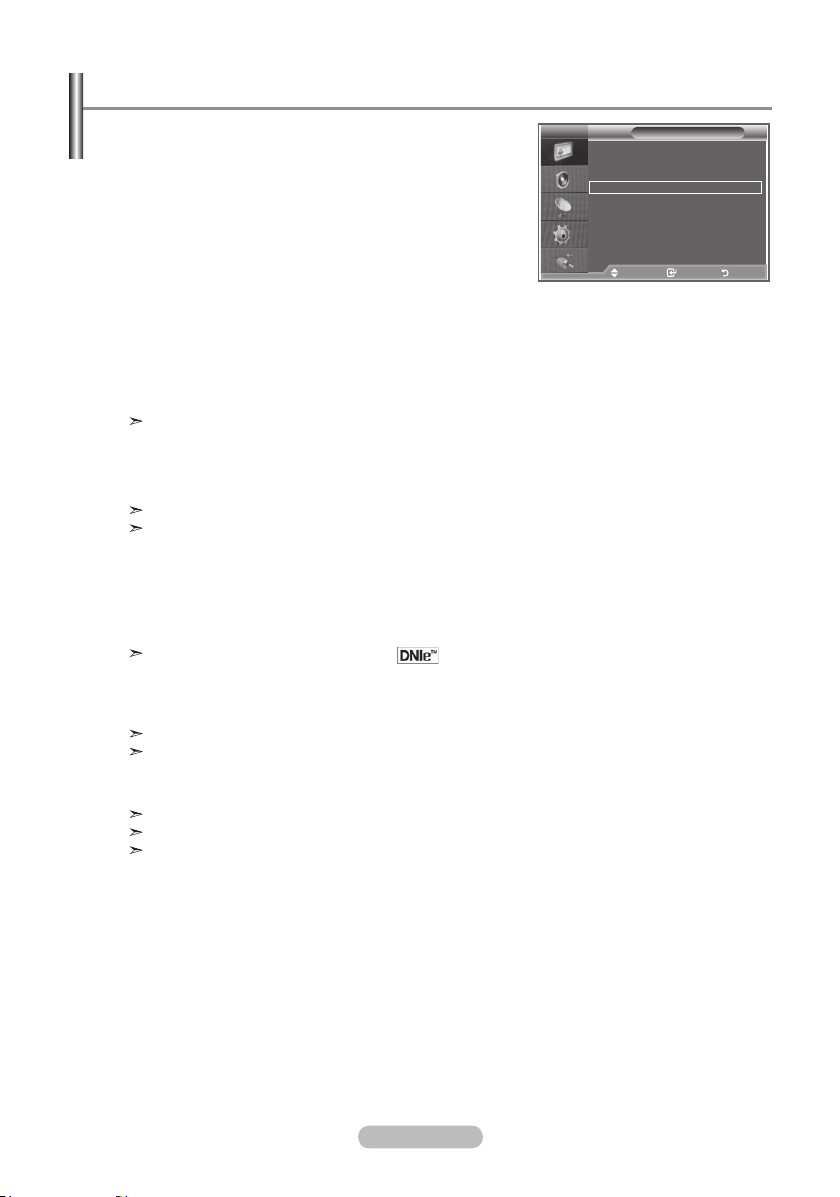
Conguring Detailed Settings on the Picture
You can set detailed picture settings.
Press the MENU button to display the menu.
1.
2.
Press the ENTER/OK button, to select "Picture".
3. Press the ▲ or ▼ button to select "Detailed Settings", then
press the ENTER/OK
button.
4. Select the required option by pressing the ▲ or ▼ button,
then press the ENTER/OK
button.
Available options: Black Adjust, Dynamic Contrast, Gamma,
White Balance, My Colour Control, Edge Enhancement,
Colour Space
When you are satisfied with your setting, press the
5.
ENTER/OK button.
Press the EXIT button to exit.
6.
When the picture mode is set to Movie or Standard, Detailed
Settings can be selected.
TV
Mode : Movie
Contrast 80
Brightness
Sharpness 10
Colour
Tint G50 R50
Colour Tone : Warm 2
Detailed Settings
Backlight : 0
More
Move Enter Return
TV
Black Adjust : Off
Dynamic Contrast
Gamma : 0
White Balance
My Colour Control
Edge Enhancement
Colour Space
Move Enter Return
Picture
Detailed Settings
: Auto
: Off
: Off
If DNIe is Off, the Detailed Settings cannot be selected when
the Picture mode is in Standard mode.
Black Adjust: Off/Low/Medium/High
You can directly select the black level on the screen to adjust the screen depth.
Dynamic Contrast: Off/Low/Medium/High
You can adjust the screen contrast so that the optimal contrast is provided.
Gamma: -3 ~ +3
You can adjust the middle brightness of pictures.
Press the ◄ or ► button until you reach the optimal setting.
White Balance: R Offset/G Offset/B Offset/R Gain/G Gain/B Gain/Reset
You can adjust the color temperature for more natural picture colors.
R Offset/G Offset/B Offset/R Gain/G Gain/B Gain: Changing the adjustment value will refresh the
adjusted screen.
Select the required option by pressing the ▲ or ▼ button, then press the ENTER/OK button.
Press the ◄ or ► button until you reach the optimal setting.
Reset: The previously adjusted white balance will be reset to the factory defaults.
My Colour Control: Pink/Green/Blue/White/Reset
This setting can be adjusted to suit your personal preferences.
Pink/Green/Blue/White: Changing the adjustment value will refresh the adjusted screen.
Select the required option by pressing the ▲ or ▼ button, then press the ENTER/OK button.
Press the ◄ or ► button until you reach the optimal setting.
Reset: The previously adjusted colours will be reset to the factory defaults.
Edge Enhancement: Off/On
You can emphasize object boundaries.
Colour Space: Auto/Wide
You can set the color reproduction space for the input signal to Auto or Wide.
45
53
English - 17
Page 20
Changing the Picture Size
You can select the picture size which best corresponds to
your viewing requirements.
1. Press the MENU button to display the menu.
Press the ENTER/OK button, to select "Picture".
2. Press the ▲ or ▼ button to select "Size", then press the
ENTER/OK button.
▲
3. Select the required option by pressing the
or ▼ button.
Press the ENTER/OK button.
4. Press the EXIT
button to exit.
Auto Wide: Automatically adjusts the picture size to the "16:9"
aspect ratio.
16:9: Adjusts the picture size to 16:9 appropriate for DVDs or
wide broadcasting.
Wide Zoom: Magnify the size of the picture more than 4:3.
Zoom: Magnifies the 16:9 wide picture (in the vertical direction)
to fit the screen size.
4:3: This is the default setting for a video movie or normal
broadcasting.
Just Scan: Displays the input scenes as they are without any
cutoff when HDMI 720p,1080i signals are input.
"Auto Wide" function is available only in "TV", "Ext.1", "Ext.2",
"AV", and "S-Video" mode.
In PC Mode, only "16:9" and "4:3" mode can be adjusted.
Zoom : Select by pressing the ◄ or ► buttons.
Use the ▲ or ▼ button to move the picture up and
down. After selecting , use the ▲ or ▼ button to
magnify or reduce the picture size in the vertical direction.
Wide Zoom : Move the screen up/down using the▲ or ▼ but-
tons after selecting the by pressing the ► or
ENTER/OK button.
TV
More
Size : Auto Wide
Screen Mode : 16 : 9
Digital NR : Off
Active Colour : Off
DNle : Off
Movie Plus : Off
Reset : OK
Move Enter Return
TV
Auto Wide
16 : 9
Wide Zoom
Zoom
4 : 3
Just Scan
Move Enter Return
Picture
Size
You can select these options
by simply pressing the P.SIZE
button on the remote control.
English - 18
Page 21
Freezing the Current Picture
Press the STILL button to freeze a moving picture into a
still one. Press again to cancel.
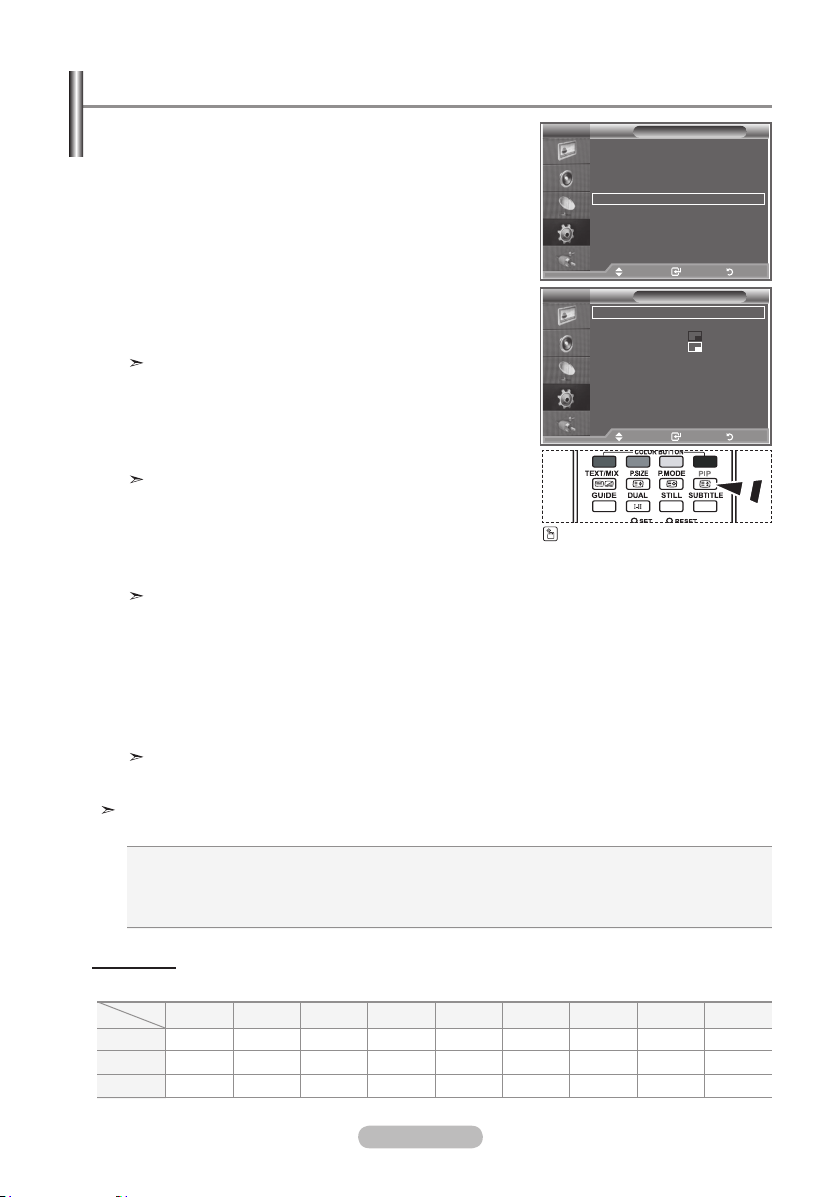
Selecting the Screen Mode
When setting the picture size to Auto Wide in a 16:9 wide TV,
you can determine the picture size you want to see the 4:3
WSS (Wide Screen Service) image or nothing. Each individual
European country requires different picture size so this function is intended for users to select it.
1. Press the MENU button to display the menu.
Press the ENTER/OK button, to select “Picture”.
2. Press the ▲ or ▼ button to select "Screen Mode", then press
the ENTER/OK button.
3. Select the required option by pressing the
Press the ENTER/OK button.
Available options: 16:9, Wide Zoom, Zoom, 4:3
16:9: Sets the picture to 16:9 wide mode.
Wide Zoom: Magnify the size of the picture more than 4:3.
Zoom: Magnify the size of the picture vertically on screen.
4:3: Sets the picture to 4:3 normal mode.
4. Press the EXIT
button to exit.
Picture Size is available in Auto Wide mode
This function is not available in PC or Component, HDMI
mode.
▲
or ▼ button.
TV
More
Size : Auto Wide
Screen Mode : 16 : 9
Digital NR : Off
Active Colour : Off
DNle : Off
Movie Plus : Off
Reset : OK
Move Enter Return
Move Enter Return
TV
More
Size : Auto Wide
Screen Mode : 16 : 9
Digital NR : Off
Active Colur : Off
DNle : Off
Movie Plus : Off
Reset : OK
Move Enter Return
Picture
Picture
Wide Zoom
16:9
Zoom
4:3
Resetting the Picture Settings to the Factory Defaults
You can return to the factory defaults picture settings.
1. To select the desired picture effect, follow the
"Changing the Picture Standard" instructions number 1 to 3
on page 15.
2. Press the ▲ or ▼ button to select "Reset", then press the
ENTER/OK button.
Press the ▲ or ▼ button to select "OK" or "Cancel".
3.
Press the ENTER/OK button.
4. Press the EXIT
button to exit.
The "Reset" will be set for each picture mode.
English - 19
TV
More
Size : Auto Wide
Screen Mode : 16 : 9
Digital NR : Off
Active Colour : Off
DNle : Off
Movie Plus : Off
Reset : OK
Move Enter Return
TV
More
Size : Auto Wide
Screen Mode : 16 : 9
Digital NR : Off
Active Colour : Off
DNle : Off
Movie Plus : Off
Reset : OK
Move Enter Return
Picture
Picture
Cancel
OK
Page 22
Digital NR / Active Colour / DNIe / Movie Plus
If the broadcast signal received by your TV is weak, you can
activate the Digital Noise Reduction feature to help reduce
any static and ghosting that may appear on the screen.
1. Press the MENU button to display the menu.
Press the ENTER/OK button, to select “Picture”.
2. Select the required option by pressing the ▲ or ▼ button,
then press the ENTER/OK button.
Available options: Digital NR, Active Colour, DNIe, Movie
Plus.
3. When you are satisfied with your setting, press the ENTER/OK
4. Press the EXIT
button to exit.
Digital NR: Off/Low/Medium/High/Auto
If the signal received by the television is weak, you can activate this feature to reduce any static and
ghosting that may appear on the screen.
This function is not available in PC mode.
Active Colour: Off/On
If you turn on this option, the colors of the sky and grass will be stronger and clearer for a more
vivid on-screen picture.
This function is not available in PC mode.
This function is not available in Movie and Standard mode.
DNIe: Off/Demo/On
This TV includes the DNIe function so as to provide a high visual quality. If you set DNIe to on, you
can view the screen with the DNIe feature activated. If you set the DNIe to Demo, you can view the
applied DNIe and normal pictures on the screen, for demonstration purposes. Using this function,
you can view the difference in the visual quality.
DNIeTM (Digital Natural Image engine)
This feature brings you more detailed image with 3D noise reduction, detail enhancement, con-
trast enhancement and white enhancement. New image compensation Algorithm gives brighter,
clearer, more detailed image to you. DNIeTM technology will fit every signal into your eyes.
This function is not available in PC mode.
This function is not available in Movie mode
Movie Plus: Off/On
You can view more natural skin and clear text even in fast moving scenes.
Use this function when watching movies.
The Wide Zoom, Zoom and Just Scan mode is not supported.
This function is not available in PC mode.
TV
button.
More
Size : Auto Wide
Screen Mode : 16 : 9
Digital NR : Off
Active Colour : Off
DNle : Off
Movie Plus : Off
Reset : OK
Move Enter Return
Picture
English - 20
Page 23
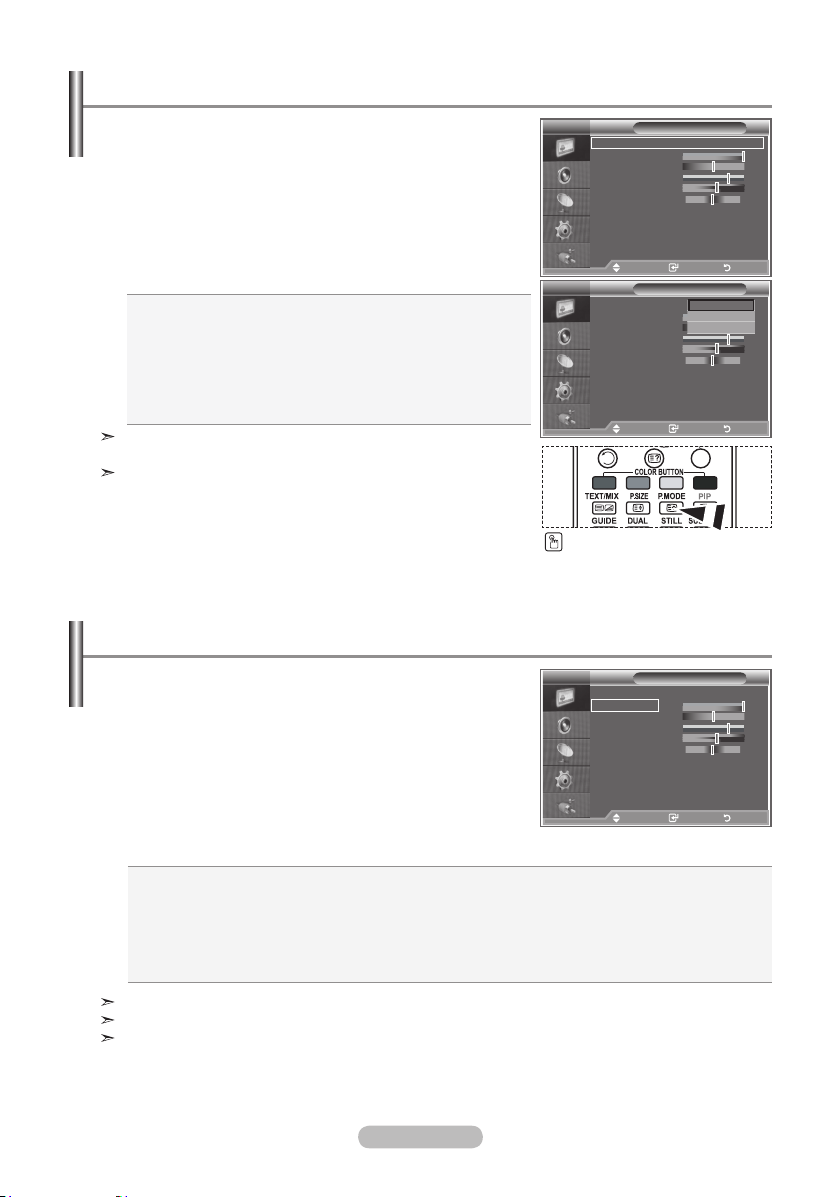
Viewing the Picture In Picture (PIP)
You can display a sub picture within the main picture of set
programme or video input. In this way, you can watch the
picture of set programme or video input from any connected
equipment while watching the main picture.
1. Press the MENU button to display the menu.
Press the ▲ or ▼ button to select "Setup", then press the
ENTER/OK button.
2. Press the ▲ or ▼ button to select "PIP", then press the
ENTER/OK button.
3. Press the ENTER/OK
Press the ▲ or ▼ button to select "On", then press
ENTER/OK button.
button again.
If the PIP is activated, the size of the main picture turns
to "16:9".
▲
4. Press the
or ▼ button to select "Source",then press
ENTER/OK button. Select a source of the sub picture by
pressing the ▲ or ▼ button and press the ENTER/OK
button.
The sub picture can serve different source selections
based on what the main picture is set to.
▲
5. Press the
or ▼ button to select "Size" of the sub picture
and then press the ENTER/OK button. Select a size of the
sub picture by pressing the ▲ or ▼ button and then press the
ENTER/OK button.
If main picture is in "PC" and "Component" mode, "Size" is
not available.
6. Press the
▲
or ▼ button to select "Position", then press the ENTER/OK button.
Select the position of the sub picture by pressing the ▲ or ▼ button and then press the
ENTER/OK button.
7. Press the
▲
or ▼ button to select "Programme" and then press the ENTER/OK button.
You can select the channel that you want to view through sub picture by pressing the ▲ or ▼
button. Press the ENTER/OK button.
The "Programme" can be active when the sub picture is set to TV.
8. Press the EXIT
button to exit.
You may notice that the picture in the PIP window becomes slightly unnatural when you use the
main screen to view a game or karaoke.
Source: Used to select a source of the sub picture.
Size: Used to select a size of the sub picture.
Position: Used to move the sub picture.
Programme: Used to Change the sub picture.
Mode : Custom
TV
Equalizer
More
SRS TS XT : Off
Auto Volume : Off
Energy Saving : Off
Internal Mute : Off
HDMI Black Level : Low
Reset
PIP
Move Enter Return
Mode : Custom
TV
Equalizer
PIP : On
SRS TS XT : Off
Source : TV
Auto Volume : Off
Size :
Internal Mute : Off
Position :
Reset
Programme : P 1
Move Enter Return
Press the PIP button on the
remote control repeatedly to activate or deactivate the "PIP".
Setup
Move Enter Return
PIP
Move Enter Return
PIP Settings
Sub
Main
Component
HDMI
PC
TV analog
O
O
O
Ext.1
O
O
O
Ext.2
O
O
O
AV
S-Video
O
O
O
English - 21
X
X
X
Component
X
X
X
O: PIP operates, X: PIP doesn’t operate
HDMI
X
X
X
PC
X
X
X
TV digital
X
X
X
Page 24
HDMI Black Level
You can directly select the black level on the screen to adjust
the screen depth.
1. Press the MENU button to display the menu.
Press the ▲ or ▼ button to select "Setup", then press the
ENTER/OK button.
2. Press the ▲ or ▼ button to select "HDMI Black Level", then
press the ENTER/OK button.
3. Press the ▲ or ▼ button to select "Normal" or "Low", then
press the ENTER/OK
4. Press the EXIT
button.
button to exit.
This Function is active only when the externel input connects
HDMI (RGB siginal).
Normal: The screen gets brighter.
Low: The screen gets darker.
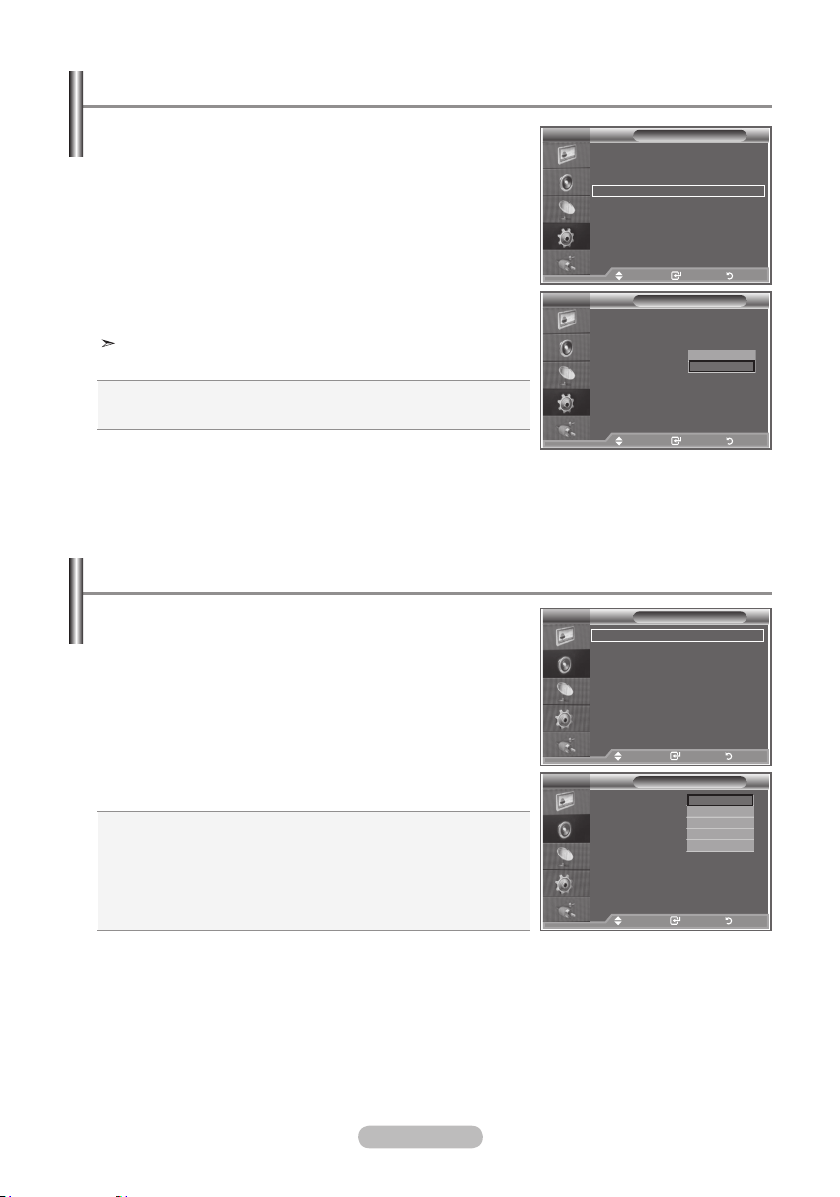
Changing the Sound Standard
You can select the type of the special sound effect to be used
when watching a given broadcast.
1. Press the MENU button to display the menu.
Press the ▲ or ▼ button to select "Sound", then press the
ENTER/OK button.
2. Press the ENTER/OK button again, to select "Mode".
▲
3. Select the required sound effect by pressing the
button repeatedly and then press the ENTER/OK button.
4. Press the EXIT
button to exit.
Standard: Selects the normal sound mode.
Music: Emphasizes music over voices.
Movie: Provides live and full sound for movies.
Speech: Emphasizes voices over other sounds.
Custom: Selects your custom sound settings.
(Refer to "Adjusting the Sound Settings")
or ▼
Mode : Custom
TV
Equalizer
More
SRS TS XT : Off
Auto Volume : Off
Energy Saving : Off
Internal Mute : Off
HDMI Black Level : Low
Reset
PIP
Move Enter Return
Move Enter Return
Mode : Custom
TV
Equalizer
More
SRS TS XT : Off
Auto Volume : Off
Energy Saving : Off
Internal Mute : Off
HDMI Black Level : Low
Reset
PIP
Move Enter Return
Move Enter Return
TV
Mode : Custom
Equalizer
SRS TS XT : Off
Auto Volume : Off
Internal Mute : Off
Sound Select : Main
Reset
Move Enter Return
TV
Mode : Custom
Equalizer
SRS TS XT : Off
Auto Volume : Off
Internal Mute : Off
Sound Select : Main
Reset
Move Enter Return
Setup
Setup
Sound
Sound
Normal
Low
Standard
Music
Movie
Speech
Custom
English - 22
Page 25
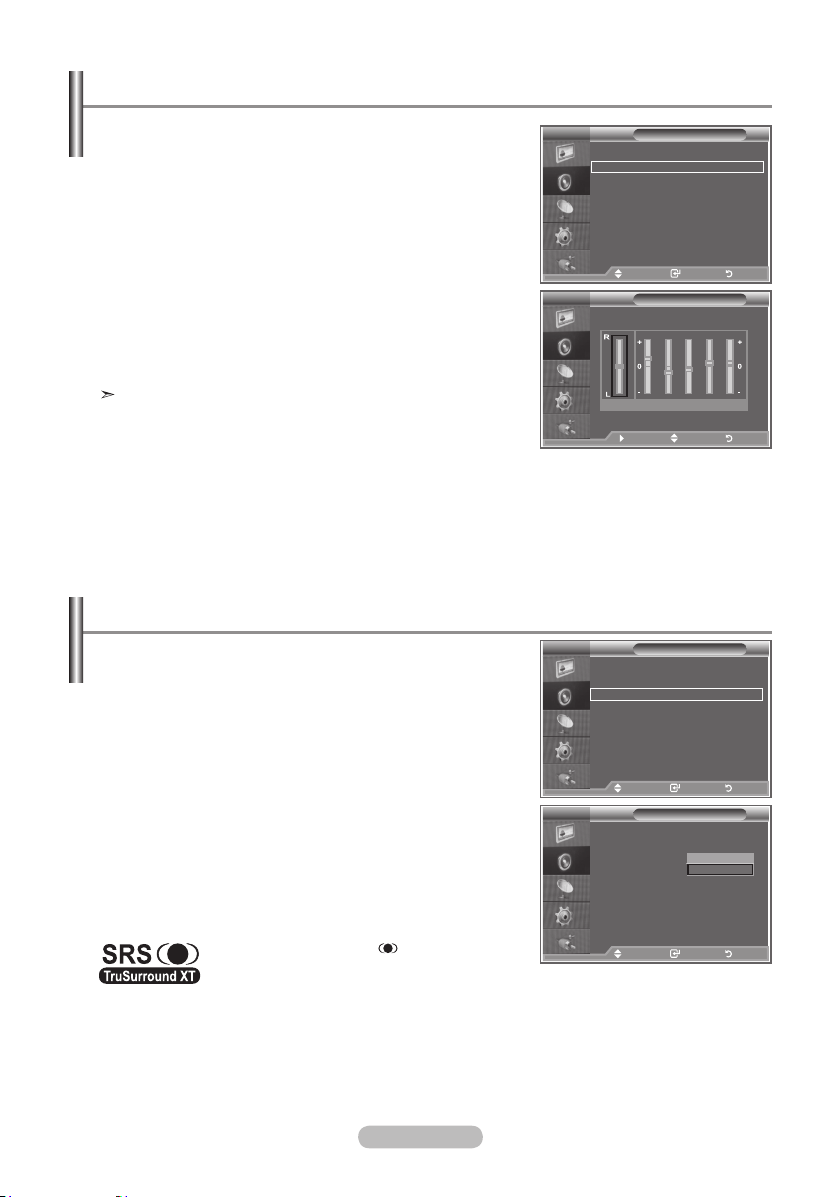
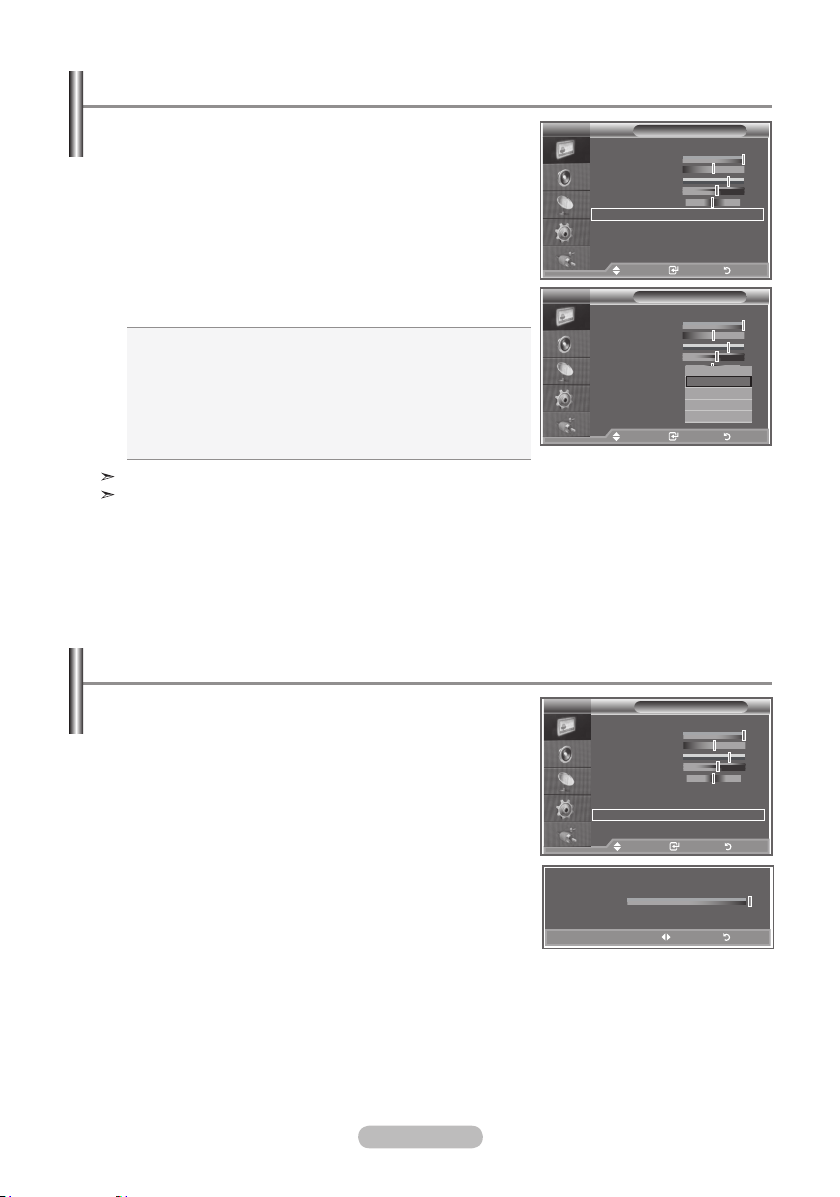
Adjusting the Sound Settings
The sound settings can be adjusted to suit your personal
preferences.
1. Press the MENU button to display the menu.
Press the ▲ or ▼ button to select "Sound", then press the
ENTER/OK button.
2. Press the ▲ or ▼ button to select "Equalizer", then press the
ENTER/OK button.
3. Press the ◄ or ► button to select a particular item.
Press the ENTER/OK button.
4. Press the ▲ or ▼ button to reach the required setting.
Press the ENTER/OK button.
5. Press the EXIT
button to exit.
If you make any changes to these settings, the Sound Mode
is automatically switched to "Custom".
Setting the TruSurround XT (SRS TS XT)
TruSurround XT is a patented SRS technology that solves
the problem of playing 5.1 multichannel content over two
speakers. TruSurround delivers a compelling,virtual surround
sound experience through any two-speaker playback system,
including internal television speakers. It is fully compatible
with all multichannel formats.
1. Press the MENU button to display the menu.
Press the ▲ or ▼ button to select "Sound", then press the
ENTER/OK button.
2. Press the ▲ or ▼ button to select "SRS TS XT", then press
the ENTER/OK button.
3. Press the ▲ or ▼ button to select "On" or "Off". Press the
ENTER/OK button.
4. Press the EXIT
button to exit.
TruSurround XT, SRS and symbol are
trademarks of SRS Labs, Inc. TruSurround XT
technology is incorporated under license from SRS
Labs, Inc.
TV
Mode : Custom
Equalizer
SRS TS XT : Off
Auto Volume : Off
Internal Mute : Off
Sound Select : Main
Reset
Move Enter Return
TV
Balance 100Hz 300Hz 1kHz 3kHz 10kHz
Move Adjust Return
TV
Mode : Custom
Equalizer
SRS TS XT : Off
Auto Volume : Off
Internal Mute : Off
Sound Select : Main
Reset
Move Enter Return
TV
Mode : Custom
Equalizer
SRS TS XT : Off
Auto Volume : Off
Internal Mute : Off
Sound Select : Main
Reset
Move Enter Return
Sound
Equalizer
Sound
Sound
Off
On
English - 23
Page 26
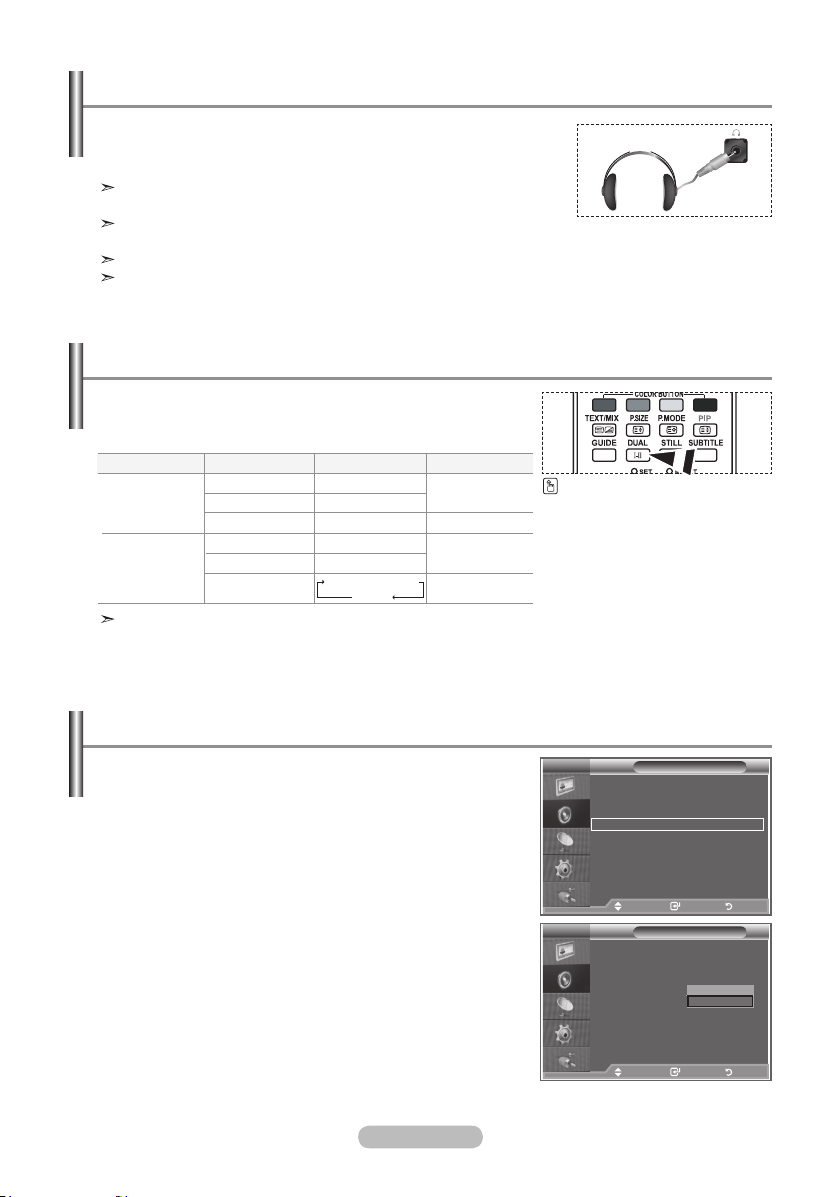
Connecting Headphones
You can connect a set of headphones to your set if you wish to
watch a TV programme without disturbing the other people in the
room.
When you insert the head set jack into the corresponding port, you
can operate only "SRS TS XT" and "Auto Volume" in Sound menu.
Prolonged use of headphones at a high volume may damage your
hearing.
You will not receive sound from the speakers when you connect headphones to the system.
The headphone volume and TV volume are adjusted differently.
Selecting the Sound Mode
You can set the sound mode by pressing the “DUAL” button.
When you press it, the current sound mode is displayed on the
screen.
Audio Type
FM
Stereo
NICAM
Stereo
Mono
Stereo
Dual
Mono
Stereo
Dual
If the stereo signal is weak and an automatic switching occurs, then switch to the Mono.
DUAL 1/2
MONO
STEREO ↔ MONO
DUAL 1 ↔ DUAL 2
MONO
MONO ↔ STEREO
MONO ↔ DUAL 1
DUAL 2
Default
Automatic
change
DUAL 1
Automatic
change
DUAL 1
You can also set these options
simply by pressing the DUAL
button on remote control.
Adjusting the Volume Automatically
Each broadcasting station has its own signal conditions, and
so it is not easy for you to adjust the volume every time the
channel is changed. This feature allows you to automatically
adjust the volume of the desired channel by lowering the
sound output when the modulation signal is high or by
raising the sound output when the modulation signal is low.
1. Press the MENU button to display the menu.
Press the ▲ or ▼ button to select "Sound", then press the
ENTER/OK button.
2. Press the ▲ or ▼ button to select "Auto Volume", then press
the ENTER/OK button.
3. Press the ▲ or ▼ button to select "On" or "Off". Press the
ENTER/OK button.
4. Press the EXIT
button to exit.
English - 24
TV
Mode : Custom
Equalizer
SRS TS XT : Off
Auto Volume : Off
Internal Mute : Off
Sound Select : Main
Reset
Move Enter Return
TV
Mode : Custom
Equalizer
SRS TS XT : Off
Auto Volume : Off
Internal Mute : Off
Sound Select : Main
Reset
Move Enter Return
Sound
Sound
Off
On
Page 27
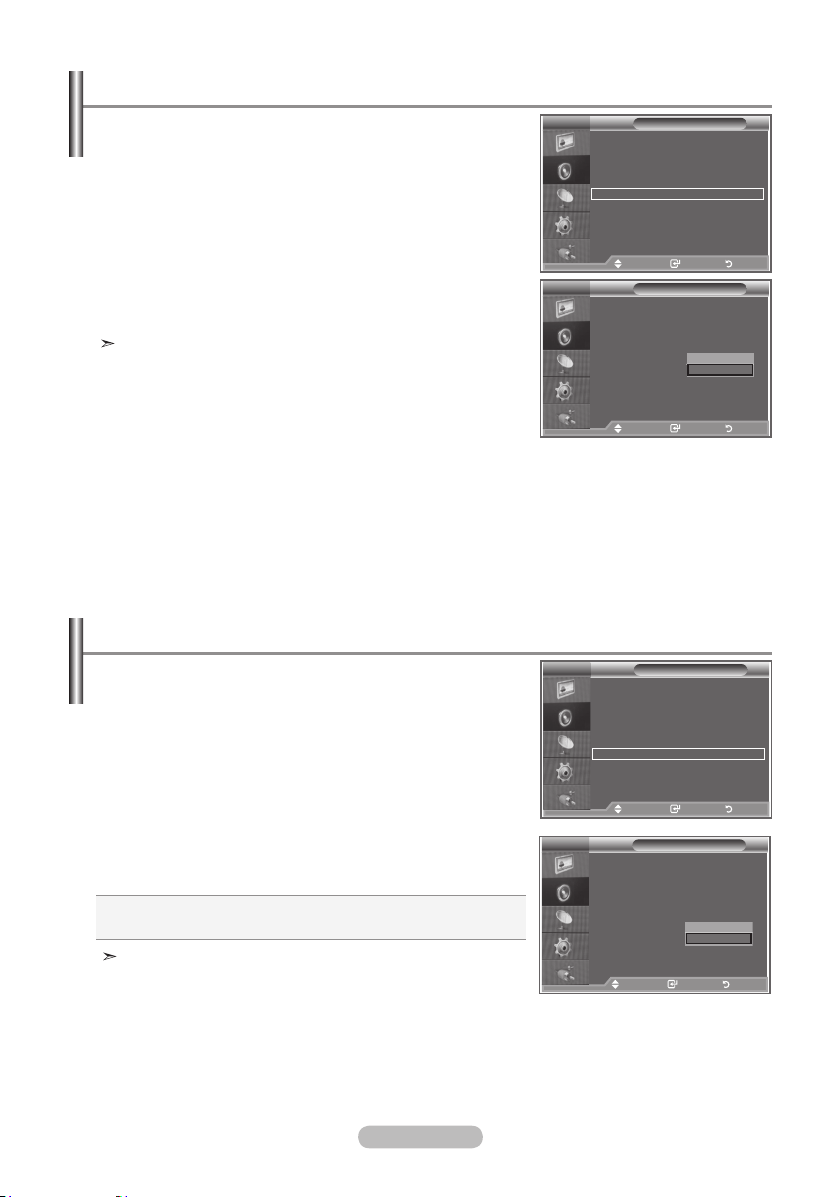
Selecting the Internal Mute
If you want to hear the sound through separate speakers,
cancel the internal amplifier.
1. Press the MENU button to display the menu.
Press the ▲ or ▼ button to select "Sound", then press the
ENTER/OK button.
2. Press the ▲ or ▼ button to select "Internal Mute", then press
the ENTER/OK button.
3. Press the ▲ or ▼ button to select "On" or "Off". Press the
ENTER/OK button.
4. Press the EXIT
button to exit.
When "Internal Mute" is set to "On", the Sound menus except
for "Sound Select" (in PIP mode) cannot be adjusted.
Listening to the Sound of the Sub Picture
During the PIP features activation, you can listen to the sound
of the sub picture.
1. Press the MENU button to display the menu.
Press the ▲ or ▼ button to select "Sound", then press the
ENTER/OK button.
2. Press the ▲ or ▼ button to select "Sound Select", then press
the ENTER/OK button.
3. Press the ▲ or ▼ button to select "Sub".
Press the ENTER/OK button.
4. Press the EXIT
button to exit.
Main : Used to listen to the sound of the main picture.
Sub : Used to listen to the sound of the sub picture.
You can select this option when the “PIP” is set to “On”.
TV
Mode : Custom
Equalizer
SRS TS XT : Off
Auto Volume : Off
Internal Mute : Off
Sound Select : Main
Reset
Move Enter Return
TV
Mode : Custom
Equalizer
SRS TS XT : Off
Auto Volume : Off
Internal Mute : Off
Sound Select :
Reset
Move Enter Return
TV
Mode : Custom
Equalizer
SRS TS XT : Off
Auto Volume : Off
Internal Mute : Off
Sound Select : Main
Reset
Move Enter Return
TV
Mode : Custom
Equalizer
SRS TS XT : Off
Auto Volume : Off
Internal Mute : Off
Sound Select : Main
Reset
Move Enter Return
Sound
Sound
Sound
Sound
Off
On
Main
Sub
English - 25
Page 28
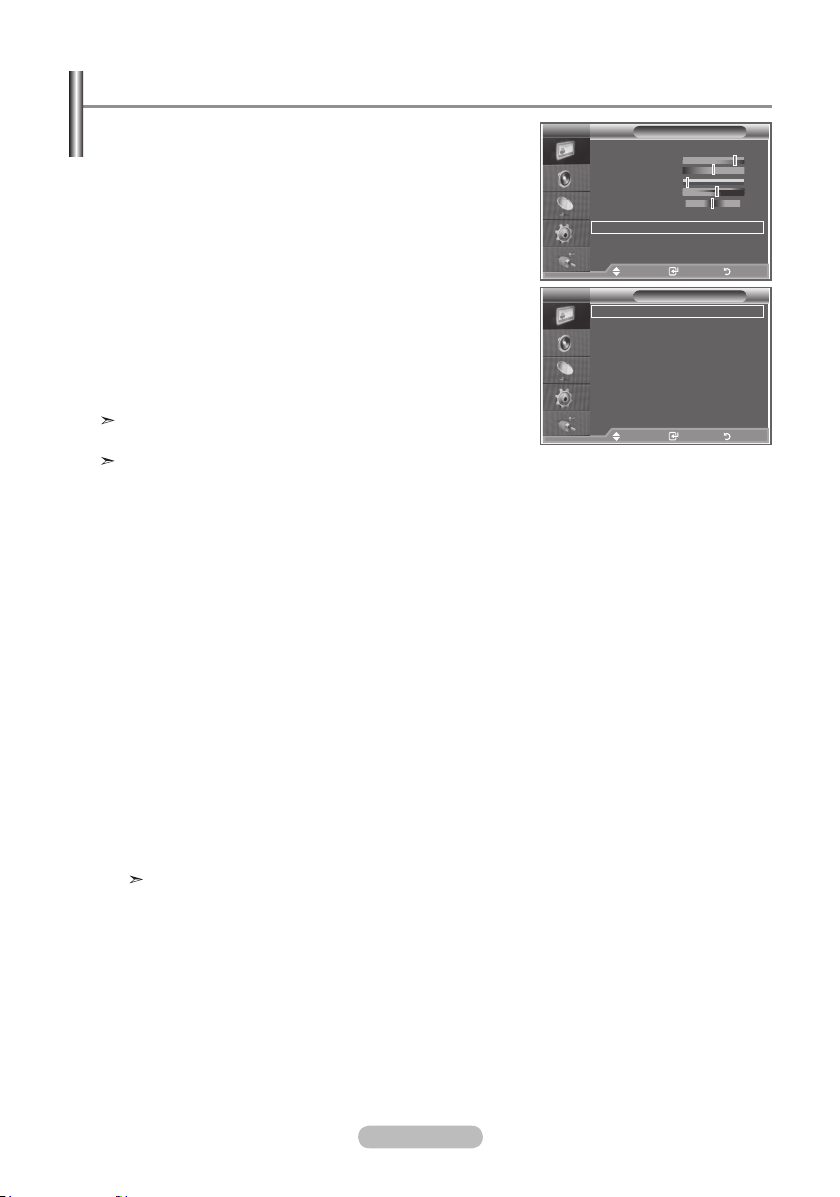
Resetting the Sound Settings to the Factory Defaults
If Game Mode is On, the Reset Sound function is activated.
Selecting the Reset function after setting the equalizer resets
the equalizer setting to the factory defaults.
1. Press the MENU button to display the menu.
Press the ▲ or ▼ button to select "Sound", then press the
ENTER/OK button.
2. Press the ▲ or ▼ button to select "Reset", then press the
ENTER/OK button.
3. Press the EXIT
You can select this option when the "Game Mode" is set to "On".
button to exit.
Setting and Displaying the Current Time
You can set the TV’s clock so that the current time is displayed when you press the INFO button. You must also set
the time if you wish to use the automatic On/Off timers.
1. Press the MENU button to display the menu.
Press the ▲ or ▼ button to select "Setup", then press the
ENTER/OK button.
2. Press the ▲ or ▼ button to select "Time", then press the
ENTER/OK button.
3. Press the ENTER/OK
4.
To...
Move to Month, Day, Year, Hour or Minute
Set the Month, Day, Year, Hour or Minute
Press the ENTER/OK button.
button to select "Clock Set".
Press the...
or button.
5
or 6 button.
TV
Mode : Custom
Equalizer
SRS TS XT : Off
Auto Volume : Off
Internal Mute : Off
Sound Select : Main
Reset
Move Enter Return
Mode : Custom
TV
Equalizer
Plug & Play
SRS TS XT : Off
Language : English
Auto Volume : Off
Time
Internal Mute : Off
Game Mode : Off
Reset
Blue Screen : Off
Melody : Off
PC
Home Theatre PC
Light Effect :
More
TV
: Off
Move Enter Return
Move Enter Return
Clock Set
Month
p
01
q
Hour00Minute
00
Sound
Setup
Watching Mode On
Day
01
Year
2007
5. Press the EXIT
button to exit.
Move Adjust Return
If you disconnect the power cord, you have to set the clock
again.
You can also set Year, Month, Day, Hour and Minute by pressing the number buttons on the
remote control.
English - 26
Page 29
Setting the Sleep Timer
You can select a time period of between 30 and 180 minutes
after which the television automatically switches to standby
mode.
1. Press the MENU button to display the menu.
Press the ▲ or ▼ button to select "Setup", then press the
ENTER/OK button.
2. Press the ▲ or ▼ button to select "Time", then press the
ENTER/OK button.
3. Press the ▲ or ▼ button to select "Sleep Timer", then press
the ENTER/OK
button.
4. Press the ▲ or ▼ button repeatedly until the desired time
appears (Off, 30, 60, 90, 120, 150, 180).
Press the ENTER/OK button.
5. Press the EXIT
button to exit.
The TV automatically switches to standby mode when the
timer reaches 0.
Mode : Custom
TV
Equalizer
Plug & Play
SRS TS XT : Off
Language : English
Auto Volume : Off
Time
Internal Mute : Off
Game Mode : Off
Reset
Blue Screen : Off
Melody : Off
PC
Home Theatre PC
Light Effect :
More
TV
Clock Set :
Sleep Timer :
Timer 1 :
Timer 2 :
Timer 3 :
: Off
Move Enter Return
Move Enter Return
Move Enter Return
Setup
Watching Mode On
Time
Off
120
150
180
30
60
90
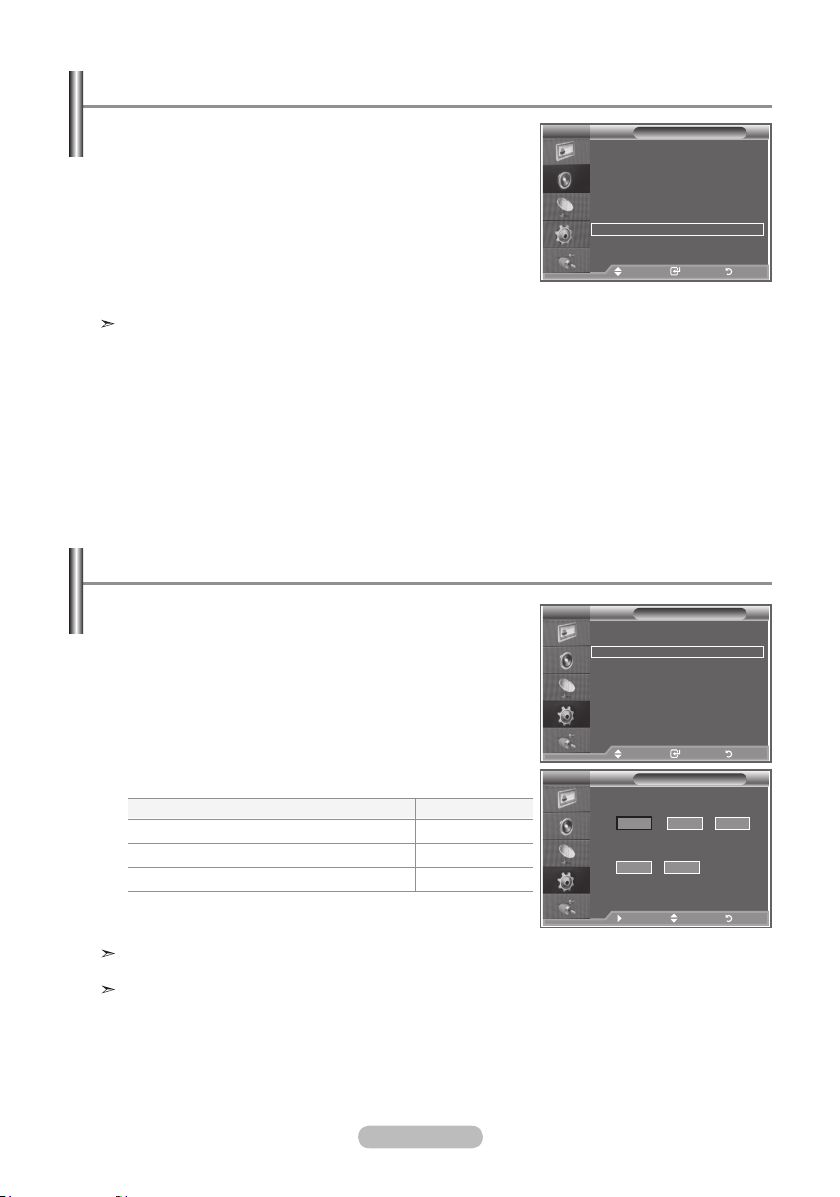
Switching the Television On and Off Automatically
1. Press the MENU button to display the menu.
Press the ▲ or ▼ button to select "Setup", then press the
ENTER/OK button.
2. Press the ▲ or ▼ button to select "Time", then press the
ENTER/OK button.
3. Press the ▲ or ▼ button to select "Timer 1", "Timer 2",
"Timer 3", then press the ENTER/OK button.
4. Press the ▲ or ▼ buttons to adjust “Hour”, then press the ►
button to move to the next step.
Set other items using the same method as above.
Yes/ No Press the ▲or▼ button
Repeat Select a Once, Everyday,
Press the ▲or▼ button
Mon-Fri, Mon-Sat, SatSun
Volume Adjust a 0~100 Press the ▲or▼ button
When finished, press the RETURN button to return.
• The current time will appear every time you press the INFO button.
• You can set the hour, minute, directly by pressing the number
buttons on the remote control.
5. Press the EXIT
button to exit.
Mode : Custom
TV
Equalizer
Plug & Play
SRS TS XT : Off
Language : English
Auto Volume : Off
Time
Internal Mute : Off
Game Mode : Off
Reset
Blue Screen : Off
Melody : Off
PC
Home Theatre PC
Light Effect :
More
TV
On Time
Off Time
Repeat
: Off
Move Enter Return
Move Enter Return
5
:
00
00
6
:
00 00 No
Once
► Move Adjust Return
Setup
Watching Mode On
Timer 1
No
Volume
10
English - 27
Page 30

Choosing Your Language
When you start using your set for the first time, you must
select the language which will be used for displaying menus
and indications.
1. Press the MENU button to display the on-screen menu.
Press the ▲ or ▼ button to select "Setup", then press the
ENTER/OK button.
2. Press the ▲ or ▼ button to select "Language", then press
the ENTER/OK button.
3. Select a particular language by pressing the ▲ or ▼ button
repeatedly.
Press the ENTER/OK button.
You can choose one of 21 languages.
4. Press the EXIT
button to exit.
Mode : Custom
TV
Equalizer
Plug & Play
SRS TS XT : Off
Language : English
Auto Volume : Off
Time
Internal Mute : Off
Game Mode : Off
Reset
Blue Screen : Off
Melody : Off
PC
Home Theatre PC
Light Effect :
More
Mode : Custom
TV
Equalizer
Plug & Play
SRS TS XT : Off
Language : English
Auto Volume : Off
Time
Internal Mute : Off
Game Mode : Off
Reset
Blue Screen : Off
Melody : Off
PC
Home Theatre PC
Light Effect :
More
: Off
Move Enter Return
Move Enter Return
: Off
Move Enter Return
Move Enter Return
Setup
Watching Mode On
Setup
English
Deutsch
Français
Italiano
Español
Nederlands
Watching Mode On
q
Using Game Mode
When connecting to a game console such as PlayStationTM or
XboxTM, you can enjoy a more realistic gaming experience by
selecting game menu.
1. Press the MENU button to display the menu.
Press the ▲ or ▼ button to select "Setup", then press the
ENTER/OK button.
2. Press the ▲ or ▼ button to select "Game Mode", then press
the ENTER/OK button.
3. Press the ▲ or ▼ button to select "On" or "Off". Press the
ENTER/OK button.
4. Press the EXIT
button to exit.
To disconnect the game console and connect another
external device, cancel game mode in the setup menu.
If you display the TV menu in Game mode, the screen
shakes slightly.
Game Mode is not available in TV mode.
If Game Mode is On:
• Picture Mode changes to Standard and Sound Mode changes to Custom automatically.
The user cannot change these to other modes.
• Sound Mode in the Sound menu is deactivated. Adjust the sound using the equalizer.
• The Reset Sound function is activated. Selecting the Reset function after setting the equalizer
resets the equalizer setting to the factory defaults.
Mode : Custom
TV
Equalizer
Plug & Play
SRS TS XT : Off
Language : English
Auto Volume : Off
Time
Internal Mute : Off
Game Mode : Off
Reset
Blue Screen : Off
Melody : Off
PC
Home Theatre PC
Light Effect :
More
Mode : Custom
TV
Equalizer
Plug & Play
SRS TS XT : Off
Language : English
Auto Volume : Off
Time
Internal Mute : Off
Game Mode : Off
Reset
Blue Screen : Off
Melody : Off
PC
Home Theatre PC
Light Effect :
More
: Off
Move Enter Return
Move Enter Return
: Off
Move Enter Return
Move Enter Return
Setup
Watching Mode On
Setup
Off
On
Watching Mode On
English - 28
Page 31

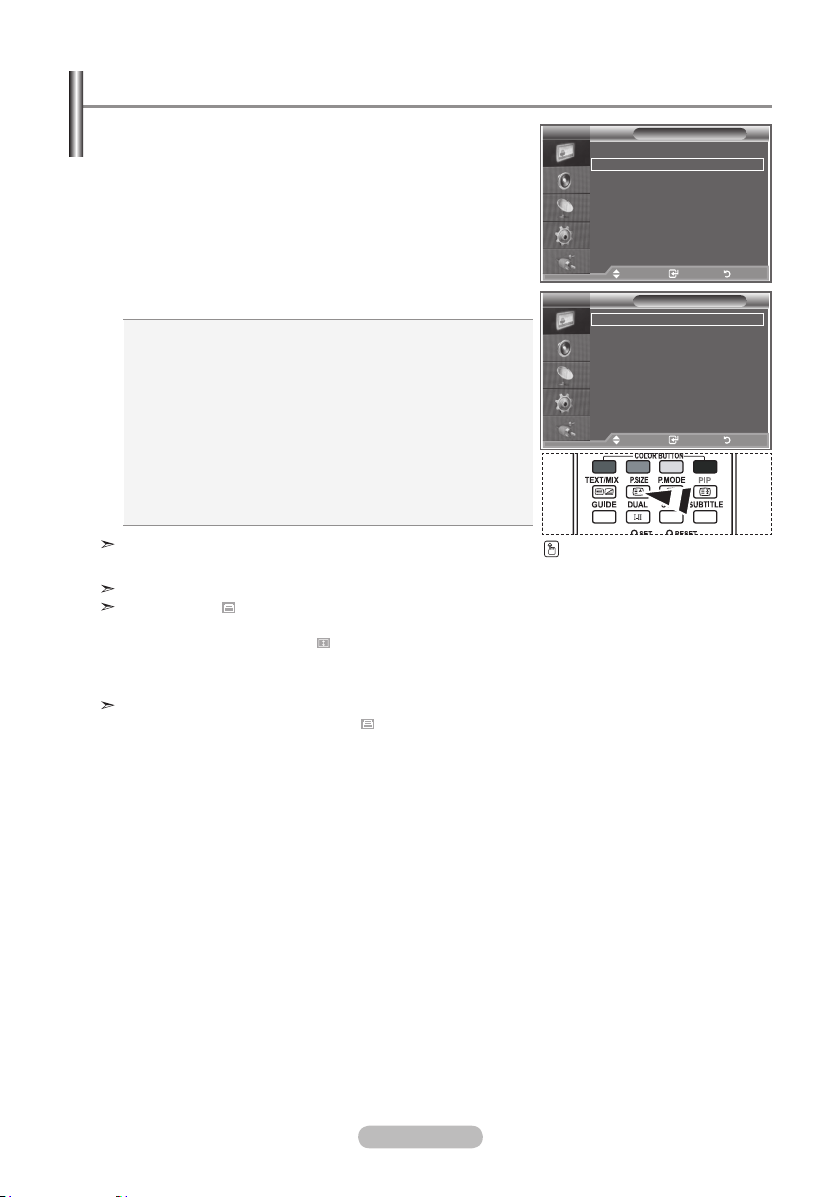
Setting the Blue Screen Mode / Selecting the Melody
Blue Screen:
If no signal is being received or the signal is very weak, a
blue screen automatically replaces the noisy picture background. If you wish to continue viewing the poor picture, you
must set the "Blue Screen" mode to "Off".
Melody:
You can hear melody sound when the television is powered
on or off.
1. Press the MENU button to display the menu.
Press the ▲ or ▼ button to select "Setup", then press the
ENTER/OK button.
2. Press the ▲ or ▼ button to select "Blue Screen" or "Melody".
Press the ENTER/OK button.
3. When you are satisfied with your setting,
press the ENTER/OK button.
Blue Screen: Off/On
Melody: Off/Low/Medium/High
4. Press the EXIT
button to exit.
Mode : Custom
TV
Equalizer
Plug & Play
SRS TS XT : Off
Language : English
Auto Volume : Off
Time
Internal Mute : Off
Game Mode : Off
Reset
Blue Screen : Off
Melody : Off
PC
Home Theatre PC
Light Effect :
More
Mode : Custom
TV
Equalizer
Plug & Play
SRS TS XT : Off
Language : English
Auto Volume : Off
Time
Internal Mute : Off
Game Mode : Off
Reset
Blue Screen : Off
Melody : Off
PC
Home Theatre PC
Light Effect :
More
: Off
Move Enter Return
Move Enter Return
: Off
Move Enter Return
Move Enter Return
Setting the Home Theatre PC
You can view higher quality pictures by configuring the
screen settings in PC Mode.
If you set the Home Theatre PC function to On, you can
configure the Detail Settings (when Picture Mode is
set to Standard or Movie) as in PC Mode.
1. Press the MENU button to display the menu.
Press the ▲ or ▼ button to select "Setup", then press the
ENTER/OK button.
2. Press the ▲ or ▼ button to select "Home Theatre PC".
Press the ENTER/OK button.
3. Press the ▲ or ▼ button to select "Off" or "On".
Press the ENTER/OK button.
4. Press the EXIT
button to exit.
This function is available only in PC mode.
Mode : Custom
TV
Equalizer
Plug & Play
SRS TS XT : Off
Language : English
Auto Volume : Off
Time
Internal Mute : Off
Game Mode : Off
Reset
Blue Screen : Off
Melody : Off
PC
Home Theatre PC
Light Effect :
More
Mode : Custom
TV
Equalizer
Plug & Play
SRS TS XT : Off
Language : English
Auto Volume : Off
Time
Internal Mute : Off
Game Mode : Off
Reset
Blue Screen : Off
Melody : Off
PC
Home Theatre PC
Light Effect :
More
: Off
Move Enter Return
Move Enter Return
: Off
Move Enter Return
Move Enter Return
Setup
Off
On
Watching Mode On
Setup
Off
Low
Medium
Watching Mode On
High
Setup
Watching Mode On
Setup
Off
Watching Mode On
On
English - 29
Page 32
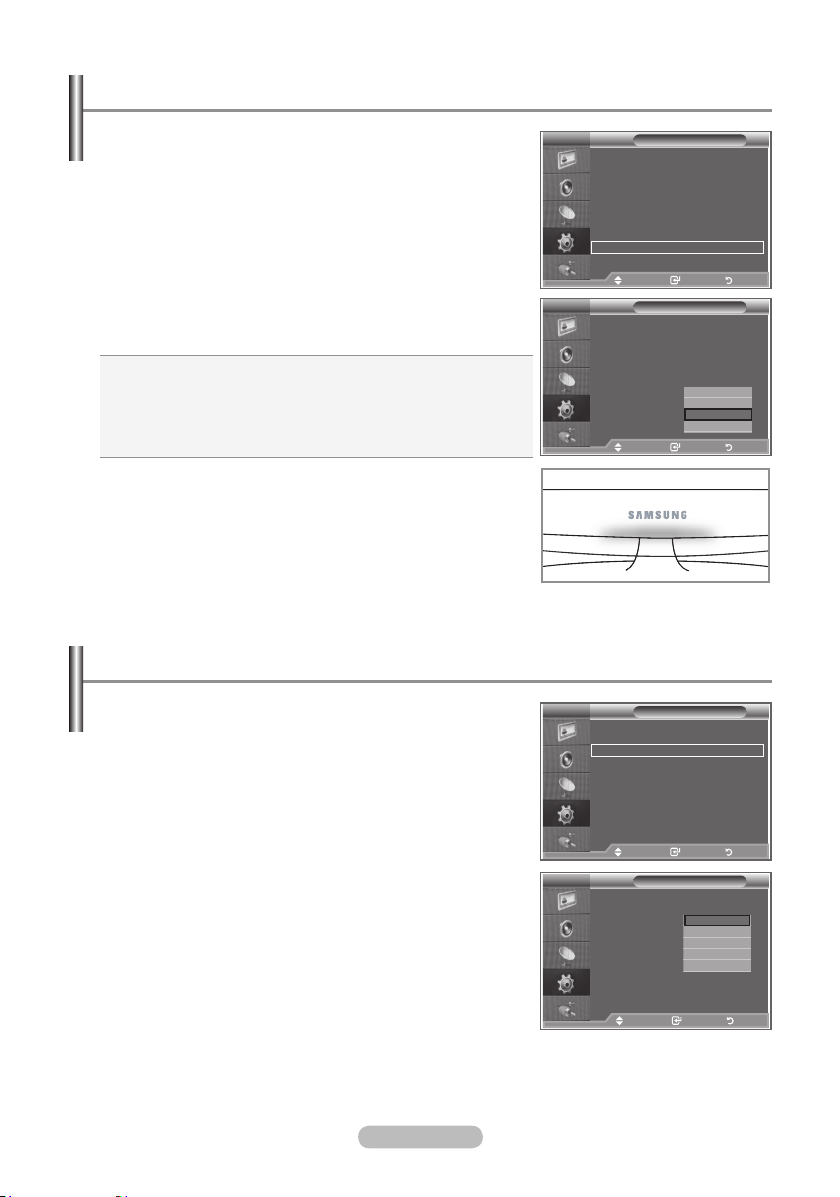
Setting the Light Effect
You can turn on/off the blue LED on the front of TV according
to the situation. Use it for saving power or when the LED
dazzles your eyes.
1. Press the MENU button to display the on-screen menu.
Press the ▲ or ▼ button to select "Setup", then press the
ENTER/OK button.
2. Press the ▲ or ▼ button to select "Light Effect", then press
the ENTER/OK button.
3. Select the required option (Off, Standby Mode On,
Watching Mode On, On) by pressing the ▲ or ▼ button.
Press the ENTER/OK button.
Off: LED will not come on.
Standby Mode On: Turns the LED on in standby mode.
Watching Mode On: Turns the LED on while watching
TV.
On: LED will come on after you turn the TV off.
4. Press the EXIT
button to exit.
Using the Energy Saving Feature
This function adjusts the brightness of the TV so as to reduce
power consumption. When you watching TV at night, set the
"Energy Saving " mode option to "High" so as to reduce the
dazzling of your eyes as well as the power consumption.
1. Press the MENU button to display the on-screen menu.
Press the ▲ or ▼ button to select "Setup", then press the
ENTER/OK button.
2. Press the ▲ or ▼ button to select "Energy Saving", then
press the ENTER/OK button.
3. Select the required option (Off, Low, Medium, High, Auto) by
pressing the ▲ or ▼ button. Press the ENTER/OK
4. Press the EXIT
button to exit.
button.
Mode : Custom
TV
Equalizer
Plug & Play
SRS TS XT : Off
Language : English
Auto Volume : Off
Time
Internal Mute : Off
Game Mode : Off
Reset
Blue Screen : Off
Melody : Off
PC
Home Theatre PC
Light Effect :
More
Move Enter Return
Mode : Custom
TV
Equalizer
Plug & Play
SRS TS XT : Off
Language : English
Auto Volume : Off
Time
Internal Mute : Off
Game Mode : Off
Reset
Blue Screen : Off
Melody : Off
PC
Home Theatre PC
Light Effect :
More
Move Enter Return
Setup
: Off
Move Enter Return
Move Enter Return
Watching Mode On
Setup
Off
: Off
Standby Mode On
Watching Mode On
Watching Mode On
On
[LE32R86, LE37R86, LE40R86,
LE32R88, LE37R88, LE40R88]
Mode : Custom
TV
Equalizer
More
SRS TS XT : Off
Auto Volume : Off
Energy Saving : Off
Internal Mute : Off
HDMI Black Level
Reset
PIP
Move Enter Return
TV
More
Energy Saving : Off
HDMI Black Level
PIP
Setup
: Low
Move Enter Return
Setup
Off
: Low
Low
Medium
High
Auto
English - 30
Move Enter Return
Page 33

Selecting the Source
You can select among external sources connected to your
TV’s input jacks.
1. Press the MENU button to display the menu.
Press the ▲ or ▼ button to select "Input", then press the
ENTER/OK button.
2. Press the ENTER/OK button again, to select "Source List".
When no external device is connected to your
set, only "TV", "Ext.1", "Ext.2" are activated in the
"Source List". "AV", "S-Video", "Component", "PC",
"HDMI1", "HDMI2","HDMI3","DTV" are activated only
when they are connected to your set.
3. Select the required device by pressing the ▲ or ▼ button.
Press the ENTER/OK button.
Press the SOURCE button on the remote control to toggel
between all the available source.
TV mode can be selected by pressing the TV/DTV button,
number buttons(0~9), and the
P / button on the remote control. But it cannot be selected
using the SOURCE button.
Mode : Custom
TV
Equalizer
Source List : TV
SRS TS XT : Off
Edit Name
Auto Volume : Off
Anynet+(HDMI-CEC)
Internal Mute : Off
Reset
Move Enter Return
Move Enter Return
Mode : Custom
TV
Equalizer
TV
SRS TS XT : Off
Ext.1 : ----
Auto Volume : Off
Ext.2 : ---Internal Mute : Off
AV : ---S-Video : ----
Reset
Component : ---PC : ---HDMI1 : ---HDMI2 : ---HDMI3 : ----
DTV : ----
Source List
Move Enter Return
Move Enter Return
Input
Editing the Input Source Names
Name the device connected to the input jacks to make your
input source selection easier.
1. Press the MENU button to display the menu.
Press the ▲ or ▼ button to select "Input", then press the
ENTER/OK button.
2. Press the ▲ or ▼ button to select "Edit Name", then press
the ENTER/OK button.
3. Press the
edit.
Press the ENTER/OK button.
4. Press the ▲ or ▼ button to select the required device.
Press the ENTER/OK button.
5. Press the EXIT
▲ or ▼ button to select the device that you wish to
button to exit.
English - 31
Mode : Custom
TV
Equalizer
Source List : TV
SRS TS XT : Off
Edit Name
Auto Volume : Off
Anynet+(HDMI-CEC)
Internal Mute : Off
Reset
Move Enter Return
Move Enter Return
Mode : Custom
TV
Equalizer
Ext.1 : ----
SRS TS XT : Off
Ext.2 : ----
Auto Volume : Off
AV : ----
Internal Mute : Off
S-Video : ----
Component : ----
Reset
PC : ----
HDMI1 : ----
HDMI2 : ----
HDMI3 : ----
Edit Name
Move Enter Return
Move Enter Return
Input
----
VCR
DVD
D-VHS
Cable STB
HD STB
Satellite STB
q
Page 34

Previewing the DTV Menu System
Available in DTV mode. Preset to the DTV mode by
using the TV/DTV button on your remote control.
To help you navigate around the on screen menu
system and adjust the various settings available, refer
to the following illustration.
This product is only applicable to Finnish broadcasts.
Broadcasts are not supported in other countries.
Press the D.MENU button.
Guide
Now & Next Guide
Full Guide
Scheduled List
Default Guide
Channel
Auto Store
Manual Store
Edit Favourite Channels
Channel List
Setup
Menu Transparency
Parental Lock
Subtitle
Subtitle Mode
Audio Format
Digital Text
Time Zone
System
Language
Audio Language
Subtitle Language
Teletext Language
Preference
The sub-items of the CI Menu may vary depending on
the CAM model.
Now/Next, Full Guide
Auto, Cable, Aerial
Cable, Aerial
All, Favourites, Default
High, Medium, Low, Opaque
Enter PIN
Off, On
Normal, Hard of hearing
PCM, Dolby Digital
Disable, Enable
Product Information
Signal Information
Software Upgrade
Common Interface
Reset
Primary Audio Language
Secondary Audio Language
Primary Subtitle Language
Secondary Subtitle Language
Primary Teletext Language
Secondary Teletext Language
Mode : Custom
Equalizer
Now & Next Guide
SRS TS XT : Off
Full Guide
Auto Volume : Off
Scheduled List
Internal Mute : Off
Default Guide : Full Guide
Reset
Auto Store
Manual Store
Edit Favourite Channels
Channel List
Menu Transparency
Parental Lock
Subtitle : On
Subtitle Mode : Normal
Audio Format : PCM
▼
Audio Language
Subtitle Language
Teletext Language
Preference
Guide
Move Enter Return
Move Enter Exit
Channel
Move Enter Return
Move Enter Exit
Setup
: Medium
Move Enter Return
Move Enter Exit
Language
Move Enter Return
Move Enter Exit
You can select these options
by simply pressing the
D.MENU button on the
remote control.
English - 32
Page 35

Updating the Channel List Automatically
You can update the channel list when the broadcaster
adds new Services or if you move the TV to a new
location.
1. Press the D.MENU button to display the DTV menu.
2. Press the
▲ or ▼
button to select "Channel", then press
the ENTER/OK button.
Press the ENTER/OK button again, to select "Auto Store".
3.
4.
Press the ▲ or ▼ button to select "Auto", "Cable" or "Aerial".
Press the ENTER/OK button.
• Auto: Scans channels automatically.
• Cable: Scans cable channels.
• Aerial: Scans aerial channels.
This product cannot scan both cable and aerial
Choose system to scan
Auto
Cable
Aerial
Move Enter Return
Move Enter Return
Mode : Custom
Equalizer
SRS TS XT : Off
Auto Volume : Off
Scanning for cable digital services...
Internal Mute : Off
Reset
Services found: 24 Frequency: 114000 KHz
channels at the same time.
5.
When it has finished, the number of scanned services will
be displayed.
The existing favourite channel list will not be deleted when
Return
the channel list is updated.
To stop the scan before it has finished, press the ENTER/OK button with "STOP" selected.
6. Press the EXIT
If the signal status is poor, the "No Service found! Check the aerial connection" message is
button to exit.
displayed.
Updating the Channel List Manually
You can specify the channel for a fast channel search.
1. Press the D.MENU button to display the DTV menu.
2. Press the
▲ or ▼
button to select "Channel", then press
the ENTER/OK button.
Press the
3.
press the ENTER/OK
Press the
4.
▲ or ▼
button to select "Manual Store", then
button.
▲ or ▼
button to select "Cable", then press
the ENTER/OK button.
• Frequency: Displays the frequency for the channel.
(Differs in each country)
• Modulation: Displays available modulation values.
• Symbol rate: Displays available symbol rates.
5.
Press the
▲ or ▼
button to select "Aerial", then press
the ENTER/OK button.
• Channel: Channel "21" to "69" in sequence are
displayed (depending on the country)
• Frequency: The frequency available in the Channel
group is displayed.
• Bandwidth: The available bandwidths are 8 MHz.
When it has finished, the number of scanned services will
6.
be displayed.
7. Press the EXIT
button to exit.
English - 33
Cable
Aerial
Channel
Manual Store
Choose system to scan
Move Enter Return
Move Enter Return
Manual Store
Frequency 114000
Modulation 64QAM
Symbol rate 6900 kS/s
Search
0 .. 9
Enter freq. Move Return
Manual Store
Frequency Bandwidth
▲
474000 8
65
▼
Search
Adjust Return
Auto Store
Auto Store
Stop
KHz
35%
KHz
MHz
Page 36

Editing Your Favourite Channels
You can edit your favourite channels using the four colour
buttons.
1.
Press the D.MENU button to display the DTV menu.
2. Press the ▲ or ▼ button to select "Channel", then press the
ENTER/OK button.
3.
Press the ▲ or ▼ button to select "Edit Favourite Channels",
then press the ENTER/OK button.
4.
Press the red button to display all currently stored channels.
5.
Press the ▲ or ▼ button to select a channel you want.
Press the ENTER/OK button.
channel will be added to the favourite channel list.
•
• Preview: Displays (a) currently selected channel(s).
6.
Add
You can use this function when one or more favourite
channels have been selected.
1.
2. Press the ▲ or ▼ button to select "Channel", then press the
ENTER/OK button.
3.
then press the ENTER/OK button.
4.
To add more channels, refer to the step 5 on the previous
description.
5.
button.
red button.
• To remove all channels, press the green button.
• Preview : Displays (a) currently selected channel(s).
• Press the CH LIST button to display the favourite channel
manager.
" icon is shown next to the selected channel and the
A "
To undo, press the ENTER/OK button again.
•
Select All
•
Select None
The Favorite Channels settings have been completed.
Press the EXIT button to exit.
: Select all channels currently displayed.
: Deselect all selected channels.
Press the D.MENU button to display the DTV menu.
Press the ▲ or ▼ button to select "Edit Favourite Channels",
Press the red button in the "Edit Favourite Channels" menu.
If you want to check the channel to be stored, press D.MENU
Press the EXIT button to exit.
• To add all channels to the favourite channel list, press the
Edit Favourite Channels
(no Channels)
Move Enter Return
Add Channels
Return
Edit Favourite Channels
5
1 BBC TWO
2 Five
3 BBC THREE
4 abc1
5 QVC
6
Move Enter Return
Select All Select None Preview
Move Select Return
Edit Favourite Channels
1 BBC TWO
3 BBC THREE
4 abc1
Move Enter Return
Add Move Prewiew Delete
Move Return
Edit Favourite Channels
5
1 BBC TWO
2 Five
3 BBC THREE
4 abc1
5 QVC
6
Move Enter Return
Select All Select None Preview
Move Select Return
★
★
★
★
★
★
English - 34
Page 37

Move
1.
Press the D.MENU button to display the DTV menu.
2. Press the ▲ or ▼ button to select "Channel", then press the
ENTER/OK button.
3.
Press the ▲ or ▼ button to select "Edit Favourite Channels",
then press the ENTER/OK button.
4.
Select the required channel using the 5 or 6 button.
5.
Press the green button.
A " " icon is displayed on the left side of the channel
name.
6. Press the ▲ or ▼ button to select the channel that you want
to move, and press the green or ENTER/OK
7.
Press the EXIT button to exit.
button.
Edit Favourite Channels
1 BBC TWO ★
3 BBC THREE
4 abc1
Move Enter Return
Add Move Prewiew Delete
Move Select Return
★
★
Preview
1.
In the "Edit Favourite Channels" menu,
select the channel to be previewed by pressing the ▲ or ▼
button.
2.
Press the yellow button.
The selected channel is displayed on the screen.
Delete
1. In the "Edit Favourite Channels" menu, select the channel to
be deleted from the favourite channels list by pressing the
▲ or ▼ button.
2.
Press the blue button.
The selected channel and number will be deleted.
To add a deleted channel back in to the favourite channel
list, see "Add" on page 34.
Edit Favourite Channels
1 BBC TWO ★
3 BBC THREE
4 abc1
Move Enter Return
Add Move Prewiew Delete
Move Return
Edit Favourite Channels
1 BBC TWO
3 BBC THREE
Move Enter Return
Add Move Prewiew Delete
Move Return
★
★
★
★
English - 35
Page 38

Selecting Channel List
You can exclude the channels you have chosen from the
channels you have scanned.When you scan through the
stored channels, those you have chosen to skip are not
displayed. All channels that you do not specifically choose to
skip are displayed during scanning.
1.
Press the D.MENU button to display the DTV menu.
2.
Press the ▲ or ▼ button to select "Channel", then press the
ENTER/OK button.
3.
Press the ▲ or ▼ button to select "Channel List".
Press the ENTER/OK button.
4.
Press the ▲ or ▼ button to select "All", "Favourites" or "Default".
Test Card M' v2.0
1 Test Card M'
3 Vida003b
4 Vida004b
5 vida005b
6 vida006b
15 Ch 15
16 QVC
17 UKTV Gold
Previous Page NextPage Favourites TV
Move Watch Return
Press the ENTER/OK button.
5.
Press the yellow button to toggle between your favourite channels and all channels.
Your favourite channels are only displayed if they were previously set in the "Editing Your
Favourite Channels" menu (refer to page 34).
6.
Press the red or green button to display the previous or next channel List page.
7.
Press the ▲ or ▼ button to select a channel to be tuned.
Press the ENTER/OK button.
The channel number, name and an icon are displayed in the top left corner while changing the
channel. The channel number and name are displayed if the channel is one of the all channels,
and a icon if the channel is one of the favourite channels.
8.
Press the blue button to toggle between your TV, Radio, Data/Other and All.
9.
Press the CH LIST button to exit from the channel List.
Channel List
23 bid-up.tv
25 TCM
26 UKTV Style
27 Discovery
28 DiscoveryH&L
15 Cartoon Nwk
33 Boomerang
55 Ttext Holidays
All Channels
60 Television X
70 BBC Radio 1
72 BBC Radio 2
73 BBC Radio 3
74 BBC Radio 4
84 heat
91 MOJO
800 ARD-MHP-Data
6 More
Displaying Programme Information
1/2
While viewing a channel, additional information about the
current programme may be displayed.
1.
While viewing a programme, press the INFO button.
The programme information is displayed.
2.
To exit from banner information, press the INFO button.
English - 36
1 AFDO,16:9
AFDO 16:9
No Block
SD
Stereo
Subtitle
English
Exit
14:30 Sat 1 Sep
AII Channels
A
14:30~14:33
Contains video with AFD O; coded frame
is 16:9
Move Enter Return
Page 39

Viewing the EPG (Electronic Programme Guide) Information
The EPG (Electronic Programme Guide) information is
provided by the broadcasters. Programme entries may
appear blank or out of date as a result of the information
broadcast on a given channel. The display will dynamically
update as soon as new information becomes available.
Now & Next Guide
For the six channels indicated in the left-hand column,
displays the Current programme and the Next programme
information.
Full Guide
Displays the programme information as time ordered One
hour segments. Two hours of programme information is
displayed which may be scrolled forwards or backwards in
time.
1.
Press the D.MENU button to display the DTV menu.
2.
Press the ENTER/OK button, to select "Guide".
3.
Press the ▲ or ▼ button to select "Now & Next Guide" or
"Full Guide".
Press the ENTER/OK button.
You can also display the guide menu simply by pressing
the GUIDE button.
4.
To... Then...
• Select a programme by pressing
Watch a programme in the EPG list
If the next program is selected, it is scheduled with the clock icon
displayed. If the ENTER/OK button is pressed again, the scheduling is
canceled with the clock icon gone. For details about scheduling
programmes, refer to the next page.
View programme information
Toggle between the "Now & Next
Guide" or "Full Guide"
Display the "Favourites" and the "All
Channels" list
Scrolls backwards quickly (24 hours). • Press the yellow button repeatedly.
Scrolls forward quickly (24 hours). • Press the blue button repeatedly.
Exit the guide • Press the EXIT button.
the 5, 6, , button.
• Press the ENTER/OK button.
• Select a programme of your choice by
pressing the 5, 6, , button.
• Press the INFO
programme of your choice is
highlighted.
• Press the red button repeatedly.
• Press the green button repeatedly.
button when the
All Channels
Extreme Machines: Armoured Cars
Now Next
Watch ExitFull Guide Favourites
Extreme Machines: Armoured Cars
13:00 14:00Today
Watch ExitNow/Next Favourites
Now & Next Guide
Full Guide
-24Hours +24Hours
13:28 Wed 16 Feb
INFO
Information
13:28 Wed 16 Feb
INFO
Information
The programme title is on the upper part of the screen center. Please click on INFO button for
the detailed information. Channel Number, Running Time, Status Bar, Parental Level, Video Quality
Information(HD/SD), Sound Modes, Subtitle or Teletext, Languages of Subtitle or Teletext, and
brief summary of the highlighted programme are included on the detailed information. "..." will be
appeared if the summary is long.
Six channels are displayed. To scroll between channels, move to a channel using the ▲ or ▼
button. To display page by page, use the P or button.
English - 37
Page 40

Using the Scheduled List
If you make a scheduled viewing list of programs you may
like to see, the channel will be automatically switched to the
scheduled program at the scheduled time even if you are
watching another program.
1.
Press the D.MENU button to display the DTV menu.
2.
Press the ENTER/OK button, to select "Guide".
3.
Press the ▲ or ▼ button to select "Scheduled List", then
press the ENTER/OK button.
4.
Press the red button.
The channel will be switched to the scheduled program.
5.
Press the ENTER/OK button to select an item and adjust with
the ◄ or ► button .
You can also set hour and minute by pressing the number
buttons on the remote control.
• Channel: Set the channel.
•
Time:
• Date: Set Year, Month and Day.
• Frequency: Set the frequency.
("Once", "Daily", or "Weekly")
After setting the schedule, Press the red button.
6.
7.
Press the EXIT button to exit.
•
Save: Save the adjusted schedule.
• Cancel: Cancel the adjusted schedule.
•
Add Programme
•
Edit
• Delete: Delete the selected schedule.
Set the time.
: Add a new schedule.
: Re-adjust the selected schedule.
Scheduled List
(No programmes)
Add Programme
Return
Scheduled List
Tuesday 22 Apr 15:30 ~ 16:00 Once
801 RaiTre
Add Programme
Move Return
Save Cancel
Adjust Move Return
Channel
Time
Date
Frequency
Edit Delete
Scheduled List
802 RaiUno
15 : 20 to -- : --
Tue 22 Apr 2007
Once
Setting the Default Guide
You can preset the default guide style.
1.
Press the D.MENU button to display the DTV menu.
2.
Press the ENTER/OK button, to select "Guide".
3.
Press the ▲ or ▼ button to select "Default Guide", then press
the ENTER/OK button.
4.
Select "Now/Next" or "Full Guide" using the ▲ or ▼ button,
and press the ENTER/OK button.
5.
Press the EXIT button to exit.
English - 38
Now & Next Guide
Full Guide
Scheduled List
Default Guide : Full Guide
Guide
Now/Next
Full Guide
Move Enter Return
Move Enter Return
You can select these options
by simply pressing the GUIDE
button on the remote control.
Page 41

Viewing All Channels and Favourite Channels
In the EPG menu, you can display all channels or favourite
channels.
1.
Press the D.MENU button to display the DTV menu.
2.
Press the ENTER/OK button again, to select "Guide".
3. Select the your required guide ("Now & Next Guide" or "Full
Guide") by pressing the
4.
Press the ENTER/OK button.
5.
Press the green button.
▲ or ▼ button.
All the channel lists and the favorite channel lists will be
toggled.
6.
Select a programme of your choice by pressing the ▲, ▼,
◄, or ► button.
7.
Press the INFO button to display information about the
highlighted programme.
8.
When the Edit Favourite Channels list has not been set up:
•
"The favourites list is empty.
Would you like to choose your favourites now?" message is
displayed.
•
Select "Yes".
The "Edit Favourite Channels" menu is displayed.
If you select "No", all channels will remain unchanged.
• To edit the favourite channels, refer to page 34 for more
details.
Press the EXIT button to exit.
9 .
All Channels" is the list of channels that have been scanned by
"
the channel list update.
All channels are displayed in the all channel mode.
Favourites" (favourite channels) is the list of channels that has
"
been set in the "Edit Favourite Channels" menu (refer to page 34).
All Channels
Extreme Machines: Armoured Cars
Watch ExitFull Guide Favourites
Extreme Machines: Armoured Cars
The favourites list is empty.
Would you like to choose your
favourites now?
Watch ExitNow/Next Favourites
Now & Next Guide
Now Next
Full Guide
13:00 14:00Today
Yes No
-24Hours +24Hours
13:28 Wed 16 Feb
INFO
Information
13:28 Wed 16 Feb
INFO
Information
English - 39
Page 42

Adjusting the Menu Translucency
You can set the translucency of the menu.
1.
Press the D.MENU button to display the DTV menu.
2.
Press the ▲ or ▼ button to select "Setup", then press
the ENTER/OK button.
3.
Press the ▲ or ▼ button to select "Menu Transparency"
then press the ENTER/OK button.
4. Select the required option ("High", "Medium", "Low", or
"Opaque") by pressing the
▲ or ▼ button, and press the
ENTER/OK button to change the setting.
5.
Press the EXIT button to exit.
Setting up the Parental Lock
Menu Transparency
Parental Lock
Subtitle : On
Subtitle Mode : Normal
Audio Format
▼
Setup
: Medium
High
Medium
Low
Opaque
Move Enter Return
This feature allows you to prevent unauthorized users, such
as children, from watching unsuitable programmes by a
4-digit PIN (Personal Identification Number) code that is
defined by the user. The on-screen menu will instruct you to
assign a PIN code (you can change it later, if necessary).
1.
Press the D.MENU button to display the DTV menu.
2.
Press the 5 or 6 button to select "Setup", then press
the ENTER/OK button.
3.
Press the 5 or 6 button to select "Parental Lock.", then
press the ENTER/OK button.
4.
The "Enter PIN" is displayed.
5. Enter your current 4-digit PIN code by using the numeric
buttons (0~9).
The options available in the "Parental Lock" group are
displayed with the "Parental Rating" selected.
The default PIN code for a new TV set is 0000.
If you enter an invalid PIN code,the "Invalid PIN code.
Please try again." message is displayed.
6.
Press the ENTER/OK button.
7.
Press the 5 or 6 button to select the age rating you want to
lock out.
Press the ENTER/OK button.
8. If you want to change the PIN code,select "Change PIN" by
pressing the
5 or 6 button. Press the ENTER/OK button.
The "Enter New PIN" is displayed.
9.
Enter your new PIN code by using the numeric buttons (0~9).
The "Confirm New PIN" is displayed.
10. Re-enter your new PIN code to confirm by using the numeric
buttons (0~9).
The Your PIN code has been changed successfully
message is displayed.
11.
Press the ENTER/OK button.
12.
Press the EXIT button to exit.
If you forget the PIN code, press the remote control buttons
in the following sequence, which resets the PIN to 0-0-0-0:
POWER (Off), MUTE, 8, 2, 4, POWER (On).
English - 40
Menu Transparency
Parental Lock
Subtitle : On
Subtitle Mode : Normal
Audio Format
▼
Enter PIN
Parental Rating: No Block
Change PIN
Confirm New PIN
Your PIN code has been changed successfully.
Setup
: Medium
Move Enter Return
Move Enter Return
Parental Lock
Enter PIN Return
Parental Lock
▲
No Block
No Block
3
4
5
6
7
Move Enter Return
Move Enter Return
Enter PIN Return
▼
Change PIN
OK
Page 43

Setting the Subtitle
You can activate and deactivate the subtitles.
1.
Press the D.MENU button to display the DTV menu.
2.
Press the ▲ or ▼ button to select "Setup", then press the
ENTER/OK button.
3.
Press the ▲ or ▼ button to select "Subtitle ", then press the
ENTER/OK button.
4.
Select "On" by pressing the ▲ or ▼ button. Press the
ENTER/OK button.
5.
Press the EXIT button to exit.
Setting the Subtitle Mode
Use this menu to set the Subtitle Mode. "Normal" under
the menu is the basic subtitle and "Hard of hearing" is the
subtitle for a hearing-impaired person.
1.
Press the D.MENU button to display the DTV menu.
2.
Press the ▲ or ▼ button to select "Setup", then press the
ENTER/OK button.
3. Press the ▲ or ▼ button to select "Subtitle Mode", then
press the ENTER/OK button.
4. Press the ▲ or ▼ button to select "Normal" or
"Hard of hearing". Press the ENTER/OK button.
5.
Press the EXIT button to exit.
If the programme you are watching does not support the
"Hard of hearing" function, "Normal" automatically activates
even though "Hard of hearing" mode is selected.
Menu Transparency
Parental Lock
Subtitle : On
Subtitle Mode : Normal
Audio Format
Menu Transparency
Parental Lock
Subtitle
Subtitle Mode : Normal
Audio Format
Setup
: Medium
Off
On
Move Enter Return
Move Enter Return
Setup
: Medium
: On
Normal
Hard of hearing
Move Enter Return
Move Enter Return
Selecting the Audio Format
You can only hear Dolby Digital sound through the audio
receiver connected through an optical cable. You can only
hear PCM sound through the main speaker.
When sound is emitted from both the main speaker and the
audio receiver, a sound echo may occur due to the decoding
speed difference between the main speaker and the audio
Menu Transparency
Parental Lock
Subtitle : On
Subtitle Mode : Normal
Audio Format : PCM
receiver. In this case, use the internal mute function.
1.
Press the D.MENU button to display the DTV menu.
2.
Press the ▲ or ▼ button to select "Setup", then press the
ENTER/OK button.
3.
Press the ▲ or ▼ button to select "Audio Format", then press the ENTER/OK button.
4. Press the ▲ or ▼ button to select "PCM" or "Dolby Digital". Press the ENTER/OK button.
5.
Press the EXIT button to exit.
The Audio Format appears according to the broadcasting signal.
Dolby digital sound is only available when the TV is connected with an external speaker using an
optical cable.
English - 41
Setup
: Medium
Move Enter Return
Page 44

Selecting the Digital Text (UK only)
If the programme is broadcast with digital text, this feature is
enabled.
1.
Press the D.MENU button to display the DTV menu.
2.
Press the ▲ or ▼ button to select "Setup", then press the
Digital Text : Enable
Time Zone
System
ENTER/OK button.
3.
Press the ▲ or ▼ button to select "Digital Text", then press
the ENTER/OK button.
4.
Press the ▲ or ▼ button to select "Disable" or
"Enable". Press the ENTER/OK button.
5.
Press the EXIT button to exit.
MHEG(Multimedia and Hypermedia Information Coding Experts Group) An International standard
for data encoding systems used in multimedia and hypermedia. This is at a higher level than the
MPEG system which includes data-linking hypermedia such as still images, character service,
animation, graphic and video files as well as multimedia data. MHEG is user runtime interaction
technology and is being applied to various fields including VOD (Video-On-Demand), ITV
(Interactive TV), EC (Electronic Commerce), tele-education, tele-conferencing, digital libraries and
network games.
Setup
Disable
Enable
Move Enter Return
Selecting the Time Zone (Spain only)
Select the time zone where locate
1.
Press the D.MENU button.
2. Press the ▲ or ▼ button to select "Setup", then press the
ENTER/OK button.
3.
Press the ▲ or ▼ button to select "Time Zone", then press
the ENTER/OK button.
4. Select the time zone where you locate by pressing the
▲ or ▼
button.
Press the ENTER/OK button.
The following options are available
The Iberian Peninsula and Balears Islands -
Canarian Islands
5. Press the EXIT button to exit.
Digital Text
Time Zone
System
The Iberian Peninsula and Balears Islands
Canarian Islands
Setup
Move Enter Return
Time Zone
Viewing Product Information
You can view your product information. For service or
repair, please contact a Samsung approved dealer.
1.
Press the D.MENU button to display the DTV menu.
2.
Press the ▲ or ▼ button to select "Setup", then press the
ENTER/OK button.
3. Press the
the ENTER/OK button.
4.
Press the ENTER/OK button again, to select "Product
Information".
- Software Version, Firmware Version
5.
Press the EXIT button to exit.
▲ or ▼
button to select "System", then press
The Product Information menu is selected.
English - 42
Adjust Enter Return
Product Information
Software Version: T_BDXPDEU00_0700
Firmware Version: T_STDEU7_102c
Return
Page 45

Checking the Signal Information
You can get information about the signal status.
1.
Press the D.MENU button to display the DTV menu.
2.
Press the ▲ or ▼ button to select "Setup", then press the
ENTER/OK button.
3.
Press the ▲ or ▼ button to select "System", then press the
ENTER/OK button.
4.
Press the ▲ or ▼ button to select "Signal Information",
then press the ENTER/OK button.
5.
Press the EXIT button to exit.
If the signal status is poor, the "No signal." message is
displayed.
Upgrading the Software
To keep your product up-to-date with new Digital Television
features then software upgrades are periodically broadcast
as part of the normal Television signal.
It will automatically detect these signals and display the
software upgrade banner. You are given the option to install
the upgrade.
1.
Press the D.MENU button to display the DTV menu.
2.
Press the ▲ or ▼ button to select "Setup", then press the
ENTER/OK button.
3.
Press the ▲ or ▼ button to select "System", then press the
ENTER/OK button.
4.
Press the ▲ or ▼ button to select "Software Upgrade",
then press the ENTER/OK button.
5.
Press the
"Manual Upgrade" or "Satandby Mode upgrade".
Press the ENTER/OK button.
Software Inforamtion
Press the ENTER/OK button, then the current software
version is shown. To display the software version
information, press the ENTER/OK button again.
Manual Upgrade
Press the ENTER/OK button to search for new software
from the currently broadcasting channels.
Standby Mode Upgrade : On / Off
Press the ENTER/OK button. To continue software
upgrade with master power on, Select On by pressing
the ▲ or ▼ button.
45 minutes after entering standby mode, a manual
upgrade is automatically conducted. Since the power
of the unit is turned on internally, the screen may be
on slightly for the LCD product. This phenomenon may
continue for more than 1 hour until the software upgrade
is completed.
6.
Press the EXIT button to exit.
▲ or ▼
button to select "Software Infomation",
Signal Information
Service: ?
Service ID:0000
Multiplex: ? (TSID 0000, ONID 0000)
Network: ? (ID 0000)
Bit error level: 10
Signal Strength: 0
Move Enter Return
Return
Product Information
Signal Information
Software Upgrade
Common Interface
Reset
Software Information
Manual Upgrade
Standby Mode upgrade : On
Software Information
Manual Upgrade
Standby Mode upgrade : On
Software Information
Manual Upgrade
Standby Mode upgrade : On
System
Move Enter Return
Software Upgrade
Move Enter Return
Software Upgrade
Move Enter Return
Software Upgrade
Move Enter Return
English - 43
Page 46

Viewing Common Interface
This contains information on CAM inserted in the CI slot and
displays it.
1.
Press the D.MENU button to display the DTV menu.
2.
Press the ▲ or ▼ button to select "Setup", then press the
ENTER/OK button.
3.
Press the ▲ or ▼ button to select "System", then press the
ENTER/OK button.
4.
Press the ▲ or ▼ button to select "Common Interface",
then press the ENTER/OK button.
5.
Press the ENTER/OK button to display the information for
your application.
6.
Press the EXIT button to exit.
The Application Info inserting is about the CI CARD.
You can install the CAM anytime whether the TV is ON or
OFF.
1. Purchase the CI CAM module by visiting your nearest dealer
or by phone.
2. Insert the CI CARD into the CAM in the direction of the
arrow until it fits.
3. Insert the CAM with the CI CARD installed into the common
interface slot.
(Insert the CAM in the direction of the arrow, right up to the end
so that it is parallel with the slot.)
4. Check if you can see a picture on a scrambled signal
channel.
Selecting the CI (Common Interface) Menu
This enables the user to select from the CAM-provided menu.
1.
Press the D.MENU button to display the DTV menu.
2.
Press the ▲ or ▼ button to select "Setup", then press the
ENTER/OK button.
3.
Press the ▲ or ▼ button to select "System", then press the
ENTER/OK button.
4.
Press the ▲ or ▼ button to select "Common Interface",
then press the ENTER/OK button.
5.
Select to "CI Menu" by pressing the ▲ or ▼ button, and
press the ENTER/OK button.
6.
Select the required option by pressing the ▲ or ▼ button,
and press the ENTER/OK button.
7.
Press the EXIT button to exit.
Select the CI Menu based on the menu PC Card.
Main menu
Press OK to select, or Exit to quit
Application Info
Type : CA
Manufacturer : Channel Plus
Info : Top Up TV
Return
CI Menu
Module informa tion
Smart card inf ormation
Language
Software Downl oad
Move Enter Exit
English - 44
Page 47

Resetting
You can reset the values stored to the factory default
values.
The Reset operation deletes all channel information
Enter PIN
Reset
and user preferences returning all values to their default
factory state.
1.
Press the D.MENU button to display the DTV menu.
2. Press the ▲ or ▼ button to select "Setup", then press the
ENTER/OK button.
3. Press the
▲ or ▼
button to select "System", then press
the ENTER/OK button.
4.
Press the
▲ or ▼
button to select "Reset", then press the
ENTER/OK button.
5.
The "Enter PIN" screen will appear.
Enter PIN Return
WARNING: All channel settings and user
preferences will be lost and returned to
the factory defaults. It is recommended
that a reset is performed only when
serious problems are experienced.
Reset
6. Enter your current 4-digit PIN code by using the numeric
buttons (0~9).
The warning message is displayed.All values will be
Return
reset by pressing the coloured buttons (red, green,
yellow, and blue)in turn.
7.
Press the EXIT button to exit.
Selecting the Preferred Language (Audio, Subtitle or Teletext)
You can change the default value for subtitle, audio teletext
languages.
Displays the language information for the incoming stream.
1.
Press the D.MENU button to display the DTV menu.
2.
Press the ▲ or ▼ button to select "Language", then press
the ENTER/OK button.
3.
Press the
▲ or ▼
button to select "Audio Language", "Subtitle
Language" or "Teletext Language".
Press the ENTER/OK button.
4. Select a particular language by pressing the ▲ or ▼ button
repeatedly.
Press the ENTER/OK button.
English is the default in cases where the selected
language is unavailable in the broadcast.
5.
Press the EXIT button to exit.
While viewing a programme, the subtitle can be selected.
While viewing a programme, audio languages can be
selected.
Audio Language
Subtitle Language
Teletext Language
Preference
Audio Language
Subtitle Language
Teletext Language
Preference
Audio Language
Subtitle Language
Teletext Language
Preference
Language
Move Enter Return
Language
Move Enter Return
Language
English - 45
Move Enter Return
Page 48

Preference
This menu consists of 6 sub-menus:
Primary Subtitle Language, Secondary Subtitle Language,
Primary Audio Language, Secondary Audio Language,
Primary Teletext Language, and Secondary Teletext
Language.
Using this feature, users can select one of the languages
(English, German, Italian, Swedish, French, Welsh, Gaelic,
Irish, Danish, Finnish, Norwegian, Spanish, Czech, and Greek).
The language selected here is the default when the user selects
Audio Language
Subtitle Language
Teletext Language
Preference
Language
Move Enter Return
Move Enter Return
a channel.
Press the ▲ or ▼ button to select required menu (Primary Audio Language, Secondary Audio
Language, Primary Subtitle Language, Secondary Subtitle Language, Primary Teletext Language,
or Secondary Teletext Language), then press the ENTER/OK button. The options of the selected
menu are displayed.
Press the ▲ or ▼ button to select required option (English, German, Italian, Swedish, French,
Welsh, Gaelic, Irish, Danish, Finnish, Norwegian, Spanish, Czech, or Greek), then press the
ENTER/OK button.
If you change the language setting, the Subtitle Language, Audio Language, and the Teletext
Language of the Language menu (refer to page 45) are automatically changed to the selected
language.
The Subtitle Language, Audio Language, and the Teletext Language of the Language menu
show a list of languages supported by the current channel and the selection is highlighted. If
you change this language setting, the new selection is only valid for the current channel. The
changed setting does not change the setting of the Primary Subtitle Language, Primary Audio
Language, or the Primary Teletext Language of the Preference menu.
Teletext Decoder
Most set channels carry " teletext ", pages of written
information that provide information such as:
Television programme times.
News bulletins and Weather forecasts.
Sports results.
Subtitles for the hard of hearing.
The teletext pages are organized according to six categories:
Part
A
B
C
D
E
F
Contents
Selected page number.
Broadcasting station identity.
Current page number or search status.
Date and time.
Text.
Status information.
English - 46
Page 49

Displaying the Teletext Information
You can display teletext information at any time, but signal reception
must be good. Otherwise:
Information may be missing.
Some pages may not be displayed.
To activate the teletext mode and display the contents page:
1. Using the P ( ) or P ( ) button, select the channel providing
the teletext service.
2. Press the TEXT/MIX ( ) button to activate the teletext mode.
The contents page is displayed. It can be redisplayed at any time
by pressing the MENU ( ) button.
3. Press the TEXT/MIX
( ) button again.
The actual broadcast will be displayed with "Teletext", "Double",
and "Mix" in order on the screen.
4. Press the TV/DTV
button to exit from the Text display.
If any broken character appears while Text is being viewed, make
sure that the Text language is identical with the language in the
"Setup" menu mode. If both languages are different, select the same language with the Text
language on the "Setup" menu.
Selecting a Specic Teletext Page
Press the number buttons on the remote control to enter the
page number directly:
1. Enter the three-digit page number listed in the contents by pressing
the corresponding numeric buttons.
2. If the selected page is linked with several secondary pages, the
secondary pages are displayed in sequence. To freeze the display
on a given page, press the PIP ( ) . Press the PIP ( ) button
again to resume.
3. Using the various display options:
To display...
Both teletext information and the normal broadcast
Hidden text (answers to quiz games, for example)
The normal screen
A secondary page, by entering its 4-digit number
The next page
The previous page
Double-size letters in the:
Upper half of the screen
Lower half of the screen
Normal screen
Press the...
TEXT/MIX (
)
INFO (
)
INFO (
PRE-CH (
P ( )
P
( )
P.SIZE
( )
Once
Twice
Three times
)
)
English - 47
Page 50

Using Fastext to Select a Teletext Page
The various topics included in the teletext pages are colour-coded,
and can be selected by pressing the coloured buttons on the remote
control.
1. Display the teletext contents page by pressing the TEXT/MIX ( )
button.
2. Press the coloured button corresponding to the topic that you wish to
select (The available topics are listed on the status information line).
3. Press the Red button to display the previous page.
Press the Green button to display the next page.
4. Press the TV/DTV
button to exit from the Text display.
Setting Up Your Remote Control
After it has been set up properly, your remote control can operate in five
different modes: TV, DVD, Cable, Set-Top Box, VCR. Pressing the corresponding button on the remote control allows you to switch between
these modes, and control whichever piece of equipment you choose.
The remote control might not be compatible with all DVD Players,
VCRs, Cable boxes, and Set-Top Boxes.
Setting Up the Remote to Operate Your VCR, CABLE, DVD and STB
1. Turn off your VCR, CABLE, DVD and STB.
2. Press the VCR, CABLE, DVD and STB button on your TV’s remote con-
trol.
3. Press the SET
4. Using the number buttons on your remote control, enter three digits of the
VCR code listed on pages 49~51 of this manual for your brand of VCR.
Make sure you enter three digits of the code, even if the first digit is a "0".
(If more than one code is listed, try the first one.)
5. Press the POWER
Your VCR should turn on if your remote is set up correctly.
If your VCR does not turn on after set up, repeat steps 2, 3, and 4, but try
one of the other codes listed for your brand of VCR.
If no other codes are listed, try each VCR code, 000 through 080.
button on your TV’s remote control.
button on the remote control.
English - 48
Page 51

Remote Control Codes
VCR
Brand Code
SAMSUNG 000 001 002 003 004 005 077 078 079
ADMIRAL 020
AIWA 025
AKAI 004 027 032
AUDIO DYNAMICS 007 026
BELL&HOWELL 018
BROKSONIC 022
CANDLE 002 003 006 008 015 055
CANON 021 056
CITIZEN 002 003 006 008 015 055
COLORTYME 007
CRAIG 002 024
CURTIS MATHES 002 007 008 017 021 025 056 064 066
DAEWOO 003 010 011 012 013 014 015 016
DB 007 026
DIMENSIA 017
DYNATECH 025
ELECTROHOME 034
EMERSON
FISHER 018 024 028 029 048 051 061
FUNAI 025
GENERAL ELECTRIC
GO VIDEO 002
HARMAN KARDON 007
HITACHI 019 025 041 042 074
INSTANT REPLAY 021
JC PENNEY
JCL 007 008 018 021 026 037
JVC 081 082 083
KENWOOD 007 008 018 021 026 037
KLH 070
KONIA 036
LG(Goldstar) 006 007 008 009 010
LIOYD 025
LOGIK 038
LXI 025
MAGNAVOX 021 056 059
MARANTZ 007 008 018 021 026 037 062
MARTA 006
MEI 021
MEMOREX 006 021 024 025
MGA 034
MIDLAND 005
MINOLTA 019 041 075
MITSUBISHI 019 034 041 046
001 003 006 021 022 025 030 032 034 040
047 050 052 060 063 065 066 067 069 073
002 005 017 021 056
002 007 018 019 021 026 037 041 054 056
Brand Code
MONTGOMERY WARD
MTC 002 025
MULTITECH 002 005 025 038
NEC 007 008 018 026 037 062 064
OPTIMUS 020
ORION 073 074 075 076
PANASONIC 021 056 071 072
PENTAX 019 041 075
PENTEX
RESEARCH+
PHILCO 021 056 059
PHILIPS 021 080
PIONEER 019 026 039 053
PORTLAND 015 049 055
PROSCAN 017
QUARTZ 018
QUASAR 021 056
RADIO SHACK/
REALISTIC
RCA
SANSUI 026
SANYO 018 024
SCOTT 003 047 052 067
SEARS 006 018 019 024 028 029 041 048 051
SHARP 020 034 045 015
SHIMTOM 027 033 038 058
SIGNATURE 025
SONY 027 033 044
SYLVANIA
SYMPHONIC 025
TANDY 018 025
TASHIKA 006
TATUNG 037
TEAC 025 037 068
TECHNICS 021
TEKNIKA 006 021 025 031
TMK 066
TOSHIBA 003 019 029 051 052
TOTEVISION 002 006
UNITECH 002
VECTOR RESEARCH
VICTOR 026
VIDEO CONCEPTS 007 026
VIDEOSONIC 002
WARDS
YAMAHA 007 008 018 026 037
ZENITH 023 027 033
020
008
006 018 020 021 024 025 029 034 048 056
002 017 019 021 035 041 043 057 068 076
021 025 056 059
007 026
002 003 006 019 020 021 024 025 034 038 041
English - 49
Page 52

CABLE BOX
Brand Code
SAMSUNG 000 001 002 003 004 005 006 007
GI 041
HAMLIN 003 024 031
HITACHI 025 030
JERROLD 038 039
MACOM 025 030
MAGNAVOX 019 023 028
OAK 026
PANASONIC 003 022 027 037 044
PHILIPS 019 021 023 028
PIONEER 004 018 020 044
RCA 014 022 040
REGAL 003
SAMSUNG DVD
Product Code
DVD 000 001 002
DVDR 003 004
BD Record 005 006
VCR COMBO 007 008 009 010 011
VCR Record 012
DHR COMBO 013
DVD
Brand Code
ANAM 030
AUDIOVOX 075
AUDIOLOGIC 085
ANABA 072
APEX DIGITAL 070 071 074 086 083 084 088 111 112
AIWA 114
BROKSONIC 062
BLAUPUNKT 074
B&K 122 123
CURTIS MATHES 027
CYBER HOME 077 078 079 082
CLARION 080 125
CIRRUS 081
CYBER HOME 065
CINEVISION 095
DAEWOO 066
DENON 146
FARENHEIT 067 068
FISHER
GPX 060
GO VIDEO 061 089 133 135
GE
GREENHILL 074
HITACHI 064 113
HITEKER 071
HOYO 073
HARMAN / KARDON 091 110
IRT 089
090
069 074
Brand Code
REGENCY 015 023
SA 042 043
SCIENTIFIC ATLAN 042 043
SPRUCER 022
STARGATE 2000 036
SYLVANIA 016
TEXSCAN 016
TOCOM 032
UNIVERSAL 033 034
VIEWSTAR 019 021 023 028
WAMER AMEX 046
ZENITH 017 029 035 037 045
Product Code
Home Theater VCR COMBO 014 015 016
HDD Recorder COMBO 017
TWIN TRAY COMBO 018
STB DVD COMBO 019
DVD Receiver 020
AV Receiver 021
Brand Code
INTEGRA 092
JBL 091
JVC 022 033 115 116
JATON 073
KENWOOD 051 108 109
KISS 073
KONKA 059 100 106 107
KLH 074 075
LG(Goldstar) 025 031
LOEWE 057
LASONIC 058
MOBILE
AUTHORITY
MEMOREX 055
MALATA 056
MAGNAVOX 076 093
MINTEK 074 094
MONYKA 073
NORCENT 048 049 050
NEXT BASE
NEC 053
NANTAUS 144
NESA
OPTOMEDIA
ELECTRONICS
OPTIVIEW 072
ONKYO 076 092 119
PHILCO 044 045
PRINCETON 046 047
PROSCAN 023
054
052
074
105
English - 50
Page 53

DVD
Brand Code
PANASONIC 024 034 124 134 136 137 138
PHILIPS 036 076
ROTEL 117 118
RIO 120
RCA 023 035 074 075 131 132
RAITE 073
ROWA 038
SAMPO 104
SONY 026 029 126 127 128 129 130 141
SHERWOOD 039 041
SVA 042
SYLVANIA 043 093
SHARP 140
SANSUI 062
SANYO 062 090
SHINSONIC 094
SAMSUNG SET-TOP BOX
Product Code
Ground wave STB 000 001 002 008 013
CABLE STB 000 004 008 013
Satellite STB 000 003 008 013
SET-TOP BOX
Brand Code
ALPHASTAR 023
ANAM 043
CHANNEL
MASTER
CROSSDIGITAL 019
CHAPARRAL 035
DIRECT TV 015 016 017 019 022 045 060 061 062
DAEWOO 074
DISH NETWORK
SYSTEM
DISHPRO 069
DRAKE 018 024 032
DX ANTENNA 027
ECHOSTAR 025 069 070 071
EXPRESSVU 069
GOI 069
GE 065
GENERAL INSTRUMENT
HTS 069
HOME CABLE 056
HITACHI
HUGHES NETWORK
IQ 020
IQ PRISM
JANEIL 059
JERROID 063
JVC 069 070
LG(Goldstar) 044 073
018 034
065 066 067 068
069 070
046 047 048 063 064
022
015 017
020
Brand Code
THOMSON 145
TOSHIBA 028 062 076
TECHNICS 139
TVIEW 072
TOKAI 073
TEAC 096
TECHWOOD 097
TREDEX 098 099 101
URBAN CONCEPTS
VENTURER 075
VOCOPRO 102
YAMAHA 032 063
YAMAKAWA 040 073
XWAVE 103
ZENITH 076 121
Brand Code
MAGNAVOX 016 021 036 038 039 040 041 042
MEMOREX 016
MOTOROLA 064
MACOM 018
MITSUBISHI 015
NEXT LEVEL 047 048 064
PHILIPS 015 016 017 021 033 036 038 039 040
PRIMESTAR
PANASONIC 058 059 061 062
PAYSAT 016
PROSCAN 065 066
RCA 051 052 053 065 066
RADIOSHACK 064
REALISTIC 057
STAR TRAK 026
STS
SKY 031
SKY LIFE 005 006 007
SHACK
STAR CHOICE
SONY 054 060
TOSHIBA
ULTIMATE TV 060 066
UNIDEN 016 021 037 055 056 057
ZENITH 024 031 068
076
041 042 067
046 049 050 063
020 027
064
064
015 017 028 029 030 072
English - 51
Page 54

Setting up Your PC Software (Based on Windows XP)
The Windows display-settings for a typical computer are shown below. The
actual screens on your PC may be different depending upon your particular
version of Windows and your particular video card. Even if your actual
screens look different, the same, basic set-up information will apply in almost
all cases. (If not, contact your computer manufacturer or Samsung Dealer.)
1. First, click on "Control Panel" on the Windows start menu.
2. When the control panel window appears, click on "Appearance and Themes"
and a display dialog-box will appear.
3. When the control panel window appears, click on "Display" and a display dia
-
log-box will appear.
4. Navigate to the "Settings" tab on the display dialog-box.
The correct size setting (resolution): Optimum- 1360 X 768
If a vertical-frequency option exists on your display settings dialog box, the correct value is
"60" or "60 Hz". Otherwise, just click "OK" and exit the dialog box.
Display Modes
Both screen position and size will vary depending on the type of PC monitor and its resolution.
The resolutions in the table are recommended. (All resolutions between the supported limits are
supported)
D-Sub Input
Mode
IBM
VESA
VESA GTF
Resolution
640×350
720×400
640×480
640×480
640×480
640×480
800×600
800×600
800×600
800×600
1024×768
1024×768
1024×768
1024×768
1360×768
1152×864
640×480
800×600
1024×768
31.469
31.469
31.469
37.861
37.500
43.269
37.879
48.077
46.875
53.674
48.363
56.476
68.677
60.023
47.712
53.783
35.000
43.750
57.672
Horizontal
Frequency (kHz)
Vertical
Frequency (Hz)
70.086
70.087
59.940
72.809
75.000
85.008
60.317
72.188
75.000
85.061
60.004
70.069
84.997
75.029
60.015
59.959
70.000
70.000
72.000
Pixel Clock
Frequency (MHz)
25.175
28.322
25.175
31.500
31.500
36.000
40.000
50.000
49.500
56.250
65.000
75.000
94.500
78.750
85.800
81.750
28.560
45.500
78.434
Sync Polarity
(H/V)
+/-
-/+
-/-
-/-
-/-
-/+/+
+/+
+/+
+/+
-/-
-/+/+
+ /+
+/+
-/+
-/+
-/+
-/-
HDMI/DVI Input
Mode
IBM
VESA
Resolution
640×350 31.469 70.086 25.175 +/720×400 31.469 70.087 28.322 -/+
640×480 31.469 59.940 25.175 -/800×600 37.879 60.317 40.000 +/+
1024×768 48.364 60.000 65.000 -/1360×768 47.712 60.015 85.800 +/+
Horizontal
Frequency (kHz)
Vertical
Frequency (Hz)
Pixel Clock
Frequency (MHz)
The interlace mode is not supported.
The set might operate abnormally if a non-standard video format is selected.
Separate and Composite modes are supported. SOG is not supported.
English - 52
Sync Polarity
(H/V)
Page 55

Setting the PC
Coarse and Fine Tuning of the Image (Image Lock):
The purpose of picture quality adjustment is to remove or
reduce picture noise.
If the noise is not removed by Fine-tuning alone, then adjust
the frequency as best as possible (coarse) and Fine-tune
again.
After the noise has been reduced, re-adjust the picture so that
it is aligned on the center of screen.
1. Preset: Press the SOURCE button to select PC mode.
2. Press the MENU button to display the menu.
Press the ▲ or ▼ button to select "Setup", then press the
ENTER/OK button.
3. Press the ▲ or ▼ button to select "PC", then press the ENTER/OK
4. Press the ENTER/OK
5. Press the
6. Press the
Press the ENTER/OK button.
▲ or ▼ button to select "Coarse" or "Fine", then press the ENTER/OK button.
◄
7. Press the EXIT
button to select "Image Lock".
or ► button to adjust the screen quality.
button to exit.
Changing the Image Position:
Adjust the PC’s screen positioning if it does not fit the TV
screen.
1. Follow the "Coarse and Fine Tuning of the Image
(Image Lock)"
instructions number 1 to 3.
2. Press the ▲ or ▼ button to select "Position", then press the
ENTER/OK button.
3. Press the ▲ or ▼ button to adjusting the Vertical-Position.
Press the ◄ or ► button to adjust the Horizontal-Position.
Press the ENTER/OK button.
4. Press the EXIT
button to exit.
Adjusting the PC Screen Automatically (Auto Adjustment):
Auto adjustment allows the PC screen of set to self-adjust to
the incoming PC video signal. The values of fine, coarse and
position are adjusted automatically.
1. Follow the "Coarse and Fine Tuning of the Image
(Image Lock)" instructions number 1 to 3.
2. Press the ▲ or ▼ button to select "Auto Adjustment", then
press the ENTER/OK button.
3. Press the EXIT
button to exit.
Initializing the Image Settings (Image Reset):
You can replace all image settings with the factory default
values.
1. Follow the "Coarse and Fine Tuning of the Image
(Image Lock)" instructions number 1 to 3.
2. Press the ▲ or ▼ button to select "Image Reset", then press
the ENTER/OK button.
3. Press the EXIT
button to exit.
Mode : Custom
TV
Equalizer
SRS TS XT : Off
Coarse 50
Auto Volume : Off
Fine 50
Internal Mute : Off
Reset
Image Lock
Move Enter Return
Move Enter Return
button.
TV
Move Enter Return
TV
Image Lock
Position
Auto Adjustment
Image Reset
Move Enter Return
TV
Image Lock
Position
Auto Adjustment
Image Reset
Move Enter Return
Position
PC
PC
English - 53
Page 56
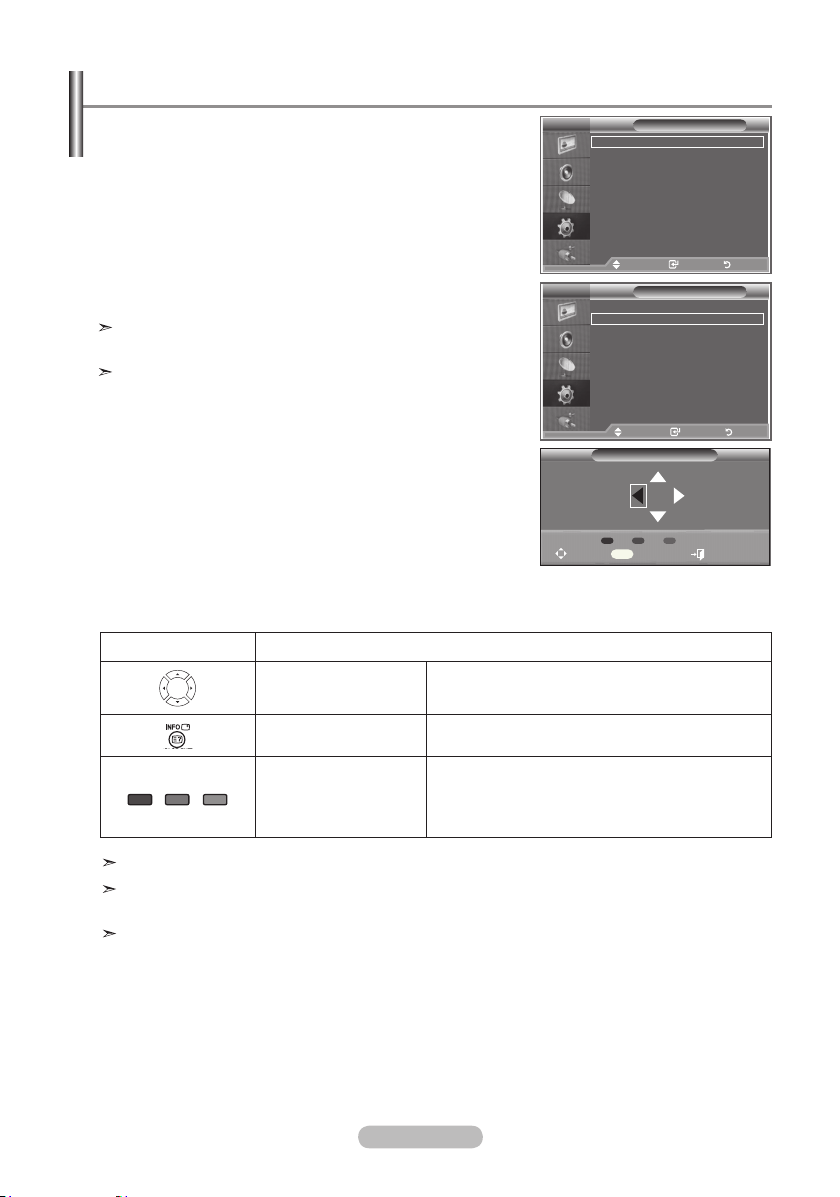
Wall-Mount Adjustment (LE40R8) (Sold separately)
Once the wall mount is installed, the position of your TV can
be easily adjustable.
1. Press the MENU button to display the menu.
Press the ▲ or ▼ button to select “Setup”, then press the
ENTER/OK button.
2. Press the ▲ or ▼ buttons to select “Wall-Mount Adjustment”,
then press the ENTER/OK button.
3.
Adjust to the desired position using the ▲,▼,◄,► buttons.
4.
Press the EXIT button to exit.
If you press an arrow button when no OSD is displayed on the
TV screen, the Adjustment screen appears.
When you turn the power off, your TV moves to the initial
installation position.
When you turn the power on, your TV moves to the last
remembered position you adjusted.
Using the Remote Control Buttons
Button Operations
Wall-mount angle
adjustment
Tilt Up, Tilt Down, Move right, Move left
TV
Plug & Play
Language : English
Time
Game Mode : Off
Blue Screen : Off
Melody : Off
PC
Home Theatre PC
Light Effect :
More
Move Enter Return
Mode : Custom
TV
Equalizer
More
SRS TS XT : Off
Wall-Mount Adjustment
Auto Volume : Off
Energy Saving : Off
Internal Mute : Off
HDMI Black Level
Reset
PIP
Move Enter Return
Wall Mount Adjusment
Position1
Position 1 2 3
Adjust Center Exit
INFO
Setup
: Off
Watchung Mode On
Setup
: Low
Move Enter Return
Reset Moves to the initial installation position
Remembering the
position and moving
to the remembered
position
Remembers 3 positions with the Red, Green and
Yellow buttons.
Moves to the remembered position using these 3
color buttons.
For installation, refer to the Installation Manual provided.
For product installation and the installation and moving of the wall mount, make sure to consult a
specialized installation company.
This installation manual is to be used when attaching the wall mount to a wall.
When attaching to other building materials, please contact your nearest dealer
English - 54
Page 57

What is Anynet+?
Anynet+ is an AV network system that enables an easy-to-use AV interface for users by controlling
all connected AV devices through the Anynet+ menu when Samsung Electronics AV devices are
connected.
Connecting Anynet+ Devices
The Anynet+ system supports AV devices supporting Anynet+ only.
Check if there is an Anynet+ mark on the AV device to be connected to the TV.
To directly connect to TV
TV
Anynet+ Device 1 Anynet+ Device 2 Anynet+ Device 3
Connect the [HDMI 1], [HDMI
2] or [HDMI 3] jack on the TV
and the HDMI OUT jack of the
corresponding Anynet+ device
using the HDMI cable.
HDMI Cable
HDMI Cable
HDMI Cable
To connect to Home Theater
TV
1. Connect the [HDMI 1],
[HDMI 2] or [HDMI 3]
jack on the TV and the
Anynet+ Device 1 Anynet+ Device 2
HDMI OUT jack of the
corresponding Anynet+
device using the HDMI
cable.
2. Connect the HDMI IN jack
HDMI Cable
Home Theater
HDMI Cable
Anynet+ Device 3
of the home theater and
the HDMI OUT jack of the
corresponding Anynet+
device using the HDMI
cable.
HDMI Cable
Optical Cable
Connect only the optical cable between [Digital Audio Out (Optical)] on your TV and Digital Audio Input on
➣
the receiver.
Connect only one receiver.
➣
You can listen to 5.1 channel sound through the home theater’s speakers. Otherwise, you can only listen
➣
to 2 channel stereo sound in other cases. Make sure to connect the Digital Audio IN (Optical) of the home
theater and the TV correctly to listen to TV sound through the home theater. However, you cannot listen to
sound from the BD recorder that is sent to the home theater via the TV in 5.1 channel sound because the
TV outputs only 2 channel stereo sound. Please see the manual for the home theater.
You can connect an Anynet+ device using the HDMI cable. Some HDMI cables may not support Anynet+
➣
functions.
Anynet+ works when the AV device supporting Anynet+ is in the Standby or On status.
➣
Anynet+ supports up to 8 AV devices in total.
➣
HDMI Cable
English - 55
Page 58

Setting Up Anynet
+
The following settings are to use Anynet+ functions.
Using the Anynet+ Function
1. Press the Anynet+ button.
Press the ▲ or ▼ button to select Setup, then press the
ENTER/OK
button.
2. Press the ENTER/OK button to select Anynet+ (HDMI-CEC),
then press the ENTER/OK button.
3. Press the ▲ or ▼ button to select On
OK
button.
The Anynet+ (HDMI-CEC) function is enabled.
➣
If you select Off, Anynet+ (HDMI-CEC) is disabled.
➣
When the Anynet+ (HDMI-CEC) function is disabled, all the
➣
, then press the ENTER/
Anynet+ related operations are deactivated.
Air 28
View TV
Select Device
Record
Menu on Device
Device Operation
Receiver :Off
Setup
Move
Exit
Anynet+ (HDMI-CEC)
Auto Turn Off
Searching Connections
Enter
: Off
Setup
: Off
Enter ReturnMove
Turning an Anynet+ Device Off Automatically when the TV is Turned Off
1. Press the ▲ or ▼ button to select Auto Turn Off, then press
the ENTER/OK button.
2. Press the ▲ or ▼ button to select On, then press the ENTER/
OK button.
The Auto turn off function is enabled.
➣
If you select Off, the Auto turn off function is canceled.
➣
Press the EXIT button to exit.
The Select Device setting of the TV remote control is to be set to
➣
Anynet+ (HDMI-CEC)
Auto Turn Off
Searching Connections
Move
Setup
: On
: Off
Enter Return
TV to use the Anynet+ function.
If you set Auto Turn Off to On, connected external devices are also turned off when the TV is turned off.
➣
However, if the device is recording, it may not be turned off.
Scanning and Switching between Anynet+ Devices
Off
On
Off
On
1. Press the Anynet+ button.
2. Press the ▲ or ▼ button to select Select Device, then press
the ENTER/OK button.
3. Press the ▲ or ▼ button to select to a particular device and
press the ENTER/OK button.
It is switched to the selected device.
4. If you cannot find a device you want, press the ▲ or ▼ button
to select Searching Connections, then press the ENTER/OK
button.
The meassage Configuring Anynet+ connection... is
displayed. When searching devices completes, the connected
devices are listed in the Anynet+ menu.
Switching to the selected devices may take up to 2 minutes. You
➣
cannot cancel the operation during the switching operation.
The time required to scan for devices is determined by the number
➣
of connected devices.
When the device scan is complete, the number of found devices
➣
is not displayed.
Although the TV automatically scans devices when it is turned on
➣
Air 28
View TV
Select Device
Record
Menu on Device
Device Operation
Receiver :Off
Setup
Move
Return
Anynet+ (HDMI-CEC)
Auto Turn Off
Searching Connections
Enter
: On
Setup
: On
Enter ReturnMove
DVDR1
DVDR2
DVD1
DVD2
using the POWER button, devices connected when the TV is on or under a specic circumstance are not
displayed in the device list. Therefore select Searching Connections menu to search devices.
If you have selected external input mode by pressing the SOURCE button, you cannot use the Anynet+
➣
function. Make sure to switch to an Anynet+ device by using the Anynet+ button.
English - 56
Page 59
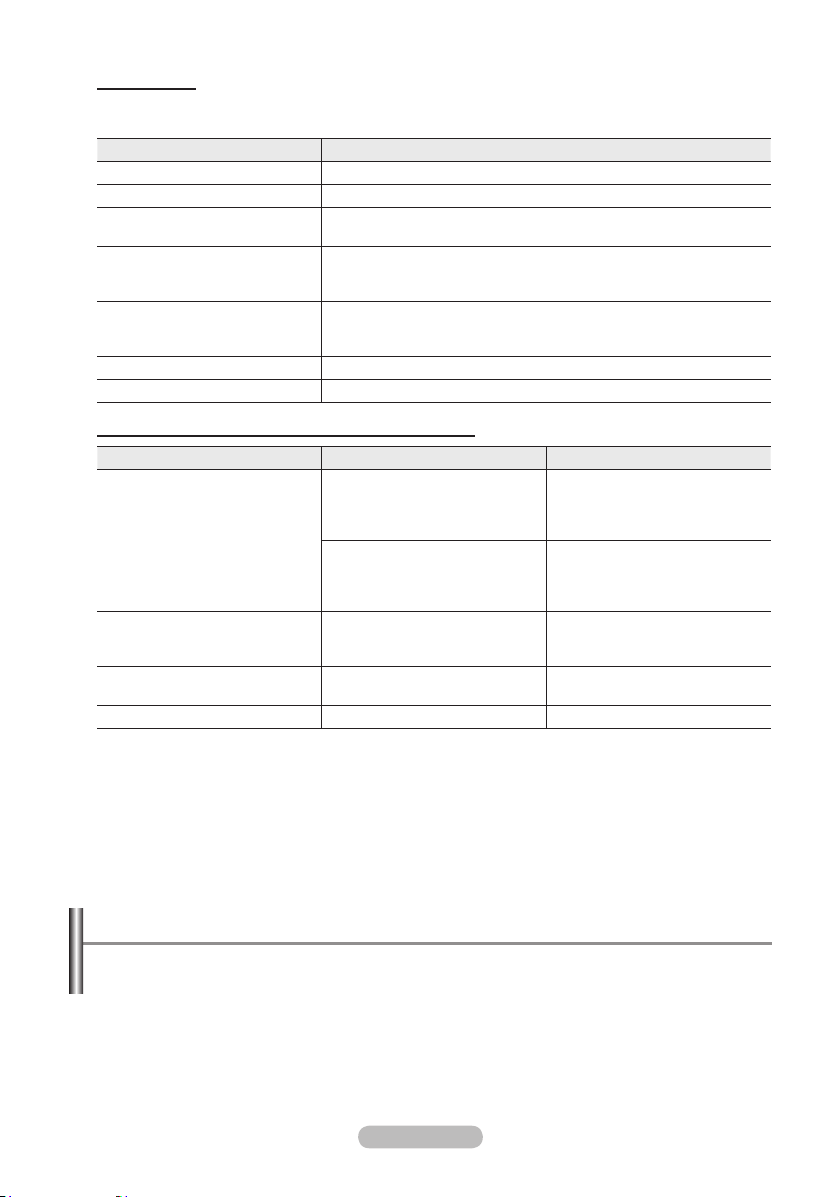
Anynet+ Menu
The Anynet+ menu changes depending on the type and status of the Anynet+ devices connected
to the TV.
Anynet+ Menu Description
View TV
Select Device Your TV connects to the corresponding device.
Record
Menu on Device
Device Operation
Receiver
Setup You can set the environment for using Anynet+.
TV Remote Control Buttons Available in Anynet+ Mode
Device Type Operating Status Available Buttons
Anynet+ Device
Device with built-in Tuner
Audio Device
Anyview2
The Anynet+ function only works when the remote control is set to TV.
➣
The REC button works only while in the recordable state.
➣
You cannot control Anynet+ devices using the buttons on the side of the TV. You can control Anynet+
➣
devices only using the TV remote control.
The TV remote control may not work under certain conditions. In this case, re-select the Anynet+ device.
➣
The Anynet+ functions don’t operate for the products from other manufacturers.
➣
In Anynet+ mode, the color buttons may not work properly.
➣
The ◄◄, ►► operations may differ depending on the device.
➣
Switches from Anynet+ to TV broadcast mode.
Starts a recording. (This menu works only for a device supporting
recording.)
Shows the menu of the connected device.
Example. When a DVD Recorder is connected, the DVD Recorder’s
title menu appears.
Shows the play control menu of the connected device.
Example. When a DVD Recorder is connected, the play control
menu of the DVD Recorder appears.
Sound is output through the receiver.
After switching to the
device, when the menu of
the corresponding device is
displayed on the screen.
After switching to the device,
while playing a file
After switching to the device,
when you are watching a TV
program
When Receiver is activated
When watching TV ►
Numeric buttons
▲/▼/◄/►/ENTER buttons
Color buttons
EXIT button
◄◄(Backward search)
►►(Forward search)
(Stop)
►
(Play/Pause)
CH ▲/▼ button
VOL +/- button
MUTE button
(Play/Pause)
Recording
You can make a recording of a TV program using a recorder.
Press the REC button.
Recording begins. (Only when the Anynet+ enabled recording device is connected.)
The current TV program is recorded in the Watching TV status. If you are watching video from another
➣
device, the video from the device is recorded.
You can also record the source streams by selecting Record after pressing the Anynet+ button.
➣
Before recording, check whether the antenna jack is properly connected to the recording device. For the
➣
antenna connection to the recording device, refer to its user manual.
English - 57
Page 60

Listening through a Receiver
You can listen to sound through a receiver instead of the TV speaker.
1. Press the Anynet+ button.
Press the ▲ or ▼ button to select Receiver, then press the
ENTER/OK
button.
2. Press the ◄ or ► button to select to On, then press the
ENTER/OK
button.
Now you can listen to sound through the receiver.
3. Press the EXIT
When the receiver is set to On, you can listen to the TV sound
➣
through the 2-channel receiver.
If the receiver is exclusively for a home theater only (supporting
➣
audio only), it may not appear in the device list.
Only when you have connected the optical jack of the TV and the receiver properly, does Receiver work.
➣
In case of a content with copyright problem, listening through the receiver may not properly operate.
➣
When listening through the receiver, there are restrictions for using the PIP and audio-related menu.
➣
button to exit.
Air 28
View TV
Select Device
Record
Menu on Device
Device Operation
Receiver :On
Setup
Move
Exit
Enter
Check Points before Requesting Service
Symptom Solution
Anynet+ does not
work.
I want to start
Anynet+.
I want to exit Anynet+. ■ Select View TV
The Connecting to
Anynet+ device…
message appears on
the screen.
The Anynet+ device
does not play.
The connected device
is not displayed.
The TV program
cannot be recorded.
The TV sound is not
output through the
receiver.
■ Check if the device is an Anynet+ device. The Anynet+ system supports Anynet+
devices only.
■ Connect only one receiver.
■ Check if the Anynet+ device power cord is properly connected.
■ Check the Anynet+ device’s Video/Audio/HDMI cable connections.
■ Check whether Anynet+ (HDMI-CEC) is set to On in the Anynet+ setup menu.
■ Check whether the TV remote control is in TV mode.
■ Check whether it is Anynet+ exclusive remote control.
■ Anynet+ doesn’t work at a certain condition. (Searching channels)
■ When connecting or removing the HDMI cable, please make sure to search
devices again or restart your TV.
■ Check if the Anynet+ Function of Anynet+ device is set on.
■ Check if the Anynet+ device is properly connected to the TV and check if the
Anynet+ (HDMI-CEC) is set to On in the Anynet+ Setup menu.
■ Press the TV
Anynet+ button to show the Anynet+ menu and select a menu you want.
■ Press the SOURCE
than Anynet+ devices.
■ Press any of CH
TV mode. (Note that the channel button operates only when a tuner-embedded
Anynet+ device is not connected.)
■ You cannot use the remote control when you are configuring Anynet+ or
switching to a view mode.
■ Use the remote control when the Anynet+ setting or switching to view mode is
complete.
You cannot use the play function when Plug & Play is in progress.
■ Check whether or not the device supports Anynet+ functions.
■ Check whether or not the HDMI cable is properly connected.
■ Check whether Anynet+ (HDMI-CEC) is set to On in the Anynet+ setup menu.
■ Search Anynet+ devices again.
■ You can connect an Anynet+ device using the HDMI cable only. Some HDMI
cables may not support Anynet+ functions.
Check whether the antenna jack on the recording device is properly connected.
Connect the optical cable between TV and the receiver.
button on the TV remote control to switch to TV. Then press the
in Anynet+ menu.
button on the TV remote control and select a device other
, CH LIST, PRE-CH, and such to change to the
English - 58
Page 61

Using the Anti-Theft Kensington Lock
The Kensington lock is a device used to physically fix the system when using it in a public place.
The locking device has to be purchased separately. The appearance and locking method may differ from the illustration depending on the manufacturer. Please refer to the manual provided with
the Kensington lock for proper use.
1. Insert the locking device into
the Kensington slot on the
LCD TV (Figure 1), and turn it
in the locking direction
(Figure 2).
2. Connect the Kensington lock
cable.
3. Fix the Kensington lock to a
desk or a heavy stationary
object.
Cable
Figure 2
Figure 1
<Optional>
The place of the Kensington Lock may be
different depending on its model.
Troubleshooting: Before Contacting Service Personnel
No sound or picture
Normal picture but no
Screen is black and power
indicator light blinks steadily
No picture or black and
white picture
Sound and picture
interference
Blurred or snowy picture,
distorted sound
Remote control malfunctions
"Check signal cable."
message is displayed.
On PC mode, "Not Supported
Mode." message is displayed.
The TFT LCD panel uses a panel consisting of sub pixels (3,133,440) which require sophisticated technology to produce. However, there may be few bright or dark pixels on the screen. These pixels will have
no impact on the performance of the product.
Check that the mains lead has been connected to a wall socket.
Check that you have pressed the buttons on the front of the set.
Check the picture contrast and brightness settings.
Check the volume.
Check the volume.
Check whether the MUTE button has been pressed on the remote control.
Check if "Internal Mute" is off
On your computer check; Power, Signal Cable.
The TV is using its power management system.
Move the computer’s mouse or press any key on the keyboard.
Adjust the colour settings.
Check that the broadcast system selected is correct.
Try to identify the electrical appliance that is affecting the set and move it
further away.
Plug your set into a different mains socket.
Check the direction, location and connections of your aerial.
This interference is often due to the use of an indoor aerial.
Replace the remote control batteries.
Clean the upper edge of the remote control (transmission window).
Check the battery terminals.
Check that the signal cable is firmly connected to the PC or video sources.
Check that the PC or video sources are turned on.
Check the maximum resolution and the frequency of the video adaptor.
Compare these values with the data in the Display Modes.
English - 59
Page 62

Technical and Environmental Specications
Model Name
Screen Size (Diagonal)
PC Resolution
Sound
Output
Dimension (WxDxH)
Body
With stand
Weight
With stand
Environmental Considerations
Operating Temperature
Operating Humidity
Storage Temperature
Storage Humidity
LE32R8
32 inch
1360 x 768 @ 60 Hz
10 W X 2
800 x 79 x 541 mm
800 x 252 x 578 mm
13 kg
10 °C to 40 °C (50 °F to 104 °F)
10 % to 80 %, non-condensing
-20 °C to 45 °C (-4 °F to 113 °F)
5 % to 95 %, non-condensing
LE37R8
37 inch
1360 x 768 @ 60 Hz
10 W X 2
917 x 87 x 616 mm
917 x 300 x 660 mm
20 kg
10 °C to 40 °C (50 °F to 104 °F)
10 % to 80 %, non-condensing
-20 °C to 45 °C (-4 °F to 113 °F)
5 % to 95 %, non-condensing
LE40R8
40 inch
1360 x 768 @ 60 Hz
10 W X 2
992 x 87 x 655 mm
992 x 300 x 702 mm
21 kg
10 °C to 40 °C (50 °F to 104 °F)
10 % to 80 %, non-condensing
-20 °C to 45 °C (-4 °F to 113 °F)
5 % to 95 %, non-condensing
Stand Swivel (Left / Right)
-20˚ ~ 20˚
Design and specifications are subject to change without prior notice.
This device is a Class B digital apparatus.
For the power supply and Power Consumption, refer to the label attached to the product.
English - 60
Page 63

This page is intentionally
left blank.
Page 64

Varoituksia pysäytyskuvan käytöstä
Pysäytyskuva voi vaurioittaa television kuvaruutua pysyvästi.
• Älä pidä nestekidetelevision kuvaruudussa pysäytyskuvaa 2 tuntia kauempaa, koska tällöin kuva voi jäädä ruutuun pysyväksi jäännöskuvaksi.
Jäännöskuvaa kuvataan myös “kuvan palamiseksi kuvaruutuun”.
Kun kuvaruudussa on pysäytyskuva, vähennä kirkkautta ja kontrastia, jottei jäännöskuvaa pääsisi muodostumaan.
• LCD-television pitkäaikainen katselu 4:3 kuvasuhteella saattaa jättää kuvaruudulle reunuksia, jotka johtuvat valon säteilyn
• Videopelien ja pc:n still-kuvien määrätyn ajan ylittävä näyttö saattaa aiheuttaa osittaisia jälkikuvia.
Voit estää tämän ilmiön vähentämällä kuvaruudun kirkkautta ja kontrastia, jos katselet pitkään pysäytyskuvia.
eroavuudesta kuvaruudulla. DVD:n tai pelin toisto saattaa aiheuttaa samanlaisen vaikutuksen näytöllä.
Takuu ei kata tästä syystä syntyneitä vaurioita.
© 2007 Samsung Electronics Co., Ltd. All rights reserved.
Page 65

Sisällys
TELEVISION KYTKEMINEN JA KÄYTTÖÖNOTTO
Osaluettelo ......................................................... 3
Jalustan asentaminen ........................................ 3
Seinätelineen asentaminen ................................ 3
Ohjauspaneeli .................................................... 4
Kytkentäpaneeli .................................................. 5
Kaukosäädin ...................................................... 7
Paristojen asettaminen kaukosäätimeen ........... 8
Virran kytkeminen ja katkaiseminen ................... 8
Television asettaminen valmiustilaan ................. 8
Plug & Play ......................................................... 9
KANAVIEN ASETTAMINEN
Kanavien automaattinen tallentaminen ............ 10
Kanavien manuaalinen tallentaminen ...............11
Kanavaluetteloiden asettaminen ...................... 12
Lapsilukon käyttöönotto ................................... 12
Tallennettujen kanavien lajitteleminen .............. 13
Kanavien nimeäminen ...................................... 13
Kanavien vastaanoton viritys ........................... 14
KUVAN SÄÄTÄMINEN
Kuvastandardin muuttaminen .......................... 15
Mukautetun kuvan säätäminen ........................ 15
Värisävyn muuttaminen .................................... 16
Taustavalon aktivointi ....................................... 16
Kuvan tarkkasäätö ........................................... 17
Kuvakoon muuttaminen ................................... 18
Kuvan pysäyttäminen ....................................... 19
Näyttötilan valitseminen ................................... 19
Kuva-asetusten palauttaminen
oletusasetuksiksi .............................................. 19
Digit. koh.vaim. / Aktiivinen väri / DNIe /
Aktiivinen väri ................................................... 20
Kuva kuvassa (PIP) -toiminto ........................... 21
PIP-asetukset ................................................... 21
HDMI musta ..................................................... 22
ÄÄNIASETUSTEN SÄÄTÄMINEN
Äänitehosteen muuttaminen ............................ 22
Ääniasetusten muuttaminen ............................. 23
TruSurround XT (SRS TS XT) -tilan
valitseminen ..................................................... 23
Kuulokkeiden kytkeminen ................................ 24
Äänitilan valitseminen ...................................... 24
Äänenvoimakkuuden automaattinen
säätäminen ....................................................... 24
Sisäisten kaiuttimien mykistäminen ................. 25
Alakuvan äänen kuunteleminen ....................... 25
Ääni-asetusten palauttaminen
oletusasetuksiksi .............................................. 26
KELLONAJAN ASETTAMINEN
Kellonajan asettaminen ja näyttäminen ........... 26
Uniajastimen asettaminen ................................ 27
Television virran automaattinen kytkeminen
ja katkaiseminen .............................................. 27
TOIMINNON KUVAUS
Kielen valitseminen .......................................... 28
Pelitilan käyttäminen ........................................ 28
Sinisen TV-kuvan käyttäminen / Melodian
valitseminen ..................................................... 29
Kotiteatteri PC:n asetukset ............................... 29
Light Effect (valoefekti) –asetuksen
asettaminen ...................................................... 30
Energiansäästö-toiminnon käyttäminen ........... 30
Kuvalähteen valitseminen ................................ 31
Kuvalähteiden nimien muokkaaminen ............ 31
Suomi
Suomi - 1
Page 66

DTV-TOIMINNON KÄYTTÄMINEN
DTV-valikkojärjestelmän esikatselu .................. 32
Kanavaluettelon automaattinen päivitys ........... 33
Kanavaluettelon manuaalinen päivitys ............. 33
Suosikkikanavien muokkaus ............................ 34
Kanavaluettelon valinta .................................... 36
Ohjelmatietojen näyttäminen ............................ 36
EPG (ohjelmaopas) -tietojen näyttäminen ....... 37
Ajastusluettelon käyttäminen ............................ 38
Oletusoppaan asettaminen .............................. 38
Kaikkien kanavien ja suosikkikanavien
näyttäminen ...................................................... 39
Valikon läpikuultavuuden säätäminen .............. 40
Lapsilukon asentaminen .................................. 40
Tekstityksen asettaminen ................................. 41
Tekstitystilan asettaminen ................................ 41
Äänimuodon valitseminen ................................ 41
Digitaalisen tekstin valitseminen
(vain Iso-Britannia) ........................................... 42
Aikavyöhykkeen valinta (vain Espanja) ............ 42
Tuotetietojen näyttäminen ................................ 42
Signaalin tietojen tarkistaminen ....................... 43
Ohjelmiston päivittäminen ................................ 43
Common Interfacen näyttäminen ..................... 44
CI (Common Interface) -valikon valinta ............ 44
Palautus ........................................................... 45
Kielen valinta (audio, tekstitys tai
tekstitelevisio) ................................................... 45
Preference (asetus) .......................................... 46
TEKSTITELEVISION KÄYTTÄMINEN
Tekstitelevision dekooderi ................................ 46
Tekstitelevision tietojen näyttäminen ................ 47
Tekstitelevision sivun valitseminen ................... 47
Tekstitelevision sivun valitseminen
Fastext-toiminnolla ........................................... 48
Kaukosäätimellä ohjattavan laitteen
valitseminen ..................................................... 48
Kaukosäädinkoodit ........................................... 49
PC-ASETUSTEN MÄÄRITTÄMINEN
Tietokoneen asetusten määrittäminen
(Windows XP) .................................................. 52
Näyttötilat ......................................................... 52
PC-asetusten määrittäminen ............................ 53
Seinäkiinnikkeen säätö (LE40R8)
(myydään erikseen) .......................................... 54
TIETOJA ANYNET+
Mikä on Anynet+? ........................................... 55
Anynet+ -laitteiden kytkeminen ........................ 55
Anynet+ asetukset ............................................ 56
Anynet+ -laitteiden haku ja laitteiden valinta .... 56
Tallennus .......................................................... 57
Äänentoisto vastaanottimella ........................... 58
Tarkistettavaa ennen huollon puoleen
kääntymistä ...................................................... 58
KÄYTTÖSUOSITUKSET
Kensington-lukon käyttö ................................... 59
Vianetsintä: Ennen yhteydenottoa
huoltohenkilöstöön ........................................... 59
Tekniset ja käyttöympäristöä koskevat tiedot ... 60
Symbolit Paina Tärkeää Huomaa Kerran painettava
Suomi - 2
näppäin
Page 67

Suomi - 3
Osaluettelo
Varmista, että nestekidetelevision mukana toimitetaan seuraavat osat.
Jos osia puuttuu, ota yhteys jälleenmyyjään.
M4 x L16
Kaukosäädin
& paristot
(AAA x 2)
Omistajan käyttöopas
•
Takuukortti / turvallisuusopas / Rekisteröintikortit (ei saatavissa kaikkialla)
➣
Jalustaa ja jalustan ruuvia ei toimiteta kaikkien mallien mukana.
➣
Virtajohto
Takuukortti
•
Alaosan
suojalevy
Jalustan ruuvit
X4
Turvallisuusopas
•
Jalustan asentaminen
Jalusta Puhdistusliina
Rekisteröintikortit
•
< 2 > < 3 >
Aseta televisio pöydälle kuvaruutu alaspäin pehmeää liinaa tai tyynyä vasten.
1.
Työnnä teline television pohjassa olevaan reikään.
2.
Aseta ruuvi kuvassa osoitettuun reikään ja kiristä se.
3.
Jalusta asennetaan malleille, joiden kuvaruudun koko on vähintään 37 tuumaa.
➣
Seinätelineen asentaminen
Televisio voidaan kiinnittää seinälle erikseen myytävällä
seinätelineellä.
Seinätelineen tarkat asennusohjeet ovat seinätelineen osien
mukana toimitetuissa ohjeissa. Anna teknikon asentaa
seinäteline.
Samsung Electronics ei vastaa tuotteiden vaurioista tai sinun tai
muiden henkilöiden vammoista, jos asennat television itse.
Älä asenna seinätelinettä, kun televisioon on kytketty
virta. Siitä voi seurata sähköisku ja vammautuminen
➣
Irrota jalusta. Peitä television pohjassa oleva reikä kannella
ja kiinnitä kansi kahdella ruuvilla.
Page 68

Ohjauspaneeli
1
2
3
4
5
[LE32R86, LE37R86, LE40R86,
LE32R88, LE37R88, LE40R88]
5,6
[LE32R87, LE37R87, LE40R87,
LE32R89, LE37R89, LE40R89]
Etupaneelin painikkeet
Käytä painikkeita koskettamalla niitä
oikealta puolelta.
6
7
1
2
3
4
7
Tuotteen väri tai muoto voi vaihdella mallista riippuen.
➣
SOURCE
1
Tällä painikkeella voit aktivoida vuorotellen
kaikki valittavissa olevat kuvalähteet (TV, Ulk.1,
Ulk.2, AV, S-Video, Komponentti, PC, HDMI1,
HDMI2, HDMI3, DTV). Käytä tätä painiketta
kuvaruutuvalikossa kuten kaukosäätimen ENTER/
OK-painiketta.
MENU
2
Tuo kuvaruutuun television toimintojen valikko
painamalla tätä.
DTV-tilassa näkyviin tulee digisovittimen valikko.
3
Suurenna tai pienennä äänenvoimakkuutta
painamalla tätä.
Käytä painikkeita kuvaruutuvalikossa
kuten kaukosäätimen ja -painikkeita.
Suomi - 4
4
Vaihda kanavaa painamalla tätä.
Käytä painikkeita kuvaruutuvalikossa
kuten kaukosäätimen ja -painikkeita.
(Voit kytkeä television päälle ilman
kaukosäädintä kanavan valintapainikkeita
käyttäen.)
(Virtapainike)
5
Kytke tai katkaise television virta painamalla
virtapainiketta.
Virtavalo
Virtavalo vilkkuu ja sammuu, kun televisioon
kytketään virta, ja syttyy valmiustilassa.
Kaukosäätimen infrapuna-anturi
6
Suuntaa kaukosäädin tähän kohtaan.
Kaiuttimet
7
Page 69

Suomi - 5
Kytkentäpaneeli
1 2 3 4
5
3
6
Virtaliitin
Tuotteen väri tai muoto voi vaihdella mallista riippuen.
➣
Kytke televisio aina pois päältä ennen ulkoisen laitteen liittämistä televisioon.
➣
Kytke ulkoisten laitteiden johdot samanvärisiin liittimiin.
➣
1 Kytkeminen digisovittimeen, videonauhuriin tai DVD-laitteeseen
Liitin
EXT 1 O O O Valittavissa vain TV- tai DTV-lähtö.
EXT 2 O O Lähtö on valittavissa.
Ulkoisten laitteiden, kuten videonauhurin, DVD-laitteen, videopelilaitteen tai videolevylaitteen tulo- tai
-
lähtöliittimet.
2
Äänijohtojen kytkeminen
Kytke RCA-äänijohdot television takapaneelin R - AUDIO - L -liittimiin ja toiset päät vahvistimen tai DVD-
-
kotiteatterin vastaaviin äänituloliittimiin.
3 HDMI IN 1,HDMI IN 2, HDMI IN 3
Liittimeen voidaan kytkeä HDMI-yhteensopivia AV-laitteita (digisovittimia, DVD-soittimia).
-
HDMI–HDMI-liitäntä ei edellytä erillistä ääniliitäntää.
-
Mikä on HDMI?
➣
-
-
Videokuva Audio (L/R) RGB Video + audio (L/R)
- “High Denition Multimedia interfacen” avulla voidaan lähettää digitaalista teräväpiirtovideota ja useita
digitaalisia audiokanavia (5. 1 kanavat).
HDMI/DVI-liitin tukee ulkoisen laitteen DVI-liitäntää sopivalla johdolla (ei toimiteta laitteen mukana).
HDMI:n ja DVI:n välinen ero on se, että HDMI-laite on pienempi, siihen on asennettu HDCP (High
Bandwidth Digital Copy Protection) –koodaus ja se tukee monikanavaista digitaaliääntä.
Tulo Lähtö
7890!@
DVI IN (HDMI 2) (AUDIO R/L)
Kun kytket tämän laitteen HDMI- tai DVI-liitännällä digisovittimeen, DVD-laitteeseen tai pelikonsoliin jne.,
-
varmista, että se on asetettu yhteensopivaan videolähtötilaan seuraavan taulukon mukaisesti. Muuten
seurauksena voi olla kuvan vääristymistä tai hajoamista tai kuvaa ei näy lainkaan.
HDMI/DVI-kaapeliliitäntä voidaan toteuttaa vain HDMI 2 -liitintä käyttäen.
-
Käytä liitäntään DVI–HDMI-johtoa tai DVI–HDMI-sovitinta
➣
ja äänijohtojen liitäntään DVI-ääniliittimiä R - AUDIO - L.
HDMI/DVI- ja komponenttiliitäntää varten tuetut tilat
➣
HDMI/DVI 50Hz X X X O O O
HDMI/DVI 60Hz X O X X O O
Komponentti O O O O O O
480i 480p 576i 576p 720p 1080i
Page 70

4
Kytkeminen antenni- tai kaapelitelevisioverkkoon
Jotta televisiokanavat näkyisivät oikein, kuvasignaali on vastaanotettava jostain seuraavista lähteistä:
Ulkoantenni / Kaapelitelevisioverkko/ Satelliittitelevisioverkko
-
5
CI (Common Interface) -kortin liittäminen
Kun CI-korttia ei aseteta joihinkin kanaviin, kuvaruutuun tulee ilmoitus “Scrambled Signal”.
-
Puhelinnumero, CI-kortin ID, isännän ID ja muita tietoja tulee näkyviin noin 2~3 minuutin kuluessa. Jos
-
ruutuun tulee virheilmoitus, ota yhteyttä palveluntarjoajaan.
Kun kanavatietojen määritys on valmis, ruutuun tulee ilmoitus “Updating Completed”, joka kertoo, että
-
kanavaluettelo on päivitetty.
Hanki CI-kortti paikalliselta kaapeliyhtiöltä.
➣
Poista CI-kortti vetämällä se käsin varovasti ulos. CI-kortti voi vahingoittua, jos se putoaa.
Aseta CI-kortti kortissa osoitetun suunnan mukaisesti.
➣
7
Kytkeminen ulkoisiin AV-laitteisiin
Kytke RCA- tai S-VIDEO-johto ulkoiseen laitteeseen, kuten videonauhuriin, DVD-laitteeseen tai
-
videokameraan.
Kytke RCA-äänijohdot television takapaneelin “R - AUDIO - L” -liittimiin ja toiset päät ulkoisen AV-laitteen
-
vastaaviin äänilähtöliittimiin.
Voit kytkeä kuulokkeet television takapaneelissa olevaan kuulokelähtöliittimeen (6). Kun kuulokkeet on
-
kytketty televisioon, television sisäänrakennetuista kaiuttimista ei kuulu ääntä.
8
Kytkeminen tietokoneeseen
Kytke D-Sub-johto (lisävaruste) television takapaneelin “PC (PC IN)” -liittimeen ja toinen pää tietokoneen
-
videokorttiin.
Kytke stereoäänijohto (lisävaruste) television takapaneelin “AUDIO (PC IN)” -liittimeen ja toinen pää
-
tietokoneen äänikortin äänilähtöön.
9
DIGITAL AUDIO OUT (OPTICAL)
Kytke digitaaliseen audiokomponenttiin.
-
0 SERVICE
Huoltoliitäntä huoltoteknikolle.
-
!
Kytkeminen komponenttilaitteisiin (digisovittimeen/DVD-laitteeseen)
Kytke komponenttivideojohdot (lisävaruste) television takapaneelin komponenttituloliittimiin (“P
-
ja toiset päät digisovittimen tai DVD-laitteen vastaaviin komponenttilähtöliittimiin.
Jos haluat kytkeä sekä digisovittimen että digitaalitelevision (tai DVD-laitteen), kytke digisovitin
-
digitaalitelevisioon (tai DVD-laitteeseen) ja kytke digitaalitelevisio (tai DVD-laite) television
komponenttiliittimeen (“PR”, “PB”, “Y”).
Komponenttilaitteiden (digisovitin tai DVD-laite) liittimet PR, PB ja Y on joskus merkitty Y, B-Y ja R-Y tai Y, Cb
-
ja Cr.
Kytke RCA-äänijohdot (lisävaruste) television takapaneelin “R - AUDIO - L” -liittimiin ja toiset päät
-
digisovittimen tai DVD-laitteen vastaaviin äänilähtöliittimiin.
Tämän nestekidetelevision kuva on optimaalinen 720p-tilassa.
-
Tämän nestekidetelevision kuva on optimaalinen 1080i -tilassa.
-
@
Kensington-lukko
Kensington-lukko (lisävaruste) on laite, jolla televisio voidaan lukita kiinni julkisissa paikoissa.
-
Jos haluat käyttää lukkolaitetta, ota yhteys television myyneeseen jälleenmyyjään.
-
Kensington-lukon sijainti voi vaihdella eri malleissa.
-
R
”, “PB”, “Y”)
Suomi - 6
Page 71

Suomi - 7
Kaukosäädin
Valitsee laitteen, jota ohjataan
1
Samsung-kaukosäätimellä
(TV, DVD, STB, CABLE,
VCR) (Katso sivut 49~51)
Television valmiustilapainike
2
Numeropainikkeet kanavien
3
suoraan valintaan
Yksi- tai kaksinumeroisen
4
kanavan valinta
Tuo näyttöön
5
“Kanavaluettelo”.
Valitsee TV-tilan ja DTV-tilan
6
suoraan
Videonauhuri/DVD-toiminnot
7
kelaus/haku taaksepäin,
pysäytys, toisto/tauko ja
pikakelaus/-haku eteenpäin
8
Äänenvoimakkuuden lisäys
Äänenvoimakkuuden
vähennys
Äänen väliaikainen mykistys
9
Kuvaruutuvalikko ja
0
muutosten vahvistus
Palaa edelliseen valikkoon
!
Ohjelmaopas (EPG)
#
Kuvakoon valinta
$
Äänitehosteen valinta
%
Viiden erillisen laitteen säätö -
^
TV, DVD, STB, CABLE, VCR
Kun tätä painiketta painetaan,
&
jotkin kaukosäätimen
painikkeet (esimerkiksi
kohdelaitteen valintapainike
sekä äänenvoimakkuus-,
kanava) syttyvät muutamaksi
sekunniksi ja sammuvat
sitten virran säästämiseksi.
Tämän toiminnon ansiosta
kaukosäädintä on kätevä
käyttää myös pimeässä.
Lähteen valinta
*
Edellinen kanava
(
Digisovittimen valikko
)
a
Suoran lähetyksen tallennus
(Vain Anynet+ -toiminto)
(Katso sivut 57)
b
P : Seuraava kanava
P : Edellinen kanava
c
Poistuminen
kuvaruutuvalikosta
d
Ohjaa valikon kohdistinta
e
Käytä saadaksesi tietoa sen
hetkisestä lähetyksestä
f
Anynet-katselutoimintojen
ohjaus ja Anynet-laitteiden
määrittäminen.
g
Värilliset painikkeet : kanavien
lisääminen, poistaminen ja
tallentaminen suosikkikanavien
luetteloon “Kanavaluettelo”.
h
Kuva kuvassa Käytössä/Pois
käyt.
i
Digitaalinen tekstitys
j
Kuvatehosteen valinta
k
Kuvan jäädytys
l
Jos kaukosäädin ei toimi,
vaihda paristot ja paina
“RESET”-painiketta 2-3
sekunnin ajan ennen käyttöä.
Tekstitelevisiotoiminnot
6
Poistuminen tekstitelevisiosta
0
Teksti-TV:n sisällys
@
Valitse vuorotellen
Teletext (teksti-tv), Double
(kaksoiskuva) tai Mix
(samanaikainen katselu).
$
Teksti-TV:n koon määritys
*
Tekst-TV –tilan valinta (LIST/
FLOF)
(
Teksti-TV:n alasivu
b
P : Tekstitelevision seuraava
sivu
P : Tekstitelevision edellinen
sivu
c
Teksti-TV peruutus
e
Teksti-TV paljasta
g
Fastext-teksti-TV:n aihevalinta
h
Teksti-TV:n pysäytin
j
Teksti-TV:n tallennus
Kirkas valo voi vaikuttaa kaukosäätimen toimintaan.
➣
Tämä on erityinen näkövammaisten kaukosäädin, jonka virta-, kanava-, pysäytys-, toisto/tauko- sekä
➣
äänenvoimakkuuspainikkeissa on Braille-pisteet.
Page 72

Paristojen asettaminen kaukosäätimeen
1. Nosta kaukosäätimen takana olevaa kantta ylöspäin kuvan osoittamalla
tavalla.
2. Asenna kaksi AAA-paristoa.
Varmista, että paristojen napaisuus vastaa paristolokeron “+” ja “–”
➣
–merkintöjä.
3. Aseta kansi paikoilleen.
Jos et käytä kaukosäädintä pitkään aikaan, poista paristot ja säilytä
➣
ne viileässä, kuivassa paikassa. Kaukosäädin toimii jopa noin 7 metrin
etäisyydellä televisiosta. (Paristot kestävät normaalissa TV-käytössä noin
vuoden.)
Jos kaukosäädin ei toimi, suorita seuraavat tarkastukset:
➣
1. Onko television virta kytketty päälle?
2. Ovatko paristot asetettu oikein päin?
3. Ovatko paristot kuluneet loppuun?
4. Onko kyseessä sähkökatkos tai onko virtajohto irti pistorasiasta?
5. Onko lähiympäristössä erikoisloistevalaisin tai neonvalomainos?
Virran kytkeminen ja katkaiseminen
Virtajohto kytketään television takapaneeliin.
1. Kytke virtajohto pistorasiaan.
Television etupaneelin valmiustilan merkkivalo syttyy.
➣
2. Paina television etupaneelin virta
Voit kytkeä televisioon virran myös painamalla kaukosäätimen POWER -painiketta tai TV/DTV-
➣
painiketta.
Viimeksi katsottu kanava tulee kuvaruutuun automaattisesti.
➣
3. Paina kaukosäätimen numeropainikkeita (0–9) tai seuraavan/edellisen kanavan painiketta (
paneelin oikealla puolella olevaa painiketta.
Sinua pyydetään valitsemaan television ensimmäisellä käyttökerralla kuvaruutuvalikon kieli.
➣
4. Katkaise television virta painamalla uudelleen
-painiketta.
/ ) tai
POWER -painiketta.
Television asettaminen valmiustilaan
Televisio on mahdollista asettaa valmiustilaan, joka vähentää virrankulutusta. Valmiustila on
kätevä, kun joudut keskeyttämään katselun väliaikaisesti (esimerkiksi ruokailun ajaksi).
1. Paina kaukosäätimen
Kuvaruutu pimenee, ja television etupaneelin punainen valmiustilan merkkivalo syttyy.
➣
2. Käynnistä laite uudelleen painamalla
painiketta tai kanava ylös/alas ( / ) -painiketta uudelleen.
Älä jätä televisiota valmiustilaan pitkäksi ajaksi (esimerkiksi loman ajaksi). Television antennijohto
➣
ja virtajohto on hyvä irrottaa pistorasiasta.
POWER -painiketta.
POWER -painiketta, numeropainikkeita (0~9), TV/DTV -
Suomi - 8
Page 73

Suomi - 9
Plug & Play
Kun televisio kytketään päälle ensimmäisen kerran, se
kehottaa sinua automaattisesti määrittämään peräkkäin
peruskäyttöasetukset. Käytettävissä ovat seuraavassa kuvatut
asetukset.
Kaikki digi-televisioon (DVB) liittyvät toiminnot toimivat vain niissä
➣
maissa/alueilla, joissa on käytössä digitaalinen maanpäällinen
lähetys DVB-T (MPEG2). Tarkista DVB-T-signaalin
vastaanottomahdollisuus paikalliselta jälleenmyyjältä. Tämä
televisio on suunniteltu vastaamaan DVB-T-vaatimuksia, mutta
yhteensopivuutta tulevien maanpäällisten DVB-T-lähetysten
kanssa ei voida taata. Monet toiminnot voivat puuttua joissakin
maissa.
Tämä tuote soveltuu vain suomalaisiin lähetyksiin. Lähetyksiä ei tueta muissa maissa.
➣
1. Paina kaukosäätimen
Kuvaruutuun tulee viesti “Start Plug & Play.”, ja vaihtoehto “OK” on valittuna.
2. Valitse haluamasi kieli painamalla painiketta
Vahvista valinta painamalla ENTER/OK -painiketta.
3. Valitse “Shop” tai “Home” painamalla ◄ tai ► -painiketta ja paina sitten
Suosittelemme, että asetat TV:n Koti-tilaan saadaksesi parhaan kuvan kotiympäristössä.
➣
Myymälä-tila on tarkoitettu käytettäväksi vain myymäläympäristöissä.
➣
Jos laite on vahingossa asetettu Myymälä-tilaan, palauta se Dynaaminen (Koti) -tilaan painamalla
➣
ensin äänenvoimakkuus-painiketta ja pitämällä sivupaneelissa olevaa MENU-painiketta painettuna
viisi sekuntia.
4. Kuvaruutuun tulee viesti “Tarkista antennitulo.”, ja vaihtoehto “OK” on valittuna.
Paina ENTER/OK-painiketta.
Tarkista, että antennijohto on kytketty oikein.
➣
5. Valitse haluamasi maa painamalla painiketta
Vahvista valinta painamalla ENTER/OK-painiketta.
6. Kuvaruutuun tulee “Automaattinen tallennus” -valikko, josta on valittu “Aloita”.
Paina ENTER/OK-painiketta.
Kanavahaku käynnistyy ja päättyy automaattisesti.
➣
DTV-kanavan selausvalikko tulee näkyviin, ja DTV-kanava päivittyy automaattisesti.
Jos DTV-kanava on päivittynyt, Input (Tulo) -valikon kuvalähdeluettelon kuvalähde vaihtuu
➣
automaattisesti DTV:ksi.
Kun kaikki näkyvät kanavat on tallennettu, kuvaruutuun tulee “Kellon asetus” -valikko.
Voit keskeyttää toiminnon koska tahansa painamalla ENTER/OK -painiketta.
➣
Tarkempia tietoja DTV-kanavan päivittämisestä on tämän oppaan sivulla 33.
➣
Tarkkasäätöä ei voi valita, jos DNIe on poissa käytöstä ja kuvatilaksi on valittu Vakio-tila.
7. Paina
8. Vahvista valinta painamalla
ENTER/OK-painiketta.
Valitse “Kuukausi”, “Pvm”, “Vuosi”, “Tunti” ja “Minuutti” painamalla painiketta tai .
Määritä “Kuukausi”, “Pvm”, “Vuosi”, “Tunti” ja “Minuutti” painamalla painiketta tai .
Voit valita tunnit ja minuutit myös painamalla kaukosäätimen numeropainikkeita.
➣
Kieli: Valitse haluamasi kieli.
Maa: Valitse maa.
Automaattinen tallennus: Televisio hakee ja tallentaa automaattisesti alueella vastaanotettavat
Kellon asetus: Aseta television kellonaika.
POWER -painiketta.
tai -painiketta.
ENTER/OK-painiketta.
tai -painiketta.
ENTER/OK-painiketta.
kanavat.
Plug & Play
Start Plug & Play.
OK
Enter Exit
Page 74

Jos haluat asettaa tämän toiminnon uudelleen...
1.
Näytä valikko painamalla MENU-painiketta.
Paina tai -painiketta ja valitse “Asetukset” ja paina sitten
ENTER/OK-painiketta.
2.
Valitse “Kytke ja käytä” painamalla ENTER/OK-painiketta
uudelleen.
3.
Kuvaruutuun tulee viesti “Aloita Kytke ja käytä”.
TV
Kytke ja käytä
Kieli : Suomi
Aika
Pelitila : Pois käyt.
Sininen ruutu : Pois käyt.
Melodia : Pois käyt.
PC
Kotiteatteri PC
Valoefekti :
Lisää
Siirrä Hyväksy Palaa
Asetukset
: Pois käyt.
Plug & Play
Aloita Kytke ja käytä.
OK
Katselutila KÄYT
Kanavien automaattinen tallentaminen
-
Kanavien manuaalinen tallentaminen
-
Hyväksy
TV
Maa : Belgia
Automaattinen tallennus
Manuaalinen tallennus
Kanavien Hallinta
Lajittelu
Nimi
Hienosäätö
Siirrä Hyväksy Palaa
Kanava
Palaa
Kanavien automaattinen tallentaminen
Voit selata käytettävissä olevia taajuusalueita (taajuudet ovat maakohtaisia).
Automaattisesti tallennetut kanavanumerot eivät aina vastaa todellisia tai haluttuja
kanavanumeroita. Voit kuitenkin lajitella kanavanumerot manuaalisesti ja poistaa kaikki ne kanavat,
joita et halua katsella.
1.
Tuo valikko esiin painamalla MENU-painiketta.
Valitse “Kanava” painamalla ▲ tai ▼ -painiketta ja paina sitten ENTER/OK-painiketta.
2.
Valitse “Maa” painamalla ENTER/OK-painiketta.
3.
Valitse haluamasi maa painamalla ▲ or ▼ -painiketta.
Vahvista valinta painamalla ENTER/OK -painiketta.
Digisovittimen maa-asetus ei muutu vaikka tämän valikon maa-asetusta muutetaan. Voit muuttaa
➣
digisovittimen maa-asetuksen Kytke ja käytä –toiminnolla. (Lisätietoja sivuilla 9.)
4.
Valitse “Automaattinen tallennus” painamalla ▲ tai ▼ -painiketta ja paina sitten ENTER/OK-painiketta.
5.
Paina ENTER/OK-painiketta.
Televisio alkaa tallentaa kaikkia vastaanotettavia kanavia.
➣
Voit keskeyttää tallennuksen koska tahansa ja palata “Kanava”-valikkoon painamalla ENTER/OK
➣
-painiketta.
6.
Kun kaikki näkyvät kanavat on tallennettu, kuvaruutuun tulee “Lajittelu”-valikko.
Suomi - 10
Page 75

Suomi - 11
Kanavien manuaalinen tallentaminen
Voit tallentaa korkeintaan sata televisiokanavaa kaapelikanavat mukaan lukien.
Kun tallennat kanavia manuaalisesti, voit valita
tallennetaanko kaikki löydetyt kanavat
mille paikkanumerolle kanavat tallennetaan.
1. Näytä valikko painamalla
Valitse “Kanava” painamalla tai -painiketta ja paina sitten ENTER/OK-painiketta.
2. Valitse “Manuaalinen tallennus” painamalla
3.
Valitse “Muistipaikka” painamalla ENTER/OK-painiketta.
4. Hae kanavalle haluamasi muistipaikkanumero painamalla
OK-painiketta.
➣
Voit valita muistipaikkanumeron myös painamalla kaukosäätimen numeropainikkeita.
5. Valitse “Värijärjestelmä” painamalla
6. Valitse oikea väristandardi painamalla
7. Valitse “Äänijärjestelmä” painamalla
8. Valitse oikea äänistandardi painamalla
➣
Jos ääni on epänormaali tai sitä ei kuulu ollenkaan, valitse äänijärjestelmä uudelleen.
9. Jos tiedät tallennettavan “Kanava” numeron, valitse Kanava painamalla tai -painiketta. Paina
ENTER/OK-painiketta. Valitse C (ilmateitse vastaanotettava kanava) tai S (kaapelikanava) painamalla
tai -painiketta. Valitse kanava painamalla -painiketta. Valitse haluamasi numero painamalla tai
-painiketta ja paina sitten ENTER/OK-painiketta.
➣
Kanavatila: P (kanavapaikkatila), C (ilman kautta lähetettävien kanavien tila), S (kaapelikanavatila)
➣
Voit valita kanavan numeron myös painamalla kaukosäätimen numeropainikkeita.
10. Jos et tiedä kanavanumeroita, valitse “Haku” painamalla
painiketta. Hae kanavat painamalla tai -painiketta ja paina sitten ENTER/OK-painiketta.
11. Valitse “Tallennus” painamalla
12. Toista vaiheet 3–11 jokaisen tallennettavan kanavan kohdalla.
Muistipaikka: Valitse kanavan kanavapaikkanumero.
Värijärjestelmä: Valitse yhteensopiva värijärjestelmä.
Äänijärjestelmä: Valitse yhteensopiva äänijärjestelmä.
Kanava: Valitse kanava.
Haku: Televisio hakee kanavan taajuuden.
Tallennus: Tallenna määrittämäsi asetukset.
MENU-painiketta.
tai -painiketta ja paina sitten ENTER/OK-painiketta.
tai -painiketta ja paina sitten ENTER/
tai -painiketta ja paina sitten ENTER/OK-painiketta.
tai -painiketta ja paina sitten ENTER/OK-painiketta.
tai -painiketta ja paina sitten ENTER/OK-painiketta.
tai -painiketta ja paina sitten ENTER/OK-painiketta.
tai -painiketta. Paina ENTER/OK-
tai -painiketta. Valitse “OK” painamalla ENTER/OK-painiketta.
Page 76

Kanavaluetteloiden asettaminen
Aseta kanavat haluamaasi järjestykseen.
Voit helposti poistaa, lisätä tai lukita haluamasi kanavan.
1. Näytä valikko painamalla
MENU-painiketta.
Valitse “Kanava” painamalla tai -painiketta ja paina sitten
ENTER/OK-painiketta.
2. Valitse “Kanavien hallinta” painamalla
tai -painiketta ja
paina sitten ENTER/OK-painiketta.
3. Valitse “Kanavaluettelo” painamalla uudelleen
ENTER/OK-
painiketta.
4. Valitse “
5. Valitse poistettava kanava painamalla
” painamalla -painiketta.
tai -painiketta ja
poista kanava painamalla ENTER/OK-painiketta.
6. Toista vaihe 5 kaikille lisättäville tai poistettaville kanaville.
7. Poistu painamalla
“ ” on aktivoitu kun “Lapsilukko” on otettu “käyttöön”.
➣
EXIT-painiketta.
Voit valita nämä vaihtoehdot painamalla kaukosäätimen
CH LIST -painiketta.
Lapsilukon käyttöönotto
Tämä toiminto estää laitteen asiattoman käytön määrätyiltä
henkilöiltä, kuten lapsilta.
Lapsilukkoa ei voi poistaa käytöstä television sivupaneelin
painikkeilla.
Lapsilukon voi poistaa käytöstä vain kaukosäätimellä, joten
pidä kaukosäädin poissa lasten ulottuvilta.
1. Näytä valikko painamalla
Valitse “Kanava” painamalla tai -painiketta ja paina sitten
ENTER/OK-painiketta.
2. Valitse “Kanavien hallinta” painamalla
paina sitten ENTER/OK-painiketta.
3. Valitse “Lapsilukko” painamalla uudelleen
paina sitten ENTER/OK-painiketta.
4. Valitse asetus “Käytössä” tai “Pois käyt.” painamalla
-painiketta uudelleen. Paina ENTER/OK-painiketta.
5. Valitse “Kanavaluettelo” painamalla
luettelo painamalla ENTER/OK-painiketta.
6. Valitse “
” painamalla -painiketta.
7. Valitse lukittavat kanavat painamalla
paina sitten ENTER/OK-painiketta.
8. Toista vaiheet jokaisen lukittavan kanavan lukitsemiseksi tai
lukituksen poistamiseksi.
9. Poistu painamalla EXIT-painiketta.
Voit aktivoida tai poistaa kanavien lukituksen helposti
➣
valitsemalla Lapsilukko-valikosta vaihtoehdon “Käytössä” tai
“Pois käyt.” (lukitut kanavat on merkitty symbolilla “ ”).
MENU-painiketta.
tai -painiketta ja
tai -painiketta ja
or
tai -painiketta ja poista
tai -painiketta ja
Kanavaluettelo
P 1 C3
Prog.
0 C--
1 C3
2 BBC 1
3 C74
4 C75
5 C76
6 S3
7 S4
8 S6
9 S7
Lisää Lukko
Siirrä
Sivu
TV
P 2 C4 BBC1
Prog.
0 C-1 C3
2 BBC 1
3 C74
4 C75
5 C76
6 S3
7 S4
8 S6
9 S7
Lisää Lukko
Kanavien Hallinta
Kanavaluettelo
Lapsilukko :
Siirrä Hyväksy Palaa
Kanavaluettelo
Siirrä
Sivu
Hyväksy
Palaa
Pois käyt.
Käytössä
Hyväksy
Palaa
1 / 10
1 / 10
Suomi - 12
Page 77

Suomi - 13
Tallennettujen kanavien lajitteleminen
Voit vaihtaa keskenään kahden kanavan numeroita seuraavasti:
Voit vaihtaa automaattisesti tallennettujen kanavien
järjestystä.
Voit antaa helposti muistettavat numerot kanaville, joita
katsot usein.
1. Tuo valikko esiin painamalla
MENU-painiketta.
Valitse “Kanava” painamalla tai -painiketta ja paina sitten
ENTER/OK-painiketta.
2. Valitse “Lajittelu” painamalla
tai -painiketta ja paina sitten
ENTER/OK-painiketta.
3.
Valitse muutettava kanavanumero painamalla toistuvasti
painiketta tai . Paina ENTER/OK-painiketta.
➣
Valitun kanavan numero ja nimi siirtyvät oikealle puolelle.
4. Siirry muutettavaan kohtaan painamalla
tai -painiketta ja
paina sitten ENTER/OK-painiketta.
➣
Valittu kanava tallentuu valitulle kanavapaikkanumerolle ja
korvaa kanavapaikkaan aiemmin tallennetun kanavan.
5. Toista vaiheet
6. Poistu painamalla
3–4 muiden lajiteltavien kanavien kohdalla.
EXIT-painiketta.
Kanavien nimeäminen
Kanavat nimetään automaattisesti, kun kanavatieto
vastaanotetaan. Voit nimetä automaattisesti nimetyt kanavat
uudelleen.
1. Näytä valikko painamalla
Valitse “Kanava” painamalla tai -painiketta ja paina sitten
ENTER/OK-painiketta.
2. Valitse “Nimi” painamalla
ENTER/OK-painiketta.
3. Jos haluat vaihtaa jonkin kanavan nimen, valitse kanava
painamalla painiketta tai . Paina ENTER/OK-painiketta.
➣
Valintapalkki siirtyy nimiruutuun.
4.
Käyttö niin…
Valitse kirjain, numero tai symboli
Siirry seuraavaan kirjaimeen
Siirry edelliseen kirjaimeen
Vahvista nimi Paina ENTER/OK-painiketta.
MENU-painiketta.
tai -painiketta ja paina sitten
TV
Paina tai -painiketta
Paina -painiketta
Paina -painiketta
Maa : Belgia
Automaattinen tallennus
Manuaalinen tallennus
Kanavien Hallinta
Lajittelu
Nimi
Hienosäätö
Siirrä Hyväksy Palaa
TV
Muistip. Kan. Nimi
0 C--
1 C23
2 C16
3 C3
4 S1
Siirrä Hyväksy Palaa
TV
Maa : Belgia
Automaattinen tallennus
Manuaalinen tallennus
Kanavien Hallinta
Lajittelu
Nimi
Hienosäätö
Siirrä Hyväksy Palaa
Muistip. Kan. Nimi
0 C-- -----
1 C23
2 C16
3 C3
4 S1
Siirrä Hyväksy Palaa
KanavaTV
Lajittelu
Kanava
Nimi
-----
-----
-----
-----
➣
Käytettävissä olevat merkit ovat: Aakkoset (A-Z) / Numerot (0-9) / Erikoismerkit (-, välilyönti)
5. Toista vaiheet
6. Poistu painamalla
3–4 kaikkien niiden kanavien kohdalla, jotka haluat nimetä uudelleen.
EXIT-painiketta.
Page 78

Kanavien vastaanoton viritys
Hienosäädöllä voit säätää tiettyä kanavaa manuaalisesti
optimaalista vastaanottoa varten.
1. Hienosäädettävä kanava voidaan valita suoraan
numeropainikkeilla.
2. Näytä valikko painamalla
Valitse “Kanava” painamalla tai -painiketta ja paina sitten
ENTER/OK-painiketta.
3. Valitse “Hienosäätö” painamalla
sitten ENTER/OK-painiketta.
4. Muuta hienosäätöä painamalla
Paina ENTER/OK-painiketta.
5. Poistu painamalla
Tallennetut hienosäädetyt kanavat on merkitty asteriskilla “ * ”,
➣
joka näkyy kanavapalkissa kanavanumeroiden oikealla puolella.
Lisäksi hienosäädetyn kanavan numero muuttuu punaiseksi.
Jos haluat nollata hienosäädön, valitse “Palauta” painamalla
➣
▲ tai ▼ -painiketta ja paina sitten ENTER/OK-painiketta.
MENU-painiketta.
tai -painiketta ja paina
tai -painiketta.
EXIT-painiketta.
TV
Maa : Belgia
Automaattinen tallennus
Manuaalinen tallennus
Kanavien Hallinta
Lajittelu
Nimi
Hienosäätö
Siirrä Hyväksy Palaa
P 1
Tallenna Säädä Palaa
Kanava
Hienosäätö
Palauta
0
Suomi - 14
Page 79

Suomi - 15
Kuvastandardin muuttaminen
Voit valita kuvatyypin, joka vastaa katseluvaatimuksiasi
parhaiten.
1. Tuo valikko esiin painamalla
MENU-painiketta.
Valitse “Kuva” painamalla ENTER/OK-painiketta.
2. Valitse “Tila” painamalla
3. Valitse haluamasi kuvatehoste painamalla
ENTER/OK-painiketta uudelleen.
tai -painiketta.
Paina ENTER/OK-painiketta.
4. Poistu painamalla
Dynaaminen:
EXIT-painiketta.
Teräväpiirtokuva, joka sopii kirkkaaseen
huonevaloon.
Vakio:
Optimaalinen kuva, joka sopii normaaliin
huonevaloon.
Elokuva:
Kuva, jota on miellyttävä katsella pimeässä
huoneessa.
Kuvatila on säädettävä erikseen kullekin kuvalähteelle.
➣
Voit palauttaa tehtaassa määritetyt oletusasetukset valitsemalla
➣
“Palauta”. (Katso kohta “Kuva-asetusten palauttaminen
oletusasetuksiksi”, sivu 19)
TV
Tila :
Kontrasti 100
Kirkkaus
Terävyys 75
Väri
Sävy V50 P50
Värisävy : Viileä1
Tarkkasäätö
Taustavalo : 10
Lisää
Siirrä Hyväksy Palaa
TV
Tila :
Kontrasti 100
Kirkkaus
Terävyys 75
Väri
Sävy V50 P50
Värisävy : Viileä1
Tarkkasäätö
Taustavalo : 10
Lisää
Siirrä Hyväksy Palaa
Kuva
Dynaaminen
Kuva
Dynaaminen
Dynaaminen
Vakio
Elokuva
Voit valita kuvatilan myös
kaukosäätimen P.MODE-
painiketta painamalla.
Mukautetun kuvan säätäminen
Voit muuttaa televisiosi kuvanlaatua useilla asetuksilla.
1. Valitse haluamasi kuvatehoste kuten kappaleen ”Kuvastandardin
muuttaminen” ohjeissa 1–3.
2. Valitse haluamasi asetus painamalla
tai -painiketta. Paina
ENTER/OK-painiketta.
3. Pienennä tai suurenna haluamasi asetuksen arvoa painamalla
tai -painiketta. Paina ENTER/OK-painiketta.
4. Poistu painamalla
EXIT-painiketta.
Kontrasti: Tällä asetuksella voit säätää kohteiden ja taustan välistä kirkkaus- ja tummuuseroa.
Brightness: Tällä asetuksella voit säätää koko kuvaruudun kirkkautta.
Terävyys: Tällä asetuksella voit tarkentaa tai sumentaa kohteiden ääriviivoja.
Väri: Tällä asetuksella voit säätää värejä vaaleammiksi tai tummemmiksi.
Sävy (vain NTSC tai DTV): Tällä asetuksella voit säätää kohteiden sävyä punaisemmaksi tai
vihreämmäksi, jotta kuva on luonnollisempi.
Säädetyt arvot tallennetaan valitun kuvatilan mukaisesti.
➣
PC-tilassa voidaan säätää “Kontrasti”, “Kirkkaus”.
➣
“Sävy” -toiminto on käytettävissä vain “HDMI”- ja “Komponentti” -tiloissa.
➣
TV
Tila :
Kontrasti 100
Kirkkaus
Terävyys 75
Väri 55
Sävy V50 P50
Värisävy : Viileä1
Tarkkasäätö
Taustavalo : 10
Lisää
Siirrä Hyväksy Palaa
Kuva
Dynaaminen
45
55
45
55
45
Page 80

Värisävyn muuttaminen
Voit valita silmiäsi eniten miellyttävän värisävyn.
1. Valitse haluamasi kuvatehoste kuten kappaleen ”Kuvastandardin
muuttaminen” ohjeissa 1–3. (sivu 15)
2. Valitse “Värisävy” painamalla
tai -painiketta ja paina sitten
ENTER/OK-painiketta.
3. Valitse haluamasi värisävyn asetus painamalla
tai -
painiketta. Paina ENTER/OK-painiketta.
4. Poistu painamalla
Viilea2:
EXIT-painiketta.
Tämä asetus tekee väristä sinisemmän kuin
“Viileä1”.
Viileä1:
Tämä asetus tekee valkoisesta väristä
sinertävän.
Normaali:
Lämmin1:
Tämä asetus näyttää valkoisen värin valkoisena.
Tämä asetus tekee valkoisesta väristä
punertavan.
Lämmin2:
Tämä asetus tekee väristä punaisemman kuin
“Lämmin1”.
Säädetyt arvot tallennetaan valitun kuvatilan mukaisesti.
➣
Kun kuvatilaksi on valittu Dynaaminen tai Vakio, Lämmin1- ja Lämmin2-asetuksia ei voi valita.
➣
TV
Tila :
Kontrasti 100
Kirkkaus
Terävyys 75
Väri
Sävy V50 P50
Värisävy : Viileä1
Tarkkasäätö
Taustavalo : 10
Lisää
Siirrä Hyväksy Palaa
TV
Tila :
Kontrasti 100
Kirkkaus
Terävyys
Väri 55
Sävy V50 P50
Värisävy : Viileä1
Tarkkasäätö
Taustavalo : 10
Lisää
Siirrä Hyväksy Palaa
Kuva
Kuva
Taustavalon aktivointi
Voit säätää kuvaruudun kirkkautta säätämällä
nestekidetelevision taustavalon kirkkautta. (0~10)
1. Valitse haluamasi kuvatehoste kuten kappaleen ”Kuvastandardin
muuttaminen” ohjeissa 1–3. (sivu 15)
2. Valitse “Taustavalo” painamalla
tai -painiketta ja paina
sitten ENTER/OK-painiketta.
3. Pienennä tai suurenna haluamasi asetuksen arvoa painamalla
tai -painiketta.
4. Paina
ENTER/OK-painiketta.
Poistu painamalla EXIT-painiketta.
TV
Tila :
Kontrasti 100
Kirkkaus
Terävyys 75
Väri 55
Sävy V50 P50
Värisävy : Viileä1
Tarkkasäätö
Taustavalo : 10
Lisää
Siirrä Hyväksy Palaa
Taustavalo
Säädä Palaa
Kuva
Dynaaminen
Dynaaminen
Viileä2
Viileä1
Normaali
Lämmin1
Lämmin2
Dynaaminen
45
55
45
75
45
10
Suomi - 16
Page 81

Suomi - 17
Kuvan tarkkasäätö
Voit valita silmiäsi eniten miellyttävän värisävyn.
1. Tuo valikko esiin painamalla
2. Valitse “Kuva” painamalla
MENU-painiketta.
ENTER/OK-painiketta.
3. Valitse “Tarkkasäätö” painamalla ▲ tai ▼ -painiketta ja paina
sitten ENTER/OK-painiketta.
4. Valitse haluamasi vaihtoehto painamalla
tai -painiketta ja
paina sitten ENTER/OK-painiketta. Vaihtoehdot: Mustasäätö,
Dynaam. kontrasti, Gamma, Valkotasapaino, Omat värisäädöt,
Reunojen parannus, Väriavaruus.
5. Kun olet valinnut haluamasi asetukset, paina
ENTER/OK-
painiketta.
6. Poistu painamalla
Kun kuvatilaksi on valittu Elokuva tai Vakio, Tarkkasäätö
➣
EXIT-painiketta.
voidaan valita.
Tarkkasäätöä ei voi valita, jos DNIe on poissa käytöstä ja
➣
kuvatilaksi on valittu Vakio-tila.
Mustasäätö: Pois käyt./Pieni/Keskikoko/Suuri
Voit suorittaa kuvaruudun syvyyden mustasäädön suoraan kuvaruudussa.
Dynaam. kontrasti: Pois käyt./Pieni/Keskikoko/Suuri
Voit säätää kuvaruudun kontrastin optimaaliseksi.
Gamma: -3~ +3
Voit säätää kuvaruudun keskikirkautta.
Paina ◄ tai ► -painiketta, kunnes asetus on mieleinen.
Valkotasapaino: R Offset/G Offset/B Offset/R Gain/G Gain/B Gain/Palauta
Voit säätää värilämpötilaa luonnollisempien värien saamiseksi.
R Offset/G Offset/B Offset/R Gain/G Gain/B Gain: Kun asetusta muutetaan, näytön asetus
muuttuu.
Valitse haluamasi vaihtoehto ▲ tai ▼ -painikkeella ja paina sitten ENTER/OK-painiketta.
Paina ◄ tai ► -painiketta, kunnes asetus on mieleinen.
Palauta: Aiemmin säädetty valkotasapaino palautuu takaisin oletusasetukseksi.
Omat värisäädöt: Vaal.pun./Vihreä/Sininen/Valkoinen/Palauta
Voit muuttaa asetuksen oman mieltymyksesi mukaiseksi.
Vaal.pun./Vihreä/Sininen/Valkoinen: Kun asetusta muutetaan, näytön asetus muuttuu.
Valitse haluamasi vaihtoehto ▲ tai ▼ -painikkeella ja paina sitten ENTER/OK-painiketta.
Paina ◄ tai ► -painiketta, kunnes asetus on mieleinen.
Palauta: Aiemmin säädetyt värit muuttuvat takaisin oletusasetuksiksi.
➣
Reunojen parannus: Pois käytöstä/Käytössä
Voit korostaa kuvan ääriviivoja.
Väriavaruus: Automaattinen/Leveä
Voit valita tulosignaalin värintoistotilaksi vaihtoehdon Automaattinen tai Leveä.
TV
Tila :
Kontrasti 80
Kirkkaus
Terävyys 10
Väri
Sävy V50 P50
Värisävy : Lämmin2
Tarkkasäätö
Taustavalo : 0
Lisää
Siirrä Hyväksy Palaa
TV
Mustasäätö : Pois käyt.
Dynaam. kontrasti
Gamma : 0
Valkotasapaino
Omat värisäädöt
Reunojen parannus
Väriavaruus
Tarkkasäätö
:
Siirrä Hyväksy Palaa
Kuva
Elokuva
: Pois käyt.
: Pois käyt.
Automaattinen
45
53
Page 82

Kuvakoon muuttaminen
Voit valita kuvakoon, joka vastaa parhaiten
katseluvaatimuksiasi.
1. Tuo valikko esiin painamalla
MENU-painiketta.
Valitse “Kuva” painamalla ENTER/OK-painiketta.
2. Valitse “Koko” painamalla
tai -painiketta ja paina sitten
ENTER/OK-painiketta.
3. Valitse haluamasi asetus painamalla
tai -painiketta. Paina
ENTER/OK-painiketta.
4. Poistu painamalla
Autom.
leveys:
16 :9:
EXIT-painiketta.
Kuvasuhde muuttuu automaattisesti “16:9”
laajakuvamuotoon.
Kuvasuhde 16:9, jota käytetään DVDelokuvissa tai laajakuvalähetyksissä.
Leveä
Suurentaa kuvakokoa kuvasuhteesta 4:3.
zoomaus:
Zoom :
Suurentaa laajakuvasuhteessa 16:9 näkyvän
kuvan (pystysuunnassa) kuvaruudun
kokoiseksi.
4:3:
Tämä on videoelokuvan tai normaalin
televisiolähetyksen oletuskuvasuhde.
Pelkkä
skannaus:
Näyttää tulevan kuvan sellaisenaan ilman
rajausta HDMI 720p, 1080i-signaalia
vastaanotettaessa.
“Autom. leveys” -toiminto on käytettävissä vain tiloissa “TV”,
➣
“Ext1”, “Ext2”, “AV” ja “S-Video”.
PC-tilassa voidaan säätää vain kuvasuhteita “16:9” ja “4:3”.
➣
Zoom : Valitse painamalla ◄ tai ► -painiketta. Voit siirtää kuvaa ylös tai alas ▲ tai ▼
➣
-painikkeella. Kun olet valinnut -kuvakkeen, voit suurentaa tai pienentää kuvakokoa
pystysuunnassa ▲ tai ▼ -painikkeella.
Leveä zoomaus : Voit siirtää kuvan paikkaa ylös tai alas sen jälkeen, kun olet valinnut
➣
painamalla ► tai ENTER/OK-painiketta.
TV
Lisää
Koko :
Näyttötila : 16 : 9
Digit. koh.vaim : Pois käyt.
Aktiivinen väri : Pois käyt.
DNle : Pois käyt.
Aktiivinen väri : Pois käyt.
Palauta : OK
Siirrä Hyväksy Palaa
TV
Autom. leveys
16 : 9
Leveä zoomaus
Zoom
4 : 3
Pelkkä skannaus
Siirrä Hyväksy Palaa
Voit valita nämä vaihtoehdot
myös suoraan painamalla
kaukosäätimen P.SIZE-
painiketta.
Kuva
Autom. leveys
Koko
Suomi - 18
Page 83

Suomi - 19
Kuvan pysäyttäminen
Pysäytä liikkuva kuva painamalla
STILL-painiketta. Peruuta pysäytys painamalla painiketta
uudelleen.
Näyttötilan valitseminen
Jos haluat valita 16:9 laajakuvatelevisiossa kuvakooksi Autom.
leveys, voit valita kuvakooksi 4:3 WSS (Wide Screen Service).
Jokaisessa Euroopan maassa käytetään eri kuvakokoa; oikea
kuvakoko voidaan valita tätä toimintoa käyttäen.
1. Tuo valikko esiin painamalla
Valitse “Kuva” painamalla ENTER/OK-painiketta.
2. Valitse “Näyttötila” painamalla
ENTER/OK-painiketta.
3. Valitse haluamasi asetus painamalla
ENTER/OK-painiketta.
Vaihtoehdot: 16:9, Leveä zoomaus, Zoom, 4:3
16:9: Laajakuvamuoto, jonka kuvasuhde on 16:9.
Leveä zoomaus: Suurentaa kuvakokoa kuvasuhteesta 4:3.
Zoom : Suurentaa kuvakokoa pystysuunnassa.
4:3: Palauttaa normaalin kuvasuhteen 4:3.
4. Poistu painamalla
Kuvakoko on käytettävissä Autom. leveys -tilassa.
➣
Tämä toiminto ei ole käytettävissä PC, Komponentti- tai
➣
EXIT-painiketta.
HDMI-tilassa.
MENU-painiketta.
tai -painiketta ja paina sitten
tai -painiketta. Paina
TV
Lisää
Koko :
Näyttötila : 16 : 9
Digit. koh.vaim : Pois käyt.
Aktiivinen väri : Pois käyt.
DNle : Pois käyt.
Aktiivinen väri : Pois käyt.
Palauta : OK
Move Enter Return
Siirrä Hyväksy Palaa
TV
Lisää
Koko :
Näyttötila : 16 : 9
Digit. koh.vaim : Pois käyt
Aktiivinen väri : Pois käyt
DNle : Pois käyt
Aktiivinen väri : Pois käyt.
Palauta : OK
Siirrä Hyväksy Palaa
Kuva
Autom. leveys
Kuva
Autom. leveys
16:9
Leveä zoomaus
Zoom
4:3
Kuva-asetusten palauttaminen oletusasetuksiksi
Voit palata tehdasasetuksiin.
1. Valitse haluamasi kuvatehoste kuten kappaleen ”Kuvastandardin
muuttaminen” ohjeissa 1–3. (sivu 15)
2. Valitse “Palauta” painamalla
tai -painiketta ja paina sitten
ENTER/OK-painiketta.
3. Valitse “OK” tai “Peruuta” painamalla ▲ tai ▼ -painiketta. Paina
ENTER/OK-painiketta.
4. Poistu painamalla
Kaikkien kuvatilojen oletusasetukset palautetaan.
➣
EXIT-painiketta.
TV
Lisää
Koko :
Näyttötila : 16 : 9
Digit. koh.vaim : Pois käyt.
Aktiivinen väri : Pois käyt.
DNle : Pois käyt.
Aktiivinen väri : Pois käyt.
Palauta : OK
Siirrä Hyväksy Palaa
TV
Lisää
Koko :
Näyttötila : 16 : 9
Digit. koh.vaim : Pois käyt.
Aktiivinen väri : Pois käyt.
DNle : Pois käyt.
Aktiivinen väri : Pois käyt.
Palauta : OK
Siirrä Hyväksy Palaa
Kuva
Autom. leveys
Kuva
Autom. leveys
Peruuta
OK
Page 84

Digit. koh.vaim. / Aktiivinen väri / DNIe / Aktiivinen väri
Jos television vastaanottama lähetyssignaali on heikko, voit
ottaa käyttöön digitaalisen kohinanvaimennuksen ja vähentää
siten kuvaruudun sähköisiä häiriöitä ja haamukuvia.
1. Tuo valikko esiin painamalla
MENU-painiketta.
Valitse “Kuva” painamalla ENTER/OK-painiketta.
2. Valitse haluamasi vaihtoehto painamalla
tai -painiketta ja
paina sitten ENTER/OK-painiketta.
Vaihtoehdot: Digit. koh.vaim., Aktiivinen väri, DNIe, Aktiivinen
väri.
3. Kun olet valinnut haluamasi asetukset, paina
4. Poistu painamalla
Digit. koh.vaim.: Pois käyt./Pieni/Keskikoko/Suuri/Automaattinen
EXIT-painiketta.
ENTER/OK-painiketta.
Jos television vastaanottama signaali on heikko, voit ottaa tämän toiminnan käyttöön ja vähentää siten
kuvaruudun sähköisiä häiriöitä ja haamukuvia.
Tämä toiminto ei ole käytettävissä PC-tilassa.
➣
Aktiivinen väri: Käytössä/Pois käyt.
Jos valitset tämän vaihtoehdon, taivaan ja ruohon värit voimistuvat ja näyttävät siten
kuvaruudulla kirkkaammilta.
Tämä toiminto ei ole käytettävissä PC-tilassa.
➣
Tämä toiminto ei ole käytettävissä Elokuva ja Vakio-tilassa.
➣
DNIe : Pois käyt./Demo/Käytössä
Tämä televisio on varustettu korkealuokkaisen kuvanlaadun takaavalla DNIe-toiminnolla. Kytkemällä
DNIe-toiminnon päälle näet, miten toiminto vaikuttaa kuvaruudulla näkyvän kuvan laatuun. Jos asetat
DNIe-toiminnon Demo-tilaan, kuvaruudulle ilmestyy vertailutarkoituksessa sekä tavallinen että DNIetoiminnolla parannettu kuva. Tätä toimintoa käyttämällä voit vertailla kuvalaatujen eroja.
DNIeTM (Digital Natural Image engine)
➣
Tämä toiminto tekee televisiokuvasta entistä tarkemman kolmiulotteisen kohinanvaimennuksen
sekä yksityiskohtien, kontrastin ja kirkkauden tehostamisen ansiosta. Uusi kuvanparannusalgoritmi
tekee kuvasta entistä kirkkaamman, selkeämmän ja yksityiskohtaisemman. DNIe
jokaisen signaalin silmiesi nähtäviksi.
Tämä toiminto ei ole käytettävissä PC-tilassa.
➣
Tämä toiminto ei ole käytettävissä Elokuva-tilassa.
➣
Aktiivinen väri: Käytössä/Pois käyt.
Näet ihon värit luonnollisempina ja tekstin selkeämpänä jopa nopeasti liikkuvissa kuvissa.
Käytä tätä toimintoa elokuvia katsellessasi.
➣
Leveä zoomaus, Zoom ja Pelkkä skannaus ei ole käytössä.
➣
Tämä toiminto ei ole käytettävissä PC-tilassa.
➣
TV
Lisää
Koko :
Näyttötila : 16 : 9
Digit. koh.vaim : Pois käyt.
Aktiivinen väri : Pois käyt.
DNle : Pois käyt.
Aktiivinen väri : Pois käyt.
Palauta : OK
Siirrä Hyväksy Palaa
TM
–tekniikka tuo
Kuva
Autom. leveys
Suomi - 20
Page 85

Suomi - 21
Kuva kuvassa (PIP) -toiminto
Voit tuoda kuvaruutuun televisiolähetyksen tai videosignaalin
kautta tulevan pääkuvan sisään alakuvan. Näin voit katsella
televisiolähetystä tai videosignaalin kautta mistä tahansa
liitetystä laitteesta vastaanotettavaa kuvaa samalla, kun katselet
pääkuvaa.
1. Tuo valikko esiin painamalla
MENU-painiketta.
Valitse “Asetukset” painamalla tai -painiketta ja paina sitten
ENTER/OK-painiketta.
2. Valitse “PIP” painamalla
tai -painiketta ja paina sitten
ENTER/OK-painiketta.
3. Paina uudelleen
ENTER/OK-painiketta.
Valitse “Käytössä” painamalla tai -painiketta ja paina sitten
ENTER/OK-painiketta.
➣
Kun otat PIP-toiminnon käyttöön, pääkuvan kooksi tulee
“16:9”.
4. Valitse “Lähde” painamalla
tai -painiketta ja paina sitten
ENTER/OK-painiketta. Valitse alakuvan lähde painamalla tai
-painiketta ja paina sitten ENTER/OK-painiketta.
➣
Alakuvalle voidaan valita useita kuvalähteitä sen mukaan,
mikä kuvalähde on valittu pääkuvalle.
5. Valitse alakuvan “Koko” painamalla
tai -painiketta ja paina
sitten ENTER/OK-painiketta.
Select a size of the sub picture by pressing the or button
and then press the ENTER/OK button.
➣
Jos pääkuva on “PC” ja “Komponentti”-tilassa, toimintoa
“Koko” ei voi valita.
6. Valitse “Sijainti” painamalla
tai -painiketta ja paina sitten ENTER/OK-painiketta.
Valitse alakuvan sijainti painamalla tai -painiketta ja paina sitten ENTER/OK-painiketta.
7. Valitse “Muistipaikka” painamalla
tai -painiketta ja paina sitten ENTER/OK-painiketta.
Voit valita alakuvassa näkyvän kanavan painamalla or -painiketta. Paina ENTER/OK-painiketta.
➣
“Muistipaikka” voi olla aktivoitu samalla, kun alakuvan kuvalähteeksi on valittu TV.
8. Poistu painamalla
➣
PIP-ikkunassa näkyvän kuvan laatu saattaa hieman vääristyä, kun pääkuvaa käytetään pelien
EXIT-painiketta.
pelaamiseen tai karaokeen.
Lähde:
Koko:
Sijainti:
Muistipaikka:
Valitse alakuvan lähde.
Valitse alakuvan koko.
Siirrä alakuvan paikkaa.
Vaihda alakuvan kuvalähdettä.
Mode : Custom
TV
Equalizer
Lisää
SRS TS XT : Off
Auto Volume : Off
Energiansäästö : Pois käyt.
Internal Mute : Off
HDMI musta : Pieni
Reset
PIP
Siirrä Hyväksy Palaa
Mode : Custom
TV
Equalizer
PIP : Käytössä
SRS TS XT : Off
Lähde : TV
Auto Volume : Off
Koko :
Internal Mute : Off
Sijainti :
Reset
Muistipaikka : P 1
Siirrä Hyväksy Palaa
Asetukset
Move Enter Return
PIP
Move Enter Return
Aktivoi “PIP”-toiminto tai poista
se käytöstä painamalla
kaukosäätimen PIP–painiketta.
PIP-asetukset
Analoginen
Ala
Pää
Komponentti
HDMI
PC
O: PIP käytössä, X: PIP ei käytössä
TV
Ext.1 Ext.2 AV S-Video Komponentti HDMI PC Digi-TV
O O O O X X X X X
O O O O X X X X X
O O O O X X X X X
Page 86

HDMI musta
Voit suorittaa kuvaruudun syvyyden mustasäädön suoraan
kuvaruudussa.
1. Tuo valikko esiin painamalla
MENU-painiketta.
Valitse “Asetukset” painamalla tai -painiketta ja paina sitten
ENTER/OK-painiketta.
2. Valitse “HDMI musta” painamalla
tai -painiketta ja paina
sitten ENTER/OK-painiketta.
3. Valitse “Normaali” tai “Pieni” painamalla
tai -painiketta ja
paina sitten ENTER/OK-painiketta.
4. Poistu painamalla
Tämä toiminto on aktivoitu vain silloin, kun ulkoiset laitteet on
➣
EXIT-painiketta.
kytketty HDMI-tuloliittimiin (RGB-signaalit).
Normaali:
Pieni:
Kuva kirkastuu.
Kuva tummenee.
Äänitehosteen muuttaminen
Voit valita kuhunkin lähetykseen sopivan äänitehosteen.
1. Tuo valikko esiin painamalla
Valitse “Ääni” painamalla tai -painiketta ja paina sitten
ENTER/OK-painiketta.
2. Valitse “Tila” painamalla uudelleen
3. Valitse oikea äänistandardi painamalla toistuvasti
-painiketta ja paina sitten ENTER/OK-painiketta.
4. Poistu painamalla
Vakio:
Musiikki:
Movie:
Puhe:
EXIT-painiketta.
Normaali äänitila.
Korostaa musiikkia enemmän kuin puheääntä.
Elävä ja täyteläinen ääni elokuvien katseluun.
Korostaa puheääntä enemmän kuin muita
ääniä.
Muunneltu:
Äänitila, jossa voit valita omat muunnellut
ääniasetukset.
(Katso lisätietoja kohdasta “Ääniasetusten
muuttaminen”)
MENU-painiketta.
ENTER/OK-painiketta.
tai
Mode : Custom
TV
Equalizer
Lisää
SRS TS XT : Off
Auto Volume : Off
Energiansäästö : Pois käyt.
Internal Mute : Off
HDMI musta : Pieni
Reset
PIP
Siirrä Hyväksy Palaa
Mode : Custom
TV
Equalizer
Lisää
SRS TS XT : Off
Auto Volume : Off
Energiansäästö : Pois käyt.
Internal Mute : Off
HDMI musta : Pieni
Reset
PIP
Siirrä Hyväksy Palaa
TV
Tila : Muunneltu
Taajuuskorjain
SRS TS XT : Pois käyt.
Autom. äänenvoim.
Sis. mykistys : Pois käyt.
Äänivalinta : Pää
Palauta
Siirrä Hyväksy Palaa
TV
Tila : Muunneltu
Taajuuskorjain
SRS TS XT : Pois käyt
Autom. äänenvoim.
Sis. mykistys : Pois käyt.
Äänivalinta : Pää
Palauta
Siirrä Hyväksy Palaa
Asetukset
Move Enter Return
Asetukset
Move Enter Return
Normaali
Pieni
Ääni
: Pois käyt.
Ääni
Vakio
Musiikki
Elokuva
Puhe
: Pois käyt
Muunneltu
Suomi - 22
Page 87

Suomi - 23
Ääniasetusten muuttaminen
Voit muuttaa ääniasetukset omien mieltymyksiesi mukaisiksi.
1. Tuo valikko esiin painamalla
MENU-painiketta.
Valitse “Ääni” painamalla tai -painiketta ja paina sitten
ENTER/OK-painiketta.
2. Valitse “Taajuuskorjain” painamalla
tai -painiketta ja paina
sitten ENTER/OK-painiketta.
3. Valitse haluamasi asetus painamalla
tai -painiketta. Paina
ENTER/OK-painiketta.
4. Paina
tai -painiketta, kunnes sopiva asetus on saavutettu.
Paina ENTER/OK-painiketta.
5. Poistu painamalla
Jos muutat näitä asetuksia, äänitilaksi tulee automaattisesti
➣
EXIT-painiketta.
“Muunneltu”.
TV
Tila : Muunneltu
Taajuuskorjain
SRS TS XT : Pois käyt.
Autom. äänenvoim.
Sis. mykistys : Pois käyt.
Äänivalinta : Pää
Palauta
Siirrä Hyväksy Palaa
TV
Balance 100Hz 300Hz 1kHz 3kHz 10kHz
Siirrä Säädä Palaa
TruSurround XT (SRS TS XT) -tilan valitseminen
TruSurround XT on patentoitu SRS-tekniikka, jonka avulla
voidaan toistaa 5,1-kanavaisia tallenteita kahdella kaiuttimella.
TruSurround simuloi laadukkaasti surround-ääntä, kun
käytössä on kahden kaiuttimen stereotoistolaitteet, kuten
television sisäiset kaiuttimet. TruSurround on yhteensopiva
kaikkien monikanavaääniformaattien kanssa.
1. Tuo valikko esiin painamalla
MENU-painiketta.
Valitse “Ääni” painamalla tai -painiketta ja paina sitten
ENTER/OK-painiketta.
2. Valitse “SRS TS XT” painamalla
tai -painiketta ja paina
sitten ENTER/OK-painiketta.
3. Valitse “Käytössä” tai “Pois käyt.” painamalla
tai -painiketta.
Paina ENTER/OK-painiketta.
4. Poistu painamalla
TruSurround XT, SRS ja -symboli ovat SRS
EXIT-painiketta.
Labs, Inc.:n tavaramerkkejä. TruSurround XT
-tekniikkaa käytetään laitteessa SRS Labs, Inc.:
n lisenssillä.
TV
Tila : Muunneltu
Taajuuskorjain
SRS TS XT : Pois käyt.
Autom. äänenvoim.
Sis. mykistys : Pois käyt.
Äänivalinta : Pää
Palauta
Siirrä Hyväksy Palaa
TV
Tila : Muunneltu
Taajuuskorjain
SRS TS XT : Pois käyt
Autom. äänenvoim.
Sis. mykistys : Pois käyt.
Äänivalinta : Pää
Palauta
Siirrä Hyväksy Palaa
Ääni
: Pois käyt.
Taajuuskorjain
Ääni
: Pois käyt.
Ääni
Pois käyt.
Käytössä
: Pois käyt
Page 88

Kuulokkeiden kytkeminen
Voit kytkeä televisiovastaanottimeen kuulokkeet, jos et halua häiritä
television katselullasi muita läsnäolijoita.
Äänivalikosta voidaan valita vain “SRS TS XT”- ja “Autom.
➣
äänenvoim”. -toiminnot, kun kuulokkeet on kytketty kuulokeliittimeen.
Kuulokkeiden pitkäaikainen käyttö kovalla äänenvoimakkuudella voi
➣
vahingoittaa kuuloasi.
Television kaiuttimista ei kuulu ääntä kun kuulokkeet on kytketty televisioon.
➣
Kuulokkeiden ja television äänenvoimakkuus säädetään erikseen.
➣
Äänitilan valitseminen
Voit asettaa äänitilan painamalla kaukosäätimen
“DUAL”-painiketta. Kun painat painiketta, kuvaruutuun tulee
käytössä oleva äänitila.
Lähetystyyppi DUAL 1/2 Oletusasetus
Mono MONO
FM Stereo
NICAM Stereo
Jos stereosignaali on heikko ja tila vaihtelee automaattisesti, vaihda käyttöön Mono-tila.
➣
Stereo
Dual
Mono MONO
Stereo
Dual
STEREO MONO
DUAL 1 DUAL 2
MONO STEREO
MONO DUAL 1
DUAL 2
Automaattinen
vaihto
DUAL 1
Automaattinen
vaihto
DUAL 1
Voit valita nämä vaihtoehdot
myös suoraan painamalla
kaukosäätimen DUALpainiketta.
Äänenvoimakkuuden automaattinen säätäminen
Eri lähetysasemien signaalivoimakkuus vaihtelee, mikä
vaikeuttaa äänenvoimakkuuden säätöä kanavaa vaihdettaessa.
Auto Volume -toiminnolla plasmanäyttö säätää valitun kanavan
äänenvoimakkuuden automaattisesti pienentämällä äänitehoa,
kun modulaatiosignaali on voimakas, tai suurentamalla
äänitehoa, kun modulaatiosignaali on heikko.
1. Tuo valikko esiin painamalla
MENU-painiketta.
Valitse “Ääni” painamalla tai -painiketta ja paina sitten
ENTER/OK-painiketta.
2. Valitse “Autom. äänenvoim.” painamalla
tai -painiketta ja
paina sitten ENTER/OK-painiketta.
3. Valitse “Käytössä” tai “Pois käyt.” painamalla
tai -painiketta.
Paina ENTER/OK-painiketta.
4. Poistu painamalla
EXIT-painiketta.
Suomi - 24
TV
Tila : Muunneltu
Taajuuskorjain
SRS TS XT :
Autom. äänenvoim.
Sis. mykistys : Pois käyt.
Äänivalinta : Pää
Palauta
Siirrä Hyväksy Palaa
TV
Tila : Muunneltu
Taajuuskorjain
SRS TS XT :
Autom. äänenvoim.
Sis. mykistys : Pois käyt
Äänivalinta : Pää
Palauta
Siirrä Hyväksy Palaa
Ääni
Pois käyt.
: Pois käyt.
Ääni
Pois käyt.
: PoPois käyt.t.
Pois käyt.
Käytössä
Page 89

Suomi - 25
Sisäisten kaiuttimien mykistäminen
Jos haluat kuunnella ääntä erillisistä kaiuttimista, poista
television sisäinen vahvistin käytöstä.
1. Tuo valikko esiin painamalla
MENU-painiketta.
Valitse “Ääni” painamalla tai -painiketta ja paina sitten
ENTER/OK-painiketta.
2. Valitse “Sis. mykistys” painamalla
tai -painiketta ja paina
sitten ENTER/OK-painiketta.
3. Valitse “Käytössä” tai “Pois käyt.” painamalla
tai -painiketta.
Paina ENTER/OK-painiketta.
4. Poistu painamalla
Kun “Sis. mykistys” on “käytössä”, Äänivalikon toiminnoista on
➣
EXIT-painiketta.
käytettävissä vain “Äänivalinta” (PIP-tilassa).
Alakuvan äänen kuunteleminen
Kun käytössä on kuva kuvassa (PIP) -toiminto, voit kuunnella
alakuvan ääntä.
1. Näytä valikko painamalla
Valitse “Ääni” painamalla ▲ or ▼ -painiketta ja paina sitten
ENTER/OK-painiketta.
2. Valitse “Äänivalinta” painamalla ▲ or ▼ -painiketta ja paina
sitten ENTER/OK-painiketta.
3. Valitse “Ala” painamalla ▲ or ▼ -painiketta.
Paina ENTER/OK -painiketta.
4. Poistu painamalla
Pää:
Ala:
Voit valita tämän vaihtoehdon, kun “PIP” on “käytössä”.
➣
Toistaa pääkuvan äänen.
Toistaa alakuvan äänen.
MENU-painiketta.
EXIT -painiketta.
TV
Tila : Muunneltu
Taajuuskorjain
SRS TS XT : Pois käyt.
Autom. äänenvoim.
Sis. mykistys : Pois käyt.
Äänivalinta : Pää
Palauta
Siirrä Hyväksy Palaa
TV
Tila : Muunneltu
Taajuuskorjain
SRS TS XT : Pois käyt.
Autom. äänenvoim.
Sis. mykistys : Pois käyt
Äänivalinta : Pää
Palauta
Siirrä Hyväksy Palaa
TV
Tila : Muunneltu
Taajuuskorjain
SRS TS XT : Pois käyt.
Autom. äänenvoim.
Sis. mykistys : Pois käyt.
Äänivalinta : Pää
Palauta
Siirrä Hyväksy Palaa
TV
Tila : Muunneltu
Taajuuskorjain
SRS TS XT : Pois käyt.
Autom. äänenvoim.
Sis. mykistys : Pois käyt.
Äänivalinta : Pää
Palauta
Ääni
: Pois käyt.
Ääni
: Pois käyt.
Pois käyt.
Käytössä
Ääni
: Pois käyt.
Ääni
: Pois käyt.
Pää
Ala
Siirrä Hyväksy Palaa
Page 90

Ääni-asetusten palauttaminen oletusasetuksiksi
Jos Pelitila on käytössä, Äänen palautus –toiminto on aktivoitu.
Palautus-toiminnon valinta taajuuskorjaimen asettamisen
jälkeen palauttaa taajuuskorjausasetuksen oletusasetukseksi.
1. Tuo valikko esiin painamalla
MENU-painiketta.
Valitse “Ääni” painamalla tai -painiketta ja paina sitten
ENTER/OK-painiketta.
2. Valitse “Palauta” painamalla
tai -painiketta ja paina sitten
ENTER/OK-painiketta.
3. Poistu painamalla
➣
Voit valita tämän vaihtoehdon, kun “Pelitila” on “käytössä”.
EXIT-painiketta.
TV
Tila : Muunneltu
Taajuuskorjain
SRS TS XT : Pois käyt.
Autom. äänenvoim.
Sis. mykistys : Pois käyt.
Äänivalinta : Pää
Palauta
Siirrä Hyväksy Palaa
Kellonajan asettaminen ja näyttäminen
Voit määrittää television kellon asetukset niin, että senhetkinen
kellonaika näkyy kuvaruudussa, kun painat INFO-painiketta.
Kellonaika on asetettava myös silloin, kun haluat käyttää
automaattisia ajastimia.
1. Tuo valikko esiin painamalla
MENU-painiketta.
Valitse “Asetukset” painamalla tai -painiketta ja paina sitten
ENTER/OK-painiketta.
2. Valitse “Aika” painamalla
tai -painiketta ja paina sitten
ENTER/OK-painiketta.
3. Valitse “Kellon asetus” painamalla
4.
Käyttö Paina
“Kuukausi”, “Pvm”, “Vuosi”, “Tunti” tai
ENTER/OK-painiketta.
tai -painike
“Minuutti”-valikkoon siirtyminen
“Kuukausi”, “Pvm”, “Vuosi”, “Tunti” tai
tai -painike
“Minuutti” asettaminen
Paina ENTER/OK-painiketta.
Mode : Custom
TV
Equalizer
Plug & Play
SRS TS XT : Off
Kieli : Suomi
Auto Volume : Off
Aika
Internal Mute : Off
Pelitila : Pois käyt.
Reset
Sininen ruutu : Pois käyt.
Melodia : Pois käyt.
PC
Kotiteatteri PC
Valoefekti :
Lisää
Siirrä Hyväksy Palaa
TV
Siirrä Säädä Palaa
Asetukset
: Pois käyt.
Move Enter Return
Kellon asetus
Kuukausi01Pvm
01
Tunti00Minuutti
00
Ääni
: Pois käyt.
Katselutila KÄYT
Vuosi
2007
5. Poistu painamalla
➣
Kellonaika on asetettava uudelleen jos virtajohto kytketään irti.
➣
Voit valita myös vuoden, kuukauden, päivämäärän, tunnit ja minuutit painamalla kaukosäätimen
EXIT-painiketta.
numeropainikkeita.
Suomi - 26
Page 91

Suomi - 27
Uniajastimen asettaminen
Voit valita 30–180 minuutin viiveen, jonka jälkeen televisio
kytkeytyy automaattisesti valmiustilaan.
1. Tuo valikko esiin painamalla
MENU-painiketta.
Valitse “Asetukset” painamalla tai -painiketta ja paina sitten
ENTER/OK-painiketta.
2. Valitse “Aika” painamalla
tai -painiketta ja paina sitten
ENTER/OK-painiketta.
3. Valitse “Uniajastin” painamalla
tai -painiketta ja paina sitten
ENTER/OK-painiketta.
4. Paina
tai -painiketta toistuvasti kunnes näkyviin tulee
haluamasi aika (Pois käyt., 30, 60, 90, 120, 150, 180).
Paina ENTER/OK-painiketta.
5. Poistu painamalla
Televisio kytkeytyy automaattisesti valmiustilaan, kun ajastimen
➣
EXIT-painiketta.
aika on 0.
Mode : Custom
TV
Equalizer
Plug & Play
SRS TS XT : Off
Kieli : Suomi
Auto Volume : Off
Aika
Internal Mute : Off
Pelitila : Pois käyt
Reset
Sininen ruutu : Pois käyt
Melodia : Pois käyt
PC
Kotiteatteri PC
Valoefekti :
Lisää
TV
Kellon asetus :
Uniajastin :
Ajastin 1 :
Ajastin 2 :
Ajastin 3 :
Asetukset
: Pois käyt
Move Enter Return
Siirrä Hyväksy Palaa
Siirrä Hyväksy Palaa
Katselutila KÄYT
Aika
Pois käyt
120
150
180
30
60
90
Television virran automaattinen kytkeminen ja katkaiseminen
1. Tuo valikko esiin painamalla MENU-painiketta.
Valitse “Asetukset” painamalla tai -painiketta ja paina sitten
ENTER/OK-painiketta.
2. Valitse “Aika” painamalla
tai -painiketta ja paina sitten
ENTER/OK-painiketta.
3. Valitse “Ajastin 1”, “Ajastin 2”, “Ajastin 3” painamalla
tai
-painiketta ja paina sitten ENTER/OK-painiketta.
4. Aseta “Tunti” painamalla
tai -painiketta ja paina sitten
-painiketta siirtyäksesi seuraavaan vaiheeseen.
Suorita muut säädöt samalla tavalla.
Kyllä/ Ei
Toisto
Äänenvoim. Säädä 0-100
Siirry takaisin RETURN-painiketta painamalla, kun olet
➣
Valitse Kerran, Joka päivä,
ma - pe, ma - la, la - su
Paina tai -painiketta
Paina tai -painiketta
Paina tai -painiketta
suorittanut säädöt.
- Kellonaika ilmestyy näkyviin aina
INFO-painiketta painettaessa.
Mode : Custom
TV
Equalizer
Plug & Play
SRS TS XT : Off
Kieli : Suomi
Auto Volume : Off
Aika
Internal Mute : Off
Pelitila : Pois käyt.
Reset
Sininen ruutu :Pois käyt.
Melodia : Pois käyt.
PC
Kotiteatteri PC
Valoefekti :
Lisää
Siirrä Hyväksy Palaa
TV
Päällekytkentäaika
5
00
6
Poiskytkentäaika
00 00 Ei
Toisto
Siirrä Säädä Palaa
- Voit valita tunnit ja minuutit suoraan painamalla kaukosäätimen numeropainikkeita.
5. Poistu painamalla
EXIT-painiketta.
Asetukset
: Pois käyt
Katselutila KÄYT
Move Enter Return
Ajastin 1
:
00
:
Äänenvoim
Kerran
Ei
10
Page 92

Kielen valitseminen
Valitse television ensimmäisellä käyttökerralla kieli, jota
käytetään kuvaruutuvalikoissa ja toiminnoissa.
1. Tuo kuvaruutuvalikko esiin painamalla
MENU -painiketta.
Valitse “Asetukset” painamalla tai -painiketta ja paina sitten
ENTER/OK-painiketta.
2. Valitse “Kieli” painamalla
tai -painiketta ja paina sitten
ENTER/OK-painiketta.
3. Valitse haluamasi kieli painamalla toistuvasti
tai -painiketta.
Paina ENTER/OK-painiketta.
Voit valita yhden 21 kielestä.
➣
4. Poistu painamalla
EXIT-painiketta.
Mode : Custom
TV
Equalizer
Plug & Play
SRS TS XT : Off
Kieli : Suomi
Auto Volume : Off
Aika
Internal Mute : Off
Pelitila : Pois käyt.
Reset
Sininen ruutu : Pois käyt.
Melodia : Pois käyt.
PC
Kotiteatteri PC
Valoefekti :
Lisää
Mode : Custom
TV
Equalizer
Plug & Play
SRS TS XT : Off
Kieli : English
Auto Volume : Off
Aika
Internal Mute : Off
Pelitila : Pois käyt
Reset
Sininen ruutu : Pois käyt
Melodia : Pois käyt
PC
Kotiteatteri PC
Valoefekti :
Lisää
Asetukset
: Pois käyt
Move Enter Return
Siirrä Hyväksy Palaa
Asetukset
: Pois käyt
Move Enter Return
Siirrä Hyväksy Palaa
Katselutila KÄYT
▲
Türkçe
Svenska
Norsk
Dansk
Suomi
Katselutila KÄYT
Pelitilan käyttäminen
Yhdistäessäsi pelipäätettä, kuten PlayStationTM tai XboxTM,
pelikokemuksesi voi olla todellisempi valitsemalla pelivalikon.
1. Tuo valikko esiin painamalla
MENU-painiketta.
Valitse “Asetukset” painamalla tai -painiketta ja paina sitten
ENTER/OK-painiketta.
2. Valitse “Pelitila” painamalla
tai -painiketta ja paina sitten
ENTER/OK-painiketta.
3. Valitse “Käytössä” tai “Pois käyt.” painamalla
tai -painiketta.
Paina ENTER/OK-painiketta.
4. Poistu painamalla
Kun haluat irrottaa pelipäätteen ja yhdistää toisen ulkoisen
➣
EXIT-painiketta.
laitteen, peruuta pelitila Asetukset valikosta.
Mikäli näytät TV–valikon pelitilassa, näyttöruutu tärisee hieman.
➣
Pelitila ei ole saatavilla TV-tilassa.
➣
Jos Pelitila on käytössä:
➣
Picture Mode vaihtuu tilaan Vakio ja Sound Mode vaihtuu
tilaan “Muunneltu” automattisesti. Käyttäjä ei voi vaihtaa näitä
tiloja.
Äänivalikon Äänitila poistetaan käytöstä. Voit säätää ääntä taajuuskorjaimella.
Äänen palautus –toiminto aktivoidaan. Palautus-toiminnon valinta taajuuskorjaimen asettamisen
jälkeen palauttaa taajuuskorjausasetuksen oletusasetukseksi.
Mode : Custom
TV
Equalizer
Plug & Play
SRS TS XT : Off
Kieli : Suomi
Auto Volume : Off
Aika
Internal Mute : Off
Pelitila : Pois käyt.
Reset
Sininen ruutu : Pois käyt.
Melodia : Pois käyt.
PC
Kotiteatteri PC
Valoefekti :
Lisää
Mode : Custom
TV
Equalizer
Plug & Play
SRS TS XT : Off
Kieli : Suomi
Auto Volume : Off
Aika
Internal Mute : Off
Pelitila : Pois käyt
Reset
Sininen ruutu : Pois käyt
Melodia : Pois käyt.
PC
Kotiteatteri PC
Valoefekti :
Lisää
Asetukset
: Pois käyt.
Move Enter Return
Siirrä Hyväksy Palaa
Asetukset
: Pois käyt.
Move Enter Return
Siirrä Hyväksy Palaa
Katselutila KÄYT
Pois käyt.
Käytössä
Katselutila KÄYT
Suomi - 28
Page 93

Suomi - 29
Sinisen TV-kuvan käyttäminen / Melodian valitseminen
Sininen ruutu:
Jos televisio ei vastaanota signaalia tai jos signaali on heikko,
sininen televisiokuva korvaa automaattisesti kohinaisen
häiriökuvan.
Jos haluat pitää kuvaruudussa häiriökuvan, poista sininen
TV-kuva käytöstä valitsemalla “Sininen ruutu” -asetukseksi
“Pois käyt.”.
Melodia:
Televisiosta kuuluu melodia, kun kytket tai katkaiset television
virran.
1. Tuo valikko esiin painamalla
MENU-painiketta.
Valitse “Asetukset” painamalla tai -painiketta ja paina sitten
ENTER/OK-painiketta.
2. Valitse “Sininen ruutu” tai “Melodia” painamalla
or -
painiketta. Paina ENTER/OK-painiketta.
3. Kun olet valinnut haluamasi asetukset, paina
ENTER/OK-
painiketta.
Sininen ruutu: Pois käyt./Käytössä
Melodia: Pois käyt./Pieni/Keskikoko/Suuri
4. Poistu painamalla
EXIT-painiketta.
Mode : Custom
TV
Equalizer
Plug & Play
SRS TS XT : Off
Kieli : Suomi
Auto Volume : Off
Aika
Internal Mute : Off
Pelitila : Pois käyt.
Reset
Sininen ruutu : Pois käyt
Melodia : Pois käyt
PC
Kotiteatteri PC
Valoefekti :
Lisää
Siirrä Hyväksy Palaa
Mode : Custom
TV
Equalizer
Plug & Play
SRS TS XT : Off
Kieli : Suomi
Auto Volume : Off
Aika
Internal Mute : Off
Pelitila : Pois käyt.
Reset
Sininen ruutu : Pois käyt.
Melodia : Pois käyt
PC
Kotiteatteri PC
Valoefekti :
Lisää
Siirrä Hyväksy Palaa
Asetukset
: Pois käyt
Move Enter Return
Asetukset
: Pois käyt
Move Enter Return
Pois käyt.
Käytössä
Katselutila KÄYT
Pois käyt
Pieni
Keskikoko
Suuri
Katselutila KÄYT
Kotiteatteri PC:n asetukset
Saat paremman kuvanlaadun, jos säädät kuva-asetukset PCtilassa.
Kytkemällä Kotiteatteri PC -toiminnon päälle voit säätää kuvan
tarkkasäädön samoin kuin PC-tilassa (kun kuvatilaksi on valittu
Vakio tai Elokuva).
1. Tuo valikko esiin painamalla
MENU-painiketta.
Valitse “Asetukset” painamalla tai -painiketta ja paina sitten
ENTER/OK-painiketta.
2. Valitse “Kotiteatteri PC” painamalla
tai -painiketta.
Paina ENTER/OK-painiketta.
3. Valitse “Käytössä” tai “Pois käyt.” painamalla
tai -painiketta.
Paina ENTER/OK-painiketta.
4. Poistu painamalla
➣
Tämä toiminto on käytettävissä vain PC-tilassa.
EXIT-painiketta.
Mode : Custom
TV
Equalizer
Plug & Play
SRS TS XT : Off
Kieli : Suomi
Auto Volume : Off
Aika
Internal Mute : Off
Pelitila : Pois käyt.
Reset
Sininen ruutu : Pois käyt.
Melodia : Pois käyt.
PC
Kotiteatteri PC
Valoefekti :
Lisää
Siirrä Hyväksy Palaa
Mode : Custom
TV
Equalizer
Plug & Play
SRS TS XT : Off
Kieli : Suomi
Auto Volume : Off
Aika
Internal Mute : Off
Pelitila : Pois käyt.
Reset
Sininen ruutu : Pois käyt.
Melodia : Pois käyt.
PC
Kotiteatteri PC
Valoefekti :
Lisää
Siirrä Hyväksy Palaa
Asetukset
: Pois käyt.
Move Enter Return
Asetukset
: Pois käyt
Move Enter Return
Katselutila KÄYT
Pois käyt.
Käytössä
Katselutila KÄYT
Page 94

Light Effect (valoefekti) –asetuksen asettaminen
Television etupaneelissa oleva sininen LED-valo voidaan
kytkeä päälle tai pois päältä tilanteen mukaan. Asetus vähentää
silmien häikäisyä ja virrankulutusta.
1. Tuo kuvaruutuvalikko esiin painamalla
MENU -painiketta.
Valitse “Asetukset” painamalla tai -painiketta ja paina
sitten ENTER/OK-painiketta.
2. Valitse “Valoefekti” painamalla
tai -painiketta ja paina sitten
ENTER/OK-painiketta.
3. Valitse haluamasi vaihtoehto (Pois käyt., Valm.tila KÄYT,
Katselutila KÄYT, Käytössä) painamalla tai -painiketta.
Paina ENTER/OK-painiketta.
Pois käyt.:
Valm.tila KÄYT:
Katselutila KÄYT:
sininen LED ei syty.
Kytkee sinisen LED valmiustilaan.
Kytkee sinisen LED päälle
televisiota katseltaessa.
Käytössä:
Sininen LED syttyy kun katkaiset
television virran.
4. Poistu painamalla
EXIT-painiketta.
Mode : Custom
TV
Equalizer
Plug & Play
SRS TS XT : Off
Kieli : Suomi
Auto Volume : Off
Aika
Internal Mute : Off
Pelitila : Pois käyt.
Reset
Sininen ruutu : Pois käyt.
Melodia : Pois käyt.
PC
Kotiteatteri PC
Valoefekti :
Lisää
Mode : Custom
TV
Equalizer
Plug & Play
SRS TS XT : Off
Kieli : Suomi
Auto Volume : Off
Aika
Internal Mute : Off
Pelitila : Pois käyt.
Reset
Sininen ruutu : Pois käyt.
Melodia : Pois käyt.
PC
Kotiteatteri PC
Valoefekti :
Lisää
Siirrä Hyväksy Palaa
Asetukset
: Pois käyt
Move Enter Return
Siirrä Hyväksy Palaa
Asetukset
: Pois käyt
Move Enter Return
[LE32R86, LE37R86, LE40R86,
LE32R88, LE37R88, LE40R88]
Katselutila KÄYT
Pois käyt.
Valm.tila KÄYT
Katselutila KÄYT
Katselutila KÄYT
Käytössä
Energiansäästö-toiminnon käyttäminen
Tällä toiminnolla voit säätää television kirkkautta ja vähentää
siten sen virrankulutusta. Kun katsot televisiota öisin, aseta
“Energiansäästö”-tilan asetukseksi “Suuri”. Tämä vähentää
silmien häikäisyä ja virrankulutusta.
1. Tuo kuvaruutuvalikko esiin painamalla
Valitse “Asetukset” painamalla tai -painiketta ja paina
sitten ENTER/OK-painiketta.
2. Valitse “Energiansäästö” painamalla
sitten the ENTER/OK-painiketta.
3. Valitse haluamasi vaihtoehto (Pois käyt., Pieni, Keskikoko,
Suuri, Automaattinen) painamalla tai -painiketta. Paina
ENTER/OK-painiketta.
4. Poistu painamalla
EXIT-painiketta.
MENU -painiketta.
tai -painiketta ja paina
Suomi - 30
Mode : Custom
TV
Equalizer
Lisää
SRS TS XT : Off
Auto Volume : Off
Energiansäästö : Pois käyt.
Internal Mute : Off
HDMI musta : Pieni
Reset
PIP
Siirrä Hyväksy Palaa
TV
Lisää
Energiansäästö : Pois käyt
HDMI musta : Pieni
PIP
Siirrä Hyväksy Palaa
Asetukset
Move Enter Return
Asetukset
Pois käyt.
Pieni
Keskikoko
Suuri
Automaattinen
Page 95

Suomi - 31
Kuvalähteen valitseminen
Voit valita kuvalähteen television tuloliittimiin kytketyistä
laitteista.
1. Tuo valikko esiin painamalla
Valitse “Tulo” painamalla ▲ tai ▼ -painiketta ja paina sitten
ENTER/OK-painiketta.
2. Valitse “Lähdeluettelo” painamalla
Jos televisioon ei ole kytketty ulkoisia laitteita,
➣
lähdeluettelossa näkyvät vain lähteet “TV”, “Ext.1” ja “Ext.2.”
Lähteet “AV”, “S-Video”, “Komponentti”, “PC”, “HDMI1”,
“HDMI2”, “HDMI3” ja “DTV” aktivoituvat vain silloin, kun
lähde on kytketty televisioon.
3. Valitse haluamasi laite painamalla
Paina ENTER/OK-painiketta.
Selaa käytettävissä olevia kuvalähteitä painamalla
kaukosäätimen SOURCE-painiketta. Voit valita TV-tilan
painamalla kaukosäätimen TV/DTV-painiketta,
numeropainikkeita (0–9) ja P / -painikkeita. Sitä ei voi valita
SOURCE-painikkeella.
MENU-painiketta.
ENTER/OK-painiketta.
tai -painiketta.
Mode : Custom
TV
Equalizer
Lähdeluettelo : TV
SRS TS XT : Off
Nimen muokkaus
Auto Volume : Off
Anynet+ (HDMI-CEC)
Internal Mute : Off
Reset
Move Enter Return
Siirrä Hyväksy Palaa
Mode : Custom
TV
Equalizer
TV
SRS TS XT : Off
Ulk. 1 : ----
Auto Volume : Off
Ulk. 2 : ---Internal Mute : Off
AV : ---S-Video : ----
Reset
Komponentti : ---PC : ---HDMI1 : ---HDMI2 : ---HDMI3 : ----
DTV : ----
Lähdeluettelo
Move Enter Return
Siirrä Hyväksy Palaa
Tulo
Kuvalähteiden nimien muokkaaminen
Nimeä tuloliittimiin kytketyt laitteet, jotta kuvalähteen
valitseminen on helpompaa.
1. Tuo valikko esiin painamalla
Valitse “Tulo” painamalla ENTER/OK-painiketta.
2. Valitse “Nimen muokkaus” painamalla
paina sitten ENTER/OK-painiketta.
3. Valitse muokattava laite painamalla
ENTER/OK-painiketta.
4. Valitse haluamasi laite painamalla
Paina ENTER/OK-painiketta.
5. Poistu painamalla
EXIT-painiketta.
MENU-painiketta.
tai -painiketta ja
tai -painiketta. Paina
tai -painiketta.
Mode : Custom
TV
Equalizer
Lähdeluettelo : TV
SRS TS XT : Off
Nimen muokkaus
Auto Volume : Off
Anynet+ (HDMI-CEC)
Internal Mute : Off
Reset
Move Enter Return
Siirrä Hyväksy Palaa
Mode : Custom
TV
Nimen muokkaus
Equalizer
Ulk. 1 : ----
SRS TS XT : Off
Ulk. 2 : ----
Auto Volume : Off
AV : ----
Internal Mute : Off
S-Video : ----
Komponentti : ----
Reset
PC : ----
HDMI1 : ----
HDMI2 : ----
HDMI3 : ----
Move Enter Return
Siirrä Hyväksy Palaa
Tulo
----
Videonauhuri
DVD
D-VHS
Kaapelipääte
HD-sovitin
Satelliittipääte
Page 96

DTV-valikkojärjestelmän esikatselu
Toiminto on käytettävissä DVT-tilassa. Aseta DTV-tila etukäteen
➣
painamalla TV/DTV-painiketta kaukosäätimestä. Tutustu
seuraavaan kuvaan, jotta kuvaruutuvalikoiden selaaminen ja
käytettävissä olevien asetusten säätäminen helpottuu.
Tämä tuote soveltuu vain suomalaisiin lähetyksiin. Lähetyksiä ei
➣
tueta muissa maissa.
Paina D.MENU-painiketta.
Opas
Nyt ja seuraavaksi -opas
Koko ohjelmaopas
Aikataululista
Palauta Oppaan tila
Nyt&seur, Koko ohjelmaopas
Mode : Custom
Equalizer
Nyt ja seuraavaksi -opas
SRS TS XT : Off
Koko ohjelmaopa
Auto Volume : Off
Aikataululista
Internal Mute : Off
Palauta Oppaan tila
Reset
Automaattinen tallennus
Manuaalinen tallennus
Suosikkikanavien muokkaus
Kanavaluettelo
Opas
:
Kokoohjelmaopas
Move Enter Return
Siirrä Sisään Poistu
Kanava
Kanava
Automaattinen tallennus
Manuaalinen tallennus
Automaattinen, Kaapeli, Antenn
Kaapeli, Antenn
Suosikkikanavien muokkaus
Kanavaluettelo
Kki, Suosikit, Oletus
Asetukset
Valikon läpinäkyvyys
Lapsilukitus
Tekstitys
Tekstitystila
Äänimuoto
Digitaalinen teksti
Aikavyöhyke
Järjestelm
Suuri, Keskikoko, Pieni, Läpinäkymätön
Anna PIN-koodi
Poissa käytöstä, Käytössä
Normaali, Huonokuuloinen
PCM, Dolby Digital
Pois käyt., Käyttöön
Tuotteen tiedot
Signaalitiedot
Ohjelm. päivitys
Yl. Liitäntä
Palauta
Kieli
Äänen kieli
Tekstityskieli
Teksti-tv:n kieli
Valinta
Ensisijainen äänen kieli
Toissijainen äänen kieli
Ensisij. tekstityskieli
Toissijainen tekstityskieli
Ensisij. teksti-tv:n kieli
Toissij. teksti-tv:n kieli
CI-valikon alavalikot voivat vaihdella CAM-mallin mukaan.
➣
Move Enter Return
Siirrä Sisään Poistu
Valikon läpinäkyvyys
Lapsilukitus
Tekstitys : Käytössä
Tekstitystila : Normaali
Äänimuoto : PCM
▼
Äänen kieli
Tekstityskieli
Teksti-tv:n kieli
Valinta
Asetukset
: Keskikoko
Move Enter Return
Siirrä Sisään Poistu
Kieli
Move Enter Return
Siirrä Sisään Poistu
Voit valita nämä vaihtoehdot
myös suoraan painamalla
kaukosäätimen D.MENUpainiketta.
Suomi - 32
Page 97

Suomi - 33
Kanavaluettelon automaattinen päivitys
Voit päivittää kanavaluettelon, kun TV-yhtiö tuo uusia palveluita
tai kun siirrät television uuteen paikkaan.
1. Tuo DTV-valikko esiin painamalla
2.
Valitse “Kanava” painamalla tai -painiketta ja paina sitten
D.MENU-painiketta.
ENTER/OK-painiketta.
3. Paina
ENTER/OK-painiketta uudelleen valitaksesi
“Automaattinen tallennus”.
4.
Valitse “Automaattinen”, “Kaapeli” tai “Antenn” painamalla
tai -painiketta.
Paina ENTER/OK-painiketta.
• Automaattinen: skannaa kanavat automaattisesti.
➣
• Kaapeli: skannaa kaapelikanavat.
• Antenn: Skannaa maanpäällisiä kanavia.
Tuote ei voi skannata kaapelikanavia ja maanpäällisiä
➣
kanavia samanaikaisesti.
5. Kun päivitys on valmis, näkyviin tulee skannattujen palveluiden
lukumäärä.
Olemassa olevaa suosikkikanavaluetteloa ei poisteta, kun kanavaluettelo päivitetään.
➣
Jos haluat pysäyttää skannauksen ennen kuin se on valmis, paina ENTER/OK-painiketta samalla, kun
➣
“Pysäytä” on valittuna.
6. Poistu painamalla
Jos signaali on heikko, näkyviin tulee ilmoitus “Palvelua ei löydy! Tarkista antennikytkentä.”.
➣
EXIT-painiketta.
Automaattinen tallennus
Valit skann.järjestel
Automaattinen
Kaapeli
Antenn
Move Enter Return
Siirrä Sisään Palaa
Mode : Custom
Automaattinen tallennus
Equalizer
SRS TS XT : Off
Auto Volume : Off
Skannataan kaapelin digit.palveluja
Internal Mute : Off
Reset
Palv. löytyi
: 24 Taajuus: 114000 KHz
Pysäytä
Move Enter Return
Palaa
Kanavaluettelon manuaalinen päivitys
Voit määrittää kanavan nopeaa kanavahakua varten.
1. Tuo DTV-valikko esiin painamalla
2.
Valitse “Kanava” painamalla tai -painiketta ja paina sitten
D.MENU-painiketta.
ENTER/OK-painiketta.
3. Valitse “Manuaalinen tallennus” painamalla
tai -painiketta ja
paina sitten ENTER/OK-painiketta.
4.
Valitse “Kaapeli” painamalla tai -painiketta ja paina sitten
ENTER/OK-painiketta.
• Taajuus:
➣
näyttää kanavan taajuuden. (maakohtainen)
• Modulaatio: näyttää käytettävissä olevat modulaatioarvot.
• Symbolinop.:
näyttää käytettävissä olevat
symbolinopeudet.
5.
Valitse “Antenn” painamalla tai -painiketta ja paina sitten
ENTER/OK-painiketta.
➣
• Kanava:
Kanavat “21”-”69” näytetään Britanniassa.
(Maakohtainen)
• Taajuus: Channel-valikon taajuusvaihtoehdot tulevat
kuvaruutuun.
• Kaistanleveys: Valittavissa olevat taajuusalueet ovat 8
MHz.
6. Kun päivitys on valmis, näkyviin tulee skannattujen palveluiden
lukumäärä.
7. Poistu painamalla
EXIT-painiketta.
Manuaalinen tallennus
Valit skann.järjestel
Kaapeli
Antenn
Move Enter Return
Siirrä Sisään Palaa
Manuaalinen tallennus
Taajuus 114000
Modulaatio 64QAM
Symbolinop. 6900 kS/s
Haku
0 .. 9
Anna taaj. Siirrä Palaa
Manuaalinen tallennus
Kanava
Taajuus
▲
21
▼
search
Haku
Säädä Palaa
Kaistanleveys
KHz
474000 8
35%
KHz
MHz
Page 98

Suosikkikanavien muokkaus
Voit muokata suosikkikanaviasi neljällä värillisellä painikkeella.
1. Tuo DTV-valikko esiin painamalla
2.
Valitse “Kanava” painamalla tai -painiketta ja paina sitten
ENTER/OK-painiketta.
3. Valitse “Suosikkikanavien muokkaus” painamalla
-painiketta ja paina sitten ENTER/OK-painiketta.
4. Tuo näkyviin kaikki tallennetut kanavat painamalla punaista
painiketta.
5. Valitse haluamasi kanava painamalla
ENTER/OK-painiketta.
A “” -kuvake näkyy valitun kanavan vieressä, ja kanava
➣
lisätään suosikkikanavien luetteloon.
Voit peruuttaa toiminnon painamalla ENTER/OK-painiketta
➣
uudelleen.
Val.kaikki: Valitse kaikki näkyvät kanavat.
Älä valits: Poistaa valinnan kaikista kanavista.
Esikats: Näyttää (a) valitut kanavat.
Suosikkikanavien asetukset on valittu.
➣
6. Poistu painamalla
Lisäys
EXIT-painiketta.
Voit käyttää tätä toimintoa yhden tai useamman kanavan
ollessa valittuna.
1. Tuo DTV-valikko esiin painamalla
2.
Valitse “Kanava” painamalla tai -painiketta ja paina sitten
ENTER/OK-painiketta.
3. Valitse “Suosikkikanavien muokkaus” painamalla
-painiketta ja paina sitten ENTER/OK-painiketta.
4. Paina punaista painiketta “Suosikkikanavien muokkaus”
-valikossa. Jos haluat lisätä enemmän kanavia, ks. edellisen
ohjeen kohta 5.
5. Jos haluat tarkistaa tallennettavan kanavan, paina
painiketta. Poistu painamalla EXIT -painiketta.
Jos haluat lisätä kaikki kanavat suosikkikanavien luetteloon,
➣
paina punaista painiketta.
Jos haluat poistaa kaikki kanavat, paina vihreää painiketta.
Esikats: Näyttää (a) valitut kanavat.
Tuo ruutuun suosikkikanavien hallinta painamalla CH LIST
-painiketta.
D.MENU-painiketta.
or
tai -painiketta. Paina
D.MENU-painiketta.
or
D.MENU-
Suosikkikanavien muokkaus
(ei kanavaa)
Move Enter Return
Kanavien lisääminen
Palaa
Suosikkikanavien muokkaus
5
1 BBC TWO
2 Five
3 BBC THREE
4 abc1
5 QVC
6
Move Enter Return
Val.kaikki Älä valits Esikats
Siirrä Valitse Palaa
Suosikkikanavien muokkaus
1 BBC TWO ★
3 BBC THREE
4 abc1
Move Enter Return
Lisäys Siirrä Esikats Poisto
Siirrä Palaa
Suosikkikanavien muokkaus
5
1 BBC TWO
2 Five
3 BBC THREE
4 abc1
5 QVC
6
Move Enter Return
Val.kaikki Älä valits Esikats
Siirrä Valitse Palaa
★
★
★
★
★
Suomi - 34
Page 99
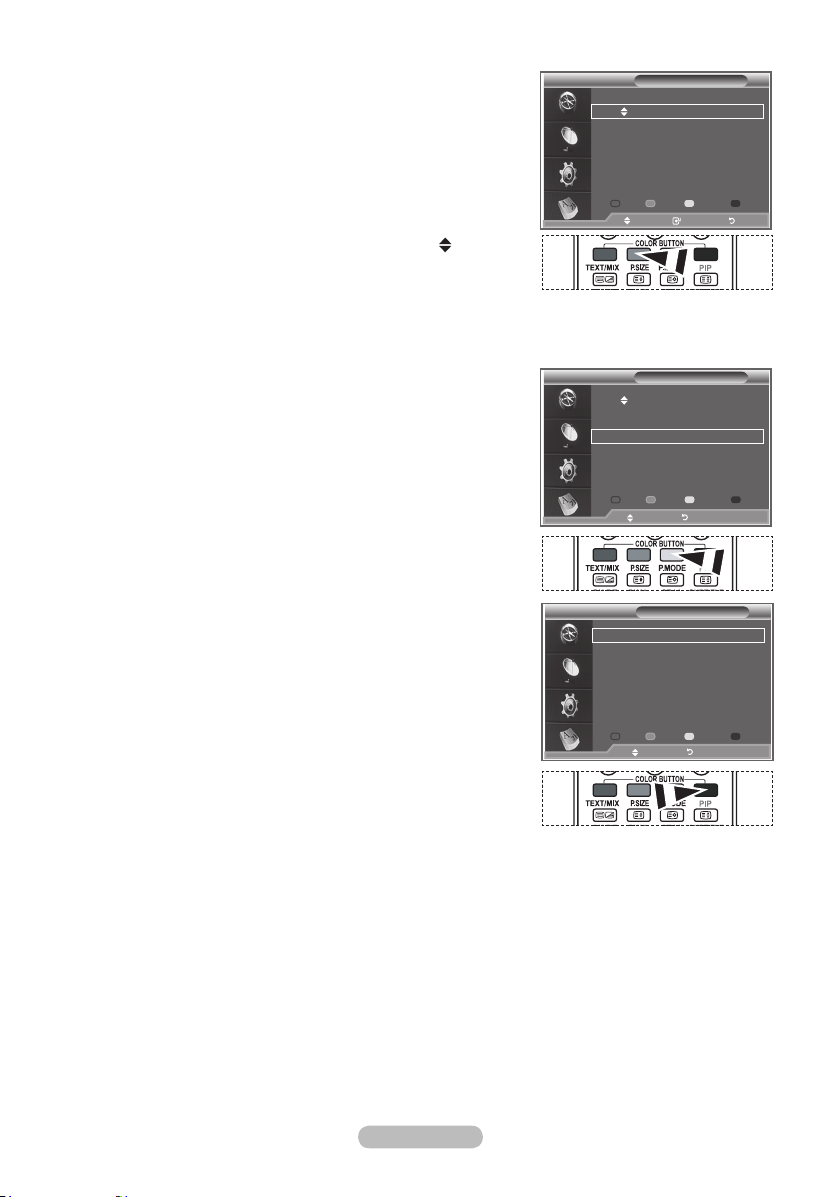
Suomi - 35
Siirrä
1. Tuo DTV-valikko esiin painamalla
2.
Valitse “Kanava” painamalla tai -painiketta ja paina sitten
D.MENU-painiketta.
ENTER/OK-painiketta.
3. Valitse “Suosikkikanavien muokkaus” painamalla
or
-painiketta ja paina sitten ENTER/OK-painiketta.
4. Valitse haluamasi kanava painamalla
tai -painiketta.
5. Paina vihreää painiketta.
Kanavan nimen vasemmalle puolelle ilmestyy “ ” -kuvake.
➣
6. Valitse siirrettävä kanava painamalla
tai -painiketta ja paina
sitten ENTER/OK-painiketta.
7. Poistu painamalla
EXIT-painiketta.
Suosikkikanavien muokkaus
1 BBC TWO ★
3 BBC THREE
4 abc1
Move Enter Return
Lisäys Siirrä Esikats Poisto
Siirrä Valitse Palaa
★
★
Esikats
1. Valitse kanava, jonka haluat nähdä, painamalla
tai -
painiketta “Suosikkikanavien muokkaus” -valikossa.
2. Paina keltaista painiketta.
Valittu kanava tulee kuvaruutuun.
➣
Poisto
1. Valitse kanava, jonka haluat poistaa, painamalla
tai
-painiketta “Suosikkikanavien muokkaus” -valikossa.
2. Paina sinistä painiketta.
Valittu kanava ja numero poistetaan.
➣
Jos haluat lisätä poistetun kanavan uudelleen
➣
suosikkikanavien luetteloon, ks. kohta “Lisäys” sivulla 34.
Suosikkikanavien muokkaus
1 BBC TWO ★
3 BBC THREE
4 abc1
Move Enter Return
Lisäys Siirrä Esikats Poisto
Siirrä Palaa
Suosikkikanavien muokkaus
1 BBC TWO ★
3 BBC THREE
Move Enter Return
Lisäys Siirrä Esikats Poisto
Siirrä Palaa
★
★
★
Page 100

Kanavaluettelon valinta
Voit ohittaa haluamasi kanavat skannatuista kanavista. Kun
selaat tallennettuja kanavia, näkyviin eivät tule ne kanavat,
jotka olet valinnut ohitettaviksi. Kaikki ne kanavat, joita et ole
valinnut ohitettaviksi, näkyvät selauksen aikana.
1. Tuo DTV-valikko esiin painamalla
2.
Valitse “Kanava” painamalla tai -painiketta ja paina sitten
D.MENU-painiketta.
ENTER/OK-painiketta.
3.
Valitse “Kanavaluettelo” painamalla tai -painiketta ja paina
Test Card M' v2.0
1 Test Card M'
3 Vida003b
4 Vida004b
5 vida005b
6 vida006b
15 Ch 15
16 QVC
17 UKTV Gold
Ed. sivu Seur.sivu Suosikit TV
sitten ENTER/OK-painiketta.
4.
Valitse “Kki”, “Suosikit” tai “Oletus” painamalla tai -painiketta.
Paina ENTER/OK-painiketta.
5. Voit vaihtaa suosikkikanavanäkymästä kaikkien kanavien näkymään ja päinvastoin painamalla keltaista
painiketta.
Suosikkikanavat näkyvät vain, jos olet asettanut ne aiemmin “Suosikkikanavien muokkaus” -valikon
➣
mukaan (ks. sivu 34).
6. Tuo näyttöön kanavien hallinnan edellinen tai seuraava sivu painamalla punaista tai vihreää painiketta.
7.
Valitse viritettävä kanava painamalla tai -painiketta ja paina sitten ENTER/OK-painiketta.
Kanavan numero, nimi ja kuvake näkyvät vasemmassa yläkulmassa kanavaa vaihdettaessa.
➣
Kanavan nimi ja numero näytetään, jos kanava on muu kuin suosikkikanava. Suosikkikanavien
kohdalla näkyy kanavan kuvake.
8.
Voit vaihtaa TV-, radio-, data- ja muiden kanavien tai kaikkien kanavien näkymän välillä painamalla
sinistä painiketta.
9. Poistu kanavaluettelosta painamalla sinistä CH LIST -painiketta.
Kanavaluettelo
23 bid-up.tv
25 TCM
26 UKTV Style
27 Discovery
28 DiscoveryH&L
15 Cartoon Nwk
33 Boomerang
55 Ttext Holidays
Siirrä Katso Poistu
Kaikki kanav
60 Television X
70 BBC Radio 1
72 BBC Radio 2
73 BBC Radio 3
74 BBC Radio 4
84 heat
91 MOJO
800 ARD-MHP-Data
6 Lisää
1/2
Ohjelmatietojen näyttäminen
Katsottavan kanavan tämänhetkisestä ohjelmasta voidaan
saada lisätietoja.
1. Paina ohjelmaa katsottaessa
Ohjelmatiedot tulevat näkyviin.
➣
2. Poistu palkista painamalla
INFO-painiketta.
INFO-painiketta.
Suomi - 36
1 AFDO,16:9
AFDO 16:9
Ei estoa
SD
Stereo
Tekstitys
Suomi
Poistu
14:30 La1 Syys
Kaikki kanav
A
14:30~14:33
Contains video with AFD O; coded frame
is 16:9
Move Enter Return
 Loading...