

Page 1

Contact SAMSUNG WORLD-WIDE
If you have any questions or comments relating to Samsung products,
please contact the SAMSUNG customer care centre.
Contatta SAMSUNG WORLD-WIDE
Se avete commenti o domande sui prodotti Samsung, contattate il
Servizio Clienti Samsung
Contacte con SAMSUNG WORLD-WIDE
Si tiene alguna pregunta o comentario referente a nuestros productos,
por favor contacte con nuestro Servicio de Atención al Cliente
LCD TV
LE32R7
LE37R7
LE40R7
Country
BELGIUM
CZECH REPUBLIC
DENMARK
FINLAND
FRANCE
GERMANY
HUNGARY
ITALIA
LUXEMBURG
NETHERLANDS
NORWAY
POLAND
PORTUGAL
RUSSIA
SLOVAKIA
SPAIN
SWEDEN
U.K
UKRAINE
Customer Care Center
02 201 2418
844 000 844
38 322 887
09 693 79 554
08 25 08 65 65 (€ 0,15/Min)
01805 - 121213 (€ 0,12/Min)
06 40 985 985
199 153 153
02 261 03 710
0900 20 200 88 (€ 0.10/Min)
231 627 22
0 801 801 881
80 8 200 128
8-800-200-0400
0850 123 989
902 10 11 30
08 585 367 87
0870 242 0303
8-800-502-0000
Web Site
www.samsung.com/be
www.samsung.com/cz
www.samsung.com/dk
www.samsung.com/fi
www.samsung.com/fr
www.samsung.de
www.samsung.com/hu
www.samsung.com/it
www.samsung.lu
www.samsung.com/nl
www.samsung.com/no
www.samsung.com/pl
www.samsung.com/pt
www.samsung.ru
www.samsung.com/sk
www.samsung.com/es
www.samsung.com/se
www.samsung.com/uk
www.samsung.com/ur
Owner’s Instructions
Before operating the unit,
please read this manual thoroughly,
and retain it for future reference.
BN68-01007B-01
ON-SCREEN MENUS
PC DISPLAY
PICTURE IN PICTURE (PIP)
TELETEXT
This device is a Class B digital apparatus.
Register your product at www.samsung.com/global/register
Page 2

Precautions When Displaying a Still Image
A still image may cause permanent damage to the TV screen.
• Do not display a still image on the LCD panel for more than 2 hours as it can cause screen image retention.
This image retention is also known as "screen burn".
To avoid such image retention, reduce the degree of brightness and contrast of the screen when displaying a still image.
• Watching the LCD TV in 4:3 format for a long period of time may leave traces of borders displayed on the left, right and center of
• Displaying still images from Video games and PC for longer than a certain period of time may produce partial after-images.
To prevent this effect, reduce the ‘brightness’ and ‘contrast’ when displaying still images.
Precauzioni da adottare quando si visualizza un’immagine fissa
Un’immagine fissa può causare danni permanenti allo schermo TV.
• Non visualizzare un’immagine fissa sul pannello LCD per oltre 2 ore poiché può causare la ritenzione dell’immagine sullo schermo.
Il fenomeno di ritenzione dell’immagine è anche noto come “bruciatura dello schermo”. Per evitare il fenomeno di ritenzione dell’immagine, ridurre il
grado di luminosità e di contrasto dello schermo quando si visualizza un’immagine fissa.
• Su un TV LCD, l’uso del formato 4:3 per un periodo prolungato può lasciare traccia dei bordi sulla parte sinistra, destra e
• La visualizzazione prolungata di immagini fisse da videogiochi e PC può causare la visualizzazione di immagini residue parziali.
Per evitare questo problema, ridurre la ‘luminosità’ e il ‘contrasto’ mentre si visualizzano immagini fisse.
Precauciones al mostrar en la pantalla una imagen fija
La imagen fija puede causar daños permanentes en la pantalla del televisor.
• No deje una imagen fija en la pantalla LCD durante más de dos horas ya que se podría producir una retención de la imagen en la pantalla.
Este fenómeno de retención de imágenes también se denomina “quemadura de pantalla”. Para evitar que se produzca esa persistencia de la
imagen, reduzca el nivel de luminosidad y de contraste de la pantalla cuando muestre imágenes fijas.
• El uso del televisor LCD en formato 4:3 durante un tiempo prolongado puede dejar rastros de bordes en las partes izquierda,
• Ver imágenes fijas de videojuegos y PC durante más tiempo del indicado puede producir imágenes fantasma parciales.
Para evitar este efecto, reduzca el ‘brillo’ y el ‘contraste’ cuando vea imágenes fijas.
the screen caused by the difference of light emission on the screen. Playing a DVD or a game console may cause a similar effect
to the screen. Damages caused by the above effect are not covered by the Warranty.
centrale del video a causa delle differenti emissioni luminose dello schermo. La riproduzione di un DVD o l’uso di una console per
videogiochi può causare effetti analoghi sullo schermo. Questo tipo di danni non è coperto dalla Garanzia.
derecha y central de la pantalla debido a las diferencias en la emisión lumínica de la pantalla. Reproducir un DVD o una
videoconsola puede causar un efecto similar en la pantalla. La garantía no cubre estos daños.
Page 3

Contents
English
CONNECTING AND PREPARING YOUR TV
List of Parts ............................................................................. 2
Installing the Stand ................................................................. 2
Installing the Wall Mount Kit .............................................. 2
Viewing the Control Panel ...................................................... 3
Viewing the Connection Panel ................................................ 4
Viewing the Remote Control ................................................... 6
Installing Batteries in the Remote Control .............................. 6
Switching On and Off .............................................................. 7
Placing Your Television in Standby Mode............................... 7
Plug & Play ............................................................................. 7
SETTING THE CHANNELS
Storing Channels Automatically .............................................. 8
Storing Channels Manually ..................................................... 8
Setting the Channel Manager ................................................. 9
Activating the Child Lock ................................................... 9
Sorting the Stored Channels .................................................. 10
Assigning Channels Names ................................................... 10
Fine Tuning Channel Reception ............................................. 10
LNA (Low Noise Amplifier) ...................................................... 11
SETTING THE PICTURE
Changing the Picture Standard .............................................. 11
Adjusting the Custom Picture ................................................. 11
Changing the Colour Tone ...................................................... 11
Resetting the Picture Settings to the
Factory Defaults...................................................................... 12
Changing the Picture Size ...................................................... 12
Freezing the Current Picture .................................................. 12
Digital Noise Reduction .......................................................... 12
DNIe Demo (Digital Natural Image engine) ............................ 13
Viewing the Picture In Picture (PIP) ....................................... 13
PIP Settings ............................................................................ 14
SETTING THE SOUND
Changing the Sound Standard .......................................... 14
Adjusting the Sound Settings ............................................ 14
Connecting Hheadphones ................................................. 14
Setting the TruSurround XT (SRS TSXT) ......................... 15
Adjusting the Volume Automatically .................................. 15
Selecting the Internal Mute ............................................... 15
Listening to the Sound of the Sub Picture ........................ 15
Resetting the Sound Settings to the Factory Defaults ...... 16
SETTING THE TIME
Setting and Displaying the Current Time .......................... 16
Setting the Sleep Timer ..................................................... 16
Switching the Television
On and Off Automatically .................................................. 16
SETTING THE OTHERS
Choosing Your Language .................................................. 17
Using Game Mode ............................................................ 17
Setting the Blue Screen Mode /
Selecting the Melody ........................................................ 17
Using the Energy Saving Feature ..................................... 18
Selecting the Source ......................................................... 18
Editing the Input Source Names ....................................... 18
USING THE DTV FEATURE
Previewing the DTV Menu System ......................................... 19
Basic Functions ...................................................................... 20
1. Display Screen ................................................................... 20
2. Volume Control ................................................................... 20
3. Select Soundtrack .............................................................. 20
4. Select Videotrack ................................................................ 20
5. Service List......................................................................... 21
6. Program Information .......................................................... 21
Operating the DTV Menu........................................................ 22
Main Menu .............................................................................. 22
1. Installation........................................................................... 22
1.1 Select Country .................................................................. 22
1.2 Auto Scanning .................................................................. 22
1.3 Manual Scanning .............................................................. 23
1.4 Reset to Factory Defaults ................................................. 23
2. Channel Organising ............................................................ 23
2.1 Delete Frequency ............................................................. 24
2.2 Delete Channel ................................................................. 24
2.3 Delete All Channels .......................................................... 24
2.4 Move & Edit Channel ........................................................ 24
3. Parental Lock ...................................................................... 25
3.1 Set Channel Lock ............................................................. 25
3.2 Change PIN Code ............................................................ 25
3.3 Set Modem Lock............................................................... 25
4. System Setup ..................................................................... 26
4.1 Language Selection .......................................................... 26
4.2 OSD Setting ...................................................................... 26
4.3 Time Setting ...................................................................... 26
4.4 System Information ........................................................... 27
4.5 Software Upgrade ............................................................. 27
4.6 MHP Application Control ................................................... 27
4.7 Modem Setup ................................................................... 28
Installing the CI card ............................................................... 28
USING THE TELETEXT FEATURE
Teletext Decoder ............................................................... 28
Displaying the Teletext Information ................................... 29
Selecting a Specific Teletext Page .................................... 29
Using Fastext to Select a Teletext Page ........................... 30
SETTING THE PC
Setting up Your PC Software
(Based on Windows XP) ................................................... 30
Display Modes ................................................................... 30
Setting the PC ................................................................... 31
RECOMMENDATIONS FOR USE
Using the Anti-Theft Kensington Lock ............................... 32
Troubleshooting:
Before Contacting Service Personnel ............................... 32
Technical and Environmental Specifications .................... 33
Symbol Press Important Note One-Touch
Button
English-1
Page 4
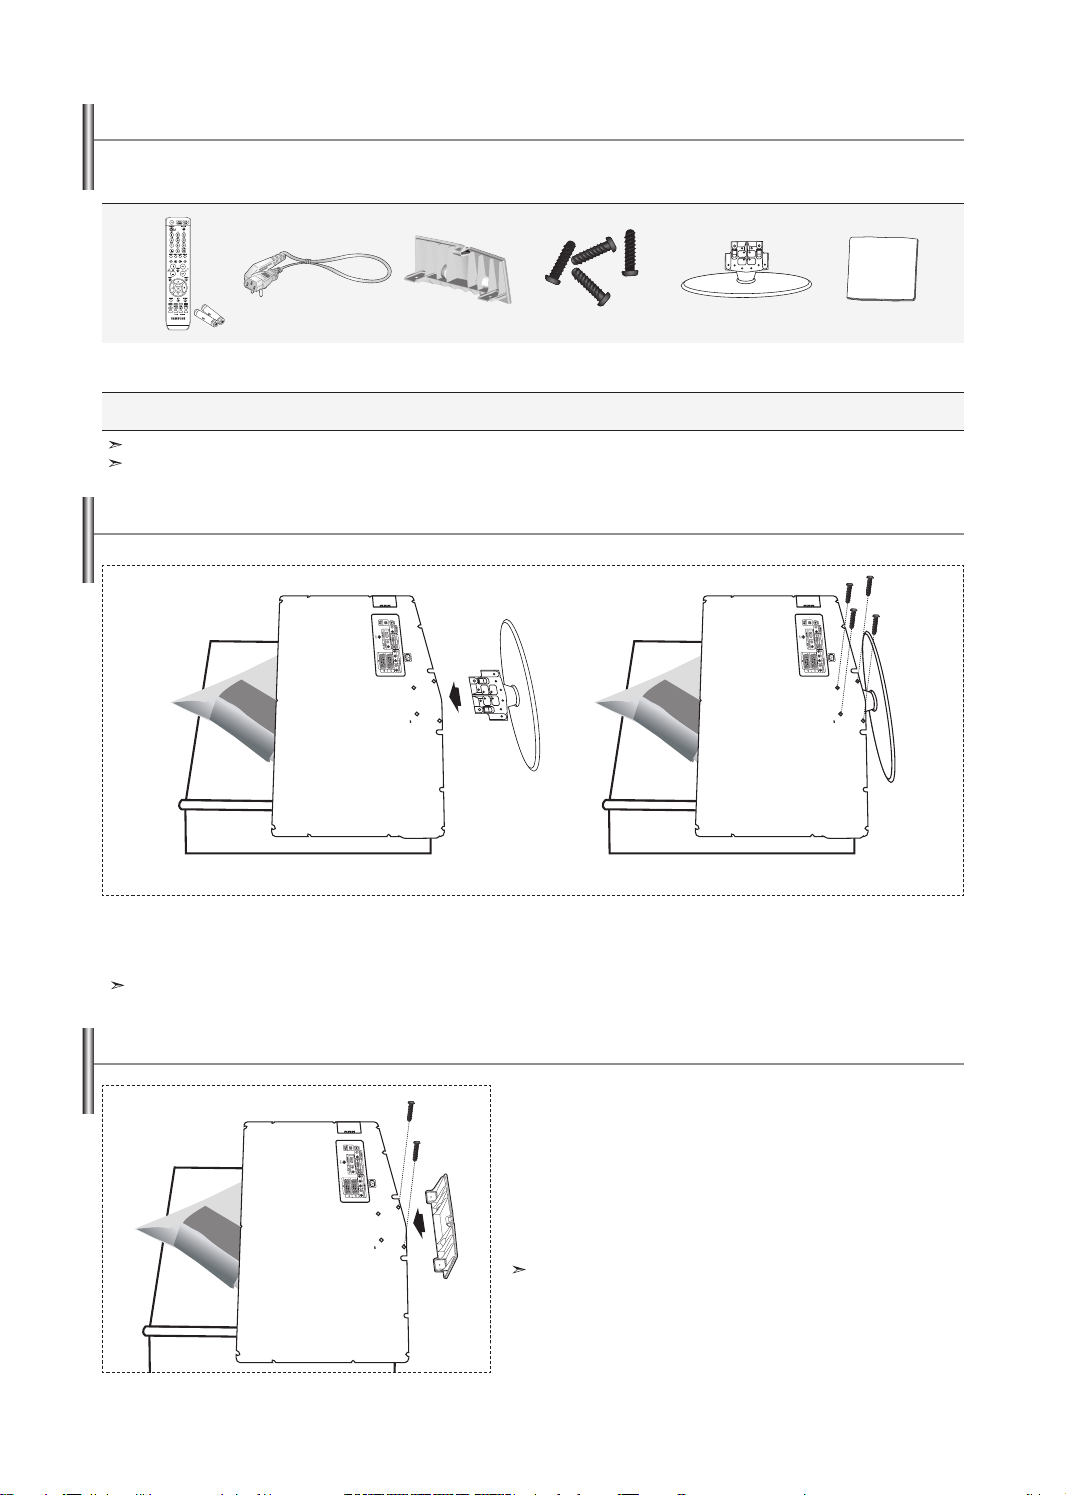
List of Parts
Please make sure the following items are included with your LCD TV.
If any items are missing, contact your dealer.
M4 X L16
Remote Control &
Batteries (AAA x 2)
Owner’s Instructions
Warranty card / Service Network Card / Safety Guide / Registration Cards (Not available in all locations)
The stand and stand screw may not be included depending on the model.
Power Cord Cover-Bottom Stand Screw X 4 Stand Cleaning Cloth
Warranty card
Service Network Card
Safety Guide Registration Cards
Installing the Stand
< 2 >
1. Place the TV faced down on a soft cloth or cushion on a table.
2. Put the stand into the hole at the bottom of the TV.
3. Insert screw into the hole indicated and tighten.
The stand is installed for models with the screen size of 40 inch and above.
Installing the Wall Mount Kit
Wall mount items (sold separately) allow you to mount the TV
on the wall.
For detailed information on installing the wall mount, see the
instructions provided with the Wall Mount items. Contact a
technician for assistance when installing the wall mounted
bracket.
Samsung Electronics is not responsible for any damage to the
product or injury to yourself or others
if you elect to install the TV on your own.
Remove the stand and cover the bottom hole with a cap
and fasten with two screws.
English-2
< 3 >
Page 5

Viewing the Control Panel
The product colour and shape may vary depending on the model.
SOURCE
Toggles between all the available input sources
(TV, Ext.1, Ext.2, AV, S-Video, Component, PC, HDMI,
DTV). In the on-screen menu, use this button as you use
the
ENTER/OK button on the remote control.
MENU
Press to see an on-screen menu of your TV’s features.
In case of DTV mode, the DTV menu appears.
Press to decrease or increase the volume.
In the on-screen menu, use the buttons as you
use the 3 and 4 buttons on the remote control.
Press to change channels.
In the on-screen menu, use the
use the 5 and 6 buttons on the remote control.
(Without the Remote Control, you can turn on the TV by
using the Channel buttons.)
Speakers
Power Indicator
Blinks and turns off when the power is on and lights up in
stand-by mode.
Press to turn the TV on and off.
Remote Control Sensor
Aim the remote control towards this spot on the TV.
(
Power)
buttons as you
English-3
Page 6

Viewing the Connection Panel
[Rear Panel Jacks]
Power Input
Whenever you connect an external device to your TV, make sure that power on the unit is turned off.
When connecting an external device, match the colour of the connection terminal to the cable.
[Side Panel Jacks]
Connecting an Aerial or Cable Television Network
To view television channels correctly, a signal must be received by the set from one of the following sources:
- An outdoor aerial / A cable television network / A satellite network
Connecting HDMI/DVI
-
Supports connections between HDMI-connection-enabled AV devices (Set-Top Boxes, DVD players, AV receivers and digital TVs).
- No additional Audio connection is needed for an HDMI to HDMI connection.
What is HDMI?
-
- The HDMI/DVI terminal supports DVI connection to an extended device with the appropriate cable (not supplied).
The difference between HDMI and DVI is that the HDMI device is smaller in size, has the HDCP
(High Bandwidth Digital Copy Protection) coding feature installed, and supports multi - channel digital audio.
video output mode as shown in the table below. Failure to observe this may result in picture distortion, image breakup or no picture.
-
“High Definition Multimedia interface” allows the transmission of high definition digital video data and multiple channels of digital audio (5. 1 channels).
You should use the DVI-to-HDMI cable or DVI-HDMI Adapter for the connection, and the "R - AUDIO - L" terminal on DVI for sound output.
When connecting this product via HDMI or DVI to a Set Top Box, DVD Player or Games Console etc, make sure that it has been set to a compatible
Supported modes for DVI or HDMI
50 Hz
60 Hz
Component
Do not attempt to connect the HDMI/DVI connector to a PC or Laptop Graphics Card. (This will result in a blank screen being displayed)
480i
X
X
O
480p
O
O
O
English-4
576i
X
X
O
576p
O
X
O
720p
O
O
O
1080i
O
O
O
Page 7

Connecting Set-Top Box, VCR or DVD
-
Connector
EXT 1
EXT 2
Connecting External A/V Devices
- Connect RCA or S-VIDEO cable to an appropriate external A/V device such as VCR, DVD or Camcorder.
-
Connect RCA audio cables to "R - AUDIO - L" on the rear of your set and the other ends to corresponding audio out connectors on the A/V device.
- Headphone may be connected to the headphone output (
the built-in speakers will be disabled.
SERVICE
- Service connection for qualified service engineer.
Connecting AUDIO
- Connect RCA audio cables to "R - AUDIO - L" on the rear of your set and the other ends to corresponding audio in connectors on the
Amplifier or DVD Home Theater.
Connecting Computer
- Connect the D- Sub cable (optional) to "PC (PC IN)" on the rear of your set and the other end to the Video Card of your computer.
-
Connect the stereo audio cable (optional) to "AUDIO (PC IN)" on the rear of your set and the other end to "Audio Out" of the sound card on your computer.
Connecting Component Devices (DTV/DVD)
- Connect component video cables (optional) to component connector ("PR", "PB", "Y") on the rear of your set and the other ends to
corresponding component video out connectors on the DTV or DVD.
- If you wish to connect both the Set-Top Box and DTV (or DVD), you should connect the Set-Top Box to the DTV (or DVD) and connect the
DTV (or DVD) to component connector ("P
- The P
- Connect RCA audio cables (optional) to "R - AUDIO - L" on the rear of your set and the other ends to corresponding audio out connectors on the DTV or DVD.
- This LCD TV displays its optimum picture resolution in 720p mode.
- This LCD TV displays its maximum picture resolution in 1080i mode.
Kensington Lock
- The Kensington lock (optional) is a device used to physically fix the system when used in a public place.
- If you want to use a locking device, contact the dealer where you purchased the TV.
-
The place of the Kensington Lock may be different depending on its model.
DIGITAL AUDIO OUT (OPTICAL)
- Connect to a Digital Audio Component.
Connecting CI (Common Interface) CARD
Service Port
- Service connection for qualified service engineer.
Modem connection port
Video Audio (L/R) RGB
R, PB and Y connectors on your component devices (DTV or DVD) are sometimes labeled Y, B-Y and R-Y or Y, Cb and Cr.
TV Rear Panel
Input
R", "PB", "Y") on your set.
CI CARD
Output
Video + Audio (L/R)
Only TV or DTV output is available.
Output you can choose.
) on the rear of your set. While the headphone is connected, the sound from
Please insert
the card as
shown
Inputs or outputs for external devices, such as VCR, DVD,
video game device or video disc players.
- When not inserting "CI CARD" in some channels,
"Scrambled Signal" is displayed on the screen.
- The pairing information containing a telephone number,
CI CARD ID, Host ID, and other information will be displayed
in about 2~3 minutes. If an error message is displayed,
please contact your service provider.
- When the channel information configuration has finished,
the message "Updating Completed" is displayed,
indicating that the channel list is now updated.
You must obtain a CI CARD from a local cable service provider.
Remove the CI CARD by carefully pulling it out with your
hands since dropping the CI CARD may cause damage to it.
English-5
Page 8

Viewing the Remote Control
Selects a target device to be
controlled by the Samsung remote control
(TV, DVD, STB, CABLE, VCR)
Television Standby button
Number buttons for direct
channel access
One/Two-digit channel selection
It display "Channel Manager"
on the screen.
Selects the TV and DTV mode directly
VCR/DVD Functions
Rewind, Stop, Play/Pause,
Fast/Forward
Volume increase
Volume decrease
Temporary sound switch-off
Menu display and
change confirmation
Electronic Program Guide (EPG) display
Picture-In-Picture On / Off
Sound effect selection
Previous channel / This key is used
in the MHP application and to change
the previous channel.
This key is also used to back to the
previous page in D.MENU.
Adjusts 5 separate devices - TV, DVD,
STB, CABLE, or VCR.
Available source selection
Previous channel
DTV menu display
Toggle between the TV
and Radio channel
P : Next channel
P : Previous channel
Exit the OSD
Control the cursor in the menu
Use to see information on the
current broadcast
Digital subtitle display
(Not available in Spain)
This button is the hard key for
accessing MHP Application List
Picture freeze
Select the soundtrack/videotrack
list for the current service
Teletext Functions
Exit from the teletext display
Teletext index
Teletext hold
Select the teletext mode
Teletext size selection
Teletext mode selection (LIST/FLOF)
Teletext sub page
P : Teletext next page
P : Teletext previous page
Teletext cancel
Teletext reveal
Alternately select Teletext, Double, or Mix.
Fastext topic selection
The performance of the remote control may be affected by bright light.
This is a special remote control for the visually impaired, and has Braille points on the
Power, Channel and Volume buttons.
Installing Batteries in the Remote Control
1. Lift the cover at the back of the remote control upward as shown in the figure.
2. Install two AAA size batterie
Make sure to match the "+" and "–" ends of the batteries with the diagram inside the compartment.
3. Replace the cover.
Remove the batteries and store them in a cool, dry place if you won’t be using the remote control for a long time.
The remote control can be used up to about 23 feet from the TV.
(Assuming typical TV usage, the batteries last for about one year.)
If the remote control doesn’t work, check the following:
1. Is the TV power on?
2. Are the plus and minus ends of the batteries reversed?
3. Are the batteries drained?
4. Is there a power outage, or is the power cord unplugged?
5. Is there a special fluorescent light or neon sign nearby?
s.
English-6
Page 9

Switching On and Off
The mains lead is attached to the rear of your set.
1. Plug the mains lead into an appropriate socket.
The standby indicator lights up on the front of the set.
2. Press the button on the front of the set.
You also can press the POWER button or the
The programme that you were watching last is reselected automatically.
3.
Press the numeric button (0~9) or channel up/down ( / ) button on the remote control or button on the right side of the set.
When you switch the set on for the very first time, you will be asked to choose language in which the menus are to be displayed.
TV/DTV
button on the remote control to turn the TV on.
4. To switch your set off, press the POWER button again.
Placing Your Television in Standby Mode
Your set can be placed in standby mode in order to reduce the power consumption. The standby mode can be useful when
you wish to interrupt viewing temporarily (during a meal, for example).
1. Press the POWER button on the remote control.
The screen is turned off and a red standby indicator appears on the front of your set.
2.
To switch your set back on, simply press the POWER , numeric buttons (0~9), TV/DTV button or channel up/down ( / ) button again.
Do not leave your set in standby mode for long periods of time (when you are away on holiday, for example).
It is best to unplug the set from the mains and aerial.
Plug & Play
When the TV is initially powered on, several basic settings proceed automatically
and subsequently. The following settings are available.
1. Press the POWER button on the remote control.
The message "Start Plug & Play." is displayed with "OK" selected.
2. Select the appropriate language by pressing the or button.
Press the ENTER/OK button to confirm your choice.
3. The message "Check antenna input." is displayed with "OK" selected.
Press the ENTER/OK button.
Please check that the antenna cable is connected correctly.
4. Select the appropriate country by pressing the or button.
Press the ENTER/OK button to confirm your choice.
5.
The "Auto Store" menu is displayed with the "Start" selected. Press the ENTER/OK button.
The channel search will start and end automatically.
After all the available channels are stored, the "Clock Set" menu appears.
Press the ENTER/OK button at any time to interrupt the memorization process.
6. Press the ENTER/OK button.
Select the "Hour" or "Minute" by pressing the
Set the "Hour" or "Minute" by pressing the
You can also set the hour and minute by pressing the number buttons on the remote control.
or
or
button.
button.
7. Press the ENTER/OK button to confirm your setting.
The DTV channel scan menu appears and the DTV channel is automatically updated.
If the DTV channel is updated, the Source in the source list of the Input menu is
automatically changed to DTV.
For detailed descriptions about DTV channel update, refer to page 27 of this manual.
Language: Select your language.
Country: Select your country.
Auto Store: Automatically scans for and stores channels available in the local area.
Clock Set: Sets the current time for the TV clock.
If you want to reset this feature...
1. Press the MENU button to display the menu.
Press the or
2. Press the
3. The message to
button
ENTER/OK
"Start Plug & Play"
to select "Setup", then press the ENTER/OK button.
button again, to select "Plug & Play".
is displayed.
English-7
Page 10

- Storing Channels Automatically
- Storing Channels Manually
Storing Channels Automatically
You can scan for the frequency ranges available to you (and availability depends on your country).
Automatically allocated programme numbers may not correspond to actual or desired programme numbers.
However, you can sort numbers manually and clear any channels you do not wish to watch.
1. Press the MENU button to display the menu.
Press the 5 or 6 button to select "Channel", then press the ENTER/OK button.
2. Press the ENTER/OK button to select "Country".
3. Select the appropriate country by pressing the 5 or 6 button. Press the ENTER/OK button to confirm your choice.
4. Press the 5 or 6 button to select "Auto Store", then press the ENTER/OK button.
5. Press the ENTER/OK button.
The TV will begin memorizing all of the available channels.
Press the ENTER/OK button at any time to interrupt the memorization process and return to the "Channel" menu.
6. After all the available channels are stored, the "Sort" menu appears.
Storing Channels Manually
You can store up to 100 channels, including those received via cable networks.
When storing channels manually, you can choose:
Whether or not to store each of the channels found.
The programme number of each stored channel which you wish to identify.
1. Press the MENU button to display the menu.
Press the 5 or 6 button to select "Channel", then press the ENTER/OK button.
2. Press the 5 or 6 button to select "Manual Store", then press the ENTER/OK button.
3. Press the ENTER/OK button to select "Programme".
4. To assign a programme number to a channel, find the correct number by pressing the 5 or 6 button
and then press the ENTER/OK button.
You can also set a programme number by pressing number buttons on the remote control.
5. Press the 5 or 6 button to select "Colour System", then press the ENTER/OK button.
6. Select the colour standard required by pressing the 5 or 6 button then, press the ENTER/OK button.
7. Press the 5 or 6 button to select "Sound System", then press the ENTER/OK button.
8. Select the sound standard required by pressing the 5 or 6 button, then press the ENTER/OK button.
If there is an abnormal sound or no sound, re-select the sound system required.
9. If you know the number of the channel to be stored, press the 5 or 6 button to select "Channel". Press the ENTER/OK
button. Select C (Air channel) or S (Cable channel) by pressing the 5 or 6 button. Press the 4 button to select channel.
Select the required number by pressing the 5 or 6 button and then press the ENTER/OK button.
Channel mode: P (Programme mode), C (Air channel mode), S (Cable channel mode)
You can also set a channel number by pressing number buttons on the remote control.
10. If you do not know the channel numbers, press the 5 or 6 button to select "Search".
Press the ENTER/OK button. Search by pressing the 5 or 6 button and then press the ENTER/OK button.
11. Press the 5 or 6 button to select "Store". Press the ENTER/OK button to select "OK".
12. Repeat steps 3 to 11 for each channel to be stored.
Programme: Selects a program number for the channel.
Colour System: Sets the colour supporting system.
Sound System: Sets the sound supporting system.
Channel: Selects a channel.
Search: Scans for the frequency value for the channel.
Store: Saves your settings.
English-8
Page 11

Setting the Channel Manager
Set the channels according to your preference.
You can easily delete, add, or lock the channel you want.
1. Press the MENU button to display the menu.
Press the 5 or 6 button to select "Channel", then press the ENTER/OK button.
2. Press the 5 or 6 button to select "Channel Manager",
then press the ENTER/OK button.
3. Press the ENTER/OK button again, to select "Channel Manager".
4. Press the 4 button to select " ".
5. Press the 5 or 6 button to select the undesired channel,
then press the ENTER/OK button to cancel.
6. Repeat steps 5 for each channel to be selected or canceled
7. Press the EXIT button to exit.
" "
You can select these options by simply
pressing the CH MGR button on the
remote control.
is active when "Child Lock" is selected to "On".
Activating the Child Lock
This feature allows you to prevent unauthorized users, such as children, from
watching unsuitable programmes by muting out video and audio.
Child Lock cannot be released using the buttons on the side.
Only the remote control can release the Child Lock setting, so keep the remote
control away from children.
1. Press the MENU button to display the menu. Press the 5 or 6 button
to select "Channel", then press the ENTER/OK button.
2. Press the 5 or 6 button to select "Channel Manager",
then press the ENTER/OK button.
3. Press the 5 or 6 button to select "Child Lock", then press the ENTER/OK button.
4. Press the 5 or 6 button to select "On" or "Off". Press the ENTER/OK button.
5. Press the 5 or 6 button to select "Channel Manager",
then press the ENTER/OK button.
6. Press the 4 button to select " " line.
7. Press the 5 or 6 button to select the channels you want to lock,
then press the ENTER/OK button.
8. Repeat steps 7 for each channel to be locked or unlocked.
9. Press the EXIT button to exit.
Select "On" or "Off" in "Child Lock" to easily turn the channels which
selected on
" "
to be active or inactive.
English-9
Page 12
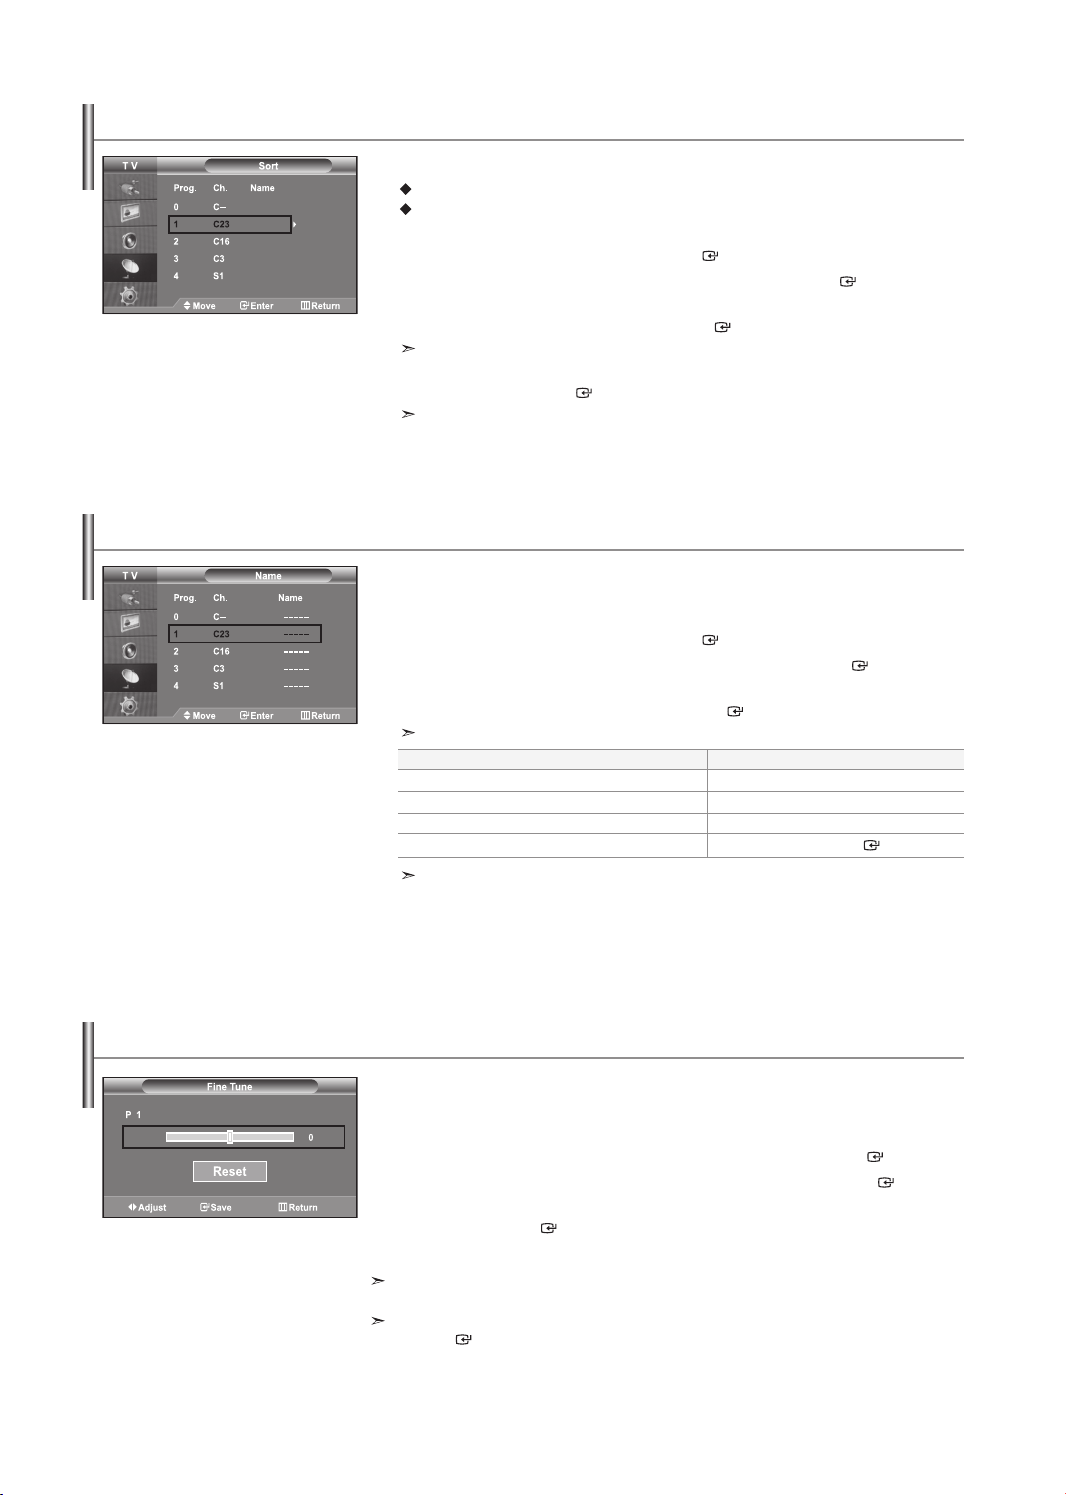
Sorting the Stored Channels
You can exchange the numbers of two channels, in order to:
1. Press the MENU button to display the menu. Press the 5 or 6 button
to select "Channel", then press the ENTER/OK button.
2. Press the 5 or 6 button to select "Sort", then press the ENTER/OK button.
3. Select channel number that you wish to change by pressing the
5 or 6 button repeatedly. Press the ENTER/OK button.
4. Press the 5 or 6 button to move to the position in which you would like to change and
then press the ENTER/OK button.
5. Repeat steps 3 to 4 for another channel to be sorted.
6. Press the EXIT button to exit.
Assigning Channels Names
Channel names will be assigned automatically when channel information is broadcast.
These names can be changed, allowing you to assign new names.
1. Press the MENU button to display the menu. Press the 5 or 6 button
to select "Channel", then press the ENTER/OK button.
2. Press the 5 or 6 button to select "Name", then press the ENTER/OK button.
3. If necessary, select the channel to be assigned to a new name by
pressing the 5 or 6 button. Press the ENTER/OK button.
4.
5.
Repeat steps 3 to 4 for each channel to be assigned to a new name.
6. Press the EXIT button to exit.
Modify the numeric order in which the channels have been automatically stored.
Give easily remembered numbers to the channels that you watch most often.
The selected channel number and name are moved to right side.
The selected channel is exchanged with the one previously stored to the chosen number.
The selection bar is displayed around the name box.
To...
Select a letter, number or symbol
Move on the next letter
Move back the previous letter
Confirm the name
The characters available are :
Letters of the alphabet (A~Z) / Numbers (0~9) / Special characters ( -, space)
Then...
Press the
Press the 4 button
Press the 3 button
Press the ENTER/OK button
5 or 6
button
Fine Tuning Channel Reception
Use fine tuning to manually adjust a particular channel for optimal reception.
1. Use the number buttons to directly select the channel that you want to fine tune.
2. Press the MENU button to display the menu.
Press the 5 or 6 button to select "Channel", then press the ENTER/OK button.
3. Press the 5 or 6 button to select "Fine Tune", then press the ENTER/OK button.
4. Press the 3 or 4 button to adjust the fine tuning.
Press the ENTER/OK button.
5. Press the EXIT button to exit.
Fine tuned channels that have been saved are marked with an asterisk "*" on the
right-hand side of the channel number in the channel banner. And the channel number turns red.
To reset the fine-tuning, select "Reset" by pressing the 5 or 6 button and then press the
ENTER/OK button.button.
English-10
Page 13
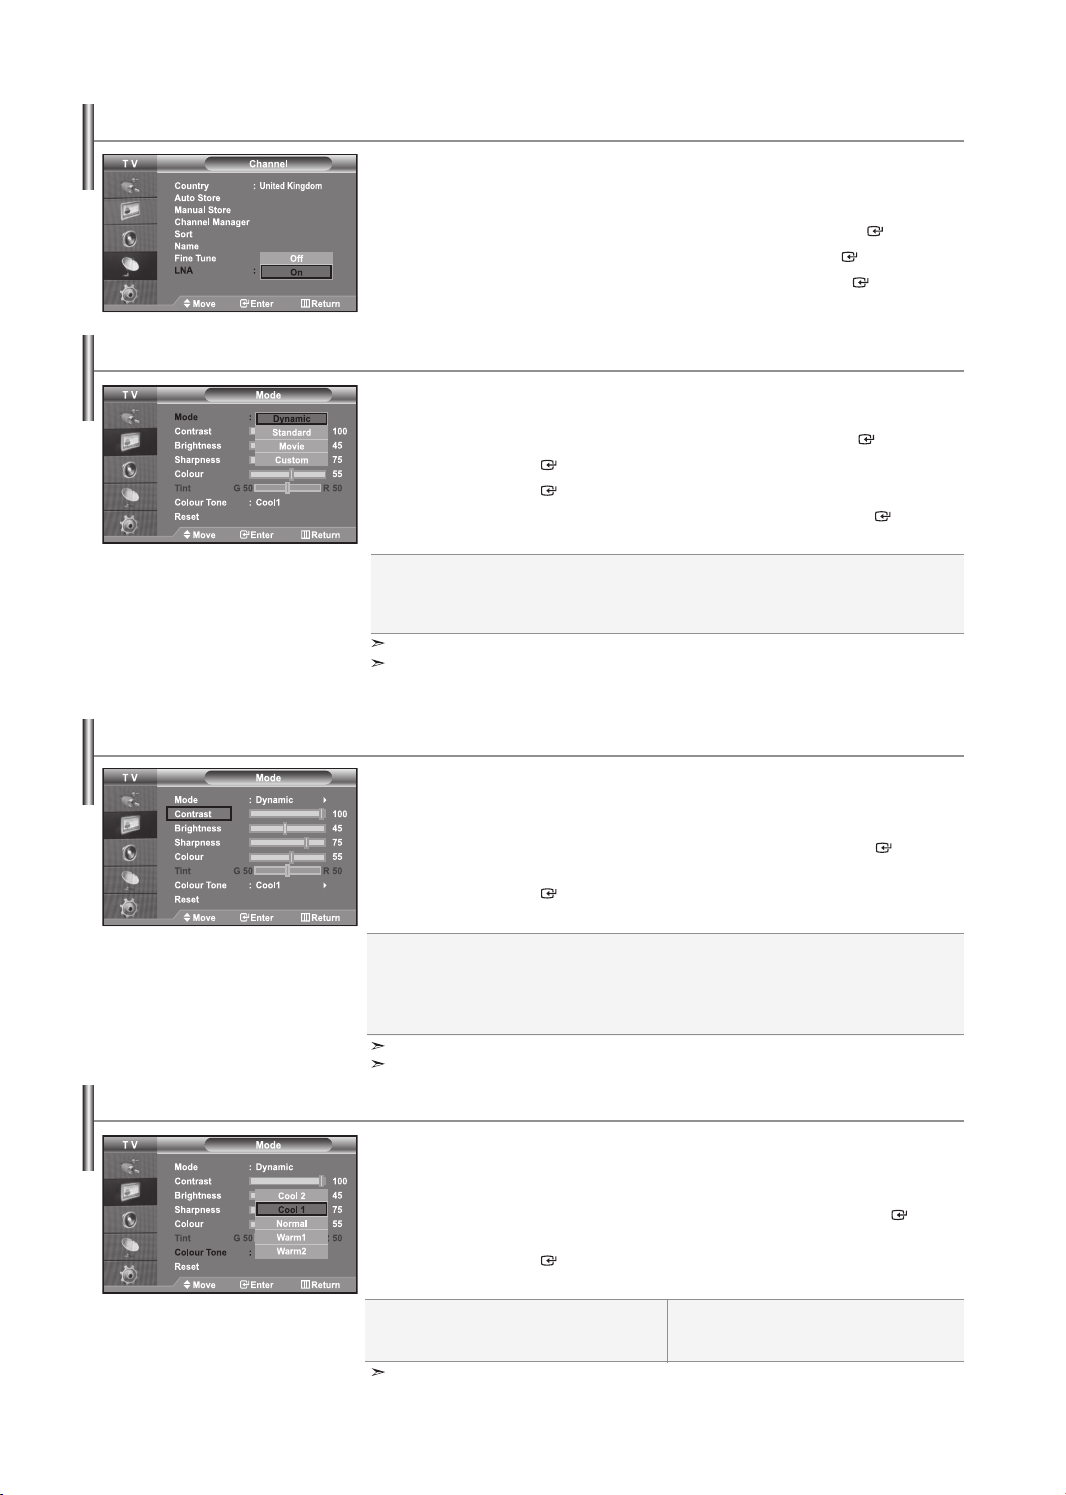
LNA (Low Noise Amplifier)
If the TV is operating in a weak-signal area, the LNA function can improve the reception
(a low-noise preamplifier boosts the incoming signal).
1. Press the MENU button to display the menu.
Press the 5 or 6 button to select "Channel", then press the ENTER/OK button.
2. Press the 5 or 6 button to select "LNA", then press the ENTER/OK button.
3. Press the 5 or 6 button to select "On" or "Off". Press the ENTER/OK button.
4. Press the EXIT button to exit.
Changing the Picture Standard
You can select the type of picture which best corresponds to your viewing requirements.
1. Press the MENU button to display the menu.
Press the 5 or 6 button to select "Picture", then press the ENTER/OK button.
2. Press the ENTER/OK button again, to select "Mode".
3. Press the ENTER/OK button again, to select "Mode".
4.
Press the 5 or 6 button to select the desired picture effect. Press the ENTER/OK button.
5. Press the EXIT button to exit.
Dynamic: Selects the picture for high-definition in a bright room.
Standard: Selects the picture for optimum display in a normal environment.
Movie: Selects the picture for comfortable display in a dark room.
Custom:
The Picture mode must be adjusted separately for each input source.
You can return to the factory defaults picture settings by selecting the "Reset".
(Refer to "Resetting the Picture Settings to the Factory Defaults" on page 12)
Select to view your favorite display settings.
(Refer to "Adjusting the Custom Picture")
Adjusting the Custom Picture
Your set has several settings which allow you to control picture quality.
1. To select the desired picture effect, follow the
"Changing the Picture Standard" instructions number 1 to 4.
2. Press the 5 or 6 button to select a particular item. Press the ENTER/OK button.
3. Press the 3 or 4 button to decrease or increase the value of a particular item.
Press the ENTER/OK button.
4. Press the EXIT button to exit.
Contrast: Adjusts the lightness and darkness between objects and the background.
Brightness: Adjusts the brightness of the whole screen.
Sharpness: Adjusts the outline of objects to either sharpen them or make them more dull.
Colour: Adjusts the colours, making them lighter or darker.
Tint (NTSC only):
The adjusted values are stored according to the selected Picture mode.
In PC Mode, Only “Contrast”, “Brightness” and “Colour” can be adjusted
Changing the Colour Tone
You can select the most comfortable colour tone to your eyes.
1. To select the desired picture effect, follow the
"Changing the Picture Standard" instructions number 1 to 4.
2. Press the 5 or 6 button to select "Colour Tone", then press the ENTER/OK button.
3. Press the 5 or 6 button to select the desired colour tone setting.
Press the ENTER/OK button.
4. Press the EXIT button to exit.
Cool2: Makes the colour temperature bluer than "Cool1" menu.
Cool1: Makes whites bluish.
Normal: Keeps whites white.
The adjusted values are stored according to the selected Picture mode.
Adjusts the colour of objects, making them more red or green for a more natural look.
Warm1: Makes whites reddish.
Warm2: Makes the colour temperature redder than
"Warm1" menu.
English-11
Page 14
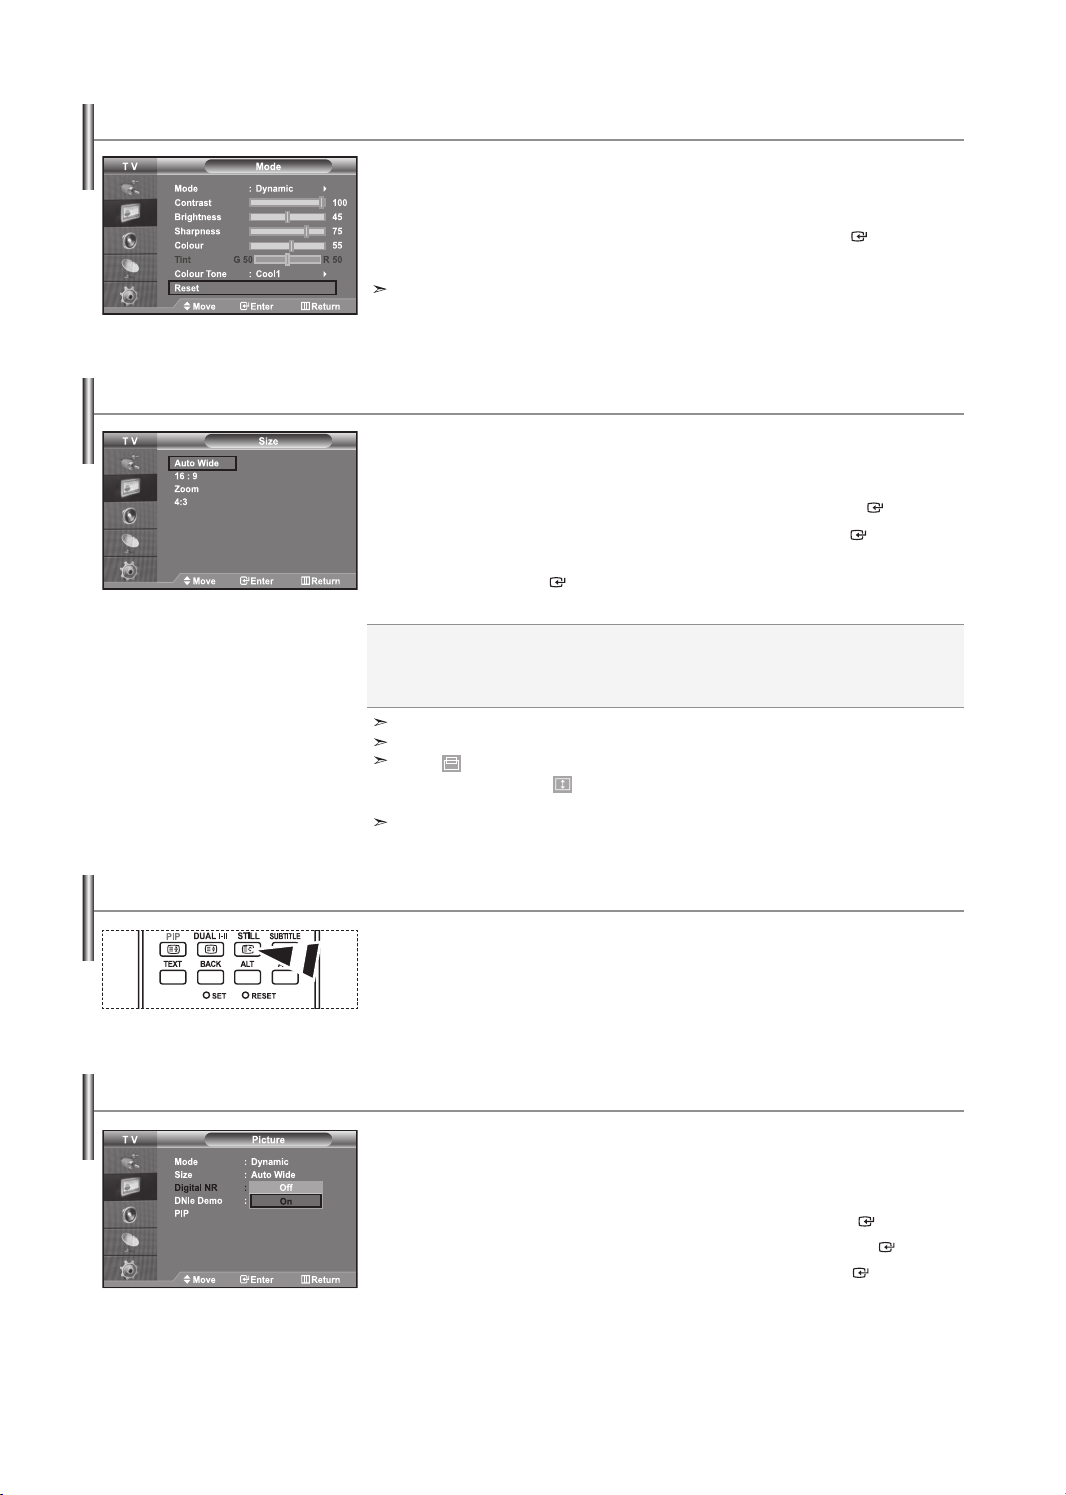
Resetting the Picture Settings to the Factory Defaults
You can return to the factory defaults picture settings.
1. To select the desired picture effect, follow the
"Changing the Picture Standard" instructions number 1 to 4 on page 11.
2. Press the 5 or 6 button to select "Reset", then press the ENTER/OK button.
3. Press the EXIT button to exit.
The "Reset" will be set for each picture mode.
Changing the Picture Size
You can select the picture size which best corresponds to your
viewing requirements.
1. Press the MENU button to display the menu.
Press the 5 or 6 button to select "Picture", then press the ENTER/OK button.
2. Press the 5 or 6 button to select "Size", then press the ENTER/OK button.
3. Select the required option by pressing the 5 or 6 button.
Press the ENTER/OK button.
4. Press the EXIT button to exit.
Auto Wide: Automatically adjusts the picture size to the "16:9" aspect ratio.
16:9: Adjusts the picture size to 16:9 appropriate for DVDs or wide broadcasting.
Zoom: Magnifies the 16:9 wide picture (in the vertical direction) to fit the screen size.
4:3: This is the default setting for a video movie or normal broadcasting.
“Auto Wide” function is available only in “TV”, “Ext1”, “Ext2”, “AV”, and “S-Video” mode.
In PC Mode, only "16:9" and "4:3" mode can be adjusted.
Select by pressing the 3 or 4 buttons. Use the 5 or 6 button to move the picture up
and down. After selecting , use the 5 or 6 button to magnify or reduce the picture size
in the vertical direction.
The Zoom mode cannot be selected in the DTV mode.
Freezing the Current Picture
Press the STILL button to freeze a moving picture into a still one.
Press again to cancel.
Digital Noise Reduction
If the broadcast signal received by your TV is weak, you can activate the Digital Noise
Reduction feature to help reduce any static and ghosting that may appear on the
screen.
1. Press the MENU button to display the menu.
Press the 5 or 6 button to select "Picture", then press the ENTER/OK button.
2. Press the 5 or 6 button to select "Digital NR", then press the ENTER/OK button.
3. Press the 5 or 6 button to select "On" or "Off". Press the ENTER/OK button.
4. Press the EXIT button to exit.
English-12
Page 15

DNIe Demo (Digital Natural Image engine)
Samsung’s new technology brings you more detailed images with contrast and white
enhancement. A new image compensation algorithm gives viewers brighter and
clearer images. DNIe technology will match every signal to your eyes.
You can see how DNIe improves the picture by setting DNIe Demo mode to On.
1. Press the MENU button to display the menu.
Press the 5 or 6 button to select "Picture", then press the ENTER/OK button.
2. Press the 5 or 6 button to select "DNIe Demo", then press the ENTER/OK button.
3. Press the 5 or 6 button to select "On" or "Off". Press the ENTER/OK button.
4. Press the EXIT button to exit.
These functions don’t work in PC mode.
The DNle Demo is designed to show the difference between the regular and DNIe pictures.
By default, the product displays the picture with DNle applied.
Viewing the Picture In Picture (PIP)
You can display a sub picture within the main picture of set programme or video
input. In this way, you can watch the picture of set programme or video input from
any connected equipment while watching the main picture.
1. Press the MENU button to display the menu.
Press the 5 or 6 button to select "Picture", then press the ENTER/OK button.
2. Press the 5 or 6 button to select "PIP", then press the ENTER/OK button.
3. Press the ENTER/OK button again.
Press the 5 or 6 button to select "On", then press ENTER/OK button.
Press the PIP button on the remote
control repeatedly to activate or
deactivate the "PIP".
4. Press the 5 or 6 button to select "Source",then press ENTER/OK button.
5. Press the 5 or 6 button to select "Swap".
6. Press the 5 or 6 button to select "Size" of the sub picture and then press the
7. Press the 5 or 6 button to select "Position", then press the ENTER/OK button.
Select the position of the sub picture by pressing the 5 or 6 button and
then press the ENTER/OK button.
8. Press the 5 or 6 button to select "Programme" and then press the
9. Press the EXIT button to exit.
Source: Used to select a source of the sub picture.
Swap: Used to interchange the main picture and the sub picture.
Size: Used to select a size of the sub picture.
Position: Used to move the sub picture.
Programme: Used to Change the sub picture.
If the PIP is activated, the size of the main picture turns to “16:9”.
Select a source of the sub picture by pressing the 5 or 6 button
and press the ENTER/OK button.
The sub picture can serve different source selections based on what the main
picture is set to.
To interchange the main picture and the sub picture, select "Swap" option
and press the ENTER/OK button.
The main picture and the sub picture are interchanged.
I
f main picture is in "PC" mode, "Swap" is not available.
ENTER/OK button. Select a size of the sub picture by pressing the 5 or 6 button
and then press the ENTER/OK button.
If main picture is in "PC" mode, "Size" is not available.
ENTER/OK button. You can select the channel that you want to view through sub
picture by pressing the 5 or 6 button. Press the ENTER/OK button.
The "Programme" can be active when the sub picture is set to TV.
You may notice that the picture in the PIP window becomes slightly unnatural when you use the main
screen to view a game or karaoke.
English-13
Page 16
PIP Settings
Sub
Main
TV
Ext.1
Ext.2
AV
S-Video
Component
PC
HDMI
DTV
TV
Ext.1
X
X
X
X
X
X
O
O
X
X
X
X
X
X
X
O
O
X
Ext.2
X
X
X
X
X
X
O
O
X
Changing the Sound Standard
You can select the type of the special sound effect to be used when watching
a given broadcast.
1. Press the MENU button to display the menu.
Press the 5 or 6 button to select "Sound", then press the ENTER/OK button.
2. Press the ENTER/OK button again, to select "Mode".
3. Select the required sound effect by pressing the 5 or 6 button repeatedly and then
press the ENTER/OK button.
4. Press the EXIT button to exit.
Standard: Selects the normal sound mode.
Music: Emphasizes music over voices.
Movie: Provides live and full sound for movies.
Speech: Emphasizes voices over other sounds.
Custom: Selects your custom sound settings.
AV
X
X
X
X
X
X
O
O
X
(Refer to "Adjusting the Sound Settings")
S-Video
X
X
X
X
X
X
X
O
X
Component
X
X
X
X
X
X
X
O
X
O: PIP operates, X: PIP doesn’t operate
PC
X
X
X
X
X
X
X
X
X
HDMI
O
O
O
O
O
O
X
X
X
DTV
X
X
X
X
X
X
X
X
X
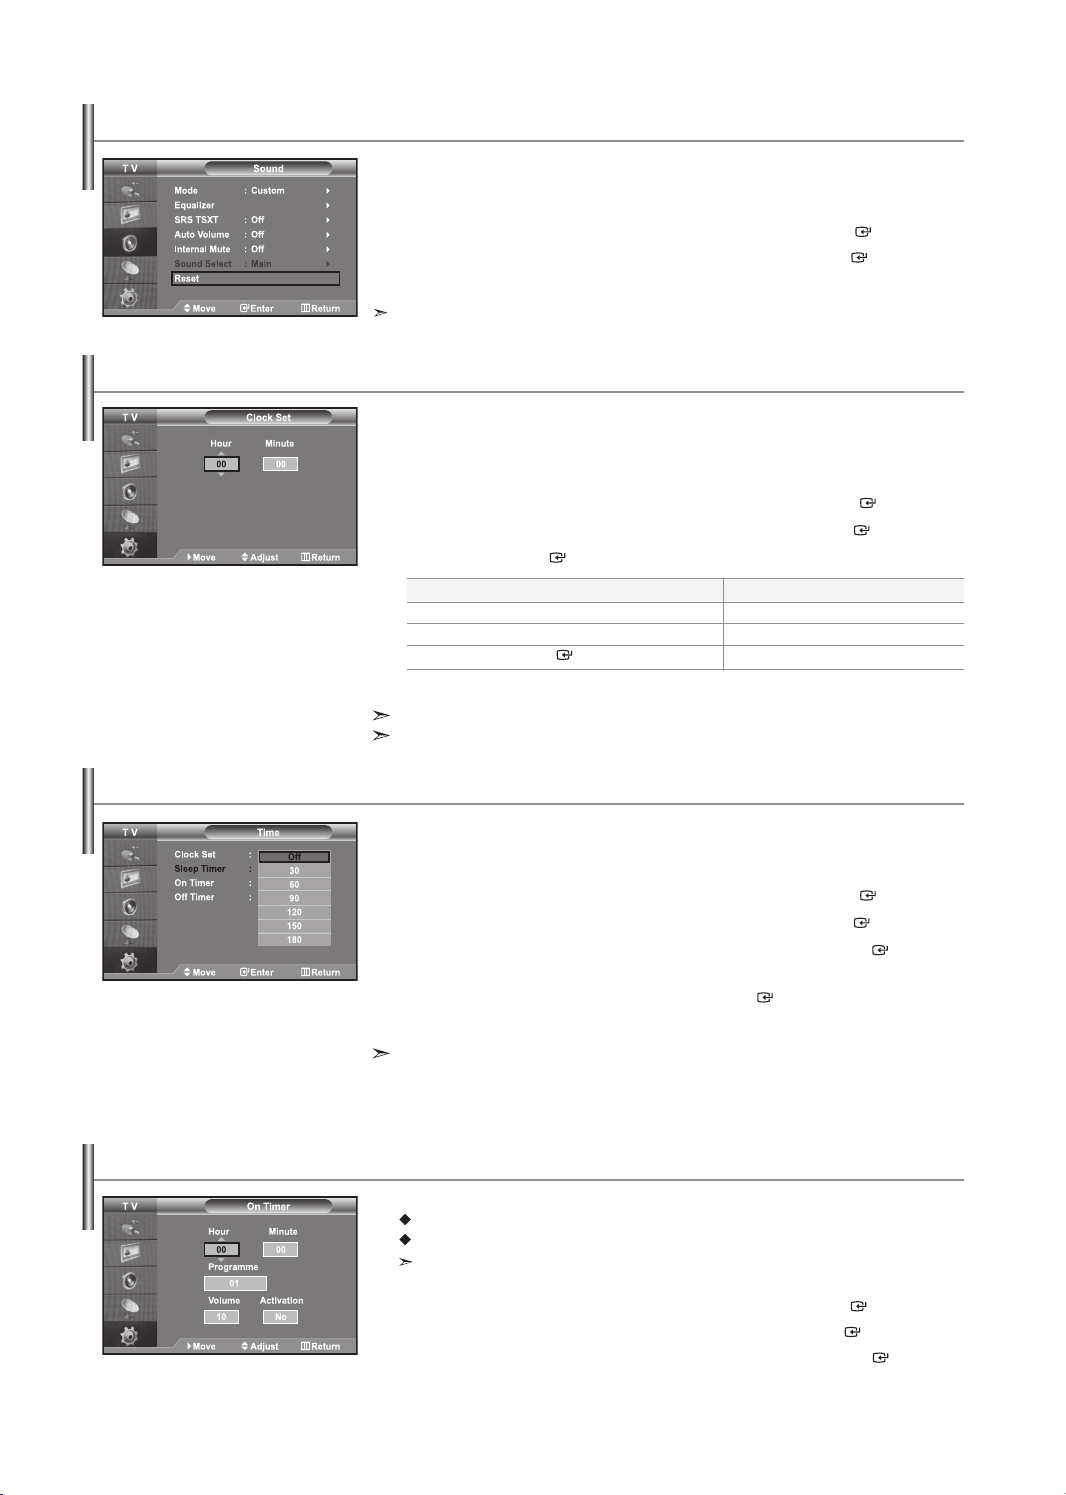
Adjusting the Sound Settings
The sound settings can be adjusted to suit your personal preferences.
1. Press the MENU button to display the menu.
Press the 5 or 6 button to select "Sound", then press the ENTER/OK button.
2. Press the 5 or 6 button to select "Equalizer", then press the ENTER/OK button.
3. Press the 3 or 4 button to select a particular item.
Press the ENTER/OK button.
4. Press the 5 or 6 button to reach the required setting.
Press the ENTER/OK button.
5. Press the EXIT button to exit.
If you make any changes to these settings, the Sound Mode is automatically switched to "Custom".
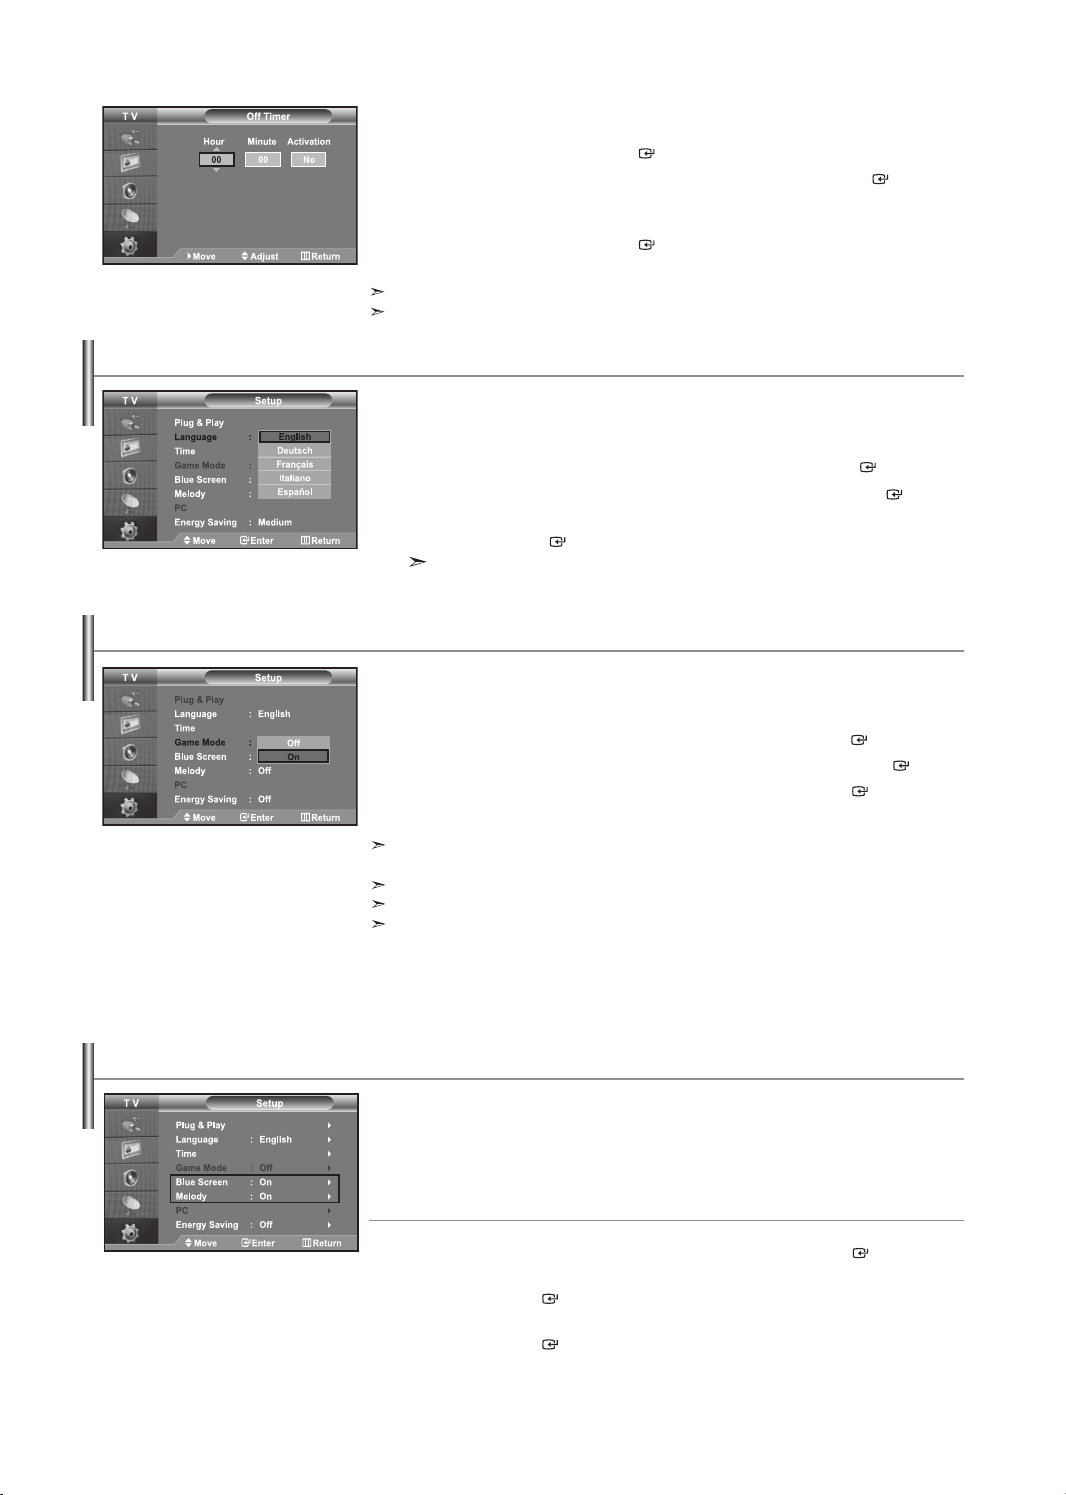
Connecting Hheadphones
You can connect a set of headphones to your set if you wish to watch a
TV programme without disturbing the other people in the room.
When you insert the head set jack into the corresponding port, you can operate only
“Internal Mute” and “Sound Select” (in PIP mode) in Sound menu.
Prolonged use of headphones at a high volume may damage your hearing.
You will not receive sound from the speakers when you connect headphones to the system.
English-14
Page 17

Setting the TruSurround XT (SRS TSXT)
TruSurround XT is a patented SRS technology that solves the problem of playing 5.1
multichannel content over two speakers.
TruSurround delivers a compelling,virtual surround sound experience through any twospeaker playback system, including internal television speakers. It is fully compatible with
all multichannel formats.
1. Press the MENU button to display the menu. Press the 5 or 6 button to
select “Sound”, then press the
2. Press the 5 or 6 button to select “SRS TSXT”,
then press the
3.
Press the 5 or 6 button to select “On” or “Off”. Press the ENTER/OK button.
4. Press the EXIT button to exit.
ENTER/OK
TruSurround XT, SRS and symbol are trademarks of
SRS Labs, Inc. TruSurround XT technology is incorporated under
license from SRS Labs, Inc.
Adjusting the Volume Automatically
Each broadcasting station has its own signal conditions, and so it is not easy for you
to adjust the volume every time the channel is changed. This feature allows you to
automatically adjust the volume of the desired channel by lowering the sound
output when the modulation signal is high or by raising the sound output when the
modulation signal is low.
1. Press the MENU button to display the menu.
Press the 5 or 6 button to select "Sound", then press the ENTER/OK button.
2. Press the 5 or 6 button to select "Auto Volume", then press the ENTER/OK button.
3. Press the 5 or 6 button to select "On" or "Off". Press the ENTER/OK button.
4. Press the EXIT button to exit.
ENTER/OK button.
button.
Selecting the Internal Mute
If you want to hear the sound through separate speakers, cancel the internal amplifier.
1. Press the MENU button to display the menu.
Press the 5 or 6 button to select "Sound", then press the ENTER/OK button.
2.
Press the 5 or 6 button to select "Internal Mute", then press the ENTER/OK button.
3. Press the 5 or 6 button to select "On" or "Off". Press the ENTER/OK button.
4. Press the EXIT button to exit.
When "Internal Mute" is set to "On’, the Sound menus except for "Sound Select"
(in PIP mode) cannot be adjusted.
Listening to the Sound of the Sub Picture
During the PIP features activation, you can listen to the sound of the sub picture.
1. Press the MENU button to display the menu.
Press the 5 or 6 button to select "Sound", then press the ENTER/OK button.
2.
Press the 5 or 6 button to select "Sound Select", then press the ENTER/OK button.
3. Press the 5 or 6 button to select "Sub". Press the ENTER/OK button.
4. Press the EXIT button to exit.
Main: Used to listen to the sound of the main picture.
Sub: Used to listen to the sound of the sub picture.
You can select this option when the "PIP" is set to "On". (refer to page 13)
English-15
Page 18
Resetting the Sound Settings to the Factory Defaults
If Game Mode is On, the Reset Sound function is activated. Selecting the Reset
function after setting the equalizer resets the equalizer setting to the factory defaults.
1. Press the MENU button to display the menu.
Press the 5 or 6 button to select "Sound", then press the ENTER/OK button.
2. Press the 5 or 6 button to select "Reset", then press the ENTER/OK button.
3. Press the EXIT button to exit.
You can select this option when the "Game Mode” is set to "On".
Setting and Displaying the Current Time
You can set the TV’s clock so that the current time is displayed when you press the
INFO button. You must also set the time if you wish to use the
automatic On/Off timers.
1. Press the MENU button to display the menu.
Press the 5 or 6 button to select "Setup", then press the ENTER/OK button.
2. Press the 5 or 6 button to select "Time", then press the ENTER/OK button.
3. Press the ENTER/OK button to select "Clock Set".
4.
To...
Move to "Hour" or "Minute"
Set the "Hour" or "Minute"
Press the
5. Press the EXIT button to exit.
If you disconnect the power cord, you have to set the clock again.
You can also set hour and minute by pressing the number buttons on the remote control.
ENTER/OK
button.
Press the...
3 or 4 button.
5 or 6 button.
Setting the Sleep Timer
You can select a time period of between 30 and 180 minutes after which the
television automatically switches to standby mode.
1. Press the MENU button to display the menu.
Press the 5 or 6 button to select "Setup", then press the ENTER/OK button.
2. Press the 5 or 6 button to select "Time", then press the ENTER/OK button.
3.
Press the 5 or 6 button to select "Sleep Timer", then press the ENTER/OK button.
4. Press the 5 or 6 button repeatedly until the desired time appears
(Off, 30, 60, 90, 120, 150, 180). Press the ENTER/OK button.
5. Press the EXIT button to exit.
The TV automatically switches to standby mode when the timer reaches 0.
Switching the Television On and Off Automatically
You can set the On/Off timers so that the set will:
Switch on automatically and tune to the channel of your choice at the time you select.
Switch off automatically at the time you select.
The first step is to set the television’s clock.
1. Press the MENU button to display the menu.
Press the 5 or 6 button to select "Setup", then press the ENTER/OK button.
2. Press the 5 or 6 button to select "Time", then press the ENTER/OK button.
3. Press the 5 or 6 button to select "On Timer", then press the ENTER/OK button.
English-16
Page 19
4. Press the 5 or 6 button to adjust "Hour", then press the 4 button to
move to the next step. Set other items using the same method as above.
When finished, press the ENTER/OK button to return.
5. Press the 5 or 6 button to select "Off Timer", then press the ENTER/OK button.
6. Press the 5 or 6 button to adjust "Hour", then press the 4 button to
move to the next step. Set other items using the same method as above.
When finished, press the ENTER/OK button to return.
7. Press the EXIT button to exit.
Choosing Your Language
When you start using your set for the first time, you must select the
language which will be used for displaying menus and indications.
1. Press the MENU button to display the on-screen menu.
Press the 5 or 6 button to select "Setup", then press the ENTER/OK button.
2. Press the 5 or 6 button to select "Language", then press the ENTER/OK button.
3. Select a particular language by pressing the 5 or 6 button repeatedly.
4. Press the EXIT button to exit.
Using Game Mode
When connecting to a game console such as PlayStationTM or XboxTM,
you can enjoy a more realistic gaming experience by selecting game menu.
1. Press the MENU button to display the menu.
Press the 5 or 6 button to select “Setup”, then press the ENTER/OK button.
2. Press the 5 or 6 button to select “Game Mode”, then press the ENTER/OK button.
3. Press the 5 or 6 button to select “On” or “Off”. Press the ENTER/OK button.
4. Press the EXIT button to exit.
in the picture menu.
•
• Sound Mode in the Sound menu is deactivated. Adjust the sound using the equalizer.
• The Reset Sound function is activated. Selecting the Reset function after setting the equalizer
You can also set hour and minute by pressing the number buttons on the remote control.
The "Activation" setting must be set to "Yes" in order for the timers to work.
Press the ENTER/OK button.
You can choose one of 5 languages.
To disconnect the game console and connect another external device, cancel game mode
If you display the TV menu in Game mode, the screen shakes slightly.
Game Mode is not available in TV mode.
If Game Mode is On:
Picture Mode and Sound Mode are automatically changed to Custom and users cannot change the mode.
resets the equalizer setting to the factory defaults.
Setting the Blue Screen Mode / Selecting the Melody
Blue Screen:
If no signal is being received or the signal is very weak, a blue screen automatically
replaces the noisy picture background. If you wish to continue viewing the poor
picture, you must set the "Blue Screen" mode to "Off".
Melody:
You can hear melody sound when the television is powered on or off.
1. Press the MENU button to display the menu.
Press the 5 or 6 button to select "Setup", then press the ENTER/OK button.
2. Press the 5 or 6 button to select "Blue Screen" or "Melody".
Press the ENTER/OK button.
3. Press the 5 or 6 button to select "On" or "Off".
Press the ENTER/OK button.
4. Press the EXIT button to exit.
English-17
Page 20

Using the Energy Saving Feature
This function adjusts the brightness of the TV so as to reduce power consumption.
When you watching TV at night, set the "Energy Saving " mode option to "High" so
as to reduce the dazzling of your eyes as well as the power consumption.
1. Press the MENU button to display the on-screen menu.
Press the 5 or 6 button to select "Setup", then press the ENTER/OK button.
2.
Press the 5 or 6 button to select "Energy Saving", then press the ENTER/OK button.
3. Select the required option (Off, Low, Medium, High) by pressing the 5 or 6 button.
Press the ENTER/OK button.
4. Press the EXIT button to exit.
Selecting the Source
You can select among external sources connected to your TV’s input jacks.
1. Press the MENU button to display the menu.
Press the ENTER/OK button, to select "Input".
2. Press the ENTER/OK button again, to select "Source List".
3. Select the required device by pressing the 5 or 6 button.
Press the ENTER/OK button.
Press the
When no external device is connected to your set, only "TV", "Ext.1", "Ext.2", "DTV" are
activated in the "Source List". "AV", "S-Video", "Component", "PC", "HDMI" are activated
only when they are connected to your set.
SOURCE
TV mode can be selected by pressing the TV/DTV button, number buttons(0~9), and the
button on the remote control. But it cannot be selected using the
P /
button on the remote control to toggel between all the available source.
SOURCE
button.
Editing the Input Source Names
Name the device connected to the input jacks to make your input source
selection easier.
1. Press the MENU button to display the menu.
Press the ENTER/OK button, to select "Input".
2. Press the 5 or 6 button to select "Edit Name", then press the ENTER/OK button.
3. Press the 5 or 6 button to select the device that you wish to edit.
Press the ENTER/OK button.
4. Press the 5 or 6 button to select the required device.
Press the ENTER/OK button.
5. Press the EXIT button to exit.
English-18
Page 21

Previewing the DTV Menu System
To help you navigate around the on-screen menu system and adjust the
various settings available, refer to the following illustration.
Available in the Digital TV mode.
Press the D.MENU button.
Installation
Select Country
Auto Scanning
Manual Scanning
Reset to Factory Defaults
Channel Organising
Delete Frequency
Delete Channel
Delete All Channels
Move & Edit Channel
Parental Lock
Set Channel Lock
Change PIN Code
Set Modem Lock
System Setup
Language Selection
OSD Setting
Time Setting
System Information
Software Upgrade
MHP App Control
Modem Setup
You can select these options by simply
pressing the D.MENU button on the
remote control.
The sub-items of the CI Menu may vary depending on the CAM model.
In the Digital TV mode, do not turn the power off before the screen is completely loaded.
English-19
Page 22

Basic Functions
1. Display Screen
Before you can view the television program, you must perform the installation.
Therefore you will see only menu images at first. After the television channels have
been programmed, you will see the following picture (banner) each time you switch
channels:
Channel Number
Signal Status Program Information The number of soundtrack
Detailed program information
First you will see the banner described above.
After pressing the INFO button for the second time you will receive detailed program
information for current program can be displayed on another banner, if there is more
information. When this information is more than one page, P / can be used for
page up and down.
This service depends on service provider.
2. Volume Control
To control the volume level :
• Press the
• Press the MUTE button to turn to silence mode.
• Press the MUTE button again or
mute function.
buttons to adjust the volume level.
buttons in order to cancel the
in current channel
3. Select Soundtrack
• Press the ALT button to see the soundtrack list.
• Press the 5 or 6 and ENTER/OK buttons to select one.
4. Select Videotrack
• Press the ALT button twice to see the videotrack list.
• Press the 5 or 6 and ENTER/OK buttons to select one.
English-20
Page 23

5. Service List
• Press the CH MGR button while you are viewing a program.
• Select list by pressing the TV/RADIO button.
The icon
behind the channel name symbolizes scrambled channel,
and the icon behind the channel name symbolizes parental locked channel.
• Select the channel by pressing the
/ and press the P / for moving up or
down pages on the lists.
• Press the ENTER/OK button to watch that channel.
6. Program Information
EPG-Electronic Program Guide
The electronic program guide gives you a programme list for the channels.
1. This service depends on service provider.
2. After receiver recognized the GMT-time from the signal which takes few seconds,
• Press the GUIDE button while you are viewing a program.
This function is displayed on the screen by using only time.
it can display correct EPG information.
• RED button : Red button is for moving back to the previous date.
• GREEN button : Green button is for moving to the next coming date.
• INFO button : This button is used to watch the program information,
if there is more information than one page.
Usethe / buttons to move up and down pages.
• 3/4 button : Use to display the program list by 30 minutes per block.
Time interval can be adjusted by pressing buttons as followings on EPG screen:
1 button: 1 hour and 30 minutes
2 button: 30 minutes
3 button: 15 minutes
• Select the channel by pressing the
/ buttons and
press the ENTER/OK button to watch this channel.
English-21
Page 24
Operating the DTV Menu
Main Menu
After installing your antenna system and TV with appropriate connectors.
• Plug in the AC main power and switch on the TV.
• Press the D.MENU button to bring up the main menu.
The following on-screen display will appear:
The sub menu topics will be displayed. For the sub-menus "Installation",
"Channel Organization" and "Parental Lock", you need the PIN Code.
1. Installation
This menu consists of 4 sub-menus:
Select Country, Auto Scanning, Manual Scanning and Reset to Factory Defaults.
• Select "Installation" by pressing the ENTER/OK button in the main menu mode to
select the sub menu.
• Enter the PIN Code.
If you have not entered your own PIN Code then the PIN Code 0000 applies,
which was set at the factory.
Once you have entered PIN Code, you do not have to input the code again unless
you turn the TV power off.
1.1 Select Country
To tune-in new channels, the TV has been provided with the option
“Select Country”. Select the country where broadcasting services are provided.
After selecting the “Select Country” from the Installation Menu, the following
screen will be displayed:
• Select the country which you are in.
You can select the value of "ITALY", "SPAIN", "SWEDEN", "UK", "USER",
"BELGIUM", "GERMANY", "FINLAND", or "FRANCE" by using 3/4 button.
• After selecting option, press the ENTER/OK button to choose the nation of
broadcasting area to be served. If you don’t want to save the changes,
press EXIT button without ENTER/OK button pressed.
If national code is changed, all of saved programs will be deleted.
USER: An user may set Channel Number and Frequency in Auto/Manual scanning.
1.2 Auto Scanning
The sub menu “Auto Scanning” will enable download of the channels
automatically from the preprogrammed load.
To download channels automatically:
• You can select the specified frequency between "Start Frequency" and
"End Frequency".
• Press the ENTER/OK button.
Auto Scanning menu will be displayed.
All the channels in the list will be automatically downloaded.
English-22
Page 25
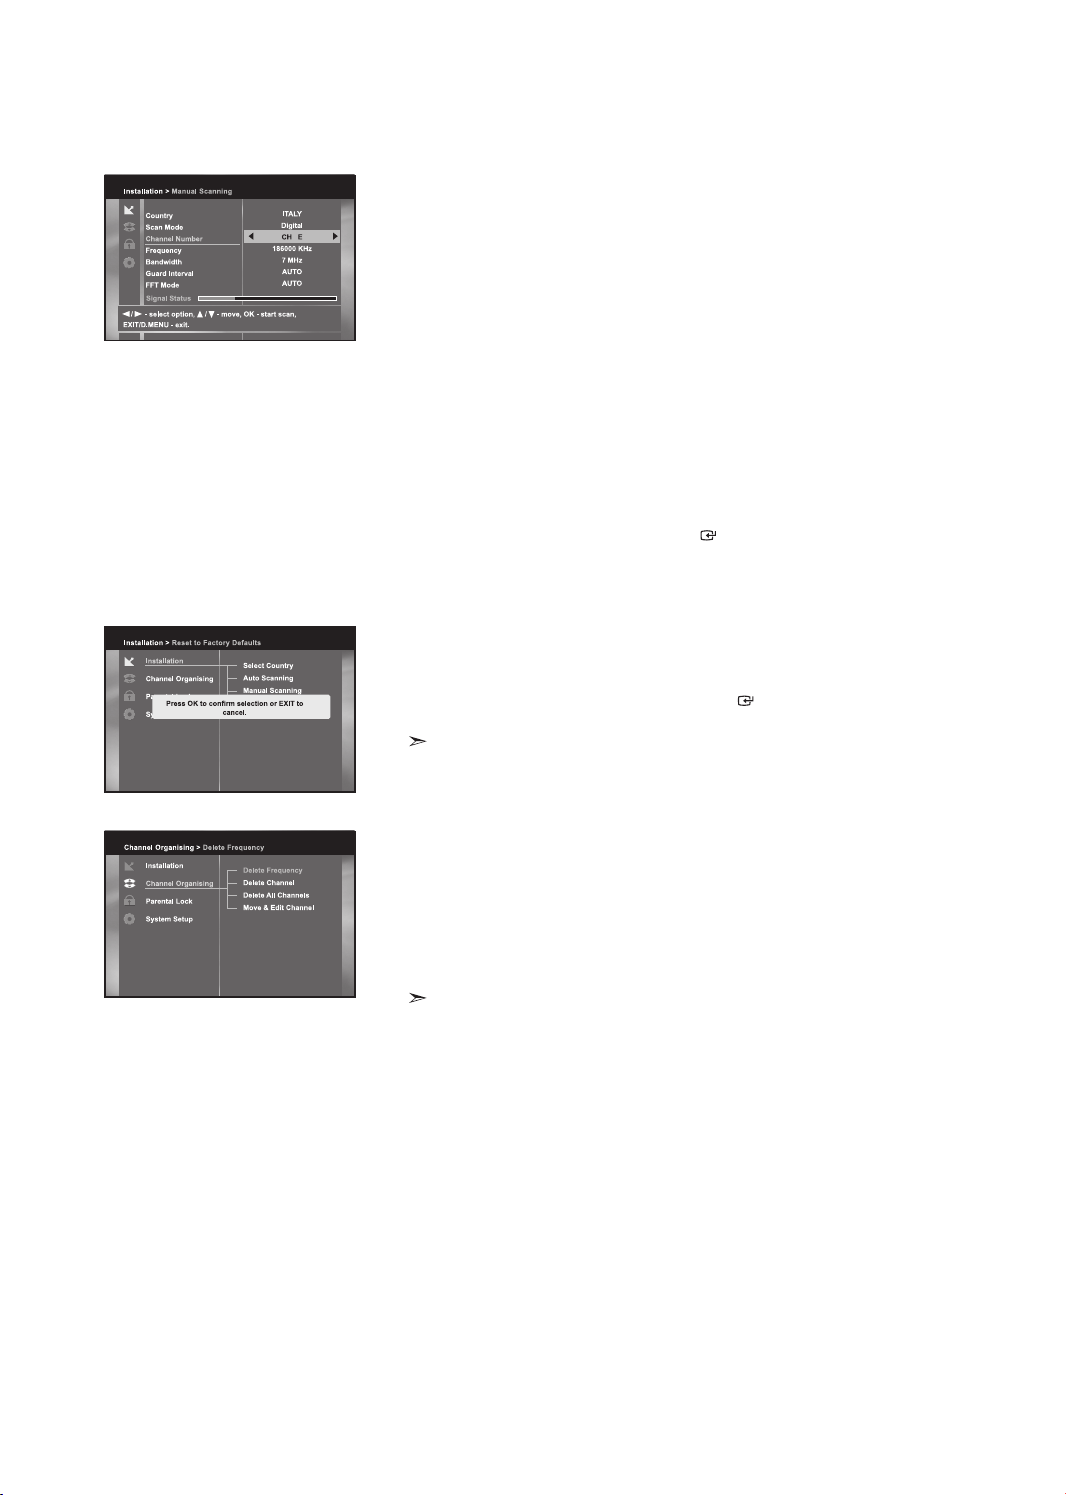
1.3 Manual Scanning
To tune-in new channels and weak signals, the TV has been provided with the
option “Manual Scanning” where the channel data can be entered by the user.
After selecting the “Manual Scanning” from the Installation Menu, the following
screen will be displayed:
• Select the Channel Number.
You can select the specified channel you want to find.
The followings are defined as a default, but optionally you can choose it.
Signal Status bar shows you if it is valid.
• Input the frequency of the channel you want to find.
• Select the bandwidth. You can select the value of "6", "7" or "8" MHz.
• Select the Guard Interval Mode.
You can select the value of "AUTO", "1/32", "1/16", "1/8", or "1/4".
• Select the FFT (Fast Fourier Transform) Mode.
One of the values-"AUOT", "2 K", and "8 K"- will be selected automatically.
You may change the set value as your preference.
• After selecting option, press the ENTER/OK button to start the scanning process.
1.4 Reset to Factory Defaults
This is to restore the factory set values in case the user has encountered some
problems after changing any values of channel data and others which may be in error.
At the request window, if you press the ENTER/OK button, the TV will be reset to
factory default settings automatically.
This causes your previous settings to be deleted!
2. Channel Organising
The “Channel Organising” menu has four functions:
The “Channel Organising” menu is used to delete the Frequencies and
Channels or Move&Edit Channel as you want.
• Enter the PIN Code.
If you have not entered your own PIN Code 0000 applies,
which was set at the factory.
Once you have entered PIN Code, you do not have to input the code again
unless you turn the TV power off.
English-23
Page 26
2.1 Delete Frequency
• Select the desired frequency list you want to delete by pressing the RED button.
• Press the ENTER/OK button for confirmation.
This feature doesn’t delete frequency itself but deletes the list of channels registered
for frequency.
2.2 Delete Channel
• Select the desired channel you want to delete by pressing the RED button.
• Press the ENTER/OK button for confirmation.
2.3 Delete All Channels
At the request window, press the ENTER/OK button to delete all channels and
press the EXIT button to exit.
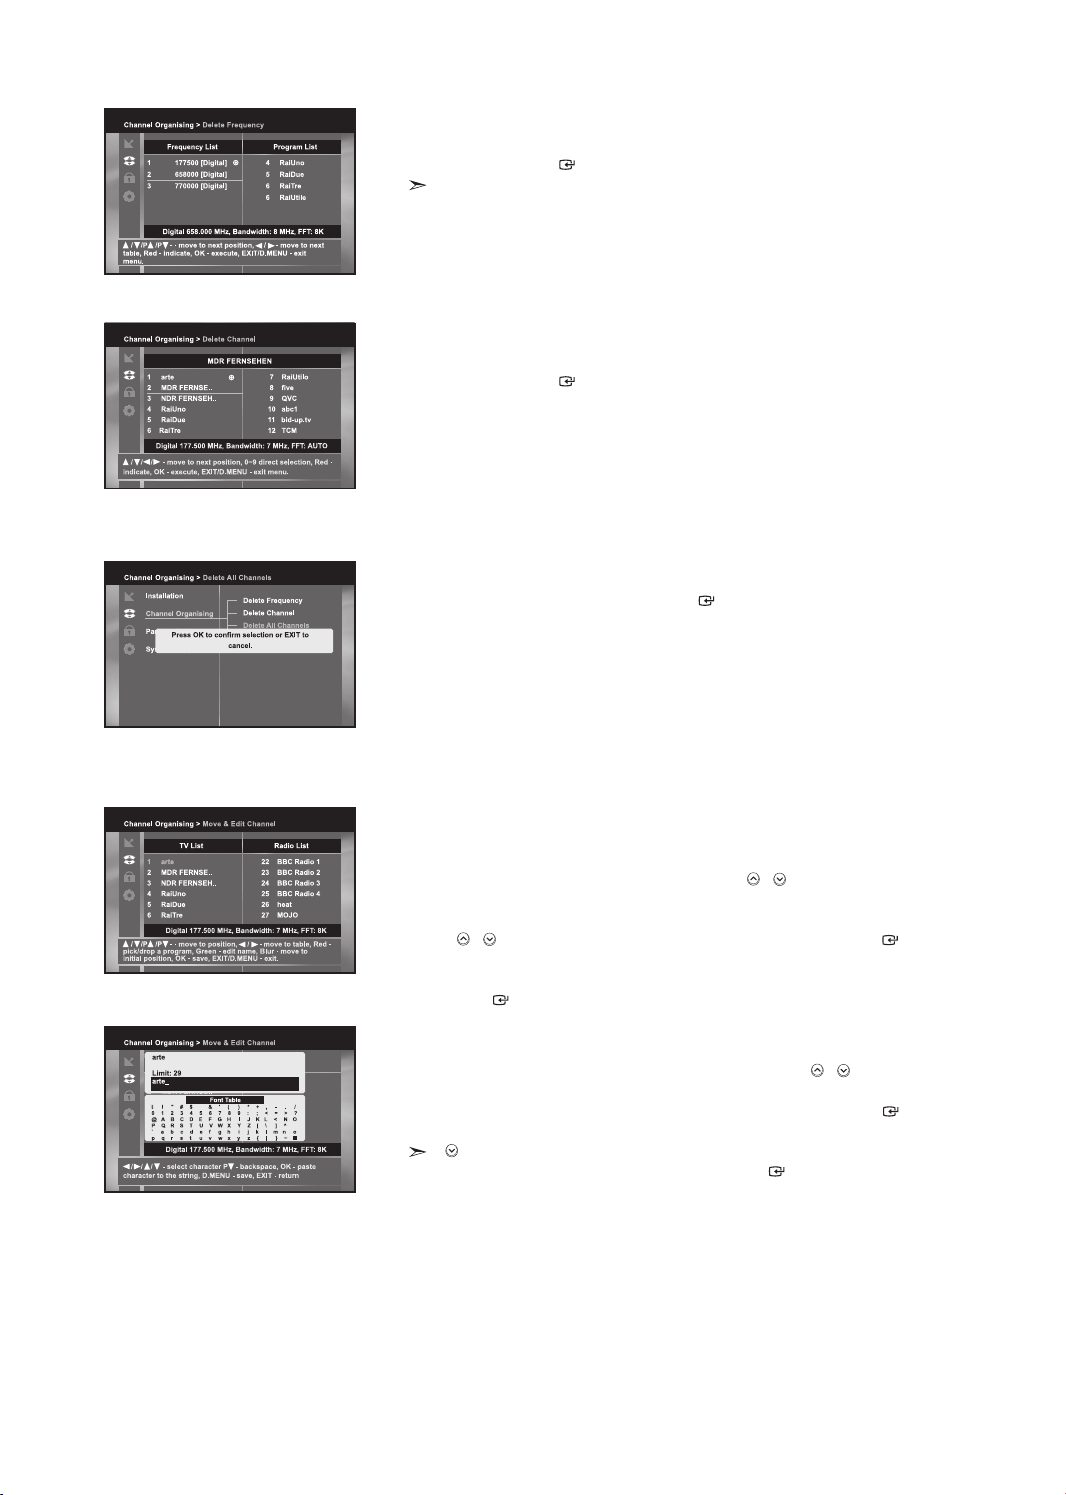
2.4 Move & Edit Channel
To move the Channel Name
• Select the TV/RADIO/Interactive list with 3/4 buttons.
• Select the TV/RADIO/Interactive list with 5/6 or P / buttons.
• Select channel by pressing the RED button.
• Press the 5/6 buttons to change the position of the channel you want,
and P / for moving up or down pages on list. Press the ENTER/OK button
for confirmation.
• If you want to return the channel to the initial position, do not press the
ENTER/OK button but press the BLUE button.
To edit Channel Name
• Select the TV/RADIO/Interactive list with 3/4 buttons.
• Select a channel list to move to other location with 5/6 or P / buttons.
• Press the GREEN button. Font Table will be displayed.
• Select desired character with 3/4,5/6 and then press the ENTER/OK button
to paste character to the string.
P button : Backspace for deleting previous character.
•
Press the D.MENU button and then press the ENTER/OK button to save the set data.
English-24
Page 27

3. Parental Lock
This “Parental Lock” feature sets viewing restrictions and prevents
unauthorized access to your TV through the PIN (Personal Identification
Number), which is a 4-digit number. (The factory preset PIN Code : 0000)
On selecting this menu, you will have three options: to set lock for any desired
channel and to change your PIN Code and to Set Modem Lock.
• Enter the PIN Code.
If you have not entered your own PIN Code then the PIN Code 0000 applies,
which was set at the factory.
3.1 Set Channel Lock
• Select the channel by pressing the 3/4 or 5/6 buttons.
• Select the channel lock by pressing the RED button.
• Press the ENTER/OK button for confirmation.
Whenever you need to view the locked channel, you will have to enter the PIN Code
at the request window. After entering PIN Code to be able to access a parental locked
channel, it will work on all parental locked channels. It means that you can access
all parental locked channels with entering PIN Code on any parental locked channel
successfully.
To cancel the lock:
• Press the RED button again in order to cancel the lock.
3.2 Change PIN Code
To change the PIN Code, select the second option “Change PIN Code”.
This will take you to the following menu:
In this option, you need to enter the current PIN Code at the first cursor, and at the
second cursor enter the desired PIN Code. To confirm, you need to enter the new PIN
Code again.
Please remember the PIN Code should be a 4 digit numerical value.
THE FACTORY PRESET PIN CODE : 0 0 0 0.
If you forget the PIN Code, contact your dealer or service provider.
Once you change password, please do not forget and keep well.
3.3 Set Modem Lock
To block watching the paid-service, e.g. PPV(Pay Per View) service,
select the third option, “Set Modem Lock”.
• You can select "Lock" or "Unlock" in Modem Parental Lock Menu.
• Select "Lock", this will make you block to watch paid-service.
• Select "Unlock", this will make you free to watch paid-service.
Pay Per View TV is available only by using CI after purchasing CAM.
English-25
Page 28

4. System Setup
This option enables you to change the factory preset system settings
as per your requirements.
4.1 Language Selection
The “Language Selection” option allows the user to select the desired
language of the OSD, Soundtrack, Teletext, and EPG.
• To accommodate user from different regions speaking different languages,
OSD languages are available 5 languages. (English, Deutsch, Français,
Italiano, Español and provided currently)
• To select the desired language menu, press the 3/4 buttons to change language
and press the ENTER/OK button.
• The OSD, Soundtrack, Teletext, or EPG language will vary according to
the selected language.
4.2 OSD Setting
You can set the OSD transparency and the display (banner) time.
• Select OSD Transparency level.
The OSD Transparency level from 0 to 100%. Setting is made with the
numeric buttons, 3/4 buttons or P / buttons.
• Set the display duration of the information(banner) box displayed in the screen.
The time ranges from 0.5 to 60.0 seconds. Setting is made with the numeric buttons,
3/4 buttons to be decrement/increment of 0.5sec and P / buttons 1sec.
4.3 Time Setting
Various time modes can be set, such as current local time. The exact local
present time can be adjusted by using the GMT.
• Place the cursor on this sub menu and press the ENTER/OK button.
• Press the 3/4 buttons to change the Local time in Time Zone.
The local time will be changed according to your location.
GMT is referred to the standard time of Greenwich.
English-26
Page 29

4.4 System Information
If you have to contact your service provider or a service center they might ask for
information available from this menu.Place the cursor on this sub menu and press
the ENTER/OK button. The following will be the on-screen display.
4.5 Software Upgrade
You can download and upgrade the system software of the TV through a
specific channel through a specific channel designated by the broadcaster.
The broadcaster will provide you with more information about that.
If you select to download a new software version, all your previous settings,
access code and favourite channels etc. will be erased! Downloading may
take a While ‘During downloading’ don’t turn off the TV.
4.6 MHP Application Control
If you want to change the display mode of MHP application,
please follow the instruction below.
• Select "Auto Start" or "Not Allowed" in Auto Start Control mode
with the 3/4 buttons.
• Select On/Off in show Apllication List mode with the 3/4 buttons.
• Press the GREEN button to edit contents in Phone Number,
User Name and Password.
• Insert value by the Numerical (0~9) and 3/4 buttons in DNS.
• Press ‘ENTER/OK ’ to save "MHP App Control".
Exit without ENTER/OK button makes MHP App Control unchanged.
MHP App: Multimedia Home Platform Application
English-27
Page 30

Installing the CI card
4.7 Modem Setup
If you want to setup Modem, please follow the instruction below.
• Select "Tone" or "Pulse" in Dial Method.
• Select the "Carrier Wait Time" ranged in 1~255 seconds
with the 3/4 buttons or numeric buttons.
• Select the "Carrier Present Time" ranged in 0.1~25.5 seconds
with the 3/4 buttons or numeric buttons.
• Select the "Carrier Loss Time" ranged in 0.1~25.5 seconds
with the 3/4 buttons or numeric buttons.
• Select Blank, 0, # or 9 in "Prefix" by using 3/4 buttons,
to specify your pre-dialing button for phone extension.
• Press ‘ENTER/OK ’ to save Modem configuration if modified.
Exit without ENTER/OK button makes Modem Setup unchanged.
1. Purchase the CI CAM module by visiting your nearest dealer or by phone.
2. Insert the CI card into the CAM in the direction of the arrow until it fits.
3. Insert the CAM with the CI card installed into the common interface slot.
Insert the CAM in the direction of the arrow, right up to the end so that it is parallel with the slot.
4. Check if you can see a picture on a scrambled signal channel.
Teletext Decoder
You can install the CAM anytime whether the TV is ON or OFF.
Most set channels carry " teletext ", pages of written information that
provide information such as:
Television programme times.
News bulletins and Weather forecasts.
Sports results.
Subtitles for the hard of hearing.
The teletext pages are organized according to six categories:
Part
A
B
C
D
E
F
Contents
Selected page number.
Broadcasting station identity.
Current page number or search status.
Date and time.
Text.
Status information.
English-28
Page 31

Displaying the Teletext Information
You can display teletext information at any time, but signal reception must be good.
Otherwise:
Information may be missing.
Some pages may not be displayed.
To activate the teletext mode and display the contents page:
1. Using the
P ( ) or P ( ) button, select the channel providing the
teletext service.
2. Press the
TTX/MIX ( ) button to activate the teletext mode.
The contents page is displayed. It can be redisplayed at any time by pressing the
MENU ( ) button.
3. Press the TTX/MIX ( ) button again.
The actual broadcast will be displayed with “Teletext”, “Double”, and “Mix” in order
on the screen.
4. Press the TV/DTV button to exit from the Text display.
If any broken character appears while Text is being viewed, make sure that the Text language is
identical with the language in the "Setup" menu mode. If both languages are different, select the
same language with the Text language on the "Setup" menu.
Selecting a Specific Teletext Page
Press the number buttons on the remote control to enter the page number directly:
1.
Enter the three-digit page number listed in the contents by pressing the
corresponding numeric buttons.
2.
If the selected page is linked with several secondary pages, the secondary pages
are displayed in sequence. To freeze the display on a given page,
press the PIP ( ) . Press the PIP ( ) button again to resume.
3. Using the various display options:
To display...
Both teletext information and the normal broadcast
Hidden text (answers to quiz games, for example)
The normal screen
A secondary page, by entering its 4-digit number
The next page
The previous page
Double-size letters in the:
Upper half of the screen
Lower half of the screen
Normal screen
Press the...
TTX/MIX ( )
INFO ( )
INFO ( )
PRE-CH ( )
P ( )
P ( )
DUAL I-II
Once
Twice
Three times
( )
English-29
Page 32

Using Fastext to Select a Teletext Page
The various topics included in the teletext pages are colour-coded, and can be
selected by pressing the coloured buttons on the remote control.
1. Display the teletext contents page by pressing the TTX/MIX ( ) button.
2. Press the coloured button corresponding to the topic that you wish to select (The
available topics are listed on the status information line).
3. Press the Red button to display the previous page.
Press the Green button to display the next page.
4. Press the TV/DTV button to exit from the Text display.
Setting up Your PC Software (Based on Windows XP)
The Windows display-settings for a typical computer are shown below. The actual screens on your PC may be
different depending upon your particular version of Windows and your particular video card. Even if your actual
screens look different, the same, basic set-up information will apply in almost all cases.
(If not, contact your computer manufacturer or Samsung Dealer.)
1. First, click on "Control Panel" on the Windows start menu.
2. When the control panel window appears, click on "Appearance and Themes" and a display
dialog-box will appear.
3. When the control panel window appears, click on "Display" and a display dialog-box will appear.
4. Navigate to the "Settings" tab on the display dialog-box.
The correct size setting (resolution): Optimum- 1360 X 768
If a vertical-frequency option exists on your display settings dialog box, the correct value is
"60" or "60 Hz". Otherwise, just click "OK" and exit the dialog box.
Display Modes
Both screen position and size will vary depending on the type of PC monitor and its resolution.
The resolutions in the table are recommended. (All resolutions between the supported limits are supported)
Mode
IBM
VESA
The interface mode is not supported.
The set might operate abnormally if a non-standard video format is selected.
DVI does not support PC function.
Separate and Composite modes are supported. SOG is not supported.
Resolution
640 x 480
720 x 400
640 x 480
640 x 480
800 x 600
800 x 600
800 x 600
1024 x 768
1024 x 768
1024 x 768
1360 x 768
Horizontal
Frequency (kHz)
31.469
31.469
37.861
37.500
37.879
48.077
46.875
48.364
56.476
60.023
47.712
Frequency (Hz)
English-30
Vertical
59.940
70.087
72.809
75.000
60.317
72.188
75.000
60.000
70.069
75.029
60.015
Pixel Clock
Frequency (MHz)
25.175
28.322
31.500
31.500
40.000
50.000
49.500
65.000
75.000
78.750
85.800
Sync Polarity
(H/V)
- / -
- / +
- / -
- / + /+
+ /+
+ /+
- / -
- / + /+
+ /+
Page 33

Setting the PC
Coarse and Fine Tuning of the Image (Image Lock):
The purpose of picture quality adjustment is to remove or reduce picture noise.
If the noise is not removed by Fine-tuning alone, then adjust the frequency as best
as possible (coarse) and Fine-tune again. After the noise has been reduced, re-adjust
the picture so that it is aligned on the center of screen.
1. Preset: Press the SOURCE button to select PC mode.
2. Press the MENU button to display the menu.
Press the 5 or 6 button to select "Setup", then press the ENTER/OK button.
3. Press the 5 or 6 button to select "PC", then press the ENTER/OK button.
4. Press the ENTER/OK button to select "Image Lock".
5.
Press the 5 or 6 button to select "Coarse" or "Fine", then press the ENTER/OK button.
6. Press the 3 or 4 button to adjust the screen quality.
Press the ENTER/OK button.
7. Press the EXIT button to exit.
Changing the Image Position (Position):
Adjust the PC’s screen positioning if it does not fit the TV screen.
1. Follow the "Coarse and Fine Tuning of the Image (Image Lock)"
instructions number 1 to 3.
2. Press the 5 or 6 button to select "Position", then press the ENTER/OK button.
3. Press the 5 or 6 button to adjusting the Vertical-Position.
Press the 3 or 4 button to adjust the Horizontal-Position.
Press the ENTER/OK button.
4. Press the EXIT button to exit.
Adjusting the PC Screen Automatically (Auto Adjustment):
Auto adjustment allows the PC screen of set to self-adjust to the incoming PC video
signal. The values of fine, coarse and position are adjusted automatically.
1. Follow the "Coarse and Fine Tuning of the Image (Image Lock)"
instructions number 1 to 3.
2.
Press the 5 or 6 button to select "Auto Adjustment", then press the ENTER/OK button.
3. Press the EXIT button to exit.
Initializing the Image Settings (Image Reset):
You can replace all image settings with the factory default values.
1. Follow the "Coarse and Fine Tuning of the Image (Image Lock)"
instructions number 1 to 3.
2.
Press the 5 or 6 button to select "Image Reset", then press the ENTER/OK button.
3. Press the EXIT button to exit.
English-31
Page 34

Using the Anti-Theft Kensington Lock
The Kensington lock is a device used to physically fix the system when using it in a public place.
The locking device has to be purchased separately. The appearance and locking method may differ from the illustration
depending on the manufacturer. Please refer to the manual provided with the Kensington lock for proper use.
1. Insert the locking device into the
Cable
Figure 2
Figure 1
<Optional>
The place of the Kensington Lock may be different depending on its model.
Kensington slot on the LCD TV
(Figure 1), and turn it in the locking
direction (Figure 2).
2. Connect the Kensington lock cable.
3. Fix the Kensington lock to a desk
or a heavy stationary object.
Troubleshooting: Before Contacting Service Personnel
No sound or picture
Normal picture but no sound
No picture or black and white
picture
Sound and picture interference
Blurred or snowy picture,
distorted sound
Remote control malfunctions
"Check signal cable."
message is displayed.
On PC mode, "Not Supported
Mode." message is displayed.
The TFT LCD panel uses a panel consisting of sub pixels (3,133,440) which require sophisticated technology to produce.
However, there may be few bright or dark pixels on the screen. These pixels will have no impact on the performance of the product.
Check that the mains lead has been connected to a wall socket.
Check that you have pressed the buttons on the front of the set.
Check the picture contrast and brightness settings.
Check the volume.
Check the volume.
Check whether the MUTE button has been pressed on the remote control.
Check if "Internal Mute" is off
Adjust the colour settings.
Check that the broadcast system selected is correct.
Try to identify the electrical appliance that is affecting the set and move it further away.
Plug your set into a different mains socket.
Check the direction, location and connections of your aerial.
This interference is often due to the use of an indoor aerial.
Replace the remote control batteries.
Clean the upper edge of the remote control (transmission window).
Check the battery terminals.
Check that the signal cable is firmly connected to the PC or video sources.
Check that the PC or video sources are turned on.
Check the maximum resolution and the frequency of the video adaptor.
Compare these values with the data in the Display Modes.
English-32
Page 35

Technical and Environmental Specifications
Model Name
Screen Size (Diagonal)
Power Supply
Power Consumption
PC Resolution
Sound
Output
Dimension (WxDxH)
Body
With stand
Weight
With stand
Environmental Considerations
Operating Temperature
Operating Humidity
Storage Temperature
Storage Humidity
Stand Swivel (Left / Right)
LE32R7
32 inch
AC220-240V 50 Hz
152 W
1360 x 768 @ 60 Hz
10 W X 2
800.0 x 80.0 x 548.5 mm
800.0 x 252.0 x 603.0 mm
14.8 kg
10 °C to 40 °C (50 °F to 104 °F)
10 % to 80 %, non-condensing
-20 °C to 45 °C (-4 °F to 113 °F)
5 % to 95 %, non-condensing
LE37R7
37 inch
AC220-240V 50 Hz
170 W
1360 x 768 @ 60 Hz
10 W X 2
923.0 x 87.0 x 618.5 mm
923.0 x 326.0 x 676.5 mm
22.8 kg
10 °C to 40 °C (50 °F to 104 °F)
10 % to 80 %, non-condensing
-20 °C to 45 °C (-4 °F to 113 °F)
5 % to 95 %, non-condensing
LE32R7 / LE37R7 / LE40R7
LE40R7
40 inch
AC220-240V 50 Hz
190 W
1360 x 768 @ 60 Hz
10 W X 2
991.5 x 87.0 x 658.5 mm
991.5 x 326.0 x 713.0 mm
22.8 kg
10 °C to 40 °C (50 °F to 104 °F)
10 % to 80 %, non-condensing
-20 °C to 45 °C (-4 °F to 113 °F)
5 % to 95 %, non-condensing
Yes
-20˚ ~ 20˚
Design and specifications are subject to change without prior notice.
English-33
Page 36

This page is intentionally
left blank.
Page 37

Sommario
COLLEGAMENTO E PREPARAZIONE DEL TELEVISORE
Elenco dei componenti ........................................................... 2
Installazione del supporto ....................................................... 2
Installazione del Kit di montaggio a parete ....................... 2
Vista del pannello di controllo ................................................. 3
Vista del pannello dei collegamenti ........................................ 4
Illustrazione del telecomando ................................................. 6
Inserimento delle batterie nel telecomando ............................ 6
Accensione e spegnimento .................................................... 7
Impostare il televisore in modalità standby ............................ 7
Plug & Play ............................................................................. 7
IMPOSTAZIONE DEI CANALI
Memorizzazione automatica dei canali .................................. 8
Memorizzazione manuale dei canali ...................................... 8
Impostazione del Gestore Canale .......................................... 9
Attivazione di Blocco canali .............................................. 9
Ordinamento dei canali memorizzati ...................................... 10
Assegnazione dei nomi ai canali ............................................ 10
Ottimizzazione della sintonia dei canali .................................. 10
LNA (Low Noise Amplifier) ...................................................... 11
IMPOSTAZIONE DELL’IMMAGINE
Modifica dello standard dell’immagine ................................... 11
Regolazione dell’immagine personalizzata ............................ 11
Modifica della tonalità di colore .............................................. 11
Azzeramento delle impostazioni di visualizzazione
dell’immagine ai valori preimpostati in fabbrica ...................... 12
Selezione delle dimensioni dell’immagine .............................. 12
Fermo immagine corrente ...................................................... 12
Uso della funzione Digital NR ................................................. 12
DNIe Demo (Digital Natural Image engine) ............................ 13
Visualizzazione dell’immagine nell’immagine (PIP) ................ 13
Impostazioni PIP ..................................................................... 14
IMPOSTAZIONE DELL’AUDIO
Modifica dello standard audio ........................................... 14
Regolazione delle impostazioni dell’audio ........................ 14
Collegamento delle cuffie di ascolto ................................. 14
Impostazione di TruSurround XT (SRS TSXT) ................. 15
Regolazione automatica del volume ................................. 15
Selezione di Internal Mute (Mute interno) ......................... 15
Ascolto dell’audio dell’immagine secondaria .................... 15
Azzeramento delle impostazioni audio ai valori
preimpostati in fabbrica ..................................................... 16
IMPOSTAZIONE DELL’ORA
Configurazione e visualizzazione dell’ora attuale ............. 16
Impostazione del timer ...................................................... 16
Spegnimento e accensione automatica
della televisione ................................................................. 16
IMPOSTAZIONE DI ALTRE FUNZIONI
Scelta della lingua ............................................................. 17
Uso di Modalità gioco ........................................................ 17
Impostazione della modalità Pagina blu /
Selezione della Melodia ................................................... 17
Utilizzo della funzione Risparmio energia ......................... 18
Selezione della sorgente ................................................... 18
Modifica dei nomi delle sorgenti di ingresso ..................... 18
USO DELLA FUNZIONE DTV
Anteprima DTV Menu System ................................................ 19
Funzioni di base ..................................................................... 20
1. Schermo ............................................................................. 20
2. Regolazione del volume ..................................................... 20
3. Selezione informazioni audio ............................................. 20
4. Selezione informazioni video .............................................. 20
5 Elenco servizi ...................................................................... 21
6. Informazioni sul programma ............................................... 21
Funzionamento del Menu DTV ............................................... 22
Menu principale ...................................................................... 22
1. Installazione ........................................................................ 22
1.1 Seleziona paese ............................................................... 22
1.2 Auto scansione ................................................................. 22
1.3 Scansione manuale .......................................................... 23
1.4 Impostazione di fabbrica .................................................. 23
2. Organizzazione canale ....................................................... 23
2.1 Cancella frequenza ........................................................... 24
2.2 Cancella Canale ............................................................... 24
2.3 Cancella tutti i Canali ........................................................ 24
2.4 Sposta e modifica canale ................................................. 24
3. Chiave elettronica ............................................................... 25
3.1 Imposta blocco canale ...................................................... 25
3.2 Modifica codice PIN .......................................................... 25
3.3 Impostare blocco modem ................................................. 25
4. Impostazioni di sistema ...................................................... 26
4.1 Selezione lingua ............................................................... 26
4.2 Impostazioni OSD ............................................................. 26
4.3 Impostazioni ora ............................................................... 26
4.4 Informazioni di sistema ..................................................... 27
4.5 Aggiornamento software ................................................... 27
4.6 Controllo appl. MHP ......................................................... 27
4.7 Impostazione modem ....................................................... 28
Installazione del scheda IC .................................................... 28
USO DELLA FUNZIONE TELETEXT
Teletext Decoder ............................................................... 28
Visualizzazione delle informazioni del Televideo .............. 29
Selezione di una pagina Teletext specifica ....................... 29
Utilizzo della modalità Fastext per selezionare
una pagina Teletext ........................................................... 30
IMPOSTAZIONE DEL PC
Configurazione del software per PC
(basato su Windows XP) ................................................... 30
Modalità di visualizzazione................................................ 30
Selezione del PC............................................................... 31
CONSIGLI PER L’USO
Specifiche tecniche e ambientali ....................................... 32
Risoluzione dei problemi:
Prima di contattare l’assistenza ........................................ 32
Specifiche tecniche e ambientali ....................................... 33
Diagrammi a blocchi.......................................................... 34
Questo apparecchio è fabbricato in conformità al D.M.28.08.95 n.548 ed in
Questo apparecchio è fabbricato nella U.E. in conformità al D.M.28.08.95 n.548
Simboli Premere Importante Nota Tasto
Italiano-1
particolare a quanto specificato nell Art.2, comma 1.
Art.2, comma 1 ed al D.M.26.03.92 Art.1
Italiano
One-Touch
Page 38

Elenco dei componenti
Controllare che nella confezione del TV LCD siano contenuti i seguenti componenti.
Se qualsiasi componente risulta mancante, contattare il rivenditore.
M4 X L16
Telecomando e
batterie (2 tipo AAA)
Manuale dell’utente Scheda di garanzia
Scheda di garanzia/Scheda rete di assistenza/Guida alla sicurezza/Schede di registrazione (non disponibile in tutti i paesi).
In base al modello, il supporto e la relativa vite potrebbero non essere inclusi.
Cavo di
alimentazione
Coprifondo 4 viti per il supporto Supporto Panno per la pulizia
Scheda rete di assistenza
Guida alla sicurezza Schede di registrazione
Installazione del supporto
< 2 > < 3 >
1. Posizionare la TV rivolta verso il basso su un panno morbido o un cuscino su una tavola.
2. Inserire il supporto nel foro sul fondo del televisore.
3. Inserire la vite nel foro indicato e serrarla.
Il supporto viene installato per modelli con schermi da 40 pollici e oltre.
Installazione del Kit di montaggio a parete
Gli articoli del kit di montaggio a parete
(venduti separatamente) consentono di montare il televisore
alla parete. Per informazioni dettagliate sull’installazione del kit
di montaggio a parete, consultare le istruzioni fornite insieme
agli articoli del kit. Contattare un tecnico per richiedere
assistenza quando si monta la staffa a parete.
Samsung Electronics non può essere ritenuta responsabile
per qualsiasi danno al prodotto, lesioni personali o altri
problemi causati da una installazione autonoma del televisore
da parte dell’utente.
Rimuovere il supporto, coprire il foro sul fondo con un
tappo e serrare con due viti.
Italiano-2
Page 39

Vista del pannello di controllo
La forma e il colore del prodotto possono variare in base al modello.
SOURCE
Passa tra tutte le sorgenti di ingresso disponibili
(TV, Est.1, Est.2, AV, S-Video, Comp., PC, HDMI, DTV).
Nel menu a video, utilizzare questo tasto così come si usa
il tasto
ENTER/OK del telecomando.
MENU
Premere per visualizzare il menu su schermo con le
funzioni del televisore.
In modalità DTV, viene visualizzato il menu DTV.
Premere per aumentare o diminuire il volume.
Nel menu a video, utilizzare i tasti così come si
usano i tasti 3 e 4 del telecomando.
Premere per cambiare canale.
Nel menu a video, utilizzare i tasti
usano i tasti 5 e 6 del telecomando.
(Senza il telecomando, si può accendere il televisore
utilizzando i tasti dei canale.)
Altoparlanti
Indicatore alimentazione
Lampeggia e si spegne quando l’alimentazione è attivata e
si accende in modalità stand-by.
Premere per accendere e spegnere il televisore.
Sensore telecomando
Puntare il telecomando verso questo punto del televisore.
(Alimentazione)
così come si
Italiano-3
Page 40

Vista del pannello dei collegamenti
[Jack pannello laterale][Jack pannello posteriore]
Ingresso alimentazione
Quando si collega un dispositivo esterno al televisore, assicurarsi che l’alimentazione dell’unità sia scollegata.
Quando si collega un terminale esterno, far corrispondere il colore del terminale di collegamento a quello del cavo.
Collegamento di un’antenna o di una rete televisiva via cavo
Per vedere correttamente i canale televisivi, il monitor TV deve ricevere un segnale da una delle seguenti fonti:
- Un’antenna all’esterno / Una rete televisiva via cavo / Una rete satellitare
Collegamento di HDMI/DVI
- Supporta le connessioni tra periferiche AV con connessione HDMI (set top box, lettori DVD, ricevitori AV e televisori digitali).
- Non è necessario un ulteriore collegamento audio per la connessione HDMI-HDMI.
Che cosa significa HDMI?
- “High Definition Multimedia interface” permette la trasmissione di dati video digitali ad alta definizione e audio digitale a
canali multipli (5. 1 canali).
- Il terminale HDMI/DVI supporta il collegamento a una periferica estesa con un cavo appropriato (non fornito).
La differenza tra HDMI e DVI è che il dispositivo HDMI è di dimensioni inferiori, ha la funzione di codifica HDCP
(High Bandwidth Digital Copy Protection) installata, e supporta audio digitale a canali multipli.
Utilizzare il cavo DVI-HDMI o una prolunga DVI-HDMI per il collegamento e il terminale “R - AUDIO – L” su DVI per l’uscita audio.
impostato a una modalità di uscita video compatibile come mostrato nella tabella sottostante. In caso contrario, possono verificarsi distorsioni,
interruzioni o assenza di immagine.
(In caso contrario verrà visualizzata una schermata vuota)
Quando si collega questo prodotto attraverso HDMI o DVI a un Set Top Box, un lettore DVD, una console di gioco ecc., verificare che sia stato
Modalità supportate per DVI o HDMI
50 Hz
60 Hz
Comp.
Non tentare di collegare il connettore HDMI/DVI a un PC o a una scheda grafica Laptop.
480i
X
X
O
480p
O
O
O
576i
X
X
O
576p
O
X
O
720p
O
O
O
1080i
O
O
O
Italiano-4
Page 41

Collegamento di un Set-Top Box, VCR o DVD
-
Connettore
EXT 1
EXT 2
Collegamento di dispositivi A/V esterni
- Collegare il cavo RCA o S-VIDEO a un dispositivo A/V esterno appropriato quale un videoregistratore, un DVD o una videocamera.
- Collegare i cavi audio RCA a “R - AUDIO - L” sul retro dell’apparecchiatura e i terminali ai corrispondenti connettori di uscita
audio sul dispositivo A/V.
- Le cuffie possono essere collegate all’apposita uscita (
uscita agli altoparlanti incorporati viene disabilitato.
ASSISTENZA
- Collegamento di servizio per tecnici dell’assistenza qualificati.
Collegamento AUDIO
- Collegare i cavi audio RCA a “R - AUDIO – L” sulla parte posteriore dell’apparecchiatura e le altre estremità ai connettori audio
corrispondenti dell’amplificatore o dell’impianto DVD Home Theater.
Collegamento di un computer
- Collegare il cavo D- Sub (opzionale) a “PC (PC IN)” sul retro dell’apparecchiatura e il terminale alla scheda video del computer.
- Collegare il cavo audio stereo (opzionale) a “AUDIO (PC IN)” sul retro dell’apparecchiatura e il terminale a “Audio Out” sulla
scheda audio del computer.
Collegamento dei componenti (DTV/DVD)
- Collegare i cavi video component (opzionali) al connettore del componente (“PR”, “PB”, “Y”) sul retro dell’apparecchiatura e i terminali ai
connettori di uscita video component corrispondenti del DTV o DVD.
- Se si desidera collegare il Set-Top Box e il DTV (o DVD), effettuare il collegamento tra i due dispositivi, quindi collegare il DTV (o DVD) al
rispettivo connettore (“P
- I connettori Y, P
- Collegare i cavi audio RCA (opzionali) a “R - AUDIO - L” sul retro dell’apparecchiatura e i terminali ai corrispondenti
connettori di uscita audio sul DTV o DVD.
- Questo TV LCD visualizza la risoluzione dell’immagine ottimale in modalità 720p.
- Questo TV LCD visualizza la risoluzione dell’immagine massima in modalità 1080i.
Blocco Kensington
Il blocco Kensington (opzionale) è un dispositivo utilizzato per assicurare fisicamente il sistema quando viene utilizzato in un luogo pubblico.
-
- Se si desidera utilizzare un dispositivo di blocco, contattare il punto vendita in cui si è acquistato il prodotto.
- La posizione del dispositivo di blocco ‘Kensington Lock’ può variare a seconda del modello.
DIGITAL AUDIO OUT (OTTICA)
- Collegare a un Digital Audio Component.
Collegamento della SCHEDA IC (interfaccia comune)
Pannello posteriore TV
Porta di servizio
- Collegamento di servizio per tecnici dell’assistenza qualificati.
Porta per connessione linea telefonica
Video Audio (L/R) RGB
R e PB dei componenti (DTV o DVD) sono talvolta etichettati con Y, B-Y e R-Y o Y, Cb e Cr.
Ingresso
R”, “PB”, “Y”) sull’apparecchiatura.
CI CARD
Uscita
Video + Audio L/R)
Solo l’uscita TV o DTV è disponibile.
Uscita da scegliere.
) situata sul retro del monitor. Quando le cuffie sono collegate, l’audio in
Inserire la
scheda come
indicato
Ingressi o uscite di dispositivi esterni quali videoregistratori,
DVD, periferiche di gioco o lettori di dischi video.
- Se per alcuni canali non si inserisce la “CI CARD”
(scheda IC), il messaggio “Scrambled Signal”
(Segnale criptato) viene visualizzato sullo schermo.
- Le informazioni di pairing che contengono un numero
telefonico, l’ID della scheda IC, l’ID host e altri dati verranno
visualizzate entro 2~3 minuti. Se viene visualizzato un
messaggio di errore, contattare il service provider.
- Quando la configurazione delle informazioni relative al canale
è stata completata, viene visualizzato il messaggio “Updating
Completed” (Completato aggiornamento), a indicare che
l’elenco dei canali è stato aggiornato.
E’ necessario richiedere una scheda IC al service provider locale.
Estrarre con delicatezza la scheda IC tirandola con le dita; fare
attenzione a non farla cadere poiché potrebbe subire danni.
Italiano-5
Page 42

Illustrazione del telecomando
Seleziona l’apparecchio di destinazione da
controllare con il telecomando Samsung
(TV, DVD, STB, CABLE, VCR)
Pulsante di standby del televisore
Tasti numerici per l’accesso diretto ai
canale
Selezione dei canali memorizzati con
una/due cifre
Visualizza “Gestore Canale” sullo schermo
Seleziona direttamente il televisore e la
modalità DTV
Funzioni videoregistratore/DVD:
Riavvolgimento, Arresto, Riproduci/Pausa,
Avanzamento rapido
Aumento del volume
Diminuzione del volume
Disattivazione temporanea audio
Visualizzazione menu e conferma modifica
Visualizzazione Electronic Program Guide (EPG)
PIP (Immagine nell’immagine) On/Off
(attivato/disattivato)
Selezione degli effetti audio
Previous channel (Canale precedente) /
Questo tasto viene utilizzato
nell’applicazione MHP e per modificare il
canale precedente. Questo tasto viene
inoltre utilizzato per tornare alla pagina
precedente in D.MENU.
Controlla 5 diversi apparecchi -
TV, DVD, STB, CABLE, VCR
Selezione delle fonti d’ingresso disponibili
Canale precedente
Le prestazioni del telecomando possono essere influenzate dalla
presenza di un’eccessiva quantità di luce.
Questo speciale telecomando, progettato per aiutare chi ha problemi di vista, presenta
punti in braille sui tasti Power, Channel e Volume.
.
Visualizzazione menu DTV
Passa dai canali TV a quelli Radio.
P : Canale successivo
P : Canale precedente
Esci dal menu a video
Controllo del cursore nel menu
Informazioni sulla trasmissione corrente
Visualizzazione sottotitoli digitali
Questo tasto consente di accedere all’MHP
Application List (Elenco applicazioni MHP).
Ferom immagine
Selezionare l’elenco soundtrack/videotrack
(tracce audio/video) per il servizio corrente.
Funzioni del Televideo
Chiusura della visualizzazione
Indice Televideo
Blocco del Televideo
Selezione della modalità Televideo
Selezione dimensioni Televideo
Selezione modalità Televideo (LIST/FLOF)
Sottopagina Televideo
P : Pagina successiva Televideo
P : Pagina precedente Televideo
Annulla Televideo
Mostra Televideo
In alternativa, selezionare Teletext,
Double o Mix.
Selezione argomento Fastext
Memorizzazione Televideo
Televideo
Inserimento delle batterie nel telecomando
1. Sollevare il coperchio sul retro del telecomando come mostrato in figura.
2. Installare due batterie AAA.
Controllare che le estremità “+” e “-” delle batterie corrispondano allo schema all’interno dello scomparto.
3. Rimettere il coperchio.
Se si prevede di non usare il telecomando per un lungo periodo di tempo, togliere le batterie e conservarle in
un luogo fresco e asciutto. Il telecomando può essere utilizzato a una distanza di circa 7 metri dal televisore.
(Con un uso normale del televisore, le batterie durano circa un anno.)
Se il telecomando non funziona, effettuare il seguente controllo:
1. La TV è accesa?
2. I poli + e - delle batterie sono correttamente orientati?
3. Le batterie sono cariche?
4. Si è verificata una interruzione di corrente o il cavo di alimentazione è scollegato?
5. Il cavo di alimentazione è scollegato?
Italiano-6
Page 43

Accensione e spegnimento
Il conduttore isolato di corrente è collegato al retro del monitor.
1. Inserire il conduttore isolato di corrente nell’apposita presa.
L’indicatore di standby sul pannello anteriore del dispositivo si accende.
2. Premere il pulsante sul pannello anteriore del dispositivo.
E’ possibile accendere il televisore anche premendo il tasto
Viene selezionato automaticamente l’ultimo programma che si stava vedendo.
3.
Premere i tasti numerici (0~9) o il tasto canale successivo/precedente ( / ) sul telecomando, oppure i tasti a destra del dispositivo.
Quando si accende il televisore per la prima volta, viene chiesto di scegliere la lingua in cui devono essere visualizzati menu.
4. Per spegnere il televisore, premere nuovamente
POWER
POWER
.
o il tasto TV/DTV sul telecomando.
Impostare il televisore in modalità standby
Il monitor TV può essere posizionato in modalità standby per ridurre il consumo di energia. La modalità standby può
essere utile quando si desidera interrompere temporaneamente la visualizzazione (ad esempio durante un pasto).
1. Premere il tasto POWER sul telecomando.
Lo schermo si spegne e si accende l’indicatore di standby rosso davanti allo schermo.
2.
Per riaccendere il televisore, è sufficiente premere nuovamente POWER , i tasti numerici (0~9), il tasto TV/DTV o il tasto su/giù dei canali ( / ) .
Non lasciare il monitor TV in modalità standby per lunghi periodi di tempo (ad esempio quando si è in vacanza).
È opportuno scollegare il monitor dalla presa di corrente elettrica e dal cavo dell’antenna esterna.
Plug & Play
Quando si accende il televisore per la prima volta, diverse impostazioni di base vengono
eseguite automaticamente e in sequenza. Sono disponibili le seguenti impostazioni.
1. Premere il tasto POWER sul telecomando.
Viene visualizzato il messaggio “
2. Selezionare la lingua desiderata premendo il pulsante o .
Premere il tasto
ENTER/OK
3. Viene visualizzato il messaggio “Controlla ingresso ant.” con “OK”
selezionato. Premere il tasto
Verificare che il cavo dell’antenna sia collegato correttamente.
4. Selezionare la Nazione premendo il tasto o .
Premere il tasto
ENTER/OK
5. Viene visualizzato il menu “Memorizzazione automatica” con “Avvio” selezionato.
Premere il tasto
La ricerca dei canali inizia e termina in modo automatico.
canali disponibili, viene visualizzato il menu “Imposta Ora”.
Premere il tasto ENTER/OK in qualsiasi momento per interrompere il processo di memorizzazione.
6. Premere il tasto
ENTER/OK
ENTER/OK
Selezionare “Ora” e i “Minuto” premendo il pulsante
Impostare “Ora” e i “Minuto” premendo il pulsante
È possibile impostare l’ora e i minuti anche premendo i tasti numerici del telecomando.
7. Premere il tasto
ENTER/OK
Viene visualizzato il menu di ricerca canali DTV e il canale DTV viene aggiornato automaticamente.
Se il canale DTV viene aggiornato, l’opzione Source (Sorgente) nell’elenco sorgenti del
menu Input viene cambiato automaticamente in DTV.
Per informazioni dettagliate sull’aggiornamento del canale DTV, consultare pagina 27 di questo manuale.
Lingua: Selezionare la lingua.
Nazione: Selezionare la nazione.
Memorizzazione automatica: Ricerca automaticamente i canali memorizzati disponibili localmente.
Imposta Ora: Imposta l’ora corrente dell’orologio del televisore.
Per reimpostare questa funzione…
1. Premere il tasto MENU per visualizzare il menu.
Premere il pulsante o per selezionare “Impostazione” e premere
2.
Premere nuovamente il tasto
3. Viene visualizzato il messaggio “Avvio Plug & Play”
Start Plug & Play.
per confermare la scelta.
ENTER/OK
.
per confermare la scelta.
.
.
per confermare la scelta.
ENTER/OK
per selezionare la funzione “Plug & Play”.
” con “OK” selezionato.
Dopo aver memorizzato tutti i
o
.
o
.
ENTER/OK
.
Italiano-7
Page 44

- Memorizzazione automatica dei canali
- Memorizzazione manuale dei canali
Memorizzazione automatica dei canali
Si può effettuare una ricerca degli intervalli di frequenze disponibili (la disponibilità dipende dalla
nazione). I numeri assegnati automaticamente ai programmi possono non corrispondere a quelli dei programmi reali
o desiderati. È comunque possibile ordinare manualmente i numeri e cancellare i canali che non si desidera vedere.
1. Premere il tasto MENU per visualizzare il menu.
Premere il pulsante 5 o 6 per selezionare “Canale” e premere
2. Premere il tasto
ENTER/OK
per selezionare l’opzione “Nazione”.
ENTER/OK
.
3. Selezionare la Nazione premendo il tasto 5 o 6.
Premere il tasto
4. Premere il pulsante 5 o 6 per selezionare “Memorizzazione automatica” e premere
5. Premere il tasto
ENTER/OK
ENTER/OK
per confermare la scelta.
.
ENTER/OK
.
Il televisore inizierà a memorizzare tutti i canali disponibili.
Premere il tasto
ENTER/OK in qualsiasi momento per interrompere la memorizzazione e ritornare al menu “Canale”.
6. Una volta memorizzati tutti i canali disponibili, verrà visualizzato il menu “Ordina”.
Memorizzazione manuale dei canali
E’ possibile memorizzare un massimo di 100 canali, compresi quelli ricevuti via cavo.
Durante la memorizzazione manuale dei canali si può scegliere:
Se memorizzare ogni canale trovato.
Il numero di programma con il quale si intende identificare ogni canale memorizzato.
1. Premere il tasto MENU per visualizzare il menu.
Premere il pulsante 5 o 6 per selezionare “Canale” e premere
2. Premere il pulsante 5 o 6 per selezionare “Memorizzazione manuale” e premere
3. Premere il tasto
ENTER/OK
per selezionare l’opzione “Programma”.
ENTER/OK
.
ENTER/OK
.
4. Per assegnare il numero di programma a un canale, cercare il numero corretto premendo il tasto 5 o 6
e poi premere il tasto
È anche possibile impostare il numero del programma premendo i pulsanti numerici del telecomando.
5. Premere il pulsante 5 o 6 per selezionare “Sistema colore” e premere
6.
Per selezionare i colori standard desiderati, premere il pulsante 5 o 6 più volte, quindi premere
7. Premere il pulsante 5 o 6 per selezionare “Sistema audio” e premere
8.
Per selezionare lo standard audio desiderato, premere il pulsante 5 o 6 più volte, quindi premere
Se l’audio non c’è o è distorto, riselezionare la norma audio desiderata.
9.
Se si conosce il numero del canale da memorizzare, premere il tasto 5 o 6 per selezionare “Canale”. Premere il tasto
ENTER/OK
.
ENTER/OK
ENTER/OK
.
ENTER/OK
.
.
ENTER/OK
.
ENTER/OK . Selezionare C (canale via antenna) o S (canale via cavo) premendo il tasto 5 o 6. Premere il pulsante4 per
selezionare il canale. Selezionare il numero richiesto premendo il tasto 5 o 6. Premere il tasto ENTER/OK .
Modalità con canale: P (Modalità programma), C (Modalità via antenna), S (Modalità canale via cavo)
È possibile impostare il canale anche premendo i tasti numerici sul telecomando.
10.
Se non si conoscono i numeri dei canali, premere il tasto 5 o 6 per selezionare “Ricerca”. Premere il tasto ENTER/OK .
Eseguire la ricerca premendo il tasto 5 o 6 , quindi premere il tasto
ENTER/OK
.
11. Premere il tasto 5 o 6 per selezionare l’opzione “Memorizza”.
Premere il tasto
ENTER/OK
per selezionare l’opzione “OK”.
12. Ripetere i passaggi da 3 a 11 per ogni canale da memorizzare.
Programma: Seleziona un numero di programma per il canale.
Sistema colore: Imposta il sistema di supporto colore.
Sistema audio: Imposta il sistema di supporto audio.
Canale: Seleziona un canale.
Ricerca: Ricerca la frequenza del canale.
Memorizza: Salva le impostazioni.
Italiano-8
Page 45

Impostazione del Gestore Canale
Impostare i canali in base alle proprie preferenze.
E’ possibile eliminare, aggiungere o bloccare facilmente il canale desiderato.
1. Premere il tasto MENU per visualizzare il menu. Premere il pulsante
5 o 6 per selezionare “Canale” e premere
2.
Premere il pulsante 5 o 6 per selezionare “Gestore Canale” e premere ENTER/OK
3.
Premere nuovamente il tasto ENTER/OK per selezionare “Gestore Canale” .
4. Premere il tasto 4 per selezionare “ ”.
5
.
Premere il tasto 5 o 6 per selezionare il canale da eliminare,
quindi premere il tasto
6.
Ripetere il passaggio 5 per ogni canale che si desidera selezionare o eliminare.
7. Premere il tasto EXIT per uscire.
“ ”
è attivo quando la funzione “Blocco canali” è impostata su “On”.
E’ possibile selezionare queste opzioni
semplicemente premendo il tasto
CH MGR sul telecomando.
ENTER/OK
ENTER/OK
.
per confermarne l’eliminazione.
.
Attivazione di Blocco canali
Tramite questa funzione è possibile impedire a utenti non autorizzati, ad
esempio i bambini, di guardare programmi non adatti annullando il video
e azzerando l’audio. La funzione Blocca canali non può essere disattivata
utilizzando i tasti sul pannello laterale. La disattivazione della funzione Blocco
canali può essere eseguita solo tramite telecomando, perciò si consiglia di
tenerlo fuori dalla portata dei bambini.
1. Premere il tasto MENU per visualizzare il menu. Premere il pulsante
5 o 6 per selezionare “Canale” e premere
2.
Premere il pulsante 5 o 6 per selezionare “Gestore Canale” e premere ENTER/OK .
3.
Premere il pulsante 5 o 6 per selezionare “Blocco canali” e premere ENTER/OK .
4.
Premere il pulsante 5 o 6 per selezionare “On” o “Off”.
Premere il tasto ENTER/OK .
5.
Premere il pulsante 5 o 6 per selezionare “Gestore Canale” e premere ENTER/OK .
6. Premere il tasto 4 per selezionare la riga “ ”.
7
.
Premere il tasto 5 o 6 per selezionare i canali che si desidera bloccare,
quindi premere il tasto
8.
Ripetere il passaggio 7 per ogni canale che si desidera bloccare o sbloccare.
9. Premere il tasto EXIT per uscire.
Selezionare “On” o “Off” nel menu della funzione “Blocco canali” per attivare o disattivare
i canali selezionati su
ENTER/OK
“ ”
.
.
ENTER/OK
.
Italiano-9
Page 46

Ordinamento dei canali memorizzati
È possibile scambiare i numeri appartenenti a due canale per le seguenti ragioni:
Modificare l’ordine numerico in cui i canale sono stati memorizzati automaticamente.
Assegnare numeri facili da ricordare ai canale che vengono guardati più spesso.
1. Premere il tasto MENU per visualizzare il menu. Premere il pulsante
5 o 6 per selezionare “Canale” e premere
2.
Premere il pulsante 5 o 6 per selezionare “Ordina” e premere
3.
Selezionare il numero del canale da modificare premendo più volte il pulsante 5 o 6.
Premere il tasto
Il numero e il nome del canale selezionato viene spostato nella parte destra dello schermo.
4.
Premere il tasto
tasto ENTER/OK .
Il canale selezionato viene sostituito con quello memorizzato in precedenza con il numero desiderato.
5.
Ripetere i passi 3 e 4 per un altro canale da memorizzare.
6. Premere il tasto EXIT per uscire.
Assegnazione dei nomi ai canali
I nomi dei canali vengono attribuiti automaticamente al ricevimento del segnale
di broadcasting del canale. Tali nomi possono essere modificati in seguito,
consentendone una personalizzazione.
1. Premere il tasto MENU per visualizzare il menu. Premere il pulsante
5 o 6 per selezionare “Canale” e premere
2.
Premere il pulsante 5 o 6 per selezionare “Nome” e premere
3.
Se necessario, selezionare il canale a cui assegnare un nuovo nome
premendo il pulsante
Viene visualizzata la barra di selezione attorno alla casella del nome.
4.
Per...
Selezionare una lettera, un numero o un simbolo
Spostarsi sulla lettera successiva
Ritornare sulla lettera precedente
Confermare il nome
I caratteri disponibili sono:
Lettere dell’ alfabeto (A~Z) / Numeri (0~9) / Caratteri speciali ( -, space)
5.
Ripetere i passaggi 3 e 4 per ordinare un altro canale.
6. Premere il tasto EXIT per uscire.
ENTER/OK
.
ENTER/OK
ENTER/OK
5 o 6
.
per spostarsi sulla posizione da modificare, quindi premere il
ENTER/OK
.
ENTER/OK
5 o 6.
Premere il tasto
ENTER/OK
Quindi...
Premere il tasto
Premere il tasto
Premere il tasto
Premere il tasto ENTER/OK
.
.
.
5 o 6
4
3
Ottimizzazione della sintonia dei canali
Utilizzare la sintonizzazione fine per regolare manualmente un canale la cui
ricezione non è ottimale.
1. Utilizzare i tasti numerici per selezionare il canale che si desidera sintonizzare.
2. Premere il tasto MENU per visualizzare il menu.
Premere il pulsante 5 o 6 per selezionare “Canale” e premere
3.
Premere il pulsante 5 o 6 per selezionare “Sintonia fine” e premere ENTER/OK .
4. Premere il tasto 3 o 4 per regolare la sintonizzazione.
Premere il tasto
5. Premere il tasto EXIT per uscire.
I canali sintonizzati e memorizzati hanno un asterisco “*” alla destra del numero di canale nel
relativo riquadro. E il numero del canale diventa rosso.
Per reimpostare la sintonizzazione, selezionare “Reset” premendo il pulsante 5 o 6 , quindi
premere ENTER/OK ..
ENTER/OK
Italiano-10
ENTER/OK
.
.
Page 47

LNA (Low Noise Amplifier)
Se il televisore si trova in un’area caratterizzata da segnale debole, la funzione LNA è in grado di
migliorare la ricezione (grazie a un preamplificatore low-noise che potenzia il segnale in ingresso).
1.
Premere il tasto MENU per visualizzare il menu.
Premere il pulsante 5 o 6 per selezionare “Canale” e premere
2.
Premere il pulsante 5 o 6 per selezionare “
3.
Premere il pulsante 5 o 6 per selezionare “On” o “Off”. Premere il tasto ENTER/OK .
4.
Premere il tasto EXIT per uscire.
Modifica dello standard dell’immagine
È possibile selezionare il tipo di ‘immagine che si adatta meglio alle proprie esigenze di visualizzazione.
1. Premere il tasto MENU per visualizzare il menu. Premere il pulsante
5 o 6 per selezionare “Immagine” e premere
2.
Premere nuovamente il tasto
3.
Premere nuovamente il tasto
4.
Premere il tasto 5 o 6 per selezionare l’effetto immagine desiderato.
Premere il tasto ENTER/OK .
5.
Premere il tasto EXIT per uscire.
Dinamica: Imposta l’immagine da visualizzare in alta definizione in un ambiente luminoso.
Standard: Imposta l’immagine per la visualizzazione ottimale in condizioni di luce normali.
Film: Imposta l’immagine per la visualizzazione confortevole in un ambiente buio.
Personalizzata: Selezionare per visualizzare le impostazioni video preferite.
La modalità Immagine deve essere regolata separatamente per ogni sorgente d’ingresso.
Premendo il tasto “Reset” è possibile ripristinare le impostazioni di fabbrica per
visualizzare l’immagine. (Consultare “Azzeramento delle impostazioni di visualizzazione
dell’immagine ai valori preimpostati in fabbrica” a pagina 12)
(Consultare “Regolazione dell’immagine personalizzata”)
ENTER/OK
ENTER/OK
ENTER/OK
LNA
” e premere
ENTER/OK
ENTER/OK
.
per selezionare “Modalità”.
per selezionare “Modalità”.
.
.
Regolazione dell’immagine personalizzata
Il monitor TV dispone di numerose impostazioni che consentono di controllare la qualità dell’immagine.
1. Per selezionare l’effetto dell’immagine desiderato, seguire le istruzioni
“Modifica dello standard dell’immagine” dal punto 1 al punto 4.
2. Premere il tasto 5 o 6 per selezionare la voce desiderata.
Premere il tasto ENTER/OK .
3. Premere il tasto 3 o 4 per diminuire o aumentare il valore della voce desiderata.
Premere il tasto ENTER/OK .
4. Premere il tasto EXIT per uscire.
Contrasto: Regola l’effetto chiaro-scuro tra gli oggetti e lo sfondo.
Luminosità: Regola la luminosità dell’intero schermo.
Nitidezza: Regola i contorni degli oggetti rendendoli più nitidi o scuri.
Colore: Regola i colori rendendoli più tenui o intensi.
Tinta (solo NTSC):
Le regolazioni vengono memorizzate in base alla modalità Immagine selezionata.
In modalità PC, solo regolabili solo le opzioni "Contrasto, "Luminosità" e “Colore"
Regola i colori degli oggetti, rendendoli più rossi o verdi per offrire immagini più naturali.
Modifica della tonalità di colore
E’ possibile selezionare il tono colore ottimale per la propria vista.
1. Per selezionare l’effetto dell’immagine desiderato, seguire le istruzioni
“Modifica dello standard dell’immagine” dal punto 1 al punto 4.
2.
Premere il pulsante 5 o 6 per selezionare “Toni colore” e premere
3. Premere il tasto 5 o 6 per selezionare il tono colore desiderato.
Premere il tasto
4. Premere il tasto EXIT per uscire.
Freddo2: Rende il colore più bluastro rispetto
Freddo1: Rende il bianco bluastro.
Normale: Mantiene intatto il colore bianco.
all’opzione di menu “Freddo1”.
Le regolazioni vengono memorizzate in base alla modalità Immagine selezionata.
ENTER/OK
Italiano-11
ENTER/OK
.
.
Caldo1: Rende il bianco rossastro.
Caldo2: Rende il colore più rossastro rispetto
all’opzione di menu “Caldo1”.
Page 48

Azzeramento delle impostazioni di visualizzazione dell’immagine ai valori preimpostati in fabbrica
E’ possibile ripristinare le impostazioni di visualizzazione dell’immagine
preimpostate in fabbrica.
1. Per selezionare l’effetto dell’immagine desiderato, seguire le istruzioni
“Modifica dello standard dell’immagine” dal punto 1 al punto 4 a pagina 11.
2.
Premere il pulsante 5 o 6 per selezionare “Reset” e premere
ENTER/OK
.
3. Premere il tasto EXIT per uscire.
La funzione “Reset” verrà impostata per ogni modalità immagine.
Selezione delle dimensioni dell’immagine
È possibile selezionare il formato dell’immagine che meglio si adatta ai propri
desideri di visualizzazione.
1. Premere il tasto MENU per visualizzare il menu. Premere il pulsante
5 o 6 per selezionare “Immagine” e premere
2.
Premere il pulsante 5 o 6 per selezionare “Formato” e premere
3. Selezionare l’opzione da regolare premendo il tasto 5 o 6.
Premere il tasto
ENTER/OK
.
4. Premere il tasto EXIT per uscire.
Automatico: Regola automaticamente la dimensione dell’immagine su un rapporto
16:9: Regola la dimensione dell’immagine a 16:9, un valore appropriato per visualizzare DVD
Zoom: Ingrandisce il formato 16:9 (in senso verticale) per adattarlo alle dimensioni dello schermo.
4:3: Questa è l’impostazione predefinita per un filmato video o una trasmissione normale.
La funzione “Automatico” è disponibile solo in modalità “TV”, “Est.1”, “Est.2”, “AV” e “S-Video”.
In modalità PC, è possibile regolare solo le modalità “16:9” e “4:3”.
Selezionare premendo il pulsante 3 o 4. Premere il pulsante 5 o 6 per spostare
l’immagine verso l’alto o il basso. Dopo aver selezionato , premere il pulsante
5 o 6 per ingrandire o ridurre l’immagine in senso verticale.
La modalità Zoom non può essere selezionata in modalità DTV.
larghezza/altezza “16:9”.
o trasmissioni panoramiche.
ENTER/OK
.
ENTER/OK
.
Fermo immagine corrente
Premere il tasto STILL per fermare un’ immagine in movimento.
Premere nuovamente il tasto per annullare la funzione.
Uso della funzione Digital NR
Se il segnale ricevuto dal televisore è debole, è possibile attivare la funzione Digital
Noise Reduction per ridurre i disturbi statici e l’effetto ghosting sullo schermo.
1. Premere il tasto MENU per visualizzare il menu. Premere il pulsante
5 o 6 per selezionare “Immagine” e premere
2. Premere il pulsante 5 o 6 per selezionare “Digital NR”
e premere
3.
Premere il pulsante 5 o 6 per selezionare “On” o “Off”.
Premere il tasto ENTER/OK .
4. Premere il tasto EXIT per uscire.
ENTER/OK
Italiano-12
ENTER/OK
.
.
Page 49

DNIe Demo (Digital Natural Image engine)
La nuova tecnologia Samsung offre immagini più dettagliate e un miglioramento
del contrasto e del bianco. Un nuovo algoritmo di compensazione dell’immagine
offre immagini più chiare e brillanti. La tecnologia DNIe adatta ogni segnale per
offrire un’immagine perfetta. E’ possibile vedere come la funzione DNIe migliori
la qualità dell’immagine impostando la modalità DNIe Demo (Demo DNIe) su On.
1. Premere il tasto MENU per visualizzare il menu. Premere il pulsante
5 o 6 per selezionare “Immagine” e premere
2.
Premere il pulsante 5 o 6 per selezionare “DNIe Demo” e premere ENTER/OK .
3.
Premere il pulsante 5 o 6 per selezionare “On” o “Off”. Premere il tasto ENTER/OK .
4. Premere il tasto EXIT per uscire.
Queste funzioni non sono disponibili in modalità PC.
La modalità DNIe Demo è progettata per mostrare la differenza di qualità delle
immagini visualizzate attivando o meno l’opzione DNIe.
Per impostazione predefinita, il prodotto visualizza l’immagine a cui è applicata la tecnologia DNle.
Visualizzazione dell’immagine nell’immagine (PIP)
È anche possibile visualizzare un’immagine secondaria all’interno dell’immagine
principale del programma impostato o dell’ingresso video. In questo modo, è
possibile vedere l’immagine del programma impostato o l’ingresso video da un
qualsiasi apparecchio collegato mentre si guarda l’immagine principale.
1. Premere il tasto MENU per visualizzare il menu. Premere il pulsante
5 o 6 per selezionare “Immagine” e premere
2. Premere il pulsante 5 o 6 per selezionare “PIP” e premere
Premere ripetutamente il tasto PIP
sul telecomando per attivare o
disattivare la funzione “PIP”
3. Premere nuovamente
Premere il pulsante 5 o 6 per selezionare “On” e premere
Se la funzione PIP è attiva, l’immagine principale viene visualizzata nel formato “16:9”.
4. Premere il pulsante 5 o 6 per selezionare “Sorgente”
e premere
ENTER/OK
secondaria premendo il pulsante 5 o 6 , quindi premere
L’immagine secondaria può provenire da diverse sorgenti ed essere scelta in base a ciò
per cui è impostata l’immagine principale.
5. Premere il tasto 5 o 6 per selezionare “Scambia”.
Per scambiare l’immagine principale e l’immagine secondaria, selezionare
l’opzione Scambia e premere
L’immagine principale e l’immagine secondaria vengono scambiate.
Se l’immagine principale è in modalità “PC”, l’opzione “Scambia” non è disponibile.
6.
Premere il tasto 5 o 6 per selezionare “Formato” dell’immagine secondaria, quindi
premere il tasto ENTER/OK . Selezionare il formato dell’immagine
secondaria premendo il tasto 5 o 6, quindi premere il tasto ENTER/OK .
Se l’immagine principale è in modalità “PC”, l’opzione “Formato” non è disponibile.
7. Premere il pulsante 5 o 6 per selezionare “Posizione” e premere
ENTER . Selezionare una Posizione dell’immagine secondaria
premendo il pulsante 5 o 6, quindi premere
8. Premere il tasto 5 o 6 per selezionare “Programma” e poi
E’ possibile selezionare il canale da vedere nell’immagine secondaria
premendo il tasto 5 or 6. Premere il tasto
La funzione “Programma” può essere attivata quando l’immagine secondaria è impostata su TV.
9. Premere il tasto EXIT per uscire.
L’immagine nella finestra PIP può diventare lievemente innaturale quando si usa lo
schermo principale per visualizzare un videogioco o il karaoke.
ENTER/OK
.
. Selezionare una sorgente dell’immagine
ENTER/OK
ENTER/OK
ENTER/OK
.
ENTER/OK
ENTER/OK
.
.
ENTER/OK
ENTER/OK
ENTER/OK
.
ENTER/OK
.
.
.
.
.
Sorgente: Utilizzata per selezionare un’origine dell’immagine secondaria.
Scambia: Utilizzato per invertire l’immagine principale con quella secondaria.
Formato: Consente di selezionare la dimensione dell’immagine secondaria.
Posizione: Consente di spostare l’immagine secondaria.
Programma: È possibile spostare l’immagine secondaria.
Italiano-13
Page 50

Impostazioni PIP
Main
Est.1
Est.2
S-Video
Comp.
HDMI
DTV
Sub
TV
AV
PC
TV
Est.1
X
X
X
X
X
X
O
O
X
X
X
X
X
X
X
O
O
X
Est.2
X
X
X
X
X
X
O
O
X
Modifica dello standard audio
È possibile selezionare il tipo di effetto audio speciale da utilizzare durante la
visione di una determinata trasmissione.
1. Premere il tasto MENU per visualizzare il menu. Premere il pulsante
5 o 6 per selezionare “Suono” e premere
2. Premere nuovamente il tasto
3. Per selezionare l’effetto audio desiderato, premere più volte il pulsante
5 o 6 , quindi il premere
4. Premere il tasto EXIT per uscire.
Standard: Seleziona la modalità audio normale.
Musica: Enfatizza la musica rispetto alla voce.
Film: Offre un’esperienza audio completa e intensa adatta alla visualizzazione di film.
Dialoghi: Enfatizza la voce rispetto ad altri suoni.
Personalizzata: Seleziona le impostazioni audio preferite.
(O: PIP attivata, X: PIP disattivata)
AV
X
X
X
X
X
X
O
O
X
S-Video
X
X
X
X
X
X
X
O
X
ENTER/OK
(Consultare “Regolazione delle impostazioni dell’audio”)
Comp.
X
X
X
X
X
X
X
O
X
ENTER/OK
PC
X
X
X
X
X
X
X
X
X
ENTER/OK
.
per selezionare “Modalità”.
.
HDMI
O
O
O
O
O
O
X
X
X
DTV
X
X
X
X
X
X
X
X
X
Regolazione delle impostazioni dell’audio
È possibile regolare le impostazioni dell’audio per adattarle alle proprie preferenze.
1. Premere il tasto MENU per visualizzare il menu. Premere il pulsante
5 o 6 per selezionare “Suono” e premere
2. Premere il pulsante 5 o 6 per selezionare “Equalizzatore”
e premere
ENTER/OK
3. Premere il tasto 3 o 4 per selezionare la voce desiderata.
Premere il tasto ENTER/OK
4. Premere il tasto 5 o 6 per raggiungere l’impostazione desiderata.
Premere il tasto ENTER/OK
5. Premere il tasto EXIT per uscire.
Se si modificano queste impostazioni, la modalità audio passa automaticamente a
“Personalizzata”.
Collegamento delle cuffie di ascolto
E’ possibile collegare al TV una coppia di cuffie di ascolto per vedere un programma
televisivo senza disturbare le altre persone eventualmente presenti nella stanza.
Quando si inserisce il jack della cuffia nella porta corrispondente, è possibile utilizzare solo
le funzioni “Mute interno” e “Selezione audio” (in modalità PIP) nel menu Audio.
Uso prolungato delle cuffie ad alto volume può danneggiare l’udito.
Quando si collegano le cuffie al sistema non si riceve l’audio dagli altoparlanti.
Italiano-14
ENTER/OK
.
.
.
.
Page 51

Impostazione di TruSurround XT (SRS TSXT)
TruSurround XT è una tecnologia SRS brevettata che risolve il problema della
riproduzione di contenuti multicanale 5.1 su due altoparlanti. TruSurround offre
una straordinaria esperienza Surround Sound virtuale attraverso un sistema di
riproduzione a due altoparlanti, inclusi gli altoparlanti interni del televisore.
È pienamente compatibile con tutti i formati multicanale.
1. Premere il tasto MENU per visualizzare il menu. Premere il pulsante
5 o 6 per selezionare “Suono” e premere
2. Premere il pulsante 5 o 6 per selezionare “TSXT SRS” e premere
3.
Premere il pulsante 5 o 6 per selezionare “On” o “Off”. Premere il tasto ENTER/OK .
4. Premere il tasto EXIT per uscire.
TruSurround XT, SRS e il simbolo sono marchi di SRS Labs,
Inc. La tecnologia TruSurround XT è incorporata in base ai termini
della licenza di SRS Labs, Inc.
Regolazione automatica del volume
Ogni stazione delle emittenti ha le proprie condizioni del segnale e non è semplice
per l’utente regolare il volume ogni volta che si cambia canale. Questa funzione
consente di regolare automaticamente il volume del canale desiderato diminuendo il
livello dell’uscita audio quando il segnale di modulazione è alto oppure aumentando il
livello dell’uscita audio quando il segnale di modulazione è basso.
1. Premere il tasto MENU per visualizzare il menu. Premere il pulsante
5 o 6 per selezionare “Suono” e premere
2.
Premere il pulsante 5 o 6 per selezionare “Volume auto” e premere ENTER/OK .
3.
Premere il pulsante 5 o 6 per selezionare “On” o “Off”. Premere il tasto ENTER/OK .
4. Premere il tasto EXIT per uscire.
ENTER/OK
ENTER/OK
.
ENTER/OK
.
.
Selezione di Internal Mute (Mute interno)
Se si desidera ascoltare l’audio da altoparlanti separati annullando l’amplificatore interno.
1. Premere il tasto MENU per visualizzare il menu. Premere il pulsante
5 o 6 per selezionare “Suono” e premere
2.
Premere il pulsante 5 o 6 per selezionare “Mute interno” e premere ENTER/OK .
3.
Premere il pulsante 5 o 6 per selezionare “On” o “Off”. Premere il tasto ENTER/OK .
4. Premere il tasto EXIT per uscire.
Se “Mute interno” è impostato su “On”, non è possibile regolare i comandi del menu Sound
(Audio), all’infuori di “Selezione audio” (in modalità PIP).
Ascolto dell’audio dell’immagine secondaria
Durante l’uso della funzione PIP, è possibile ascoltare l’audio dell’immagine secondaria.
1. Premere il tasto MENU per visualizzare il menu. Premere il pulsante
5 o 6 per selezionare “Suono” e premere
2.
Premere il pulsante 5 o 6 per selezionare “Selezione audio” e premere ENTER/OK .
3.
Premere il tasto 5 o 6 per selezionare “Secondario”. Premere il tasto ENTER/OK .
4. Premere il tasto EXIT per uscire.
Principale
Secondario
: Consente di ascoltare l’audio dell’immagine principale.
: Consente di ascoltare l’audio dell’immagine secondaria.
E’ possibile selezionare questa opzione quando la modalità “PIP” è “On”. (
Italiano-15
ENTER/OK
ENTER/OK
.
.
Consultare a pagina 13)
Page 52

Azzeramento delle impostazioni audio ai valori preimpostati in fabbrica
Se la Modalità gioco è On, la funzione Reimposta audio è attiva. Selezionando la funzione Reset
dopo aver effettuato l’impostazione, l’equalizzatore viene reimpostato ai valori di fabbrica.
1. Premere il tasto MENU per visualizzare il menu. Premere il pulsante
5 o 6 per selezionare “Suono” e premere
2. Premere il pulsante 5 o 6 per selezionare “Reset” e premere
ENTER/OK
.
ENTER/OK
3. Premere il tasto EXIT per uscire.
E’ possibile selezionare questa opzione quando la modalità “Modalità gioco” è “On”.
Configurazione e visualizzazione dell’ora attuale
È possibile impostare l’orologio del televisore in modo da visualizzare l’ora
corrente quando si preme il tasto INFO. Per utilizzare i timer di accensione/
spegnimento automatico è necessario impostare anche l’ora.
1. Premere il tasto MENU per visualizzare il menu. Premere il pulsante
5 o 6 per selezionare “Impostazione” e premere
2. Premere il pulsante 5 o 6 per selezionare “Ora” e premere
3. Premere il tasto
4.
Per...
Andare su “Ora” o “Minuto”
Impostare “Ora” o “Minuto”
Premere il tasto ENTER/OK .
ENTER/OK
per selezionare “Imposta Ora”.
5. Premere il tasto EXIT per uscire.
Se si scollega il cavo di alimentazione è necessario impostare nuovamente l’orologio.
È possibile impostare l’ora e i minuti anche premendo i tasti numerici del telecomando.
ENTER/OK
Premere il...
tasto 3 o 4.
tasto 5 o 6.
.
ENTER/OK
.
.
Impostazione del timer
È possibile impostare un periodo di tempo compreso tra 30 e 180 minuti,
scaduto il quale il monitor TV si spegne automaticamente.
1. Premere il tasto MENU per visualizzare il menu. Premere il pulsante
5 o 6 per selezionare “Impostazione” e premere
2. Premere il pulsante 5 o 6 per selezionare “Ora” e premere
3.
Premere il pulsante 5 o 6 per selezionare “Timer stand-by” e premere ENTER/OK .
4. Premere ripetutamente il tasto 5 o 6 ino a impostare l’ora desiderata
(Off, 30, 60, 90, 120, 150, 180). Premere il tasto
5. Premere il tasto EXIT per uscire.
Il TV passa automaticamente in modalità standby non appena il timer raggiunge lo 0.
Spegnimento e accensione automatica della televisione
È possibile impostare i timer di accensione/spegnimento automatico in modo che
il monitor TV:
Si accenda automaticamente e si sintonizzi sul canale desiderato
all’ora selezionata.
Si spenga automaticamente all’ora selezionata.
Per prima cosa, impostare l’orologio del televisore.
1. Premere il tasto MENU per visualizzare il menu. Premere il pulsante
5 o 6 per selezionare “Impostazione” e premere
2. Premere il pulsante 5 o 6 per selezionare “Ora” e premere
3. Premere il pulsante 5 o 6 per selezionare “Timer accensione”
e premere
ENTER/OK
Italiano-16
.
ENTER/OK
ENTER/OK
ENTER/OK
.
ENTER/OK
.
.
ENTER/OK
.
.
Page 53

Scelta della lingua
Uso di Modalità gioco
4. Premere il tasto 5 o 6 per regolare l’opzione “Ora”, quindi premere il tasto 4 per
passare alla fase successiva. Impostare altre voci utilizzando la stessa procedura
sopra riportata. Al termine, premere il tasto
5.
Premere il pulsante 5 o 6 per selezionare “Timer spegnimento” e premere ENTER/OK .
ENTER/OK
per ritornare.
6. Premere il tasto 5 o 6 per regolare l’opzione “Ora”, quindi premere il tasto 4 per
passare alla fase successiva. Impostare altre voci utilizzando la stessa procedura
sopra riportata. Al termine, premere il tasto
ENTER/OK
per ritornare.
7. Premere il tasto EXIT per uscire.
È possibile impostare l’ora e i minuti anche premendo i tasti numerici del telecomando.
La configurazione dell’opzione “Attivazione” deve essere impostata su “On” in modo che funzionino i timer.
Quando si utilizza il monitor TV per la prima volta, è necessario
selezionare la lingua di visualizzazione dei menu e delle indicazioni.
1. Premere il tasto MENU per visualizzare il menu a video. Premere il pulsante
5 o 6 per selezionare “Impostazione” e premere
2. Premere il pulsante 5 o 6 per selezionare “Lingua” e premere
ENTER/OK
.
ENTER/OK
.
3. Selezionare la lingua desiderata premendo il pulsante 5 o 6 più volte.
Premere il tasto
È possibile effettuare la scelta tra 5 lingue.
ENTER/OK
.
4. Premere il tasto EXIT per uscire.
Quando ci si collega a una console di gioco come PlayStationTM o XboxTM, è
possibile divertirsi con giochi ancora più realistici utilizzando il menu Giochi.
1. Premere il tasto MENU per visualizzare il menu. Premere il pulsante
5 o 6 per selezionare “Impostazione” e premere
2.
Premere il pulsante 5 o 6 per selezionare “Modalità gioco” e premere ENTER/OK .
3.
Premere il pulsante 5 o 6 per selezionare “On” o “Off”. Premere il tasto ENTER/OK .
ENTER/OK
.
4. Premere il tasto EXIT per uscire.
Per scollegare la console di gioco e collegare un altro dispositivo esterno, annullare la
modalità gioco nel menu Immagine.
Se si visualizza il menu TV in Modalità gioco, lo schermo sfarfalla leggermente.
Modalità gioco non è disponibile in modalità TV.
Se la modalità Game (Gioco) è On:
• Le modalità Picture (Immagine) e Sound (Audio) cambiano automaticamente in
Custom (Personalizzata) e l’utente non può modificare la modalità.
• La modalità Sound (Audio) nel menu Sound (Audio) è disattivata. Regolare l’audio
mediante l’equalizzatore.
• La funzione Reset Sound (Reimposta audio) è attiva. Selezionando la funzione Reset (Reimposta) dopo
aver effettuato l’impostazione, l’equalizzatore viene reimpostato ai valori di fabbrica.
Impostazione della modalità Pagina blu / Selezione della Melodia
Pagina blu:
Se il segnale non viene ricevuto o è molto debole, una schermata blu sostituisce
automaticamente lo sfondo dell’immagine disturbata. Se si desidera continuare a visualizzare
l’immagine di qualità scadente, è necessario impostare la modalità “Pagina blu” su “Off”.
Melodia:
L’apparecchiatura consente di scegliere quali segnali audio/video vengono inviati al connettore esterno.
1. Premere il tasto MENU per visualizzare il menu. Premere il pulsante
5 o 6 per selezionare “Impostazione” e premere
2. Premere il pulsante 5 o 6 per selezionare “Pagina blu” o “Melodia”.
Premere il tasto
3.
Premere il pulsante 5 o 6 per selezionare “On” o “Off”. Premere il tasto ENTER/OK .
ENTER/OK
.
4. Premere il tasto EXIT per uscire.
Italiano-17
ENTER/OK
.
Page 54

Utilizzo della funzione Risparmio energia
Questa funzione regola la luminosità del televisore oltre a ridurre il consumo di
energia. Quando si guarda il televisore di notte, impostare la modalità “Risp. energia”
su “Alto” in modo da ridurre l’affaticamento della vista e il consumo di corrente.
1. Premere il tasto MENU per visualizzare il menu a video.
Premere il pulsante 5 o 6 per selezionare “Impostazione” e premere ENTER/OK .
2.
Premere il pulsante 5 o 6 per selezionare “Risp. energia” e premere ENTER/OK .
3. Selezionare l’opzione richiesta (Off, Bassa, Medio, Alto) premendo il tasto 5 o 6 .
Premere il tasto
4. Premere il tasto EXIT per uscire.
ENTER/OK
Selezione della sorgente
E’ possibile selezionare una delle sorgenti esterne collegate al jack di ingresso del televisore.
1. Premere il tasto MENU per visualizzare il menu.
Premere il tasto
2.
Premere nuovamente il tasto ENTER/OK per selezionare la funzione “Elenco sorgenti”.
Se all’apparecchiatura non sono collegate periferiche esterne, nel “Elenco sorgenti” sono
attivate solo “TV”, “Est.1”, “Est.2”, “DTV”. “AV”, “S-Video”, “Comp.”, “PC”, “HDMI” sono attivate
solo se collegate all’apparecchiatura.
3.
Selezionare il dispositivo desiderato premendo ripetutamente il tasto 5 o 6.
Premere il tasto
Premere il tasto SOURCE finché viene selezionata la fonte d’ingresso desiderata. La modalità TV può
essere selezionata premendo il tasto TV/DTV, i tasti numerici (0~9), e il tasto P / sul telecomando.
Tuttavia non può essere selezionata usando il tasto SOURCE.
ENTER/OK
ENTER/OK
.
per selezionare “Inserisci”.
.
Modifica dei nomi delle sorgenti di ingresso
Assegnare un nome al dispositivo collegato ai jack di ingresso per semplificare la selezione della sorgente di ingresso.
1. Premere il tasto MENU per visualizzare il menu.
Premere il tasto
2. Premere il pulsante 5 o 6 per selezionare “Modifica Nome”
e premere
3. Premere il tasto 5 o 6 per selezionare il dispositivo che si desidera
richiamare. Premere il tasto
4. Premere il tasto 5 o 6 per selezionare il dispositivo richiesto.
Premere il tasto
5. Premere il tasto EXIT per uscire.
ENTER/OK
ENTER/OK
ENTER/OK
Italiano-18
.
ENTER/OK
per selezionare “Inserisci”.
.
.
Page 55

Anteprima DTV Menu System
Per navigare nel sistema di menu a video e regolare le impostazioni
disponibili, fare riferimento alle illustrazioni seguenti.
Disponibile in modalità Digital TV (TV digitale).
Premere il tasto “D.MENU”.
Installazione
Seleziona paese
Auto scansione
Scansione manuale
Impostazione di fabbrica
Organizzazione canale
Cancella frequenza
Cancella Canale
Cancella tutti i Canali
Sposta e modifica canale
Chiave elettronica
Imposta blocco canale
Modifica codice PIN
Impostare blocco modem
Impostazioni di sistema
Selezione lingua
Impostazioni OSD
Impostazioni ora
Informazioni di sistema
Aggiornamento software
Controllo appl. MHP
Impostazione modem
E’ possibile selezionare queste opzioni
semplicemente premendo il tasto
D.MENU del telecomando.
Le sotto voci del Menu IC variano in base al modello di CAM.
In modalità Digital TV (TV digitale), non spegnere l’unità prima che lo schermo sia
completamente caricato.
Italiano-19
Page 56

Funzioni di base
1. Schermo
Prima di visualizzare il programma televisivo, è necessario eseguire l’installazione.
In un primo tempo sarà infatti possibile vedere solo le immagini dei menu. Una volta
programmati i canali televisivi, l’immagine che segue (banner) apparirà ogni volta che
si cambia canale:
Numero canale
Stato segnale Informazioni sul programma Il numero dell’audio nel
Informazioni dettagliate sul programma
Con la prima pressione del tasto apparirà il banner descritto sopra.
Dopo aver premuto il tasto INFO una seconda volta, si otterranno informazioni
dettagliate sul programma che si sta visualizzando e, se le informazioni sono
numerose, verranno visualizzate in un altro riquadro. Quando le informazioni sono
costituite da più pagine, P / può essere utilizzato per sfogliare le pagine su è giù.
questo servizio dipende dal provider.
2. Regolazione del volume
Per regolare il livello del volume:
• Premere i tasti
• Premere il tasto MUTE per disattivare l’audio.
• Premere nuovamente il tasto MUTE o i tasti per annullare la
disattivazione dell’audio.
per regolare il livello del volume.
canale corrente
3. Selezione informazioni audio
• Premere il tasto ALT per visualizzare l’elenco delle informazioni audio.
• Premere i tasti
4. Selezione informazioni video
• Premere il tasto ALT due volte per visualizzare l’elenco delle informazioni video.
• Premere i tasti
5/6
e ENTER/OK per effettuare una selezione.
5/6
e ENTER/OK per effettuare una selezione.
Italiano-20
Page 57

5 Elenco servizi
• Premere il tasto CH MGR mentre si sta visualizzando un programma.
• Selezionare l’elenco premendo TV/RADIO.
Poste dietro il nome del canale, l’icona
indica che il canale è criptato,
mentre l’icona indica che il canale è bloccato.
• Selezionare il canale premendo
/ e premere P / per passare alle
pagine precedenti e successive dell’elenco.
• Premere il tasto ENTER/OK per visualizzare il canale selezionato.
6. Informazioni sul programma
EPG - Guida elettronica avanzata ai programmi
La guida elettronica al programma fornisce per tutti i canali le informazioni
sul programma scelto.
1. questo servizio dipende dal provider.
2. Dopo avere riconosciuto il GMT dal segnale, operazione che richiede alcuni secondi,
il ricevitore è in grado di visualizzare le informazioni corrette sui programmi.
• Premere il tasto GUIDE mentre si sta visualizzando un programma.
Questa funzione viene visualizzata sullo schermo solo durante l’utilizzo.
• Tasto ROSSO : Il tasto rosso consente di passare alla data precedente.
• Tasto VERDE : Il tasto verde consente di passare alla data successiva.
• Tasto INFO : Questo tasto consente di visualizzare le informazioni sul
programma, se non sono tutte elencate nella stessa pagina.
Utilizzare i tasti / per passare alle pagine precedenti e
successive.
• Tasto3/4 : Visualizza l’elenco dei programmi in blocchi da 30 minuti.
L’intervallo di tempo può essere regolato premendo i seguenti tasti sulla schermata EPG:
Tasto 1: 1 ora e 30 minuti
Tasto 2: 30 minuti
Tasto 3: 15 minuti
• Selezionare il canale premendo i tasti
/ e premere il tasto ENTER/OK
per visualizzare il canale selezionato.
Italiano-21
Page 58

Funzionamento del Menu DTV
Menu principale
Dopo avere installato il sistema dell’antenna e l’TV con i connettori appropriati:
• Collegare il televisore alla rete CA e accenderlo.
• Premere il tasto D.MENU per visualizzare il menu principale.
Verrà visualizzata la seguente schermata:
Le voci del sottomenu verranno visualizzate. Per i sottomenu "Installazione",
"Organizzazione" e "Chiave elettronica" è necessario il codice PIN.
1. Installazione
Il menu è costituito da 4 sottomenu:
Seleziona paese, Auto scansione, Manuale scansione e Azzera alle impostazioni
di fabbrica.
• Selezionare Installazione premendo il tasto ENTER/OK in modalità
menu principale per selezionare il menu secondario.
• Immettere il codice PIN.
Se non è stato immesso un codice PIN personale, verrà utilizzato il codice PIN 0000
impostato in fabbrica.
Una volta immesso il codice PIN, non è necessario inserire nuovamente il codice a meno
che non si spenga il televisore.
1.1 Seleziona paese
Per sintonizzare i nuovi canali, sul televisore è disponibile l’opzione “Seleziona
paese” che consente di selezionare la nazione dove hanno sede i servizi
dell’emittente. Una volta selezionato “Seleziona paese” nel menu Installazione,
verrà visualizzata la schermata seguente:
• Selezionare la propria nazione.
È possibile selezionare il valore "ITALY", "SPAIN", "SWEDEN", "UK", "USER",
"BELGIUM", "GERMANY", "FINLAND", o "FRANCE" premendo i tasti 3/4.
• Una volta selezionata l’opzione, premere il tasto ENTER/OK per scegliere la
nazione corrispondente all’area di trasmissione. Se non si desidera salvare le
modifiche, premere il tasto EXIT senza premere ENTER/OK .
Se si modifica il codice nazionale, tutti i programmi salvati verranno eliminati.
UTENTE: Un utente può impostare un numero di canale e la frequenza nella
ricerca automatica/manuale.
1.2 Auto scansione
Il sottomenu “Auto scansione” consente di scaricare automaticamente i canali
dal punto di caricamento preprogrammato.
Per scaricare automaticamente i canali:
• È possibile selezionare la frequenza specificata tra "Frequenza inizio" e
"Frequenza fine".
• Premere il tasto ENTER/OK .
Verrà visualizzato il menu Auto scansione.
Tutti i canali nell’elenco verranno automaticamente scaricati.
Italiano-22
Page 59

1.3 Scansione manuale
Per sintonizzare i nuovi canali e i segnali più deboli, sul televisore è disponibile
l’opzione “Scansione manuale” che consente di immettere manualmente i dati
sui canali. Dopo aver selezionato “Scansione manuale” dal menu Installazione
verrà visualizzata la schermata seguente:
• Selezionare il numero del canale.
È possibile selezionare il canale specifico da cercare.
Le opzioni seguenti sono impostante per default, tuttavia è possibile modificarle.
La barra di stato del segnale mostra se il canale è valido.
• Immettere la frequenza del canale da trovare.
• Selezionare la larghezza di banda.
È possibile selezionare un valore pari a "6", "7" o "8" MHz.
• Selezionare la modalità di intervallo di sicurezza.
È possibile selezionare il valore "AUTO", "1/32", "1/16", "1/8", o "1/4".
• Selezionare la modalità FFT (Fast Fourier Transform).
Uno dei valori -"AUTO", "2K" e "8K"- verrà selezionato automaticamente.
E’ possibile modificare il valore impostato in base alle proprie preferenze.
• Una volta selezionate le opzioni, premere il tasto ENTER/OK per avviare
la procedura di scansione.
1.4 Impostazione di fabbrica
Consente di tornare ai valori impostati in fabbrica nel casoin cui si verificassero dei
problemi dopo la modifica di alcuni valori relativi ai dati dei canali o per l’uso di valori
errati. Nella finestra di richiesta, se si preme il tasto ENTER/OK , il televisore viene
automaticamente reimpostato in base ai valori predefiniti.
Questa operazione elimina tutte le impostazioni esistenti!
2. Organizzazione canale
Il menu “Organizzazione canale” ha quattro opzioni:
Il menu “Organizzazione canale” viene utilizzato per eliminare
Frequenze e Canali oppure per spostarli e modificarli in base alle proprie
preferenze.
• Immettere il codice PIN.
Se non è stato immesso un codice PIN personale, verrà utilizzato il codice
0000 impostato in fabbrica.
Una volta immesso il codice PIN, non è necessario inserire nuovamente il codice a meno che
non si spenga il televisore.
Italiano-23
Page 60

2.1 Cancella frequenza
• Selezionare l’elenco delle frequenze da eliminare premendo il tasto ROSSO.
• Premere il tasto ENTER/OK per confermare.
Questo commando non elimina le frequenze, ma solo l’elenco dei canali registrati su quella
frequenza.
2.2 Cancella Canale
• Selezionare l’elenco dei canali da eliminare premendo il tasto ROSSO.
• Premere il tasto ENTER/OK per confermare.
2.3 Cancella tutti i Canali
Nella finestra di richiesta, premere il tasto ENTER/OK per eliminare tutti i canali e
premere EXIT per uscire.
2.4 Sposta e modifica canale
Per spostare il nome del canale
• Selezionare l’elenco Interattivo/TV/RADIO premendo i tasti 3/4.
•
Selezionare l’elenco Interattivo/TV/RADIO premendo i tasti 5/6 oppure i tasti P / .
• Selezionare il canale premendo il tasto ROSSO.
• Premere i tasti
5/6
per modificare la posizione del canale desiderato,
e premere P / per passare alle pagine precedenti e successive dell’elenco.
Premere il tasto ENTER/OK per confermare.
• Per rimettere il canale nella posizione iniziale, premere il tasto BLU senza
premere il tasto ENTER/OK .
Per modificare il nome di un canale
• Selezionare l’elenco Interattivo/TV/RADIO premendo i tasti 3/4.
• Selezionare un elenco di canali da spostare in un’altra posizione premendo i
tasti 5/6 oppure i tasti P / .
• Premere il tasto VERDE. Viene visualizzata la tabella dei font.
• Selezionare il carattere desiderato premendo i tasti 3/4,5/6 quindi
premere ENTER/OK per associare il carattere alla stringa.
Tasto P : Elimina il carattere precedente.
•
Premere il tasto D.MENU e poi il tasto
ENTER/OK
per salvare i dati impostati.
Italiano-24
Page 61

3. Chiave elettronica
La funzione “Chiave elettronica” consente di impostare le limitazioni della
visualizzazione e impedisce l’accesso non autorizzato al televisore tramite l’uso
del PIN (Personal Identification Number), un numero personale di 4 cifre
(codice PIN preimpostato in fabbrica : 0000)
Selezionando questo menu, si dispone di tre opzioni:
• Immettere il codice PIN.
Se non è stato immesso un codice PIN personale, verrà utilizzato il codice PIN 0000
impostato in fabbrica.
3.1 Imposta blocco canale
• Selezionare il canale premendo i tasti 3/4 oppure i tasti 5/6.
• Selezionare il blocco del canale premendo il tasto ROSSO.
• Premere il tasto ENTER/OK per confermare.
Quando si desidera visualizzare il canale bloccato, è necessario immettere ogni volta
il codice PIN nella finestra di richiesta. L’inserimento del codice PIN, che consente
l’accesso a un canale bloccato, agisce su tutti i canali bloccati. Ciò significa che,
inserendo il codice PIN corretto in uno qualsiasi dei canali bloccati, è possibile
accedere a tutti i canali bloccati.
Per annullare il blocco:
• Premere di nuovo il tasto ROSSO per annullare il blocco.
3.2 Modifica codice PIN
Per modificare il codice PIN, selezionare la seconda opzione,
“Modifica codice PIN”.
In questo modo si accederà al menu seguente:
In questa opzione, è necessario immettere il codice PIN corrente in corrispondenza
del primo cursore e in corrispondenza del secondo il codice PIN desiderato. Per
confermare, immettere nuovamente il nuovo codice PIN.
Occorre ricordare che il codice PIN deve essere un valore numerico di 4 cifre.
CODICE PIN PREIMPOSTATO IN FABBRICA : 0 0 0 0.
nel caso in cui si dimenticasse il Codice PIN, contattare il rivenditore o il servizio assistenza
Una volta modificata la password, è necessario ricordarla e conservarla in un luogo sicuro.
3.3 Impostare blocco modem
Per bloccare la visione dei servizi a pagamento, come ad esempio il servizio
PPV (Pay Per View), selezionare la terza opzione “Impostare blocco modem”.
• È possibile selezionare "Blocca" o "Sblocca" nel menu Parental Lock del modem.
• Selezionare "Blocca" per bloccare la visione dei servizi a pagamento.
• Selezionare "Sblocca" per sbloccare la visione dei servizi a pagamento.
I canali televisivi a pagamento sono visibili solo attraverso CI dopo l’acquisto di un CAM.
Italiano-25
Page 62

4. Impostazioni di sistema
È possibile modificare le impostazioni predefinite del sistema in base alle
proprie esigenze.
4.1 Selezione lingua
L’opzione “Selezione lingua” consente all’utente di selezionare la lingua
desiderata per OSD, informazioni audio, Teletext e EPG.
• Per favorire gli utenti delle varie nazioni che parlano lingue diverse, gli OSD
sono disponibili in 5 lingue diverse. (Sono attualmente supportate le lingue
"English", "Deutsch", "Français", "Italiano" - "Español")
• Per selezionare il menu nella lingua desiderata premere i tasti 3/4,
quindi premere ENTER/OK .
• Gli OSD, le informazioni audio, il Teletext e l’EPG variano a seconda
della lingua selezionata.
4.2 Impostazioni OSD
È possibile impostare la trasparenza dell’OSD e la durata della visualizzazione.
• Selezionare il livello di trasparenza dell’OSD.
Il livello di trasparenza dell’OSD varia da 0 a 100%. L’impostazione viene effettuata
premendo i tasti numerici 3/4 oppure i tasti P / .
• Impostare la durata della visualizzazione del riquadro delle informazioni che appare
sullo schermo. La durata varia da 0,5 a 60,0 secondi. L’impostazione viene
effettuata premendo i tasti numerici 3/4 (a ogni pressione il valore decrementa o
incrementa di 0.5 sec) oppure i tasti P / (a ogni pressione il valore decrementa
o incrementa di 1 sec).
4.3 Impostazioni ora
Possono essere impostate diverse modalità di orario, quale per esempio l’ora
locale corrente. L’ora locale corrente può essere regolata mediante il GMT.
• Posizionare il cursore sul sottomenu e premere il tasto ENTER/OK .
• Premere i tasti 3/4 per modificare l’ora locale in base al fuso orario.
L’ora locale varia a seconda della località.
Il GMT si riferisce all’ora standard di Greenwich.
Italiano-26
Page 63

4.4 Informazioni di sistema
Nel caso in cui sia necessario contattare il service provider o un centro di assistenza,
è possibile che vengano richieste alcune informazioni contenute in questo menu.
Posizionare il cursore sul sottomenu e premere il tasto ENTER/OK .
Verrà visualizzata la seguente schermata:
4.5 Aggiornamento software
È possibile scaricare e aggiornare il software di sistema del televisore
utilizzando un canale specifico indicato dall’emittente.
Maggiori informazioni verranno fornite direttamente dall’emittente.
Se si sceglie di scaricare una nuova versione del software, tutte le impostazioni
precedenti, come codici d’accesso, canali preferiti, ecc., verranno eliminate!
Lo scaricamento può richiedere diverso tempo. Durante lo scaricamento, non
spegnere il ricevitore.
4.6 Controllo appl. MHP
Per modificare la modalità di visualizzazione dell’applicazione MHP,
seguire le istruzioni fornite di seguito.
• Selezionare "Avvio automatico" o "Non consentito" in Controllo avvio
automat.. utilizzando i tasti 3/4.
• Selezionare On/Off in modalità Mostra elenco appl. premendo i tasti 3/4.
• Premere il tasto VERDE per modificare i dati contenuti in Numero telefonico,
Nome utente e Password.
• Inserire il valore desiderato utilizzando i tasti Numerici (0~9) e premendo i
tasti 3/4 in DNS.
• Premere ‘ENTER/OK ’ per salvare le nuove impostazioni "Controllo appl. MHP".
Se si sceglie Exit senza premere il tasto ENTER/OK le modifiche apportate al
menu MHP App Control non verranno salvate.
App MHP: Applicazione Multimedia Home Platform
Italiano-27
Page 64

4.7 Impostazione modem
Per impostare il modem, seguire le istruzioni fornite di seguito.
• Selezionare "Tone" o "Pulse" in Modalit di composizione.
• Selezionare il "Tempo d’attesa portante" nell’intervallo compreso tra
1 e 255 secondi utilizzando i tasti 3/4 o i tasti numerici.
• Selezionare il "Tempo attuale portante" nell’intervallo compreso tra 0.1~25.5
secondi utilizzando i tasti 3/4 o i tasti numerici.
• Selezionare il "Tempo perdita portante" nell’intervallo compreso tra
0.1 e 25.5 secondi utilizzando i tasti 3/4 o i tasti numerici.
• Selezionare Blank (Vuoto), 0, # o 9 nella casella "Prefisso" utilizzando i tasti 3/4,
per specificare il tasto di pre-composizione per l’estensione telefonica.
• Premere ‘ENTER/OK ’ per salvare la configurazione del modem,
se è stata modificata.
Se si sceglie Exit senza premere il tasto ENTER/OK le modifiche apportate al
modem non verranno salvate.
Installazione del scheda IC
1. Acquistate il modulo CI CAM presso il rivenditore locale più vicino o via telefono.
2. Inserite la scheda IC nella CAM nella direzione indicata dalla freccia.
3. Inserire la CAM con la scheda IC installata nello slot di interfaccia comune (IC).
Inserire completamente la CAM nella direzione indicata dalla freccia in modo che
risulti parallela allo slot.
4. Verificare la visione dell’immagine su un canale a segnale criptato.
Teletext Decoder
E’ possibile installare la CAM in qualsiasi momento sia mentre televisore è acceso (ON) sia
mentre è spento (OFF).
La maggior parte dei canale del TV è dotata di “teletext”, ovvero di
pagine di informazioni scritte, quali:
Orari dei programmi televisivi.
Notiziari e previsioni del tempo.
Risultati sportivi.
Sottotitoli per non udenti.
Le pagine del teletext sono suddivise in sei categorie:
Part
A
B
C
D
E
F
Sommario
Numero della pagina selezionata.
Identità della stazione trasmittente.
Numero della pagina corrente o stato della ricerca.
Data e ora.
Testo.
Informazioni sullo stato.
Italiano-28
Page 65

Visualizzazione delle informazioni del Televideo
È possibile visualizzare le informazioni del teletext in qualsiasi momento,
tuttavia, la ricezione del segnale deve essere buona. In caso contrario:
Le informazioni potrebbero mancare.
Alcune pagine potrebbero non essere visualizzate.
Per attivare la modalità teletext e visualizzare la pagina del sommario:
1.
Utilizzando il tasto P ( ) o P ( ) selezionare il canale che offre il servizio
teletext.
2.
Premere il tasto TTX/MIX ( ) per attivare la modalità Teletext.
Viene visualizzata la pagina del sommario. È possibile richiamarla in qualsiasi
momento premendo il tasto
MENU ( ).
3. Premere nuovamente il pulsante TTX/MIX ( ).
La trasmissione corrente verrà visualizzata con le opzioni “Teletext”, “Double” e “Mix”
in ordine di apparizione sullo schermo.
4. Premere il tasto TV/DTV per uscire dalla schermata Testo.
Se durante la visualizzazione del testo compaiono caratteri spezzati, verificare che la
lingua del testo sia uguale a quella della modalità del menu “Impostazione”. Se le due lingue sono
diverse, selezionare la stessa lingua del testo nel menu “Impostazione”.
Selezione di una pagina Teletext specifica
Premere i tasti numerici sul telecomando per immettere il numero di pagina
direttamente:
1. Immettere il numero della pagina a tre cifre indicato nel sommario
utilizzando i tasti numerici corrispondenti.
2. Se la pagina selezionata è collegata a diverse pagine secondarie, le pagine
secondarie vengono mostrate in sequenza. Per bloccare il video su una pagina
scelta, premere il tasto
PIP( ).
Premere nuovamente il tasto PIP( ) per riprendere la registrazione.
3. Utilizzo delle diverse opzioni di visualizzazione:
Per visualizzare...
Sia le informazioni del teletext che la trasmissione normale.
Il tasto nascosto (risposte ai quiz, ad esempio)
Lo schermo normale
Una pagina secondaria immettendo il relativo numero a quattro cifre
La pagina successiva
La pagina precedente
Lettere con dimensione doppia nella:
Metà superiore dello schermo
Metà inferiore dello schermo
Schermo normale
Premere...
TTX/MIX ( )
INFO ( )
INFO ( )
PRE-CH ( )
P ( )
P ( )
DUAL I-II
Una volta
Due volte
Tre volte
( )
Italiano-29
Page 66

Utilizzo della modalità Fastext per selezionare una pagina Teletext
I vari argomenti inclusi nelle pagine del Televideo sono codificati in base a diversi
colori e possono essere selezionati premendo i pulsanti colorati sul telecomando.
1.
Visualizzare la pagina del sommario del Televideo premendo il tasto
TTX/MIX ( )
.
2. Premere il tasto colorato corrispondente all’argomento che si desidera selezionare (gli argomenti disponibili sono indicati sulla riga di stato).
3. Premere il tasto rosso per visualizzare la pagina precedente.
Premere il tasto verde per visualizzare la pagina successiva.
4. Premere il tasto TV/DTV per uscire dalla schermata Testo.
Configurazione del software per PC (basato su Windows XP)
Di seguito vengono illustrate le impostazioni di visualizzazione di Windows per un PC tipico. Le schermate visualizzate
sul proprio PC possono differire in base alla versione di Windows e alla scheda video installate. Nel caso le schermate
risultassero differenti, le stesse informazioni di base per la configurazione sono applicabili praticamente in ogni caso.
(In caso contrario, contattare la casa costruttrice del proprio computer oppure un rivenditore Samsung).
1. Fare clic su “Control Panel” nel menu di Start di Windows.
2. Nella finestra del Pannello di controllo, fare doppio clic su “Appearance and Themes” per
visualizzare la relativa finestra di dialogo.
3. Nella finestra del Pannello di controllo, fare doppio clic su “Display” per visualizzare la relativa
finestra di dialogo.
4. Selezionare la scheda “Settings”.
L’impostazione corretta delle dimensioni (risoluzione): Ottimale- 1360 X 768
Se nella finestra di dialogo delle impostazioni dello schermo è disponibile un’opzione per la
frequenza verticale, il valore corretto è “60” o “60 Hz”. Altrimenti, fare semplicemente clic su “OK”
e uscire dalla finestra di dialogo.
Modalità di visualizzazione
La posizione e la dimensione dello schermo variano in base al tipo di schermo del PC e alla relativa risoluzione.
Le risoluzioni incluse nella tabella sono consigliate. (Sono supportate tutte le risoluzioni comprese entro i limiti indicati)
Modalità
IBM
VESA
La modalità interalacciata non è supportata.
Questo dispositivo potrebbe non funzionare correttamente se si seleziona un formato video non standard.
DVI non supporta la funzione PC.
Le modalità Separato e Composito sono supportate. Il formato SOG non è supportato.
Risoluzione
640 x 480
720 x 400
640 x 480
640 x 480
800 x 600
800 x 600
800 x 600
1024 x 768
1024 x 768
1024 x 768
1360 x 768
Frequenza
orizzontale (kHz)
31,469
31,469
37,861
37,500
37,879
48,077
46,875
48,364
56,476
60,023
47,712
Italiano-30
Frequenza
verticale (Hz)
59,940
70,087
72,809
75,000
60,317
72,188
75,000
60,000
70,069
75,029
60,015
Frequenza di clock
dei pixel (MHz)
25,175
28,322
31,500
31,500
40,000
50,000
49,500
65,000
75,000
78,750
85,800
Polarità
sync (H/V)
- / -
- / +
- / -
- / + /+
+ /+
+ /+
- / -
- / + /+
+ /+
Page 67

Selezione del PC
Regolazione della qualità dell’immagine (Blocco immagine):
Lo scopo della regolazione della qualità dell’immagine è di rimuovere o ridurre i
disturbi. Se il disturbo non viene eliminato mediante la semplice sintonizzazione fine,
è necessario regolare al meglio la frequenza (sintonizzazione grossa) ed eseguire
nuovamente la sintonizzazione fine. Dopo aver ridotti i disturbi, regolare nuovamente
l’immagine in modo che sia allineata al centro dello schermo.
1. Preimpostazione: Premere il tasto SOURCE per selezionare la modalità PC.
2. Premere il tasto MENU per visualizzare il menu.
Premere il pulsante 5 o 6 per selezionare “Impostazione”
e premere
3. Premere il pulsante 5 o 6 per selezionare “PC”
e premere
4. Premere il tasto
5. Premere il pulsante 5 o 6 per selezionare “Grossa” o “Fine”
e premere
6. Premere il tasto 3 o 4 bper regolare la qualità dello schermo.
Premere il tasto
7. Premere il tasto EXIT per uscire.
Modifica della posizione dell’immagine (Posizione):
Regolare la posizione dello schermo del PC per adattarlo come schermo TV.
1. Seguire le istruzioni “Regolazione della qualità dell’immagine
(Blocco immagine)” da 1 a 3.
2. Premere il pulsante 5 o 6 per selezionare “Posizione”
e premere
3. Premere il tasto 5 o 6 per regolare la posizione orizzontale.
Premere il tasto 3 o 4 per regolare la posizione verticale.
Premere il tasto
4. Premere il tasto EXIT per uscire.
Regolazione automatica dello schermo del PC (Regolazione auto):
L’Auto regolazione consente allo schermo del PC di adattarsi
automaticamente al segnale video PC in ingresso. I valori Fine, Grossa e
Posizione vengono regolati automaticamente.
1. Seguire le istruzioni “Regolazione della qualità dell’immagine
(Blocco immagine)” da 1 a 3.
2. Premere il pulsante 5 o 6 per selezionare “Regolazione auto”
e premere
3. Premere il tasto EXIT per uscire.
Inizializzazione delle impostazioni dell’immagine (Reset immagine):
È possibile sostituire tutte le impostazioni dell’immagine con i valori predefiniti.
1. Seguire le istruzioni “Regolazione della qualità dell’immagine
(Blocco immagine)” da 1 a 3.
2. Premere il pulsante 5 o 6 per selezionare “Reset immagine”
e premere
3. Premere il tasto EXIT per uscire.
ENTER/OK
ENTER/OK
ENTER/OK
ENTER/OK
ENTER/OK
ENTER/OK
ENTER/OK
ENTER/OK
ENTER/OK
.
.
per selezionare “Blocco immagine”.
.
.
.
.
.
.
Italiano-31
Page 68

Specifiche tecniche e ambientali
Il catenaccio Kensington è utilizzato per fissare il sistema durante l’impiego in ambienti pubblici e deve essere acquistato
separatamente. L’aspetto e il metodo di bloccaggio potrebbero differire dall’illustrazione a seconda del produttore.
Per ulteriori informazioni relative all’uso corretto del catenaccio Kensington, fare riferimento al rispettivo manuale.
1. Inserire il dispositivo di blocco nella
Cavo
Figura 2
Figura 1
<Opzionale>
La posizione del dispositivo di blocco ‘Kensington Lock’ può variare a seconda del modello.
fessura Kensington
situata sul TV LCD (Figura 1),
quindi ruotarlo nella direzione di
bloccaggio (Figura 2).
2. Collegare il cavo di bloccaggio
Kensington.
3. Fissare il catenaccio Kensington a
una scrivania o ad un altro oggetto
fisso pesante.
Risoluzione dei problemi: Prima di contattare l’assistenza
Niente audio e nessuna immagine.
Immagine normale ma niente Suono.
Nessuna immagine o immagine in
bianco e nero.
Interferenza audio o immagine.
Immagine sfocata o disturbata,
Suono distorto.
Cattivo funzionamento del
telecomando.
Viene visualizzato il messaggio
“Controlla cavo segnale”.
In modalità PC, viene visualizzato il
messaggio “Modo non supportato”
Il TFT LCD utilizza un pannello composto da sotto-pixel (3.133.440) la cui produzione è basata su una sofisticata tecnologia.
Alcuni pixel potrebbero apparire più brillanti o neri sullo schermo, ma questo non avrà alcun impatto sulle prestazioni del prodotto.
Verificare che il cavo di alimentazione sia collegato a presa a muro.
Verificare di aver premuto i tasti POWER sul pannello anteriore dell’apparecchio.
Verificare le impostazioni del contrasto e della luminosità dell’immagine.
Controllare il volume.
Controllare il volume.
Verificare che non sia stato premuto il tasto MUTE sul telecomando.
Verificare che la funzione “Mute interno” sia disattivata.
Regolare le impostazioni del colore.
Verificare che il sistema di trasmissione selezionato sia corretto.
Tentare di identificare quale elettrodomestico sta interferendo con il monitor TV e allontanarlo.
Inserire la spina del monitor TV in un’altra presa.
Verificare la direzione, la posizione e i collegamenti dell’antenna.
L’interferenza è spesso dovuta all’uso di antenne interne.
Sostituire le batterie del telecomando.
Pulire il bordo superiore del telecomando (finestra di trasmissione).
Controllare i terminali delle batterie.
Verificare che il cavo del segnale sia saldamente collegato al PC.
Verificare che il PC sia on.
Controllare la risoluzione e la frequenza massime della scheda video.
Confrontare questi valori con i dati presenti nella sezione delle Modalità di visualizzazione.
Italiano-32
Page 69

Specifiche tecniche e ambientali
Nome del modello
Dimensione schermo (Diagonale)
Alimentazione
Consumo di energia
PC Risoluzione
Audio
Uscita
Dimensioni (Lar. x Pro. x Alt.)
Corpo.
Con supporto
Peso
Con supporto
Considerazioni ambientali
Temperatura di esercizio
Umidità di esercizio
Temperatura di stoccaggio
Umidità di stoccaggio
Supporto ruotabile (Sinistra / Destra)
LE32R7
32 poll.
AC220-240V 50 Hz
152 W
1360 x 768 @ 60 Hz
10 W X 2
800,0 x 80,0 x 548,5 mm
800,0 x 252,0 x 603,0 mm
14,8 kg
Da 10 °C a 40 °C (50 °F a 104 °F)
Dal 10 % all’80 %, senza condensa
Da -20 °C a 45 °C (-4 °F a 113 °F)
Dal 5 % al 95 %, senza condensa
LE37R7
37 poll.
AC220-240V 50 Hz
170 W
1360 x 768 @ 60 Hz
10 W X 2
923,0 x 87,0 x 618,5 mm
923,0 x 326,0 x 676,5 mm
22,8 kg
Da 10 °C a 40 °C (50 °F a 104 °F)
Dal 10 % all’80 %, senza condensa
Da -20 °C a 45 °C (-4 °F a 113 °F)
Dal 5 % al 95 %, senza condensa
LE32R7 / LE37R7 / LE40R7
LE40R7
40 poll.
AC220-240V 50 Hz
190 W
1360 x 768 @ 60 Hz
10 W X 2
991,5 x 87,0 x 658,5 mm
991,5 x 326,0 x 713,0 mm
22,8 kg
Da 10 °C a 40 °C (50 °F a 104 °F)
Dal 10 % all’80 %, senza condensa
Da -20 °C a 45 °C (-4 °F a 113 °F)
Dal 5 % al 95 %, senza condensa
Sì
-20˚ ~ 20˚
ll progetto e le specifiehe sono Sync on Greengetti a variazioni senza preavviso.
Italiano-33
Page 70

Diagrammi a blocchi
Italiano-34
Page 71

Italiano-35
Page 72

Questa pagina è stata lasciata
intenzionalmente vuota.
Page 73

Indice
CONEXIÓN Y CONFIGURACIÓN DEL TELEVISOR
Lista de componentes ............................................................ 2
Instalación del soporte ............................................................ 2
Instalación del equipo de montaje en la pared ................. 2
Visualización del Panel de control .......................................... 3
Visualización del Panel de conexión ...................................... 4
Visualización del mando a distancia ...................................... 6
Instalación de las pilas en el mando a distancia .................... 6
Encendido y apagado ............................................................. 7
Cómo poner el televisor en modo de espera ......................... 7
Plug & Play ............................................................................. 7
AJUSTE DE LOS CANALES
Memorización automática de canales .................................... 8
Memorización manual de canales .......................................... 8
Configuración del Gestor de Canales .................................... 9
Activación del bloqueo para niños .................................... 9
Orden de los canales memorizados ....................................... 10
Asignación de nombres de canales ....................................... 10
Sintonía fina de la recepción de canales ............................... 10
LNA (Low Noise Amplifier - Amplificador de ruido bajo) ......... 11
AJUSTE DE LA IMAGEN
Cambio de la imagen estándar .............................................. 11
Ajuste de imagen personal ..................................................... 11
Cambio del tono del color ....................................................... 11
Reajuste de los valores de la imagen a los
valores predefinidos de fábrica .............................................. 12
Selección del Tamaño de la imagen ....................................... 12
Congelación de la imagen actual ........................................... 12
Reducción de ruido digital ...................................................... 12
DNIe Demo (motor digital de imágenes naturales) ................ 13
Visualización de Imagen en imagen (PIP) ............................. 13
Configuración de PIP .............................................................. 14
AJUSTE DEL SONIDO
Cambio del estándar de sonido ........................................ 14
Ajuste de los parámetros de sonido ................................. 14
Conexión de los auriculares .............................................. 14
Configuración de TruSurround XT (SRS TSXT) ............... 15
Ajuste del volumen automáticamente ............................... 15
Selección del silencio interno ............................................ 15
Cómo escuchar el sonido de la imagen secundaria ......... 15
Reajuste de valores de sonido a los valores
predefinidos de fábrica ...................................................... 16
AJUSTE DE LA HORA
Configuración y visualización de hora actual .................... 16
Ajuste del temporizador de desconexión .......................... 16
Encendido y apagado de la
televisión automáticamente ............................................... 16
OTROS AJUSTES
Selección del idioma ......................................................... 17
Uso del Modo Juego ......................................................... 17
Ajuste del modo Pantalla Azul /
Selección de Melodía ........................................................ 17
Uso de la función de ahorro de energía ........................... 18
Selección de la fuente ....................................................... 18
Edición de los nombres de fuentes de entrada ................ 18
USO DE LA FUNCIÓN DE DTV
Previsualización del sistema de menús del DTV ................... 19
Funciones básicas .................................................................. 20
1. Pantalla de visualización .................................................... 20
2. Control del volumen............................................................ 20
3. Selección de la pista sonora .............................................. 20
4. Selección de la pista de vídeo ........................................... 20
5. Lista de servicios ............................................................... 21
6. Información del programa .................................................. 21
Funcionamiento del menú DTV .............................................. 22
Menú principal ........................................................................ 22
1. Instalación........................................................................... 22
1.1 Selec. país ........................................................................ 22
1.2 Exploración automática .................................................... 22
1.3 Exploración manual .......................................................... 23
1.4 Restaurar los valores de fábrica ...................................... 23
2. Organización de los canales .............................................. 23
2.1 Borrar frecuencia .............................................................. 24
2.2 Suprimir canal ................................................................... 24
2.3 Suprimir todos los canales ............................................... 24
2.4 Desplazar y editor canal ................................................... 24
3. Bloqueo primario ................................................................ 25
3.1 Fijar el bloqueo de canales .............................................. 25
3.2 Cambiar el código PIN ..................................................... 25
3.3 Bloquear módom .............................................................. 25
4. Configuración del sistema .................................................. 26
4.1 Selección del idioma ........................................................ 26
4.2 Configuración de OSD ..................................................... 26
4.3 Parámetros de hora .......................................................... 26
4.4 Información del sistema.................................................... 27
4.5 Ampliación del software .................................................... 27
4.6 Control apli. MHP ............................................................. 27
4.7 Conf. módem .................................................................... 28
Instalación de la tarjeta CI ...................................................... 28
USO DE LA FUNCIÓN DE TELETEXTO
Decodificador de teletexto................................................. 28
Visualización de informaciones del teletexto .................... 29
Selección de una página de teletexto específica.............. 29
Uso de Fastext para seleccionar una
página del teletexto ........................................................... 30
AJUSTE DEL PC
Configuración del software del PC
(basado en Windows XP) ................................................. 30
Modo de visualización (PC) .............................................. 30
Selección del PC ............................................................... 31
RECOMENDACIONES PARA EL USO
Especificaciones técnicas y medioambientales ................ 32
Solución de problemas:
antes de ponerse en contacto con el servicio técnicoa .... 32
Especificaciones técnicas y medioambientales ................ 33
Símbolos Pulsar Importante Nota
Español
Botón de
unapulsación
Español-1
Page 74

Lista de componentes
Asegúrese de que los siguientes elementos se incluyan con el televisor de pantalla LCD.
Si falta alguno, póngase en contacto con su distribuidor.
M4 X L16
Mando a distancia
+ pilas (2x AAA)
Manual de instrucciones
Tarjeta de garantía / Tarjeta de red de servicio / Guía de seguridad / Tarjetas de registro (no esta disponible en todas las localidades).
El soporte y el tornillo del soporte podrían no estar incluidos, según el modelo.
Cable de
alimentación
Tarjeta de garantía
Cubierta - inferior 4 tornillos estándar Soporte Paño de limpieza
Tarjeta de red de servicio
Guía de seguridad Tarjetas de registro
Instalación del soporte
< 2 >
1. Coloque hacia abajo el TV sobre un paño suave o un almohadón sobre una mesa.
2. Coloque el soporte en el orificio de la parte inferior del televisor.
3. Inserte el tornillo en el orificio indicado y apriételo.
En los modelos con un tamaño de pantalla de 40 pulgadas y más el soporte ya está instalado.
Instalación del equipo de montaje en la pared
Los elementos para montaje en la pared (se venden por
separado) permiten instalar el televisor en una pared.
Si desea más información sobre la instalación de los
componentes para montaje en la pared, consulte las
instrucciones que se facilitan con dichos elementos.
Para la instalación del soporte mural, póngase en contacto
con un técnico.
Samsung Electronics no se hace responsable de los daños
causados al producto o a los usuarios si éstos han efectuado
personalmente la instalación del televisor.
Retire el soporte, tape el agujero inferior; asegure con los
dos tornillos.
Español-2
< 3 >
Page 75

Visualización del Panel de control
El color y la forma del producto pueden variar según el modelo.
SOURCE
Cambia entre todas las fuentes de entrada disponibles
(TV, Ext.1, Ext.2, AV, S-Vídeo, Componente, PC, HDMI,
DTV). En el menú de la pantalla, use este botón del mismo
modo que el botón
MENU
Púlselo para ver en pantalla un menú de las características
del televisor.
En el modo DTV, aparece el menú DTV.
Púlselo para aumentar o reducir el volumen.
En el menú de la pantalla, use estos botones
del mismo modo que los botones 3 y 4
del mando a distancia.
ENTER/OK
del mando a distancia.
Púlselos para cambiar de canal.
En el menú de la pantalla, use estos botones
del mando a distancia.
(Sin mando a distancia, puede encender el TV utilizando el
botón de los canales.)
Altavoces
Indicador de encendido
Parpadea y se apaga cuando la unidad está encendida y
se enciende en modo de espera.
Púlselo para encender o apagar el televisor.
Sensor del mando a distancia
Dirija el mando a distancia hacia este punto del televisor.
del mismo modo que los botones 5 y 6
(
Encendido)
Español-3
Page 76

Visualización del Panel de conexión
[Tomas del panel lateral][Tomas del panel posterior]
Entrada de
alimentación
Cada vez que conecte un dispositivo externo al televisor, compruebe que la unidad esté desconectada de la alimentación.
Cuando conecte un terminal externo, debe hacer coincidir los colores del terminal de conexión y del cable.
Conexión a la antena o a la red de televisión por cable
Para ver los canales de televisión correctamente, la unidad debe recibir una señal de una de las fuentes siguientes:
- Una antena exterior / Una red de televisión por cable / Una red por satélite
Conexión de HDMI/DVI
-
Admite conexiones entre dispositivos de AV con conexión HDMI (receptores de televisión digital, reproductores de DVD,
receptores de AV y televisores digitales).
- No se necesita conexión de audio adicional para una conexión de HDMI a HDMI.
¿Qué es HDMI?
digital (5.1 canales).
- El terminal HDMI/DVI admite la conexión DVI con un dispositivo ampliado mediante el cable apropiado (no suministrado).
La diferencia entre HDMI y DVI es que el dispositivo HDMI es de menor tamaño, tiene una función de codificación HDCP (protección alta de la copia
digital del ancho de banda) y es compatible con el sonido digital de varios canales.
- Cuando conecte este equipo a un decodificador, un reproductor de DVD, una consola de juegos, etc., a través de HDMI o DVI debe
comprobar que el modo de salida de vídeo sea compatible como se muestra en la tabla inferior.
Un error de compatibilidad puede causar distorsión o ruptura de la imagen o que ésta no se vea.
-
“La interfaz multimedia de alta definición” (HDMI) permite la transmisión de los datos de vídeo digital de alta definición y varios canales de sonido
Debe utilizar un cable de DVI a HDMI o un prolongador DVI-HDMI para la conexión, y el terminal “R - AUDIO - L” en DVI para salida de sonido.
Modos admitidos para DVI o HDMI
50 Hz
60 Hz
Componente
No intente conectar en la toma HDMI/DVI un PC o una tarjeta gráfica portátil. (Sólo se conseguirá una pantalla en blanco.)
480i
X
X
O
480p
O
O
O
576i
X
X
O
576p
O
X
O
720p
O
O
O
1080i
O
O
O
Español-4
Page 77

Conexión del receptor de TV digital, vídeo o DVD
-
Conector
EXT 1
EXT 2
Conexión a dispositivos de A/V
- Conecte el cable RCA o S-VIDEO a un dispositivo A/V externo apropiado, como un vídeo, DVD o cámara de vídeo.
- Conecte los cables de sonido RCA a “R - AUDIO - L” de la parte posterior del aparato y los otros extremos a los conectores de salida de
sonido correspondientes en el dispositivo A/V.
- Los auriculares pueden estar conectados a la salida de auriculares (
están conectados, se desactiva el sonido de los altavoces integrados.
SERVICE (servicio)
- Conexión de servicio para el ingeniero de servicio cualificado.
Conexión del audio
- Conecte los cables de audio RCA a “R - AUDIO - L” en la parte posterior de la unidad y los otros extremos a los conectores de salida de
audio correspondientes en el amplificador o el sistema DVD Home Theater.
Conexión a un equipo
- Conecte el cable D- sub (opcional) a “PC (PC IN)”, en la parte posterior del aparato, y el otro extremo a la tarjeta de vídeo del ordenador.
- Conecte el cable estéreo de audio (opcional) a la entrada “AUDIO (PC IN)” en la parte posterior del equipo y el otro extremo a la salida
“Audio Out” de la tarjeta de sonido del ordenador.
Conexión de dispositivos con salida de vídeo por componentes (DTV/DVD)
- Conecte los cables de vídeo de componentes (opcionales) al conector de componentes (“PR”, “PB”, “Y”) de la parte posterior del equipo y
los otros extremos a los conectores de salida de vídeo de los componentes correspondientes en el DTV o DVD.
- Si desea conectar tanto el decodificador como el DTV (o DVD), deberá conectar el decodificador al DTV (o DVD) y conectar el DTV
(o DVD) al conector de componentes (“P
-
Los conectores Y, PB y PR de los dispositivos con salida de vídeo por componentes (DTV o DVD) se denominan a veces Y, B-Y y R-Y o Y, Cb y Cr.
- Conecte los cables de sonido RCA (opcionales) a “R - AUDIO - L” de la parte posterior del aparato y los otros extremos a os conectores de
salida de sonido correspondientes en el DTV o DVD.
- Este TV LCD muestra la imagen con la resolución óptima en modo 720p.
- Este TV LCD muestra la imagen con la resolución máxima en modo 1080i.
Bloqueo Kensington
- El bloqueo Kensington (opcional) es un dispositivo que se utiliza para fijar físicamente el sistema cuando se utiliza en un sitio público.
- Si desea usar un dispositivo de bloqueo, póngase en contacto con el distribuidor donde adquirió el televisor.
- La ubicación del “Bloqueo Kensington” puede variar según el modelo.
SALIDA DE AUDIO DIGITAL (ÓPTICA)
- Se conecta a un componente de audio digital.
Conexión de la TARJETA CI (Interfaz común)
Panel posterior del TV
Puerto de servicio
- Conexión de servicio para el ingeniero de servicio cualificado.
Puerto de conexión del módem
Vídeo Audio (L/R)
Entrada
RGB
R”, “PB”, “Y”) de su equipo.
TARJETA CI
Salida
Vídeo + Audio (L/R)
Sólo está disponible la salida de TV o DTV.
La salida que puede elegir.
Inserte la
tarjeta tal como
se indica
Tomas de entrada o salida para dispositivos externos,
como aparatos de vídeo, reproductores de DVD,
videojuegos o reproductores de videodiscos.
) ubicada en la parte posterior del aparato. Mientras los auriculares
- Si no se inserta una “TARJETA CI” con algunos canales,
en la pantalla aparece “Scramble Signal” (Señal codificada).
- En 2 o 3 minutos aparecerá en la pantalla la información del
enlace que contiene un número telefónico, un identificador de
TARJETA CI, un identificador del sistema y demás
información. Si aparece un mensaje de error, póngase en
contacto con su proveedor de servicios.
- Una vez completada la configuración de la información del
canal, aparecerá el mensaje “Updating Completed”
(Actualización completada), para indicar que la lista de
canales ya se ha actualizado.
Debe obtener una TARJETA CI en un proveedor local de
servicios. Para retirar la TARJETA CI, extráigala cuidadosamente
con los dedos, puesto que si cae al suelo se puede dañar.
Español-5
Page 78

Visualización del mando a distancia
(No disponible en Español)
Selecciona un dispositivo de destino que
controlar con el mando a distancia
Samsung (TV, DVD, STB, CABLE, VCR).
Botón de suspensión del televisor
Botón numéricos para elegir un canal
directamente
Selección de canal de uno/dos dígitos
Muestra el “Gestor de Canales” en la
pantalla.
Selecciona directamente los modos TV y DTV
Funciones de VÍDEO/DVD
Rebobinar, Parar, Reproducir/Pausa,
Avance rápido
Disminución del volumen
Aumento del volumen
Interrupción momentánea del sonido
Pantalla de menús y confirmación de
cambios
Visualización de la Guía electrónica de
programas (EPG).
Activar/desactivar PIP (imagen en imagen)
Selección de los efectos de sonido
Canal anterior / Esta tecla se utiliza en la
aplicación MHP y para cambiar el canal
anterior. Se utiliza también para retroceder
a la página anterior del D.MENU.
Ajusta 5 dispositivos diferentes: TV, DVD,
decodificador, cable o aparato de vídeo.
Selección de fuente de entrada de vídeo
Canal anterior
Menú de pantalla del DTV
Botón para alternar entre canal de radio y
canal de TV
P : Canal siguiente
P : Canal anterior
Sale del menú en pantalla
Controla el cursor en el menú
Se utiliza para ver información sobre la
emisión actual
Visualización de subtítulos digitales
Este botón es la tecla de acceso a la lista
de aplicaciones MHP
Congelación de la imagen
Selecciona la lista de las pistas sonoras y
de vídeo para el servicio actual
Funciones de Teletexto
Sale de la visualización del teletexto
Índice del teletexto
Hold del teletexto
Selecciona el modo teletexto
Selección de tamaño de teletexto
Selección del modo de teletexto
(Lista o Flof)
Página secundaria de teletexto
P : Siguiente página de teletexto
P : Página de teletexto anterior
Cancelar teletexto
Mostrar teletexto
Seleccione alternativamente Teletxt,
Double o Mix.
Selección de tema de fastext
Awaiting for explanation
El funcionamiento del mando a distancia se puede ver afectado por la luz brillante.
Es un mando a distancia especial para personas con discapacidades visuales; presenta
puntos Braille en los botones de encendido, de canales y del volumen.
Instalación de las pilas en el mando a distancia
1. Levante la tapa de la parte posterior del mando a distancia, como se muestra en la ilustración.
2. Coloque dos pilas de tamaño AAA.
Compruebe que los extremos “+” y “–” de las pilas concuerdan con el diagrama del interior del compartimiento.
3. Vuelva a colocar la tapa.
Si no va a usar el mando a distancia durante un largo período de tiempo, extraiga las pilas y guárdelas en un lugar
fresco y seco. El mando se puede utilizar hasta una distancia de unos 7 metros del televisor.
(Con un uso normal del TV,las pilas duran alrededor de un año.)
Si el mando a distancia no funciona, haga estas comprobaciones:
1. ¿Está encendido el TV?
2. ¿Están invertidos los extremos positivo y negativo de las pilas?
3. ¿Se han agotado las baterías?
4. ¿Ha habido un corte de luz o el cable está desenchufado?
5. ¿Hay cerca una luz fluorescente o un letrero de neón?
Español-6
Page 79

Encendido y apagado
El cable de alimentación se encuentra en la parte posterior de la unidad.
1. Conecte el cordón eléctrico en un enchufe adecuado.
Se enciende el indicador de modo en espera de la parte frontal del equipo.
2. Pulse el botón de la parte frontal del aparato.
También puede pulsar el botón POWER o el botón
El programa que estaba viendo por última vez se vuelve a seleccionar de forma automática.
3.
Pulse el botón numérico (0~9) o el botón de canal siguiente/anterior ( / ) del mando a distancia o el botón de la parte
derecha del equipo.
Cuando encienda el equipo pro primera vez, se le pedirá que elija el idioma en el que quiere que aparezcan los menús.
TV/DTV
del mando a distancia para encender el televisor.
4. Para apagar el equipo, pulse de nuevo POWER .
Cómo poner el televisor en modo de espera
Se puede dejar el Televisor en modo de espera para reducir el consumo de energía.
El modo de espera es muy útil si desea interrumpir la visualización momentáneamente (durante la comida, por ejemplo).
1. Pulse el botón POWER del mando a distancia.
La pantalla se apaga y aparece un indicador rojo de modo en espera en la parte frontal del aparato.
2.
Para volver a encender el equipo, pulse de nuevo POWER , los botones numéricos (0~9), TV/DTV o de canal siguiente/anterior ( / ).
No deje el Televisor en modo de espera durante largos períodos de tiempo (cuando esté fuera de casa por vacaciones,
por ejemplo). Lo más apropiado es desenchufar el cordón de corriente y el cable de la antena.
Plug & Play
Cuando el equipo se enciende por primera vez, se presenta automáticamente
una serie de opciones de configuración básicas. Los ajustes siguientes están
disponibles.
1. Pulse el botón POWER del mando a distancia.
Aparece el mensaje “Start Plug & Play” con “OK” seleccionado.
2. Seleccione el idioma apropiado pulsando los botones 5 o 6.
Pulse el botón ENTER/OK para confirmar la elección.
3. Aparece el mensaje “Comprovar la entrada de la antena” con la opción “OK”
seleccionada. Pulse el botón ENTER/OK .
Compruebe que el cable de la antena esté conectado correctamente.
4. Seleccione el país apropiado pulsando los botones 5 o 6.
Pulse el botón ENTER/OK para confirmar la elección.
5. Se visualiza el menú “Guardado automático” con la opción “Empezar” seleccionada.
Pulse el botón ENTER/OK .
La búsqueda de canales comenzará y terminará automáticamente.
Después de memorizar todos los canales, se muestra “Ajustar hora”
Pulse el botón ENTER/OK en cualquier momento para interrumpir el proceso de memorización.
6. Pulse el botón ENTER/OK .
Seleccione la “Hora” o el “Minuto” pulsando los botones
Establezca la “Hora” o el “Minuto” pulsando los botones
También puede ajustar la hora y los minutos pulsando los botones numéricos del mando a distancia.
7. Pulse el botón ENTER/OK para confirmar el ajuste. Aparece el menú de búsqueda
de canales de DTV y el canal de DTV se actualiza automáticamente.
Cuando se actualiza el canal de DTV, la fuente de la lista de fuentes del menú Input
(Entrada) se cambia automáticamente a DTV.
Para obtener información detallada acerca de la actualización de canales de DTV,
consulte la página 27 de este manual.
Idioma: Seleccione el idioma.
País: Seleccione el país.
Guardado automático: Automáticamente busca y almacena los canales disponibles en el área local.
Ajustar hora: Ajusta la hora actual del reloj del televisor.
Si quiere volver a ajustar esta característica...
1. Pulse el botón MENU ver el menú. Pulse los botones
“Configuración” y pulse el botón
2. Pulse de nuevo el botón
ENTER/OK .
ENTER/OK
para seleccionar “Plug & Play”.
3. Aparece el mensaje para iniciar “Start Plug & Play”
3 o 4
5 o 6
5 o 6
.
.
para seleccionar
Español-7
Page 80

- Memorización automática de canales
- Memorización manual de canales
Memorización automática de canales
Puede explorar los rangos de frecuencia disponibles (la disponibilidad varía en función del país).
Los números de programa adjudicados automáticamente puede que no se correspondan con los números de programa
reales o deseados. No obstante, puede ordenar los números manualmente y borrar los canales que no desea ver.
1. Pulse el botón MENU para ver el menú.
Pulse los botones 5 o 6 para seleccionar “Canal” y pulse el botón ENTER/OK .
2. Pulse el botón ENTER/OK para seleccionar “País”.
3. Seleccione el país apropiado pulsando los botones 5 o 6. Pulse el botón ENTER/OK para confirmar la elección.
4. Pulse los botones 5 o 6 para seleccionar “Guardado automático” y pulse el botón ENTER/OK .
5. Pulse el botón ENTER/OK .
El televisor empezará a memorizar todos los canales disponibles.
Pulse el botón ENTER/OK en cualquier momento si desea interrumpir el proceso de memorización y volver al menú “Canal”.
6. Una vez memorizados todos los canales disponibles, aparecerá el menú “Ordenar”.
Memorización manual de canales
Se pueden memorizar hasta 100 canales, que incluyen los que se reciben a través de redes por cable.
Cuando memorice los canales manualmente, podrá elegir:
Si se memoriza o no cada canal que se encuentre
El número de programa con el que desea identificar cada canal memorizado
1. Pulse el botón MENU para ver el menú.
Pulse los botones 5 o 6 para seleccionar “Canal” y pulse el botón ENTER/OK .
2. Pulse los botones 5 o 6 para seleccionar “Guardado manual” y pulse el botón ENTER/OK .
3. Pulse el botón ENTER/OK para seleccionar “Programa”.
4. Para asignar un número de programa a un canal, busque el número correcto pulsando el botón 5 o 6
y pulse el botón ENTER/OK .
También puede establecer el número de cada programa pulsando los botones numéricos en el mando a distancia.
5. Pulse los botones 5 o 6 para seleccionar “Sistema de color” y pulse el botón ENTER/OK .
6. Seleccione el estándar de color deseado pulsando varias veces los botones 5 o 6 y, a continuación, pulse el botón ENTER/OK .
7. Pulse los botones 5 o 6 para seleccionar “Sistema de sonido” y pulse el botón ENTER/OK .
8. Seleccione el estándar de sonido deseado pulsando varias veces los botones 5 o 6 y, a continuación, pulse el botón ENTER/OK .
Si se produce un sonido anormal o no se produce sonido, vuelva a seleccionar el sistema de sonido adecuado.
9. Si sabe el número del canal que desea almacenar, pulse el botón 5 o 6 para seleccionar “Canal”. Pulse el botón
ENTER/OK . Seleccione C (canal aéreo) o S (canal por cable) pulsando el botón 5 o 6. Pulse el botón 4 para seleccionar
el canal. Seleccione el número que desea pulsando el botón 5 o 6 y, a continuación, pulse el botón ENTER/OK .
Modo de canal: P (Modo Programa), C (Modo de canal aéreo), S (Modo Canal por cable)
También puede definir el canal pulsando los botones numéricos en el mando a distancia.
10. Si no conoce los números de canal, pulse los botones 5 o 6 para seleccionar “Buscar”. Pulse el botón ENTER/OK .
Realice la búsqueda pulsando los botones 5 o 6 y, a continuación, pulse el botón ENTER/OK .
11. Pulse el botón 5 o 6 para seleccionar “Guardar”. Pulse el botón ENTER/OK para seleccionar “Aceptar”.
12. Repita los pasos 3 a 11 para cada canal que quiera memorizar.
Programa: Selecciona un número de programa para el canal.
Sistema de color: Ajusta el sistema de soporte del color.
Sistema de sonido: Ajusta el sistema de soporte del sonido.
Canal: Selecciona un canal.
Buscar: Busca el valor de frecuencia del canal.
Guardar: Guarda la configuración.
Español-8
Page 81

Configuración del Gestor de Canales
Puede configurar los canales como prefiera.
Puede suprimir, añadir o bloquear fácilmente el canal que desee.
1. Pulse el botón MENU para ver el menú.
Pulse los botones 5 o 6 para seleccionar “Canal” y pulse el botón ENTER/OK .
2. Pulse los botones 5 o 6 para seleccionar “Gestor de Canales” y pulse el botón
ENTER/OK .
3. Pulse el botón ENTER/OK para seleccionar “Gestor de Canales”.
4. Pulse el botón 4 para seleccionar “ ”.
5. Pulse los botones 5 o 6 para seleccionar el canal no deseado y pulse el botón
ENTER/OK para cancelar.
6. Repita el paso 5 con cada canal que desee seleccionar o cancelar.
7. Pulse el botón EXIT para salir.
“ ” está activo cuando “Seguridad para niños” está seleccionado como “Activado”.
Puede seleccionar estas opciones
pulsando el botón CH MGR del mando
a distancia.
Activación del bloqueo para niños
Esta función permite evitar que usuarios no autorizados, como niños, puedan ver
programas poco recomendables desactivando el vídeo y el audio.
El bloqueo infantil no se puede desactivar mediante los botones del panel lateral.
Únicamente con el mando a distancia es posible desactivar el ajuste del bloqueo
infantil; por tanto, mantenga el mando a distancia fuera del alcance de los niños.
1. Pulse el botón MENU para ver el menú.
Pulse los botones 5 o 6 para seleccionar “Canal” y pulse el botón ENTER/OK .
2. Pulse los botones 5 o 6 para seleccionar “Gestor de Canales” y pulse el botón
ENTER/OK .
3. Pulse los botones 5 o 6 para seleccionar “Seguridad para niños” y pulse el botón
ENTER/OK .
4. Pulse el botón 5 o 6 seleccionar “Activado” o “Desactivado”.
Pulse el botón ENTER/OK .
5. Pulse los botones 5 o 6 para seleccionar “Gestor de Canales” y pulse el botón
ENTER/OK .
6. Pulse el botón 4 para seleccionar la línea “ ”.
7. Pulse los botones 5 o 6 para seleccionar los canales que desee bloquear y
pulse el botón ENTER/OK .
8. Repita el paso 7 con cada canal que desee bloquear o desbloquear.
9. Pulse el botón EXIT para salir.
Seleccione “Activado” u “Desactivado” en “Seguridad para niños” para activar o desactivar
fácilmente los canales que estén marcados con “ ”.
Español-9
Page 82

Orden de los canales memorizados
Puede intercambiar los números de dos canales para:
Modificar el orden numérico en que los canales se han memorizado
automáticamente.
Asignar números fáciles de recordar a los canales que ve con más frecuencia.
1. Pulse el botón MENU para ver el menú.
Pulse los botones 5 o 6 para seleccionar “Canal” y pulse el botón ENTER/OK .
2. Pulse los botones 5 o 6 para seleccionar “Ordenar” y pulse el botón ENTER/OK .
3. Seleccione el número del canal que desea cambiar pulsando varias veces los botones
5 o 6. Pulse el botón ENTER/OK .
El número de canal seleccionado y su nombre se mueven al lado derecho.
4. Pulse los botones 5 o 6 para desplazarse a la posición a la que desea cambiar y
pulse el botón ENTER/OK .
El canal seleccionado se intercambia con el memorizado previamente con el número elegido.
5. Repita los pasos 3 a 4 para clasificar otro canal.
Pulse el botón EXIT para salir.
6.
Asignación de nombres de canales
Los nombres de los canales se asignarán automáticamente si se emite la información
del canal. Estos nombres se pueden cambiar y puede asignar nombres nuevos.
1. Pulse el botón MENU para ver el menú.
Pulse los botones 5 o 6 para seleccionar “Canal” y pulse el botón ENTER/OK .
2. Pulse los botones 5 o 6 para seleccionar “Nombre” y pulse el botón ENTER/OK .
3. Si es necesario, seleccione el canal al que se va a asignar un nombre nuevo pulsando
los botones 5 o 6. Pulse el botón ENTER/OK .
La barra de selección se muestra en el cuadro de nombre.
4.
Para...
Seleccionar una letra, número o símbolo
Desplazarse a la letra siguiente
Retroceder a la letra anterior
Confirme el nombre
Los caracteres disponibles son:
Letras del alfabeto (A~Z) / Números (0~9) / Caracteres especiales (-, espacio)
5.
Repita los pasos 3 a 4 para cada canal al que se asigne un nombre nuevo.
6. Pulse el botón EXIT para salir.
Entonces...
Pulse el botón
Pulse el botón
Pulse el botón
Pulse el botón ENTER/OK
5 o 6
4
3
Sintonía fina de la recepción de canales
Utilice la sintonización fina para ajustar manualmente un determinado canal de modo
que la recepción sea óptima.
1. Utilice los botones numéricos para seleccionar directamente el canal que desee ajustar
con precisión.
2. Pulse el botón MENU para ver el menú.
Pulse los botones 5 o 6 para seleccionar “Canal” y pulse el botón ENTER/OK .
3. Pulse los botones 5 o 6 para seleccionar “Sintonización fina” y pulse el botón
ENTER/OK .
4. Pulse los botones 3 o 4 para ajustar la sintonización fina. Pulse el botón ENTER/OK .
5. Pulse el botón EXIT para salir.
Los canales guardados en los que se haya efectuado un ajuste fino están marcados con un asterisco “*” en
el lado derecho del número del canal, en la banda de canales. Y el número de canal se pone de color rojo.
Para reiniciar el ajuste fino, seleccione “Restabl.” pulsado los botones 5 o 6 y, a continuación, pulse
el botón ENTER/OK .
Español-10
Page 83

LNA (Low Noise Amplifier - Amplificador de ruido bajo)
Si el TV funciona en una zona de señal débil, la función LNA puede mejorar la recepción
(un preamplificador de nivel bajo de ruido aumenta la señal de entrada).
1. Pulse el botón MENU para ver el menú.
Pulse los botones 5 o 6 para seleccionar “Canal” y pulse el botón ENTER/OK .
2. Pulse los botones 5 o 6 para seleccionar “LNA” y pulse el botón ENTER/OK .
3.
Pulse el botón 5 o 6 seleccionar “Activado” o “Desactivado”. Pulse el botón ENTER/OK .
4. Pulse el botón EXIT para salir.
Cambio de la imagen estándar
Se puede seleccionar el tipo de imagen que mejor se corresponda a los requisitos de
visualización.
1. Pulse el botón MENU para ver el menú.
Pulse los botones 5 o 6 para seleccionar “Imagen” y pulse el botón ENTER/OK .
2. Pulse de nuevo el botón ENTER/OK para seleccionar “Modo”.
3. Pulse de nuevo el botón ENTER/OK para seleccionar “Modo”.
4.
Pulse el botón 5 o 6 para seleccionar el efecto de imagen deseado. Pulse el botón ENTER/OK .
5. Pulse el botón EXIT para salir.
Dinámico: Selecciona la alta definición en la imagen, en una habitación luminosa.
Estándar: Selecciona la visualización óptima de la imagen, en un entorno normal.
Película: Selecciona una visualización agradable de la imagen, en una sala oscura.
Personal:
El modo Imagen se debe ajustar independientemente para cada fuente de entrada.
Puede volver a los ajustes de imagen predefinidos de fábrica seleccionando “Restablecer”.
(Consulte “Reajuste de los valores de la imagen a los valores predefinidos de fábrica” en la página 12)
Selecciónelo para ver los ajustes de pantalla favoritos.
(Consulte “Ajuste de imagen personal”)
Ajuste de imagen personal
La unidad ofrece varias configuraciones que permiten controlar la calidad de imagen.
1. Para seleccionar el efecto de imagen deseado, siga las instrucciones 1 a 4 de
“Cambio de la imagen estándar”.
2. Pulse los botones 5 o 6 para seleccionar un elemento concreto.
3. Pulse los botones 3 o 4 para reducir o aumentar el valor de un elemento concreto.
Pulse el botón ENTER/OK .
4. Pulse el botón EXIT para salir.
Contraste: Ajusta la claridad y oscuridad entre los objetos y el fondo.
Brillo: Ajusta el brillo de toda la pantalla.
Nitidez: Ajusta el contorno de los objetos para que estén más o menos nítidos.
Color: Ajusta los colores para que aparezcan más claros o más oscuros.
Matiz(Sólo NTSC): Ajusta el color de los objetos haciendo que sean más rojos o verdes para que
Los parámetros ajustados se almacenan de acuerdo con el modo Imagen seleccionado.
En el modo PC, sólo “Contraste”, “Brillo” y “Color” se pueden ajustar.
Cambio del tono del color
Puede seleccionar el tono de color que le resulte más cómodo para su vista.
1. Para seleccionar el efecto de imagen deseado, siga las instrucciones 1 a 4 de
“Cambio de la imagen estándar”.
2. Pulse los botones 5 o 6 para seleccionar “Tono de color” y pulse el botón ENTER/OK .
3. Pulse los botones 5 o 6 para seleccionar el ajuste de tono de color deseado.
4. Pulse el botón EXIT para salir.
Frío2: Hace que la temperatura del color sea más
Frío1: Hace que el blanco sea azulado.
Normal: Mantiene el color blanco sin modificaciones.
Los parámetros ajustados se almacenan de acuerdo con el modo Imagen seleccionado.
Pulse el botón ENTER/OK .
tengan un aspecto más natural.
Pulse el botón ENTER/OK .
azul que en el menú “Frío1”.
Español-11
Cálido1: Hace que el blanco sea rojizo.
Cálido2: Hace que la temperatura del color sea más
azul que en el menú “Cálido1”.
Page 84

Reajuste de los valores de la imagen a los valores predefinidos de fábrica
Puede volver a los ajustes de imagen predefinidos de fábrica.
1. Para seleccionar el efecto de imagen deseado, siga las instrucciones 1 a 4 de
“Cambio de la imagen estándar” de la página Reducción de ruido digital 11.
2. Pulse los botones 5 o 6 para seleccionar “Restablecer” y pulse el botón
ENTER/OK .
3. Pulse el botón EXIT para salir.
La función “Restablecer” afectará a cada modo de imagen.
Selección del Tamaño de la imagen
Puede seleccionar el tamaño de imagen que mejor corresponda con sus requisitos
de visualización.
1. Pulse el botón MENU para ver el menú. Pulse los botones 5 o 6 para
seleccionar “Imagen” y pulse el botón ENTER/OK .
2. Pulse los botones 5 o 6 para seleccionar “Tamaño” y pulse el botón ENTER/OK .
3. Seleccione la opción que desee pulsando el botón 5 o 6.
Pulse el botón ENTER/OK .
4. Pulse el botón EXIT para salir.
Ancho automát.: Ajusta automáticamente el tamaño de la imagen a la relación de aspecto de la
16:9: Ajusta el tamaño de la imagen a 16:9, adecuado para ver los DVD o las emisiones en formato ancho.
Zoom: Amplía la imagen ancha de 16:9 (en sentido vertical) para que la imagen ocupe el tamaño de
la pantalla.
4:3: Es la configuración predeterminada para una película de vídeo o una emisión normal.
La función “Ancho automát.” sólo está disponible en los modos “TV”, “Ext1”, “Ext2”, “AV” y “S-Vídeo”.
En modo PC, solamente se puede ajustar el modo “16:9” y “4:3”.
Seleccione pulsando los botones 3 o 4. Utilice los botones 5 o 6 para mover la imagen
arriba y abajo. Después de seleccionar , utilice los botones 5 o 6 para ampliar o reducir el
tamaño de la imagen en dirección vertical.
El modo Zoom (Zoom) no se puede seleccionar en el modo de DTV.
pantalla “16:9”.
Congelación de la imagen actual
Pulse el botón STILL (Imagen fija) para congelar una imagen en movimiento en una
imagen fija. Vuelva a pulsar el botón STILL para cancelar.
Reducción de ruido digital
Si la señal de emisión que recibe el televisor es débil, puede activarse la función de
reducción digital del ruido para reducir la estática y las imágenes superpuestas que
pueden aparecer en la pantalla.
1. Pulse el botón MENU para ver el menú. Pulse los botones 5 o 6 para
seleccionar “Imagen” y pulse el botón ENTER/OK .
2. Pulse los botones 5 o 6 para seleccionar “Digital NR” y pulse el botón ENTER/OK .
3. Pulse el botón 5 o 6 seleccionar “Activado” o “Desactivado”.
Pulse el botón ENTER/OK .
4. Pulse el botón EXIT para salir.
Español-12
Page 85

DNIe Demo (motor digital de imágenes naturales)
La nueva tecnología de Samsung le ofrece imágenes más detalladas con mejoras en
contraste y blancos. Un nuevo algoritmo de compensación de imagen proporciona a
los usuarios una imagen más brillante y más clara.
La tecnología DNIe adaptará todas las señales a su vista.
Puede ver cómo DNIe mejora la imagen activando el modo DNIe Demo.
1. Pulse el botón MENU para ver el menú. Pulse los botones 5 o 6 para
seleccionar “Imagen” y pulse el botón ENTER/OK .
2. Pulse los botones 5 o 6 para seleccionar “DNIe Demo” y pulse el botón ENTER/OK .
3. Pulse el botón 5 o 6 seleccionar “Activado” o “Desactivado”.
Pulse el botón ENTER/OK .
4. Pulse el botón EXIT para salir.
Estas funciones no están operativas en el modo PC.
El DNle Demo se ha diseñado para mostrar la diferencia entre las imágenes habituales y DNIe.
De forma predeterminada, el producto aplica DNIe a la presentación de la imagen.
Visualización de Imagen en imagen (PIP)
Puede visualizar una imagen secundaria dentro de la imagen principal del programa
o de la entrada de video definidos. De esta manera, es posible visualizar la imagen
del programa o la entrada de video definidos desde cualquier equipo conectado
mientras se visualiza la imagen principal.
1. Pulse el botón MENU para ver el menú. Pulse los botones 5 o 6 para
seleccionar “Imagen” y pulse el botón ENTER/OK .
2. Pulse los botones 5 o 6 para seleccionar “PIP” y pulse el botón ENTER/OK .
3. Pulse el botón ENTER/OK de nuevo. Seleccione “Activado” pulsando el botón
5 o 6 y , a continuación, pulse el botón ENTER/OK .
Si PIP está activado, el tamaño de la imagen principal cambia a “16:9”.
4. Pulse los botones 5 o 6 para seleccionar “Fuente” y pulse el botón ENTER/OK .
Pulse repetidamente el botón PIP
del mando a distancia para activar
o desactivar “PIP”.
Seleccione una fuente de entrada de la imagen secundaria pulsando los botones
5 o 6 y pulse el botón ENTER/OK .
La imagen secundaria puede servir a diferentes selecciones de fuente basadas en cómo esté
configurada la imagen principal.
5. Pulse el botón 5 o 6 para seleccionar “Intercambiar”.
Para intercambiar la imagen principal y la imagen secundaria, seleccione la opción
“Intercambiar” y pulse el botón ENTER/OK .
Se intercambian la imagen principal y la imagen secundaria.
Si la imagen principal está en modo “PC”, la opción “Intercambiar” no está disponible.
6. Pulse el botón 5 o 6 para seleccionar “Tamaño” de la imagen secundaria y pulse el
botón ENTER/OK . Seleccione el tamaño de la imagen secundaria pulsando los
botones 5 o 6 y pulse el botón ENTER/OK .
Si la imagen principal está en modo “PC”, la opción “Tamaño” no está disponible.
7. Pulse los botones 5 o 6 para seleccionar “Posición” y pulse el botón ENTER/OK .
Seleccione una fuente de entrada de la imagen secundaria pulsando los botones
5 o 6 y pulse el botón ENTER/OK .
8. Pulse el botón 5 o 6 para seleccionar “Programa” y pulse el botón ENTER/OK .
Puede seleccionar el canal que desee ver en la imagen secundaria pulsando el
botón5 o 6. Pulse el botón ENTER/OK .
“Programa” puede estar activo cuando la imagen secundaria esté configurada como TV.
9. Pulse el botón EXIT para salir.
Cuando utilice la pantalla principal para visualizar un juego o un karaoke, podrá advertir que la
imagen en la ventana PIP no resultará del todo natural.
Fuente: Se usa para seleccionar la fuente de entrada de la imagen secundaria.
Intercambiar: Se utiliza para intercambiar la imagen principal y la secundaria.
Tamaño: Se utiliza para seleccionar el tamaño de la imagen secundaria.
Posición: Se usa para desplazar la imagen secundaria.
Programa: Se utiliza para cambiar la imagen secundaria.
Español-13
Page 86

Configuración de PIP
Secundaria
Principal
TV
Ext.1
Ext.2
AV
S-Video
Component
PC
HDMI
DTV
TV
X
X
X
X
X
X
O
O
X
Ext.1
X
X
X
X
X
X
O
O
X
Ext.2
X
X
X
X
X
X
O
O
X
Cambio del estándar de sonido
Puede seleccionar un tipo de efecto de sonido especial que se usará cuando se
visualice una emisión concreta.
1. Pulse el botón MENU para ver el menú.
Pulse los botones 5 o 6 para seleccionar “Sonido” y pulse el botón ENTER/OK .
2. Pulse de nuevo el botón ENTER/OK para seleccionar “Modo”.
3. Seleccione el efecto de sonido deseado pulsando varias veces el botón 5 o 6 y,
a continuación, pulse el botón ENTER/OK .
4. Pulse el botón EXIT para salir.
Estándar: Selecciona el modo de sonido normal.
Música: Realza la música respecto de las voces.
Película: Proporciona un sonido vivo y natural en las películas.
Diálogo: Realza las voces respecto de los sonidos.
Personal: Seleccione los ajustes del sonido que prefiera.
(O: PIP está activado, X: PIP está desactivado)
AV
X
X
X
X
X
X
O
O
X
(Consulte “Ajuste de los parámetros de sonido”)
S-Video
X
X
X
X
X
X
X
O
X
Component
X
X
X
X
X
X
X
O
X
PC
X
X
X
X
X
X
X
X
X
HDMI
O
O
O
O
O
O
X
X
X
DTV
X
X
X
X
X
X
X
X
X
Ajuste de los parámetros de sonido
Es posible ajustar los parámetros del sonido según sus preferencias personales.
1. Pulse el botón MENU para ver el menú.
Pulse los botones 5 o 6 para seleccionar “Sonido” y pulse el botón ENTER/OK .
2. Pulse los botones 5 o 6 para seleccionar “Ecualizador” y pulse el botón ENTER/OK .
3. Pulse los botones 3 o 4 para seleccionar un elemento concreto.
Pulse el botón ENTER/OK .
4. Pulse el botón 5 o 6 para llegar al ajuste necesario.
Pulse el botón ENTER/OK .
5. Pulse el botón EXIT para salir.
Si efectúa algún cambio en esta configuración, el modo de sonido cambiará automáticamente a
“Personal”.
Conexión de los auriculares
Puede conectar unos auriculares al Televisor si desear ver un programa en el
Televisor sin molestar a las demás personas que se encuentren en la sala.
Cuando se inserta el conector del conjunto del cabezal en el puerto correspondiente, se puede trabajar
sólo con las opciones, “Silencio interno” y “Selección de sonido”, en el modo PIP, del menú Sonido.
El uso prolongado de los auriculares a un volumen alto puede dañar los oídos.
No recibirá sonido de los altavoces cuando conecte los auriculares al sistema.
Español-14
Page 87

Configuración de TruSurround XT (SRS TSXT)
TruSurround XT es una tecnología patentada de SRS que resuelve el problema de la
reproducción de contenidos multicanal 5.1 con dos altavoces. TruSurround XT proporciona
una convincente experiencia de sonido surround virtual a través de cualquier sistema de
reproducción con dos altavoces, como los propios altavoces internos del televisor.
Es totalmente compatible con todos los formatos multicanal.
1. Pulse el botón MENU para ver el menú. Pulse los botones 5 o 6 para
seleccionar “Sonido” y pulse el botón ENTER/OK .
2. Pulse los botones 5 o 6 para seleccionar “SRS TSXT” y pulse el botón ENTER/OK .
3. Pulse el botón 5 o 6 seleccionar “Activado” o “Desactivado”.
Pulse el botón ENTER/OK .
4. Pulse el botón EXIT para salir.
TruSurround XT, SRS y el símbolo
de SRS Labs, Inc. La tecnología TruSurround XT se incorpora
Selección del silencio interno bajo licencia de SRS Labs, Inc.
Ajuste del volumen automáticamente
Cada emisora tiene sus propias condiciones de señal, así que no resulta cómodo
ajustar el volumen cada vez que se cambia de canal. Con esta función el volumen
del canal deseado se ajusta de forma automática ya que reduce la salida de sonido
cuando la señal de modulación es alta o la aumenta cuando es baja.
1. Pulse el botón MENU para ver el menú. Pulse los botones 5 o 6 para
seleccionar “Sonido” y pulse el botón ENTER/OK .
2. Pulse los botones 5 o 6 para seleccionar “Volumen autom.” y pulse el botón
ENTER/OK .
3. Pulse el botón 5 o 6 seleccionar “Activado” o “Desactivado”.
Pulse el botón ENTER/OK .
4. Pulse el botón EXIT para salir.
son marcas comerciales
Selección del silencio interno
Si desea oír el sonido a través de altavoces independientes, desactive el amplificador
interno.
1. Pulse el botón MENU para ver el menú. Pulse los botones 5 o 6 para
seleccionar “Sonido” y pulse el botón ENTER/OK .
2. Pulse los botones 5 o 6 para seleccionar “Silencio interno” y pulse el botón
ENTER/OK .
3. Pulse el botón 5 o 6 seleccionar “Activado” o “Desactivado”.
Pulse el botón ENTER/OK .
4. Pulse el botón EXIT para salir.
Cuando “Silencio interno” está en “Activado”, no es posible efectuar ajustes en los menús de
sonido, excepto en “Selección de sonido” en el modo PIP.
Cómo escuchar el sonido de la imagen secundaria
Mientras esté activada la función PIP se puede escuchar el sonido de la imagen
secundaria.
1. Pulse el botón MENU para ver el menú. Pulse los botones 5 o 6 para
seleccionar “Sonido” y pulse el botón ENTER/OK .
2. Pulse los botones 5 o 6 para seleccionar “Selección de sonido” y pulse el botón
ENTER/OK .
3. Pulse el botón 5 o 6 seleccionar “Sub”. Pulse el botón ENTER/OK .
4. Pulse el botón EXIT para salir.
Principal
Sub: Se usa para escuchar el sonido de la imagen secundaria.
: Se usa para escuchar el sonido de la imagen principal.
Puede seleccionar esta opción cuando “PIP” está ajustado como “Activado”.(consulte la página 13).
Español-15
Page 88

Ajustar hora T V
Volver Mover Ajustar
Hora Minuto
4
4
00 00
Reajuste de valores de sonido a los valores predefinidos de fábrica
Si Modo Juego está activado, la función de restablecer el sonido se activa. Si, tras
configurar el ecualizador selecciona la función Reset (Restablecer), se restauran los
parámetros de fábrica de la configuración del ecualizador.
1. Pulse el botón MENU para ver el menú.
Pulse los botones 5 o 6 para seleccionar “Sonido” y pulse el botón ENTER/OK .
2. Pulse los botones 5 o 6 para seleccionar “Restablecer” y pulse el botón ENTER/OK .
3. Pulse el botón EXIT para salir.
Puede seleccionar esta opción cuando “Modo Juego” está ajustado como “Activado”.
Configuración y visualización de hora actual
Puede establecer el reloj del TV para que aparezca la hora actual al pulsar el botón
INFO. Si el ruido no desaparece sólo con la sintonización precisa, realice los ajustes
de frecuencia hasta el máximo y vuelva a realizar la sintonización precisa.
1. Pulse el botón MENU para ver el menú. Pulse los botones 5 o 6 para seleccionar
“Configuración” y pulse el botón ENTER/OK .
2. Pulse los botones 5 o 6 para seleccionar “Hora” y pulse el botón ENTER/OK .
3. Pulse el botón ENTER/OK para seleccionar “Ajustar hora”.
4.
Para...
Vaya a “Hora” o “Minuto”
Ajuste la “Hora” o los “Minuto”
Pulse el botón
ENTER/OK
.
5. Pulse el botón EXIT para salir.
Si desconecta el cable de alimentación, tendrá que establecer el reloj en hora otra vez.
También puede definir la hora y los minutos pulsando los botones numéricos en el mando a distancia.
Pulse...
El botón 3 o 4.
El botón 5 o 6.
Ajuste del temporizador de desconexión
Puede seleccionar un período de tiempo entre 30 y 180 mins para que, una vez
transcurridos, el televisor pase automáticamente al modo de espera.
1. Pulse el botón MENU para ver el menú. Pulse los botones 5 o 6 para seleccionar
“Configuración” y pulse el botón ENTER/OK .
2. Pulse los botones 5 o 6 para seleccionar “Hora” y pulse el botón ENTER/OK .
3. Pulse los botones 5 o 6 para seleccionar “Temp. de desc.” y pulse el botón
ENTER/OK .
4. Pulse los botones 5 o 6 varias veces hasta que aparezca la hora deseada
(Desactivado, 30, 60, 90, 120, 150, 180). Pulse el botón ENTER/OK .
5. Pulse el botón EXIT para salir.
El Televisor cambiará automáticamente a modo de espera cuando el temporizador llegue a 0.
Encendido y apagado de la televisión automáticamente
Puede ajustar los temporizadores de Des./Act. para que el Televisor:
Se encienda automáticamente y sintonice el canal seleccionado en el momento
que seleccione.
Se apague automáticamente a la hora que seleccione.
El primer paso es ajustar el reloj del televisor.
1. Pulse el botón MENU para ver el menú. Pulse los botones 5 o 6 para seleccionar
“Configuración” y pulse el botón ENTER/OK .
2. Pulse los botones 5 o 6 para seleccionar “Hora” y pulse el botón ENTER/OK .
3. Pulse los botones 5 o 6 para seleccionar “Temp. de encen.” y pulse el botón
ENTER/OK .
Español-16
Page 89

Selección del idioma
Uso del Modo Juego
4. Pulse los botones 5 o 6 para ajustar “Hora” y pulse el botón 4 para ir al paso siguiente.
Ajuste otras opciones utilizando el mismo método que se indica anteriormente.
Cuando haya terminado, pulse el botón ENTER/OK para volver.
5.
Pulse los botones 5 o 6 para seleccionar “Temp. de apag.” y pulse el botón ENTER/OK .
6. Pulse los botones 5 o 6 para ajustar “Hora” y pulse el botón 4 para ir al paso siguiente.
Ajuste otras opciones utilizando el mismo método que se indica anteriormente.
Cuando haya terminado, pulse el botón ENTER/OK para volver.
7. Pulse el botón EXIT para salir.
También puede definir la hora y los minutos pulsando los botones numéricos en el mando a distancia.
El ajuste “Activación” debe estar establecido en “Sí” para que los temporizadores funcionen.
Cuando utilice la unidad por primera vez, debe seleccionar el idioma que se utilizará
para visualizar menús e indicaciones.
1. Pulse el botón MENU para ver el menú en pantalla. Pulse los botones 5 o 6 para
seleccionar “Configuración” y pulse el botón ENTER/OK .
2. Pulse los botones 5 o 6 para seleccionar “Idioma” y pulse el botón ENTER/OK .
3. Seleccione un idioma pulsando varias veces los botones 5 o 6.
Pulse el botón ENTER/OK .
Puede elegir uno de los 5 idiomas.
4. Pulse el botón EXIT para salir.
Si se conecta a una consola de videojuegos como PlayStationTM o XboxTM, podrá
experimentar sensaciones más realistas seleccionando el menú de juego.
1. Pulse el botón MENU para ver el menú en pantalla. Pulse los botones 5 o 6 para
seleccionar “Configuración” y pulse el botón ENTER/OK .
2. Pulse los botones 5 o 6 para seleccionar “Modo Juego” y pulse el botón ENTER/OK .
3. Pulse el botón 5 o 6 para seleccionar “Activado” o “Desactivado”.
Pulse el botón ENTER/OK .
4. Pulse el botón EXIT para salir.
Si desea desconectarse de la consola de videojuegos y conectar otro dispositivo externo,
cancele el Modo Juego en el menú de la imagen.
Si ve la televisión en Modo Juego, la pantalla tiembla ligeramente.
Modo Juego no está disponible en el modo de TV.
Si Modo Juego está activado:
• Los modos Imagen y Sonido cambian automáticamente a Custom (Personal) y los usuarios noLos modos Imagen y Sonido cambian automáticamente a Custom (Personal) y los usuarios no
pueden cambiar el modo.
• El modo Sonido del menú Sound (Sonido) se desactiva. Debe ajustar el sonido mediante el ecualizador.El modo Sonido del menú Sound (Sonido) se desactiva. Debe ajustar el sonido mediante el ecualizador.
• La función de establecer el sonido se activa. Si, tras configurar el ecualizador, selecciona la funciónLa función de establecer el sonido se activa. Si, tras configurar el ecualizador, selecciona la función
Reset (Restablecer), se restauran los parámetros de fábrica de la configuración del ecualizador.
Ajuste del modo Pantalla Azul / Selección de Melodía
Pantalla azul:
Si no se recibe ninguna señal o la señal es muy débil, una pantalla azul sustituirá
automáticamente el fondo ruidoso de la imagen. Si desea continuar visualizando la
imagen deficiente, ajuste el modo “Pantalla azul” en “Desactivado”.
Melodía:
Puede oír la melodía cuando la televisión se enciende o se apaga.
1. Pulse el botón MENU para ver el menú en pantalla. Pulse los botones 5 o 6 para
seleccionar “Configuración” y pulse el botón ENTER/OK .
2. Pulse el botón 5 o 6 para seleccionar “Pantalla azul” o ”Melodía”.
Pulse el botón ENTER/OK .
3. Pulse el botón 5 o 6 para seleccionar “Activado” o “Desactivado”.
Pulse el botón ENTER/OK .
4. Pulse el botón EXIT para salir.
Español-17
Page 90

Uso de la función de ahorro de energía
Esta función ajusta el brillo del televisor, lo cual reduce el consumo de energía. Si
desea ver la televisión por la noche, ajuste la opción del modo “Ahorro energía” en
“Alto” sus ojos se lo agradecerán y, además, reducirá el consumo de energía.
1. Pulse el botón MENU para ver el menú en pantalla. Pulse los botones 5 o 6 para
seleccionar “Configuración” y pulse el botón ENTER/OK .
2.
Pulse los botones 5 o 6 para seleccionar “Ahorro energía” y pulse el botón ENTER/OK .
3. Seleccione la opción deseada (Desactivado, Bajo, Medio, Alto) pulsando los botones
5 or 6. Pulse el botón ENTER/OK .
4. Pulse el botón EXIT para salir.
Selección de la fuente
Puede elegir entre varias fuentes externas conectadas a las tomas de entrada del
televisor.
1. Pulse el botón MENU para ver el menú.
Pulse el botón ENTER/OK para seleccionar “Entrada”.
2. Pulse el botón ENTER/OK para seleccionar “Fuentes”.
Si no hay ningún dispositivo externo conectado a la unidad, solo las opciones “TV”, “EXT.1”,
“EXT.2”, “DTV” están activadas en “Fuentes”. “AV”, “S-Vídeo”, “Componente”, “PC” y “HDMI”
solo se activan si tales fuentes están conectadas a su unidad.
3. Seleccione el dispositivo que desea pulsando de forma repetida el botón 5 o 6.
Pulse el botón ENTER/OK .
Pulse el botón SOURCE hasta seleccionar la fuente de entrada que desea. El modo TV se puede
seleccionar pulsando el botón TV/DTV, los botones numéricos (0~9) y el botón
distancia. Pero no se puede seleccionar con el botón SOURCE.
P /
del mando a
Edición de los nombres de fuentes de entrada
Dé un nombre al dispositivo conectado en las tomas de entrada; de esta manera será
más fácil seleccionar el dispositivo de entrada.
1. Pulse el botón MENU para ver el menú.
Pulse el botón ENTER/OK para seleccionar “Entrada”.
2. Pulse los botones 5 o 6 para seleccionar “Editar nombre” y pulse el botón
ENTER/OK .
3. Pulse los botones 5 o 6 para seleccionar el dispositivo que desea editar.
Pulse el botón ENTER/OK .
4. Pulse los botones 5 o 6 para seleccionar el dispositivo deseado.
Pulse el botón ENTER/OK .
5. Pulse el botón EXIT para salir.
Español-18
Page 91

Previsualización del sistema de menús del DTV
Para desplazarse por el sistema de menús en pantalla y para ajustar las
configuraciones disponibles, consulte la ilustración siguiente.
Disponible en el modo de televisión digital.
Pulse el botón D.MENU.
Instalación
Selec. País
Exploración automática
Exploración manual
Restaurar los valores de fábrica
Organización de los canales
Borrar frecuencia
Suprimir canal
Suprimir todos los canales
Desplazar y editor canal
Bloqueo primario
Fijar el bloqueo de canales
Cambiar el código PIN
Bloquear módom
Configuración del sistema
Selección del idioma
Configuración de OSD
Parámetros de hora
Información del sistema
Ampliación del software
Control apli. MHP
Conf. módem
Puede seleccionar estas opciones
pulsando el botón D.MENU del mando
a distancia.
Las opciones secundarias del menú CI pueden variar según el modelo de CAM.
En el modo Digital TV (Televisión digital), no desconecte el aparato antes de que la
pantalla se cargue completamente.
Español-19
Page 92

Funciones básicas
1. Pantalla de visualización
Antes de poder ver el programa de televisión se ha de llevar a cabo la instalación.
Por tanto, al principio sólo se verán imágenes de menú. Una vez programados los
canales de televisión, se verá la siguiente imagen (banda) cada vez que se cambie
de canal:
Número de canal
Estado de la señal Información del programa Número de la pista sonora
Información detallada sobre el programa
En primer lugar verá la banda descrita arriba.
Después de pulsar el botón INFO por segunda vez, recibirá información detallada del
programa actual, que se puede mostrar en otra banda si hay más información. Si la
extensión de la información es superior a una página, puede utilizar P / para ir a
la página anterior y siguiente.
Este servicio depende del proveedor de servicios.
2. Control del volumen
Para controlar el volumen:
• Pulse los botones
• Pulse el botón MUTE para cambiar al modo de silencio.
• Vuelva a pulsar el botón MUTE o los botones
de silencio.
para ajustar el nivel de volumen.
del canal actual
para cancelar la función
3. Selección de la pista sonora
• Pulse el botón ALT para mostrar la lista de pistas sonoras.
• Pulse los botones 5 o 6 y ENTER/OK para seleccionar una.
4. Selección de la pista de vídeo
• Pulse el botón ALT para mostrar la lista de pistas de vídeo.
• Pulse los botones 5 o 6 y ENTER/OK para seleccionar una.
Español-20
Page 93

5. Lista de servicios
• Pulse el botón CH MGR mientras está viendo un programa.
• Seleccione la lista pulsando el botón TV/RADIO.
El icono que aparece detrás del nombre del canal indica que está codificado,
mientras que el icono significa que el canal está bloqueado.
• Seleccione el canal pulsando los botones 5/6 y pulse P / para ir a la página
anterior o siguiente de las listas.
• Pulse el botón ENTER/OK para ver el canal seleccionado.
6. Información del programa
EPG: guía electrónica de programas
La guía electrónica de programas ofrece una lista de programas de los canales.
1. Este servicio depende del proveedor de servicios.
2. Cuando el receptor ha reconocido la hora GMT de la señal (lo que lleva unos segundos),
puede mostrar la información correcta de la EPG.
• Pulse el botón GUIDE mientras está viendo un programa.
Esta función aparece en la pantalla usando sólo la hora.
• Botón ROJO : El botón rojo sirve para retroceder a la fecha anterior.
• Botón VERDE : El botón verde sirve para ir a la fecha siguiente.
• Botón INFO : Este botón sirve para ver la información del programa si su
extensión excede una página.
Utilice los botones 5/6 para ir a la página anterior o siguiente.
• Botón 3/4 : Se utiliza para ver la lista de programas en bloques de 30 minutos.
El intervalo de tiempo se puede ajustar pulsando los botones de la pantalla de la EPG
de la manera siguiente:
Botón 1: 1 hora y 30 minutos
Botón 2: 30 minutos
Botón 3: 15 minutos
• Seleccione el canal pulsando los botones 5/6 y pulse el botón ENTER/OK
para verlo.
Español-21
Page 94

Funcionamiento del menú DTV
Menú principal
Después de instalar el sistema de antena y el TV con los conectores adecuados.
• Enchufe el televisor a la corriente de red y enciéndalo.
• Pulse el botón D.MENU para ver el menú principal.
Aparecerá la siguiente visualización en pantalla:
Aparecen las opciones del submenú. Para los submenús “Instalación”,
“Organización de los canales” y “Bloqueo primario”, necesitará el código PIN.
1. Instalación
El menú Instalación consta de 4 submenús:
Selec. país, Exploración automática, Exploración manual y Restaurar los valores
de fábrica.
• Seleccione “Instalación” pulsando el botón ENTER/OK en el modo de menú
principal para seleccionar el submenú.
• Introduzca el código PIN.
Si aún no ha introducido su propio código PIN, se aplica el código PIN 0000 establecido
en fábrica.
Cuando haya introducido el código PIN una vez, no será necesario repetir la operación a
menos que apague el televisor.
1.1 Selec. país
Para sintonizar nuevos canales, el televisor cuenta con la opción “Selec. país”.
Debe seleccionar un país que proporcione servicio de emisión.
Tras seleccionar “Selec. país” en el menú Instalación, aparecerá la pantalla
siguiente:
• Seleccione el país donde se encuentra.
Puede seleccionar el valor de “ITALY”, “SPAIN”, “SWEDEN”, “UK”, “USER”,
“BELGIUM”, “GERMANY”, “FINLAND”, o “FRANCE” mediante los botones 3/4.
• Tras seleccionar la opción, pulse el botón ENTER/OK para elegir el área de
emisión para la que desea servicio. Si no quiere guardar los cambios,
pulse el botón EXIT sin pulsar el botón ENTER/OK .
Si se cambia el código nacional, todos los programas guardados se perderán.
USER (Usuario): El usuario puede establecer el número de canal y la frecuencia en la
exploración manual/automática.
1.2 Exploración automática
El submenú “Exploración automática” permite descargar canales
automáticamente desde la carga programada previamente.
Para descargar canales automáticamente:
• Puede seleccionar la frecuencia especificada entre “Inic. frecuencia” y “Fin. frecuencia”.
• Pulse el botón ENTER/OK .
Aparecerá el menú Exploración automática.
Todos los canales de la lista se descargarán automáticamente.
Español-22
Page 95

1.3 Exploración manual
Para sintonizar canales nuevos o señales débiles, el TV incorpora la opción
“Exploración manual” en la que el usuario puede introducir los datos del canal.
Tras seleccionar “Exploración manual” en el menú Instalación, aparecerá la
pantalla siguiente:
• Seleccione el número de canal.
Puede seleccionar el canal concreto que desea buscar.
Los valores siguientes son los predeterminados, pero es posible seleccionarlos.
La barra de estado de la señal le dirá si son válidos.
• Introduzca la frecuencia del canal que desea encontrar.
• Seleccione el ancho de banda. Puede seleccionar el valor “6”, “7” o “8” MHz.
• Seleccione el modo Guard Interval (Intervalo de seguridad).
Puede seleccionar el valor “AUTO”, “1/32”, “1/16”, “1/8” o “1/4”.
• Seleccione el modo FFT (Fast Fourier Transform – Transformación rápida de Fourier).
Uno de los valores -“Auto”, “2K” y “8K”- se seleccionará automáticamente.
Puede cambiar el valor establecido de acuerdo con sus preferencias.
• Una vez seleccionada la opción, pulse el botón ENTER/OK para iniciar el
proceso de exploración.
1.4 Restaurar los valores de fábrica
El menú Reset to Factory Defaults (Restaurar los valores predeterminados de fábrica)
sirve para restaurar los valores predeterminados establecidos en fábrica si el usuario
se encuentra con problemas después de cambiar algún valor de los datos de los
canales u otros que puedan ser erróneos. Cuando la ventana se lo solicite, pulse el
botón ENTER/OK y el TV se restaurará automáticamente a los valores de fábrica
predeterminados.
Los valores anteriores se borrarán.
2. Organización de los canales
El menú “Organización de los canales” tiene cuatro funciones:
El menú “Organización de los canales” se usa para borrar las frecuencias y los
canales o para mover y editar un canal a la conveniencia del usuario.
• Introduzca el código PIN.
Si aún no ha introducido el código PIN propio, se aplica el código 0000,
establecido en fábrica.
Cuando haya introducido el código PIN una vez, no será necesario repetir la operación a
menos que apague el televisor.
Español-23
Page 96

2.1 Borrar frecuencia
• Seleccione la lista de frecuencias que desea borrar pulsando el botón ROJO.
• Pulse el botón ENTER/OK para confirmar.
Esta función no suprime la frecuencia sino la lista de canales registrados de aquélla.
2.2 Suprimir canal
• Seleccione el canal que desea borrar pulsando el botón ROJO.
• Pulse el botón ENTER/OK para confirmar.
2.3 Suprimir todos los canales
Cuando la ventana lo solicite, pulse el botón ENTER/OK para borrar todos los
canales y pulse el botón EXIT para salir.
2.4 Desplazar y editor canal
Para desplazar el nombre del canal:
• Seleccione la lista TV/RADIO/Interactiva mediante los botones 3/4.
• Seleccione la lista TV/RADIO/Interactiva mediante los botones 5/6 o P / .
• Seleccione el canal pulsando el botón ROJO.
• Pulse los botones 5/6 para cambiar la posición del canal que desee,
y pulse P / para desplazarse a la página anterior o siguiente de la lista.
Pulse el botón ENTER/OK para confirmar.
• Si desea que el canal vuelva a la posición inicial, no pulse el botón ENTER/OK ,
sino el botón AZUL.
Para editar el nombre del canal
• Seleccione la lista TV/RADIO/Interactiva mediante los botones 3/4.
• Seleccione la lista de canales y desplácela a otro lugar mediante los botones
5/6 o P / .
• Pulse el botón VERDE. Aparecerá la tabla de tipos de letra.
• Seleccione el carácter deseado con 3/4, 5/6 y pulse el botón ENTER/OK
para pegar el carácter a la cadena.
Botón P : Tecla de retroceso para borrar el carácter anterior.
•
Pulse el botón D.MENU y, a continuación, pulse el botón ENTER/OK para guardar
los datos establecidos.
Español-24
Page 97

3. Bloqueo primario
La función de “Bloqueo primario” establece restricciones de visionado e impide
el acceso no autorizado al televisor por medio del PIN (Número de identificación
personal), que es un número de cuatro dígitos. (Código PIN establecido en
fábrica: 0000) Este menú ofrece tres opciones: bloquear un canal determinado,
cambiar el código PIN y establecer el bloqueo para módem.
• Introducción del código PIN.
Si aún no ha introducido su propio código PIN, se aplica el código PIN 0000
establecido en fábrica.
3.1 Fijar el bloqueo de canales
• Seleccione el canal pulsando los botones 3/4 o 5/6.
• Seleccione el bloqueo de canal pulsando el botón ROJO.
• Pulse el botón ENTER/OK para confirmar.
Si desea ver el canal bloqueado, deberá introducir el código PIN cuando la ventana
se lo solicite. Una vez introducido el código PIN para acceder a un canal bloqueado,
se podrá acceder a los demás canales bloqueados. Es decir, puede acceder a todos
los canales bloqueados para seguridad infantil si ha accedido a uno introduciendo
correctamente el código PIN.
Para cancelar el bloqueo:
• Pulse de nuevo el botón ROJO para anular el bloqueo.
3.2 Cambiar el código PIN
Para cambiar el código PIN, seleccione la segunda opción
“Cambiar el código PIN”.
De este modo se desplazará al menú siguiente:
En esta opción se debe introducir el código PIN actual junto al primer cursor y el
código PIN nuevo junto al segundo. Para confirmar se debe volver a introducir el
código PIN nuevo.
Recuerde que el código PIN debe ser un valor numérico de cuatro dígitos.
CÓDIGO PIN ESTABLECIDO EN FÁBRICA: 0 0 0 0.
Si no recuerda cuál es su código PIN, póngase en contacto con el distribuidor o con el
proveedor de servicios. Si cambia la contraseña, guárdela en un lugar seguro y no la olvide.
3.3 Bloquear módom
Para impedir que alguien vea el servicio de pago (por ejemplo, PPV, Pay per
View-pago por visión), seleccione la tercera opción, “Bloquear módem”.
• Puede seleccionar “Bloquear” o “Desbloq” en el menú Modem Bloqueo paterno del
módem.
• Seleccionando “Bloquear” se bloquea la visión del servicio pagado.
• Seleccionando “Desbloq” se permite la visión del servicio pagado.
La TV Pay Per View sólo está disponible utilizando CI una vez se ha adquirido CAM.
Español-25
Page 98

4. Configuración del sistema
Puede cambiar los valores del sistema prefijados en fábrica en función de sus
necesidades.
4.1 Selección del idioma
La opción de “Selección de idioma” permite al usuario seleccionar el idioma de
OSD, pista sonora, teletexto y EPG.
• Para adaptarse a los usuarios de distintas zonas que hablan distintas lenguas, las
OSD están disponibles en cinco idiomas (actualmente English, Deutsch, Français,
Italiano, y Español).
• Para seleccionar el menú del idioma, pulse los botones 3/4 para cambiar el idioma
y pulse el botón ENTER/OK .
• El idioma de OSD, pista sonora, teletexto y EPG variará de acuerdo con el idioma
seleccionado.
4.2 Configuración de OSD
Puede establecer la transparencia de la OSD y el tiempo de visualización
(banda).
• Selección del nivel de transparencia de la OSD.
El nivel va de 0 a 100% El ajuste se realiza mediante los botones numéricos,
3/4 o P / .
• Ajuste de la duración de la visualización del cuadro de información (banda)
mostrado en la pantalla. El tiempo va de 0,5 a 60 segundos. El ajuste se realiza
mediante los botones numéricos, los botones 3/4 para aumentar o disminuir 0,5
segundos y los botones P / para 1 segundo.
4.3 Parámetros de hora
Pueden establecerse distintos modos para la hora, como, por ejemplo, la hora
local. La hora local exacta puede ajustarse mediante GMT.
• Coloque el cursor en este submenú y pulse el botón ENTER/OK .
• Pulse los botones 3/4 para cambiar la hora local en Zona horaria.
La hora local cambiará de acuerdo con su ubicación.
GMT es la hora estándar de Greenwich.
Español-26
Page 99

4.4 Información del sistema
Cuando se ponga en contacto con el proveedor de servicios o con un centro de
servicio, es posible que soliciten información disponible en este menú. Coloque el
cursor en este submenú y pulse el botón ENTER/OK .
En la pantalla aparecerá lo siguiente.
4.5 Ampliación del software
Puede descargar y actualizar el software de este televisor a través de un canal
específico designado por la emisora de televisión. Ésta le proporcionará más
información al respecto. Si decide descargar una nueva versión del software, la
configuración, el código de acceso, los canales favoritos, etc. se borrarán.
La descarga puede tardar un poco. No apague el televisor durante el proceso de
descarga.
4.6 Control apli. MHP
Si desea cambiar el modo de visualización de la aplicación MHP, siga las
instrucciones que figuran a continuación.
• Seleccione “Inicio automático” o “No permitido” en el modo Control de inic. auto.
mediante los botones 3/4.
• Seleccione Activado/Desactivado en el modo Lista de aplicaciones mediante los
botones 3/4.
• Pulse el botón VERDE para editar el contenido de Número de teléfono,
Nombre de usuario y Contraseña.
• Introduzca el valor numérico mediante las teclas numéricas (0-9) y los botones
3/4 en DNS.
• Pulse ‘ENTER/OK ’ para guardar “Control apli. MHP”.
Si pulsa Exit sin pulsar el botón ENTER/OK
apli. MHP: Aplicación de plataforma multimedia doméstica
Español-27
, el control de la aplicación MHP no cambia.
Page 100

4.7 Conf. módem
Si desea configurar el módem, siga las instrucciones siguientes.
• Seleccione “Tone” o “Pulse” en Método llam.
• Seleccione “Tiempo espera comp.”,
de 1 a 255 segundos, mediante los botones 3/4 o los botones numéricos.
• Seleccione “Tiempo actual comp.”, de 0,1 a 25,5 segundos,
mediante los botones 3/4 o los botones numéricos.
• Seleccione “Tiempo perd. comp.”, de 0,1 a 25,5 segundos,
mediante los botones 3/4 o los botones numéricos.
• Seleccione espacio en blanco, 0, # o 9 en “Prefijo” mediante los botones
3/4 para especificar el botón de premarcado para la extensión telefónica.
• Pulse ‘ENTER/OK ’ para guardar la configuración del módem si se ha modificado.
Si pulsa Exit sin pulsar el botón ENTER/OK
Instalación de la tarjeta CI
1. Puede adquirir el módulo del CAM de CI por teléfono o en el distribuidor más cercano a
su domicilio.
2. Inserte la tarjeta CI en el CAM siguiendo la dirección de la flecha hasta que encaje.
3. Inserte el CAM con la tarjeta CI instalada en la ranura para interfaz común.
Inserte el CAM, siguiendo la dirección de la flecha, hasta el fondo,
de modo que quede paralelo a la ranura.
4. Compruebe si se ven imágenes en un canal de señal codificada.
la configuración del módem no cambia.
,
Decodificador de teletexto
La instalación del CAM puede efectuarse con el televisor encendido o apagado.
Muchos canales de Televisor incluyen “teletexto”, páginas de
información escrita que proporciona datos como:
Horas de los programas de televisión
Boletines de noticias y partes meteorológicos.
Resultados deportivos
Subtítulos para sordos
Las páginas de teletexto se organizan en seis categorías:
Parte
A
B
C
D
E
F
Contenido
Número de página seleccionado.
Identidad de la emisora.
Número de página actual o estado de la búsqueda.
Fecha y hora.
Texto.
Información de estado.
Español-28
 Loading...