How it Works
Log In / Sign Up
Buy Points
How it Works
FAQ
Contact Us
Questions and Suggestions
Users
Samsung
Loading...
H
HT-D353HK
HT-D353K
HT-D355
4
HT-D400
HT-D4200
8
HT-D423H
3
HT-D450
3
HT-D4500
7
HT-D4500-ZA
HT-D450K
HT-D453
HT-D453H
2
HT-D453K
HT-D455
5
HT-D4550
2
HT-D4600
2
HT-D5000
12
HT-D5000WXZF
2
HT-D5100
7
HT-D5100K
3
HT-D5100-ZC
HT-D5130
2
HT-D5200
10
HT-D5200WXZF
HT-D5210C
HT-D5210C-ZA
HT-D5300
2
HT-D5300-ZA
HT-D5330
2
HT-D5350
2
HT-D550
6
HT-D5500
12
HT-D5500K
2
HT-D5500WXZF
HT-D5500-ZA
HT-D550K
HT-D550W
HT-D550-ZA
HT-D553
HT-D5530
8
HT-D5530K
2
HT-D553K
HT-D555
4
HT-D5550
7
HT-D5550K
2
HT-D5550W
2
HT-D5550WK
HT-D5550WXZF
HT-D555K
HT-D555W
HT-D555WK
2
HT-D650
3
HT-D6500
5
HT-D6500W
HT-D6500W-ZA
HT-D6530
2
HT-D6730W
2
HT-D6730W/ZA
HT-D6750
3
HT-D6750W
14
HT-D6750WK
4
HT-D6750WWXZF
HT-D6759W
HT-D680
HT-D7000
11
HT-D7100
14
HT-D720
4
HT-D7200
13
HT-D7200B
13
HT-D7200WXZF
HT-D750
2
HT-D7500W
HT-D750A
HT-D770
HT-D780
HT-DB120
26
HT-DB120N
HT-DB1350
7
HT-DB1650
12
HT-DB1680
HT-DB1750
8
HT-DB1850
10
HT-DB300
23
HT-DB330F
HT-DB350
4
HT-DB390
20
HT-DB400M
HT-DB600
6
HT-DB650
4
HT-DB657T
HT-DB660
HT-DB750
22
HT-DB750M
7
HT-DB756T
HT-DB757T
2
HT-DB758T
HT-DB758TA
HT-DB760
7
HT-DB760T
5
HT-DB770
Loading...
Loading...
Nothing found
HT-D555WK
User manual
94 pgs
16.91 Mb
0
User manual
147 pgs
6.96 Mb
0
Table of contents
Loading...
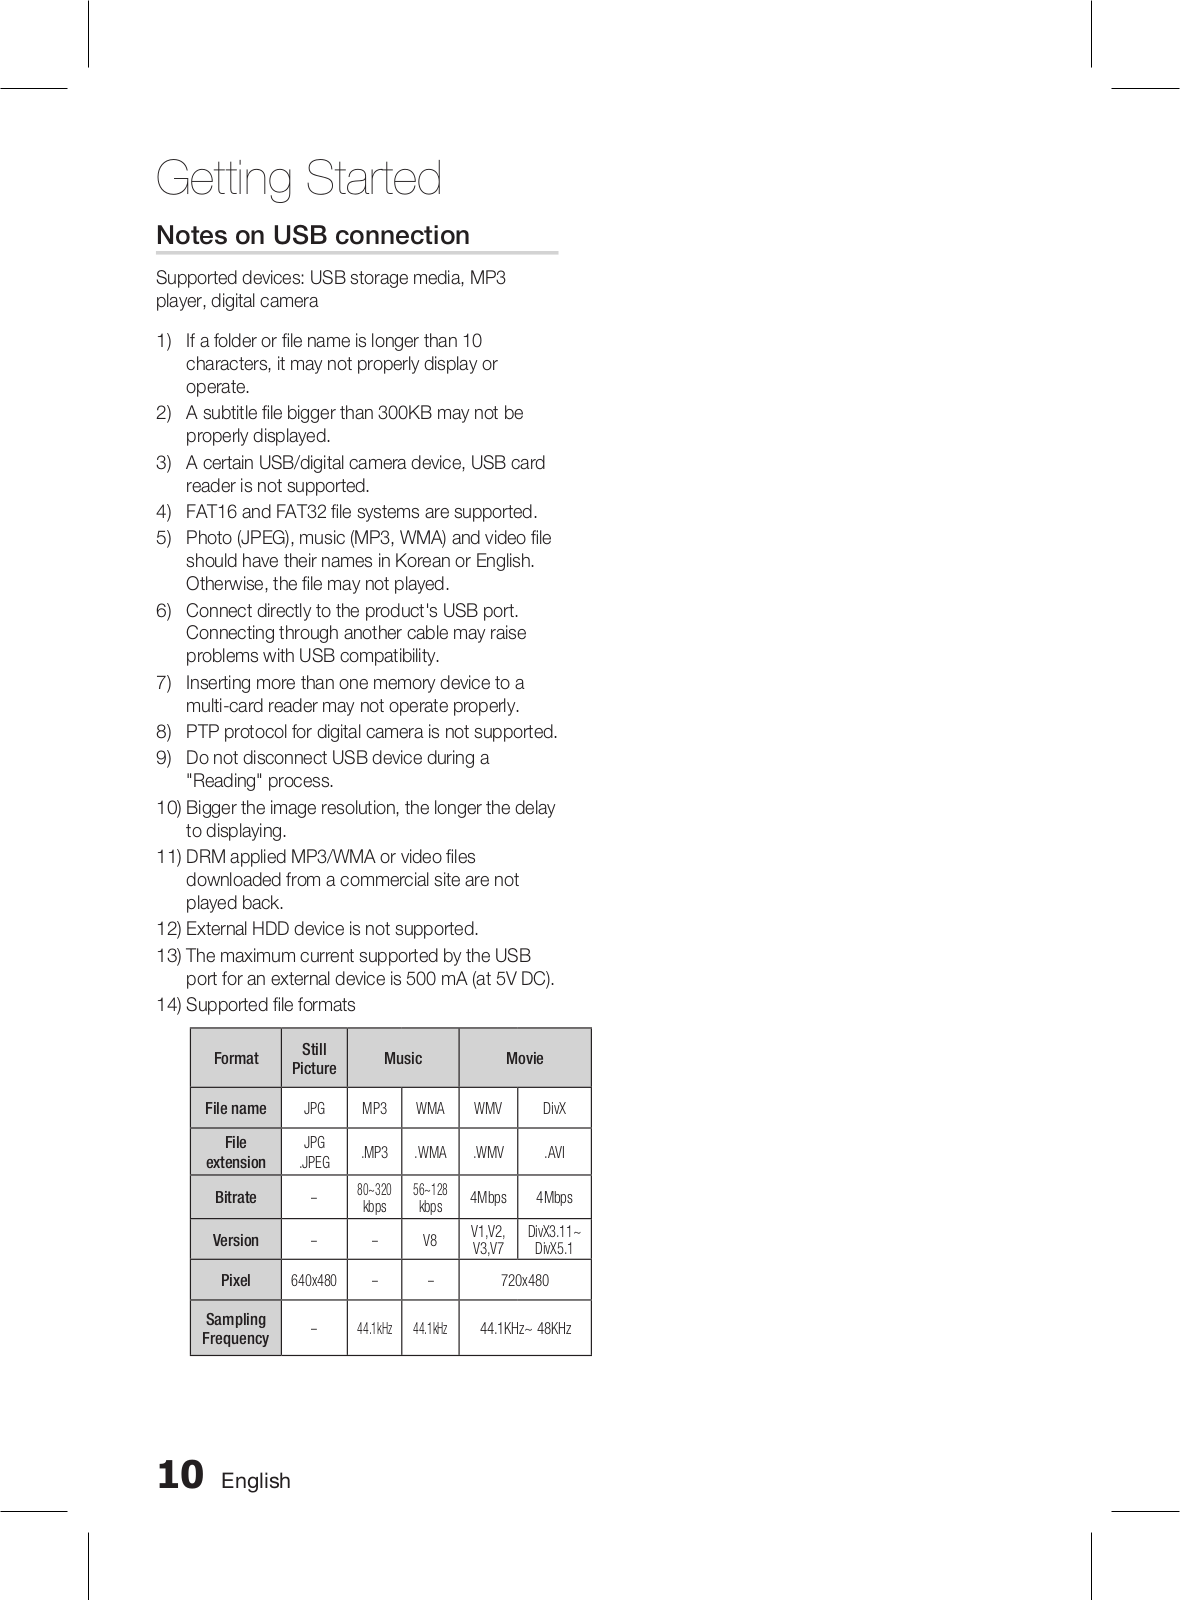
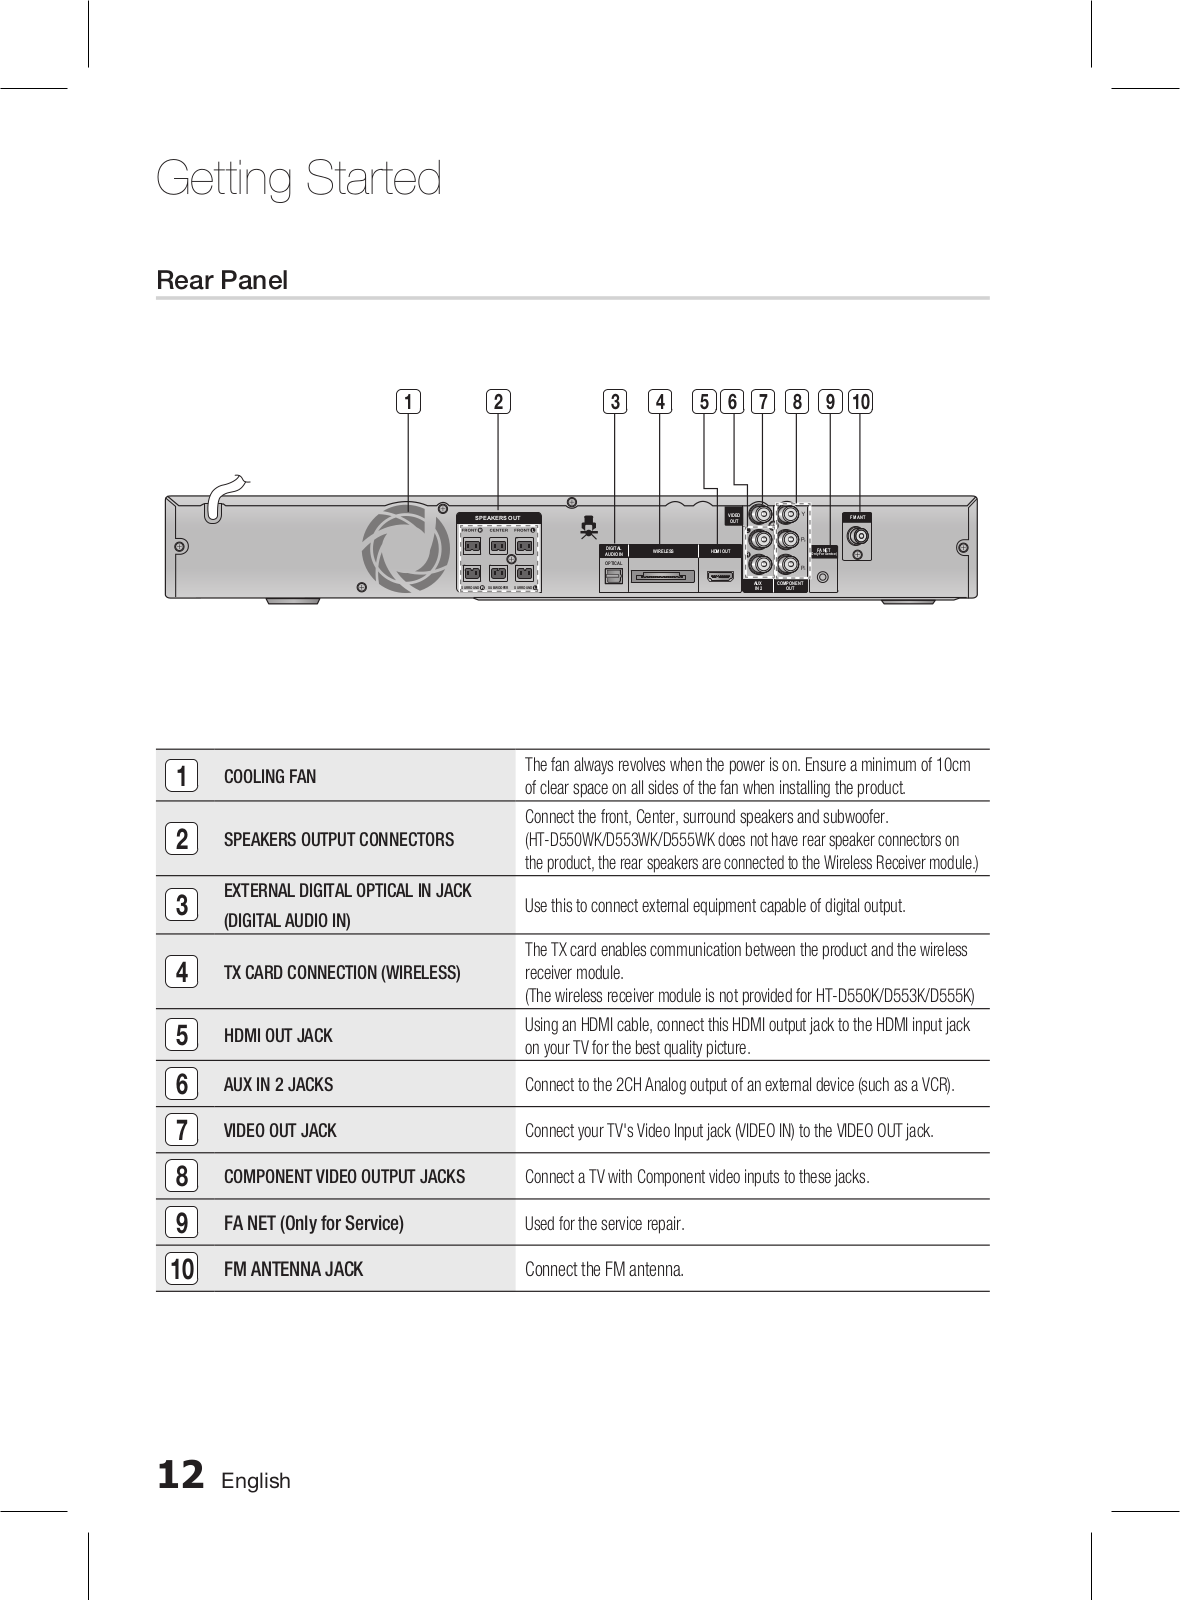
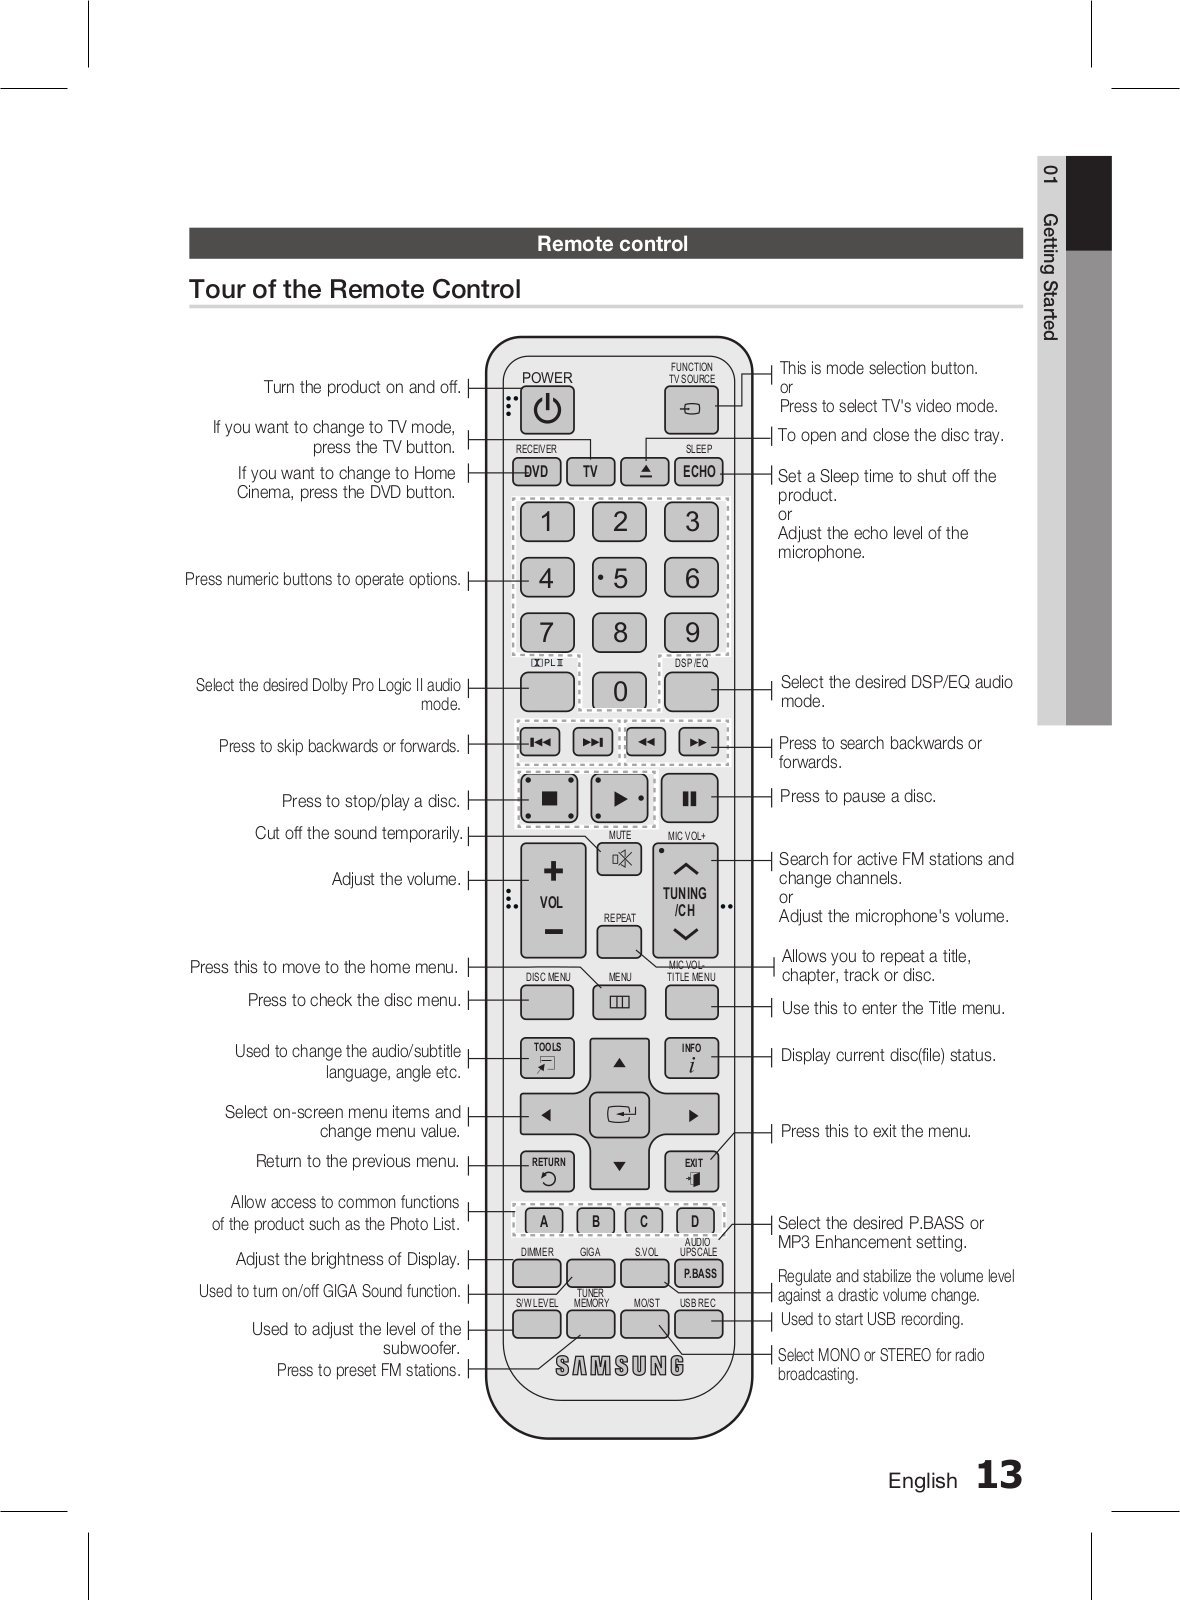
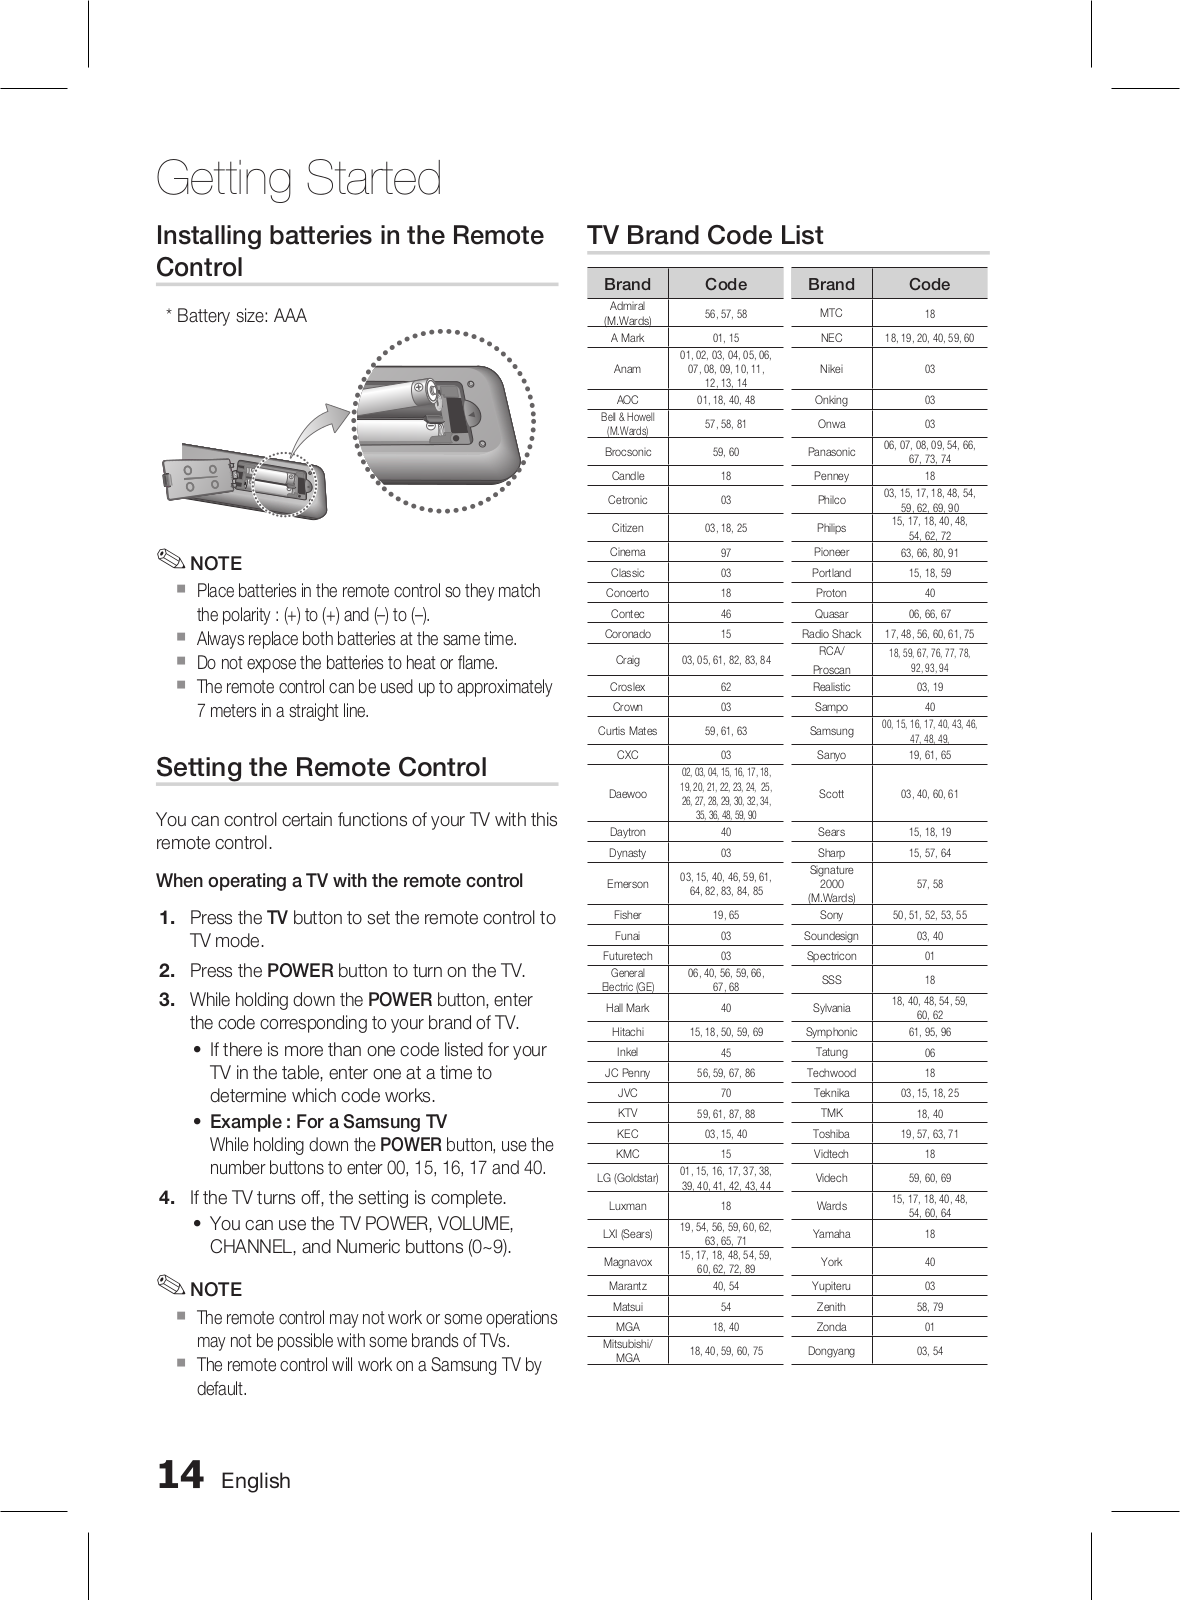
Samsung HT-D555WK User manual
...
Samsung User manual
Download
Specifications and Main Features
Frequently Asked Questions
User Manual
Download
Loading...
+
65
hidden pages
Unhide
You need points to download manuals.
1 point = 1 manual.
You can buy points or you can get point for every manual you upload.
Buy points
Upload your manuals
 Loading...