

Samsung GH68-02493A User Manual

DUAL BAND
GSM TELEPHONE
SGH-N620
OWNER’S MANUAL
World Wide Web
http://www.samsungmobile.com
Printed in Korea
Code No.: GH68-02493A
Eng. 10/01. Rev.1.0

The information in this manual is believed to be correct at
the time of printing; Samsung reserves the right, however,
to change or modify any of the specifications
without notice.
Some of the contents in this manual may differ from your
phone, depending on the software installed, your SIM card
or your service provider.

C o n t e n t s
Safety Precautions . . . . . . . . . . . . . . . . 7
Unpacking . . . . . . . . . . . . . . . . . . . . . . 9
Your Phone . . . . . . . . . . . . . . . . . . . . . 10
Phone Layout. . . . . . . . . . . . . . . . . . . . . . . . . . 10
Display. . . . . . . . . . . . . . . . . . . . . . . . . . . . . . . 12
Service Light . . . . . . . . . . . . . . . . . . . . . . . . . . 14
Getting Started . . . . . . . . . . . . . . . . . . 15
Installing the SIM Card and the Battery . . . 15
Charging a Battery . . . . . . . . . . . . . . . . . . . . . 18
Switching the Phone On/Off . . . . . . . . . . . . . 20
Call Functions . . . . . . . . . . . . . . . . . . . 22
Making a Call . . . . . . . . . . . . . . . . . . . . . . . . . 22
Adjusting the Volume . . . . . . . . . . . . . . . . . . . 24
Answering or Rejecting a Call . . . . . . . . . . . 25
Viewing Missed Calls. . . . . . . . . . . . . . . . . . . 26
In-Call Options . . . . . . . . . . . . . . . . . . . . . . . . 28
Entering Text . . . . . . . . . . . . . . . . . . . 35
Changing the Text Input Mode . . . . . . . . . . . 36
Using the T9 Mode . . . . . . . . . . . . . . . . . . . . . 36
Using the ABC Mode . . . . . . . . . . . . . . . . . . . 38
Using the Number Mode . . . . . . . . . . . . . . . . 40
Using the Symbolic Mode . . . . . . . . . . . . . . . 40
3

C o n t e n t s
(continued)
Phonebook . . . . . . . . . . . . . . . . . . . . . 41
Storing a Phone Number with a Name . . . . 41
Phonebook Options . . . . . . . . . . . . . . . . . . . . 42
Speed-Dialling by SIM Memory Location . . 45
Searching for and Dialling a Number
in the Phonebook . . . . . . . . . . . . . . . . . . . . . . 46
Dialling a Number using the Service
Directory or Information Numbers . . . . . . . 47
Selecting Functions and Options . . . . . . 48
Using the Menus . . . . . . . . . . . . . . . . . 50
Accessing Menu Functions by Scrolling . . . 50
Accessing Menu Functions by
Using Shortcuts . . . . . . . . . . . . . . . . . . . . . . . 51
Menu Structure. . . . . . . . . . . . . . . . . . . . . . . . 52
Call Records . . . . . . . . . . . . . . . . . . . . 55
Missed Calls (Menu 1-1) . . . . . . . . . . . . . . . . 55
Received Calls (Menu 1-2). . . . . . . . . . . . . . . 55
Dialled Calls (Menu 1-3). . . . . . . . . . . . . . . . . 56
Call Time (Menu 1-4). . . . . . . . . . . . . . . . . . . . 56
Call Cost (Menu 1-5) . . . . . . . . . . . . . . . . . . . . 57
Messages . . . . . . . . . . . . . . . . . . . . . . 58
Voice Mail (Menu 2-1) . . . . . . . . . . . . . . . . . . 58
Read Messages (Menu 2-2). . . . . . . . . . . . . . 59
Write Messages (Menu 2-3) . . . . . . . . . . . . . 61
Preset Message List (Menu 2-4) . . . . . . . . . . 62
Set Up (Menu 2-5). . . . . . . . . . . . . . . . . . . . . . 62
Broadcast (Menu 2-6) . . . . . . . . . . . . . . . . . . 63
Picture Messages (Menu 2-7). . . . . . . . . . . . 64
Voice Functions . . . . . . . . . . . . . . . . . . 66
Voice Dial (Menu 3-1) . . . . . . . . . . . . . . . . . . . . 66
Voice Command (Menu 3-2) . . . . . . . . . . . . . . . 69
Voice Memo (Menu 3-3) . . . . . . . . . . . . . . . . . . 69
Voice Active (Menu 3-4) . . . . . . . . . . . . . . . . . . 71
AnswerPhone (Menu 3-5) . . . . . . . . . . . . . . . . . 72
Tones . . . . . . . . . . . . . . . . . . . . . . . . . 73
Ring Tone (Menu 4-1). . . . . . . . . . . . . . . . . . . 73
Melody Composer (Menu 4-2). . . . . . . . . . . . 74
Ring Volume (Menu 4-3). . . . . . . . . . . . . . . . . 76
Alert Type (Menu 4-4). . . . . . . . . . . . . . . . . . . 76
Keypad Tone (Menu 4-5) . . . . . . . . . . . . . . . . 77
Message Tone (Menu 4-6). . . . . . . . . . . . . . . 77
Error Tone (Menu 4-7). . . . . . . . . . . . . . . . . . . 78
Minute Minder (Menu 4-8). . . . . . . . . . . . . . . 78
Connect Tone (Menu 4-9). . . . . . . . . . . . . . . . 78
Settings . . . . . . . . . . . . . . . . . . . . . . . 79
Phone Settings (Menu 5-1) . . . . . . . . . . . . . . 79
Network Services (Menu 5-2) . . . . . . . . . . . . 84
Security Settings (Menu 5-3). . . . . . . . . . . . . 93
LCD/LED Settings (Menu 5-4) . . . . . . . . . . . . 96
Browser Settings (Menu 5-5) . . . . . . . . . . . . 98
Organiser . . . . . . . . . . . . . . . . . . . . . . 99
Scheduler (Menu 6-1). . . . . . . . . . . . . . . . . . . 99
Alarm (Menu 6-2) . . . . . . . . . . . . . . . . . . . . . . 101
Calculator (Menu 6-3). . . . . . . . . . . . . . . . . . . 103
World Time (Menu 6-4). . . . . . . . . . . . . . . . . . 105
Clock (Menu 6-5). . . . . . . . . . . . . . . . . . . . . . . 106
4 5

C o n t e n t s
(continued)
Safety Precautions
Games . . . . . . . . . . . . . . . . . . . . . . . . 107
Squares (Menu 7-1) . . . . . . . . . . . . . . . . . . . . . 108
Fortress (Menu 7-2) . . . . . . . . . . . . . . . . . . . . . 109
Ice Cave (Menu 7-3) . . . . . . . . . . . . . . . . . . . . 110
WWW Services . . . . . . . . . . . . . . . . . . 111
Home (Menu 8-1) . . . . . . . . . . . . . . . . . . . . . . . 111
Bookmark (Menu 8-2) . . . . . . . . . . . . . . . . . . . 112
Goto (Menu 8-3) . . . . . . . . . . . . . . . . . . . . . . . . 113
Navigating with the WAP Browser. . . . . . . . 113
Entering Text, Numbers, or Symbols . . . . . . . 115
Network Connection Information . . . . . . . . . 116
Additional Services . . . . . . . . . . . . . . . 117
ALS (Alternate Line Service). . . . . . . . . . . . . 117
Solving Problems . . . . . . . . . . . . . . . . . 119
Reference Information . . . . . . . . . . . . . 122
Access Codes . . . . . . . . . . . . . . . . . . . . . . . . 122
Using the Batteries . . . . . . . . . . . . . . . . . . . . 125
Safety Information . . . . . . . . . . . . . . . . . . . . . 127
Glossary . . . . . . . . . . . . . . . . . . . . . . 131
Index . . . . . . . . . . . . . . . . . . . . . . . . . 135
Quick Reference Card . . . . . . . . . . . . . . 139
Read these simple guidelines. Failure to comply with
them may be dangerous or illegal.
For more detailed safety information, see “Safety
Information” on page 127.
Road safety comes first
Do not use a hand-held phone while driving; park the
vehicle first. Remember that in some countries, it is
illegal to use a hand-held phone while driving.
Switch off when refuelling
Do not use the phone at a refuelling point (service
station) or near fuels or chemicals.
Switch off in aircraft
Mobile phones can cause interference. Using them
on aircraft is both illegal and dangerous.
Respect special regulations
Follow any special regulations in force in any are a
and always switch off your phone whenever it is
forbidden to use it, or when it may cause interf e re n c e
or danger (in a hospital for example).
Interference
All mobile phones may be subject to radio
interference, which may affect their performance.
6
7
Safety Precautions
U n p a c k i n g
Qualified service
Only qualified service personnel must repair cellular
equipment. Use only approved accessories and
batteries.
Use sensibly
Use only in the normal position (held to the ear).
Avoid unnecessary contact with the antenna when
the phone is switched on.
Emergency calls
Ensure that the phone is switched on and in service.
Enter the emergency number (112 or another official
emergency number) and press the key. Give your
location. Do not end the call until given permission to
do so.
End the call by pressing .
IMPORTANT!Use only SAMSUNG-approved
accessories. The use of any other power accessory
will invalidate any approval or warranty applying to
the phone, and may be dangerous.
When you disconnect the power cord of any
accessory, grasp and pull the connector, not the cord.
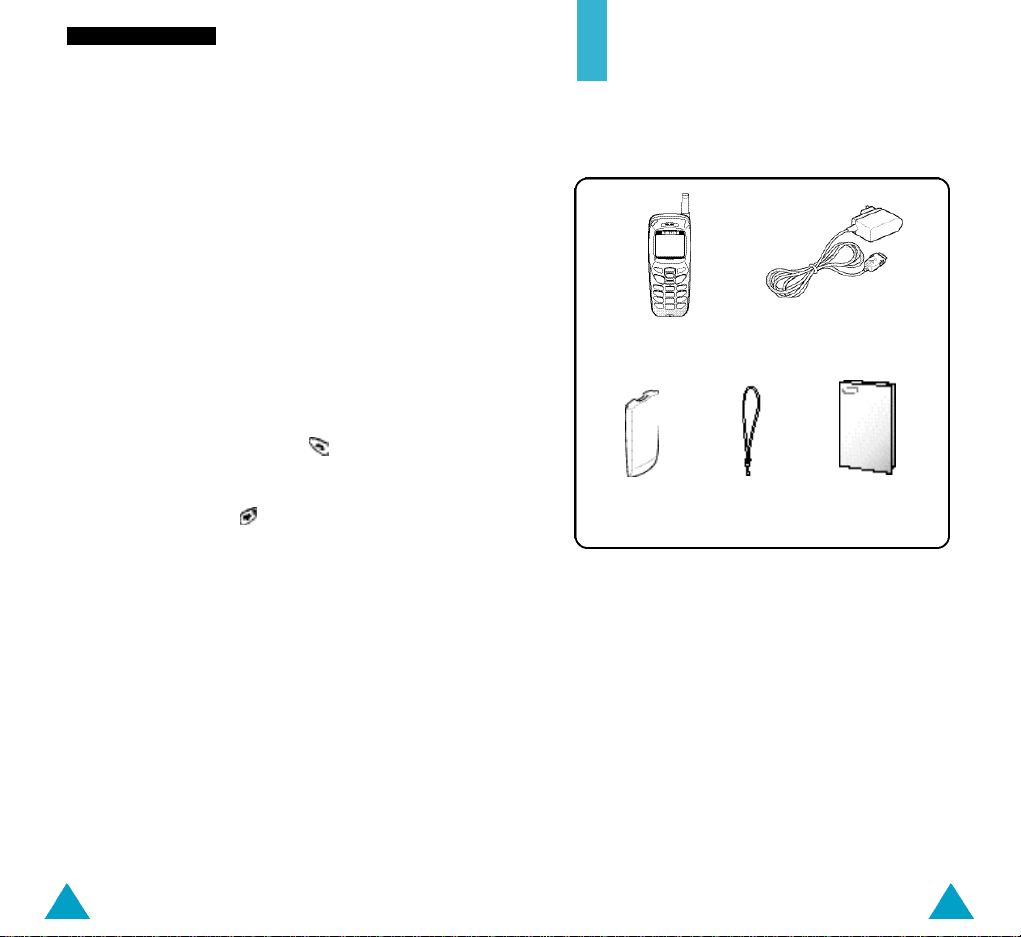
Your package contains the following items.
Phone
Battery
In addition, you can obtain the following accessories
for your phone from your local SAMSUNG dealer:
• Cigarette lighter adapter
• Simple hands-free car kit
• Standard battery
• Data kit
• Ear-microphone*
Travel Adapter
Hand Strap
Owner’s Manual
* : Depending on the country, this accessory may be
supplied in the standard package.
98

Your Phone
Your Phone
Phone Layout
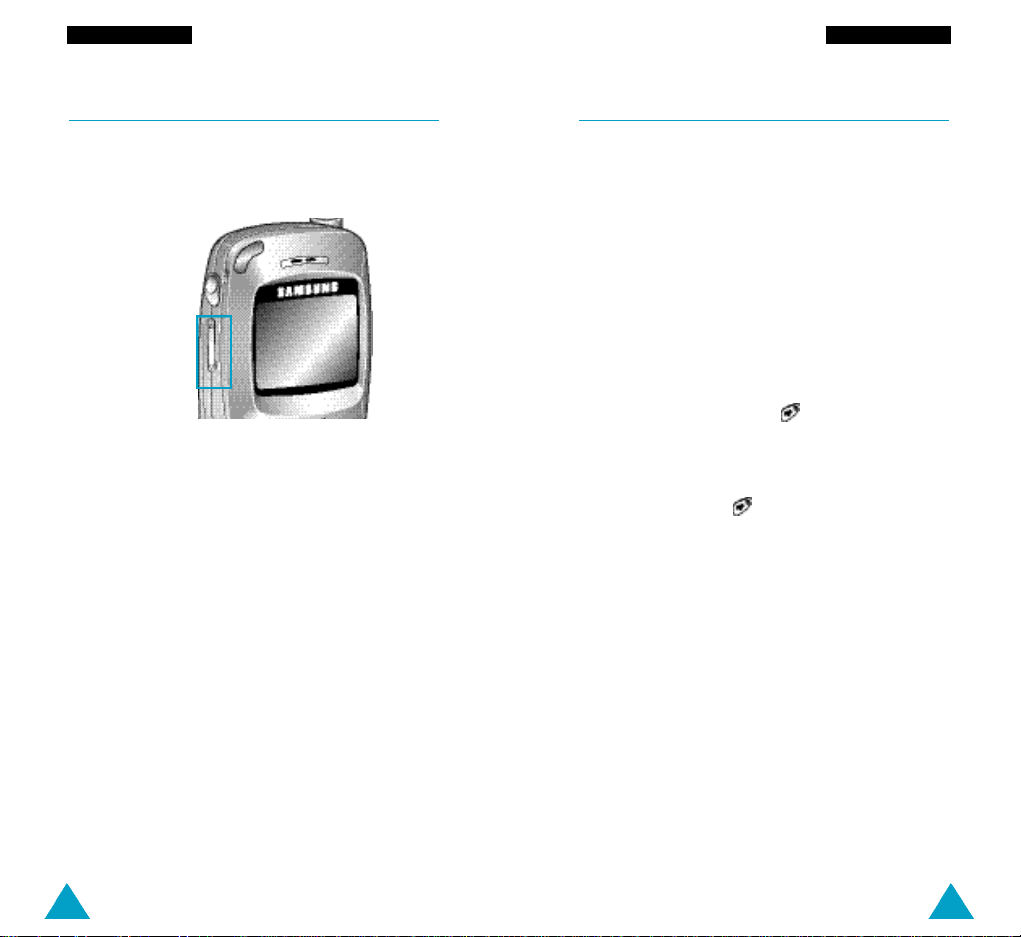
The following illustration shows the main elements
of your phone.
Service light
Antenna
Earpiece
Earphone jack
Display
Volume keys
Soft keys
Perform the functions indicated by the text
above them (in the bottom line of the display).
In the menu facility, scroll through the menu
options and phonebook memory.
allows you to access the Ring Tone menu
in idle mode. allows you to access the
Voice dialling or Voice command when you set
the Voice Active option.
Deletes characters from the display.
In idle mode, allows you to access the WAP
Browser quickly.
Makes or answers a call.
In idle mode, recalls the last number dialled.
In the menu facility, selects a menu function or
s t o res information that you have entered (such
as a name) in the phonebook.
Ends a call. Also switches the phone on and
off when pressed and held.
In the menu facility, returns to the idle mode
and cancels your input.
Enter numbers, letters and some special
characters.
When held down in idle mode, locks the
keypad manually.
Microphone
10
When held down, toggles the Silent mode on
and off.(This feature is not available when
the phone is connected to a optional car kit.).
During a call, adjust the earpiece volume.
In idle mode, adjust the key tone volume.
When you get a call, silent the ring tone
immediately.
11

Your Phone
Display
Your Phone
Display Layout
The display comprises three areas.
Icons
Text and
graphic area
Soft key
indications
Area Description
First line Displays various icons (see opposite).
Middle lines Display messages, instructions and
any information that you enter
(number to be dialled, for example).
Last line Shows the functions currently
assigned to the two soft keys.Or
shows various types of information,
such as missed calls, call diverting
options, advice of charge information
or the keypad lock icon ( ). This
information varies, depending on
your SIM card, service provider or
current context.
Icons
Signal strength: shows the received
signal strength. The greater the number
of bars, the better the signal strength.
Service: appears when a call is in
progress.
New Message: appears when a new
text message has been received.
New Voice Mail: appears when a new
voice mail message has been received.
Vibrator on/Silent mode on: appears
when the Vibrate mode or Silent mode
is active.
Alarm on: appears when you set an
alarm.
Battery strength: shows the level of
your battery. The more bars you see, the
more power you have left.
12
13
Your Phone
Getting Started
Backlight
The display and keypad are illuminated by a
backlight. When you press any key, the backlight
comes on.
To specify the length of time for which the backlight
is active, set the Backlight menu option (5-1-5); see
page 81 for further details.
N o t e
When you are in lock mode, press and hold the
soft key to come on the backlight.
Service Light
There are several cases in which the service light
flashes.
• When in service.
To activate or deactivate the service light, set the
Service Light menu option (5-1-6); see page 82.
To select the colour of the service light, set the
Service Colour menu option (5-4-4); see page 97.
• When an SMS message is received (the light is
yellow, only if the Alert type set Light only.).
Installing the SIM Card and the Battery
When you subscribe to a cellular network, you are
p rovided with a SIM card loaded with your subscription
details (PIN, optional services available and so on).
• Keep all SIM cards out of the reach of small
children.
• The SIM card and its contacts can be easily
damaged by scratches or bending, so be careful
when handling, inserting or removing the card.
• Before installing the SIM card, always make sure
that the phone is switched off before removing the
battery.
1.
If necessary, switch off the phone by holding
down until the closing animation is displayed.
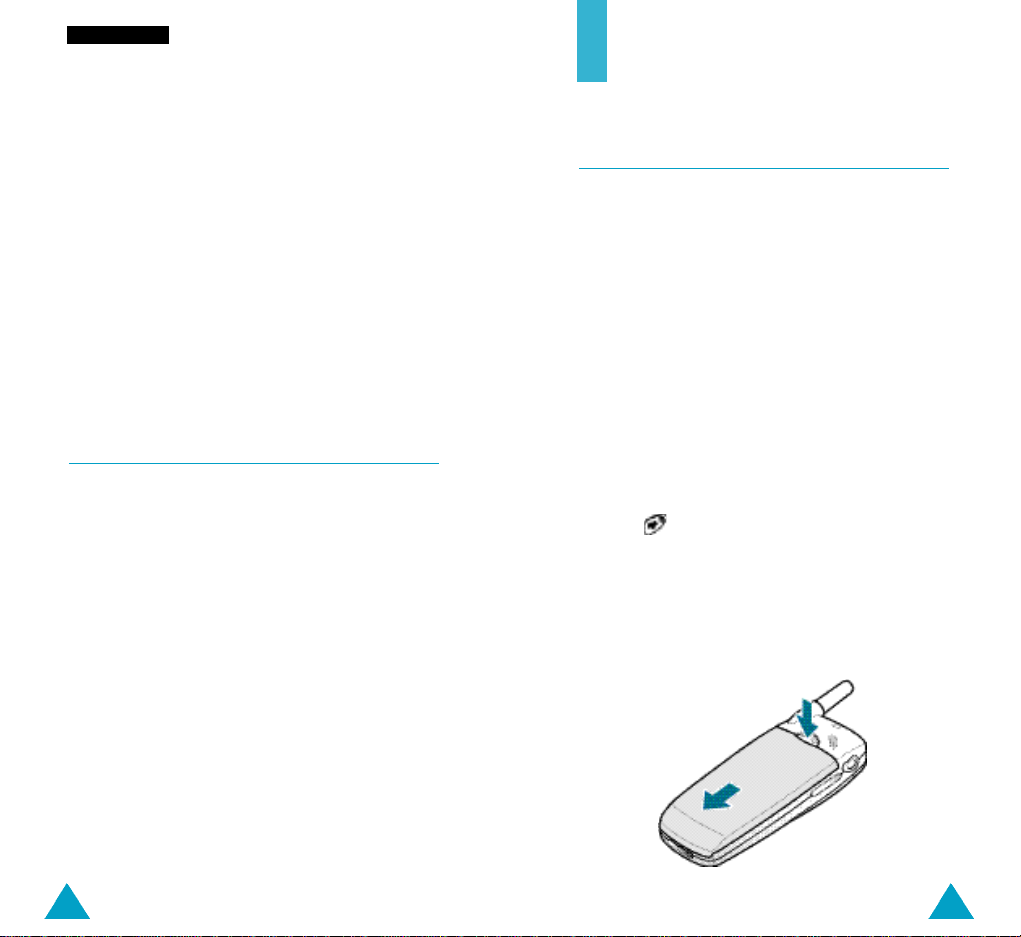
2. Remove the battery. To do so:
➀ Press and hold down the catch above the
battery on the back of the phone
➁ Slide the battery away, as shown
①
• When the alarms rings.
• When you receive a call (the light is green by
default).
To change the colour, set the phonebook Colour
option; see page 45.
②
1514
Getting Started Getting Started
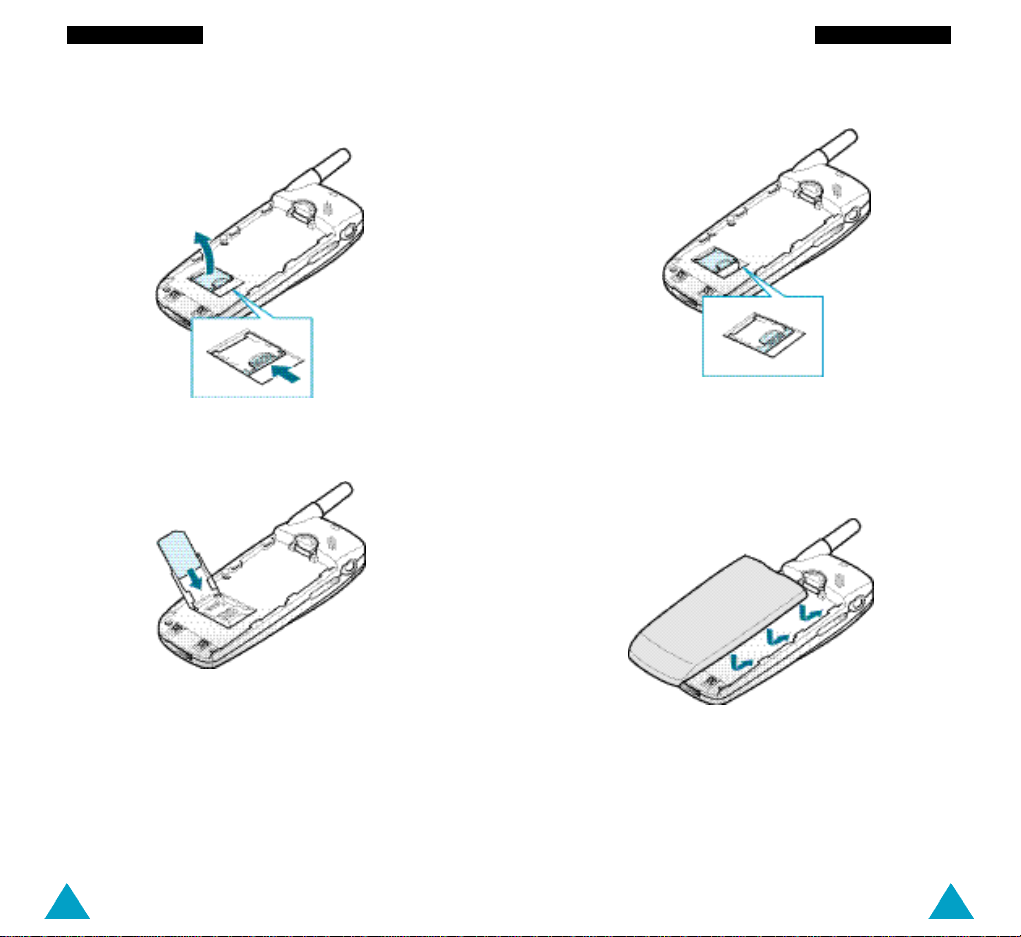
3. Slide the ivory-coloured lock on the SIM card
holder left to unlock the holder. Lift the holder up.
4. Insert the SIM card, ensuring that the cut corner
faces top left and the gold contacts of the card
face into the phone.
5. Close the SIM card holder and slide the ivorycoloured lock right.
6. Place the battery back on the phone. Slide the
battery up towards the catch until it locks into
place. Make sure that the battery is properly
installed before switching on the power.
1716
Getting Started Getting Started
Charging a Battery
Your phone is powered by a rechargeable Li-ion
battery. A travel adapter is provided with your phone.
Use only approved batteries and chargers. Ask your
local SAMSUNG dealer for further details.
The phone can be used while the battery is charging.
N o t e: You must fully charge the battery before using
your phone for the first time. A discharged
battery is fully recharged in approximately
1 4 0m i n u t e s .
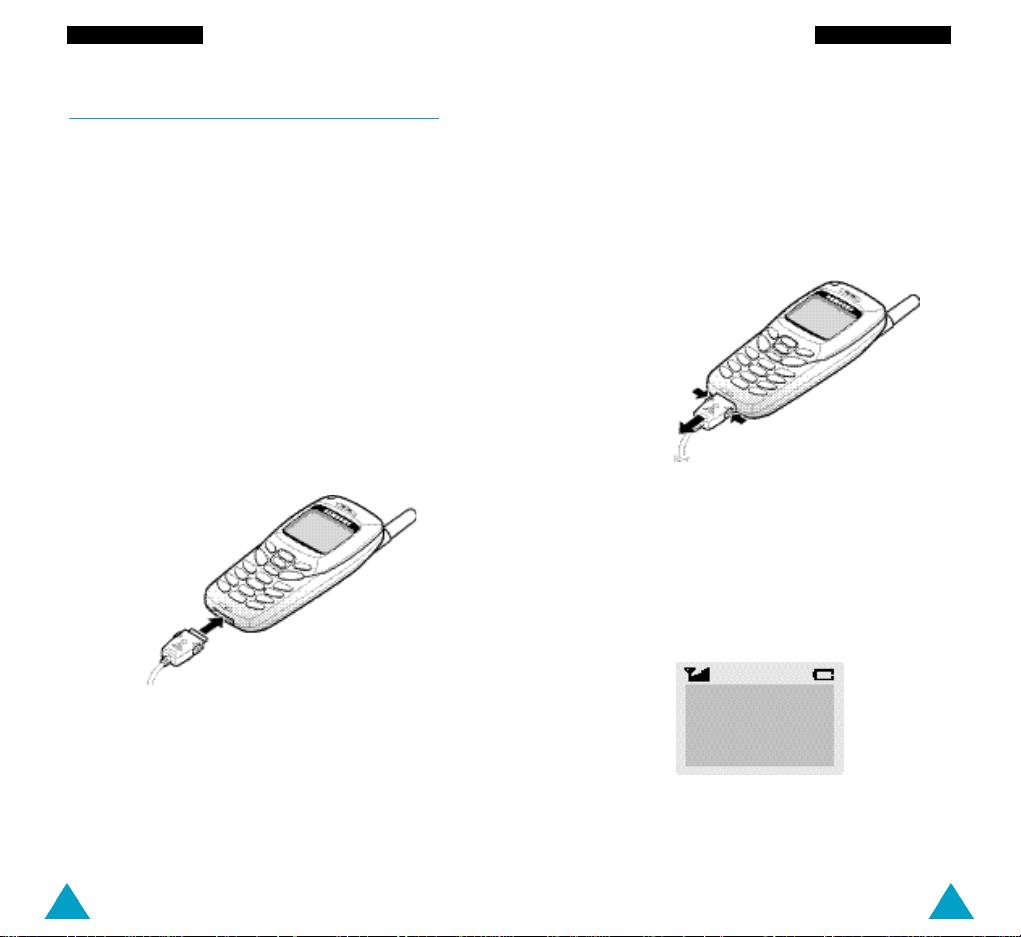
1. With the battery in position on the phone connect
the lead from the travel adapter to the bottom of
the phone. Check that the arrow on the lead
connector is facing towards the front of the phone.
2. Connect the adapter to a standard AC wall outlet.
When the battery is charging, the battery icon
in the top right-hand corner of the display fills
repeatedly.
N o t e: Do not remove the battery from the phone
while the travel adapter is connected to the
p h o n e .
3. When charging is finished, disconnect the adapter
from the power outlet and from the phone by
pressing the grey tabs on both sides of the
connector and pulling the connector out.
Low Battery Indicator
When the battery is weak and only a few minutes of
talk time remain, you will hear a warning tone and a
message will be repeated at regular intervals on the
display:
** Warning **
Battery Low
When the battery becomes too weak for the phone
to operate, the phone switches off automatically.
1918
Getting Started
page 80.
Switching the Phone On/Off
1. Hold down for more than one second to
switch the phone on.
Getting Started
4.
When you wish to switch the phone off, hold
down for more than two seconds.
Note: If “Insert SIM Card” appears on the display,
please check that the SIM card is correctly
inserted.
2. If the phone asks for a password, key in the
password and press the OK soft key. The phone
password is factory set to 0000. For further
details, see page 122.
3. If the phone asks for a PIN, key in the PIN and
press the OK soft key. For further details, see
page 123.
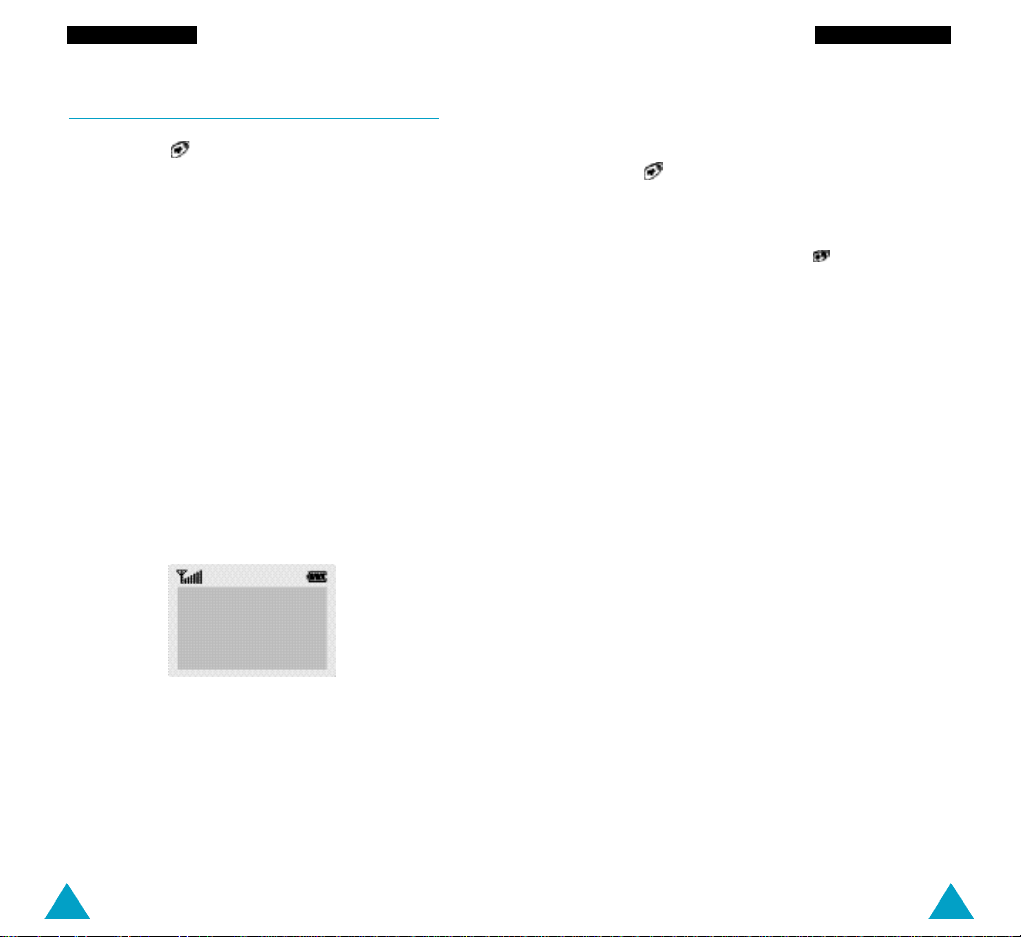
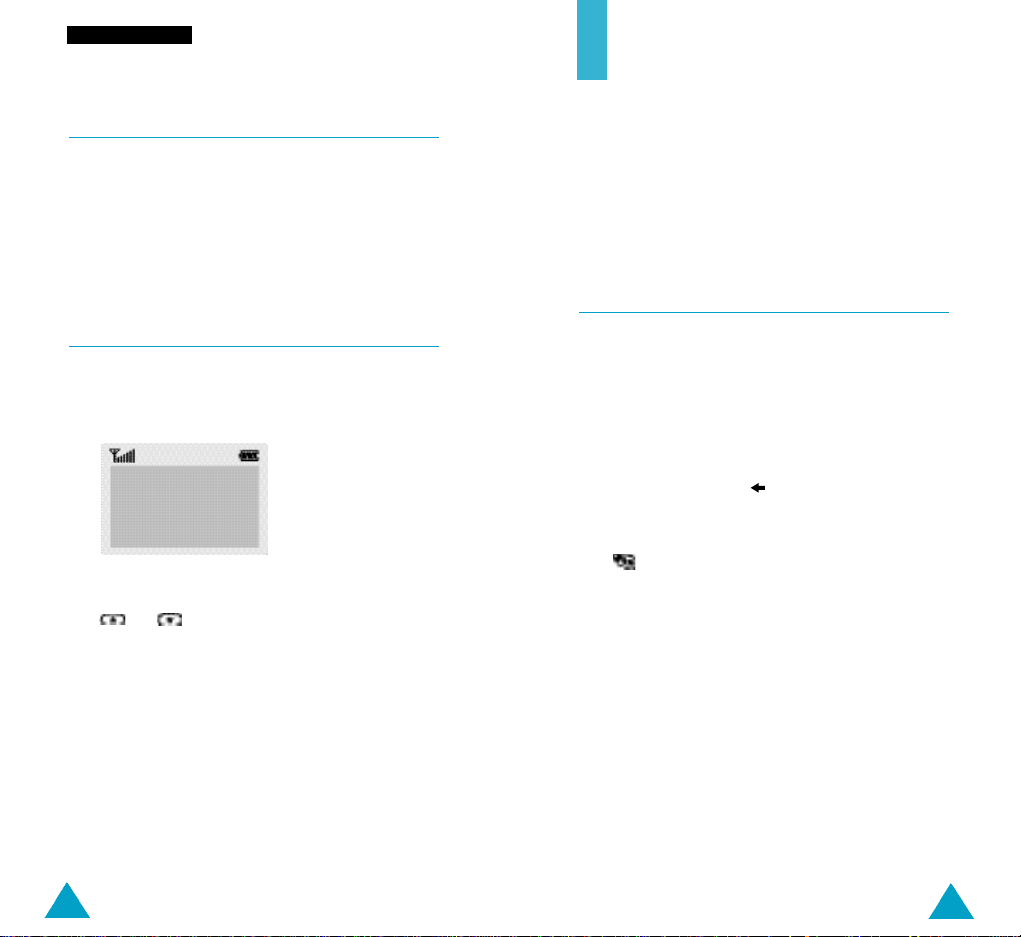
The phone searches for your network and when it
finds it, the idle screen, illustrated below, is
displayed.
<SERVICE PROVIDER>
Sat 14 Mar 12:57
Menu PhoneBook
N o t e: The display language is determined by the
SIM card inserted. To change the language,
use the L a n g u a g e menu option (5 - 1 - 3) . See
N o t e:
If you want to switch the phone off in lock
mode, unlock the phone first by pressing left
soft key and pressing the k e y.
20
21
Call Functions
Making a Call
Call Functions
When the idle screen is displayed, key in the area
code and phone number and press .
N o t e:
If you have set the Auto Redialoption (5 - 1 - 7) to
O N(see page 82) and the person called does not
answer or the line is busy, the number is
redialled automatically up to ten times.
Making International Calls
1. Press and hold down the key.
The + international prefix appears.
2. Key in the country code, area code and phone
number and press .
Correcting the Number
To clear... Then...
The last digit Press the soft key.
displayed
Any other digit Press the or key
in the number until the cursor ( ❘ ) is immedia-
tely to the right of the digit to
be cleared. Press the soft
key. You can also insert a
missing digit simply by pressing
the appropriate key.
The whole display Hold down the soft key
for more than one second.
Ending a Call
When you have finished your call, briefly press .
Making a Call from the Phonebook
You can store the names and phone numbers of the
people you call regularly in the SIM card memory and
phone memory, called the phonebook. You then
simply select the required name to recall the
associated number. For further details on the
Phonebook feature, refer to page 41.
Redialling the Last Number
The phone stores the last 10 numbers dialled. To
recall any of these numbers, proceed as follows.
1. If there are any characters on the display, press
the key to return to the idle mode.
2. P ress the key to access the list of the last
numbers dialled.
3. Use the and keys to scroll through the
numbers until the required number is displayed.
4. Press the key to dial the number displayed.
2322
Call Functions Call Functions
Adjusting the Volume
During a call, if you wish to adjust the earpiece
volume, use the volume key on the left side of the
phone.
When you get a call, press the volume key to silent
the ring tone immediately.
In idle mode, you can adjust the key tone volume
using the same keys.
Answering or Rejecting a Call
When somebody calls you, the phone rings and the
phone icon in the middle of the screen flashes.
If the caller can be identified, the caller’s phone
number (or name if stored in your phonebook) is
displayed.
Answering a Call
There are two ways to answer an incoming call.
• Press the Accept soft key.
• When the Any-Key Answer menu option is set to
ON, press any key( except or the Reject soft
key).
Rejecting a Call
To reject a call, press or the Reject soft key.
N o t e
When you have a call in lock mode, the lock
mode is deactivated automatically. When you
end the call the phone will be locked
automatically after the predetermined amount of
t i m e .
2524
Call Functions Call Functions
Viewing Missed Calls
If you are unable to answer a call for any reason, you
can find out who was calling you, provided that this
service is available. In this way, you can call the
person back, if necessary.
The number of missed calls is displayed on the idle
screen immediately after the call was missed.
To view the missed call immediately, proceed as
follows.
1. Press the View soft key.
The number corresponding to the most recent
missed call is displayed, if available.
2. To... Then press the...
Scroll through the or key.
missed calls
Call the number displayed key.
Edit or delete a missed Options soft key
call number (see opposite).
Editing a Missed Call Number
1. Press the Options soft key.
2. Press or to highlight the Paste option.
3. Press the Select soft key.
4. Change the number as required. Press or
to move back through the number.
5. To... Then press the...
Call the number key.
Store the number Save soft key and enter
the name and location
required (for further
details, refer to page 41).
Deleting a Missed Call
1. Press the Options soft key.
2. P ress or to highlight the D e l e t e o p t i o n .
3. Press the Select soft key.
You can press at any time to exit the Missed Call
feature.
N o t e:
You can access the Missed Call feature at any
time by selecting the Missed Callsmenu option
(1 - 1); for further details, see page 55.
2726
Call Functions
In-Call Options
Call Functions
Your phone provides a number of control functions
during a call. To access these functions during a call,
press the Options soft key.
Switching the Microphone Off (Mute)
You can temporarily switch your phone’s microphone
off, so that the other party cannot hear you.
Example: You wish to say something to another
person in the room but do not want the
other party to hear you.
To switch the microphone off temporarily, proceed as
follows.
1. Press the Options soft key.
2. P ress or to highlight the M u t e o p t i o n .
3. Press the OK soft key.
Your correspondent can no longer hear you.
To switch the microphone back on, proceed as
follows.
1. Press the Options soft key.
2. Press or to highlight the Unmute
option.
Searching for a Number in the Phonebook
You can search for a number in the phonebook during
a call.
1. Press the Options soft key.
2. Press or to highlight the Phonebook
option.
3. Press the OK soft key.
4. Enter the start of the name that you wish to find
and press the Find soft key.
N o t e : You can also scroll through the phonebook
from the beginning, by pressing the F i n d
soft key directly.
The phonebook entries are listed, starting with
the first entry matching your input. This entry is
also highlighted.
5. To view the highlighted entry, press the View soft
key.
For a more detailed description of the Phonebook
feature, refer to page 41.
3. Press the OK soft key.
Your correspondent can hear you again.
28
29

Call Functions
Call Functions
Putting a Call on Hold
You can place the current call on hold whenever you
want. You can make another call while you have a
call in progress if this service is supported by the
network. Of these two calls, one is active and the
other is on hold and you can swap between the calls.
To place a call on hold, press the Options soft key,
and select the Hold option. You can reactivate the
call whenever you want, by pressing the Retrieve
soft key.
To make a call while you have a call in progress,
proceed as follows.
1. Key in the phone number that you wish to dial or
look it up in the phonebook.
2. Press to dial the second call.
The first call is automatically put on hold.
Or alternatively, proceed as follows.
1. Put the current call on hold by pressing the
Options soft key and selecting the Hold option.
2. Make the second call in the normal way.
Answering a Second Call
You can answer an incoming call while you have a
call in progress, if this service is supported by the
network and you have set the Call Waiting menu
option (5-2-3) to Activate (see page 89). You will be
notified of an incoming call by a call waiting tone.
To answer a call while you have a call in progress,
proceed as follows.
1. Press to answer the incoming call.
The first call is automatically put on hold.
2. To switch between the two calls, press the Swap
soft key.
To end a held call, press the Options soft key and
select the End held call option.
3. To end the current call, press .
You are automatically switched back to any held
calls.
To swap between the two calls, simply press the
Swap soft key.
The current call is placed on hold and the call on
hold is reactivated so that you can continue
conversing with the other party.
When you have finished, end each call normally by
pressing .
30
31
Call Functions
Making a Multiparty Call
Call Functions
A multiparty call is a network service that allows
up to six people to take part simultaneously in a
multiparty or conference call. For more information,
contact your service provider.
Setting up the Multiparty Call
1. Call the first participant in the normal way.
2. Call the second participant in the normal way.
The first call is automatically put on hold.
3. To join the first participant to the multiparty call,
press the Options soft key and select the Join
option.
4. To add a new person to the multiparty call, call
the person in the normal way, then press the
Options soft key and select the Join option.
You can add incoming callers by answering the call
and pressing Options, followed by Join. Repeat as
required.
Having a Private Conversation With One
Participant
1. Press the Options soft key and choose the
Select one option.
The list of call participants appears.
2. Highlight the required person, by pressing
or , followed by .
3. Select Private.
Now you can talk privately with that person. The
other participants can continue to converse with
each other.
4. To return to the multiparty call, press the Options
soft key and select Join.
All the multiparty call participants can now hear
each other.
Dropping One Participant
1. Press the Options soft key and choose the
Select one option.
The list of call participants appears.
2. Highlight the required person, by pressing
or , followed by .
3. Select the Remove soft key.
The call is ended with that participant, but you
can continue to talk with the other participants.
4. End the multiparty call by pressing
.
32
33

Call Functions
Entering Text
Muting/Sending Key Tones
These options allow you to turn the key tones off or
on. If the Mute keys option is selected, your phone
does not transmit the key tones.
Note: To communicate with answering machines or
computerised telephony systems, the S e n d
k e y s option must be selected.
Using the SMS Service
If you receive an SMS (Short Message Service)
message during a call, the message icon ( )
appears in the display.
After you have finished your call, you can read the
message; refer to page 59 for further details.
When storing a name in the phonebook, creating
your personal greeting or scheduling events in your
calendar, you will need to enter text.
You are provided with the following text input
modes.
T9 mode
This mode allows you to enter words with only one
keystroke per letter. Each key on the keypad has
more than one letter – when you press the key
once, J, K or L may be displayed. The T9 mode
automatically compares your keystrokes with an
internal linguistic dictionary to determine the correct
word, thus requiring far fewer keystrokes than the
traditional ABC mode.
ABC mode
This mode allows you to enter letters by pressing the
key labelled with the required letter once, twice or
three times until the letter is displayed.
Number mode
This mode allows you to enter numbers.
Symbolic mode
This mode allows you to enter special characters.
is a registered trademark of Tegic Communications, Inc.
3534
Entering Text
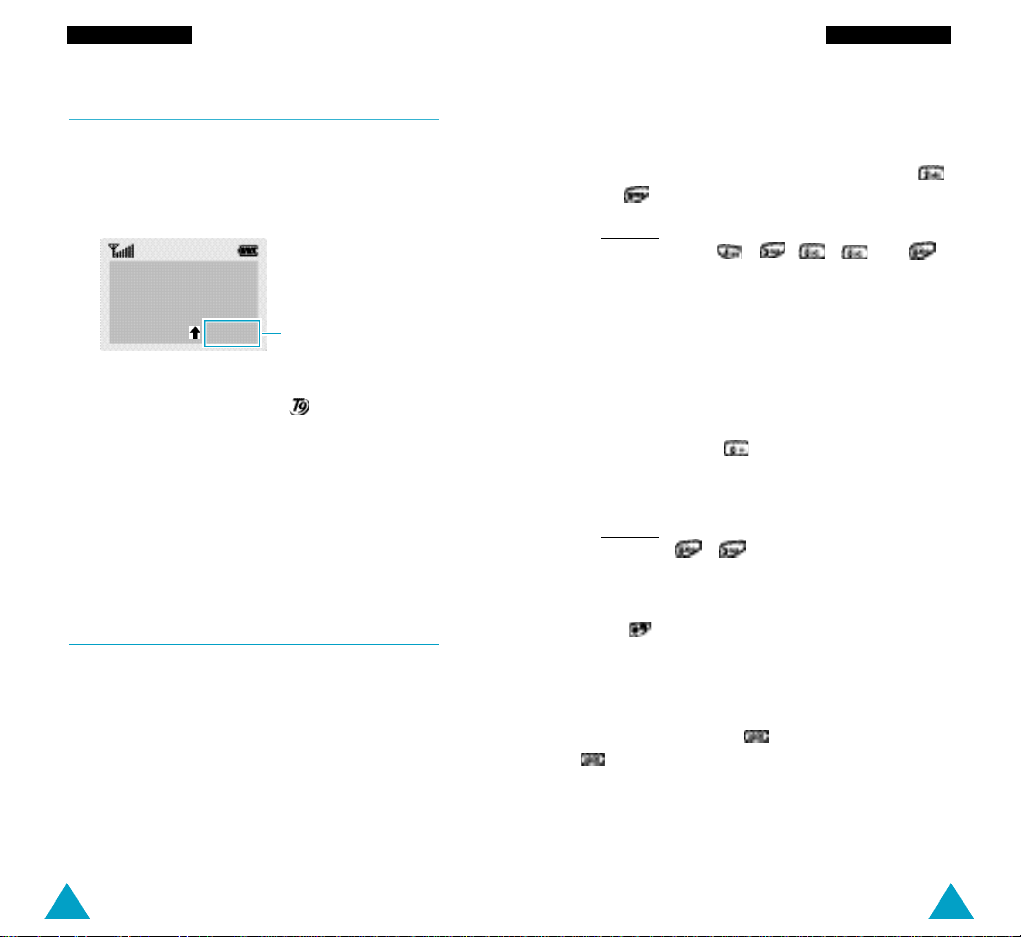
Changing the Text Input Mode
Entering Text
1. When you are in a field that allows characters to
be entered, you will notice the text input mode
indicator in the lower right corner of the display.
Save ABC
Text input mode
indicator:
ABC: ABC mode
NUM: Number mode
: T9 mode
SYM: Symbolic mode
2. Press the right soft key.
The modes available are displayed.
3. Scroll to the required mode, then press the Select
soft key.
Using the T9 Mode
The T9 predictive text input mode allows you to enter
words easily with a minimum of key presses. As you
press each key, the phone selects a letter that makes
up the word that it thinks you are typing, based on a
built-in dictionary. As a new letter is added, the word
changes based on the key that you have pressed.
1. When you are in the T9 predictive text input
mode, start entering a word by pressing keys
to . Press each key only once for one letter.
Example: to enter HELLO in the T9 English m o d e ,
p ress , , , and .
The word that you are typing appears in the display.
It may change with each key that you pre s s .
2. Enter the whole word before editing or deleting
any keystrokes.
3. If the word is correct, start entering the next
word.
Otherwise, press repeatedly to display
alternate word choices for the keys that you have
pressed.
Example: OF and ME both share the sequence
, . The phone displays the
most commonly used choice first.
4. Complete each word with a space by pressing
the key.
To type words not found in the T9 mode, change the
text input mode to the ABC mode.
To delete letters, press . Press and hold down
to erase entire words.
36
37
Entering Text
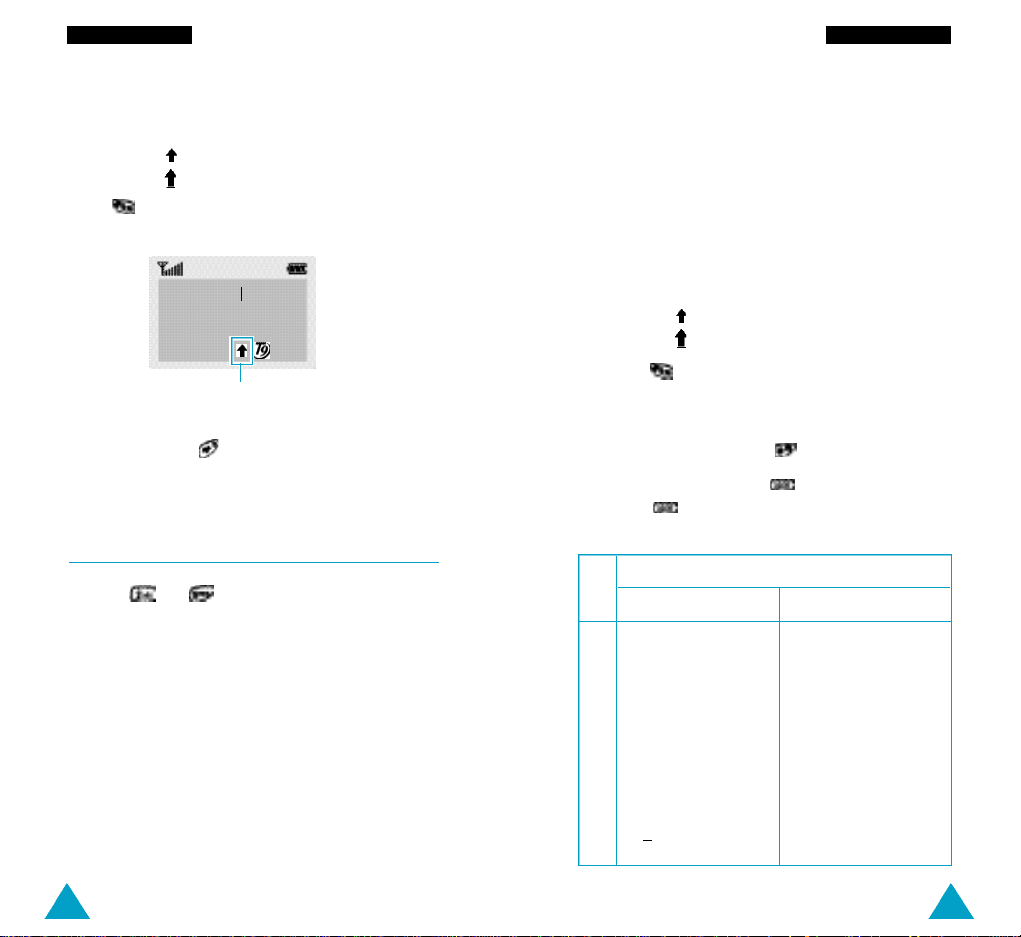
Entering Text
There are three shift options:
•
Lower Case (no shift indicator)
•
Initial Cap ( indicator)
•
Caps Lock ( indicator)
P
ress one or more times to display the appro-
priate shift indicator and continue typing normally.
Meet me at
OK ENG
Shift indicator
N o t e: To exit the text input mode without saving your
input, press . The phone returns to the
previous menu level.
Using the ABC Mode
Use the to keys to enter your text.
1. Press the key labelled with the required letter:
• Once for the first letter
• Twice for the second letter
• And so on
2. Select the other letters in the same way.
N o t e: The cursor moves to the right when you
press a different key. When entering the
same letter twice (or a different letter on the
same key), just wait for a few seconds for
the cursor to move right automatically, and
then select the next letter.
There are three shift options:
•
Lower Case (no shift indicator)
•
Initial Cap ( indicator)
•
Caps Lock ( indicator)
Press the key one or more times to display the
appropriate shift indicator in the bottom line of the
display and continue typing normally.
To insert a space, press the key.
To delete letters, press the key. Press and hold
down the key to clear the display.
Key Characters in the Order Displayed
Upper Case Lower Case
: ; ¿ ¡ 1 = “ /
1
A B C 2 Ä Æ Å Γ
2
D E F 3 É ∆
3
G H I 4 Θ
4
J K L 5 Λ
5
M N O 6 Ñ Ö Ø Ξ
6
P Q R S 7 Π Σ
7
T U V 8 Ü Φ
8
W X Y Z 9 Ψ Ω
9
0 x < > % # £
0
. , ? ! 1 - ‘ @ :
a b c 2 à ä æ å Ç
d e f 3 é è
g h i 4 ì
j k l 5
m n o 6 ñ ò ö ø
p q r s 7 ß
t u v 8 ù ü
w x y z 9
0 + ( ) & _ $
38
39
Entering Text
P h o n e b o o k
Using the Number Mode
The Number mode enables you to enter numbers in a
text message (a telephone number, for example).
Press the keys corresponding to the required digits
before manually switching back to the appropriate
text entry mode.
Using the Symbolic Mode
The Symbolic mode enables you to enter various
symbols.
123 456 789
.( ), : ; %!
Save SYM
To scroll through the symbols available, press
the or key. Press the number key
corresponding to the required symbol. The phone
then automatically switches back to the text entry
mode used immediately prior to selecting the
Symbolicmode.
You can store phone numbers and their corresponding names in the memory of your SIM card. In
addition, you can store up to 500 numbers and
names in the phone memory. The SIM card and
phone memories, although physically separate, are
used as if they were a single entity, called the
phonebook.
Storing a Phone Number with a Name
As soon as you start to enter a number, Save
appears above the left soft key to allow you to store
the number in the phonebook.
1. Key in the number to be stored.
N o t e s:
• If you make a mistake while entering a number,
correct it usingthe
details, refer to page 22.
• To insert a dialling pause for special phone
services, such as banking by phone, hold down
. ‘P’ is displayed to indicate the pause.
2. When you are sure that the number is correct,
press the Save soft key.
3. Enter the corresponding name (the maximum
length depends on your SIM card). For information
on how to enter a name, see page 35.
4. When you are satisfied, press the Save soft key.
The phone now displays the first free location in
the SIM card for you to save the number and
name. If the card memory is full, the first free
location in the phone memory is displayed.
soft key. For further
5. Press the right soft key to toggle between the phone
40
(To Phone) and card (To Card) memories.
41
P h o n e b o o k
P h o n e b o o k
6. If you do not want to save the number and name
in the suggested location, press to clear the
location number and enter your preferred location
by pressing the number keys.
7. Press OK to store the name and number.
You can access the phonebook options by
pressing the Options soft key, or scroll through
the memory with or .
8. To exit, press the key.
Phonebook Options
When storing or viewing a number in the phonebook,
Options appears above the left soft key to allow you
to access the phonebook options, described in the
following paragraphs.
Accessing the Options
To access the various phonebook options, proceed as
follows.
1. Press the Options soft key.
Voice Record
Note: This option only appears if no name has as yet
been recorded.
This option allows you to add a voice tag to the
number.
Follow the instructions given by your phone to record
the required name.
Play Voice
Note: This option only appears when you have
already recorded a name.
This option plays back the names that you have
recorded.
Voice Delete
N o t e :This option only appears when you have
already recorded a name.
This option allows you to delete a specific voice tag.
You are asked to confirm the deletion by pressing the
OK soft key.
Paste
The first available option is highlighted.
2. To... Then press the...
Select the Select soft key.
highlighted option
Highlight a or key one or
different option more times until the
required option is
42
highlighted.
Allows you to paste the phonebook number into the
normal dialling mode. Use this option to dial a
number similar to one in the phonebook (a different
extension in the same office for example).
Use the soft key to change the number as
required (refer to page 22 for further details). When
you are ready to dial, press .
43
 Loading...