

Page 1

DVD Player
User Manual
imagine the possibilities
Thank you for purchasing this Samsung product.
To receive more complete service, please register your product at
DVD-C450/XTR
DVD-C360/XTR
DVD-C350/XTR
AK68-01928A
www.samsung.com/global/register
ENGLISH
Page 2

2
precautions
1. Setting up
- Refer to the identification label located on
the rear of your player for its proper operating voltage.
- Install your player in a cabinet with adequate ventilation holes. (7~10cm) Do not
block ventilation holes on any of the components for air circulation.
- Do not push the disc tray in by hand.
- Do not stack components.
- Be sure to turn all components off before
moving the player.
- Before connecting other components to this
player, be sure to turn them off.
- Be sure to remove the disc and turn off the
player after use, especially if you are not
going to use it for a long time.
- The mains plug is used as a disconnect
device and shall stay readily operable at
any time.
2. For your safety
- This product utilizes a laser. Use of controls
or adjustments or performance of procedures other than those specified herein may
result in hazardous radiation exposure.
- Do not open covers and do not repair yourself. Refer servicing to qualified personal.
3. Caution
- Your player is not intended for industrial
use but for domestic purposes. Use of this
product is for personal use only.
- Apparatus shall not be exposed to dripping or splashing and no objects filled with
liquids, such as vases, shall be placed on
the apparatus.
- Exterior influences such as lightning and
static electricity can affect normal operation
of this player. If this occurs, turn the player
off and on again with the POWER button,
or disconnect and then reconnect the AC
power cord to the AC power outlet. The
player will operate normally.
- When condensation forms inside the player
due to sharp changes in temperature, the
player may not operate correctly. If this
occurs, leave the player at room temperature until the inside of the player becomes
dry and operational.
4. Disc
- Do not use record-cleaning sprays, benzene, thinner, or other volatile solvents that
may cause damage to the disc surface.
- Do not touch the disc’s signal surface. Hold
by the edges or by one edge and the hole
in the center.
- Wipe the dirt away gently; never wipe a
cloth back and forth over the disc.
5. Environmental info
- The battery used in this product contains
chemicals that are harmful to the environment.
- So, dispose of batteries in the proper man
ner, according to federal, state, and local
regulations.
The product unit accompanying this user manual
is licensed under certain intellectual property
rights of certain third parties. This license is limited to private non-commercial use by end-user
consumers for licensed contents. No rights are
granted for commercial use. The license does
not cover any product unit other than this product unit and the license does not extend to any
unlicensed product unit or process conforming
to ISO/OUR 11172-3 or ISO/OUR 13818-3 used
or sold in combination with this product unit. The
license only covers the use of this product unit to
encode and/or decode audio files conforming to
the ISO/OUR 11172-3 or ISO/OUR 13818-3. No
rights are granted under this license for product
features or functions that do not conform to the
ISO/OUR 11172-3 or ISO/OUR 13818-3.
CAUTION: USE OF ANY CONTROLS,
ADJUSTMENTS, OR PROCEDURES OTHER
THAN SPECIFIED HEREIN MAY RESULT IN
HAZARDOUS RADIATION EXPOSURE.
Contents
Precautions . . . . . . . . . . . . . . . . . . . . . . . . . . . 2
Setup
General Features . . . . . . . . . . . . . . . . . . . . . . 2
Description . . . . . . . . . . . . . . . . . . . . . . . . . . . 3
Tour of the Remote Control ............... 4
Connections
Choosing a Connection ................. 4
Basic Functions
Playing a Disc . . . . . . . . . . . . . . . . . . . . . . . . . 5
Using the Search and Skip Functions ...... 5
Using the Display Function . . . . . . . . . . . . . . 5
Using the Disc Menu and Title Menu . . . . . . . 6
Repeat Play . . . . . . . . . . . . . . . . . . . . . . . . . . 6
Slow Play . . . . . . . . . . . . . . . . . . . . . . . . . . . . 6
Advanced Functions
Adjusting the Aspect Ratio (EZ View) ....... 6
Selecting the Audio Language . . . . . . . . . . . . 6
Selecting the Subtitle Language ........... 7
Changing the Camera Angle .............. 7
Using the Bookmark Function . . . . . . . . . . . . 7
setup
General Features
Excellent Sound
Dolby Digital, a technology developed by Dolby
Laboratories, provides crystal clear sound
reproduction.
Screen
Both regular and widescreen(16:9) pictures can
be viewed.
Slow Motion
An important scene can be viewed in slow
motion.
Parental Control (DVD)
The parental control allows users to set the level
necessary to prohibit children from viewing harmful movies such as those with violence, adult
subject matter, etc.
Various On-Screen Menu
Functions
You can select various languages (Audio/Subtitle)
and screen angles while enjoying movies.
Progressive Scan
Progressive scanning creates an improved picture
Using the Zoom Function . . . . . . . . . . . . . . . . 7
Clips Menu for MP3/WMA/JPEG/MPEG4
CD Audio . . . . . . . . . . . . . . . . . . . . . . . . . . . . 7
Folder Selection . . . . . . . . . . . . . . . . . . . . . . . 7
MP3/WMA/CD Audio Playback. . . . . . . . . . . . 7
MPEG4 Playback . . . . . . . . . . . . . . . . . . . . . . 8
Playing media files Using the USB Host
Feature (Only DVD-C360,C450) ........... 9
CD Ripping (Only DVD-C360,C450) ........ 9
Picture CD Playback .................... 9
Changing Setup Menu
Using the Setup Menu . . . . . . . . . . . . . . . . . 10
Setting Up the Language Features ........ 10
Setting Up the Audio Options ............ 10
Setting Up the Display Options. . . . . . . . . . . 11
Setting Up the Parental Control . . . . . . . . . . 11
Setting Up the Divx .................... 11
Reference
Troubleshooting ....................... 12
Specifications . . . . . . . . . . . . . . . . . . . . . . . . 12
with double the scan lines of a conventional interlaced picture.
EZ VIEW (DVD)
Easy View enables picture adjustment to match
your TV's screen size (16:9 or 4:3).
Digital Photo Viewer (JPEG)
You can view Digital Photos on your TV.
Repeat
You can repeat a song or movie simply by pressing the REPEAT button.
MP3/WMA
This unit can play discs created from MP3/WMA
files.
MPEG4
This unit can play MPEG4 formats within an avi
file.
CD Ripping
(Only DVD-C360,C450)
This feature lets you copy audio files from discs
to USB device into MP3 format. (only audio CD
(CD DA)
Page 3
3
Note
▼
▼
▼
▼▼
▼
▼
▼
▼▼
▼
▼
▼
▼
▼
▼▼
▼
- Discs which cannot be played with this
player.
• DVD-ROM •DVD-RAM
• CD-ROM •CDV
• CDI •CVD
• CDGsplayaudioonly,notgraphics.
- Ability to play back may depend on
recording conditions.
• DVD-R,+R
• CD-RW
• DVD+RW,-RW(Vmode)
- The unit may not play certain CD-R, CD-RW
and DVD-R due to the disc type or record
ing conditions.
COPY PROTECTION
Many DVD discs are encoded with copy protection. Because of this, you should only connect your DVD player directly to your TV, not to
a VCR. Connecting to a VCR results in a distorted picture from copy-protected DVD discs.
This product incorporates copyright protection technology that is protected by
methods claims of certain U.S. patents and
other intellectual property rights owned by
Disc Markings
~
PAL
STEREO
DIGITAL
SOUND
Play Region Number
PAL broadcast system in U.K,
France, Germany, etc.
Dolby Digital disc
Stereo disc
Digital Audio disc
DTS disc
MP3 disc
Rovi Corporation and other rights owners. Use
of this copyright protection technology must
be auzthorized by Rovi Corporation, and is
intended for home and other limited viewing
uses only unless otherwise authorized by Rovi
Corporation. Reverse engineering or disassembly is prohibited.
PROGRESSIVE SCAN OUTPUTS
(576p)
“CONSUMERS SHOULD NOTE THAT NOT
ALL HIGH DEFINITION TELEVISION SETS ARE
FULLY COMPATIBLE WITH THIS PRODUCT AND
MAY CAUSE ARTIFACTS TO BE DISPLAYED IN
THE PICTURE, IN CASE OF 576 PROGRESSIVE
SCAN PICTURE PROBLEMS, IT IS
RECOMMENDED THAT THE USER SWITCH THE
CONNECTION TO THE ‘STANDARD DEFINITION’
OUTPUT. IF THERE ARE QUESTIONS
REGARDING YOUR TV SET COMPATIBILITY
WITH THIS MODEL 576p DVD PLAYER, PLEASE
CONTACT SAMSUNG'S CUSTOMER SERVICE
CENTER.”
Region Number
Both the DVD player and the discs are coded
by region. These regional codes must match in
order for the disc to play. If the codes do not
match, the disc will not play.
The Region Number for this player is described
on the rear panel of the player.
DivX Certification
DivX, DivX Certified,
and associated logos
are trademarks of
DivXNetworks, Inc and
are used under license. DivX Certified to play
DivX video.
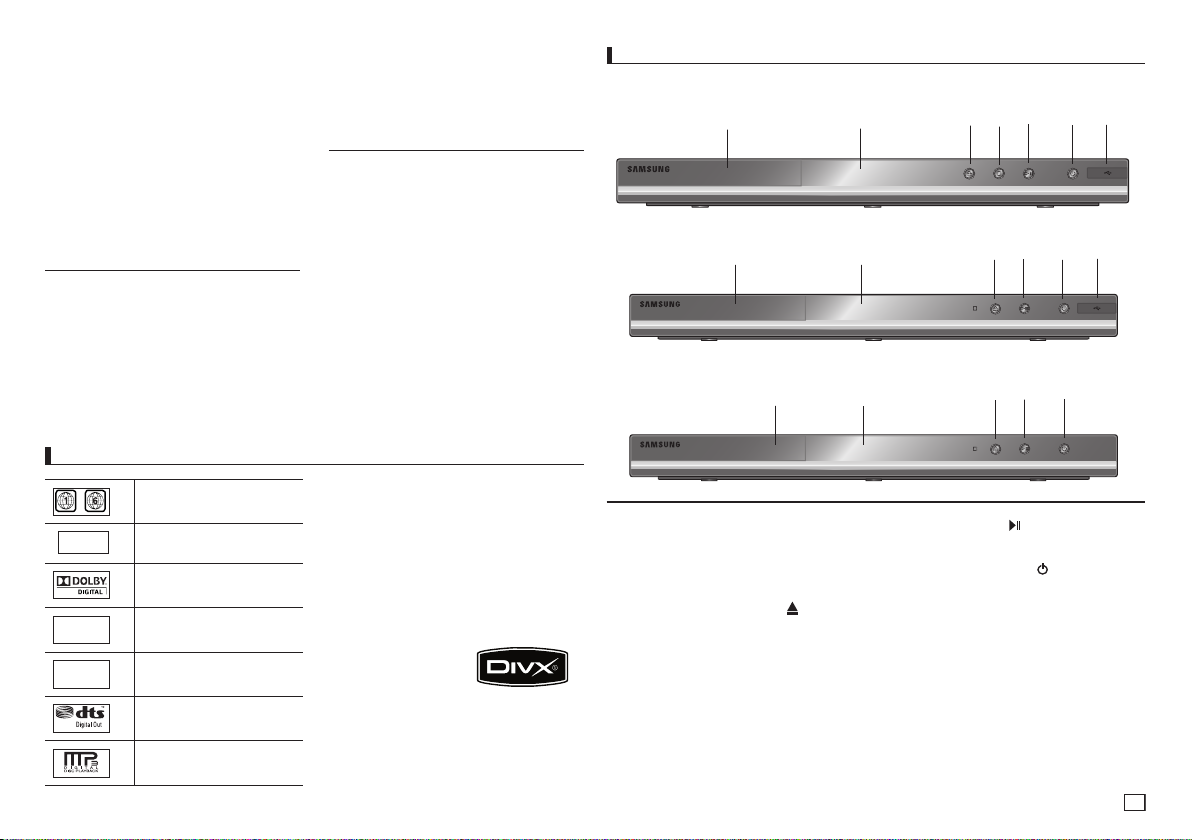
Descriptions
Front Panel Controls
DVD-C450
DVD-C360
DVD-C350
1. DISC TRAY
Place the disc here.
2. DISPLAY
Operation indicators are displayed here.
3. OPEN/CLOSE/STOP ( )
Press to open and close the disc tray
4. STOP (■
(
Only DVD-C450)
Stop disc play.
1
1
1
)
2
2
2
5. PLAY/PAUSE
3
4
3
3
( )
5
5 6
6
6
5
Play or pause the disc / Stops Disc Play
6. POWER ON/OFF ( )
Turn On/Off the DVD Player
7. USB HOST
(Only DVD-C360,C450)
Connect digital still camera, MP3 player, memory
stick, Card reader, or another removable storage
devices.
7
7
Page 4
4
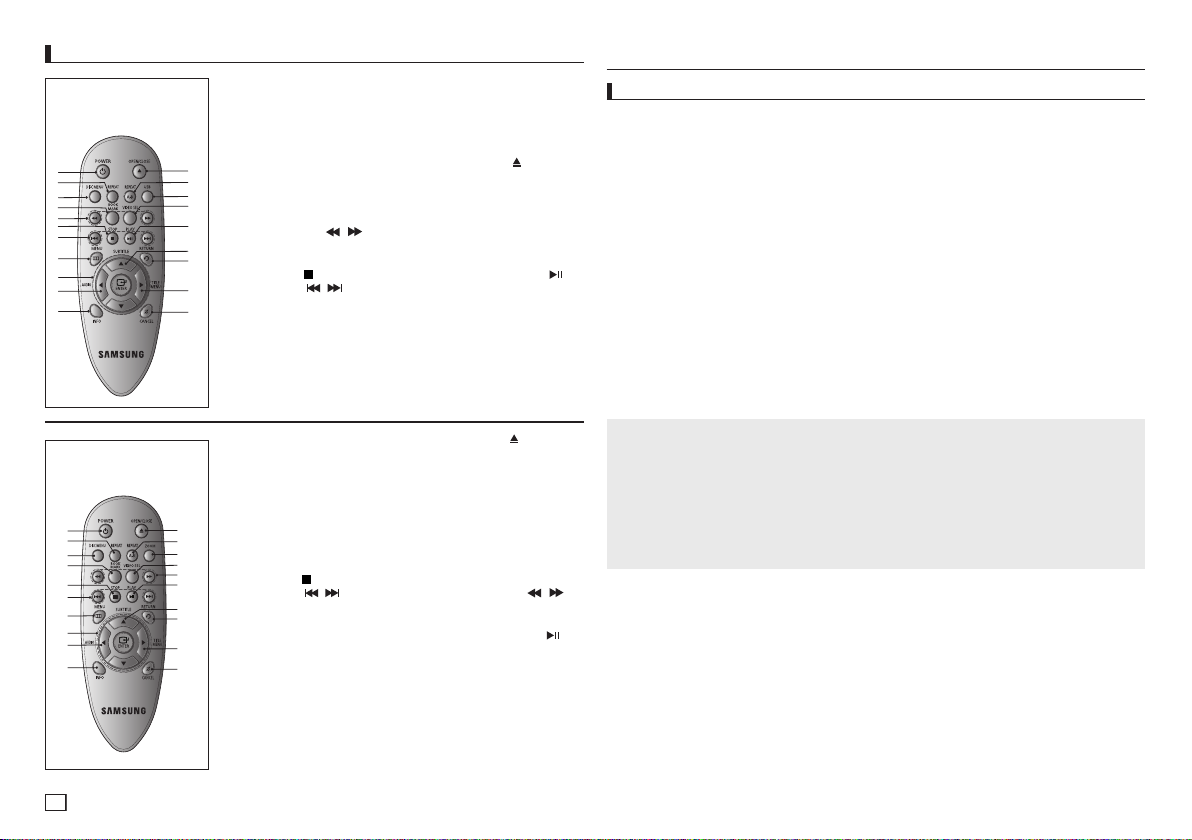
Tour of the Remote Control
1. DVD POWER Button
DVD-C450
DVD-C360
1
2
3
4
5
6
7
8
9
10
11
DVD-C350
1
2
3
4
5
6
7
8
9
10
Turns the power on or off.
2. REPEAT Button
Allows you to repeat play
a title,
chapter, track, or disc.
3. DISC MENU Button
12
Brings up the Disc menu.
13
4. BOOKMARK
14
Quickly find bookmark sec-
15
tions of a DVD.
16
5. SEARCH Buttons ( / )
Allow you to search forward/
17
18
back ward through a disc.
6. STOP Button ( )
7. SKIP Buttons ( / )
19
Use to skip the title, chapter
20
or track
8. MENU Button
Brings up the DVD player’s
menu.
9. ENTER /π/†,√/® Buttons
This button functions as a
toggle switch.
1. DVD POWER Button
Turns the power on or off.
2. REPEAT Button
Allows you to repeat play a
title, chapter, track, or disc.
3. DISC MENU Button
Brings up the Disc menu.
11
4. BOOKMARK
12
Quickly find bookmark sections
13
14
of a DVD.
15
5. STOP Button ( )
16
6. SKIP Buttons ( / )
Use to skip the title, chapter or
17
18
track
7. MENU Button
Brings up the DVD player’s
19
menu.
20
8. ENTER/π/†,√/® Buttons
This button functions as a
toggle switch.
9. AUDIO Button (√)
Use this button to access vari-
ous audio functions on a disc.
10. INFO Button
Displays the current disc
mode.
10. AUDIO Button (√)
Use this button to access var-
ious audio functions on a disc.
11. INFO Button
Displays the current disc
mode.
12. OPEN/CLOSE ( ) Button
To open and close the disc
tray.
13. REPEAT A-B Button
Allows you to repeat A-B disc.
14. USB Button
15. VIDEO SEL. Button
Selects video output formats.
16. PLAY/PAUSE Button ( )
Begin/Pause disc play.
17. SUBTITLE Button (π)
18. RETURN Button
Returns to a previous menu.
19. TITLE MENU Button (®)
Brings up the Title menu.
20. CANCEL Button
Use to remove menus or sta-
tus displays from the screen.
11. OPEN/CLOSE ( ) Button
To open and close the disc
tray.
12. REPEAT A-B Button
Allows you to repeat A-B
disc.
13. ZOOM Button
Enlarges the DVD Picture.
14. VIDEO SEL. Button
Selects video output for
mats.
15. SEARCH Buttons ( / )
Allow you to search forward/
back ward through a disc.
16. PLAY/PAUSE Button ( )
Begin/Pause disc play.
17. SUBTITLE Button (π)
18. RETURN Button
Returns to a previous menu.
19. TITLE MENU Button (®)
Brings up the Title menu.
20. CANCEL Button
Use to remove menus
or status displays from the
screen.
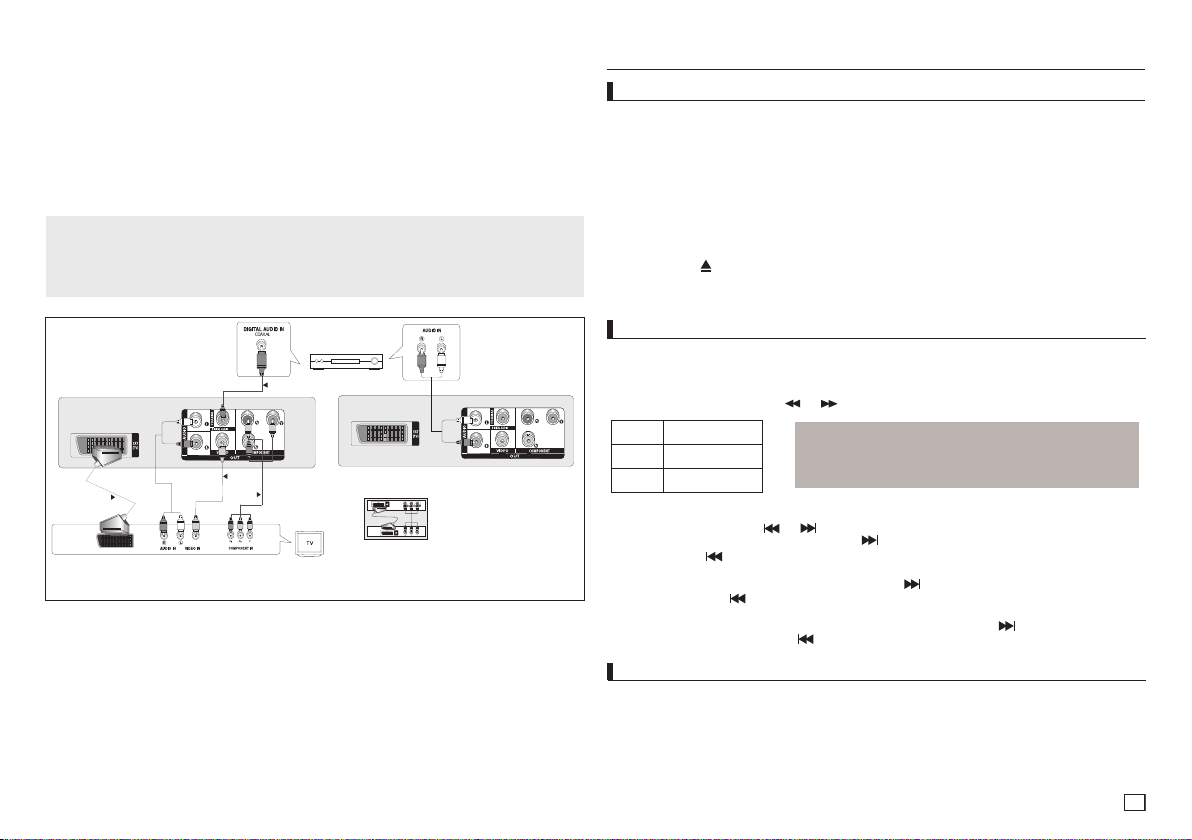
Connections
Choosing a Connection
The following shows examples of connections commonly used to connect the DVD player with a TV
and other components.
Before Connecting the DVD Player
- Always turn off the DVD player, TV, and other components before you connect or disconnect any
cables.
- Refer to the user’s manual of the additional components you are connecting for more information on those particular components.
A. Connecting to a TV (SCART)
- Using Scart cable, connect to SCART terminal on the rear of the DVD player to the SCART IN
terminals of TV.
- Turn on the DVD player and TV.
- Press the input selector on your TV remote control until the Video signal from the DVD player
appears on the TV screen.
B. Connecting to a TV (VIDEO CVBS)
- Using video/audio cables, connect the VIDEO (yellow)/AUDIO (red and white) OUT terminals
on the rear of the DVD player to the VIDEO (yellow)/AUDIO (red and white) IN terminals of TV.
- Turn on the DVD player and TV.
- Press the input selector on your TV remote control until the Video signal from the DVD player
appears on the TV screen.
Note
- Noise may be generated if the audio cable is too close to the power cable.
- If you want to connect to an Amplifier, please refer to the Amplifier connection page.
- The number and position of terminals can vary depending on your TV set.
Please refer to the user's manual of the TV.
- If there is one audio input terminal on the TV, connect it to the [AUDIO OUT][left] (white) terminal
of the DVD player.
- If you press the VIDEO SEL. button when DVD Player is in stop mode or no disc is inserted, the
Video Output mode changes in the following sequence: (SCART-CVBS ➝ I-SCAN ➝ P-SCAN ➝
SCART-RGB).
C. Connection to an Audio System (2 Channel Amplifier, Dolby
Digital,MPEG2 or DTS Amplifier)
- Using the audio cables, connect the AUDIO (red and white) OUT terminals on the rear of the
DVD player to the AUDIO (red and white) IN terminals of the Amplifier.
- If Using the video signal cable(s), connect the VIDEO terminals on the rear of the DVD player
to the VIDEO terminal of your TV, If using a coaxial cable, connect the DIGITAL AUDIO OUT
(COAXIAL) terminal on the rear of the DVD player to the DIGITAL AUDIO IN (COAXIAL) terminal
of the Amplifier.
- Turn on the DVD player, TV, and Amplifier.
- Press the input select button of the Amplifier to select external input in order to hear sound
from the DVD player.
Refer to your Amplifier's user manual to set the Amplifier's audio input.
Page 5
5
D. Connections to a TV Interlace / Progressive
D
B
C
A
- Using component video cables, connect the COMPONENT VIDEO OUT terminal on the rear of
the DVD player to the COMPONENT IN terminal of TV.
- Using the audio cables, connect the AUDIO (red and white) OUT terminals on the rear of the
DVD player to the AUDIO (red and white) IN terminals of TV. Turn on the DVD player and TV.
- Press the input selector on your TV remote control until the Component signal from the DVD
player appears on the TV screen.
- Set the Video Output to I-SCAN/P-SCAN in the Display Setup menu. You can use the VIDEO
SEL. button to change the Video Output mode.
Note
- What is "Progressive Scan"? Progressive scan has twice as many scanning lines as the interlace
output method has. Progressive scanning method can provide better and clearer picture quality.
- There is no component video displayed when "SCART-RGB" Selected by pressing VIDEO
SELECT button on remote control.
2-Channel stereo ampilfier,
Dolby digital or
DTS amplifier
AUDIO CABLE
SCART CABLE
COAXIAL CABLE
WHITE
RED
VIDEO CABLE
YELLOW
WHITE
RED
YELLOW
RED BLUE GREEN
BLUE GREEN
RED
COMPONENT CABLE
RED
WHITE
WHITE
RED
Do not use the connection
Scart and Component Video
(Y.Pb,Pr) Simultaneously
basic functions
Playing a Disc
Before Play
- Turn on your TV and set it to the correct Video Input by pressing TV/VIDEO button on the TV
remote control.
- If you connected an external Audio System, turn on your Audio System and set it to the correct
Audio Input.
After plugging in the player, the first time you press the DVD POWER button, this screen comes
up: If you want to select a language, press a π/† button then press ENTER (This screen will only
appear when you plug in the player for the first time.) If the language for the startup screen is not
set, the settings may change whenever you turn the power on or off. Therefore, make sure that
you select the language you want to use. Once you select a menu language, you can change it by
pressing the ■ / button on the front panel of the unit for more than 5 seconds with no disc in
the unit. Then the SELECT MENU LANGUAGE window appears again where you can reset your
preferred language.
Using the Search and Skip Functions
During play, you can search quickly through a chapter or track, and use the skip function to jump to
the next selection.
Searching through a Chapter or Track
During play, press the SEARCH ( or ) button on the remote control for more than 1 second.
DVD 2X, 4X, 64X, 128X
VCD 4X, 8X
CD 2X, 4X, 8X
Skipping Tracks
During play, press the SKIP ( or ) button.
- When playing a DVD, if you press the SKIP ( ) button, it moves to the next chapter. If you
press the SKIP ( ) button, it moves to the beginning of the chapter. One more press makes it
move to the beginning of the previous chapter.
- When playing a VCD or a CD, if you press the SKIP ( ) button, it moves to the next track. If
you press the SKIP ( ) button, it moves to the beginning of the track. One more press makes it
move to the beginning of the previous track.
- If a track exceeds 15 minutes when playing a VCD and you press the button, it moves for-
ward 5 minutes. If you press the button, it moves backward 5 minutes.
Using the Display Function
When Playing a DVD/VCD/MPEG4
1. During play, press the INFO button on the remote control.
2. Press the π/† buttons to select the desired item.
- When playing VCD, the Disc Menu may notwork.
3. Press the √/® buttons to make the desired setup and then press the ENTER button.
4. To make the screen disappear, press the INFO button.
Note
- The speed marked in this function may be different from the
actual playback speed.
- No sound is heard during search mode (Except CD).
Page 6
6
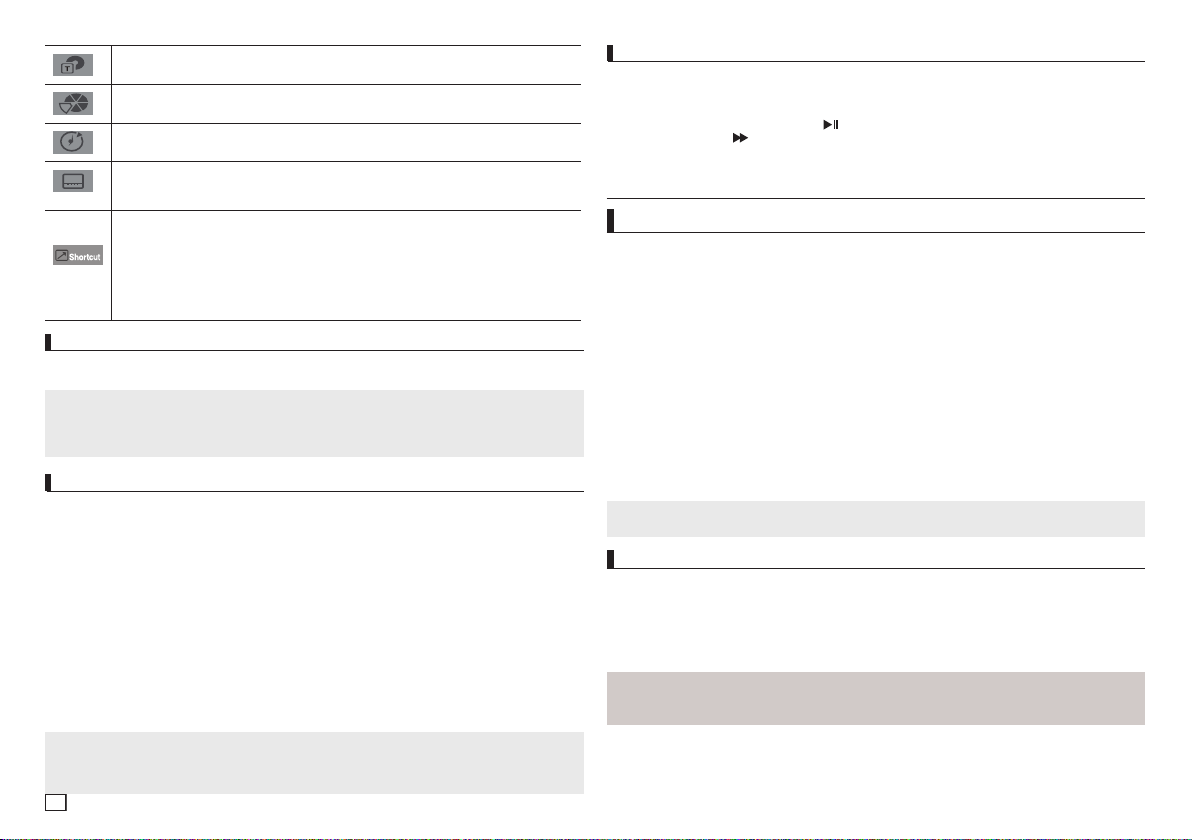
To access the desired title when there is more than one in the disc. For example, if there is
more than one movie on a DVD, each movie will be identified.
Most DVD discs are recorded in chapters so that you can quickly find a specific passage.
Allows playback of the film from a desired time. You must enter the starting time as a reference.
The time search function does not operate on some disc.
Refers to the subtitle languages available in the disc. You will be able to choose the subtitle
languages or, if you prefer, turn them off from the screen. A DVD disc can have up to 32 different
subtitles.
Enter and press the
function and Zoom.
Refers to the language of the film soundtrack. In the example, the soundtrack is played in
English 5.1CH. A DVD disc can have up to eight different soundtracks. Some DVD discs are
have more angle function from any picture.
Bookmark function make you easily and quickly to find a track or chapter from DVD or CD.
The EZ View function is use for changing the aspect ratio in DVD.
The ZOOM function is use for Enlarge DVD Picture
√/®
buttons to access the desired Audio, Angle, Bookmark, EZ View
Using the Disc and Title Menu
During stop mode of a DVD disc, press the DISC MENU/TITLE MENU button on the remote control.
Note
- The Disc Menu or Title Menu may not work. Depending on the disc.
- You can also use the Disc Menu, using the DISC MENU button on the remote control.
- Title Menu will only be displayed if there are at least two titles in the disc.
Repeat Play
Repeat the current track, chapter, title, a chosen section (A-B), or all of the disc.
When playing a DVD/VCD
Press the REPEAT buttons to select Chapter, Title, Disc, Track, or Repeat : Off
- DVD repeats play by chapter or title, VCD repeat play by disc or track.
- Chapter : repeats the chapter that is playing.
- Title : repeats the title that is playing.
- Disc : repeats the disc that is playing.
- Repeat : Off
- Track : repeats the track that is playing.
Using the A-B Repeat function
1. Press the REPEAT A-B button at the point where you want repeat play to start (A).
2. Press the REPEAT A-B button at the point where you want the repeat play to stop (B).
- To return to normal play, press the CANCEL button.
3. To return to normal play, press the REPEAT A-B then press the ENTER button until the display
shows Repeat : Off
Note
- A-B REPEAT allow you to set point (B) directly after point (A) has been set.
- Depending on the disc, the Repeat function may not work.
- When playing VCD, the Disc Menu may not work.
Slow Play
This feature allows you to repeat scenes slowly containing sports, dancing, musical instruments
being played etc., so you can study them more closely.
When playing a DVD/VCD
1. During play, press the PLAY/PAUSE ( ) button.
2. Press the SEARCH ( ) button to choose the play speed between 1/2, 1/4, 1/8 and 1/16 of
normal during PAUSE.
advanced functions
Adjusting the Aspect Ratio (EZ View)
To play back using aspect ratio (DVD)
1. During play, press the INFO button on the remote control.
2. Press the π/† buttons to select Shortcut, then press the ENTER button.
3. Press the √/® buttons to select EZ View, then press the ENTER button.
- Each time you press the √/® button, the screen size changes. For graphics of the screen sizes
and the sequence in which the sizes change, see the next column.
If you are using a 16:9 TV
For 16:9 aspect ratio discs
- NORMAL WIDE
- SCREEN FIT
- ZOOM FIT
- VERTICAL FIT
For 4:3 aspect ratio discs
- NORMAL SCREEN
- SCREEN FIT
- ZOOM FIT
Note
This function may behave differently depending on the type of disc.
Selecting the Audio Language
You can select a desired audio language quickly and easily with the AUDIO button.
Using the AUDIO/ √ button (DVD/VCD/MPEG4)
1. Press the AUDIO/√ button. The Audio changes when the button is pressed repeatedly. The
audio languages are represented by abbreviations.
Press Audio /√ button at remocon repeatedly to select the desired Audio on MPEG4 then press the
ENTER.
Note
- This function depends on audio languages are encoded on the disc and may not work.
- A DVD disc can contain up to 8 audio languages.
If you are using a 4:3 TV
For 16:9 aspect ratio discs
- 4:3 Letter Box
- 4:3 Pan Scan
- SCREEN FIT
- ZOOM FIT
For 4:3 aspect ratio discs
- NORMAL SCREEN
- SCREEN FIT
- ZOOM FIT
Page 7
7
Selecting the Subtitle Language
001/004
O
You can select a desired subtitle quickly and easily with the SUBTITLE (π) button.
Using the SUBTITLE / π button (DVD/MPEG4)
1. Press the SUBTITLE / π
subtitle changes when the button is pressed repeatedly.
Press SUBTITLE / π
MPEG4 then press the ENTER.
2. To remove the SUBTITLE icon, press the SUBTITLE / π button.
Note
- You have to change the desired subtitle in the Disc Menu, according to discs. Press the DISC
MENU button.
- This function depends on what subtitles are encoded on the disc and may not work on all DVDs.
- A DVD disc can contain up to 32 subtitle languages.
button. The subtitle languages are represented by abbreviations. The
button at remocon repeatedly to select the desired subtitle language on a
Changing the Camera Angle
When a DVD contains multiple angles of a particular scene, you can use the ANGLE function.
Using the ANGLE button (DVD)
If the disc contains multiple angles, the ANGLE appears on the screen.
1. During play, press the INFO button on the remote control.
2. Press the π/† buttons to select Shortcut. then press the ENTER button.
3. Press the √/® buttons to select Angle, then press the ENTER button.
4. Press the √/® buttons on the remote control to select the desired angle.
Note
- If the disc has only one angle, this feature won’t work. Currently, very few discs have this
feature.
- Depending on the disc, these functions may not work.
Using the Bookmark Function
This feature lets you bookmark sections of a DVD or VCD (Menu Off mode) so you can quickly find
them at a later time.
Using the Bookmark Function DVD/VCD
1. During play, press the INFO button on the remote control.
2. Press the π/† buttons to select Shortcut, then press the ENTER button
3. Press the √/® buttons to select Bookmark then press the ENTER button.
4. When you reach the scene you want to mark, press-the ENTER button. You can bookmark up to
12 scenes at a time.
Note
- Depending on a disc, the Bookmark function may not work.
- When playing VCD, the Disc Menu may not work.
Recalling a Marked Scene
1~3. The first 1~3 steps are the same as those for “Using the Bookmark Function”..
4. Press the √/® buttons to select a marked scene.
5. Press the PLAY/PAUSE ( ) button to skip to the marked scene.
Clearing a Bookmark
1~3. The first 1~3 steps are the same as those for “Using the Bookmark Function”.
4. Press the √/® buttons to select the bookmark number you want to delete.
5. Press the CANCEL button to delete a bookmark number.
Using the Zoom Function
- Using the Zoom Function (DVD/VCD) (DVD-C350)
1. During play, press the ZOOM button on the remote control.
- Using the Zoom Function (DVD/VCD) (DVD-C360,C450)
1. During play, press the INFO button on the remote control.
2. Press the π/† buttons to select Shortcut, then press the ENTER button
3. Press the √/® buttons to select Zoom, then press the ENTER button.
- During DVD/VCD play, press ENTER to zoom in 2X/3X/4X/ Normal in order.
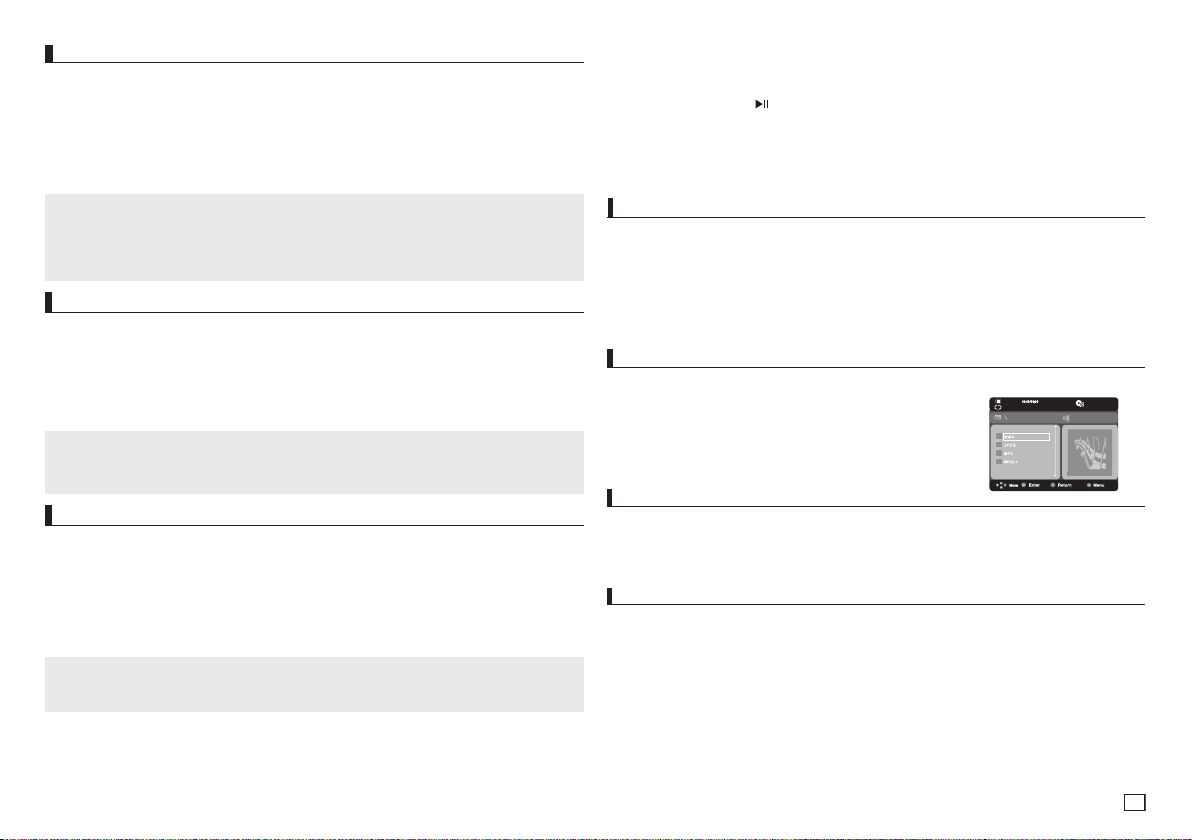
Clips Menu for MP3/WMA/JPEG/MPEG/CD Audio
CD Audio or discs with MP3/WMA/JPEG contain individual songs and/or pictures that can be organized into folders as shown below. They are similar to how you use
your computer to put files into different folders.
Open the disc tray. Place the disc on the tray. Close the tray. and the
tray closes.
Folder Selections
The folder can be selected in Stop or Play mode.
- To select the Parent Folder
Press the RETURN button to go to parent folder, or press the π/† buttons to select “..” and
press ENTER to go to the parent folder.
MP3/WMA/CD Audio Playback
1. Open the disc tray. Place the disc on the tray. Close the tray.
- Only one kind of file is played back when a disc or a folder contains both MP3 and WMA files.
2. Press the π/† buttons to select a song file.
- Press ENTER to begin playback of the song file.
Repeat/Random playback
Press the REPEAT button to change the playback mode. There are four modes, such as Off, Track,
Folder and Random.
- Off: Normal Playback
- Track: Repeats the current song file.
- Folder: Repeats the song files which have the same extension in the current folder.
- Random: Song files which have the same extension will be played in random order.
To resume normal play, press the CANCEL button.
Page 8
8
CD-R MP3/WMA file
When you record MP3 or WMA files on CD-R, please refer to the following.
- Your MP3 or WMA files should be ISO 9660 or JOLIET format.
ISO 9660 format and Joliet MP3 or WMA files are compatible with Microsoft's DOS and
Windows, and with Apple's Mac.This format is the most widely used.
- When naming your MP3 or WMA files, do not exceed 8 characters, and enter “.mp3, .wma”
as the file extension.
General name format : Title.mp3. or Title.wma. When composing your title, make sure that you
use 8 characters or less, have no spaces in the name, and avoid the use of special characters
including:(.,/,\,=,+).
- Use a decompression transfer rate of at least 128 Kbps when recording MP3 files.
Sound quality with MP3 files basically depends on the rate of compression/ decompression you
choose. Getting CD audio sound requires an analog/digital sampling rate, that is conversion
to MP3 format, of at least 128 Kbps and up to 160 Kbps. However, choosing higher rates, like
Kbps or more, only rarely give better sound quality. Conversely, files with decompression rates
below 128 Kbps will not be played properly.
- Use a decompression transfer rate of at least 64Kbps when recording WMA files.
Sound quality with WMA files basically depends on the rate of compression/decompression you
choose. Getting CD audio sound requires an analog/digital sampling rate, that is conversion to
WMA format, of at least 64Kbps and up to Kbps. Conversely, files with decompression rates
below 64Kbps or over Kbps will not be played properly.
- Do not try recording copyright protected MP3 files.
Certain "secured" files are encrypted and code protected to prevent illegal copying. These files
are of the following types: Windows Media (registered trade mark of Microsoft Inc) and SDMITM
(registered trade mark of The SDMI Foundation). You cannot copy such files.
- Important:
The above recommendations cannot be taken as a guarantee that the DVD player will play MP3
recordings, or as an assurance of sound quality. You should note that certain technologies and
methods for MP3 file recording on CD-Rs prevent optimal playback of these files on your DVD
player (degraded sound quality and in some cases, inability of the player to read the files).
- This unit can play a maximum of 500 files and 500 folders per disc.
MPEG4 Playback
MPEG4 Play Function
MPEG4 is a compressed video format designed to deliver DVD quality video at lower data rates
and smaller file sizes. Types of MPEG4 files are DivX or Xvid. These files have an .avi extension. AVI
files are used to contain the audio and video data. This unit can only play AVI format files with the
“.avi” extension.
1. Open the disc tray. Place the disc on the tray. Close the tray.
2. Press the π/† buttons to select an avi file (DivX/XviD) and then press ENTER button.
Repeat playback
Press the REPEAT button to change playback mode. There are 3 modes, such as Track, Folder and Off.
- Track : repeats the track that is playing.
- Folder : repeats the AVI files which have the same extension in the current folder.
- Off
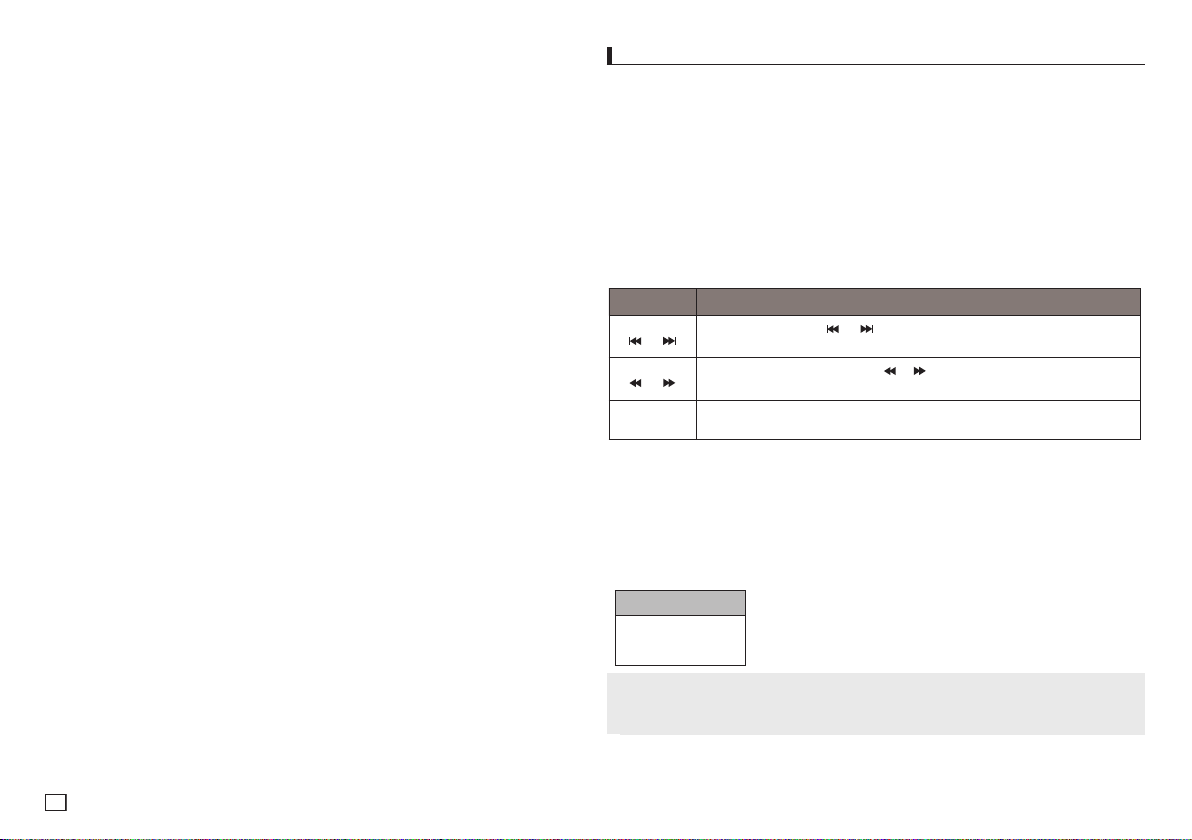
MPEG4 Function Description
Function Description
Skip
( or )
Search
( or )
Slow motion
Play
- These functions may not work depending on MPEG4 file.
CD-R AVI file
This unit can play the following video compression formats within the AVI file format:
- DivX 3.11 contents
- DivX 4 contents (Based on MPEG-4 Simple Profile)
- DivX 5 contents (MPEG-4 simple profile plus additional features such as bi-directional frames.
Qpel and GMC are also supported.)
- XviD MPEG-4 compliant Contents.
This unit supports all resolutions up to maximum below.
720 x 480 @30fps
720 x 576 @25fps
: Maximum bit rate :4Mbps
Note
•SomeMPEG-4files createdonapersonalcomputer maynotbeplay back.ThatiswhyCodec
Type, Version and Higher resolution over specification is not supported.
•Thisunitsupports CD-R/RWwritteninMPEG4in accordancewiththe“ISO9660format”.
During play, press the or button, it moves forward or backward 5 minutes.
During play, press the SEARCH ( or ) button and press again to search at
a faster speed. Allows you to search at a faster speed in an AVI file. (2X, 4X, 8X)
Allows you to search at a slower speed in an AVI file. (1/2, 1/4, 1/8, 1/16)
DivX5
Page 9

9
Playing Media File Using the USB Host feature
(Only DVD-C360, C450)
You can enjoy the media files such as pictures, movies and tunes saved in an MP3 player, USB
memory or digital camera in high audio by connecting the storage device to the USB port of the
DVD Player.
Using the USB HOST feature
1. Connect the USB device to the USB port on the front of the unit.
2. Press the π/† buttons to select a file in USB. Press ENTER to Open file.
Note
•EachtimetheUSBbuttononthe remotecontrolispressed,aframe oftheUSBdevice
selection will appear.
•“USB” appears on the display screen.
•WhenplayingDVDorCDandUSB inserted,“PressUSBtoselect device”appearatthe top
left corner for a moment.
•USBMENU screenappearsontheTV screenandthesavedfile isplayed.
Skip Forward/Back
During playback, press the ( / ) button.
•Whenthereismorethanonefile,whenyoupressthe button, the next file is selected.
•Whenthereismorethanonefile,whenyoupressthe button, the previous file is selected.
Safe USB Removal
To prevent damage to the memory stored in the USB device, perform safe removal before
disconnecting the USB cable.
- Press the STOP ( ) button
- Remove the USB cable.
Fast playback
To play back the disc at a faster speed, press ( / ) during playback.
•Eachtime youpresseitherbutton,the playbackspeedwillchangeasfollows:
2x ➞ 4x ➞ 8x.
Compatible Devices
1. USB devices that support USB Mass Storage v1.0. (USB devices that operate as a removable
disk in Windows (2000 or later) without additional driver installation.)
2. MP3 Player: Flash type MP3 player.
3. Digital camera: Cameras that support USB Mass Storage v1.0.
• Camerasthatoperate asaremovablediskin Windows(2000orlater) withoutadditional
driver installation.
4. USB Flash Drive: Devices that support USB2.0 or USB1.1.
•Youmayexperiencea differenceinplaybackqualitywhen youconnectaUSB1.1device.
5. USB card Reader: One slot USB card reader and Multi slot USB card reader
•Depending onthemanufacturer.theUSBcardreadermaynotbe supported.
• Ifyouinstall multiplememorydevicesintoamulticardreader,youmayexperienceproblems.
6. If you use a USB extension cable, the USB device might not be recognized.
•CBI(Control/Bulk/Interrupt)isnot supported.
•DigitalCamerasthat usePTPprotocolorrequireadditional programinstallationwhenconnected
to a PC are not supported.
•Adeviceusing NTFSfilesystemis notsupported.(OnlyFAT16/32(FileAllocationTable16/32)
file system is supported.)
•SomeMP3players, whenconnectedtothis product,maynotoperatedependingon thesector
size of their file system.
•TheUSBHOST functionisnotsupported ifaproductthattransfers mediafilesbyits
manufacturer-specific program is connected.
•Doesnotoperate withJanusenabledMTP (MediaTransferProtocol)devices.
•TheUSBhost functionofthisproductdoes notsupportallUSB devices.
CD Ripping (Only DVD-C360, C450)
This feature lets you to copy audio files from disc to USB device into MP3 format.
1. Open the dics tray. Place the Audio CD(CD DA) disc on the tray, and close the tray.
Connect the USB device to the USB port on the front of the unit.This screen will be displayed.
Press ENTER to select disc.
2. Press the RETURN button to display the ripping screen.
3. Press the π/† buttons, then press the ENTER button to select files for ripping.
- To deselect files, press ENTER button again.
4. Press the ® and † button to select START, then press the ENTER button begin ripping.
The Ripping menu contain the following buttons :
- Mode (Fast/normal)
- Bit Rate, press ENTER to change 128kbps ➔ 192kbps ➔ 256kbps ➔ 320kbps.
Standart : 128kbps.
Better Quality : 320kbps.
- Device selection, press ENTER to change between deviced (max 4).
- Select - Unselect, Press ENTER to change from Select all or Select none.
- Start ripping, press ENTER to start ripping process.
Note
- To return to CDDA screen, press the RETURN button again.
- When the CD ripping is in process the player will automatically begin playing.
- Only Audio CD (CD DA) discs can be ripped.
- Because the speed is 2.6x of normal speed. User is unable to play the CD DA through the rip
ping process.
Picture CD Playback
1. Select the desired folder.
2. Press the π/† buttons to select a Picture file in the clips menu and then press the ENTER but-
ton.
Note
- Press the STOP button to return to the clips menu.
- When playing a Kodak Picture CD, the unit displays the Photo directly, not the clips menu.
Rotation
- Each time the √/® button is pressed, the picture rotates 90 degrees clockwise.
- Each time the π button is pressed, the picture rotates 180 degrees.
- Each time the † button is pressed, the picture changes to the mirror appearance.
Zoom
- Each time the ENTER Button is pressed repeteadly, the picture is enlarged. zoom mode : 100%,
125%, 150%, 200%.
Page 10

10
Slide show
- When you press the ENTER/PLAY at JPEG file,it will go to full screen mode and automaically slide
show.
Note
- Depending on a file size, the amount of time between each picture may be different from the manual.
- If you don’t press any button, the slide show will start automatically in about 10 seconds by
default.
CD-R JPEG Disc
- Only files with the “.jpg” and “.JPG” extensions can be played.
- If the disc has not been closed during the recording phase,(ie has not been finalised) it will take
longer to start playing and not all of the recorded files may be played.
- Only CD-R discs with JPEG files in ISO 9660 or Joliet format can be played.
- The name of the JPEG file may not be longer than 8 characters and should contain no blank
spacesorspecialcharacters(./=+).
- Only a consecutively written multi-se ssion disc can be played.If there is a blank segment in the
multi-session disc, the disc can be played only up to the blank segment.
- A maximum of 500 images can be stored on a single CD.
- Kodak Picture CDs are recommended.
- When playing a Kodak Picture CD, only the JPEG files in the pictures folder can be played.
- Kodak Picture CD: The JPEG files in the pictures folder can be played automatically.
- Konica Picture CD: If you want to see the Picture, select the JPEG files in the clips menu.
- Fuji Picture CD: If you want to see the Picture, select the JPEG files in the clips menu.
- QSS Picture CD: The unit may not play QSS Picture CD.
- If the number of files in 1 Disc is over 500, only 500 JPEG files can be played.
- If the number of folders in 1 Disc is over 500, only JPEG files in 500 folders can be played
changing setup menu
Using the Setup Menu
The Setup menu lets you customize your DVD player by allowing you to select various language
preferences, set up a parental level, even adjust the player to the type of television screen you
have.
1. With the unit in Stop mode, press the MENU button on the remote control.Use the √/® buttons
to select Setup, then press the † or ENTER button.
2. Press the π/† buttons to access the different features. Press the ® or ENTER button to
access the sub features.
3. To make the setup screen disappear after setting up, press the MENU button again.
Note
Depending on the disc, some Setup Menu selections may not work.
Setting Up the Language Features
If you set the player menu, disc menu, audio and subtitle language in advance, they will come up
automatically every time you watch a movie.
Using the Player Menu Language
1. With the unit in Stop mode, press the MENU button.
2. Press the √/® buttons to select Language Setup Page, then press the † or ENTER button.
3. Press the π/† buttons to select the desired language, then press the ® or ENTER button.
Note
- The language is selected and the screen returns to Language Setup menu.
- To make the setup menu disappear, press the MENU button.
- If the selected language is not recorded on the disc, the original pre-recorded language is
selected.
- Select “Original” if you want the default soundrack language to be the original languange the
disc is recorded in.
- Select “Automatic” if you want the subtitle language to be the same as the language selected
as the audio language.
- Some discs may not contain the language you select : in that case the disc will use its original
languange setting.
Setting Up the Audio Options
Audio Options allows you to setup the audio device and sound status settings depending on the
audio system in use.
1. With the unit in Stop mode, press the MENU button.
2. Press the √/® buttons to select Audio Setup Page, then press the † or ENTER button.
3. Press the π/† buttons to select the desired item, then press the ® or ENTER button.
Note :
•EvenwhenPCMDownsamplingisOff
• Somediscswillonly outputdownsampledaudiothroughthedigitaloutputs.
• Thereisnoanalogaudio outputwhenyouplay aDTSsounddisc.
Page 11

11
Manufactured under license from Dolby Laboratories. “Dolby” and the double-D symbol are trademarks of Dolby Laboratories. “DTS” and “DTS Digital Out” are trademarks of Digital Theater Systems,
Inc.
Setting Up the Display Options
Display options enable you to set various video functions of the player.
1. With the unit in Stop mode, press the MENU button.
2. Press the √/® buttons to select Display Setup Page, then press the † or ENTER button.
3. Press the π/† buttons to select the desired item, then press the ® or ENTER button.
• Consult your TV User’s Manual to findout if your TV supports Progressive Scan. If
Progressive Scan is supported, follow the TV User’s Manual regarding Progressive Scan
settings in the TV’s menu system.
• If Video Output is set incorrectly, the screen may be blocked.
• When the resolution is changed during playback, it may take a few seconds for a normal
image to appear.
Setting Up the Parental Control
The Parental Control function works in conjunction with DVDs that have been assigned a rating,
which helps you control the types of DVDs that your family watches. There are up to 8 rating levels
on a disc.
Setting Up the Rating Level /
1. With the unit in Stop mode, press the MENU button.
2. Press the √/® buttons to select Parental Page, then press the † or ENTER button.
3. Press the π/† buttons to select Parental/
4. Press the π/† buttons to select Rating Level you want, then press the ENTER button.
e.g) Setting up in KID SAFE.
5. Enter your password. If this is the first time, enter 0000. Then, enter a new password. The new
password must be a number other than 0000 to activate the parental control function. Then, reenter the new password.
Note
ΠKID SAFE.
´ G (General Audiences) : All Ages Admited.
ˇ PG (Parental Guidance suggested) : Some material may not be suitable for young children.
¨ PG 13 (PG-13 Parents strongly cautioned) : Some material may be in appropriate for children
under 13.
ˆ PGR (Parental Guide Recommended) : These are not necessarily unsuitable for children, but
viewer discretion is advised, and parents and guardians are encouraged to supervise younger
viewer.
Ø R (Restricted) : Under 17 requires accompanying adult.
∏ NC17 (NC-17) : No one 17 and under admitted.
” ADULT.
- If you have forgotten your password, see “Forgot Password” in the Troubleshooting Guide.
Changing the Password
Password
, then press the ® or ENTER button.
Setting Up the DivX
Setting Up the DivX
1. With the unit in Stop mode, press the MENU button.
2. Press the √/® buttons to select DivX Page, then press the † or ENTER button.
3. Press the π/† buttons to select the desired item, then press the ® or ENTER button.
Note :
•PressOkwillmake theregistrationcodewindowdisappear.
•DivXcanonlybeaccessedatstopmode.
Page 12
reference
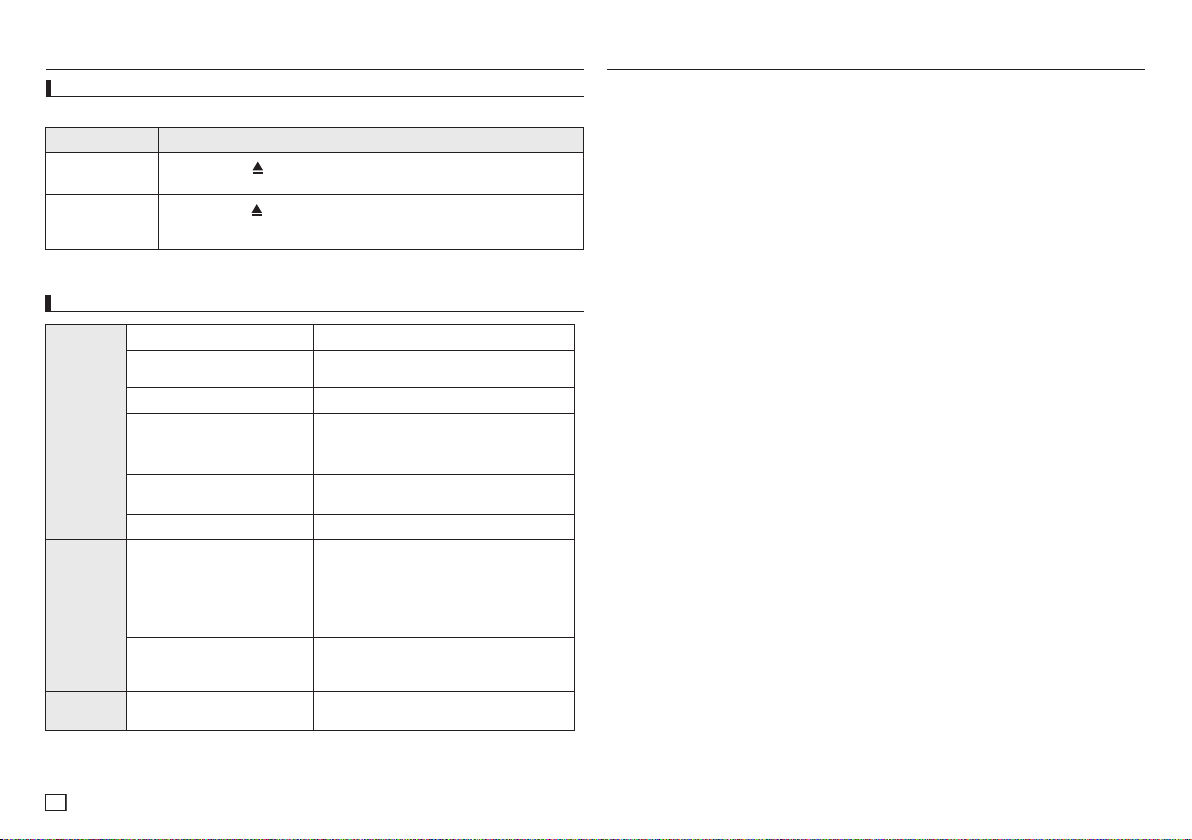
Troubleshooting
Before requesting service (troubleshooting), please check the following.
Problem Action
The screen is
blocked
Forgot password.
Specifications
•Pressthe
disc inside. All settings will revert to the factory settings.
■
/
button (in front panel) for more than 5 seconds under no
Press the •
■
/
disc inside. All setings including the password will revert to the factory settings. Don’t use this unless absolutely necessary.
button (in the panel) for more than 5 seconds under no
memo
12
General
Video
Output
Audio
Output
Power Requirements
Weight
Power Comsumption
Dimensions
Operating Temperature
Range
Operating Humidity Range
Scart Jack
Component Video
Frequency Response
AC 110-240 V ~ 50/60 Hz
DVD-C350/C360 : 1.2 Kg
DVD-C450 : 1.5 Kg
6W
DVD-C350/C360 :
360mm (W) X 207mm(D) X 42mm (H)
DVD-C450 :
430mm (W) X 207mm(D) X 42mm (H)
+5°Cto+35°C
10 % to 75 %
R(Red) : 0.7 Vp-p (75 Ω load)
G(Green) : 0.7 Vp-p (75 Ω load)
B(Blue) : 0.7 Vp-p (75 Ω load)
Composite Video : 1.0 Vp-p (75 Ω load)
Luminance Signal : 1.0 Vp-p (75 Ω load)
Color Signal : 0.3 Vp-p (75 Ω load)
Y : 1.0 Vp-p (75 Ω load)
Pr : 0.70 Vp-p (75 Ω load)
Pb : 0.70 Vp-p (75 Ω load)
20Hz ~ 20kHz
Page 13

memo
Page 14

memo
Page 15

memo
Page 16

$POUBDU4".46/(803-%8*%&
*GZPVIBWFBOZRVFTUJPOTPSDPNNFOUTSFMBUJOHUP4BNTVOHQSPEVDUTQMFBTFDPOUBDUUIF4".46/(DVTUPNFSDBSFDFOUFS
Region Area Contact Center
Web Site
North America
Canada 1-800-SAMSUNG (726-7864) www.samsung.com/ca
Mexico 01-800-SAMSUNG (726-7864) www.samsung.com/mx
U.S.A 1-800-SAMSUNG (726-7864) www.samsung.com/us
Latin America
Argentine 0800-333-3733 www.samsung.com/ar
Brazil 0800-124-421, 4004-0000 www.samsung.com/br
Chile 800-SAMSUNG (726-7864) www.samsung.com/cl
Nicaragua 00-1800-5077267 www.samsung.com/latin
Honduras 800-7919267 www.samsung.com/latin
Costa Rica 0-800-507-7267 www.samsung.com/latin
Ecuador 1-800-10-7267 www.samsung.com/latin
El Salvador 800-6225 www.samsung.com/latin
Guatemala 1-800-299-0013 www.samsung.com/latin
Jamaica 1-800-234-7267 www.samsung.com/latin
Panama 800-7267 www.samsung.com/latin
Puerto Rico 1-800-682-3180 www.samsung.com/latin
Rep. Dominica 1-800-751-2676 www.samsung.com/latin
Trinidad & Tobago 1-800-SAMSUNG (726-7864) www.samsung.com/latin
Venezuela 0-800-100-5303 www.samsung.com/latin
Colombia 01-8000112112 www.samsung.com.co
Europe
Belgium 02 201 2418
www.samsung.com/be (Dutch)
www.samsung.com/be_fr (French)
Czech Republic 800-SAMSUNG (800-726786) www.samsung.com/cz
Denmark 8-SAMSUNG (7267864) www.samsung.com/dk
Finland 30-6227 515 www.samsung.com/fi
France 01 4863 0000 www.samsung.com/fr
Germany 01805-SAMSUNG (726-7864 å 0,14/Min) www.samsung.de
Hungary 06-80-SAMSUNG (726-7864) www.samsung.com/hu
Italia 800-SAMSUNG (726-7864) www.samsung.com/it
Luxemburg 02 261 03 710 www.samsung.com/lu
Netherlands 0900-SAMSUNG (0900-7267864) (å 0,10/Min) www.samsung.com/nl
Norway 3-SAMSUNG (7267864) www.samsung.com/no
Poland 0 801 1SAMSUNG (172678), 022-607-93-33 www.samsung.com/pl
Portugal 80820-SAMSUNG (726-7864) www.samsung.com/pt
Slovakia 0800-SAMSUNG (726-7864) www.samsung.com/sk
Spain 902-1-SAMSUNG (902 172 678) www.samsung.com/es
Sweden 0771 726 7864 (SAMSUNG) www.samsung.com/se
U.K 0845 SAMSUNG (7267864) www.samsung.com/uk
Eire 0818 717 100 www.samsung.com/ie
Austria 0810-SAMSUNG (7267864, å 0.07/min) www.samsung.com/at
Switzerland 0848-SAMSUNG (7267864, CHF 0.08/min)
www.samsung.com/ch
www.samsung.com/ch_fr/ (French)
CIS
Russia 8-800-555-55-55 www.samsung.ru
Kazakhstan 8-10-800-500-55-500 www.samsung.com/kz_ru
Uzbekistan 8-10-800-500-55-500 www.samsung.com/kz_ru
Kyrgyzstan 00-800-500-55-500
Tadjikistan 8-10-800-500-55-500
Ukraine 8-800-502-0000
www.samsung.ua
www.samsung.com/ua_ru
Belarus 810-800-500-55-500
Moldova 00-800-500-55-500
Lithuania 8-800-77777 www.samsung.com/lt
Latvia 8000-7267 www.samsung.com/lv
Estonia 800-7267 www.samsung.com/ee
Asia Pacific
Australia 1300 362 603 www.samsung.com/au
New Zealand 0800 SAMSUNG (0800 726 786) www.samsung.com/nz
China 400-810-5858, 010-6475 1880 www.samsung.com/cn
Hong Kong 3698-4698
www.samsung.com/hk
www.samsung.com/hk_en/
India 3030 8282, 1800 110011, 1800 3000 8282 www.samsung.com/in
Indonesia 0800-112-8888 www.samsung.com/id
Japan 0120-327-527 www.samsung.com/jp
Malaysia 1800-88-9999 www.samsung.com/my
Philippines
1-800-10-SAMSUNG (726-7864), 1-800-3-SAMSUNG (726-7864),
1-800-8-SAMSUNG (726-7864), 02-5805777
www.samsung.com/ph
Singapore 1800-SAMSUNG (726-7864) www.samsung.com/sg
Thailand 1800-29-3232, 02-689-3232 www.samsung.com/th
Taiwan 0800-329-999 www.samsung.com/tw
Vietnam 1 800 588 889 www.samsung.com/vn
Middle East &
Africa
Turkey 444 77 11 www.samsung.com/tr
South Africa 0860-SAMSUNG (726-7864 ) www.samsung.com/za
U.A.E 800-SAMSUNG (726-7864), 8000-4726 www.samsung.com/ae
ENG
Correct Disposal of This Product
(Waste Electrical & Electronic Equipment)
Household users should contact either the retailer where they purchased this product, or their local government
office, for details of where and how they can take these items for environmentally safe recycling.
Business users should contact their supplier and check the terms and conditions of the purchase contract. This
product and its electronic accessories should not be mixed with other commercial wastes for disposal.
resources and to promote material reuse, please separate batteries from other types of waste and recycle them
through your local, free battery return system.
(Applicable in the European Union and other European countries with separate collection
systems)
This marking on the product, accessories or literature indicates that the product and its
electronic accessories (e.g. charger, headset, USB cable) should not be disposed of with other
household waste at the end of their working life. To prevent possible harm to the environment or
human health from uncontrolled waste disposal, please separate these items from other types
of waste and recycle them responsibly to promote the sustainable reuse of material resources
Correct disposal of batteries in this product
(Applicable in the European Union and other European countries with separate battery
This marking on the battery, manual or packaging indicates that the batteries in this product
should not be disposed of with other household waste at the end of their working life. Where
marked, the chemical symbols Hg, Cd or Pb indicate that the battery contains mercury, cadmium
or lead above the reference levels in EC Directive 2006/66. If batteries are not properly disposed
of, these substances can cause harm to human health or the environment. To protect natural
AK68-01928A
Page 17
DVD Oynatıcı
Kullanım Kılavuzu
yapabileceklerinizi hayal edin
Bu Samsung ürününü tercih ettiğiniz için teşekkür ederiz.
Hizmetlerimizin tamamından faydalanmak için lütfen
ürününüzü aşağıdaki adresten kayıt ettiriniz:
DVD-C450/XTR
DVD-C360/XTR
DVD-C350/XTR
AK68-01928A
www.samsung.com/global/register
TURKISH
Page 18

2
önlemler
1. Kurulum
- Uygun çalışma gerilimini ğrenmekiçin,oynatı
cınızın arkasında yer alan etikete bakınız.
- Oynatıcınızı, yeterli miktarda havalandırma
deliği olan bir kabine yerleştiriniz (7~10cm).
Hava dolaşımı ile ilgili parçaların üzerindeki
havalandırma deliklerini kapatmayınız.
- Disk tepsisini elle itmeyiniz.
- Cihazları birbiri üzerine yışmayınız.
- Oynatıcıyı taşımadan önce hiçbir parçanın
açık (çalışır durumda)
- Başka cihazları bu oynatıcıya bağlamadan
önce, açık (çalışır durumda) olmadıklarından
emin olunuz.
- Kullanımdan sonra diski çıkartıp oynatıcıyı
kapatınız; oynatıcıyı uzun süreli
kullanmayacaksanız, buna özellikle dikkat
ediniz.
- Elektrik fişi cihaz bağlantısını kesmek için
ullanılır, bu yüzden her zaman kullanıma
müsait durumda bulunmalıdır.”
2. Güvenlişiniz Için
- Bu üründe lazer teknolojisi kullanılmaktadır.
Kılavuzda belirtilenlerden başka kontrollerin,
ayarların veya işlem performanslarının
kullanılması, tehlikeli radyasyon yayılımına
neden olabilir.
- Kapakları açıp oynatıcıyı tamir etmeye
çalışmayın. Teknik servis için uzman personele başvurun.
3. Dikkat
- Oynatıcınız endüstriyel değil, ev kullanımına
yönelik tasarımlanmıştır. Bu ürünü yalnızca
kişisel amaçlı kullanınız.
- Cihaza sıvı damlatılmamalı veya dökülme-
melidir; ayrıca, vazo gibi sıvıyla dolu nesneler cihaz yakınında bulundurulmamalıdır.”
- Aydınlatma veya durgun elektrik gibi dış
etkiler, bu oynatıcının normal çalışmasını
etkiler. Bu durumda, POWER düşmesine
basarak oynatıcıyı kapatıp açın veya fişini
çekip tekrar takın. Oynatıcı normal olarak
çalışacaktır.
- Bu durumda, oynatıcı içindeki nem kuruyana
ve oynatıcı çalışır duruma gelene dek oda
sıcaklışında tutunuz.
4. Disk
- Diski, yüzeyine zarar verebilecek plak tem-
izleme spreyleri, benzen, inceltici veya
başka uçucu çözücülerle temizlemeyiniz.
- Diskin sinyallerin okunduğu yüzeyine
dokunmayınız. Kenarlarından veya, bir
kenarı ve ortasındaki deliğinden tutunuz.
- Kiri nazikçe siliniz; diski ASLA, bezi ileri geri
hareket ettirerek temizlemeyiniz.
5. Çevresel Bilgi
- Bu üründe kullanılan pil, çevreye zararlı
kimyasallariçermektedir.
- Bu yüzden, pilleri bölgenizdeki yasalara
uygun şekilde çöpe atınız.
Bu kullanma kılavuzuna sahip olan
cihaz, bazı üçüncü şahısların bir takım
mülk hakları altında lisanslanmıştır. Bu
lisansın, lisanslı içerişin özel, ticari
olmayan amaçla kullanması için son
kullanıcıları sınırlar. Ticari kullanım hakkı
yoktur. Söz konusu lisans, bu ürün
dışındaki herhangi bir ürünü kapsamaz ve
lisans, bu ürünle birlikte kullanılan veya
satılan, ISO/OUR 11172-3 veya ISO/OUR
13818-3’e uyan lisanslanmamış herhangi
bir ürün veya işlem için geçerli değildir.
Lisans sadece; bu ürünün, ISO/OUR
11172-3 veya ISO/OUR 13818-3’e uyan
ses dosyalarını kodlamak veya kodunu
çözmek için kullanımını kapsar. ISO/OUR
11172-3 veya ISO/OUR 13818-3’e uymayan
ürün özellikleri ve işlevler için bu lisans
altında bir hak iddia edilemez.
DİKKAT : BU KILAVUZDABELİRTİLENLERD
EN BAŞKA KONTROLLERİN, AYARLARIN
VEYA İŞLEMLERIN KULLANILMASI,
TEHLİKELİ RADYASYON YAYILIMINA
NEDEN OLABİLİR.
içindekiler
Önlemler ...................................2
Kurulum
Genel Özellikler .............................2
Tanımlama .................................3
Uzaktan Kumanda Turu. . . . . . . . . . . . . . . . . . . . . . . . 4
Bağlantılar
Bir Başlantı Seçmek ..........................4
Temel Fonksiyonlar
Bir Diskin Oynatılması ........................5
Arama ve Atlama Fonksiyonlarının Kullanımı ......5
Ekran Fonksiyonunun Kullanımı ................ 5
Disk ve Başlık Menüsünün Kullanımı .............6
Oynatımı Tekrarlama ......................... 6
Oynatımı Yavaş .............................6
İleri Fonksiyonlar
Görüntü Oranının Ayarlanması (EZ View) .......... 6
Ses Için Dil Seçimi ........................... 6
Altyazı Için Dil Seçimi. .........................7
Kamera Açısının Değiştirilmesi ..................7
Işaretleme Fonksiyonunun Kullanımı .............7
Zoom Fonksiyonunun Kullanımı .................7
kurulum
Genel Özellikler
Muhteşem Ses
Dolby Laboratuarları tarafından geliştirilmiş bir
teknoloji olan Dolby Digital, kristal netliğinde bir
ses sağlar.
Ekran
Hem normal hem de geniş ekran (16:9) görüntüler
izlenebilir.
Aşır Çekim
Önemli bir sahne, yavaşlatılarak seyredilebilir.
Ebeveyn Kontrolü (DVD)
Çocukların şiddet, erişkinlere özel vb.
zararlı filmleri izlemesini engellemek için,
kullanıcıların gerekli seviyeyi ayarlamalarını
sağlar.
Çeşitli Ekran Menüsü Işlevleri
Filmleri izlerken, farklı dilleri (Ses/Altyazı)
ve ekran açılarını seçebilirsiniz.
Progresif Tarama
Progresif tarama, geleneksel aralıklı (interlaced)
görüntünün tarama çizgilerini iki kat arttırarak
gelişmiş bir görüntü yaratır.
MP3/WMA/JPEG/MPEG4/CD Audio Için Klip
Menüsü .................................... 7
Klasör Seçimi ...............................7
MP3/WMA/CD Audio Çalma ....................7
MPEG4 Oynatım .............................8
USB Host özelliği ile Medya Dosyalarının
Oynatılması (Sedece DVD-C360,C450) ........... 9
CD Dönüştürme (Ripping)
(Sedece DVD-C360,C450) .....................9
Resim CD'sinin Oynatımı ......................9
Ayar Menüsünü Değiştirmek
Ayar Menüsünün Kullanımı ....................10
Dil Seçeneklerinin Ayarlanması. ................ 10
Ses Seçeneklerinin Ayarlanması ................ 10
Ekran Seçeneklerinin Ayarlanması. .............. 11
Ebeveyn Kontrolünün Ayarlanması .............. 11
DivX Özelliğinin Ayarlanması ..................11
Başvuru
Arıza Giderme ..............................12
Teknik Özellikler ............................12
EZ VIEW (DVD)
Görüntünün TV'nizin ekran formatına (16:9 veya
4:3) uyması için ayarlama yapabilmeyi sağlar.
Dijital Fotoğraf Gösterimi (JPEG)
Dijital fotoşraflarınızı televizyondan izleyebilirsiniz.
Tekrar
REPEAT tuşuna basarak bir şarkı veya
filmi tekrarlatabilirsiniz.
MP3/WMA
MP3/WMA dosyalarından oluşan diskleri çalabilirsiniz.
MPEG4
avi.osyasındaki MPEG4 formatlarını oynatabilirsiniz.
CD Dönüştürme (Ripping)
(Sadece DVD-C360,C450)
Bu özellik, ses dosyalarını diskten USB aygıtına
MP3 formatinda kopyalamanizi sağlar. (Sadece
Ses CD’si (CDDA))
Page 19

3
Not
▼
▼
▼
▼▼
▼
▼
▼
▼▼
▼
▼
▼
▼
▼
▼▼
▼
- Bu oynatıcıya uygun olmayan diskler :
• DVD-ROM • DVD-RAM
• CD-ROM • CDV
• CDI • CVD
• CDG'ler sadece ses çalar; görüntü yoktur.
- Oynatabilme, kayıt koşullarına başlı ola
bilir :
• DVD-R, +R
• CD-RW
• DVD+RW, -RW (V mode)
- Disk tipi veya kayıt koşullarına başlı olarak,
ünite bazı CD-R, CD-RW ve DVD-R
diskleri ça amayabilir.
KOPYA KORUMA
Çoşu DVD disk, kopya korumalıdır.
Bu nedenle DVD oynatıcınızı bir VCR'a değil;
doğrudan televizyonunuza başlamalısınız.
VCR'a başlarsanız, kopya korumalı
DVD disklerden alınan görüntü bozuk olacaktır.
Bu ürün, kopya koruma teknolojisi içermektedir.
Söz konusu teknoloji, bazı ABD patentleri ve
Disc Markings
~
PAL
STEREO
DIGITAL
SOUND
Oynatma Bölge Numarası
PAL Yayın Sistemi İngiltere, Almanya,
Türkiye.
Dolby Digital Disk
Stereo Disk
Digital Audio Disk
DTS Disk
MP3 Disk
Rovi Şirketi ile diğer hak sahiplerine ait
mülkiyet hakları tarafından korunmaktadır.
Bu kopya koruma teknolojisinin kullanımı,
Rovi Şirketi tarafından yetkilendirilir ve
Rovi Şirketi tarafından yetki verilmediği
sürece, yalnızca ev ve diğer sınırlı kullanımlar
için dir. Tersi mühendislik veya parçaların
ayrılması yasaklanmıştır.
PROGRESIF TARAMA ÇIKIŞLARI
(576p)
"YÜKSEK TANIMLI TELEVİZYONLARIN
(HDTV) HEPSİ BU ÜRÜNLE TAM OLARAK
UYUMLU DEŞILDIR VE GÖRÜNTÜDE
PARAZİTLER OLUŞMASINA YOL
AÇABILIRLER. 576 PROGRESIF TARAMA
GÖRÜNTÜ PROBLEMLERİ
OLMASI DURUMUNDA, BAĞLANTINIZI
'STANDARD DEFINITION' ÇIKIşINA
GETİRMENİZ TAVSİYE EDİLİR. BU 576 p
MODEL DVD OYNATICI İLE TV'NİZİN UYUMU
HAKKINDA SORULARINIZ VARSA, LÜTFEN
SAMSUNG MÜŞTERI SERVİS MERKEZİNE
BAŞVURUNUZ."
Bölge Numarası
DVD oynatıcı ve diskler bölgelere göre
kodlanmıştır. Diski oynatmak için bu bölgesel
kodlara uygun olması gerekmektedir. Eğer
kodlar uygun değilse diski oynatamazsınız. Bu
oynatıcının bölge numarası oynatıcının arka
panelinde yer almaktadır.
DivX Sertikasyonu
DivX, DivX oynaylıdır. İlgili
logolar DivXNetworks, Inc
rmasının ticari markalarıdır
ve lisans altında
kullanılmaktadır. “DivX video’ları oynatacak
şekilde DivX Onaylıdır.”
Tanımlama
Ön Panel Kontrolleri
DVD-C450
DVD-C360
DVD-C350
1. DİSK TEPSİSİ
Diski buraya yerleştirin.
2. EKRAN
Operasyon göstergeleri burada görüntülenir.
3. AÇMA/KAPAMA/DURDURMA
( )
Disk tepsisini açmak/kapatmak için bu tuşa
basın
.
4. DURDURMA ( )
(Sadece DVD-C450)
Diski oynatmayı durdurur.
1
1
1
5
3
2
2
2
4
3
3
5
5 6
6
5. OYNATMA/DURAKLATMA ( )
Diski oynatmaya başlar ya da oynatımı
duraklatır.
6. POWER ON / OFF ( )
Açık/kapalı konuma getirdiğinizde, oynatıcı
da açılır/kapanır.
7. USB Host
(Sadece DVD-C360,C450)
Dijital fotoğraf makinesi, MP3 çalar, memory
stick, kart okuyucu veya diğer kaldırılabilir
depolama cihazlarını bağlar.
7
6
7
Page 20

4
Uzaktan Kumanda Turu
DVD-C450
DVD-C360
1
2
3
4
5
6
7
8
9
10
11
DVD-C350
1
2
3
4
5
6
7
8
9
10
1. DVD GÜÇ Düşmesi
Gücü açar ya da kapatır.
2. TEKRAR Tuşu
Bir başlık, bölüm, parça ya da
3. DİSK MENÜ Tuşu
Disk menüsünü ekrana getirir.
12
4. BOOKMARK Tuşu
13
5. ARAMA Tuşları ( / )
14
15
Diskte ileri ya da geri arama
16
6. DURDURMA Tuşu ( )
17
7. ATLAMA Tuşları ( / )
18
Başlık, Bölüm ya da Parça atla-
19
8. MENÜ Düşmesi
DVD oynatıcının menüsünü açar.
20
9. GIRIş /π/†,√/® Düşmeleri
Bu düşme geçiş anahtarı olarak
10. SES Tuşu (√)
Diskteki çeşitli ses fonksiyonlarına
1. DVD GÜÇ Düşmesi
Gücü açar ya da kapatır.
2. TEKRAR Tuşu
Bir başlık, bölüm, parça ya da
3. DİSK MENÜ Tuşu
Disk menüsünü ekrana getirir.
11
12
4. BOOKMARK Tuşu
13
5. DURDURMA Tuşu ( )
14
6. ATLAMA Tuşları ( / )
15
16
Başlık, Bölüm ya da Parça atla-
17
7. MENÜ Düşmesi
18
DVD oynatıcının menüsünü açar.
8. GIRIş /π/†,√/® Düşmeleri
19
Bu düşme geçiş anahtarı olarak
20
9. SES Tuşu (√)
Diskteki çeşitli ses fonksiyonlarına
10. BİLGİ Tuşu
Geçerli disk modunu görüntüler.
diski tekrar oynatmanıza izin verir.
yapmanıza izin verir.
mak için kullanabilirsiniz.
çalışır.
erişmek için bu tuşu kullanın.
diski tekrar oynatmanıza izin verir.
mak için kullanabilirsiniz.
çalışır.
erişmek için bu tuşu kullanın.
11. BİLGİ Tuşu
Geçerli disk modunu görüntüler.
12. AÇMA/KAPAMA Düşmesi ( )
Disk tepsisini açmak ya da kapa-
mak için.
13. A-B TEKRAR Tuşu
A-B diski tekrar oynatmaniza izin
verir.
14. USB Tuşu
15. VIDEO SEL. Tuşu
Video çıkış formatını seçer.
16. OYNATMA/DURAKLATMA Tuşu
( )
Disk oynatmayı Başlatır ya da
Duraklatır.
17. ALTYAZI Tuşu (π)
18. GERİ DÖNME Tuşu
Bir önceki menüye geri döner.
19. TITLE MENU Tuşu (®)
20. CANCEL Tuşu
Ekrandan menüleri yada durum
göstergelerini silmek için kullanın.
11. AÇMA/KAPAMA Düşmesi ( )
Disk tepsisini açmak ya da kapa-
mak için.
12. A-B TEKRAR Tuşu
A-B diski tekrar oynatmaniza izin
verir.
13. Zoom Tuşu
14. VIDEO SEL. Tuşu
Video çıkış formatını seçer.
15. ARAMA Tuşları ( / )
Diskte ileri ya da geri arama
yapmanıza izin verir.
16. OYNATMA/DURAKLATMA Tuşu
( )
Disk oynatmayı Başlatır ya da
Duraklatır.
17. ALTYAZI Tuşu (π)
18. GERİ DÖNME Tuşu
Bir önceki menüye geri döner.
19. TITLE MENU Tuşu (®)
20. CANCEL Tuşu
Ekrandan menüleri yada durum
göstergelerini silmek için kullanın.
bağlantilar
Bir Başlantı Seçmek
Aşaşıda DVD oynatıcıyı bir TV ve başka cihazlara bağlamak için yaygın olarak kullanılan başlantı
örnekleri gösterilmektedir :
DVD Oynatıcıyı Bağlamadan Önce
- Herhangi bir kablonun başlanması veya sökülmesinden önce DVD oynatıcıyı, TV ve diğer
bileşenleri daima kapatın.
- Başladışınız ilâve cihazlar (örn., bir TV) ve onların belirli bileşenleriyle ilgili daha fazla bilgi için bu
cihazların kullanım kılavuzuna bakınız.
A. TV Balantısı (SKART)
- SKART’ı kullanarak, DVD oynatıcının arkasındaki SKART (EXT) terminalini TV’nizin SKART (IN)
termina-line balayın.
B. TV Başlantısı (Video)
- A/V kablolarını kullanarak, DVD oynatıcının arkasındaki VIDEO (sarı)/AUDIO (kırmızı ve beyaz)
OUT terminallerini, TV'nizin VIDEO (sarı)/AUDIO (kırmızı ve beyaz) IN terminallerine başlayınız.
- DVD oynatıcıyı ve TV'yi çalıştırınız.
- DVD oynatıcıdan gelen görüntü sinyali TV ekranında belirene dek, TV'nizin uzaktan kumandası
üzerindeki giriş seçiciye basınız.
Not
- Ses kablosu güç kablosuna çok yakınsa, parazit oluşabilir.
- Bir amplifikatör bağlamak isterseniz, lütfen amplifikatör başlantısı sayfasına bakınız.
- Terminallerin sayısı ve yerleşimi, TV'ye göre değişiklik gösterebilir. Lütfen TV'nizin kullanım
kılavuzuna bakınız.
- TV'de sadece bir adet ses giriş terminali varsa, onu DVD oynatıcınızın [AUDIO OUT] [sol]
(beyaz) terminaline başlayınız.
- DVD oynatıcı STOP modunda iken ya da oynatıcıda disk yokken VIDEO SEL. (VIDEO SEÇIM)
tuşuna basarsanız, Video Çıkış modu takip eden düzende değişir :
(I-SCAN → P-SCAN → SCART-RGB → SCART-CVBS).
C. Ses Sistemi Başlantısı (2 Kanallı Amplifikatör, Dolby Digital, MPEG2
veya DTS Amplifikatör)
- Ses kablolarını kullanarak, DVD oynatıcının arkasındaki AUDIO (kırmızı ve beyaz) OUT terminallerini, amplifikatörün AUDIO (kırmızı ve beyaz) IN terminallerine başlayınız.
- Koaksiyel kablo kullanımı durumunda, DVD oynatıcının arkasındaki DIGITAL AUDIO OUT
(COAXIAL) terminalini, amplifikatörün DIGITAL AUDIO IN (COAXIAL) terminaline başlayınız,
Görüntü sinyali kablolarını kullanarak, DVD oynatıcının arkasındaki VIDEO,COMPONENT IN terminallerine de anlatıldışı şekilde başlayınız.
- DVD oynatıcı, TV ve amplifikatörü çalıştırınız.
- DVD oynatıcıdan ses duymak amacıyla, harici girişi seçmek için amplifikatörün giriş seçimi
tuşuna basınız. Amplifikatörün ses girişini ayarlamak için, amplifikatörünüzün kullanma kılavuzuna
bakınız.
Page 21

5
D. TV Başlantısı (Interlace / Progresif )
D
B
C
A
- Komponent görüntü kabloları kullanarak, DVD oynatıcının arkasındaki COMPONENT VIDEO OUT
terminallerini TV'nizin COMPONENT IN terminallerine başlayınız.
- Ses kablolarını kullanarak, DVD oynatıcının arkasındaki AUDIO (kırmızı ve beyaz) OUT terminallerini TV'nizin AUDIO (kırmızı ve beyaz) IN terminallerine başlayınız.
DVD oynatıcıyı ve TV'yi çalıştırınız.
- DVD oynatıcıdan gelen komponent sinyali TV ekranında belirene dek, TV'nizin uzaktan kumandası
üzerindeki giriş seçiciye basınız.
- Ekran ayarları mönüsünde, görüntü çıkışını KOMPONENT (I-SCAN/P-SCAN) olarak ayarlayınız.
Video Çıkış modunu değiştirmek için VIDEO SEL. tuşunu kullanabilirsiniz.
Not
- “Progresif Tarama” nedir?
Progresif tarama, interlace çıkışın iki katı kadar tarama çizgisine sahiptir; Progresif tarama yön
temi daha iyi ve net resim sağlar.
- Uzaktan kumandada video seçme düğmesine basılarak “Scart-RGB” seçimi yapıldığında kompo
nent video gösterilmiyor.
2-Channel stereo ampilfier,
Dolby digital or
DTS amplifier
Audio Kablosu
SCART KABLOSU
KIRMIZI
BEYAZ
KIRMIZI
Video Kablosu
BEYAZ
COAXIAL KABLOSU
SARI
SARI
KIRMIZI
MAVI YEŞİL
KIRMIZI
MAVI
YEŞİL
Komponent Kablosu
KIRMIZI
BAĞLANTILARINI AYNI ANDA
BEYAZ
BEYAZ
KIRMIZI
SCART VE KOMPONENT
VIDEO (Y.Pb,Pr)
KULLANMAYIN
temel fonksiyonlar
Bir Diskin Oynatilmasi
- TV'nizi açın ve televizyonun uzaktan
kumandasındaki doğru görüntü girişine ayarlayın.
- Harici bir ses sistemi başladıysanız, ses sisteminizi açın ve doğru ses girişine ayarlayın.
Oynatıcıyı fişe taktıktan sonra ilk defa DVD güç düşmesine bastışınızda, dil seçimi için π/†
tuğlarına basarak, ardından tuşuna ENTER düğmesine basın. (Bu ekran yalnızca, oynatıcıyı
ilk defa fişe taktışınız zaman ortaya çıkacaktır.) Başlatma ekranında dil seçimi yapılmazsa,
DVD oynatıcıyı açıp kapattışınız her zaman için ayarlar değişebilir. Sonuçta, istediğiniz dili
seçtişinizden emin olunuz. Menü dilini seçtikten sonra dilerseniz, ünitede disk yokken ünitenin
ön panelindeki
işlemi yaptıktansonra, tercih ettiğiniz dili yeniden ayarlayabileceğiniz SELECT MENU LANGUAGE
penceresi ekranda tekrar belirecektir.
Arama ve Atlama Fonksiyonlarının Kullanımı
Oynatın sırasında, bir bölüm ya da parçada hızlı bir şekilde arama yapabilirsiniz ve bir sonraki
seçime geçmek için atlama fonksiyonunu kullanabilirsiniz.
Bir Bölüm ya da Parçada Arama Yapmak
Oynatma işlemi sırasında uzaktan kumanda SEARCH ( veya ) tuşlarına 1 saniyeden fazla
basın.
DVD 2X, 4X, 64X, 128X
VCD 4X, 8X
CD 2X, 4X, 8X
Parçaları Atlamak
Oynatma sırasında SKIP ( veya ) tuşuna basın.
- Bir DVD oynatırken, SKIP ( ) tuşuna basarsanız bir sonraki bölüme geçiş yapılır. Eğer diğer
yönde SKIP ( ) tuşuna basarsanız, bölümün başına gidilir. Bir kez daha basarsanız bir önceki
bölümüN başına gidilir.
- VCD ya da CD oynatıyorsanız, SKIP ( ) tuşuna bastışınızda bir sonraki parçaya gidilir. Eğer
diğer yönde SKIP ( ) tuşuna basarsanız, parçanın başına gidilir. Bir kez daha basarsanız bir
önceki parçanın başına gidilir.
- Bir VCD oynatırken parça 15 dakikayı aşmış se tuşuna basın, bu sizi 5 dakika ileri götürecektir. Eğer tuşuna basarsanız, 5 dakika geri gidersiniz.
Ekran Fonksiyonunun Kullanımı
Bir DVD/VCD/MPEG4 Oynatırken
1. Oynatma esnasında, uzaktan kumandanızdaki INFO tuşuna basın.
2. Istedişiniz maddeyi seçmek için π/† tuşuna basın.
- Bir DVD oynatırken, Disk Menüsü çalışmayabilir.
3. Istedişiniz ayarı yapmak için √/® tuşlarına basın ve-sonra ENTER düşmesine basın.
4. Ekran görüntüsünü yok etmek için tekrar INFO tuşuna basın.
■
/
tuşuna 5 saniyeden uzun bir süre basarak bu seçimi değiştirebilirsiniz. Bu
Not
- Bu fonksiyon için işaretlenmiş hız gerçek oynatım hızından
farklı olabilir.
- Arama modu esnasında ses duyulmaz. (CD Hariç)
.
Page 22

6
Bir diskte birden fazla başlık olduğunda, istenen başlışı oynatmak için. Örneşin, bir DVD'de birden
fazla film varsa, her bir film tanımlanacaktır.
Çoşu DVD disk, bölümler hâlinde kaydedilir; bu sayede özel bir bölümü çabucak bulabilirsiniz (ses
CD'sinde kayıtlı parçalara benzer bir şekilde).
İstenen dakikadan filmi oynatma imkânı. Filmin başlayacaşı zamanı girmeniz gerekir. Zaman arama
işlevi, bazı disklerde çalışmayabilir.
Diskte bulunan altyazı dil seçeneklerini gösterir Altyazı dillerini seçebilir veya altyazıyı ekranda göstermeyebilirsiniz. Bir DVD diskte en çok 32 farklı alt yazı olabilir.
İstediğiniz Ses, Açı, Yer İmi, EZ Görünüm fonksiyonu ve Zoom’a erişmek için girin ve√/®
düğmelerine basın Film müzişinin dilini gösterir. Örnekteki film müzişi, İngilizce 5.1 kanal
çalınmaktadır. Bir DVD disk, en çok sekiz farklı film müzişi
içerebilir. Bookmark işlevi DVD veya VCD'deki bir parçayı veya bölümü kolay ve hızlı
bulmanızı sağlar (Menu Off) EZ Görüntü işlevi DVD’deki en-boy oranını değiştirmek için
kullanılır. Zoom işlevi DVD görüntüsünü büyütür.
Disk ve Başlık Menüsünün Kullanımı
Bir DVD diski oynatırken uzaktan kumanda üzerindeki Menu'yü / Title Menu'yü tuşuna basın.
Not
- Diske başlı olarak, Disk Menüsü çalışmayabilir.
- Uzaktan kumandanın üzerindeki DISC MENU tuşuna basarak da Disk Menüsünü kullanabilirsiniz.
- Bir DVD oynatırken, Disk Menüsü çalışmayabilir.
Oynatımı Tekrarlama
Mevcut parçayı, bölümü, başlışı, seçilmiş bir bölgeyi (A-B) ya da diskin tamamını tekrarlayabilirsiniz.
Bir DVD/VCD Oynatırken
1.Bölüm, Başlık, Disk, Parça, ya da Repeat:Off, seçmek için REPEAT tuşuna basın.
- DVD oynatımı bölüm ya da başlık olarak tekrarlar. VCD oynatımı disk ya da parça olarak tekrar
lar.
- Chapter (Bölüm) : oynayan bölümü tekrar eder.
- Title (Başlık) : oynayan başlışı tekrar eder.
- Disc (Disk) : oynayan diski tekrar eder.
- Repeat : Off
- Track (Parça) : oynayan parçayı tekrar eder.
A-B Tekrarlama Fonksiyonunun Kullanımı
1. Tekrar oynatımın başlamasını istediğiniz noktada REPEAT A-B tuşuna basın (A).
2. Tekrar oynatımın durmasını istediğiniz noktada REPEAT A-B tuşuna basın (B).
3. Normal oynatıma geri dönmek için, ekran Tekrar (Repeat) mesajını görüntüleyene kadar REPEAT A-B
düğmesine basın: Kapalı (Off).
Not
- A-B REPEAT, (A) noktası ayarlandıktan sonra oynatım zamanından en az 5 saniye geçinceye
kadar (B) notaksının ayarlanmasına izin vermez.
- Diske başlı olarak, Tekrarlama fonksiyonu çalışmayabilir.
- Bir DVD oynatırken, Disk Menüsü çalışmayabilir.
Oynatımı Yavaş
Bu özellik, spor, dans, çalınan müzik aletleri gibi içerişe sahip sahneleri yavaş çekimde tekrar
oynatmanıza izin verir. Böylece, bunları daha yakından izleyerek üzerinde çalışma yapabilirsiniz.
Bir DVD/VCD Oynatırken
1. Oynatım esnasında, PLAY/PAUSE ( ) tuşuna basın.
2. PAUSE modunda iken normal oynatım hızının 1/2, 1/4, 1/8 ve 1/16'si olarak seçim yapmak için
SEARCH ( ) tuşuna basın ve basılı tutun.
ileri funksiyonlar
Görüntü Oranının Ayarlanması (EZ View)
Görüntü Oranını Kullanarak Oynatma (DVD)
1. Oynatım esnasında uzaktan kumanda üzerindeki INFO tuşuna basın.
2. Shortcut seçmek için π/† tuğlarına basın, ardından ENTER düğmesine basın.
3. EZ View seçmek için √/® tuğlarına basın, ardından ENTER düğmesine basın
- EZ GÖRÜNÜMÜ √/® düğmelerine her basışınızda ekran boyutu değişir.Ekran boyutları grafikleri
ve boyutların değiştiği dizi listeleri için sonraki sütuna bakınız.
16:9 TV Kullanıyorsanız
16:9 formatındaki diskler için
- SCREEN WIDE
- SCREEN FIT
- ZOOM FIT
4:3 formatındaki diskler için
- Normal Wide
- SCREEN FIT
- ZOOM FIT
- VERTICAL FIT
Not
Diskin tipine bağlı olarak, bu işlev farklı şekilde çalığabilir.
Ses Için Dil Seçimi
AUDIO (SES) tuşu ile istediğiniz ses dilini hızlı ve kolay bir şekilde seçebilirsiniz.
AUDIO Tuşunun Kullanımı (DVD/VCD/MPEG4)
1. AUDIO (√) tuşuna basın. Tuşa her basığınızda ses seçeneğiniz değişecektir. Her bir dil
kısaltmalarla ifade edilir.
MPEG4 üzerinde istediğiniz sesi seçmek için Audio (√) tuşuna basın, ardından ENTER düğmesine
basın.
Not
- Bu fonksiyon diske kodlanmığ ses dili seçeneklerine bağlıdır ve çalığmayabilir.
- Bir DVD disk maksimum 8 adet dil seçeneği içerir.
4:3 TV Kullanıyorsanız
16:9 formatındaki diskler için
- 4:3 Letter Box
- 4:3 Pan Scan
- SCREEN FIT
- ZOOM FIT
4:3 formatındaki diskler için
- NORMAL SCREEN
- SCREEN FIT
- ZOOM FIT
Page 23

7
Altyazı Için Dil Seçimi
001/004
O
SUBTITLE (ALTYAZI) tuşu ile istediğiniz altyazı dilini hızlı ve kolay bir şekilde seçebilirsiniz.
SUBTITLE Tuşunun Kullanımı (DVD/MPEG4)
1. SUBTITLE (π) tuşuna basın. Tuşa her basığınızda altyazı seçeneğiniz değişecektir. Altyazı dilleri
kısaltmalarla gösterimektedir.
Basin SUBTITLE (π) uzaktan kumanda olarak düğmesine tekrar tekrar ENTER tuşuna basın
MPEG4 üzerinde istediğiniz altyazı dilini seçmek için.
2. SUBTITLE ikonunu silmek için, SUBTITLE (π) tuşuna basın.
Not
- DVD'lere bağlı olarak, istediğiniz altyazıyı Disk Menüsünde değiştirebilirsiniz. DISC MENU tuşuna
basınız.
- Bu fonksiyon diske kodlanmığ altyazı seçenek lerine bağlıdır ve çalığmayabilir.
- Bir DVD disk maksimum 32 adet altyazı dili seçeneği içerir.
Kamera Açısının Değiştirilmesi
DVD, belirli bir sahne için çoklu açı içeriyorsa, ANGLE (AÇI) fonksiyonunu kullanabilirsiniz.
ANGLE Tuşunun Kullanımı (DVD)
Eğer disk çoklu kamera açısı içeriyorsa, ekranda ANGLE görüntülenecektir.
1. Oynatım esnasında uzaktan kumanda üzerindeki INFO tuşuna basın.
2. Shortcut seçmek için π/† tuğlarına basın, ardından ENTER düğmesine basın.
3. ANGLE seçmek için √/® tuğlarına basın, ardından ENTER düğmesine basın.
4. Basın √/® düşmeleme veya sen sayı düşmeleyen yarar kutulama select uzak kontrol arzulamadı
açı.
Not
- Eğer disk sadece tek bir açıya sahipse, bu özellik çalığmayacaktır. Genelde az sayıda
disk bu özelliğe sahiptir.
- Diske bağlı olarak, bu fonksiyonlar çalığmaya bilir.
Işaretleme Fonksiyonunun Kullanımı
Bu özellik DVD ya da VCD'nin (Menu Off modunda) bölümlerini işaretlemenize izin verir. Böylece
onları daha sonraki bir zamanda kolaylıkla bulabilirsiniz.
Iğaretleme (Bookmark) Fonksiyonunun Kullanımı (DVD/VCD)
1. Oynatım esnasında uzaktan kumanda üzerindeki INFO tuşuna basın.
2. Shortcut seçmek için π/† tuğlarına basın, ardından ENTER düğmesine basın.
3. Bookmark seçmek için √/® tuğlarına basın, ardından ENTER düğmesine basın.
4. Iğaretlemek istediğiniz sahneye eriştiğinizde ENTER tuşuna basın. Bir seferde 12
sahneişaretlenebilir.
Not
- Bir VCD oynatırken, Disk Menüsü çalışmayabilir.
- Diske bağlı olarak, Iğaretleme (Bookmark) fonksiyonu çalığmayabilir.
Iğaretlenmiğ Bir Sahnenin Çağrılması
1~3. Ilk 1-3 adım deki “Iğaretlenmiğ Bir Sahnenin Çağrılması“
4. Iğaretlenmiğ bir sahneyi seçmek için √/® tuşuna basın.
5. tuşuna PLAY/PAUSE ( ) basarak işaretlenmiş sahneye geçiğ yapın.
Bir Iğaretin Silinmesi
1~3. Ilk 1-3 adım deki “Iğaretlenmiğ Bir Sahnenin Çağrılması“
4. √/® tuğlarına basarak silmek istediğiniz işaret numarasını seçin.
5. Iğaret numarasını silmek için CANCEL tuşuna basın.
Zoom Fonksiyonunun Kullanımı
Zoom Fonksiyonunun Kullanımı (DVD/VCD) (DVD-C350)
1. Oynatım esnasında uzaktan kumanda üzerindeki ZOOM tuşuna basın.
Zoom Fonksiyonunun Kullanımı (DVD/VCD) (DVD-C360,C450)
1. Oynatım esnasında uzaktan kumanda üzerindeki INFO tuşuna basın.
2. Shortcut seçmek için π/† tuğlarına basın, ardından ENTER düğmesine basın.
3. Zoom seçmek için √/® tuğlarına basın, ardından ENTER düğmesine basın.
- DVD/VCD oynatım esnasında, ENTER düğmesine basarak 2X/3X/4X/Normal sırasında zoom
işlemi yapa bilirsiniz.
MP3/WMA/ JPEG/ MPEG4/CD Audio Için Klip Menüsü
MP3/WMA/JPEG/MPEG4 diskleri ağağıda gösterildiği gibi klasörlerde organize edilmiş ğarkılar
ve/veya resimler içerir. Bilgisayarınızda farklı klasörlere dosya
yerleştirme işlemiyle aynıdır.
Disk tepsisini açın.Tepsiye bir disk yerleştirin.Disk tepsisini kapatın.
Tepsi kapanacak ve yandakiekran görüntül-enecektir.
Klasör Seçimi
Klasörler sadece Stop modunda iken seçilebilir.
- Ana Klasörü Seçmek
Ana klasöre gitmek için RETURN btuşuna basın. ya da π/† tuğlarına basarak “..” seçin ve ana
klasöre gitmek için ENTER tuşuna basın.
MP3/WMA/CD Audio Çalma
1. Disk tepsisini açın. Tepsiye bir disk yerleştirin. Disk tep sisini kapatın.
2. π/† tuğlarına basarak bir ğarkı dosyası seçin.
ğarkı dosyasını çalmaya başlamak için ENTER düğmesine basın.
Tekrar/Rastgele Çalma
Çalma modunu değiştirmek için REPEAT tuşuna basın. 3 mod vardır; Off, Track, Folder ve Random.
- Off: Normal çalma
- Track: Mevcut ğarkı dosyasını tekrar eder.
- Folder : Mevcut klasör içindeki aynı dosya uzantısına sahip ğarkı dosyalarını terkrar eder.
- Random : Aynı dosya uzantısına sahip ğarkı dosyaları rastgele bir düzende çalınır.
Normal çalma işlemine devam etmek için CANCEL tuşuna basın.
Page 24
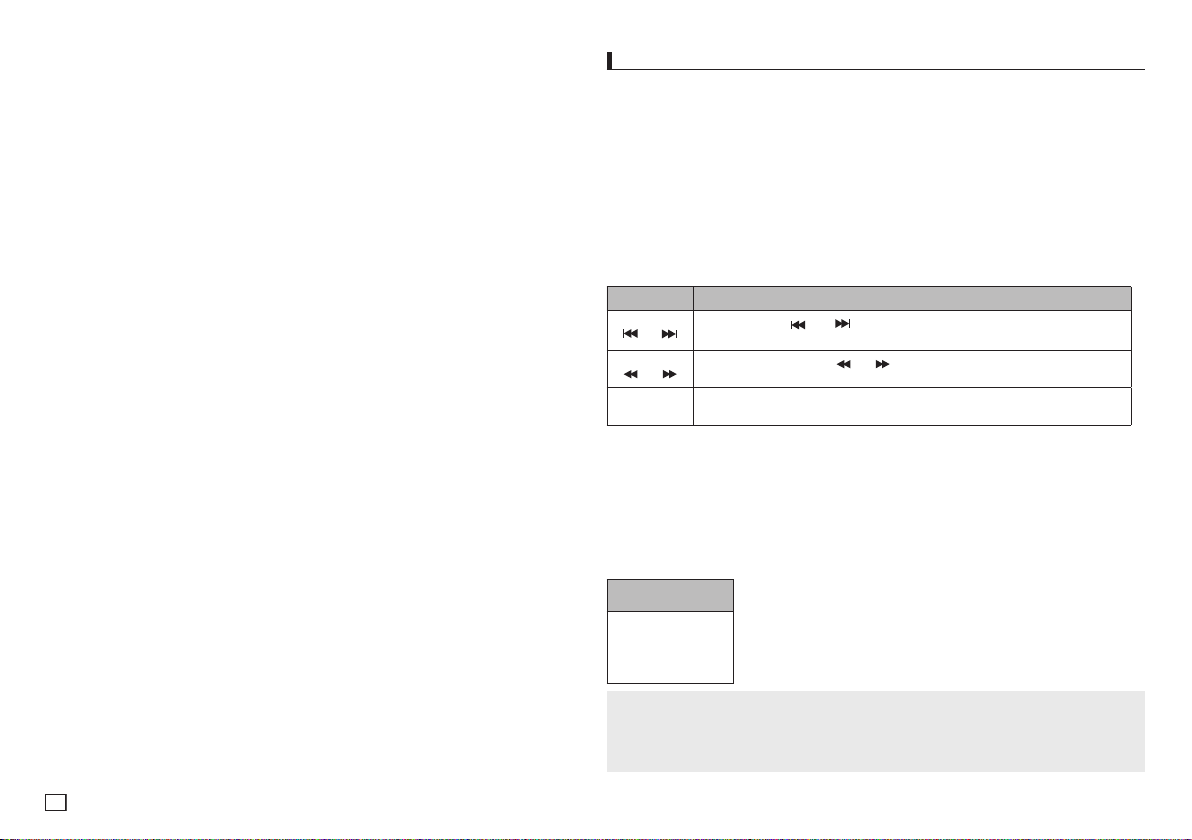
8
CD-R MP3/WMA Dosyası
CD-R üzerine MP3 veya WMA dosyaları kaydettiğiniz zaman, lütfen ağağıda yazılanları dikkate
alınız.
- MP3 veya WMA dosyalarınız, ISO 9660 veya JOLIET for matlı olmalıdır.
ISO 9660 formatı ve Joliet MP3 veya WMA dosyaları, Microsoft'un DOS ve Window'su ve Apple'ın
Mac'ı ile uyumludur. Bu, en çok kullanılan formattır.
- MP3 veya WMA dosyalarınıza isim verirken, 8 karakteri ağmayın ve dosya uzantısı olarak
".mp3, .wma" yazın.
Genel isim formatı : Isim.mp3. veya Isim.wma. Ismi yazdığınız zaman; 8 veya daha az karakter
kullanın, i simde boşluklar bırakmayın ve (.,/,\,=,+) içeren özel karak terler kullanmaktan kaçının.
- MP3 dosyaları kaydederken, dekompresyon aktarım hızınız en az 128 Kbps olmalıdır.
MP3 dosyaları söz konusu olduğunda ses kalitesi; seçtiğiniz kompresyon/dekompresyon oranına
bağlıdır. Ses CD'si için, analog/dijital örnekleme yani MP3 formatına dönüğtürme hızı gerekir. Bu
hız en az 128 Kbps'dir ve 160 Kbps'ye dek çıkar. Ancak, 192 Kbps veya daha yüksek hızların
seçilmesi, nadiren daha iyi bir ses kalitesi verir. Öte yandan, dekom presyon hızları 128 Kbps'nin
altında olan dosyalar ise düzgün şekilde çalınamaz.
- WMA dosyaları kaydettiğinizde, dekompresyon aktarım hızı en az 64Kbps olmalıdır.
WMA dosyaları söz konusu olduğunda ses kalitesi; seçtiğiniz kompresyon/dekompresyon oranına
bağlıdır.
Ses CD'si için, analog/dijital örnekleme yani WMA formatına dönüğtürme hızı gerekir. Bu hız en az
64Kbps'dir ve-192Kbps'ye dek çıkar. Ancak, dekompresyon hızları 192 Kbps'nin üzerinde veya 64
Kbps'nin altında olan dosyalar düzgün şekilde çalınamaz.
- Kopya korumalı MP3 dosyalarını kaydetmeye çalığmayın.
"Güvence altına alınmığ" bazı dosyalar, yasa dığıkopyalamayı önlemek için şifrelenmiş ve kod
korumalı durumdadır. Bu dosyalar ğunlardır: Windows MediaTM (Microsoft'un kayıtlı markası) ve
SDMITM (SDMI'ya ait kayıtlı marka). Bu tip dosyaları kopyalayamazsınız.
- Önemli:
Yukarıdaki öneriler, DVD oynatıcının MP3 kayıtlarını-çalacağının garantisi veya ses kalitesinin
güvencesi olarak düğünülemez. Bilinmelidir ki, CD-R üzerine MP3 dosyası kaydetmek için
kullanılan bazı teknoloji ve yöntemler, bu dosyaların DVD oynatıcınızda en iyi şekilde çalınmasını
engeller (bazı durumlarda azalmığ ses kalitesi ve bazen de oynatıcının dosyaları okuyamaması
gibi).
- Bu ünite, disk bağına en çok 500 dosya ve 500 klasör-çal abilir.
MPEG4 Oynatım
MPEG4 Oynatım Fonksiyonu
AVI dosyaları hem ses hem de görüntü verisini içerirler. Sadece “.avi” uzantısına sahip AVI
formatındaki.
1. Disk tepsisini açın. Tepsiye bir disk yerleştirin. Disk tep sisini kapatın.
2. π/† tuğlarına basarak bir avi dosyası (DivX/XviD) seçin, ardından ENTER düğmesine basın.
Oynatımı Tekrarlama
1. Oynatım modunu değiştirmek için REPEAT düğmesine basın. 3 mod vardır: Track (Parça), Folder
(Klasör) ve Off (Kapalı)
- Track (Parça) : Çalan Parça tekrarlar.
- Folder (Klasör) : Mevcut klasör içindeki aynı uzantıya sahip AVI dosyalarını tekrarlar.
- Off (Kapali)
MPEG4 Fonksiyonun Tanımı
Fonksiyon Tanımı
Atlama
( veya )
Search
( veya )
Yavaş Çekim
Oynatım
- Bu fonksiyonlar MPEG4 dosyasına bağlı olarak çalığmayabilir.
CD-R AVI Dosyası
Bu cihaz AVI dosya formatında, ağağıda belirtilen video sıkığtırma formatlarını oynatabilir :
- DivX 3.11 içeriği
- DivX 4 içeriği ("MPEG4 Simple Profile" tabanlı)
- DivX 5 içeriği (MPEG4 basit profil artı çift yönlü kareler
gibi ilave özellikler. Qpel ve GMC de desteklenir.
- XviD MPEG-4 uyumlu içerikler.
Bu cihaz ağağıdaki maksimum değerlere kadar tüm çözünürlükleri destekler.
720 x 480 @30fps
720 x 576 @25fps
: Maks. veriyolu hızı :
4Mbps
Oynatım esnasında, veya tuşuna basın, 5 dakika ileri ya da geri gidilir.
Oynatım esnasında, SEARCH ( veya ) tuşuna basın, daha hızlı arama için tekrar SEARCH
tuşuna basın. Böylece AVI dosyasında daha hızlı arama yapabilirsiniz. (2X, 4X, 8X)
AVI dosyasında daha düğük hızda arama yapmanızı sağlar. (1/2X, 1/4X, 1/8X, 1/16X)
DivX5
Not
• PC'de oluşturulmuş bazı MPEG4 dosyaları oynatılamayabilir. Bunun nedeni teknik özelliklerin
üstündeki Codec Tipi, Versiyon ve Yüksek çözünürlüğün desteklen memesidir.
• Bunun nedeni teknik özelliklerin üstündeki Codec Tipi, Versiyon ve Yüksek çözünürlüğün
desteklenmemesidir.
Page 25

9
USB Host özelliği ile Medya Dosyalarının Oynatılması
(Sadece DVD-C360,C450)
Depolama cihazını DVD çaların USB bağlantı noktasına bağlayarak MP3 çalar, USB belleği veya
dijital fotoğraf makinesine kaydedilen resimler, videolar ve melodiler gibi medya dosyalarının yüksek
ses kalitesiyle keyfini çıkarabilirsiniz.
USBHOST özelliğinin kullanılması
1. USB cihazını birimin önündeki USB bağlantı noktasına takın.
2. USB içinde bir dosya seçmek için π/† düğmelerine basın.Dosyayı açmak için ENTER
düğmesine basın.
Not
• Uzaktan kumanda üzerindeki USB düğmesine her basıldığında, USB aygıtı seçimi için bir
çerçeve görünür.
• Görüntü ekranında “USB” görünür.
• DVD veya CD ve USB takılmış olarak oynatırken, kısa bir süre için “Cihazı seçmek için USB’ye
basın” (Press USB to select device) yazısı görüntülenir
• USB MENU (USB Menüsü) ekranı televizyon ekranında görünür ve kaydedilen dosya oynatılır.
Güvenli USB Çıkarma.
USB cihazında saklanan belleğe zarar gelmesini önlemek için, USB cihazını ayırmadan önce
güvenli çıkarma işlemi yapın.
- STOP ( ) (Durdur) düğmesine basın.
- USB Kablosunu Çıkarın
İleri / Geri Atlama
Oynatma sırasında ( / ) düğmesine basın.
• Birden fazla dosya varsa, düğmeye bastığınızda bir sonraki dosya seçilir.
• Birden fazla dosya varsa, düğmesine bastığınızda bir önceki dosya seçilir.
Hızlı oynatma
Diski daha yüksek bir hızda oynatmak için oynatma sırasında ( / ) düğmesine basın.
• Düğmelere her bastığınızda, oynatma hızı aşağıdaki şekilde artacaktır:
2x k 4x k 8x.
Uyumlu Cihazlar
1. USB Yığın Bellek v1.0’i destekleyen USB cihazları.(Ek sürücü yüklemesi olmadan Windows’ta
(2000 veya üzeri) kaldırılabilir disk olarak çalışan USB cihazları.)
2. MP3 Çalar: HDD ve flash tipi MP3 çalar.
3. Dijital fotoğraf makinesi: USB Yığın Bellek v1.0’i destekleyen cihazlar.
• Ek sürücü yüklemesi olmadan Windows’ta (2000 veya üzeri) kaldırılabilir disk olarak çalışan
cihazlar
4. USB HDD ve USB Flash Sürücü: USB2.0 veya USB1.1’i destekleyen cihazlar.
• USB1.1 cihazı bağladığınızda farklı bir oynatma kalitesiyle karşılaşabilirsiniz.
• USB HDD'de, düzgün çalışma için USB HDD’ye yardımcı bir güç kablosu taktığınızdan emin
olun.
5. USB kartı Okuyucu: Tek yuvalı USB kartı okuyucu ve Çok yuvalı USB kartı okuyucu)
• Üreticiye bağlıdır. USB kartı okuyucu desteklenmiyor olabilir.
• Çoklu kart okuyucuya birden çok bellek cihazı yüklerseniz sorunlarla karşılaşabilirsiniz.
6. USB uzatma kablosu kullanırsanız, USB cihazı tanınmayabilir.
• CBI (Control/Bulk/Interrupt) desteklenmemektedir.
• PTP protokolü kullanan veya bilgisayara bağlandığında ek program kurulumu gerektiren Dijital
Kameralar desteklenmemektedir.
• NTFS dosya sistemi kullanan cihazlar desteklenmemektedir. (Yalnızca FAT 16/32 (Dosya
Ayırma Tablosu 16/32) dosya sistemi desteklenmektedir.)
• Bazı MP3 çalarlar bu ürüne bağlandığında kendi dosya sistemlerinin sektör boyutuna bağlı
olarak çalışmayabilir.
• USB HOST (USB SUNUCUSU) fonksiyonu, ortam dosyalarını üreticisine özgü programla
aktaran bir ürünün bağlı olması durumunda desteklenmez.
• Janus’un etkin olduğu MTP (Ortam Transfer Protokolü) aygıtlarıyla çalışmaz.
• Bu ürünün USB sunucusu fonksiyonu tüm USB aygıtlarını desteklememektedir.
CD Dönüştürme (Ripping)
(Sadece DVD-C360,C450)
Bu özellik, ses dosyalarını diskten USB aygıtına MP3 formatında kopyalamanızı sağlar
1. Disk tepsisini açın. Disk tepsisine bir Ses CD’si (CD-DA) yerleştirin ve tepsiyi kapatın. USB
aygıtını oynatıcının önündeki USB sunucusuna takın. Disk seçmek için ENTER tuşuna basın.
2. Cihaz durma modundayken Dönüştürme ekranını görüntülemek için RETURN tuşuna basın..
3. Press the π/† buttons to select the desired files, ardından ENTER (GİRİŞ) düğmesine basarak
kopyalanacak tüm dosyaları işaretleyin.
- Kopyalanacak tüm dosyaların seçimini kaldırmak için ENTER (GİRİŞ) düğmesine bir kez daha
basın..
4. Dönüştürme menüsünde BAŞLAT seçeneğini seçmek için ® ve † TAG tuşlarına basın.
Dönüştürme menüsünde düğme bulunur:
- Modu (Hizli/normal)
- Bitrates (Bit hızları), ENTER (GİRİŞ) tuşuna basarak değiştirebilirsiniz; 128kbps ➔ 192kbps ➔
256bkps ➔ 320kbps.
Standart : 128kbps.
Better Quality : 320kbps.
- Device selection (Cihaz seçimi), cihazlar arasında geçiş yapmak için ENTER (GİRİŞ)
düğmesine basın (maks. 4).
- Select – Unselect (Seç – Seçimi Kaldır); Tümünü Seç veya Hiçbirini Seçme arasında geçiş
yapmak için ENTER (GİRİŞ) düğmesine basın.
- Start ripping (Dönüştürmeyi başlat); dönüştürme işlemini başlatmak için ENTER (GİRİŞ)
düğmesine basın.
Not
- CDDA ekranına geri dönmek için tekrar RETURN (GERİ DÖNÜŞ) düğmesine basın..
- Sadece Ses CD’si (CD-DA) diskleri dönüştürülebilir.
- CD dönüştürme devam ederken cihaz otomatik olarak çalma modundadır.
- Normal hızın 2.6 katı olması nedeniyle. Kullanıcı dönüştürme işlemi sonunda CDDA oynatamaz.
Resim CD'sinin Oynatımı
1. Istediğiniz klasörü seçin.
2. π/†tuğlarına basarak klipler menüsü içinde bir resim dosyası seçin ve ardından ENTER
düğmesine basın.
Not
- Klipler menüsüne dönmek için STOP tuşuna basın.
- Bir Kodak Picture CD oynatırken, ünite fotoğrafları doğrudan görüntüler, klip menü yoktur.
Page 26

10
Döndürme
- Düğmeye √/® her basıldığında resim saat yönünde 90 derece döner.
- π TAG tuşuna her basıldığında, görüntü ayna görünümü verecek şekilde ters çevrilir..
- † TAG tuşuna her basıldığında, görüntü ayna görünümü verecek şekilde sağ tarafa çevrilir.
Zoom
- ENTER düğmesine her basıldığında resim büyür. Zoom modu : 100%, 125%, 150%, 200%.
Slayt Gösterim
- Jpeg dosyas nda PLAY düğmesine basıldığında, tam ekran moduna gider ve slayt gösterisi oto matik olarak başlar.
Not
- Dosya büyüklüğüne bağlı olarak, her bir resim arasındaki süresinden farklı olabilir..
- Eğer herhangı bir tuşa basılmazsa, slayt gös terisi yaklağık 10 saniye içinde bağlayacaktır.
CD-R JPEG Diskler
- Sadece ".jpg" ve ".JPG" uzantılı dosyalar oynatılabilir.
- Disk sonlandırılmamığsa, çalmaya başlamak daha fazla vakit alacaktır; kaydedilen dosyaların tümü
çalınamayabilir.
- Yalnızca ISO 9660 ya da Joliet formatındaki JPEG dosyalı CD-R diskler oynatılabilir.
- JPEG dosyasının adı 8 karakterden uzun olmamalıdır ve boşluk veya özel karakterler içermemeli
dir (. / = +).
- Yalnızca, ardığık yazılmığ çok-oturumlu bir disk çalınabilir. Çok oturumlu bir diskte boş bir bölüm
varsa, disk sadece boş bölüme dek çalınabilir.
- Tek bir CD üzerine en fazla 500 resim kaydedilebilir.
- Kodak Picture CD'ler tavsiye edilir.
- Bir Kodak Picture CD'si oynatıldığında, sadece resim klasöründeki JPEG dosyalar gösterilebilir.
- Kodak Picture CD: Resim klasöründeki JPEG dosyalar otomatik olarak gösterilmeye başlayabilir.
- Konica Picture CD: Resim dosyası görmek için, klipler mönüsünde JPEG dosyalarını seçiniz.
- Fuji Picture CD: Resim dosyası görmek için, klipler mönüsünde JPEG dosyalarını seçiniz.
- QSS Picture CD: Ünite, QSS Picture CD oynatamayabilir.
- Bir diskteki dosyaların sayısı 500'in üzerindeyse, yalnızca 500 JPEG dosyası gösterilebilir.
- Bir diskteki klasörlerin sayısı 500'ün üzerindeyse, yalnızca 500 klasördeki JPEG dosyaları göster
ilebilir.
ayar menüsünü değiştirmek
Ayar Menüsünün Kullanımı
Ayar Menüsü, çeğitli diller seçerek, ebeveyn seviyesi ayarlayarak ve hatta oynatıcınızı evinizdeki
televizyonun ekran tipine (formatına) göre ayarlayarak, DVD oynatıcıyı kişiselleştirmenize olanak
tanır.
1. Ünite Stop modunda iken uzaktan kumandanızdaki MENU tuşuna basın. √/® tuğlarına basarak
Setup'ı seçin, ardından † tuşuna ya da ENTER düğmesine basın.
2. π/† tuğlarına basarak farklı özelliklere erişebilirsiniz ® tuşuna ya da ENTER düğmesine basarak
alt özelliklere erişebilirsiniz.
3. Ayarlama işleminden sonra Ayar ekranını yok etmek için tekrar MENU tuşuna basın.
Not
Diske bağlı olarak, bazı Ayar Menüsü seçenekleri çalığmayabilir.
Dil Seçeneklerinin Ayarlanması
Oynatıcı menüsü, disk menüsü, ses ve altyazı dilini sonraki kullanımlar için ayarladıysanız, her film
izleyişinizde bunlar otomatik olarak gelecektir.
Oynatıcı Menü Dilinin Kullanımı
1. Ünite Stop modunda iken MENU tuşuna basın.
2. √/® tuğlarına basarak Language Setup Page 'ı seçin, ardından † tuşuna ya da ENTER
düğmesine basın.
3. π/† tuğlarına basarak-istediğiniz dili seçin, ardından ® tuşuna ya da ENTER düğmesine basın.
Not
- Dil seçilecek ve ekran Dil Ayar Menüsüne geri dönecektir.
- Ayar menüsünü ekrandan kaldırmak için, MENU tuşuna basın.
- Seçtiğiniz dil diskte kayıtlı değilse, orijinal, önceden kaydedilmiş dil seçilecektir.
- Ses dilinin diskin kaydedildiği orijinal dilde olmasını istiyorsanız “Original” seçeneğini seçin.
- Ses dili olarak seçilen dille aynı altyazı dilini istiyorsanız “Automatic” seçeneğini seçin.
- Bazı diskler sizin ilk olrak seçtiğiniz dili içermiyor olabilir; Bu durumda disk kendi orijinal dil
ayarlarını lkul lanacaktır.
Ses Seçeneklerinin Ayarlanması
Ses seçenekleri, kullanmakta olduğunuz ses sistemine bağlı olarak ses aygıtlarını ayarlamanıza
veses durumuyla ilgili ayarlamalar yapmanıza olanak tanır.
1. Ünite Stop modunda iken MENU tuşuna basın.
2. √/® tuğlarına basarak Audio Setup Page'ı seçin, ardından † tuşuna ya da ENTER düğmesine
basın.
3. π/† tuğlarına basarak istediğiniz maddeyi seçin, ardından ® tuşuna ya da ENTER düğmesine
basın.
Page 27

11
Not :
PCM Ağağı Örnekleme "Off" durumunda olsa bile
• Bazı diskler, dijital çıkığlardan yalnızca indirgenmiş ses çıkığı vereceklerdir.
• Ayar menüsünü ekrandan kaldırmak için, MENU tuşuna basın.
• DTS ses diski çaldığınızda analog ses çıkığı yoktur.
yöne-lik tedbir alınması önerilir; ebeveynler ve bakıcılar gen ç izleyicileri denetlemelidir.
Ø R (Sınırlı): 17 yaş altındaki izleyicilere bir yetişkinin eşlik etmesi gerekir.
∏ NC17 (NC-17) : NC17 (NC-17) : 17 yaş ve altı için uygun değildir..
” ADULT.
- Eğer parolanızı unutursanız, Arıza Giderme Kılavuzundaki “Parola Unutma” bölümüne bakınız.
Dolby Laboratuarları'ndan alınan lisans altında üretilmiğtir. "Dolby" ve çift D simgesi,
Dolby Laboratuarları'nın ticari markasıdır. "DTS" ve "DTS Digital Out" ise, Digital Theater
Systems'in ticari markasıdır.
Ekran Seçeneklerinin Ayarlanması
Ekran seçenekleri oynatıcınızın çeğitli video fonksiyonlarını ayarlamanıza olanak tanır.
1. Ünite Stop modunda iken MENU tuşuna basın.
2. √/® tuğlarına basarak Display Setup Page'ı seçin, ardından † tuşuna ya da tuşuna ya da
ENTER düğmesine basın.
3. π/† tuğlarına basarak istediğiniz maddeyi seçin, ardından ® tuşuna ya da ENTER düğmesine
basın.
• TV'nizin progresif taramayı destekleyip desteklemediğini örenmek için TV'nizin Kullanma
Kılavuzuna bakınız. Progresif tarama destekleniyorsa, TV'nizin menü sistemindeki progresif tarama ayarları kosununda, kılavuza göre hereket ediniz.
• Video çıkış yanlış ayarlanmışsa, ekranda görüntü olyamabilir.
• Oynatım sırasında çözünürlük değiştirilirse normal görüntünün ekrana gelmesi birkaç
saniye sürebilir.
Ebeveyn Kontrolünün Ayarlanması
Ebeveyn Kontrol fonksiyonu sınıflandırılmığ DVD'lerle bütünleğik bir çalığma yürütür. Bu sayede
ailenizin izleyebileceği DVD'leri kontrol edebilirsiniz. Bir diskte 8 sınıflandırma seviyesi vardır.
Sınıflandırma Seviyesinin Ayarlanması/ Parolayı Değiştirmek
1. Ünite Stop modunda iken MENU tuşuna basın.
2. √/® tuşuna basarak Parental Page''ı seçin, sonra † or tuşuna ya da ENTER düğmesine basın.
3. π/† tuğlarına basarak Parental/Password'ı seçin, sonra ® tuşuna ya da ENTER düğmesine
basın.
4. π/† tuğlarına basarak istediğiniz sınıflandırma seviyesi ni seçin ve ardından ® tuşuna ya da
ENTER düğmesine basın. örneğin) Kids Safe konumuna ayarlayın.
5. Parolanızı girin. İlk sefer yapıyorsanız 0000 rakamlarını girin. Ardından yeni bir şifre girin.
Ebeveyn kontrol fonksiyonunu etkinleştirmek üzere yeni şifre, 0000 rakamlarından farklı bir rakam
olmalıdır. Yeni parolanızı tekrar girin.
Not
ΠKID SAFE.
´ G (Genel İzleyiciler): Her Yaş İçin Uygundur.
ˇ PG (Ebeveyn rehberliği önerilir): Bazı materyaller çocuklar için uygun olmayabilir..
¨ PG 13 (Ebeveynler için ciddi uyarı): Bazı materyalle r 13 yaş altı çocuklar için uygunsuz
olabilir.
ˆ PGR (Ebeveyn Rehberliği Önerilir): Bunlar çocukl ar için uygunsuz olmayabilir ancak izleyiciye
DivX Özelliğinin Ayarlanması
1. Ünite Stop modunda iken MENU tuşuna basın.
2. √/® tuğlarına basarak DivX Page'ı seçin, ardından † tuşuna ya da tuşuna ya da ENTER
düğmesine basın.
3. π/† tuğlarına basarak istediğiniz maddeyi seçin, ardından ® tuşuna ya da ENTER düğmesine
basın.
Not :
• OK düğmesine bastığınızda ayar menüsü kaybolur.
• DivX sacede modu durdurmark erişilebilir.
Page 28

başvuru
Arıza Giderme
Servise başvurmadan önce lütfen ağağıdakileri kontrol ediniz.
Problem Yapılacak Iğlem
Ekran bloke
olmuş
Parola unutma
Teknik Özellikler
Genel
Video
Çıkığı
Ses Çıkığı
•
Ünitede disk yokken, 5 saniye boyunca ■ / tuşuna basınız. Tüm ayarlar, fabrika
çıkığ ayarlarına geri dönecektir.
•
Ünitede disk yokken, 5 saniye boyunca ■ / tuşuna basınız.
Parolayı da içeren tüm ayarlar fabrika çıkığ ayarlarına geri dönecektir. Son derece
gerekli olmadıkça bunu kullanmayın.
Güç Gereksinimleri AC 110-240 V ~ 50/60 Hz
Ağırlık
Güç Tüketimi
Ebat
Çalığma Sıcaklığı +5°C to +35°C
Çalığma Nem Oranı 10 % to 75 %
Scart Jak
Komponent Video
*Frekans Cevabı 20Hz ~ 20kHz
DVD-C350/C360 : 1.2 Kg
DVD-C450 : 1.5 Kg
6W
DVD-C350/C360 :
360mm (W) X 207mm(D) X 42mm (H)
DVD-C450 :
430mm (W) X 207mm(D) X 42mm (H)
R(kirmizi) : 0.7 Vp-p (75 Ω yük)
G(Yeşil) : 0.7 Vp-p (75 Ω yük)
B(Mavi) : 0.7 Vp-p (75 Ω yük)
Kompozit Video : 1.0 Vp-p (75 Ω yük)
Parlaklik sinyali : 1.0 Vp-p (75 Ω yük)
Renk sinyali : 0.3 Vp-p (75 Ω yük)
Y : 1.0 Vp-p (75 Ω yük
Pr : 0.70 Vp-p (75 Ω yük
Pb : 0.70 Vp-p (75 Ω yük
Memo
12
Page 29

Memo
Page 30

Memo
Page 31

Memo
Page 32
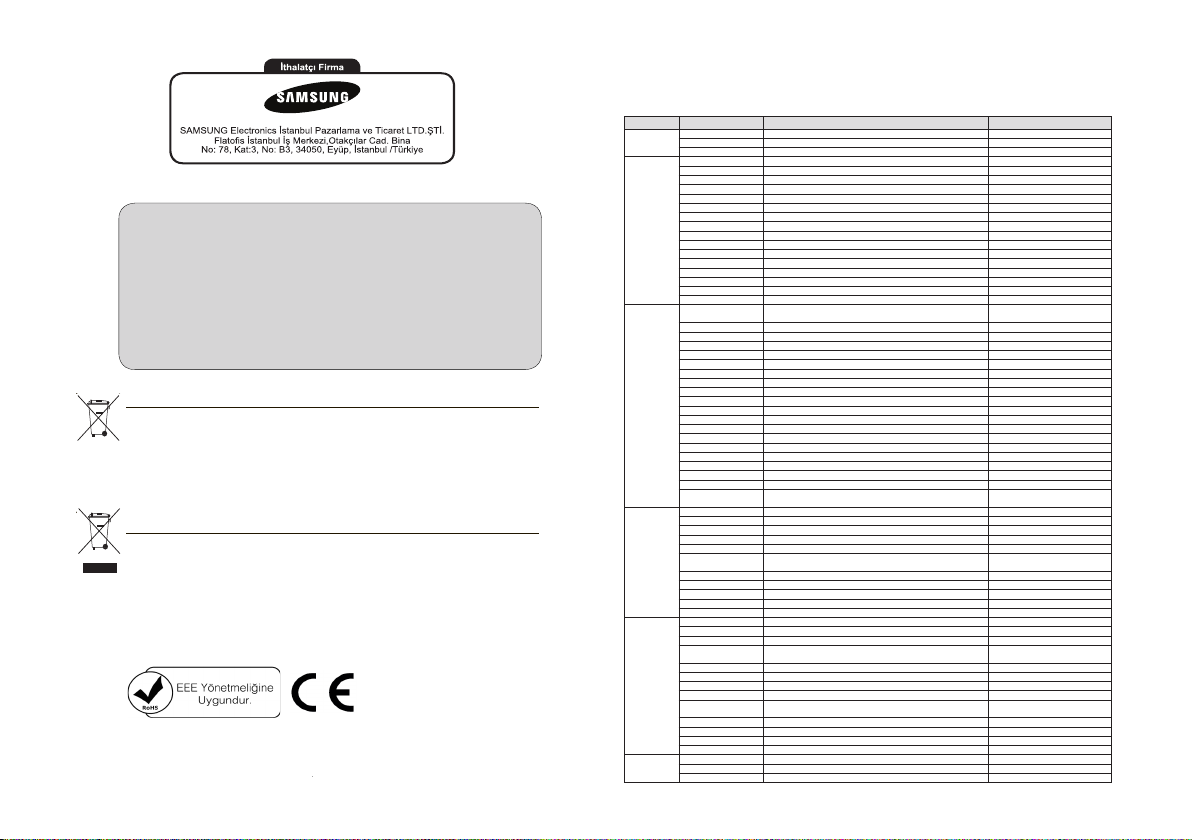
%Ã/:"/*/)&3:&3è/%&/4".46/(B6MBçO
4BNTVOHßSßOMFSJJMFJMHJMJPMBSBLIFSIBOHJCJSZPSVNZBEBTPSVOV[WBSTBMßUGFO4".46/(NßæUFSJIJ[NFUMFSJNFSLF[JJMFUFNBT
LVSVO
Region Area Contact Center
Web Site
North America
Canada 1-800-SAMSUNG (726-7864) www.samsung.com/ca
Mexico 01-800-SAMSUNG (726-7864) www.samsung.com/mx
U.S.A 1-800-SAMSUNG (726-7864) www.samsung.com/us
Latin America
Argentine 0800-333-3733 www.samsung.com/ar
Brazil 0800-124-421, 4004-0000 www.samsung.com/br
Chile 800-SAMSUNG (726-7864) www.samsung.com/cl
Nicaragua 00-1800-5077267 www.samsung.com/latin
Honduras 800-7919267 www.samsung.com/latin
Costa Rica 0-800-507-7267 www.samsung.com/latin
Ecuador 1-800-10-7267 www.samsung.com/latin
El Salvador 800-6225 www.samsung.com/latin
Guatemala 1-800-299-0013 www.samsung.com/latin
Jamaica 1-800-234-7267 www.samsung.com/latin
Panama 800-7267 www.samsung.com/latin
Puerto Rico 1-800-682-3180 www.samsung.com/latin
Rep. Dominica 1-800-751-2676 www.samsung.com/latin
Trinidad & Tobago 1-800-SAMSUNG (726-7864) www.samsung.com/latin
Venezuela 0-800-100-5303 www.samsung.com/latin
Colombia 01-8000112112 www.samsung.com.co
Europe
Belgium 02 201 2418
www.samsung.com/be (Dutch)
www.samsung.com/be_fr (French)
Czech Republic 800-SAMSUNG (800-726786) www.samsung.com/cz
Denmark 8-SAMSUNG (7267864) www.samsung.com/dk
Finland 30-6227 515 www.samsung.com/fi
France 01 4863 0000 www.samsung.com/fr
Germany 01805-SAMSUNG (726-7864 å 0,14/Min) www.samsung.de
Hungary 06-80-SAMSUNG (726-7864) www.samsung.com/hu
Italia 800-SAMSUNG (726-7864) www.samsung.com/it
Luxemburg 02 261 03 710 www.samsung.com/lu
Netherlands 0900-SAMSUNG (0900-7267864) (å 0,10/Min) www.samsung.com/nl
Norway 3-SAMSUNG (7267864) www.samsung.com/no
Poland 0 801 1SAMSUNG (172678), 022-607-93-33 www.samsung.com/pl
Portugal 80820-SAMSUNG (726-7864) www.samsung.com/pt
Slovakia 0800-SAMSUNG (726-7864) www.samsung.com/sk
Spain 902-1-SAMSUNG (902 172 678) www.samsung.com/es
Sweden 0771 726 7864 (SAMSUNG) www.samsung.com/se
U.K 0845 SAMSUNG (7267864) www.samsung.com/uk
Eire 0818 717 100 www.samsung.com/ie
Austria 0810-SAMSUNG (7267864, å 0.07/min) www.samsung.com/at
Switzerland 0848-SAMSUNG (7267864, CHF 0.08/min)
www.samsung.com/ch
www.samsung.com/ch_fr/ (French)
CIS
Russia 8-800-555-55-55 www.samsung.ru
Kazakhstan 8-10-800-500-55-500 www.samsung.com/kz_ru
Uzbekistan 8-10-800-500-55-500 www.samsung.com/kz_ru
Kyrgyzstan 00-800-500-55-500
Tadjikistan 8-10-800-500-55-500
Ukraine 8-800-502-0000
www.samsung.ua
www.samsung.com/ua_ru
Belarus 810-800-500-55-500
Moldova 00-800-500-55-500
Lithuania 8-800-77777 www.samsung.com/lt
Latvia 8000-7267 www.samsung.com/lv
Estonia 800-7267 www.samsung.com/ee
Asia Pacific
Australia 1300 362 603 www.samsung.com/au
New Zealand 0800 SAMSUNG (0800 726 786) www.samsung.com/nz
China 400-810-5858, 010-6475 1880 www.samsung.com/cn
Hong Kong 3698-4698
www.samsung.com/hk
www.samsung.com/hk_en/
India 3030 8282, 1800 110011, 1800 3000 8282 www.samsung.com/in
Indonesia 0800-112-8888 www.samsung.com/id
Japan 0120-327-527 www.samsung.com/jp
Malaysia 1800-88-9999 www.samsung.com/my
Philippines
1-800-10-SAMSUNG (726-7864), 1-800-3-SAMSUNG (726-7864),
1-800-8-SAMSUNG (726-7864), 02-5805777
www.samsung.com/ph
Singapore 1800-SAMSUNG (726-7864) www.samsung.com/sg
Thailand 1800-29-3232, 02-689-3232 www.samsung.com/th
Taiwan 0800-329-999 www.samsung.com/tw
Vietnam 1 800 588 889 www.samsung.com/vn
Middle East &
Africa
Turkey 444 77 11 www.samsung.com/tr
South Africa 0860-SAMSUNG (726-7864 ) www.samsung.com/za
U.A.E 800-SAMSUNG (726-7864), 8000-4726 www.samsung.com/ae
TUR
Bu üründe bulunan pillerin doğru şekilde atılması
Bu Ьrьnьn Uygun Şekilde Atılması
(Atık Elektrikli ve Elektronik Ekipman)
(Avrupa Birliği’nde ve ayrı pil dönüşüm sistemlerine sahip diğer Avrupa ülkelerinde geçerlidir.)
Pil, kullanma kılavuzu veya ambalajın üzerinde yer alan bu işaret, bu üründe bulunan pillerin çalışma
ömürlerini doldurduklarında diğer evsel atıklarla birlikte atılmaması gerektiğini belirtmektedir. İşaretlenmiş
olduklarında, Hg, Cd veya Pb kimyasal sembolleri pilin 2006/66 EC Direktifinde belirtilen referans
seviyelerinin üzerinde cıva, kadmiyum veya kurşun içerdiğini belirtir. Pillerin uygun şekilde atılmaması
halinde, bu maddeler insan sağlığına veya çevreye zarar verebilir.
Doğal kaynakları korumak ve malzemelerin yeniden kullanılmasını desteklemek için, lütfen pilleri diğer atık
türlerinden ayırın ve yerel, ücretsiz pil dönüşüm sisteminiz aracılığıyla geri dönüştürün.
(Ayrı toplama sistemlerine sahip Avrupa Birliği ьlkeleri ve diğer Avrupa ьlkelerinde geзerlidir)
Ьrьn, aksesuarlar veya literatьrde yer alan bu işaret, ьrьnьn ve elektronik aksesuarlarının (цrn. şarj cihazı,
kulaklık, USB kablosu), kullanım цmьrlerinin sonunda diğer ev atıklarıyla birlikte atılması gerektiğini belirtir.
Kontrolsьz atık atılması nedeniyle зevrenin veya insan sağlığının zarar gцrmesini цnlemek iзin lьtfen bu ц
ğeleri diğer atık tьrlerinden ayırın ve malzeme kaynaklarının sьrdьrьlebilir bir şekilde yeniden kullanılmasını
sağlamak iзin uygun bir şekilde geri dцnьşьmьnь sağlayın.
Ev kullanıcıları, зevreye zarar vermeden bu цğelerin nasıl ve nerede geri dцnьşьmьnь sağlayabileceklerini
цğrenmek iзin ьrьnь aldıkları perakendecilere veya yerel devlet dairesine başvurmalıdır.
Ticari kullanıcılar tedarikзileriyle temas kurup satın alma sцzleşmesinin koşullarını ve şartlarını kontrol
etmelidir. Bu ьrьn ve elektronik aksesuarları atma işlemi iзin diğer ticari atıklarla karıştırılmamalıdır.
AK68-0000A
Bu ürünün ortalama yaşam süresi 10 yıldır
İmalatçı : SAMSUNG ELECTRONICS CO., LTD.
416 Maetan-3 Dong, Yeongtong-Gu,Suwon City Gyeonggi-Do,
Korea, 442-742
Tel: +82 2 2255 0114 / Fax: +82 2 2255 0117
LVD:SEC EMC Laboratory
416 Maetan 3-Dong,Yeongtong-Gu, Suwon-Si, Gyeonggi-Do,
443-742 Korea
Tel: +82 31 277 7752 / Fax: +82 31 277 7753
EMC:Korea Testing Laboratory
222-13 Guro3-dong,Guro-gu Seoul, Korea 152-718
Tel: +82 2 860 1309 / Fax: +82 2 838 2675
AK68-01928A
 Loading...