

Page 1
4. Disassembly and Reassembly
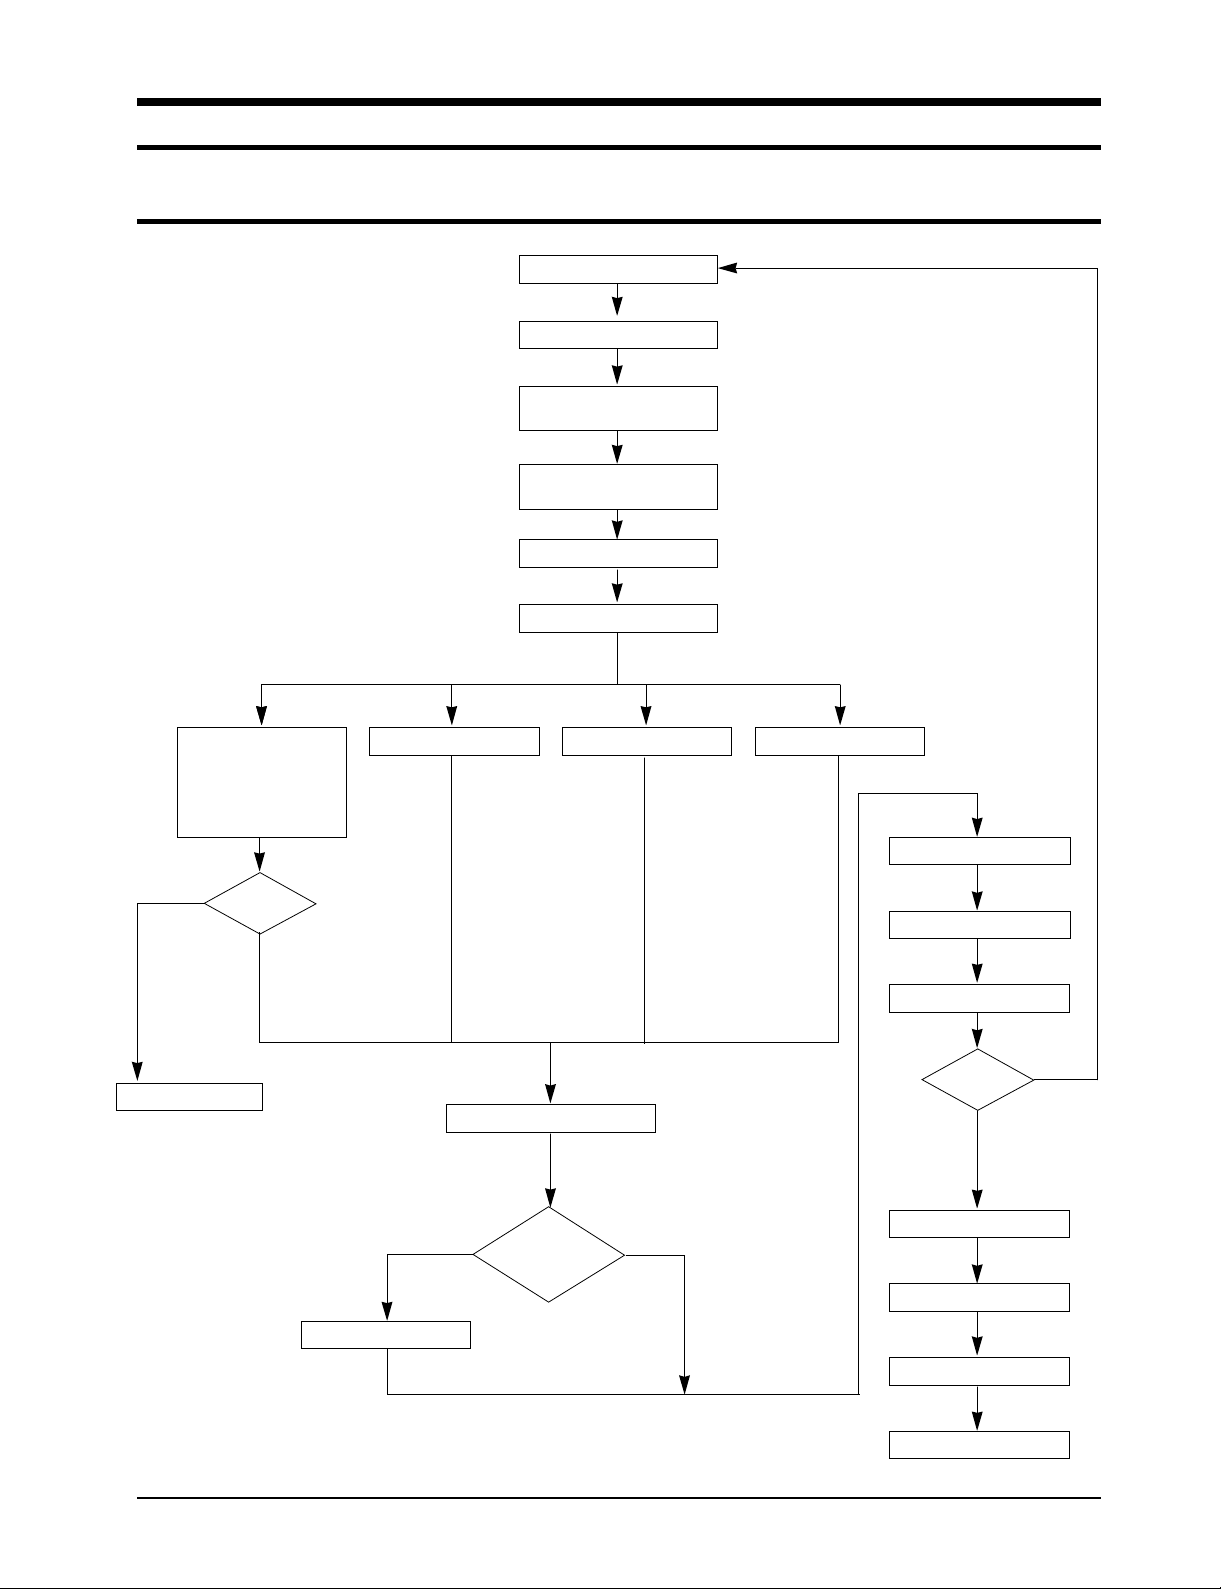
4-1 Compressor Replacement Flow Chart
Locate cause of defect
Release refrigerant
Disconnect electrical wiring
from compressor
Cut refrigerant lines
from compressor
Plug disconnected lines
Replace compressor
Inspect electrical
wiring for defects,
and terminals for
correct and secure
connections
Problem?
Y N
Corrective action
Solder discharge line
Check refrigerant oil level
Low oil level?
Solder suction line Use nitrogen gas
NY
Perform soldering function
Fill system with nitrogen gas
Check for leakage
Y
Leakage?
N
Release nitrogen gas?
Evacuate system
Add oil as necessary
Recharge system
Pinch and braze filling tube
Samsung Electronics 4-1
Page 2
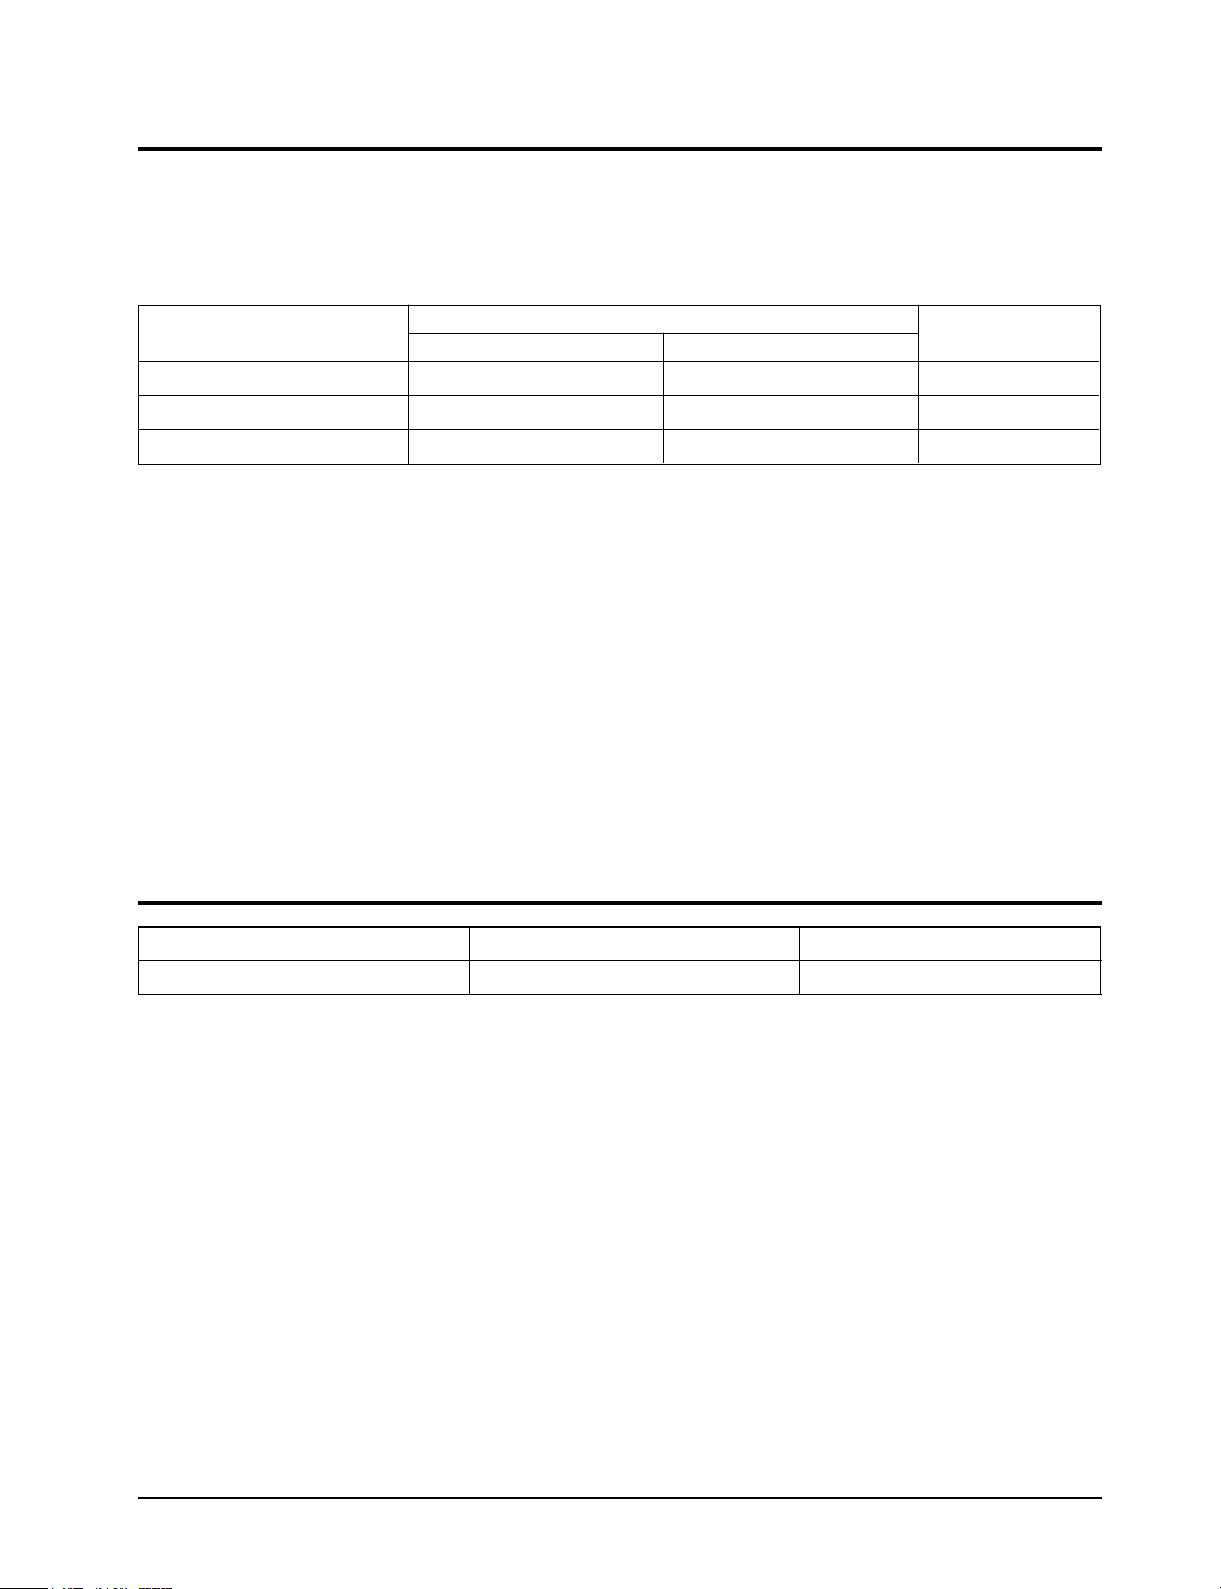
4-2 Checking the Oil
Put approximately 10cc oil into a transparent container and test it.
4-2-1 Oil quality
Condition of
Refrigerant Cycle
Normal
Overheat
Motor Damage
Color
Light Yellow
Brown Color
Dark Brown
Condition of Oil
4-2-2 Changing and adding refrigerant oil
1. Change the compressor - DO NOT recharge the oil as the compressor itself is
already charged.
2. Change the condenser .... add 50cc
3. Change the evaporator .... add 50cc
4. When the refrigerant is replaced .... add 30cc oil.
5. After vacuum is completed, the oil is filled through the high pressure side.
6. In the event of a refrigerant leak, generally it is not necessary to add oil
(unless the oil has leaked significantly).
4-3 Refrigerant Oil Specifications
Odor
No Odor
-
Pungent Oil
Remarks
Return with the system
Oil Change
Oil Change
Model Oil Specification Oil Change
AW05B0LA(AW0519) SONTEX 200LT 280CC
4-2 Samsung Electronics
Page 3

4-4 Disassembly and Reassembly Procedure
Stop operating of the air conditioner and remove the power cord before repairing the unit.
No. Part name Procedures Remarks
Ass'y - Grille 1. Remove the knobs and the grille screw
①
located behind the knob on right.
2. Remove the grille from the cabinet by pushing
in on the grille tabs on both cabinet sides, and
then lift the grille off the top latches.
Ass'y - Frame 1. Remove the 8 screws on each of the cabinet
➁
Ass'y - Evaporator 1. Remove foam-seal on the top of the unit.
➂
Ass'y - Blower 1. Loose the bolt to disassemble the blower.
➃
and lift the cabinet upward.
2. After unfolding evaporator cover upwardly,
remove screw on top of right side.
3. Separate the evaporator from the unit.
Samsung Electronics 4-3
Page 4

Disassembly and Reassembly
No. Part name Procedures Remarks
Ass'y - Control 1. Remove the 2 screws at the bottom of
➄
Ass'y - Condenser 1. Remove the 6 screws on the condenser.
➅
between the base-pan and the control-box.
2. Separate the power cord from the base pan.
2. Separate the cond-casing from the base-pan.
Ass'y - Fan Propeller 1. Loose the bolt to disassemble the fan-propeller.
➆
2. Separate the fan-propeller from the motor and
the cond-casing.
Ass'y - Motor 1. Separate the motor and the bulk-head from the
⑧
base pan.
2. Loose the 4 nuts on the bulk-head.
4-4 Samsung Electronics
 Loading...