

Samsung a300h Disassembly & Reassembly
Level
7.
Disassembly
7-1.
Repair
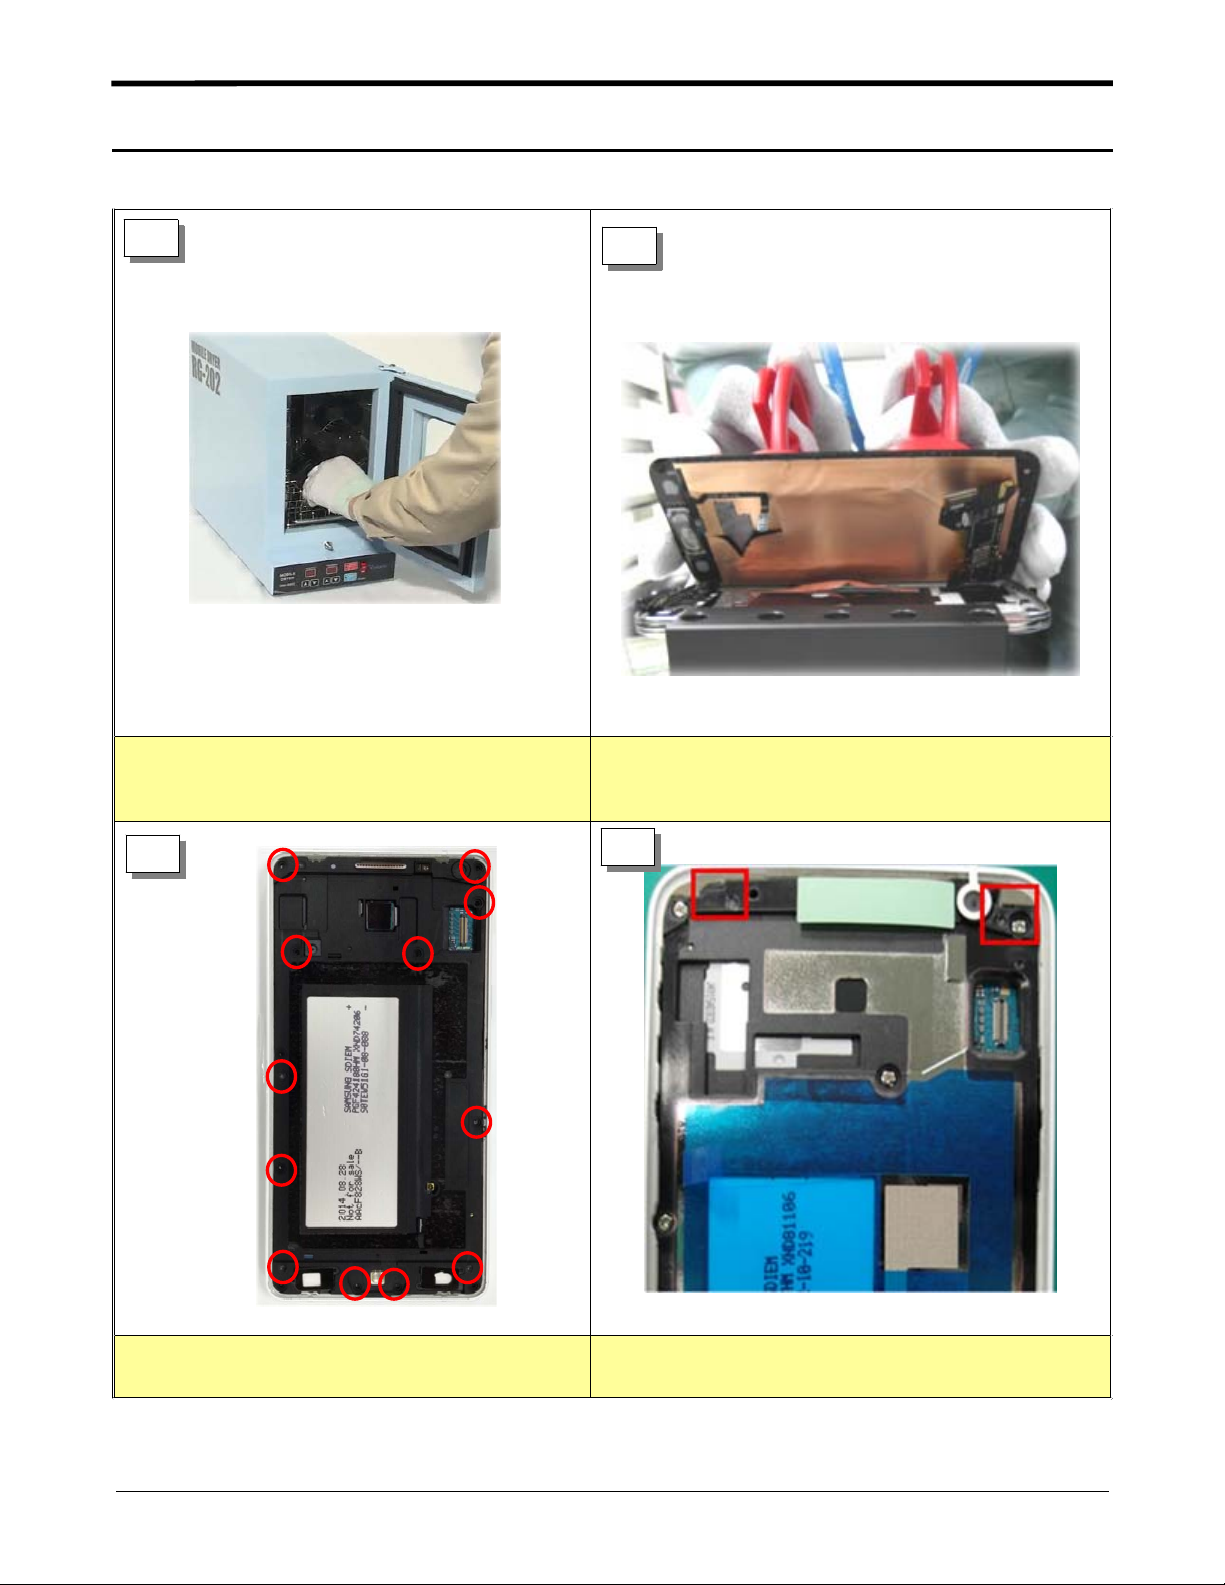
2
1
1) Put the device in the chamber for
5~10 minutes under 70~80℃.
2
1) Detach the Bracket Cu tape carefully from the OCTA
Cu sheet using Glass absorber and holder.
2) Be careful not to separate LCD from TSP.
3
1) Disassemble loosen 12 Point of Bracket 1) Disassemble Bracket and REAR
4
7-1
Confidential and proprietary-the contents in this service guide subject to change without prior notice.
Distribution, transmission, or infringement of any content or data from this document without Samsung’swritten authorization is strictly prohibited.
Level2Repair
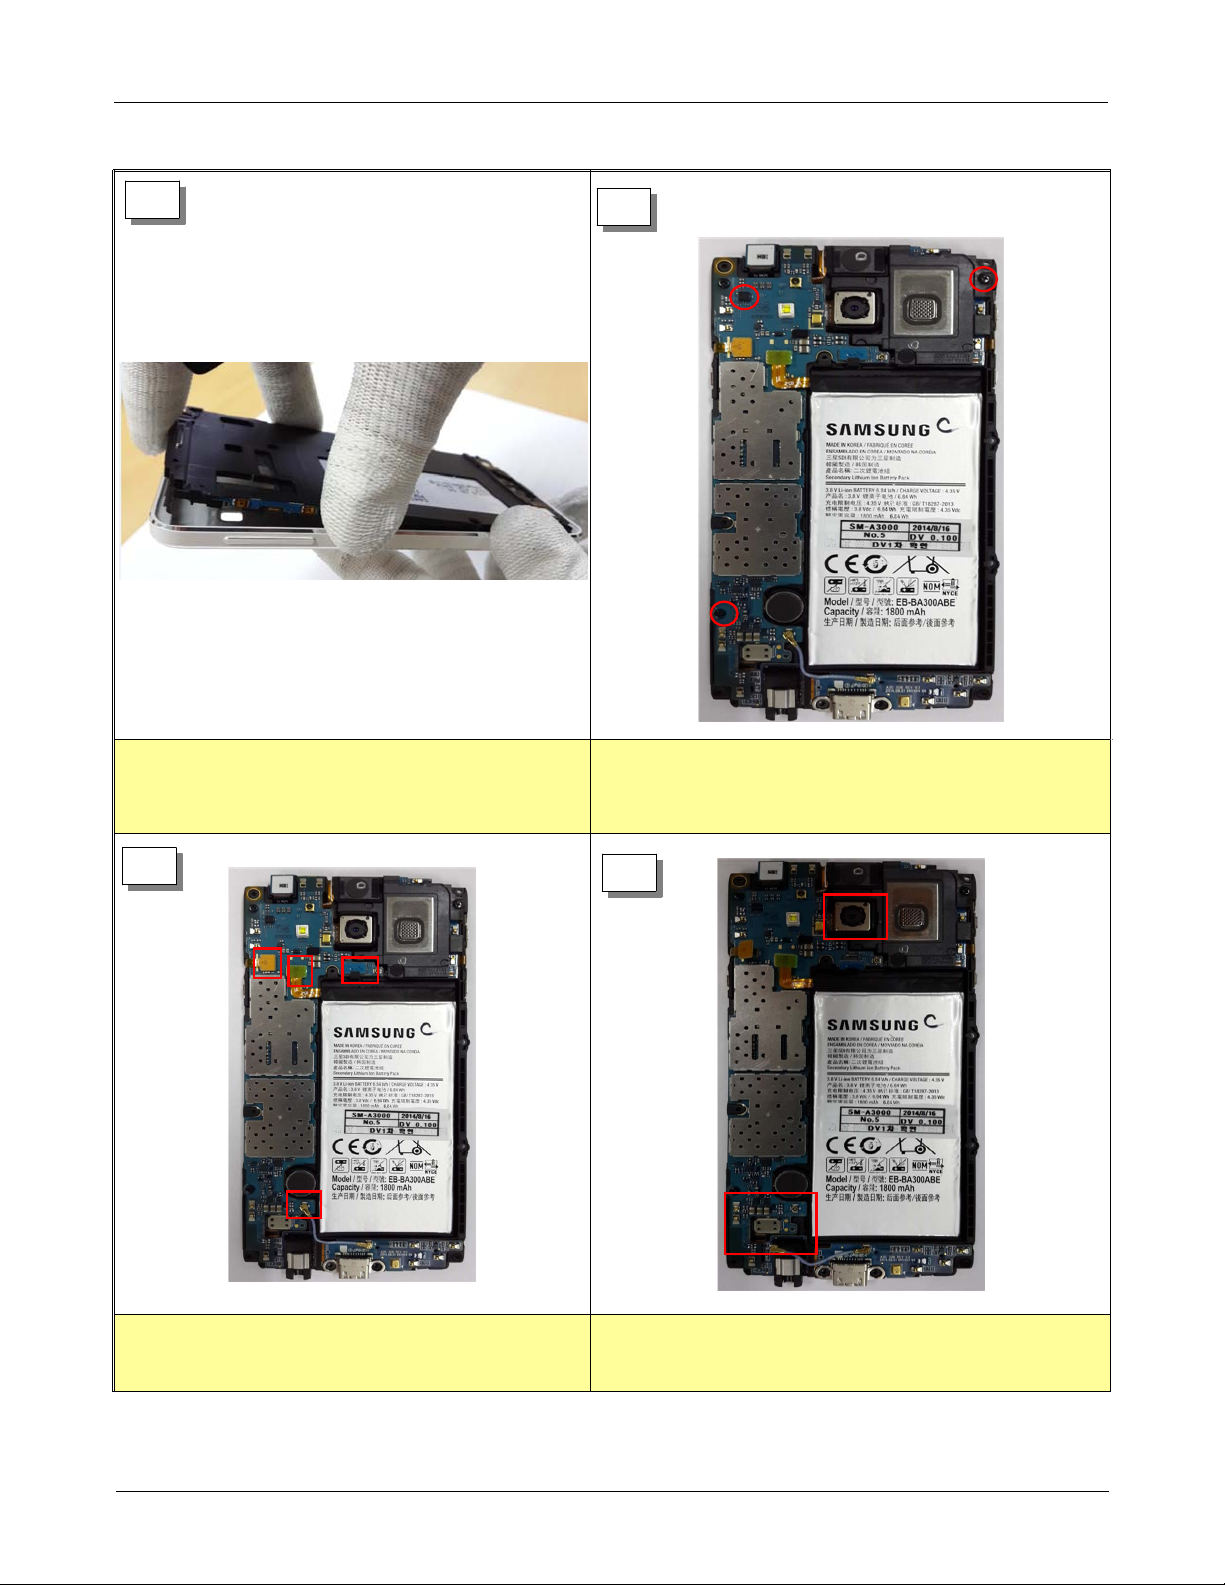
5
6
1) Detach the Bracket and REAR 1) Loosen a Screw in PBA Ass'y
7
1) Detach Connector by PBA Ass'y
8
1) Detach the PBA from bottom REAR.
2) Be careful not to Damage.
7-2
Confidential and proprietary-the contents in this service guide subject to change without prior notice.
Distribution, transmission, or infringement of any content or data from this document without Samsung’swritten authorization is strictly prohibited.
 Loading...