

Page 1
SAMSON SPLICING INSTRUCTIONS
Round Plait Class I Eye Splice
Class I round plait ropes are made from any or all of the following bers: olen, polyester, or nylon.
The round plait construction requires a splicing technique different from other 12-strand braided ropes.
The “tuck” procedure may be performed in the eld on both new and used rope with a minimum of tools.
The eye splice is used to place a permanent loop in the end of a rope, generally for attachment purposes to a xed point. An eye is also used
to form the rope around a thimble, which is used to protect the rope, especially when it is to be attached to a shackle, chain, or wire rope.
step
1
step
2
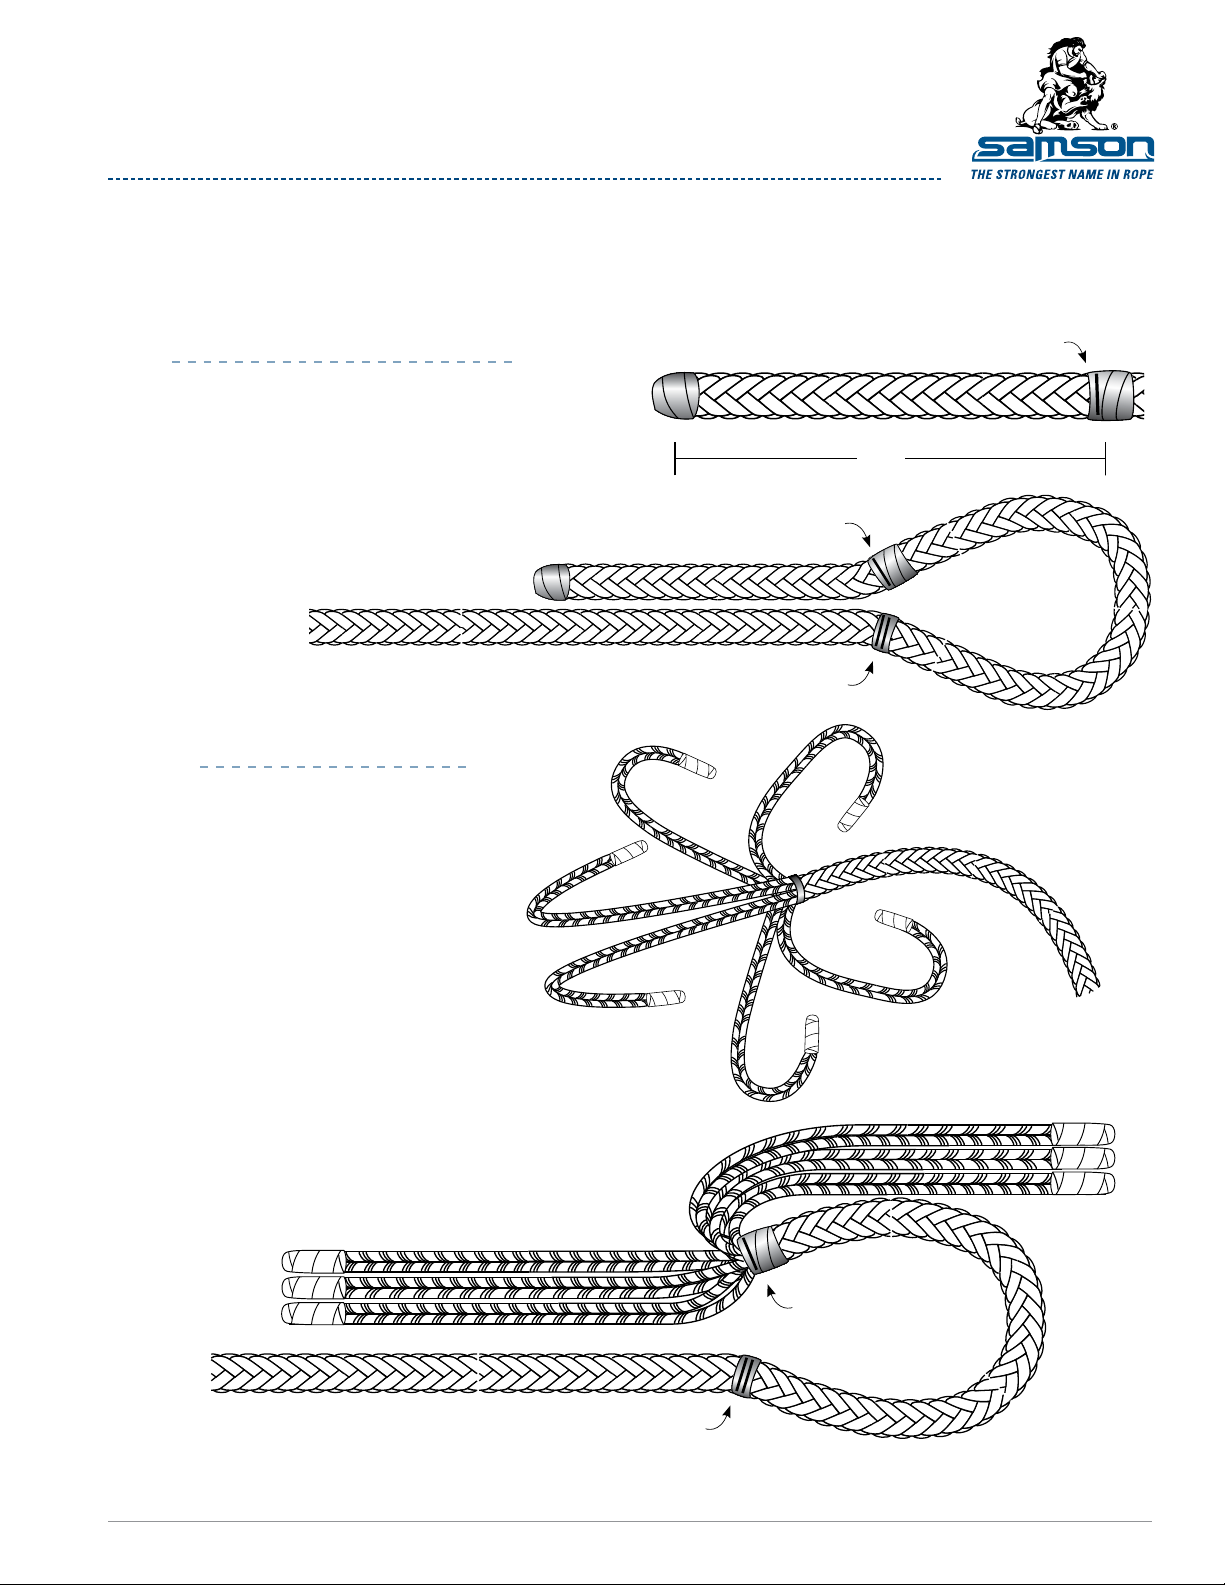
MEASURING AND MARKING
From the end of the rope, measure 1 d length. At this point
put 1 loose wrap of tape around the rope. This is Mark 1.
Form the desired eye size using the tape wrapped
1A
around the rope as a reference mark. Mark
the body of the rope at the point where it
matches up with Mark 1. This is Mark 2.
PAIRING THE STRANDS
Divide the 12 individual strands
into 6 pairs of 2 strands each. The
strands that are paired together
should be adjacent to each other at
the point where the unbraided rope
meets the tape wrapped around the
rope. There should be 1 "S" strand
(strand with clockwise twist) and
1 "Z" strand (strand with counterclockwise twist) in each pair. Before
taping each set of strands together,
twist each strand separately to
maintain the twist of the ber.
Mark 1
1 fid
length
Mark 1
Mark 2
Note: Each taped pair
of strands has 1 Z
strand and 1 S strand.
Mark 2
SamsonRope.com | Email CustServ@SamsonRope.com | Tel +1.360.384.4669
Mark 1
PAGE 1 OF 3
Page 2
SAMSON SPLICING INSTRUCTIONS
Round Plait Class I Eye Splice
step
3
step
4
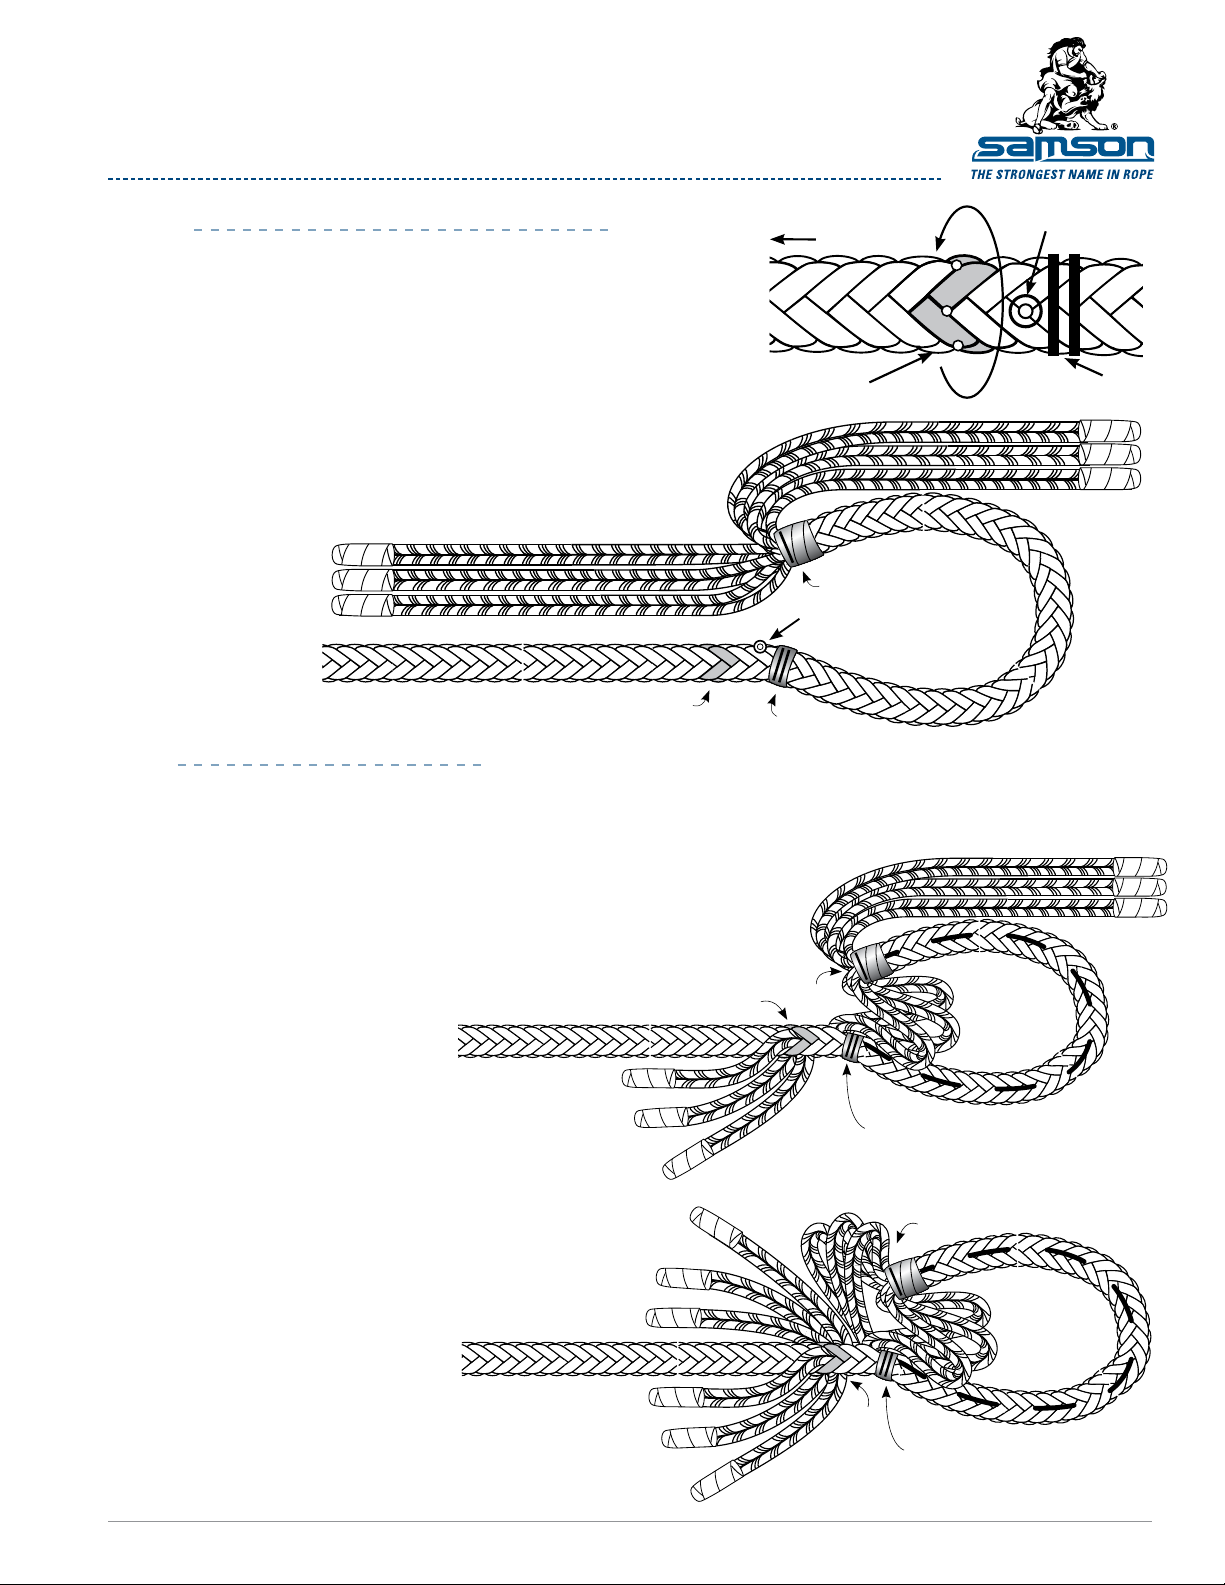
MARKING ENTRY AND EXIT POINTS
At Mark 2, make a mark at the intersection of an S and a
Z strand. This will be the entry point for all 6 strands and
the tail when it is buried. The entry point should be on the
side of the rope facing the opposite leg of the eye.
From the entry point, count 2 picks down the rope and
mark 6 strands around the circumference of the rope.
There will be 3 S strands and 3 Z strands marked. At
each intersection of an S and a Z strand, mark an exit
point. There will be 6 exit points marked.
Marked
strands
Standing rope
Exit points
Mark 1
Entry Point
Mark 2
ROUTING THE STRANDS
The rst 3 strands closest to the inside of the eye are now routed from the entry point at Mark 2 to the
exit points on the opposite side of the rope. Each strand is routed separately, entering at the entry point
and exiting at its own exit point. Do not pull the strands up tight yet. Leave slack at the entry point.
Entry point
Mark 2
4A
4B
The 3 remaining strands are now routed from the entry point
at Mark 2 to the exit point. Each strand is routed separately,
entering at the entry point and exiting at its own exit point. Do
not pull the strands up tight yet. Leave slack at the entry point.
With all 6 strands routed, pull each
of the 6 routed strands to remove
any slack, and make sure the rope
is smooth and tight at the entry point.
Marked
strands
Mark 1
Mark 2
Marked
strands
Mark 1
Mark 2
SamsonRope.com | Email CustServ@SamsonRope.com | Tel +1.360.384.4669
PAGE 2 OF 3
Page 3

SAMSON SPLICING INSTRUCTIONS
Round Plait Class I Eye Splice
step
5
4C
When all strand pairs are routed, snug
the strands and remove the tape at the
base of the tail. Once routed, the strand
pairs should have an “X” (overlapping
right and left strands)between them or
they will touch.
BEGIN TUCKING THE STRAND PAIRS
Begin tucking the strand pairs over 1 and
under 2 for 3 tucks. Each strand is tucked
down the same row of picks in the braid,
over 1 strand and under 2 strands.
3 tucks
6
step
TAPERING THE SPLICE
When all 6 strand pairs have been tucked
for 3 tucks, drop every other strand pair.
Use the remaining 3 strands to continue
down the rope for 3 more tucks.
6A
6B
Finally, once 3 of the
strand pairs have 6
full tucks, separate
the strand pairs into
individual strands
and drop 1 strand in
each pair, continuing
down 2 more tucks.
Cut the excess
tails to complete the
splice. Leave enough
of an end protruding
so that the end does
not slip back into
the rope when
over-loaded.
Dropped
strand pairs
DOCUMENT Round_Plait_C1_Eye_Splice.pdf
SamsonRope.com | Email CustServ@SamsonRope.com | Tel +1.360.384.4669
© 2012 Samson Rope Technologies, Inc. All rights reserved. S/WD #108294 7/2012
PAGE 3 OF 3
 Loading...