

Page 1
INSTRUCCIONES - USERS MANUAL - GEBRAUCHSANWEISUNG MODE D’EMPLOI - INSTRUZIONI PER L’USO - MANUAL DE INSTRUÇÕES
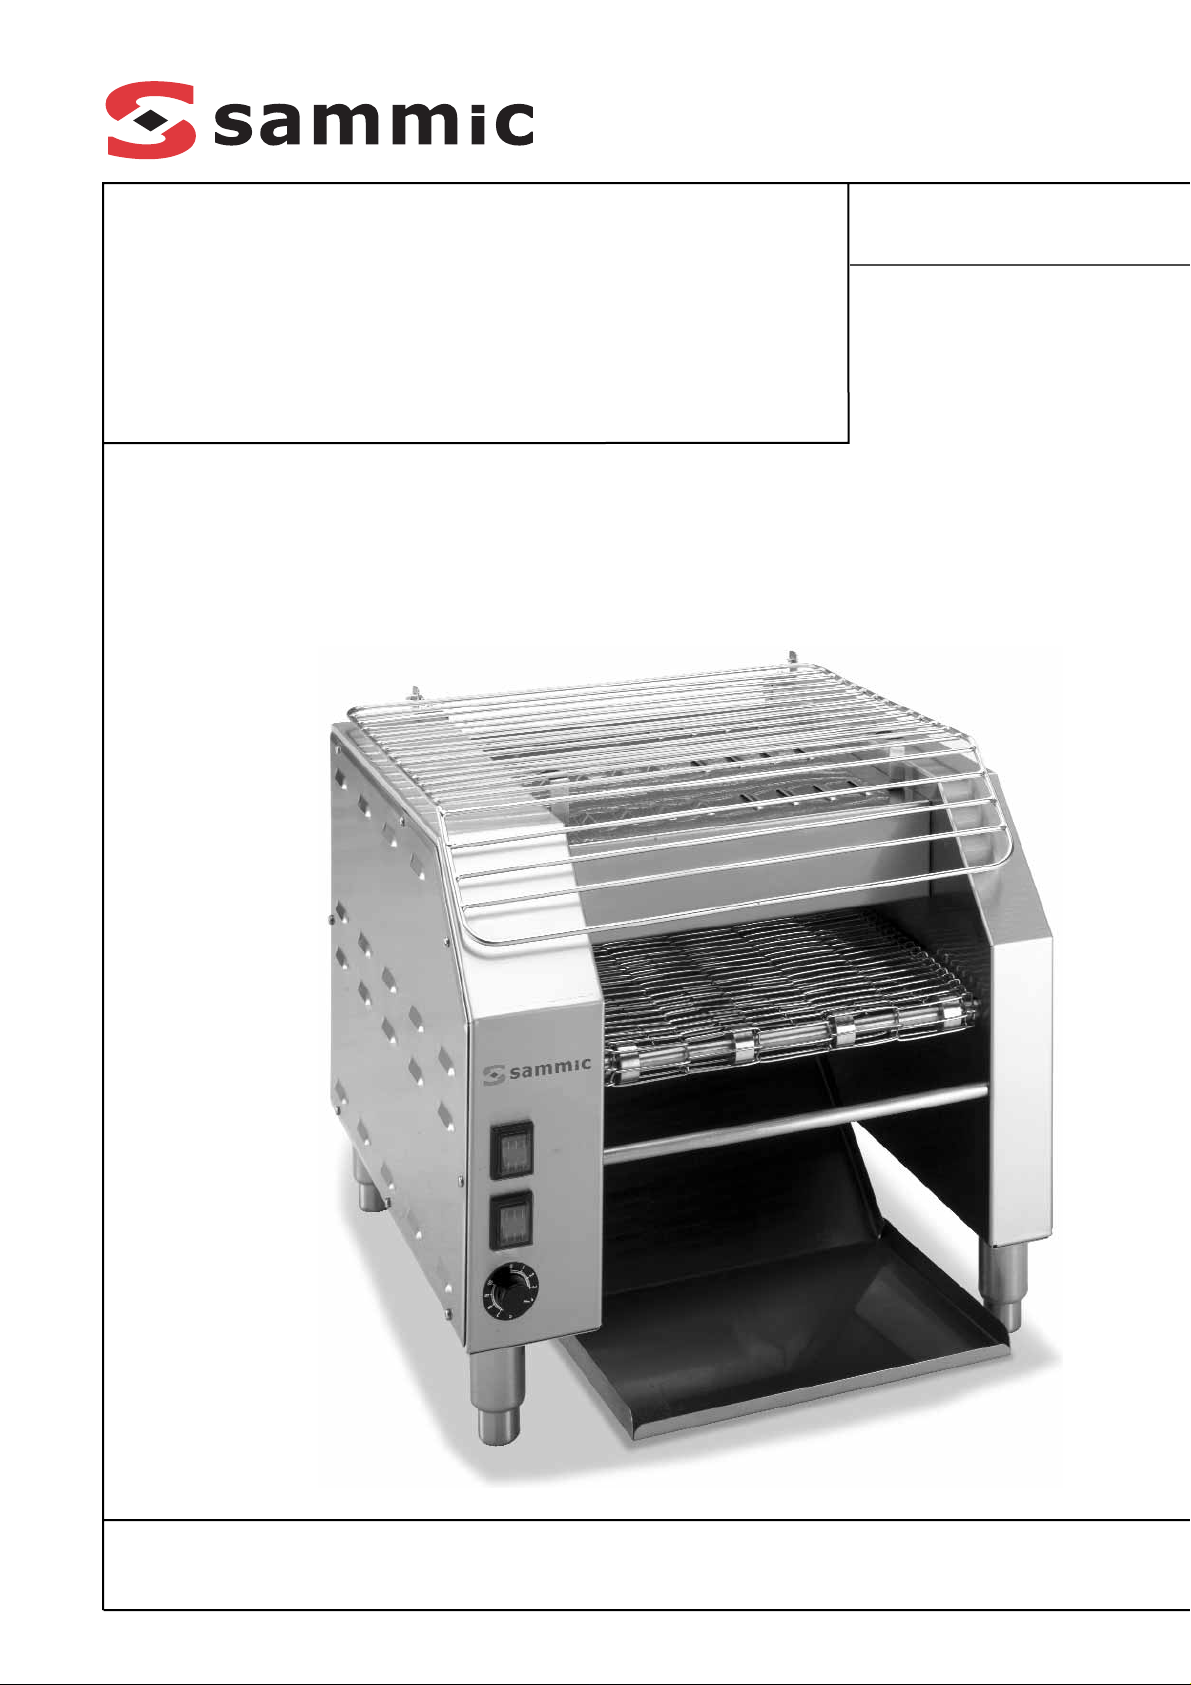
ST-2
Tostadora
Conveyor toaster
Toaster
Grille-pain
Tostiere
Torradeira de p
ã
o
Page 2

DESCRIPCION DEL PRODUCTO
El tostador ST-2 puede tostar por una
o por las dos caras una gran variedad
de panes, como por ejemplo: panes,
bollos, pan con pasas, pan dulce etc.
El modelo ST-2 cuenta con una cinta
transportadora horizontal que ofrece
múltiples posibilidades, aunque de
tamaño muy reducido con el fin de
ocupar el menor espacio posible en la
encimera.
El aparato se suministra preparado
para conectar a 230V 50/60 Hz.
Provista de 2 interruptores para la
puesta en marcha/parada, (calentamiento superior / inferior) y mando
variador de velocidad de cinta
Atención: Este manual contiene instrucciones muy importantes para la
instalación, funcionamiento y seguridad del equipo. Los usuarios deben
leer estas instrucciones antes de utilizar el tostador. El incumplimiento de
las mismas puede provocar daños personales y serias averías. En tal caso, la
garantía no tendrá validez.
A
NTES DE LA INSTALACIÓN
Nada más recibir el aparato, proceda a
desembalarlo e inspeccionarlo para
ver si presenta algún desperfecto oculto. Si los hubiera, guarde todo el material de embalaje y póngase en contacto con el transportista en el plazo de
24 horas. El incumplimiento de las instrucciones especificadas en este
manual anula el derecho a presentar
reclamaciones a SAMMIC y a recibir
compensaciones por los desperfectos
causados.
I
NSTALACIÓN
Instale el tostador ST-2 en el lugar que
considere más apropiado para su limpieza, mantenimiento, y funcionamiento general. Evite lugares sometidos a corrientes o próximos a electrodomésticos que puedan desprender
vapor o grasa; evite también las fuentes de calor. Deje una holgura de aproximadamente 30 mm a ambos lados y
en la parte posterior del aparato para
permitir una ventilación adecuada. El
tostador tiene que estar bien nivelado
para funcionar debidamente, y por
ello dispone de 4 patas ajustables
Antes de poner en marcha el aparato
debe asegurarse de la perfecta instalación:
La bandeja de recogida de las tostadas
viene embalada por separado y debe
instalarse antes de poner en marcha el
aparato. Deslice la bandeja de recogida por la cavidad que queda debajo de
la cinta transportadora, asegurándose
de introducir primero el extremo curvado. Coloque dicho extremo curvado
sobre los dos salientes situados en la
parte trasera del tostador.
ATENCIÓN
Es muy importante conectar el tostador al voltaje que se especifique en la
placa de características. La utilización
de otro voltaje o la confusión de los
enchufes estropearía el aparato, anularía la garantía y podría provocar
daños personales.
E
SPECIFICACIONES ELECTRICAS
El circuito al que se conecte el aparato
debe tener un tamaño de instalación
adecuado y una capacidad suficiente
como para ajustarse a los requisitos
indicados en la placa de características
del aparato de acuerdo con las
Normas Eléctricas Nacionales y con las
normativas locales.
C
ARACTERÍSTICAS DEL PANEL DE MANDO
Interruptor puesta en marcha superior, al conectarlo se pone en marcha
el aparato y comienzan a calentar las
resistencias superiores.
Interruptor puesta en marcha inferior,
al conectarlo pone en marcha el aparato y comienzan a calentar los resistencias inferiores.
Cuando queremos que la maquina
funcione a toda potencia de calentamiento (resistencias superiores e inferiores) los dos interruptores deben
estar conectadas.
Conectar el aparato 10 minutos antes
de iniciar el trabajo, para que la misma
tenga la temperatura adecuada para el
trabajo a realizar.
Variador de velocidad de la cinta, elija
la velocidad de la cinta según tipo de
pan y humedad de la misma.
T
OSTADO DE LOS PANES
A primera vista puede parecer que el
tostar panes es un proceso muy simple, pero hay una serie de factores que
influyen significativamente en el resultado. Lo primero que hay que tener en
cuenta es el tipo de producto que va a
tostarse. Las distintas variedades de
pan, tales como el pan integral, el pan
de centeno, el pan blanco, el pan
dulce, los bollos, etc precisan requisitos específicos para que queden bien
tostados. La sequedad o el grado de
humedad del pan (la frescura del pan,
cuanto mayor humedad mayor la frescura) y el contenido de azúcar y el
espesor de la rebanada o del bollo juegan un papel fundamental en el proceso de tostado. Su tostador ST-2 ha
sido diseñado para funcionar con
todas estas variedades de panes; ajustando la velocidad de la cinta es posible aumentar o disminuir el grado de
tostado de manera que puedan tostarse más los productos que contienen
mayor humedad, como por ejemplo el
pan dulce o cierto tipo de bollos.
Un apartado distinto lo constituyen
ciertos panes que contienen frutas y
nueces. Puede suceder que al calentarse se desprendan algunos trocitos y
se introduzcan por el mecanismo de la
banda provocando el desgaste prematuro del aparato. Se recomienda retirar
los trocitos sueltos antes de poner el
pan en la cinta. Como es imposible
determinar previamente con qué velocidad de banda van a conseguirse los
mejores resultados, recomendamos
experimentar previamente con todos
los tipos de panes que vayan a tostarse. Una vez que haya probado con
todas las variedades de producto y
que haya encontrado los ajustes adecuados, deberá anotarlos y recurrir a
ellos cuando vaya a tostar un determinado tipo de pan. No olvide que la
frescura del pan obliga a efectuar un
ajuste especial.
Cuando desee tostar grandes cantidades de productos, como en las horas
puntas, por ejemplo, tendrá que ajustar el aparato, y también cuando la
demanda se limite a una sola tostada.
Cuando el tostador está encendido sin
que pase ninguna tostada por la cinta
se calienta mucho. Y si en dicho
momento en que el tostador está vacío
tiene que calentar una sola tostada
ésta se tostará con mayor rapidez por
lo que posiblemente tendrá que cambiar la velocidad de la cinta a un
número mayor para compensar. Y al
contrario, cuando se están sirviendo
2
ESPAÑOL
Page 3

pocas tostadas y comienza una gran
demanda tendrá que reducir la velocidad de la cinta porque el mayor volumen de pan enfría al tostador.
Cuando se encuentre en estos períodos de transición, ajuste la velocidad
de la cinta a mayor o menor velocidad
según corresponda. Le recomendamos
poner una velocidad baja para productos gruesos o cuando el tostador está
fría y una velocidad alta para productos finos o cuando el tostador está
encendida pero lleva un rato sin usarse.
I
NSTRUCCIONES DEL FUNCIONAMIENTO
Compruebe que el tostador está adecuadamente nivelado, que la bandeja
de recogida están perfectamente instaladas y que el aparato está conectado a la red con el voltaje adecuado.
Seguidamente proceda del siguiente
modo:
1.Ajustar inicialmente en la posición
5. Si precisa un tostado más oscuro,
seleccione un número menor. Para
obtener los resultados deseados
suele ser aconsejable realizar algunas pruebas con el producto concreto que va a utilizar. La sequedad de
pan, las diferencias de voltaje y el
contenido de azúcar del pan afectan
al tono de tostado conseguido. De
hecho, los panes integrales, el pan
de centeno y otros panes con bajo
contenido de azúcar requieren una
velocidad baja para conseguir un
tostado medio.
2.Deje trascurrir un período de calentamiento de unos 10 minutos.
3.Coloque el pan en la cinta. Siempre
que sea posible coloque los productos uno junto al otro para conseguir
el máximo rendimiento del aparato.
IMPORTANTE: si va a tostar productos por una sola cara, colóquelos en
la cinta con la parte cortada hacia
arriba.
4.Al terminar el proceso los productos
salen automáticamente y se colocan
en la bandeja de recogida. Si deja la
tostada en esta bandeja de recogida
se mantiene caliente hasta que haga
uso de ella.
5.Si el producto final está demasiado
claro o está demasiado oscuro,
seleccione un número mayor o
menor del mando que controla la
velocidad de la cinta aumentará o
disminuirá dicha velocidad. IMPORTANTE: deje trascurrir un período de
5 minutos de calentamiento o
enfriamiento cuando ajuste los reguladores.
6.Cuando no este usando de forma
continuada el tostador, desconecte
el interruptor inferior, con las resistencias superiores mantenemos en
caliente el aparato. Cuando volvemos al funcionamiento normal,
conectar nuevamente el interruptor
inferior y esperar un periodo calentamiento de 5 minutos antes de proceder a tostar el pan.. También si
reduce la velocidad de la cinta le
permite empezar a tostar inmediatamente mientras el aparato esta
volviendo a la potencia total.
Después de unos 5 minutos vuelva a
situar la velocidad de la cinta en la
posición original.
C
LAVES PARA CONSEGUIR UN BUEN TOSTADO
1.El contenido de humedad es el factor más importante a tener en cuenta para conseguir un producto de
alta calidad. El grado de humedad
del producto debe ser lo más uniforme posible.
2.Se aconseja no tostar productos
enfriados o congelados. Deje que
los productos alcancen la temperatura ambiente antes de tostarlos.
3. Para un tostado más rápido se reco-
mienda utilizar la parrilla superior
del aparato para eliminar la humedad del pan, antes de introducirlo
en el aparato.
4.Se recomienda no aplicar mantequilla a los productos antes del tostado
o del calentamiento. Esto puede dar
lugar a acumulaciones de grasas,
humo y condiciones poco higiénicas.
L
IMPIEZA
ATENCIÓN: DESCONECTE EL TOSTADOR Y
DEJELO ENFRIAR
El tostador ST-2 está diseñado para
limpiarse fácilmente. Para limpiar las
brillantes superficies externas basta
con pasar diariamente un paño húmedo. Retire la bandeja de recogida diariamente y límpielas con un paño
húmedo para eliminar los restos de
migas que pudieran haberse acumulado. Limpie los componentes en agua
jabonosa bien caliente para eliminar
los restos de migas más difíciles y
manténgalos siempre bien limpios y
brillantes para conseguir un tostado
perfecto. Limpie la cinta con un paño
suave o con un cepillo de púas duras
(NO METÁLICO).
No utilice nunca limpiadores abrasivos
ya que pueden dañar el acabado del
aparato. ATENCIÓN: evite que el agua
y los productos de limpieza penetren
en las partes internas del aparato,
sobretodo en los interruptores del
panel. Nunca moje ni rocíe directamente con agua ninguna parte del tostador, ya que podrían estropearse los
mecanismos internos, acortando la
vida útil del aparato y pudiendo PROVOCAR DAÑOS PERSONALES.
G
ARANTIA
La garantía del tostador ST-2 cubre los
materiales del aparato por el período
de un año a partir de la fecha de compra siempre y cuando se hayan seguido las instrucciones y recomendaciones de uso del fabricante. Sammic se
encargará de cambiar las piezas defectuosas gratis durante dicho período.
(Nota: en cada tostador encontrará
una tarjeta de garantía. Rellénela con
los datos solicitados y envíela inmediatamente a Sammic para que queden debidamente registrados). Los
daños que puedan producirse por
accidentes, alteraciones, mal uso, mal
trato, instalación indebida o incumplimiento de las recomendaciones del
fabricante anularán la garantía.
3
ESPAÑOL
Page 4

PRODUCT DESCRIPTION
The ST-2 toaster will brown numerous
types of bread, such as standard loaves, rolls, currant buns, sweet bread,
etc., on one or both sides.
It includes a horizontal conveyor belt
offering multiple possibilities in spite
of its very small size intended to reduce the occupied space on the worktop
as much as possible.
This appliance is supplied for its connection to a 230V 50/60 Hz power
supply. It has 2 on/off switches (upper
/ lower radiant heat) and a belt speed
selector.
Warning: This manual contains very
important instructions for the installation, operation and safety of the
equipment. Users are requested to
read these instructions before using
the toaster. Failure to comply with the
said instructions may cause personal
injury and severe physical damage and
will void the warranty.
B
EFORE INSTALLING THE APPLIANCE
Upon receipt of your appliance, remove it from its packaging and inspect it
to see if it has suffered any damage.
Should any defect be found, keep the
complete package and contact the
carrier within 24 hours.
Noncompliance of the instructions
detailed in this manual will cancel any
right to lodge claims with SAMMIC and
to receive any compensation for damages.
I
NSTALLATION
Place your ST-2 toaster at such location as you think proper for easy cleaning, maintenance and use in general.
Avoid installation sites subject to
currents or next to electrical appliances releasing steam or fat; do not install near sources of heat. A ca. 30mm
clearance is required on both sides
and at the rear of the appliance to
ensure adequate ventilation. For its
correct operation, the toaster must be
levelled and for this purpose, it has
been fitted with 4 adjustable feet.
Before starting the appliance, make
sure all parts have been mounted perfectly:
The toast collecting tray is packed
separately and must be fitted before
switching on the appliance. Insert the
collecting tray - curved end first - into
the void that exists under the conveyor belt. Check the curved end rests
on the two catches at the back of the
toaster.
WARNING
It is essential that the mains voltage
should be as specified on the toaster
nameplate. Connection to a different
voltage or using inadequate plugs may
lead to personal injury, would damage
the appliance and void the warranty.
P
OWER SPECIFICATIONS
The electric circuit the applicance will
be connected to shall be properly
dimensioned and rated so as to meet
the requirements specified on the
toaster nameplate, in accordance with
National Electric Codes and local regulations.
C
HARACTERISTICS OF THE CONTROL PANEL
Upper on/off switch: when made, this
switch starts the toaster, the upper
resistors warming up.
Lower on/off switch: when made, this
switch starts the toaster, the lower
resistors warming up.
For the machine to operate at full heating power (both upper and lower
resistors on), the two switches must
be turned on.
Switch on the appliance 10 minutes
before starting toasting bread, to
allow temperature to rise to an adequate level for the process required.
Belt speed variator: select the belt
speed according to the type of bread
to be toasted and its moisture content.
T
OASTING BREAD
Although toasting bread may seem, in
principle, to be a very simple process,
there is a number of factors which
influence the result significantly. One
of these factors is the type of product
that is going to be toasted. Wholemeal
bread, rye bread, white bread, sweet
bread, rolls, etc. are so many types of
bread which need specific adjustments if toasting is to be as desired.
Bread dryness or moisture content
(bread freshness: the higher the moisture content, the fresher the bread
loaf), the sugar content, the thickness
of a slice or roll are determinants of
the toasting results. Your ST-2 toaster
has been designed to process all those
varieties of bread; adjusting the belt
speed enables more or less toasting,
so that products with a higher moisture content, such as sweet bread or
some types of rolls, can be toasted
harder.
Bread containing fruits and nuts fall
within a special category, deserving a
special treatment. When heated, this
type of bread may crumble, with fragments getting into the belt mechanism
and causing premature wear of the
appliance. Therefore, we recommend
that any loose fragments be removed
before placing the piece of bread on
the belt. Since it is impossible to establish in advance which speed range
permits to obtain the best results,
users should carry out previous experiments on all types of bread they
intend to toast. On completion of such
tests and having determined the
appropriate settings in each case,
users should record them for future
reference. Remember, bread freshness
makes special adjustment necessary.
If you have to toast a great quantity of
products, at peak hours for instance,
you will need to set up the appliance
accordingly and then again when there
is a demand for one single toast. The
inside of a toaster is very hot, when
the resistors are on and no piece of
bread passes through it. Under these
circumstances, with the toaster empty
and hot, if you have to toast only one
slice of bread, this will brown more
rapidly and you will probably have to
increase the belt speed in order to
compensate for heat. By contrast,
when few toasts are being produced
and there is a sudden rise in demand,
the belt speed will have to be reduced,
since a larger volume of bread lowers
the temperature inside the toaster.
During such transitory periods, increase or reduce the belt speed as appropriate. Also, we recommend that a low
speed is set for thicker products or
when the toaster is still cold, whilst a
higher speed should be used for thinner slices or when the toaster has
been on and empty for a certain lapse
of time.
D
IRECTIONS FOR USE
Check the toaster is correctly levelled,
the collecting tray has been installed
4
ENGLISH
Page 5

and the appliance is connected to the
mains at the adequate voltage. Next,
proceed as follows:
1. Initially, set the seed selector on 5.
For darker browning, select a lower
setting. Best results will be obtained if
trials are made on the specific products. Bread dryness, sugar content,
and voltage fluctuations influence the
appearance of the toast. As a matter
of fact, wholemeal bread, rye bread
and other types of bread with a low
sugar content demand a low speed to
toast to a medium brown.
2. Place pieces of bread on the belt,
close to each other whenever possible,
so as to optimise the toaster's capacity. IMPORTANT: for toasting products on one single side, place them
with the cut face upwards.
3. The conveyor belt carries the toasted products automatically out to the
collecting tray. While toasts remain on
the collecting tray, they are kept
warm.
4. If the toast colour is excessively or
insufficiently dark, select a higher or
lower setting, in order to increase or
decrease the belt speed as appropriate. IMPORTANT: when changing the
setting, allow a 5-minute period for
warming up or cooling down.
5. If the toaster is not in continuous
operation, turn the lower switch off,
since the upper resistors are sufficient
to keep the appliance hot. For normal
duty, then turn the lower switch on
again and wait 5 minutes for warming
up before toasting bread. Else, if you
want to start toasting immediately,
you can reduce the belt speed until full
power is reached. After 5 minutes
approximately, reset the belt speed
selector to its original position.
K
EYS TO SUCESSFUL TOASTING
1. The moisture content is the most
important factor one should consider
in order to obtain high quality toasts.
Humidity must be as much uniform as
possible throughout the pieces of
bread.
2. It is not advisable to toast refrigerated or frozen products. Before toasting such products, let them reach the
room temperature.
3. For quicker toasting, remove humidity from the piece of bread by placing
it over the grid on top of the appliance before introducing it in the toaster.
4. Refrain from buttering the pieces of
bread before their toasting or heating,
as fat deposits, smoke and unhealthy
conditions might otherwise result.
CLEANING
WARNING: S
WITCH THE TOASTER OFF AND
WAIT UNTIL IT IS COLD BEFORE CLEANING
Your ST-2 toaster has been designed
so as to make cleaning easy. The
external bright surfaces will be kept
clean if wiped daily with a damp cloth.
Remove the toast collecting tray every
day and clean it with a damp cloth, eliminating all the accumulated breadcrumbs. Wash the components in hot
soapy water to remove all adhering
residues and keep them always clean
and bright as a requisite for perfect
toasting.Wipe the belt with a soft cloth
or a hard-haired brush (NO METALLIC
WIRE BRUSH).
Never use abrasive cleaning agents
that would damage the finish of the
appliance. WARNING: Take care that
no water and cleaner enters the internal parts of the toaster, especially the
switches on the control panel. Never
douse the toaster with water or direct
a jet of water to the appliance, as you
could damage the internal mechanism, reduce the toaster's life span
and CAUSE PERSONAL INJURY.
W
ARRANTY
The ST-2 toaster is guaranteed for a
one-year period starting from the date
of purchase, provided the manufacturer's directions for use and recommendations have been followed.
Under this warranty, Sammic will
replace, free of charge, any components found defective during the said
period.
(Note: Included in each toaster box is
a warranty slip. Please fill in the
requested data and return the slip to
Sammic immediately for their registration.) This warranty does not cover any
damage resulting from accidents,
modifications, incorrect use, abuse,
improper installation of the appliance
or failure to comply with the manufacturer's instructions.
5
ENGLISH
Page 6

PRODUKTBESCHREIBUNG
Mit dem Durchlauftoaster ST-2 können
die verschiedensten Brotsorten (wie
z.B. Baguetten, Brötchen, Früchtebrot
usw.) auf einer oder auf beiden Seiten
geröstet werden.
Das Modell ST-2 ist mit einem horizontales Förderband ausgestattet, das
zahlreiche Nutzungsmöglichkeiten
bietet. Das Förderband ist sehr klein
gehalten, damit so wenig wie möglich
Platz auf der Tischfläche eingenommen wird.
Das Gerät ist für den Anschluss an
230V 50/60 Hz vorgesehen und mit 2
Schaltern zum Aus- und Einschalten
(Oberhitze / Unterhitze) sowie mit
einem Regler für die
Bandlaufgeschwindigkeit ausgestattet.
Bitte beachten: Dieses Handbuch
enthält wichtige Hinweise für die
Aufstellung, den Betrieb und die
Sicherheit des Gerätes. Vor der ersten
Inbetriebnahme sollte der Benutzer
diese Anleitung gründlich durchlesen.
Die Nichtbeachtung der Hinweise kann
schwere persönliche und materielle
Schäden verursachen. Ausserdem geht
in einem solchen Fall jeglicher
Anspruch auf Garantieleistung verloren.
VOR DEM AUFSTELLEN DES GERÄTES
Bitte packen Sie das Gerät sofort nach
Erhalt aus und untersuchen Sie es auf
eventuelle versteckte Schäden. Sollten
Sie einen Schaden feststellen, so
bewahren Sie bitte alles
Verpackungsmaterial auf und setzen
Sie sich innerhalb der nächsten 24
Stunden mit dem Spediteur in
Verbindung. Bei Nichteinhaltung der
in diesem Handbuch gegebenen
Hinweise verlieren Sie das Recht, SAMMIC gegenüber zu reklamieren und
eine Vergütung für den entstandenen
Schaden zu erhalten.
AUFSTELLUNG
Stellen Sie den Toaster ST-2 an einem
für die Reinigung, die Wartung und die
Benutzung bequem zugänglichen Ort
auf. Halten Sie das Gerät fern von
Luftzug und stellen Sie es nicht in der
Nähe von Elektrogeräten auf, die
Dampf oder Fett abgeben könnten;
vermeiden Sie auch Wärmequellen. Um
eine ausreichende Belüftung sicherzustellen muss an beiden Seiten und
hinter dem Gerät ein etwa 30 mm breiter Zwischenraum bewahrt werden.
Für einen einwandfreien Betrieb muss
der Toaster gut ausnivelliert sein.
Seine 4 verstellbaren Füsse sind hierbei behilflich.
Vor der Inbetriebnahme des Gerätes
muss die fachgerechte Aufstellung
geprüft werden:
Das Auffangblech ist separat verpackt
und muss vor dem Einschalten des
Gerätes angebracht werden. Legen Sie
hierzu das gebogene Ende des Bleches
auf die beiden Vorsprünge auf der
Rückseite des Gerätes und schieben
Sie dann das Blech mit dem gebogenen Ende voran durch den Hohlraum
unter dem Förderband.
BITTE BEACHTEN
Der Toaster muss an die auf dem
Typenschild angegebene
Stromspannung angeschlossen werden. Der Anschluss an eine andere
Spannung oder ein Verwechseln der
Stecker würde das Gerät beschädigen,
die Garantieansprüche ungültig werden lassen und könnte persönliche
Schäden verursachen.
ELEKTRISCHE VORSCHRIFTEN
Der Stromkreis, an den das Gerät
angeschlossen wird, muss die geeignete Installationsgrösse und die ausreichende Kapazität haben, um den
auf dem Typenschild aufgeführten
Anforderungen in Übereinstimmung
mit den elektrischen Vorschriften des
Landes und mit den örtlich gültigen
Regelungen gerecht zu werden.
BEDIENUNGSFELD
· Einschalten oben. Mit diesem
Schalter setzt sich das Gerät in Gang
und die oberen Widerstände beginnen,
Hitze abzustrahlen.
· Einschalten unten. Mit diesem
Schalter setzt sich das Gerät in Gang
und die unteren Widerstände beginnen, Hitze abzustrahlen.
· Wenn die Maschine bei voller
Leistung toasten soll (Ober- und
Unterhitze) müssen beide Schalter eingeschaltet sein.
· Es empfiehlt sich, vor Arbeitsbeginn
den Toaster etwa 10 Minuten lang aufzuheizen.
· Bandlaufgeschwindigkeitsregler:
Wählen Sie je nach Brotsorte und
Brotfeuchtigkeitsgrad die geeignete
Bandlaufgeschwindigkeit.
RÖSTEN VON BROT
Auf den ersten Blick mag das Rösten
von Brot als eine sehr einfache Sache
erscheinen, aber es gibt eine Reihe
von Faktoren, die das Endergebnis
entscheidend beeinflussen. Zuerst einmal ist auf die Art von Brot zu achten,
die wir toasten wollen. Die verschiedenen Brotvarietäten wie z.B. Weissbrot,
Graubrot, Brötchen usw. haben ihre
spezifischen Anforderungen, um geschmackvoll geröstet zu werden. Der
Trockenheits- oder der
Feuchtigkeitsgrad des Brotes (die
Frische des Brotes, je feuchter desto
frischer), der Zuckergehalt und die
Dicke der Brotscheibe oder des
Brötchens spielen eine entscheidende
Rolle beim Röstvorgang. Ihr Toaster
ST-2 ist dazu geeignet, mit all diesen
Brotarten zu arbeiten; durch
Verstellen der Bandgeschwindigkeit
können Sie den Röstgrad erhöhen
oder verringern, damit die feuchten
Produkte, wie z.B. süsses Brot oder
manche Gebäckarten, länger geröstet
werden.
Ein anderes Kapitel stellen bestimmte
Brotsorten dar, die Früchte und Nüsse
enthalten. Es kann vorkommen, dass
sich beim Erhitzen kleine Stückchen
ablösen und in den Bandmechanismus
eindringen, was einen vorzeitigen
Verschleiss des Gerätes verursacht. Es
empfiehlt sich deshalb, die losen
Stückchen zu entfernen bevor das Brot
auf das Band gelegt wird. Da man
nicht im voraus bestimmen kann, bei
welcher Bandlaufgeschwindigkeit man
die besten Ergebnisse erzielt, sollte
man möglichst zuerst mit allen zu röstenden Brotarten einen Versuch fahren. Nachdem alle Produkte geprobt
und die geeigneten Einstellungen
gefunden sind, sollte man sich diese
notieren und darauf zurückgreifen,
wenn eine bestimmte Brotsorte geröstet werden muss. Vergessen Sie nicht,
dass bei frischem Brot eine besondere
Einstellung erforderlich ist.
Wenn es darum geht, grössere
Mengen zu toasten, wie z.B. zu den
Hauptbetriebszeiten, dann muss das
Gerät entsprechend eingestellt werden. Das gleiche gilt, wenn nur nach
einem einzigen Stück Toastbrot
gefragt wird. Wenn der Toaster eingeschaltet ist aber nichts geröstet
wird, so erhitzt er sich stark. Und
wenn Sie dann, wenn der Toaster leer
ist, nur eine einzige Scheibe Toast rösten wollen, dann wird dieses Toastbrot
schneller braun. Deshalb müssen Sie
zum Ausgleich wahrscheinlich die
6
DEUTSTH
Page 7

Bandlaufgeschwindigkeit höherstellen. Und wenn, im Gegenteil, nur
wenige Scheiben geröstet werden und
dann eine plötzliche starke Nachfrage
auftritt, dann muss die
Geschwindigkeit verringert werden,
denn die grössere Menge Brot kühlt
den Toaster ab.
Während dieser Übergangszeiten
muss die Bandgeschwindigkeit je nach
Erfordernis verringert oder erhöht
werden. Für dicke Produkte und auch
wenn der Toaster kalt ist, empfehlen
wir eine niedrige Geschwindigkeit,
und für dünne Brotscheiben sowie
wenn der Toaster eingeschaltet aber
schon seit einiger Zeit nicht benutzt
worden ist, empfehlen wir, eine höhere Geschwindigkeit einzustellen.
BETRIEBSHINWEISE
Prüfen Sie bitte nach, ob der Toaster
einwandfrei ausnivelliert ist, ob das
Auffangblech richtig eingesteckt und
ob das Gerät an das Netz mit der richtigen Spannung angeschlossen ist.
Gehen Sie dann wie folgt vor:
1.Als erste Einstellung schlagen wir
die Position 5 vor. Wenn ein kräftigeres Bräunen gewünscht wird, stellen
Sie bitte eine kleinere Nummer ein.
Die gewünschten Ergebnisse erzielt
man am besten, wenn man zu Anfang
einige Versuche mit dem zu verwendenden Produkt durchführt. Die
Trockenheit des Brotes, die
Spannungsunterschiede und der
Zuckergehalt im Brot, all dies nimmt
Einfluss auf den erzielten Röstpunkt.
Beim Grahambrot, Roggenbrot und
anderen Brotarten mit wenig
Zuckergehalt erzielt man bei niedriger
Geschwindigkeit einen mittleren
Röstpunkt.
2.Legen Sie das Brot auf das Band. Für
eine maximale Leistung des Gerätes
sollte man immer wenn möglich die
Produkte dicht nebeneinander legen.
WICHTIG: Zum Rösten auf nur einer
Seite legen Sie bitte die aufgeschnittenen Brote (z.B. Brötchen, Baguetten
usw.) mit der Schnittseite nach oben
auf das Band.
3.Nach Fertigstellung kommen die
Produkte von selbst heraus und bleiben auf dem Auffangblech liegen.
Wenn Sie das Toastbrot auf diesem
Blech liegenlassen, so bleibt es bis
zum Verzehr warm.
4. Wenn das Endprodukt zu hell oder
zu dunkel geröstet ist, so wählen Sie
eine Nummer grösser oder kleiner mit
dem Schalter, der die
Bandgeschwindigkeit kontrolliert, d.h.
erhöht oder verringert. WICHTIG:
Lassen Sie nach dem Verstellen der
Regler etwa 5 Minuten zum Aufheizen
oder Abkühlen verstreichen.
5. Wenn Sie den Toaster nicht
andauernd benutzen, schalten Sie den
unteren Schalter aus, denn die oberen
Widerstände reichen aus, um das
Gerät warmzuhalten. Für den normalen Betrieb muss dann der untere
Schalter wieder eingeschaltet und das
Gerät 5 Minuten lang aufgeheizt werden bevor man wieder zu rösten
anfängt. Ein Verringern der
Bandgeschwindigkeit gestattet Ihnen,
sofort mit dem Toasten zu beginnen
während das Gerät wieder auf seine
Gesamtleistung hochfährt. Stellen Sie
nach etwa 5 Minuten die
Bandgeschwindigkeit wieder auf die
ursprüngliche Position.
DER SCHLÜSS EL FÜR GUTES TOASTEN
1. Der wichtigste Faktor der zu beach-
ten ist, wenn man ein erstklassiges
Produkt erhalten will, ist der
Feuchtigkeitsgrad. Der
Feuchtigkeitsgrad des Produktes sollte
möglichst gleichmässig sein.
2. Kalte oder tiefgekühlte Produkte
sollte man nicht rösten. Warten Sie vor
dem Rösten immer so lange, bis die
Produkte Raumtemperatur erlangt
haben.
3. Für ein schnelleres Toasten emp-
fehlen wir die Verwendung des oberen
Rostes. Hier wird dem Brot bereits ein
Teil der Feuchtigkeit entzogen bevor
Sie es in den Toaster geben.
4. Streichen Sie bitte vor dem
Erwärmen oder vor dem Toasten keine
Butter auf das Röstgut, denn dies führt
zur Ansammlung von Fett und Rauch
sowie zu wenig hygienischen
Bedingungen.
REINIGUNG
ZU BEACHTEN: VOR DEM REINIGEN
MUSS DAS GERÄT AUSGESCHALTET
WERDEN UND VOLLKOMMEN
ABKÜHLEN
Der Toaster ST-2 lässt sich leicht reinigen. Die glänzenden Aussenflächen
brauchen nur täglich mit einem feuchten Tuch abgewischt zu werden. Das
Auffangblech muss täglich einmal
herausgezogen und mit einem feuchten Tuch die darin angesammelten
Krümel entfernt werden. Spülen Sie
die Einzelteile mit heissem Wasser, um
auch die festanhaftenden Reste zu
entfernen, und halten Sie die Teile
stets sauber und glänzend, um eine
perfekte Röstqualität zu erzielen. Das
Förderband können Sie mit einem weichen Tuch oder auch mit einer harten
Bürste (KEINE METALLBÜRSTE) säubern.
Verwenden Sie bitte keine kratzenden
Putzmittel, weil diese die Oberfläche
des Gerätes beschädigen würden.
VORSICHT: Achten Sie gut darauf, dass
weder Wasser noch Putzmittel in das
Geräteinnere geraten und schützen Sie
vor allem die Schalter auf dem
Bedienungsfeld. Der Toaster darf niemals direkt mit Wasser befeuchtet
oder bespritzt werden, denn die internen Mechanismen könnten beschädigt, die Lebensdauer des Gerätes
verringert und PERSÖNLICHE
SCHÄDEN verursacht werden.
GARANTIE
Der Toaster ST-2 ist mit einer einjährigen Garantie geschützt, gerechnet ab
Kaufdatum, vorausgesetzt die
Hinweise und Empfehlungen des
Herstellers werden befolgt.
Fehlerhafte Teile werden von Sammic
während der genannten
Garantielaufzeit unentgeltlich ersetzt.
(Hinweis: Jedem Toaster wird ein
Garantieschein beigefügt. Füllen Sie
den Schein mit den erbetenen Daten
aus und senden Sie ihn unverzüglich
an Sammic, damit die Daten entsprechend registriert werden.). Bei
Schäden, die verursacht werden aufgrund von Unfällen, Anderungen,
nicht korrekter Benutzung, fahrlässiger Behandlung, falscher Aufstellung
oder Nichteinhaltung der
Empfehlungen des Herstellers, werden
alle Garantieansprüche ungültig.
7
DEUTSTH
Page 8

8
FRANÇAISE
DESCRIPTION DU PRODUIT
Le grille-pain ST-2 permet de griller
d'un seul côté ou des deux côtés une
grande variété de pains, tels que pain
blanc ou complet, petits pains, pains
aux raisins, pains au lait, viennoiseries, etc.
Le modèle ST-2 est doté d'un tapis
horizontal offrant de multiples possibilités, bien qu'il soit de dimension
très réduite afin de prendre la moindre
place possible sur le plan de travail.
L'appareil est fourni prêt pour son
branchement à 230V 50/60 Hz. Il est
doté de 2 interrupteurs de marche /
arrêt (chauffage haut / bas) et d'une
commande de réglage de la vitesse du
tapis.
Attention : Cette notice contient des
instructions très importantes pour
l'installation, le fonctionnement et la
sécurité du grille-pain. Les utilisateurs
doivent lire ces instructions avant la
mise en service de l'équipement. Le
non respect de ces instructions peut
entraîner des risques d'accident et de
graves dommages qui, dans ce cas, ne
seront pas couverts par la garantie.
AVANT L'INSTALLATION
A la réception de l'appareil, procédez
immédiatement à son déballage et
vérifiez l'absence de tout dommage.
En cas d'anomalie, gardez bien l'ensemble de l'emballage et contactez le
transporteur sous 24 heures. Le non
respect des instructions contenues
dans cette notice annule tout droit de
réclamation à SAMMIC et de compensation des dommages causés.
INSTALLATION
Installez le grille-pain ST-2 à un emplacement approprié pour son nettoyage,
son entretien et son fonctionnement
général. Evitez les endroits exposés à
des courants d'air ou proches d'électroménagers pouvant dégager graisses ou vapeur ; évitez également la
proximité de sources de chaleur.
Laissez un espace de dégagement
d'environ 30 mm de chaque côté et à
l'arrière de l'appareil pour assurer une
bonne aération. Le grille-pain doit être
bien de niveau pour fonctionner convenablement et il possède pour cela 4
pieds réglables.
Avant la mise en marche de l'appareil,
vérifiez sa parfaite installation :
Le plateau de réception du pain grillé
est emballé séparément et doit être
mis en place avant la mise en marche
de l'appareil. Glissez ce plateau dans
la cavité située sous le tapis, en insérant en premier lieu le bord recourbé.
Placez ce bord recourbé sur les deux
bossages situés à l'arrière du grillepain.
ATTENTION
Vérifier que l'indication de tension
figurant sur la plaque signalétique du
grille-pain correspond bien à celle du
secteur. Le branchement à une autre
tension ou une erreur de prises peut
entraîner des risques d'accident et
l'endommagement de l'appareil, et
donnerait lieu à l'annulation de la
garantie.
SPÉCIFICATIONS ÉLECTRIQUES
Les caractéristiques de puissance et
protection du circuit électrique auquel
le grille-pain va être branché doivent
répondre aux indications figurant sur
la plaque signalétique de l'appareil et
être conformes aux Normes
Electriques Nationales et des règlementations locales.
DESCRIPTION DU PANNEAU DE COMMANDE
· Interrupteur de mise en marche haut
: lorsqu'il est actionné, l'appareil se
met en marche et les résistances du
haut commencent à chauffer.
· Interrupteur mise en marche bas :
lorsqu'il est actionné, l'appareil se met
en marche et les résistances du bas
commencent à chauffer.
· Pour que l'appareil fonctionne à
toute sa puissance de chauffe (résistances du haut et du bas) , les deux
interrupteurs doivent être actionnés.
· Avant de débuter le travail, préchauffez l'appareil 10 minutes pour
qu'il soit à la température requise.
· Réglage de la vitesse du tapis :
réglez la vitesse du tapis suivant le
type de pain et son degré d'humidité.
LE GRILLAGE DU PAIN
Même si le grillage du pain peut sembler une opération simple à première
vue, il faut néanmoins tenir compte
d'une série de facteurs conditionnant
le résultat final. Le premier d'entre eux
est le type de produit à griller. Les différents types de pain (pain complet,
pain de seigle, pain blanc, pain au lait,
viennoiseries...) ne se grillent pas toutes de la même façon. La sécheresse
ou le degré d'humidité du pain (la fraîcheur du pain : plus le pain est frais
plus il contient d'humidité), sa teneur
en sucre, l'épaisseur de la tranche ou
du pain sont des paramètres importants pour un bon grillage. Votre grille-pain ST-2 a été conçu pour pouvoir
griller tous ces types de pain : le
réglage de la vitesse du tapis permet
d'augmenter ou de diminuer le temps
de grillage, de façon à griller davantage les produits contenant plus d'humidité, comme le pain au lait ou certains
types de viennoiseries.
Un autre point concerne les pains contenant des fruits et des noix. Avec la
chaleur, de petits morceaux peuvent
se détacher et tomber dans le mécanisme du tapis, entraînant une usure
prématurée de l'appareil. Il est recommandé d'enlever les petits morceaux
détachés avant de mettre le pain sur le
tapis. Comme il est impossible de
déterminer à l'avance la vitesse du
tapis permettant d'obtenir les meilleurs résultats, nous vous recommandons de faire préalablement des
essais avec tous les types de pain que
vous avez à griller pour mettre au
point les réglages requis pour chacun.
Notez ces réglages et il vous suffit
ensuite de les appliquer suivant le
type de pain à griller, en tenant juste
compte que le réglage dépend aussi
de la fraîcheur du pain.
L'appareil demande un réglage différent suivant s'il faut griller de grandes
quantités de pain, au moment des
coups de feu par exemple, ou bien
une seule tranche. Lorsque le grillepain est allumé mais en inactivité (pas
de pain sur le tapis), il devient très
chaud. Si on met alors un seul produit
à griller, il va griller très rapidement et
il convient donc d'augmenter la vitesse du tapis pour co mpenser. Au contraire, si après une période de moindre activité (peu de produits à griller),
l'appareil doit griller une grande quantité de pains, il faut réduire la vitesse
du tapis car le grand volume de pain
refroidit le grille-pain.
Pour répondre à ces périodes de transition, il faut augmenter ou diminuer
la vitesse du tapis comme il convient.
Nous recommandons une petite vitesse pour les produits épais ou lorsque
le grille-pain est froid et une vitesse
plus élevée pour les produits fins ou
lorsque le grille-pain est allumé mais
n'a pas été utilisé depuis un moment.
Page 9

INSTRUCTIONS DE FONCTIONNEMENT
Contrôlez que le grille-pain est bien de
niveau, que le plateau de réception du
pain grillé est en place et que l'appareil est branché à la tension voulue.
Procédez alors comme suit :
1. Au début, réglez la vitesse du tapis
sur la position 5. Si vous désirez un
grillage plus foncé, réglez-la sur une
position plus faible. Pour obtenir les
résultats désirés, il est conseillable de
faire des essais avec le produit à griller. Suivant la sécheresse du pain, les
fluctuations de tension et la teneur en
sucre du pain, la couleur du grillage
peut être plus ou moins foncée. De
fait, le tapis doit être réglé sur une
petite vitesse pour un grillage moyen
du pain complet, du pain de seigle et
des pains à faible teneur en sucre.
2. Posez le pain sur le tapis. Dans la
mesure du possible, disposez les produits les uns à côté des autres pour
optimiser le rendement de l'appareil.
IMPORTANT : Pour griller les produits
d'un seul côté, placez-les sur le tapis
le côté coupé vers le haut.
3. Au terme du grillage, les produits
sortent automatiquement et passent
sur le plateau de réception. Si les
pains grillés sont laissés dans ce plateau, ils sont maintenus chauds jusqu'à leur utilisation.
4. Si le produit final est soit pas assez
grillé soit trop grillé (couleur trop claire ou trop foncée), modifiez la vitesse
du tapis : réglez la commande sur une
position plus grande ou plus petite
suivant si vous voulez augmenter ou
diminuer cette vitesse.
IMPORTANT : Attendez 5 minutes pour
laisser chauffer ou refroidir l'appareil
après tout nouveau réglage.
5. Pendant les périodes d'inactivité du
grille-pain, basculez l'interrupteur du
bas sur "OFF". Les résistances du haut
sont suffisantes pour maintenir l'appareil chaud. Pour revenir au fonctionnement normal, remettez sur marche
l'interrupteur du bas et laissez préchauffer 5 minutes avant de commencer à griller le pain. Néanmoins, vous
pourrez commencer le grillage immédiatement en réduisant la vitesse du
tapis, jusqu'à ce que l'appareil revienne à sa puissance totale. Au bout de 5
minutes, repassez la vitesse du tapis à
la position initiale.
LES SECRETS D'UN BON GRILLAGE
1. Le degré d'humidité du produit est
le facteur majeur à prendre en compte
pour obtenir de bons résultats. Le
degré d'humidité du produit doit être
le plus uniforme possible.
2. Il est recommandé de ne pas griller
des produits réfrigérés ou surgelés.
Les produits doivent être remis à la
température ambiante avant d'être grillés.
3. Pour un grillage plus rapide, il est
recommandé d'utiliser la grille supérieure de l'appareil pour éliminer l'humidité du pain avant de l'introduire
dans l'appareil.
4. Il est recommandé de ne pas beu-
rrer les produits avant de les faire griller ou chauffer. Cela pourrait provoquer des accumulations de graisses,
de fumée et des conditions peu hygiéniques.
NETTOYAGE
ATTENTION : DÉBRANCHEZ LE GRILLEPAIN ET LAISSEZ-LE REFROIDIR AVANT
DE LE NETTOYER.
Le grille-pain ST-2 est conçu pour un
facile nettoyage. Pour nettoyer les surfaces extérieures brillantes, il suffit de
passer tous les jours une éponge
humide. Enlevez le plateau de réception du pain grillé tous les jours et
essuyez-le avec une éponge humide
pour enlever les éventuels restes de
miettes. Lavez les composants à l'eau
savonneuse bien chaude pour enlever
les restes de miettes pouvant être
resté collés. Il est important de les
maintenir toujours bien propres et brillants pour obtenir un grillage parfait.
Nettoyez le tapis avec un chiffon doux
ou avec une brosse dure (NON METALLIQUE).
N'utilisez jamais de produits abrasifs
pouvant endommager la finition de
l'appareil. ATTENTION : Evitez toute
entrée d'eau ou de produits de nettoyage à l'intérieur de l'appareil, notamment au niveau des interrupteurs du
panneau de commande. Ne mouillez
pas, n'aspergez pas directement d'eau
aucune des parties du grille-pain car
cela pourrait endommager les mécanismes internes, diminuer la durée de
vie de l'appareil et CAUSER DES ACCIDENTS GRAVES.
GARANTIE
La garantie du grille-pain ST-2 couvre
tous les matériels de l'appareil pendant une durée d'un an à partir de la
date d'achat, sous réserve du respect
des instructions et des recommandations d'utilisation du fabricant.
Sammic assurera le remplacement gratuit des pièces défectueuses pendant
la durée de cette garantie.
(Nota : Chaque grille-pain est accompagné d'une carte de garantie.
Veuillez remplir cette carte et la renvoyer immédiatement à Sammic pour
enregistrement ). La garantie ne couvre pas les dommages relevant d'accidents, de modifications, de fautes d'utilisation, d'une manipulation incorrecte, d'une mauvaise installation ou du
non respect des recommandations du
fabricant.
FRANÇAISE
0
Page 10

10
ITALIANO
DESCRIZIONE DEL PRODOTTO
Il tostapane ST-2 può tostare da uno o
dai due lati una gran varietà di pane
quale, per esempio: pane, dolciumi,
pane con passa, pane dolce, ecc.
Il modello ST-2 è dotato di un nastro
trasportatore orizzontale, che offre
molteplici possibilità, anche se il suo
formato è molto ridotto al fine di occupare il minor spazio possibile sulla
superficie di lavoro.
L'apparecchiatura si fornisce preparata per il collegamento a 230V 50/60
Hz, provvista di 2 interruttori per la
messa in funzionamento /arresto (riscaldamento superiore / inferiore) oltre
il comando variatore di velocità del
nastro.
Attenzione: Questo manuale contiene
istruzioni molto importanti per l'installazione, il funzionamento e la sicurezza dell'impianto. Gli utenti devono leggere queste istruzioni prima di utilizzare il tostapane. La mancata osservanza delle stesse può provocare
danni personali e forti guasti. In tal
caso, la garanzia perderà la sua validità..
P
RIMA DELL‘INSTALLAZIONE
Non appena si riceve l'apparecchiatura, si deve provvedere al suo disimballo ed alla relativa ispezione per vedere se presenta qualche anomalia occulta. Se così fosse, si deve conservare
tutto il materiale di imballaggio e mettersi in contatto con il trasportatore
nel giro di 24 ore. La mancata osservanza delle istruzioni specificate in
questo manuale darebbe luogo all'annullamento del diritto di presentare
reclami alla SAMMIC ed a ricevere
compensi per i danni causati.
I
NSTALLAZIONE
Installi il tostapane ST-2 in un luogo
che ritiene più appropriato per la sua
pulizia, manutenzione e funzionamento generale. Eviti i luoghi sottoposti
alla corrente o vicini ad altri elettrodomestici che possano emettere vapori o
grassi. Eviti anche le fonti di calore.
Lasci un gioco di circa 30 mm in
entrambi i lati e nella parte posteriore
dell'apparecchiatura, onde consentire
una ventilazione adeguata. Il tostapane deve essere ben livellato per funzionare correttamente e per questo
dispone di 4 piedini regolabili.
Prima di mettere in funzionamento
l'apparecchiatura, ci si deve assicurare
della perfetta installazione.
Il vassoio di raccolta dei toast viene
imballato separatamente e si deve installare prima di mettere in funzionamento l'apparecchiatura. Faccia scorrere il vassoio di raccolta per la cavità
che rimane al di sotto del nastro trasportatore, assicurandosi di introdurre
prima l'estremo curvato. Situi detto
estremo curvato sulle due sporgenze
che si trovano nella parte posteriore
del tostapane.
ATTENZIONE
È molto importante collegare il tostapane al voltaggio che si specifica sulla
targhetta delle caratteristiche.
L'utilizzo di un voltaggio diverso o la
confusione delle spine guasterebbe
l'apparecchiatura, annullerebbe la
garanzia e potrebbe provocare danni
personali.
S
PECIFICHE ELETTRICHE
Il circuito al quale si andrà a collegare
l'apparecchiatura deve avere delle
dimensioni di installazione adeguate
ed una capacità sufficiente, che si
adatti ai requisiti indicati sulla targhetta delle caratteristiche dell'apparecchiatura, d'accordo con le Norme
Elettriche Nazionali e con le normative
locali.
C
ARATTERISTICHE DELLA PULSANTIERA DI
CONTROLLO
Interruttore di messa in funzionamento superiore: quando si accende, si
mette in funzionamento l'apparecchiatura e si cominciano a riscaldare le
resistenze superiori.
Interruttore di messa in funzionamento inferiore: quando si accende, si
mette in funzionamento l'apparecchiatura e si cominciano a riscaldare le
resistenze inferiori.
Quando abbiamo bisogno che la macchina funzioni a tutta potenza di riscaldamento (resistenze superiori ed
inferiori) i due interruttori devono
essere accesi.
Collegare l'apparecchiatura 10 minuti
prima di dare inizio il lavoro, affinché
la stesso abbia la temperatura adeguata al lavoro da realizzare.
Variatore delle velocità del nastro:
scelga la velocità del nastro in base al
tipo di pane e all'umidità dello stesso.
T
OSTATURA DEL PANE
A prima vista potrebbe sembrare che
tostare il pane è un processo molto
semplice, ma esistono una serie di fattori che influiscono significativamente
sui risultati. La prima cosa che bisogna tenere presente è il tipo di prodotto che si andrà a tostare. Le diverse
varietà di pane, quali il pane integrale,
il pane di segala, in pane bianco, il
pane dolce, i dolciumi, ecc., hanno
bisogno di requisiti specifici per essere ben tostati. La secchezza o il grado
di umidità del pane (la freschezza del
pane, quanta più umidità, più freschezza) ed il contenuto di zucchero e
lo spessore della fetta o del dolciume
rivestono un ruolo fondamentale nel
processo di tostatura. Il suo tostapane
ST-2 è stato disegnato per funzionare
con tutta questa varietà di pane, regolando la velocità del nastro è possibile
aumentare o diminuire il grado di tostatura in modo che si possano tostare
di più i prodotti che contengono maggiore umidità, quali, per esempio, il
pane dolce o certi tipi di dolciumi.
Un capitolo a parte viene costituito da
un certo tipo di pane che contiene
frutta e noci. Può succedere che quando si riscalda si stacchi qualche pezzettino e si inserisca nel meccanismo
della banda provocando l'usura prematura dell'apparecchiatura. Si raccomanda di ritirare i pezzettini staccati
prima di mettere il pane sul nastro.
Siccome è impossibile determinare
previamente a quale velocità di banda
si otterranno i migliori risultati, raccomandiamo di sperimentare prima con
tutti i tipi di pane che si andranno a
tostare. Una volta provato con tutta la
varietà di prodotti e che abbia trovato
le regolazioni adeguate, ne dovrà
prendere nota e ricorrere a tali dati
quando dovrà tostare un determinato
tipo di pane. Non dimentichi che la
freschezza del pane obbliga a effettuare una regolazione speciale.
Quando desidera tostare grandi quantità di prodotti come succede nelle ore
di punta, per esempio, oppure quando la richiesta è di un solo toast, dovrà
regolare l'apparecchiatura. Se il tostapane è acceso e non passa nessun
toast per il nastro, si riscalda molto. E
se nel momento in cui il tostapane è
Page 11

11
ITALIANO
vuoto deve riscaldare un solo toast, lo
stesso si tosterà con maggiore rapidità, per cui possibilmente dovrà cambiare la velocità del nastro con un
numero maggiore per compensare. E
al contrario, se si stanno servendo
pochi toast e si verifica una grande
richiesta si dovrà ridurre la velocità del
nastro, dato che il maggiore volume di
pane raffredda il tostapane .
Quando ci si trova in questi periodi di
transizione, si deve regolare la velocità del nastro a maggiore o minore
velocità, in funzione di quanto corrisponde. Le raccomandiamo di applicare
una velocità bassa per prodotti di
maggiore spessore o quando il tostapane è freddo ed una velocità alta per
prodotti di minore spessore, o quando
il tostapane è acceso, ma non si usa da
un po' di tempo.
I
STRUZIONI DI FUNZIONAMENTO
Verifichi se il tostapane è adeguatamente livellato, se il vassoio di raccolta è perfettamente installato e se l'apparecchiatura è ben collegata alla rete,
con il voltaggio adeguato. Di seguito,
provveda nel modo seguente:
1. Regoli inizialmente alla posizione 5.
Se ha bisogno di una tostatura più
oscura, selezioni un numero di meno.
Per ottenere i risultati desiderati, di
solito si consiglia di realizzare alcune
prove con il prodotto concreto che si
andrà a utilizzare. La secchezza del
pane, la differenza di voltaggio ed il
contenuto di zucchero nel pane
influiscono sul tono di tostatura ottenuto. Difatti, il pane integrale, il pane
di segala ed altro pane con basso contenuto di zucchero richiede una velocità bassa per ottenere una tostatura
media.
2. Metta il pane sul nastro. Quando è
possibile, metta i prodotti l'uno accanto all'altro, per ottenere il massimo
rendimento dell'apparecchiatura.
IMPORTANTE: se deve tostare prodotti
da un solo lato, li metta sul nastro con
la parte tagliata verso l'alto.
3. Al portare a termine il processo, i
prodotti usciranno automaticamente e
si collocheranno sul vassoio di raccolta. Se lascia il toast in questo vassoio
di raccolta, si manterrà caldo fino a
che faccia uso dello stesso.
4. Se il prodotto finale è troppo chiaro
o troppo oscuro, selezioni un numero
maggiore o minore del comando che
controlla la velocità del nastro e
aumenterà o diminuirà detta velocità.
IMPORTANTE: Lasci trascorrere un
periodo di 5 minuti di riscaldamento o
raffreddamento quando deve aggiustare i regolatori.
5. Quando non sta usando in modo
continuo il tostapane, disinserisca l'interruttore inferiore, con le resistenze
superiori manteniamo calda l'apparecchiatura . Quando torneremo al funzionamento normale, si deve inserire
di nuovo l'interruttore inferiore ed
attendere un periodo di riscaldamento
di 5 minuti, prima di provvedere a tostare il pane. Se reduce la velocità del
nastro, ciò le permette di cominciare a
tostare subito, mentre l'apparecchiatura sta tornando alla potenza totale.
Dopo circa 5 minuti torni a situare la
velocità del nastro alla posizione originale.
C
HIAVI PER OTTENERE UNA BUONA TOSTATU
-
RA
1. Il contenuto dell'umidità è il fattore
più importante da tenere presente per
ottenere un prodotto di alta qualità. Il
grado di umidità del prodotto deve
essere il più uniforme possibile.
2. Si consiglia di non tostare prodotti
raffreddati o congelati. Lasci che i prodotti raggiungano la temperatura
ambiente prima di tostarli.
3. Per una tostatura più rapida, si rac-
comanda di usare la griglia superiore
dell'apparecchiatura , per eliminare
l'umidità del pane, prima di introdurlo
nell'apparecchiatura.
4. Si raccomanda di non mettere burro
ai prodotti, prima della tostatura o del
riscaldamento. Ciò può dare luogo ad
accumuli di grasso, fumo e condizioni
poco igieniche.
P
ULIZIA
ATTENZIONE: D
ISINSERISCA IL TOSTAPANE
E LO LASCI RAFFREDDARE PRIMA DI PULIRLO
Il tostapane ST-2 è stato disegnato per
essere pulito facilmente. Per pulire le
brillanti superfici esterne, basta passare giornalmente un panno umido.
Ritiri il vassoio di raccolta giornalmente e lo pulisca con un panno umido per
eliminare i residui di briciole che si
fossero potuti accumulare. Pulisca i
componenti in acqua ben calda con
sapone, per eliminare i residui di briciole più difficili e li mantenga sempre
ben puliti e brillanti per ottenere una
tostatura perfetta. Pulisca il nastro con
un panno morbido o con una spazzola con setole dure (NON METALLICA).
Non utilizzi mai pulenti abrasivi, poiché possono danneggiare la finitura
dell'apparecchiatura. ATTENZIONE:
eviti che l'acqua ed i prodotti di pulizia
penetrino nelle parti interne dell'apparecchiatura, soprattutto negli interruttori del pannello. Non bagni mai, né
spruzzi direttamente con acqua nessuna parte del tostapane, dato che
potrebbe dar origine a guasti nei meccanismi interni, accorciando la durata
dell'apparecchiatura e potendo PROVOCARE DANNI PERSONALI.
G
ARANZIA
La garanzia del tostapane ST-2 copre i
materiali dell'apparecchiatura per un
periodo di un anno, a partire dalla
data di acquisto, a patto che si siano
seguite le istruzioni e le raccomandazioni di uso del fabbricante. La
Sammic si incaricherà di cambiare i
pezzi difettosi gratis durante tale
periodo.
(Nota: in ogni tostapane troverà una
scheda di garanzia. La dovrà compilare con i dati richiesti e la dovrà inviare
subito alla Sammic affinché vengano
immediatamente registrati). I danni
che si potessero provocare a causa di
incidenti, alterazioni, cattivo uso, maltrattamento, installazione indebita o
mancata osservanza delle raccomandazioni del fabbricante, darebbero origine all'annullamento della garanzia.
Page 12

12
PORTUGUES
DESCRIÇAO DO PRODUTO
A torradeira ST-2 pode torrar por um
ou pelos dois lados uma grande variedade de pão, como por exemplo o pão
normal, bolos, pão com passas, pão
doce, etc.
O modelo ST-2 dispõe de uma correia
transportadora horizontal que oferece
múltiplas possibilidades, apesar do
seu tamanho muito reduzido que
ocupa o menor espaço possível na
bancada.
O aparelho está previsto para funcionar com uma tensão de 230V 50/60
Hz. Dispõe de 2 interruptores para a
colocação em funcionamento/paragem, (aquecimento superior / inferior)
e comando variador de velocidade de
correia.
Atenção: Este manual contém instruções muito importantes para a instalação, funcionamento e segurança do
equipamento. Os utilizadores devem
ler estas instruções antes de utilizar a
torradeira. A falta de cumprimento das
instruções de uso pode causar danos
pessoais e avarias graves. Nesse caso,
a garantia não teria validez.
A
NTES DA INSTALAÇÃO
No momento de receber o aparelho,
proceda à sua desembalagem e inspeccione o aparelho para verificar se
apresenta algum defeito ou deterioro.
Se detectar alguma anomalia, guarde
todo o material de embalagem e entre
em contacto com o transportador num
prazo de 24 horas. A falta de cumprimento das instruções especificadas
neste manual anula o direito de apresentar reclamações a SAMMIC e de
receber compensações pelos defeitos
causados.
I
NSTALAÇÃO
Instale a torradeira ST-2 no lugar que
considere mais apropriado para a sua
limpeza, manutenção e funcionamento geral. Evite lugares sujeitos a
correntes ou próximos de electrodomésticos que possam desprender
vapor ou gordura; evite igualmente as
fontes de calor. Deixe uma folga de
aproximadamente 30 mm em ambos
lados e na parte posterior do aparelho
para permitir uma ventilação adequada. Para funcionar devidamente, a
torradeira deve estar bien nivelada
dispondo para o efeito de 4 patas
ajustáveis.
Assegure-se da perfeita instalação do
aparelho antes de o pôr em funcionamento:
O tabuleiro de recolha das torradas
vem embalado separadamente e deve
ser instalado antes de pôr o aparelho
em funcionamento. Deslize o tabuleiro
de recolha pela cavidade que fica
debaixo da correia transportadora,
introduzindo primeiro o extremo curvado sobre as duas saliências situadas
na parte traseira da torradeira.
ATENÇÃO
É fundamental ligar a torradeira à voltagem que se especifica na placa de
características. A utilização de outra
voltagem ou a confusão das tomadas
danificaria o aparelho, anularia a
garantia e poderia provocar danos
pessoais.
ESPECIFICAÇÕES ELÉCTRICAS
O circuito onde o aparelho é ligado
deve ter um tamanho de instalação
adequado e a capacidade suficiente
para ajustar-se aos requisitos indicados na placa de características do aparelho de acordo com as Normas
Eléctricas nacionais e com as normativas locais.
C
ARACTERÍSTICAS DO PAINEL DE COMANDOS
Interruptor de colocação em funcionamento superior: o aparelho entra
em funcionamento e as resistências
superiores começam a aquecer.
· Interruptor de colocação em funcionamento inferior: o aparelho entra em
funcionamento e as resistências inferiores começam a aquecer.
· Para que a máquina funcione com
toda a potência de aquecimento (resistências superiores e inferiores) devese ligar os dois interruptores.
Ligar o aparelho 10 minutos antes de
iniciar o trabalho para que atinja a
temperatura adequada ao trabalho a
realizar.
Variador de velocidade da correia:
determine a velocidade da correia conforme o tipo de pão e a respectiva
humidade.
T
ORRAR O PÃO
Torrar pão é um processo aparentemente muito simples de realizar. Há,
no entanto, uma série de factores que
influem significativamente no resultado. O primeiro factor a ter em conta é
o tipo de produto a torrar. As diferentes variedades de pão tais como o pão
integral, o pão de centeio, o pão branco, o pão doce, os bolos, etc. exigem
condições específicas para que fiquem
bem tostadas. O grau de humidade do
pão (quanto mais fresco for o pão,
maior o seu grau de humidade), o conteúdo de açúcar e a espessura da fatia
têm um papel fundamental no processo de torragem. A torradeira ST-2 foi
concebida para funcionar com todas
estas variedades de pão; ajustando a
velocidade da correia é possível
aumentar ou diminuir o grau de torragem de maneira a torrar mais intensamente os produtos que contêm maior
humidade nomeadamente o pão doce
ou certo tipo de bolos.
Certos pães que contêm frutas e
nozes constituem um capítulo à parte.
Com frequência esses pedaços de frutas e de nozes desprendem-se com o
calor e introduzem-se pelo mecanismo
da banda provocando o desgaste prematuro do aparelho. Recomenda-se
retirar os pedaços soltos antes de
colocar o pão na correia. Como é
impossível determinar previamente a
velocidade de banda com a qual se
conseguirá os melhores resultados,
recomendamos experimentar com
todos os tipos de pão a torrar. Depois
de experimentar com todas as variedades de produto e de encontrar os
ajustes adequados, deverá anotar
esses dados e consultá-los antes de
torrar um determinado tipo de pão.
Não esqueça que a frescura do pão
requer um ajuste especial.
Quer para torrar grandes quantidades
de produto, por exemplo em horas de
ponta, quer para preparar uma única
torrada, é necessário ajustar o aparelho. Quando a torradeira está acesa e
não passa nenhuma torrada pela
correia, a máquina aquece muito. E se
no momento em que a torradeira está
vazia tiver que aquecer uma única
fatia, esta torrar-se-á com maior rapidez pelo que possivelmente terá quemudar a velocidade da correia a um
número superior para compensar.
Pelo contrário, quando se está a servir
poucas torradas e surge um grande
pedido, é necessário reduzir a velocidade da correia porque o maior volume de pão diminui a temperatura da
torradeira.
Page 13

Nestes períodos de transição, é conveniente ajustar a velocidade da correia
a uma maior ou menor velocidade
conforme necessário. Recomenda-se
uma velocidade baixa para produtos
grossos ou quando a torradeira está
fria e uma velocidade alta para produtos finos ou quando a torradeira está
acesa mas leva algum tempo sem ser
usada.
I
NSTRUÇÕES DE FUNCIONAMIENTO
Verifique se a torradeira está adequadamente nivelada, se o tabuleiro de
recolha está perfeitamente instalado e
se o aparelho está ligado à rede eléctrica com a voltagem adequada.
Seguidamente proceda do seguinte
modo:
1.Ajustar inicialmente na posição 5. Se
deseja torradas com uma tonalidade
mais escura, seleccione um número
menor. Para obter os resultados desejados convém realizar algumas provas com o produto concreto que vai
utilizar. A qualidade de pão (mais ou
menos fresco), as diferenças de voltagem e o conteúdo de açúcar do pão
afectam o tom de tostagem conseguido. Com efeito, o pão integral, o pão
de centeio e otros pães com baixo
conteúdo de açúcar requerem uma
velocidade baixa para conseguir uma
torragem média.
2.Coloque o pão na correia. Sempre
que possível junte os produtos uns ao
lado dos outros para conseguir o
máximo rendimento do aparelho.
IMPORTANTE: se vai torrar apenas um
dos lados, coloque-os na correia com
a parte cortada para cima.
3.Ao terminar o processo, os produtos
saem automaticamente para o tabuleiro de recolha. A torrada mantém-se
quente até ao momento em que é retirada do tabuleiro.
4.Se o produto final estiver demasiado
claro ou demasiado escuro, seleccione
um número maior ou menor do
comando que controla a velocidade da
correia, aumentando ou diminuindo
essa velocidade. IMPORTANTE:
Quando ajustar os reguladores, deixe
decorrer um período de 5 minutos de
aquecimento ou de arrefecimento.
5.Se não utilizar a torradeira de forma
contínua, desligue o interruptor inferior; com as resistências superiores
mantemos o aparelho quente. Para
retomar o funcionamento normal,
ligar novamente o interruptor inferior
e aguardar um período de aquecimento de 5 minutos antes de voltar a
torrar o pão. Do mesmo modo, se
reduzir a velocidade da correia, poderá começar a torrar imediatamente
enquanto o aparelho recupera a
potência total. Aproximadamente 5
minutos mais tarde volte a situar a
velocidade da correia na posição original.
C
ONSELHOS PARA CONSEGUIR UNAS BOAS
TORRADAS
1.O conteúdo de humidade é o factor
mais importante a ter em conta para
conseguir um produto de alta qualidade. O grau de humidade do produto
deve ser o mais uniforme possível.
2.Recomenda-se não torrar produtos
arrefecidos ou congelados. Deixe que
os alimentos atinjam a temperatura
ambiente antes de os torrar.
3. Para torrar mais rapidamente, con-
vém utilizar a grelha superior do aparelho para eliminar a humidade do
pão, antes de o introduzir no aparelho.
4.Recomenda-se não aplicar manteiga
nos produtos antes de os torrar ou
aquecer. A sua utilização pode dar
lugar a acumulações de gorduras,
fumo e condições higiénicas deficientes.
L
IMPEZA
ATENÇÃO: D
ESLIGUE A TORRADEIRA E
DEIXE QUE ARREFEÇA ANTES DE A LIMPAR
A torradeira ST-2 está concebida para
ser limpa facilmente. Para limpar as
brilhantes superfícies externas basta
passar um pano húmido diariamente.
Retire o tabuleiro de recolha todos os
dias e elimine os restos de migalhas
acumulados com um pano húmido.
Limpe os componentes com água bem
quente e detergente para eliminar restos de migalhas mais difíceis e mantenha-os sempre impecáveis e brilhantes para obter umas torradas óptimas.
Limpe a correia com um pano suave
ou com uma escova de pontas duras
(NÃO METÁLICA).
Nunca utilize produtos de limpeza
abrasivos porque poderiam danificar o
acabamento do aparelho. ATENÇÃO:
evite que a água e os produtos de limpeza penetrem no interior do aparelho, sobretudo nos interruptores do
painel. Nunca molhe nem salpique
directamente com água nenhuma
parte da torradeira visto que poderia
danificar os mecanismos internos,
reduzindo a vida útil do aparelho e
provocando eventuais DANOS PESSOAIS.
G
ARANTIA
A garantia da torradeira ST-2 cobre os
materiais do aparelho pelo período de
um ano a partir da data de compra,
sempre que se cumpram as instruções
e recomendações de uso do fabricante. Sammic encarrega-se de substituir
gratuitamente as peças defeituosas
durante esse período.
(Nota: em cada torradeira encontrará
um cartão de garantia. Preencha-o
com os dados solicitados e envie-o de
imediato a Sammic para que fiquem
devidamente registados). Os eventuais
danos provocados por acidentes, alterações, uso deficiente, negligência,
instalação indevida ou falta de cumprimento das recomendações do fabricante anularão a garantia.
PORTUGUES
13
Page 14

14
230V / 50-60 HZ 1~
2.500 W
900
460 mm
500 mm
455 mm
29 Kg
E
LECTRICAL SUPPLY
LOADING
OUTPUT TOASTS / HOUR
DIMENSIONS
- WIDTH
- D
EPTH
- HEIGHT
N
ET WEIGHT
ST-2
SPECIFICATIONS
ALIMENTACIÓN
POTENCIA
PRODUCCIÓN TOSTADAS / HORA
DIMENSIONES (mm)
- Ancho
- Fondo
- Alto
P
ESO NETO
CARACTERISTICAS
ELEKTROANSCHLUß
NUTZLEISTUNG
TOAST PRODUKTION / STD
ABMESSUNGEN (MM)
- BREITE
- TIEFE
- HÖHE
NETTOGEWICHT
EIGENSCHAFTEN
230V / 50-60 HZ 1~
2.500 W
900
460 mm
500 mm
455 mm
29 Kg
A
LIMENTAZIONE ELETTRICA
POTENZA
PRODUZIONE TOAST / ORARIA
D
IMENSIONI (MM)
- L
ARGHEZZA
- PROFONDITÁ
- ALTEZZA
PESO NETTO
ST-2
CARATTERISTICHE
A
LIMENTATION
PUISSANCE
DÉBIT TRANCHES / HEURE
DIMENSIONS (MM)
- L
ARGEUR
- PROFONDEUR
-HAUTEUR
POIDS NET
CARACTÉRISTIQUES
ALIMENTAÇÃO
POTÊNCIA ÚTIL
PRODUÇÃO TORRADAS / HORA
DIMENSÕES
- LARGURA
- PROFUNDIDADE
- ALTURA
PESO LÍQUIDO
CARACTERISTICAS
ST-2
Page 15

15
ST-2
Page 16

ER-437/1/96
UNE-EN
ISO 9001
SAMMIC, S.A. (Sociedad Unipersonal) C/ Atxubiaga, 14 - 20730 AZPEITIA- www.sammic.com
05-03/0
 Loading...