

Page 1

You have just purchased a SAGEM mobile phone
, and we congratulate you on your choice.
Your phone can be used internationally in t he various dual
band networks (GSM 900 MHz and 1800 MHz DCS)
depending on the roaming arrangements with your
operator.
We remind you that this phone is approved to meet
European standards.
We recommend that you read this handbook carefully
before using your phone efficiently and in the best
conditions.
WARNING
Depending on the confi guration of the net works and the
associated su bscriber car ds, some func tions may not be
available.
Ensure that yo ur SIM card is a 3 V (Volt) SIM type that is
compatible with your phone. Inserting an incompatible card
will be indicated by a message when your phone is
switched on. Contact your operator.
SAGEM is a trademark of SAGEM SA.
AT is a registered trademark of Hayes Microcomputer Products Inc.
Hates is a registered trademark of Hayes Microcomputer Products Inc.
T9™ Text Input is a registered trademark of ©Tegic Communications Inc.
T9 is protected by one or more of the f ollowi ng US patents: 5,818,437 ,
5,953,541, 5,187,480, 5,945,928, 6,011,554 and other patents are being
applied for worldwide.
Couverture My-X2.fm Page 1 Lundi, 26. mai 2003 11:09 11
Page 2

1
CE Conformance Document
SAGEM SA declare under its sole responsibility that the product Dual Band GSM/DCS Type B2003 conforms to the
requirements of the fo llo w ing EEC directives:
EEC Directive 1999/5/CE
Safety EN 60950
EMC EN 301 48 9- 1
EN 301 48 9- 7
Low voltage directive 73/23/CEE
Network 3GPP TS 51.010-1 v 5.2.0 selected with GCF-CC v 3.10.0 included
Requirements GT01 v 4.7.0
TBR 19 Edition 5
TBR 20 Edition 3
TBR 31 Edition 2
TBR 32 Edition 2
EN 301 41 9- 1
EN 301511
Health EN 50360
EN 50361
My-X2 English.book Page 1 Lundi, 26. mai 2003 10:45 10
Page 3

2
Menus
Phonebook
Phonebook menu
Messages
Compose
Inbox
Drafts
Options
Memory
WAP
Picture puzzle
Sounds
Ring tones
Vibrate
Silent mode
Beeps
Background
Colours
Wallpapers
Screensavers
Greeting msg
Settings
Date/T im e
My objects
Languages
Networks
Contrast
Energy saving
Shortcuts
Reset settings
Calls
Calls forwarded
View las t calls
Counters
Display number
Call waiting
Auto redial
Answer phone number
Local info
Security
Keypad locking
PIN number
PIN number 2
Phone code
Confide n tiality
Operator
Call barring
Fixed dia lling
Accessories
Calculator
Converter
Alarm
Timer
Car kit
Data
Services
My-X2 English.book Page 2 Lundi, 26. mai 2003 10:45 10
Page 4
3
Contents
Page 2 MENUS
Page 7 DESCRIPTION
Page 8 PRINCIPLES OF NAVIGATION
Page 9 HOME PAGE
Page 10 ACTIVATING YOUR PHONE
Information on the SIM card
Installing the SIM card and installing the battery
Changing the cover
Charging the battery
Do NOT obstruct the antenna with your fingers
Page 15 MY PHONE IN 5 MINUTES
Getting started
PIN Number
Setting time and date
Network
First call
Receiving a call
Switching off
Page 19 FIRST SETTING: RING TONE
Volume and ring tone
Page 21 PHONEBOOK
Using the phonebook
Phonebook menu
Phonebook menu
Call groups
Page 26 MESSAGES
Composing messages
Receiving messages
Inbox
Drafts
Sending options
Memory
My-X2 English.book Page 3 Lundi, 26. mai 2003 10:45 10
Page 5

4
Contents
Page 32 WAP
The WAP Menus
Configuring WAP parameters
WAP Logging on
Downloading objects
WAP Logging off
Page 35 GAMES
Picture puzzle
Page 36 SOUNDS
Volume and ring tone
Vibrate
Silent mode
Beeps
Page 38 BACKGROUND
Colours
Wallpapers
Screensavers
Greeting message
Page 40 SETTINGS
Date / Time
My Objects
Languages
Networks
Contrast
Energy saving
Shortcuts
Reset Settings
Page 44 CALLS
Forward calls
View last calls
Counters
Display number
Call waiting
My-X2 English.book Page 4 Lundi, 26. mai 2003 10:45 10
Page 6
5
Contents
Automatic redial
Answer phone number
Local info
Page 49 SECURITY
Keypad locking
PIN number
PIN number 2
Phone code
Confidentiality
Operator code
Call barring
Fixed dialling
Page 53 ACCESSORIES
Calculator
Converter
Alarm
Timer
Car kit
Data
Page 57 SERVICES
Page 58 TECHNICAL FEATURES
Page 60 WARRANTIES
Page 63 TROUBLESHOOTING
Page 66 INDEX
My-X2 English.book Page 5 Lundi, 26. mai 2003 10:45 10
Page 7
6
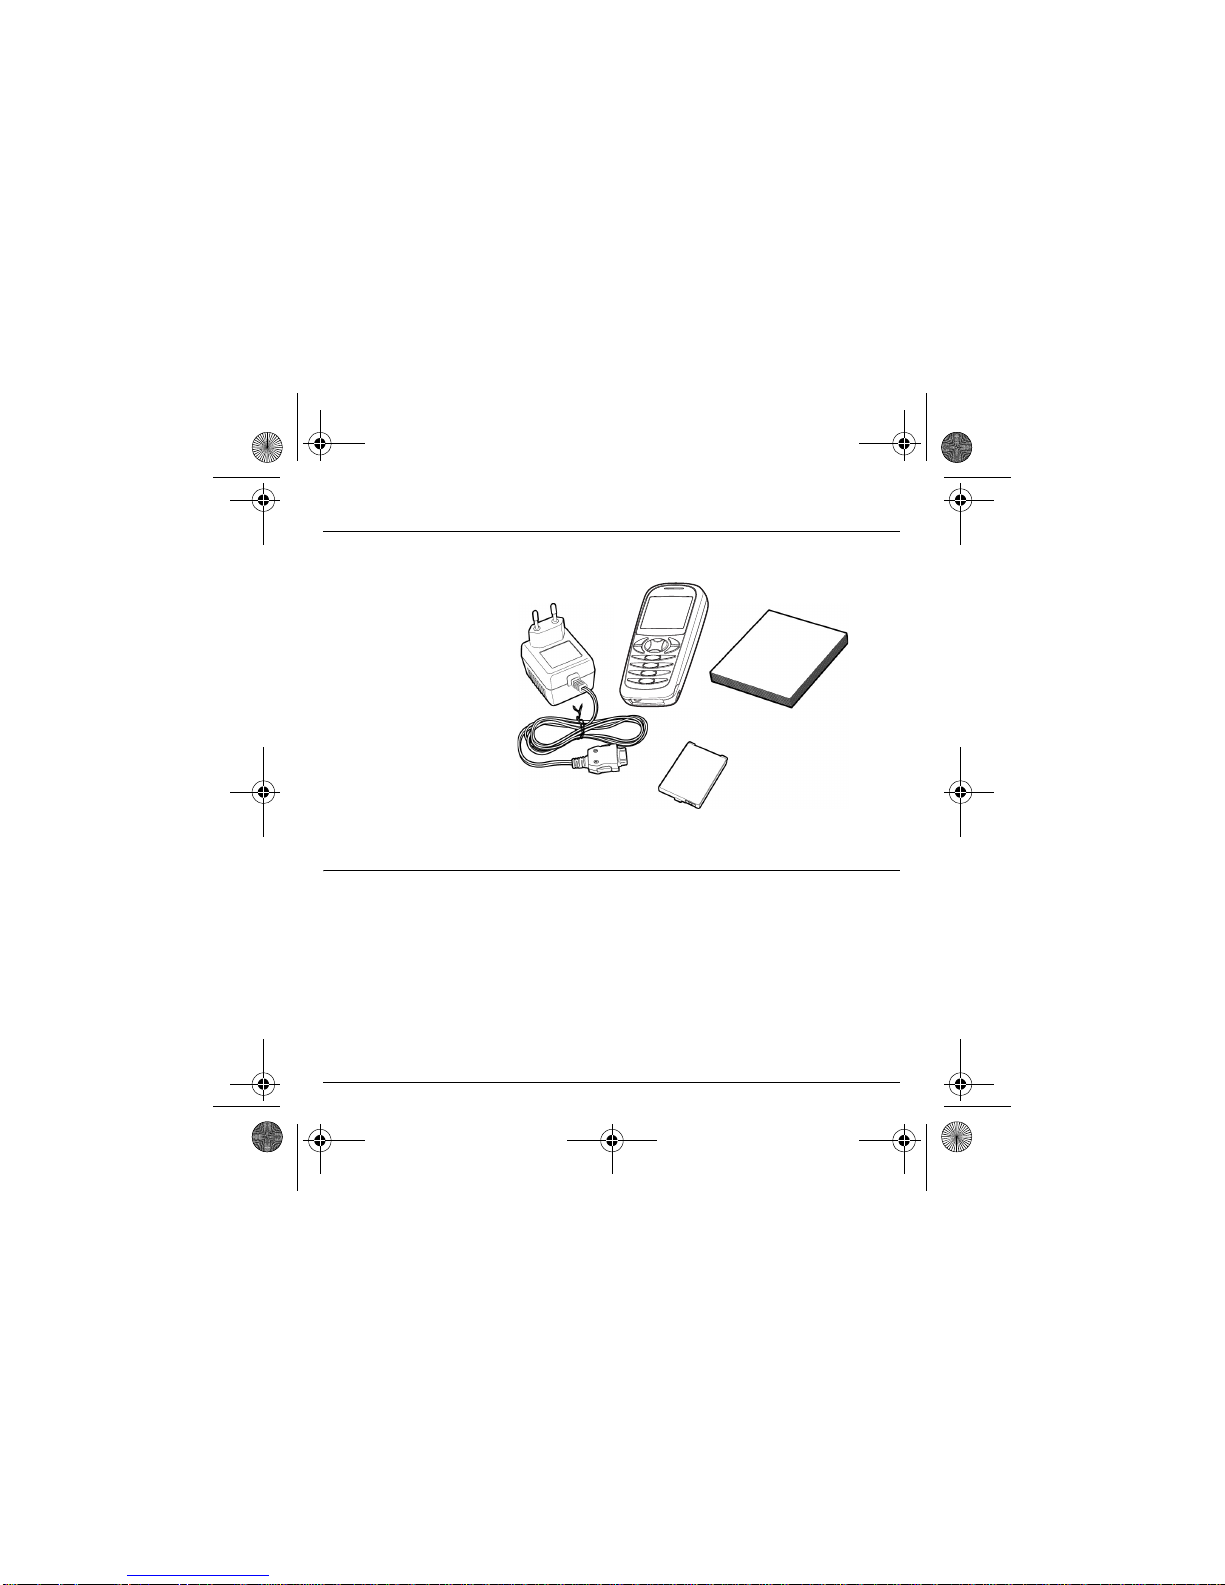
Your phone package - Accessories
When you open the box, check th at all the items are present:
1 - Phone
2 - Mains charge r
3 - Battery
4 - User manual
Accessories
You can also find (as an option) or order the f ollowing accessories:
Pedestrian kit (*)
Extra battery
Extra charger (*)
Desktop support (* )
Cigar lighter adapter (*)
Colour cover
Hands-free kit (*)
Strap
For more information: www.planetsagem.com
(*) These accessories ar e id entical to the ones provided fo r the myX-3, myX-5 a nd myX-6 series.
4
2
3
1
My-X2 English.book Page 6 Lundi, 26. mai 2003 10:45 10
Page 8

7
Description
Programmable keys
and Shortcut keys
Stop key:
Hold down:
Stop
Press briefly:
In a call context: Rejects a call - hung up
In men u s: Return to home page .
Start key:
Press briefly: Starts phone
In call co ntext: Call - reception of a call - hands-free mode
Left programmable key:
In home page: Access to certain functions (shortcuts)
In men u s: Cancel (or return) as indicated on screen
During c all: Reduces volume
Right programmable key:
In home page: Access to certain functions (shortcuts)
In men u s: Accept, choose as shown on screen
During c all: Increases volume
Top key:
Previous choice / increase value / top
Down key:
Down choice / re duce value / down
Left key:
Up input field / mo ve left
Right key:
Down input field / move right
* Key :
Hold down: In home page: Silent mode
Press brief ly
+
OK (right programmab le key)
activates or deactivates
keypad locking
In call reception mode: Short press stops ring tone
In ring tone settin g mode: A ctivates/deactivate s ring ton e
# Key:
Zoom mod e ( see message and WAP me nus)
My-X2 English.book Page 7 Lundi, 26. mai 2003 10:45 10
Page 9
8
Principles of navigation
These basic principles bring a great deal of intuitiveness to your telephone
All the active areas on a white background (icon selector, programmable
keys, menu selecto r, ch oice list)
Accept
by pressing the
right programmable key
.
Cancel
by pressing the
left programmable key
.
The tabs on the side s at the bottom o f the screen r efer to the
Programmable
keys
(and not to the le ft/right key s ).
In the menus a t itle bar indicates the down hig her level.
The
down / top
navigati on key s are used to navi gate f rom one
menu to the down within the same menu structure .
The
right programmable ke y
is used to go from a menu to a sub-
menu.
The
left programmable key
is used to go from a sub-me nu to a m enu.
The first menu level can be identified by a large animated icon in the centre
of the screen.
The second me nu level ca n be iden tified by a large static icon in the centre o f
the screen.
The lowest sub -menus are lists.
The
Stop
key (press briefly) is used to return to the hom e page (curren t
function is abando ned).
S
ounds
V
olume and ring ton
e
V olum e and ring tone
2nd level
3nd level
1st level
My-X2 English.book Page 8 Lundi, 26. mai 2003 10:45 10
Page 10
9
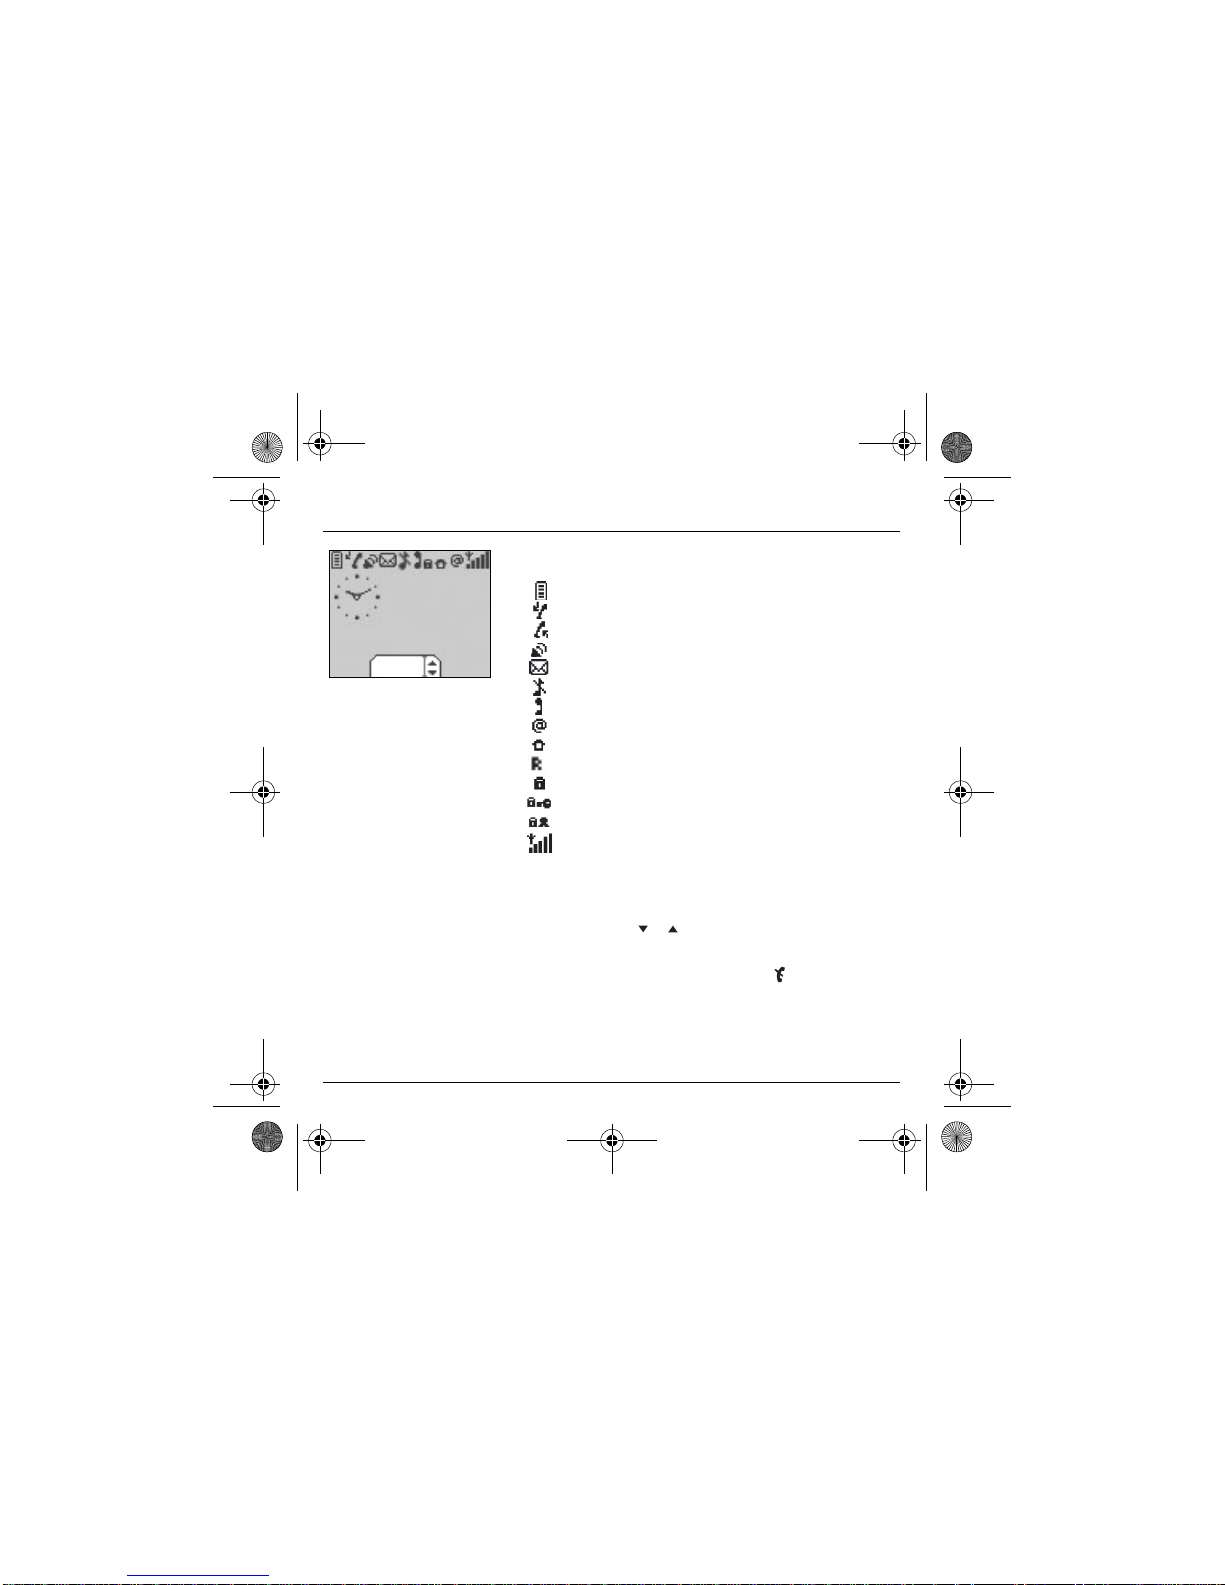
Home page
The home page contains the following
1 - The title bar icons:
Battery
Calls forwarded
Call (establishing th e call)
Call (hands free)
SMS (reception of an SMS)
Silent mode
Message in answer phonebox
WAP (@)
Home zone
HPLMN / roaming
Keypad locking + WTLS (exclusive functions)
Protected WAP logon
Protected WAP logon icon with certificate
Signal strength level (5 bars).
2 - Date and time
, in digital or analogue mode
3 - Network provider
4 - Tab centred on down line:
the main "menu" tab shows that the menu can be accessed via the
down / up
keys.
The following information may also be displayed:
"1 message re ceiv ed"; or "1 call".
They can be deleted by pressing
Stop key briefly.
Menu
Fri 3 May
My-X2 English.book Page 9 Lundi, 26. mai 2003 10:45 10
Page 11
10
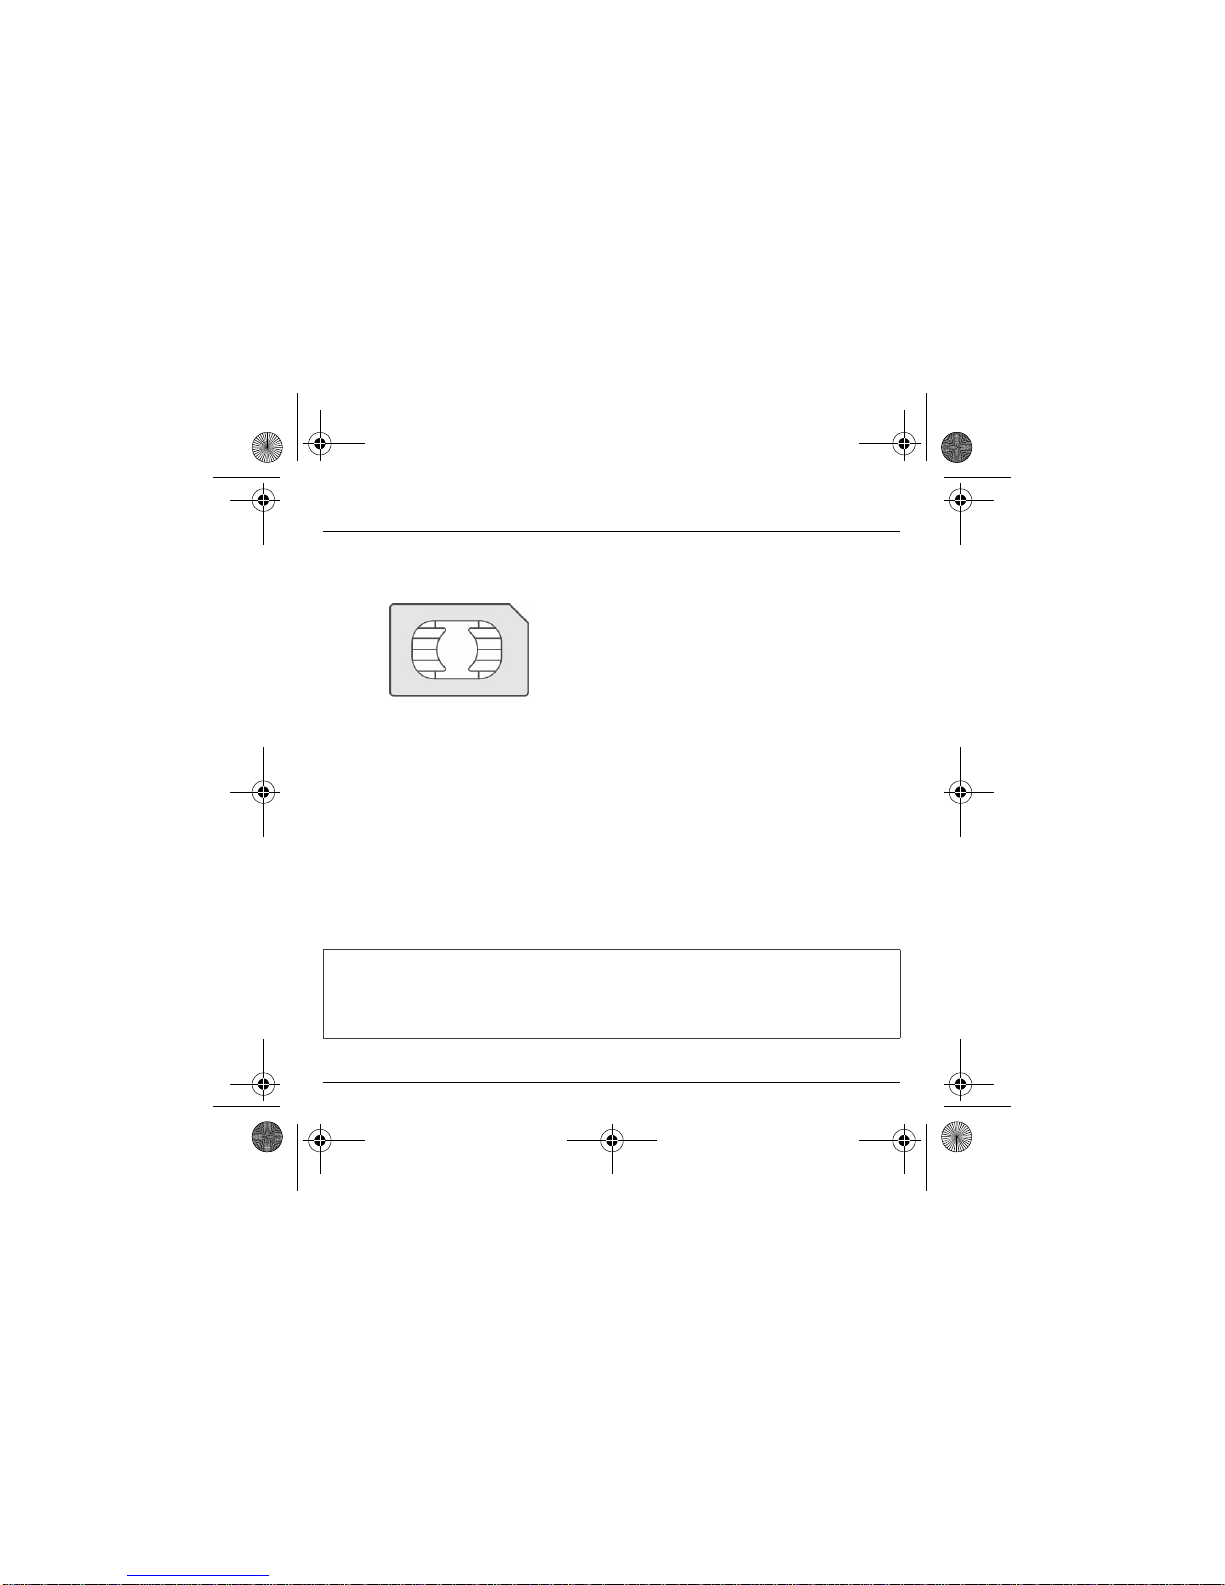
Activating your phone
To use your ph on e, yo u ha ve a s ma rt c ard called a SIM card.
It cont ains all the information needed by t he network as well
as other information unique to you and that you can modify:
Secret codes (PIN(s): Personal Identification Numbers),
these codes allow you to restrict access to your SIM card.
Phonebook,
Messages,
How sp e cial services work.
Your phone is compatible with the different SIM cards offered
by operators.
It is also compatible with the SIM/WIM cards (cards
containing the WIM module in addition (WIM = Wireless
Identity Module) that is used for secure WAP
communications.
Information on the SIM card
WARNING
This card must be handled and sto red with c are to avoid dama ging it by scrap ing or be nding i t. If y ou
should lose your SIM card, contact your operator or your SMC (Services Marketing Company)
immediately.
Comment: do not leave your SIM card within the reach of young children.
My-X2 English.book Page 10 Lundi, 26. mai 2003 10:45 10
Page 12

11
Activating your phone
The SIM card is inserted under the phone's battery. Ensure
that the phone is switched off and the charger disconnected.
Turn phone over and remove rear cover by lifting bottom end
first.
Take o u t battery if already installed.
Slide card fully un der re tainin g plate with gold-p lated cont acts
facing phone and bevelled corner pointing as shown on
drawing of phone.
Insert batt er y in to p os ition b y first p o s ition ing to p s ect ion w ith
connectors.
Replace c over by engagin g top ho ok firs t, t hen push down
back of rear cover.
Installing the SIM card and installing the battery
2
1
3
4
5
123
4
5
My-X2 English.book Page 11 Lundi, 26. mai 2003 10:45 10
Page 13

12
Activating your phone
Remove rear cover as above.
Turn phone over.
Lift front cover in same way as rear cover. Remove panel
(electro n ic card).
Position keypad in new cov er, ensur in g it is free of dust.
Insert pa nel into front cover.
Do as above to r eplace rear cover.
Changing the cover
1
2
1
3
4
2
3
4
My-X2 English.book Page 12 Lundi, 26. mai 2003 10:45 10
Page 14

13
Activating your phone
Your phone is powered by a rechar geable batter y. A new
batter y must be char ged for 4 ho urs at lea st before b eing
used for th e fir st time. It reach e s its o pt imu m capacit y a fte r a
few cycles of use.
When your ba ttery h as been discharged, the phone displays
the state (empty battery icon flashes). In this case recharge
your battery for at least 15 minutes before making any more
calls so as to avoid being cut off mid-call.
To recharge the battery:
Connect the cha rger to a mains socket.
Plug the end of the cable into the connector at the base of the
phone.
The phone starts to charge up, the battery charging light
flashes to indicate charging. Charging stops by itself.
Disconnect the cable .
It is possible that the battery may heat up slightly during
charging; this phenomenon is norma l.
Charging the battery
WARNING
There is danger of explosion if the battery is replaced incorrectly or if it is exposed to f ire.
Do not short circuit it.
The battery does not have any part that you can change.
Do not try to open the ba ttery casin g.
Use only the appropriate chargers and batteries shown in the manufacturer's catalogue.
Used batteries must be disposed o f in th e appropriate places.
It is advisable to remove the batte ry if your ph one is no t used fo r extended period s.
My-X2 English.book Page 13 Lundi, 26. mai 2003 10:45 10
Page 15
14
Activating your phone
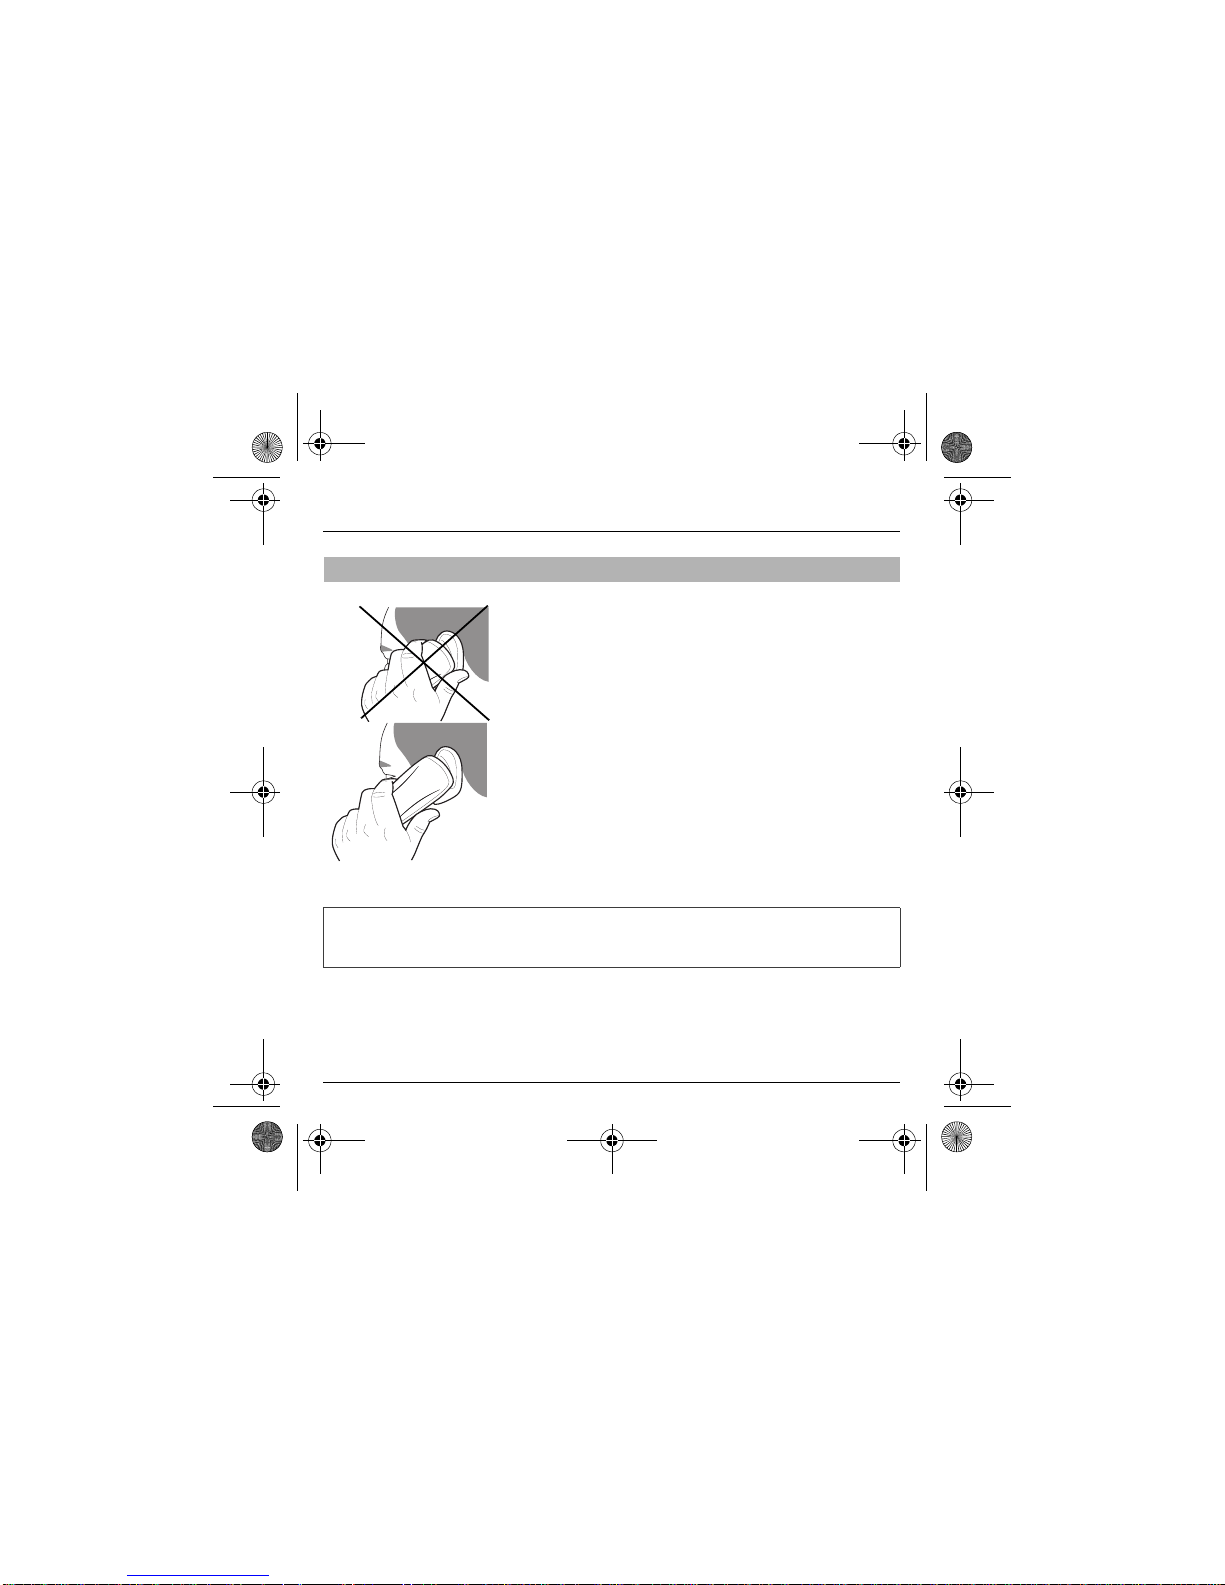
The antenn a is integrate d in your phone, under the back
cover a t the top.
Avoid putting your fingers on this area when the phone is
switched ON.
If your fingers obstruct the antenna, the phone may have to
operate with a higher power level than usual; decreasing its
efficiency quickly. It could also affect the quality of your
communications.
Do NOT obstruct the antenna with your fingers
WARNING
The use of a hands-free kit is recommended when using the phone frequently.
My-X2 English.book Page 14 Lundi, 26. mai 2003 10:45 10
Page 16

15
My phone in 5 minutes
Switch on the phone by pressing the
Start key. A short display appears.
If access to the SIM card is protected, the device prompts you to enter the
PIN number:
Enter the code
between 4 and 8 digits given to you when the S IM card was
issued. These digits do not appear on the screen for security reasons.
Press the
right programmable key
to accept.
If your phone indicates that the SIM is missing, press the
Stop
key to
switch off your phone and check that the SIM card is correctly installed.
Getting started
You are now ready to use your phone for the first time.
PIN Number
This is your SIM's secret code.
WARNING
If a wrong PIN nu mber is entered three times in succession, your S IM card is blocked. You must the n:
- Enter "**05*".
- Enter the PUK (Personal Unblocking Key) code provided by your operator, and accept.
- Enter your PIN number and accept.
- Enter your PIN number again an d accept.
After 5 or 10 failed attem pts (de pe nding on th e type o f SIM ca rd), th e SIM car d is de finitely locked . You m us t then
contact your operator or your SMC to ob tain a new card.
Delete OK
PIN number?
*
***
My-X2 English.book Page 15 Lundi, 26. mai 2003 10:45 10
Page 17
16
In due course, when the battery is completely discharged, or if it has been
removed, you will be prompted systematically to confirm date and time.
Setting the date:
Set the date by entering it directly in numerical form or by usi ng the
down
/
up
keys to decrease or increase the default values.
Use the
right key
(or left key ) to access the
next
(or last ) data inp ut
field.
Once the date is correct, press the
right programmable key
to
accept
.
Setting the time:
Same procedure as for setting the date.
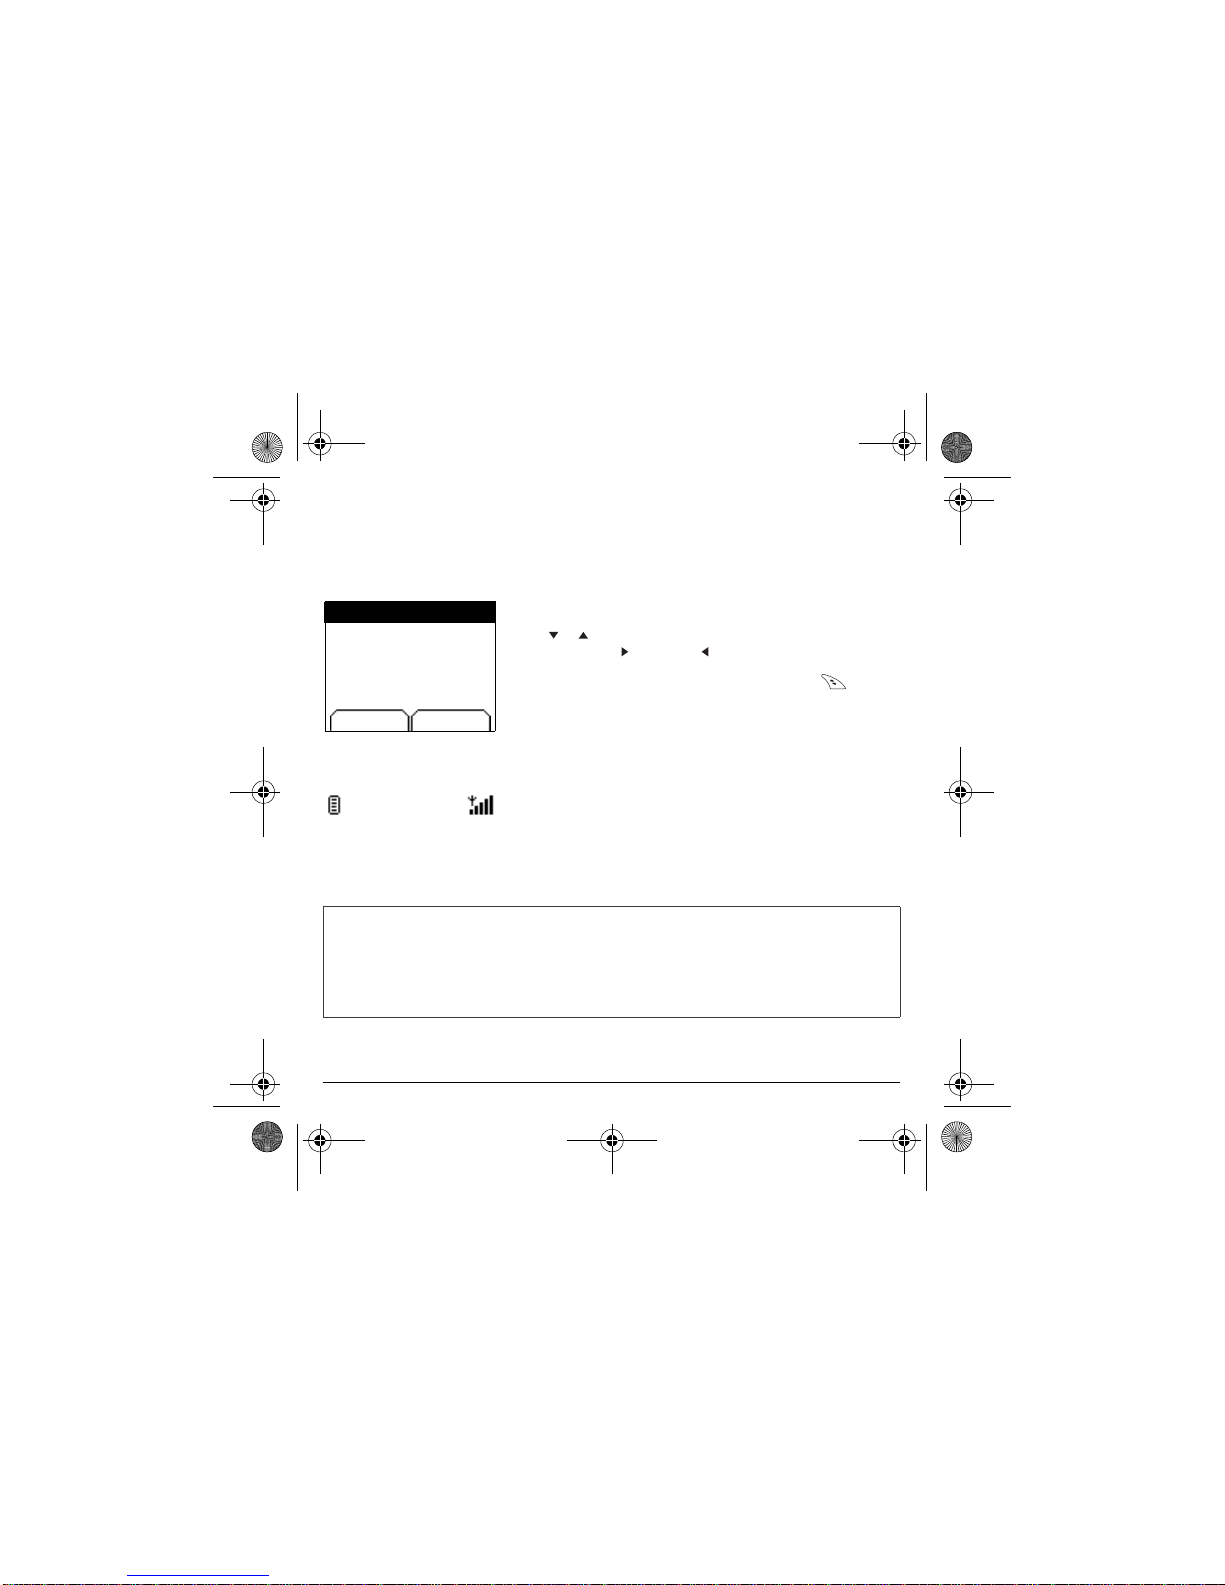
From now on the phone hunts for a network on which it can make calls. If it
finds one, it di spla ys the na me of the ne twork on the scr een. You are the n
ready to send or r ece ive a call.
Setting time and date
When you use your phone for the first time, you need to set the date and time.
Network
If the network icon ap pears, calls are possible on your operator's network.
If the letter R and a network name are displayed, calls are possible on the network of a different operator.
If the l e t ter R i s di sp l ayed wi t hou t any ne two rk na me, on ly t h e e mer genc y s er vi c es a re ac ces si bl e (a mbul a nce,
police, fire brigade ).
If the ne twork ico n fl ashe s, t he ph one is in pe rmane nt s earc h mode. Th ere i s no networ k av ail abl e. Th e si gnal
strength indicator received allows you to display the quality of reception. If it indicates less than three bars,
search for better reception in order to call in good conditions.
Time and date
Date valid?
Friday
03 May 2002
Cancel OK
My-X2 English.book Page 16 Lundi, 26. mai 2003 10:45 10
Page 18
17
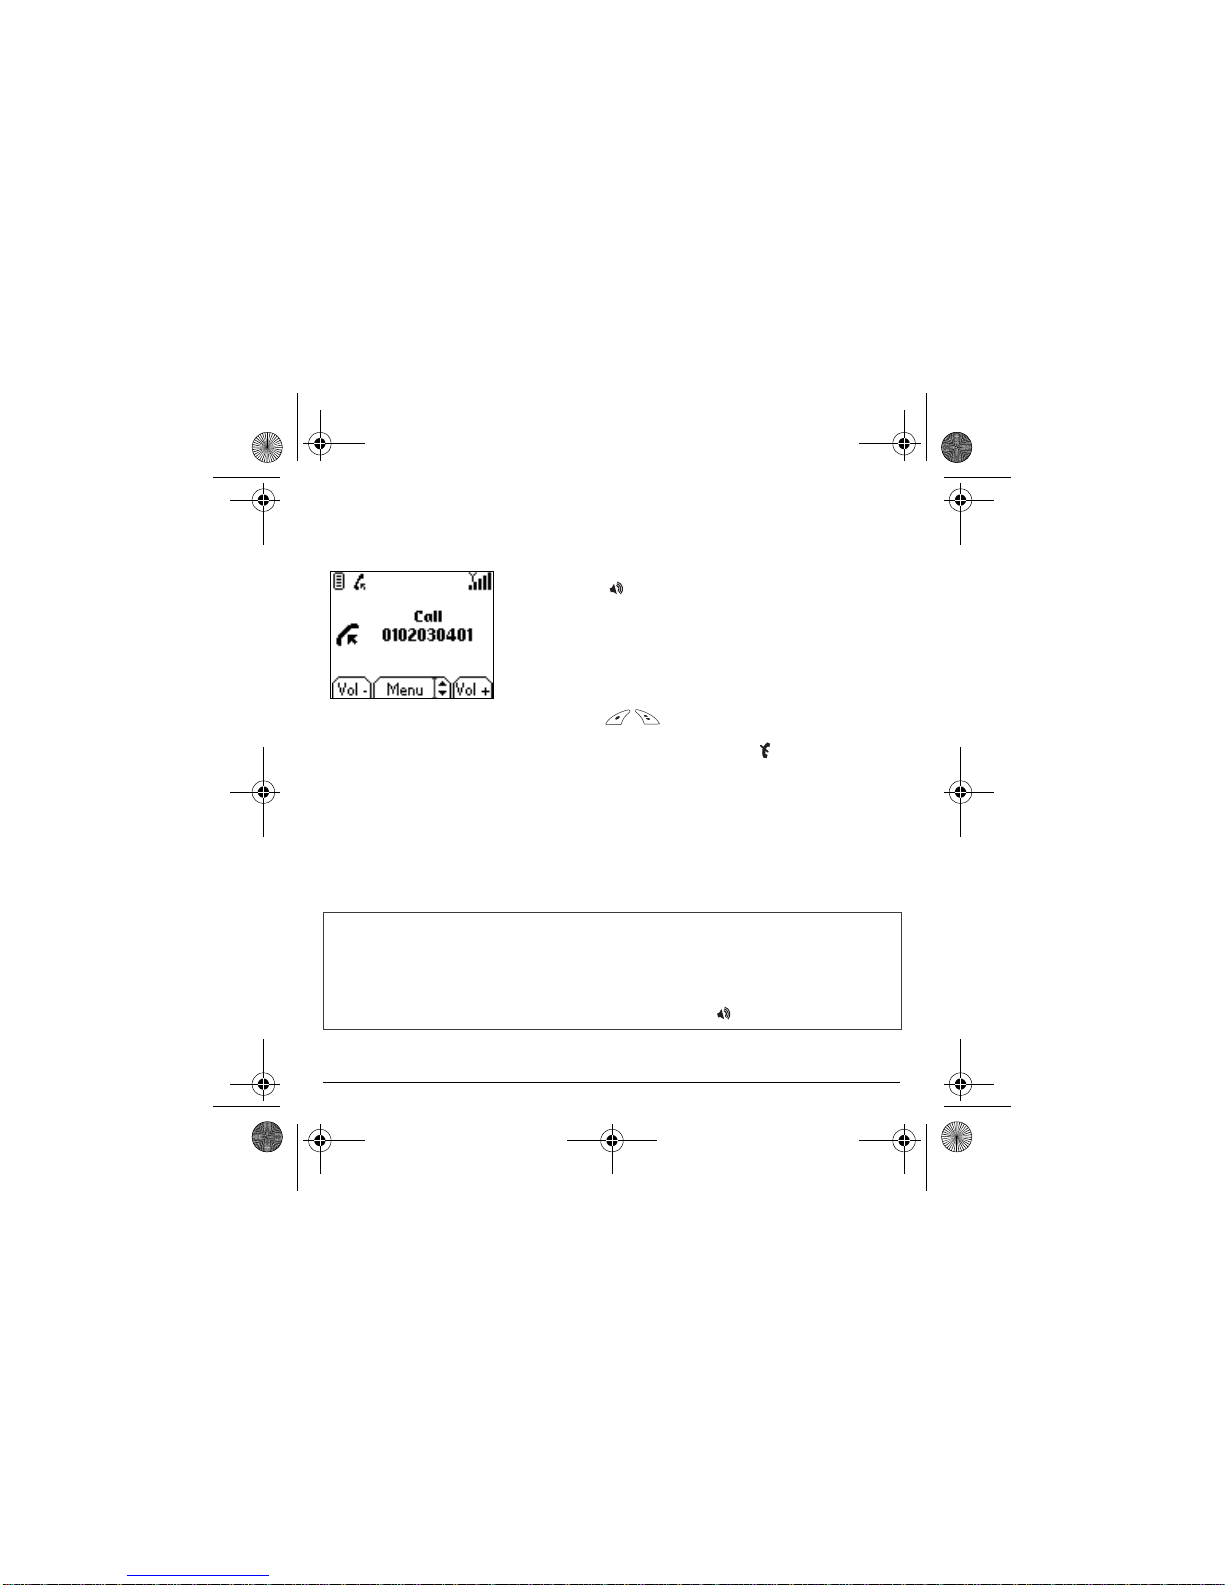
Dial the number of your correspondent.
Press the
Start key.
During the call, the call in progress icon flashes on screen and tones may
indicate the establishment of the call.
Once communication has been established, the call icon stops flashing.
You can adjust the sound level (volume) using the
left
and
right
programmable
keys
.
At the end of the conversation press the
Stop
key to hang up.
First call
International ca ll
Press 0 (hold down ) to display "+", then dial the cou ntry code withou t wa iting for the dial tone , then the num ber of
the called party.
Emergency se rv ic es
Depending on the operators you can obtain the eme rg ency service with or without SIM card or w hen the keypad
is locked. It is enough to be in an area serve d by a network.
To obtain the international emergency service, dial
112
then press the
Start key.
My-X2 English.book Page 17 Lundi, 26. mai 2003 10:45 10
Page 19

18
When you receive a call, the number of your correspondent is
displayed when it is presented by the network.
Press the
Start
key or the
right programmable key
to
answer, and speak.
To refuse the call, press the
Stop key or the
left programmable ke y
.
To stop the ring tone or the vibrate, without refusing the call, press
the key.
All the numbers corresponding to incoming and outgoing calls are logged in the
list of recent calls.
Press the Stop key for one second.
The end message is displayed. The phone switches off.
Receiving a call
WARNING:
Pressing the Start key a second time launches hands-free mode, in
this mode do not bring the phone up to your ear.
Switching off
Busy
Select
Call from
0605030401
My-X2 English.book Page 18 Lundi, 26. mai 2003 10:45 10
Page 20

19
1
2
First setting: Ring tone
We want to familiarise you with the interface of your new phone, using a
simple setting: choosing a ring tone and adjusting the volume.
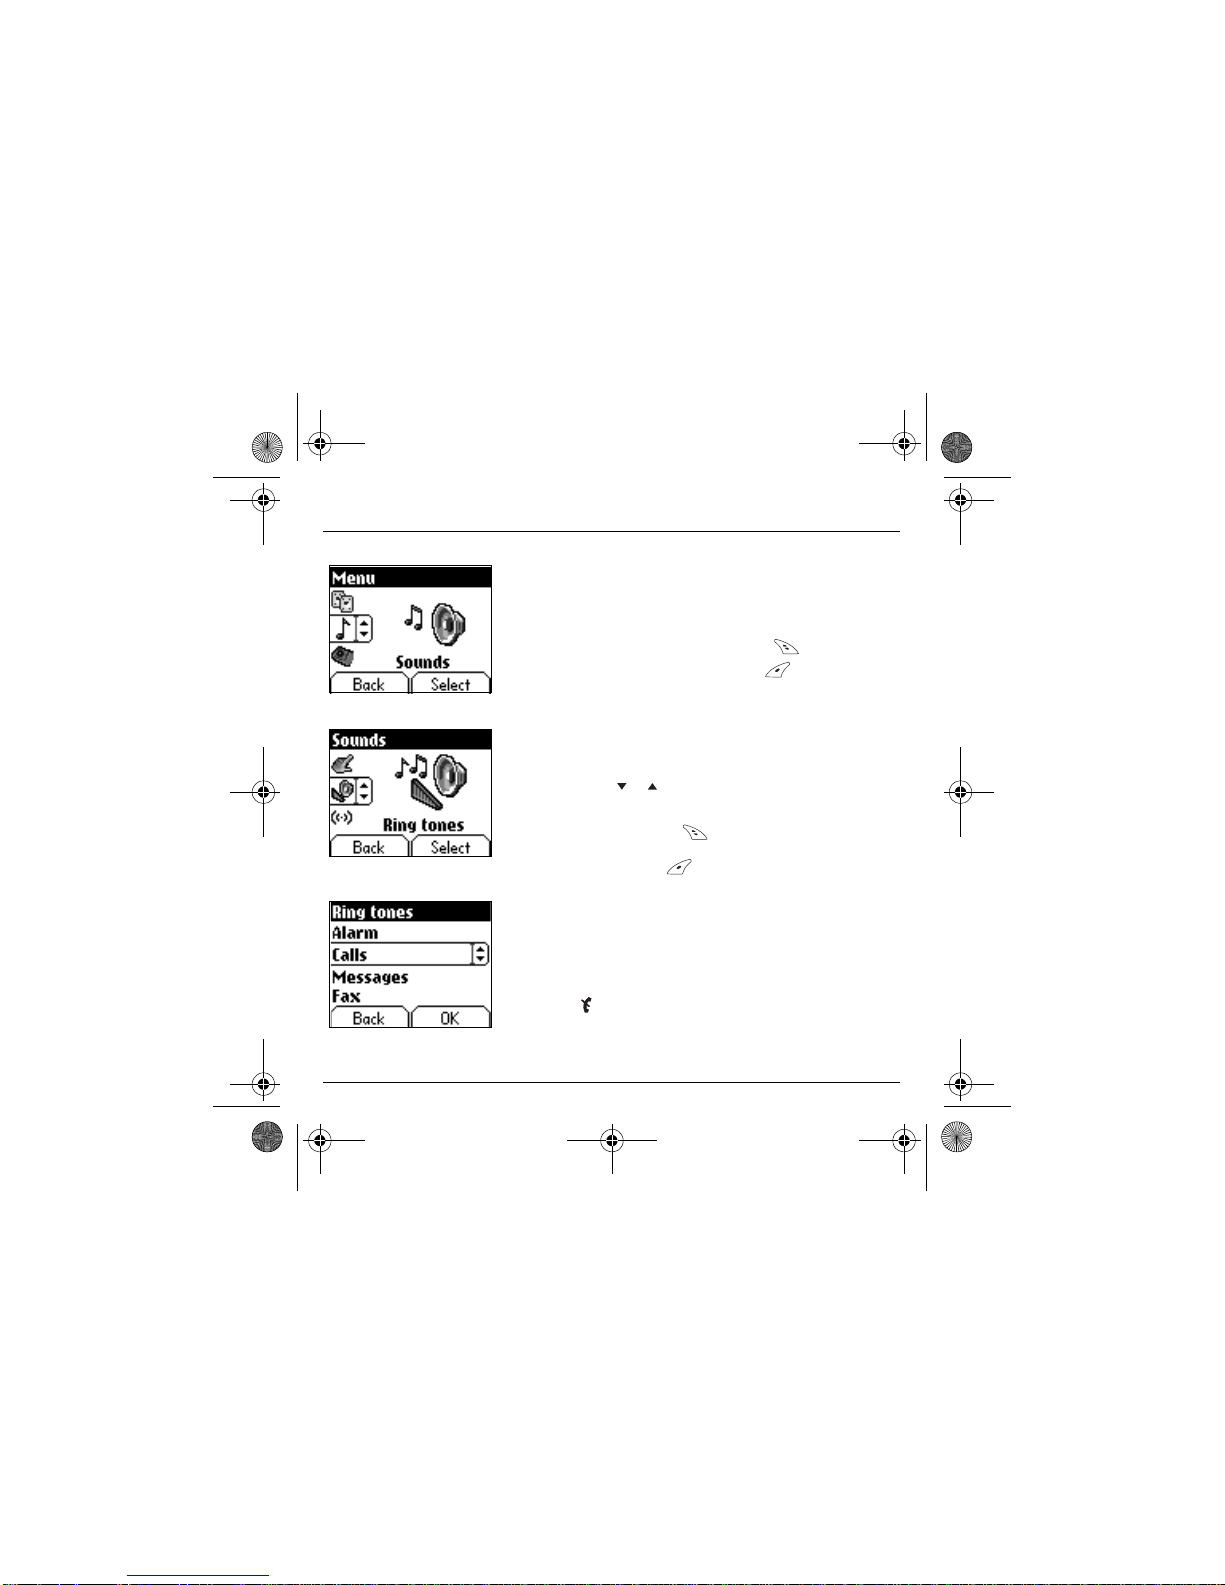
In the
home page
, press the
down
key to access the main menus.
The first menu offered is
Phonebook
.
Press the
down key four times to access the
Sounds
menu.
Enter
this menu by pressing the
right programmable key
.
You can access the
second level
of the menu that contains four sub-
menus: Ring tones, Vibrate, Silent mode, beeps.
The first sub-menu offered is
Ring tones
.
Enter
by pressing the
right programmable key
.
Volume and ring tone
This me n u allows y ou to allo c a te a ring tone to ea c h type of e v ent.
Messages
My-X2 English.book Page 19 Lundi, 26. mai 2003 10:45 10
Page 21

20
3
4
5
With the hel p of the
down
/
up keys select the type of
function where you want to change the ring tone from the proposed
list (Alarm, Calls, Messages and Fax) and accept.
Enter
by pressing the
right programmable key
.
Using the
down
/ up keys select the ring tone from the list
offered.
Enter
by pressing the
right programmable key
.
For every new selection, you will hear the corresponding ring.
If required, press the
Silent mode key to cancel the sound.
Adjust the volume using the
down
/
up
keys.
The volume is adjusted over a scale of 1 to 4.
The ring tone is played at the chosen level whenever a change is made.
You can select "+"
volume
to choose a ring that starts qui etly and rises
to a crescendo.
Accept
by pressing the
right programmable key
.
Draft
T9
Draft
T9
My-X2 English.book Page 20 Lundi, 26. mai 2003 10:45 10
Page 22

21
Phonebook
The phonebook allows you to store numbers that you call regularly.
These numbers can be stored in the SIM card or in the telephone.
Different icons inform you of the position o f the phonebook wher e the
number is stored:
Your SIM card phonebook
Your telephone phonebook
Your SIM card's fixed dialing.
.
In the home page press the
down
key to access the main menus.
The first menu offered is
phonebook
.
Press the
right programmable key
corresponding to the accept
tab to enter the menu.
The list of your correspondents appears, by default, the cursor is
positioned on the first name in alphabetical order.
If you are using y our telephone and SIM card for t he first time, the
phonebook list will be empty, only the
Phonebook Menu
function will be
available.
Select a contact from the list using the
down
/
up keys. Then press
the
right programmable key
.
Using the phonebook
T
he list of numbers in th
e
p
honebook of the SIM car
d
v
aries in relation to th
e
c
apacity of the card: th
e
s
upplier company will tell yo
u
w
hat this is.
P
honebook
My-X2 English.book Page 21 Lundi, 26. mai 2003 10:45 10
Page 23

22
You can also enter a letter to access directly the first contact starting with
this letter.
If you know the memory number of this contact on the SIM card (say 21
for example), you can enter 21# directly.
Choose from the options offered:
See contact
The first menu offered is
See contact. Enter
.
The detail of the store appears (location, call group, name, number).
Modify contact
Modify contact. Enter
. Using the
down key.
Modify name if required, and
Accept
.
Modify number if required, and
Accept
.
Modify call group if required, and
Accept
.
Delete
Select
Delete. Enter
.
Confirm deletion of entry with
Yes
.
Call
Select
Call
. Press the
right programmable key
to start the call.
You can also select the party to be called from the phonebook, and press
the
Start key to make the call.
Send message
Select
Send message. Accept
.
Text editor opens automatically.
Back OK
Phonebook
Back OK
S
ee contact
My-X2 English.book Page 22 Lundi, 26. mai 2003 10:45 10
Page 24

23
Phonebook
The phonebook menu allows you to create new contacts, to create cal l
groups and to check the memory available to store new contacts.
In the
Phonebook screen
, press the
right programmable key
to
enter the menu.
Press the
up key to position the cursor on the
Phonebook menu
and
accept
.
Choose from the options of fered add contact, call group, memory, my
numbers).
Add contact
Select
Add contact
and accept and press the
right programmable
key
to enter the menu.
Choose the place where you wish to enter the contact (SIM card or
telephone) using the
down
/
up
keys, and
accept
.
Enter name of your correspondent and
accept
.
Enter telephone number and
accept
.
Choose a
call group
to which you want to allocate this con tact and
accept
. (See page 25: call groups)
Phonebook menu
Phonebook
Back OK
Phonebook
My-X2 English.book Page 23 Lundi, 26. mai 2003 10:45 10
Page 25

24
Phonebook
Call groups
(See page 25)
Memory
Select
memory
and
accept
.
The screen displays the number of free locat ions on SIM card and in
telephone itself.
My numbers
You can create the entries corresponding to your own numbers in order
to consult them when necessary.
Select
My numbers
and
accept
.
Enter the different details and
accept
.
Phonebook menu
My-X2 English.book Page 24 Lundi, 26. mai 2003 10:45 10
Page 26

25
Phonebook
You have the facility to group your contacts into call groups.
It is possible t o allocate charact eristics t o each group (icon, ring tone,
vibrate).
Creating new groups:
Do same as above to obtain the
phonebook menu
and
accept
.
Press
down key to position the cursor on
Call groups
and
enter
.
By default, the cursor is placed on
Call groups menu, accept
.
Choose one of the options offered (Create group or memory available).
Creating a group
By default, the cursor is placed on
Create group, enter
.
Enter group name and
accept
.
Choose the
icon, ring tone
and
vibrate
mode that you want to allocate
to this group (
accept
after each step).
Memory
Select
memory
and OK.
The screen displays the number of locations available for new groups.
Call groups
6 default call groups have already been created. You can create others.
Back Options
Phonebook
Call groups
My-X2 English.book Page 25 Lundi, 26. mai 2003 10:45 10
Page 27

26
Messages
The message menu brings together the following two types of messages:
SMS and EMS (an EMS is an extended message, longer t han an SMS
with images and sounds added). It is possible to exchange different types
of contents: text, call group icons, screen backgrounds, tunes, WAP
bookmarks..
From the
Messages
menu select the
Compose
menu and
enter
.
By default, the language used is the language activated in the
telephone's menu display (or English if a language not supported by Easy
Message T9™ has been chosen for the menus).
When the text has been entered, the
right programmable key
(
choice
) can also be used to access the functions offered:
Send
is used to send the mess age by entering th e corres p ondent's number.
T9 options
(see next page)
ABC mode
(see page 28)
123 mode
(see page 28)
Cancel
is used to delete a ll text enter e d
Activate/deactivate zoom
is used to modify size of characters
Store
is used to save a draft in
memory
Formatting
is used to enrich a text
Insert
to insert an image or sound into your messag e
(see page 28).
Composing messages
This menu allow s you to compose your messages.
M
essages
T
his menu has been
c
ompiled in collaboration with
My-X2 English.book Page 26 Lundi, 26. mai 2003 10:45 10
Page 28

27
Messages
The Easy Message T9™ helps you to convenientl y enter your short
messages.
Using T9 Mode
Press once the key co rrespo nd ing to the le tter chos en and m a ke th e w ord by
continui ng to press t he keys corr esponding to the various l etters wit hout
paying attention to the display, until you have finished inputting the word: it
then appears in inverse video.
If the word offered is what you wanted to enter, press the 0 key to
accept it, create a space and move to the next word.
However, it is possible that several words exist in the corresponding
dictionary for the same sequence of keys pressed. If the word that appears is
not the word you expected, press the
right programmable key
indicating to scroll through the words held in the dictionary
corresponding to this key sequence.
When you find the chosen word, press the 0 key to acc ept it, crea te a space
and move on to the down word.
Press the
right key
to simp ly accept the chara cters ente red without creatin g
a space and moving on to another T9 word.
If the word you a re expecting is not proposed, please go on adding characters
until you get the message “Add a word?”. Select “Yes”, correct the word when
necessary and press ”OK”.
D
rafts
T
9
D
rafts
T
9
Messages
My-X2 English.book Page 27 Lundi, 26. mai 2003 10:45 10
Page 29

28
Messages
In the input screen, t he
right programmable ke y
is used to access
other input options.
Input modes
The
ABC mode
is used to enter words that do n ot exist in the dictiona ry. To
obtain a letter, press the corr espon ding key sever al times, th e letters an d the
number scroll past.
Mode 123
is used to inse rt nu m b e rs .
Insert mode
is used t o insert symbols, an imations, c all group icons and
tunes: the SMS then becomes an EMS. Images and sounds can be two
types: pre-defined or customised. Pre-defined images and sounds are
smaller in size, especially su ited to ex c h anging messages.
Upper case:
A quick touch of the key
will display the next letter in upper case.
Two short presses on the
key
allow yo u to switch to u pp er cas e e d iting
mode for the w hole message.
Punctuation characters
Punctuati on charact ers are obt ained wit h the help of k ey 1 (except in
123
mode), or with the help of
Insert
mode (fast access via the
key
).
Accented characters
Accented characters are generated automatically in T9™ mode.
In ABC mode accented characters are available by pressing the key
supporting the non-accented character in succession.
When comp osing a message:
The navigation keys assume th
e
following fu n ctio ns :
-
Left key :
Last word
-
Right key :
Next word
-
Up key :
Previous line
-
Down key :
Next line
-
Left programmable key
:
Deletes last letter
-
Right programmable ke
y
:
Message options
-
Hold down key:
Zoom mode (changes size o
f
characters)
-
Short press of key:
Access to symbo l table
My-X2 English.book Page 28 Lundi, 26. mai 2003 10:45 10
Page 30

29
Messages
The number of messages stored in the SIM card varies depending on the
card's capacity.
When you recei ve a message , an a udi o sig nal sounds (t he one s ele cted in
the
Sounds
menu) and the m essage icon ap pears on your telephone scre en.
If you do not read the messages, this icon remains displayed on the screen.
When it flashes, th e memory is full.
Receiving icons, bac kgrou nds o r tunes ca n take seve ral seco nd s. Me ssa ges
inform you of the p ro gr ess of the download.
You have the fa c ility to do th e following at any time:
- To mask this progress screen by pressing the
left programmable key
to make a call or access other telephone in fo rm ation.
- Or stop th e download i n progress by pr essing th e
right programmable
key
.
Consult your network operator on the downloading of icons, backgrounds or
tunes.
Receiving messages
Menu
Fri 3 May
My-X2 English.book Page 29 Lundi, 26. mai 2003 10:45 10
Page 31

30
Messages
Received messages are stored in th e SIM card or in the telephone unt i l
you choose to delete them.
From the
Messages
menu choose the
Inbox
menu and
Select
.
Each message contains information on type of message (in the form of an
icon) and time (or date) of reception.
Unread messa ges a re entere d in bold an d arrange d by arrival time an d date.
Select a message and press the
right programmable key
.
Choose fro m the opti ons offer ed (Rea d, Forwar d, Delet e read, reply, reply
with orig inal message, call, s e nd, delet e , delete all).
If your message contains objects (images or sounds), you can save them in
order to use them later (stored in your telephone's memory); when reading
text, place th e cursor on the o bject an d choose t he Save op tion fr om the
options on the
right programmable key
.
When they have been stored in memory, the space required in the telephone
is then in dicated.
You can consult them in the correspond ing menus ( WAP bo okmarks in
WAP
,
tune in
Sounds
, backgrounds in
Background
, and icons in
Call groups
).
From the
Messages
menu choose the
Drafts
menu and
Select
.
Select a messag e and pr ess the
right programmable ke y
. If you do
not delete this message, it will remain as a draft and can be re-used even if
you have already sent it.
Choose from th e options offered (Read, Send, Delete, Delete all, Mo d ify).
Inbox
Drafts
When you store a composed m essage, it is stored amo ng the drafts.
Messages
M
essages
My-X2 English.book Page 30 Lundi, 26. mai 2003 10:45 10
Page 32

31
Messages
l
From the
Messages
menu choose the Send
Options
and
Select
.
From the send options offered (acknowledgement, reply offered, period of
validity -
life cycle of message on network before being routed
-, message
format, message centre).
From the
Messages
menu select the
Memory
option and
Select
.
The screen shows you the memory available on the SIM card and in the
telephone.
Sending options
Several sending options are offered.
Memory
You may want to know the memory available for saving messages.
Messages
Messages
My-X2 English.book Page 31 Lundi, 26. mai 2003 10:45 10
Page 33

32
WAP
WAP (Wireless Application Protocol): protocol that translates the Internet
language into W ML la nguage th at can be read by a mobile. T he W AP function
allows yo u to log o n to ce rt ain In te rn et sites . Y o u can lo g on to s ites tha t a llo w
you to download tunes, icons or animated screensavers to your telephone.
The
Services menu
, a dropdow n me nu, can be acc es sed at all times when
navigating through WAP pages.
Select the top left icon using the
up
key.
Consult the menu using the
right programmable key
.
The
Services menu
contains all the following sub-menus:
Welcome:
logs onto the home page.
(carries the name of your access provider)
Bookmarks:
is used to save in a phonebook the names and addresses of
Internet sites to fa c ilitate easy access .
You can receive bookm a rks from S M S and add them to this list (see chapter
on SMS).
You can also send messag es by SMS: select a bookm ark, pr ess th e
right
programmable key (Choice)
, then se lect
Send by SMS
.
Go to URL:
this menu allows you to input an In te rnet address directly.
Inbox:
this me n u allows y ou to consult messages se nt by the Internet s ite .
Save image:
is used to save a WAP site image (option).
Reload:
refreshes the curren t p age.
Clear the cache:
clears the stored information on previous logons.
The WAP Menus
T
he WAP navigator is und
er
l
icence:
T
he WAP navigator is the exclusiv
e
p
roperty of Openwave. For th
is
r
eason, it is forbidden to modif
y,
t
ranslate, disassemble or eve
n
d
ecompile all or part of the softwa
re
t
hat makes up the navigator.
You can ac t ivate the magnify ing
glass to increase the size of the
characte rs by holdi ng down the
#key
.
My-X2 English.book Page 32 Lundi, 26. mai 2003 10:45 10
Page 34

33
WAP
Advanced…:
offers the following advanced settings
- Configuring parameters
- Show URL
- Logoff
- Circuit message (if user can confirm each logon)
- Security (is used to access i nformat ion on making WAP connect ions
secure).
About…:
information on the browser.
Exit:
returns to the telephone's home page.
Select the
Advanced…
menu, the n the
configuration
menu.
Choose from the sub-menus offered:
Logon parameters
is used to select or modify your access prov ider's l ogon
parameters or configure the parameters of other access providers.
The active access ser vice is preceded with a sta rt.
Configuration of WAP parameters:
All information to be entered in the parameters a re provided by your
operator or access provider.
- Choose desired access service, then press
Choice
.
- Enter title of service and accept.
- Enter Internet address of home page and accept.
The
GSM parameters
to be entered are:
- User name
- Password
- IP address of WAP gateway
- Port type (secure or insecure)
- Call number
- Access mode (digital, analogue or automatic)
In automatic mo de acces s can be g ained to the operator's ne twork by a digital
link and by an analogue link to a different netw or k ( in ro aming).
Configuring WAP parameters
My-X2 English.book Page 33 Lundi, 26. mai 2003 10:45 10
Page 35

34
WAP
Once all the settings have been entered, you can act ivate the chosen
access provider. Select him from the list. Confirm your choice with OK.
Inactivity time
is used to choose the time after which the call is
automatically disconnected if you have forgotten to log off from a service.
Using the
Welcome
menu, you can log onto your access provider's
WAP site by pressing the
right programmable key
.
If you are logging onto the GSM network, the @ symbol flashes, the
metering of the cost of the call starts as soon as it stops flashing.
Some WAP sites allow you to download ring tones, icons or animated
screensavers. Once downloaded, they are stored in your telephone's
memory. You can then save them in your teleph one (same op eration as used
for downloading using SMS).
To log off press
Stop
key.
The logoff happens automatically after a few seconds of inactivity if you forget
to log off.
This period is def in ed by the in activity time setting .
WAP Log ging on
Downloading objects
WAP Log ging off
My-X2 English.book Page 34 Lundi, 26. mai 2003 10:45 10
Page 36

35
Games
Your phone is supplied with the game: Picture puzzle.
From the
Picture puzzle
menu press
Select
.
On line h elp is supplied to u s e the gam e .
Picture puzzle
G
ames
My-X2 English.book Page 35 Lundi, 26. mai 2003 10:45 10
Page 37

36
Sounds
This menu allows you to customise the ring tones on your telephone and
to activate beep and vibrate modes.
From the
Sounds
menu choose
Ring tone
menu and
Select
.
Select the type of event from the list offered (Alarm, Calls, Messages
and Fax) and
accept
.
Select the
ring tone
from the list offered and
accept
.
Adjust the
volume
using the
down /up
keys and
accept
.
You can deactivate the sound by pressing the
key
.
From the
Sounds
menu choose the
Vibrate
menu and
Select
.
Select the vibrate mode from the ch oice s offered (ring tone and vibr ate ,
vibrate only, vibrate inactive or vibrate plus ring tone) and
accept
.
Volume and
ring tone
This me n u allows y ou to allo c a te a ring tone to ea c h type of e v ent.
Vibrate
This menu allow s you to activate the vibrate mode for calls.
S
ounds
S
ounds
My-X2 English.book Page 36 Lundi, 26. mai 2003 10:45 10
Page 38

37
Sounds
WARNING: vibrate mode is not a priority in relati on to the choice of ring
tones in the call groups. To make vibrate mode apply in general , swit ch
to Silent mode.
From the
Sounds
menu select
Silent mode
and
Select
.
Activate
or
deactivate
Silent mode and
accept
.
Silent mode can also be access ed vi a the ho me page by hol ding down
the key.
When the device is in silent mode, the relevant icon appears on the
home page.
In this mode the ring tone will not function, except for the alarm clock..
From the Sounds menu choose the
Beeps
menu and
Select
.
Select the type of beep you want to allocate from the choices offered (Key
beep, Network beep or Battery beep) and
accept
.
Activate or deactivate the beep and
accept
.
In the case of key beeps, you can al so choose from the two types o f
beeps offered: key beeps or Dtmf tone (different beep depending on the
key pressed).
Silent mode
This me n u allows y ou to switch to Sile nt mode.
Beeps
This menu allow s you to activate a beep f or each type of event.
S
ounds
S
ounds
My-X2 English.book Page 37 Lundi, 26. mai 2003 10:45 10
Page 39

38
Background
This menu allows you to customise your screen by choosing the colour,
background image, animation or greeting message.
From the
Background
menu select the
Colours
menu and
Select
.
Select the colour you want to see during navigation from the menus and
accept
.
From the
Background
menu select the
Wallpapers
menu and
Select
.
Select the Wallpaper and
Select (right programmable key
). The
image appears in the background of the home page.
Press the
right programmable key
to select this choice, or the
left
programmable key
to return to choice.
Colours
This menu allow s you to display the colours you want on your mobile.
Wallpapers
This menu allows you to display the background image you want on your
mobile.
B
ackground
Background
My-X2 English.book Page 38 Lundi, 26. mai 2003 10:45 10
Page 40

39
Background
From the
Background
menu select the
Screensavers
menu and
Select
.
Select a screens aver from the options offered and accept.
The chosen screensaver appears on the screen ,
accept
it.
Adjust the screensaver display time (greater than 60 seconds) and
accept
. The screensaver appears at the end of each period of inactivity.
Warning: the animated screensaver uses processing power. For a better
efficiency you can deac tivate the scree n saver or select the activation
time to be more than every 300s.
From the
Background
menu select the
Greeting message
menu and
Select
.
Enter the text that you want to see appear in the greeting message (when
you switch on) and
accept
.
Screensavers
This menu allows you to display an animation when the telephone is in
standby mode.
Greeting message
This menu allow s you to customise your greeting message.
B
ackground
B
ackground
My-X2 English.book Page 39 Lundi, 26. mai 2003 10:45 10
Page 41

40
Settings
This menu allows you to customise the settings of your telephone to make it
as convenient as possible for you to use.
From the
Settings
menu select the
Date / Time
menu and
Select
.
Date:
set the date by entering it directly in digital form or by using the
down /
up
keys.
Use the
right key
(or left ) to acce s s the next (or last) in put field.
Once t h e date is correct,
accept
it.
Time:
same procedure as for setting the date.
From the
Settings
menu select the
My objects
menu and
Select
.
The amount of memory available is displayed. This memory is divided
between your downloaded ring tone s, wallpapers and screensavers.
You can delete your objects to increase the memory available for new
downloads.
Date / Time
This me n u allows y ou to set the date and time o f your tele phone.
My Objects
This me n u a llows you to fin d o ut ho w m uc h m e m or y is a va ila ble fo r o bje c ts .
Back
Settings
Settings
Back
Select
My-X2 English.book Page 40 Lundi, 26. mai 2003 10:45 10
Page 42

41
Settings
From the
Settings
menu select the
Languages
menu and
Select
.
Select the language of your choice and
accept
.
If you sel ect
Automatic
, the display language will be the language of your
SIM card.
From the
Settings
menu select the
Networks
menu and
Select
.
Choose
Preferred
to view all the pre-registered networks.
Choose
Selection
to activate (automatically or manually) one of the
networks accessible in the area in which your are located.
Languages
This menu allows you to choose your telephone's display language.
Networks
This menu allows you to configure network preferences.
Settings
Back
Select
Settings
Back
Select
My-X2 English.book Page 41 Lundi, 26. mai 2003 10:45 10
Page 43

42
Settings
From the
Settings
menu select the
Contrast
menu and
Select
.
A test screen allows you to adjust the contrast by means of the
down / up
keys and
enter
.
From the
Settings
menu select the
Energy saving
menu and
Select
.
Activate
or
deactivate
the backlight and
accept
.
By deactivating the screen backlight you increase the battery life of your
telephone.
WARNING: dis play legibility is redu c ed.
Contrast
This menu is us ed to adjust screen contrast.
Energy saving
This function is used to deactivate the screen backlight.
Back
Select
Back
Select
My-X2 English.book Page 42 Lundi, 26. mai 2003 10:45 10
Page 44

43
Settings
From the
Settings
menu select the
Shortcuts
menu and
Select
.
Select the key that you wish to modify and
accept
.
Choose the fun c tion that y o u want to allocate t o this key a nd
accept
.
From the
Settings
menu select the
RES
menu (Reset) and
Select
.
WARNING: you are a bo ut to lose all the do wnlo ade d obj ects and
all the settings made on your telephone since you bought it.
A validation scree n allows yo u to confirm this choice.
The telephone switches of f and resets a utomatically w hen po wered up to take
account of the change of settings.
Shortcuts
This menu allows you to allocate functions to the programmable keys.
Reset Settings
This menu a llow s you to re se t all yo u r tele ph on e 's s ettin g s.
Back
Select
Back
Select
My-X2 English.book Page 43 Lundi, 26. mai 2003 10:45 10
Page 45

44
Calls
The Calls menu allows you to manage and consult all your telephone's
incoming and o ut going calls that are marked as follows:
Incoming call
Outgoin g call
Depen din g o n yo ur su bs c rip tio n, th is se r vic e allo w s yo u to re -d ire ct inc o m ing
calls to a different number or answer phonebo x.
From the
Calls
menu select the
Calls Forwarded
menu and
Select
.
Choose the typ e of forwarding you wa nt from the options available.
Forward calls
This menu a llow s you to tra ns fe r ca lls a dd re sse d to yo u .
My-X2 English.book Page 44 Lundi, 26. mai 2003 10:45 10
Page 46

45
Calls
Fast access to the list of calls from the ho me pa ge: press the
Start
key.
From the
Calls
menu select the
View last calls
menu and
Select
.
Each call contains information on type of call (in the form of an icon), time (or
date) and duration .
Select a call from the list and
accept
.
Choose fro m the opt ions offered (Cal l, store in your phonebook, se nd a
message, delete , delete a ll).
You can also make the call by pressing the
Start key.
From the
Calls
menu select the
Counters
menu and
Select
.
Choose the type of cou n ter you w ant from the options offere d .
View last calls
This me n u allows y ou to access the list of last nu mbers u s ed.
Counters
This me n u allows y ou to consult the d uration o f the outgoing calls.
Back
Select
Back
Select
My-X2 English.book Page 45 Lundi, 26. mai 2003 10:45 10
Page 47

46
Calls
From the
Calls
menu select the
Display number
menu and
Select
.
Choose from the options offered (Anonymous mode, My number, Caller’s
number).
Anonymous mode
You have the facility to mask your number o n the telephone from the per s o n
you are calling.
Initial:
network default mode.
No:
you choose no t to acti vate anonymous mode and so to di splay your
number.
Yes:
you choose to active anonymous mode and so not to display your
number.
Display number
This menu allow s you to modify the status of th e display number fun ction.
Back
Select
My-X2 English.book Page 46 Lundi, 26. mai 2003 10:45 10
Page 48

47
Calls
During a call you ma y be informed that a caller is trying to reach you: you he ar
a special tone. The caller's number is displayed on the screen (or the caller's
name if it has been stored).
From the
Calls
menu select the
Call waiting
menu and
Select
.
You can
activate, deacti vate, or consult t he status
of the call waiting
service in orde r to check if it is active or not.
During a call, if a second caller tries to contact you, the screen displays
the call warning.
From the
Calls
menu select the
Automatic redial
menu and
Select
.
You can set the redial fun ction to in a c tive, on d e mand or systematic.
If you choose
On demand
, your telephone will offer to redial your caller
automa tically if the n umber is b usy.
Call waiting
(Operator-depend ent service)
Automatic redial
This menu allows you to call back a person you tried to reach.
Back
Select
Back
Select
My-X2 English.book Page 47 Lundi, 26. mai 2003 10:45 10
Page 49

48
Calls
This number will be used when you make a call from the answer phonebox
using the programmable keys.
From the
Calls
menu select the
Answer phone number
menu and
Select
.
Enter your answer ph one
number
and
accept
.
You can choo se w h ether or n ot to receive in forma tion (ask the c om pa ny w ith
which you took o ut your subscription).
From the
Calls
menu select the
Local info
menu and
Select
.
Answer phone
number
This function is used to set your answer phone number.
Local info
This menu is u sed t o act ivat e re cepti on of loc al i nfor mati on br oadcast by
the n e twork.
Back
Select
My-X2 English.book Page 48 Lundi, 26. mai 2003 10:45 10
Page 50

49
Security
This menu allow s you to configure your phone's security settings.
From the
Security
menu select the
Lock keypad
menu and
Select
.
Select
Activate
or
deactivate
and
accept
.
The lock icon appears on the home page.
This function is also available in the home page via a combination of the
and
Select keys (right programmable key ).
From the
Security
menu select the
PIN number
menu and
Select
.
To modify the P IN, select
Modify
and
Select
.
Enter old PIN and
accept
.
Enter new PIN twice and
accept
.
To activ ate or dea ctivate the PIN, se le ct the
Check PIN
menu and
Select
.
Enter PIN and
accept
.
Select
Activate
or
Deactivate
and
accept
.
Keypad locking
This menu allow s you to lock the keypad .
PIN number
This menu allows you to activate and mod ify your phon e's PIN.
Back
Back
Select
My-X2 English.book Page 49 Lundi, 26. mai 2003 10:45 10
Page 51

50
Security
The
Phone code
menu allows you to activate the phone code so that it is
requested and checked whenever the phone is switched on if a different SIM
card is u se d . T h is c od e is a uto m atic a lly link ed to th e S IM c a rd in sta lled w h en
the phone is activate d.
* This function may or may not be available depending o n your SIMcard.
Proceed as ab ove in order to activate, deactiv ate or modify PIN number 2 of
your phone.
To activ a te or deact ivate the ph one code , select the
Phone code
menu and
accept
.
Enter 0000 and
accept
.
Select
Activate
or
Deactivate
and
accept
.
To modify the ph one code, select
Modify
and
accept
.
Enter old phone code and
accept
.
Enter new phone code and
accept
.
Enter phone code again to verify it and
accept
.
PIN number 2
You have a second PIN number to allow you to access certain functions*.
Phone code
The phone cod e is a secret code intend ed to protect the phone if sto len .
Back
Select
Back
Select
My-X2 English.book Page 50 Lundi, 26. mai 2003 10:45 10
Page 52

51
Security
The
Confidentiality
functi on is used t o del ete number s sto red in Vi ew last
calls and the SMS stored in the me mory whe n a new SIM card is inserted into
the phone.
From the
Security
menu, select the
Confidentiality
menu and
Select
.
Select
Activate
or
Deactivate
and
accept
.
From the
Security
menu, select the
Operator code
menu and
Select
.
Access to this se r v ice depen ds on your type o f subscript io n.
Confidentiality
Operator code
This menu allows you to modify the call barring.
Back
Select
Back
Select
My-X2 English.book Page 51 Lundi, 26. mai 2003 10:45 10
Page 53

52
Security
Call barring can be applied to ALL calls (incoming and outgoing), to all
incoming calls when you are away from your home country (if roaming
available).
Before you ca n use th is serv ice, a pa ssw ord w ill be pro vided by you r ope rator
when you take out your subscription.
From the
Security
menu, select the
Call barring
menu and
Select
.
Select
Activate
or
Deactivate
and
accept
.
Access to this se r v ice depen ds on your subscription type.
From the Secu rity menu, select th e
Fixed dialli n g
menu and
Select
.
Enter PIN number 2 and
accept
.
Select
Activate
or
Deactivate
and
accept
.
Proceed as for any other phonebook.
By activating this function, you can send calls only to the numbers stored in
this phonebook.
This phonebook is linked to the SIM card, and its size depends on the card's
capacity.
Call barring
This menu allow s you to block the send ing or r eception of certain calls.
Fixed dialling
This menu allows you to restrict the sending of calls.
Back
Select
Back
Select
My-X2 English.book Page 52 Lundi, 26. mai 2003 10:45 10
Page 54

53
Accessories
This menu allows you to access the various accessories offered by your
phone : calculato r, conver te r, alarm, timer, ca r kit, data parameters.
From the
Accessories
menu, select the
Calculator
menu and
Select
.
You can use the calculator with the help of the following keys:
Up key:
Add
Down key:
Subtract
Right key:
Multiply
Left key:
Divide
Right programmable key:
Equals
Left programmable key:
Delete
* key or #:
Decima l point.
If no calculations are being run, the
Right programmable key
allows
you to use the value in the
converter
directly.
Calculator
This menu allow s you to use your phone as a calculator.
Back
My-X2 English.book Page 53 Lundi, 26. mai 2003 10:45 10
Page 55

54
Accessories
From the
Accessories
menu, select the
Converter
menu and
Select
.
Enter a value and press the
Up key to convert from one currency to
another, or the
Down key to convert back.
The
right programmable key
allows you to use the following options:
Rapid exchange
If you check the Rapid exchange box, the converter will work in the home
page by enter ing the desi red numbers and pr essing the
up / down
keys to make the conversion.
Exchange rate
Enter the rate of exchange corresponding to the chosen currencies.
Currencies
Enter t h e two typ es of curr e ncies to be conv e rted.
Go to calculator
This option allows you to immediately use the value converted in
the
calculator
.
Converter
This menu allow s you to convert one c ur re ncy to another .
Back
Select
My-X2 English.book Page 54 Lundi, 26. mai 2003 10:45 10
Page 56

55
Accessories
The alarm works even when th e phone is switched of f.
From the
Accessories
menu, select the
Alarm
menu and
Select
.
Activate
or
Deactivate
the alarm and
accept
.
Set the waking time by entering the numbers directly or using the
down / up
keys and
accept
.
The alarm icon appears on the home page.
From the
Accessories
menu, select the
Timer
menu and
Select
.
Activate
or
Deactivate
the alarm and
accept
.
Set the duration by entering the numbers directly or using the
down / up
keys and
accept
.
The alarm icon appears on the home page.
Alarm
This menu allow s you to set and activate the alarm.
Timer
This me n u is used to set a n d activate the timer.
Back
Select
Back
Select
My-X2 English.book Page 55 Lundi, 26. mai 2003 10:45 10
Page 57

56
Accessories
From the
Accessories
menu, select the
Car kit
menu and
Select
.
Choose from the options offered (Automatic response, Switch off, Alarm
timing, Hands-free volume control).
From the
Accessories
menu, select the
Data
parameters menu and
Enter
.
Choose the cor rect speed depe nding on the Per sonal compute r you woul d
like to connect to the handset.
Car kit
This menu allows you to configure your phone with a car kit.
Data
This menu is used to configure the data exchange with a Personal
Computer.
Back
Select
Back
Select
My-X2 English.book Page 56 Lundi, 26. mai 2003 10:45 10
Page 58

57
Services
This menu allows yo u to acces s nume rous service s offered by yo ur operat or.
The list of these services will appear in the menu depending on your
subscription.
From the
Services
menu , c hoose fro m the list o ffered.
Services
This menu allow s you to access your operator's basic services.
My-X2 English.book Page 57 Lundi, 26. mai 2003 10:45 10
Page 59

58
Technical features
Use of your phone is subject to safety measures designed to protect users and their environment.
Electrical sa fety:
Only use th ose charge rs list ed in t he manufact urer’s catalo gue. Usin g any othe r charger may be dang erous; i t would al so
invalidate your warranty. Line voltage must be the same as that indicated on the ch arger’s serial plate.
Aircraft safety:
You must switch off your phone on aeroplanes when so instructed either by cabin cre w or by signs. Mobile phone use may be
dangerous to the operation of the aircraft and may disrupt the phone network.
Explosive materials:
Please comply with signs at petrol stations telling you to switch off your phone. You must also observe radio equipment usage
restrictions in chemical plants, fuel depots and at any location where blasting operations are under way.
Electronic medical equipment:
Your phone is a radio transmitter which may interfere with electronic medical equipment such as hearing aids, pacemakers, etc.
Your doctor or the man ufacture rs of such equipm ent will be able to give you any advic e you may need in this area. Alwa ys make
sure that your phone is switched off in hospitals when so instructed by signs or by medical staff.
Road safety :
Except in emergencies, do not use your phone when driving unless you have a hands-free kit enabling you to manoeuvre freely.
In order t o give your full at tentio n to driv ing, sto p and park safely bef ore maki ng a call . You must co mply with any curre nt
legislation.
This mobile phone complies with E uropean requirements governin g exposure to radio waves.
Your phone is a transmitt er/recei ver. It has been designed an d manufactu r ed to c omp l y wi th radiof requency energy exposure
limits recommended by the Council of the European Union and the ICNIRP for the entire population. These limits were
established by independent scientific agencies on the basi s of in-depth a nd regular evaluations of scient ific studies. The limits
include a large safety margin that is intended to guarantee the safety of all, irrespective of age or state of health.
The exposure s tandard for mobile phones uses a unit of measure called the SAR, or Specific Absorption Ratio. The SAR limit
recommended by the Council of the European Union and the ICNIRP is 2 W/kg*. Tests were conducted on a standardised usage
positio n ba s i s , with the ph one transmi t t ing at its max i m um level certified i n all its fr e q uency bands. Al t h ough the sta nd ar d i s e d
measurement is done at maximum power, the real SAR of the phone in use is generally very far below the maximum value. The
phone was design ed to op era te at the pow er level stric tly necess ary to e nsure c omm unicatio n with th e netw ork. In gene ral, the
closer you are to a base station, the lower the power at which th e phone will transmit.
Validation of conformity with European directive 1999/5 (directive R&TTE) is a pre-requisite for introducing any model of phone
onto the market. Protection of health an d the safety of the public and the user are a vital requirement of this dire ctive.
This model's maximum SAR v alue measured in the conformity test is 0.64 W/kg .
Although differences may exist from one phone to the other and depending on position, all comply with European regulations.
My-X2 English.book Page 58 Lundi, 26. mai 2003 10:45 10
Page 60

59
Technical features
Advice for limiting exposure to radiofrequency (RF) fields
For individuals concerned about limiting their exposure to RF fields, the World Health Organization (WHO) provides the
following advice:
Precautionary measures: Individuals: Present scientific information does not indicate the need for any special precautions for
the use of mobile phones. If individuals are conce rned, they might choose to limit their own or their c hildren’s’ RF exposure by
limiting the length of calls, or using "hands-free" devices to keep mobile phones away from the head and body.
Further i nfor mation on t his su bjec t can be obta ined from t he WHO home pa ge ht tp:/ /www. who.i nt/p eh-e mf WHO Fact sheet
193: June 2000.
*The SAR limi t for phone s used by the ge nera l publ ic is 2 wat ts/ki log ram ( 2 W/kg) on aver age f or 10 g of tiss ue. This value
includes a large safety mar gin to increase pr otection and to t ake account of the v ariations in mea surements. The SAR
information may v ary in differen t parts of the wo rld, dependin g on declare d national req uiremen ts and the freq uency ba nds used
by the network.
My-X2 English.book Page 59 Lundi, 26. mai 2003 10:45 10
Page 61

60
Warranties
Usage precautions
Your mobile phone allows yo u to download ring t ones, icons and animated screens avers. Some of these items may c ontain data tha t may
cause malfunctions of your mobile phon e or data losses (v irus for example) .
For this reason, Sagem rejects all r esponsibili ty concern ing (1) the reception of downl oaded data or lo sses o f the said data, (2) th e impact
on the operation of the mobile phone and (3) damag es res ulting from receiving the s aid down loaded data or l oss of s aid data . In addition,
Sagem states that a failure caused by receiving downloaded data that do not comply with the specifications set by Sagem is excluded
from the warranty. Consequently, the diagnosis and repair of a phone infected by the said downloaded data will be at the expense of the
customer.
Warra nty conditions
Whenever you wish to make use of the warranty, please contact your vendor and present him with the purchasing paperwork that he gave you.
If a fault occurs, he will advise you.
If you bought your phone directly from SAGEM SA, th e following rules will apply:
1.
The new equipment (excluding consumables), including new accessories bundled with the phone, are guaranteed by SAGEM SA, par ts
and labour (apart f rom travel ) ag ainst an y m anufacturing fault for a period of twelve (12) m onths w ith ef fect from the s ale of the equ ipment
by SAGEM SA to the customer, on presentation of the paper work statin g the purchase date of the equipment.
Equipment that has been repaired or replaced as standard during the warr anty period s tated abov e is guara nteed (pa rts and labour) until
the later of these two dates:
Expiry of the guarantee peri od of twelve (12) mo nths stated above or three (3) months with eff ect from the support prov ided by SAGEM SA.
In any disputes, the equipment is covered by the legal w arranty again st the conseq uences of faults or hi dden defect s in compliance with
articles 1641 and subsequent of the French civil code.
2.
All faulty equipment und er w arr ant y wi ll be replaced or repaired free o f cha rge at SAGEM SA's option (with the e xclus ion of repair of any
other damage), once it has been specified that the work required for the application of the warranty will be done in a workshop and that
the return costs (transport and insurance) of t he equipment to the address to be indi cated to it by the SA GEM SA after-sales service, whose
phone number will appear on the delivery not e, will be charge d to the customer.
Subject to essential legal provisions, SAGEM SA does not accept any warranty, explicit or implicit, other than the warranty provided
expressly in this chapter, nor shall SAGEM SA accept responsibilit y for any im ma ter ial and/or indirect damages (such as loss of orders,
loss of profit or any other financial or commercia l damage) und er the warra nty or not.
3.
The acceptance of an item of equipment under warranty demands that a purchase document that is legible and without modi-fication,
stating vendor's name and address, dat e and plac e of purc has e, type of equipment and IMEI, are attached to the warranty, and that the
information on the equipment identifica tion label is legible and that this lab el or any other sea l has not been tampere d with.
The warranty applies in normal conditi ons of use.
My-X2 English.book Page 60 Lundi, 26. mai 2003 10:45 10
Page 62

61
Warranties
Prior to sending the equipment for repair, it is the customer's responsibility to backup at his expense the customised data stored in the
equipment (phonebook, settings, wallpapers). A list of backup facilities can be provided by SAGEM SA on request. The responsibility of
SAGEM SA cannot be invoked if damage occurs to customer files, programs or data. The information or operating elements and the
contents of files will not be re-installed in any case in the event of loss.
SAGEM SA may decide, at its option , to repair the equip ment with new or reco nditioned parts , replace the equipme nt with new equipment
or, in any dispute, equipment in good working condition. D urin g it s wo rk SAGEM SA reserves the facilit y to ma ke, w here necessary, any
technical modifications to the equipmen t where these m odifications do not adversely af fect its initial purp ose.
Faulty parts to be replaced during a repair under warra nty will bec ome the property of SAGEM SA.
The equipment repair and stands till time during the warranty period may not lead to an extension of the warrant y period as stated i n art icle
1 above, provided no other vital provision s have been agreed.
The application of the warranty is subject to the full pa yment of the sum s due for the equipmen t when the request for support is mad e.
4.
The following are excluded from the warranty :
Breakdowns or malfunctions due to non-compliance with the installation and use instructions, to an external cause of the equipment
(shock, lightning, fire, van dalis m , ma lice, wa ter dam age of any type, contact with various liquids or any harmful agent , unsuit able electric
current...), to modifications of the equipment made without the written consent of SAGEM SA, to a servicing fault, as described in the
documentation supplied w ith the equ ipment, to lack of superv ision or ca re, to poor environ menta l conditions of the equipm ent (espec ially
temperature and hygrometry, effec ts of variations in ele ctric voltage, inte rference from the mai ns network or earth ) or even due to a repair,
a call-out (opening or trying to open the equipmen t) or to servicing done by personnel not appr oved by SAG EM SA.
Damage resulting from inadequate pack aging and/o r poor packing of the equ ipment sent back to SAGE M SA.
Normal wear and tear of equipment and acces sories.
Communication problems linke d with a poor enviro nment, espec ially:
Problems accessing and/or logging onto the Internet, such as breakdowns of the access network, the failure of the subscriber's or his
correspondent's line, transm ission f ault (p oor geograp hic cov erage by radio t ransmitters, interfere nce, disturbance, fai-lur e or poor quality
of phone lines...), a fault inherent to the local network (cabling, file server, user terminal) and/or transmission network fault (interference,
disturbance, failure or poor quality of the netw ork...).
Change of parameters of the cellular network made after the equipm ent was sold.
Supply of new software versions.
Current servicing work: delivery of consumables , installation or replacement of these consumabl es...
Call-outs for equipment or software modified or added with out the written con sent of SAGEM SA.
Faults or disruptions resulting from the use of produc ts or accessorie s not comp atible with the equi pment.
Items of equipment returned to SAGE M SA withou t ha vin g complied with the return procedure specific to the equipment covered by this
warranty.
The opening or closing of a SIM operator key and c all-outs resulting in the non-operation of the equipm ent res ulting f rom the opening or
closing of SIM operator key done without the agreement of the original oper ator.
5.
In the cases of war ranty ex clusion and of expiry of the warrant y pe riod, SAGEM SA shall draw u p an estima te to be give n to th e customer
for acceptance before any call-out. The repair and carriage costs (there and back) given in the accepted estimate will be charged to the
customer.
My-X2 English.book Page 61 Lundi, 26. mai 2003 10:45 10
Page 63

62
Warranties
These provisions are valid unless a special written agreem ent has bee n made with the customer, and shall apply in mainland France. If
one of the provisions turns out to infringe a legally essential rule that consumers could have the benefit of under the national legislation,
this provision will not be applied, but all other prov isions wi ll remain v alid.
My-X2 English.book Page 62 Lundi, 26. mai 2003 10:45 10
Page 64

63
Troubleshooting
P
ROBLEM
- S
ITUATION
ACTIONS
Impossible to start phone
Hold down the
Start
key (3s).
Charge the phone up for 15 minutes befor e starting it again.
Check the battery change icon s crolls.
Yes: charge correct.
No: disconnect the charger, then reconnect it, check that the battery icon scrolls.
Press the right programmable key "Start".
If the i con contin ues not t o scroll, repeat the disconnect and connec t operati on
several times. If the battery still does not charge, contact the after-s ales service.
When the charge battery icon has stopped flashing, the battery is charged.
BATTERY STATE UNKNOWN
message
The batter y has not been reco gnised by the phone. Check that the ba ttery is
correctly installed in the phone .
LOW BATTERY message
This message is displayed when the battery becomes too weak. The phone
switches itself off automa ti cally. P ut the phone on charge.
SIM ABSENT message
Check SIMcard is present and properly installed.
Visually check the SIM card. If the card is damaged, contact the operator's point of sale
to check. If the message contin ues, co n ta ct th e afte r -sal es servi ce .
PIN INCORRECT Message
PIN keying error. Ca ution: after three attempts, the SIM ca rd is locked.
SIM LOCKED message
Three wrong PIN have been entered. Enter your PUK code to unlock the
SIM card.
You must then enter: **05*PUK*PIN*PIN#
PUK: PUK ( Personal Unblock i ng Key) code su pplied by your operator.
PIN: your PIN.
After 10 failed attempts, the SIM c ard is permanently locked. You wi l l th en need to
contact your operator or SMC to obtain a new SIM card.
LOCK SIM
At the request of the operator, the phone may be used only with certain types of
SIM cards. This message indicates that the SIMcard used is not suitable.
Remove the SIM card and restart the phone. If the SI M ABSENT message appea rs,
check the compati bility of the SI M c ard with the company that sold you the phone.
Otherwise, contact the after-sales service.
No call connection
Check the called number. Check that at least one signal strength bar is present. If
the R ico n appe ars with out any opera tor name b eing dis play ed, o nly emer gency
calls are possible.
Check that your call cred it with you r oper ato r has not be en us ed u p.
Check that the SIM card used offers the service that you are requesting and that
its validity has not expired.
Check and deactivate the restriction on outgoing calls if necessary.
The network is overloaded. Call again later.
If the poor ca l l connection persists, contact the hotline.
My-X2 English.book Page 63 Lundi, 26. mai 2003 10:45 10
Page 65

64
Troubleshooting
No call reception
Try to make a call to check that the phone and the network are operational. Check
and deactivate the permanent calls forwarded (permanent calls forwarded icon
displayed). Check and deactivate the restriction on incoming calls if necessary. If
the poor reception persists, contact the hotline.
Network reception l ess good
during a call
Avoid holding the phone with your fingers at the top of the rear cover; this creates
an obstacle for the antenna located at this spot.
Impossible to send message
Check that the SIM card used offers this service. Try to make a call to check that
phone and network are op er ationa l.
Check the answer phone number is properly configured. To do this, go to the "Calls"
menu, select "Answer phone number" and check the number. Otherwise, enter your
operator's answer phone centre number.
No answer phonebox
Check that the SIM card does offer this service.
Programme the call to be forwarded to answer phoneusing the information
provided by the operator.
Answer phone icon flashing
Call the answe r phone to mak e it disappear.
Backlight does not work
Go into the
Settings
menu, selec t th e
Energy savi ng
menu and act ivate ba ckligh t
In WAP context:
SERVER NOT ANSWERING
message
Switch off and then switch phone back on.
Logon to home page impossible
In the
WAP
menu,
Clear the cach e
.
Operator name does not appear on
screen
Go into the
Settings
menu, select
Networks
, then
Selectio n
. Wait until the
operator appears, select it and accept.
How do I (un)lock the keypad?
Hit key
, then the
right programmable key (OK).
How do I switch to silent mode?
Hold key
down unless ring tone soun ds, wh en a short touch is enou gh .
How do I activate zoom?
Can be activated only in SMS and WAP screens; hold down key.
How do I remove the envelop that
appears on the sc re en ?
This envelop means that you have written or answer phone.
To remove it, all you need to do is ente r the "Messages" menu to rea d your
messages. The envelop is th en deleted.
In the case of a voice message, contact your answer phonebox and let it guide
you.
How do I lift the receiver that
appears on the sc re en ?
This receiver means that you have received answer phone in your message box.
To remove it, call your answer ph one.
How do I remove the written
message at the down of the home
page (1 call)
Press the
Stop key to return to the home page without messages.
Go into the
Messages
menu, select
Compose
and enter your message using the
T9 script (predictiv e input method), which is the default entry mode.
P
ROBLEM
- S
ITUATION
ACTIONS
My-X2 English.book Page 64 Lundi, 26. mai 2003 10:45 10
Page 66

65
Troubleshooting
How do I download ring tones?
Logon to one of the following site via your computer: www.planetsagem.com. This
site offers to send ring tones to your phone in the form of an SMS. You can also
logon to your operator's site. Once the SMS has been received, all you have to do
is save it: accept the option "Save messages" , the tune will then be added to your
list. In addition, you can logon to some sites by phone.
How do I free up memory to
download my objects (sounds,
images)
Go into the
Settings
menu, select
My objects
then delete some objects (too
many).
How can I in crea se t he effi cie ncy of
my phone?
The most efficient actions are as follows:
You can deactivate th e backlight (i n the menu
Settings/Energy saving
) or be
carefully where you keep your phone to make sure that the keys can’t be pressed
accidentally because any key press will activate the backlight.
You can deactivate the screensaver or select the activation time to be more than
every 300s (the screensaver uses processing power).
Make sure that you don’t obstruct the antenna with your fingers when using the
phone (see page14).
P
ROBLEM
- S
ITUATION
ACTIONS
My-X2 English.book Page 65 Lundi, 26. mai 2003 10:45 10
Page 67

66
Index
A
Accessories p6
Accessories (menu) p53
Activating your telephone p10
Adapter p6
Alarm p55
Anonymous mode p46
Answer phone number p48
B
Background p38, p39
Battery
Charging the battery p13, p14
Installing the battery p11
Beeps p37
C
Calculator p53
Call barring p52
Call groups p30
Calls
Emergency services p17
First call p17
Receiving a call p18
CALLS (menu) p44
Automatic redial p47
Call waiting p47
Calls forwarded p44
Counters p45
Display numbers p46
View last calls p45
Car kit p56
Changing cover p12
Charger p6
Colours p38
Confidentiality p51
Contact
Add contact p23
Delete contact p22
Modify contact p22
See contact p22
Contrast p42
Converter p54
Currencies p54
D
Data p56
Data and time p16
Date and time p40
Description p7
E
Emergency services p17
EMS p28
Energy saving p42
F
Fixed dialling p52
G
Games p35
Greeting msg p39
H
Hands-free mode p18
Home page p9
I
Icon p8, p9
Input modes p28
International p17
IP address p33
K
Keypad locking p7, p49
L
Languages p41
Local info p48
Lock keypad p49
My-X2 English.book Page 66 Lundi, 26. mai 2003 10:45 10
Page 68

67
Index
M
MegaBox Conquest p35
Memory p23, p31
Menus p2
Messages p26
Compose p26
Drafts p27, p30
Inbox p30
Sending options p31
N
Network p16
Networks p41
O
Objects p40
Operator code p51
P
Phone code p50
Phonebook p21
Phonebook Menu p23
Using the phonebook p21
PIN number p10, p15, p49
PIN number 2 p50, p52
Principles of navigation p8
Programmable keys p7
PUK code p15
R
Receiving messages p29
Reset setting p43
Ring tones p19, p36
S
Screensavers p39
Security p52
Send options p31
Services p57
Settings p40
Shortcut keys p7, p43
Silent mode p20, p37
SIM (card) p10
SIM card p11
SMS p28
Sounds p36
Switching off p18
T
T9 p27
Technical features p58
Text p26, p28
Timer p55
Troubleshooting p63
V
Vibrate p36
Volume p19, p36
W
Wallpapers p38
WAP
Services menu p32
WAP p32, p34
Configuring WAP parameters p33
Downloading objects p34
Services menu p32
WAP logging off p34
WAP logging on p34
Warranties p60
Y
Your phone package p6
My-X2 English.book Page 67 Lundi, 26. mai 2003 10:45 10
Page 69

Weight: 89 g
Size: 99.4 x 44.8 x 20.5 mm
Volume: 75 cm3
Original battery: Lithium ion 860 mAh
Battery life calls/standby: up to 5 h / 340 h
Multimedia objects supported:
Audio formats: iMelody, Midi, wave, HiFi
Graphic formats: bmp, png, gif, jpeg
Size of memory avai lable for r i ng tones and images t o be
downloaded: up to 300 KB.
The technical cha racteri sti cs of the produc t are subjec t to
change without notice.
Couverture My-X2.fm Page 2 Lundi, 26. mai 2003 11:09 11
 Loading...