

Sage The Smart Grill Pro BGR840, Smart Grill Pro BGR840 Instruction Booklet

Registered in England & Wales No. 8223512. Due to continued product improvement, the products illustrated or photographed
in this document may vary slightly from the actual product.
Copyright BRG Appliances 2015.
BGR840 UKM Issue - A15
Freephone (UK Landline): 0808 178 1650
Mobile Calls (National Rate): 0333 0142 970
www.sageappliances.co.uk
customerservice@sageappliances.co.uk
Register your product and get
more from your purchase
Product registration takes only a few
minutes and ensures a record of your
purchase. Registration also makes it
easier to get support and advice on any
questions or issues that you might have
in the future. If you wish, we can also send
you free recipes and additional hints and
tips on making the best of your appliance.
Go to www.sageappliances.co.uk
and click on ‘Product Registration’.
What’s on your mind?
Our constant aim is to improve the quality
and features of our appliances.
We welcome your comments and ideas in
assisting our ongoing development.
Go to www.sageappliances.co.uk
and click on ‘Support’.
Sage™ by Heston Blumenthal‰
Customer Service Centre
BGR840
the Smart Grill
™
Pro
Instruction Booklet

2 3
CONTENTS WE RECOMMEND SAFETY FIRSTCONTENTS
3 We recommend safety first
7 Getting to know your new appliance
9 Assembling your new appliance
10 Operating your new appliance
16 Grilling tips
17 Care & cleaning
19 Troubleshooting
20 Starter recipes from Sage
READ ALL INSTRUCTIONS
BEFORE USE AND SAVE FOR
FUTURE REFERENCE
• Before using for the first
time please ensure that
your electricity supply is the
same as shown on the rating
label on the underside of the
appliance. If you have any
concerns please contact your
local electricity company.
• Your Sage™ by Heston
Blumenthal
‰
appliance
includes a BS 13 amp
moulded mains plug on the
supply cord.
• Should you need to change
this plug, please complete
the rewiring as follows
(after safe disposal of the
moulded plug).
• Please note that a cut off plug
inserted into a socket is a
serious danger risk
• Wires are coloured as follows:
−Blue = Neutral
−Brown = Live
−Green & Yellow = Earth
• As the colours of the wire
may not correspond with the
coloured markings which
identify the terminals in
your plug, please refer to
the following:
−The Blue wire must be
connected to the terminal
which is marked ‘N’.
−The Brown wire must be
connected to the terminal
which is marked with the
letter ‘L’.
−The Green & Yellow wire
must be connected to the
terminal which is marked
with the letter E or the earth
symbol
.
• Please note that if a 13 amp
plug is used, a 13 amp fuse
should be used.
IMPORTANT SAFEGUARDS
At Sage™ by Heston Blumenthal‰ we are very safety conscious.
We design and manufacture consumer products with the safety of
you, our valued customer, foremost in mind. In addition we ask that
you exercise a degree of care when using any electrical appliance
and adhere to the following precautions.

4 5
WE RECOMMEND SAFETY FIRST WE RECOMMEND SAFETY FIRST
• Remove and safely discard
any packaging material
and promotional labels
before using the grill for
the first time.
• To eliminate a choking
hazard for young children,
remove and safely discard the
protective cover fitted to the
power plug of this appliance.
• Do not place the grill near
the edge of a bench or table
during operation. Ensure
the surface is level, clean
and free of water and
other substances.
• Do not use the grill on a sink
drain board.
• Do not place the grill on or
near a hot gas or electric
burner, or where it could
touch a heated oven.
• Position the grill at a
minimum distance of 20cm
away from walls, curtains,
cloths and other heat
sensitive materials.
• Always operate the grill on
a stable and heat resistant
surface. Do not use on a clothcovered surface, near curtains
or other flammable materials.
SAVE THESE INSTRUCTIONS
• Always ensure the grill is
properly assembled before
use. Follow the instructions
provided in this book.
• The appliance is not intended
to be operated by means of
an external timer or separate
remote control system.
• The lid and the outer
surface will be hot when the
appliance is operating.
• The temperature of accessible
surfaces will be high when
the appliance is operating
and for some time after use.
• Do not place anything on
top of the grill when the lid
is closed, when in use and
when stored.
• Always switch to the
appliance to the off position,
switch off at the power outlet,
then unplug the power cord
and cool completely when
the appliance is not in use or
before cleaning, attempting
to move, assembling,
disassembling and storing.
• Keep the grill clean. Follow
the cleaning instructions
provided in this book.
• The connector must be
removed before the appliance
is cleaned and that the
appliance inlet must be
dried before the appliance
is used again.
This appliance is marked with
a hot surface symbol, the lid
and the outer surface will be hot
when the appliance is operating
and for some time after use.
IMPORTANT SAFEGUARDS
FOR ALL ELECTRICAL
APPLIANCES
• Fully unwind the power cord
before use.
• Do not let the power cord
hang over the edge of a
bench or table, touch hot
surfaces or become knotted.
• Keep the appliance and its
cord out of reach of children
less than 8 years.
• To protect against electric
shock do not immerse the
power cord, power plug or
appliance in water or any
other liquid.
• This appliance can be used
by children aged from 8 years
and above and persons with
reduced physical, sensory
or mental capabilities or
lack of experience and
knowledge if they have
been given supervision or
instruction concerning use
of the appliance in a safe
way and understand the
hazards involved.
• Children shall not play with
the appliance. Cleaning and
user maintenance shall not
be made by children without
supervision unless they are
aged from 8 years and above
and supervised.
6 7
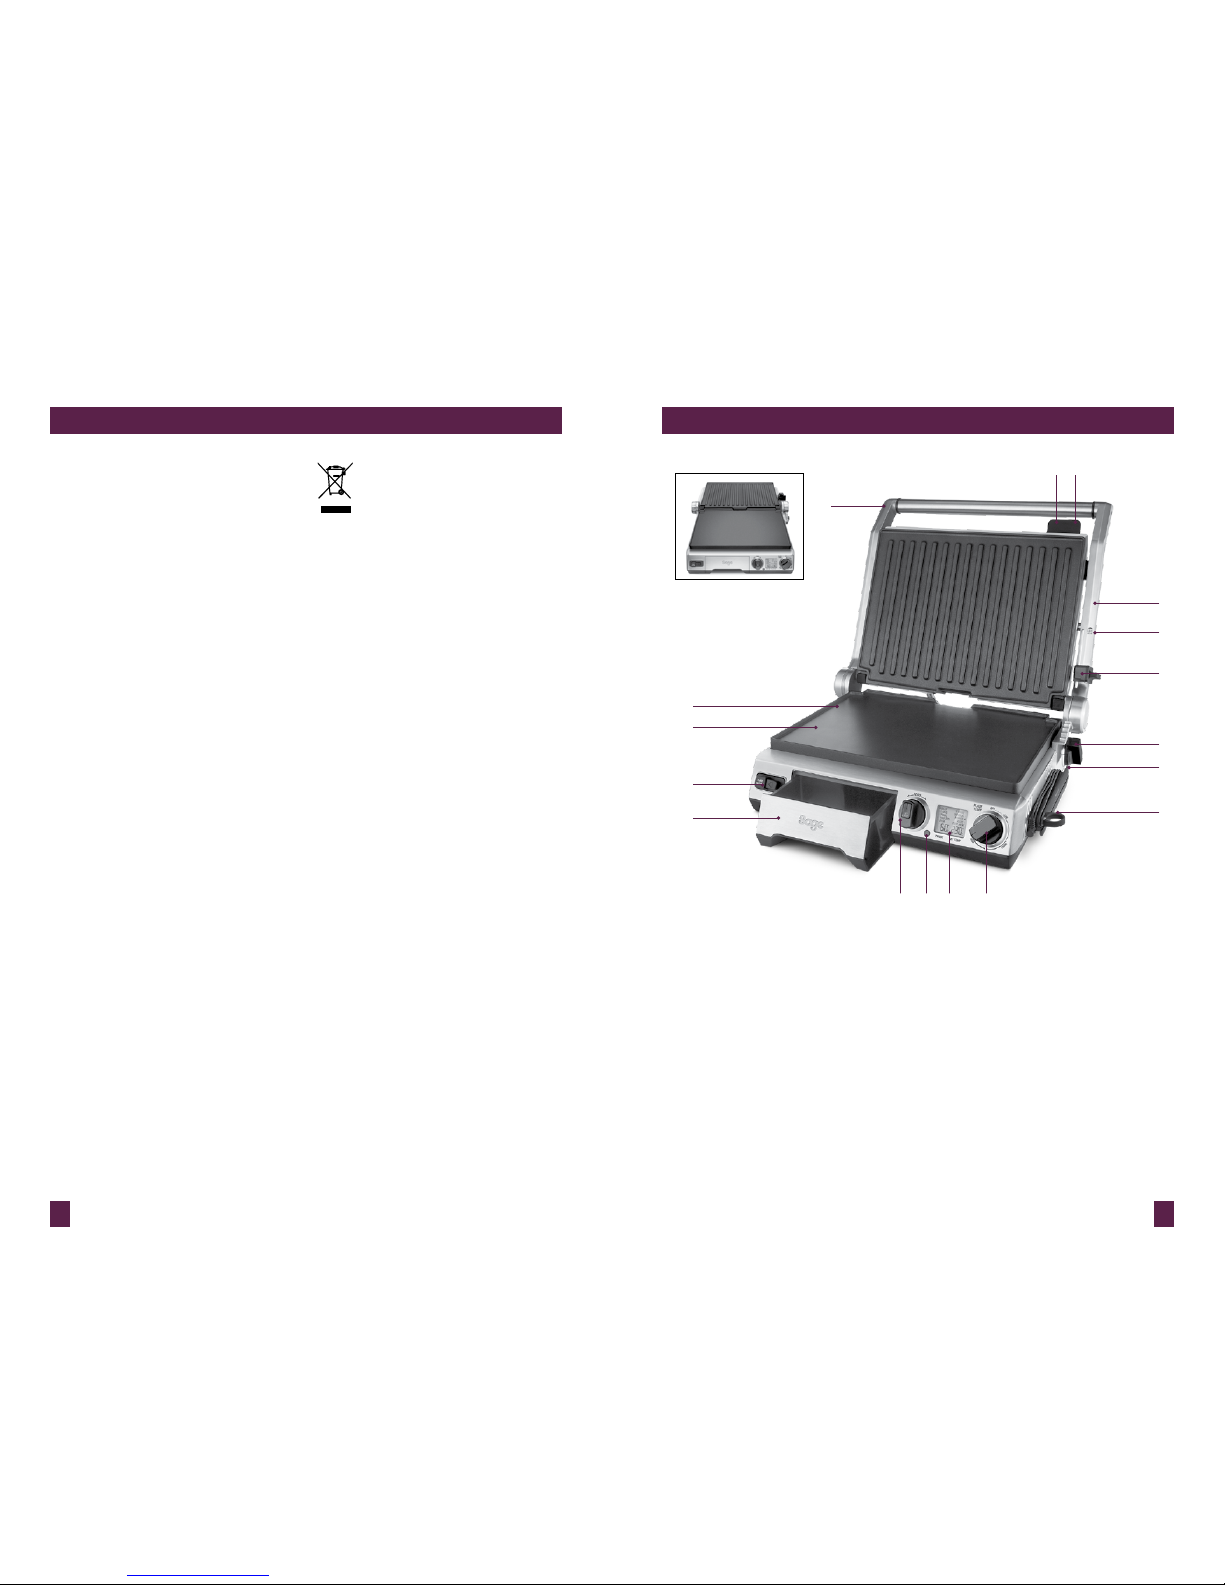
WE RECOMMEND SAFETY FIRST GETTING TO KNOW YOUR NEW APPLIANCE
A. Stainless Steel Housing with
Die-Cast Arms
B. Cast Aluminium, Non-Stick Plates
Coated with PFOA-free titanium infused
Quantanium™ for scratch resistance
and oil free cooking.
C. Removable, Interchangeable and
Dishwasher Safe Plates
Flat plate for eggs and panca kes, ribbed
plate to sear meats .
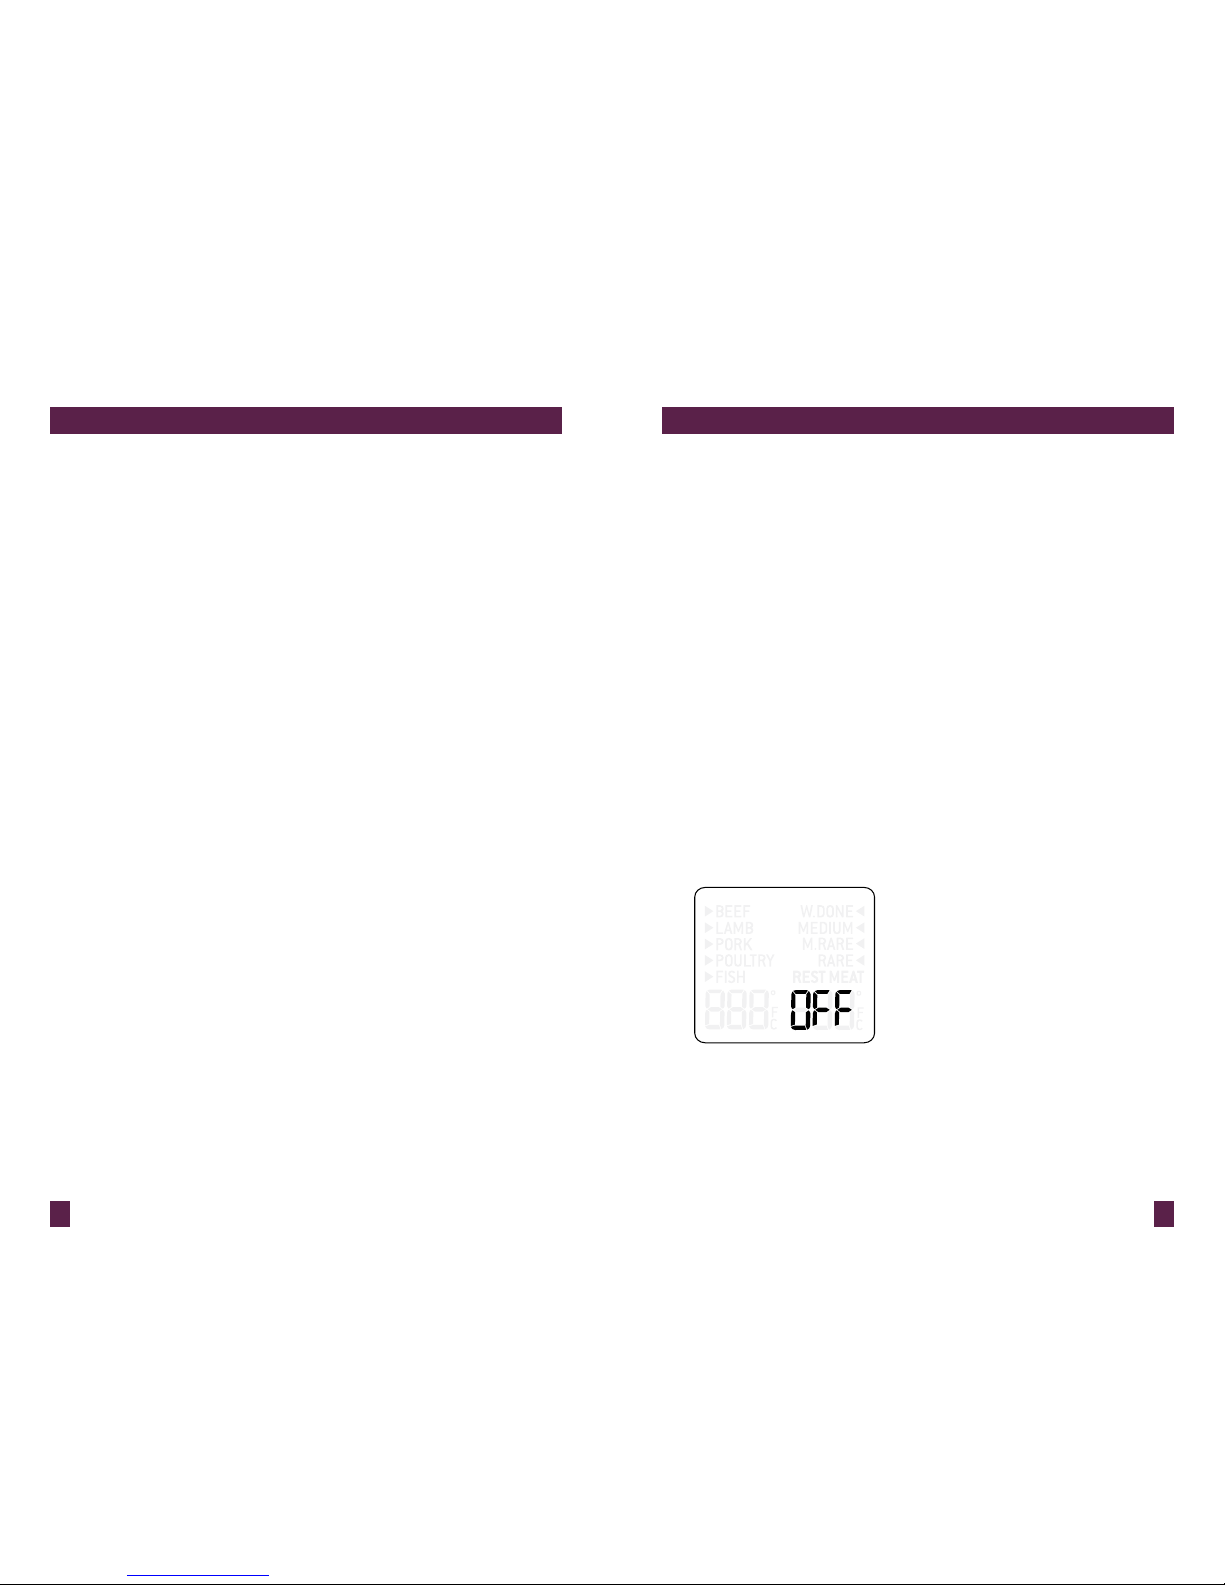
D. Food type selection dial with Sound Alert
Pressing t he centre button of the dial
toggles through the S et Temp
(Doneness) list.
E. Temperature Conversion But ton
Converts the d efault Celsius reading
to Fahrenheit.
F. Smart Settings with Rest Indicator
5 meat setting s have programmed
temperature s for your chosen donenes s.
G. Temperature Dial (160°C–230°C)
With Low, Pani ni (sandwich) and Sear
modes.
H. Integrated Probe wit h Sage Assist™ Loop
& Probe Storage
For precision cooking and e asy storage.
A
B
C
P
O
ED F G
H
Q
I
J
K
L
N M
Open Flat BBQ Mode
Opens flat into a
1650 sq. cm grilling
surface.
• It is recommended to
regularly inspect the
appliance. Do not use the
appliance if power cord,
power plug or appliance
becomes damaged in
any way. If damaged or
maintenance other than
cleaning is required, please
contact Sage Customer
Service on 0808 178 1650 |
0333 0142 970 or go to
sageappliances.co.uk.
• This appliance is for
household use only.
Do not use this appliance
for anything other than its
intended use. Do not use in
moving vehicles or boats.
Do not use outdoors.
Misuse may cause injury.
• The installation of a residual
current device (safety switch)
is recommended to provide
additional safety protection
when using electrical
appliances. It is advisable that
a safety switch with a rated
residual operating current not
exceeding 30mA be installed
in the electrical circuit
supplying the appliance.
See your electrician for
professional advice.
The symbol shown
indicates that this
appliance should not be
disposed of in normal
household waste. It should be
taken to a local authority waste
collection centre designated
for this purpose or to a dealer
providing this service.
For more information, please
contact your local council office.
8 9
GETTING TO KNOW YOUR NEW APPLIANCE
I. Adjustable Plate Ti lt
Adjusts the a ngle of the bottom cook ing
plate to drain fat s, or can be made flat for
eggs and panca kes.
J. Height Control & Locking Storage Clip
Locks the plate s into different height
positions during cooking & closed for
upright storag e.
K. BBQ Lock Release
L. 6 Adjustable Height Settings
Reduces the weight of t he top plate on
delicate foods or ca n be set high enough
for open melts.
M. Le velling Support
Integrated i nto the top plate release ,
use to adjust the po sition of the floating
top plate.
N. Top Plate Release
Removes the top cooking plate.
Independently remo ve the top and bottom
cooking plates for ea sy cleaning or to
interchange plate positions .
O. Bottom Plate Release
Removes the bot tom cooking plate.
P. Integrated, Removable Drip Tray
Catches excess fat for hea lthier cooking.
In BBQ mode, the u nique design
drains fat from both plates i nto the
same drip t ray.
Q. Cord Storage
Located on the unde rside of the grill.
1-Hour auto shut-off automatically stops
heating the cooking plates after 1 hour
of inactivity.
ELEMENT IQ™
Sensors detect when the cooking plates drop in
temperature and compensate by injecting heat
for rapid recovery back to the selected cooking
temperature. 2400 watt embedded heating
elements ensure consistently high heat for
faster cooking and reduced preheating time.
ASSEMBLING YOUR NEW APPLIANCE
PREPARING THE GRILL FOR USE
1. Remove and safely discard any packing
material and promotional labels from
the grill.
2. Wipe the cooking plates and drip tray with
a soft damp sponge. Dry thoroughly.
3. Ensure the drip tray is correctly inserted
into the grill.
4. Ensure the cooking plates are correctly
inserted and securely locked into position.
5. Place the grill on a flat, dry surface. Ensure
there is a minimum distance of 10cm of
space on both sides of the appliance.
6. Remove probe from packaging and insert
jack into the socket on the front face of the
Probe Storage area located on the right
hand side of the grill. When not in use,
wrap probe cord around Probe Storage.
7. Unwind the power cord completely and
insert the power plug into a grounded
wall outlet.
8. The grill alert will sound and the LCD
screen will display OFF.
9. The grill is now ready for the
preheating cycle.
The grill features 2 x PLATE RELEASE. These
allow you to independently remove the top and
bottom cooking plates for easy cleaning, or to
interchange plate positions.
USING THE PLATE RELEASE
• To use the PLATE RELEASE:
− Always ensure the grill is completely cool.
Use the handle to open the top plate to a
90 degree position.
− Use the ‘Plate Release’ on the front, right
side of the top plate to remove the top
cooking plate, and the ‘Plate Release’
on the left side of the control panel to
remove the bottom cooking plate.
Once released, gently slide the plates
off the grill.
• If the cooking plates are incorrectly
inserted, the LCD screen will display Er1.
Use the 2 x PLATE RELEASE to remove
the plates then re-insert so they securely
lock into position. Always ensure the grill
is completely cool before releasing and
removing the cooking plates.
• When the grill is turned on and heating
for the first time, it may emit a fine
smoke haze. This is due to the protective
substances on the heating elements.
It is safe and not detrimental to the
performance of the grill.
 Loading...