

Sage Nutri Juicer BJE410 Quick Manual

the Nutri Juicer
™
BJE410
EN
QUICK GUIDE
DE
KURZANLEITUNG

2
CONTENTS
SAGE®
RECOMMENDS
SAFETY FIRST
At Sage® we are very safety
conscious. We design and
manufacture consumer
products with the safety of
you, our valued customer,
foremost in mind.
In addition we ask that you
exercise a degree of care
when using any electrical
appliance and adhere to the
following precautions.
IMPORTANT
SAFEGUARDS
READ ALL INSTRUCTIONS
BEFORE USE AND SAVE
FOR FUTURE REFERENCE
• The full information
book is available at
sageappliances.com
• Before using the rst time
ensure your electricity supply
is the same as shown on
the label on the underside
of the appliance.
• Remove and safely discard
any packaging materials
before rst use.
• To eliminate a choking hazard
for young children, safely
discard the protective cover
tted to the power plug.
• This appliance is for household
use only. Do not use the
appliance for anything other
than its intended use. Do not
use in moving vehicles or boats.
Do not use outdoors. Misuse
may cause injury.
• Fully unwind the power cord
before operating.
• Position the appliance on a
stable, heat resistant, level, dry
surface away from the edge and
do not operate on or near a heat
source such as a hot plate, oven
or gas hob.
• Vibration during operation may
cause the appliance to move.
• Do not let the power cord hang
over the edge of a bench or
table, touch hot surfaces or
become knotted.
• Always ensure the appliance
is turned OFF, unplugged at
the power outlet and has been
allowed to cool before cleaning,
attempting to move or storing.
2 Important Safeguards
5 Components
6 Assembly
8 Operation
9 Care & Cleaning
11 Troubleshooting

3
EN
WE RECOMMEND SAFETY FIRST
• Always turn the appliance to
the o position, switch o at
the power outlet and unplug
at the power outlet when the
appliance is not in use.
• Do not use the appliance
if the power cord, plug, or
appliance becomes damaged
in any way. If damaged or
maintenance other than
cleaning is required, please
contact Sage Customer Service
or go to sageappliances.com
• Any maintenance other than
cleaning should be performed
by an authorised Sage
®
service centre.
• Children should not play with
the appliance.
• Cleaning of the appliance
should not be carried out by
children unless they are 8 year
or older and supervised.
• The appliance and its
cord should be kept out
of reach of children aged
8 years and younger.
• The installation of a residual
current safety switch is
recommended to provide
additional safety when using
all electrical appliances.
Safety switches with a rated
operating current not more
than 30mA are recommended.
Consult an electrician for
professional advice.
• Always ensure the appliance is
properly assembled before use.
The appliance will not operate
unless properly assembled.
• Do not use the appliance on
a sink drain board.
• Keep hands, ngers, hair,
clothing as well as spatulas
and other utensils away from
moving or rotating parts
during operation.
• Do not use the appliance for
anything other than food and/or
beverage preparation.
• In order to avoid the possible
hazard of the appliance starting
by itself due to inadvertent
resetting of the overload
protection, do not attach
an external switching device
(such as a timer) or connect the
appliance to a circuit that can
regularly switch the appliance
on and o.
• Carefully read all instructions
before operation and save for
future reference.
• The appliance can be used by
persons with reduced physical
or mental capabilities or a lack
of experience and knowledge,
only if they have been given
supervision or instruction
concerning use of the appliance
in a safe way and understand
the hazards involved.

4
WE RECOMMEND SAFETY FIRST
• This appliance shall not be used
by children.
• Do not leave the appliance
unattended when in use.
• Allow the motor to rest for
1 minute between each use.
• Do not push food into the
feed chute with your ngers
or other utensils. Always use
the food pusher provided.
Do not place hand or ngers
into the food chute when it is
attached to the appliance.
• Do not juice stone fruit
unless seeds and/or stones
have been removed.
• Make sure the stainless steel
lter basket has stopped
rotating and the motor has
completely stopped before
releasing the safety locking
arm and/or attempting to
move the appliance, when
the juicer is not in use, and
before disassembling,
cleaning and storing.
• Any signicant spillage onto
the surface under or around the
appliance, or onto the appliance
itself, should be cleaned and
dried before continuing to use
the appliance.
• Be careful when handling
the stainless steel lter
basket as the small cutting
blades at the base of the
lter basket are very sharp.
Mishandling may cause injury.
• Remove rind from all citrus fruit
before juicing.
• Do not use the appliance if the
rotating sieve (lter basket)
or lid is damaged.
• Always make sure juicer cover
is clamped securely in place
before motor is turned on.
Do not unfasten interlock arm
while juicer is in operation.
The symbol shown
indicates that this appliance
should not be disposed of
in normal household waste.
It should be taken to a local
authority waste collection centre
designated for this purpose or to
a dealer providing this service.
For more information, please
contact your local council oce.
To protect against electric
shock, do not immerse the
power plug, cord or appliance
in water or any liquid.
SAVE THESE INSTRUCTIONS

5
EN
COMPONENTS
A. Food pusher
B. Unique Direct Central Feed System
C. Extra wide 84mm feed chute
D. Stainless steel titanium reinforced
micro mesh lter basket
E. Large capacity pulp container
(dishwasher safe).
F. Heavy duty 1200 watt motor
G. Cord storage
B
A
C
E
D
F
G
H. Interlocking safety arm
I. Juicer cover
(not dishwasher safe).
J. Filter bowl surround
(dishwasher safe).
K. 1 litre juice jug and lid
(dishwasher safe).
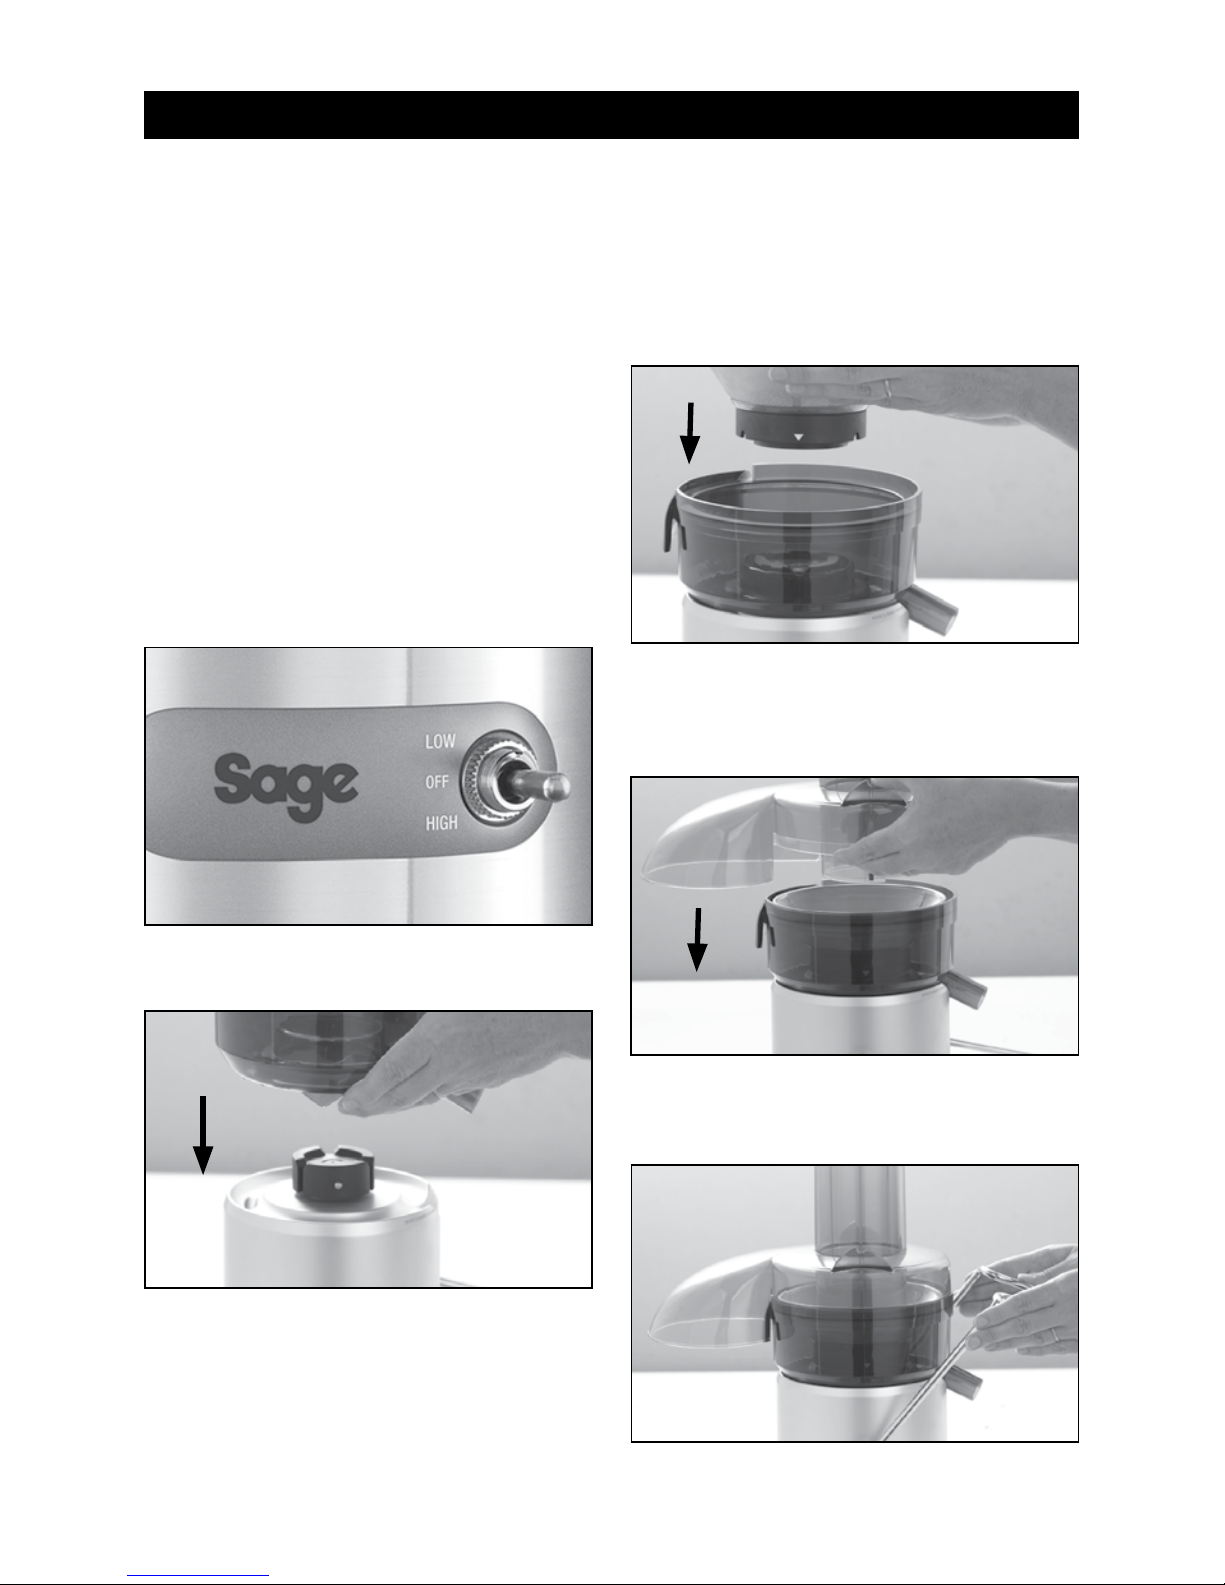
L. 2 speed electronic control
ON / OFF switch
H
I
J
K
L
Rating Information
220–240V~ 50/60Hz 1050–1250W
6
BEFORE FIRST USE
Before using your juicer for the rst time, remove
and safely discard any packaging materials and
promotional stickers and labels.
Ensure the appliance is switched o at the power
outlet and the power cord is unplugged.
Wash the lter bowl surround, lter basket,
juicer cover, food pusher, pulp container and
juice jug and lid in warm, soapy water with a soft
cloth. Rinse and dry thoroughly. The motor base
can be wiped with a damp cloth. Dry thoroughly.
1. Place motor base on a at, dry surface
such as a bench top. Ensure that the
motor base is switched OFF at the
control panel, then switch the appliance
o at the power outlet and unplug the
power cord.
2. Place lter bowl surround on top of the
motor base.
3. Align the arrows at the base of the
stainless steel lter basket with the
arrows on the motor drive coupling
and push down until it clicks into place.
Ensure the stainless steel lter basket
is tted securely inside the lter bowl
surround and onto the motor base.
4. Place the juicer cover over the lter bowl
surround, positioning the feed chute over
the stainless steel lter basket and lower
into position.
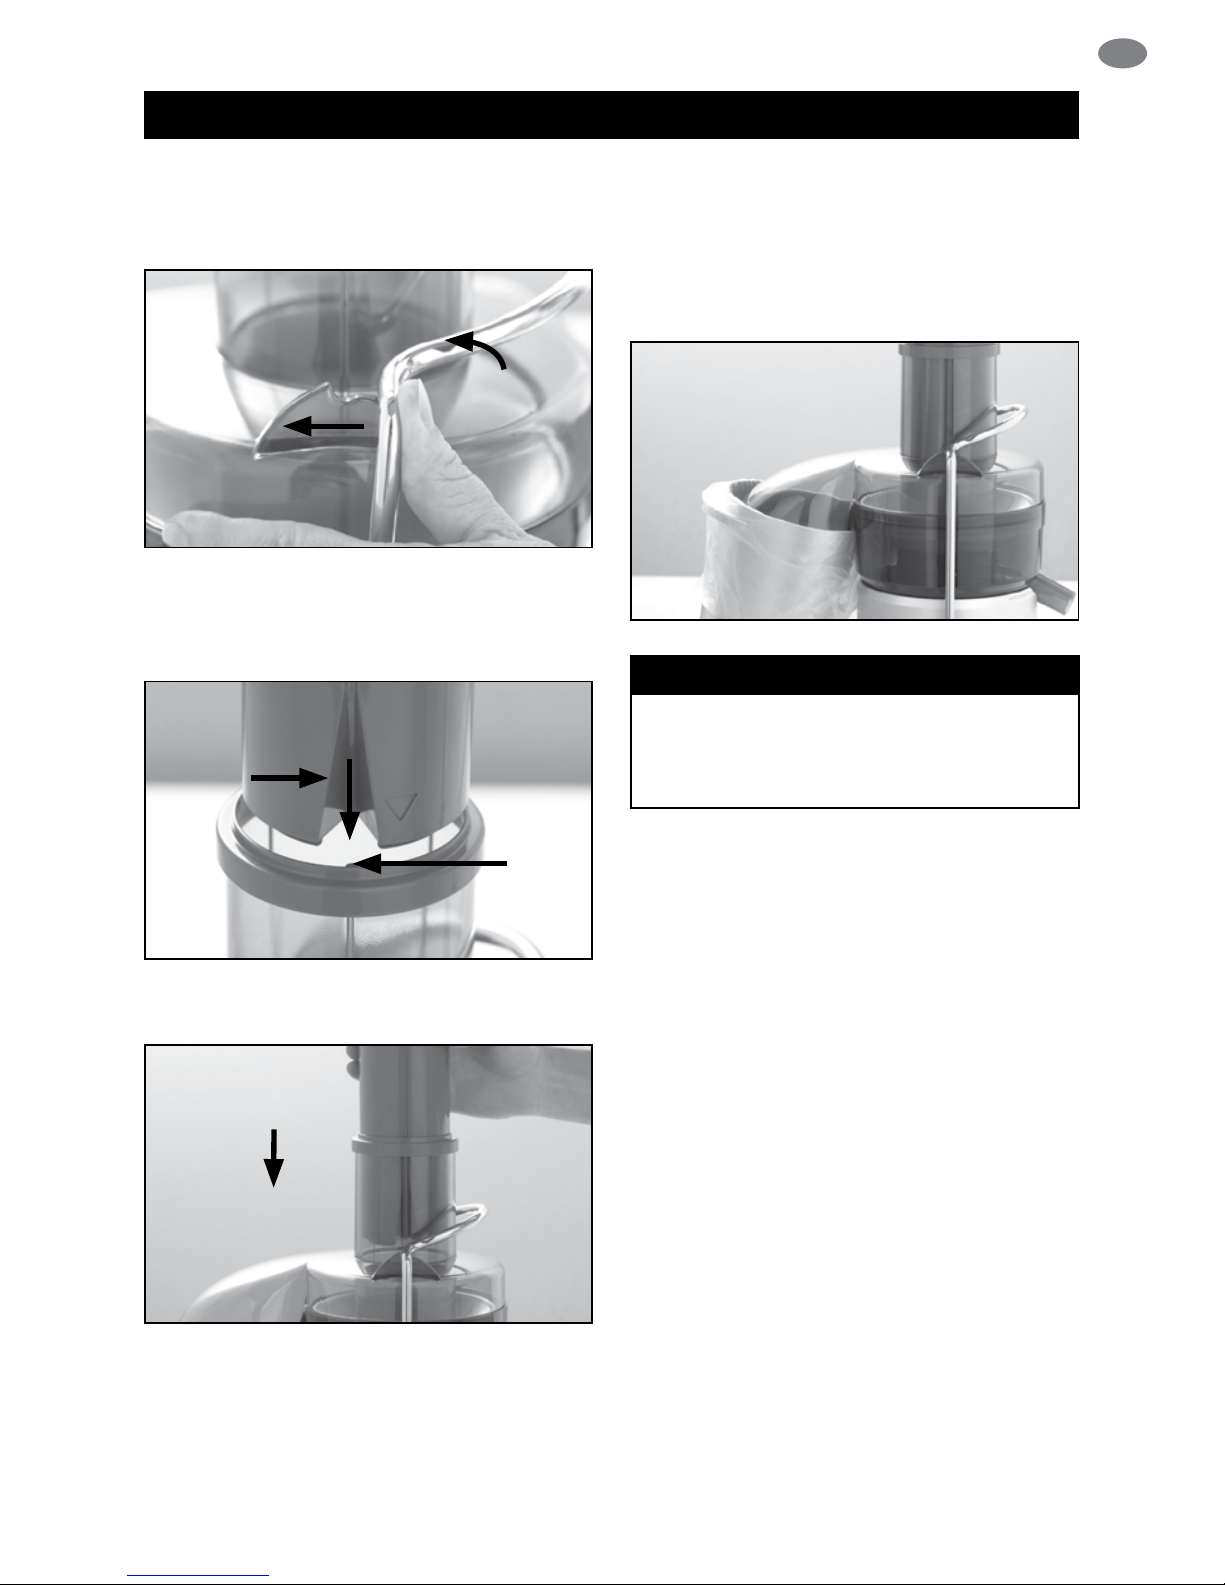
5. Raise the safety locking arm up and
locate into the two grooves on either side
of the juice cover.
ASSEMBLY
7
EN
ASSEMBLY
The safety locking arm should now be in a
vertical position and locked into place on top
of the juice cover.
6. Slide the food pusher down the food
chute by aligning the groove in the food
pusher, with the small protrusion on the
inside of the top of the feed tube.
Food
Pusher
Groove
Small
Protrusion
Inside Feed
Tube
Continue to slide the food pusher down on
the feed chute.
7. Place the pulp container into position by
tilting the motor base slightly to the right.
Insert the pulp container under the juicer
cover on the left hand side ensuring
it is supported by the juicer cover and
motor base.
NOTE
To minimise cleaning, line the pulp container
with a plastic freezer bag to collect the pulp.
Pulp can be used in other dishes, or as a
compost for the garden or discarded.
8. Place the juicer jug under the juice
spout on the right hand side of the juicer.
The juice jug lid can be used to avoid
any splatter.
8
OPERATION
1. Wash your selection of fruit and
vegetables to be juiced.
2. Ensure the juicer is correctly assembled.
Refer to Assembling your Sage
®
juicer.
Ensure the juicer jug is placed under
the juice spout and pulp container is in
position before commencing juicing.
3. Plug the power cord into a 220–240V
power outlet. Turn the power ON at the
power outlet. Adjust the speed to the
desired setting. Push the two speed
switch either up for low speed or down
for high speed depending on the type
of fruit or vegetable being juiced. Use
the speed selector as a guide for juicing
dierent fruits and vegetables.
SPEED SELECTOR TABLE
Apples High
Apricots (stone removed) Low
Beetroot (trimmed) High
Blueberries Low
Broccoli Low
Brussels sprouts (trimmed) High
Cabbage Low
Carrots High
Cauliower Low
Celery High
Cucumber (peeled) Low
Cucumber, soft skinned High
Fennel High
Grapes (seedless) Low
Kiwi Fruit (peeled) Low
Mangoes (peeled, stone
removed)
Low
Melons (peeled) Low
Nectarines (stone removed) Low
Oranges (peeled) High or Low
SPEED SELECTOR TABLE
Peaches (stone removed) Low
Pears (stalks removed) High for hard
or Low for soft
Pineapple (peeled) High
Plums (stone removed) Low
Raspberries Low
Tomatoes Low
Watermelon (peeled) Low
4. With the motor running, place food into
the feed chute and use the food pusher
to gently guide food down. To extract the
maximum amount of juice, always push
the food pusher down slowly.
NOTE
The motor must be running prior to loading
the feed chute.
WARNING
Never use ngers to push food down
the feed chute or to clear the feed chute.
Always use the food pusher provided.
Filter
Basket
Caution:
Sharp Blades
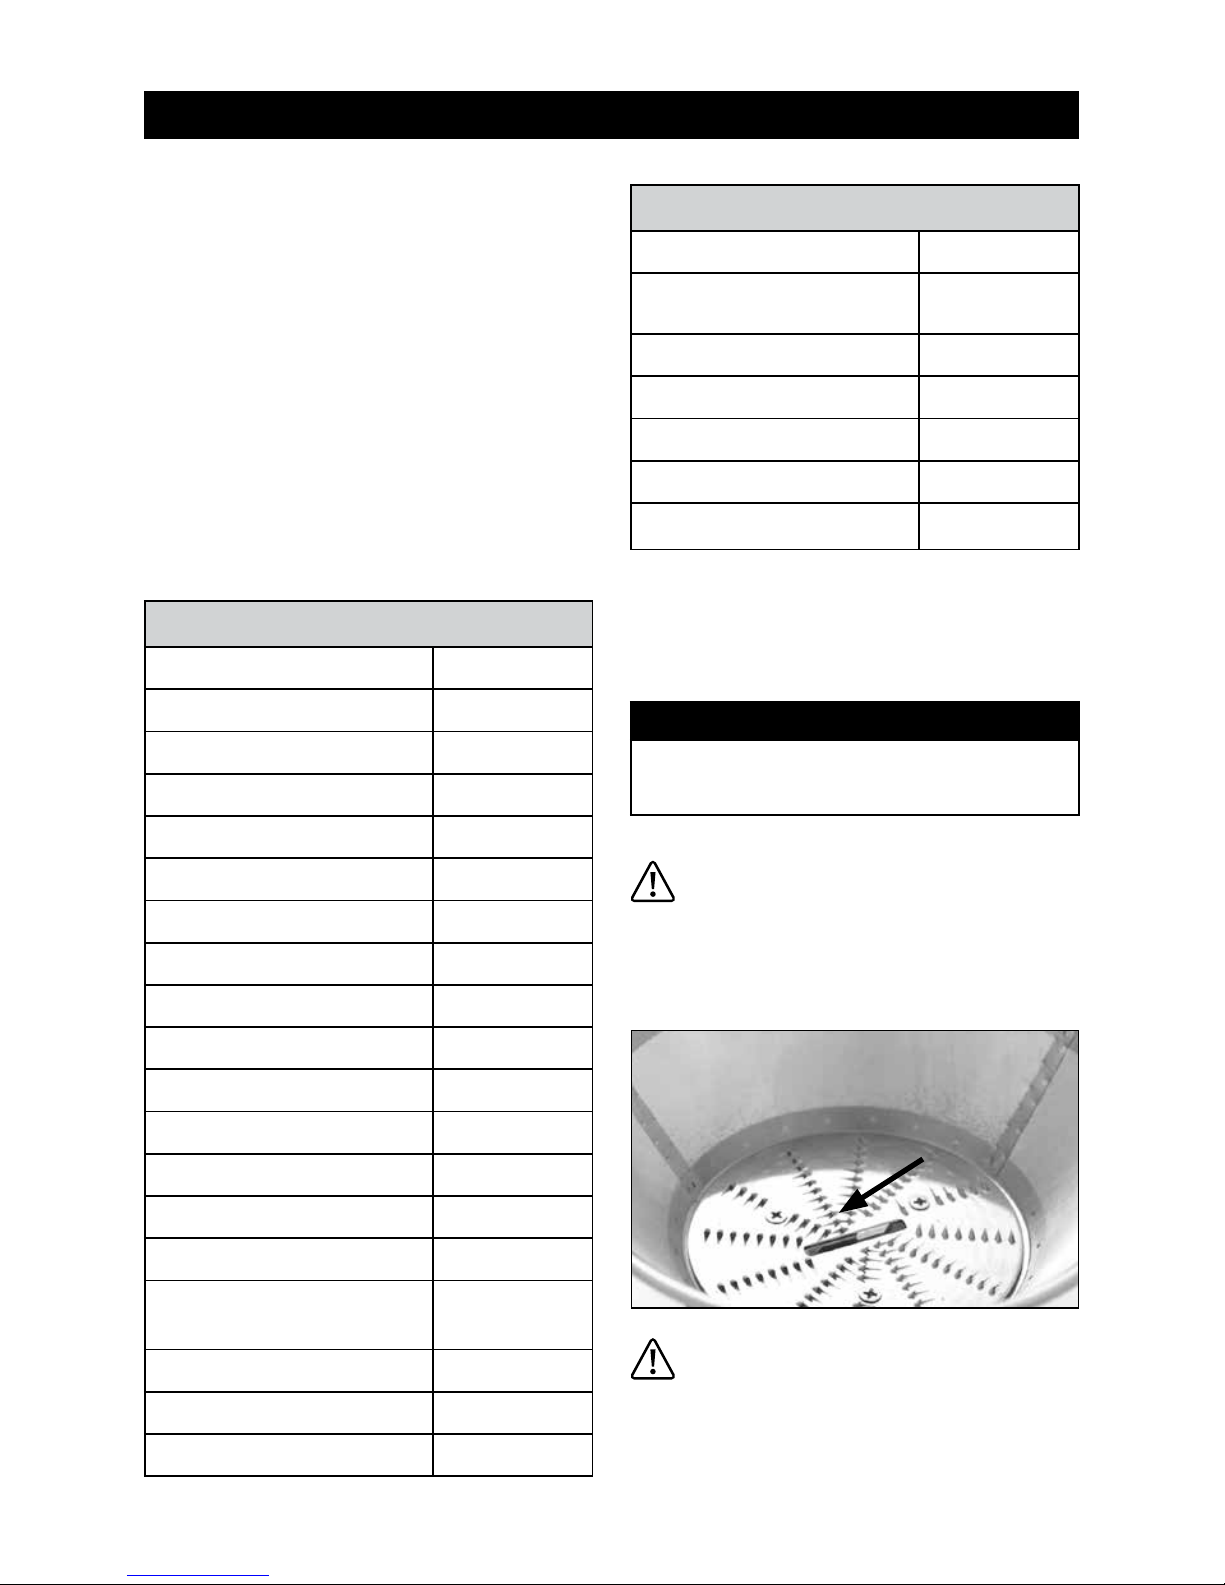
WARNING
The stainless steel lter basket contains
small sharp blades to cut and process
fruit and vegetables. Avoid touching the
blades when handling the lter basket.

9
EN
CARE & CLEANING
Ensure the juicer is turned o by switching the
ON / OFF button on the control panel to OFF.
Then switch the appliance o at the power outlet
and unplug the power cord.
Ensure the juicer
is correctly disassembled.
Refer to Disassembling your new appliance.
FOR EASIER CLEANING:
• Clean as you go and avoid dried on
juice or pulp residue.
• Immediately after each use, rinse
removable parts in hot water to remove
wet pulp. Allow parts to air dry.
NOTE
To minimise cleaning, line the pulp container
with a plastic freezer bag to collect the pulp.
Pulp can then be used for other dishes, or
as compost for the garden or discarded.
CLEANING THE MOTOR BASE
• Wipe the motor base with a soft, damp
cloth then dry thoroughly.
• Wipe any excess food particles from the
power cord.
NOTE
Do not use abrasive scouring pads or
cleaners when cleaning the parts or motor
base as they may scratch the surface.
CLEANING THE FILTER BOWL
SURROUND, JUICER COVER,
FOOD PUSHER, PULP CONTAINER
Wash all parts in warm soapy water with
a soft cloth. Rinse and dry thoroughly.
NOTE
The lter bowl surround, juicing jug and
lid, food pusher and pulp container, are
dishwasher safe (top shelf only). The juice
cover is not dishwasher safe.
CLEANING THE FILTER BASKET
• For consistent juicing results always
ensure that the stainless steel lter
basket is thoroughly cleaned using the
supplied cleaning brush. It is important
to do this immediately after use.
• Soak the stainless steel lter basket
in hot soapy water for approximately
10 minutes immediately after juicing
is completed. If pulp is left to dry on
the lter it may clog the ne pores of
the lter mesh thereby lessening the
eectiveness of the juicer.
• Using the cleaning brush, hold the
lter basket under running water and
brush from the inside of the basket to
the outer rim. Avoid touching the small
sharp blades in the centre of the lter
basket. Repeat this process on the
outside of the basket. After cleaning the
lter basket, hold it up towards a light
to ensure the ne mesh holes are not
blocked. If the holes are blocked, soak
the lter basket in hot water with 10%
lemon juice to loosen the blocked holes.
Repeat the cleaning process using the
cleaning brush. Alternatively, wash the
lter basket in the dishwasher.
 Loading...