

Page 1

Sage 923LTS User’s Guide
Automated Local Loop Test
System
Sage Instruments
240 Airport Blvd.
Freedom, CA 95019
Tel. (831) 761-1000, Fax (831) 761-2452
www.sageinst.com
Part Number 9100-0923-01 v2.0
Advanced Test Equipment Rentals
www.atecorp.com 800-404-ATEC (2832)
®
E
s
t
a
b
l
i
s
h
e
d
1
9
8
1
Page 2

No part of this publication may be reproduced, photocopied, stored in a retrieval
system, distributed, translated, or transmitted in any form or by any means
(electronic, mechanical, recording or otherwise) without the express written
2 9100-0923-01 V2.0 SAGE INSTRUMENTS
2000 Sage Instruments
permission of Sage Instruments.
Sage Instruments
240 Airport Blvd.
Freedom, CA 95019
Tel. (831) 761-1000, Fax (831) 761-2452
www.sageinst.com
Page 3

Table of Contents
Section 1 Introduction 5
The Sage Instruments 923LTS.......................................................................................5
Automated Local Loop Test System (ALTS)...................................................................5
Automated Local Loop Tests...........................................................................................6
Other Tests......................................................................................................................6
100 Responder Noise Measurement ..............................................................................6
102 Responder Loss Measurement ................................................................................6
Perceptual Speech Quality Measurement (PSQM)..........................................................6
The 923LTS Test Environment........................................................................................7
Section 2 Getting Started 9
Unpacking........................................................................................................................9
Options............................................................................................................................9
Charging the Batteries.....................................................................................................9
Initial Charge...................................................................................................................9
Recharging......................................................................................................................9
Viewing the Display........................................................................................................10
Special Screen Display Characters ..................................................................................10
Arrows ....................................................................................................................... 10
Blinking Cursor ........................................................................................................... 10
< Bracketed Selection > .............................................................................................. 10
Using the Keypad ...........................................................................................................11
F1 and F2................................................................................................................... 11
Light Bulb Key ............................................................................................................ 11
t u Backspace, Delete, and Forward ..........................................................................11
pq Up, Down, and Escape ........................................................................................ 11
CLR (Clear)................................................................................................................ 11
INFO.......................................................................................................................... 11
BACK......................................................................................................................... 11
NEXT......................................................................................................................... 11
Volume Control ...........................................................................................................12
TALK.......................................................................................................................... 12
ON/OFF ..................................................................................................................... 12
Using the Telephone Keypad.......................................................................................... 12
Alphabetic and Numeric Data Entry ..............................................................................12
Setting Up the Basic Operating Features......................................................................13
Interfaces ...................................................................................................................... 13
Test Interface .............................................................................................................13
Serial Port .................................................................................................................. 13
Environment .................................................................................................................. 14
Display Contrast ......................................................................................................... 14
Maximum Wait for Dial Tone ........................................................................................ 14
No Answer Time Out................................................................................................... 14
Backlight Time Out ...................................................................................................... 14
Audible Alert............................................................................................................... 14
Phone Lists (for Responders)..........................................................................................15
Loading Tests ................................................................................................................16
Loading ALTS Test Templates for the First Time ..............................................................16
SAGE INSTRUMENTS 9100-0923-01 V2.0 3
Page 4

Section 3 Using the 923LTS 17
Test Steps in Brief ..........................................................................................................17
Field Testing Prerequisites ............................................................................................. 17
Connecting to the Line Under Test................................................................................ 17
RJ Connections ..............................................................................................................17
Ground Connection ........................................................................................................17
How to Perform a Test or Test Suite.............................................................................18
How to Perform a 100 or 102 Test................................................................................19
Aborting a Test .............................................................................................................. 19
Viewing Test Results.....................................................................................................19
Viewing Results on the 923LTS....................................................................................... 20
Test ID Screen............................................................................................................ 20
Test Call Screen .........................................................................................................21
Call Back Screen ........................................................................................................ 21
Test Measurement Details.............................................................................................. 21
23 Tones Measurement Data....................................................................................... 21
Updating Test Suites .....................................................................................................22
Automatic Test Updates ................................................................................................. 22
Manually Updating Tests................................................................................................ 22
Using the 923LTS as a Telephone................................................................................22
Section 4 Technical Support 25
923LTS Technical Support............................................................................................25
Internet Support.......................................................................................................... 25
Frequently Asked Questions .........................................................................................25
Why does the display light go out?.................................................................................. 25
Why does the 923LTS automatically shut off?.................................................................. 25
Failing Battery Power ..................................................................................................25
Does the 923LTS need to be calibrated? .........................................................................26
How can I restore the original defaults? ...........................................................................26
Cold Boot ................................................................................................................... 26
Confirming a Successful Cold Boot .............................................................................. 26
What are the 923LTS’ default settings?........................................................................... 26
Interfaces ................................................................................................................... 27
Environment ............................................................................................................... 27
Phone Lists................................................................................................................ 27
Sage 923LTS Warranty.................................................................................................28
Product Warranty........................................................................................................... 28
Limitation Of Warranty.................................................................................................... 28
Exclusive Remedies ....................................................................................................... 28
Repaired Products Warranty ...........................................................................................28
Shipping Instructions ...................................................................................................... 28
4 9100-0923-01 V2.0 SAGE INSTRUMENTS
Page 5
Section 1 Introduction
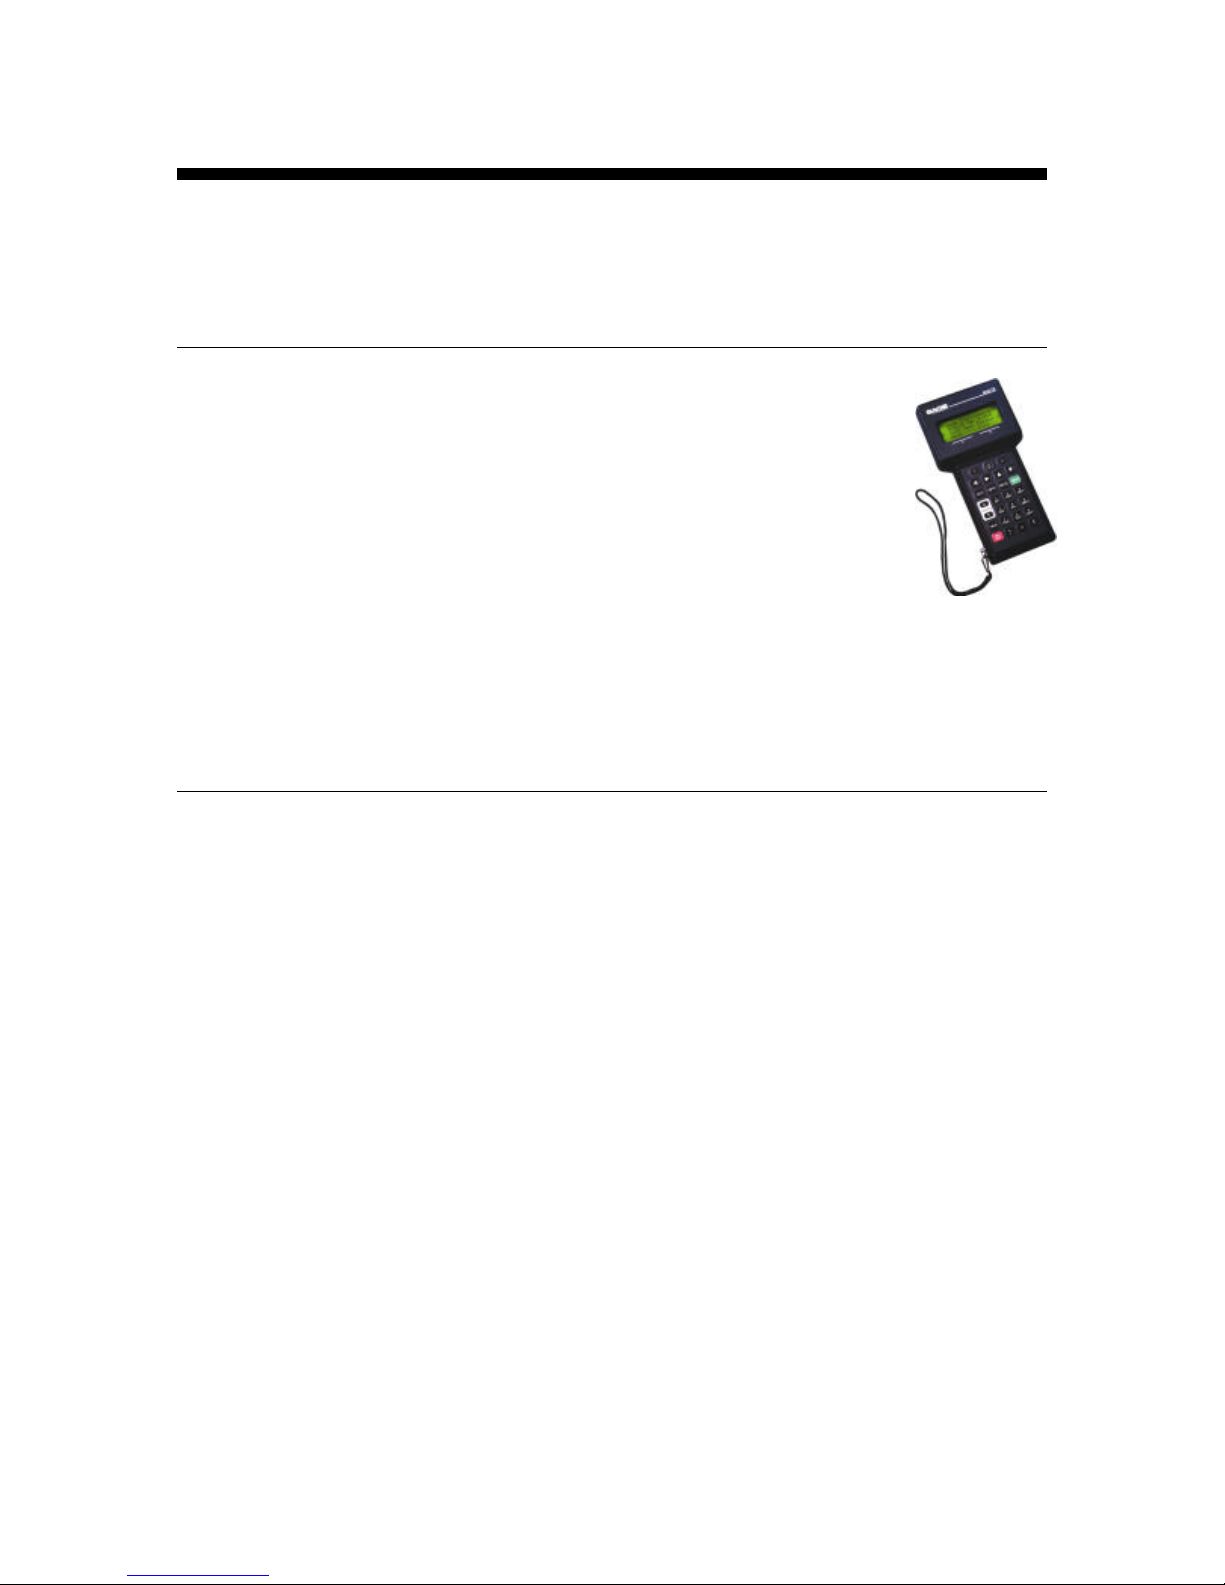
The Sage Instruments 923LTS
The Sage 923LTS is the field component of the Sage Automated Local
Loop Test System (ALTS). The 923LTS initiates loop qualification and
benchmark tests between a subscriber site (or any two-wire access
point) and a Sage responder located with the telephone equipment at
the central office. The Sage 950RTS (or the Sage 356Eplus) performs
farend responder functions for the 923LTS.
The 923LTS is designed to be portable and durable, and can function
just like a telephone handset.
The 923LTS comes equipped to perform 100 and 102 test line
measurements, and performs Perceptual Speech Quality Measurement
(PSQM) tests.
Automated Local Loop Test System
(ALTS)
The Automated Local Loop Test System (ALTS) is designed to automatically test local
loops. Tests are useful to confirm proper line installation, and to monitor ongoing
performance.
ALTS has two components:
1. the Sage 923LTS hand-held unit used in the field
2. a Sage 950RTS (or 356Eplus) responder located in the central office.
A local subscriber can be served by a copper loop, a hybrid fiber coax loop, cable, or a
wireless loop. The 923LTS initiates tests, and displays results immediately upon
completion. Once a test is selected on the 923LTS, it runs automatically. Test templates
installed on the responder determine which tests the 923LTS performs, and each test’s
pass or fail criteria.
The Sage ALTS system can:
• Test transmission characteristics (e.g., loop voltage, ring voltage, call back
verification, connect time)
• Perform a 23 Tones test (e.g., attenuation distortion, 2-wire envelope delay distortion,
signal to noise, intermodulation distortion)
• Measure noise and delay (e.g., C-message, C-notched, absolute delay)
• Perform voice quality measurements (using PSQM)
• Perform 100 and 102 test line measurements
• Measure echo return loss
Page 6

Automated Local Loop Tests
The Sage 923LTS performs tests (individually or as part of a test suite) based on the test
templates supplied by the Sage responder. These local loop test suites may include the
following:
• Ring voltage and frequency
• 3-Tone Gain Slope
• C-Measure Noise
• C-Notch Noise
• Return Loss
• 3kHz Flat Noise
• Phase and Amplitude Jitter
• Impulse Noise and Hits and Droupouts
• 23 Tones
• Level
• 23 Tone Loss
• Envelope Delay Distortion
• Signal-to-Noise
• Signal-to-Total Distortion
• Intermodulation Distortion
• Perceptual Speech Quality Measurement (PSQM)
Other Tests
The 923LTS may come equipped with other tests that do not require an ALTS responder.
They provide detailed results that can be viewed only on the 923LTS (i.e., results are not
collected in the ALTS database). Built-in tests may include:
100 Responder Noise Measurement
The 100 responder noise measurement operates with a type 100 quiet termination test
line.
102 Responder Loss Measurement
The 102 responder loss test operates with the type 100 milliwatt test line.
Perceptual Speech Quality Measurement (PSQM)
The built-in PSQM test operates with a Sage PSQM responder.
6 9100-0923-01 V2.0 SAGE INSTRUMENTS
Page 7

The 923LTS Test Environment
Sage 950RTS
cable
cooper
Central Office
Customer’s
Network
Interface
RJ Connectors
Use the Sage 923LTS hand-held unit in the field to connect to the line being tested. The
Interface can be at a customer premises or at any two-wire access point. The 923LTS
can connect to customers served by:
• copper loop
• hybrid fiber coax loop
• wireless loop
Using menus on the 923LTS, the technician selects the test or test suite, and then
initiates a call to the farend responder (either the Sage 950RTS or 356Eplus). The Sage
responder contains instructions for the test sequence, and each test’s pass/fail
parameters. The selected test runs automatically. At the conclusion of the test, the
923LTS displays an immediate, overall pass/fail notification.
Using menus on the 923LTS, the technician can view the detailed results of each portion
of the test. During the test, the technician can listen to the dial tone, progress tones, and
other audible sounds. Typically, a test suite takes less than a minute to complete.
The 923LTS stores the results of the 10 most recent tests. Complete test data is stored
on the responder.
hybrid fiber coax
wireless loop
Responder
SAGE INSTRUMENTS 9100-0923-01 V2.0 7
Page 8

8 9100-0923-01 V2.0 SAGE INSTRUMENTS
Page 9

Battery: z z z z z z z z z
Section 2 Getting Started
Unpacking
In addition to this User’s Guide, the following items should arrive with your 923LTS
system:
• 923LTS hand-held unit
• AC adapter/power cord
• Connector cable (RJ-48 plug on one end, RJ-11 plug on the other end)
• Banana plug to alligator clip ground cable
Options
Additional items may be included with your shipment:
• RJ-48 to alligator clips cable/adapter
• RS-232 cable
• padded case with belt loop
• Sage Instruments 923LTS Automated Local Loop Testing System Quick
Reference Guide (a laminated card)
Charging the Batteries
WARNING: Use only the AC/DC transformer supplied with the 923LTS to charge the
batteries. Other transformers may damage the
923LTS, and void the warranty.
Initial Charge
The 923LTS comes with rechargeable batteries
installed at the factory. Before using the
923LTS for the first time, charge the batteries for two hours.
Do not turn on the 923LTS while the batteries charge for the first time.
3. Make sure the 923LTS is off (i.e., the display is blank and dark).
4. Plug the AC adapter power cord into a 110V AC outlet.
5. Plug in the cord from the AC adapter into the power port on the bottom of the
923LTS. Leave the power cord plugged in for at least two hours to allow the
batteries to fully charge.
Recharging
Each time the 923LTS is turned on, the system checks the batteries.
To fully recharge the battery:
1. Turn off the 923LTS.
Calibrating
Please wait . . .
Page 10

2. Plug in the AC adapter to a 110V AC outlet.
3:Modem Qual
brackets indicate the
press qq for more
selections
3. Plug in the cord from the AC adapter to the power connector on the 923LTS.
4. Allow the 923LTS to charge for two hours.
NOTE: You can use the 923LTS while it is connected to the AC adapter unless it is being
charged for the very first time.
To ensure that the battery is fully charged:
1. Turn off the 923LTS.
2. Disconnect the AC adapter from the 923LTS.
3. Turn on the 923LTS and note the indicator bars during the booting process.
Indicator bars reach across the full display when the batteries are fully charged.
Viewing the Display
The viewing area on the 923LTS displays alphabetic and numeric information on four
rows, 20 characters wide. Navigate the screens
and menu selections using the keypad.
At any time, press the INFO key to display help
text or directions.
Sage Instruments
923LTS 1.1400
Self Test Passed
Special Screen Display Characters
Arrows
An Û (up) or Ü (down) arrow in the upper
right corner of the display indicates that
additional selections or data are available
on other screens. The number next to the
arrow indicates which screen is currently
displayed. Use the por q key as indicated
in the display to see more selections.
Blinking Cursor
The blinking cursor indicates an active field waiting for data entry from the keypad.
< Bracketed Selection >
Brackets indicate the active selection or field. An option enclosed in angle brackets is the
default or last option that was chosen. Bracketed options appear on numbered lists as
well as F1 and F2 function key selections.
In numbered lists with multiple screens, the bracketed option might not appear on the
currently displayed screen. Use the por q keys to locate the bracketed option.
To select the bracketed option, press NEXT.
The NEXT key advances to the next screen based on the bracketed option, even when
the bracketed option is not on the current screen.
Test Select 1 Ü
1:<23Tone-10>
2:All Domestic
selected item
10 9100-0923-01 V2.0 SAGE INSTRUMENTS
Page 11

Using the Keypad
F1 and F2
Use the F1 and F2 function keys for various data entry tasks.
For example, F1 and F2 toggle between numeric and
alphabetic data entry. In some cases, screen text describes the
functions of the F1 and F2 keys. Brackets ( < >) indicate the
active selection.
Light Bulb Key
Use the light bulb key to control the display light. While
the unit is on, press the key to toggle the light on or off. The
light automatically turns off after a few seconds. Define the
number of seconds the light remains on using the Backlight
Timeout option on the Setup menu.
t u Backspace, Delete, and Forward
Press the t key to delete the character to the left of the cursor.
Press the u key to enter a blank space and move the cursor to the right. A blank space in
a telephone number represents a 1-second pause in the dialing sequence.
pq Up, Down, and Escape
Use the p (Up) and q (Down) keys to scroll through lists that span several screens, or to
move to the previous or next screen. You can use the p and q keys whenever an up or
down arrow (Û or Ü) appears in the upper right corner of the screen display.
In the last screen of a list, only the Û symbol appears in the display. The final down press
returns to the top of the list.
Also use the p and q keys to escape from a data entry field without saving your
changes. If you enter data and then press the p or q key, the field reverts to the last
saved entry.
CLR (Clear)
Use the CLR key to erase the current data in a data entry field. Press and hold down the
CLR key to display the Main Menu. When a test is in progress, use the CLR key to abort
the test.
INFO
Press the INFO key to display help for the current screen.
BACK
Press the BACK key to move back one screen or level. Repeated presses on the BACK
key eventually display the Main Menu.
NEXT
From the introductory screens, the NEXT key moves to the next screen or to the first data
entry screen.
SAGE INSTRUMENTS 9100-0923-01 V2.0 11
Page 12

From a data entry screen, press NEXT to accept the current selection or field contents,
2nd press
and move to the next data entry screen or function.
Volume Control
During tests, you can hear the sounds produced (e.g., dial tone, call progress tones, etc.).
Use the volume control keys to adjust the volume of these sounds. To adjust a sound,
press and hold the key while the sound is audible. Release the key when you reach the
desired level.
TALK
Use the TALK key when you use the 923LTS as a telephone. (A speaker and
microphone are located on the back side of the unit.)
When you press the TALK key, the 923LTS goes off hook and the keyboard functions as
a telephone keypad. Press the TALK key again to toggle back to on-hook, and to disable
the telephone speaker and microphone.
ON/OFF
Press the ON/OFF key to turn on the 923LTS. To turn off the 923LTS, press and hold
down the ON/OFF key until the display darkens.
Using the Telephone Keypad
The 923LTS telephone keypad performs many functions, and can be used for both
alphabetic and numeric data entry. Use the keypad for:
• making menu selections
• entering telephone numbers
• entering other information (e.g., your identification
number, names for responder phone lists, and selecting
display options)
Alphabetic and Numeric Data Entry
Some data entry fields accept both alphabetic and numeric
characters. While the cursor is in a field that accepts both types of
characters, use the F1 and F2 function keys to toggle the keypad
between the two.
There are two ways to enter alphabetic and numeric characters in
a field:
1. toggle the keypad between Alpha and Numeric modes using F1 and F2,
- or -
2. leave the keypad in Alpha mode and press the same
key repeatedly to enter the desired letter or number.
For example, when the keypad is set to alphabetic character
entry, the 2 key provides four characters: A, B, C, and 2. The
first time you press the 2 key, the “A” displays at the cursor
position. A second press within one second displays the “B,” a
third press a “C,” and the fourth press a “2.”
Press NEXT to store an entry and move the cursor to the next
space. Press t or u to move the cursor without storing.
12 9100-0923-01 V2.0 SAGE INSTRUMENTS
telephone keypad
4th press
3rd press
1st press
Page 13

4:Gnd-Start 900
When the correct character appears, press the NEXT key to accept it and move the
cursor to the next position. If the next character is entered by the same key, wait for the
cursor to automatically advance to the next character space, or press the u key.
Setting Up the Basic Operating Features
Basic operating features include selecting the type of line used, enabling audible alerts,
and brightening or darkening the display screen. From the Main Menu, press 2 to display
the Setup menu. Use the Setup screens to change some of the basic operating features
of the 923LT, including:
• Interfaces (line types and ports)
• Environment (light and sound levels)
• Phone lists (responder phone numbers)
Interfaces
Setup
1:<Interfaces>
2:Environment
3:Phone Lists
Use the Interfaces screens to select the type of line
to be tested (i.e., the customer’s line), and to set up
the 923LTS’ serial port.
To access the Interfaces screen from the Setup
screen, press 1.
Interfaces
1:<Test Interface>
2:Serial Port
Test Interface
Use the Test Interface screen to set the parameters for the phone line being tested.
Choose the impedance and signaling type for the
phone line interface.
Serial Port
Use the serial port to transfer test results data to a
personal computer, or to a printer.. Connecting to
computer or a printer allows you to print test results.
NOTE: For best results, select the 923LTS defaults:
• 38400 bps (this is the baud rate)
• 8 data bits
• No Parity
For more information, contact your Sage Instruments customer service representative.
1:<Loop 600>
2:Loop 900
3:Gnd-Start 600
SAGE INSTRUMENTS 9100-0923-01 V2.0 13
Page 14

Lighter Darker
F1
F2
Environment
Use the five Environment settings to adjust the 923LTS display contrast, how long it will
wait to hear dial tone, how long it will wait for an outgoing call to be answered, how long
the screen light remains on after each press of the light button, and the volume of sounds.
To access the Environment screens from the Set up screen, press 2.
Display Contrast
At the Display Contrast screen, press F1
(lighter) or F2 (darker) to adjust the display
contrast. Repeated presses to continue
adjust contrast. The default contrast is dark.
Environment 1 Ü
Display Contrast:
Maximum Wait for Dial Tone
When the 923LTS is connected to the line under test, and the desired responder phone
number is selected, the 923LTS listens for a dial tone before dialing the responder. At the
Max Wait Dial-Tone screen, use the keypad to enter the desired number of seconds the
923LTS will wait for a dial tone before dialing the responder. The 923LTS dials the
responder number even if no dial tone is detected. The maximum wait allowed is 99
seconds; the default is 40 seconds.
No Answer Time Out
While the 923LTS dials the responder to begin a test, the display reads Calling Test
Line, Please wait… If the responder does not answer the call, the test is aborted
and the display reads Test Aborted.
To view the No Answer Time Out screen, press NEXT or q at the Display Contrast
screen. Enter the number of seconds the 923LTS waits for an outgoing call to be
answered. The maximum wait allowed is 99 seconds; the default is 40 seconds.
Backlight Time Out
The backlight illuminates the display when you press the light bulb key. The light goes
out automatically after the number of seconds you specify.
To view the Backlight Time Out screen, press NEXT or q at the No Answer Time Out
screen. Enter the number of seconds the display light is on before it automatically shuts
off. The maximum illumination time is 99 seconds; the default is 15 seconds.
Audible Alert
Audible alerts indicate test activities such as an aborted test. To view the Audible Alert
screen, press NEXT or q at the Backlight Timeout screen.
Press 1 or 2 to enable or disable audible alerts. The default is enabled.
14 9100-0923-01 V2.0 SAGE INSTRUMENTS
Page 15

<Number> Name
F1
F2
Phone Lists (for Responders)
<Number> Name
F1
F2
The phone list contains the phone numbers to
responders that the 923LTS calls to conduct
tests. The list works like a speed dial function
on a telephone.
You can enter new responders or modify the
current entries. The 923LTS can store up to 9
phone numbers, each with 18 digits.
To access the Phone List screen from the
Setup screen, press 3.
To view the responders that are already in the list, press the p or q keys.
Follow these steps to add or change phone numbers:
1. Use the p or q keys to locate the number to change, or to display a new, empty
screen.
2. Press F1 to place the cursor on the number field.
3. Use the keypad to enter digits.
4. Use the u key to enter a one second pause in the dialing sequence. Press the
CLEAR key to delete all data in the current field.
5. Press the F2 key to move the cursor to the Name field.
6. Use the keypad to enter alphabetic or
numeric characters. For best results, use
a name that describes the type of
responder. For example, to call the 100
test line, name the responder 100
Responder.
7. Press NEXT to store the data.
8. If necessary, press F1 (for Yes) to overwrite the prior name and number. Press
F2 (for No) to go back to the Edit Phone List screen.
Edit Phone List 6 ÛÜ
#:
Name:
Edit Phone List 1Ü
#:17074328878
Name:100 RESPONDER
9. When you are finished, press BACK to return to the Setup menu.
SAGE INSTRUMENTS 9100-0923-01 V2.0 15
Page 16

Loading Tests
New 923LTS units are equipped to perform three tests that do not operate with an ALTS
responder. They are:
1. 100 responder noise measurement
2. 102 responder loss measurement
3. Perceptual Speech Quality Measurement (PSQM) test
All other tests (and test suites) are downloaded from the ALTS farend responder (either
the Sage 950RTS or 356Eplus).
Loading ALTS Test Templates for the First Time
New 923LTS units are not equipped with test templates (except for 100, 102, and PSQM
tests that do not operate with an ALTS responder). To download templates to a new
923LTS, select Update Tests from the Test menu, and then call the responder. The first
time a new 923LTS unit connects with the responder, all available templates are
automatically downloaded.
To download loop test templates from a responder to a new 923LTS, follow these steps:
1. From the Main Menu, select Test to display the Test Select screen.
2. From the Test Select screen, select Update
Tests. This displays the available responder
names and phone numbers.
3. Use the p or q keys to locate the desired
responder, and press NEXT. This initiates
the call to the responder.
NOTE: You can also use the manual entry screen
to enter the responder phone number. To store a
phone number on the 923LTS, use the Phone Lists
feature from the Setup menu. See Phone Lists (for
Responders) on page 15.
When the responder answers the call from the 923LTS, loop test templates automatically
download. When the transfer is complete, the 923LTS display reads New Templates
Received. Press NEXT to display the Main Menu.
Main Menu
1:<Test>
2:Environment
3:Phone Lists
Test Select
1:<Update Tests>
2:100 Responder
3:102 Responder
To view the newly downloaded test suites, select Test from the Main Menu.
NOTE: To update the 923LTS with new or changed ALTS responder tests, see Updating
Test Suites on page 22 .
16 9100-0923-01 V2.0 SAGE INSTRUMENTS
Page 17

Section 3 Using the 923LTS
RJ48
Bottom Ports on the 923LTS
This section describes using the Sage 923LTS to conduct local loop tests. See Section 1,
Getting Started for instructions about initial setup, charging the batteries, and loading test
software.
Test Steps in Brief
In brief, these are the steps to use the 923LTS in the field to test subscriber lines:
1. Turn on the 923LTS and select the desired test (or test suite).
2. Enter the phone number of the subscriber line.
3. If desired, enter your identification number and the order or trouble ticket number.
4. Using the supplied RJ-connectors cord, connect the 923LTS to the line.
5. Select the desired Sage 950RTS responder to call; testing begins automatically.
6. Review results, if desired.
Field Testing Prerequisites
The 923LTS is ready to perform tests in the field when:
• the batteries are charged
• responder phone numbers are stored or available for entry
• test suites are available on the Sage 950RTS responder
• if required, a service order number or trouble ticket number is available for entry
Connecting to the Line Under Test
In most cases, you connect the 923LTS to the line at the demarcation point or inside the
subscriber’s premises. Alternately, connect to the line at any two wire access point along
the circuit.
RJ Connections
Use the supplied cords to connect the 923LTS to
the line being tested (either the cord with RJ
connectors, or the cord with alligator clips). To
use the RJ connection cord:
1. Plug the RJ-48 (the larger end) into the
bottom of the 923LTS.
2. Plug the RJ-11 (the smaller end) into the customer’s connection.
Ground Connection
Connect the 923LTS to ground if:
• the line being tested uses ground start signaling
• a noise-to-ground measurement is part of the test sequence
ground start
connection
power cord and
battery
Page 18

You can establish the ground connection via the ground cable supplied with the 923LTS.
The ground cable has a banana plug at one end and a large alligator clip housed in an
insulating boot at the other end.
1. Insert the banana plug into the round jack in the center of the bottom of the
923LTS.
2. Connect the alligator clip (on the other end of the cable) to the grounding
connection on the network interface attached to the line being tested.
How to Perform a Test or Test Suite
Use the steps in this section to perform tests that are downloaded from the farend
responder. To perform 100 or 102 tests, see How to Perform a 100 or 102 Test on
page19.
1. Turn on the 923LTS.
2. Press NEXT to display the Main Menu.
3. Press 1 to view the Test Select screen.
4. Choose a test (or test suite) from the Test Select menu.
To choose a test, press the numeric key that corresponds to the test name. If you
don’t see the desired test, press the por q key to scroll through additional
screens.
5. Enter the phone number for the subscriber premises you are testing.
This step is important if the test includes a call from the responder back to the
923LTS. If this screen is left blank, then the call from the responder will not be
performed.
6. Press NEXT to display the technician identification screen.
7. Enter your identification number. An example identification number is Ed50.
8. Press NEXT to display the Order Number screen.
Enter an appropriate number. For example, enter the service order number on a
new line installation, or enter a trouble ticket number.
9. Connect the 923LTS to the line being tested.
Insert the larger RJ48 connector into the port on the 923LTS. Insert the smaller
RJ11 connector into the jack for the line to test.
10. From the Enter Order Number screen, press NEXT to display the responders
screens. Use the por q keys to locate the desired responder.
If the desired responder phone number is not already stored on the 923LTS,
enter the number on the Manual # Entry screen.
11. When the desired responder appears in the display, press NEXT to start the test.
The testing process lasts from about one minute to several minutes, depending
on the types and number of tests in the selected test suite. If enabled, you can
hear the audible tones and test signals during the test. Use the volume keys to
adjust the volume.
When the test is complete, the display indicates pass or fail. Press NEXT to
return to the Main Menu.
18 9100-0923-01 V2.0 SAGE INSTRUMENTS
Page 19

How to Perform a 100 or 102 Test
Yes No
F1
F2
ERL: 9 dB
100 Test Line Results
If the 923LTS is equipped with 100 or 102 responder tests, follow the steps below to
perform them.
1. Turn on the 923LTS.
2. Press NEXT to display the Main Menu.
3. Press 1 to view the Test Select screen.
4. Use the por q keys to scroll through the Test Select screens until the desired
test displays, then use the numeric keypad to select the test number.
NOTE: If installed, the 100 and 102 responder menu options are found
immediately following the Update Tests option.
5. Connect the 923LTS to the line being tested.
Insert the larger RJ48 connector into the port on the 923LTS. Insert the smaller
RJ11 connector into the jack for the line to
test.
6. Press NEXT to display the Responder
screens. Use the por q keys to locate the
desired responder (i.e., the responder that
calls either the 100 test line or the 102 test
line).
7. Press NEXT to start the test.
8. When testing is complete, the 923LTS immediately displays complete detailed
results.
NOTE: The 923LTS stores only the results of the most recent 100 or 102 tests.
Results:
Cmsg: 8 dBrnC
3K FLAT: 13 dBrn
Aborting a Test
While a test is in progress, you can end it and return to the Main Menu. To abort a test
while in progress, follow these steps:
1. Press the CLR (clear) key. A warning screen
displays, and the test continues.
2. At the warning screen, press F1.to stop the
test and return to the Main Menu.
3. To continue the test, press F2.
Test in Progress!
Do You Want to Abort
Viewing Test Results
Results for up to ten tests are stored on the 923LTS. Immediately following, or at any time
after completion of a test, you can view results using the 923LTS display.
You can view the following test information:
• General test information
• Test ID
• Test call
• Call back
SAGE INSTRUMENTS 9100-0923-01 V2.0 19
Page 20

3:09/14/00 09:54
3:Print Results
3:Call Back PASS
• Near results pass/fail summary
0002
Test ID Screen
date and time
call was
line under test
• Far results pass/fail summary
• Far results test details
• Near results test details
NOTE: The 923LTS stores only the results of the most recent 100 and 102 tests.
Viewing Results on the 923LTS
To view test results for any test or test suite
(except for 100 and 102 test line tests), follow
these steps:
1. From the Main Menu, select 3. View
Results. The Select Call screen displays
the date and time (in 24 hour notation) of test calls.
2. Use the keypad to select the desired call. Use the p and q keys to scroll to
more screens. Up to ten calls can be stored
on the 923LTS.
3. Use the keypad to select results for either the
near or far end of the call.
• Near results are results of
measurements made at the customer
site.
• Far results are results of measurements
made at the central office.
Select Call 1 Ü
1:09/14/00 16:01
2:09/14/00 15:54
View Results
1:<Near>
2:Far
Indicates near results
Test Results N1Ü
1:<Test ID>
2:Test Call PASS
Test ID Screen
Use the 1:Test ID option to verify that the call selected is correct. The Test ID screen
displays a summary of the test
call, including:
• test suite name
• date and time of test call
• the phone number of
the line tested
• the order number or
trouble ticket number.
20 9100-0923-01 V2.0 SAGE INSTRUMENTS
test suite name
All Domestic
09/14/00 15:54:08
7618407
order number
or trouble ticket
Page 21

3:Call Back PASS
press q to view the list of tests
3:Noise PASS
press 2 to view jitter
Test Call Screen
Test Call
Test Call
line voltage
dial tone delay
connection
Select 2:Test Call to see details about the connection from the 923LTS to the Sage
950RTS responder, including:
• line voltage and
current
• number of
milliseconds before
and current
-50 V 32 mA
DT: 675ms Con: 3.6s
the 923LTS detected
a dial tone
• number of seconds
before the responder answered the call
Call Back Screen
Select 3:Call Back to see details about the call from the Sage 950RTS responder to the
923LTS, including:
• ring voltage
• ring frequency
NOTE: The call back option is applicable only if the test included a call initiated by the
950RTS responder in the Central Office
to the 923LTS in the field.
Test Measurement Details
From the Test Results screen, press the q
key to display a list of tests completed for the
selected call.
Press the number that corresponds to the
desired test to view the measurement data.
For example, press 2 to view jitter
measurements.
23 Tones Measurement Data
The measurement data for each of the 23 Tones tests are grouped into three selections.
Use the keypad to select the desired category.
23 Tones measurements are grouped by:
• Loss
• Absolute Delay
• Noise
Test Results N 1 Ü
1:<Test ID>
2:Test Call PASS
measurements
Test Results N 2ÛÜ
1:23 Tones
2:Jitter PASS
SAGE INSTRUMENTS 9100-0923-01 V2.0 21
Page 22

Updating Test Suites
Test templates, along with their pass/fail criteria, are maintained by the ALTS database
on the Sage responder at the central office. There are two ways to update the 923LTS
with new or changed test templates:
• Manually
• Automatically
At any time, you can manually update tests. Use the Update Tests option on the Test
menu, and follow the steps below.
Automatic Test Updates
The Sage responder at the central office maintains test templates and test results. The
responder automatically updates the 923LTS with new or changed templates if a test
requested by the 923LTS is not on the ALTS responder.
Manually Updating Tests
Use the manual updating method to downloaded a new test to the 923LTS. During the
updating process, the responder downloads all test templates (both those that already
reside on the 923LTS and new ones that have never been downloaded).
To manually update all of the tests on the 923LTS, follow these steps:
1. From the Main Menu, select 1:Test.
2. Use the q or p keys to scroll to the Update Tests option.
3. Use the q or p keys to scroll to the desired responder.
NOTE: To download test suites from a new responder that does not appear on
the display, enter the phone number for the new responder. See Phone Lists (for
Responders) in Getting Started on page 15.
4. Press NEXT to call the responder and initiate the automatic downloading
process.
When the process is complete, the display reads New Templates Received.
Using the 923LTS as a Telephone
When the 923LTS is connected to a working phone line, you can use it as a telephone
handset. A telephone speaker and microphone are located on the back of the 923LTS.
The speaker volume is automatically adjusted to a level suitable for use as an earphone.
NOTE: When the 923LTS is connected to a working phone line, it can receive telephone
calls even when it is turned off.
To use the 923LTS as a telephone, follow these steps:
1. Use the supplied cord to connect the 923LTS to an operating phone line.
2. Press the TALK key, and listen for a dial tone. The display shows the last number
dialed.
When you press the TALK key, the 923LTS goes off hook and the functions of
the alpha-numeric keypad become just like a telephone. At any time, press the
TALK key again to disable the telephone function.
22 9100-0923-01 V2.0 SAGE INSTRUMENTS
Page 23

3. Dial the desired number, or press NEXT to dial the displayed number.
4. Dial access numbers and area codes just as you would from a regular telephone
on the line.
5. To hang up, press TALK.
The 923LTS reverts back to a automated loop test tool, and displays the last
screen prior to pressing TALK.
SAGE INSTRUMENTS 9100-0923-01 V2.0 23
Page 24

24 9100-0923-01 V2.0 SAGE INSTRUMENTS
Page 25

Section 4 Technical Support
923LTS Technical Support
Telephone and email technical support for the 923LTS is available from a qualified Sage
Instruments engineer every business day, from 9:00 AM to 5:00 PM, Pacific Time. If you
think your 923LTS is not working properly, or if you have questions, contact Sage
Instruments.
Email: techsupport@sageinst.com
Telephone (831) 761-1000 (Monday - Friday, 9 AM to 5 PM, Pacific Time)
Post: Sage Instruments, 240 Airport Blvd., Freedom, CA 95019
Internet: http://www.sageinst.com
Internet Support
Sage Instruments maintains a web site at http://www.sageinst.com. The site contains
technical information from Sage instruments, and from users in the field. Technical
information is available for download and printing. Click on Service, Literature, or App
Notes to locate information.
You can also request repair service from http://www.sageinst.com. Use the Repairs
and Service link to access electronic forms to submit your request.
Frequently Asked Questions
Why does the display light go out?
The display light automatically turns itself off to conserve power. Press the backlight key
to turn it back on. If you find that the light shuts off too frequently, adjust the timeout in the
Setup menu under Environment settings (see page 14).
Why does the 923LTS automatically shut off?
The 923LTS automatically turns completely off after approximately 10 minutes of
inactivity. To keep the unit on longer during a period of inactivity, press the BACK and
NEXT key to start the 10 minute timer over again, while retaining the current settings and
display.
To turn the 923LTS on again after it automatically shuts down, press the ON/OFF button.
Failing Battery Power
The 923LTS automatically shuts completely off after approximately 10 minutes. This is
true when it is using battery power or it is plugged into a power supply. If the unit has
been active in the past 10 minutes and it shuts down, the batteries need to be recharged.
See Charging the Batteries in Getting Started.
Page 26

Does the 923LTS need to be calibrated?
Only in very rare situations does the 923LTS require calibration. The 923LTS uses test
parameters supplied by the Sage 950RTS responder (or from the Sage 356Eplus
responder). To download updated tests, see Loading Tests in Getting Started .
How can I restore the original defaults?
You may want to remove all the custom data you have entered into the 923LTS, and
restore it to its original, “new” state. This is accomplished by performing a cold boot.
Cold Boot
A cold boot erases all stored test results, test suite names, and responder phone lists. It
returns the 923LTS to its original, “new” state. To perform a cold boot, follow these steps:
1. Turn off the 923LTS.
2. Press and hold the CLR key.
3. While holding down the CLR key, press and hold the ON/OFF key.
Continue holding both the CLR and the ON/OFF keys until two lines of bars
appear in the display.
4. When the bars appear, release the ON/OFF key.
Continue to hold down the CLR key until the display goes blank.
5. When the display goes blank, release the CLR key.
The cold boot is now complete, and settings are returned to their factory default
settings.
Confirming a Successful Cold Boot
After you perform a cold boot, you can confirm that the 923LTS is in its original, “new”
state. Follow these steps to confirm a cold boot:
1. Press the ON/OFF key to turn on the 923LTS.
2. Press NEXT to display the Main Menu.
The Main Menu should contain only two options: 1: <Test> 2: Setup.
3. Press 1 (or NEXT).
4. The Test Select screen should appear with only one selection: 1: <Update
Tests>.
What are the 923LTS’ default settings?
There are three categories of default settings on the 923LTS:
• Interfaces (to connect the 923LTS to phone lines and to a computer or printer)
• Environment (to adjust the display light or volume of audible alerts)
• Phone Lists (to enter responder telephone numbers)
26 9100-0923-01 V2.0 SAGE INSTRUMENTS
Page 27

The following are the factory default settings for each category:
Interfaces
Test Interface: Loop 600 ohm
Serial Port: 9600 bps, 8 Data Bits, No Parity
Environment
Display Contrast: Dark
Max Wait Dial-Tone: 40 seconds
No Answer Timeout: 40 seconds
Backlight Timeout: 15 seconds
Audible Alert: enabled
Phone Lists
The responder phone number screens are empty. No responder phone numbers are
supplied by Sage Instruments.
SAGE INSTRUMENTS 9100-0923-01 V2.0 27
Page 28

Sage 923LTS Warranty
Product Warranty
Sage Instruments products are warranted to be free from defects in materials or
workmanship for a period of one year from the date of shipment. Sage Instruments
further warrants that each product will execute its software programming instructions.
During the one year warranty period, Sage will, at its option and expense, either repair or
replace products which prove to be defective.
Limitation Of Warranty
This warranty does not cover repairs for damages from accident, misuse (including
modification to or addition of software), tampering, improper maintenance, repair by
anyone not authorized by Sage Instruments, or shipment in unapproved packaging. Outof-warranty repairs performed by Sage Instruments are billed to the customer. Sage
Instruments does not warrant that the operation of its products will be continuous or error
free.
Exclusive Remedies
The remedies provided in this warranty are available exclusively to the original buyer of
the Sage Instruments product. Sage Instruments is not liable for consequential damages
or damages to any party other than the original buyer. Sage Instruments specifically
disclaims any implied warranty of merchantability or fitness for a particular purpose. No
other warranty is expressed or implied.
Repaired Products Warranty
Sage Instruments products that are repaired during the initial one year warranty period by
Sage Instruments or its authorized representative are further warranted for a period of 90
days from the date of shipment from the repair facility. All out-of-warranty repairs
performed by Sage Instruments are warranted for a period of 90 days.
Shipping Instructions
To exercise the Sage Instruments warranty, contact a Sage Instruments customer
service representative and obtain a returned material authorization number RNA). Include
a detailed description of the problem and the conditions and circumstances under which
the symptoms occurred. Ship the product in its original packaging, or in packaging
approved by Sage Instruments. If unapproved packaging is used, this warranty is void.
Shipping charges, duties, and taxes must be prepaid. Return shipping to the customer is
paid by Sage Instruments.
Sage Instruments
240 Airport Blvd.
Freedom, CA 95019
(831) 761-10
28 9100-0923-01 V2.0 SAGE INSTRUMENTS
 Loading...