

Coupling Procedures
1. Inspect the fifth wheel mounting.
• Tighten loose
fasteners
• Replace missing
fasteners
• Repair/replace
cracked
components
NOTE: If you have a sliding fifth wheel, make sure
both plungers are fully engaged (locked).
(See Page 4, Figure 4B)
2. Make sure coupling area is flat, level and clear
of persons and obstacles.
3. Lubricate the fifth wheel-to-trailer contact
surface with grease. Tilt the ramps down.
XL-FW421-02
TILT
DOWNWARD
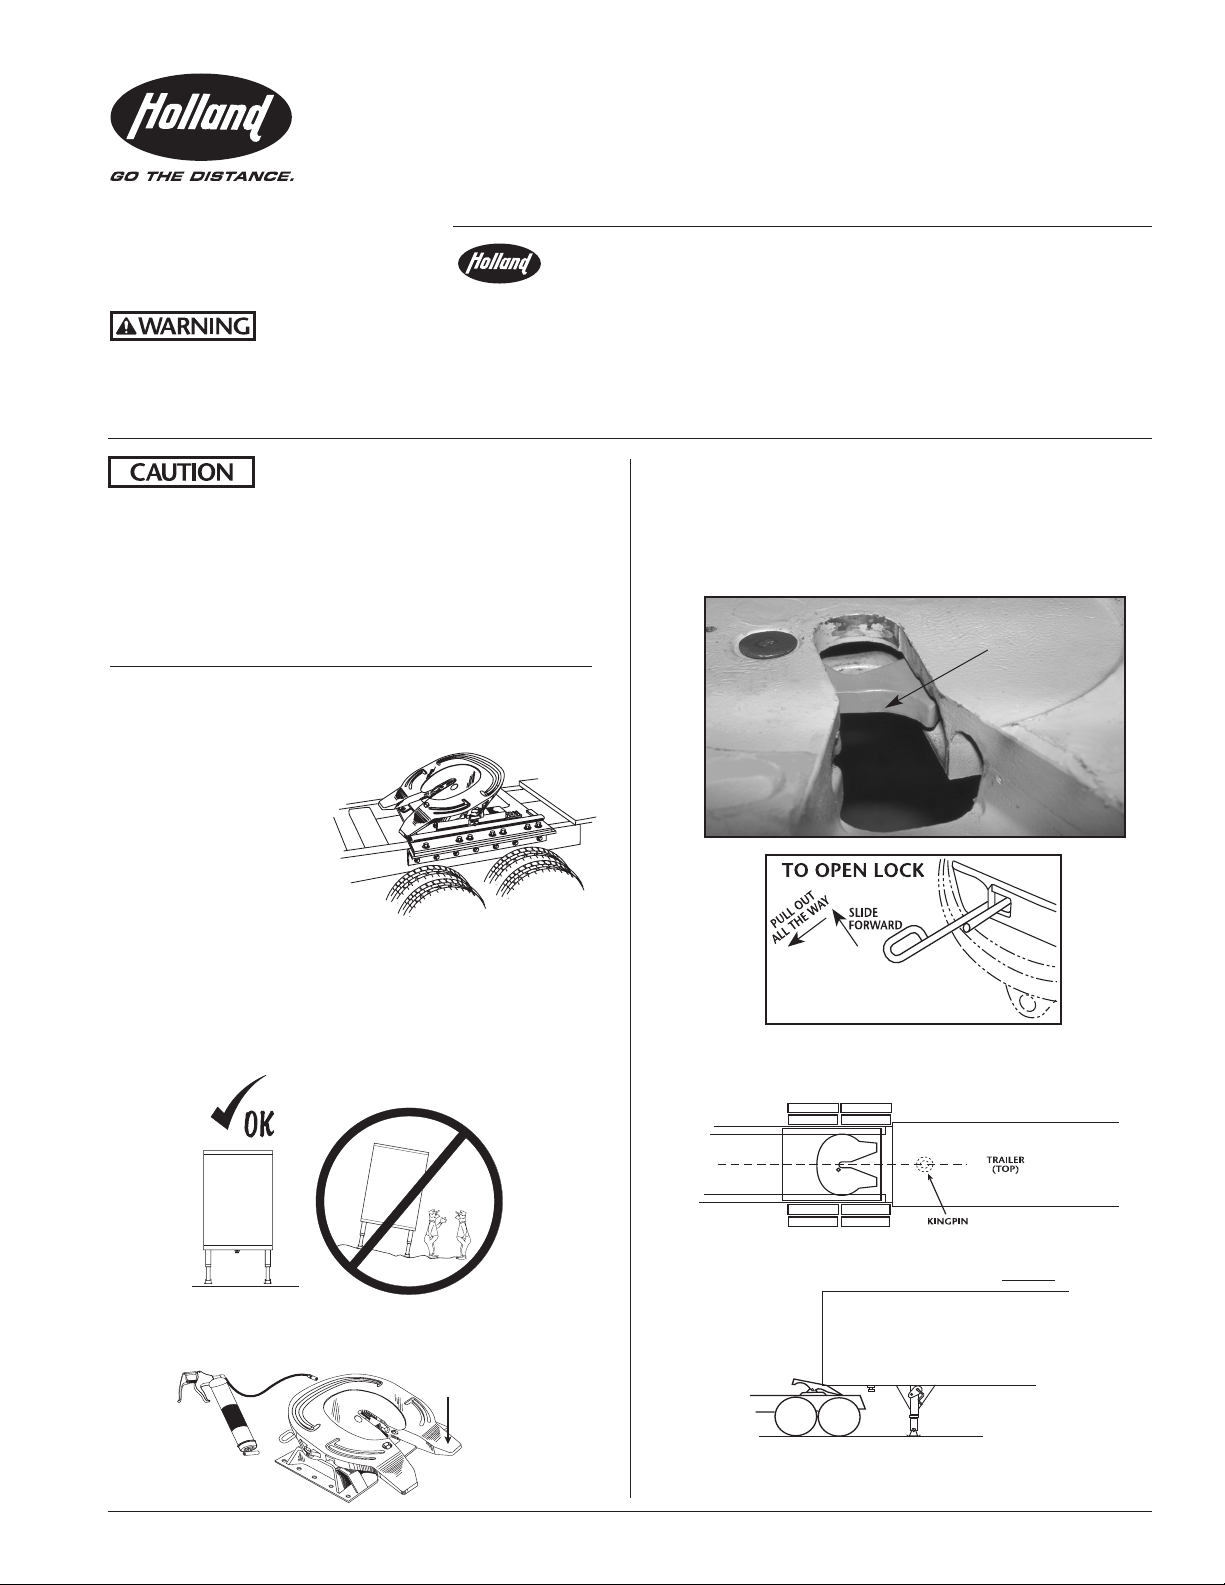
4. Make sure the locks are open. To open locks,
slide the handle forward and pull it out to the
maximum extension. The lock will swing to
the open position. Note: When you first receive
your fifth wheel, you may have to pry open the lock.
5. Center fifth wheel with kingpin.
6. Back tractor close to trailer and STOP.
LOCK OPEN
POSITION
ACTUATING FINGER
1
FLEETMASTER
XA-201-A-80-L AIR RELEASE
OPERATING INSTRUCTIONS &
MAINTENANCE PROCEDURES
OPERATING INSTRUCTIONS
This air release option fifth wheel
top plate is not intended to be
mounted onto low mount stationary brackets (Part
No. XA-7586 and XA-7886). Low mount brackets
do not provide sufficient clearance for the air
cylinder which can be damaged when the fifth
wheel is articulated.
You must read and understand the following instructions before operating your fifth
wheel. Failure to follow all of the important maintenance procedures contained in
these instructions may result in a hazardous condition or cause a hazardous condition to develop.
All maintenance must be performed by a qualified person using proper tools and safe procedures.
All maintenance must be performed while the tractor is uncoupled from the trailer.
7. Chock trailer wheels.
8. Connect brake lines and light cord.
9. Support slack in lines
to prevent interference.
10. Set trailer brakes.
11. Adjust trailer height so fifth wheel will lift trailer.
Trailer should contact fifth wheel 4˝–6˝ behind
fifth wheel bracket pin.
12. Slowly back into trailer.
13. Do a pull test as an INITIAL CHECK.
Wrong
FIFTH WHEEL
WILL NOT LIFT
TRAILER
BACK INTO TRAILER
SLOWLY
à
à
à
à
à
à
DO NOT
BACK INTO
TRAILER FAST
14. Visual Inspection.
GET OUT OF THE TRACTOR!
VISUALLY check that the lock is CLOSED!
DO NOT
RELY ON
SOUND
à
à
2
A direct visual inspection is
required to assure proper
coupling. Improper coupling can pass the initial
pull test. Sound is unreliable. DO NOT take for
granted that you are properly coupled. Get out of
the cab and look. An improperly coupled truck and
trailer could result in seperation and may cause
death or serious injury to others.
If you do not obtain a proper
couple, repeat the coupling
sequence. DO NOT use any fifth wheel that fails to
operate properly. An improperly coupled truck and
trailer could result in seperation and may cause
death or serious injury to others.
OPERATING INSTRUCTIONS
Coupling Procedures (con’t.)
Attempting to couple with the
trailer at an improper height
could result in a false or improper coupling and
cause damage to the tractor, fifth wheel, or trailer.
XL-FW421-02
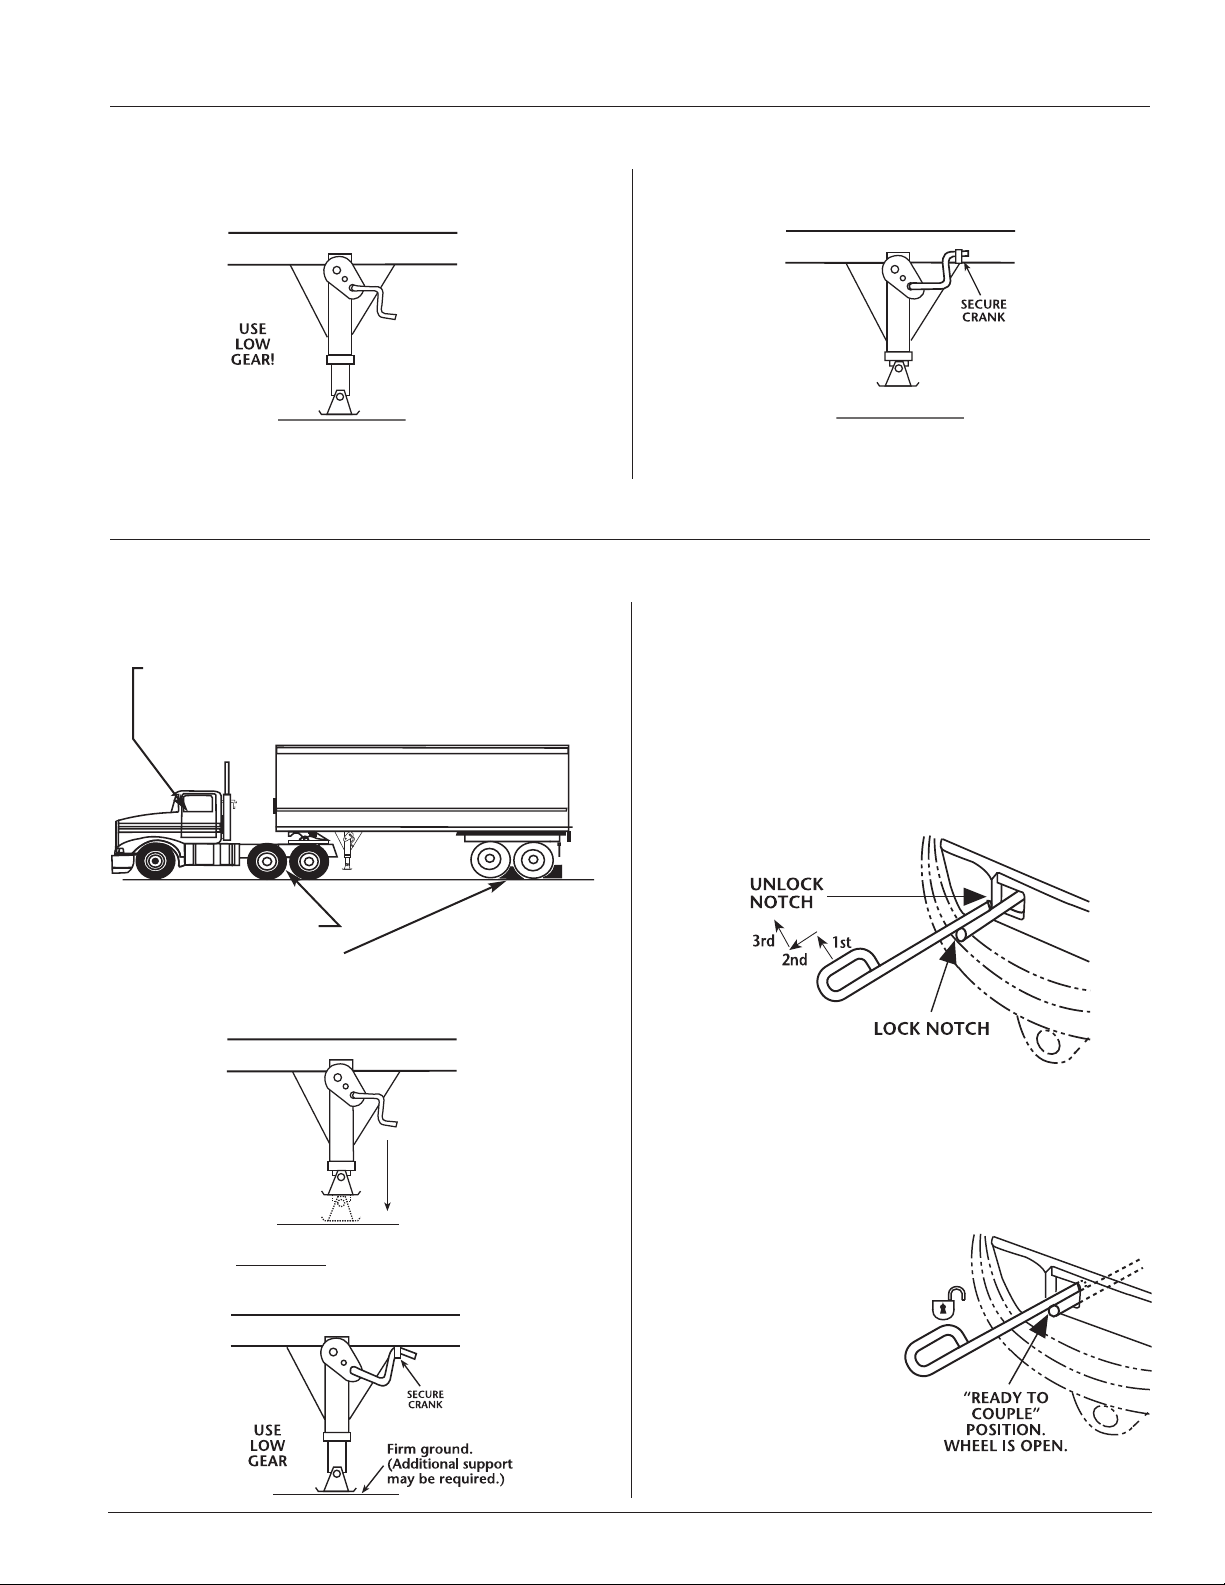
8. Disconnect brake lines and light cord. Attach
brake line to dummy coupling to keep line clean.
9. Actuate the fifth wheel control valve to open
the locks.
10. Slowly pull out from the trailer.
IF MANUAL RELEASE IS REQUIRED, FOLLOW
INSTRUCTIONS BELOW:
Release tractor brakes and slowly drive away
from the trailer. Let the trailer slide down the
fifth wheel and pick-up ramps, being careful
that the trailer landing gear touch the ground
with minimal impact.
NOTE: It is
normal after
uncoupling for
the release
handle to come
off the unlock
notch and move
to a “ready to
couple” position.
1. Position tractor and trailer on firm, level
ground clear of obstacles and persons.
2. Set trailer brakes.
3. Slowly back tractor tightly against trailer.
4. Set tractor brakes.
5. Chock trailer wheels.
6. Lower landing gear until pads just touch the
ground.
7. Switch to low gear
and crank an additional 4-
8 turns. Do not raise trailer off the fifth wheel.
USE
HIGH
GEAR
3
OPERATING INSTRUCTIONS
Coupling Procedures (con’t.)
15. Retract landing gear until pads come off the
ground.
16. Switch to high gear, fully retract and secure
crank handle.
17. Re-check brake lines and light cord. Remove
wheel chocks, continue with pre-trip inspection.
OPERATING INSTRUCTIONS
Uncoupling Procedures
XL-FW421-02
 Loading...