

Page 1

STAMPATO SU CARTA RICICLATA. NESSUN ALBERO E' STATO ABBATTUTO PER PRODURRE QUESTO MANUALE
Cod. 0313.959 - Ed.02 11/00
We congratulate for having bought this top-quality espresso
machine and thank you for choosing Saeco.
Before operating the machine, we recommend to read the
following instructions thouroughly which explain how to use,
clean and maintain the machine.
User's and maintenance booklet
TYPE SUP 015
HOUSEHOLD USE ONLY
OY L
DIGITAL
Page 2

3
4
11 13
9
Aufheizen...
8
7
6
5
23 23
1
24
1410 12
15
16
17
18
21
22
19
20
Page 3

45
25
27
29
2
3
4
Aufheizen...
26
5
7
6
28
+
-
30
35
38
40
36
37
39
41
7
6
5
4
3
2
1
7
6
5
4
3
2
1
31
33
32
34
42
44
42
43
7
6
5
4
3
2
1
7
6
5
4
3
2
1
45
7
6
5
4
3
2
1
7
6
5
4
3
2
1
Page 4
30
DESCRIPTION OF SYMBOLS TECHNICA L DA T A
31
The warning triangle shows all important
safety indications to ensure the user’s safety.
The non-observance of said instructions
may cause serious injuries!
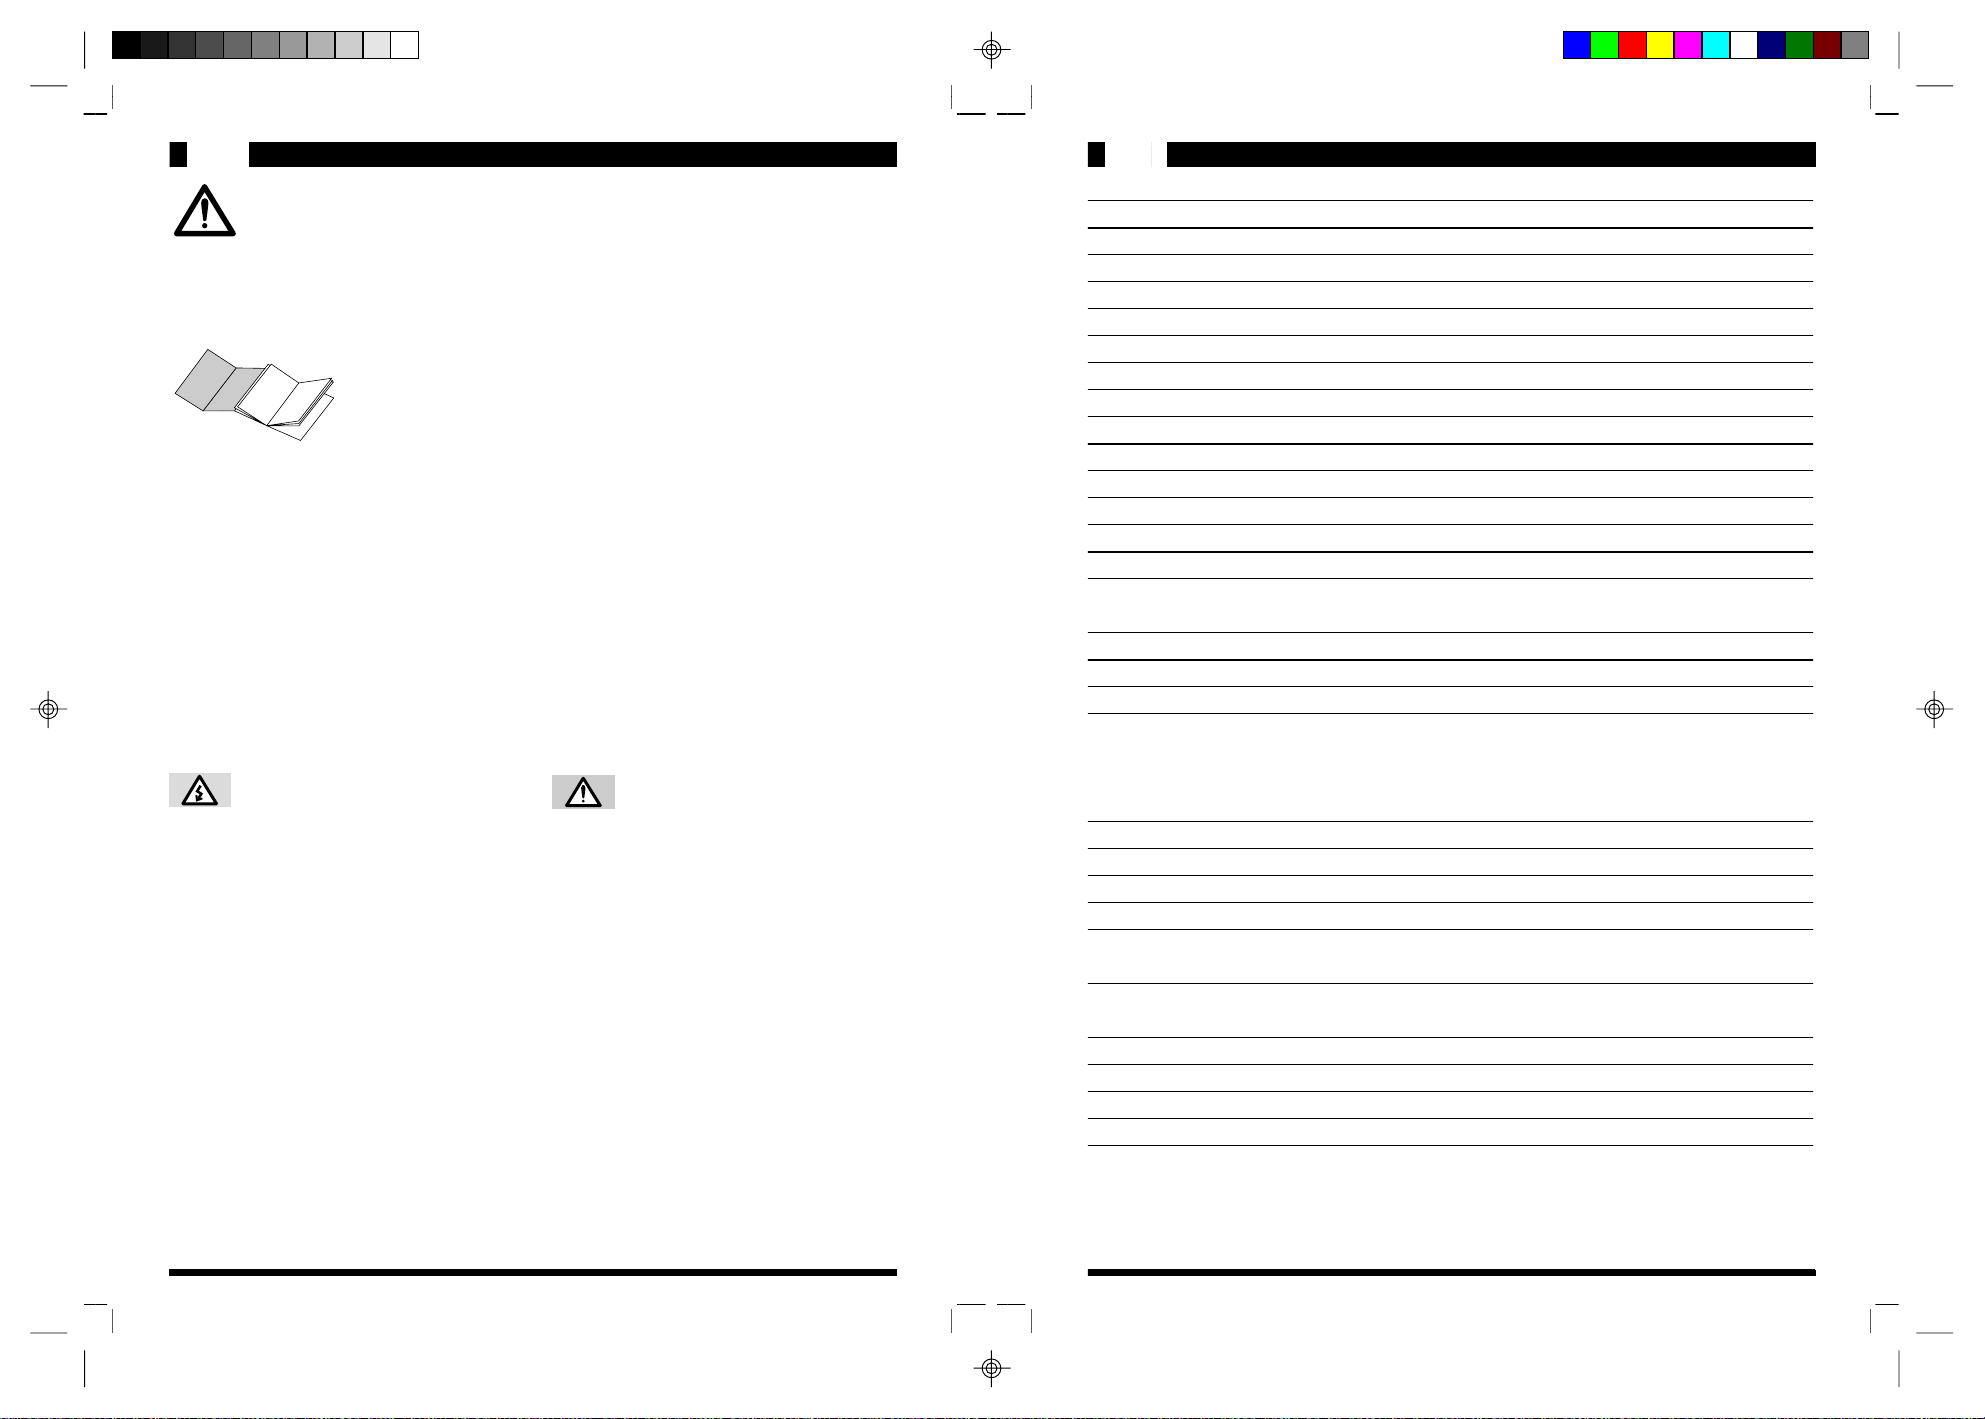
The first cover page of the manual shows
figures relevant to the text. Thus, keep it
open while reading the instructions.
How to use the instructions
These instructions cannot anticipate every
possible use of the machine.
For further information or questions concerning specific situations or problems, please
contact the local dealer or manufacturer
directly.
SAVE THESE INSTRUCTIONS
The lightning flash with arrowhead symbol,
within an equilateral triangle, is intended to alert
the user to the presence of unisulated
«dangerous voltage» within the product‘s
enclosure that may be of sufficient magnitude to
constitute a risk of fire or electric shock to
persons.
B
Reference to figures, parts of the machine
and control elements are given by numbers
or letters, as figure B exemplifies.
Save these instructions carefully
and make sure to hand them to
other users.
The exclamation point within an equilateral
triangle is intended to alert the user to the
presence of important operating and
maintena nce (se r vici ng) inst ru ct ions in the
literature accompanying the appliance.
Voltage ratin g See rating plate o n th e back of the mach in e
Nominal power See rating plate o n th e back of the mach in e
Dimension s (length x width x height) approx. 385x3 30x3 95 m m
Machine case plastic material ABS/me tal
Weight approx. 13 kg
Cable len gth approx. 1.2 m
System
Temperature control electronic
Coffee grin der adjustmen t grinding adjustme nt device
Coffee gro unds ejectio n automatic
Ground co ffee dosag e coffee releas ing devic e
Cup programmin g 0-250 ml approx.
Water tank removable, tran sparent tan k
Water regulatio n electronic, continuous
Capacity - water tank approx. 2.4 l itres
- bean coffee contain er 300 g bean coffee
Steam/hot water dispe nsin g tube adjustable, suppl ied with bur n protection
Steam/hot wate r dispensin g adjustable, con tinuo us
Heating time appro x. 2 min.
Brewing time - espresso coffee approx. 20s/cu p
- coffee approx. 30s/cup
- hot water approx. 60s/cu p
- milk approx. 60-90s cream/cup
Overheating protection incorporated
Insulation protection range I
Approvals See rating plate o n th e back of the mach in e
In compliance with EN regulation
Warran ty in compliance with th e warranty
free flow thermal cut-out, alternating piston pump
EN 6033 5-2 -1 5 ( 96 ) - E N 603 35 -2- 14 ( 96) - E N 55 01 4
certificate enclosed herein
Table of contents
Page
31 Technical data
33 Safety indications
35 Controls and machine parts
35 Control panel description
36 Unpacking/Installation
36 Power supply connection
36 Starting and use
37 Drainage
Man. Titan 0313.959 ING (UL) 12-12-2000, 16:091
Page
38 Programming the machine
41 Recommendations
42 Brewing
43 Incorporated safety devices
45 Cleaning/Maintenance
49 Disposal
50 Troubleshooting
Accessoi res (incl uded in the machine price)
Measuring spoon
Central unit key
Cleaning brush
Water hardn ess detecti ng strips
The manufacturer reserves the right t o make improve ments t o the appliance due to t echnological advance ment.
Page 5

3332
2928
SAFETY INDICATIONS
A
B
D
10cm
10cm
Positioning
Place the machine on a plane surface, where
nobody can turn it upside down or be hurt. Hot
Electrical parts should never be in
contact with water: danger of shortcircuit! Steam and hot water may
cause burns. Never direct steam or
water jets towards the body; special
attention must be paid when touching
the steam/hot water spout and the
heating plate: danger of burns!
This machine must be used exclu-
C
E
sively for the purposes it has been
manufactured.
Do not make technical changes for any reason
whatsoever; any improper use is forbidden, due
to the risks which might occur!
Warnings
The machine shall only be used by adults and
properly instructed persons.
Voltage
Never touch parts under current! They might
cause electric shocks, serious injuries and death.
The machine must be connected to a socket with
suitable voltage. Voltage must correspond to the
voltage shown on the appliance rating plate.
A
Power cord
Never use the machine with a defective power
cord. Replace defective power cords and plugs,
contacting authorised personnel . Do not extend
the power cord around corners, sharp edges or
over hot parts and protect it from oil. Do not shift
or move the machine by pulling its power cord. Do
not unplug the machine by pulling the power cord
and never touch it with wet hands. Make sure the
power cord does not hang from tables or shelves.
B
Keep children away
Do not allow children to play with the machine.
Children are not aware of the potential danger
caused by electric appliances.
water or overheated steam might escape from
the machine: danger of burns! Never use the
coffee machine outdoors or inside rooms with
low temperature conditions. Do not place the
machine on hot surfaces or in the proximity of
open flames to avoid possible damages of the
case.
C
Danger of burns
Do not direct the overheated steam or hot water
jet towards you or other people. Do not touch hot
surfaces, such as the steam/hot water spout.
D
Necessary space
For a proper operation of the machine it is
advisable to keep to the following indications:
- choose a levelled surface
- choose a properly lit and hygienic room
provided with accessible sockets
- leave a minimum distance of 100 mm between
the machine and the wall
E
Cleaning
Before cleaning the machine, make sure to
switch off all keys and unplug the machine. Wait
until the machine cools down. Never plunge the
machine into water! Do not tamper with the inner
parts of the machine and never open the machine.
Repair/maintenance
In case of defect or suspected damage following
a fall, unplug the machine immediately. Never
use a defective appliance. Only skilled personnel are authorised to carry out repairs. The
manufacturer declines any liability whatsoever,
should repairs fail to be carried out by authorised
personnel.
In case of fires, use carbon dioxide (CO
extinguishers. Never use water or powder extinguishers.
2)
Man. Titan 0313.959 ING (UL) 12-12-2000, 16:092
Page 6

CONTROLS AND MACHINE PARTS UNPACKING/INSTALLATION
3130
3635
IMPORTANT SAFEGUARDS
a) A short power-supply cord (or detachable power-supply cord) is to be provided to
reduce risks resulting from becoming entangled in or tripping over a longer cord.
b) Longer detachable power-supply cords or extension cords are available and may be
used if care is exercised in their use.
c) If a long detachable power-supply cord or extension cords is used,
1) The marked electrical rating of the detachable power-supply cord or extension cord
should be at least as great as the electrical rating of the appliance,
2) If the appliance is of the grounded type, the extension cord should be a groundingtype 3-wire cord, and
3) The longer cord should be arranged so that it will not drape over the counter top or
table top where it can be pulled on by children or tripped over.
1
Coffee grounds container
2
Drip tray
3
Cup holder sur face
4
Main switch
5
Power cord
6
Coffee dispe nsin g uni t
7
Steam/hot water dispensin g tube with heat
protector
8
Control pan el
9
Steam/hot water sel ection kn ob
10
Heating plate for cups
11
Water tank
12
Water tank cover
Control panel description
Digital displa y
13
Wate r l e vel
14
Pre-ground coffee container with cover
15
Coffee bean co ntainer cover
16
Coffee bean co ntain er
17
Grind adjustment l ever
18
Coffee dosage adjustme nt lever
19
Service door
20
Filling funnel
21
Handle for assembling and disassembling
of central unit
22
Central unit
23
Coffee rest dr awer
24
Swivel
“WARMING UP” ......
Unpacking/Installation
Standard packing is str ong enough to protect
the machine during mail shipping. Keep this
package to return the machine to the manufacturer should it be necessary.
Before installing the machine, keep to the
following sa fety i ndicatio ns:
Position th e mach in e in a safe place.
Do not allow children to play with the machine.
Make sure the machine is not placed nearby hot
surfaces or o pen flames.
Always use the mac hine with the swivel (24).
Thus, when installing the machine, make sure to
rest it directly on this support by inserting it into
the slot on the lower side of the ma ch i n e.
Now the m ac h ine is ready to be connected.
Power supply connection
power cords an d plugs must be replaced by
authorised perso nnel.
Should an extension cord be used, check its
perfe ct condit ion. The e xtension cord m ust have
a minimum section
must be supplied with a three-pole plug/socket.
of
1,5 mm
2
or 16 AWG and
Starting and use
Danger!
Electric voltage may cause death!
Parts under current shall never be in
contact with water: danger of shortcircuit! Overheated steam and hot
water may cause burns. Do not direct
steam or water jet tow ards the body;
furthermore, great attention mus t be
given when touching either the dispensing tube or the heating plate:
danger of burns!
For your own safety as well as for
other people’s safety, keep to the
safety precautions described (see
page 33).
Standby switch
Standby mode on/off
Selection key for 1 or 2 cups of tall coffee or key
<<
>> in the programming mode
Selection key for 1 or 2 cups of regular coffee
or key <<
Selection key for 1 or 2 cup s of espr esso coff ee or key <<ESC>> in the prog ramming
mode
Pre-ground coffee selection button or key <<ENT>> in the programming mode
Steam selection button
Man. Titan 0313.959 ING (UL) 12-12-2000, 16:093
>> in the programming mode
Warning: electric curren t may cause death!
The coffee machine must be connected to a n
adequate socket. Vo ltage must suit to the voltage specified on the applian ce rating plate.
Never use defective power cords. Defective
Never use the machin e without wateror coffee
beans.
Remove measurin g spo on, brush and th e central unit key fro m the coffee gro und s contain er
(1) and keep them with in r each .
Unwind the power cord (5) from the rear side of
the machine.
Page 7

DRAINAGE PROGRAMMING THE COFFEE MACHINE
3837
3332
25
The bean coffee container (16) is attached with
two screws. Remove the co ver (15) and fill it
with coffee beans (approx. 300 g), then replace the cover.
Adjust grinding by means of the grind adjustment lever (17), positioning it on point 5 of the
scale.
Never fill the coffee bean container with other
products. They might damage the mach ine!
Before fillin g the container with coffee beans,
make sure th e pre-ground coffee c ontainer is
closed to prevent coffee beans from falling into
it. They might damage th e machin e!.
26
Remove the water tank (11) from the machine,
remove its cover (12) and fi ll it with cold wate r
(approx. 2.4 l). A valve on the tank bottom
prevents water from esc aping.
Before installing the water tank in the
machine, make sure the coffee bean
container cover is properly fitted.
Instal l the wa te r ta nk, s lig htly p res si ng ov er it t o
fit the valve which will open automatically.
Replace the c o ver o n th e tank.
Do not fill the tank with an excessive quantity of
water.
Always fill the tank with fresh water : h o t water
as well as other fluids migh t damage th e tan k.
Do not switch on the machine if the water tank
is empty. Befo r e u sing the m achine make sur e
there is en o u gh water in the tank.
Connect the plu g to the socket and press the
main switch.
The display sh ows
"WARM ING UP ... ... "
Should "E NER GY "
"SAVI NG "
be displayed, press the Energy saving switch to
disactivate the en ergy sav ing mode.
Drainage
Direct the steam/hot water dispensing tube (7)
over the drip tray (2). Pl ace a cup or another
suitable contain er under the dispensing tube,
then turn the steam/hot water knob (9)
counterclockwise. The pump starts automatically. Wait until a regular water jet is obtained,
then close the knob. The machine is now
drained and ready to work.
The display sh ows
"SELECT PRODUCT "
"READ Y FO R US E "
Important: It is advisable to drain the machine
before the first start, after a prolonged perio d
the machine has not been used or whenever the
water tank h as been completel y em ptied. Fur thermore, should the pump be defe ctive, the
display shows
"VENT ILA TE "
Programming
the coffee machine
27
To enter the programming mode, press the key
ENT (pre-gr ound coffee) w hen the mac hine is
on and keep it pressed until the first two lines of
the programmin g mode are displaye d:
"LANG UAG E "
"RINS ING "
At the end of the line appears a blinking
asterisk, which can be moved up and down
with the keys
The display shows the followi ng items in this
sequenc e:
LANGUAGE PREGRINDING
RINSING TOTAL COFFEES
WATER HARDN. DESCALING
CUP HEATER SIGNAL. DESCAL.
TEMPERATUR E TIMER
PREBREWING RINSING CYCLE
Then, pr ess ESC. The machine is now in the
normal mode again.
(tall and regular co ffee).
Selecting menu items
Select the different menu items by means of the
keys
activate the selected item. It is possible to
modify the selected figures in a menu item using
the keys
selected op tions, for instan ce ON fo r the item
cup heater.
Should you accidentally change some data,
press ESC to leave the menu item without saving
the new options which were selected accidentally.
. The key ENT allows you to
. The key ENT memorizes the
Selecting the language
Move the aster isk at the end o f the lin e to th e
menu item LANGUAGE using the keys
Press ENT to activate this item.
The display sh ows:
"LANG UAG E "
"ENGL ISH "
The keys allow you to ch ange the set
options: italiano, français, Deutsch, english,
español, po rtuguês.
Rinsing cycle function
If the rinsing cycle function is activated, the
machine that is started after a period of inactivity starts a water rinsing cycle to the coffee
dispensing un its automarical ly.
Move the asterisk to the menu item RINSING CYCLE
using the keys
The display sh ows:
und press ENT to active it.
"RINS ING "
"ON "
You can modify the chosen item with the
key
Water har dne ss a dj ustm en t
In order to adjust the water hardness, it is
necessary to test the water using the strip
supplied with the machine. Dip the strip into the
water for a se cond, shake off ex cess water
gently, wait approx. 1 minute and read the
results.
Move the aster isk at the end o f the lin e to th e
menu item WATER HARDN. using the keys
: on; off.
.
Man. Titan 0313.959 ING (UL) 12-12-2000, 16:094
Page 8

39
PROGRAMMING THE COFFEE MACHINE PROGRAMMING THE COFFEE MACHINE
40
3534
. Press ENT to activate this item.
The display sh ows:
"WATE R HA RDN "
"HARD NES S 2 "
The keys allow
you to change the set
Hardness 4
Hardness 3
Hardness 2
Hardness 1
options:hardness 1 (very
soft), hardness 2 (soft),
hardness 3 (medium),
hardness 4 (hard).
Activating the cup heater
Move the aster isk at the end o f the lin e to th e
menu item CUP HEATER. Pres s ENT to activate
this function.
The display sh ows:
"CUP EATE R "
"ON "
The keys allow you to change the set
options: on, off.
Selecting temperature
Move the aster isk at the end o f the lin e to th e
menu item TEMPERATURE using the keys
Press ENT to activate this item.
The display sh ows:
"TEMP ERA TUR E "
"MEDI UM "
The keys allow you to change the set
options: minimum, low, medium, high, maximum.
Selecting the prebrewing
function
As soon as the coffee has been moistened, the
pump stops for a while. Then, the brewing cycle
continues.
Move the aster isk at the end o f the lin e to th e
menu item PREBREWING using the keys
Press ENT to activate this function .
The display sh ows:
"PREB REW ING "
"ON "
The keys allow you to change the set
options: on, off, long (in this case the pump
stops for a longer per iod).
Selecting the pregrinding
function
By selecting the pregrindin g function , the machine grinds coffee every time the doser is
empty. So, a groun d coffee p ortio n is always
ready in the doser. This allows time saving in the
semi-professio nal domain .
Move the aster isk at the end o f the lin e to th e
menu item PREGRINDING using the keys
. Press ENT to activate this fun ctio n .
The display sh ows:
.
"PREG RIN DIN G "
"OFF "
The keys allow you to change the set
options: on, off.
Total coffee
Move the aster isk at the end o f the lin e to th e
menu item TOTAL COFFEES using the keys
. Press ENT to activate the option.
The display sh ows:
" TOTA L CO FFEE "
" 1234 "
and the total number of coffees dispensed by
.
the machine.
This figure cannot be changed.
To leave this menu, press ENT or ESC.
Descaling
Move the aster isk at the end o f the lin e to th e
menu item DESCALING using the keys
Press ENT to activate th e item.
The display sh ows:
"DESC ALI NG "
On descaling see page 47.
In programming function, by pressing keys,
move the asterisk till the en d of the line on the
menu Sign. Descal. and confirm the selection
with ENT butto n.
The following message will be displayed:
Timer
The timer enables the automatic switching off of
the machine after a preset period, which can be
set from 15 minutes to 12 hours after last
dispensing.
If after a few seconds coffee is brewed again,
the timer is r eset. If the value set is 0:00, the
timer function is not activated and the machine
does not switch o ff.
Move the aster isk at the end o f the lin e to th e
menu item TIMER by means of the keys
Press ENT to activate this item.
The display sh ows:
.
"STAN DBY "
"AFTE R 0:00 "
The keys allow you to set the time periods. Save by means of the ENT key.
If the set time h as already passe d, the display
shows:
"ENER GY "
"SAVI NG "
and the machine switches off. If necessary, you
can switch on the machine again by means of
the energy savin g sw itch.
.
"RESE T DES CAL ING "
"NO "
Rinsing cycle
By mean s of the same ke ys, it is possible to
modify th e v al u e; Yes, or no .
If the function
is selected without the display message Descale,
the following message will be displayed:
"SIGN . DES CAL . "
"QUAN TIT Y WAT ER "
"NOT REAC HED "
To enter the programming mode, press the Key
ENT.
This appliance is equipped with a rinsing
cycle program for the usual, daily and
weekly rinsing. If regularly used, this program effectively eliminates the greasiness of
coffee in inaccessible parts and avoids
alterations in the taste of coffee.
Depending on the way the appliance is
used, it is advisable to rinse it every month
or after max. 250 cups of coffee. The
rinsing cycle lasts about 5 minutes, and it is
divided into 4 cycles, including the rinsing
Man. Titan 0313.959 ING (UL) 12-12-2000, 16:095
Page 9

RECOMMENDATIONS BREWING
4241
3736
with cold water. Each cycle is followed by
a short pause of about 40 seconds.
Never stop the rinsing cycle.
Important: before starting the rinsing
cycle, always fill completely the water tank
and put a capacious container (min. 1 litre)
under the coffee dispensing unit, which is
height-adjustable and can be removed for
cleaning.
The rinsing cycle needs about 1 litre of
water (including final rinsing). From time to
time, empty the water tank.
By using the keys
the menu item RINSING CYCLE . To enable
this menu item use the ENT key.
The following message appears on the
display:
move the asterisk to
"RINS ING CYC LE "
This function starts the rinsing cycle with
water of those parts concerned with the
coffee dispensing. When the rinsing cycle
ends, the following message appears on
the display:
"SELECT PRODUCT "
"READ Y FO R US E "
Recommendations
Test
If the machine has not been used for a prolonged period, it is advisable for hygienic
reasons to run a rinse cycle through the machine.
Place a cup under the dispensing tube (7) and
operate the steam/hot water (9) knob. Fill a cup
with water.
Preheati ng cu ps
Cups may be preheated by placing them on the
heating plate.
Temperature l ed
When connecting the machine, the display
shows
"WARNI NG UP .... .. "
As soon as the operating temperature has been
reached, the display sh ows
"SELECT PRODUCT "
"READ Y FO R US E "
Empty coffee bean contai ner
warning light
"COF. BEAN S EMP TY "
"READ Y FO R US E "
When this led is on, the coffee grinder stops. Fill
the container with coffee beans and restart the
cycle.
Empty water tank warning light
"FILL WATE RTA NK "
An empty water tan k causes
automatica lly. Fill the ta nk with w ater an d restart
the cy cle .
Grounds con t ainer wa r ning li ght
the cy cle to st op
"DREG DRA WER FULL "
"READ Y FO R US E "
This message appears on the di splay as soon
as there are 30 coffee grounds in the container.
The machine though does not stop. Remove the
grounds container and empty it.
Grind
If the c of f ee f l ow s too qu ic k l y (coarse grind) or
too slowly (fine grind) in to the cup, adju st the
coffee grinder :
Recommended gr ind level: position 5
Grind too coa rse = a djust to a lower v a lue (f or
instance fr o m 5 to 3)
Grind too fin e = adjust to a higher value (for
instance from 5 to 7).
Adjust the grind level only when the coffee
grinder is running.
Avoid extreme adjustment (for instance, on
position 1) whenever possible. It is preferable to
try another coffee blend, because not all coffee
blends are suitable.
Coffee
Make sure coffee is fresh. An espresso roast is
preferable.
In order to obtain a strong and aromatic espresso
coffee, use special blends suitable for espresso
coffee ma chines and special cups with thick sides.
Keep coffee in a cool place, in an hermetically
sealed container.
Dosage of gro u n d coffee
28
The coffe dosage adjustment lever (18) allows
the selection of the coffee quantity, from 6 to 9
grams.
Place the adjustment lever (18) on the required
position.
Water qualit y
In addition to blend, grind and water temperature, the water quality is of th e utmost importance for th e br ewing of a go o d co ffee. Thus,
the use of a decalcifier to remove limescale and
eliminate any unpleasant taste and organic
impurities from water, is strongly recommended.
Furthermore a water decalcifier partially eliminates limescale from water, thus protecting the
machine heating system from chemical buildup
and prolonging its wor king life.
The water tank must be emptied daily and filled
with fresh water.
Operation time
The machine may be kept on all day long.
However, it is advisable to activate the energy
saving mode after the last use. Press the Energy
saving switch. If the timer has been programmed,
the machine switches on automatically. See
page 40.
Should the machine not be used for a pro-
longed period (e.g. during the night) it is
advisable to switch th e main switch (4) o ff.
Switching off the machine
Switch the machine off only after the coffee
cycle has been concluded.
Brewing
Cup level filling
This machine allows the precise dosage of the
Man. Titan 0313.959 ING (UL) 12-12-2000, 16:096
Page 10

BREWING BREWING
4443
3938
coffee quantity according to the cup dimension.
By means of the 3 selection keys
desired coffee quantity can be chosen. The
display shows th e selecte d quanti ty.
the
Cup level adjustment
To set the quantity of coffee to be dispen sed,
press the selection key corresponding to the
right quantity and keep it pressed while the
coffee is dispensed into the cup. Release the key
only when the right level has been reached
(max. 250 ml approx.). As soon as the dosage
programming mode gets activated, the display
shows:
"1 SMA LL COFF EE "
"PROG R. QUA NTI TY
Warning! If activated, the pre-brewing function
will be performed.
Double quanti ty of coffe e
i.e. 2 cups of coffee
If one of the three selection keys (no matter
which one) is pressed twice before coffee
brewing, the machine will brew a double
quantity of coffee.
Coffee beans
29
This machine grinds a portion of fresh coffee for
each cup; for two cups, it grinds two portions of
coffee, o ne after the o ther thus ensu ring optimum coffee qual ity.
Adjust the desired grinding degree: the recommended average val ue is 5.
The grinding degree must be adjusted only
when the coffee grinder is operating, otherwise
it may be da mag ed.
Place one or two preheated cups on the grill (3)
under the dispenser (6). Press the relevant
selection key. The machine will automatically
dispense the se lected coffee .
The coffee flow may be stopped at an y mo ment
by pressing any selection button (except the
standby s witch), fo r in stance when an e x cessive
quantity of water has been selected. Should you
interrupt the coffee flow after the first of two coffees
has bee n br ewed, the second is no t dispensed.
"
Pre-ground cof fee
Make sure to u se pre-groun d coffee only (medium ground). Never use whole beans or
soluble co ffee!
Right before making coffee, fill the container
with freshly ground coffee. Remember that
ground coffee ages soon, thus losing its quality.
30
Use the measuring spoon supplied to fill the
containe r ( 14 ) wit h ground cof fe e. Use a ful l
measure only.
of coffee.
The coffee flow may be stopped at any moment
by pressing any selection button (except the
standby switch), for instance when an excessive
quantity of water has been selected.
Hot water
The hot water dispe nsin g is separ ate from th e
coffee circuit, in order to supply tasteless ho t
water for tea, soup etc.
31
Place a glass or cup under the steam/hot water
dispensing tube (7), then slowly open knob (9),
turning it counter clockwise. Hot water will be
automatically dispen sed. As soon as disp ensing is over, close knob again.
Steam
To heat milk or other drinks.
Clean the spo ut with a damp cloth soon after
use; otherwise, it might be difficult to remove
milk residues.
After a steam outflow, always drain the machine. If the machine is not drained or drained
partially, the coffee brewing program automatically stops, du e to excessive tem per ature.
"STEA M "
"WARM ING UP ... ... "
Press the steam selectio n button and wait
until the machine reaches the operating temperature.
"STEA M "
"READ Y FO R US E "
Operating tem peratur e has been reach ed.
Direct the steam/hot water dispensing tube (7)
over the cup ho lder grill (3) and sligh tly open
knob (9), tur ning it co untercl ockwise.
Wait until the remaining water has flown out of
the spout. Then move the s pou t outwar ds and
immerse it in to the fluid to heat.
32
Slowly open the steam/hot water knob and
heat the fluid using a circular movement from the
bottom to the to p.
When the flu id has reached th e desired temperature, close the knob and immediately clean
the spout with a damp clo th .
Warning: the spout is hot, it may cause burns!
If you are not going to use the steam/hot water
dispensing tube any longer, position it over the
cup holder grill and disactivate the steam function by pressin g th e key
.
"OVER TEM PER ATU RE "
The machine stops working and does not brew
coffee. Let it cool down or open the steam/hot
water knob again.
Before any use, make sur e the stea m/hot water
knob is closed.
Man. Titan 0313.959 ING (UL) 12-12-2000, 16:097
Then, press the pre-ground coffee selection
button
lar, espresso o r tall coffee) to o btain a cup o f
coffee. It is not possible to obtain a second cup
and the desired selection key (regu-
If the machine i s on the steam mode , the
automatic coffee br ewin g is preven ted.
"HOT WATE R "
"OVER TEM PER ATU RE "
Drain the machine (the pump starts automati-
Page 11

4645
4140
CLEANING/MAINTENANCEINCORPORATED SAFETY DEVICES / CLEANING/MAINTENANCE
cally) until water flows regularly out of the spout
(see section on Drain age, page. 37) and th e
display shows
"HOT WATE R "
Close the steam/hot water knob. The machine
is ready to br ew coffee again.
Cappuccino froth
Fill a cup 1/3 with cold fresh milk, the n immerse
the steam/hot water dispensing tube (7) just
below the milk surface. Move the cup with a
circular movemen t to form a thick froth. Then
immerse the dispensing tube deep into the milk
to heat it.
USER MAINTENANCE
INSTRUCTIONS
Incorporated safety devices
Automatic off
Should the service door be open, the machine
automatically switches off an d its operation is
thus prevented. If the central unit is not mounted,
it is possibl e to dispense water bu t not steam
and coffee.
Electronic grinding time control
As soon as the coffee bean container is empty, the
machine automatically stops after approx. 20
seconds. Fill the contai ner with coffee bea ns. The
coffee brewing cycle can be restarted.
Automatic temperature
adjustment
This adjustment controls the correct temperature
for coffee, water, and steam. Coffee brewing is
automatically interrupted should the water temperature be too high (safety thermostat and
overheating safe ty device activa ted).
Antigravel device
Even selected coffees may contain some impurities. The coffee grinder is fitted with an antigravel
device to avoid any da mage. Should gravel
end up into the coffee grinder, you will hear a
strong and ch aracteristic noise. Stop the machine immediately otherwise the protection system will stop the coffee grinder after approx. 20
seconds.
Cleaning/Maintenance
Cleaning
To ensure high coffee quality and a longer
working li fe of the machin e, always ke ep the
machine clean.
Before cleaning the machine, turn o ff the m ain
switch and unplug the mach ine.
Before cleaning the machine, wait until it cools
down.
Do not wash parts of the machine in the
dishwasher!.
Always handdry all parts of the machine; do not
dry them i n th e o ven o r microwave oven!
Water tank / Drip tray / Coffee
grounds container / Coffee dispensing unit / coffee machine
33
In order to keep the service area and the central
unit (22) clean, it is recommended to empty the
coffee grou nds co ntainer (1) every day .
The water tank (11), drip tr ay (2), cup holder
grill (3), and co ffee groun ds container sho uld
be washed per io dicall y, u sin g a n o n -abr asive
solvent and dr ying them carefull y.
34
The coffee d ispenser (6 ) may be removed fo r
cleaning o perations. Unloose the screws an d
rinse the dispen sing tubes thor oughly with hot
water.
From time to time, clean the machine casing
with a damp c l o th and dr y it.
Clean the pre-ground coffee container (14) with
the ai d of the bru sh supplied whenever nec essary.
Central unit
switch (4) and open the service door (19).
Remove the c offee gro un ds contain er (1).
35
Remove the central unit (22) by holding the
handle and pressin g the “PRESS” key.
Wash the central unit with warm water withou t
any sol vent. Make sure there are no coffee
residues on the two steel filters.
36
Remove the superior filter by means of the
supplied screw and clean it. Unscrew the
screw, tu rning it counterclo ckwise. Then, dry a ll
the parts of the central unit and tighten the filter
with the screw.
37
Remove the c o ffee r est drawer (23) an d cl ean
it, using a non-abrasive sol vent.
Clean the ser vice space thoro u gh ly and fit th e
coffee rest drawer aga in.
38
By holding the centr al unit by its h andle, slide it
back into its original position, making sure it is
correctly engaged. Then close the service door.
Insert the coffee gr ounds con tainer again.
When fitting the central unit, d o not
press “PRESS” (this may cause damage to the machine)!
Warning: if the central unit is not co rrectly
fitted, the display shows
Electronic pump delivery control
The machine switches off automatically as soon
as the wate r tan k is e mpty.
Man. Titan 0313.959 ING (UL) 12-12-2000, 16:098
Do not immerse the machine into water or
other fluids. (It may be damag ed!)
Clean the central unit (22) whenever the coffee
bean container ha s been re-filled, or at least
once or twice a week.
Switch off th e machine by pressing the ma in
"BREW UNI T MIS S "
It is not possibl e to brew co ffee. The ma ch ine
does not w o r k.
Page 12
47
CLEANING/MAINTENANCE
48
CLEANING/MAINTENANCE
Coffee grinder
Never fill the coffee grinder with water: it may
damage the machin e!
Descaling
Warning
be carried out when the machine
components are cold.
Descaling is necessary to remove limescale
from all surfaces and holes, thus ensuring a
perfect operation of valves, heating controls
and other importan t parts.
Note: due to the complexity of the coffee
machine hydraulic circuit, the following
descaling cycles (automatic and standard)
do not allow the descaling of all tubes.
In fact, easily accessible components
such as the central unit (22) and its
plastic connection are excluded.
The machine must be descaled every 3-4 months,
according to the water hardness degree. A
more frequent descaling is recommended wherever the water hard n ess degree is very high.
This machine is supplied with a particular
warnin g ligh t
: The descaling operations mus
"DESC ALI NG "
"READ Y FO R US E "
Descaling must be carried out at the latest when
this message is displaye d. In spite of th e message, the ma ch ine does n ot sto p wo rkin g. To
switch off th e displ ay, press the steam key f or
approx. 5 seconds until the message disappears.
Furthermore, said display warning may be
adjusted accordin g to the water hardn ess degree. The m achine has been adjuste d at the
factory to 25º _H value, which causes the
display to switch on showing the message
DESCALING after appro x 150 l.
The water hardn ess val ue may be changed, if
necessary, following the instructions shown on
page 38.
The following adjustme nts ar e possible:
Hardness 4: high wat er hardness, over 2 9º
H (14° dH), approx. 80 l w ater passage.
Hardness 3: medium water hardness, approx.
20º-29º H (7 °-14° dH) , approx . 150 l water
passage
Hardn e ss 2: soft water, approx. 12º-20º H
(4°-7° dH), approx . 300 l water passage
Hardness 1: less than 10º H (3° dH), approx.
500 l w ate r passage
In case of hard water, a filter should be used
both to improve the coffee quality and to protect
the mach ine, thus reducin g the descalin g frequency.
Note: for this purpo se, u se a des cal in g pr o duct suitable for coffee mach ines. Never use
vinegar to clean the machine; it might
damage it.
There are two ways to carry ou t th e descaling
of the machine:
Automatic descali ng
Switch the machine onto the programming
mode (see page 38).
Move the aster isk at the end o f the lin e to th e
menu item D ES C ALING. To activate th is men u
item press ENT.
The display sh ows:
"DESC ALI NG "
Pour a descalin g solution into the water tank
(according to the instructions on the package).
Place a large container under the steam/h ot
water dispensing tube and open the steam/hot
water knob slowly. The automatic descaling
starts. Small quantities of descaling solution are
pumped into the circuit. Then the pump stops to
let the solution take effect.
The display sh ows:
"MACH INE IS "
"DESC ALI NG "
This operation takes about 45 minutes. As soon
as descaling is compl ete d, th e displ ay s h o ws:
" DES CAL ING "
" FIN ISH ED "
and the pum p s t o ps.
Close the hot water knob an d press ENT. A
display message reminds you to rinse away
residue from th e machine
"RINS E MA CHI NE "
Remove the water tank, rinse it an d fill it with
water. Clean the mach ine using the h ot water
knob and let the wh ole tank content flow out.
The display sh ows:
"RINS ING FI NIS HED "
Close the hot water knob again and press ENT.
The machine is in the main menu of the programming mode. Press ENT. The machine is now in
the normal mode. After heating, the machine is
ready to work.
Note
Descaling can be interrupted any time by
pressing ESC. Before doing this, close the hot
water knob.
Standard desc aling
Switch off the machine. Pour a descaling product into the water ta nk (accordin g to the instructions on the package). Place a large container
under the steam/hot water dispensing tube (7)
and open the steam/hot water knob (9) slowly,
turning it counterclockwise. Turn on the machine
by pressing the main switch and let the descaling
product flow out of the dispensing tube for
approx. 1 min.
Turn off the machine with the main switch and
let the solution take effect for approx. 5 minutes.
Repeat this procedure two or three times, to
allow all the descaling product in the water tank
to flow out o f th e dispensing tube.
As soon as decalcification has been carried
out, rinse the water tank (11) thoroughly and fill
it with water.
Switch on the machine again and let water
(approx. 2 l) flo w out of the steam/h ot water
dispensing tube in order to rinse away residue.
The coffee machine is now ready for operation.
Important
A periodic descaling avoids expensive repairs.
The machine warranty does not cover damages
occurring as a result of the non-observance of
descaling procedur es, improper use an d any
other instructions contained herein. Maintain
the manufacturer’s adjustment if the water hardness degree is not known.
Storage of the machine
Switch off and unplug the machine if it will not
be used fo r l o ng per i o ds o f time .
Man. Titan 0313.959 ING (UL) 12-12-2000, 16:099
Page 13

DISPOSAL
5049
TROUBLESHOOTING
Keep the mac h in e i n a dr y pl ace, far from the
reach of children.
Should the machine not be used for a long
period, keep it from dust an d dir ty.
Maintenance
Periodicall y ch eck the mach ine and clean it in
accordance to the instructio ns.
Disposal
Machines which are no longer operational
should immediatel y be made non serviceable,
by cutting the power cord. Machines should be
delivered to a public disposal cen tre.
Troubleshooting
In case of failur e, fault or suspected damag e
following a fall, unplug the machine immediately.
To fix problems, follow the instructions in the table below. Otherwise
contact authorised personnel.
Trouble
No message on the
display
The automatic coffee
brewing does not start
Water is dispensed
instead of coffee
Steam and/or hot water
are not dispensed
Coffee flows too quickl y
Coffee is flows too slowly
Coffee is not hot enough
Coffee is not creamy
The coff ee brewing is reduced, the machine takes
longer to heat and the water
capacity is n o t correct
The central unit cannot be
removed
Poss ib le ca u s e/ ca u s e s
The machine is not getting power
The service door is open
BREW UNIT MISS
BREW UNIT BLOCK.
The steam key is being pressed
WATERTANK EMPTY
OVERTEMPERATURE
DREGDRA W. MISS.
GRINDER BLOCKED
The pre-ground c offee sel ection key
has been pressed whil e there is no
coffee in the container
The stea m/hot w ater sp out h ol e is
clogged
Grinding too coarse
Gri n ding to o fi ne
The central unit filter is jammed
The cup has not been preheated
The coffee blend is not suitable,
coffee has not been recently
ground, the p re-grou nd coffee h as
been ground too thin or too co arse
Limescale i n th e machi ne
The cent ral unit is ou t of po si tion
COF.BEA NS EMPTY
READY FOR USE
Resolution
Turn the main s witch on, che ck plug
and fuse
Close the service door
Insert an d lock the central un i t
Clean the central unit (see page 46)
Disactivate the steam function and
drain the machine (see page 44)
Fill with water or coffee beans and
restart the cycle
Drain thoroughly the machine again
Fit the coffee grounds container
properly
Clean the grinder
Fill with pre-ground coffee
Clear it with the aid of a thin needle
Adjust th e g rind er t o a fine r g rin din g ,
ex. from 6 to 3
Adjust the grinder to a coarser grinding. ex. from 6 to 7
Clean the filter
Place the cup on the heating plate
Try another coffee blend
Carry out the machine descaling, as
described at page 47.
Switch on the machine. Close the
service door a nd fit the coffee grounds
container. The machine returns automatically in its starting position.
Man. Titan 0313.959 ING (UL) 12-12-2000, 16:0910
Only skilled personnel are authorised to service and repair the machine. The user might incur serious injuries should repairs
not be properly carried out. The manufacturer declines any liability what soever, should repairs fail to be carried out
according to the instructions contained in this manual. Furt hermor e, in these c ases warranty rights cannot be hono red.
Page 14

34
IMPORT ANT SA FEGUARD S
IMPORTANT SAFEGUARDS
51
When using your coffee maker, basic
safety precautions should always be
followed, including the followed to reduce
the risk of fire, electric shock, and/or
injury to persons including the following:
● Read all instructions.
1
● Do not touch hot surfaces. Use
2
handles or knobs.
3
● To protect against electric shock,
do not place cord, plug or appliance in
water or other liquid.
● Close supervision is necessary
4
when any appliance is used by or near
children.
5
● Unplug from the outlet when not in
use and before cleaning. Allow to cool
before putting on or taking off parts, and
before cleaning the appliance.
● Do not operate any appliance with
6
a damaged cord or plug or after the
appliance malfunctions, or has been
SAVE THESE INSTRUCTIONS
damaged in any manner. Return
appliance to an authorised service facility
for examination, repair or adjustment.
7
● The use of an accessory not
evaulated for use with this appliance may
cause injuries.
● Do not use outdoors.
8
● Do not let cord hang over edge or
9
table or counter, or touch hot surfaces.
10
● Do not place on or near a hot gas
or electric burner, or in a heated oven.
● Always attach plug to appliance
11
first, then plug cord into the wall outlet. To
disconnect, turn any control to the off
position, then remove plug from wall
outlet.
● Use this appliance only for its
12
intended use as described in this manual.
● Keep the cord away from heated
13
surfaces.
WARNING: TO REDUCE THE RISK OF FIRE OR ELECTRIC SHOCK.
DO NOT REMOVE COVER (OR BACK)
NO USER-SERVICEABLE PARTS INSIDE
REPAIR SHOULD BE DONE BY AUTORIZED SERVICE PERSONNEL ONLY
Man. Titan 0313.959 ING (UL) 12-12-2000, 16:0911
WARNING
RISK OF FIRE OR ELECTRIC SHOCK
DO NOT OPEN
 Loading...