

Page 1
QSG_MBG_061307
Ruckus Metro Broadband
Gateway Quick Setup Guide
Packing list
Depending on your Service Provider, the package contents
may differ slightly.
•Ruckus Metro Broadband Gateway
•AC power adapter
•Category 5 (CAT5) Ethernet cable
•Ruckus Metro Broadband Gateway Quick Setup Guide
(this document)
Understand the Default Network
Settings
IP Address
• The default IP address is displayed on the bottom of the
unit.
• The Subnet Mask address is 255.255.255.0
• To gain administrative control of the gateway, you must
set your computer’s network IP address to obtain an IP
address automatically.
Proceed to the next section for instructions on configuring
your IP address.
Manually Configure an IP Address
on Your Computer
1. For Windows 2000: Select Start->Settings->Network
and choose Dialup Connections
2. For Windows XP: Select Start->Settings->Control
Panel-> Network Connections
3. Double-click the icon for the Local Area Connection
designated for your home network. This is not the same
icon as your home wireless network.
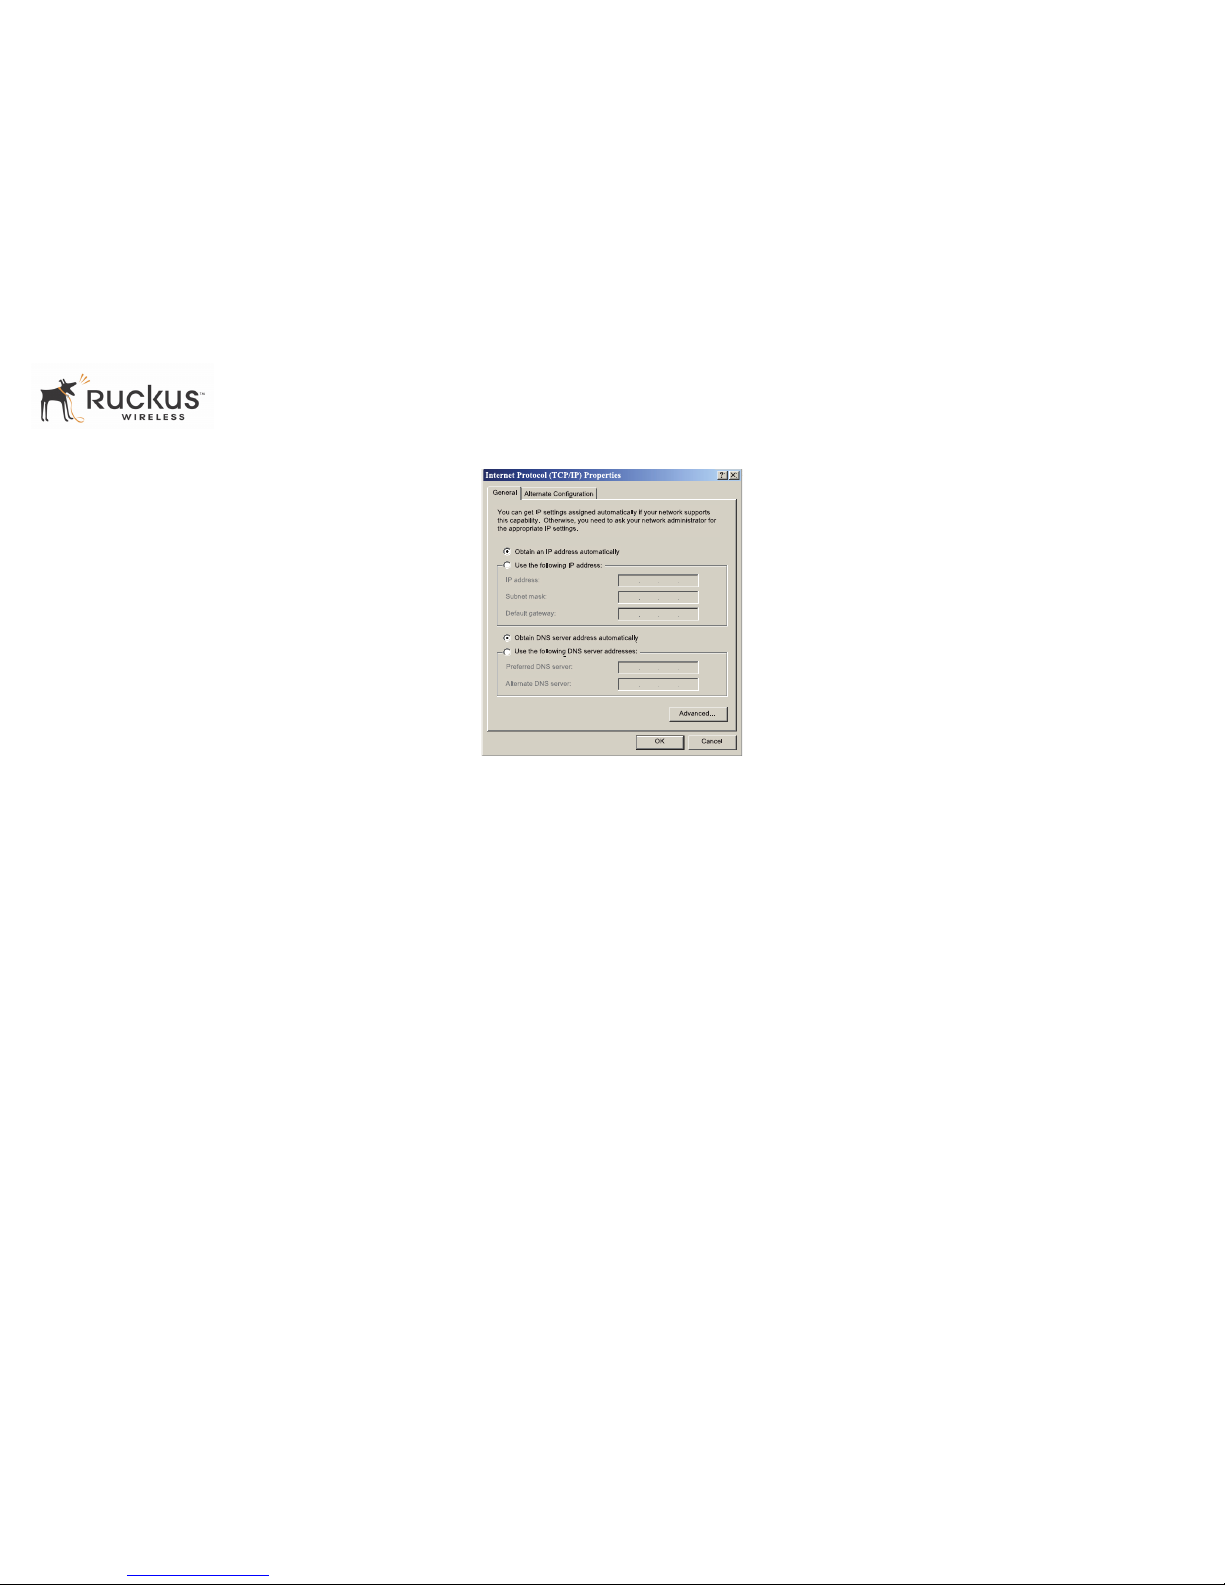
4. In the Local Area Connection Properties window, select
Internet Protocol (TCP/IP) and click Properties.
5. Select Obtain an IP address automatically, and click
OK to exit the TCP/IP Properties window.
6. Click OK to exit the Local Area Connection Properties
window.
Connect and Configure Your
Ruckus Gateway
The following steps will guide you to set up and gain
administrative access to your Ruckus Metro Broadband
Gateway.
1. Remove the Ruckus Metro Broadband Gateway gateway from the packaging and place it next to your computer.
2. Connect the AC power adapter to the Ruckus gateway
and plug the other end into a power outlet or to a surge
protector that is plugged into a power outlet.
3. Connect the CAT5 Ethernet cable to the Ethernet port
on your computer, and to the Ethernet port on the
Ruckus Metro Broadband Gateway.
4. On your PC, open a browser window. Enter the default
IP address listed on the bottom of the unit.
5. When the login screen appears, enter the username and
password listed on the bottom of the unit. Then click
the Log On button.
6. The Quick Wizard page appears. If you want to use the
wizard, follow the instructions to complete configuration; otherwise, go to the next step for manual configuration.
7. In the Configuration->Wireless menu, you may change
the default wireless network Name (SSID) name for
this device to match the SSID of the AP you intend to
connect to. Click Update to save the changes.
8. Refer to the information provided under the Need Help
button before attempting to change any other default
settings in this screen.
9. The initial configuration is now complete. Click
Reboot to make the change take effect.
Troubleshooting
If you cannot connect to your Ruckus Metro Broadband
Gateway, perform the following steps:
If the startup sequence didn’t work, verify that the Network
name (SSID) and security settings on the Ruckus Metro
Broadband Gateway match your wireless network.
1. Connect your computer to the Ruckus Metro Broadband Gateway by an Ethernet cable. Set your computer’s network to get an IP address automatically.
2. Open a Web browser window.
3. Point your browser to the default IP address listed on
the bottom of the unit. At the login screen, enter the
username and password listed at the bottom of the unit.
Click Login.
4. Click the Wireless link under the Configuration menu
on the left panel of the Ruckus Web user interface. Verify that the Ruckus Metro Broadband Gateway’s wireless settings match those of your remote AP by clicking
the Metro WLAN tab and checking the SSID field.
Page 2
QSG_MBG_061307
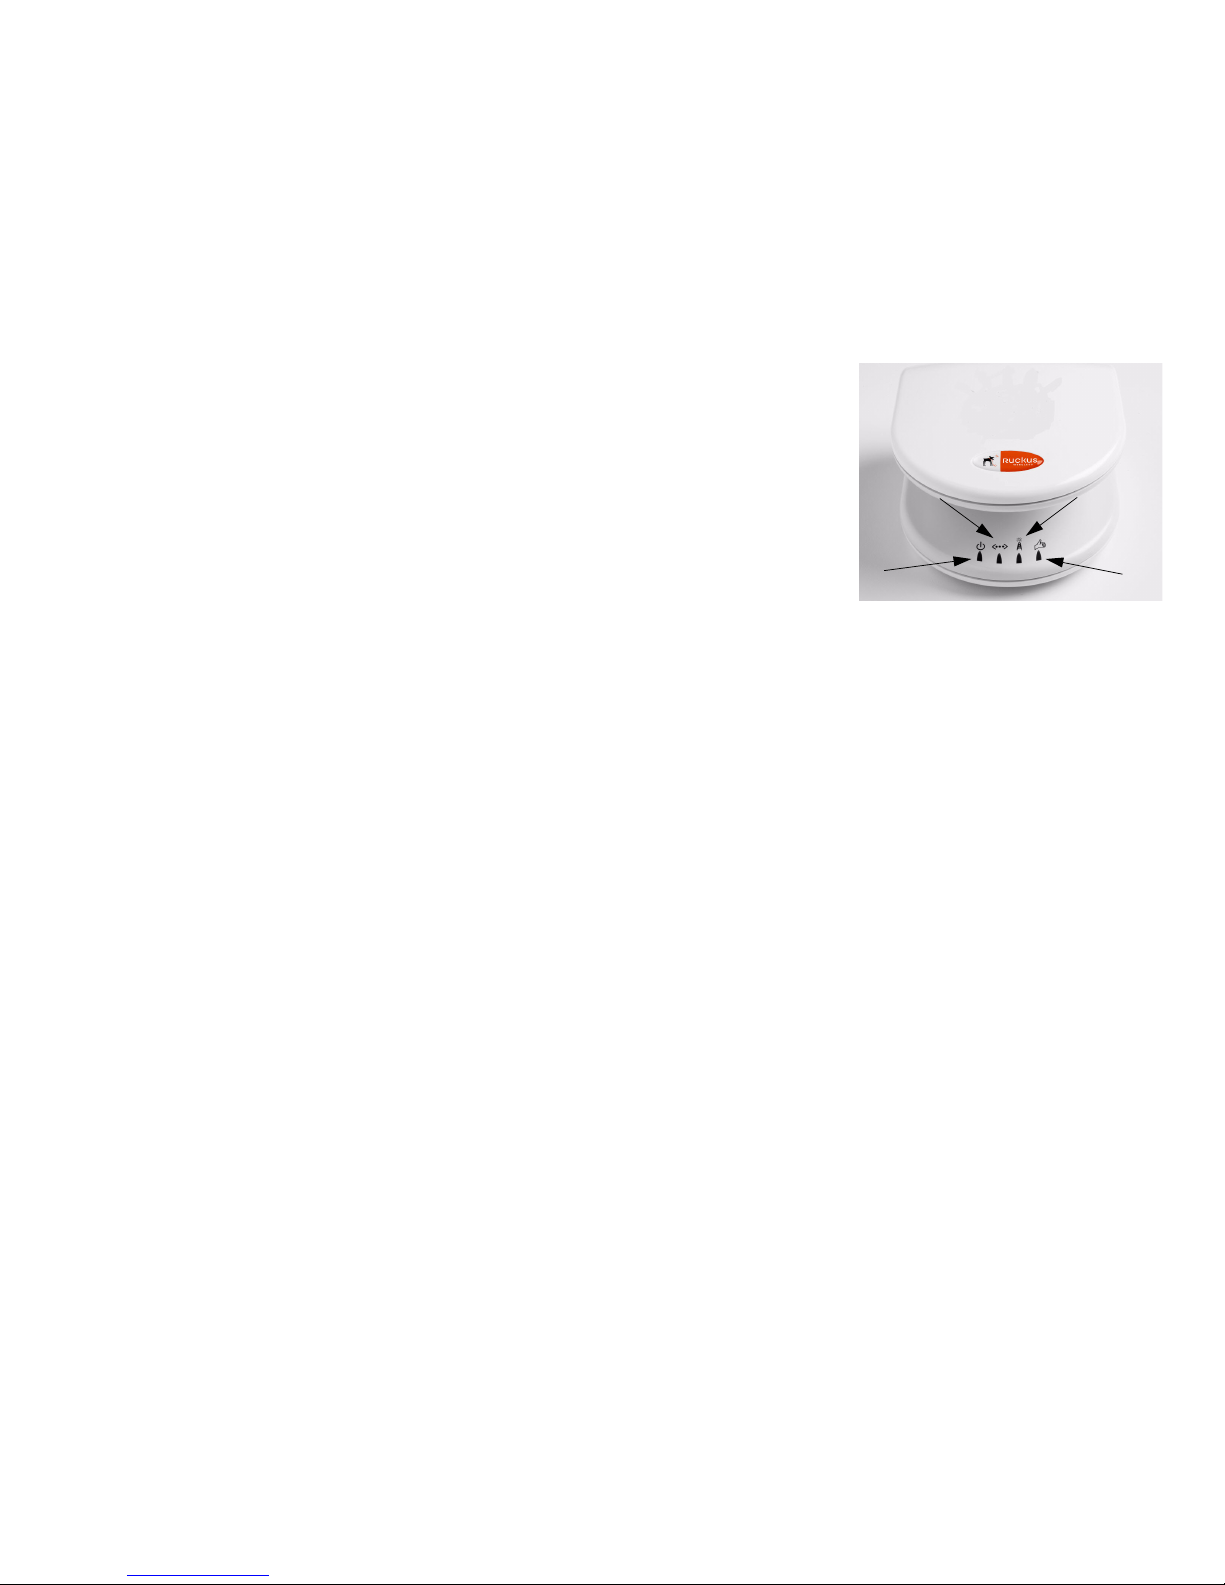
Check the LED status lights to verify correct operation.
1. Make sure you are using the power adapter supplied by
Ruckus Wireless.
2. Make sure the Power LED is lit. If it is not lit, make
sure that the power cord is properly connected to the
Ruckus Metro Broadband Gateway, and that the power
supply adapter is properly connected to a functioning
power outlet. If the error persists, you have a hardware
problem and should contact technical support.
3. If you have a PC/laptop connected to the gateway,
make sure your Network LED is lit. Make sure the
Ethernet cable connections are secure at the Ruckus
Metro Broadband Gateway and your computer. The
Network LED on the Ruckus Metro Broadband Gateway indicates link when the cable connection is solidly
connected to the port on the gateway and to the port on
your computer.
4. Make sure the Wireless LED is either steady or flashing
Green. If not lit, the Wireless settings may be incorrect
between the Ruckus Metro Broadband Gateway and
your computer.
If necessary, reset the Ruckus Metro Broadband Gateway
gateway to its factory defaults
If you forgot which security settings you assigned to the
Ruckus Metro Broadband Gateway, you can reset it to factory defaults by inserting the end of a paper clip into the
Reset button hole located on the back of the unit.
When resetting the device, wait until you see both the third
(Wireless) and fourth (Diagnostic) LED lights turn off and
then turn back on.
LED Information
3. Wireless LED
4. Diagnostic LED
2. Network LED
1. Power LED
 Loading...