

Page 1
User Manual
MODEL BP-300
Portable Belt Pack User S tation
9350-1786-00 Rev H 09/2006
Page 2

PROPRIETARY NOTICE
SHIPPING TO THE MANUFACTURER
The product information and design disclosed herein were originated by
and are the property of Telex Communications, Inc. Telex reserves all
patent, proprietary design, manufacturing, reproduction, use and sales
rights thereto, and to any article disclosed therein, except to the extent
rights are expressly granted to others.
COPYRIGHT NOTICE
Copyright 2006 by Telex Communications, Inc. All rights reserved.
Reproduction, in whole or in part, without prior written permission from
Telex is prohibited.
WARRANTY NOTICE
See the enclosed warranty card for further details.
CUSTOMER SUPPORT
Te chnical questions should be directed to:
Customer Service Department
RTS/Telex Communications, Inc.
12000 Portland Avenue South
Burnsville, MN 55337 USA
Telephone: 800-392-3497
Fax: 800-323-0498
Factory Service: 800-553-5992
All shipments of product should be made via UPS Ground, prepaid (you
may request from Factory Service a different shipment method). Any
shipment upgrades will be paid by the customer. The equipment should
be shipped in the original packing carton. If the original carton is not
available, use any suitable container that is rigid and of adequate size. If
a substitute container is used, the equipment should be wrapped in paper
and surrounded with at least four (4) inches of excelsior or similar
shock-absorbing material. All shipments must be sent to the following
address and must include the Proof of Purchase for warranty repair.
Upon completion of any repair the equipment will be returned via
United Parcel Service or specified shipper, collect.
Factory Service Department
Telex Communications, Inc.
8601 East Cornhusker Hwy.
Lincoln, NE 68507 U.S.A.
Attn: Service
RETURN SHIPPING INSTRUCTIONS
Customer Service Department
Telex Communications, Inc. (Lincoln, NE)
Telephone: 402-467-5321
Fax: 402-467-3279
Factory Service: 800-553-5992
Please include a note in the box which supplies the company name,
address, phone number, a person to contact regarding the repair , the type
and quantity of equipment, a description of the problem and the serial
number(s).
Page 3
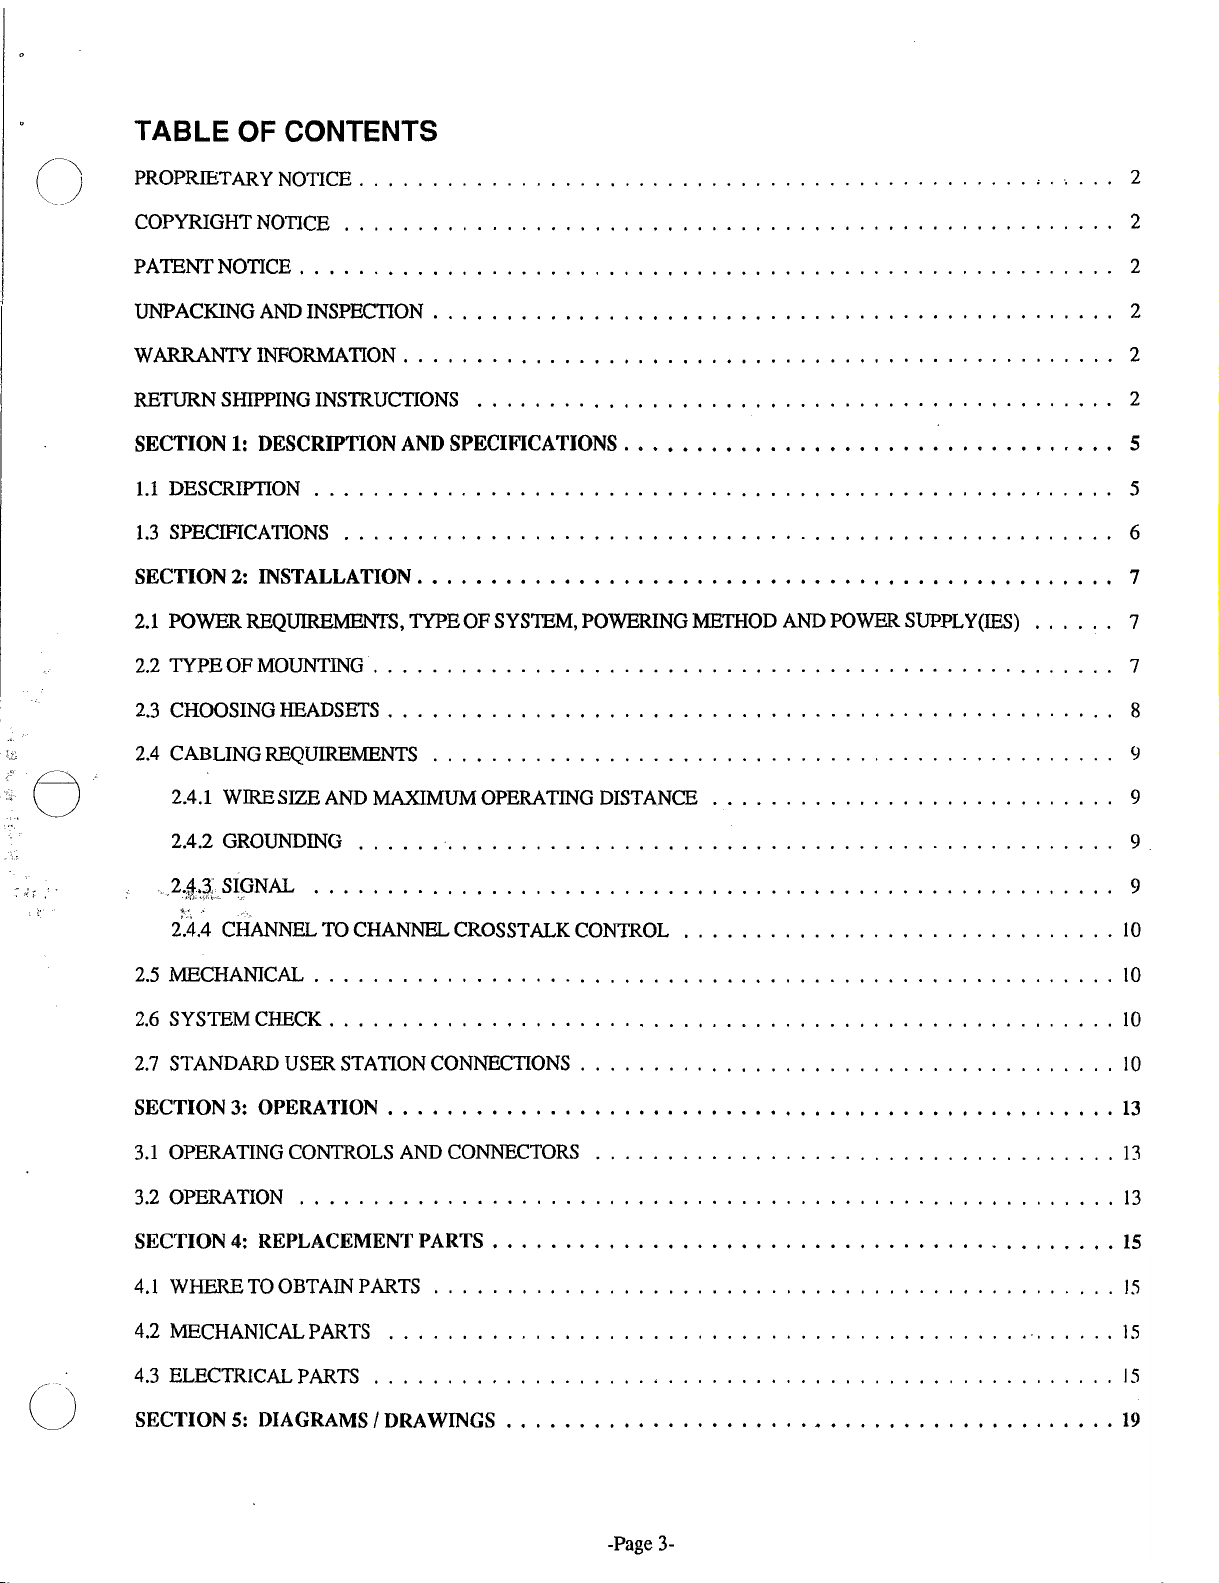
TABLE OF CONTENTS
PROPRIETARYNOTICE
....................................................
.
.
2
COPYRIGHTNOTICE
PATENTNOTICE 2
UNPACKING
WARRANmIWORMATION 2
RETURN
SECTION
1.1DESCRIFTON
1.3 SPECIFICAlIONS 6
SECTION2.INSTALLATION
2.1
POWER
2.2 TYPE OF MOUNTING 7
2.3 CHOOSING HEADSETS
2.4CABLINGREQULREMENTS
2.4.1 WIRE SIZE AND
AND
SHlPPING INSTRUCTIONS 2
1:
DESCRIPTION AND SPECIFICATIONS
REQUlREMENTS. TYPE OF SYSTEM. POWERING METHOD
.....................................................
2
........................................................
INSPECTION 2
...............................................
.................................................
............................................
..................................
.......................................................
5
5
.....................................................
................................................
AND
POWER SUPPLY
(IES)
......
7
7
...................................................
..................................................
...............................................
MAXIMUM
OPERATING DISTANCE
............................
9
9
8
2.5MECHANICAL
2.6SYSTEMCHECK
2.7 STANDARD
SECTION3.OPERATION 13
3.1 OPERATING CONTROLS
3.2 OPERATION
SECTION
4.1
WHERE
4.2 MECHANICAL PARTS
4.3
ELECTRICAL
SECTION
4:
TO OBTAIN
5:
.......................................................
......................................................
USER
STATION CONNECTIONS
.....................................
10
10
10
..................................................
AND
CONNECTORS
........................................................
REPLACEMENT PARTS
PARTS
...................................................
PARTS
DIAGRAMS 1 DRAWINGS
...................................................
...........................................
...............................................
..........................................
....................................
13
13
15
15
15
15
19
Page 4

MICROPHONE
Page
4
Page 5
0
3
()
Ll'
SECTION
1.1
DESCRIPTION
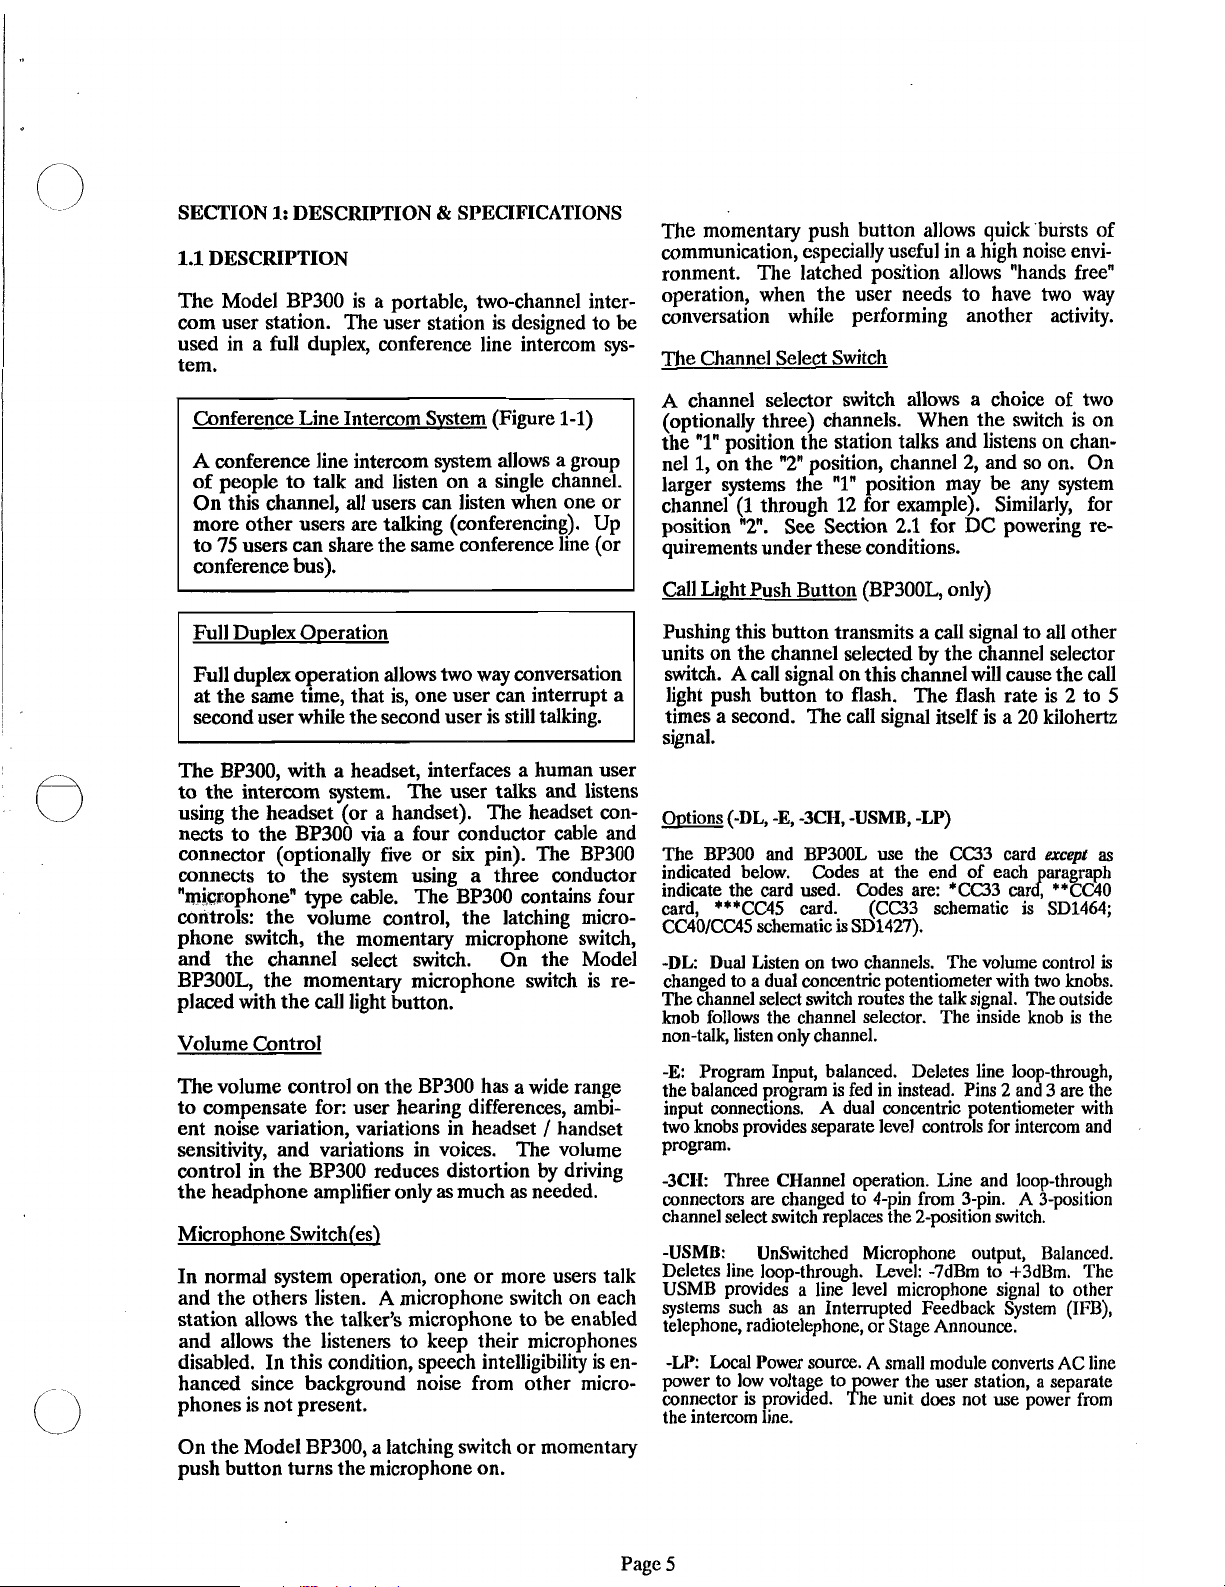
The Model BP300 is a portable, two-channel inter-
com user station. The user station is designed to be
used in a full duplex, conference line intercom sys-
tem.
Conference Line Intercom Svstem (Figure 1-1)
A
of people to talk and listen on a single channel.
On this channel, all users can listen when one or
more other users are talking (conferencing). Up
to
conference bus).
Full duplex operation allows two way conversation
at the same time, that is, one user can interrupt a
second user while the second user is still talking.
The BP300, with a headset, interfaces a human user
to the intercom system. The user talks
using the headset (or a handset). The headset con-
nects to the BP300 via a four conductor cable and
connector (optionally five or six pin). The BP300
connects to the system using a three conductor
"microphone" type cable. The BP300 contains four
controls: the volume control, the latching micro-
phone switch, the momentary microphone switch,
and the channel select switch. On the Model
BP300L, the momentary microphone switch is re-
placed with the call light button.
Volume Control
The volume control on the
to compensate for: user hearing differences, ambi-
ent noise variation, variations in headset
sensitivity, and variations in voices. The volume
control in the BP300 reduces distortion by driving
the headphone amplifier only
Microphone Switch(es1
In normal system operation, one or more users talk
and the others listen.
station allows the talker's microphone to
and allows the listeners to keep their microphones
disabled. In this condition, speech intelligibility is en-
hanced since background noise from other micro-
phones is not present.
On the Model BP300, a latching switch or momentary
push button turns the microphone on.
1:
DESCRIPTION & SPECIFICATIONS
conference line intercom system allows a group
75
users
can
share the same conference line (or
and
listens
a
BP300 has
as
much as needed.
A
microphone switch on each
wide range
/
handset
be
enabled
The momentaty push button allows quick 'bursts of
communication, especially useful in a high noise envi-
ronment. The latched position allows "hands freen
operation, when the user needs to have two way
conversation while performing another activity.
The Channel Select Switch
A
channel selector switch allows a choice of two
(optionally three) channels.
the
"1"
position the station talks and listens on chan-
nel
1,
on the "2"position, channel 2, and so on. On
larger systems the "1" position may be any system
channel (1 through 12 for example). Similarly, for
position
quirements under these conditions.
Call Light Push Button (BP300L, only)
Pushing this button transmits a call signal to all other
units on the channel selected by the channel selector
switch.
light push button to flash. The flash rate is 2 to
times a second. The call signal itself is a 20 kilohertz
signal.
Options (-DL,
The BP300 and BP3OOL use the CC33 card
indicated below. Codes at the end of each aragraph
indicate the card used. Codes are: *CC33 car$ **CC4O
card, ***CC45 card. (CC33 schematic is SD1464;
CC40/CC45 schematic is SD1427).
-DL: Dual Listen on two channels. The volume control is
changed to
The channel select switch routes the
knob follows the channel selector. The inside knob is the
non-talk, listen only channel.
-E:
the balanced program is fed in instead. Pins 2
input connections.
two knobs provides separate level controls for interwm
program.
-3CII: Three CHannel operation. Line and loop-through
connectors are changed to 4-pin from 3-pin. A 3-position
channel select switch replaces the 2-position switch.
-USMB: UnSwitched Microphone output, Balanced.
Deletes line loop-through. Level: -7dBm to S3dBm. The
USMB
systems such
telephone, radiotelephone, or Stage Announce.
-LP:
power to low volta e to wer the user station,
connector
the interwm line.
"2".
See Section 2.1 for DC powering re-
A
call signal on this channel will cause the call
-E,
-3CH,
-USMB, -LP)
a
dual
concentric potentiometer with two knobs.
Program Input, balanced. Deletes line loop-through,
A
dual
provides a line level microphone signal to other
as
an Interrupted Feedback System
Local
Power source. A small module converts AC line
is
provib;d.
#e unit does not use power from
When the switch is on
except
as
talk
signal. The outside
and
concentric potentiometer with
3 are the
(IFB),
a
separate
and
5
Page
5
Page 6

1.3 BP300 SPECIFICATIONS
Current Source
Input DC Voltage
18
TW Mode
LP Option
Battery
DC Current Drawn from
no current from
Quiescent
BP300 23 milliamperes 210%
BP3OOL 33 milliamperes 210%
Operating, 25 ohm headphones
BP300 37 milliamperes
BP3OOL 45 milliamperes 210%
Operating, 25 ohm headphones
BP300L 60 milliamperes
Impedance Across Line 10,000 ohms, minimum
Environmental
Temperature
Operating 0.C to 60°C
Storage
Humidity
TW
line)
to 35 volts DC
15 to 35 volts DC
12 to 35 volts DC (reduced
performance)
TW
Line (Note: LP Option draws
2
10%
+
Call Light
f
10%
-
40°C to 85°C
Transfer Ratio
Output
I-leadphone Amplifier
Voltage Gain 34 dB
Output Voltage 8 volts peak-to-peak into 25
Output Power 112 watt peak into 25 ohms
Frequency Response 150 hertz to 8 kilohertz
Headphone
Impedance Range
NOTE: DO NOT USE HEADPHONES
IMPEDANCES LESS THAN
Sidetone
Adjustment Range
Call-Light
Signaling Frequency 20,000 hertz
Flashing Rate
Auxiliarv Connections
Headset Connector
Dynamic Microphone XLR
Carbon Microphone 114" standard phone jack,
3.3 milliamperes
=
3.3 millislemens
A
5 milliamperes into 200 ohms
=
-c
1
volt peak, nominal
25 to 600 ohms (600 to 2000 with
reduced levels)
-
20 dB to full on
A
5 hertz
type
3 circuit
/
volt
25
OHMS.
f
100 hertz
2 hertz
4-pin female
-t
WITH
Cl
3 dB
&
Operating
Noise Contribution
One unit -75 dBu
Ten units: -67 dBu
Microphone Preamplifier
Input Impedance 470 ohmsldynamic mic
Source Impedance 200 ohms, nominal
Maximum Input Level 150 millivolts
Fre uency Response 100 hertz to 10 kilohertz k3 dB
q-54 dBu input)
Limiter Range 30 dB
Carbon Mic
Excitation Current 10 milliamperes, nominal
Storage
5%
to 95% non-condensing
Line Connections
Input XLR type 3-pin female
Loop/External XLR type 3-pin male
Mechanical
Dimensions
Weight 1.0 pounds, 0.45 kilograms
Finish Clear, anodized aluminum
SPECIFICATION NOTES:
=
0 dBu
0 dBm
(0 dBu, open circuit)
0.775 volts rms.
=
1
milliwatt = 0.775 volts rms. into 600 ohm load
Note:
All
products and specifications subject to
H
x
6.00
152.4
change without notice.
3.50 W x
H
x
88.9
1.75 D inches
W
x
44.5 D, millimeters
Pagc
6
Page 7
lo
I
I
SECTION
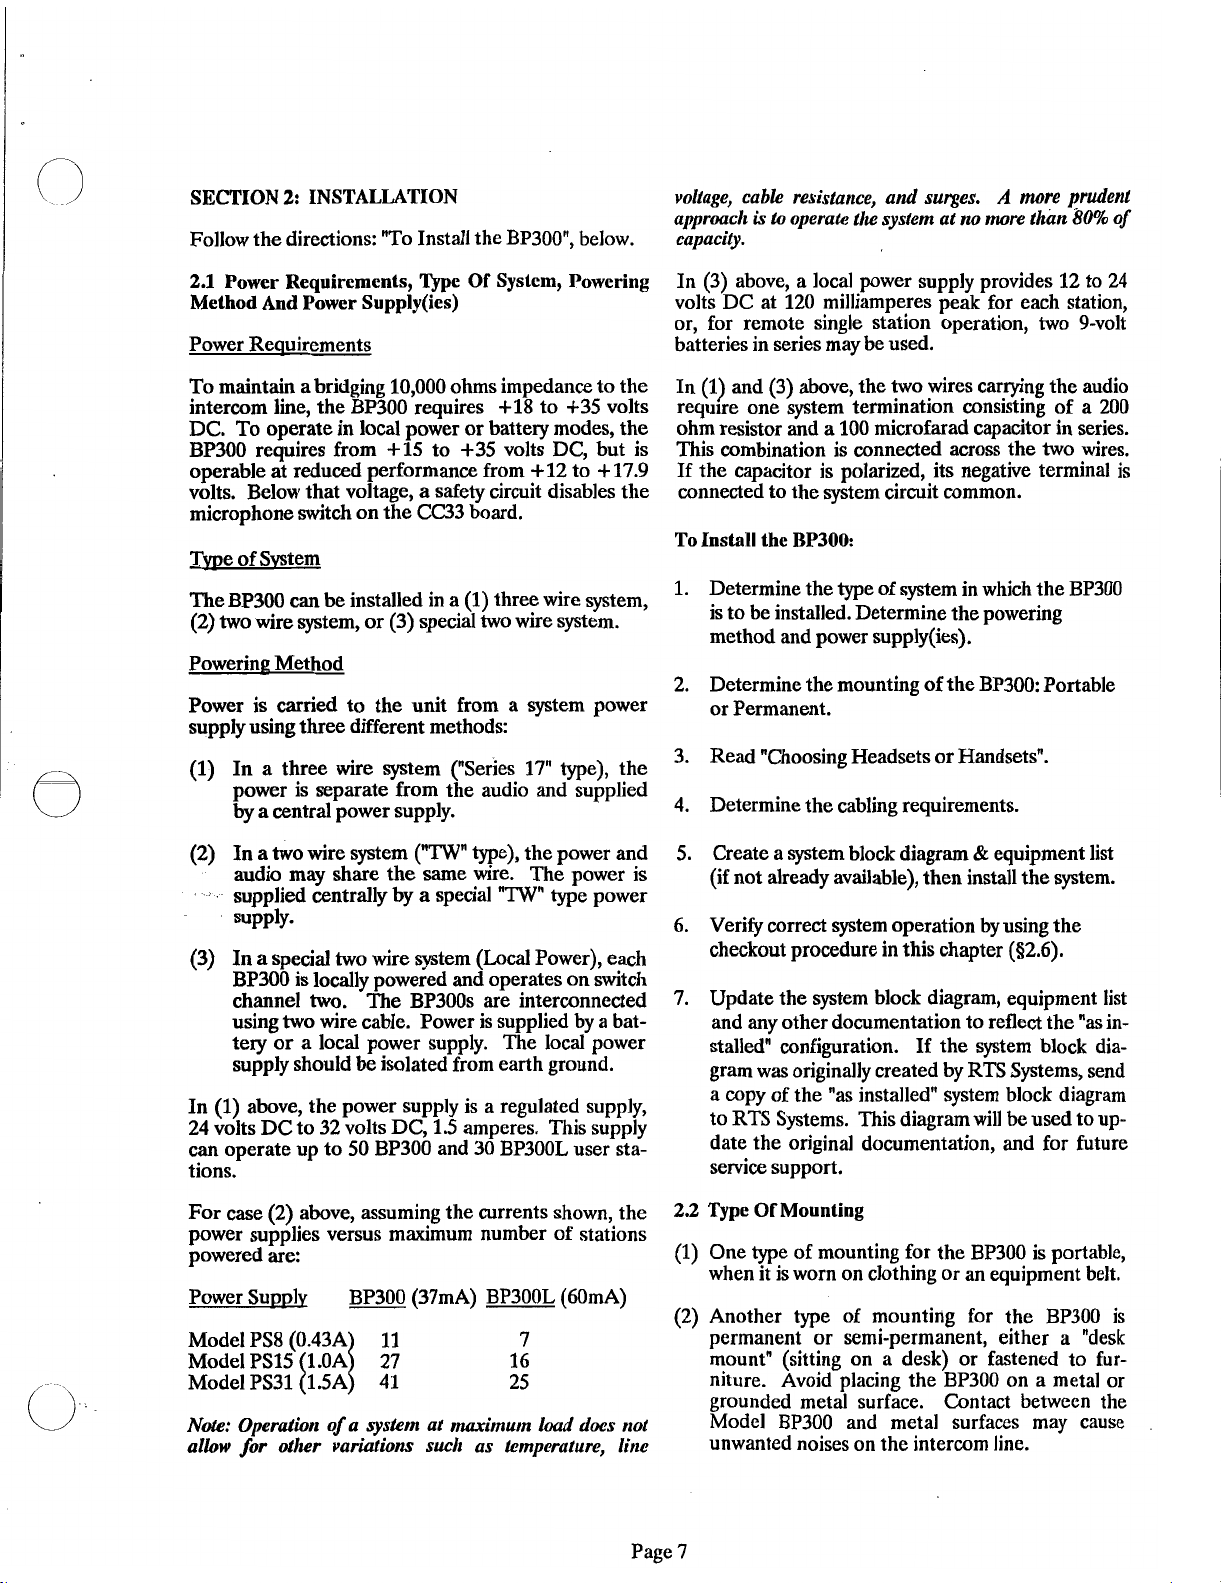
Follow the directions: "To Install the BP300n, below.
2.1
Method And Power Supply(ies)
Power Requirements
To maintain a bridging 10,000 ohms impedance to the
intercom line, the
DC. To operate in local power or battery modes, the
BP300 requires from +15 to +35 volts DC, but is
operable at reduced performance from +12 to
volts. Below that voltage, a safety circuit disables the
microphone switch on the
Twe of System
The BP300 can be installed in a (1) three wire system,
(2) two wire system, or (3) special two wire system.
power in^
Power is carried to the unit from a system power
supply using three different methods:
(1)
2:
INSTALLATION
Power Requirements, Type
BP300 requires +18 to +35 volts
Method
In a three wire system ("Series 17n type), the
power is separate from the audio and supplied
by
a central power supply.
Of
System, Powering
CC33 board.
+
17.9
A
voltage, cable resistartce, and surges.
approacli is
capacity.
In (3) above, a local power supply provides 12 to
volts DC at 120 milliamperes peak for each station,
or, for remote single station operation, two 9-volt
batteries in series may
In (1) and (3) above, the two wires carrying the audio
requlre one system termination consisting of a
ohm resistor and a 100 microfarad capacitor in series.
This combination is connected across the two wires.
If the capacitor is polarized, its negative terminal is
connected to the system circuit common.
To Install the BP300:
1.
2. Determine the mounting of the BP300: Portable
3. Read "Choosing Headsets or Handsets".
4. Determine the cabling requirements.
to
operate ti= system at no more than
be
used.
Determine the type of system in which the BP300
is to be installed. Determine the powering
method and power supply(ies).
or Permanent.
more prudent
80%
of
24
200
a
(2) In
(3)
In (1) above, the power supply is a regulated supply,
24
can operate up to 50 BP300 and 30 BP300L user sta-
tions.
For case (2) above, assuming the currents shown, the
power supplies versus maximum number of stations
powered are:
Power Supply
Model
Model PSI5 1.OA 27 16
Model PS3l 1.5A 41 25
N&:
allow for other variations such as lemnperaturc, litw
two wire system ("TW-e), the power and
audio may share the same wire. The power is
supplied centrally by a special "TW" type power
supply-
In a special two wire system (Local Power), each
BP300 is locally powered and operates on switch
channel two. The BP300s are interconnected
using two wire cable. Power is supplied by a bat-
tery or a local power supply. The local power
supply should be isolated from earth ground.
volts DC to 32 volts DC, 1.5 amperes. This supply
BP300 (37mA) BP300L (60mA)
PS8
(j.43AI
Operaiwn of a system at maxitnutn load docs not
11
7
&
5. Create a system block diagram
(if not already available), then install the system.
6. Verify correct system operation by using the
checkout procedure in this chapter (02.6).
Update the system block diagram, equipment list
and any other documentation to reflect the
stal1ed"configuration. If the system block dia-
gram was originally created by
a copy of the
to RTS Systems. This diagram will be used to up-
date the original documentation, and for future
service support.
2.2
Type Of Mounting
(1) One type of mounting for the BP300 is portable,
when it is worn on clothing or an equipment belt.
(2) Another type of mounting for the BP300 is
permanent or semi-permanent, either
mountn (sitting on a desk) or fastened to fur-
niture. Avoid placing the BP300 on a metal or
grounded metal surface. Contact between the
Model BP300 and metal surfaces may cause
unwanted noises on the intercom line.
"as
installedn system block diagram
equipment list
RTS
Systems, send
a
"as
"desk
in-
Page 7
Page 8
23
Choosing IIeadscts
Introduction Headset or handset choice depends on
operating environment, operating requirements, and
personal taste.
Operating Environment Table 2-1 shows typical oper-
ating environments and the amount of background
noise present.
A very quiet operating environment, such as a
television studio, may require that sound does not
leak from the headphones, meaning the headphones
should have good "acoustic isolation".
A
very noisy or loud environment usually requires
headphones that prevent outside sound from leaking
in (again, good acoustic isolation), headphones that
can produce a loud, clear sound, and noise cancelling
as
microphones,
Understanding speech in a noisy environment re-
quires that the sound from the headphones is as loud
or louder than the sound leaking into the headphones
from the noisy environment.
well.
is 23 milliamperes for the BP300,33 milliamperes for
the BP300L).
Headphone Sound Isolation
The ability of headphones to shut out unwanted envi-
ronmental noise varies from none (0 dB isolation) to
about 118th as loud (30 dB isolation). The degree of
isolation depends both on the design of the headset
and the frequency content of the environmental
noise. Lightweight, "open" headsets such as the RTS
Systems
muff), have almost no (0 dB) isolation. The trade-off
is that the LH267LH268 are very comfortable and
can be worn for long periods (8 to 12 hours) without
physical discomfort from the earmuffs or headband.
The LH267LH268 are low impedance and can be
turned up loud.
Because there is less acoustic isolation, care must be
taken that the sound signals from the LH267LH268
are not unintentionally leaked into microphones.
The DT108PT109 headsets have an isolation rang-
ing from 10 dB to 20 dB.
LH267 (single muff) and LH268 (double
Loudness In general, the loudness of a headphone
depends upon its ability to absorb power at a given
voltage (impedance) and the efficiency of its design.
Practically, the impedance has a larger effect with
present day headsets.
Impedance Low impedance headphones are louder,
causing the
power supply. High impedance headphones are not
as loud, drawing less current from the power supply.
The BP300 design range of impedances for the head-
phone
Headphone impedances 600 to 2000 ohms will oper-
ate at reduced levels. In a double muff headset such
as the Beyer
50 ohm headphones connected in parallel resulting in
an impedance of 25 ohms.
Efficiencv The BP300 produces the loudest sound in
low impedance headphones such as the DT109. In
this headphone, one milliwatt of electrical power
produces
Practical Loudness The BP300
duce an SPL of
DT108 headset. Low impedance headsets such
DT108 and DT109 headsets, cause the BP300
BP300L to require more power from the power sup-
ply. With DT109 headsets, BP300 peak current is 75
milliamperes. BP300L peak current is
80 milliamperes. With 600 ohm headphones, peak
current is 30 milliamperes for the BP300,
40 milliamperes for the BP300L. (Quiescent current
BP300 to draw more current from the
part
of the headset is 25 ohms to 600 ohms.
DT109 sold by RTS Systems, there are
94
dB SPL (Sound Pressure Level).
/
BP300L can pro-
111
dB in each ear of a DT109 or
as
the
At least four companies, Telex, Setcom, David Clark,
and Carter Engineering sell headsets intended for
heavy industrial, aerospace, and military markets.
These headsets can provide acoustic isolation figures
of 20dB to 40dB. Generally speaking, these headsets
are heavier and less comfortable to wear.
Isolation, Headset
In high noise environments, the headset microphone
should be a noise cancelling type.
Comfort In general, the comfort of headsets depends
upon their weight, padding and design.
In the headset connecting cable, prevent coupling be-
tween the microphone and headphone leads
at least a shielded wire for the microphone, and a
separate pair of wires for the headphone(s). Better
isolation may be possible with a twisted, shielded pair
for the microphone leads. Do not allow headphone
ground to contact microphone ground or shield. Tie
the shield to microphone ground or microphone low.
Do not tie the shield to the case of the connector or
the case of the user station. In general the maximum
length for the headset cable is ten feet (3.1 meters).
Lengths over ten feet require a special extension
/
cable. Check with RTS Systems for help with longer
cables.
Microvhones
by
using
Page 8
Page 9
2.4.
Cabling Requirements
2.4.1
Wire Size and Maximum Operating Distance
Wire sue determines the maximum operating dis-
tance (where the DC voltage drop is the limiting fac-
tor). The following equations apply for a conductor
sue of #22 AWG, a minimum user station voltage of
18.0 volts, and a minimum power supply voltage as
stated below.
For Models PS10, PS30, PS31, PS50, PS60 (Vmin
=
28.4 WC):
=
Distance,, (feet)
Distan%, (meters)
322,181
=
/
99,133
Itot
(milliamperes).
/Itot
(milliamperes)
Another benefit of not "earthn grounding the circuit
return is that it prevents the introduction'of'noise
through "earth" currents from other equipment. If
RTS
the
currents, it is likely that they will be heard
Systmes circuit ground conducts these
as
interfering noise on the communication line.
2.43
Signal
The number of conductors required to interconnect
user stations is:
-
No. of
No. of
Conductors Channels
=
For Models PS8, PSI5 (Vmin
Distanc&, (feet)
Distan%, (meter)
Example:
The BP300L with 25 ohm headphones uses
=
185,874
=
56,654
24.0 VDC):
/Itot
(milliamperes)
/
Itot
(milliamperes)
up to 60 milliamperes. With a PS8 supply the maxi-
mum operating distance for this station is 185,874160
=
milliamperes
3098 feet (944 meters). And with a
PS31 power supply the maximum operating distance
=
is 322,181160 milliamperes
5370 feet (1652 meters).
The maximum operating distance using a PS8 power
supply and a BP300 with 25 ohm phones (37
185,874137
*
h
>.'
2.4.2
=
5024 feet (1531 meters).
Grounding
mA)
is
System circuit ground should not be directly con-
nected to "earth" or "chassisn ground (directly means a
connection an ohmmeter would show). Each user
station is bypassed to its own chassis via a 0.1 mi-
crofarad capacitor, establishing a radio frequency
(RF) ground to reduce radio frequency interference
from radio transmitters.
To prevent a buildup of voltage across the system
ca-
pacitance, the power supply has a bleeder resistor to
chassis ground (22 kilohms). If the system has
no
RTS Systems power supply, add a bleeder resistor at a
central point in the system.
The benefit of not "earthn grounding the RTS System
circuit return is that continued
o~eration is ~ossible
during an accidental system grouid fault. This acci-
dental grounding can happen when
a
wire is pinched
or a cable scraped across a sharp edge. One acciden-
tal ground can
can
fault
be
tolerated by the system until the
be cleared and (with luck) before a second
ground fault can cause noise or overload or bring the
system down.
Wirin~ICabling (See Cable Wiring Diagrams in Sec-
tion
7,
Application Information)
"TW"
Two channel
applications, or single channel,
three wire applications may use either standard mi-
crophone cabfe (for conveGence) or two-twisted-pair
cable (less expensive than microphone cable). Stan-
dard
wire sue for the system is #22 gauge wire for
interconnection. For permanent installations each
channel should have
an
individually shielded twisted
pair of at least #22 gauge wire; such as Belden 8723
for 2 channels, and 8777 for 3 channels. For plenum
and
/
or 200" C wiring, use Belden 88723 and 88777.
The plenum cable has a slightly smaller diameter, is
Teflon insulated, and about three times the price of
Wire using Cable Wiring Diagrams, Section 7, to re-
duce interference and help maintain a low crosstalk
figure between channels.
The audio signal line level is between 10
dBu and
0 dBu (between 0.24 and 0.77 volts rms). These levels
are low enough to prevent crosstalk into other equip-
TV
ment (such as
mize external interference to the
cameras) yet high enough to mini-
TW
System.
The 200 ohm line impedance is high enough to allow
communication over line lengths of 1.6 kilometers
(one mile) and low enough to permit an adequate
speech bandwidth with 3.2 kilometers of accumulated
cable. In most systems the 200 ohm impedance gives
a high fidelity bandwidth with low losses.
When using equipment in rain or conditions of exces-
sive moisture, always protect the equipment with plas-
tic covers and make sure all cable connectors are
lifted out of mud, snow or moisture and protected
with plastic. Water mud and snow in connectors can
cause noise.
Page 9
Page 10
2.4.4
Channel to Channel Crosstalk Control
2.7
Standard User Station Connections
In the
TW
Intercom System all channels share a com-
mon circuit ground return. Crosstalk due to common
ground resistance
be reduced by using
22
gage
can
shielded cable, and paralleling shield drain wires with
circuit return wires. Capacitive crosstalk can be re-
duced by using two shielded pair. One wire of one
pair connects to channel one (pin
other pair connects to channel two (pin
2),
one wire of the
3),
the re-
maining wires are circuit return (pin 1). (See Cable
Wiring Diagram at back of manual).
Crosstalk reduction may also be achieved in some
CCD
cases using Model
214 Crosstalk Cancellation
Device.
25
Mechanical
The BP300 user station is either clipped to a user's
clothing for portable operation, or mounted on a
structure, camera or vehicle.
For permanent installation, temporarily remove the
electronics from the case. Drill, deburr and fasten the
case
as
necessary, then reinstall the electronics.
An
outline drawing for headset user station BP300 is
included at the end of the manual. This drawing pro-
vides mechanical information useful for permanent
and other type installations. This information in-
cludes overall dimensions, mounting information,
console cutout dimensions and weights.
It is recommended that space
access, cabling and servicing, such
loops, reaching
XLR
be.provided .for control
as
cabling
type
connector locks, local
service
power option power supplies and headset connectors
and cables.
If the headset connector is remoted, do not run this
cable close to interfering sources such
as
videom
monitors, power supplies and equipment with inter-
nal power supplies.
2.6
System Check
Dynamic Microphone headset connectors:
XLR-4-31 receptacle
Input level: -55 dBu, nominal
Output level to headphone:
1
-
Microphone low
Pin
2 - Microphone high
Pin
Pin
3
-
Headphone low
Pin 4
-
Headphone high
XLR-5-31 receptacle
Pin
1
-
Microphone low
Pin
2
-
Microphone high
-
Headphone low
Pin 3
Pin
4
-
Headphone high, left
-
Headphone high, right
Pin 5
XLR-6-31 receptacle
1
-
Microphone low
Pin
Pin
2 - Microphone high
-
Headphone low
Pin 3
-
Headphone high, left
Pin 4
Pin 5
-
Headphone high, right
Pin
6
-
Microphone switch
Carbon Microphone Headset Connector: 114 inch phone
jack (52):
Carbon Microphone: Tip (-15
Headphone: Ring (10
Common: Sleeve
LINE input and LOOPIEXTension connectors: (J3lJ4)
XLR-3-31 receptacle (for single-channel)
1
-
Common (low side of line)
Pin
Pin
2
-
Power
-
Channel
Pin 3
10 volts peak-to-peak,
open circuit.
dBV
input, nominal)
V
peak to peak open circuit)
Using three beltpacks with three headsets and three
persons, verify that all persons
can
intercommunicate
throughout the system. Verify that with all micro-
phone switches off and volume controls midway, only
a barely audible hiss is heard. The other two persons
should sound equally loud and clear to the third per-
son.
Page 10
XLR-3-31 receptacle (for two-channel line)
1
-
Common (low side of line)
Pin
Pin 2
-
Channel
Pin 3 - Channel
XLR-Q-31 receptacle (for three-channel line)
Pin
1
-Channel
Pin
2
-
Channel
Pin 3 - Channel 3
4
-
Common
Pin
1
(+DC)
2
1
2
Page 11

Table 2-1
Table 2-2
Typical Operating Environments,
Environmental Noise, Sound Pressure Level,
at 10 meters distance
Source
Aircraft
Orchestra, 75 piece, (Peaks) or 140 dB
Pipe Organ, (Peaks)
Rock Concert
Piano, Peaks 120 dB
Blaring Radio 110 dB
Centrifugal Ventilating Fan 110 dB
Auto on Highway 100 dB
Vaneaxial Ventilating Fan 90 dB
Voice, Shouting 90 dB
Factory
Voice, Conversational 70 dB
120 dB to 160 dB
110 dB to 140 dB
-
SPL
75
dB
Typical Operating Environments,
Sound Pressure Level,
at Ear
Source
Maximum Allowable
Impulse Exposure 140 db
LH267
10 db below Clipping 114 db
DT109
10 db below Clipping
LH268
10 db below Clipping
Setcom Series 5
10 db below Clipping
Headphones with 20 db Acoustic
Isolation at 130 db Rock Concert 110 db
(Mouth Closed)
Headphones with 40 db Acoustic
Isolation at 140 db Rock Concert 100 db
(Mouth Closed)
+
BP300,
+
BP300,
+
BP300,
+
BP300,
-
SPL
111
db
110 db
99
db
+:Residence 45 dB
Television Studio
Voice, Whisper 30 dB
25 dB to 35 dB
Page 11
Page 12

Figure 3-1A
Front Panel, Model BP300 Portable Belt Pack User Station
CAR6
,
Figure
3-1U
Rcar Pancl, Modcl BP300 Portablc Bclt Pack Uscr Station
Page
12
MIC
HDST~
Page 13

SECTION
3.1
Operating Controls And Connectors
Table 3-1 below lists the Model BP300 user station controls and connectors. The reference numbers in Table
3-1
correspond to the circled numbers in Figure 3-1A and Figure 3-1B.
3:
OPERATION
Table
3-1
F3
u
Ref No. Name
--
1)
2) MIC ON-OFF toggle A latching-action switch.
3)
3)
4)
5)
7)
8)
CHannel Select Switch
MIC ON-off push button A momentary-action microphone enable switch on the Model BP300
CALL push button
VOLUME
DYNamic MICrophone
HeaDSeT Connector.
INPUT Plug in the Line connector here. Connects the belt pack user station to
LOOP/EXTension
CARBon MICrophone
HeaDSeT Connector
Description
1
2
Selects 1 of 2 channels (standard) or 1 of 3 channels (optional). The
optional Call Light operates on the channel selected by this switch. The
CHannel select switch is omitted in the Single Channel (SC) option.
-
-
(Standard
(Optional) The CALL push button in Model BP300L (No momentary
mic).
A headphone VOLUME control. (May be a dual control for the Dual
Listen (DL) or Program
A
dynamic microphone type headset plugs in here.
TW
the
A convenience connector
connected to the
A carbon microphone type headset plugs in here. The headset may also
be a carbon microphone emulate type headset.
without the Call Light option).
intercom system.
TW
intercom system.
(E)
option).
- -
allows another belt pack user station to be
Always
3.2
To communicate directlywith another station or stations:
1)
2)
3)
4)
turn the volume control
Operation (After connecting station to the intercom line and plugging in headset).
Turn the VOLUME control all the way counterclocliwise (to the left) before plugging in the headset.
Select the channel using the CHannel select switch.
Set the listening level in the headset using the VOLUME control.
When you want to talk, set the
button) and speak into the microphone. Return the switch to the OFF position to eliminate unnecessary
noise on the intercom line.
all
the way counterclockwise
MIC
ONIOFF toggle switch to the "ONn position (or push the MIC push
Page 13
(to
the left) before plugging in the headset
CAUTION!
Page 14

Figure
I%lock
Iliagram, Model
Page
3-2
RI'300
14
Page 15

SECTION
4.1
WHERE TO OBTAIN PARTS
4:
REPLACEMENT PARTS
ltem No.
FRONT PANEL ASSEMBLY
*to Drawing #AS1787 for ltem No.
Description
Part No.
Parts may be obtained directly from Telex
TelexIRTS Systems
12000 Portland Ave.
Burnsville,
877-863-4169
Fax: 800-323-0498
4.2
MECHANICAL PARTS
(Refer to Drawing #AS1786 for ltem No. locations)
NO.
item
PARTS
CF, Carbon Film; CM, Ceramic Monolithic; EL,
Electrolytic; MF, Metal Film; Rad, Radial Leads;
Tant, Tantalum.
MN
)
Front Panel Assy, BP300
PCB Assy, CC33
Back Panel Assy
Case
Screw, #8-32 X 112
Belt Clip
Rivet
Jack, Phone, 3-cond, Double
Closed Circuit
Cap, Gray With Dot
Knob, Gray
Nut Cover, Gray
Mylar,
#73 Shield Bead
Shrink Sleeving,
Lockwasher
Potentiometer, Audio, 50K
Nut, Hex 318"
Washer, Lock, 318" Internal
Tooth
Switch, SPDT
Switch, DPDT Toggle
Nut
Dress Nut, Satin Finish
Washer, Teflon (for Volume
Cont)
LIST
ABBREVIATIONS:
S.
55337
FINAL ASSEMBLY
Description
3-112" X 100 Ft
114"
at:
I
CD,
Ceramic Disk;
part
NO.
Back Panel
Connector, 4-Pin Female
Switch, Pushbutton
Lens, Mic On
Lug, Solder,
Screw, 4-40
Nut, Hex, KEP 6-32
(Refer to Drawing #AS1788 for ltem No. locations)
item
NO.
I
Back Panel
Connector, 3-Pin Female,
Canon AXR 3-31
Connector, 3-Pin Male
Jack, Phone, 3-Cond, Double
Closed Circuit
Washer,
Wires, Local Purchase
Screw, 4-40
Nut, Hex, KEP 6-32
4.3
ELECTRICAL PARTS
CC-33 CIRCUIT BOARD ASSEMBLY
Ref. No.
I
C19
I
c20
C21
I
Capacitor, CM, 0.1 pF, 50V
Capacitor, CM, 0.033 pF, 50V
Capacitor, Tant, 10 pF, 6.3V,
1
20%
Capacitor, CM, 0.1 pF, 50V
Capacitor, EL, Rad, 33 pF, 16V
Capacitor, CM, 0.01 pF, 50V
Capacitor, CM, Rad, 100 pF,
50V
Capacitor, CM, 0.1 pF, 50V
Capacitor, EL, 10 pF, 16V
Capacitor, CM, 0.01 IF, 50V
Capacitor, CM, 0.1 pF, 50V
Capacitor, CD, 10 pF, 500V
Capacitor, EL, Rad, 47 pF, 16V
Capacitor, CM, 0.1 pF, 50V
Capacitor, Mylar, 0.001 pF,
I
Capacitor, EL, Rad, 4.7 pF, 16V 1 1513R4754E
Capacitor, Tant, 1.0 pF, 35V,
1
20%
I
Capacitor, CM, 0.1 pF, 50V
#4
X
318"
BACK PANEL ASSEMBLY
Description
:378 ID
X
318"
Description
Part
No.
I
part
NO.
1511R10421
1
151 1 R33321
1
1515R1063B
151 1 R10421
151 3R3364E
151 1R10321
I
1514R1022L
I
1515R1053G
1
1511R10421
I
1
I
1
I
1
Page 16

CC-33 CIRCUIT BOARD ASSEMBLY
Ref. No.
C27
C28,C29
D1-D3
D4
D5,D6
D7
D8
D9-Dl1
Q1 ,Q2
R 1
R2
R3
R4
R5
R6
R7
R8
R9
R10
Rll
R12
R13
R14,R15
R16
R17
R18,R19
R20
R22
R23
R26
R27
R28
R29
R30
R3 1
R32
R33
R34
R35,R36
S 1
S2
U 1
U2
U3
U4
Capacitor, CM, Rad, 0.01 pF,
200v
Capacitor, EL, 10 pF, 50V
Diode, Signal 1 N6263
Diode, 1 N5231 B
Diode, 1 N4004, IA, 400V
Diode, 1 N5245B Zener, Voltage
Reg l5V
Diode, 1 N5365B Zener, Voltage
Reg 36V
Diode, 1 N4004, lA, 400V
Transistor, Siliconix J305lE305
Resistor, CF, 470 Ohm, 1/4W, 5%
Resistor, CF, 820 Ohm, 1/4W, 5%
Resistor, CF, 220 Ohm, 1/4W, 5%
Resistor, CF, 68K, 1/4W, 5%
Resistor, CF, 5.1M, 1/4W, 5%
Resistor, CF, 330K, 1/4W, 5%
Resistor, CF, 10K, 1/4W, 5%
Resistor, CF, 22K, 1/4W, 5%
Resistor, CF, IOOK,
Resistor, CF, 22 Ohm, 1/4W, 5%
Trim Pot, 100K
Resistor, CF, 22K, 1/4W, 5%
Resistor, CF, 200K, 1/4W, 5%
Resistor, MF, 60.4K, 1/4W, 1%
Trimpot, 10K
Resistor, CF, 270K, 1 /4W, 5%
Resistor, MF, 20.OK, 1/4W, 1%
Resistor,
Resistor, CF, 22K, 1/4W, 5%
Resisbr, CF, 2.2K, 4/4W, 5%
Resistor,
Resistor, CF, 4.7 Ohm, 1/4W, 5%
Resistor, CF, 22K, 1/4W, 5%
Resistor, CF, 100 Ohm, 114W, 5%
Resistor, CF, 36 Ohm, 1/4W, 5%
Resistor, CF, 1.3K, 1/4W, 5%
Resistor, CF, 12K Ohm, sO/O, 118W
Resistor, CF, 1 K, 1/4W, 5%
Resistor, CF, 3.3 Ohm, 1/8W, 5%
Resistor, CF, 100K. 114W,
Switch, SPDT
Switch, DPDT Toggle
IC,
IC, CD4053BE
IC, Op Amp, National LM386N-1
IC, Voltage Regulator, National
LM317MP
Insulator w/o Hole, Silicon
IC Socket, 16-Pin
IC Socket, 8-Pin
Description
1
/4W, 5%
CF,
loOK, 114W,
CF,
1.2K, 114W,
Signetics NE5532N
s0/o
5%
5%
PARTS LIST ABBREVIATIONS: CD,
CF,
Carbon
Electrolytic;
Tant,
Film;
MF,
Tantalum.
CM,
Metal
Ceramic
Film;
Rad,
Monolithic;
Radial
Part
1514R10320
1513R10641
1601626300
160352310B
1601400400
1601524508
1601536508
1601400400
1602030500
140247005D
140282005D
1402220050
140268025D
140251045D
1402330350
1402100250
140222025D
1402100350
140222R05D
1409001 100
140222025D
140220035D
140360422D
1409000300
1402270350
140320022D
140210005D
140222025D
44022P15D
140212015D
14024R705D
140222025D
140210005E
140236R05E
140213015D
140212025D
140210015D
14023R305B
140210035D
1903000100
1903000200
160355320N
16034053BE
1603038600
1603031 7MP
91301 84000
2001000300
2001000100
Ceramic
EL,
Leads;
No.
Disk;
C20
C23
C25
C26
C27
C28
C29
C30
C3 1
C32
C42
CR2
CR3
CR4
CR5
R3
R4
R5
R6
R7
R8
R9
R10
R11
R12
R14
R15
R16
R17
R18
R19
R20
R2 1
R22
R23
R24
R25
Capacitor, CD., 22 pF, 50V
Capacitor, EL, Rad., 10
Capacitor, EL, Rad., 100 uF, 10V
Capacitor, Mylar, Rad., .001 uF,
l00V
Capacitor, EL, Rad., 10 uF, 16V
Capacitor, CM Rad., 1 uF, 50V
Capacitor, EL, Rad., 100uF, 10V
Capacitor, EL, Axial, 2200 uF, 16V
Capacitor, EL, Axial, 2200 uF, 16V
Capacitor, EL, Rad., 100 uF, 16V
Capacitor, CM Rad., 1 uF, 50V
Capacitor, CD, 100 uF, 50V
Diode, 1 N6263
Diode, 1 N6263
Diode, 1 N6263
Diode, 1 N914B
Resistor, CF, 820 Ohm, 1/4W, 5%
Resistor, CF, 220 Ohm, 114W, 5%
Resistor, CF, 68K, 1/4W, 5%
Resistor, CF, 220K, 1/4W, 5%
Resistor, CF, 10M, 1/4W, 5%
Resistor, CF, 22K, 1/4W, 5%
Resistor, CF, 10K, ll4W. 5%
Potentiometer, Trimmer, 2.5 TO
1 OK
Resistor, CF, loOK, 1/4W, 5%
Resistor, CF, 22 Ohm, 1/4W, 5%
Resistor, CF, 22K, 1/4W, 5%
Resistor, CF, 22K, 1/4W, 5%
Resistor, CF, 22 Ohm, 1/4W, 5%
Resistor, CF, 2.2K, 1/4W,
Resistor, CF, 2.2K, 1/4W, 5%
Potentiometer, Trimmer, 2.5
1 OK
Resistor, MF, 60.4K, 1/4W,
Resistor, MF, 60.4K, l/4W, 1%
Resistor, MF, 20K, 1/4W, 1%
Resistor, CF, 1 K, 1/4W, 5%
Resistor, CF, 100 Ohm, 1/4W, 5%
Resistor, MF, 20K, 1/4W, 1%
uF, 50V
5%
TO
1%
51821 110
51821 529
4R1022L
151
51821230
151 1R10421
51821529
151 3A2284E
151 3A2284E
51821524
151 1R10421
521 57330
1601626300
1601626300
1601626300
160109140B
521 54283
521 54297
521 54237
521 54225
521 54 185
521 54249
521 54257
46643P1
521 54233
521 54321
521 54249
521 54249
521 54321
521 54273
521 54273
46643P1
54045604
54045604
54045200
521 5428 1
521 54305
54045200
Page 17

Ref.
No.
R26
R28
R29
R36
R38
R39
R40
R4 1
R42
R43
R44
R45
R49
U1
U2
U3
U4
U5
VR1
90301 41 800,B
CC-40145 CIRCUIT BOARD ASSEMBLY
Description
5%
X
521 54482
52154233
521 54233
521 54249
521 54301
52154343
521 54249
52154493
521 54278
521 54255
521 54281
521
521 54289
53293000
160334580P
160308200M
1603031 7MP
16034053BE
86266008
160152450B
160153650B
2001000100
2001000100
2001000100
53041 30 1
91301 84000
51379024
Resistor, CF, 100 Ohm,
Resistor, CF, loOK, 114W, 5%
Resistor, CF, loOK, 114W, 5%
Resistor, CF, 22K, 114W, 5%
Resistor, CF, 150 Ohm, 114W, 5%
Resistor, CF, 2.7 Ohm, 1/4W, 5%
Resistor, CF, 22K, 114W, 5%
Resistor, CF, 36 Ohm, 1/2W, 5%
Resistor, CF, 1.3K, 114W, 5%
Resistor, CF, 12K, 114W, 5%
Resistor, CF, 1 K, 1 14W, 5%
Resistor, CF, 3.3 Ohm, 1/8W, 5%
Resistor,
IC, NE5534N
IC, MC3458P
IC, SGS TBA-820-M
IC, LM317MP
IC, Analog Switch
Voltage Regulator, 5.1 V, 5%,
Voltage Regulator, 15V, 5%.
Voltage Regulator, 36V, 5%
IC Socket, 8 Pin
IC Socket, 8 Pin
IC Socket. 8 Pin
IC Socket, 16 Pin DIP
Insulator wlo Hole, Silicone
ShrinkTubing, Clear, .25 Dia.
I
CF,
N5231 B
1
1 N5245B
1 N5365 B
1.0 Lg.
470 Ohm,
1/2W, 5%
1/4W,
Part No.
54120
Ref. No.
CG18SL CIRCUIT BOARD ASSEMBLY
[
Description
I
I
Capacitor, CD, 330 pF1 50V
Capacitor, 220 pF150V
Capacitor, Mylar, ,022 uF/ l00V
Capacitor, Cer, .0033 uF150V
Capacitor, Mylar, .047 uF/ 50V
Capacitor, CM, .1 uF150V
Capacitor, CD,
Capacitor, Mylar, .O1 uFI50V
Capacitor, Tant, 1 uF, 35V
Diode, Signal, 1 N914B
Transistor, MPSU45
Resistor, CF, 68K, 114 W, 5%
Resistor, CF, 470K, 114 W, 5%
Resistor, Variable Trim, 20K
Resistor, MF,
Resistor, CF, 22K, 114 W, 5%
Resistor, CF, 22M, 114 W, 5%
Resistor, CF, 2M, 114 W, 5%
Resistor, CF, 10M, 114 W, 5%
Resistor, CF, 22K, 114 W, 5%
Resistor, CF, 4.7K, 114 W, 5%
Resistor, Variable Trim, 5K
Resistor, CF, IOK, 114 W, 5%
Resistor, CF, 0 Ohm, 114 W, 5%
Resistor, MF, 12.7K, 1
lC, CD4001AE
IC, NE567N
lC, LM78L05AC2W
Wire, 24 AWG, Blk, 3.0" LG.
Wire, 24 AWG, Blu, 3.0" LG.
Wire, 24 AWG, Red.
Wire, 24 AWG, Brn, 3.0" LG.
Pin, Cambion
IC Socket, 14-Pin DIP
I
IC Socket, 8-Pin DIP
OG
680
pFl5OV
63.4K, 114 W, 1
%
3.0"
LG.
%
part
.
NO.
.
\)
PARTS
CF,
LIST ABBREVIATIONS:
Carbon
Electrolytic;
Tant,
Tantalum.
Film;
MF,
CM,
Metal
Ceramic
Film;
Rad,
CD,
Ceramic
Monolithic;
Radial
Leads;
Disk;
EL,
Page 18

This
page intentionally left blank.
Page
18
Page 19

SECTION
5:
DIAGRAMS 1 DRAWINGS
0
F7
g$::
This drawing applies to
OD3415 Outline Drawing, BP300 20
----
----
Application Znformation
'I'M11786
Model
BP300
SD1464
AS 1821 Assembly Diagram, P.C.B., CC33 25
Model
BP300
standard units built between
SD1427-01
AS 1409 Assembly Diagram, P.C.B. CC40145 Layout 27
CC40
card detaileddiagrams
Title
BP300
Units with
CC33
or
CC40
cards. Units with CC45 cards are one inch longer.
...........................................
Cable Wiring Diagram, Two Channel System
Cable Wiring Diagram, Three Channel System
/
12-Volt Battery Operation
Dry
Line Operation (For extended distances)
User Stations with
Schematic Diagram, Series B Phase
CC33
Teleproduction System Example / Multi-channel Operation
card (Standard units and unit3 with Call Light Opfion).
3
User Station
................................
...............................
................................
.............................
......................................
User Stations with
(Simplified) Schematic Diagram, Phase I11 User Stations (CC40) sheet 1
1979
CC40
card (Units with various options or combinations of options. Also applies to
and
1981,
approximately.)
................................
Page
21
22
/
23
24
.................
26
SD1427-00
SD1427~00
Call Light Option used
Option).
SD1470 Servicing Diagram, Light Signaling Circuit, CC-18SL, Phase 3 Configuration
Exploded Views
AS 1786
AS 1787 Front Panel Assembly, Model BP300
AS 1788 Back Panel Assembly, BP I TWI
Schematic Diagram, Phase 3 User Stations, sheet 1 of 2.
Schematic Diagram, Phase 3 User Stations, sheet 2 of 2
by
both
Model
BP300
Final Assembly, Model BP300
User Stations with
CC33
........................................
...........................
card (Standard units and units with Call Light
.....................................
UNITS
..................................
..........................
28
29
...............
30
3
32
33
1
Page 19
Page 20

OD3415
Outline
BP300
Page
Drawing,
20
WEIGHT: 1 .OLBS
ALL
DIMENSIONS: INCHES(mrn)
(.45kg)
Page 21

Cable Wiring
Two
Channel System
Diagram
3
>
2"
>
I
A
w
>
-
-
4
To Supply
Channel
Common
Channel
Common
Drain Wires
2
1
----c-
w
To Station
3
>
2
>
-
-
>
-
1
Page
21
Page 22

Cable Wiring Diagram
Three Channel System
3
>
N.C.
-
N.C.
I
To
4.1
A
-
Supply
Grn Channel
Bl
k
Drain Wires
Common
3
---
Common
N.C.
A
.
To Station
A
w
w
3
>
4
-c-
Page
22
Page 23

12V
Battery
Operation
Page 24

Page 25

Page 26

8
DYNAMIC MIC
CONNECTOR
XLR-4 STANDARD
MOMENTARY
7
P.C.B. CC -40
6
5
4
3
2
ECO"
2523
ELO"
REVISIONS
ZMlE REV. DESCRlPMlN
D AEDRAWN
E
REVISED
F
CHbD
PER
NOTE 5 PER
31%
erL
1
DATE APPROVED
12-9-65
6.ZB.59
4.
14,40
h
D
-
C
-
A
SD1427-01
(Simplified) Schematic Diagram,
111
Phase
DYNAMIC
MIC
CONNECTOR
User Stations (CC-40)
HP
Lo
JI
Hp
I
I
I
I
HPHI
IO. THIS DRAWING DOES NOT SHOW OPT/ONAL PARTS. FOR OPTION
/NFORMAT/OAI, REFER TO SD /427-00.
9
FOR SPEAKER STATIOAIS) CHANGE
0LM317T ATzACIFO TO HEATSlNK>JUCI
AHAM
rt31o2.
8.
SEE 503362 FOR ALTERNATE HEADPHONE/
SPEAKER AMP TBA 820M AL7: PINOUT NOJFU.
t
#
z
SCHOTTKY DIODE, VF
AIOMIAIAL VALUE
5.
TEST JIG AND 5 ET
SET CHAIVAIEL JELECT FOR CH.2. DISCONNECT SPEAKER.
TEST SWIT%H
,
GENERATOR
HAY
VARY.
UP
FOR CALIBRATION 6 VOLTAGE READINGJ,
U4
TO AN LM317K TTNE
.-
-
0.1 JO 0.3V.
AS
4-
I
4.
ALL
TEST VOLTAGCS AND CURRENTS: LIO%
3.
-
-
LAST USED' C43,CR8,J4,83,R44,55,
NOT
USED:
CI,C18,CZI,C22)C33-C41,CRI,Q2,
R37,
R47)
R48
U5,
VR3
R2,R13,R27,
R30-R35,
I
WLEM
O~WlSE
OlYllMOHS
IRE
TWIINCEIAIE
FAA-
DE~UB
Ut
xxxz
YATEIlAL
FlMSH
WECIFIW
*1
INCHES
MLES
*
OPTIONS AND MNEMONICS ARE EAPLA/NED OAl THE
OPTION LIST, AND ON THE OPTIOAI DETAIL
2.
CAP.
VALUES ARE JHOWN: MICROFARADS/UOLTS.
I.
ALL
RESISTORS ARE CARBON
NOTES: (UNLESS OTHERWISE SPECIFIED)
cmcl
mr
-
--
DRAW
CHECKED
APPROVALS
NElLSOm
DATE
12-9-85
SCHEMATIC
USER
5T.4
NLM,1/4
DIAGAAM,
T/OM
SHEET:
WATT,+S%.
PHASE
(CC
-40)
A
ZZ
-
DO NOT
SCALE
L
4
DRAWlNO
SCALE SHEET
Page 27

Assembly Diagram,
P.C.B. CC40/45
Layout
Page 28

Page 29

E
OPTION
CC-45 ONLY
-RHC
(*M)
OPTION
MS6
OPTION (FOR
CC-45 ONLY
J1)
CONNECTION
VI
OPTION
J4
XLR-5-32 A5F
P4
(*B)
i
i
i
1
SD1427-00
Schematic Diagram,
3
Pl~ase
User Stations,
2
of
Sheet
Page
2
29
Page 30

Page 31

Page 32

#W
RIV.
REVlSlONS
DCIOlWmOU
OAn
A??noWO
_
BLUE
9"
I@P
DETAIL
3
1
A
DETAIL
B
>
A
REV/JED
PER
2
ECO
/266
REQD
7.5084
2.
I.
FOR
SEl
PC
ITEM
17fI8
PART
SEPARATE
9020-
ARE
NUMBERS
TW/STED
PARTS
/787-OCd
WIES.
oL
O€SCR/P7'ION
'
L/S
T
SEE
DETAIL
B
Page 33

MISTED PAlR
GRN
9'
MISTED PAlR
(PIN
MISTED PAlR
2)
I
(PIN
sd
fit
(PIN
3)
1)
DETAIL
A
II
SEE
DETAIL
A
SEE
DETAIL
B
 Loading...