

Page 1

Getting Started Guide
Page 2

Toast 6 Titanium Getting Started Guide
ii
Legal Information
Legal Information
© 1994-2003 Roxio, Inc. All rights reserved. Use of this product is subject to your agreement
to all of the terms of each of the license agreements included in this package.
Trademarks
The Roxio logo, the toaster with discs logo, ToastAnywhere, Toast It, and Plug & Burn are
trademarks of Roxio, Inc. which may be registered in some jurisdictions. Roxio, the burning
CD logo, Toast, and CD Spin Doctor are registered trademarks of Roxio, Inc. in the United
States and/or other countries. This product may be protected by one or more of the patents
listed at www.roxio.com/en/patents.
Third-Party Trademarks
The Mac logo, Macintosh, Power Macintosh, Mac, QuickTime, and iTunes are trademarks
of Apple Computer, Inc. registered in the U.S. and other countries. iMovie, iPhoto,
Rendezvous, and iDVD are trademarks of Apple Computer, Inc.
Windows is a registered trademark of Microsoft, Inc.
MPEG Layer-3 audio compression technology licensed by Coding Technologies, Fraunhofer
IIS and THOMSON multimedia.
Audio effect engine licensed by Algorithmix, www.algorithmix.com.
VST plug-in technology by Steinberg.
Portions based on nanoPEG Technology. Copyright © 2003 nanocosmos.
Discus is a registered trademark of Magic Mouse Productions.
Music recognition technology and related data are provided by Gracenote and the
Gracenote CDDB® Music Recognition ServiceSM. Gracenote is the industry standard in
music recognition technology and related content delivery. For more information, visit
www.Gracenote.com.
Page 3

Toast 6 Titanium Getting Started Guide
Gracenote is CDDB, Inc. d/b/a "Gracenote." CD and music-related data from Gracenote
CDDB® Music Recognition ServiceSM © 2000-2003 Gracenote. Gracenote CDDB2 Client
Software ® 2000-2003 Gracenote. U.S. Patents Numbers #5,987,525; #6,061,680; #6,154,773,
and other patents issued or pending.
CDDB is a registered trademark of Gracenote. The Gracenote logo and logotype, the
Gracenote CDDB logo and logotype, and the "Powered by Gracenote CDDB" logo are
trademarks of Gracenote. Music Recognition Service and MRS are service marks of
Gracenote.
Legal Information
iii
Changes
The material in this document is for information only and is subject to change without
notice. While reasonable efforts have been made in the preparation of this document to
assure its accuracy, Roxio, Inc. assumes no liability resulting from errors or omissions in this
document, or from the use of the information contained herein.
Roxio reserves the right to make changes in the product design without reservation and
without notification to its users.
Disclaimer
IF THIS PRODUCT DIRECTS YOU TO COPY MATERIALS, YOU MUST HAVE
PERMISSION FROM THE COPYRIGHT OWNER OF THE MATERIALS TO AVOID
VIOLATING THE LAW WHICH COULD RESULT IN DAMAGES OR OTHER
REMEDIES.
Page 4

Page 5

Getting Started
v
Contents
1
Introduction 3
About Toast. . . . . . . . . . . . . . . . . . . . . . . . . . . . . . . . . . . . . . . . . . 4
Where to Find More Information . . . . . . . . . . . . . . . . . . . . . . . . . . 4
What’s New in Toast 6 . . . . . . . . . . . . . . . . . . . . . . . . . . . . . . . . . 5
System Requirements . . . . . . . . . . . . . . . . . . . . . . . . . . . . . . . . . . 6
Installing Toast 6 Titanium . . . . . . . . . . . . . . . . . . . . . . . . . . . . . . 7
About the Toast Main Window . . . . . . . . . . . . . . . . . . . . . . . . . . . 7
Setting Up and Turning On the Recorder. . . . . . . . . . . . . . . . . . . 11
Choosing the Kind of Media to Use . . . . . . . . . . . . . . . . . . . . . . . 11
Page 6

vi
Toast 6 Titanium Getting Started Guide
Contents
Toast Basics 13
2
Overview of Using Toast to Make a Disc. . . . . . . . . . . . . . . . . . . 14
Choosing the Recorder . . . . . . . . . . . . . . . . . . . . . . . . . . . . . . . . 14
Changing Recorder Settings. . . . . . . . . . . . . . . . . . . . . . . . . . . . . 15
Saving and Opening Toast Projects . . . . . . . . . . . . . . . . . . . . . . . 18
Clearing Items from the Content Area . . . . . . . . . . . . . . . . . . . . . 18
Miscellaneous General Features 19
3
Sharing Recorders Over a Network (ToastAnywhere) . . . . . . . . . 20
Sending Files or Folders to Toast from the Desktop (Toast It) . . . . 22
Erasing a Rewritable Disc . . . . . . . . . . . . . . . . . . . . . . . . . . . . . . 23
Ejecting a Disc . . . . . . . . . . . . . . . . . . . . . . . . . . . . . . . . . . . . . . 23
Setting Toast Preferences . . . . . . . . . . . . . . . . . . . . . . . . . . . . . . . 24
Viewing Detailed Disc Information . . . . . . . . . . . . . . . . . . . . . . . 24
4
Miscellaneous Advanced Features 27
Making a Multisession Disc. . . . . . . . . . . . . . . . . . . . . . . . . . . . . 28
Saving a Project as an Image File. . . . . . . . . . . . . . . . . . . . . . . . . 29
Mounting an Image File on the Desktop . . . . . . . . . . . . . . . . . . . 30
Creating a Temporary Partition . . . . . . . . . . . . . . . . . . . . . . . . . . 30
Comparing the Contents of Two Files or Folders . . . . . . . . . . . . . 32
Page 7

Data
5
Toast 6 Titanium Getting Started Guide
Contents
Making Data Discs 37
What is a Data Disc? . . . . . . . . . . . . . . . . . . . . . . . . . . . . . . . . . . 38
Overview of Making a Data Disc . . . . . . . . . . . . . . . . . . . . . . . . 38
Starting a Data Disc. . . . . . . . . . . . . . . . . . . . . . . . . . . . . . . . . . . 39
Changing Data Disc Settings . . . . . . . . . . . . . . . . . . . . . . . . . . . . 39
Adding Files or Folders to a Data Disc. . . . . . . . . . . . . . . . . . . . . 40
Working with Files and Folders in a Data Disc . . . . . . . . . . . . . . 41
Recording a Data Disc . . . . . . . . . . . . . . . . . . . . . . . . . . . . . . . . 43
vii
6
Using Additional Data Features 45
Choosing Which Mac OS Can Read Your Disc . . . . . . . . . . . . . . 46
Compressing a Mac OS Only Data Disc . . . . . . . . . . . . . . . . . . . 46
Encrypting a Mac Only Data Disc . . . . . . . . . . . . . . . . . . . . . . . . 47
Copying a Data Disc . . . . . . . . . . . . . . . . . . . . . . . . . . . . . . . . . . 48
Scheduling Automatic Backups . . . . . . . . . . . . . . . . . . . . . . . . . . 48
Making Advanced Data Discs . . . . . . . . . . . . . . . . . . . . . . . . . . . 49
Page 8

viii
Toast 6 Titanium Getting Started Guide
Contents
Audio
Making Audio CDs 53
7
What Is an Audio CD?. . . . . . . . . . . . . . . . . . . . . . . . . . . . . . . . . 54
Choosing Audio CD Media . . . . . . . . . . . . . . . . . . . . . . . . . . . . . 54
Overview of Making an Audio CD . . . . . . . . . . . . . . . . . . . . . . . 55
Starting a New Audio CD . . . . . . . . . . . . . . . . . . . . . . . . . . . . . . 55
Choosing the Audio CD Format. . . . . . . . . . . . . . . . . . . . . . . . . . 56
Adding Files to Your Audio CD . . . . . . . . . . . . . . . . . . . . . . . . . . 56
Working with Files in an Audio CD. . . . . . . . . . . . . . . . . . . . . . . 58
Recording an Audio CD . . . . . . . . . . . . . . . . . . . . . . . . . . . . . . . 62
8
9
Making MP3 Discs 63
What Is an MP3 Disc? . . . . . . . . . . . . . . . . . . . . . . . . . . . . . . . . . 64
Choosing MP3 Disc Media . . . . . . . . . . . . . . . . . . . . . . . . . . . . . 64
Overview of Making an MP3 Disc. . . . . . . . . . . . . . . . . . . . . . . . 65
Starting a New MP3 Disc . . . . . . . . . . . . . . . . . . . . . . . . . . . . . . 65
Choosing the MP3 Disc Format . . . . . . . . . . . . . . . . . . . . . . . . . . 66
Adding MP3 Files or Folders to Your MP3 Disc . . . . . . . . . . . . . . 66
Working with MP3 Files in an MP3 Disc. . . . . . . . . . . . . . . . . . . 68
Recording Your MP3 Disc . . . . . . . . . . . . . . . . . . . . . . . . . . . . . . 70
Using Additional Audio Features 71
Exporting Audio from Different Sources. . . . . . . . . . . . . . . . . . . . 72
Copying Audio Discs. . . . . . . . . . . . . . . . . . . . . . . . . . . . . . . . . . 74
Digitizing Your LPs or Cassettes . . . . . . . . . . . . . . . . . . . . . . . . . 74
Making Advanced Audio Discs . . . . . . . . . . . . . . . . . . . . . . . . . . 75
Page 9

Video/Photo
Making Video Discs 79
10
What Is a Video Disc? . . . . . . . . . . . . . . . . . . . . . . . . . . . . . . . . . 80
Choosing Video Disc Media . . . . . . . . . . . . . . . . . . . . . . . . . . . . 80
Understanding Menus and Buttons . . . . . . . . . . . . . . . . . . . . . . . 80
Overview of Making a Video Disc. . . . . . . . . . . . . . . . . . . . . . . . 81
Starting a Video Disc. . . . . . . . . . . . . . . . . . . . . . . . . . . . . . . . . . 82
Changing Video Disc Settings . . . . . . . . . . . . . . . . . . . . . . . . . . . 82
Adding Video or Slideshows to a Video Disc. . . . . . . . . . . . . . . . 84
Editing a Video File in the Video Content Area . . . . . . . . . . . . . . 88
Editing a Slideshow in the Video Content Area . . . . . . . . . . . . . . 90
Working with Content in a Video Disc . . . . . . . . . . . . . . . . . . . . 92
Recording a Video Disc. . . . . . . . . . . . . . . . . . . . . . . . . . . . . . . . 93
Toast 6 Titanium Getting Started Guide
Contents
ix
11
Importing Video from a DV Camcorder
(Plug & Burn) 95
What Is Plug & Burn? . . . . . . . . . . . . . . . . . . . . . . . . . . . . . . . . . 96
Quick Plug & Burn . . . . . . . . . . . . . . . . . . . . . . . . . . . . . . . . . . . 97
Other Ways of Using Plug & Burn . . . . . . . . . . . . . . . . . . . . . . . . 98
Connecting Your DV Camcorder to the Computer. . . . . . . . . . . . 99
Using the Video Player Controls to Cue the Tape . . . . . . . . . . . 100
Importing Video into Toast from a DV Camcorder. . . . . . . . . . . 100
Completing a Video Project After Importing . . . . . . . . . . . . . . . 101
Page 10

x
Toast 6 Titanium Getting Started Guide
Contents
Using Additional Video Features 103
12
Exporting Video from an Existing Video Disc. . . . . . . . . . . . . . . 104
Turning Video Menus On or Off . . . . . . . . . . . . . . . . . . . . . . . . 104
Copying a Video Disc . . . . . . . . . . . . . . . . . . . . . . . . . . . . . . . . 105
Using Motion Pictures . . . . . . . . . . . . . . . . . . . . . . . . . . . . . . . . 105
Making Advanced Video Discs . . . . . . . . . . . . . . . . . . . . . . . . . 106
Copy
13
Copying Discs 109
Overview of Copying a Disc . . . . . . . . . . . . . . . . . . . . . . . . . . . 110
Copying a Disc with Only One Recorder . . . . . . . . . . . . . . . . . 110
Copying a Disc with Two Drives . . . . . . . . . . . . . . . . . . . . . . . . 111
Copying an Image File to Disc. . . . . . . . . . . . . . . . . . . . . . . . . . 112
Using Advanced Copy Features. . . . . . . . . . . . . . . . . . . . . . . . . 113
Index 115
Page 11

1
2
3
4
Getting Started
Introduction 3
Toast Basics 13
Miscellaneous General Features 19
Miscellaneous Advanced Features 27
Page 12

Page 13

Introduction
In this chapter
About Toast 4
3
Where to Find More Information 4
What’s New in Toast 6 5
System Requirements 6
Installing Toast 6 Titanium 7
About the Toast Main Window 7
Setting Up and Turning On the Recorder 11
Choosing the Kind of Media to Use 11
Page 14

Toast 6 Titanium Getting Started Guide
4
Chapter 1: Introduction
Getting Started
About Toast
Toast® is award-winning software that helps you make CDs or DVDs. Here
are some of the things you can do with Toast:
■
Save your data to CD or DVD
■
Create audio or MP3 discs
■
Create Video CDs (VCDs), Super Video CDs (SVCDs), or DVDs
■
Make backup copies of your discs
There are many other kinds of tasks you can perform with Toast. To get the
most out of Toast, please read through this guide.
Where to Find More Information
This guide provides information about getting started with Toast and using
the most common tasks. Information about more advanced features is
available where noted, and throughout Toast Help.
To a cc e ss To a st He l p, c h o o s e He l p > To a st He lp .
For additional information, choose Help > Product Support.
Page 15

What’s New in Toast 6
Here’s what’s new in Toast 6 Titanium:
Usability and Performance
■
Toast It. Save time and burn directly from the desktop - without any
initialization or "pre-flight" steps. Toast is now only one click away
whenever you need it.
■
ToastAnywhere. Share CD or DVD burners across a network or the
Internet with other Toast 6 Titanium users. An entire office or home
network can use a single burner.
■
Quick Record. Record immediately, without any initialization or
verification steps.
Data Features
■
Encryption. Secure your data with 128-bit encryption and password
protection.
Toast 6 Titanium Getting Started Guide
What’s New in Toast 6
5
Getting Started
■
Compression. Compress your data up to 50% more on CDs and DVDs.
■
Déjà Vu Backup. Automatically perform scheduled backups to CD,
DVD, networked servers, or web-based storage.
Audio Features
■
CD Spin Doctor® 2. Digitize vinyl records and cassette tapes, or record
live audio. Reduce noises, pops and clicks, and enhance the sound with
included filters, or add your own 3rd party VST effects. Automatically
define tracks and burn a CD with a single click.
■
Universal Audio Converter.Turn any audio file that QuickTime can
recognize (e.g., WAV, AIFF, MP3, AAC, etc.) or any iTunes track into
an audio CD.
Photo Features
■
Motion Pictures. Turn still photos into stunning media shows with
Hollywood-style pan & zoom effects, cross fades, and soundtracks.
Page 16

Toast 6 Titanium Getting Started Guide
6
Chapter 1: Introduction
Getting Started
■
Photo Slideshows. Drag & drop pictures directly from the hard drive or
iPhoto library to create fast and easy full screen slideshows on Video
CD, Super Video CD, or DVD.
Video Features
■
Video CDs & Super Video CDs. Create Video CDs and Super Video
CDs with menus and buttons.
■
DVD Authoring. Create simple DVDs with menus, buttons and
chapters. Watch them on a home DVD player from the comfort of the
couch.
■
Plug & Burn™. Create VCDs, SVCDs and DVDs directly from your DV
camcorder, automatically and effortlessly. Transfer an entire weekend's
worth of video footage with a single click.
■
Universal Video Converter. Turn any video file that QuickTime can
recognize (e.g., DV, AVI, MOV, MPEG1/2/4, etc.) into a video disc.
■
Disc Extractor. Extract and reuse video from an iDVD or Toast disc.
System Requirements
Toast requires the following system:
■
Power Mac G3 or higher
■
Mac OS X v10.2 or higher
■
200 MB hard disk space
■
Approximately 2 GB for every 10 minutes of digital video
■
QuickTime® 6 or higher
■
CD or DVD recorder (optional with ToastAnywhere™)
Page 17

Toast 6 Titanium Getting Started Guide
Installing Toast 6 Titanium
To install Toast:
1 Insert the Toast CD into your drive.
The Roxio Toast 6 Titanium folder appears on your desktop.
2 Drag the Roxio Toast 6 Titanium folder to the location on your hard
disk where you want Toast to be installed.
3 In the new location, double-click the application to launch Toast.
4 Follow the onscreen instructions to set up Toast the first time.
You will be asked to enter a CD key and accept the license agreement.
About the Toast Main Window
The Toast main window contains these components:
■
Disc tabs. Click a tab to select the type of disc you want to make.
Installing Toast 6 Titanium
7
Getting Started
■
Content area. This is where the files you are recording to disc appear.
■
Record button. Click this button to begin recording the files in the
content area to disc.
■
Disc Settings drawer. This drawer lets you change preferences about
each type of disc you are making.
The Toast main
window
Page 18

Toast 6 Titanium Getting Started Guide
8
Chapter 1: Introduction
Getting Started
Data, Audio, Video, and Copy Tabs
Toast helps you easily create different types of discs. Clicking each of these
tabs let you perform different tasks:
■
Data tab. Put any kind of file or folder on a disc for archiving or
backup purposes, for use on a Mac, PC, or any computer. See Starting a
Data Disc on page 39.
■
Audio tab. Make audio CDs or MP3 discs for use on a computer, MP3
player, or home or car stereo system. See Starting a New Audio CD on
page 55 or Starting a New MP3 Disc on page 65.
■
Video tab. Make VCDs, Super Video CDs, or DVDs for use on a
computer or home DVD player. See Starting a Video Disc on page 82.
■
Copy tab. Copy a disc or image file. See Overview of Copying a Disc on
page 110.
Page 19

Toast 6 Titanium Getting Started Guide
Content Area
The content area is where you add and organize your files, or where discs
you want to copy appear. It is slightly different depending on which kind of
disc you are making. To add content, drag your files here. In some views,
you can click the Add button to add files from a file dialog. For more
information, see Overview of Using Toast to Make a Disc on page 14.
Content area (in
this case, the
Audio content
area)
About the Toast Main Window
9
Getting Started
Record Button
Clicking the red Record button lets you begin recording a disc. The Record
button has other parts:
Space
Indicator
Recorder name Recorder Options
button
■
Space Indicator. Displays approximately how much of a disc will be full
depending on the type of disc you plan to record it to.
■
CD/DVD button. Click this button to toggle the type of media that the
Space Indicator shows free space for (CD or DVD).
CD/DVD button
Record button
Page 20

Toast 6 Titanium Getting Started Guide
10
Chapter 1: Introduction
Getting Started
■
Recorder Options button. The green Recorder Options button displays
the different recorders that are available for you to choose from, as well
as a link to the Recorder Settings dialog (which lets you change
preferences for the selected recorder).
■
Recorder Name. Displays the name of the currently-selected recorder.
If more than one recorder is connected to your computer, click the
name of the recorder to cycle through them.
Disc Settings Drawers
Each of the four tabs (Data, Audio, Video, and Copy) has a settings drawer
that allows you to make changes for the selected type of disc.
Disc Settings
drawer (Audio
disc shown)
Disc Settings button
Page 21

Setting Up and Turning On the Recorder
Disc Settings Button
Clicking the Disc Settings button in any view opens the Disc Settings
drawer. (You can also click the current disc title.)
Click the Disc Settings
button
You can also click the disc title to
open the Disc Settings drawer
Setting Up and Turning On the Recorder
To set up your recorder for Toast:
■
Make sure your recorder is connected to the computer and turned on.
For more information, see the instructions provided by the
manufacturer.
Toast 6 Titanium Getting Started Guide
11
Getting Started
After a moment, Toast should automatically detect the recorder and
display its name at the bottom of the window.
If Toast does not display the name of the recorder, click Recorder Not
Found. After a moment, the recorder name should appear. (If the
recorder does not appear, check the cable and/or the power cord.)
You are now ready to make a disc.
Choosing the Kind of Media to Use
Many kinds of blank CD and DVD media are available in the marketplace.
The type of disc you should use can be determined by two key
compatibility factors:
■
Compatibility between the type of media and the playback device
■
Compatibility between the type of media and the recorder
Page 22

Toast 6 Titanium Getting Started Guide
12
Chapter 1: Introduction
Getting Started
Compatibility between media and playback devices
To make sure that the CD or DVD media you are using is compatible with
your playback device, check the manufacturer instructions included with
them.
Compatibility between media and recorders
To make sure that CD or DVD media is compatible with your recorder,
check the manufacturer instructions included with them.
What if I am having problems even though my compatibility seems good?
Sometimes, different brands of media can work differently in your recorder
or playback device. If you are experiencing repeated problems with one
kind of media, another brand may give you different results.
Page 23

Toast Basics
In this chapter
Overview of Using Toast to Make a Disc 14
13
Choosing the Recorder 14
Changing Recorder Settings 15
Saving and Opening Toast Projects 18
Clearing Items from the Content Area 18
Page 24

Toast 6 Titanium Getting Started Guide
14
Chapter 2: Toast Basics
Getting Started
Overview of Using Toast to Make a Disc
This section describes the basic process of making any CD or DVD with
To a s t .
Select the disc type. Click the tab matching the type of disc you want to
1
make with Toast.
■
Data tab. Put any kind of file or folder on a disc for archiving or
backup purposes, for use on a Mac, PC, or any computer. See
Starting a Data Disc on page 39.
■
Audio tab. Make audio CDs or MP3 discs for use on a computer,
MP3 player, or home or car stereo system. See Starting a New
Audio CD on page 55 or Starting a New MP3 Disc on page 65.
■
Video tab. Make VCDs, Super Video CDs, or DVDs for use on a
computer or home DVD player. See Starting a Video Disc on
page 82.
■
Copy tab. Copy a disc or image file. See Overview of Copying a Disc
on page 110.
Change disc settings. Click the Disc Settings button to open the Disc
2
Settings drawer, which allows you to change optional settings for each
type of disc.
Add files to the content area. If you have selected a Data, Audio, or
3
Video disc, add files that you want to record to disc. If you have
selected the Copy tab, you can add an image file or your disc.
Record the disc. Click the red Record button to make your disc.
4
Choosing the Recorder
You can choose the recorder you want to use to record files to disc from
To a s t .
To choose the recorder:
1 At the bottom of the Toast window, click the green Recorder Options
button.
Page 25

Toast 6 Titanium Getting Started Guide
A pop-up menu appears, displaying the recorders you can record to.
2 Select the recorder.
Changing Recorder Settings
Before you record a disc, you can view or change the settings the recorder
uses when it records your disc, including:
■
Which recorder is selected (if you have more than one connected)
■
Number of copies of a disc to record
■
What Toast does after a recording is complete
■
Recorder-specific settings and information
To change recorder settings:
1 Choose Recorder > Recorder Settings (or click the green Recorder
Options button, and choose Recorder Settings).
Changing Recorder Settings
15
Getting Started
Recorder Options
button
2 Click the Basic tab. In the Basic tab, you can change the following
settings:
■
Recorder: Displays the name of the recorder you are recording to.
To change the recorder, select it from the pop-up menu.
■
Write Speed: Displays how fast the recorder records the disc. To
change write speed, select the speed from the pop-up menu. By
default, Toast will record to the best write speed possible
depending on the speed of the media and the recorder you are
using.
You may need to change the write speed if the blank disc you are
using is optimized for a lower drive speed, or if your recorder
records at a faster rate than your hard disk can process
Page 26

Toast 6 Titanium Getting Started Guide
16
Chapter 2: Toast Basics
Getting Started
■
Number of Copies: Enter the number of copies of the disc you
want the recorder will make. Toast will prompt you for blank discs
after each copy.
3 Click the Advanced tab. In the Advanced tab, you can change the
following settings:
■
After Writing: From this pop-up menu, select what you want to do
with the disc after recording it. Toast can mount the disc on the
desktop, eject the disc, or prompt you for either.
■
Close Disc: Select this check box to finalize the disc so that Toast
cannot record any further sessions to the disc. (A session is a single
recording.) This is useful for making data discs that you would like
to record data to in more than one session.
Uncheck this check box if you want to record more than one
session to the disc.
■
Verify Data: If you are making a data disc, select this check box to
automatically verify the contents of a disc against the same data on
your hard disk after recording the disc.
Uncheck this check box if you do not want to automatically verify
the contents of a data disc after recording.
■
Simulation Mode: Select this check box if you want to simulate the
process of recording data or audio on a disc. You might do this to
make sure that the write speed and other factors that you have set
up for your recorder are correctly in place before you start to
record to actual media.
Uncheck this box if you want to record to an actual disc.
■
Buffer Underrun Prevention: Select this check box to turn on
buffer underrun prevention. A buffer underrun is an error in
which your hard disk is unable to send data fast enough to the
recorder during a recording. This causes errors that make a blank
disc unusable.
Page 27

■
Audio Write Mode: Displays the mode of recording for the
recorder. Choose the option that best fits the type of recording you
want to make:
■
DAO. Short for “Disc-At-Once,” this method of recording
allows pauses of varying lengths of up to 8 seconds between
audio tracks. Choose this option if you are making audio CDs
to be commercially reproduced. Some recorders cannot record
in DAO mode.
■
TAO. Short for “Track-At-Once,” this method of recording
requires a pause of 2 seconds between tracks (depending
on your recorder). You cannot record CD-TEXT in this
mode. For more information, see Turning on CD-TEXT
page 56
■
Display Recorder Settings Before Writing: Select this check box if
.
you want Toast to display the Recorder Settings dialog each time
you click the red Record button.
Toast 6 Titanium Getting Started Guide
Changing Recorder Settings
on
17
Getting Started
Uncheck this check box if you want Toast to begin recording
immediately after you click the red Record button.
4 To see information about the currently selected recorder, click the tab
that matches the name of the recorder.
5 When you are finished, click OK.
Page 28

Toast 6 Titanium Getting Started Guide
18
Chapter 2: Toast Basics
Getting Started
Saving and Opening Toast Projects
You can save a project or open existing projects.
Note Toast saves pointers for the items in the content area so that
you can continue working on them later. If you move or delete any
of the original files or folders from your hard disk, Toast will not be
able to find them.
To open an existing project:
1 Choose File > Open.
2 Select the Toast file you want to open.
3 Click Open.
To save the current project:
■
Choose File > Save.
To save a project using a different name:
1 Choose File > Save As.
2 Type a file name, and select a location for the project.
3 Click Save.
Clearing Items from the Content Area
You can clear all items or selected items from the content area.
To clear items from the content area:
1 In the content area, select the items you want to clear.
To select all, choose Edit > Select All (or press Command-A).
2 Press the Delete key on your keyboard (or choose Edit > Clear).
Toast clears the content area of any selected items.
Page 29

Miscellaneous General
Features
In this chapter
Sharing Recorders Over a Network (ToastAnywhere) 20
19
Sending Files or Folders to Toast from the Desktop (Toast It) 22
Erasing a Rewritable Disc 23
Ejecting a Disc 23
Setting Toast Preferences 24
Viewing Detailed Disc Information 24
Page 30

Toast 6 Titanium Getting Started Guide
20
Chapter 3: Miscellaneous General Features
Getting Started
Sharing Recorders Over a Network
(ToastAnywhere)
The ToastAnywhere™ feature helps you share CD or DVD recorders across
a network or the Internet with other Toast 6 Titanium users. An entire
office or home network can use a single recorder.
Note If someone else on your computer network has shared their
recorder, you can record any kind of data to that recorder. This will
take longer than any recording with a recorder connected directly
to your computer.
To share your recorder with other Toast 6 Titanium users over a network:
1 Choose Toast Titanium > Preferences.
The Preferences dialog appears.
2 In the Preferences dialog, click the Sharing tab.
3 In the Sharing tab, click the Start button.
4 Do one of the following:
■
If you want other Toast 6 Titanium users on the network or
Internet to have unlimited access to your recorder, click OK.
■
If you want to establish a password that users must type in to
access the recorder connected to your computer, click Set
Password. A dialog box appears, where you will be asked to enter
the password. Click OK when you are finished.
To unshare your recorder or change your password:
1 Choose Toast Titanium > Preferences.
The Preferences dialog appears.
2 In the Preferences dialog, click the Sharing tab.
3 In the Sharing tab, do one of the following:
■
To unshare your recorder, click Stop.
Page 31

Toast 6 Titanium Getting Started Guide
Sharing Recorders Over a Network (ToastAnywhere)
■
To change your password, click Set Password. You will be asked to
enter a new password and verify it.
4 When you are finished, click OK.
Recording to a Shared Recorder
To record from Toast to a shared recorder:
1 Set up your disc as you normally would.
2 At the bottom of the Toast window, click the green Recorder Options
button.
A pop-up list appears, displaying names of any recorders connected to
your system and any shared recorders on the same local network.
3 Choose the name of a shared recorder.
To access a shared recorder at any location on the Internet, choose
Other Shared Recorder. A dialog appears, where you can enter an IP
address.
21
Getting Started
4 If the person who shared their recorder set a password, you must enter
the password in the dialog box that appears.
The recorder displays as your current recorder.
5 Click the red Record button.
6 The person using the computer with the shared recorder connected to
will be prompted to insert a blank disc.
Toast records your content to disc over the network.
Page 32

Toast 6 Titanium Getting Started Guide
22
Chapter 3: Miscellaneous General Features
Sending Files or Folders to Toast from the
Desktop (Toast It)
The Toast It™ feature lets you automatically send files or folders to Toast
from anywhere on your desktop.
Getting Started
Note This feature works regardless of whether Toast is running. If
Toast is not running, it launches automatically.
To turn Toast It on or off:
1 Choose Toast Titanium > Preferences.
The Preferences dialog appears.
2 In the General tab, select Use Toast It Contextual Menu to turn it on.
Deselect it to turn it off.
3 To exit preferences, click OK.
To use the Toast It feature:
1 In any folder on your desktop or hard disk, select any files or folders
that you want to send to Toast.
2 Ctrl-click the selected files or folders.
A pop-up menu appears.
3 From the pop-up menu, choose Toast It.
The files or folders you selected are sent to Toast.
Page 33

Toast 6 Titanium Getting Started Guide
Erasing a Rewritable Disc
If you are using CD-RW, DVD-RW, DVD+RW, and DVD-RAM media,
you can erase the entire contents of a disc and re-record to it.
Caution If you have copied extremely sensitive data to a
rewritable disc (such as private personal information), you may
want to destroy the disc rather than choose the option of erasing it
and re-recording over the data.
To erase a rewritable disc:
1 Insert the disc into the recorder.
2 Choose Recorder > Erase.
A dialog appears, prompting you to confirm that you want to erase this
disc:
■
If you want to erase the disc quickly and you do not mind that this
disc will be usable only by Toast (or Jam), click Quick Erase.
Erasing a Rewritable Disc
23
Getting Started
■
If you want to erase the disc so that it can be used anywhere, click
Erase.
3 To erase the disc, click OK.
If you confirm, Toast displays a progress bar while erasing the disc.
Ejecting a Disc
You can eject a disc from a recorder or drive in any of these ways:
■
Choose Recorder > Eject.
■
In the Recorder Settings dialog, click Eject.
■
Drag the disc icon to the Trash in the Dock.
Page 34

Toast 6 Titanium Getting Started Guide
24
Chapter 3: Miscellaneous General Features
Getting Started
Setting Toast Preferences
To set Toast Preferences:
1 Choose Toast Titanium > Preferences.
The Toast Preferences dialog appears.
2 In the General tab, you can choose these options:
■
Place Toast icon on the Dock. To keep the Toast icon on the
Dock—even when it is not running—select this check box.
■
Install “Toast It” Contextual Menu. If you want to be able to send
items directly to Toast from the desktop, select this check box. For
more information, see Sending Files or Folders to Toast from the
Desktop (Toast It) on page 22.
3 Click the Sharing tab.
The Sharing tab lets you share CD or DVD recorders over a network or
the Internet with other Toast 6 Titanium users. For more information,
see Sharing Recorders Over a Network (ToastAnywhere) on page 20.
4 When you are finished, click the Close button to close the Preferences
dialog.
Viewing Detailed Disc Information
You can view detailed information about a blank or recorded disc inside
the currently selected recorder that is connected to your computer.
Note This feature works only with CD or DVD recorders.
To view detailed disc information:
1 Insert a blank or used disc into the recorder.
2 Choose Recorder > Disc Info.
The Disc Information dialog appears. Here is a summary of some of
the information this dialog gives you about the disc:
Page 35

Toast 6 Titanium Getting Started Guide
Viewing Detailed Disc Information
■
Name of the disc label (if any)
■
Type of disc (for example, Data CD-R or Audio CD)
■
Tra c k na m es
■
Start track information
■
Track size (or length of track)
■
Session information
Erasing ReWritable Discs
If your recorder has rewritable capabilities and the disc in the currently
selected recorder is rewritable, the Erase feature in the Disc Info window is
active.
For more information, see Erasing a Rewritable Disc on page 23.
25
Getting Started
Page 36

Page 37

Miscellaneous Advanced
Features
In this chapter
Making a Multisession Disc 28
27
Saving a Project as an Image File 29
Mounting an Image File on the Desktop 30
Creating a Temporary Partition 30
Comparing the Contents of Two Files or Folders 32
Page 38

Toast 6 Titanium Getting Started Guide
28
Chapter 4: Miscellaneous Advanced Features
Making a Multisession Disc
A session is a recorded area on a disc that contains one or more music or
data tracks. A disc can have either a single session or multiple sessions, and
a disc with multiple sessions is called a multisession disc.
Getting Started
Note A multisession audio CD is not recommended. Only the
tracks recorded in the first session are playable on most home or
car stereo CD players.
To make the first session:
1 To record the first session, add files to the content area as you normally
would.
2 When you are ready to record, choose Recorder > Recorder Settings
(or click the green Recorder Options button, and choose Recorder
Settings).
The Recorder Settings dialog appears.
3 In the Recorder Settings dialog, click the Advanced tab, then make sure
the Close Disc check box is not checked.
4 Click OK.
5 Click the red Record button.
6 When prompted, insert a disc into the currently selected recorder. For
information about the best types of media to use, see Choosing the Kind
of Media to Use on page 11.
Toast displays a progress bar as it burns your data to disc. A message
appears indicating that recording is complete.
To make the disc a multisession disc:
1 To record another session to a disc that already has a first session, add
files to the content area as you normally would.
2 When you are ready to record, click the red Record button.
3 When prompted, insert a disc with one or more sessions on it.
Page 39

Toast 6 Titanium Getting Started Guide
Saving a Project as an Image File
Toast displays a progress bar as it burns your data to disc. A message
appears indicating that recording is complete.
Saving a Project as an Image File
Instead of recording a data, audio, video, or copy project to CD or DVD
media, you can save it as an image file. An image file is a single file, saved
on your hard disk, that contains ALL the data and formatting information
needed to create a CD or DVD.
Reasons You Might Make an Image File
■
If you want to record the disc at a later time
■
If you are writing data from a network drive that doesn’t have sufficient
speed to write directly
■
If you want another person to record the discs
■
Preserve a master copy of your master discs
29
Getting Started
Properties of Image Files
■
Image files contain all necessary data (as opposed to saved Toast
projects which contain only references to the data)
■
Most image files can be mounted to check contents and functionality.
■
Mounted image files appear like a disc on the desktop.
To save a project as an image file:
1 Set up your disc as you normally would.
2 Choose File > Save As Disc Image.
The Save Disc Image as dialog appears
3 In the Save Disc Image dialog, browse to the location on your hard disk
where you want the image file to be saved.
Page 40

Toast 6 Titanium Getting Started Guide
30
Chapter 4: Miscellaneous Advanced Features
Mounting an Image File on the Desktop
You can mount a previously created image file on desktop. Most image files
can be mounted.
Mounted images function like any other disc and are write-protected.
Getting Started
Note If this is the first time you are mounting an image file to the
desktop after installing Toast, Toast will prompt you to enter the
administrator password. Once you have done this, you no longer
need to enter the password to mount an image file. If you do not
have administrator privileges, you will not be able to mount image
files with Toast.
You can also mount images by clicking the Mount button in the Disc Image
format window.
To mount an image file on the desktop:
■
Choose Utilities > Mount Disc Image.
Creating a Temporary Partition
You can create a temporary partition on your hard disk that can be used to
set up data you want to record to a disc.
Temporary partitions are useful in situations where you want to have
complete control over the layout of your data and how its windows are
arranged and displayed.
Page 41

Toast 6 Titanium Getting Started Guide
To create a temporary partition:
1 Choose Utilities > Create Temporary Partition.
The Create Temporary Partition dialog appears.
2 Enter a name and size for the partition. Choose a size that is
appropriate for the size of the disc you are making with the partition.
3 From the On pop-up menu, choose the hard disk or network folder
where you want the temporary partition to reside.
Creating a Temporary Partition
31
Getting Started
4 From the Format pop-up menu, choose the type of format you want
this temporary hard disk to have:
■
Mac OS Extended. Select this option if you plan to use the
partition to record a disc that will be usable only on Mac OS 8.1 or
later.
■
Mac OS Standard. Select this option if you plan to use the partition
to record a disc that is usable on ANY Macintosh computer.
■
UNIX File System. Select this option if you plan to use the partition
to record a disc that is usable on the UNIX operating system.
5 Click OK.
Toast mounts the partition on the desktop.
Page 42

Toast 6 Titanium Getting Started Guide
32
Chapter 4: Miscellaneous Advanced Features
Getting Started
Comparing the Contents of Two Files or
Folders
You can compare the contents of two folders or two files to see if they
match. You might do this to double-check that original files are identical to
a copy you made of them.
Note Compare differs from the verification that Toast performs
after recording a disc. First, verification always compares the
selected source data to the finished disc; with the Compare
command
command checks each individual file when comparing the data;
verification compares only blocks. The Compare command
usually tells you exactly which file contains an error.
To compare folders or files:
, you compare any two data sets. Second, the Compare
1 Choose Utilities > Compare.
Page 43

The Compare dialog opens.
Toast 6 Titanium Getting Started Guide
Comparing the Contents of Two Files or Folders
33
Getting Started
2 From the Compare pop-up menu at the top of the dialog, choose
whether you want to compare two files or two folders.
3 In most situations, it is recommended to leave the Ignore .DS Store
check box selected.
4 Click the Original button.
The Choose a File dialog appears, where you can browse to the file or
folder on your hard disk that you want to compare another file or
folder with.
5 When you locate the file or folder, click Choose.
6 Click the Copy button.
The Choose a File dialog appears, where you can browse to the file or
folder on your hard disk that you want to compare against the first
item you chose.
7 When you locate the file or folder, click Choose.
Page 44

Toast 6 Titanium Getting Started Guide
34
Chapter 4: Miscellaneous Advanced Features
Getting Started
8 Click Start.
The Compare dialog displays a progress bar that tracks the
comparison. Any information about discrepancies between the files or
folders you are comparing appears in the Compare window.
Page 45

5
6
Data
Making Data Discs 37
Using Additional Data Features 45
Page 46

Page 47

Making Data Discs
In this chapter
What is a Data Disc? 38
37
Overview of Making a Data Disc 38
Starting a Data Disc 39
Changing Data Disc Settings 39
Adding Files or Folders to a Data Disc 40
Working with Files and Folders in a Data Disc 41
Recording a Data Disc 43
Page 48

Toast 6 Titanium Getting Started Guide
38
Chapter 5: Making Data Discs
Data
What is a Data Disc?
A data disc is a CD or DVD that contains files or folders. You can back up
any of these items to CD or DVD media as long as the size of the item does
not exceed the capacity of the disc.
Reasons You Might Make a Data Disc
You might make a data disc for any of these reasons:
■
To back up valuable files of any kind
■
To a rc h iv e y o ur pho t o s
■
To make a disc that is usable on Macintosh or Windows computers
Overview of Making a Data Disc
Making a data disc involves these steps:
1 Start a data disc. Select the Data disc type.
Change the settings of your data disc (optional). You can change
2
settings for your data disc, or you can leave your last settings
untouched—Toast remembers the last settings you used. An important
setting to choose is which operating systems the final disc will be
readable on.
Add content to your disc. You can add any combination of files or
3
folders to a data disc.
4
Record your data disc. When you are finished, you can record the data
to CD or DVD media.
Page 49

Starting a Data Disc
To start a data disc:
■
Click the Data tab.
The Data content area displays.
Toast 6 Titanium Getting Started Guide
Starting a Data Disc
39
Data
Changing Data Disc Settings
You can optionally change different settings for your data disc. An
important setting to choose is whether to make a Mac Only disc (usable
only on Macintosh computers) or a Mac & PC disc (usable on both
Macintosh and Windows computers).
Choosing a Mac Only or Mac & PC Disc
You can make a data disc that is usable only on Macintosh computers, or
usable on both Macintosh and Windows computers.
What Is a Mac Only Data Disc?
A Macintosh only disc is a data disc that contains Macintosh data and is
usable only on a Macintosh computer.
Page 50

Toast 6 Titanium Getting Started Guide
40
Chapter 5: Making Data Discs
What Is a Mac & PC Disc?
A Mac & PC disc is a cross-platform data disc that contains Macintosh and
Windows data, and is usable on either operating system. Macintosh data
will also be visible to Windows users.
Note For information about making advanced types of crossplatform discs, see Making Advanced Data Discs on page 49.
To choose a Mac Only or Mac & PC data disc:
1 In the Data tab, click the Disc Settings button (or the disc title).
Data
The Disc Settings drawer opens.
2 In the Disc Settings drawer, choose whether you want the final disc to
be usable by Macintosh computers only, or also usable by Windows
computers:
■
For Macintosh only, select the Mac Only option.
■
For Macintosh and Windows, select Mac & PC option.
Changing Advanced Data Disc Settings
For a complete list of advanced data tasks available from the Data Disc
Settings drawer, see Making Advanced Data Discs on page 49.
Adding Files or Folders to a Data Disc
You can add files or folders to a data disc in any of these ways:
■
With the Data tab selected, select and drag files or folders from any
location on your hard disk to the Data content area.
■
With the Data tab selected, click the Add button. The Open dialog
appears, where you can browse your hard disk for files or folders. Select
the files and folders you want to add, then click Open.
■
If Toast It is turned on: On your hard disk, select the files or folders that
you want to send to Toast. Ctrl-click the selected items, then choose
Toast It from the pop-up menu. For more information, see Sending
Files or Folders to Toast from the Desktop (Toast It) on page 22.
Page 51

Toast 6 Titanium Getting Started Guide
Working with Files and Folders in a Data Disc
Each file or folder you add appears as a separate row in the Data content
area.
Note Adding files or folders to Toast does not move or change the
original files on your hard disk. Toast simply creates pointers to
items on the hard disk.
Working with Files and Folders in a Data Disc
Once you have added files or folders to the Data content area, you can
organize them in different ways:
■
Creating a new folder
■
Organizing files or folders
■
Renaming a file or folder
■
Removing files or folders
41
Data
Creating a New Folder on a Data Disc
You can create and organize folders in the Data content area just as you
would do on your hard disk. (This does not add any folders on your hard
disk.)
To create a folder:
1 In the Data content area, select the disc or folder where you want to
create the new folder.
2 To create one new folder, click the New Folder button.
A new folder appears in the Data content area under the currently
selected item.
Page 52

Toast 6 Titanium Getting Started Guide
42
Chapter 5: Making Data Discs
Organizing Files or Folders on a Data Disc
You can organize files or folders in the Data content area just as you would
do with files and folders on the hard disk. (This does not change the
location of the original files on your hard disk.)
To organize files or folders:
■
Drag and drop selected files or folders into a folder to add them to that
folder.
Renaming a File, Folder, or Disc on a Data Disc
To rename a file or folder, or disc in a data disc:
Data
1 Click the item briefly.
After a moment, the item will become selected.
2 Type a new name for the item.
3 To go to the next item for renaming, press Tab.
To rename the item, press Enter.
Removing Files or Folders
You can remove files or folders from the Data content area. (This does not
remove the original files or folders on your hard disk.)
To remove files or folders from the Data content area:
1 Select the files or folders you want to remove.
2 You can remove files or folders in any of these ways:
■
Click the Remove button.
■
Press the Delete key.
■
Choose Edit > Clear.
Toast removes the files or folders from the Data content area.
Page 53

Toast 6 Titanium Getting Started Guide
Recording a Data Disc
Recording a Data Disc
When you have finished organizing your files and folders in the Data
content area, you are ready to record it to a recordable CD or DVD.
Note Before recording, you can select a different recorder or
change recorder settings. For more information, see or Choosing
the Recorder on page 14 or Changing Recorder Settings on page 15.
To record your disc:
3 Click the red Record button.
4 When prompted, insert a disc into the currently selected recorder.
Toast displays a progress bar as it burns your data to disc.
If you have selected the verification option, Toast checks the contents
of the disc against the original data to ensure that recording was
successful.
43
Data
Page 54

Page 55

Using Additional Data
Features
In this chapter
Choosing Which Mac OS Can Read Your Disc 46
45
Compressing a Mac OS Only Data Disc 46
Encrypting a Mac Only Data Disc 47
Copying a Data Disc 48
Scheduling Automatic Backups 48
Making Advanced Data Discs 49
Page 56

Toast 6 Titanium Getting Started Guide
46
Chapter 6: Using Additional Data Features
Choosing Which Mac OS Can Read Your Disc
When you are making a data disc, you can determine whether the data disc
is usable on ALL Macintosh computers or only Macintosh computers
running Mac OS 8.1 or later.
To choose which Macintosh operating systems can use your data disc:
1 Click the Disc Settings button (or the disc title).
The Disc Settings drawer opens.
2 In the Disc Settings drawer, click Advanced, then choose which
Macintosh operating systems can read this disc:
Data
■
If you want the final disc to be usable only on a Macintosh with
Mac OS 8.1 or later installed, leave HFS Standard unchecked.
■
If you want the final data disc to be usable on ANY Macintosh,
select the HFS Standard check box.
You are now ready to continue adding files to your data disc.
Compressing a Mac OS Only Data Disc
If you are planning to record a Mac Only data disc, you can compress the
contents of the disc during recording. Depending on the type of files you
are recording to disc, Toast can fit up to fifty percent more data on the disc.
To compress a Mac Only data disc:
1 In the Data tab, click the Disc Settings button (or the disc title).
The Disc Settings drawer opens.
2 In the Disc Settings drawer, select the Compressed check box.
You are now ready to continue adding files to your data disc. Once you
record your project to disc, it will be compressed. (Toast does not have
to be installed on the machine in order to compress the disc.)
To use a compressed disc after compression:
1 Insert the disc into a drive.
2 When the disc icon appears on the desktop, double-click it.
Page 57

Toast 6 Titanium Getting Started Guide
Encrypting a Mac Only Data Disc
The disc opens into a folder, which contains the compressed file
containing the contents of the disc.
3 Double-click the compressed file.
The file will de-compress and you will be able to view the contents.
Encrypting a Mac Only Data Disc
If you are planning to record a Mac Only data disc, you can encrypt your
data with 128-bit encryption and protect it with a password.
Toast does not have to be installed on the Macintosh where you view the
contents of the disc, but inserting the disc into that computer will prompt
you for a password.
To encrypt a Mac Only data disc:
1 Set up your data disc.
2 In the Data tab, click the Disc Settings button (or the disc title).
47
Data
The Disc Settings drawer opens.
3 In the Disc Settings drawer, select the Encrypted check box.
4 Click the red Record button.
The New Passphrase dialog appears, asking you to enter a password.
5 Enter a password, verify it, and click OK.
Warning Keep your password in a safe place. If you forget your
password, there will be no way to access the data on the disc.
6 When prompted, insert a disc into the currently selected recorder.
Toast displays a progress bar as it burns your encrypted data to disc.
If you have selected the verification option, Toast checks the contents
of the disc against the original data to ensure that recording was
successful.
To use an encrypted disc after encryption:
1 Insert the encrypted disc into the drive.
Page 58

Toast 6 Titanium Getting Started Guide
48
Chapter 6: Using Additional Data Features
2 When the disc icon appears on the desktop, double-click it.
The disc opens into a folder, which contains the encrypted file
containing the contents of the disc.
3 Double-click the encrypted file.
Mac OS will prompt you for the password.
4 Enter the correct password.
The file will de-crypt and you will be able to view the contents.
Copying a Data Disc
Data
You can copy a data disc in much the same way as you would copy any
other type of disc. For more information, see Overview of Copying a Disc
on page 110.
Scheduling Automatic Backups
Déjà Vu is third-party software that lets you perform scheduled or manual
backups of important folders using Toast.
To install Déjà Vu:
Déjà Vu is automatically installed when you install Toast and run it for the
first time.
To run Déjà Vu:
1 Go to Macintosh System Preferences.
2 Under the Other portion of System Preferences, click the Déjà Vu icon.
3 For more information, click the Help button in the Déjà Vu window.
Page 59

Toast 6 Titanium Getting Started Guide
Making Advanced Data Discs
The Disc Settings drawer for the Data tab contains advanced features that
allow you to make these additional kinds of discs:
■
UDF. Make a DVD-Video from a VIDEO_TS folder, or a data CD or
DVD usable on computers with UDF reader software.
■
ISO 9660 discs. Make a data disc that is usable on multiple operating
systems, including Windows, Macintosh, UNIX, Linux, and DOS.
■
Custom Hybrid. Make a data disc that is usable on both Macintosh and
Windows computers. Macintosh data will be visible to Macintosh users
but not to Windows users, and vice versa. This also allows Macintosh
users to see the normal icons and window positions for the data while
maintaining complete compatibility with Windows systems.
■
Mac Volume. Record the entire contents of a local HFS Standard or
HFS+ volume or partition to a disc.
Making Advanced Data Discs
49
Data
For more information on these features, launch Toast Help, click the List of
Topics link, and browse to the topic.
Page 60

Page 61

7
8
9
Audio
Making Audio CDs 53
Making MP3 Discs 63
Using Additional Audio Features 71
Page 62

Page 63

Making Audio CDs
In this chapter
What Is an Audio CD? 54
53
Choosing Audio CD Media 54
Overview of Making an Audio CD 55
Starting a New Audio CD 55
Choosing the Audio CD Format 56
Adding Files to Your Audio CD 56
Working with Files in an Audio CD 58
Recording an Audio CD 62
Page 64

Toast 6 Titanium Getting Started Guide
54
Chapter 7: Making Audio CDs
What Is an Audio CD?
An audio CD is a CD that contains audio tracks and is playable by CD
players, some MP3 disc players, computers, and even some DVD players.
You can add most kinds of audio files to an audio CD—Toast automatically
converts them to CD tracks during recording.
Why Should You Choose an Audio CD Over an MP3 Disc?
Choose the audio CD format in any of these conditions:
■
You have an audio CD player
■
You want the best sound quality and audio range for your recording
■
You want full control over the exact arrangement of your audio tracks
■
You want to make a professional-quality “Redbook” audio CD
Supported File Formats
You can use any audio file format that is also recognized by QuickTime®.
See www.apple.com/quicktime
If needed, Toast will automatically convert audio files to make an audio
Audio
CD.
Making MP3 Discs
For information about making MP3 discs, see Overview of Making an MP3
Disc on page 65.
Choosing Audio CD Media
For information about media types, see Choosing the Kind of Media to Use
on page 11.
Page 65

Toast 6 Titanium Getting Started Guide
Overview of Making an Audio CD
Overview of Making an Audio CD
1 Start an audio disc. Click the Audio tab to begin setting up your audio
disc.
Choose the Audio CD format. In the Disc Settings drawer, make sure to
2
select Audio CD.
Add audio files to your audio CD. You can add almost any kind of
3
audio file to the Audio content area.
4
Record your audio CD. When you are finished adding and organizing
your audio files, you can record your audio CD.
Starting a New Audio CD
To start a new Audio CD:
■
Click the Audio tab.
The Audio content area displays.
55
Audio content
area (with audio
CD format
shown)
Audio
Page 66

Toast 6 Titanium Getting Started Guide
56
Chapter 7: Making Audio CDs
Choosing the Audio CD Format
To choose an audio CD:
1 In the Audio tab, click the Disc Settings button (or the disc title).
The Disc Settings drawer opens.
2 To choose an audio CD, select the Audio CD option.
Turning on CD-TEXT
CD-TEXT is a feature that allows you to store text information like the disc
title, artist name, and track titles on an audio CD. This information can
then be displayed on consumer electronic devices that support CD-TEXT
information.
You can enable the feature on your disc if your recorder supports CDTEXT and you record your disc in Disc-at-Once mode. For more
information, see Changing Recorder Settings on page 15.
To enable or disable CD-TEXT:
1 In the Audio tab, click the Disc Settings button (or the disc title).
Audio
The Disc Settings drawer opens.
2 To turn on CD-TEXT, select the CD-TEXT check box.
Changing Advanced Audio Disc Settings
For a complete list of advanced audio tasks available from the Audio Disc
Settings drawer, see Making Advanced Audio Discs on page 75.
Adding Files to Your Audio CD
You can add audio files to an audio CD in any of these ways:
■
By dragging or adding from the hard disk
■
By adding directly from an existing audio CD
■
By dragging directly from iTunes®
Page 67

Adding Audio Files from the Hard Disk
You can add audio files to your audio CD in any of these ways:
■
With the Audio tab selected, drag audio files from any location on your
hard disk to the Audio content area.
■
With the Audio tab selected, click the Add button. The Open dialog
appears, where you can browse your hard disk for audio files. Select the
files and folders you want to add, then click Open.
Adding Audio Files from an Audio CD
You can add files to an audio CD from any existing audio CD.
Note If you have only one drive connected to your computer, you
must export the audio tracks to your hard disk before you can
build an audio disc from them. For more information, see
Exporting Audio from an Audio CD on page 72.
Toast 6 Titanium Getting Started Guide
Adding Files to Your Audio CD
57
To create an audio CD from a source disc:
1 Insert the source audio CD into the source drive.
2 You can add tracks in these ways:
■
On your desktop, double-click the icon of the source CD to open
its contents. Select and drag the audio tracks from the window to
the Audio content area.
■
On the Toast window, click the Add button.
A dialog appears, where you can browse your hard disk for audio
files. Navigate to the audio CD and select the audio tracks you
want to add. When you are finished, click Open.
The tracks you added from the CD appear in Toast.
Audio
Page 68

Toast 6 Titanium Getting Started Guide
58
Chapter 7: Making Audio CDs
Adding Audio Files from iTunes
To add audio files from iTunes:
1 Make sure the Audio tab is displayed in Toast.
2 In any iTunes view, select the audio files you want to add to Toast.
3 Drag the selected audio files from iTunes into the Audio content area
in Toast.
Toast adds the audio files to the Audio content area. After you begin
recording the final disc, Toast automatically converts audio files to
AIFF where necessary.
Working with Files in an Audio CD
You can work with your audio files in any of these ways:
■
By rearranging audio tracks
■
By previewing them
■
Entering track information automatically
■
Removing them
Audio
■
Viewing or editing information about them
■
Changing the pause between tracks
Rearranging Audio Tracks in an Audio CD
You can rearrange the order of audio files on an audio CD disc.
To rearrange audio tracks:
1 Select the audio files you want to rearrange.
2 Drag the audio files to a new position in the track list. (A black bar
between audio tracks in the track list indicates where the new
placement of the audio files will be.)
Page 69

Toast 6 Titanium Getting Started Guide
Working with Files in an Audio CD
Previewing Audio Files
You can preview audio tracks in any of these ways:
■
Click to the left of the title of a track to preview it.
Play Icon
■
Use the Player Controls.
Using the Player Controls:
The Play Controls allow you to play, stop, or pause any audio file, as well as
go back and forth through the audio files in the Audio content area.
Track Number
59
Track Tim e
Play/Pause
Previous Track
Next Track
Stop
Entering Track Information for an Audio CD
Automatically
You can attempt to automatically enter album, track, and artist names for
audio tracks by having Toast search an online track naming database. If the
search is successful, Toast automatically adds the information about the
disc.
To enter titles of source discs and tracks:
1 Click the Audio tab to display the Audio content area.
2 Insert the audio CD into the drive.
3 Drag the disc icon into the Audio content area.
Audio
Page 70

Toast 6 Titanium Getting Started Guide
60
Chapter 7: Making Audio CDs
If the CD does not have a name, Toast prompts you to identify it. To
have Toast search for album, artist, and track information, click
Internet to search for the database.
4 If you have an Internet connection, Toast connects to the online
database. If the search is successful, Toast adds the information to the
Audio content area and the database it shares with iTunes®.
Removing Audio Files
When you remove audio files from the content area, Toast does not remove
the original files from the hard disk.
To remove audio files from the Audio content area:
1 Select the audio files you want to remove.
2 You can remove audio files in any of these ways:
■
Click the Remove button.
■
Press Delete.
■
Choose Edit > Clear.
Audio
Toast removes the selected audio files from the Audio content area.
Viewing or Editing Information for an Audio CD (or
Tracks)
To view or edit information for an audio CD:
1 You can view or edit information of an audio CD in any of these ways:
■
Double-click the name of the audio CD.
■
Select the track in the Audio content area, then choose Disc > Get
Tra c k Inf o .
The Audio Info dialog appears.
2 In the Disc tab, you can edit Title and Artist information.
3 When you are finished, click OK.
Page 71

Toast 6 Titanium Getting Started Guide
Working with Files in an Audio CD
To view or edit information for an audio CD track:
■
Select a track in the track list, wait a moment for its highlight color
to change, and type a new title.
■
Double-click the name of the audio CD (or choose Disc > Get
Tra c k Inf o ).
The Audio Info dialog appears. In the Disc tab, you can enter Title
and Artist information. When you are finished, click OK.
Changing the Pause Between Tracks
For an audio CD, Toast automatically inserts a 2-second pause between
tracks. If you drag an audio CD into the Audio content area, Toast retains
the pauses.
Note The pause before the first track must be exactly two seconds.
61
To change the pause between tracks:
1 Select the tracks that you want to change the pause for.
2 Click the Pause column.
A pop-up menu appears, displaying possible pause settings.
3 From the pop-up menu, choose the pause that you want to apply to the
selected tracks.
Audio
Page 72

Toast 6 Titanium Getting Started Guide
62
Chapter 7: Making Audio CDs
Recording an Audio CD
When you have finished organizing your audio files in the Audio content
area, you are ready to record your audio CD.
Note Before recording, you can select a different recorder or
change recorder settings. For more information, see or Choosing
the Recorder on page 14 or Changing Recorder Settings on page 15.
To record your disc:
1 Click the red Record button.
2 When prompted, insert a disc into the currently selected recorder.
Toast displays a progress bar as it records your audio CD.
Audio
Page 73

Making MP3 Discs
In this chapter
What Is an MP3 Disc? 64
63
Choosing MP3 Disc Media 64
Overview of Making an MP3 Disc 65
Starting a New MP3 Disc 65
Choosing the MP3 Disc Format 66
Adding MP3 Files or Folders to Your MP3 Disc 66
Working with MP3 Files in an MP3 Disc 68
Recording Your MP3 Disc 70
Page 74

Toast 6 Titanium Getting Started Guide
64
Chapter 8: Making MP3 Discs
What Is an MP3 Disc?
An MP3 disc is a CD or DVD that contains audio files in the MP3 file
format and is playable by MP3 disc players, computers, and some DVD
players. You should only use MP3 files to build an MP3 disc.
MP3 files are compressed and take up far less space than audio tracks on an
audio CD, which tend to be approximately ten times larger than an
equivalent MP3. Although this high compression somewhat limits the
quality and audio range of an MP3 file compared to an audio CD track, the
difference is hardly noticeable.
Why Should You Choose an MP3 Disc Over an Audio CD?
Choose the MP3 disc format in any of these conditions:
■
You want to put a large amount of audio on one disc—approximately
ten times the amount of audio that a regular audio CD can hold
■
You want your audio files to be as small as possible
■
You want to group your tracks in folders for organization (for example,
a folder for each album on the disc)
Audio
Supported File Formats
An MP3 disc can only contain MP3 files. Use iTunes® to encode your audio
in MP3 format.
Making Audio CDs
For information about making audio CDs, see Overview of Making an
Audio CD on page 55.
Choosing MP3 Disc Media
For information about media types, see Choosing the Kind of Media to Use
on page 11.
Page 75

Toast 6 Titanium Getting Started Guide
Overview of Making an MP3 Disc
1 Start a new MP3 disc. Click the Audio tab to begin setting up your
audio disc.
Choose the MP3 Disc format. In the Disc Settings drawer, select MP3
2
Disc. Make sure you have selected MP3 disc.
Add MP3 files to Toast. Add MP3 files to the Audio content area.
3
Record your MP3 disc. When you are finished adding and organizing
4
your MP3 files, you can record your project to disc.
Starting a New MP3 Disc
To start a new MP3 disc:
■
Click the Audio tab.
The Audio content area displays.
Overview of Making an MP3 Disc
65
Audio content
area (with MP3
format shown)
Audio
Page 76

Toast 6 Titanium Getting Started Guide
66
Chapter 8: Making MP3 Discs
Choosing the MP3 Disc Format
To choose an MP3 disc:
1 In the Audio tab, click the Disc Settings button (or the disc title).
The Disc Settings drawer opens.
To choose an MP3 disc, select MP3 Disc.
Changing Advanced Data Disc Settings
For a complete list of advanced data tasks available from the Data Disc
Settings drawer, see Making Advanced Data Discs on page 49.
Adding MP3 Files or Folders to Your MP3 Disc
You can add MP3 files to your MP3 disc in any of these ways:
■
By dragging or adding from the hard disk
■
By adding directly from a data disc or an existing MP3 disc
■
By dragging directly from iTunes®
Audio
Adding MP3 Files or Folders from the Hard Disk
You can add MP3 files from the hard disk in any of these ways:
■
With the Audio tab selected, drag MP3 files or folders from any
location on your hard disk to the Audio content area.
■
With the Audio tab selected, click the Add button. The Open dialog
appears, where you can browse your hard disk for MP3 files. Select the
files and folders you want to add, then click Open.
Adding MP3 Files from a Data Disc or Existing Disc
You can add MP3 files to an MP3 disc from any existing disc.
Page 77

Note If you have only one recorder connected to your computer,
you should copy the MP3 files to your hard disk (by dragging them
or to the desktop), then add them to Toast from the hard disk. For
more information, see Adding Files or Folders to a Data Disc on
page 40.
To create an MP3 disc from a source disc:
1 Insert the source disc into the source drive.
2 You can add MP3 files in these ways:
■
On your desktop, double-click the icon of the source disc to open
its contents. Select and drag MP3 files from the window to the
Audio content area.
■
In the Toast window, click the Add button.
A dialog appears, where you can browse your hard disk for MP3
files. Navigate to the source disc and select the MP3 files you want
to add. When you are finished, click Open.
Toast 6 Titanium Getting Started Guide
Adding MP3 Files or Folders to Your MP3 Disc
67
Audio
The MP3 files you added from the disc appear in Toast.
Adding MP3 Files from iTunes
To add MP3 files from iTunes:
1 Make sure the Audio tab is displayed in Toast.
2 In any iTunes view, select the MP3 files you want to add to Toast.
3 Drag the selected MP3 files from iTunes into the Audio content area in
To a s t .
Page 78

Toast 6 Titanium Getting Started Guide
68
Chapter 8: Making MP3 Discs
Working with MP3 Files in an MP3 Disc
Once you have added MP3 files or folders to the Data content area, you can
organize them in different ways:
■
Creating a new folder
■
Organizing files or folders
■
Renaming a file or folder
■
Removing files or folders
Creating a New Folder for Your MP3 Disc
You can create and organize folders in an MP3 disc just as you would do on
your hard disk. You might do this, for example, to organize MP3 files into
one folder per album. (This does not add any folders on your hard disk.)
To create a folder in an MP3 disc:
1 In the Audio content area, select the folder you want to add a new
folder under.
2 Do one of the following:
Audio
■
To create one new folder, click the New Folder button.
A new folder appears in the Audio content area under the currently
selected folder.
■
To create more than one folder, create folders on the hard disk and
add them to the Audio content area as described in Adding MP3
Files or Folders from the Hard Disk on page 66.
Organizing Files or Folders in an MP3 Disc
You can organize files or folders in an MP3 disc just as you would do with
files and folders on the hard disk. You mi g h t d o t h i s , fo r exa m p l e , to
organize MP3 files into one folder per album. (This does not add any
folders on your hard disk.)
To organize files or folders:
■
Drag and drop selected files or folders into a folder to add them to that
folder.
Page 79

Toast 6 Titanium Getting Started Guide
Working with MP3 Files in an MP3 Disc
Renaming an MP3 File, Folder, or Disc
To rename a file, folder, or disc in an MP3 disc:
1 Click the item briefly.
After a moment, the item will become selected.
2 Type a new name for the item.
3 To go to the next item for renaming, press Tab.
To rename the item, press Enter.
Removing MP3 Files or Folders
You can remove MP3 files or folders from the Audio content area. (This
does not remove the original MP3 files or folders on your hard disk or
from the iTunes® Library.)
To remove files or folders from an MP3 disc:
1 Select the MP3 files or folders you want to remove.
69
2 You can remove files or folders in any of these ways:
■
Click the Remove button.
■
Press the Delete key.
■
Choose Edit > Clear.
Toast removes the files or folders from the Data content area.
Audio
Page 80

Toast 6 Titanium Getting Started Guide
70
Chapter 8: Making MP3 Discs
Recording Your MP3 Disc
When you have finished organizing your audio files in the Audio content
area, you are ready to record them to a recordable CD or DVD.
Note Before recording, you can select a different recorder or
change recorder settings. For more information, see or Choosing
the Recorder on page 14 or Changing Recorder Settings on page 15.
To record your MP3 disc:
1 Click the red Record button.
2 When prompted, insert a disc into the currently selected recorder.
Toast displays a progress bar as it records your MP3 disc.
Audio
Page 81

Using Additional Audio
Features
In this chapter
Exporting Audio from Different Sources 72
71
Copying Audio Discs 74
Digitizing Your LPs or Cassettes 74
Making Advanced Audio Discs 75
Page 82

Toast 6 Titanium Getting Started Guide
72
Chapter 9: Using Additional Audio Features
Exporting Audio from Different Sources
Toast lets you export audio from any of these sources and then save it to
your hard disk as an AIFF file:
■
Audio CD
■
iTunes®
■
Any QuickTime® video file
Exporting Audio from an Audio CD
You can export an audio track from an audio CD and save it directly to
your hard disk as an AIFF file. You might want to do this in any of these
situations:
■
You want to make an audio CD that combines different types of files
from different sources
■
You want to use the audio file in another application and keep a copy
on your hard disk
■
You have only one drive connected to your computer
Audio
To export audio tracks to your hard disk:
1 With the Audio tab displayed, insert the audio CD into a drive.
2 When the disc icon appears on the desktop, do one of the following:
■
To export all audio files from the disc, drag the disc icon into the
Audio content area.
The entire contents of the disc appear in the Audio content area.
■
To export selected audio tracks, double-click the disc icon to open
it. In the window, select all the files you want to export, and drag
them to the Audio content area.
The files you selected appear in the Audio content area.
3 Click the Export button (or choose Disc > Export Audio).
The Save As dialog appears, with the name of the first selected file
displayed in the Save As field.
Page 83

Toast 6 Titanium Getting Started Guide
Exporting Audio from Different Sources
4 In the Save As field, you can optionally enter a new name for the first
audio file you are exporting. (Only the first file exported to your hard
disk will have a new name.)
5 From the Where pop-up menu, choose the location on your hard disk
where you want to export the files to.
Exporting Audio from iTunes
You can export audio files from iTunes® to any location on your hard disk.
Toast automatically converts the audio files to AIFF.
To export audio from iTunes to Toast:
1 In the Toast Audio tab, click the Disc Settings button (or the disc title).
The Disc Settings drawer opens.
2 In the Disc Settings drawer, select the Audio CD option.
3 In iTunes, select the audio files you want to export, and drag them to
To a s t .
73
Toast automatically converts audio files to AIFF where necessary.
4 Click the Export button (or choose Disc > Export Audio).
The Save As dialog appears, with the name of the first selected file
displayed in the Save As field.
5 In the Save As field, you can optionally enter a new name for the first
audio file you are exporting. (Only the first file exported to your hard
disk will have a new name.)
6 From the Where pop-up menu, choose the location on your hard disk
where you want to export the files to.
Exporting Audio from a QuickTime Video File
You can export the audio portion from any QuickTime video file to any
location on your hard disk. Toast automatically converts the audio files to
AIFF.
To export audio from a QuickTime video file:
1 In the Toast Audio tab, click the Disc Settings button (or the disc title).
Audio
Page 84

Toast 6 Titanium Getting Started Guide
74
Chapter 9: Using Additional Audio Features
The Disc Settings drawer opens.
2 In the Disc Settings drawer, select the Audio CD option.
3 Drag a QuickTime video file to the Audio content area.
Toast automatically extracts the audio portion from the QuickTime
video file, and converts it to AIFF.
4 Click the Export button (or choose Disc > Export Audio).
The Save As dialog appears, with the name of the first selected file
displayed in the Save As field.
5 In the Save As field, you can optionally enter a new name for the first
audio file you are exporting. (Only the first file exported to your hard
disk will have a new name.)
6 From the Where pop-up menu, choose the location on your hard disk
where you want to export the file(s) to.
Copying Audio Discs
You can copy an audio disc in the same way as you copy any other singlesession disc. For more information, see Overview of Copying a Disc on
Audio
page 110.
Digitizing Your LPs or Cassettes
CD Spin Doctor 2 is software that helps you digitize audio from LPs or
cassettes. It is installed automatically when you install Toast.
Once you have imported audio into CD Spin Doctor from a turntable or
cassette deck, you can work with your audio in just some of these ways:
■
By defining tracks
■
By reducing noise and enhancing sound quality
■
By send your tracks directly to Toast for recording to disc
■
By saving your tracks to the hard disk
To launch CD Spin Doctor:
■
Double-click the CD Spin Doctor icon.
Page 85

Toast 6 Titanium Getting Started Guide
To get full-text search help:
■
In CD Spin Doctor, choose Help > CD Spin Doctor Help.
Making Advanced Audio Discs
The Disc Settings drawer for the Audio tab contains features that allow you
to make these types of discs:
■
Enhanced Audio CD. Make an audio CD that contains audio tracks and
enhanced content such as photos or videos. The audio portion of the
CD is playable in a CD player, and the enhanced content is playable on
a Macintosh or Windows computer.
■
Mixed Mode CD. Make a CD that combines data and audio in a single
session.
For more information on these features, launch Toast Help, click the List of
Topics link, and browse to the topic.
Making Advanced Audio Discs
75
Audio
Page 86

Page 87

10
11
12
Video/Photo
Making Video Discs 79
Importing Video from a DV Camcorder (Plug &
Burn) 95
Using Additional Video Features 103
Page 88

Page 89

7 Making Video Discs
In this chapter
What Is a Video Disc? 80
79
Choosing Video Disc Media 80
Understanding Menus and Buttons 80
Overview of Making a Video Disc 81
Starting a Video Disc 82
Changing Video Disc Settings 82
Adding Video or Slideshows to a Video Disc 84
Editing a Video File in the Video Content Area 88
Editing a Slideshow in the Video Content Area 90
Working with Content in a Video Disc 92
Recording a Video Disc 93
Page 90

Toast 6 Titanium Getting Started Guide
80
Chapter 10: Making Video Discs
What Is a Video Disc?
A video disc is a CD or DVD that contains videos or photo slideshows and
is playable on a DVD player or computer.
Supported Video and Photo File Formats
You can use any video file or photo file format that is also recognized by
QuickTime®. See www.apple.com/quicktime
Toast will automatically convert files where appropriate at recording time.
Choosing Video Disc Media
For information about media types, see Choosing the Kind of Media to Use
on page 11.
Understanding Menus and Buttons
The video discs you make with Toast will have menus that contain buttons
similar to the menus and buttons in a commercially-produced DVD. Your
final disc allows you to navigate through menus and select buttons to play
videos or slideshows.
Video/Photo
Creating Menus in Toast
Toast will create menus automatically (which appear on the final disc)
when you add video or slideshows.
How do I turn off menus in Toast?
For more information, see Turning Video Menus On or Off on page 104.
Creating Buttons in Toast
Each video file or photo slideshow you add to a video disc in Toast appears
as a button on a menu.
How Many Buttons Can a Menu Hold?
A menu can hold up to three buttons. Each button links to video or a
slideshow. Each time you fill a menu with more than three buttons, Toast
automatically creates a new menu and adds the next button to that.
Page 91

Toast 6 Titanium Getting Started Guide
Overview of Making a Video Disc
Making a video disc involves these steps:
1 Start a new video disc. Click the Video tab to begin setting up your
video disc.
Change the settings of your video disc (optional). You can change
2
settings for your video disc, or you can leave your last settings
untouched—Toast remembers the last settings you used. An important
setting is whether to make a Video CD, Super Video CD, or DVD.
3
Add content to your video disc. You can combine video and photo
content on your video disc, or import directly from your DV
camcorder.
4
Record your video disc. When you are finished, you can record your
video or photo slideshows to disc.
Overview of Making a Video Disc
81
Video/Photo
Page 92

Toast 6 Titanium Getting Started Guide
82
Chapter 10: Making Video Discs
Starting a Video Disc
To start a new video disc:
■
Click the Video tab.
The Video content area displays.
Video/Photo
Changing Video Disc Settings
You can change different settings for your video disc. The important
settings to change are the type of disc, video standard, and type of
encoding.
To change video disc settings:
1 In the Video tab, click the Disc Settings button (or the disc title).
The Disc Settings drawer opens.
2 You can select the format of disc you want to record:
■
VCD (Video CD): CD-Recordable disc in the VCD format, which
can be played in most newer-model DVD players. A VCD holds
approximately 60 minutes of video and results in lower video
quality than the SVCD, and DVD formats.
Page 93

■
SVCD (Super Video CD): CD-Recordable disc in the SVCD
format, which can be played in many newer-model DVD players.
An SVCD holds approximately 15-20 minutes of video and results
in higher video quality than the VCD format, but is not as good as
the video quality in the DVD format.
Note While VCD and SVCD discs can be played by most newer
DVD players, many older DVD players will be unable to play these
types of discs.
■
DVD: DVD-Recordable disc, which can be played on almost any
DVD player. A DVD holds over 60 minutes of video and has the
highest video quality.
3 Select the type of video standard for the disc:
■
NTSC. Select this option if you want your disc recorded in the
NTSC video standard, compatible with televisions in North
America, Japan, and parts of South America and Asia.
Toast 6 Titanium Getting Started Guide
Changing Video Disc Settings
83
■
PAL. Select this option if you want your disc recorded in the PAL
video standard, compatible with televisions in much of Europe
and Asia, and parts of South America.
4 From the Video Quality pop-up menu, select the type of video
encoding Toast uses to record your disc:
■
Standard. This type of encoding takes less time to encode, but the
quality is generally not as good as the High option. You might
choose this option if faster encoding speed is more important to
you than the video quality.
■
High. This type of encoding takes more time to encode, and the
quality is generally better than the Standard option. You might
choose this option if video quality is more important to you than a
faster encoding speed.
Video/Photo
Page 94

Toast 6 Titanium Getting Started Guide
84
Chapter 10: Making Video Discs
Note Regardless of which Video Quality setting you choose, Toast
automatically adjusts the encoding rate to use all available space on
a disc. Putting less content on a disc will provide better quality
than more content. This has no effect on recording time.
Including Photo Originals on a Video Disc
If you are making a video disc that contains slideshows, Toast can include
the original full-quality photos used by the slideshows in a separate folder
on the disc. This folder will be accessible when you use the disc on a
computer.
To include photo originals on a video disc:
1 In the Video tab, click the Disc Settings button.
The Disc Settings drawer opens.
2 In the Disc Settings drawer, select the Add Original Photos check box.
Video/Photo
Adding Video or Slideshows to a Video Disc
You can combine video or slideshows on a video disc in any of these ways:
■
By dragging or adding video from the hard disk
■
By importing video from a DV camcorder
■
By adding an iMovie™
■
By dragging or adding photos from the hard disk
■
By adding photos from iPhoto™
Each video or group of photos you add appears as its own row in the Video
content area, and each row will be its own button on the finished disc. You
can also add photos to an existing slideshow. For more information, see
Understanding Menus and Buttons on page 80.
Page 95
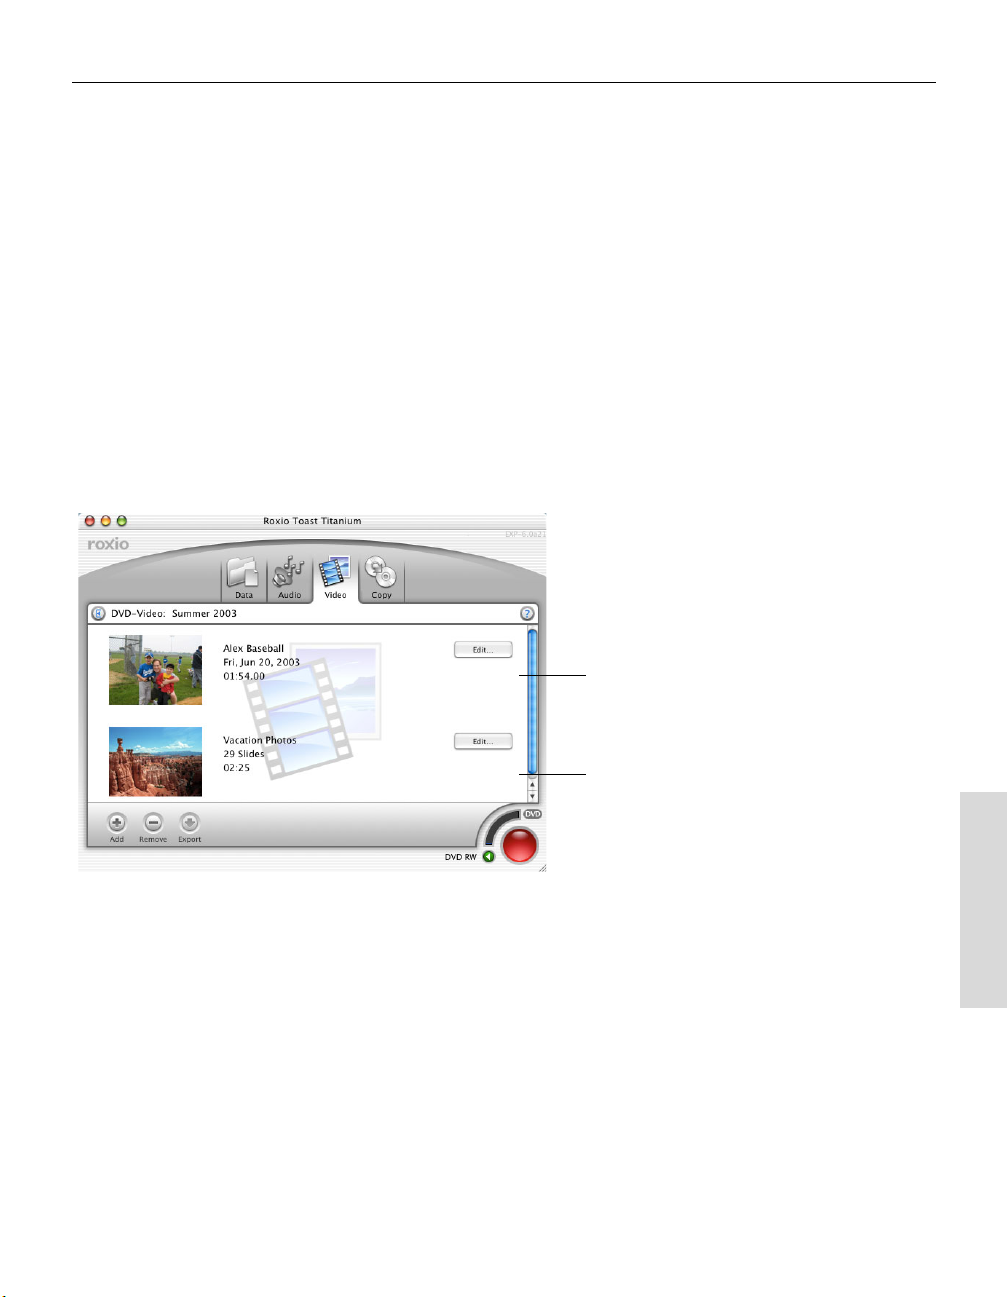
Toast 6 Titanium Getting Started Guide
Adding Video or Slideshows to a Video Disc
Adding Video from the Hard Disk
You can add video from the hard disk in any of these ways:
■
With the Video tab selected, drag video files from any location on your
hard disk to the Video content area.
■
With the Video tab selected, click the Add button. The Open dialog
appears, where you can browse your hard disk for video files. Select the
files you want to add, then click Open.
Each video file you add appears as its own row in the Video content area,
with each row appearing as a button on the menu on the finished disc. For
information about how this will look on your TV in your final video disc,
see Understanding Menus and Buttons on page 80.
85
Video
Slideshow
Importing Video from a DV Camcorder (Plug & Burn)
Plug & Burn™ helps you easily import video from a DV camcorder into
Toast. For more information on using Plug & Burn, see What Is Plug &
Burn? on page 96.
Adding an iMovie Project to Toast
To add an iMovie project to Toast:
1 Save your iMovie™ project.
2 Open the folder containing your iMovie project.
Video/Photo
Page 96

Toast 6 Titanium Getting Started Guide
86
Chapter 10: Making Video Discs
3 Drag and drop the iMovie reference file into Toast.
Toast adds the movie to the Video content area.
Note For more information, see the documentation provided
with these applications.
Adding Photos from the Hard Disk
You can add one or more photos to a video disc from the hard disk. When
adding photos, you can either make a new slideshow or add photos to an
existing slideshow.
You can add photos from the hard disk in any of these ways:
■
With the Video tab selected, drag one or more photos (or folders
containing them) from any location on your hard disk to the Video
content area.
■
With the Video tab selected, click the Add button. The Open dialog
appears, where you can browse your hard disk for folders containing
folders. Select the files you want to add, then click Open.
Video/Photo
Each slideshow appears as its own row in the Video content area, with each
row appearing as a button on the menu on the finished disc. For
information about how this will look on TV in your final video disc, see
Understanding Menus and Buttons on page 80.
Page 97

Adding Photos from iPhoto
To add photos from iPhoto to Toast:
1 Make sure the Video tab is displayed in Toast.
Toast 6 Titanium Getting Started Guide
Adding Video or Slideshows to a Video Disc
Video
Slideshow
87
2 In your iPhoto Library, select one or more photos you want to add to
To a s t .
3 You can add a new slideshow or add photos to an existing slideshow:
■
To add a separate slideshow to the Video content area, drag the
selected photos from iPhoto into an empty part of the Video
content area.
■
To add photos to an existing slideshow in the Video content area,
drag the selected photos from iPhoto into an existing slideshow
folder in the Video content area.
Toast adds the photos to Video content area. Once you record this disc,
each slideshow appears as a separate button in a menu on the finished
disc.
Video/Photo
Page 98

Toast 6 Titanium Getting Started Guide
88
Chapter 10: Making Video Discs
Editing a Video File in the Video Content Area
You can edit a video file in these ways:
■
By trimming the video so Toast includes only the portions you want
recorded to your final disc
■
By setting the picture of the menu button for this video
Trimming Video
You can trim a video file to determine which portion of the video Toast
records to disc. This does not affect the original video file on your hard
disk.
Note Some video cannot be trimmed.
To trim video:
Video/Photo
1 In the Video content area, select the video file you want to trim, and
click Edit.
The Edit sheet appears.
2 In the Edit sheet, click the Video tab.
3 In the Video Preview, use the controls to crop the video:
Playhead
Play button
Start marker
■
Drag the Playhead to preview the video.
■
Drag the Start marker to mark the beginning of the video.
Finish marker
The video to the left of the Start marker will not be included in the
final video disc.
■
Drag the Finish marker to mark the end of the video.
Page 99

Toast 6 Titanium Getting Started Guide
Editing a Video File in the Video Content Area
The video to the right of the Finish marker will not be included in
the final video disc.
89
Cropped video
(not recorded to
disc)
Video that Toast
will record to
disc
Cropped video
(not recorded to
disc)
Setting the Button Picture for a Video File
You can select a specific frame of a video file as the button picture that
appears in a menu when you view the disc on a TV.
To set the button picture:
1 In the Video content area, select the video file you want to edit, and
click Edit.
The Edit sheet appears.
2 In the Edit sheet, click the Video tab.
Video/Photo
Page 100

Toast 6 Titanium Getting Started Guide
90
Chapter 10: Making Video Discs
3 You can choose the frame of video you want to use as a button picture
in either of these ways:
■
In the video preview window, drag the Playhead back or forth to
preview the video until you find the video frame that you wish to
include.
■
Press the Play button to play through the video. When you find the
video frame you wish to include, click Pause.
4 Click the Set Button Picture button.
The video frame you selected appears in the Button Preview at the top
left of the Video tab.
Editing a Slideshow in the Video Content Area
You can edit a slideshow in any these ways:
■
By setting the picture of the menu button for this slideshow
Video/Photo
■
By setting how long a slide remains on screen before the transition to
the next one
■
By adding or removing photos from the slideshow
To set the button picture for a slideshow:
1 In the Video content area, select the Slideshow you want to edit and
click Edit.
The Edit sheet appears.
 Loading...