

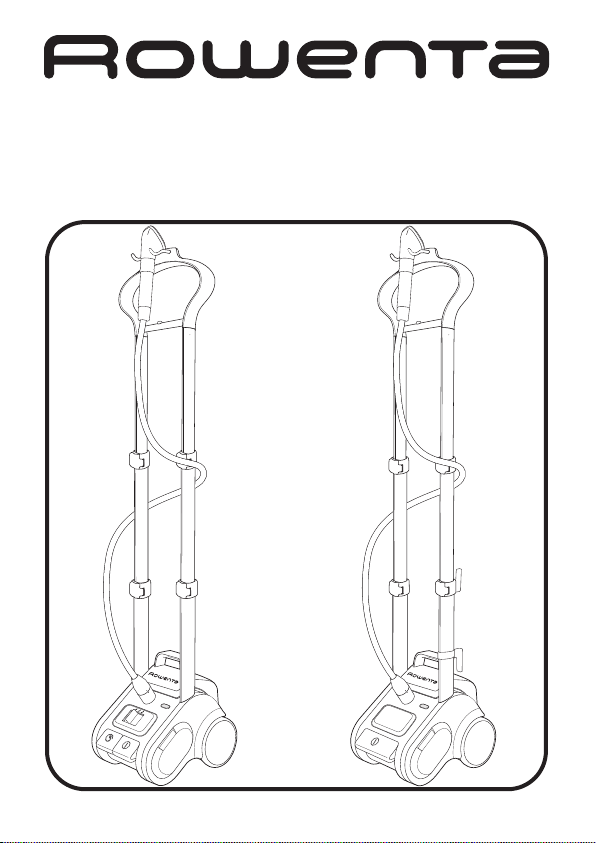
Page 1
GARMENT STEAMER IS9000
1103905164 - 39/08
www.rowentausa.com
Page 2
1
2
10
11
3
12
18
13
14
15
19
4
5
17
6
16
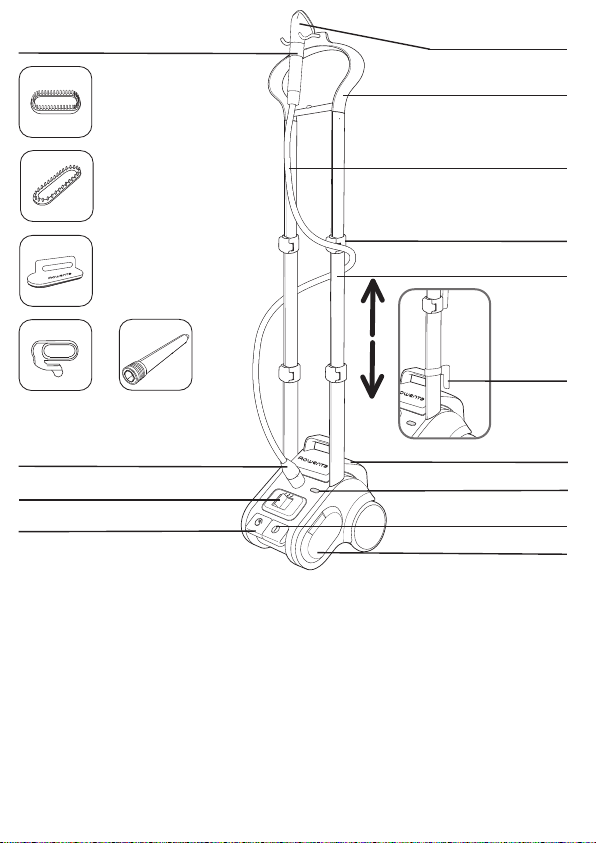
DESCRIPTION
1. Ha nd le
2. St ea m he ad
3. Fl ex ibl e hose
4. Ho se con ne cto r
5. Varia ble st eam co ntrol *
6. Foot operated cor d reel *
7. On/off foot operated switch
8. Re mo vab le wat er tan k
9. Do ub le tel esc op ic pol e
10 . In te gra te d ha ng er
*Depending on the model: these accessories are specific to certain models or available as an option.
11 . Fa br ic bru sh *
12 . Up ho lst er y br us h*
13 . Li nt pad *
14 . Cr ea se att ach me nt*
15 . Cu rt ain ro d ex te nsi on *
16. On board accessories
storage
17. Po we r in di cat or lig ht
18. Cl ip s fo r pole faste ni ng
19. Po we r co rd cli ps *
2
9
8
7
Page 3

IIMMPPOORRTTAANNTT SSAAFFEETTYY IINNSSTTRRUUCCTTIIOONNS
When using your appliance, basic precautions should always be followed, including the following:
S
RREEAADD AALLLL IINNSSTTRRUUCCTTIIOONNS
-To reduce the risk of contact with hot water emitting from steam
BBEEFFOORREE UUSSIINNG
vents, check appliance before each use by holding it away from body
and operating steam button.
-Use appliance for its intended use only.
-To reduce the risk of electric shock, do not immerse the appliance in
water or other liquids.
-Appliance should always be turned “OFF” before plugging or unplugging from outlet. Never yank the cord to disconnect from the outlet,
instead grasp plug and pull to disconnect.
-Do not allow cord to touch hot surfaces. Let appliance cool completely
before storing away. Loop cord loosely around appliance when storing
or rewind using the cord reel.
-Do not direct steam at people or animals, or use steamer on garments
while they are being worn.
-Always disconnect appliance from electrical outlet when filling with
water, emptying or when not in use.
-Do not operate appliance with a damaged cord or if the appliance has
been dropped or damaged. To avoid the risk of electrical shock, do not
disassemble or attempt to repair the appliance. Ship it to the nearest
authorized Rowenta approved service center for examination and
repair. Incorrect reassembly can cause risk of fire, injury and electrical
shock to persons when the appliance is in use.
-This appliance is not intended for use by or near children and other
persons whose physical, sensory or mental capabilities or lack of experience and knowledge prevents them from using the appliance safely
without supervision or instruction by a responsible person to ensure
that they can use the appliance safely.
-Children should be supervised by the responsible person to ensure
that they do not play with the appliance.
-Burns could occur from touching hot metal parts, hot water or steam.
Use care when you empty a steam appliance, there may be hot water
in the reservoir.
3
G
S
Page 4

-Never pour water directly into reservoir. Pour water in water tank only.
-Never drop or insert any object into any opening or hose.
-Always keep the hose and nozzle elevated above the water tank.
-Steam only in an up and down vertical motion. Never use steamer in
a horizontal position or tilt into a backward position, this may result in
hot water discharge.
-Do not place the steam nozzle directly on any surface or the appliance
power cord while it is hot or plugged in. Use the stand provided.
-When changing attachments, please be sure, the unit is off and no
steam is being released to avoid contact with hot water.
-Use caution when changing attachments, as they may contain hot
water from condensation. Ensure the attachments are cooled off to
avoid contact with hot water.
-The use of accessory attachments other than those provided by
Rowenta is not recommended and may result in fire, electric shock or
personal injury.
-This unit is for indoor use only.
SSPPEECCIIAALL IINNSSTTRRUUCCTTIIOONNS
-To avoid a circuit overload, do not operate another high wattage
appliance on the same circuit.
If an extension cord is absolutely necessary, a 15-ampere rated cord
should be used. Cords rated for less amperage may overheat. Care
should be taken to arrange the cord so that it cannot be pulled or tripped over.
SSAAVVEE TTHHEESSEE IINNSSTTRRUUCCTTIIOONNS
S
S
ENVIRONMENTAL PROTECTION FIRST!
Your appliance contains valuable materials which can be
recovered or recycled.
When disposing of it, take it to a collection point or an
approved service center.
4
Page 5

Assembly :
P
ole 1
Pole 2
Preparation:
• Place the base on the floor and remove
the water tank.
Install pole in main unit:
• Insert pole 1 and 2 according to the
diagram to the right, ensuring the marks
on the unit and the poles line up.
• Press pole firmly into place.
Locking the pole :
• With the poles inserted lay the base on
its side.
• Turn the 2 lockbars on the base of the
steamer 90° to secure the poles.
• Use a coin or similar object to turn the
lockbar.
• After the poles are locked, pick up the
unit and return to its use position.
Installing Integrated Hanger :
• Take the hanger with the brush hooks
facing to the front.
• Check for correct orientation with the
index marks matching.
• Insert both ends of the hanger into the
pole connection and press both ends
simultaneously into the pole until the
hanger properly engages.
• If it is required to dismantle the pole from
the main unit, tilt the appliance and
unlock the pole first.
• Then place the appliance back into it’s
upright position. Expand both poles to
the desired height by unlocking them.
Pulling them gently and locking them.
WARNING : unlock the four clips while
keeping integrated hanger in your hand.
• Dismantling of the hanger from the poles
by the customer is not foreseen.
Attaching Steam hose to main unit :
1) Insert hose plug into hose connector on
main unit.
2) Fix hose connector by pulling clamping
ring upwards.
1
2
Page 6

Filling the water tank
• The steamer is designed to be used
with TAP WATER . If the water in your
area is hard, Rowenta recommends
that you mix half tap water and half
distilled water, which reduces the
hardness; you may also use bottled
spring water or distilled water only.
IMPORTANT
Never use water that contains
additives (starch, perfume, aromatic
substances, softener, etc) in the
steamer. Additives such as these can
affect the properties of the steam and
lead to the formation of deposits.
• Ensure that the device is unplugged.
Remove the water tank from the base
of the appliance by pulling it
upwards. Unscrew the lid and fill the
tank.
The tank holds 128 ounces.
• After closing the lid, place the water
tank into place on the base of the
appliance.
Tips
• We recommend checking the garment care label for manufacturer
recommendations. We also recommend testing the garment on an
unobtrusive area such as an inner seam.
• Read the recommendations for the maintenance of the fabrics on the
labels of the clothing to be steamed.
• Test the strength of the colour of the fabric on an area of the garment
that is not visible (inside of a hem).
• Avoid contact between the steam head and silk or velvet.
• Certain garments are smoothed more easily on the reverse side.
• If you are using your steamer in a position close to the ground, raise
the hose frequently in order to avoid the formation of condensation.
You may hear a gurgling noise if the hose is obstructed in any way.
• Heavy fabrics may need to be steamed longer.
• Be careful at all times.
*Depending on the model: these accessories are specific to certain models or available as an option.
6
Page 7

Use
Warning: Never steam a garment while it
is being worn. The hose and steam head
may become hot during use.
This is perfectly normal. Be careful and
avoid any prolonged contact.
• Only operate the steamer on
clear of any materials which may obstruct
the base of the steamer (flat and horizontal
surface). Do not obstruct the orifices on the
lower part of the appliance.
• Depending on the model the steam
amount can be set to the desired level with
the variable steam control.*
• If necessary, expand the poles to the
desired height by unlocking them. Gently
pull the hanger with the hand and lock the
poles to the desired height with the other
hand. Take care not to jam the double
poles by pulling them asymetrically.
• Plug in the power cord and turn on the
power using the foot operated pedal. The
power light will illuminate. The steamer is
operating.
• The unit will produce steam in 60 seconds.
• Put garment onto the hanger head. Grasp
the steam head with the steam vents
pointing away from you. Start steaming by
touching material lightly with steaming
head and moving in an up/down vertical
motion. Beginning at the top of the
garment move in a downward direction.
Always steam in a vertical position.
• During use, the hose may make a gurgling
noise. This is normal and caused by
condensation. If you hear the gurgling
noise, hold the hose up to direct the
condensation back into the appliance.
the floor
Warning: Do not allow the steamer to
run dry.
Warning: Never use the steamer more
than 3 hours.
*Depending on the model: these accessories are specific to certain models or available as an option.
7
Page 8

Crease attachement*
• Gently push into place.
• Push on the handle to open out the
crease attachment .
• Place the garment between the crease
attachment and steam head.
• Release the handle.
• Starting at the top of the garment, move
the crease attachment in a downwards
motion.
• Once unit is unplugged and completely
cooled down, remove the crease
attachment by sliding it off of the steam
head.
The lint pad is a separate accessory and
cannot be attached to the steam head.
You can use the lint pad independently
from the steamer.
Lint pad*
The lint pad removes hair, lint and animal
fur for a professional finish.
• To use the lint pad, slowly brush the
clothing with the grain or nap of the
fabric.
•The pad can be cleaned by brushing it in
the opposite direction. We recommend
cleaning the pad on an old cloth that can
be discarded.
After use
• After using the steamer, switch the
power off (power indicator light will go
out) and unplug the appliance.
• Hang steam head in an upright position
on hanger head when not in use.
• Wrap the cord around the power cord
clips for storage.
or
*Depending on the model: these accessories are specific to certain models or available as an option.
8
Page 9

• Empty water tank before storage.
• Do not carry the steamer by the water tank
handle.
The unit is designed to transport with the
convenience of rolling luggage for easy
storage.
Warning: Never touch the steam head until it
has cooled down completely.
Cleaning
Clean the main unit with a damp cloth. To
maintain maximum performance, your
steamer must be descaled occasionally. The
time between two descaling operations
depends on the quality of the water and the
frequency with which you use the appliance.
The appliance must be descaled at least once
a year or after 100 hours of use.
To carry out a descaling operation, follow the
following steps:
1. Ensure that the appliance has cooled down
completely. Unplug the unit and remove the
steam hose from main unit. Collapse the
telescopic poles.
2. Fill the water tank with fresh water and
attach it to the main unit again.
3. Remove the tank from main unit and empty
the water from the boiler through the open
hose connector into a sink. Scale and other
residues will be rinsed out.
4. Repeat Step 2 and 3 several times until the
scale has been removed.
*Depending on the model: these accessories are specific to certain models or available as an option.
Page 10

Troubleshooting
PROBLEMS Possible causes Solutions
There is no steam. The appliance has not
The steam flow
is low.
Water runs
through the holes
of the steambrush.
The steamer
takes a long time
to heat.
If it is not possible to establish the cause of the problem, seek the assistance of an
Approved ROWENTA Service Center www.rowentausa.com
been turned on.
The hose has been
obstructed.
There is no water left. Turn off the appliance and refill the
Your steamer has a build-up
of scale because it has not
been rinsed out regularly.
There is no water left. Turn the appliance off and refill it.
There is condensation in
the hose.
Your steamer has a build-up
of scale because it has not
been descaled regularly.
Check that your appliance is properly
plugged in and press the On / Off
button (on the front of the appliance).
The power light should turn on.
Check that the hose is not bent or twisted.
water tank.
Descale the steamer at least once a
year or every 100 hours of use. If your
water is hard, increase the frequency.
Never use steamer in a horizontal
position. Hold the hose vertically
outstretched and wait for water to
flow back into the steamer.
Rinse out the steamer at least once
a year or every 100 hours of use. If your
water is hard, increase the frequency.
10
Page 11

In the interest of improving products, Rowenta reserves the
right to change specifications without prior notice.
LIMITED WARRANTY
This Rowenta product is warranted for 6 months from date of
purchase against defects in material and workmanship. During this
period, any Rowenta product that, upon inspection by Rowenta, is
proved defective, will be repaired or replaced, at Rowenta´s option,
without charge to the customer. If a replacement product is sent, it
will carry the remaining warranty of the original product. This
warranty does not apply to any defect arising from a buyer’s or user’s
misuse of the product, negligence, failure to follow Rowenta’s
instructions, use on current or voltage other than that stamped on the
product, or alteration or repair not authorized by Rowenta. Repair or
disassembly by anyone other than a Rowenta authorized service
center will void the warranty.
THE WARRANTIES SET FORTH HEREIN ARE EXCLUSIVE AND NO
OTHER WARRANTIES, EXPRESS OR IMPLIED, INCLUDING BUT NOT
LIMITED TO ANY WARRANTY OF MERCHANTABILITY OR FITNESS
FOR A PARTICULAR PURPOSE OR USE, ARE MADE BY ROWENTA OR
ARE AUTHORIZED TO BE MADE WITH RESPECT TO THE PRODUCT.
Some states do not allow limitations on how long an implied
warranty lasts or do not allow the exclusion of incidental or
consequential damages, so the above limitations may not apply to
you. This warranty gives you specific legal rights, and you may also
have other rights, which vary from state to state.
If you believe your product is defective, bring the product (or send it,
postage prepaid) along with proof of purchase to the nearest
authorized Rowenta Service Center (see below). If you send the
product, please include a letter explaining the nature of the claimed
defect.
11
Page 12

CORRESPONDENCE CAN BE SENT TO:
Groupe SEB USA
2121 Eden Road
Millville, NJ 08332, USA
Tel: 856-825-6300
www.rowentausa.com
OFFICE LOCATION ONLY. Letters will be accepted at this address and
packages without a return authorization number will be refused or
forwarded to a service center. For product service, see information
below.
SERVICE CENTER INFORMATION:
If your appliance needs service, ship the product to your nearest
regional service center. Be sure to put your name on the outside of the
shipping box (no P.O. boxes please), include a brief note describing the
issue, and include a copy of the sales receipt if the product is in
warranty. If in warranty, Rowenta will repair or replace the product at
their discretion. If the product is out of warranty, you will be advised of
the cost of repair before any work begins.
Turnpike Appliance
3495A Lawson Blvd.
Oceanside, NY 11572
516-483-5596
SERVICE CENTER INFORMATION IS SUBJECT TO CHANGE. Please visit
our website at www.rowentausa.com or call 781-396-0600 for
automated service center information.
California Electric
1170G Burnett Ave.
Concord, CA 94520
925-827-1011
Authorized Appliance
1644 West Ogden Ave.
Downers Grove, IL 60515
630-852-1550
 Loading...